|
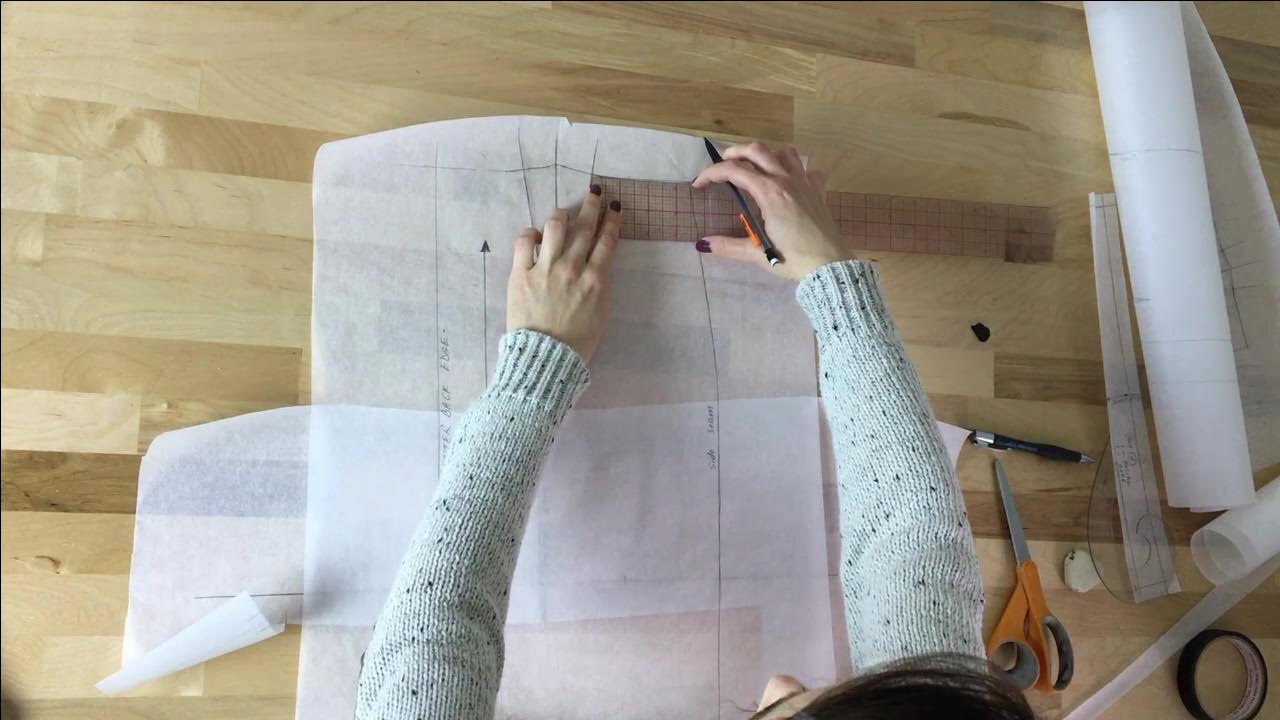
As one of my favorite looks of all time, this box pleat skirt is every bit the playful yet classic cut you want in a silhouette. From a technical stand point, drafting its sewing patterns form scratch is moderately simple yet a little more time consuming (proof in the duration of the sewalong video below). The steps below will walk you through the complete process of sewing a full, box pleat skirt with invisible side zipper and side seam pocket, from drafting all sewing patterns (from scratch) to cutting, marking and sewing the final skirt! Side note: This tutorial will emphasize the importance of using notches as they provide one of the most essential markers for matching pleats and pockets in the sewing process. Drafting The Box Pleat Skirt PatternsWhen I draft sewing patterns from scratch, I always work from a set of basic dress patterns (also called blocks) fitted perfectly to my size. If you choose to do the same, never work on your original basic patterns. Always trace a copy to a separate piece of paper that you can then completely alter into the new design. Doing so not only allows for re-usability but also takes the pressure off making mistakes! If you take a difficult-to-fix wrong turn, you can always retrace the basic dress patterns and start the process all over. My dress patterns are cut on fold style with single pointed bust darts on the front and double pointed (contour) waist darts at the front and back. This style is as simple as you can get in terms of a non-stretch, basic fitted dress. For this skirt tutorial, I separated the bottom portion of each front and back dress pattern and used it as a blue print for drafting my box pleat skirt. The Waistband Patterns Before you start altering the body of the skirt pattern, use the original waistline to draft the waistband patterns first. It is a lot more difficult to draft the waistband once the pleats have alreday been added to the skirt's waistline as you would have to keep the pleats folded as you draft. No need to complicate things! Get the waistband patterns out of the way first. You can view the full tutorial of drafting this particular waistband pattern here: How To Draft A Sewing Pattern For A Non-Stretch Skirt Waistband (Faced Style) To give you a more succinct breakdown, here are some of the main steps in the process: 1. On a separate piece of paper (large enough to hold the full waistband pattern), draw a straight horizontal line with a shorter vertical line perpendicular at its mid point. The vertical line will serve as the center front on the front waistband pattern. You'll repeat this step on the back waistband pattern, following the same logic to denote the center back line. 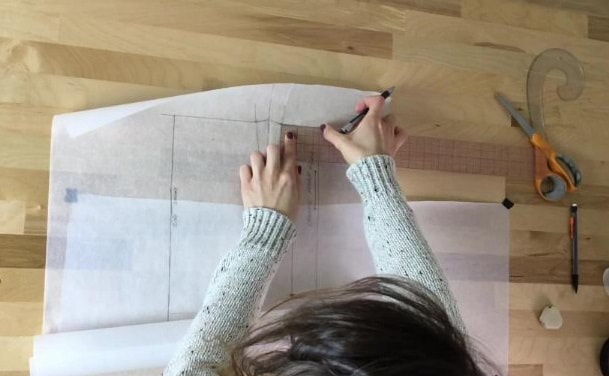 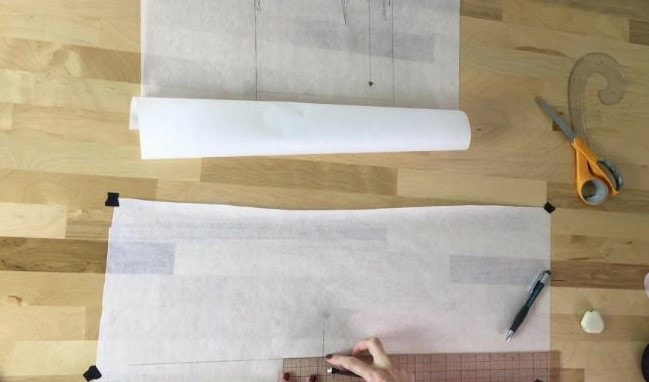 2. Starting with the front skirt pattern first, measure along the waistline from the skirt's center front in, towards the first dart leg. Mark this measurement on your waistband pattern by measuring from the vertical line out (to the left of it) and adding a dash directly on the horizontal line as shown. 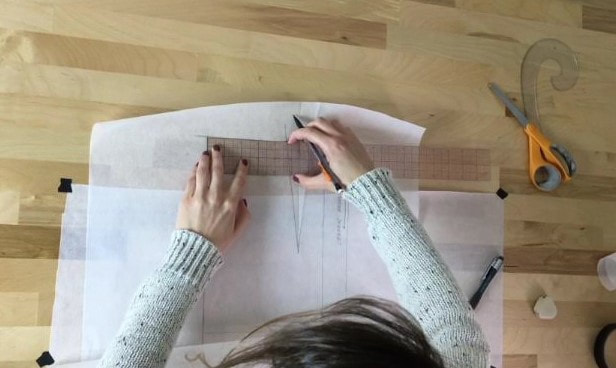 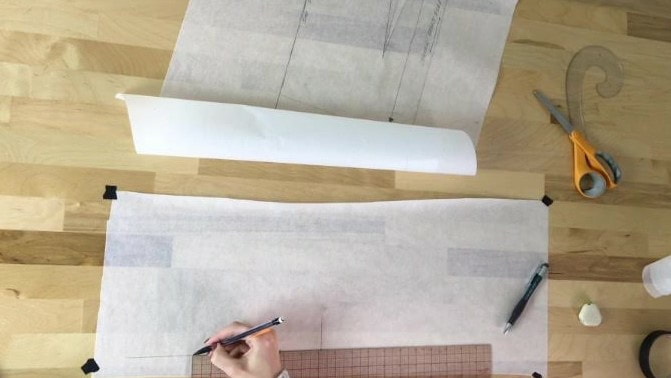 3. Next, measure along the skirt's waistline edge again, this time from the second dart leg to the side seam. Mark this corresponding measurement on the waistband's horizontal line starting at the mark in step 1 above, and moving towards the left again as shown. 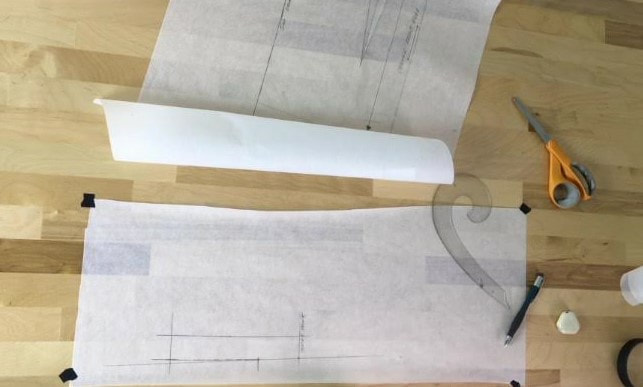 4. To complete the bottom edge of the waistband pattern, you have to make it slightly curved for optimal fit. Measure up 1/4" on the waistband's side seam edge and blend into the horizontal line to form a soft curve at the bottom as shown in the image above. Next, figure out how wide you want the waistband to be. Mine is 1 1/4". Using a clear plastic ruler marked down the 1/16" of an inch like the one in this tutorial (highly recommended!), draw the shape of the waistband at an even width throughout. 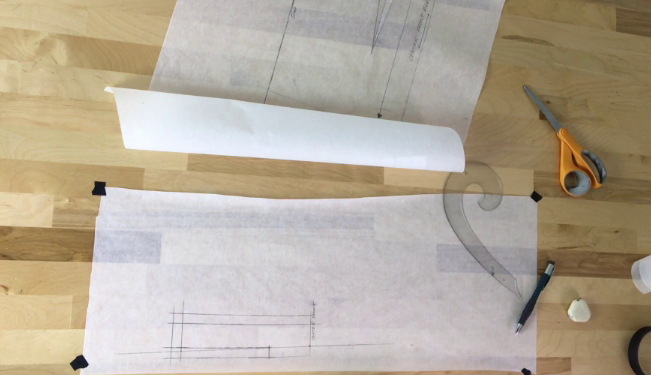 5. Add seam allowance along all the edges. As always, I'm working with a 1/2" seam allowance. By the way, that first dash mark will become a notch in the final waistband pattern. 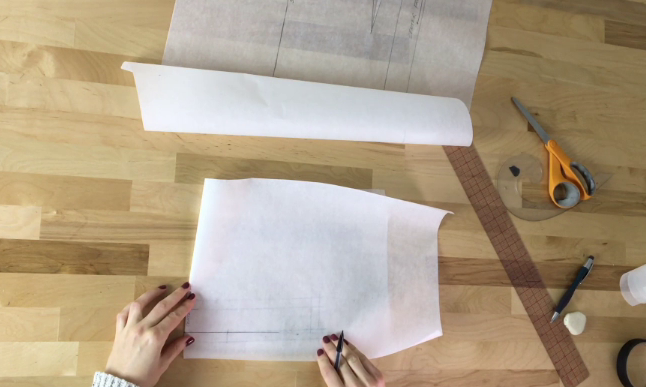 6. Remember, my skirt pattern is cut on fold style so to complete the full waistband pattern, fold the tracing paper down the center front line (vertical) and transfer the waistband lines and the notch to the other side as shown. 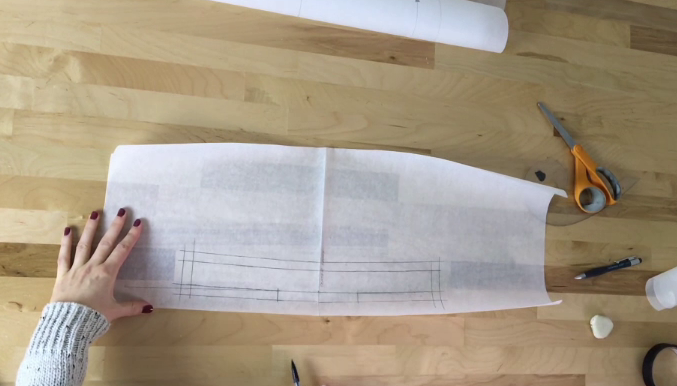 This classic waistband requires two identical pieces to be cut for each front and back- one piece serves as the self or outer later, while the other is backed with interfacing and is used as a full facing. For that reason, we need to add seam allowance along all the edges of the waistband pattern. In addition, be sure to complete the notches along the waistband's bottom edge corresponding to each dart location on the skirt (as shown). Doing so will facilitate matching the fabric pieces in the sewing process and it will also help you distinguish the waistband's top edge from the bottom edge. At this point, cut the final waistband pattern along the outer edges.
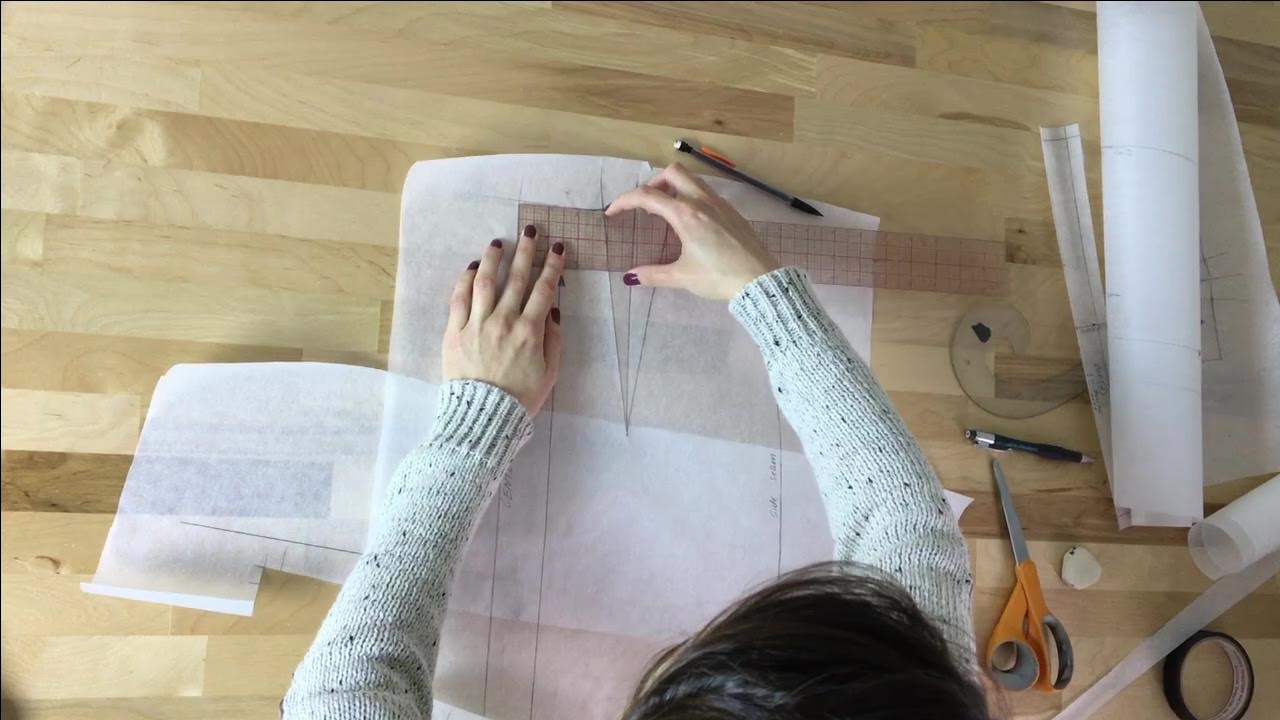
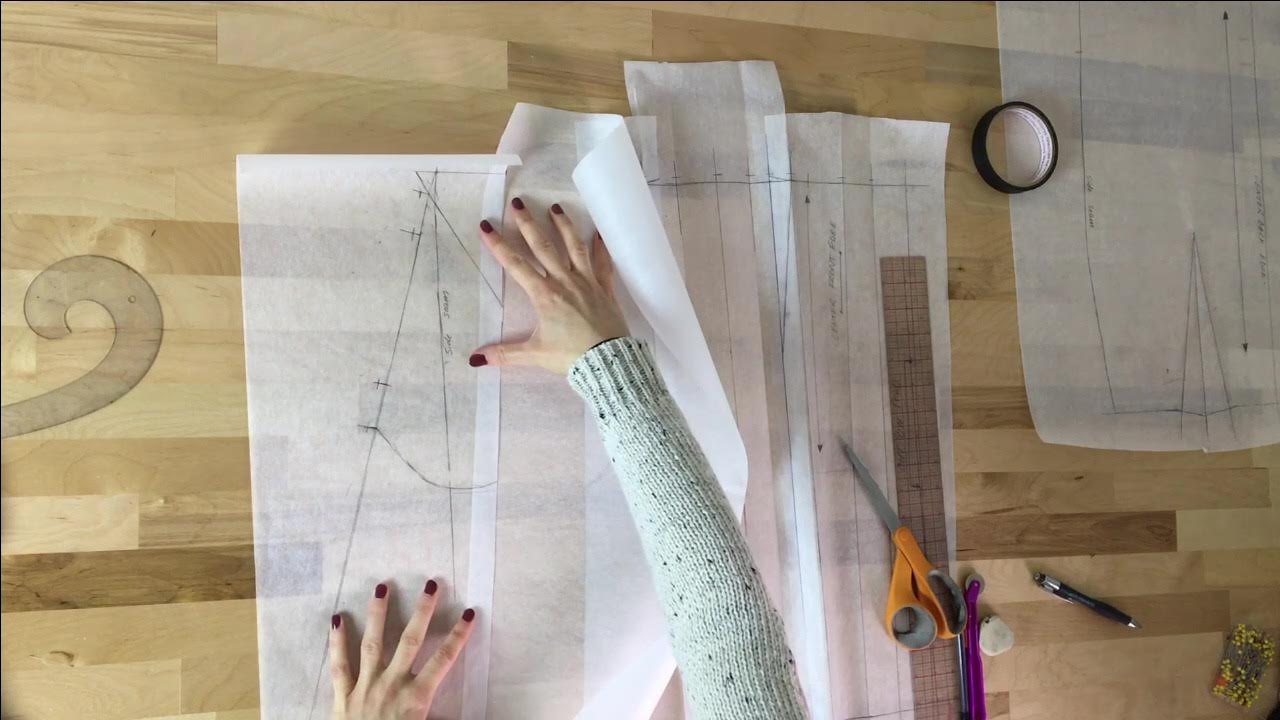
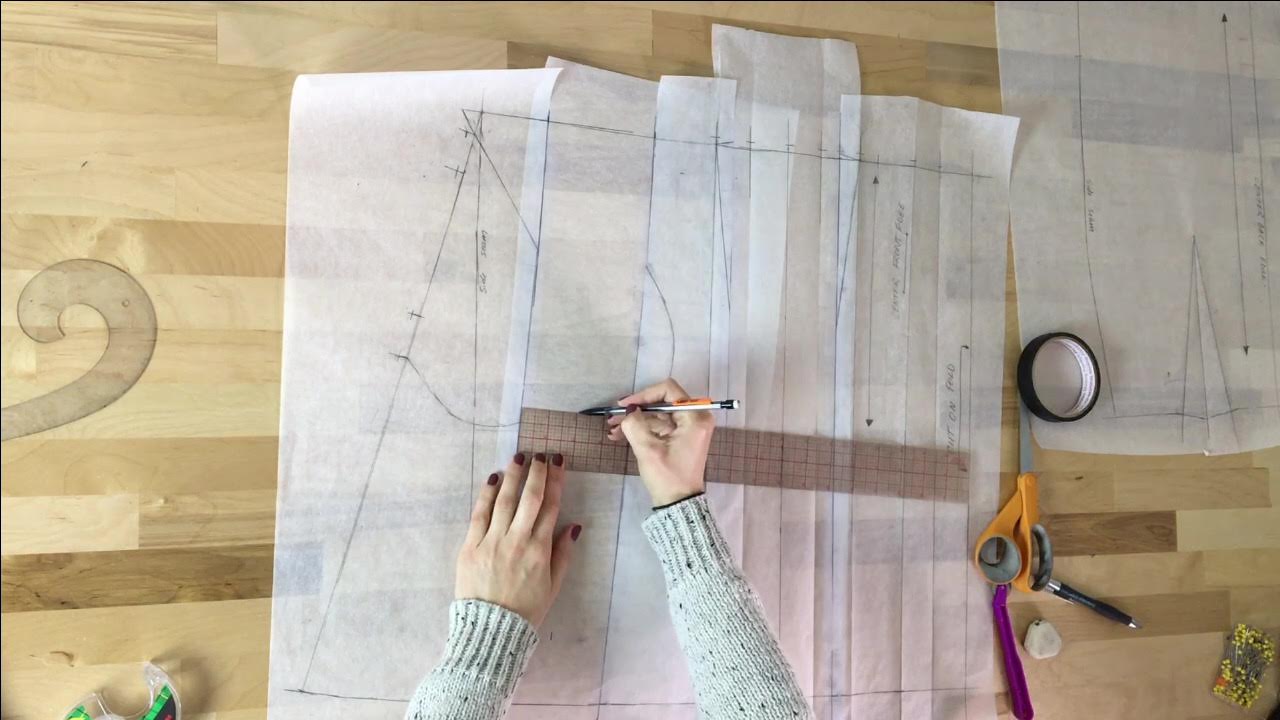
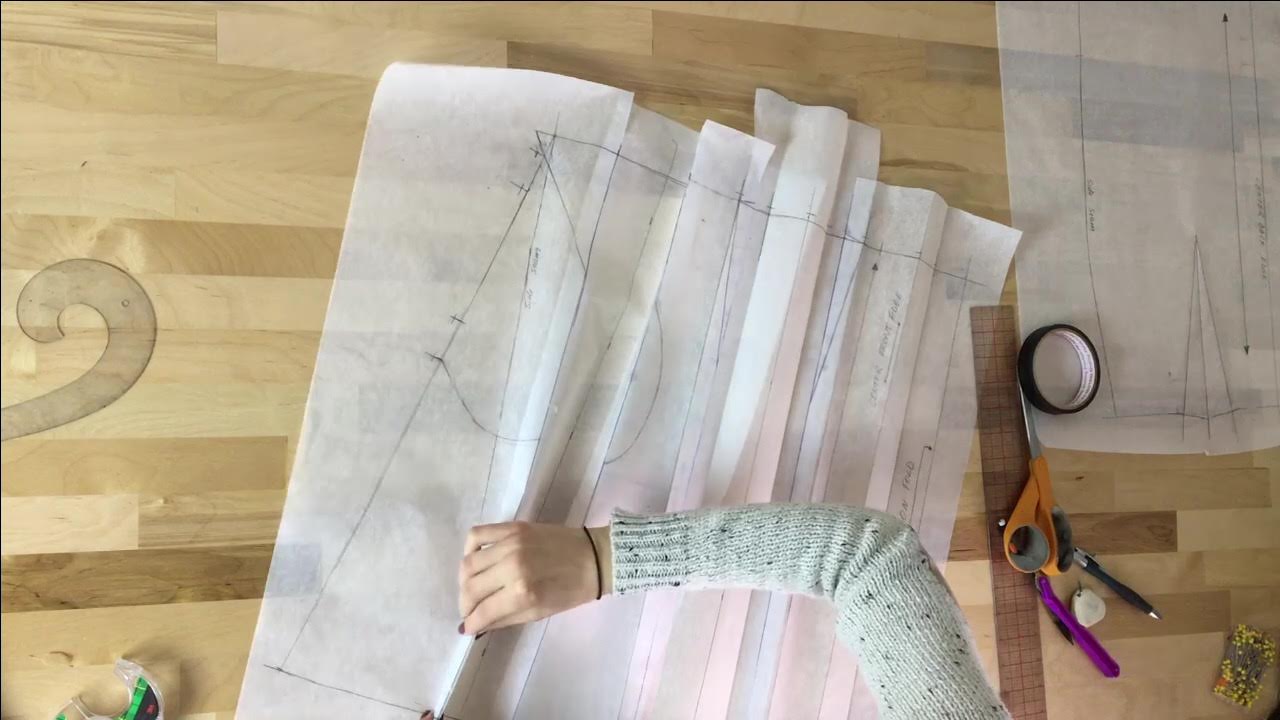
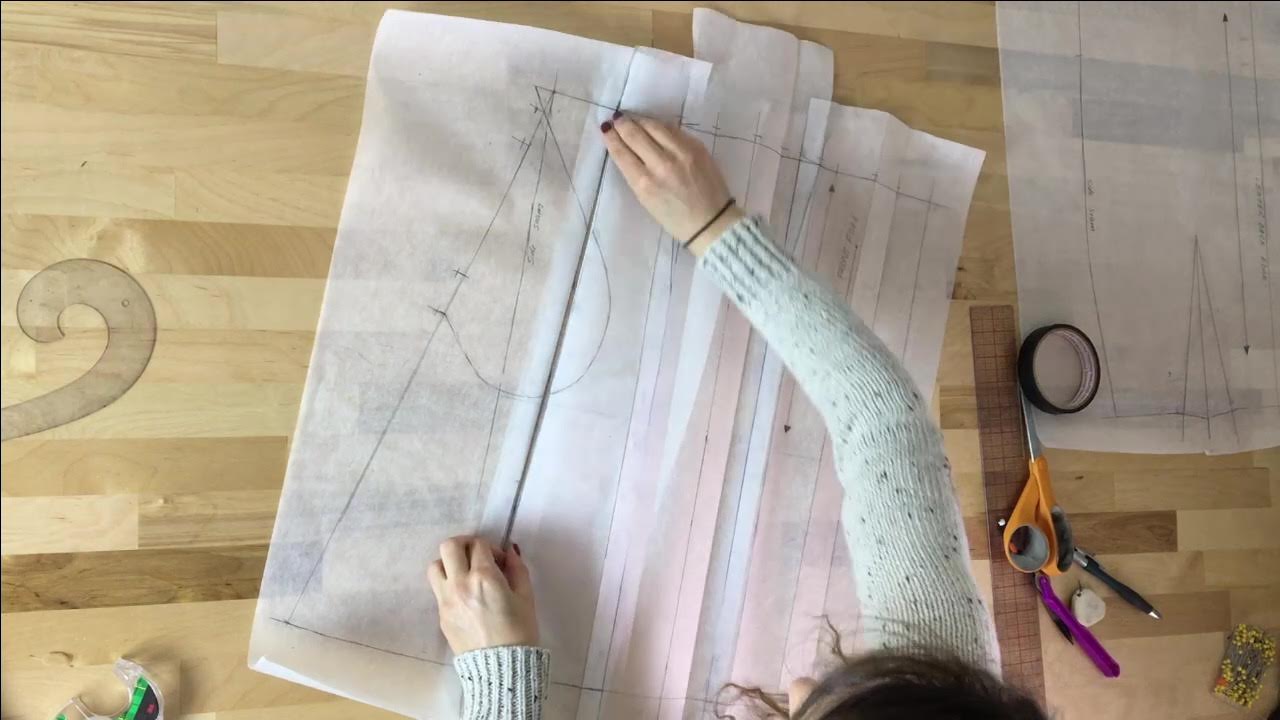
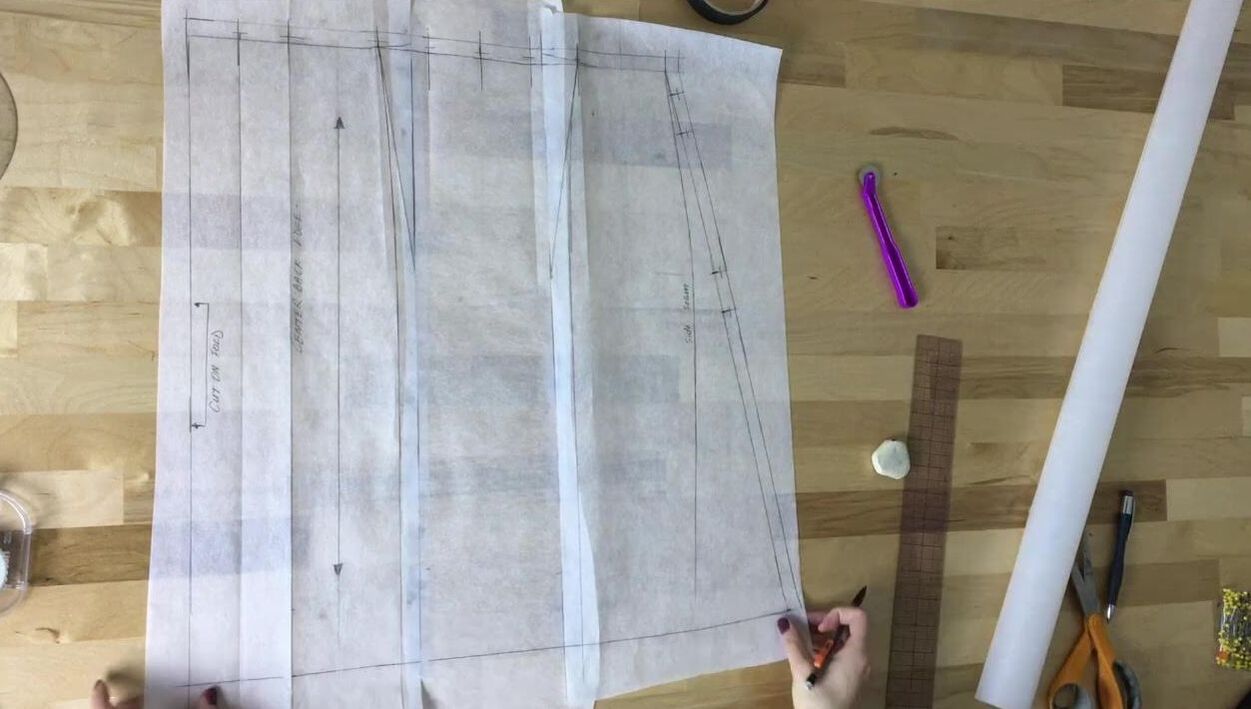
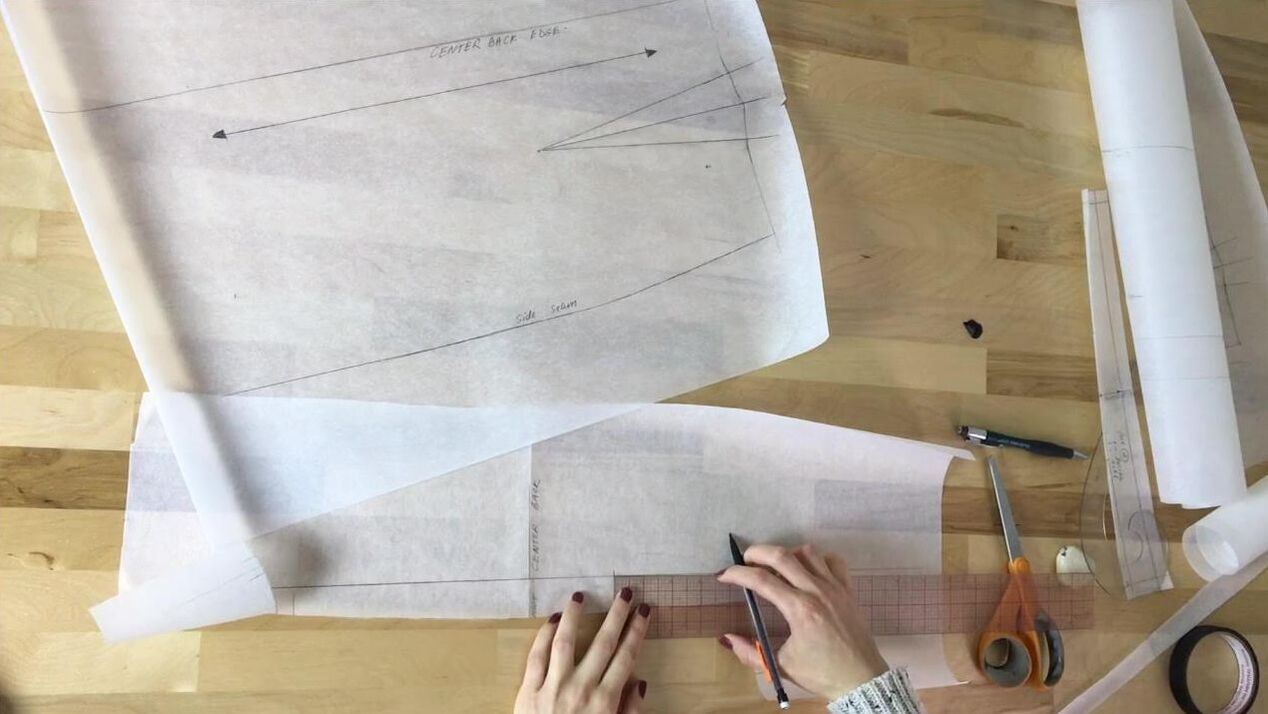 Repeat the pattern process described above to draft the back waistband pattern. The Side Seam and Pocket Pattern Since I'm adding a pocket into the side seam, I am going to first draft the skirt's side seam edge. Doing so first will make the process of generating the side seam pocket patterns much easier. Plus, it's nice to get that out of the way before starting the pleating process. 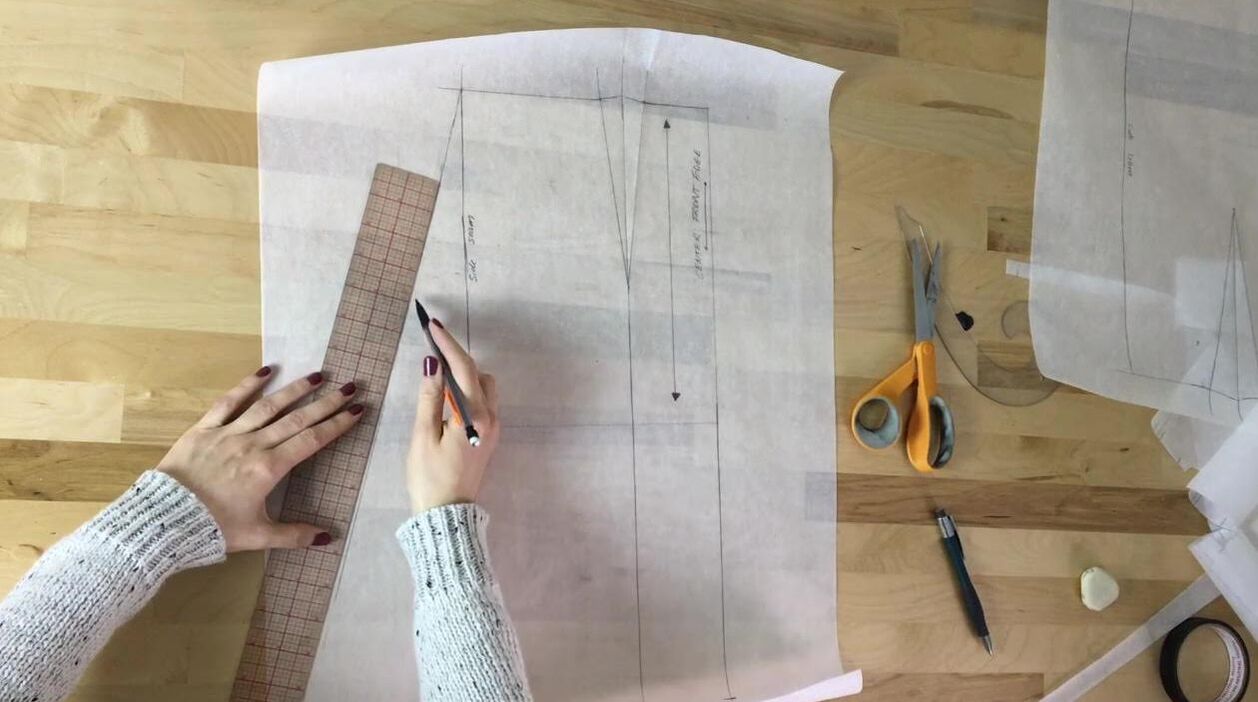 1. To draft the side seam, using your ruler, draw the side seam line moving away from the existing side seam (on the basic skirt). Stop at the desired length of the skirt. 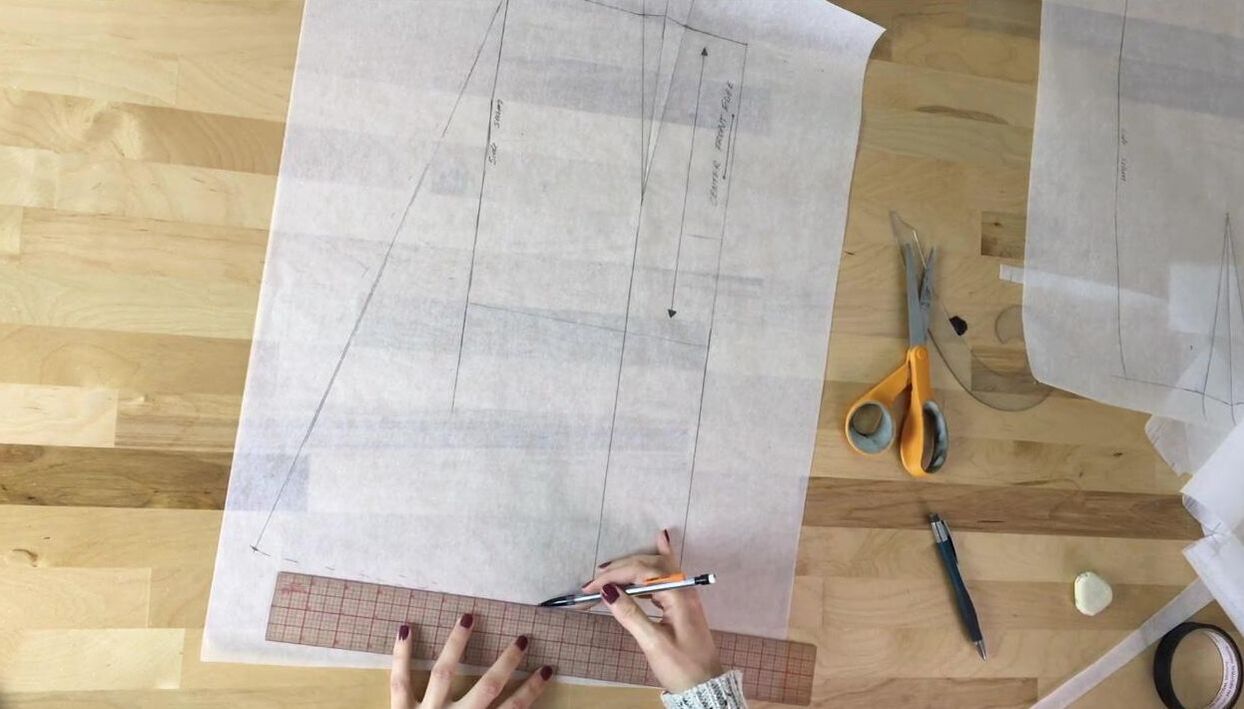 2. Draw the new skirt hemline at the desired length from the side seam to the center front line as shown above. 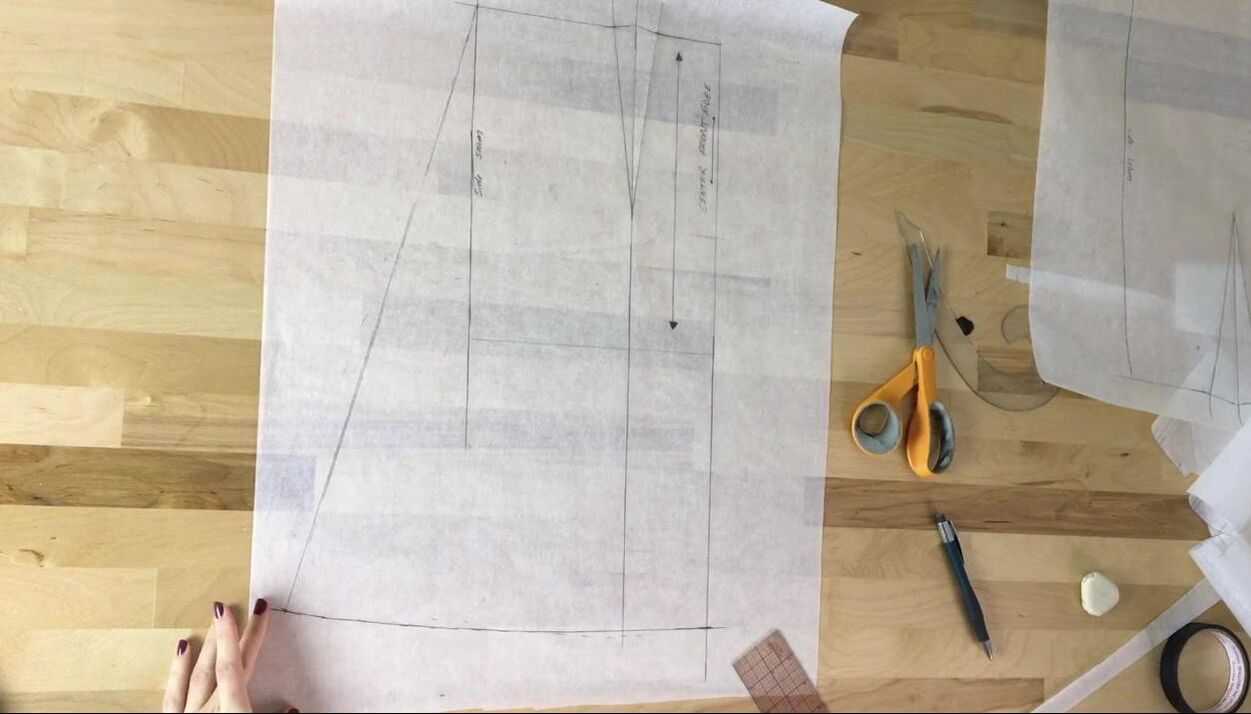 Since this skirt has an A-line silhouette at the sides, the hemline will be slightly curved as it moves form center front to side seam. Keep in mind that the distance from the waistline edge down to the hemline should be exactly the same throughout. At this point, let's draft the side seam pocket patterns. For the detailed tutorial on drafting this skirt's pocket pattern, check out this tutorial: How To Make A Sewing pattern For A Skirt On- Seam Pocket. 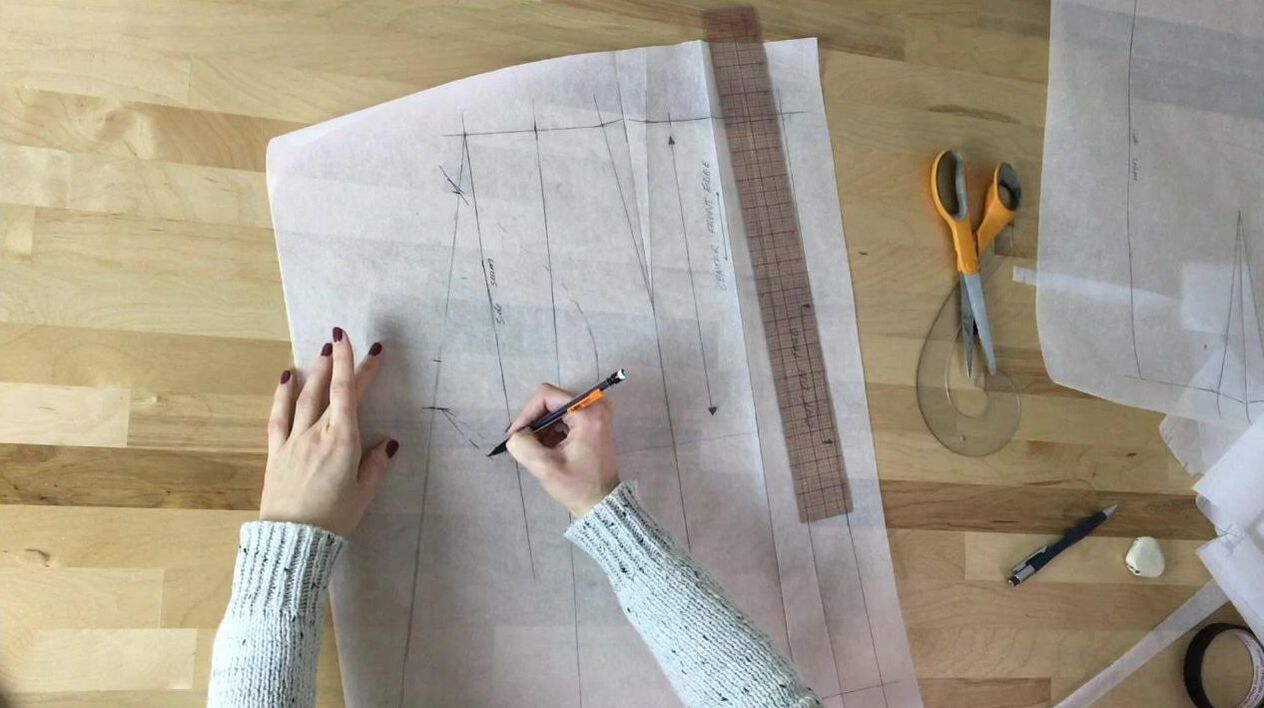 3. On the new side seam, mark the pocket opening using notches at the exact location where you'd like it to be on the final skirt. A generic on-seam pocket opening is about 5 1/2-6" but of course it's up to you and your design how wide or narrow you'd like it to be. Mark a second set of notches, about 1" away from pocket opening notches. These second notches mark the outer edges of the pocket bag. Using the very top notch, sketch the desired shape of the pocket bag. This shape should become wider and deeper at the bottom, moving up into the last notch at the bottom as shown above. I like to use a dash line to sketch the general shape of the pocket before settling on the final pocket. 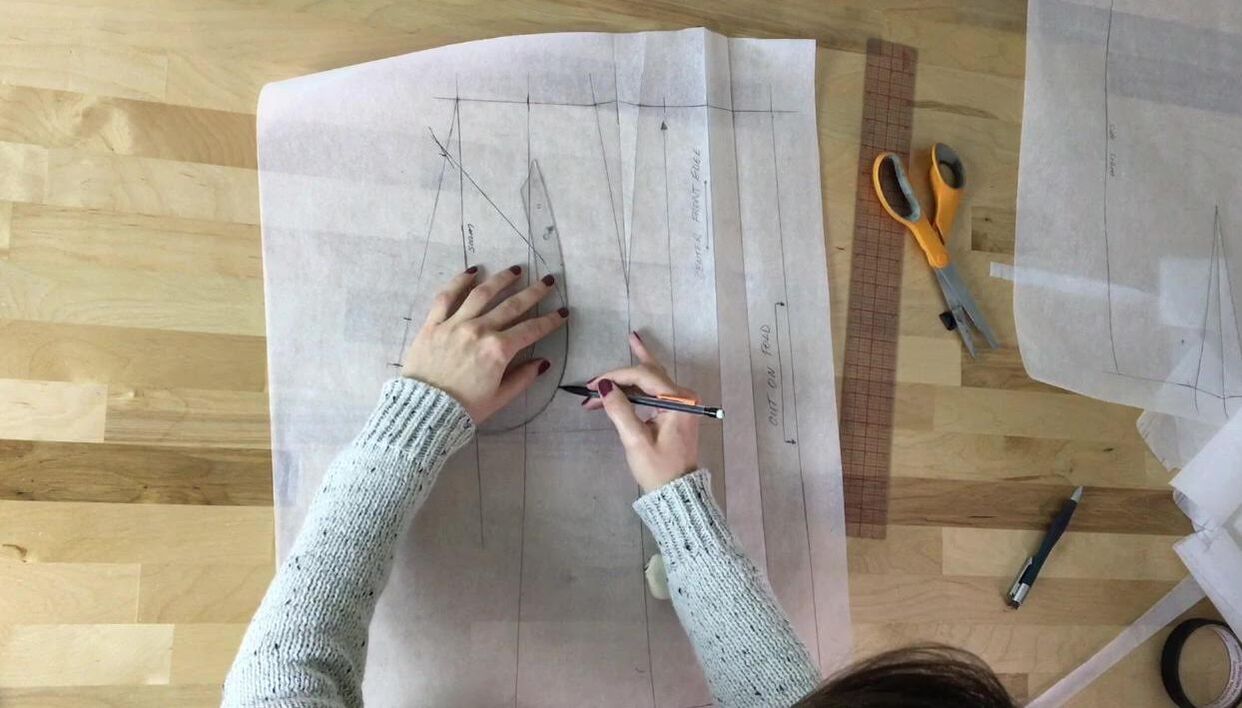 Use a french curve to smooth the dash line into a solid line. 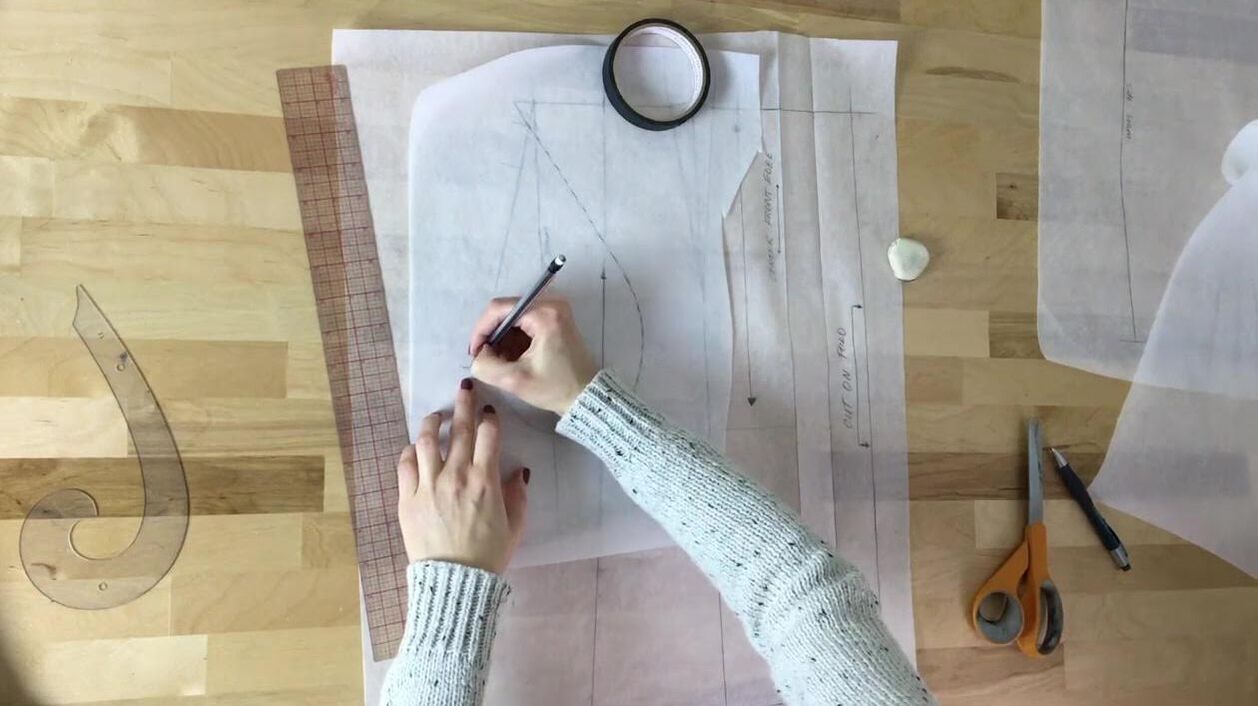 4. Transfer the pocket bag lines onto a separate piece of paper as shown. 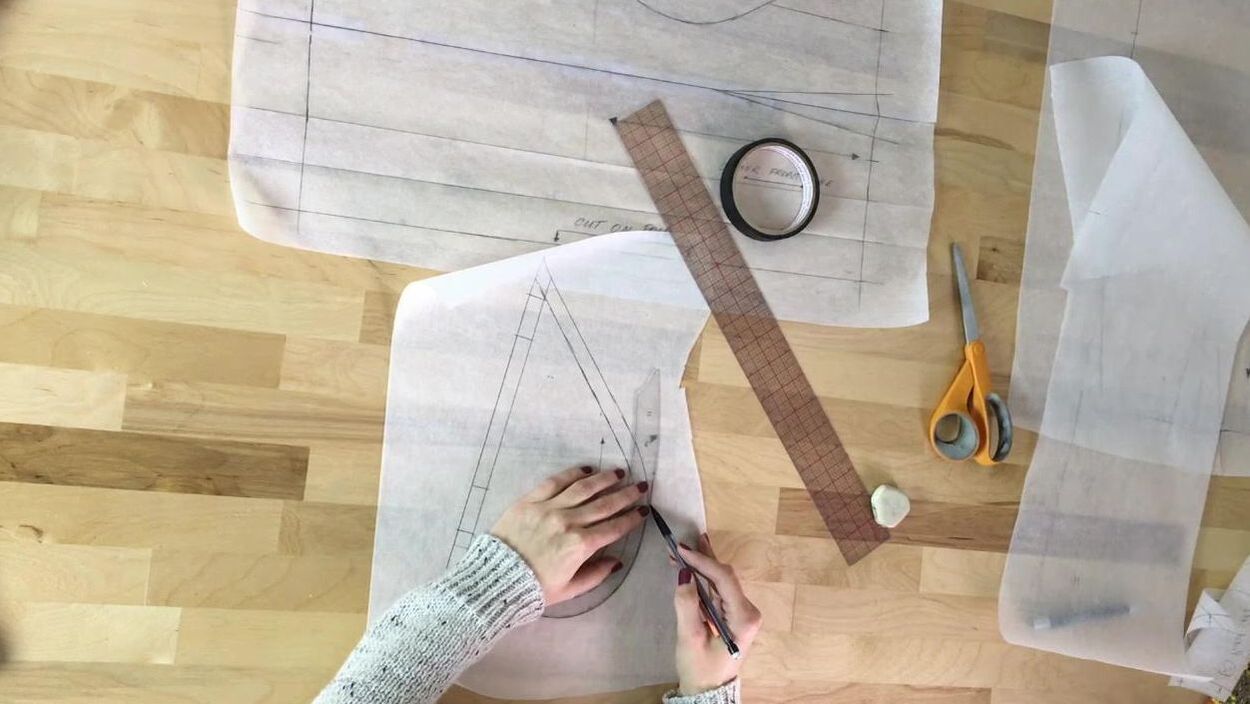 5. Add seam allowance along all the edges to complete the pocket pattern. Don't forget to transfer all 4 notches as they provide an essential marker when matching the pocket to the skirt's side seam in the sewing process. Respectively, make sure the 4 notches marked directly on the skirt pattern remain in place and are also transferred to the fabric when all the pieces are cut. As you'll see in the sewing portion below, these pocket notches will be extremely important in the process. 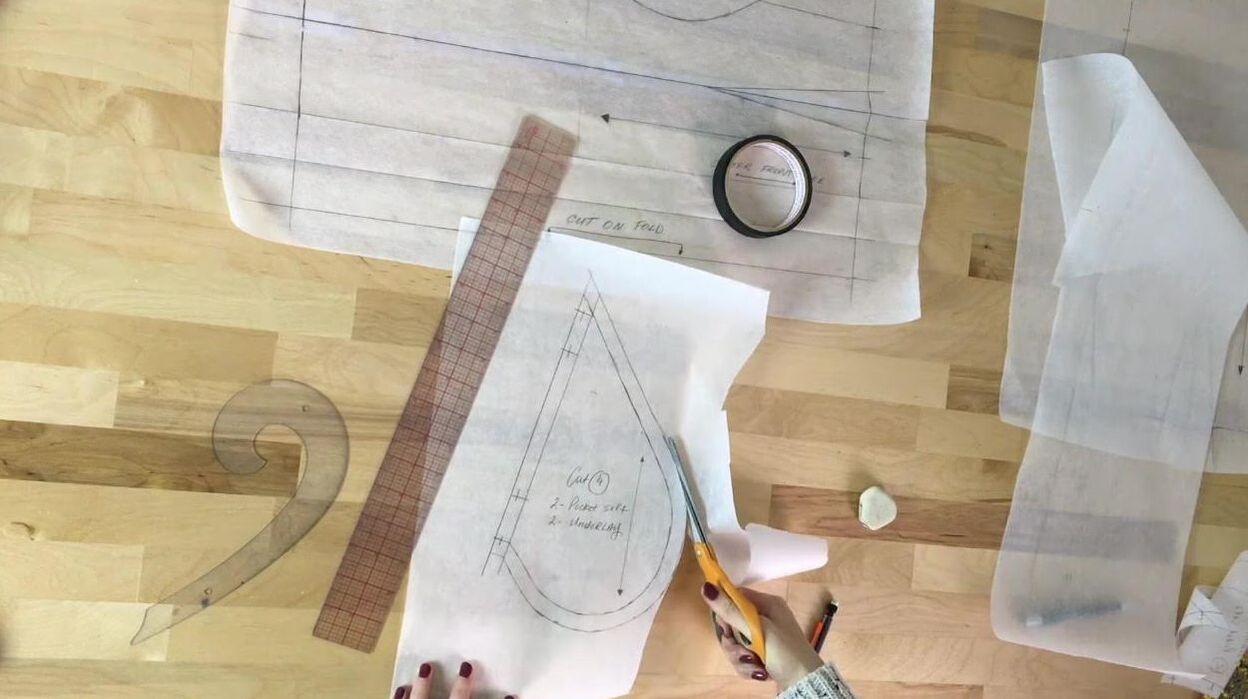 Last but not least, cut the final pocket bag pattern along all the outer edge as shown above. Adding Box Pleats And Finalizing The Skirt Front And Back Patterns To insert pleats onto the skirt pattern, you'll need some extra pieces of paper and invisible scotch tape. We'll use a patterning method called slash and spread. Let's start with the front skirt pattern. To save some pattern paper and some space, I'm keeping my patterns cut on fold style. As far as the box pleats, I'll be adding one pleat at the center front and two on each side. Since my skirt patterns have darts, I will replace them each with a pleat. Doing this is the only thing that adds a bit of complexity to a drafting technique that it otherwise quite simple. Follow the video tutorial above for a more detailed look at the process. Otherwise, below are some basic steps fpr adding the box pleats and finalizing the new skirt hem. 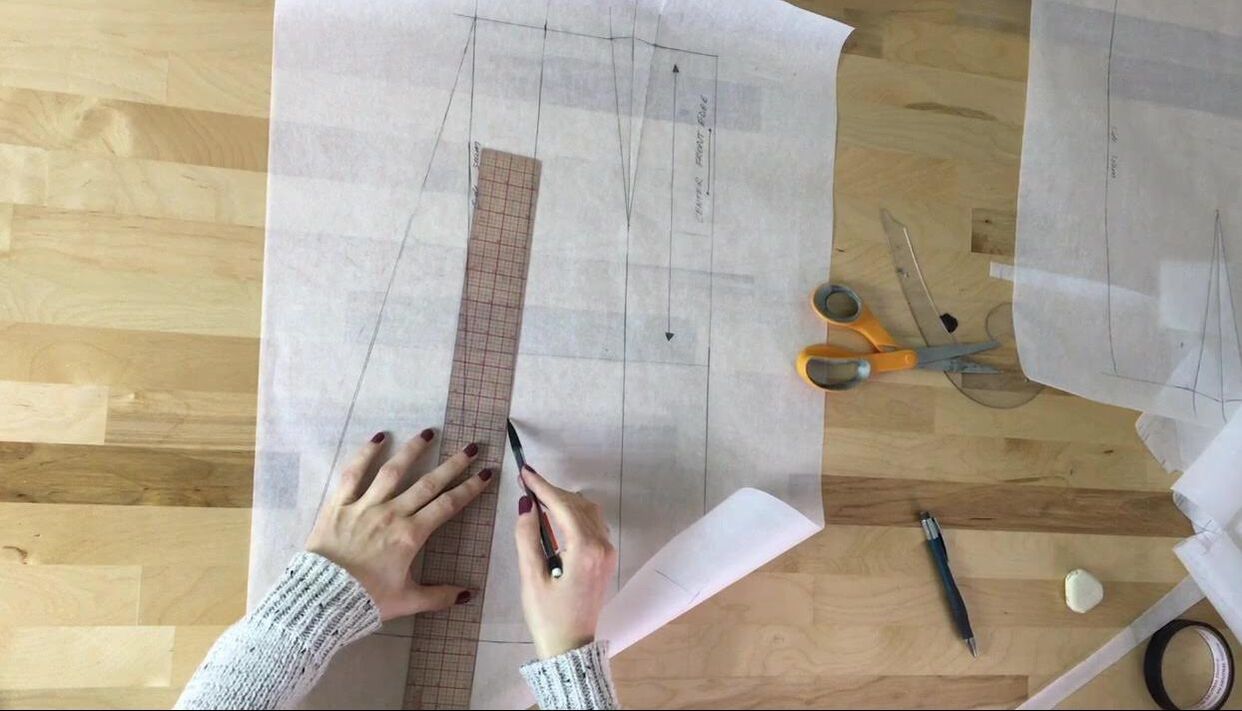 1. Add vertical lines at each desired pleat location, starting at the waistline and all the way down to new hem. I'm adding 5 total pleats on the front side and 3 pleats on the back. 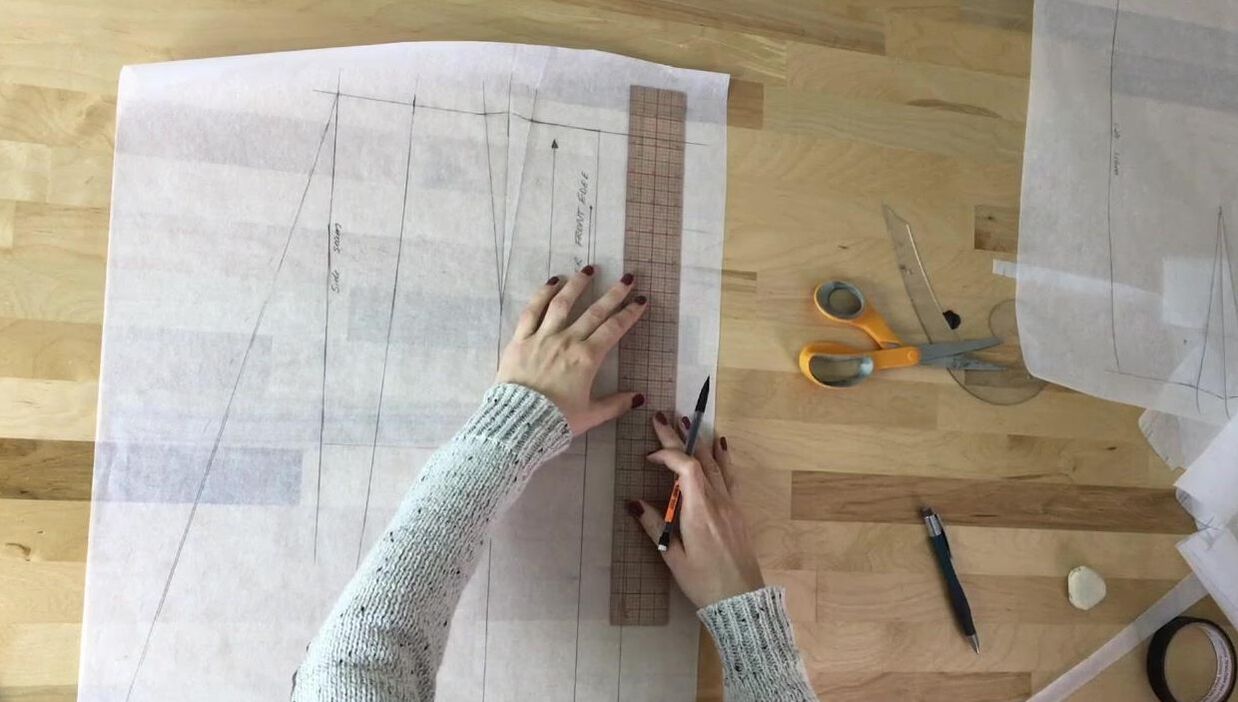 2. Let's start the center front pleat first. Remember, my sewing pattern will be cut on fold, and since I have a box pleat going straight down the skirt's center, you only need to draft half of it. The depth of each one of the pleats will be 1". This means that to draft half of the box pleat I need to add 2" of extra width along the center front edge. 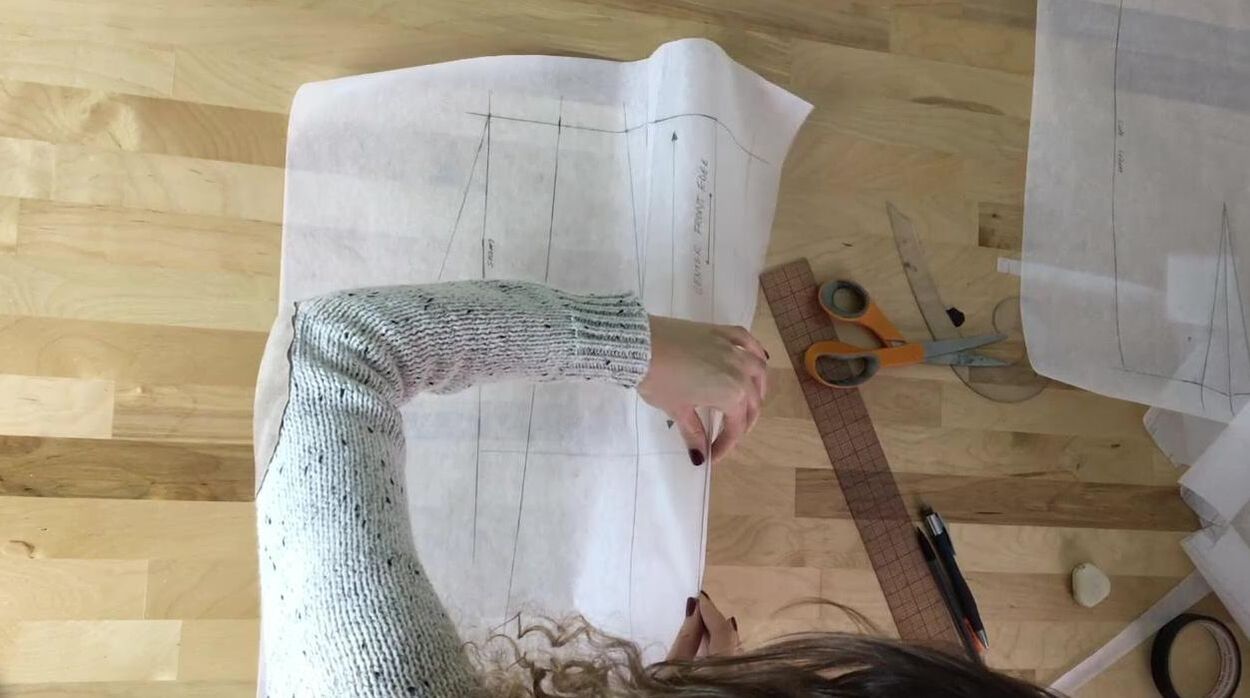 Folding the 2" excess down the middle and then folding it again down the center front edge will create half a box pleat. 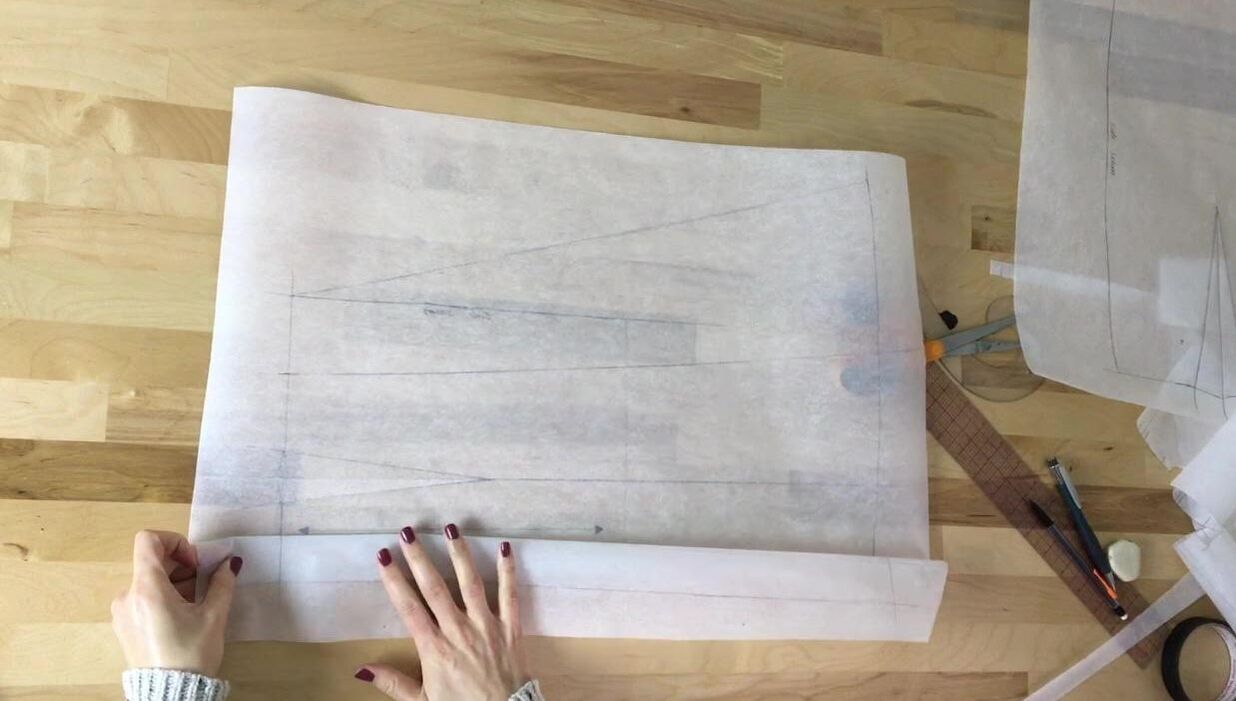 The skirt's original center front edge will correspond to the pleat's middle. When cut on fold, a mirror of this pleat will naturally be created to complete the center box pleat. 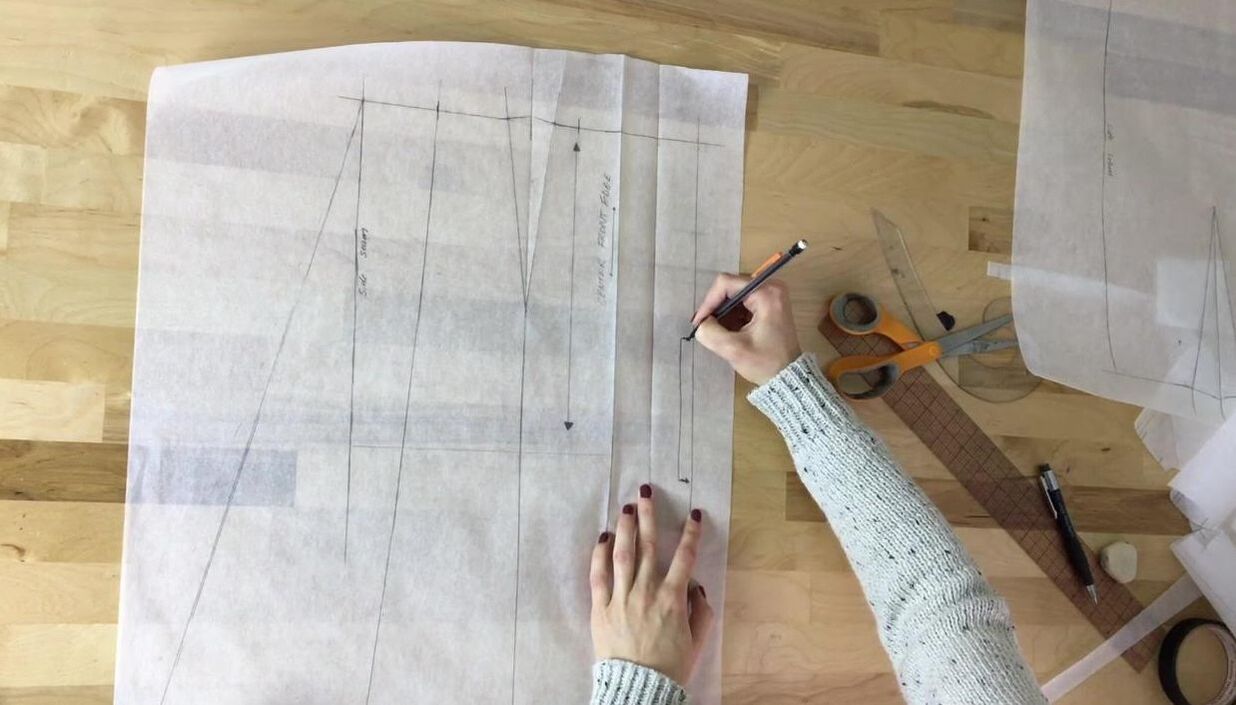 Mark the new cut-on-fold edge. You'll repeat this process for the back skirt pattern. If this sounds a bit confusing, just try to replicate the steps shown in the video tutorial above! 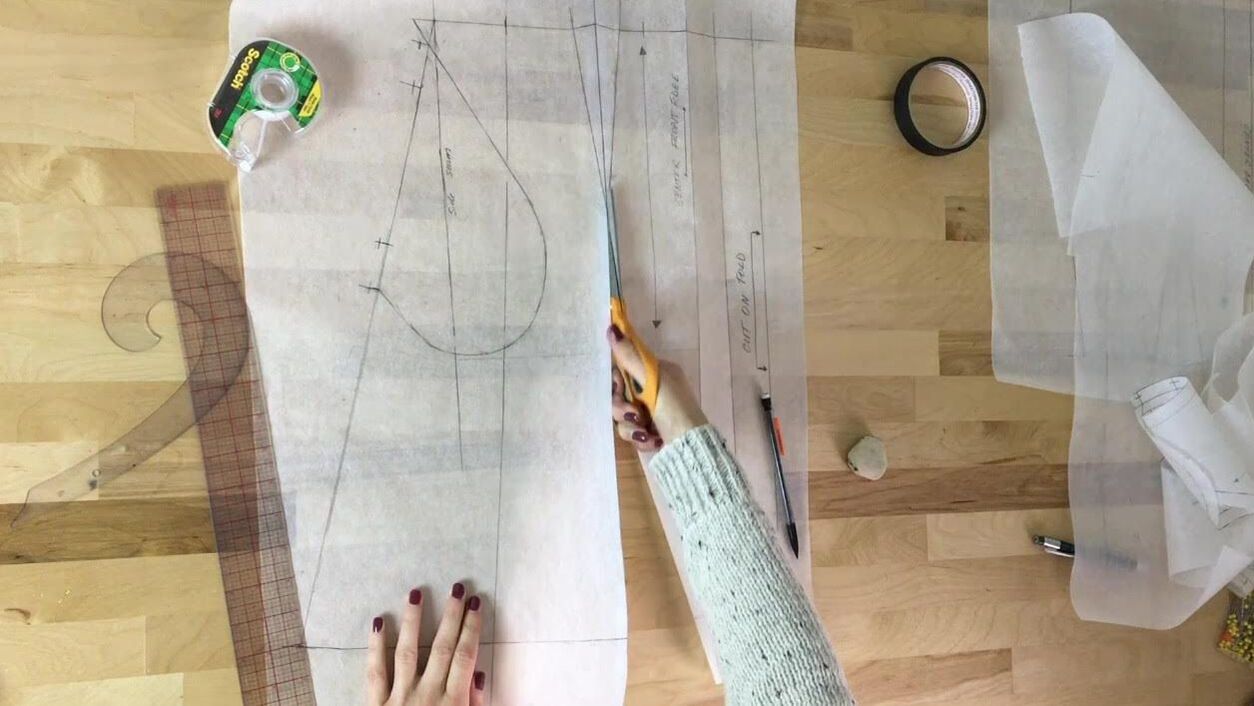 3. Carefully cut down a vertical line to completely separate the skirt pieces. Add the desired pleat width (taking into account how it will be folded) using extra paper and invisible frosty tape (shown above). Don't cut all the vertical lines at once. Instead, work with on pleat at a time so that you don't confuse and mismatch the pieces. Think about how box pleats are folded. A traditional box pleats has two folded edges that meet at the same point. For that reason you should add enough excess paper for both pleats to fold appropriately. 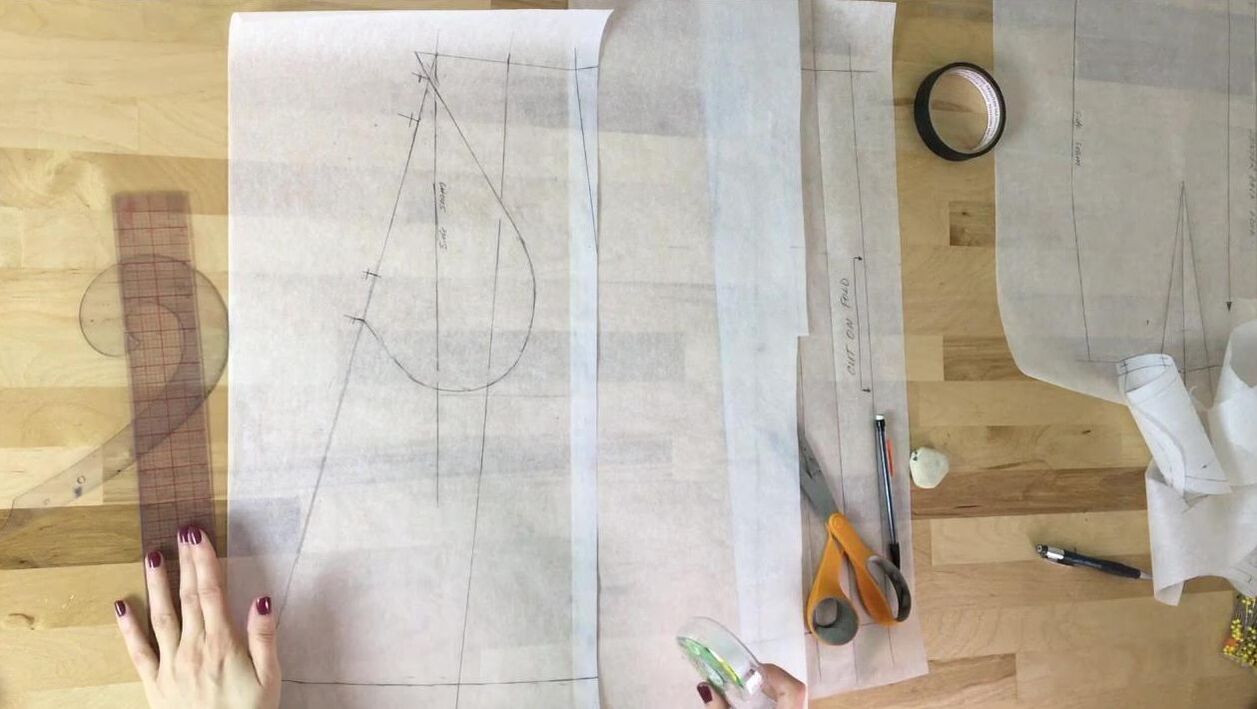 I added 4" of pleat excess. When this excess is folded into a box pleat, the depth of each pleat will be 1 ". 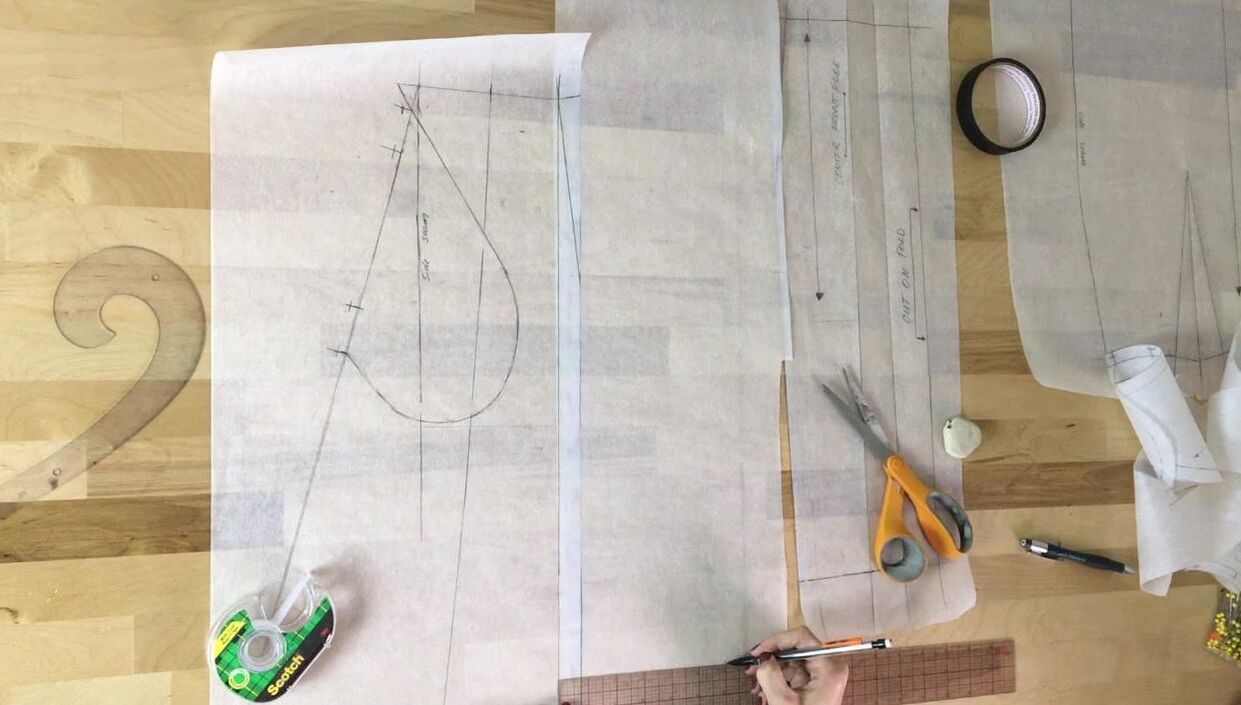 4. Use the invisible tape to fully connect one of the cut edges to the loose paper as shown. 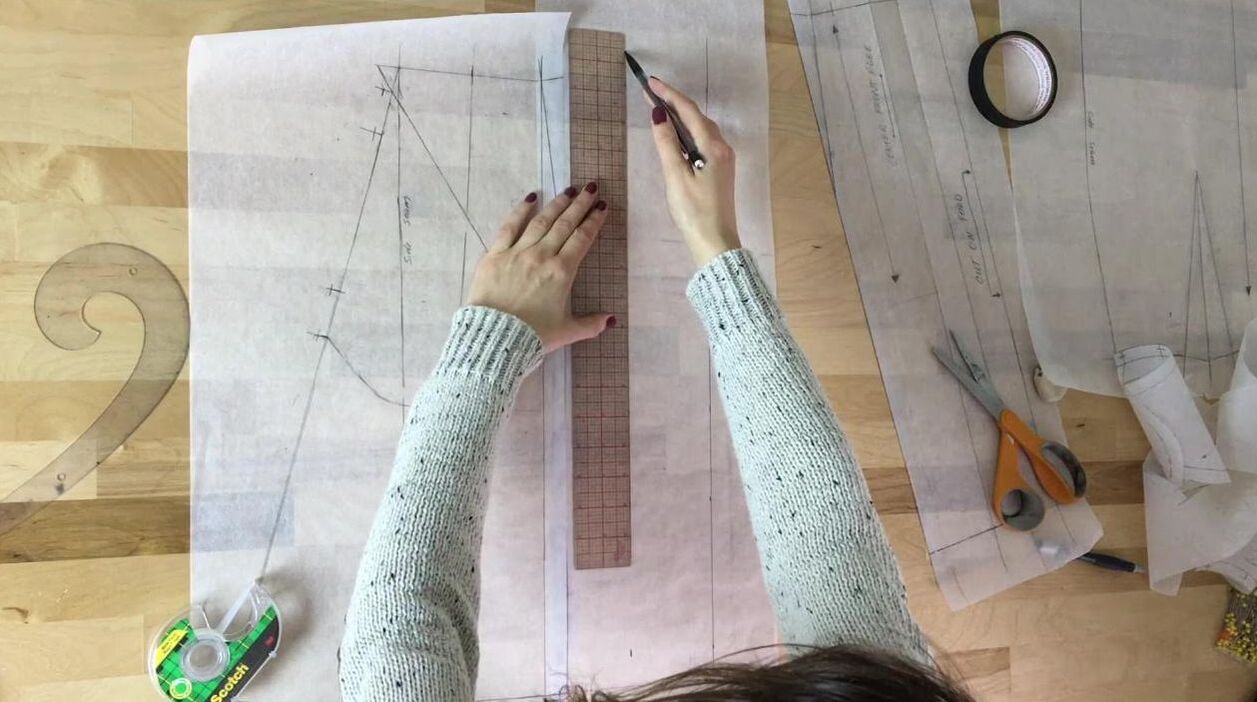 5. Using your straight ruler, draw each fold line. 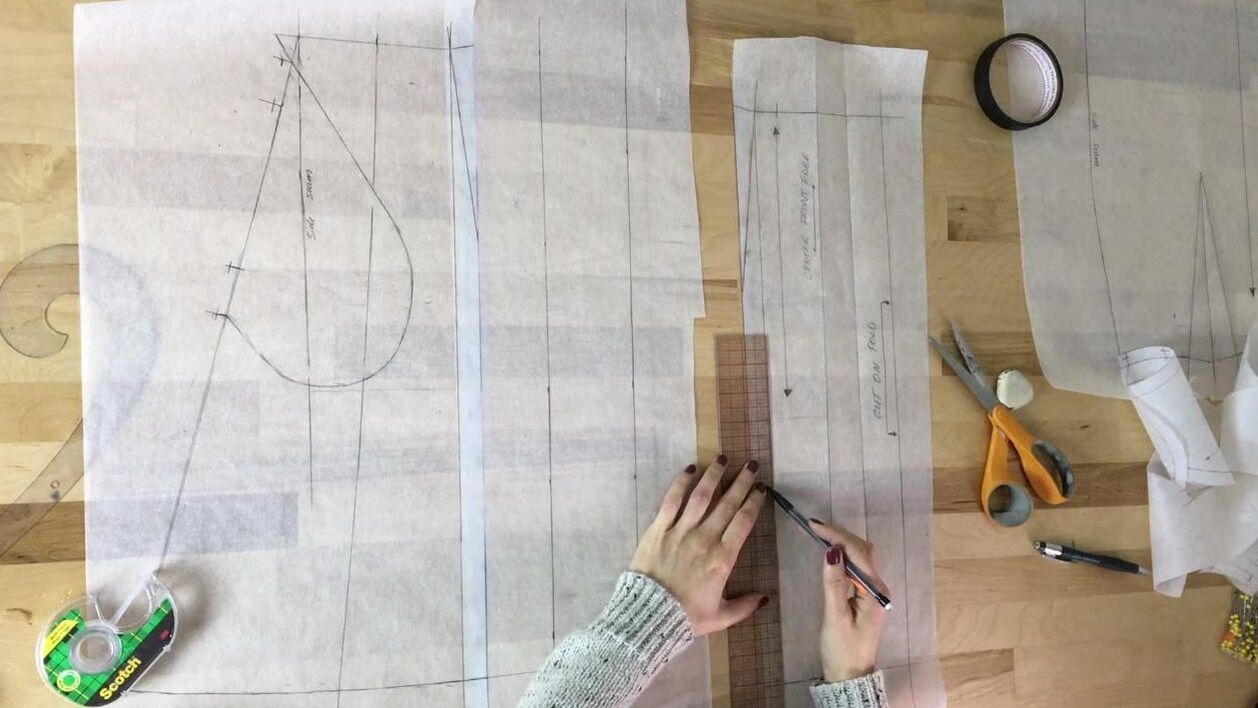 This particular pleat is one that replaces the dart. For that reason, draw the vertical cut line such that it goes through the middle of the dart (along dart fold line). The outer fold lines should correspond to the dart legs. To mark the fold line, draw straight lines all the way down to the hem as shown. 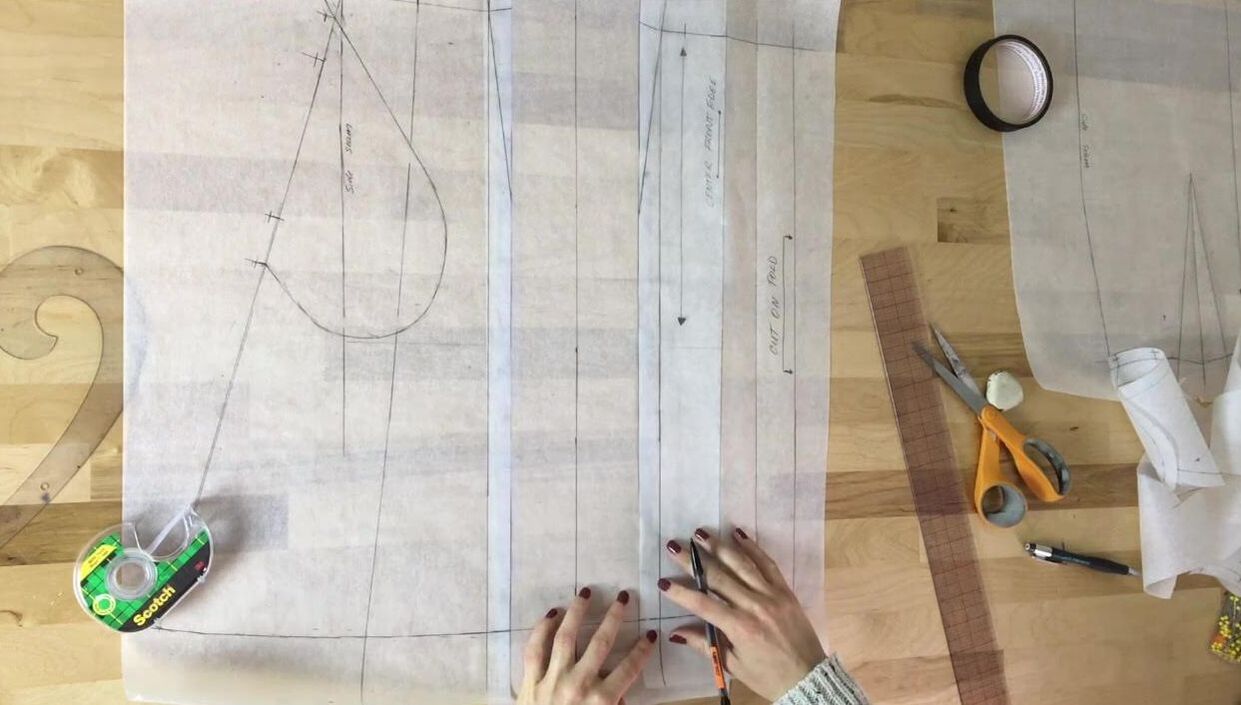 5. Once the fold lines are marked, tape the other side of the skirt pattern to the other end of the excess paper to complete the box pleat.   It is a good idea to actually fold the paper into the final box pleat using the lines as a guide. Doing this will help you visualize the look and depth of the skirt, and later aid in identifying the notches correctly.   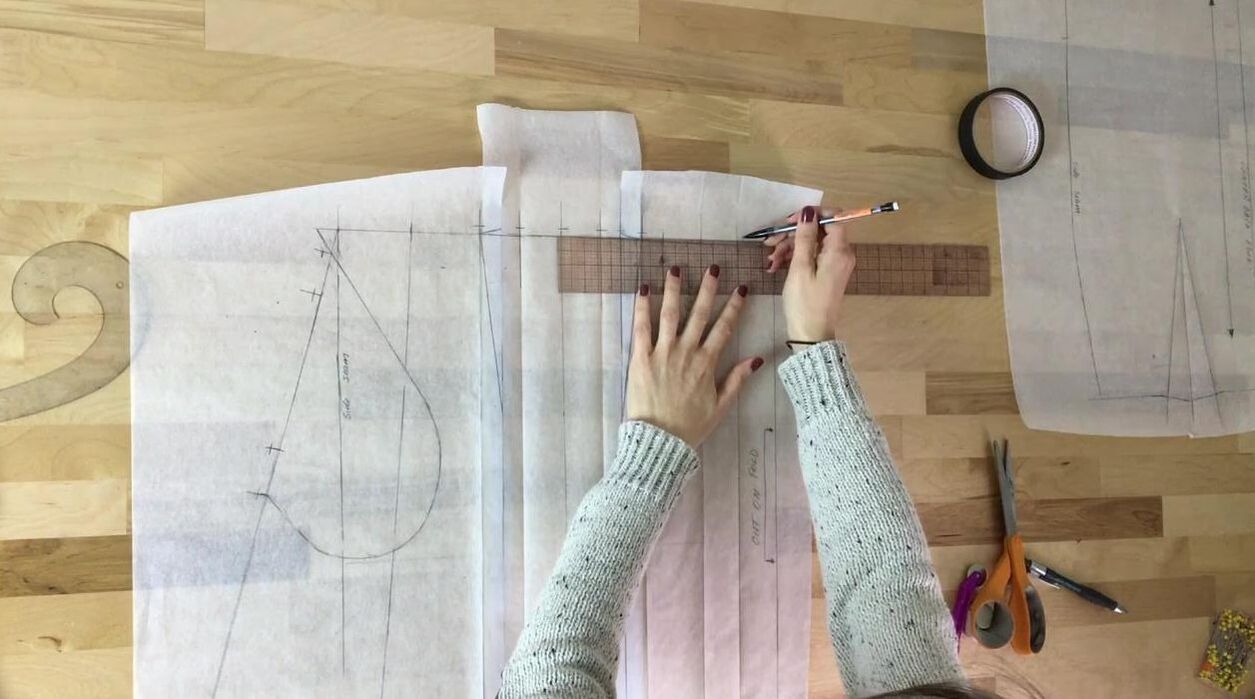 Speaking of notches, add a notch to mark each fold line along the waist edge. For this particular skirt design you do not need to add the corresponding notches at the hem since the hem itself will not be folded into pleats.
Repeat the process described above to add the rest of the box pleats on both the front and the back skirt pattern pieces. To complete the hem, connect the original hem lines through the pleat openings. 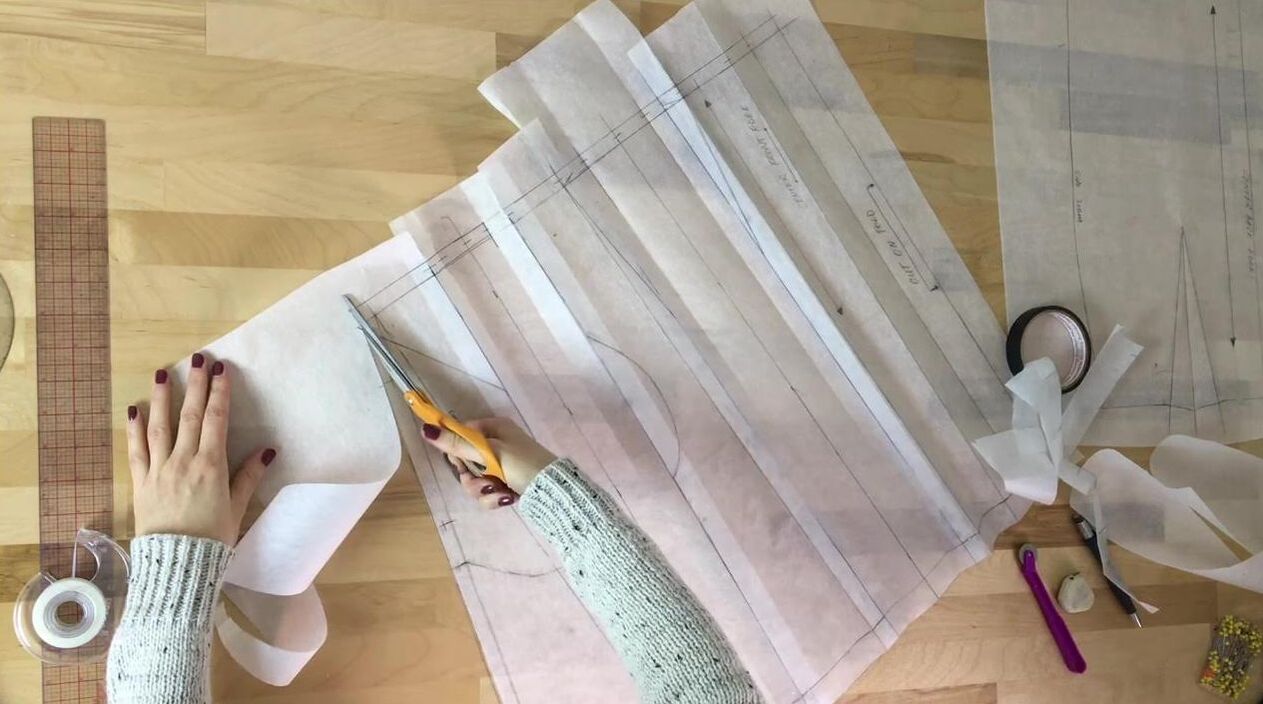 Add hem and seam allowance as desired and cut all the pattern pieces along the outer edges of the allowance as shown. My skirt has a seam allowance of 1/2" along all the edges and a hem allowance of 1 1/2". Since the skirt's closure is a simple invisible zipper along the side seam, I don't have to worry about adding any special seam allowance- 1/2" allowance is perfect for inserting an invisible zipper.
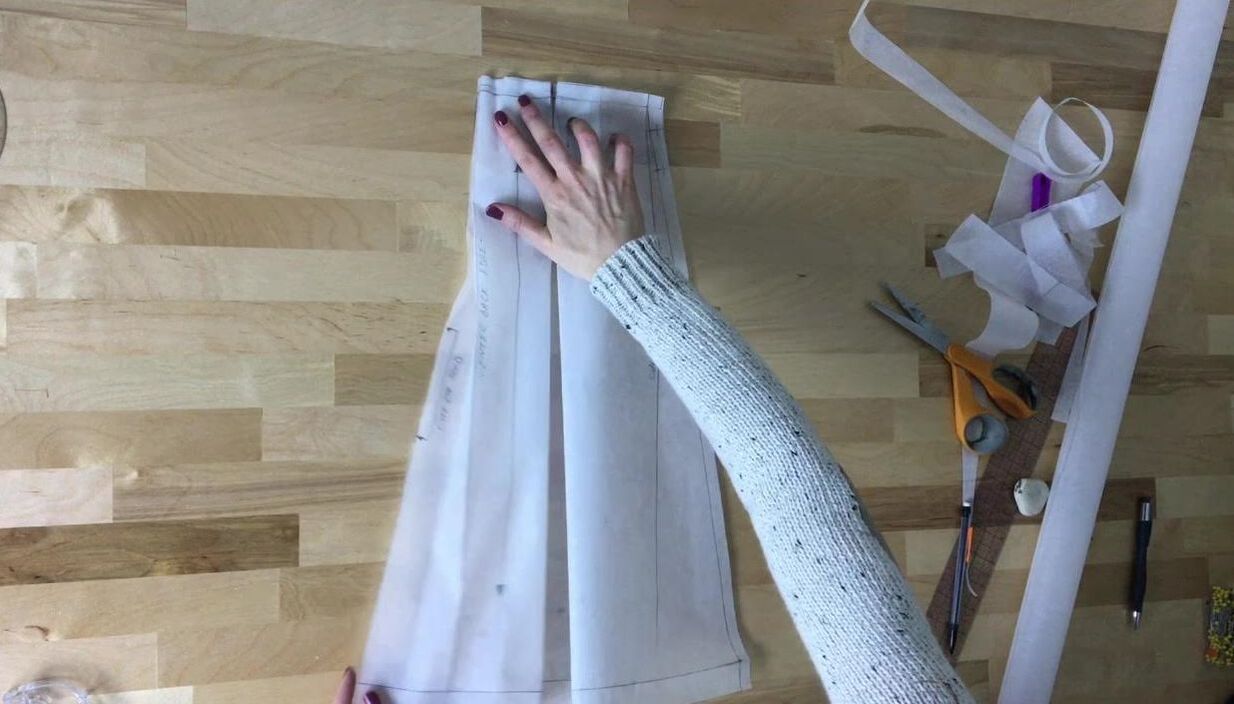
Repeat the pleating process on the back skirt pattern using the same slash and spread method described above. 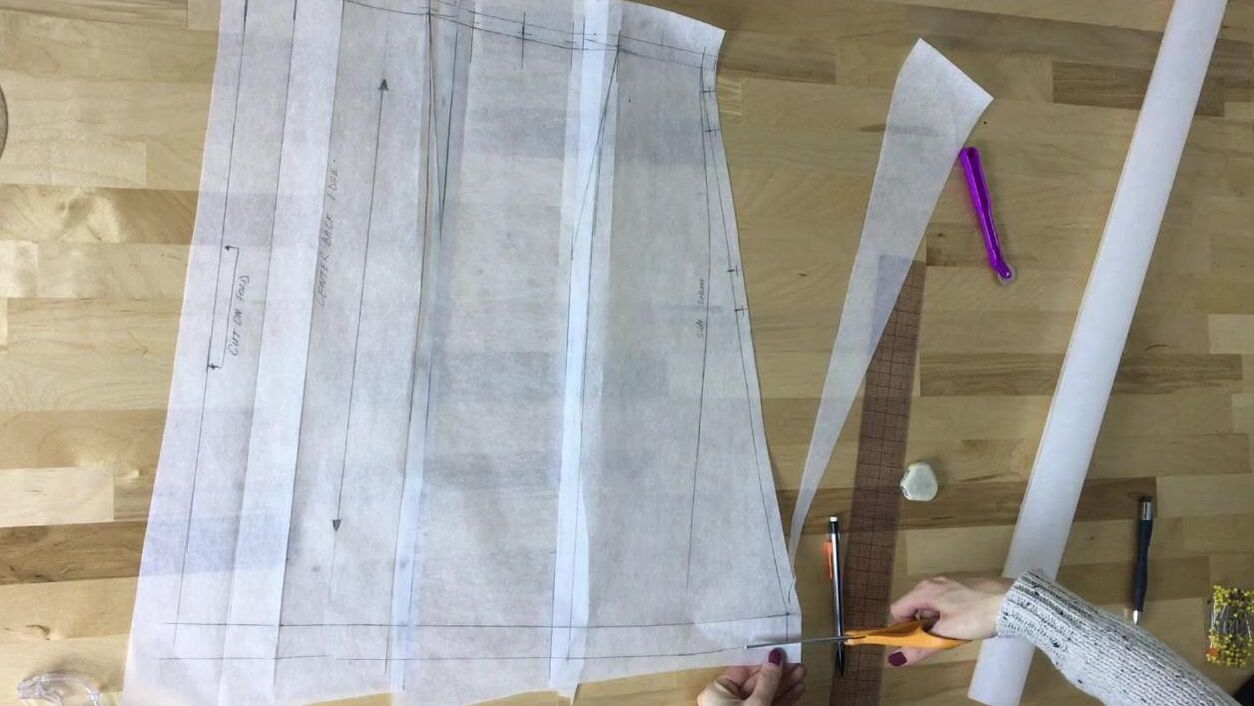 Pinning And Cutting Out The Pattern PiecesSince both front and back skirt patterns are drafted on fold, the fabric will be folded lengthwise in the cutting process. Keep in mind when cutting a pattern on fold, the selvage edge should be oriented vertically unless stated otherwise on your patterns. 1. Fold the fabric lengthwise such that its wrong side is on the outside and the face is sandwiched in between. This is an important rule to follow in the cutting process considering that all the markings transferred from pattern onto fabric (such as darts) should correspond to the fabric's wrong side. 2. Align the skirt pattern's cut on fold edge with the fabric fold. The skirt's grain line should be parallel to this fold and respectively, the selvage edge. 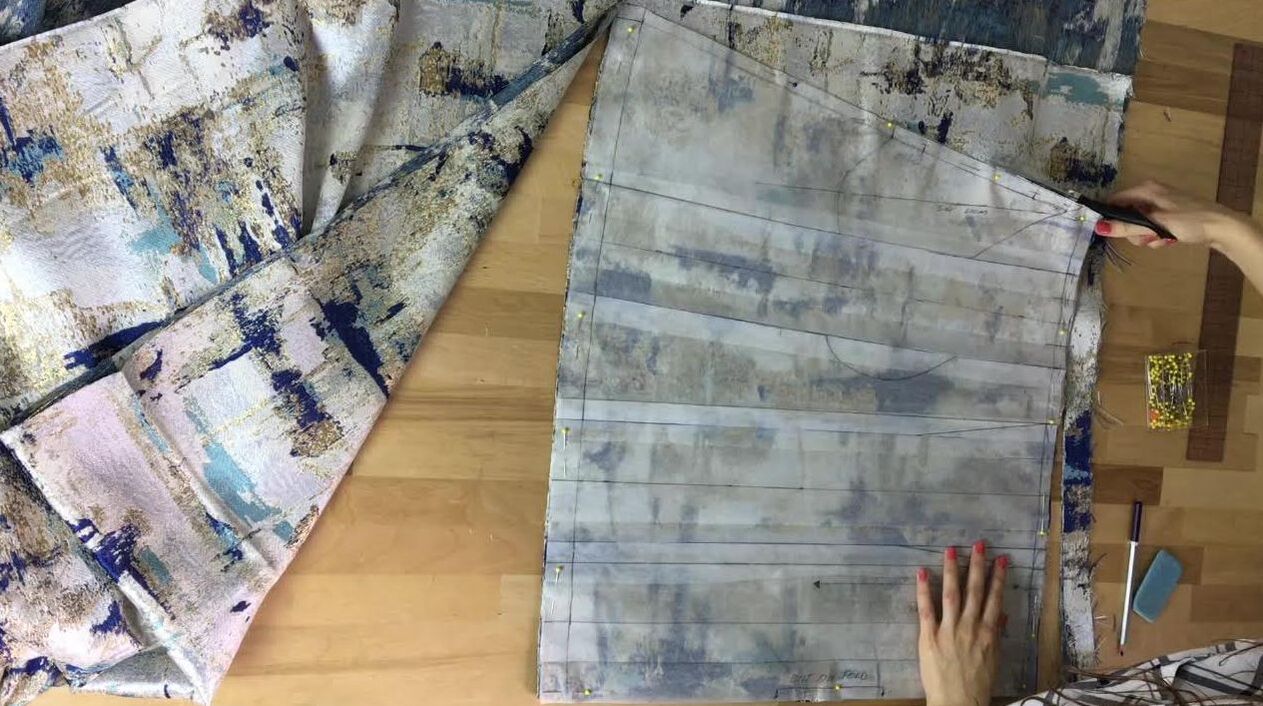 3. Insert the pins along the seam allowance through the paper pattern and fabric layers underneath as shown. It is good practice to always pin along the edge of the pattern not only to keep in flat in the cutting process but to also prevent potentially damaging the surface of the fabric visible on the finished garment. Cut the folded fabric, carefully following the sewing pattern's edge as shown.  4. Before removing the pins, transfer all the notches from the patterns onto the fabric as shown.  Don't forget the pocket notches! For this skirt design, you do not need to transfer the pleat fold lines on the fabric since they will only be folded into the waistband. Repeat this pinning, cutting and marking process for both front and back skirt. For the waistband, cut two of each front and back pieces. You can cut the two pieces of each simultaneously but make sure you follow the same right and wrong side fabric alignment described above- the the face of the fabric layers should be touching while the wrong side should correspond to the outside. In this case, this alignment will insure that the two corresponding waistband pieces (self and facing) are the mirror image of each other. Once the waistband pieces are cut, don't forget to transfer all necessary notches before the pins/patterns are removed. Since you have the waistband patterns handy, use them to cut the corresponding front and back interfacing layers. Interfacing will only back the facing layers of the waistband, so a single cut of each front and back waistband piece should be enough. Align each front and back waist band pattern onto a layer of fusible interfacing, pin and cut as described above. Just to get it out of the way, I always fuse the interfacing to each waistband facing at this point. I suggest you do the same as it helps differentiate between the waistband facing and self later in the sewing process.  The same steps should be followed for cutting the pocket bag pieces. Each pocket bag will consist of two pieces, each piece the mirror image of the other. As you'll see the sewing portion below, one of the pocket pieces will be sewn to the front skirt's side seam while the other to the corresponding back. I chose a contrasting pink color for my pocket bag. I love using different fabrics for the pockets as it creates a unique accent and makes the overall design more fun!  Just as you did for the skirt pattern, pin the pocket bag at the seam allowance and carefully cut the pocket pieces out along the pattern's edge. 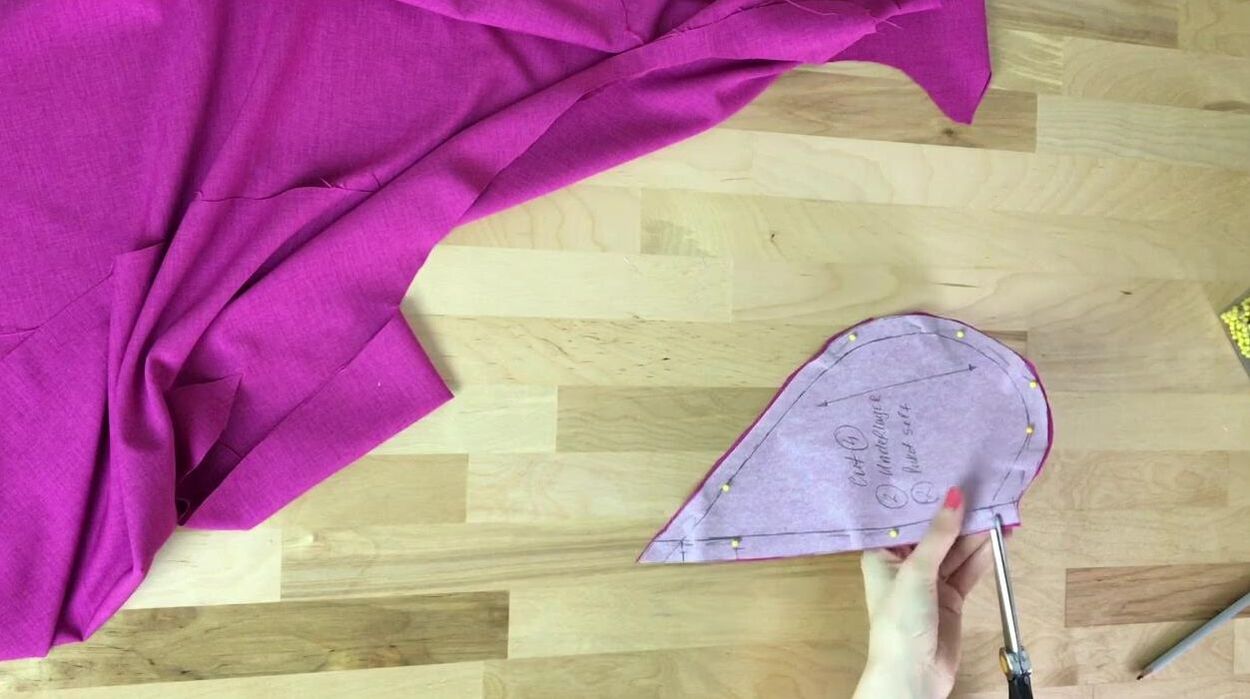 Equally important as alignment, is transferring the pocket bag notches from sewing pattern onto the fabric pieces before removing the pins. Remember, these side notches will serve as an essential tool when matching each pocket bag layer to the skirt side seam. Now that all the pattern pieces are cut, we're ready to sew! I have to admit that the sewing portion is the most rewarding part for me- seeing the design come alive into a 3 dimensional object is so satisfying. Folding And Reinforcing The Pleats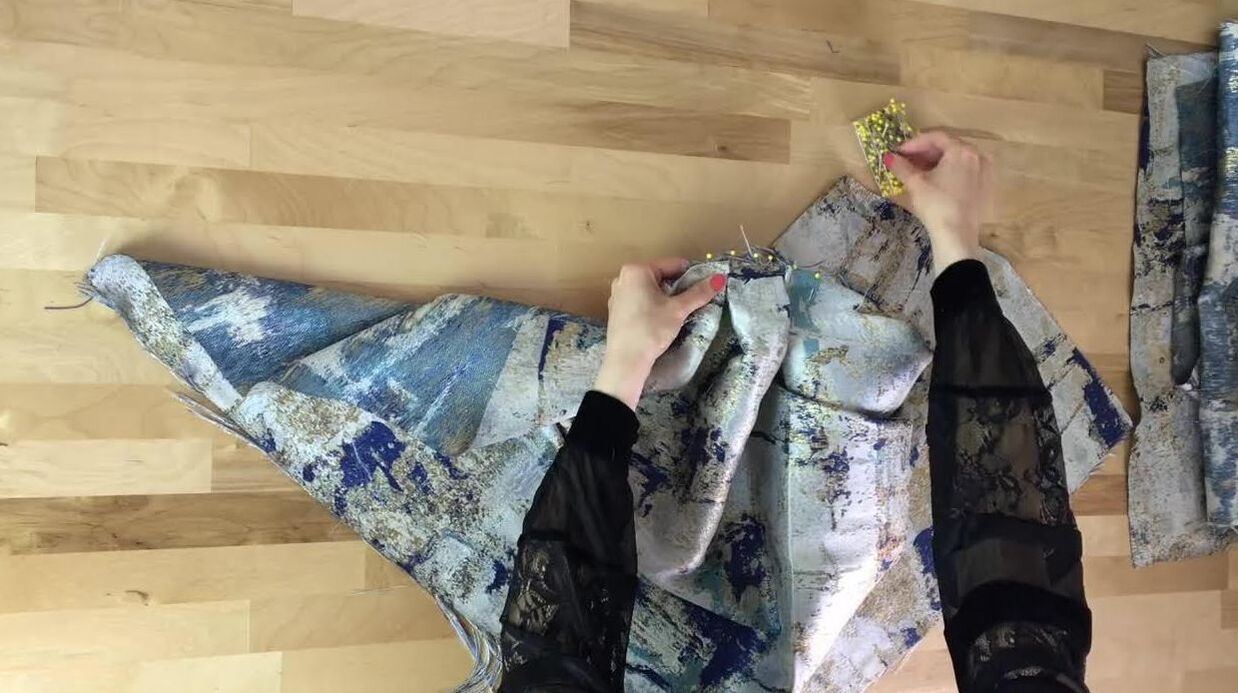 Starting at the center front, fold and pin the box pleats in place using the waistline notches as a guide. Insert the pins perpendicular to the waistline edge for a sturdier hold and easier removal during machine stitching. You may need to refer to the paper patterns in this process. It is very common to get confused with the different fold lines when using the notches alone. The actual crease and fold lines on your patterns will help in identifying each inner and outer fold line on the fabric. 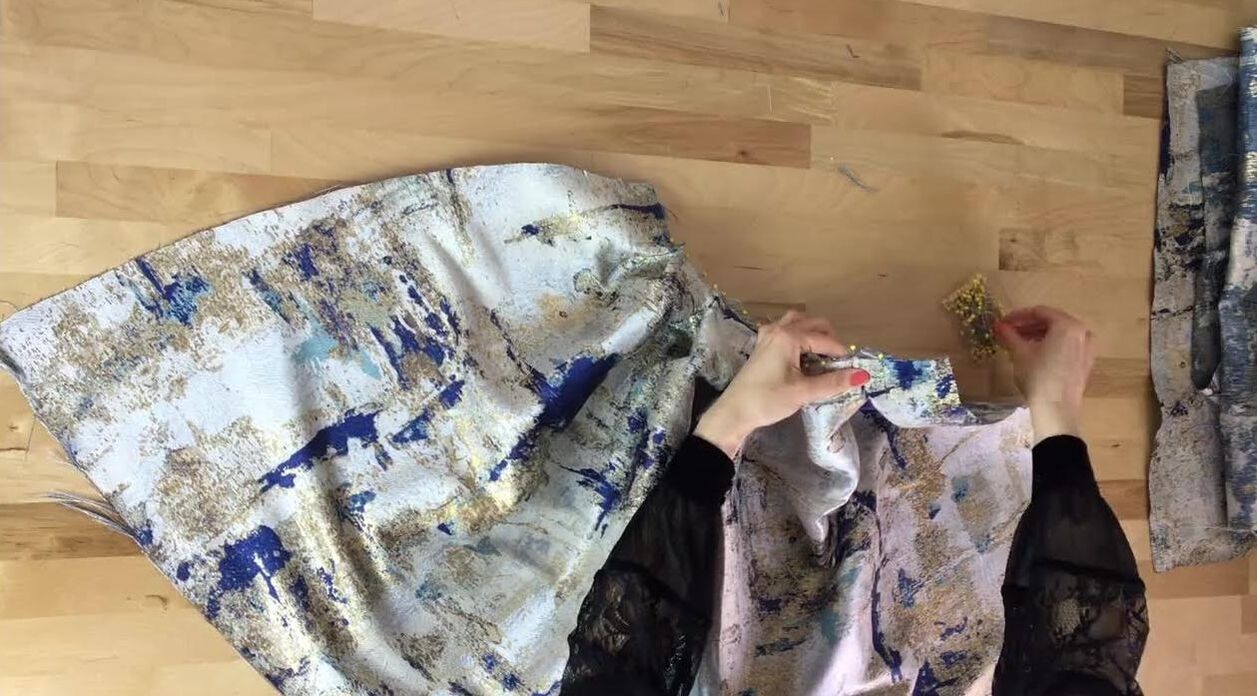 Repeat the folding and pinning process on both the front and back skirt pieces. 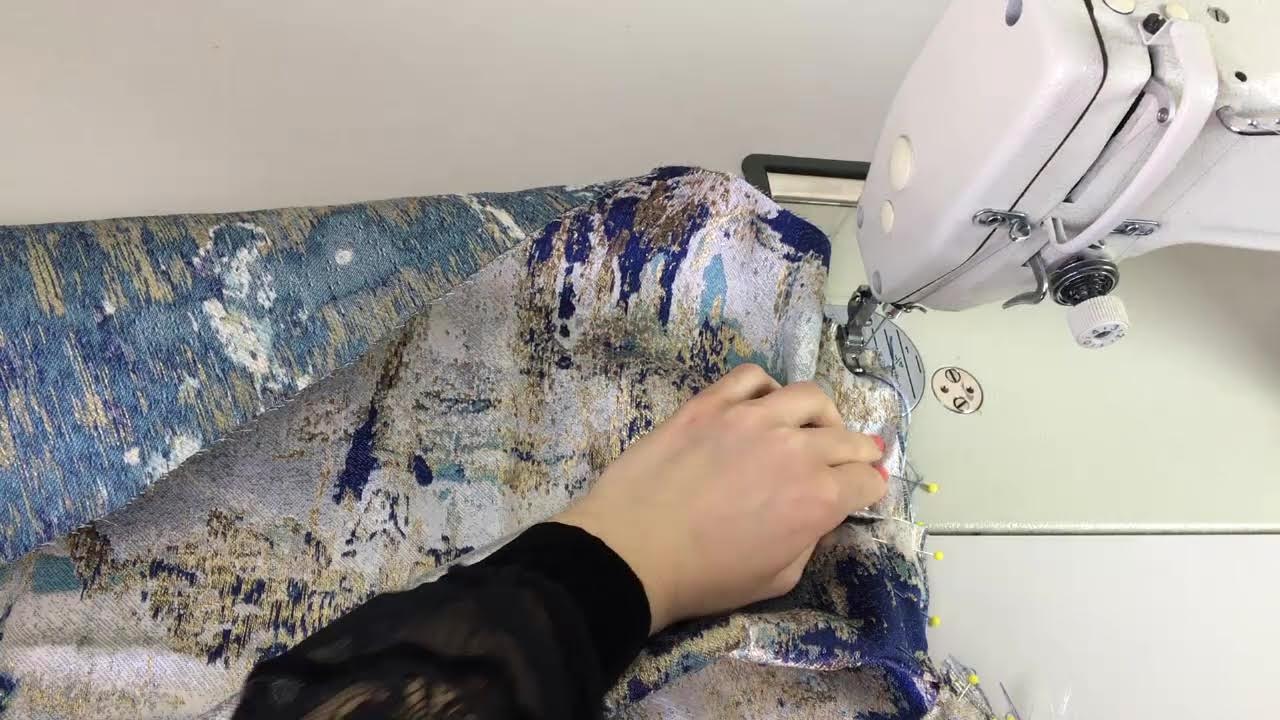 To keep the pleats from shifting during the rest of the sewing process, add a stitch along the waistline edge to reinforce all the folds as shown. Remove each pin as you sew. Now that both the back and front box pleats are folded and reinforced accordingly, it's time to piece the skirt together, starting with the side pocket described below. Sewing The Pocket SeamSince the invisible zipper will be inserted into the waistband at the side seam, I have to wait until the waistband is connected to the waistline edge before sewing it. However, to sew the waistband, the other side seam (with the pocket) needs to be fully sewn and clean finished first. For that reason, lets start with the side pocket. You can check out the full tutorial on this side pocket here: 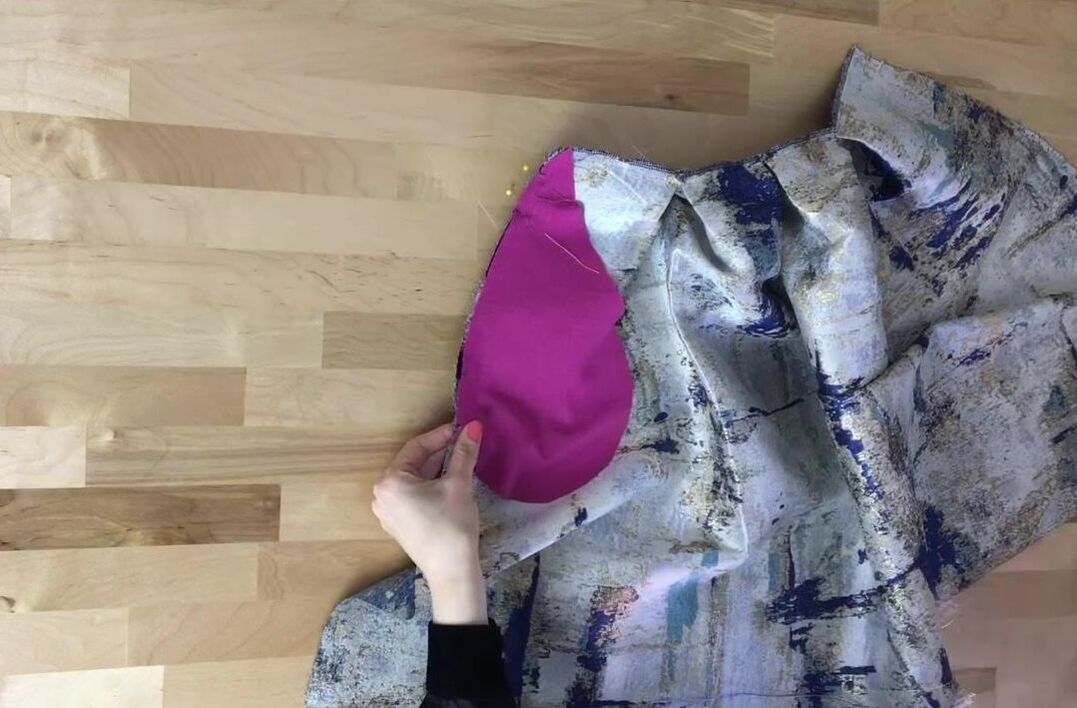 1. Align and pin one pocket bag piece to the front skirt and the other to the corresponding back skirt, matching the 4 notches in the process. Pin perpendicular to the edge as shown 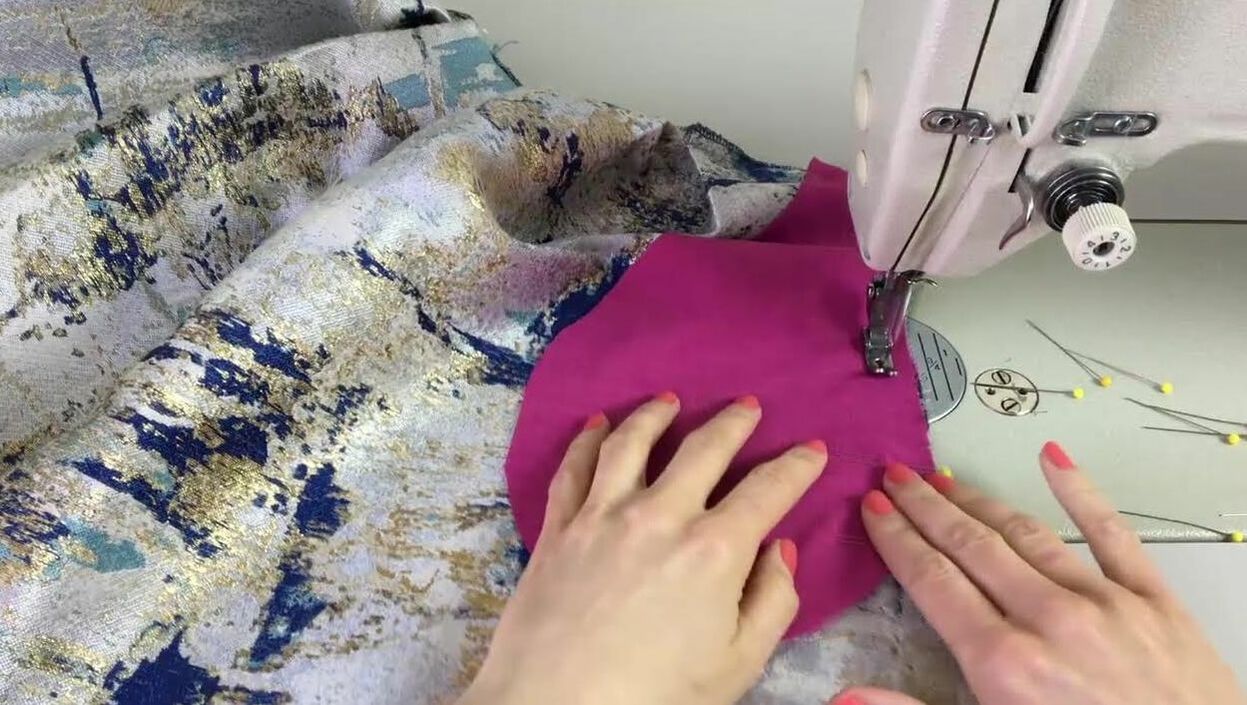 2. Machine stitch each pocket piece at the designated seam allowance- 1/2" in this case. 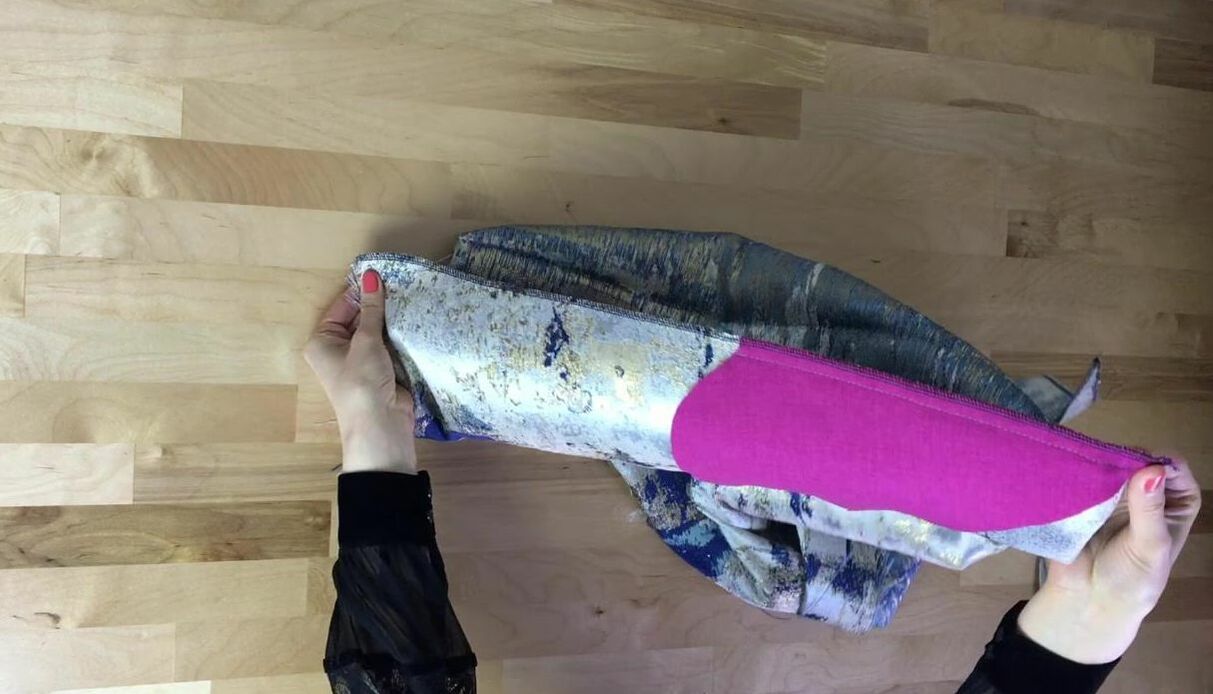 3. At this point, clean finish the seam's raw edges using a zig zag or serging stitch as shown. 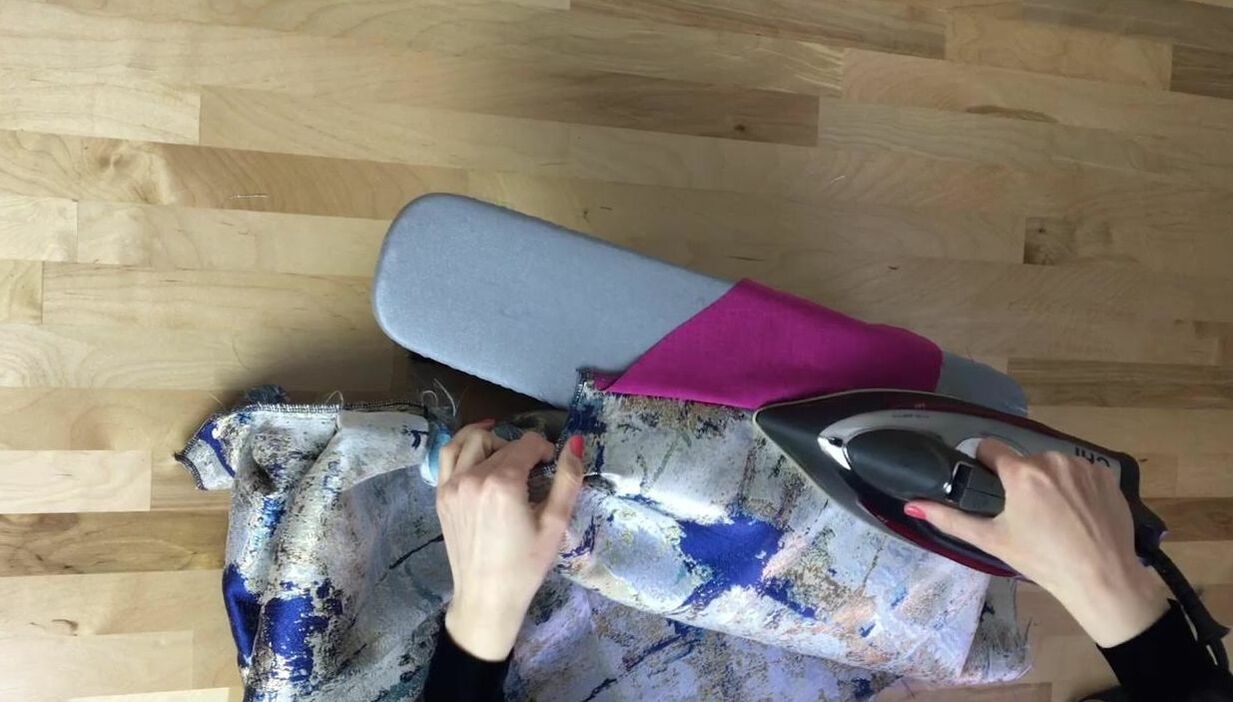 4. Iron the seam with the seam allowance pointing out, away from the skirt's edge as shown. 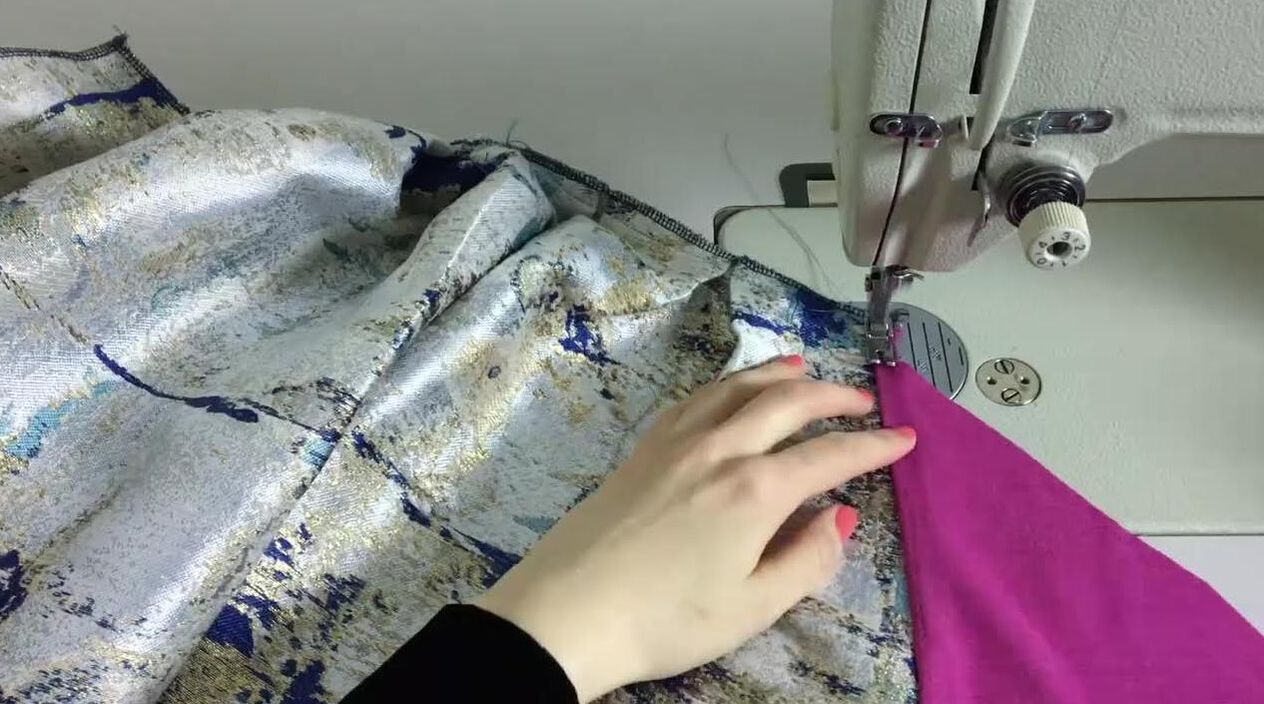 5. Only for the front pocket bag- understitch at 1/4" away from the seam to keep the pocket bag from rolling to the outside of the finished garment. 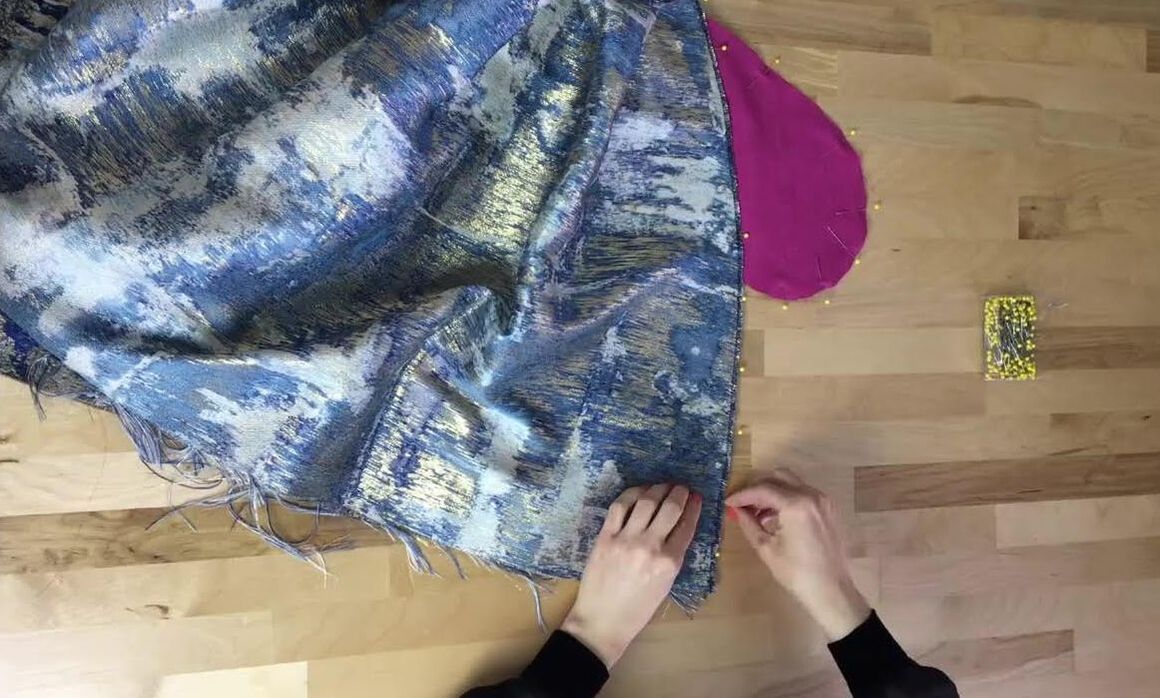 6. Next, match the front and back skirt pieces at the side seam such that the fabric's right sides are touching and the pocket bag layers are overlapping perfectly as shown above. Pin the side seam at the top, above the pocket opening and at the bottom, below the pocket opening. 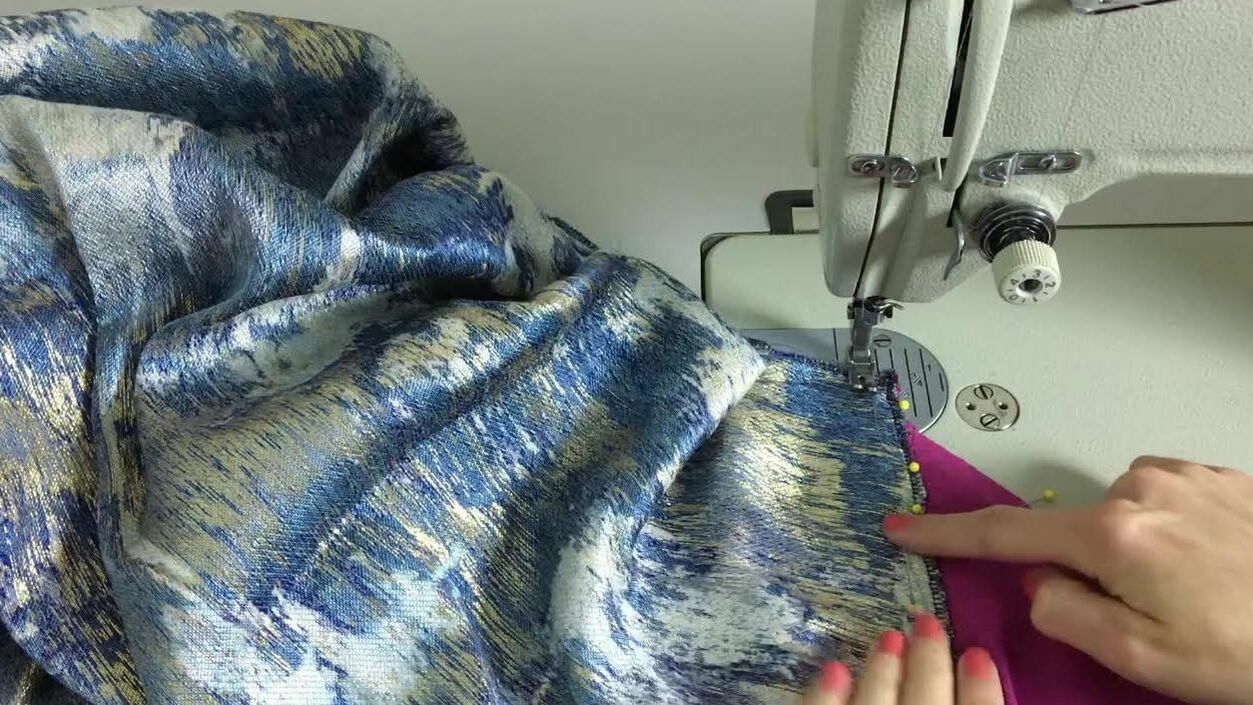 7. Starting from the top (waistline edge), stitch down to the second notch or top pocket opening and backstitch a few times to reinforce. 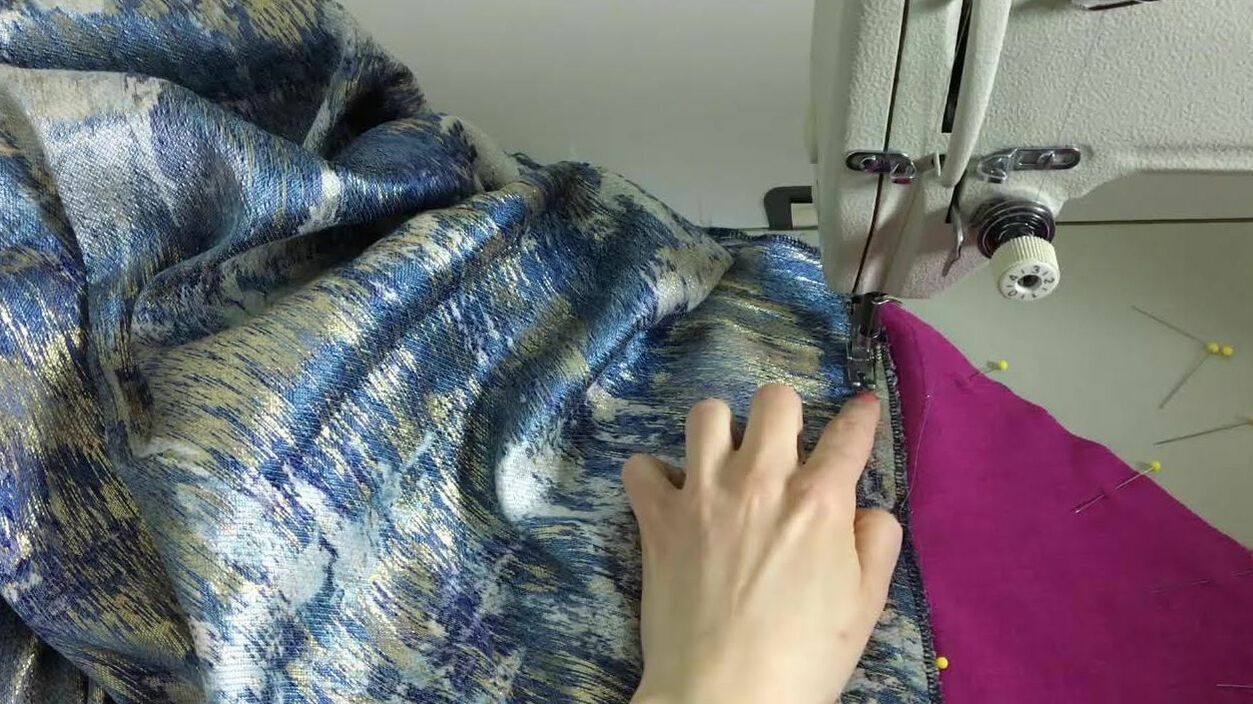 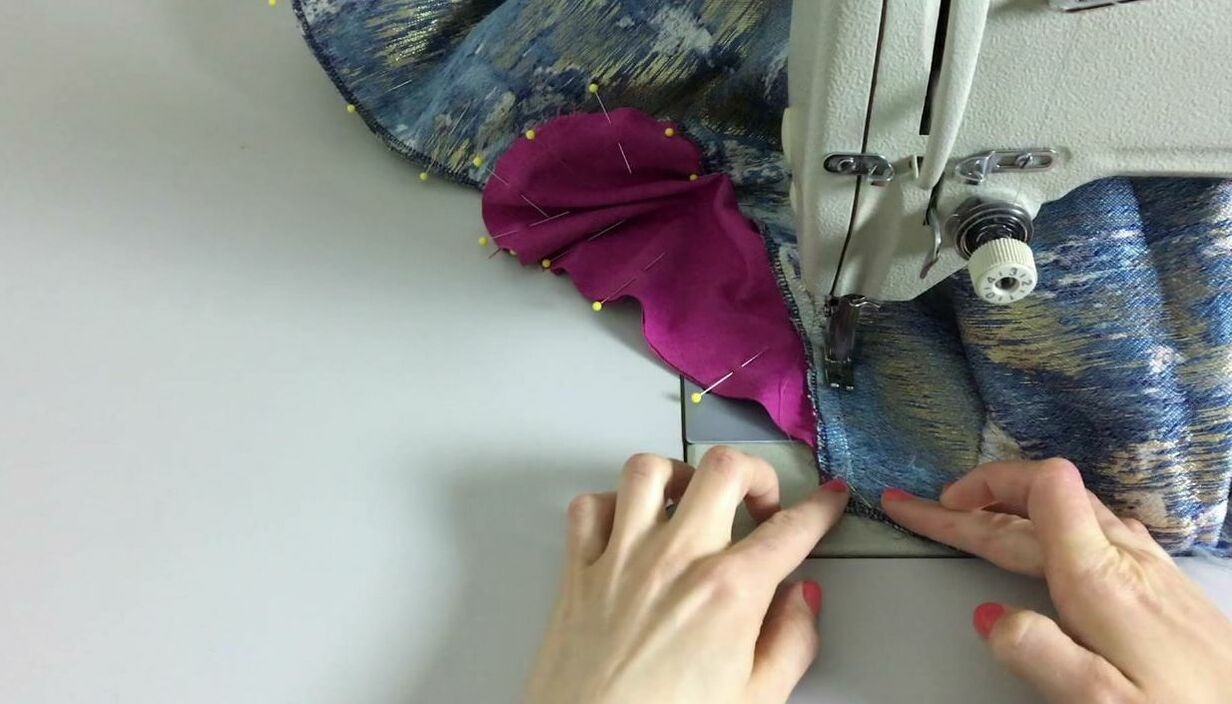 Backstitching, or stitching reverse, is extremely important at this point since the final pocket opening needs to be durable enough to withstand lots of wear over time. 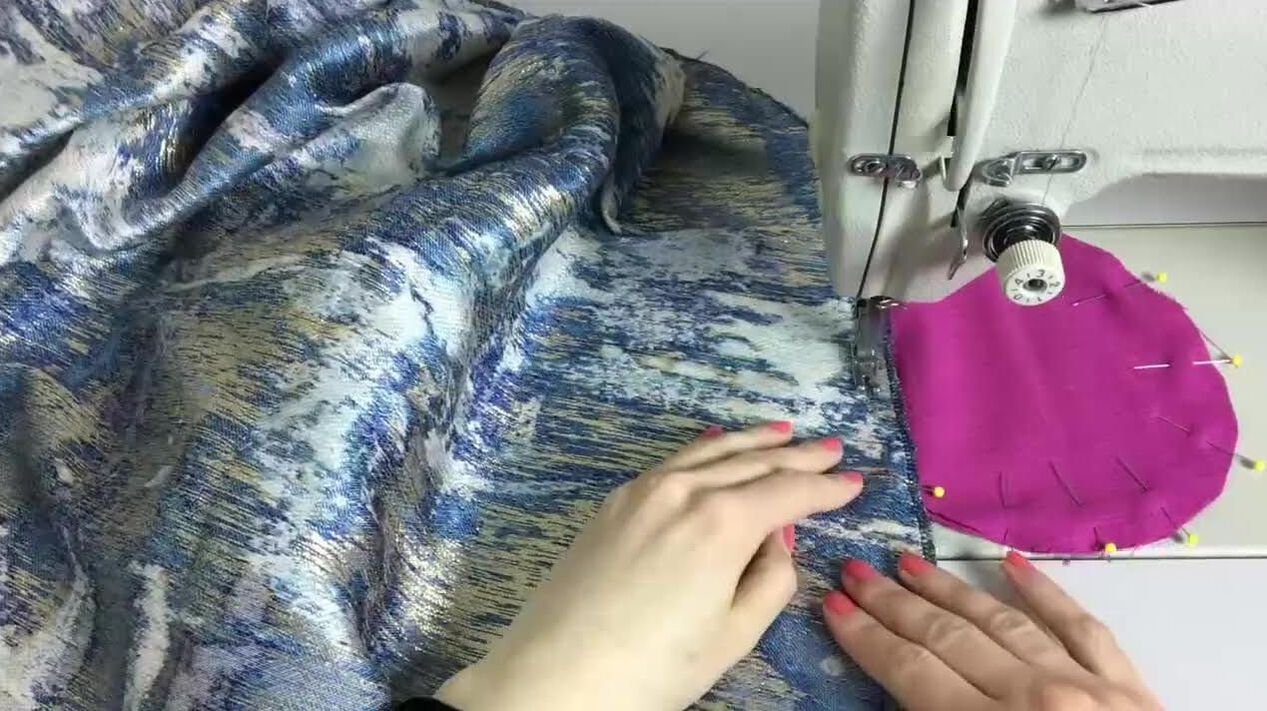 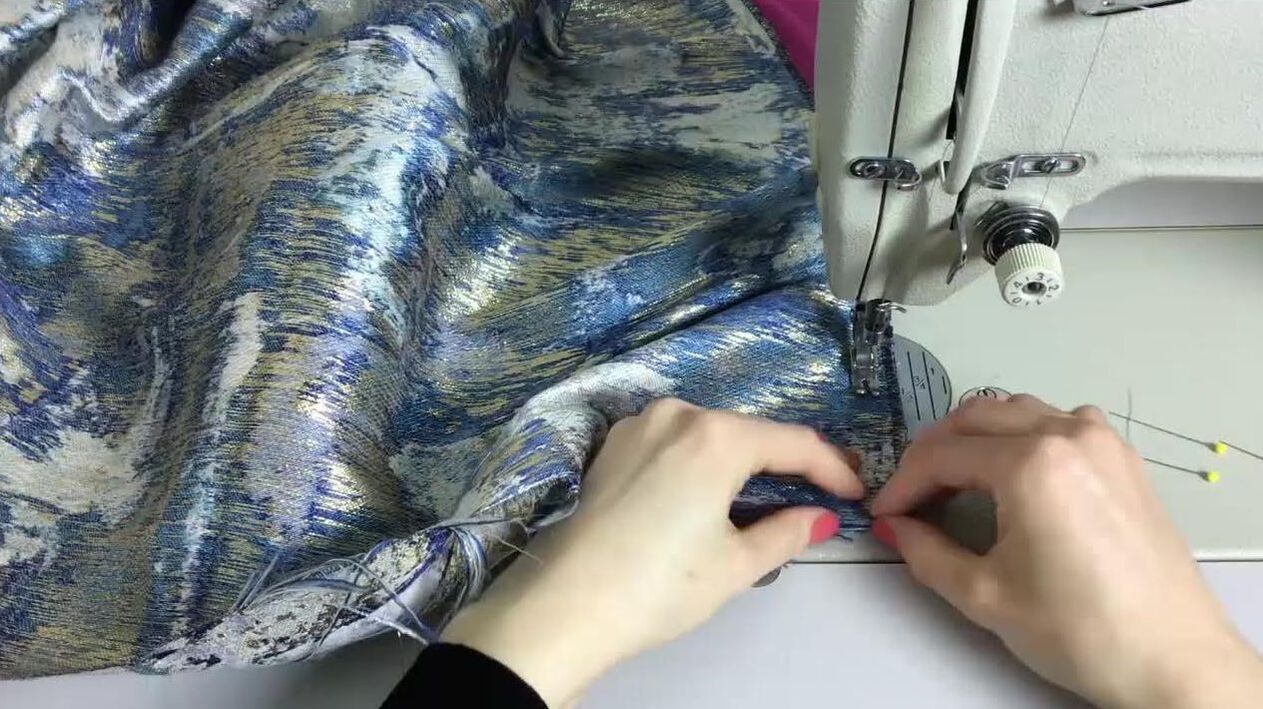 8. Next, starting at the third notch from the top, or the bottom pocket opening, stitch a few times in reverse before stitching all the way to the skirt's hem as shown. Again, reverse stitching is extremely important at the beginning as it ensures the pocket opening will be durable to withstand long term use. 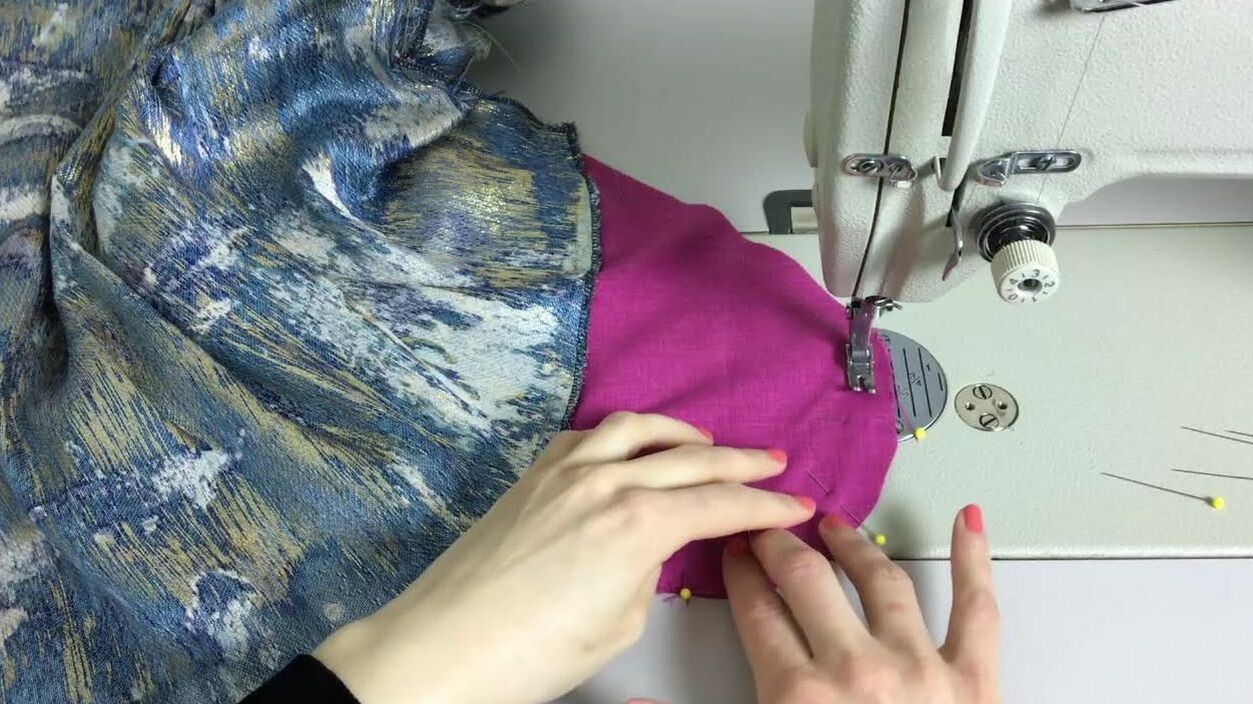 9. Last but not least, starting at the very top, stitch the two pocket layers together following the designated seam allowance (1/2" in this case), stitching around the curved area at the bottom and ending at the lower side seam as shown. 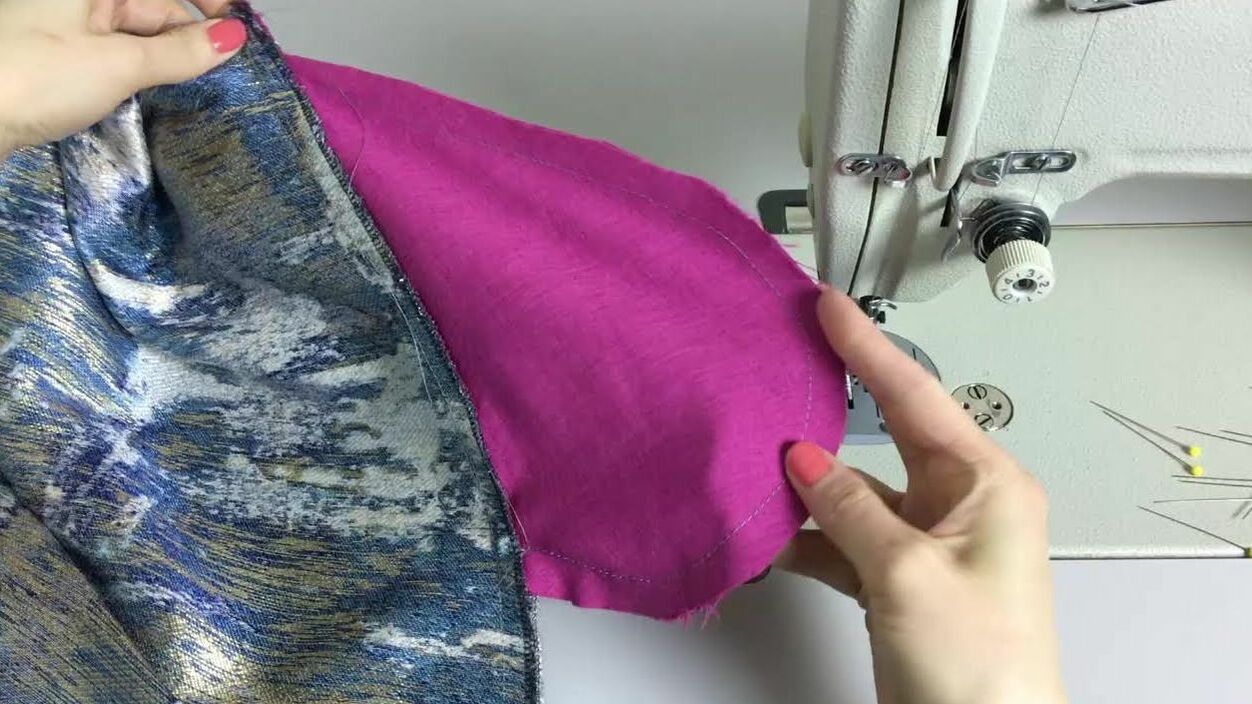 Using a zig-zag stitch or serging stitch (if you have an overlock sewing machine), clean finish the raw edge of the pocket bag. 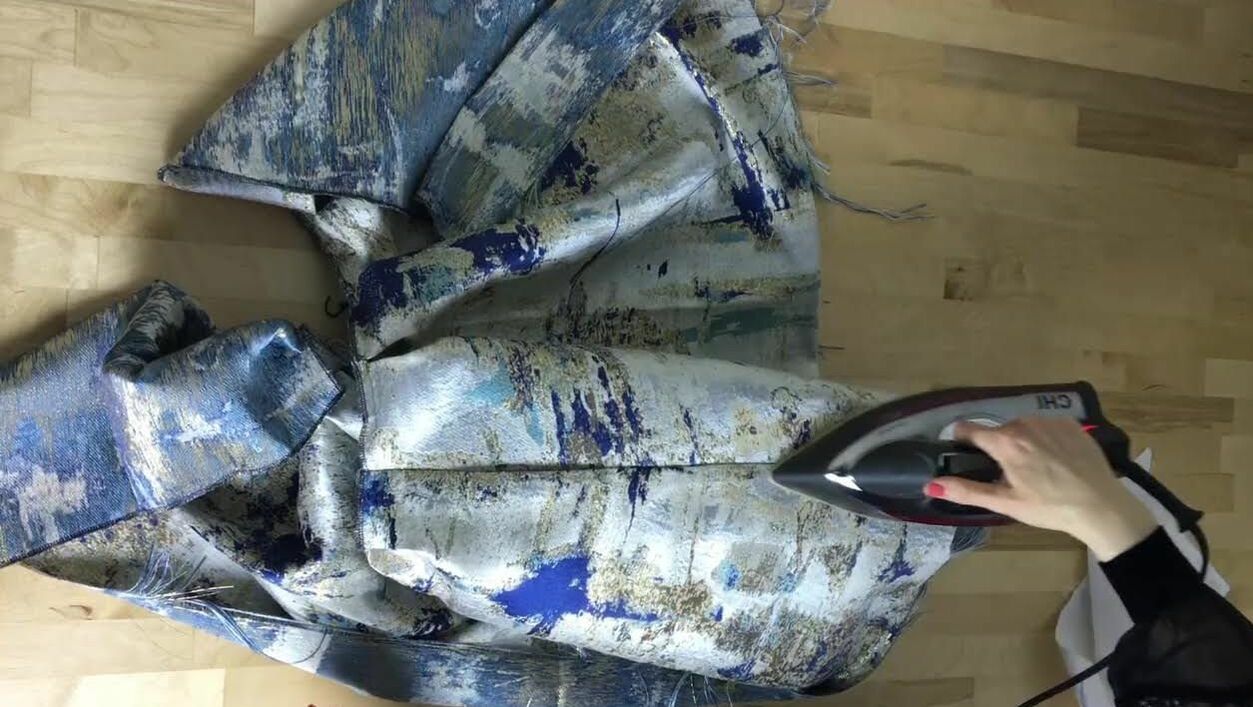 Last but not least, iron the seam with the pocket bag and seam allowance pointing towards the front of the skirt. The best way to do this is to iron the seam on the right side of the skirt. Sewing The Skirt Waistband And Zipper SeamBefore attaching the waistband to the skirt, you should first connect the front waistband pieces to the back then attach the facing to the waistband self. For the detailed steps on sewing this classic waistband, check out this tutorial: How To Sew A Skirt Waistband With A Side Seam Invisible Zipper. 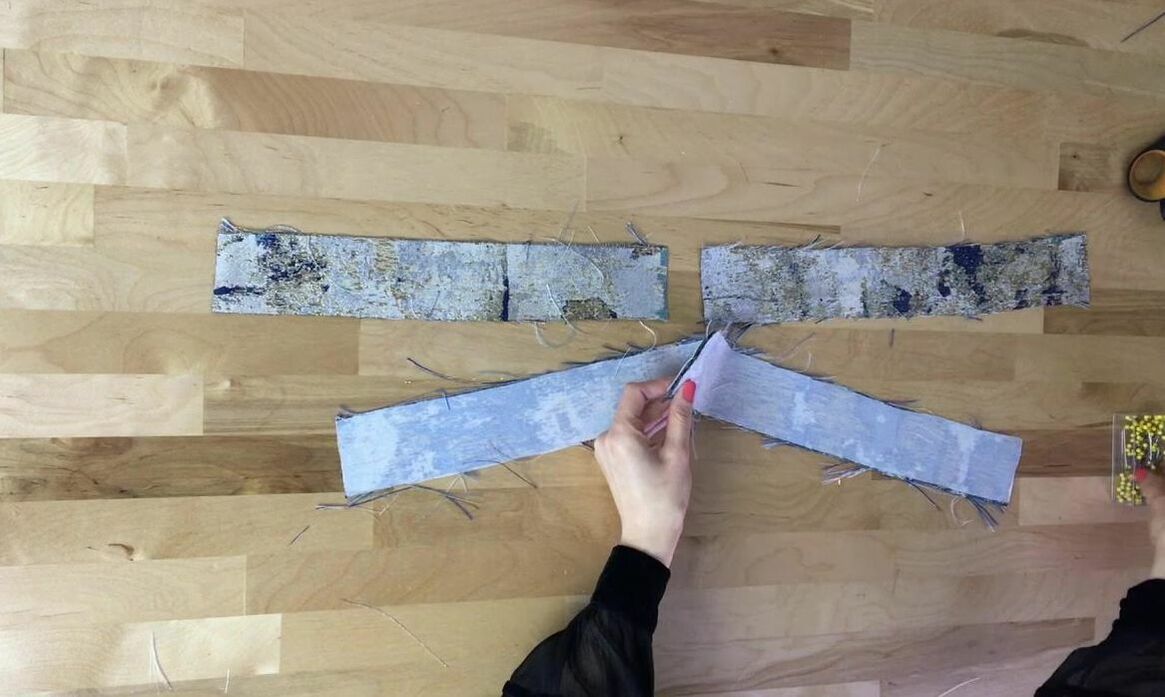 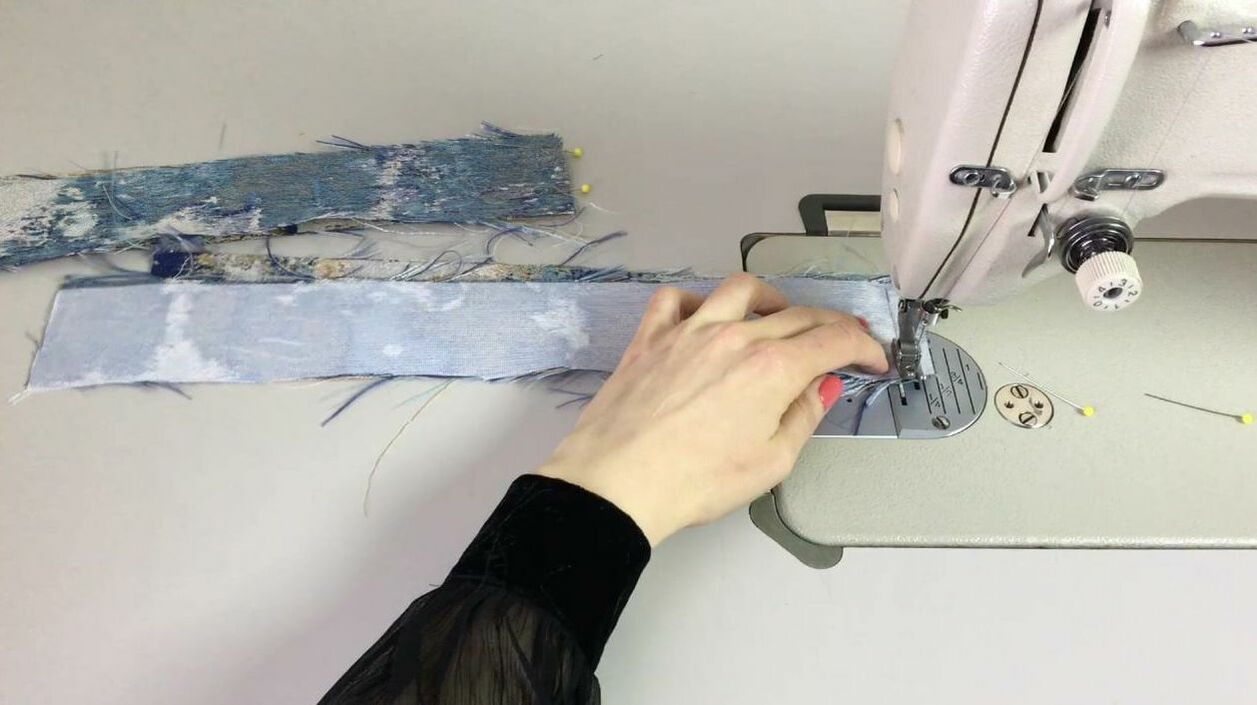 1. Match and pin the front to the back self piece at the side seam. Machine stitch it at the designated seam allowance. 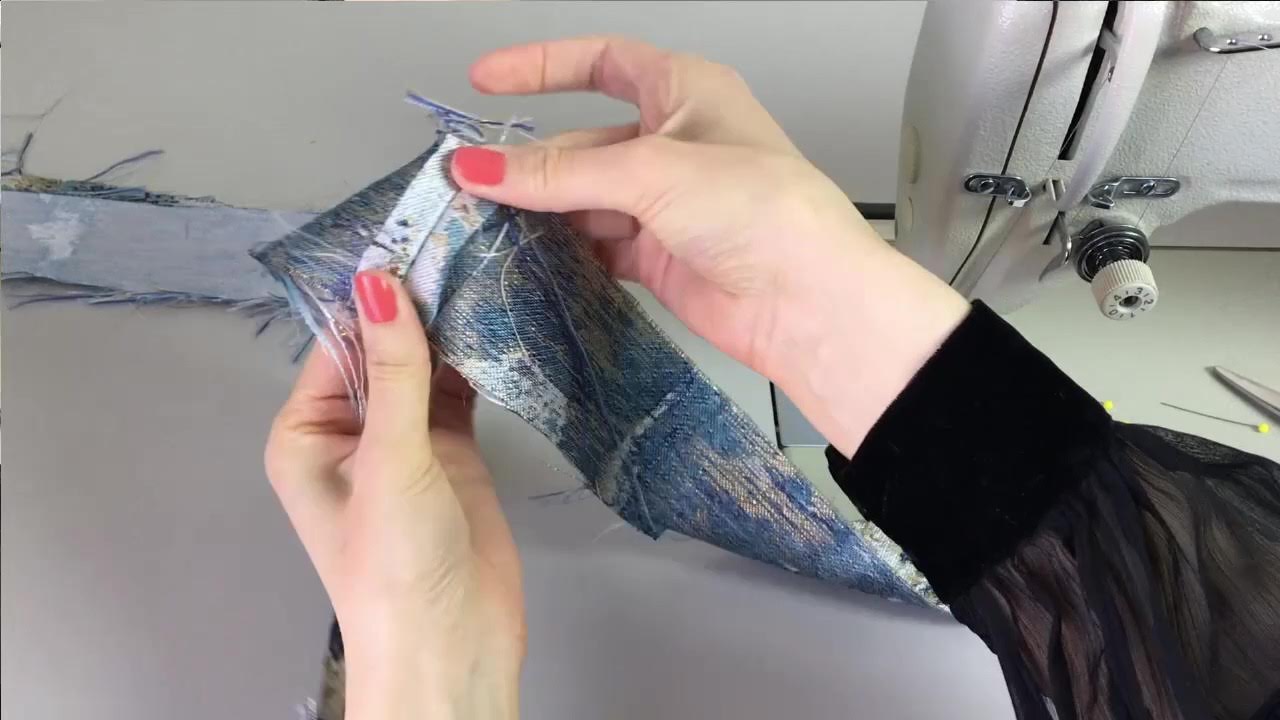 Iron the seam allowance open as shown. Repeat for the front and back facing pieces. 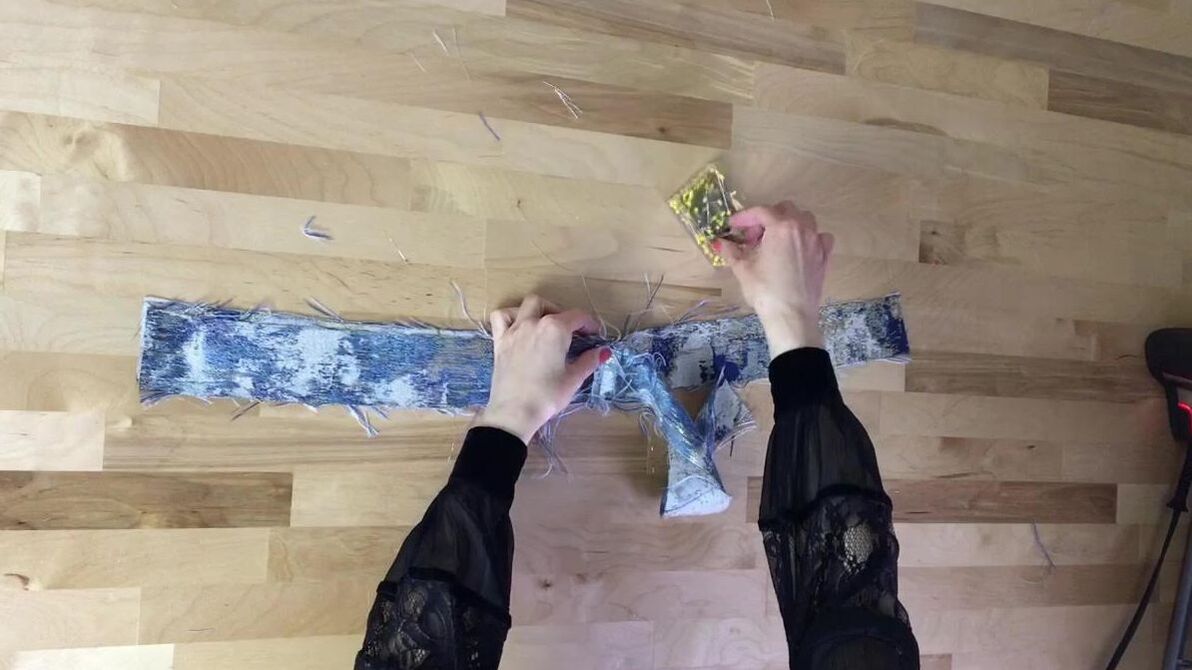 2. Now that the front and back layers are connected into a single piece for the self and a single piece for the facing, place the two waistband pieces such that the fabric's face sides are touching. 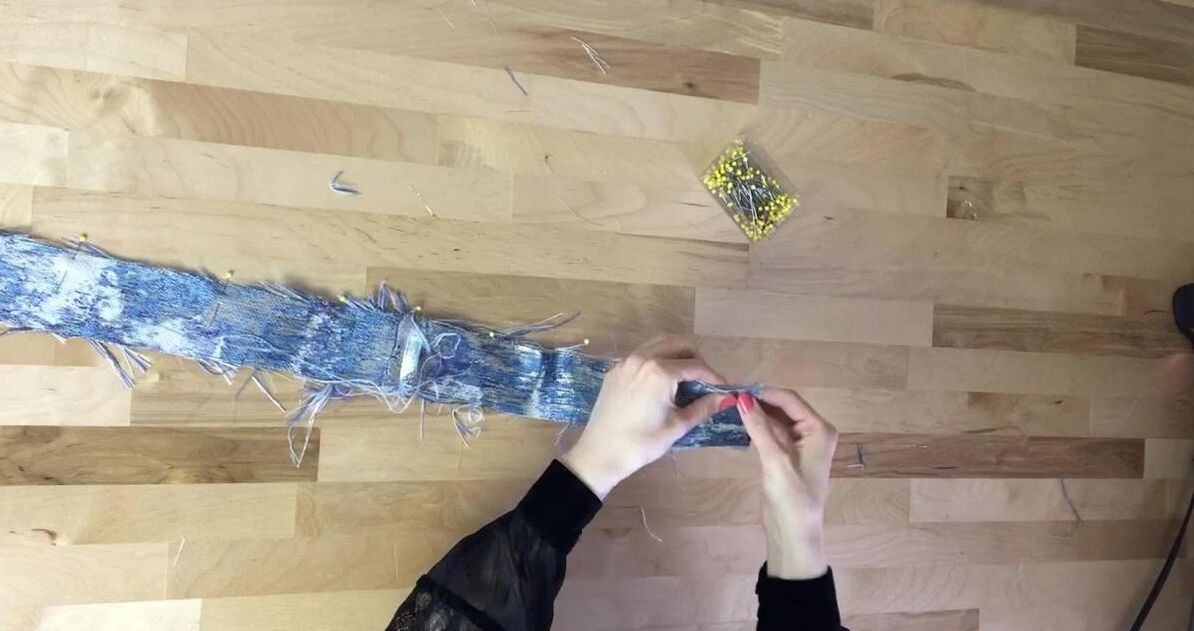 Pin them together along the top edge as shown. 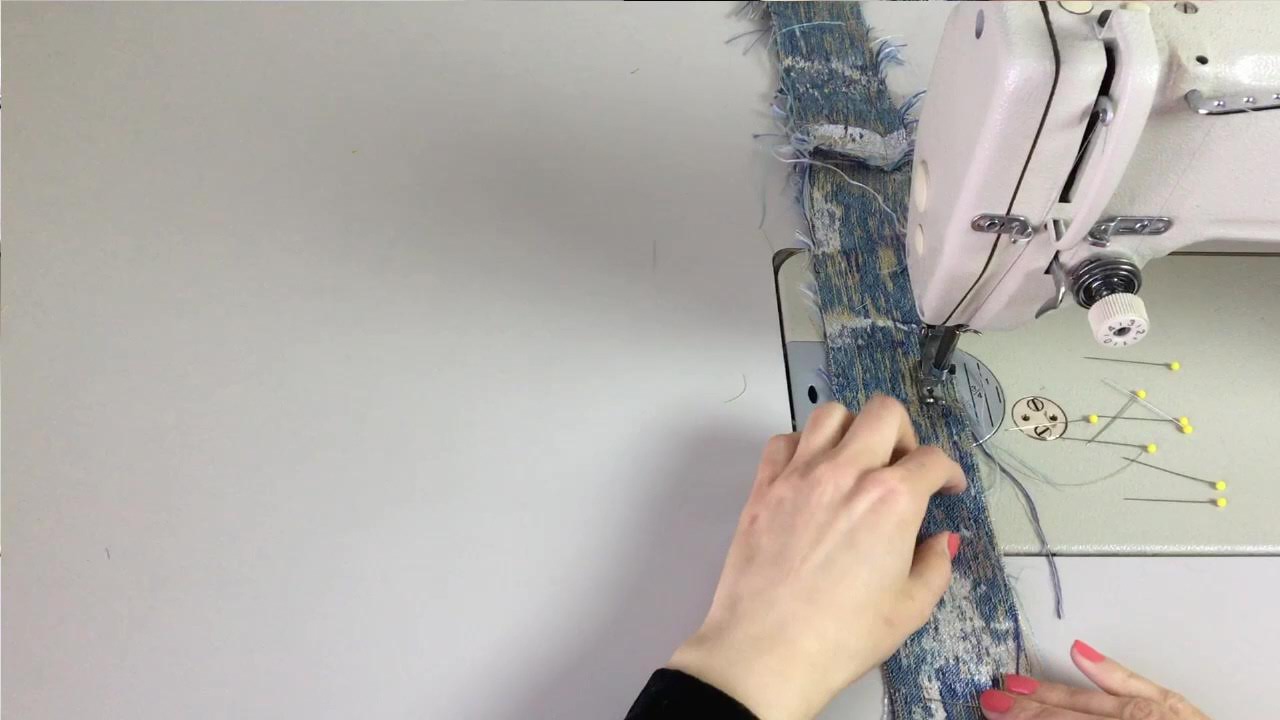 3. Stitch the top edge at the designated seam allowance- 1/2" in this tutorial. 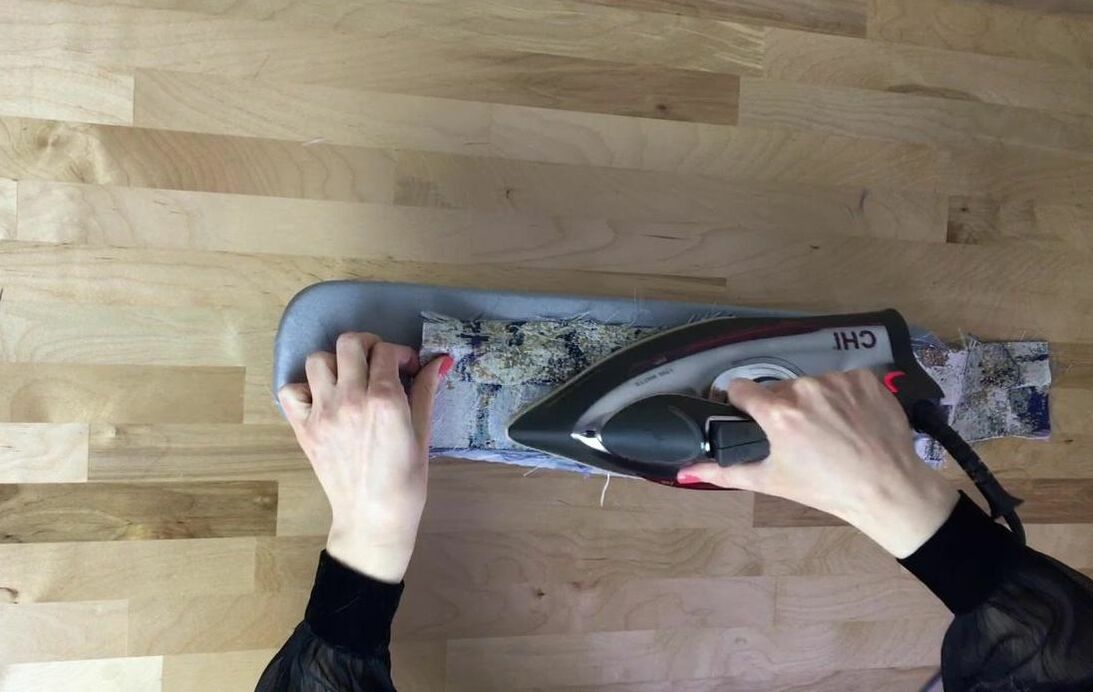 Once stitched, iron the seam with the seam allowance pointing towards the facing layer. 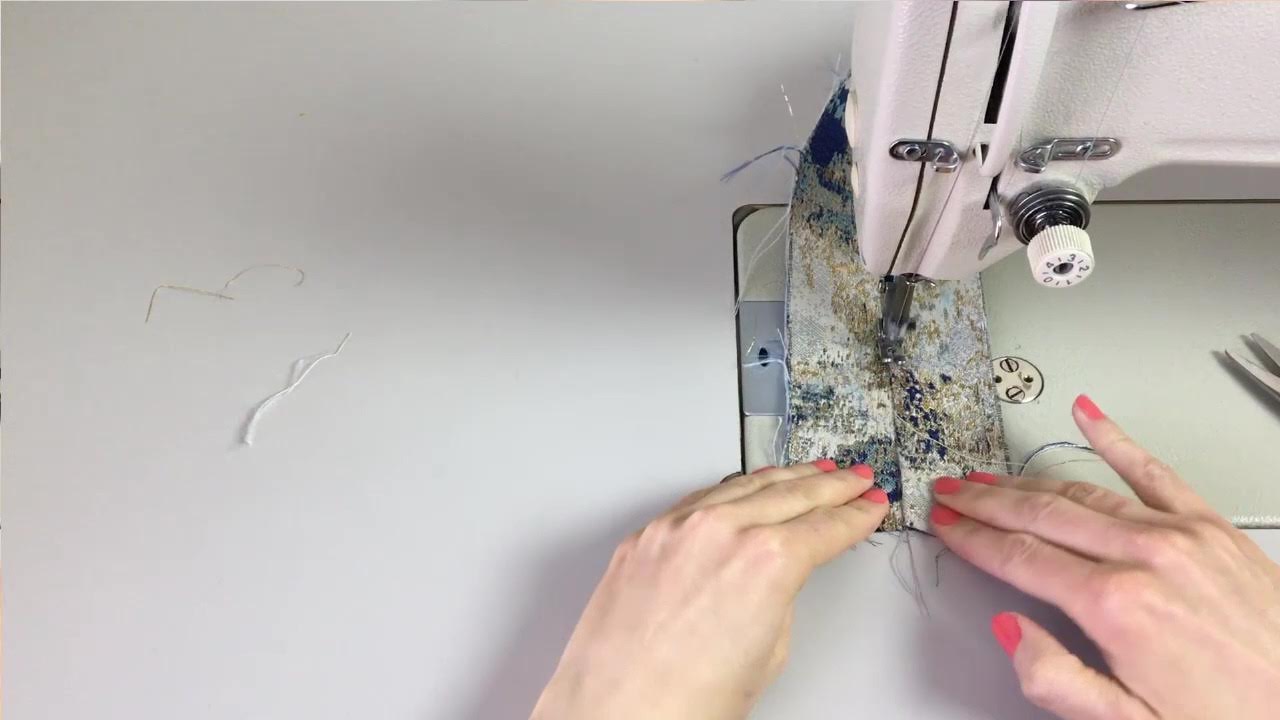 4. Understitch at about 1/4" away from the seam line through the facing and seam allowance layers underneath. Once understitched, the waistband is finally ready to be connected to the skirt's waistline. 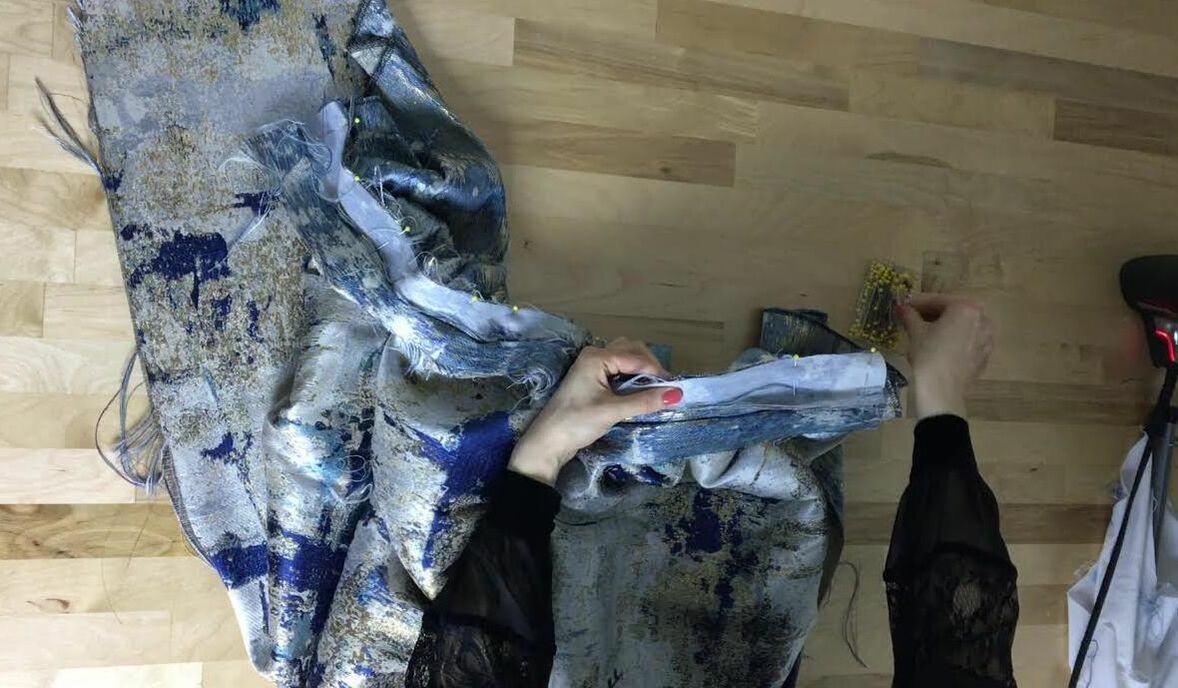 5. Match the edge of the waistband self layer to the edge of the skirt waistline, making sure the face of both fabric layers are touching as shown above. Match the notches on the bottom edge of the waistband to their corresponding pleats on the skirt waistline. Inert pins perpendicular to the edge. 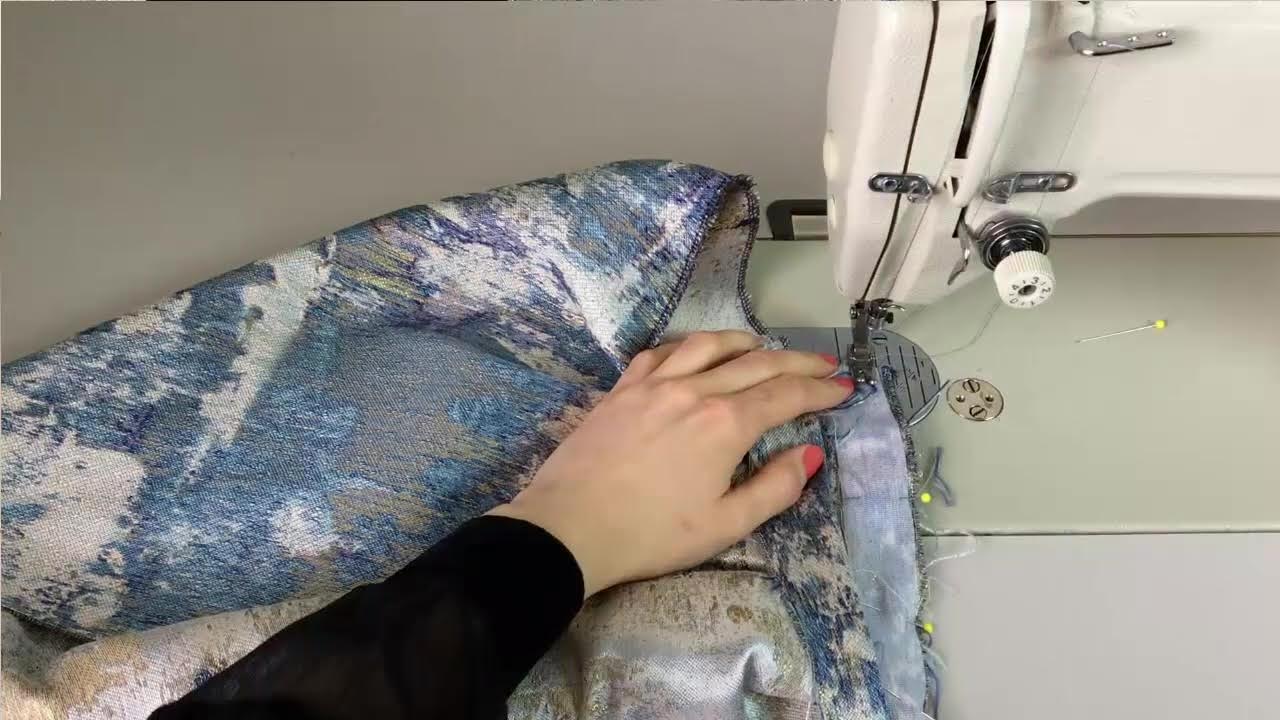 6. Stitch at the designated seam allowance. Again, for my skirt, the seam allowance is 1/2". 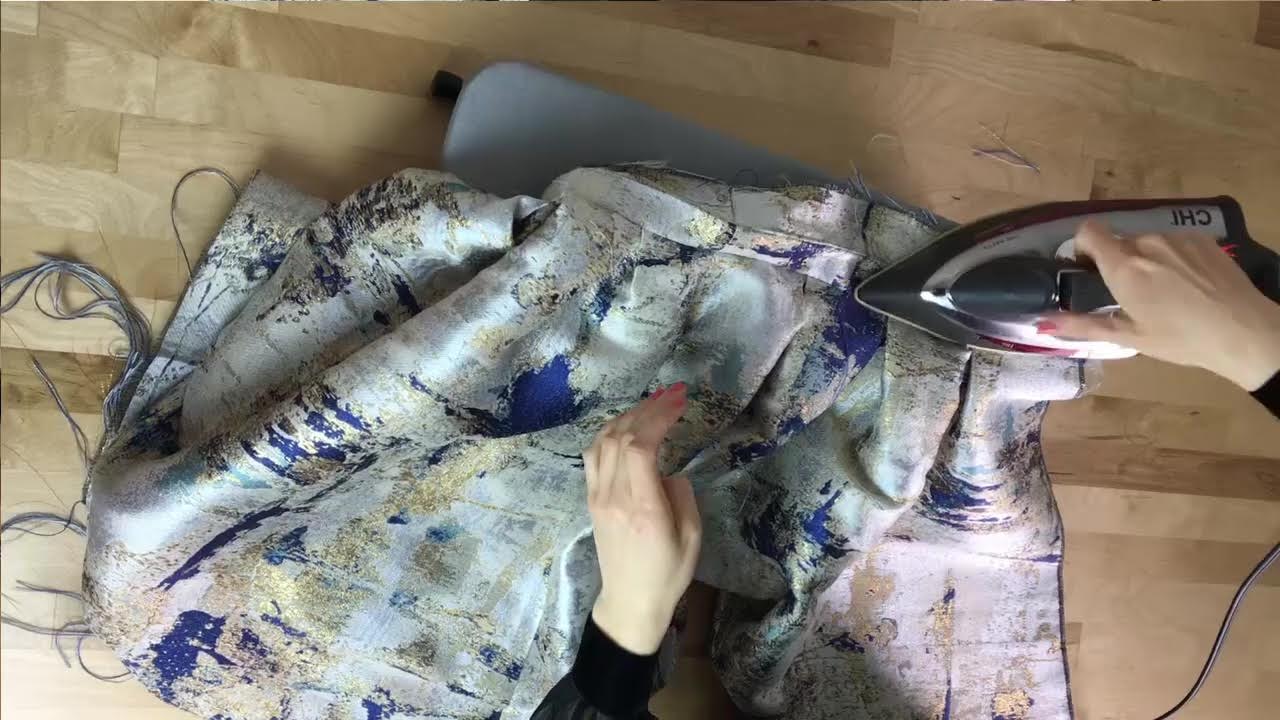 Iron the seam allowance pointing upwards towards the waistband as shown above. 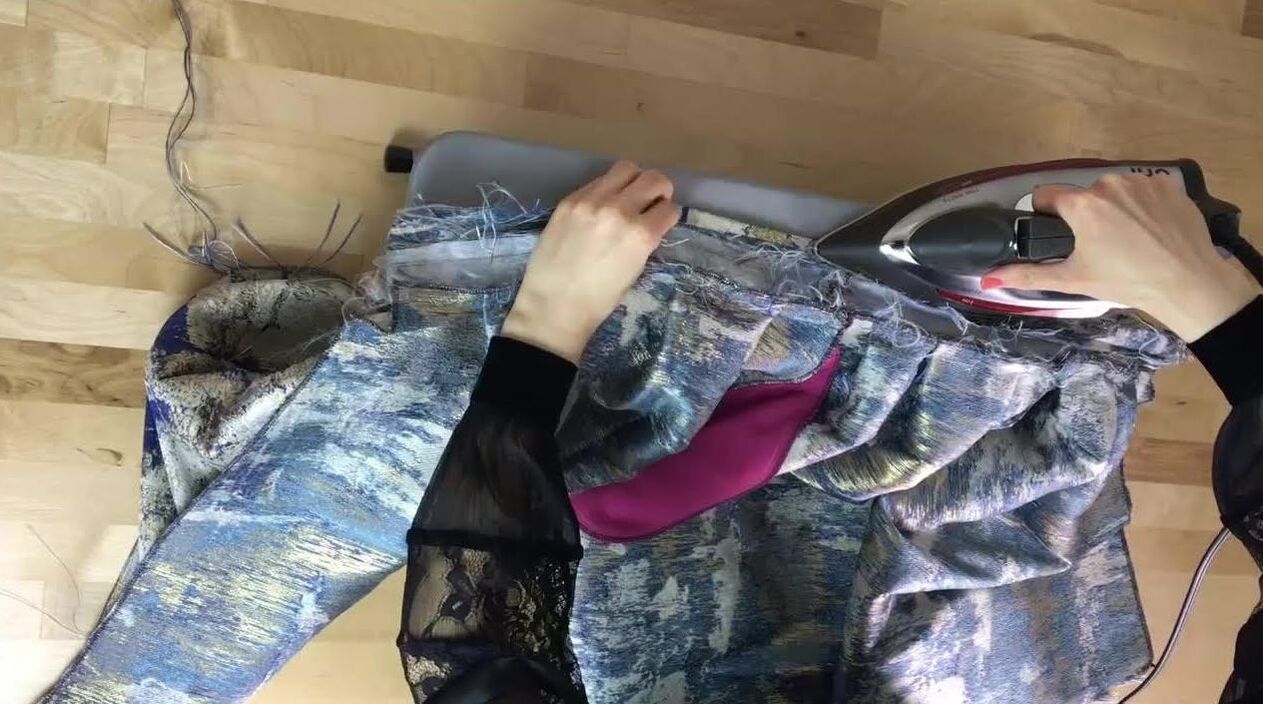 7. Before moving on to sewing the zipper, fold the edge of the facing in at the corresponding seam allowance. In this tutorial, I folded the facing edge at 1/2". Iron the fold line to keep it in place. Doing this ahead of time will make the process of hand stitching the waistband closed much easier and enjoyable later. To sew the invisible zipper: 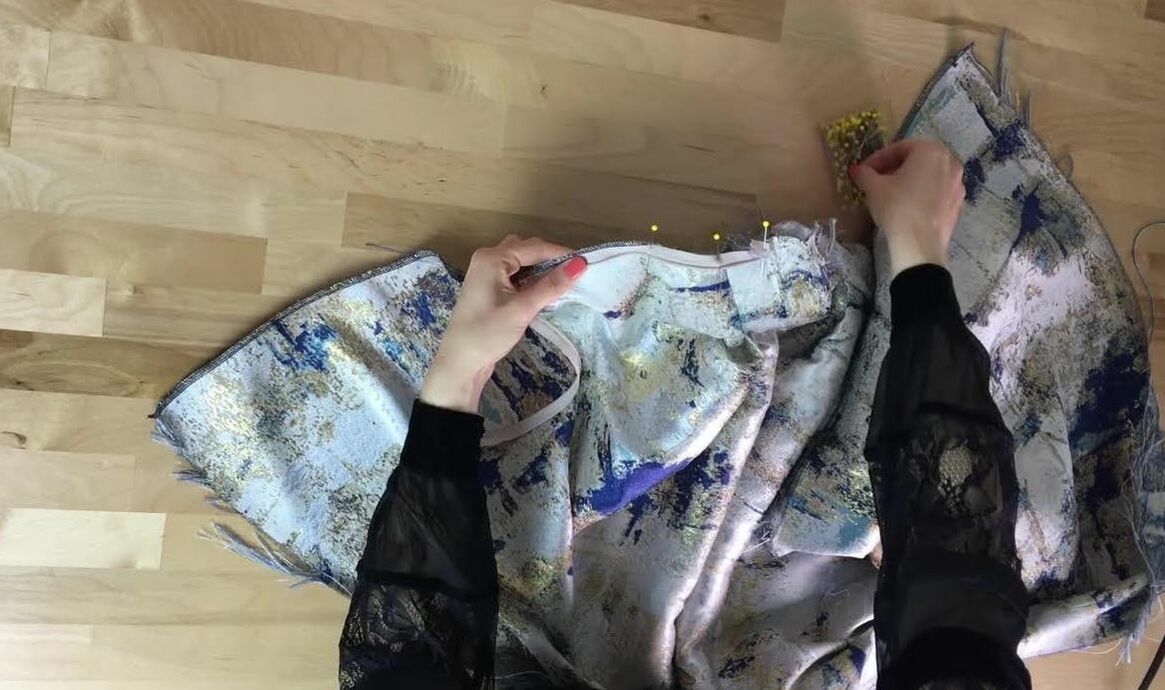 1. Keeping the zipper open, align each zipper tape portion to its corresponding skirt side (either front or back layer). 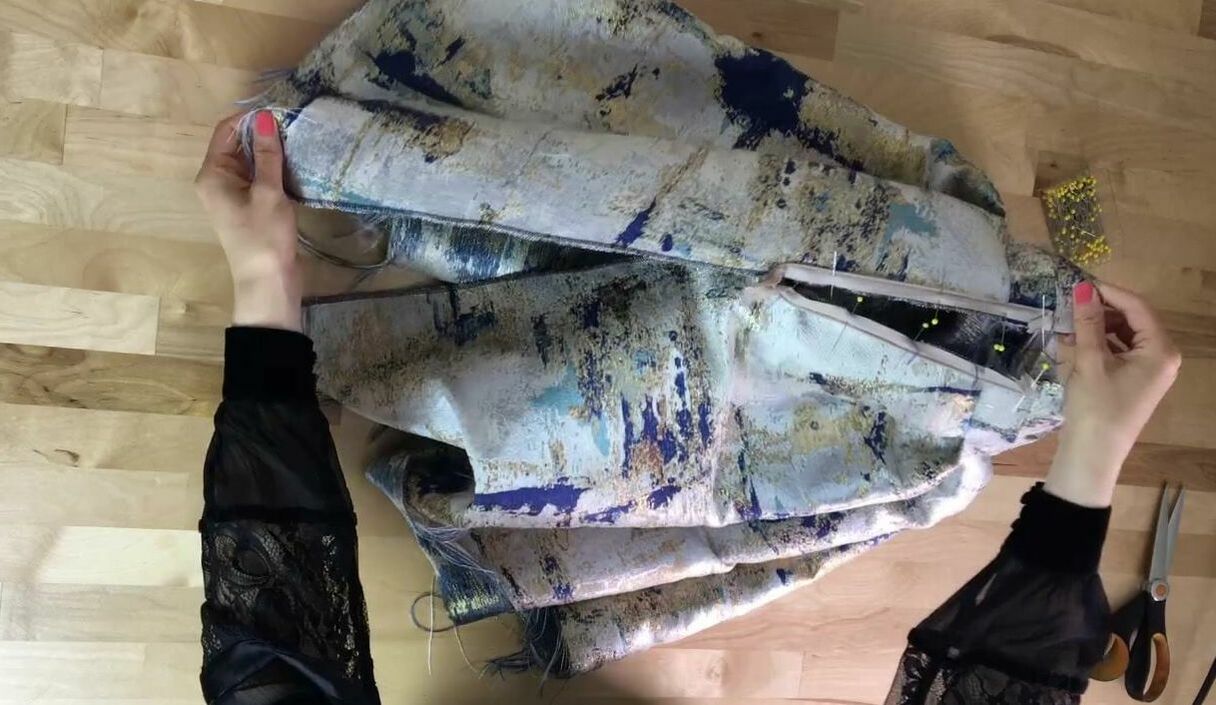 2. Just as is true for sewing any conventional seam, the face of the zipper tape should be touching the face of the fabric. The lengthwise edge of both skirt and zipper tape should align to each other as shown. The very top opening of the zipper should also be aligned with the very top edge of the waistband such that when the zipped up, both the side seam and waistband are closed all the way. Although you can use pins alone to keep the zipper tape in place, I highly recommend hand basting it to the skirt before proceeding with the permanent stitch. 3. Using a regular zipper foot, stitch each zipper portion to its corresponding skirt side. 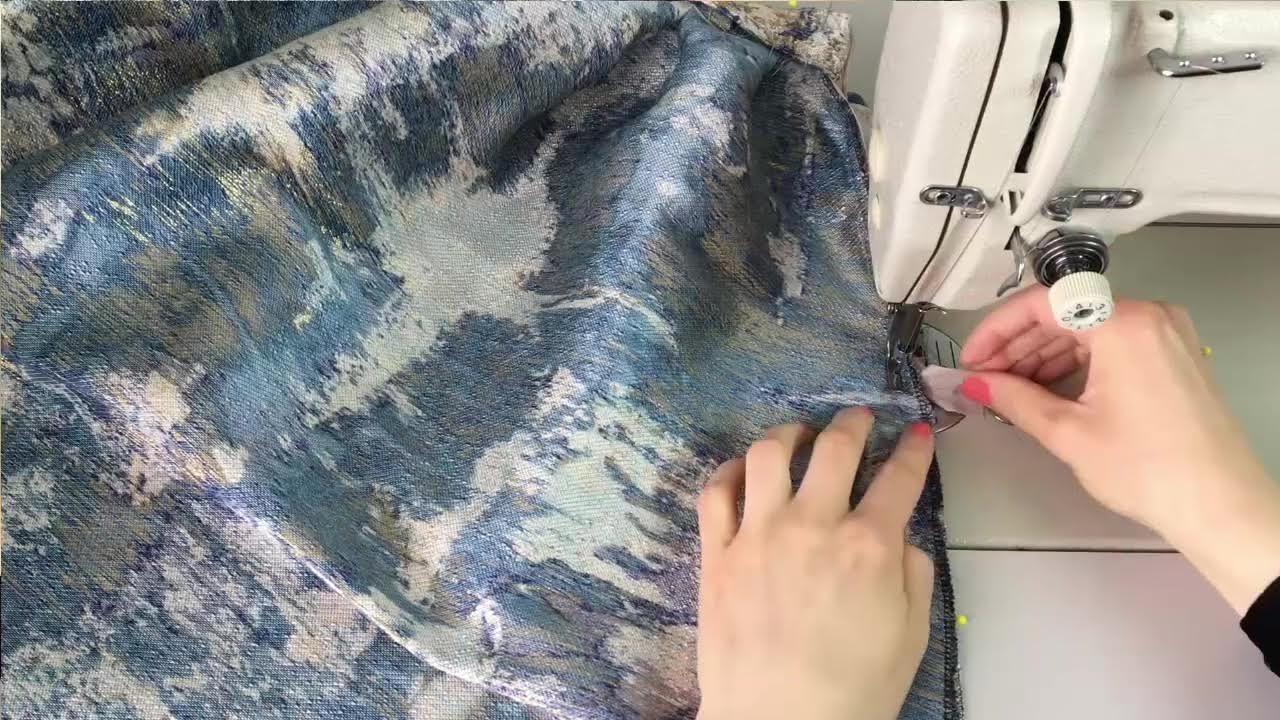 4. Using the zipper foot again, finish stitching the rest of the seam, starting at the bottom of the invisible zipper all the way down to the skirt hem. 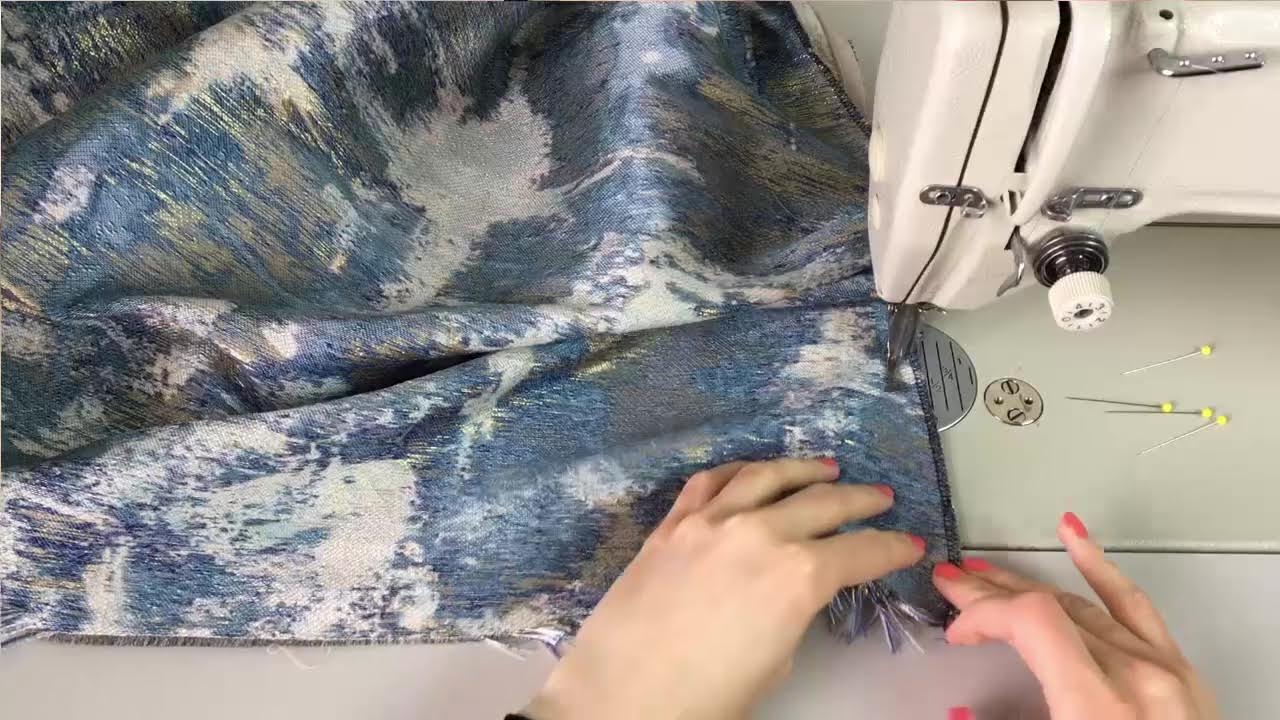 Of course, don't forget to follow the appropriate seam allowance. 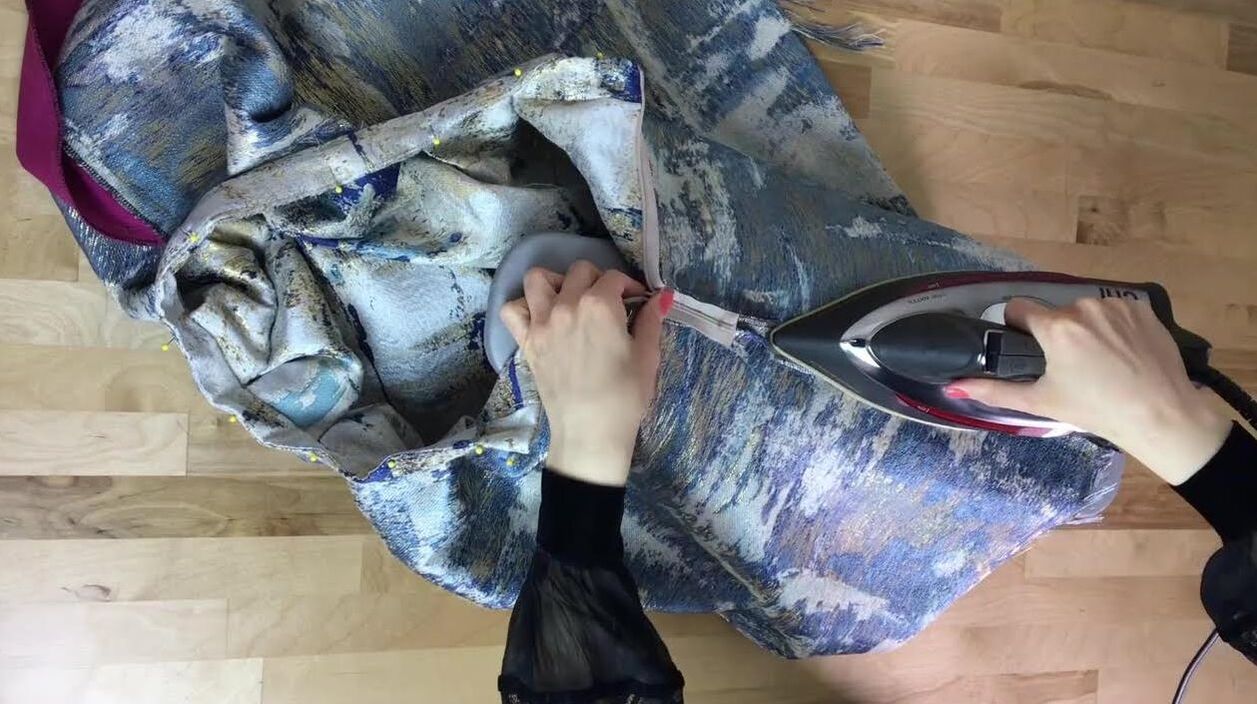 5. Iron the seam allowance open as shown to complete the seam. Sealing And Clean Finishing The Waistband The waistband is attached, the side pocket and zipper are in, and both side seams are finished- all that's left to do now is seal and clean finish the waistband and hem. Let's start with the waistband as this is the more time consuming of the two. For the detailed steps on sewing this waistband from start to finish, check out this tutorial: How To Sew A Skirt Waistband With Invisible Side Zipper. Before hand stitching the waistband shut, we need clean finish it at each end of the zipper opening. To do so, fold the waistband facing over its top edge such that the right sides of both self and facing are touching and the zipper tape is sandwiched in between. Using a zipper presser foot (it is much thinner), stitch though all three layers enclosing the zipper tape in between. Repeat the process described above on both sides of the zipper opening before turning the corners of the waistband back on their right side. You should have perfectly straight corners that enclose the top edge of the zipper tape on both sides. 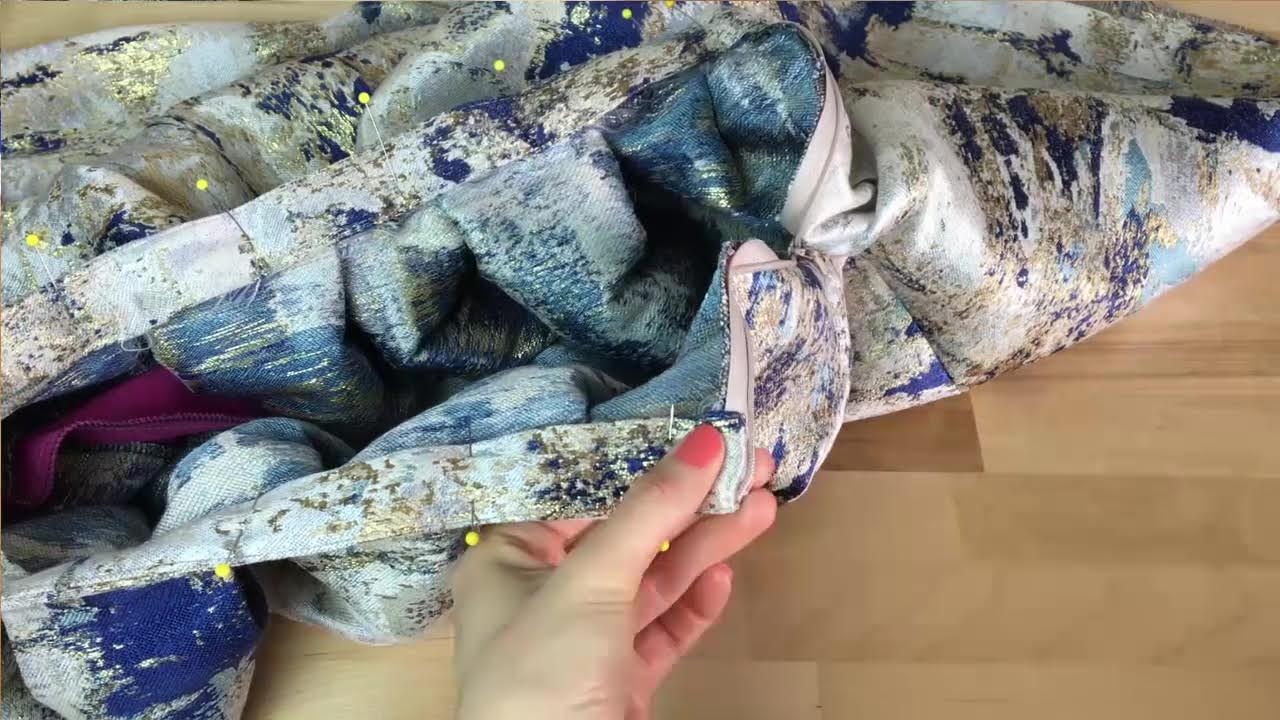 1. To finalize the waistband, pin the waistband facing down to enclose all fabric raw edges underneath. This should be fairly natural and easy to do given that the facing's bottom edge was folded in the preliminary step above. Insert a few pins vertically to hold all the layers in place as shown above. I highly recommend using a temporary hand basting stitch instead of pins to keep all the layers from moving in the hand stitching process to follow. 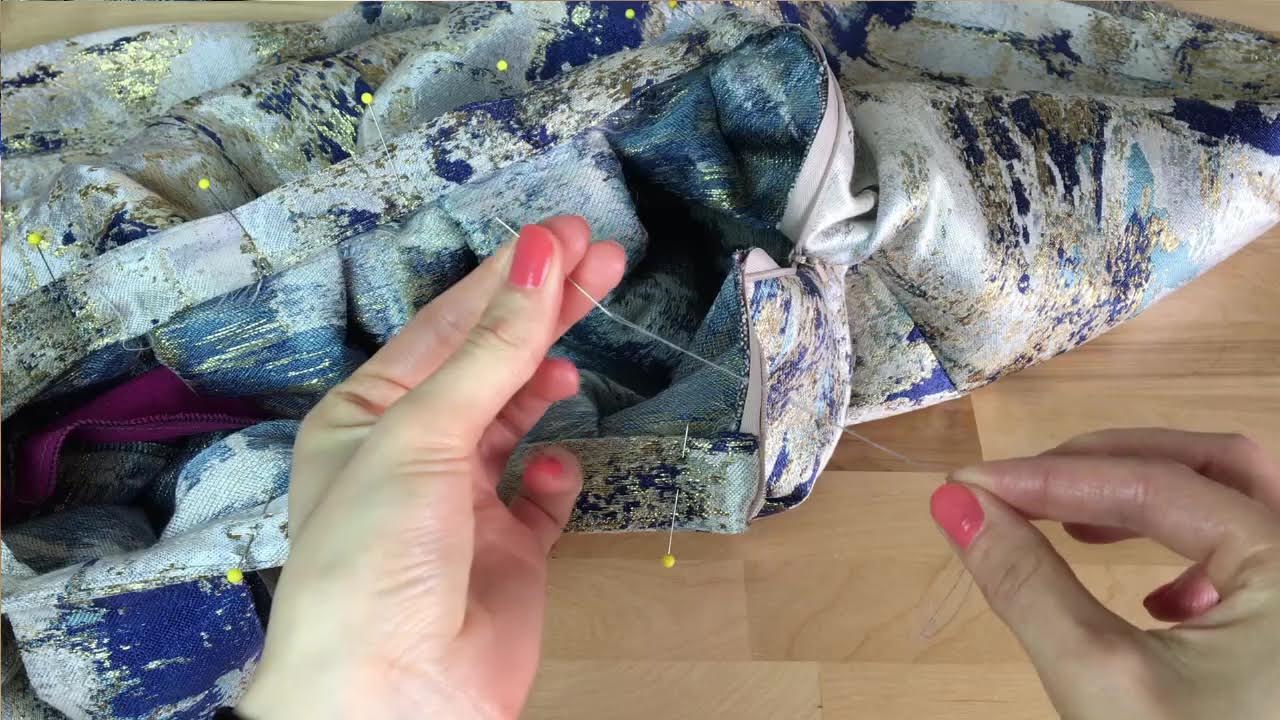 Of course you could machine stitch a waistband closed but this particular design calls for no top stitching. For that reason, blind stitching by hand is the simplest technique to use for sealing this waistband's facing edge. Blind stitching is also easier for beginners to start with, and is the method I, myself learned first as a beginner. It's called a blind stitch because it looks invisible in the right side of the garment. A slip stitch is a form of blind stitching and is the method I'll be using in this tutorial. 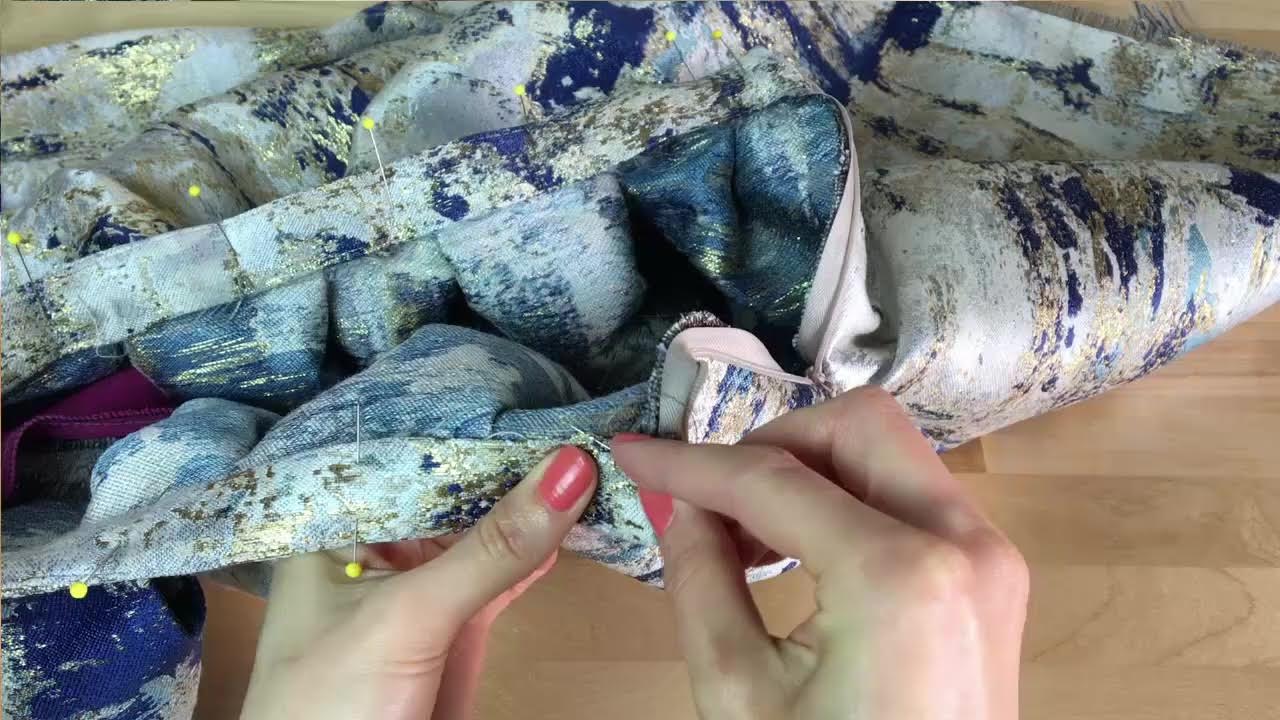 2. Simply catch a small portion of the facing edge with your hand sewing needle and then catch a few threads from the skirt's waistline to connect the two together. 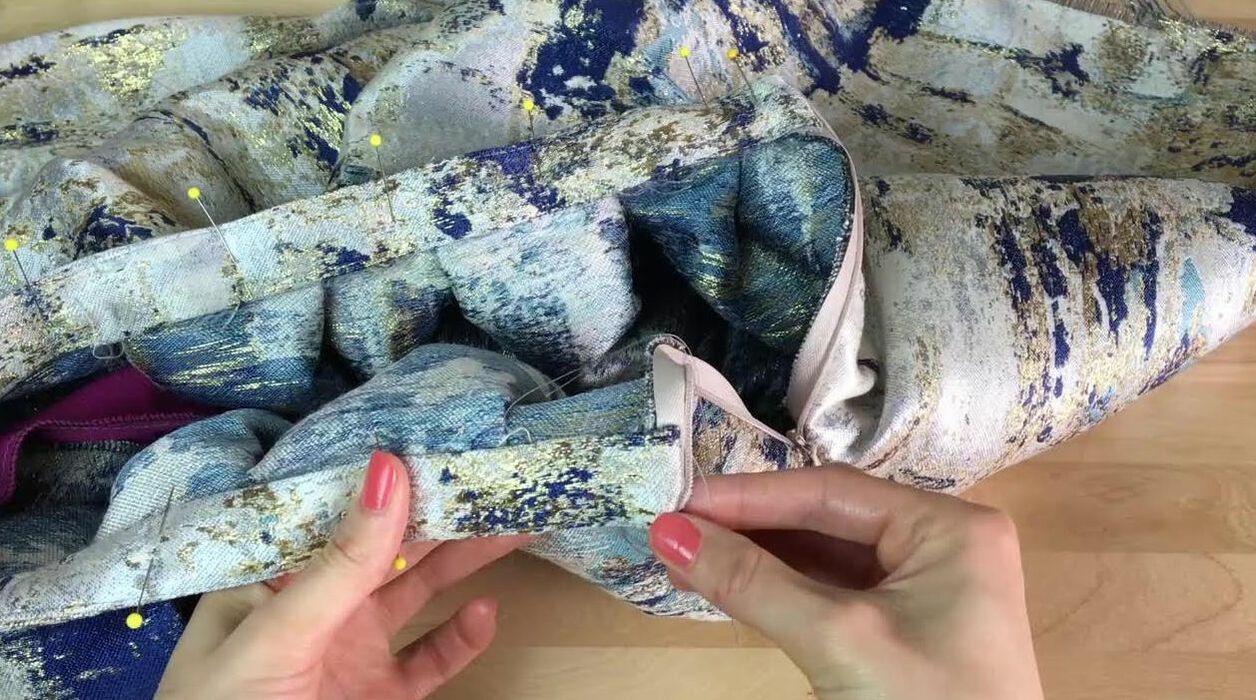 3. Continue the stitch described above, going back and forth until the waistband is fully sealed as shown. For a more detailed breakdown on blind stitching (and other useful hand stitches), check out this tutorial: 4 Hand Sewing Techniques and Stitches You Should Know As A Sewing Beginner. Clean Finishing The Skirt Hem By HandLast but not least, let's clean finish the hem! For optimal quality and to maintain the skirt's clean lines, no top stitching should be visible along the hem (on the face side of the skirt). For that reason, a blind stitch is most suitable for this design. Just as I did for the waistband above, I am using a slip stitch to complete the hem. 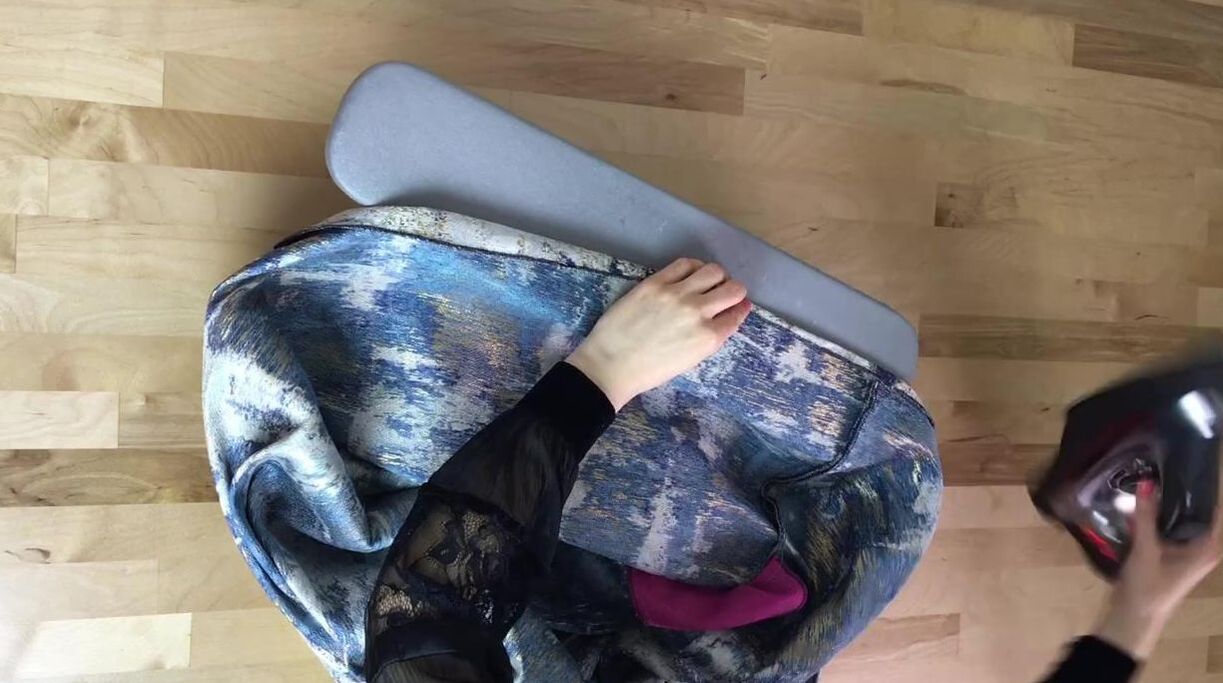 1. Before starting the hand stitching process, double fold the raw edge of the hem in at the designated hem allowance. My skirt has a hem allowance of 1 1/2". Keeping this measurement in mind, I folded the raw edge of the hem in at 1/2" once and ironed it as shown. 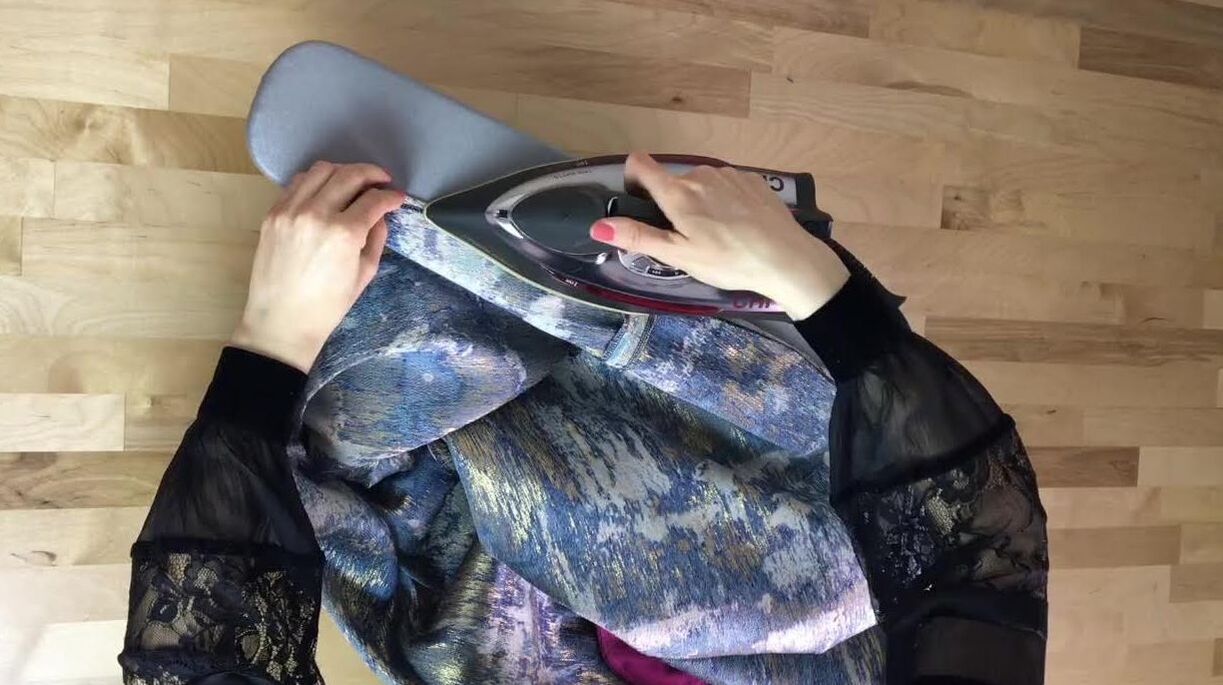 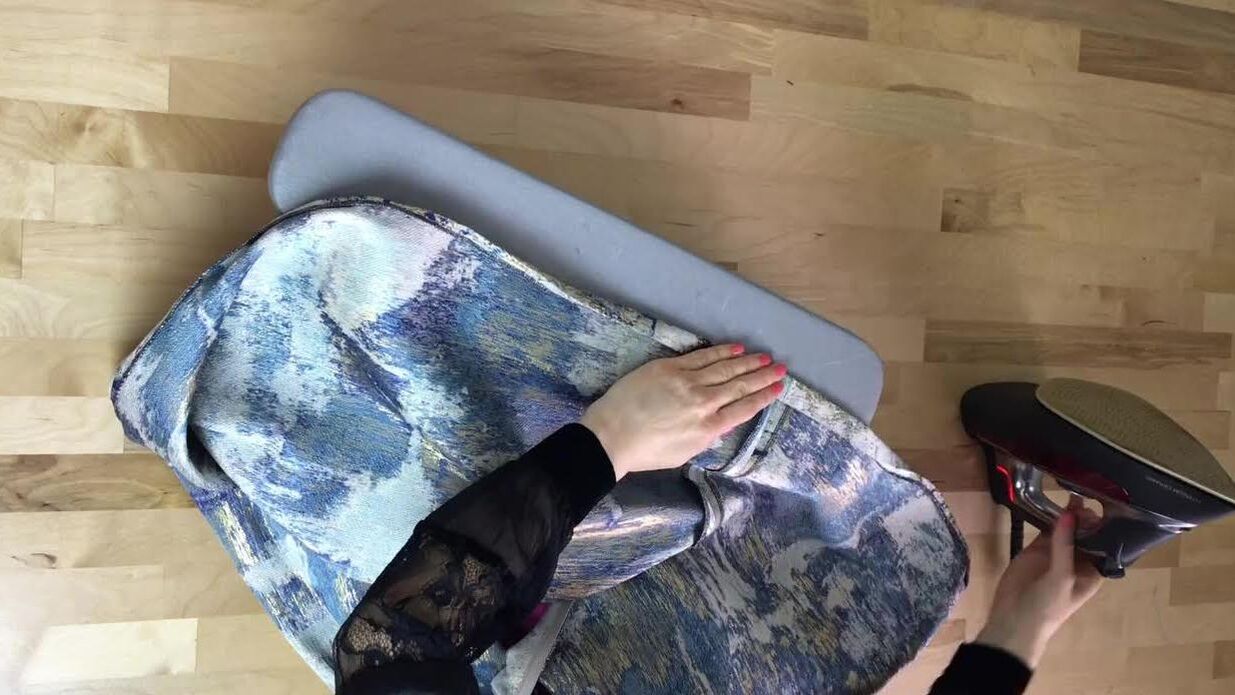 2. Next, I folded once more at 1" to enclose the fabric's raw edge as shown above. 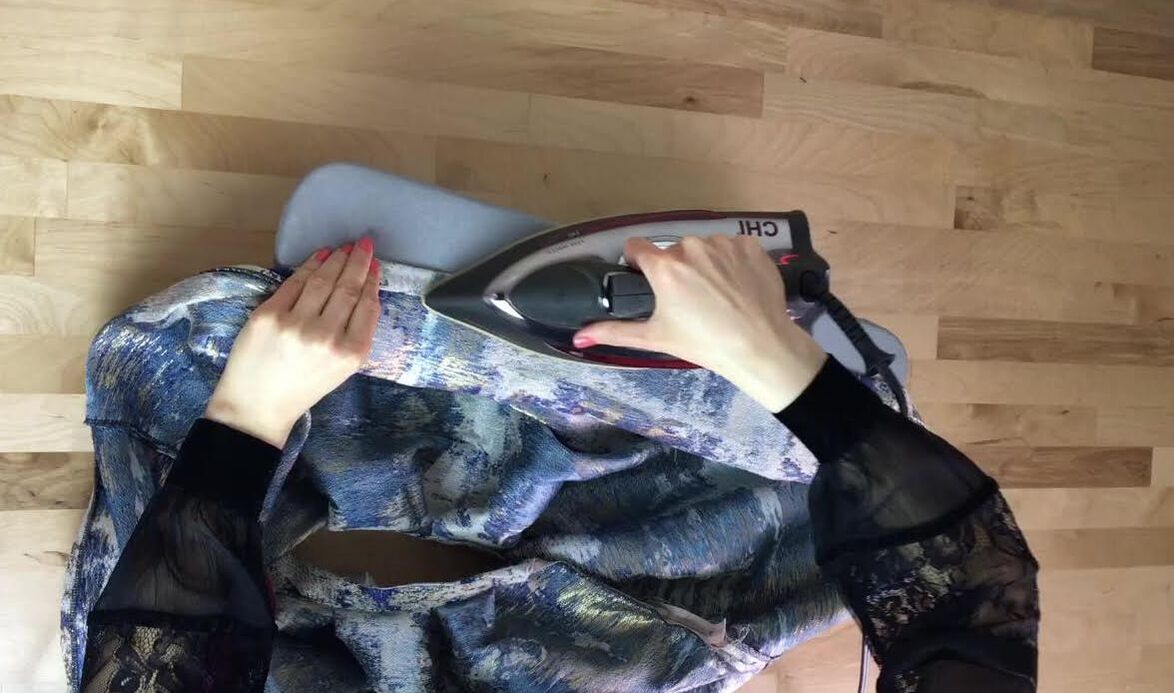 3. Iron the second fold and insert pins to keep the double fold in place for the slip stitching process to follow. 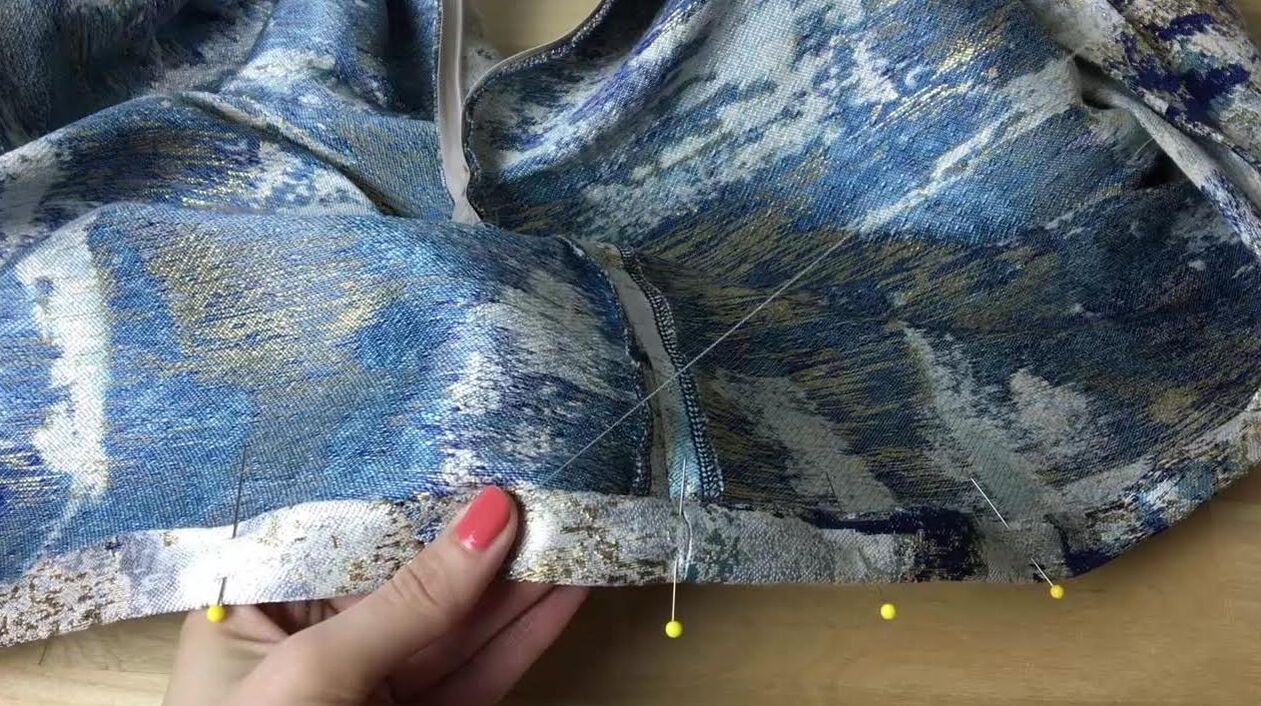 4. Using matching thread and a hand sewing needle, grab a 1-2 mms from the hem's fold and stitch through a few threads of the actual skirt layer as shown. No stitches should be visible on the right side of the skirt. 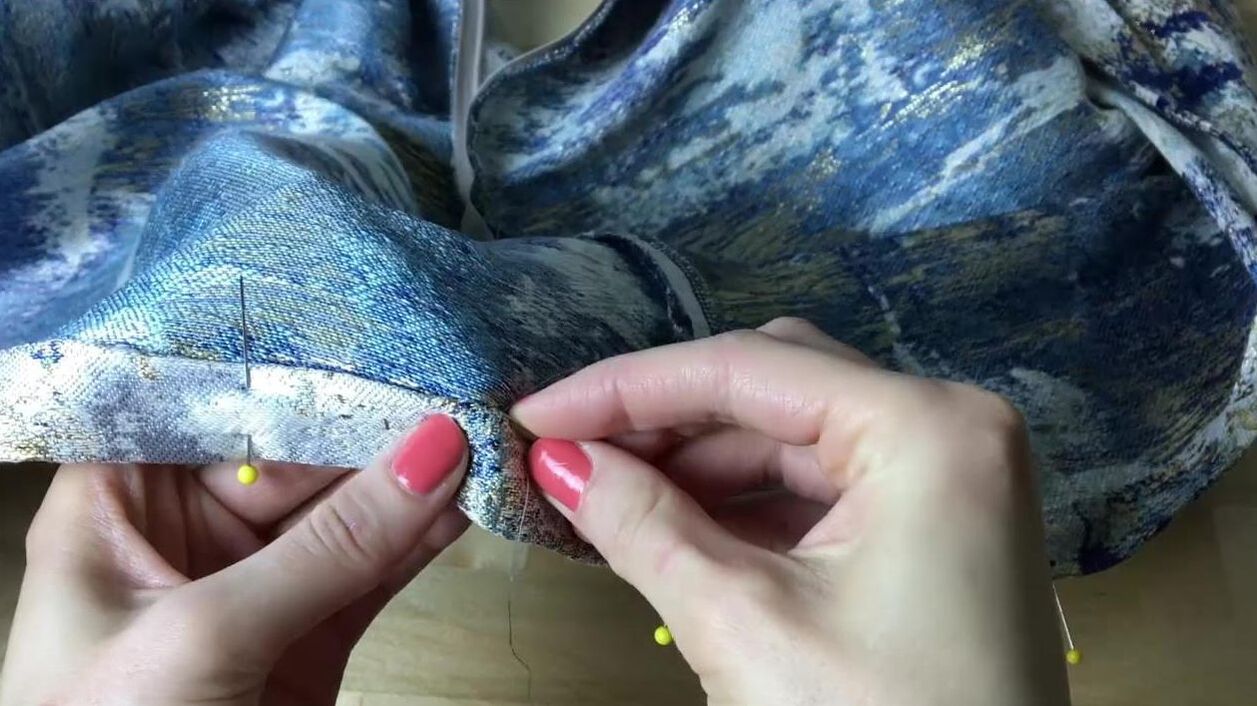 Continue slip stitching until the hem is sealed with the fabric's raw edge is enclosed on the inside of the fold. Curious about the matching top for this skirt? It is a fully lined, crop top with a hem facing and invisible side zipper. Check out the top's full tutorial for complete sewing steps and techniques here: Video Sewalong- How To Sew A lined Blouse With An Invisible Side Zipper. Similar Tutorials You May Like: Learn To Sew: Sewing Terms You Should Know As A Sewing Beginner How To Sew A Pant Or Skirt Non-Stretch Waistband How To Pattern And Sew An Elastic Waistband How To Add A Side Seam Pocket To A Dress The Easiest Way To Sew An Invisible Zipper Using A Regular Zipper Foot 4 Easy And Most Common Techniques For Clean Finishing Hems How To Finish Seam Raw Edges: 4 Easy Ways How To Understitch During Sewing And Why It Is Needed 3 Easy To Find Substitutes For Pattern Paper That Won't Break The Bank
0 Comments
Leave a Reply. |
The Blog:A journey into our design process, sewing tutorials, fashion tips, and all the inspiring people and things we love. 
Doina AlexeiDesigner by trade and dressmaker at heart. I spend most of my days obsessing over new fabrics and daydreaming new ideas. 
Sadie
Executive Assistant & Client Relations Manager Archives
November 2019
Categories
All

|

-
Sewing Tutorials
-
Basics
>
- Aligning Pattern Grainlines To Fabric
- Preparing Fabrics For Sewing
- Pinning Sewing Patterns To Fabric
- Placing Sewing Patterns On Fabric For Cutting
- Rotary Cutters or Fabric Scissors?
- Cutting The Sewing Patterns
- What Are Notches And How To Use Them In The Sewing Process
- Transferring Notches From Pattern To Fabric
- Transferring Seamlines to Fabric
- Staystitching
- Backstitching: A Complete Guide
- Hand Basting: A Complete Guide
- Sewing Continuous Bias Binding
- Darts >
-
Sewing Seams
>
- The Basics Of Seams And Seam Allowance
- How To Sew A Straight Seam
- Sewing Curved Seams
- Sewing Corner Seams
- Trimming And Grading Seam Excess
- Notching/Clipping Seam Allowance for Tension Release
- Sewing Topstitched Seams
- Sewing Corded Seams
- Sewing A Slot Seam
- Sewing A Gathered Seam
- Sewing Bias Seams
- Sewing Seams With Ease
- Sewing Seams With Crossing Seamlines
- Sewing Unlike Fabric Seams
- How To Iron Seams: Ironing Tools And Conventions
- Sewing With Knit Fabrics
- Understanding Stitch Length And Tension
- Sewing Unique Fabric Seams
-
Seam Finishes
>
- Seam Finishing Techniques - Overview
- Applying A Pinked Seam Finish
- Applying A Bias Bound Seam Finish
- Serging And Zigzag Seam Finishes
- Sewing A Self-Bound Seam Finish
- Sewing A French Seam Finish
- Sewing A Hong Kong Seam Finish
- Sewing A Mock French Seam Finish
- Sewing A Turned-and-Stitched Seam Finish
- Sewing Overcast Hand-Applied Seam Finishes
- Sewing A Flat Felled Seam
- Sewing A Hairline Seam Finish
-
Hem Finishes
>
- Garment Hem Finishes: Overview
- Sewing A Double Fold Hem Finish
- Sewing A Single Fold Hem Finish
- Sewing Bound Hem Finishes
- Sewing An Exposed Double Layer Bound Hem
- Sewing A Folded-Up Bound Hem with Pre-folded Binding
- Sewing A Hong Kong Hem Finish
- Sewing A Band Hem Finish
- Sewing A Bias Faced Hem Finish
- Sewing A Twill Tape Hem Finish
- Sewing A Rolled Hem Finish
- Sewing A Shaped Hem Facing
- Using Fusible Hem Tape And Webbing
- Finishing A Lace Fabric Hem
- Finishing A Leather Hem
- Sewing Faced Hem Corners
- How To Finish Lining At The Hem
- Finishing Fabric Corners by Mitering >
- Interfacing A Hemline: Lined And Unlined Examples
-
Sewing Pockets
>
- Curved Patch Pocket With Flap
- Unlined Square Patch Pockets
- Lined Patch Pockets: Two Ways
- Extension On-Seam Pockets
- Separate On-Seam Pocket
- Front Hip Pockets
- Bound Double Welt Pocket
- Double Welt Pocket With Flap
- Self-Welt Pocket (Using Single Fabric Layer)
- Slanted Welt Pocket (Hand-Stitched)
- Faced Slash Pockets: Overview >
-
Sewing Zippers
>
- Sewing Zippers: General Information
- Sewing A Centered Zipper
- Sewing A Lapped Zipper
- Sewing An Invisible Zipper
- Sewing A Fly Front Zipper
- Sewing A Closed-End Exposed Zipper (No Seam)
- Sewing An Exposed Separating Zipper
- Sewing Hand Stitched Zipper Applications
- Sewing A Zipper Underlay
- Sewing A Placket-Enclosed Separating Zipper
- Sleeveless Finishes >
-
Neckline Finishes
>
- Sewing A Neck Shaped Facing
- Sewing An All-In-One Neck Facing
- Neck And Garment Opening Combination Facings >
- Sewing A Bias Faced Neckline Finish
- Sewing A Band Neckline Finish
- Bound Neckline Finishes: Overview >
- Sewing A Semi-Stretch Strip Band Neckline
- Ribbed Neck Band And Classic Turtleneck
- Decorative Neckline Finishes >
- Finishing Facing Edges >
-
Extras
>
- A Complete Guide on Interfacing
- Sewing Bound Spaghetti Straps
- Sewing Spaghetti Straps To A Faced Neckline
- Sewing Ruffles: Overview
- Patterning And Sewing A Circle Ruffle
- Sewing A Gathered Heading Ruffle
- Sewing Double Layer Gathered Ruffles
- Sewing A Gathered Ruffle Into A Seam
- Sewing A Gathered Ruffle To A Fabric Edge
- Sewing A Fabric Surface Slit
- Sewing A Slit Seam
- Hand-Applied Straight Stitches
- Hand-Applied Blind Stitches
- Hand-Applied Overedge Stitches
- Hand-Applied Tack Stitches
- Hand-Applied Decorative Stitches
-
Basics
>
- Custom Bridal
- Custom Apparel
- About
- Blog
 RSS Feed
Services |
Company |
|
