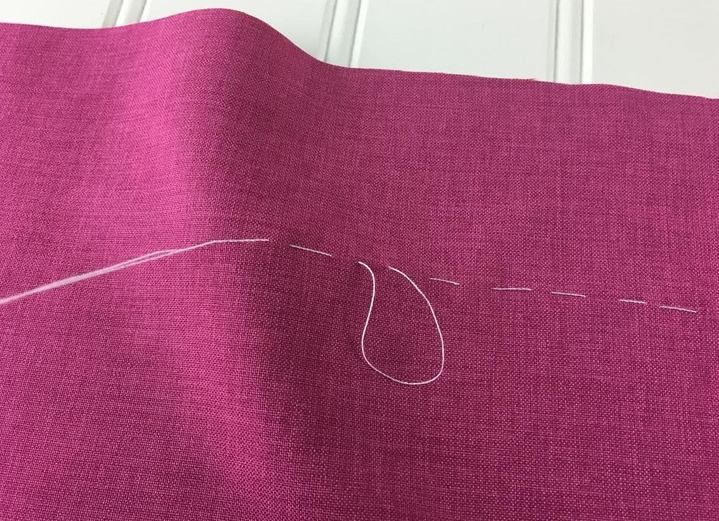
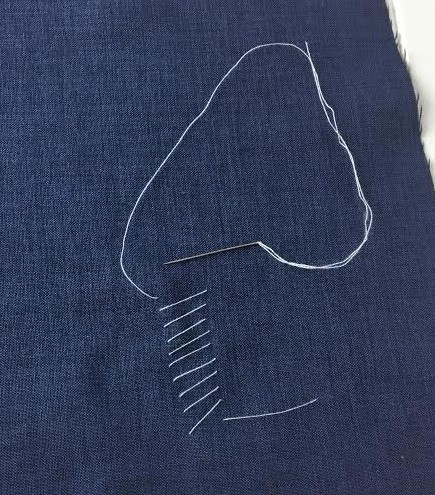
 What Is Basting: Basting is a longer hand or machine stitch that is used as a stabilizer to hold layers of fabric together in the sewing process. It serves as a tool for fitting, quilting, home decor and shaping a variety of different garment finishes like gathers, sleeves and ruffles. Basting is an important tool used in tailoring to maintain structure in the construction process and ensure that everything aligns accurately before receiving a final stitch. A quick basting stitch can save you from having to redo zippers, neckline and armhole facings/lining, and other finishes that require proper alignment. Basting can be comprised of even or uneven stitches. Uneven stitching is a quick way to baste for fitting purposes or to keep layers of fabric together, after which the stitch is removed. Even basting is also a non-permanent stitch but has more control and structure- used on sleeves, gathers, some hems and quilting techniques. Machine Basting: What is it and when to machine baste? Basting on the sewing machine simply requires that you stitch at the highest setting available for the longest stitch. Using a machine for basting is more common for instances when the stitch isn't necessarily removed afterwards. Such finishes include: gathers, set-in sleeves, quilting and hemming. In order to achieve gathers, you must use a basting stitch to bundle the fabric together evenly- this is properly achieved by using a basting stitch on the sewing machine which will ensure that the gathers are spread evenly and hold their shape during the sewing process. Same goes for sewing in a sleeve which requires a pair of basting stitches along the cap's seam allowance in order to give it a 3 dimensional, round shape. Another use for machine basting is aligning zippers before sewing them permanently. If you're a sewing beginner, you'll find that sewing a zipper with the use of pins alone proves to be very tricky. Basting, whether on the machine or by hand, allows you to keep the zipper in place before adding the final stitches. Hand Basting: When to Use It. 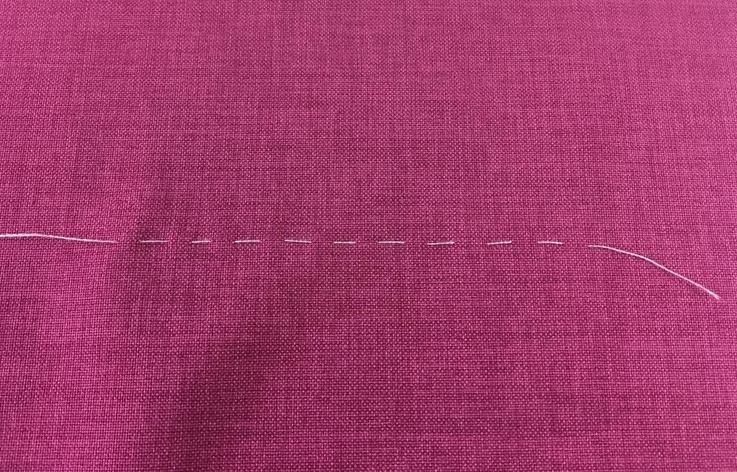 Our policy on hand basting is that you should use it whenever you feel like you need extra stability that pins alone can't achieve. Uneven hand basting in apparel construction is used temporarily as a fast and easy technique to hold various layers together keeping them flat and aligned for final stitching. This ensures that the final garment fits and aligns properly at every edge and seam. Hand basting is most commonly used in tailoring as a way to keep collars, facings, lapels and hems flat during the construction process. On regular garments, hand basting is a great tool for keeping linings and facings laying flat around the neckline, armholes and center front before everything is finalized. It also serves as a convenient way to stabilize zippers and hems before applying final finishes. During fittings, you can quickly hand baste along any edges and excess that needs to be taken in, thus achieving a perfect fit. Hand basting is almost always removed once its purpose is served. Even hand basting features evenly spaced, usually same-length stitches providing more structure and close control. It is used on curved seams and round edges, set-in sleeve caps and seams with excess ease fabric requiring even distribution. Types of Basting Stitches and How to Sew Them Uneven Hand Basting Stitch: 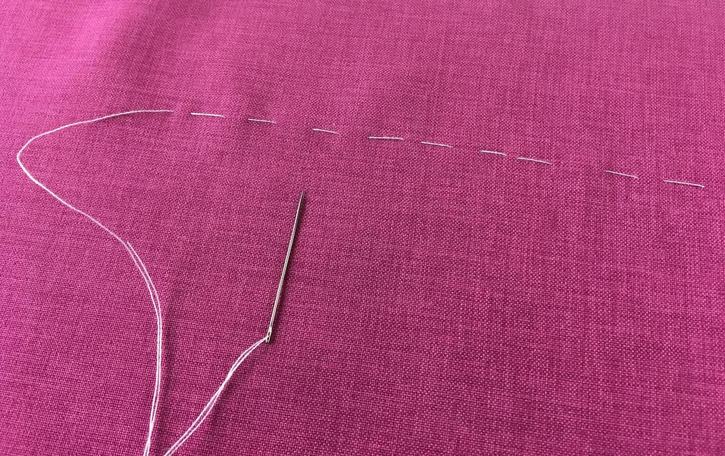 As described above, uneven hand basting is a quick and effective way to stabilize layers or temporarily attach zippers and trims to a garment before final stitching. A straight, uneven hand baste is applied when looking to keep edges flat and layers of fabric together in a quick fashion. It is a general basting techniques used during the construction process to facilitate control during permanent machine stitching, as well as for marking and fitting purposes. How to sew an uneven hand basting stitch: 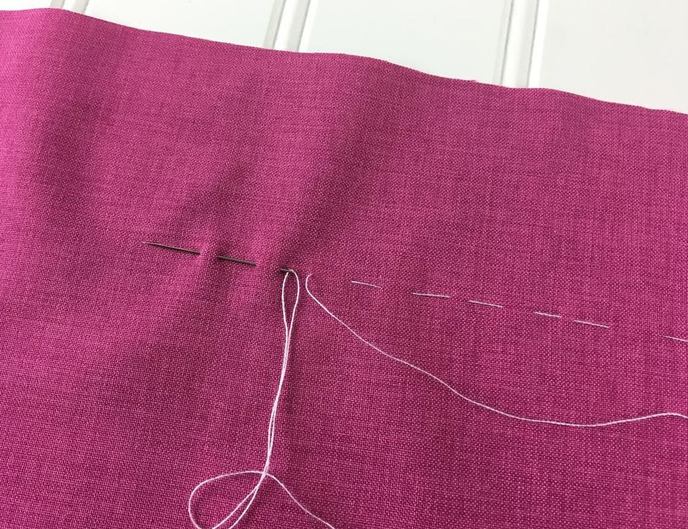 1. Insert your hand needle through the layers of fabric that require basting a few times in the direction required for the stitch placement. You do not need to create even stitches throughout so don't worry about the size and distance between each stitch.  2. Pull the thread to create uneven hand stitches that temporarily hold the layers of fabric together. Your basting stitch doesn't always have to be straight- It can be curved or angular depending on the purpose of the basting. 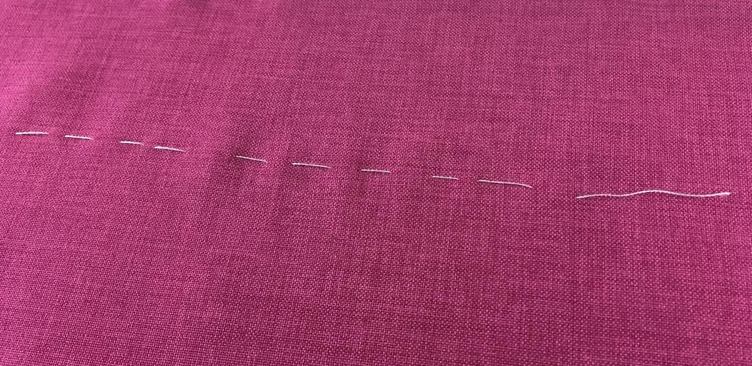 Uneven basting stitches have different sized spaces in between each stitch, and the hand stitches are also not even. As mentioned above, it is the quickest, easiest way to baste as well as the most commonly used. Even Hand Basting Stitch: 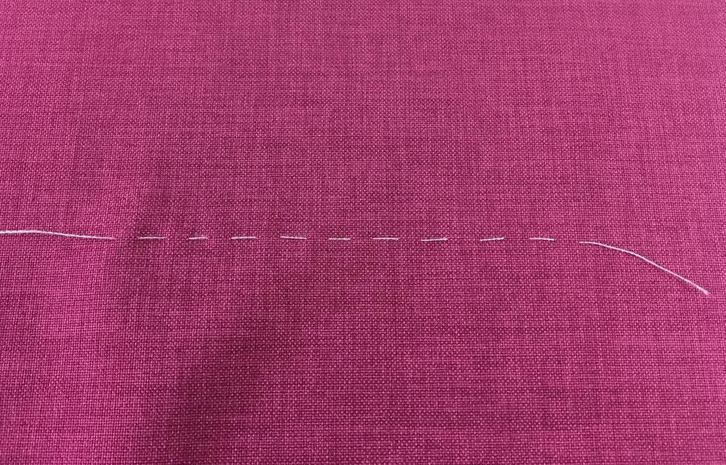 Even hand basting is made of equally sized stitches and equally sized spaces between these stitches (floats). These hand stitches are usually shorter in length than those of uneven basting. Even basting is used on areas that require close control and stability. It works well on very curved seams and round hems, as well as a variety of different sleeves and edges that are difficult to pin. Additionally, more dense, even basting is used for decorative purposes and in quilting to hold thicker layers of fabric together permanently. Sewing an even hand basting stitch: 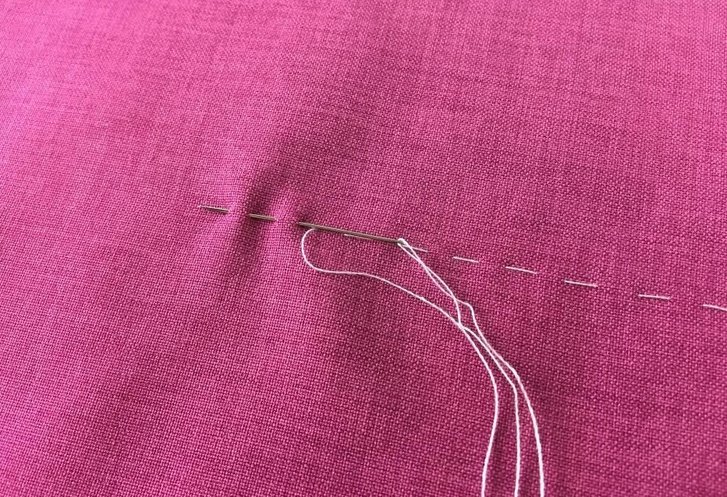 1. Just like you did for the uneven basting stitch, insert the needle through the fabric layers but this time making sure that the stitches are aligned at the same distance throughout. This means that the floats (space between stitches) are exactly the same length on both sides. Even basting also ensures that the stitches are the same length. 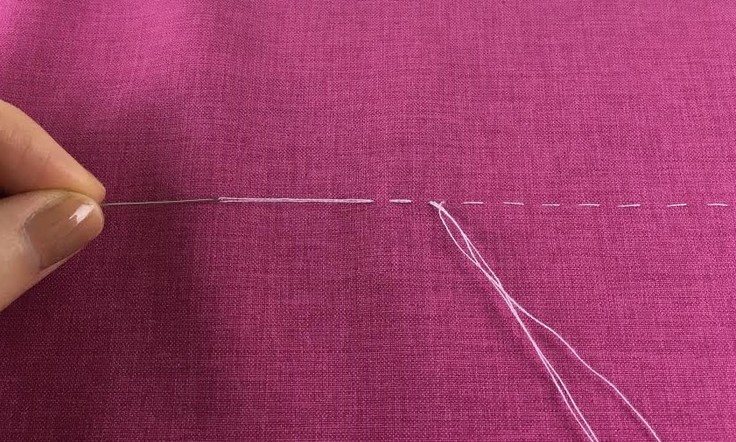 2. Pull the thread to insert the basting gently resulting in a smooth stitch that is stable but not too tight as to wrinkle the fabric. 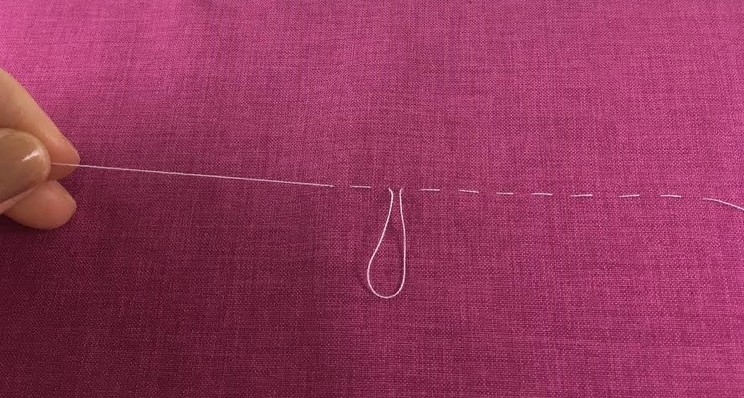 As mentioned above, make sure both the stitches and the floats in between are the same length. This provides a lot more stability and close control. Diagonal Basting 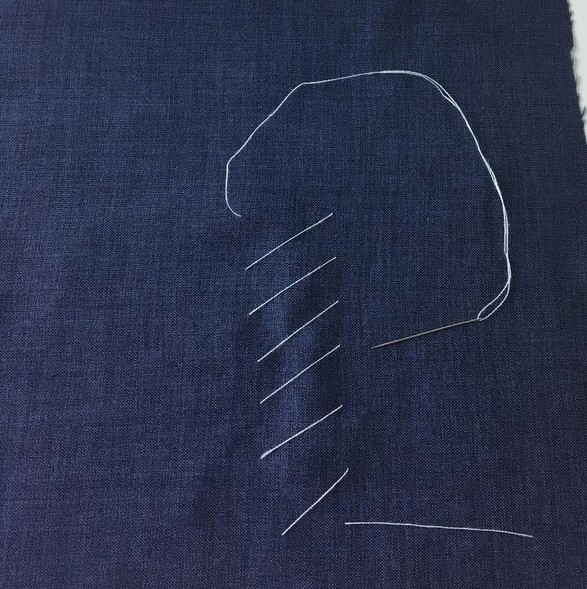 Diagonal basting is a temporary hand stitch that is applied to keep a larger surface area flat. It consists of a group of horizontal/diagonal stitches that are placed parallel to each other forming parallel floats (spaces) in between. Shorter diagonal basting stitches allow for more control and are commonly used to keep seam allowance flat and seam lines open during stitching or pressing. Larger diagonal basting with larger spaces in between allow for less close control. This is a great stitch for facings and certain linings that require control over a larger area. It is also commonly used to keep seams closed and overlapping edges straight during sewing while handling and ironing the garment- examples include skirt/dress vents and various styles of pockets. 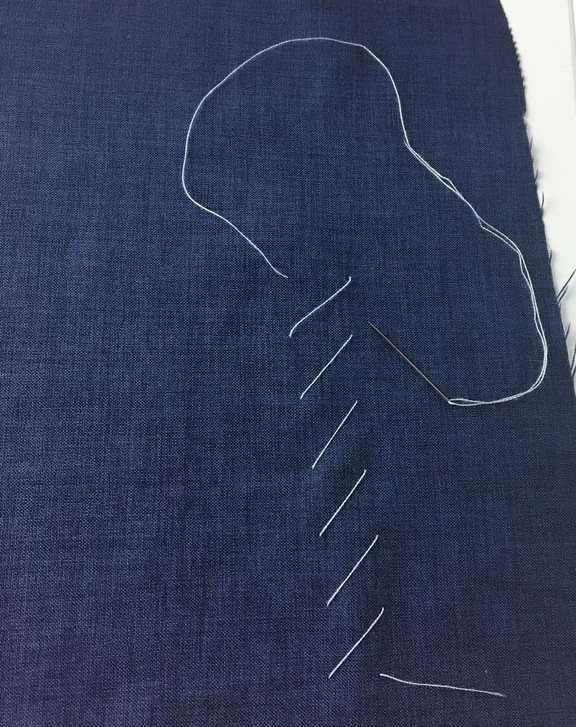 Larger floats or a larger space between the diagonal parallel basting stitches provides less control and faster basting. This is used on larger surface areas like facings, lining and certain collars where less control and stability is needed.  Diagonal basting creates horizontal parallel stitch lines on the back. Just like the face side, the horizontal basting stitches on the wrong side are placed parallel, at exactly the same distance throughout. Sewing a diagonal basting stitch:
Start at a point on the fabric and insert stitches horizontally or diagonally parallel to one another thus keeping the layers of fabric together across. A shorter space in between each stitch as pictured above will result in tighter basting and provide more stability and close control. Slip Basting 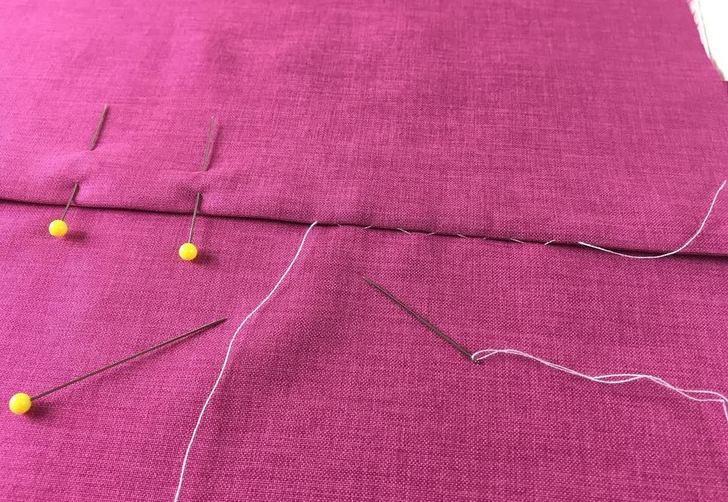 Slip basting is a hand basting technique used when temporarily connecting a folded edge to a flat surface. Just like a permanent slip-stitch, slip basting is less visible on the surface of the garment. However, as opposed to a regular slip stitch, slip basting is uneven and not permanent. It is used to temporarily match various plaid and stripe prints at the seams, as well as for fitting corrections made on the right side of the garment. It is also used on very curved sections that feature a curved fold/seam. Sewing a slip basting stitch: 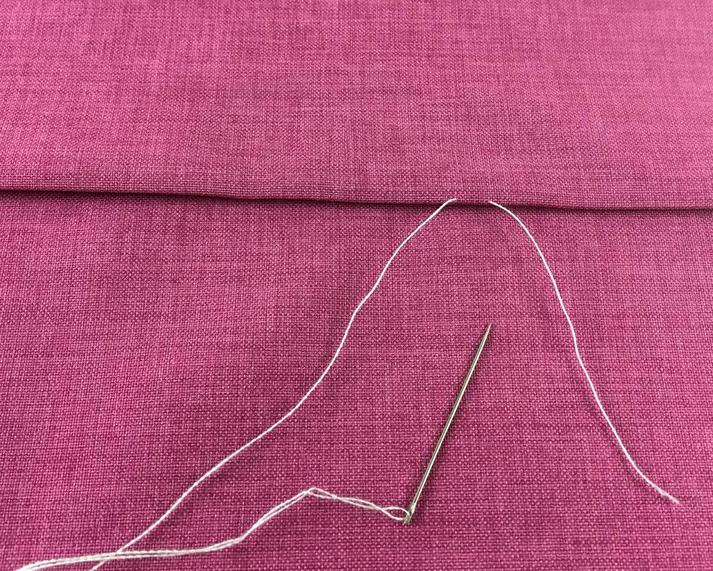 1. Catch the edge of the fold with your hand sewing needle at about 1/4" as shown above. You may slip baste at a very wide stitch ratio or a smaller one depending on the level of tight basting control your project requires. 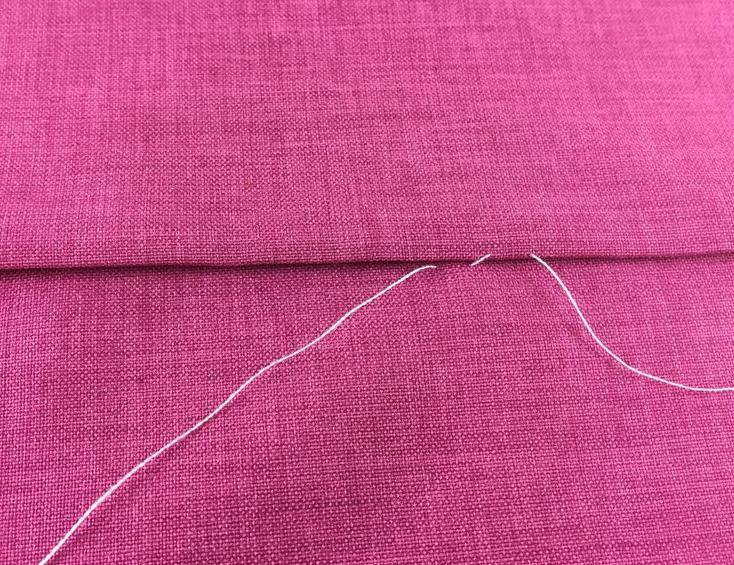 2. Insert a horizontal hand stitch on the fabric bellow also measuring approximately 1/4". For easier basting, apply a few pins horizontally keeping both the fold and flat piece of fabric together for stitching.  3. Repeat this two-step process for the rest of the slip basting stitch by alternating basting stitches through the fold at the top and the flat surface of the fabric underneath. 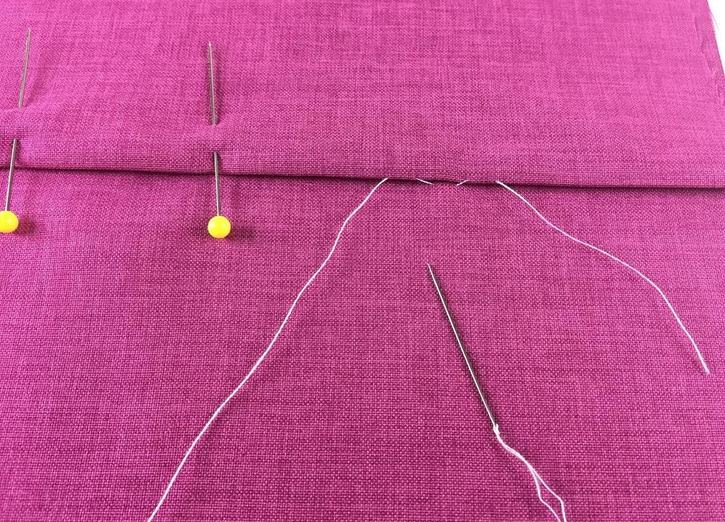 4. Continue stitching until the fold is connected to the fabric throughout. Don't forget to remove each pin as you get closer to it. 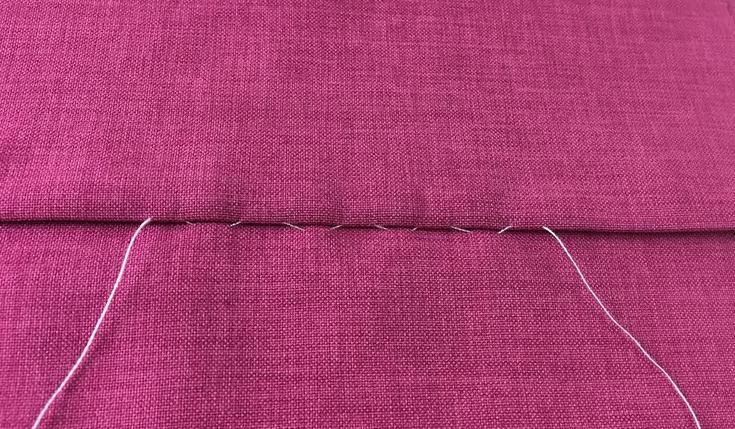 
1 Comment
10/25/2021 09:42:26 pm
Thank you very much for sharing this information. I shared this to my dressmaking students in senior high school. Leave a Reply. |
The Blog:A journey into our design process, sewing tutorials, fashion tips, and all the inspiring people and things we love. 
Doina AlexeiDesigner by trade and dressmaker at heart. I spend most of my days obsessing over new fabrics and daydreaming new ideas. 
Sadie
Executive Assistant & Client Relations Manager Archives
November 2019
Categories
All

|

-
Sewing Tutorials
-
Basics
>
- Aligning Pattern Grainlines To Fabric
- Preparing Fabrics For Sewing
- Pinning Sewing Patterns To Fabric
- Placing Sewing Patterns On Fabric For Cutting
- Rotary Cutters or Fabric Scissors?
- Cutting The Sewing Patterns
- What Are Notches And How To Use Them In The Sewing Process
- Transferring Notches From Pattern To Fabric
- Transferring Seamlines to Fabric
- Staystitching
- Backstitching: A Complete Guide
- Hand Basting: A Complete Guide
- Sewing Continuous Bias Binding
- Darts >
-
Sewing Seams
>
- The Basics Of Seams And Seam Allowance
- How To Sew A Straight Seam
- Sewing Curved Seams
- Sewing Corner Seams
- Trimming And Grading Seam Excess
- Notching/Clipping Seam Allowance for Tension Release
- Sewing Topstitched Seams
- Sewing Corded Seams
- Sewing A Slot Seam
- Sewing A Gathered Seam
- Sewing Bias Seams
- Sewing Seams With Ease
- Sewing Seams With Crossing Seamlines
- Sewing Unlike Fabric Seams
- How To Iron Seams: Ironing Tools And Conventions
- Sewing With Knit Fabrics
- Understanding Stitch Length And Tension
- Sewing Unique Fabric Seams
-
Seam Finishes
>
- Seam Finishing Techniques - Overview
- Applying A Pinked Seam Finish
- Applying A Bias Bound Seam Finish
- Serging And Zigzag Seam Finishes
- Sewing A Self-Bound Seam Finish
- Sewing A French Seam Finish
- Sewing A Hong Kong Seam Finish
- Sewing A Mock French Seam Finish
- Sewing A Turned-and-Stitched Seam Finish
- Sewing Overcast Hand-Applied Seam Finishes
- Sewing A Flat Felled Seam
- Sewing A Hairline Seam Finish
-
Hem Finishes
>
- Garment Hem Finishes: Overview
- Sewing A Double Fold Hem Finish
- Sewing A Single Fold Hem Finish
- Sewing Bound Hem Finishes
- Sewing An Exposed Double Layer Bound Hem
- Sewing A Folded-Up Bound Hem with Pre-folded Binding
- Sewing A Hong Kong Hem Finish
- Sewing A Band Hem Finish
- Sewing A Bias Faced Hem Finish
- Sewing A Twill Tape Hem Finish
- Sewing A Rolled Hem Finish
- Sewing A Shaped Hem Facing
- Using Fusible Hem Tape And Webbing
- Finishing A Lace Fabric Hem
- Finishing A Leather Hem
- Sewing Faced Hem Corners
- How To Finish Lining At The Hem
- Finishing Fabric Corners by Mitering >
- Interfacing A Hemline: Lined And Unlined Examples
-
Sewing Pockets
>
- Curved Patch Pocket With Flap
- Unlined Square Patch Pockets
- Lined Patch Pockets: Two Ways
- Extension On-Seam Pockets
- Separate On-Seam Pocket
- Front Hip Pockets
- Bound Double Welt Pocket
- Double Welt Pocket With Flap
- Self-Welt Pocket (Using Single Fabric Layer)
- Slanted Welt Pocket (Hand-Stitched)
- Faced Slash Pockets: Overview >
-
Sewing Zippers
>
- Sewing Zippers: General Information
- Sewing A Centered Zipper
- Sewing A Lapped Zipper
- Sewing An Invisible Zipper
- Sewing A Fly Front Zipper
- Sewing A Closed-End Exposed Zipper (No Seam)
- Sewing An Exposed Separating Zipper
- Sewing Hand Stitched Zipper Applications
- Sewing A Zipper Underlay
- Sewing A Placket-Enclosed Separating Zipper
- Sleeveless Finishes >
-
Neckline Finishes
>
- Sewing A Neck Shaped Facing
- Sewing An All-In-One Neck Facing
- Neck And Garment Opening Combination Facings >
- Sewing A Bias Faced Neckline Finish
- Sewing A Band Neckline Finish
- Bound Neckline Finishes: Overview >
- Sewing A Semi-Stretch Strip Band Neckline
- Ribbed Neck Band And Classic Turtleneck
- Decorative Neckline Finishes >
- Finishing Facing Edges >
-
Extras
>
- A Complete Guide on Interfacing
- Sewing Bound Spaghetti Straps
- Sewing Spaghetti Straps To A Faced Neckline
- Sewing Ruffles: Overview
- Patterning And Sewing A Circle Ruffle
- Sewing A Gathered Heading Ruffle
- Sewing Double Layer Gathered Ruffles
- Sewing A Gathered Ruffle Into A Seam
- Sewing A Gathered Ruffle To A Fabric Edge
- Sewing A Fabric Surface Slit
- Sewing A Slit Seam
- Hand-Applied Straight Stitches
- Hand-Applied Blind Stitches
- Hand-Applied Overedge Stitches
- Hand-Applied Tack Stitches
- Hand-Applied Decorative Stitches
-
Basics
>
- Custom Bridal
- Custom Apparel
- About
- Blog

 RSS Feed
Services |
Company |
|
