|
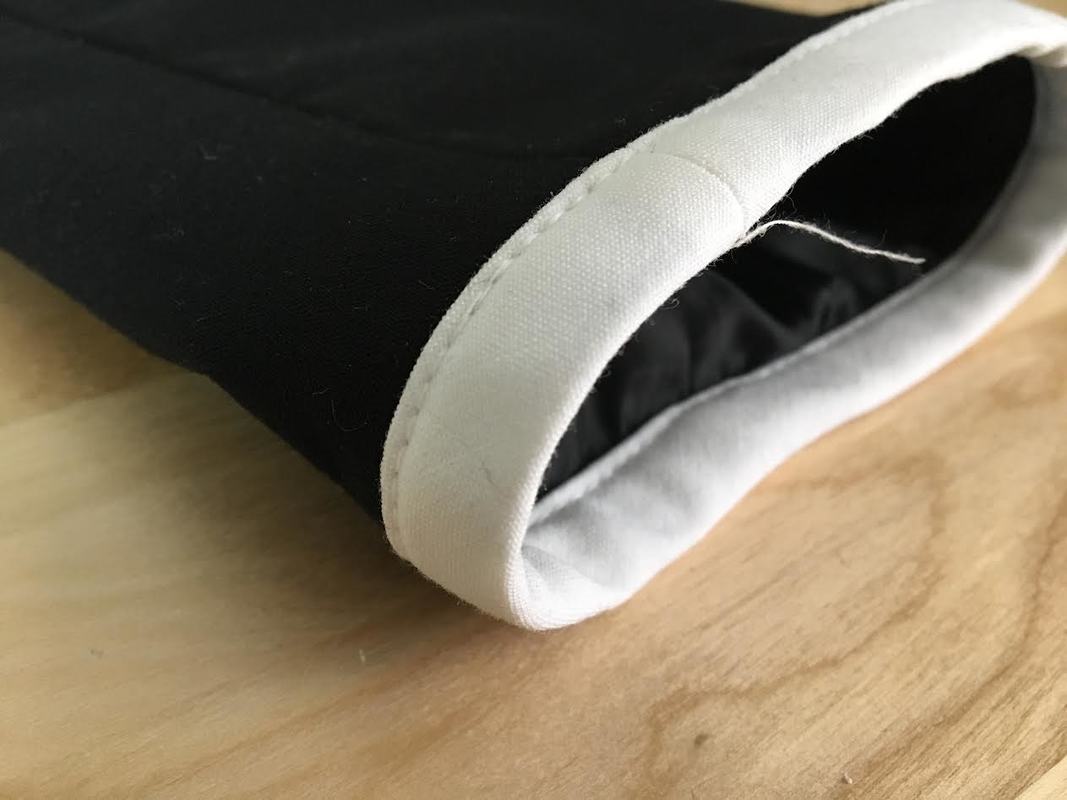
Shortening a sleeve length is perhaps one of the most common alterations. It is particularly used on coat and jacket sleeves that cannot be worn in a folded style and require actual trimming. In simpler instances, you may find yourself shortening plain sleeves that don not feature lining or other complicated hemming elements. This is quite easy to do since working with just one layer of fabric will require simply to be measured, cut and re-finished. However, altering coats, jackets or blazer sleeves can prove to be a bit more tricky especially for sewing beginners. Additions such as lining, binding, cuffs and facings can be a bit more complicated to work with, especially if you lack sewing experience. Lining that is sewn into the bottom of the sleeve is perhaps one of the most common finishing techniques used in more tailored items such as jackets and blazers. Shortening a sleeve that features lining can thus be a bit more complicated for sewing beginners. Nevertheless, if you measure each element accurately and take the process step by step, this shouldn't be too difficult to do. In the sewing tutorial below, you will learn how to shorten a sleeve that features both lining and a bound edge. Binding might seem intimidating at first, but as you'll find from the sewing step described, it is actually quite easy to re-sew due to the fact that it has already been prepped and pre-folded. It is very important that when shortening sleeves, you measure each sleeve carefully from the bottom up. This will ensure that both sleeves remain identical in length and the lining is cut in accordance with the outer shell (outer sleeve layer).
When shortening a sleeve that features lining, you'll often find that the lining is sewn to the sleeve at the bottom. This means that both the lining and the sleeve (self) layers will have to be measured and trimmed separately in the shortening process after which the bottom edges of these two pieces will be re-sewn to each other in the same matter as the original finish. This can be a bit tricky to do, especially for sewing beginners. It is very important that each layer of fabric is measured accurately. It is also recommended that these two layers (lining and self) are sewn using the same method as the original sleeve in order to avoid fit and structural issues. For example, if the sleeve lining is cut considerably shorter than the sleeve self, the lining will pull on the sleeve bottom and create tension once the bottom edges are sewn together.
0 Comments
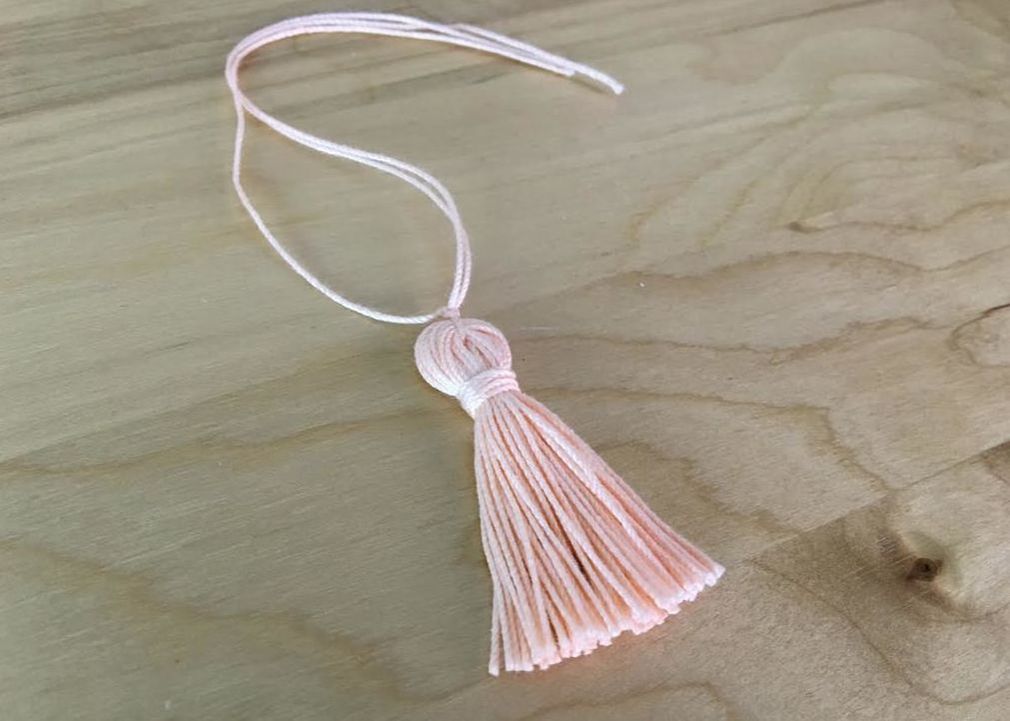
Tassels are those cute little trims that will probably never go out of style. They are applicable just as much in apparel as they are in home decor, accessory and jewelry design. Tassels can be used individually or added to continuous trims and fabrics. They can also be beaded and are available in a variety of lengths, densities and materials. It is perhaps this functional and aesthetic versatility that allows tassels to be incorporated into just about any project, adding a playful and elevated quality to a garment or accessory. As mentioned, various tassel styles are available on the market as individual pieces or incorporated into decorative trims and novelty fabrics. Deciding on which tassel style to use really depends on the project at hand. In apparel, you should particularly pay attention to end-use, especially the care of the final clothing item that the tassels are added to. If you prefer the final garment to be machine washable, use polyester tassels as opposed to silk and examine them carefully to see how they are constructed- Will the tassels withstand the friction of a washing machine without coming apart?
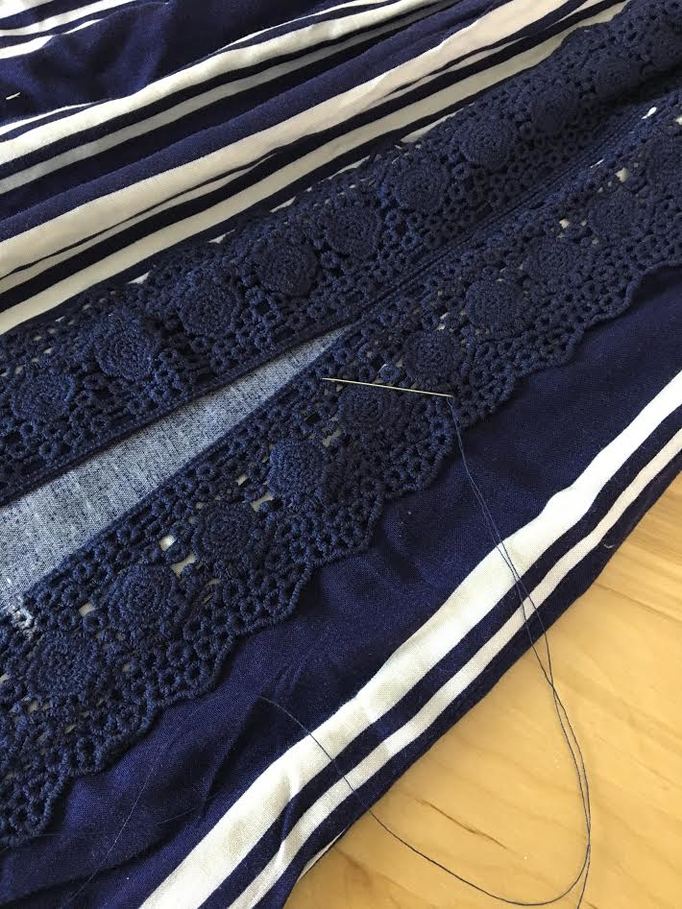
It is often difficult to resist a clothing item that features a slit. Whether it is added in the front or the side seam of a garment, a slit is both feminine and sexy, modernizing a clothing item while adding comfort. A slit is a design element that serves both a functional and aesthetic purpose. Slits are always added into some form of seam, whether at the front, back or side of the garment. It is very rare that you'll find a slit cut into the fabric and not actually inserted into a seam. If a slit is cut directly into the fabric and not an open extension of a seam, the slit wont lay flat, will open uncomfortably, or rip at the top during wear. Just as you would with any seam, slits need to be clean-finished and reinforced by using the appropriate clean finishing method. This can range from serging and folding, double folding and top stitching, using a facing or adding binding along the slit opening edges. Regardless of what the finish is, the slit should blend into the rest of the seam smoothly without disrupting the fit and structure of the garment. This means that the clean finishing method used for slits should not be so bulky or heavy as to jeopardize the comfort and function of the clothing item at hand. Have you ever fallen in love with a dress or a skirt featuring a slit only to find that the slit is a bit too high for everyday wear? Due to the fact that all of us have different body types, this problem is more common than you would think. You might find yourself in a situation where the slit itself forces you to wear the garment in a very limited setting, being either too risky or maybe too inappropriate for certain occasions (like work, for example). Thankfully, there is an easy fix! You can close any slit by any distance necessary using a simple hand stitch described in the sewing tutorial below.
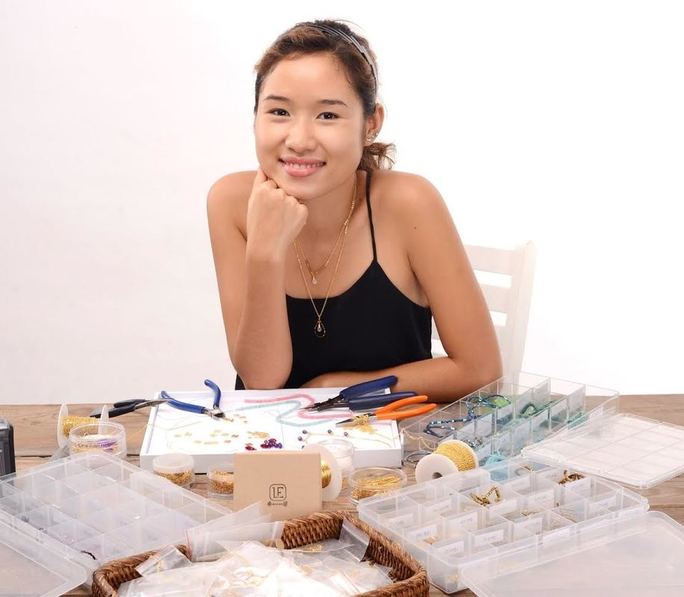
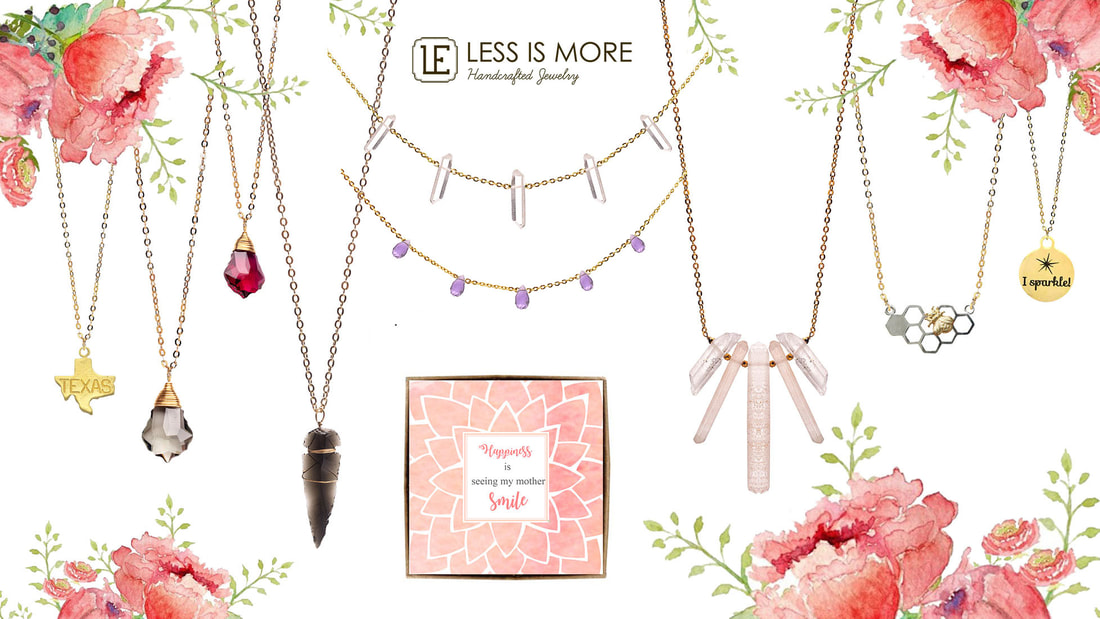
"Less is more" says Ha Le of Less Is More Jewelry. She has built a successful jewelry brand around the idea that jewelry should complement a women's natural beauty rather than overwhelm it. Ha was introduced to jewelry making and design back in college when she took a jewelry class. Naturally, given her passion for art (especially drawing and painting) she was fascinated by the idea of designing and building something 3-dimensional. Since then, she has developed a jewelry brand that stays true to a gentle and luxurious style perfectly congruent to the brand's name- Less Is More. Ha believes in improving one's self every single day and uses her brand as a platform to positively impact the world. Ha Le of Less Is More Jewelry and Succulents Box. Behind the beautifully feminine jewelry, there is a heartwarming charitable cause- one that has been with Ha since she was attending middle school in Vietnam. Smile Restaurant in Ho Chi Minh City, Vietnam provides meals to disadvantaged, low-income Vietnamese workers and families that are in need of quality food and meal sustainability. Every Less Is More piece of jewelry sold provides a meal for someone in need regardless of their job, appearance or disability. Less Is More Jewelry also donates a portion of all sales towards the restaurant's survival and operation contributing to cooking ingredients, rent and gas/water bills. The brand's volunteers donate their precious time to the sustainability and daily operation of the restaurant, cooking meals in the tropical Vietnam heat and taking pride in the smiles each meal brings. Photo courtesy of Less Is More Jewelry In her quest for development, Ha doesn't stop at jewelry. She incorporates everything she loves into her business and a love for nature is one of her greatest passions. She created Succulents Box which has since become a successful part of her brand, offering a variety of unique succulent species and a blog featuring succulent information and care tips. Ha's love for succulents comes as no surprise. They symbolize harmony and endurance, thriving in poor soil and low-water conditions thus serving as a perfect addition to a brand featuring such a kind, compassionate message. Perhaps what will be most notable in the interview with Ha Le below is her humble and hardworking spirit. She allows us a look into her design process and provides some words of wisdom and inspiration for all creative souls that dream of one day building a brand out of what they love. Photo courtesy of Less Is More Jewelry When did you start designing and making jewelry and how did you discover your love for this craft? I first learned jewelry making skills back in college in a Jewelry class. I was a painter and drawer, so that jewelry class was my first ever experience creating something three dimensional. It was definitely more challenging as I had to think and execute more carefully so that my creations could be enjoyed from all different angles. Making jewelry has become my passion since then.
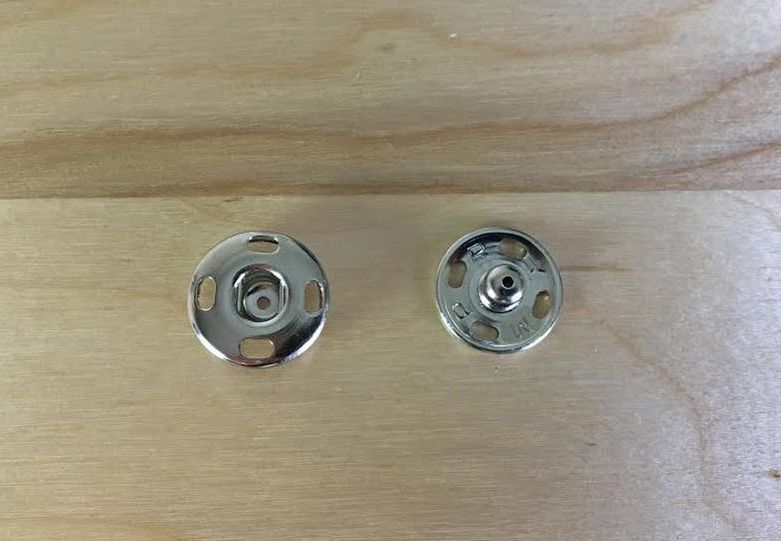
What Are Snap Closures/Fasteners? Snaps (in dressmaking) are types of fasteners that allow for the connection of lapped edges and abutted edges across a variety of clothing items and designs. Snap fasteners offer incredible versatility both functionally and aesthetically. Although a snap mechanism has less holding power than a hook and eye application, they are much easier to open and close, and often used along the entire opening edge of a garment. "Holding power" means that if you pull a closed hook -and-eye edge apart, it will hold better than when pulling a snap-closed edge apart. After all, snaps are actually designed to open when pulled apart- The ball and socket mechanism, which you'll read more about below, allows for effortless yet sturdy opening and closing of the snap. As you read on, you'll find that there are a variety of snap styles ranging from sew-on to no-sew to magnetic. The versatility of a snap closure and the various styles of snaps available nowadays on the market allow you the ability to choose the right size and snap style for any clothing item, whether it is very lightweight or heavy duty. End use for snaps range from single snap applications at the cuff, collar and waistband areas to entire garment edge applications at the opening of tops, cardigans, jackets, coats and a variety of bottoms. Snap finishes are available in nickel, black and sometimes gold-tone. Due to the durability requirement of snaps, metal is the most conventional, commonly found option on the market. Types of Basic Snaps In Dressmaking: Sew-on snaps: Sew-on (or sew-in) snaps are hand sewn to the surface of the fabric using a whipstitch. These are the most commonly-used snaps for home dressmakers, featuring the conventional ball-and-socket mechanism and sewing holes (described below). Sew-on snaps are a great way to start if you are sewing beginner. Why? If you apply them incorrectly, they are easy to take out using a seam ripper without incurring any fabric damage. This is a very important factor to consider if you are a sewing beginner, because chances are, you will either miss-align the snap components or sew them upside down if you are unfamiliar with their structure. Even after years of sewing, you may still find yourself having to redo snap application if you're not extra careful in the alignment process. No-sew snaps: No-sew snaps require some extra tools to be fastened, ranging from small to heavy duty. To apply no-sew snaps at home, you'll need to invest in some snap pliers or use a hammer and hand application tool. Here's the thing, no-sew snaps are actually designed to be more durable than sew-on snaps. However, because you need to use the right tools during application as well as choose the right snap size for the thickness and consistency of the fabric, if you attach no-sew snaps at home you might find that they are actually weaker than sew-on snaps if they are not applied correctly. When attached correctly and all aspects are taken in consideration, no-sew snaps do provide a much more durable finish. No-sew snaps styles depend greatly on end use and whether they are applied to thick, heavy duty fabrics or fine, lightweight clothing. Those constructed to be most heavy duty are standard ring and spring snaps used on denim, canvas, leather and other heavy duty, thick materials. Of course if the fabric is thick and heavier-weight, the snaps should be larger and more durable to withstand this application. Prong ring snaps are most commonly available at the fabric/craft stores, and can be inserted using snap pliers or a hammer and hand tool. The size of the snaps should be chosen based on the thickness of the fabric layer(s). The prongs, which are little spikes placed around the ball and socket portions, will be inserted through the fabric and folded down to hold the snap in place thus serving as permanent crimps. For that reason, the thickness of the fabric should allow enough room for these spikes/crimps to fold over keeping the snap durably in place. Fabric covered snaps: These are usually attached by sew-on methods and conventionally designed to match the fabric/color of a garment. You can actually cover a regular sew-on snap with your chosen fabric at home. For this application, make sure the snap is a bit larger and the fabric is lightweight enough to mold around the round shape of the snap pieces. Although covering a snap with fabric won't be discussed in the tutorial below, to give you an idea of the process: You simply cut a circular shape out of fabric at double the diameter of the snap, cover the face of the snaps with the circular fabric and tuck in the raw edges of the fabric on the back side of the snap using a running stitch. After the fabric has been placed over the ball and the socket pieces, insert the ball into the socket thus naturally cutting the fabric encasing the ball portion underneath. Apply whipstitches through both the sewing holes and the fabric layers to attach the fabric-covered snap to the garment. Magnetic Purse Snaps: As you might have guessed from the name, these snaps are used mostly in accessory design as a convenient closing method for bags, purses, luggage etc. They are thicker, heavier and much bulkier than dressmaking snaps. The magnetic purse snaps available at your local fabric/craft store don't always require the purchase of a special tool. They are fastened by inserting larger metal crimps through the fabric layers and folding them down to connect. In some cases, a hand tool and hammer can be used to warrant a more durable connection. Although like most snaps, they feature a ball-and-socket design, the closure is magnetic and doesn't snap in place in a conventional push-and-snap mechanism. On that same note, magnetic snaps have less holding power than traditional dressmaking snaps, which makes them perfect for purse/bag closures which require an easy yet efficient closure. The Structure Of a Sew-On (Sew-In) Snap: A sew-on snap is comprised of two functional parts: A ball and a socket. Along the outer edge, each ball and socket contains sewing holes (usually 4) through which the snaps are hand sewn to the garment using a whipstitch. The thread is usually doubled for durability and should match the color of the fabric/garment. When sewn to lapped edges (garment edges that overlap), the socket, which is the piece consisting of the "fastening hole", is always sewn on the bottom while the ball, which is the piece housing the "ball" extension, should correspond to the top and be sewn to the underside of the top layer. There are two main reasons for this placement:
The socket snap piece has an extension on it's back side (into which the ball piece is inserted)- if this socket is sewn to the top layer of the lapped edges, this extension will show through the fabric on the face of the garment jeopardizing its smoothness and adding bulkiness and unnecessary wrinkles. The second reason for this placement simply consists in the natural way our hands operate: It is easier to insert the ball into the socket while it is positioned at the bottom than vise versa. |
The Blog:A journey into our design process, sewing tutorials, fashion tips, and all the inspiring people and things we love. Doina AlexeiDesigner by trade and dressmaker at heart. I spend most of my days obsessing over new fabrics and daydreaming new ideas. Sadie
Executive Assistant & Client Relations Manager Archives
November 2019
Categories
All
|
-
Sewing Tutorials
-
Basics
>
- Aligning Pattern Grainlines To Fabric
- Preparing Fabrics For Sewing
- Pinning Sewing Patterns To Fabric
- Placing Sewing Patterns On Fabric For Cutting
- Rotary Cutters or Fabric Scissors?
- Cutting The Sewing Patterns
- What Are Notches And How To Use Them In The Sewing Process
- Transferring Notches From Pattern To Fabric
- Transferring Seamlines to Fabric
- Staystitching
- Backstitching: A Complete Guide
- Hand Basting: A Complete Guide
- Sewing Continuous Bias Binding
- Darts >
-
Sewing Seams
>
- The Basics Of Seams And Seam Allowance
- How To Sew A Straight Seam
- Sewing Curved Seams
- Sewing Corner Seams
- Trimming And Grading Seam Excess
- Notching/Clipping Seam Allowance for Tension Release
- Sewing Topstitched Seams
- Sewing Corded Seams
- Sewing A Slot Seam
- Sewing A Gathered Seam
- Sewing Bias Seams
- Sewing Seams With Ease
- Sewing Seams With Crossing Seamlines
- Sewing Unlike Fabric Seams
- How To Iron Seams: Ironing Tools And Conventions
- Sewing With Knit Fabrics
- Understanding Stitch Length And Tension
- Sewing Unique Fabric Seams
-
Seam Finishes
>
- Seam Finishing Techniques - Overview
- Applying A Pinked Seam Finish
- Applying A Bias Bound Seam Finish
- Serging And Zigzag Seam Finishes
- Sewing A Self-Bound Seam Finish
- Sewing A French Seam Finish
- Sewing A Hong Kong Seam Finish
- Sewing A Mock French Seam Finish
- Sewing A Turned-and-Stitched Seam Finish
- Sewing Overcast Hand-Applied Seam Finishes
- Sewing A Flat Felled Seam
- Sewing A Hairline Seam Finish
-
Hem Finishes
>
- Garment Hem Finishes: Overview
- Sewing A Double Fold Hem Finish
- Sewing A Single Fold Hem Finish
- Sewing Bound Hem Finishes
- Sewing An Exposed Double Layer Bound Hem
- Sewing A Folded-Up Bound Hem with Pre-folded Binding
- Sewing A Hong Kong Hem Finish
- Sewing A Band Hem Finish
- Sewing A Bias Faced Hem Finish
- Sewing A Twill Tape Hem Finish
- Sewing A Rolled Hem Finish
- Sewing A Shaped Hem Facing
- Using Fusible Hem Tape And Webbing
- Finishing A Lace Fabric Hem
- Finishing A Leather Hem
- Sewing Faced Hem Corners
- How To Finish Lining At The Hem
- Finishing Fabric Corners by Mitering >
- Interfacing A Hemline: Lined And Unlined Examples
-
Sewing Pockets
>
- Curved Patch Pocket With Flap
- Unlined Square Patch Pockets
- Lined Patch Pockets: Two Ways
- Extension On-Seam Pockets
- Separate On-Seam Pocket
- Front Hip Pockets
- Bound Double Welt Pocket
- Double Welt Pocket With Flap
- Self-Welt Pocket (Using Single Fabric Layer)
- Slanted Welt Pocket (Hand-Stitched)
- Faced Slash Pockets: Overview >
-
Sewing Zippers
>
- Sewing Zippers: General Information
- Sewing A Centered Zipper
- Sewing A Lapped Zipper
- Sewing An Invisible Zipper
- Sewing A Fly Front Zipper
- Sewing A Closed-End Exposed Zipper (No Seam)
- Sewing An Exposed Separating Zipper
- Sewing Hand Stitched Zipper Applications
- Sewing A Zipper Underlay
- Sewing A Placket-Enclosed Separating Zipper
- Sleeveless Finishes >
-
Neckline Finishes
>
- Sewing A Neck Shaped Facing
- Sewing An All-In-One Neck Facing
- Neck And Garment Opening Combination Facings >
- Sewing A Bias Faced Neckline Finish
- Sewing A Band Neckline Finish
- Bound Neckline Finishes: Overview >
- Sewing A Semi-Stretch Strip Band Neckline
- Ribbed Neck Band And Classic Turtleneck
- Decorative Neckline Finishes >
- Finishing Facing Edges >
-
Extras
>
- A Complete Guide on Interfacing
- Sewing Bound Spaghetti Straps
- Sewing Spaghetti Straps To A Faced Neckline
- Sewing Ruffles: Overview
- Patterning And Sewing A Circle Ruffle
- Sewing A Gathered Heading Ruffle
- Sewing Double Layer Gathered Ruffles
- Sewing A Gathered Ruffle Into A Seam
- Sewing A Gathered Ruffle To A Fabric Edge
- Sewing A Fabric Surface Slit
- Sewing A Slit Seam
- Hand-Applied Straight Stitches
- Hand-Applied Blind Stitches
- Hand-Applied Overedge Stitches
- Hand-Applied Tack Stitches
- Hand-Applied Decorative Stitches
-
Basics
>
- Custom Bridal
- Custom Apparel
- About
- Blog
Services |
Company |
|




 RSS Feed

