
Understanding Ribbed (High-Stretch) Neckline Finishes In Dressmaking
A high-stretch strip band is almost identical to a semi-stretch one in the way it looks and lays along a neckline edge. However, due to the difference in stretch and recovery, a high-stretch strip band is constructed a bit differently.
|
There is no need for shaping with steam prior to the band being sewn. However, the strip band itself is cut much shorter in comparison to the garment’s neckline and stretched evenly in the pinning and stitching process.
|
The reason a stretchy strip band has to be shorter than the edge it finishes is so that when sewn to the neckline, the band stretches to the length of the neckline while its folded edge remains in unstretched position. This allows the band to lay flat along the neckline curve while simultaneously shaping to the organic form of the body at the top.
If this is the first time you’ve ever sewn a stretch neck band, you will find the difference in length between the neck and the band itself a bit perplexing- not to worry, it will all make sense when you see the finished neckline.
The beauty of sewing a stretchy strip band is that a garment that has one, is almost always stretchy enough to be pulled over the head without limitations. For that reason, you don’t have to worry about finishing a garment opening- chances are, any clothing item that is stretchy enough to be pulled over does not have one altogether.
There is an exception with zipper-front jackets and sweatshirts which use a ribbed neckline as both a neck finishing technique and a design element.
|
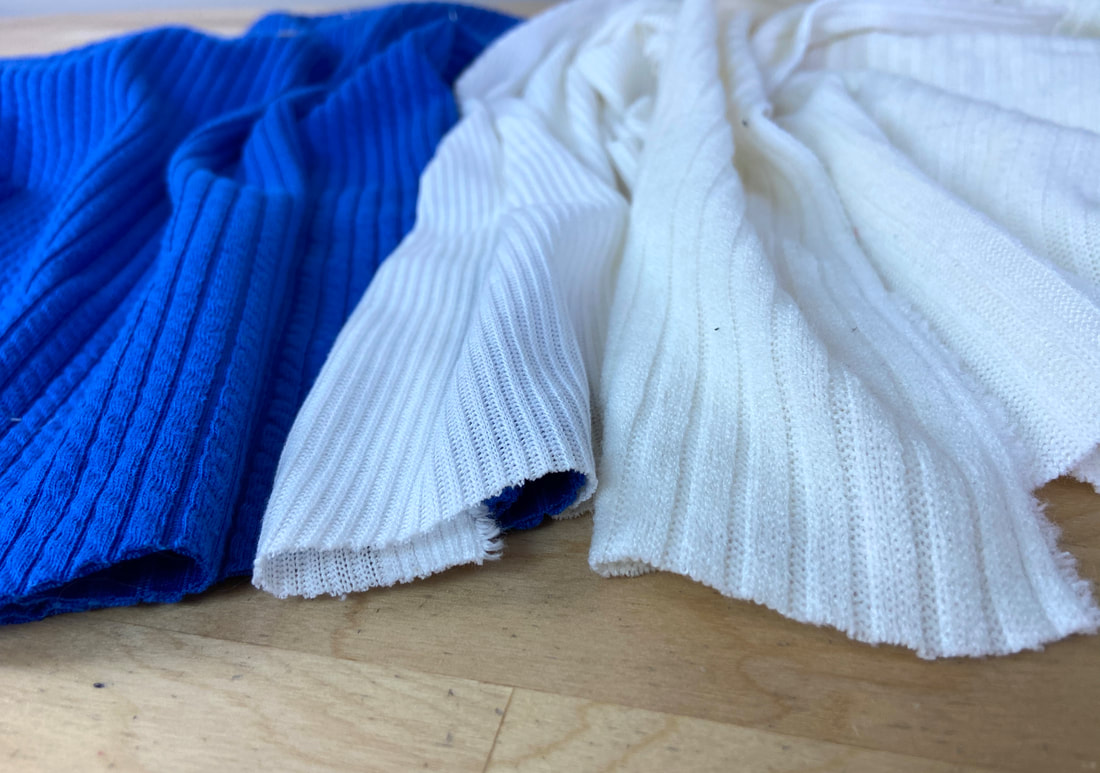
Speaking of ribbed necklines, rib knit is a fabric most commonly used to construct high-stretch strip bands. Ribbing is built to have a lot more structure and great recovery. It is a type of knit fabric that has vertical rows of opposite knit stitches. When unstretched, they compress the fabric into a snug fit. When stretched, they expand the fabric as wide as needed for the garment to be pulled over the head/body.
|
Ribbing is available in a variety of ratios. The ratio refers to how many rows of each knit stitch the fabric has. For example, a 3 x 3 rib knit means that the ribbing has 3 rows of a stockinette stitch and 3 rows of the reverse-stockinette stitch. These stitch ratios can sometimes determine how stretchy the rib knit is.
Ribbing is available in a variety of colors, thicknesses and stitch ratios. Your choice should depend on the color, fabric and type of garment it finishes.

Aside from neck strip bands, rib knit is also used to finish sleeve cuffs, waistlines and garment hems. You can buy ribbed fabric by the yard as you would any regular fabric, or in a pre-folded style already cut to a specific width. If the precut, pre-folded ribbing does not have the correct width for your project, it is best to purchase ribbing by the yard and stitch it to your specification.
In the steps to follow, you will learn how to sew a crew (curved) neckline with a ribbed strip band finish. Right below it, you’ll find a short tutorial on sewing a classic turtleneck using ribbing.
Finishing A Neckline Edge With A Ribbed Strip Band
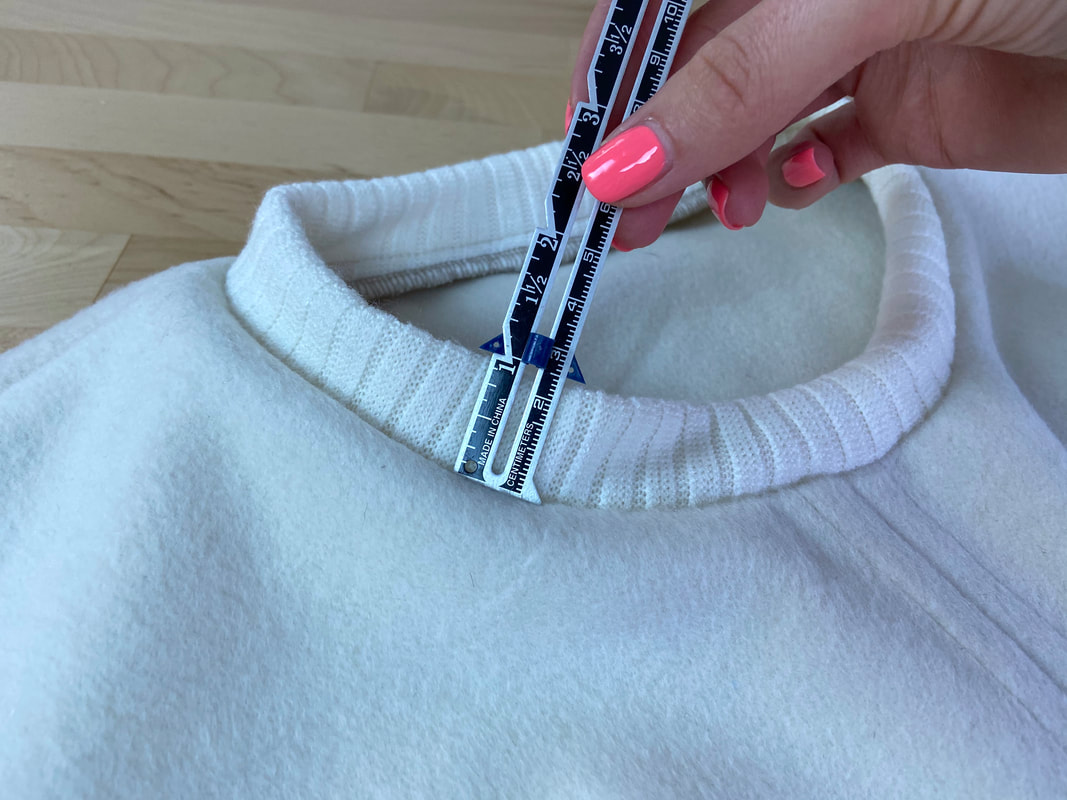
To start with, choose your desired ribbed strip band width.
For a crew neck, the band width should be anywhere form ½”- 1 ¼” depending on how thick the rib knit fabric is.
|
To keep things simple, in this example, the strip band is 1” wide.
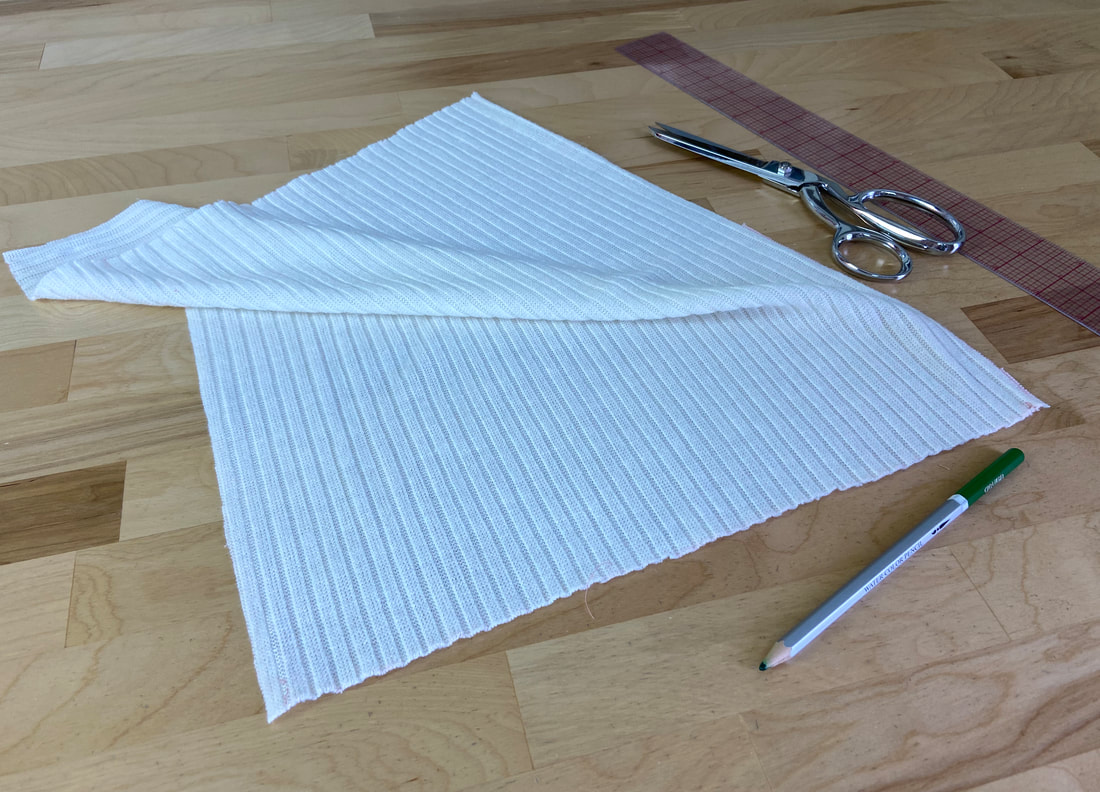
A knit strip band is folded onto itself to self-finish. For that reason, the initial fabric strip is cut twice its finished width plus two seam allowances. The seam allowance should be exactly the same as the neckline's.
Since the finished strip band in this example is 1” wide and the neck seam allowance is ¼”, the initial fabric strip will be 2.5” wide (1” x 2 plus two seam allowances of ¼”).
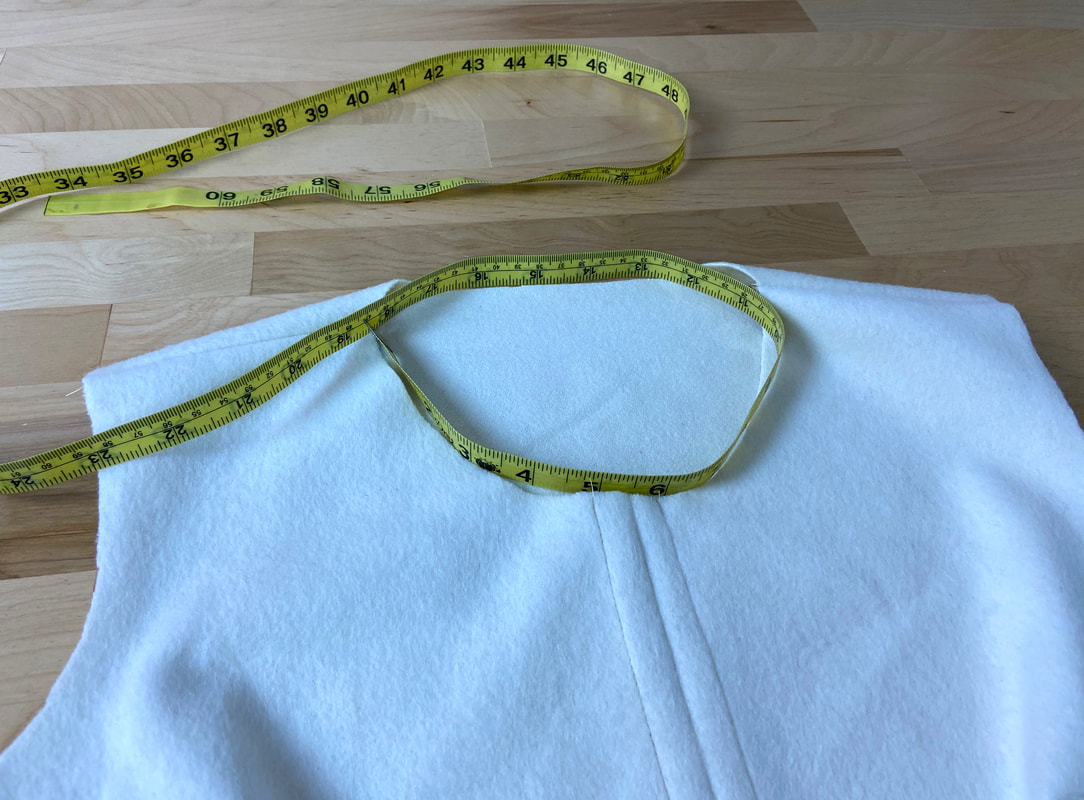
The strip band’s length should be 2”-4” less than the neckline edge plus two seam allowances.
The difference in length depends on how stretchy the ribbing is. The stretcher the rib knit, the more you should subtract from its length.
|
1. First, carefully measure the neckline edge using a flexible measuring tape. The neckline in this case is: 18.5". Subtract 2” from this measurement and add two ¼” seam allowances (1/2"). The final length of the ribbing fabric strip is: 17".
|
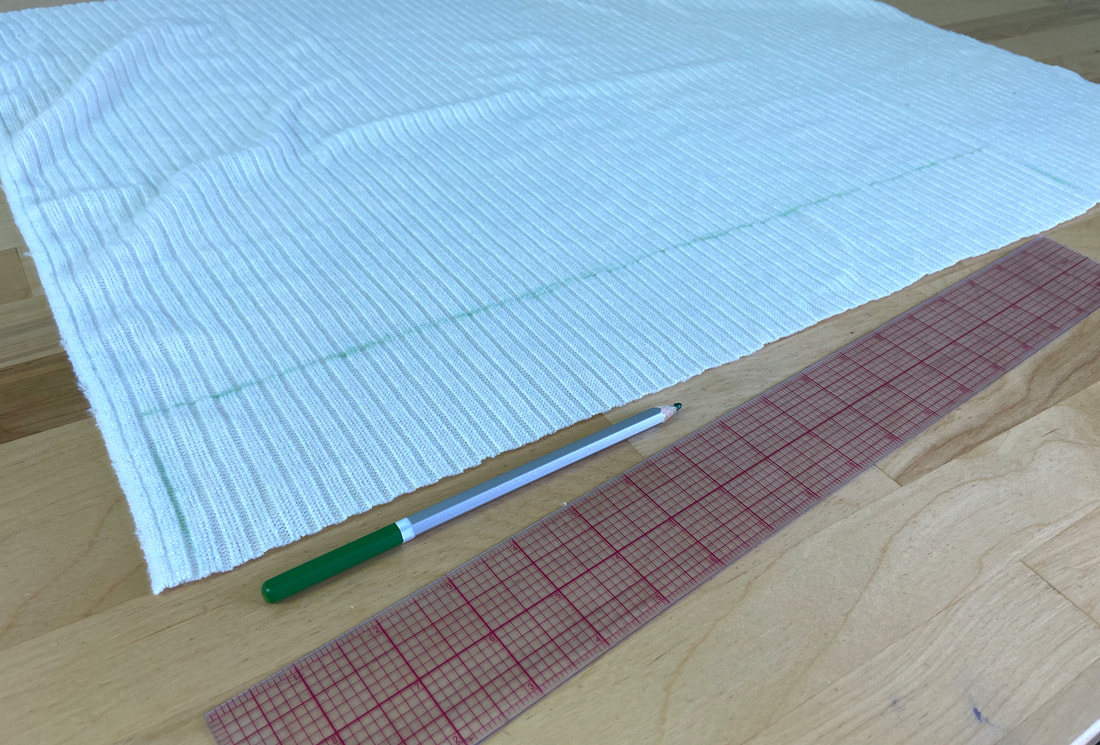
2. Using a ruler and tailor's chalk/fabric pencil, draw the fabric strip directly on top of the rib knit fabric in crosswise direction- use the total width and length calculated above.
The ribbing should have the highest amount of stretch when pulled apart by its short ends. As you mark the lines, be careful not to stretch out the fabric. The ribbing should remain in its natural, unstretched position during this process.
|
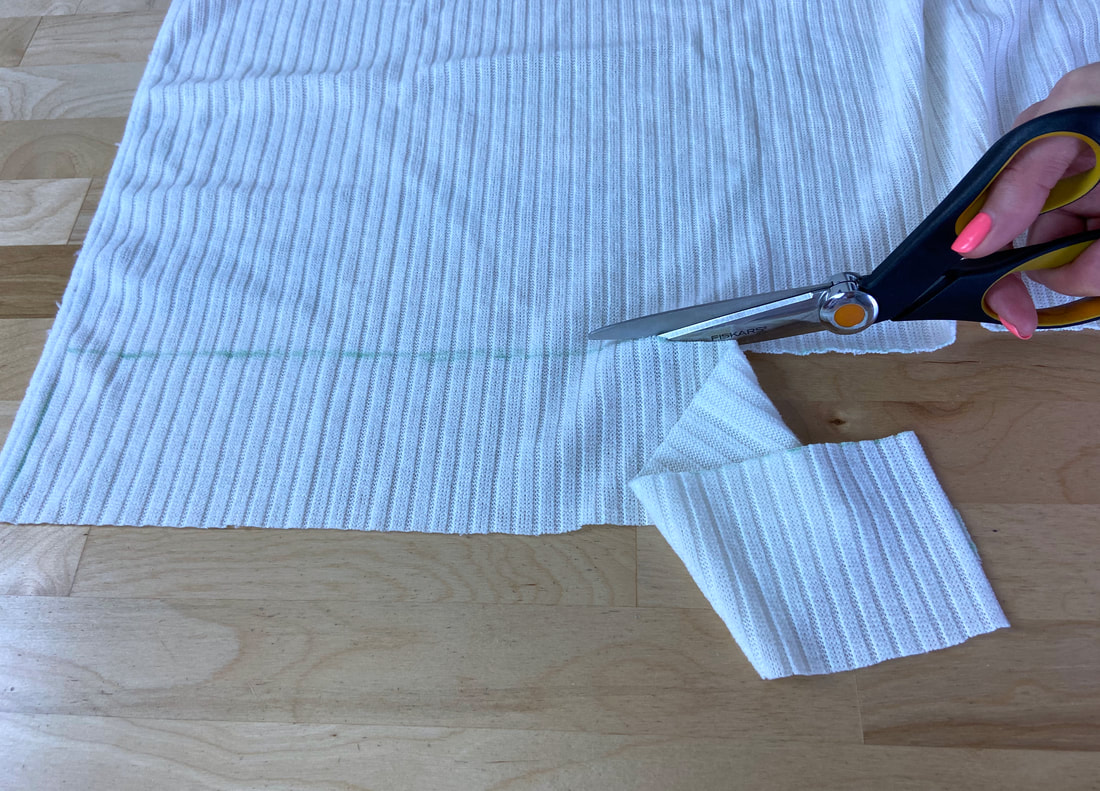
3. Once marked, cut the ribbed fabric strip carefully along the chalk lines.
|
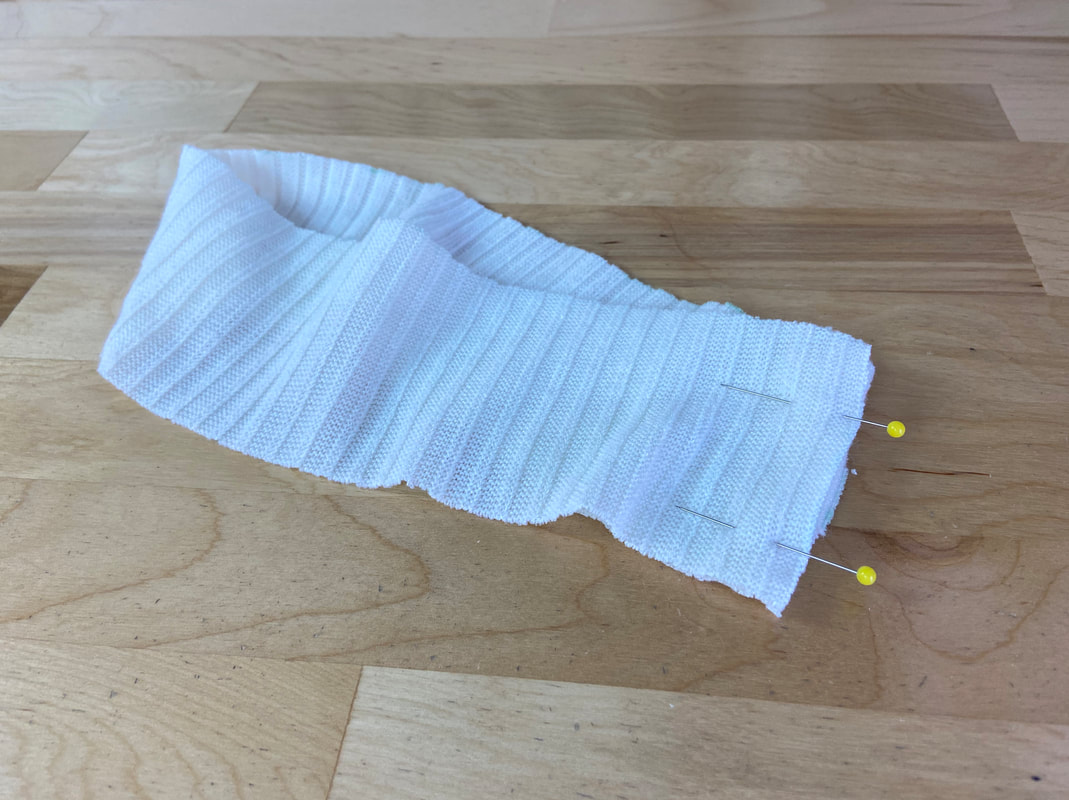
4. Next, align the vertical short ends together such that the fabric right sides are touching and a tubular piece is formed. Pin the edges perpendicularly.
For the most part, ribbing does not have a wrong or a right side. If unsure, choose the side that looks better to you as the designated face side.
|
5. Stitch the ends together using an overedge stitch or a straight stitch. If using a straight stitch, stretch the fabric slightly as you machine stitch.
|
6. Next, fold the ribbing strip down the center such that the lengthwise edges are touching and the fabric wrong sides and seam(s) are aligned (seam allowances should be enclosed on the inside).
|
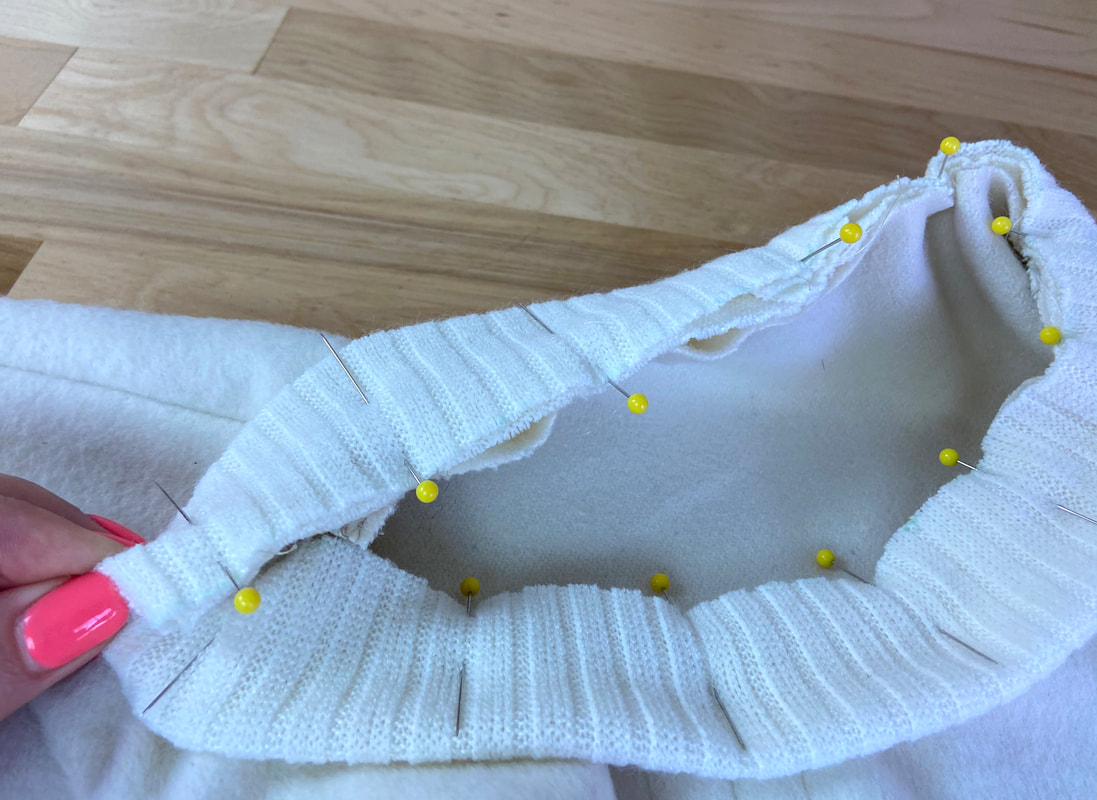
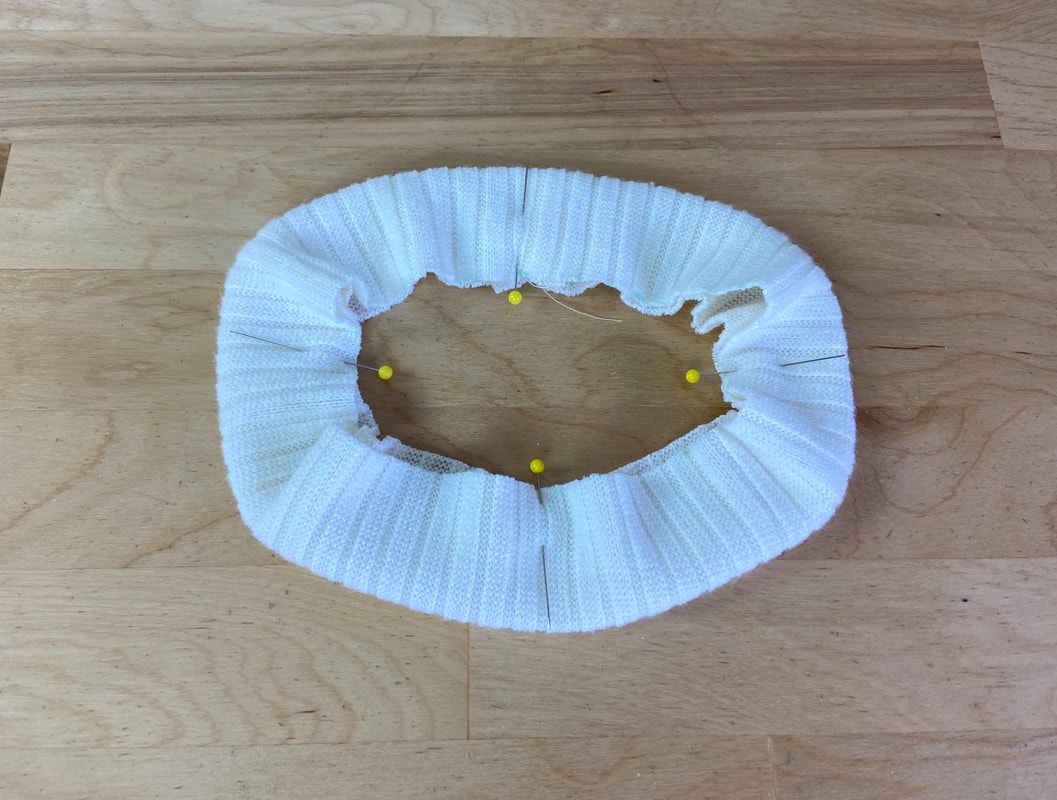
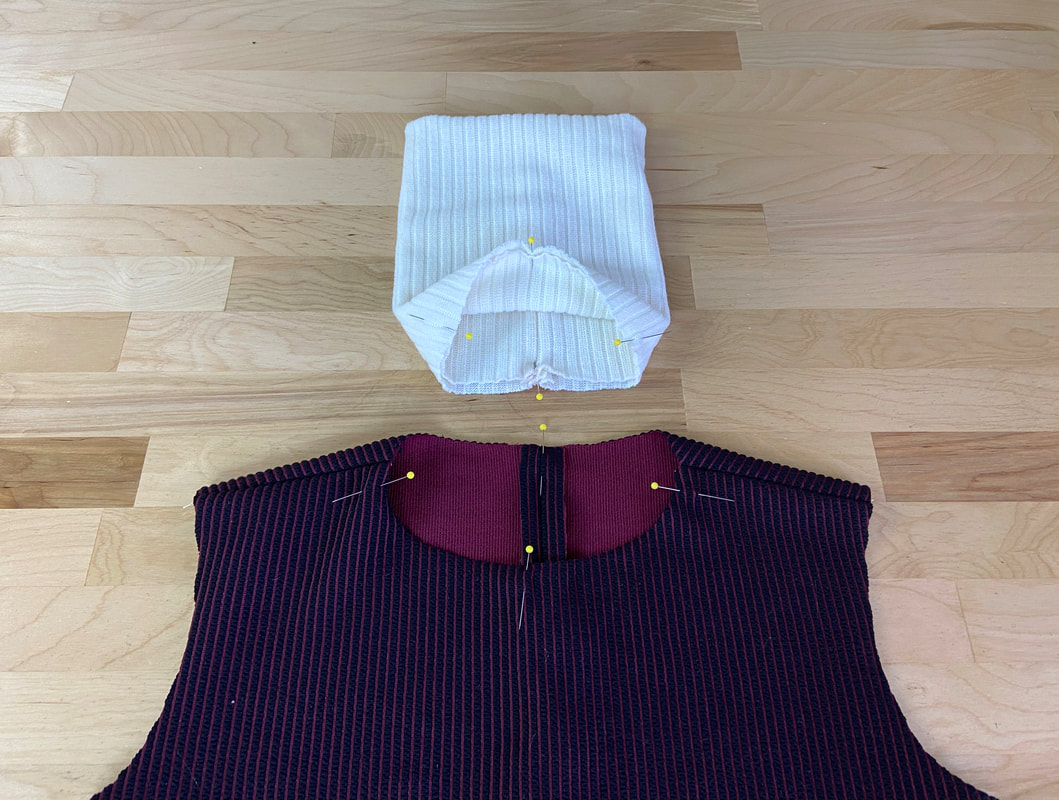
7. Next, divide the folded strip band in four equal parts and insert a pin at each location. Use a ruler or a measuring tape for this process. Insert the pins through both fabric layers to keep the band securely folded down.
|
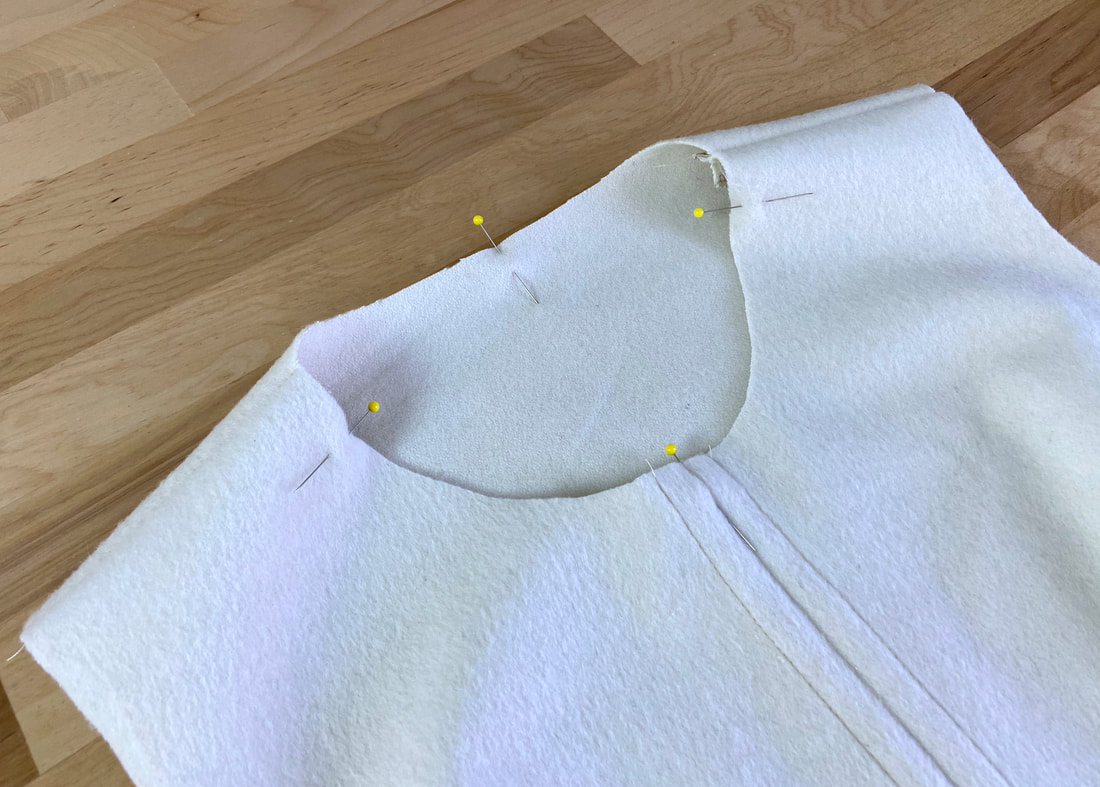
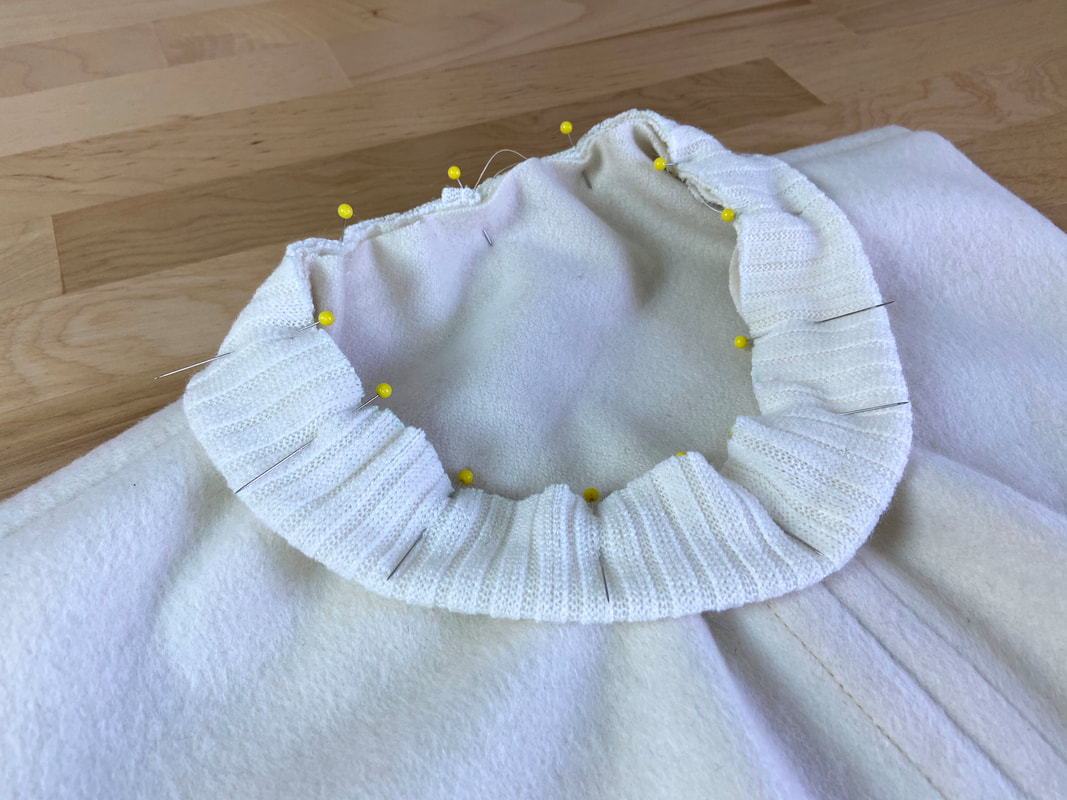
8. Divide the neckline in four equal parts. To keep things simple, use the center back and center front as two of the marks, and divide the spaces in between in half for a total of four equal portions. Insert a pin at each location.
|
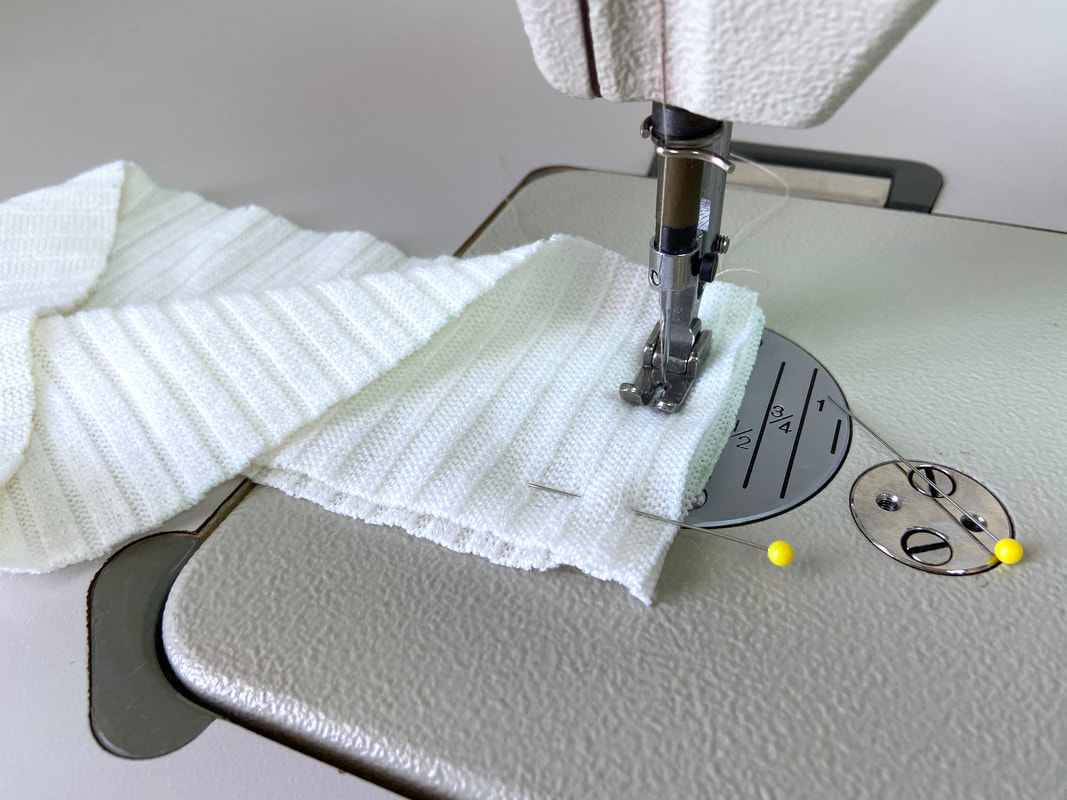
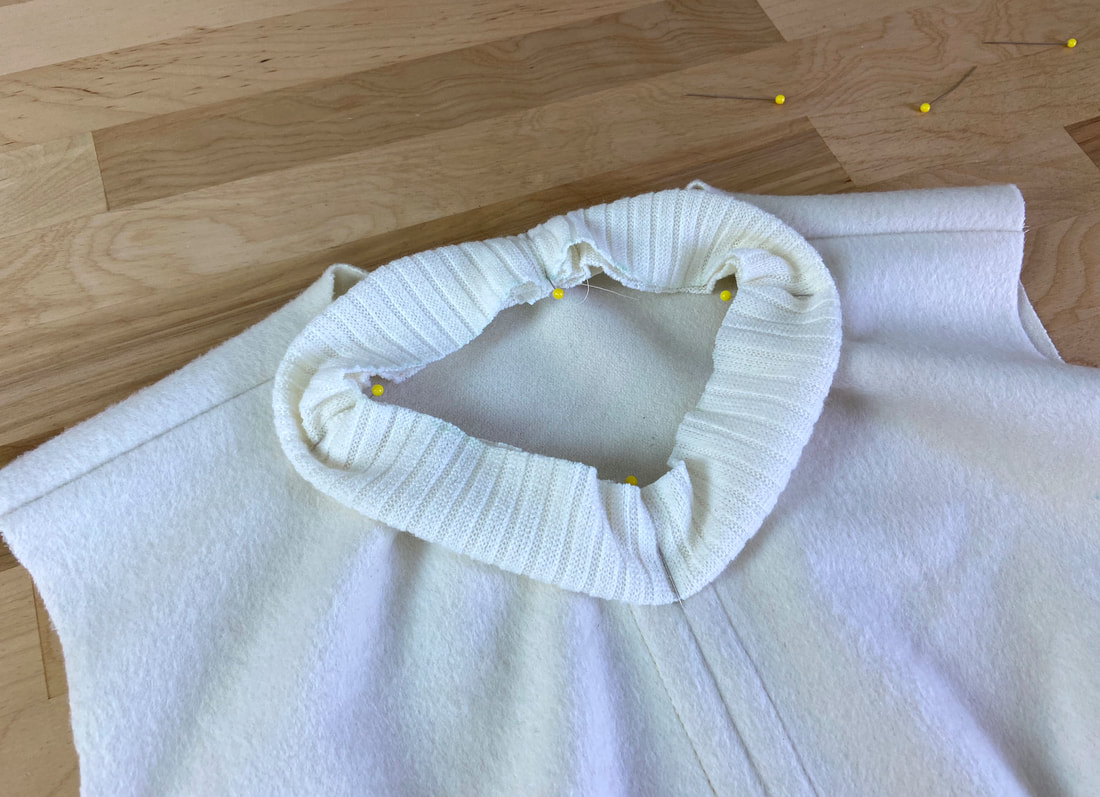
9. Working on the right side of the garment, align each pinned location on the strip band to each one on the neckline edge. Insert a pin at each location to secure. After all four points are matched, you will notice a clear difference between the length of the neckline and that of the strip band. This is exactly what you want! In the stitching process, the strip band will be stretched to mold to the curved neckline edge.
|
For a professional finish, it is important to align the band's seam to either the center back or one of the garment's shoulder seams.
|
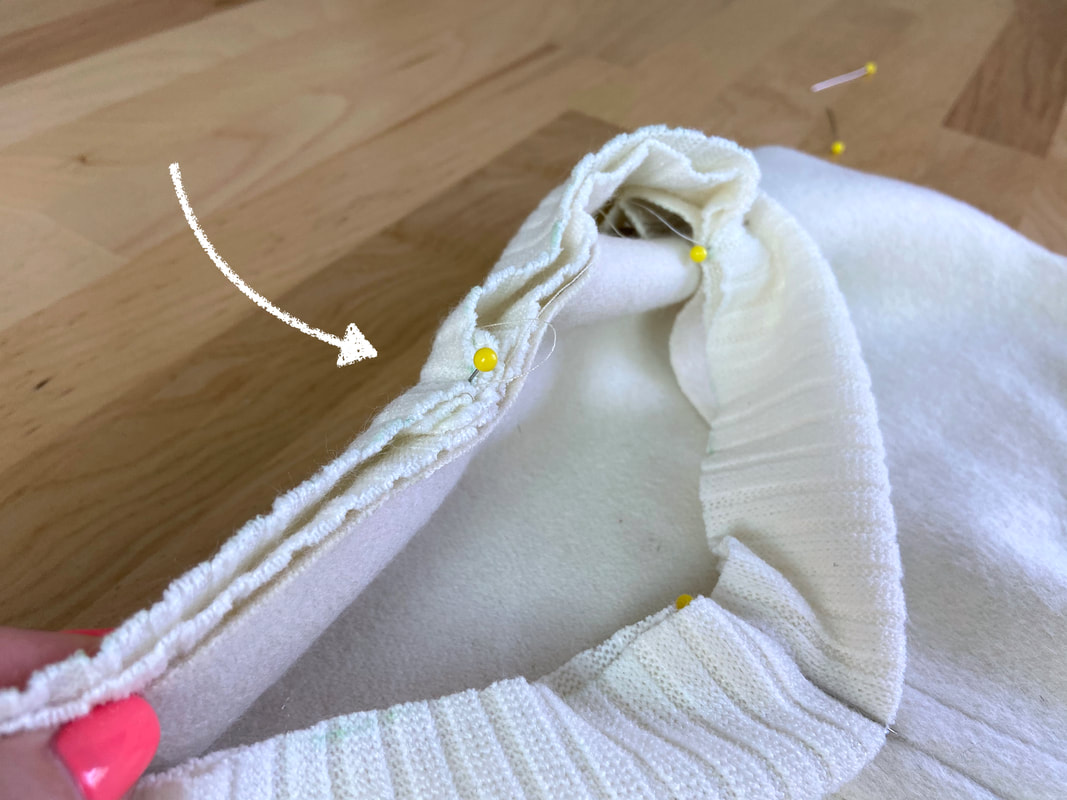
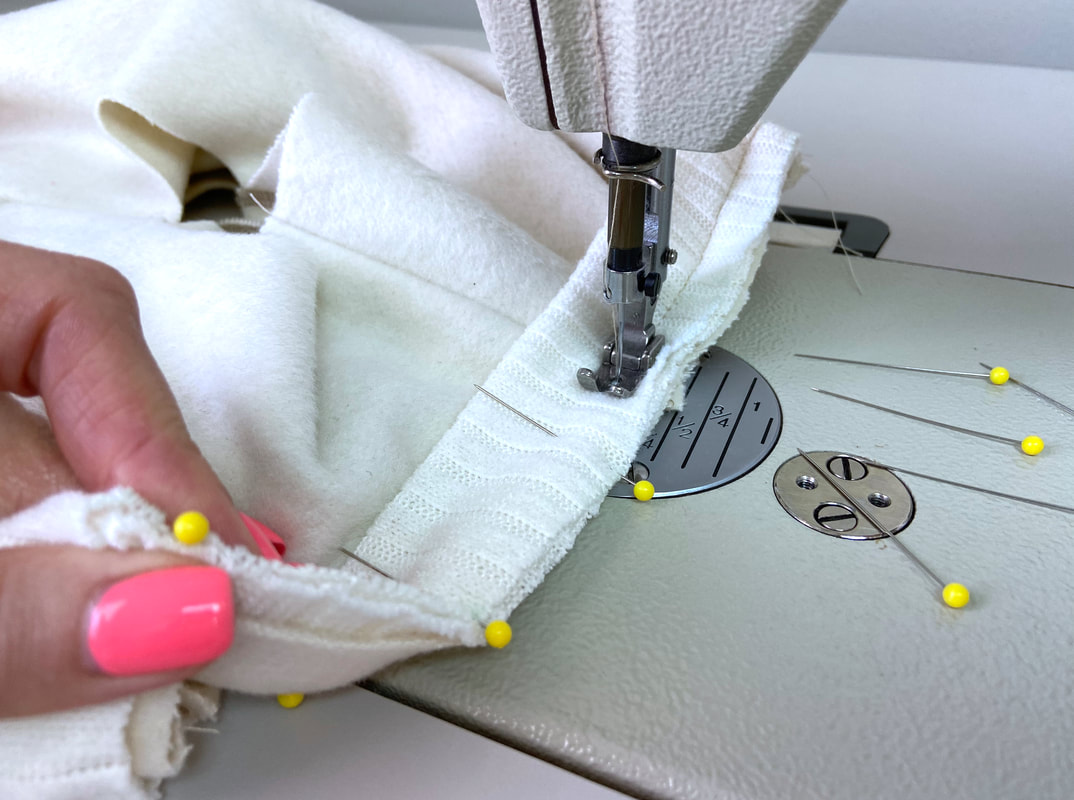
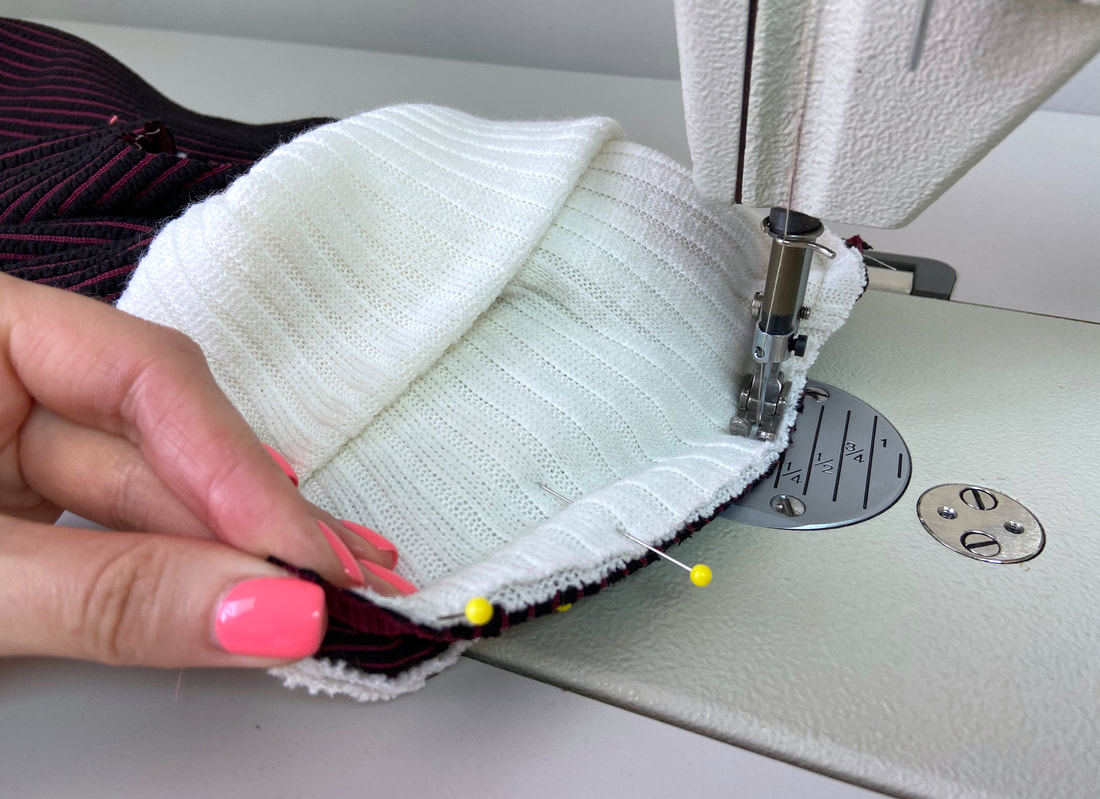
10. For better alignment, stretch the ribbed band to fit the neck edge and insert a few pins perpendicularly to secure.
Note: If pinning is not sufficient to keep the fabric layers aligned, apply a dense hand basting stitch to stabilize the neckline edges.
|
11. Using a dense serging stitch or a straight stitch, machine stitch the ribbed strip band to the neck edge at the designated seam allowance, stretching the ribbing to fit to the neckline in the process. Especially if using a straight stitch, stretching all layers in the process will add much-needed flexibility in the finished neckline seam.
|
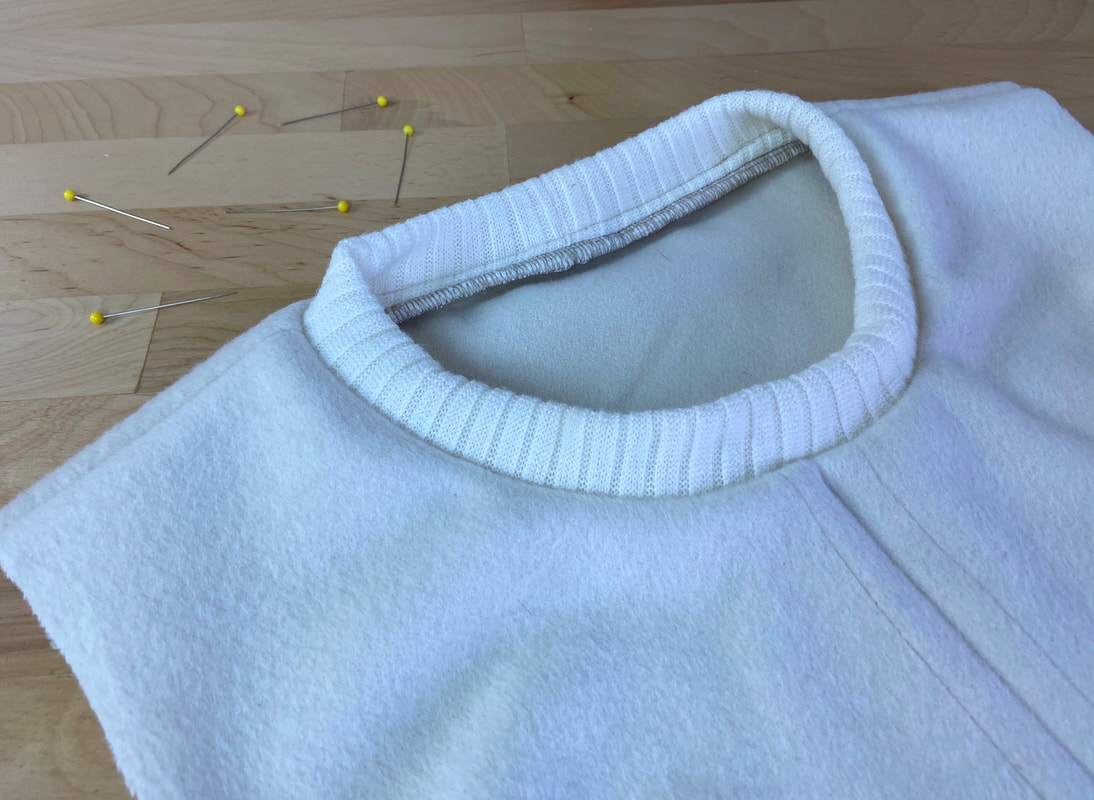
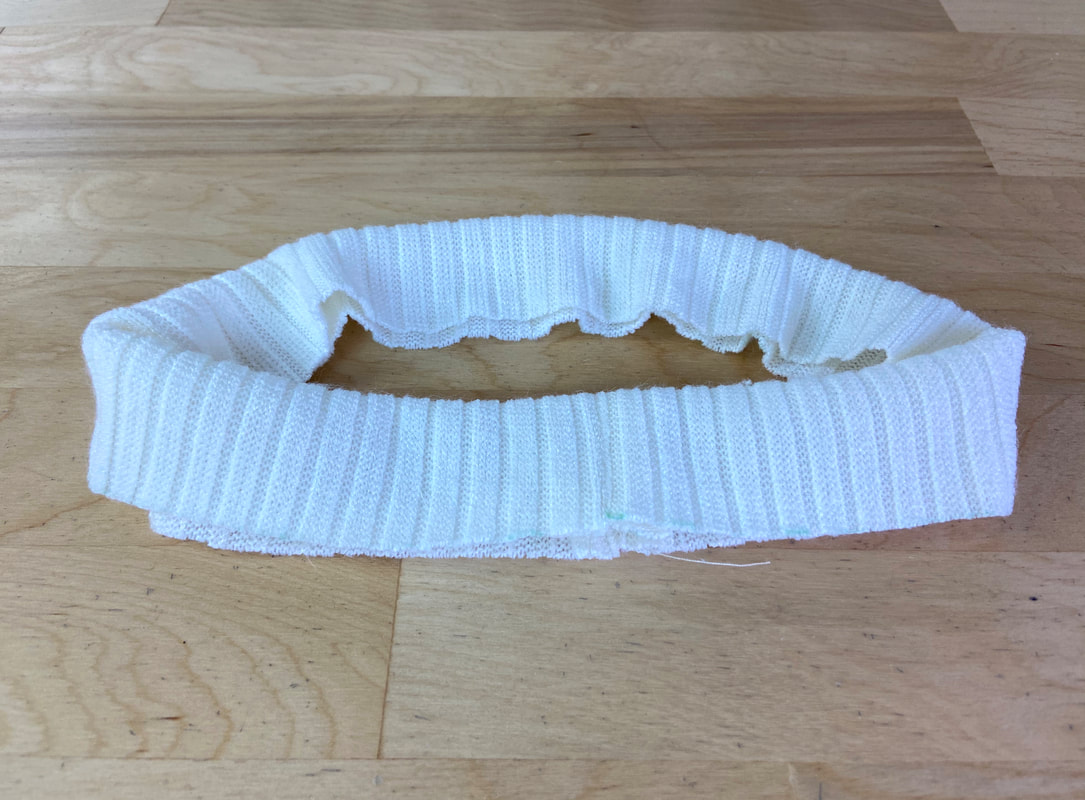
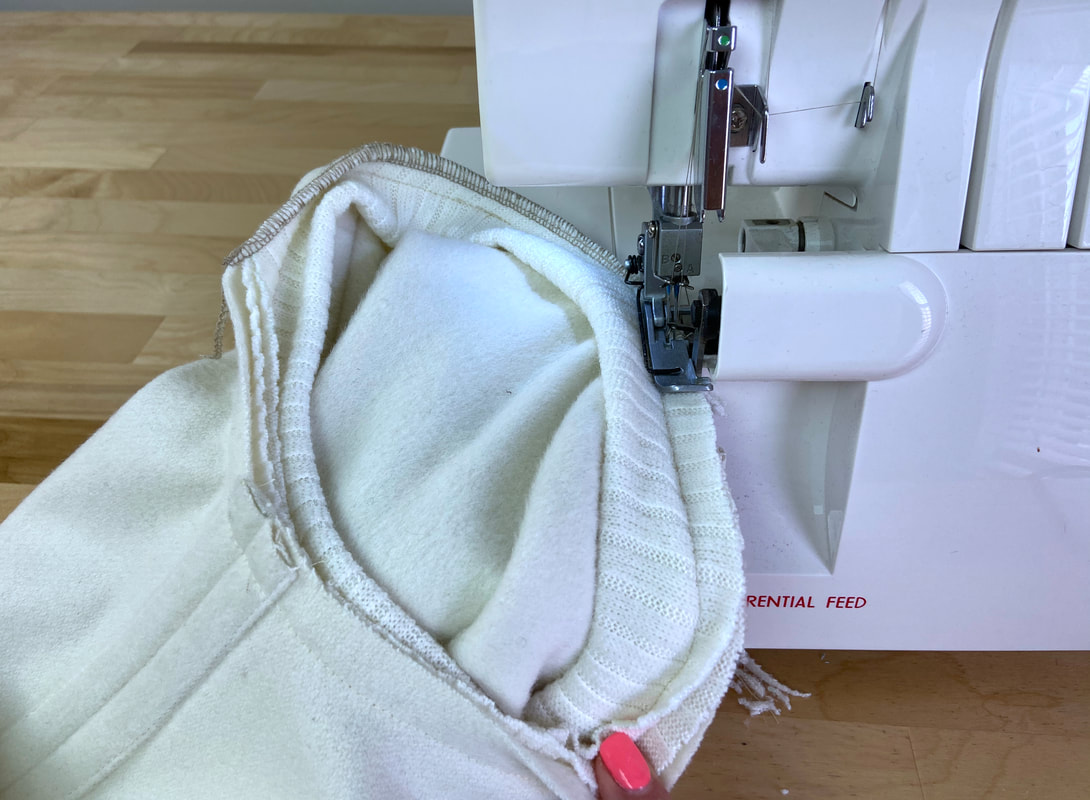
12. If you used a regular straight stitch, add an overedge stitch (like serging or zigzag) to finish the neck seam allowance layers as shown.
|
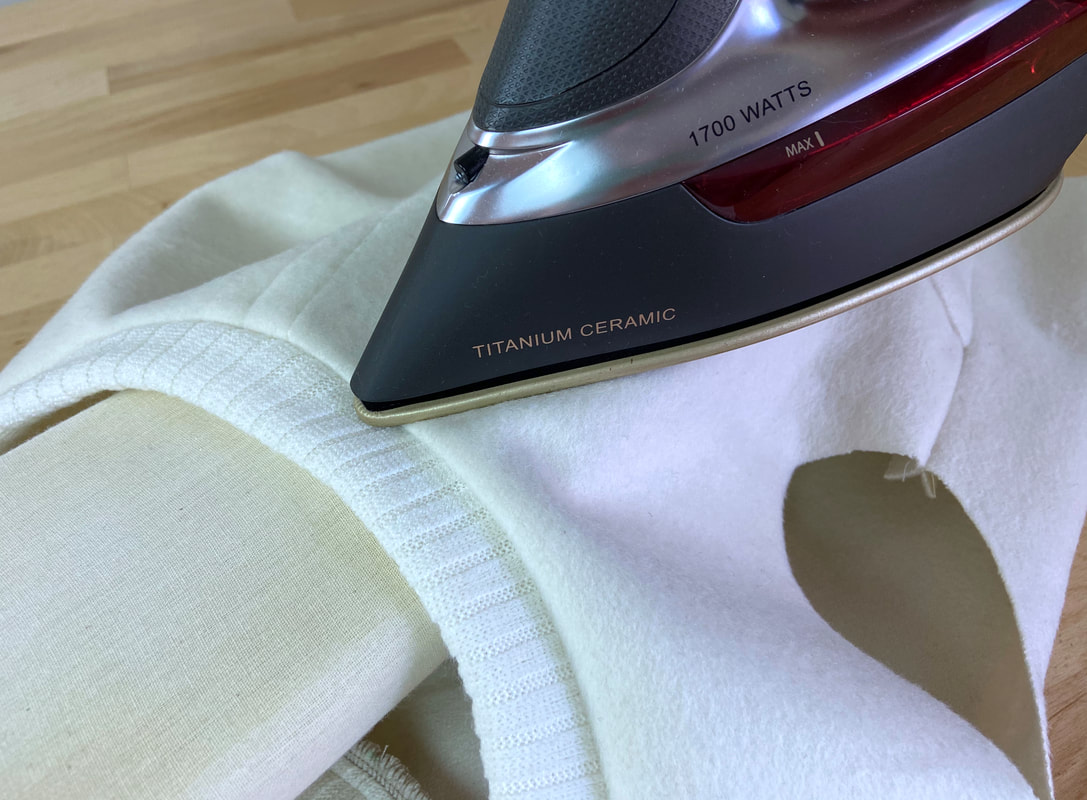
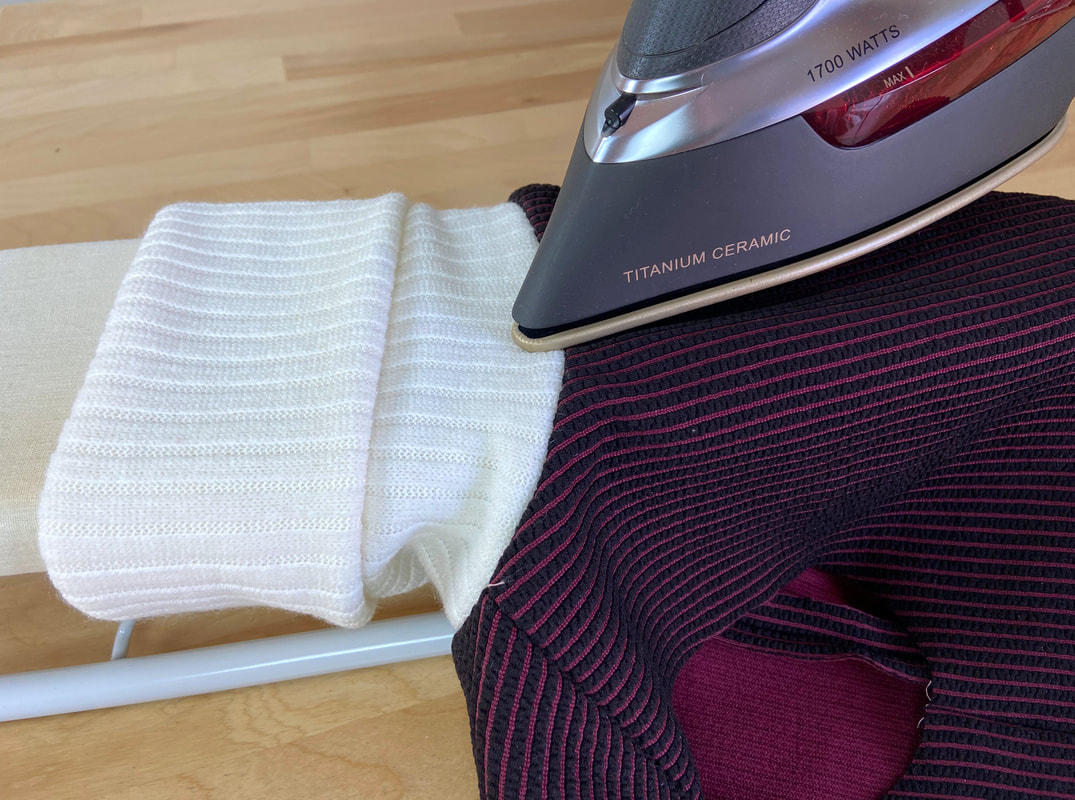
13. Press the neckline seam with the seam allowance pointing down. Apply some steam to compress the ribbed strip band in its natural position. For aesthetic purposes, you should not press directly on the ribbing's folded edge.
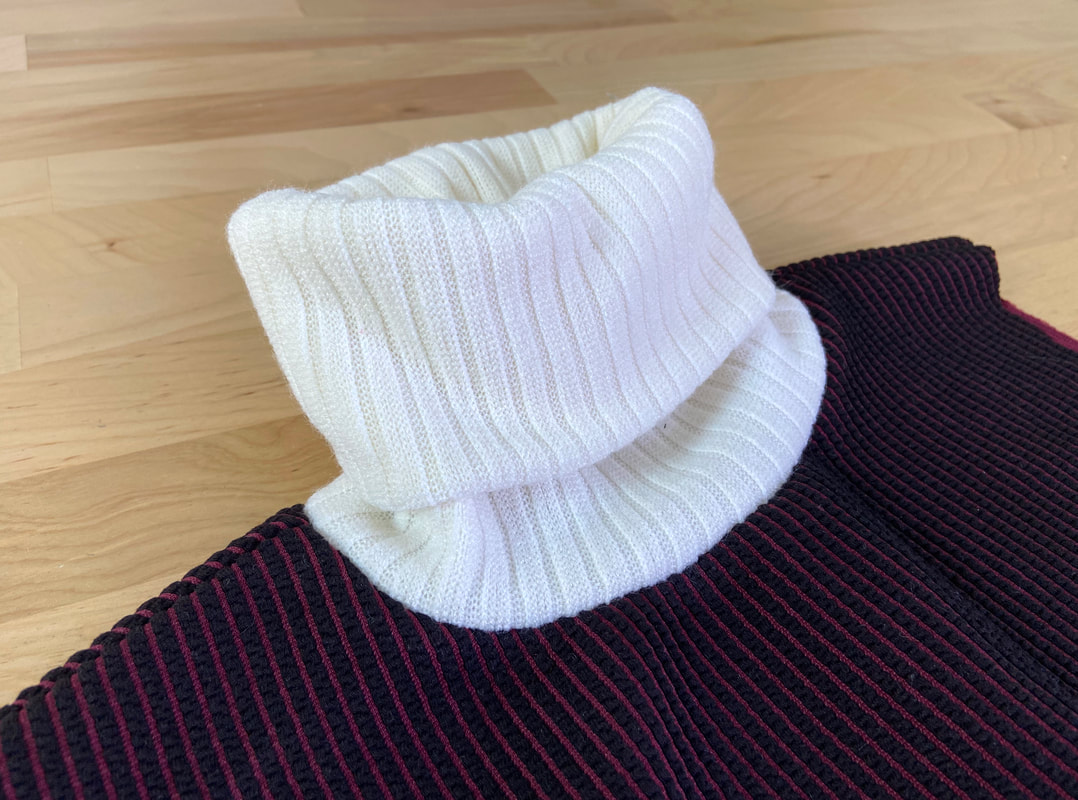
How To Sew A Ribbed Turtleneck
|
A turtleneck is sewn to a high neckline that sits at the natural neck base. Turtlenecks are constructed exactly as the crew neck described above, except the strip band is much wider. For a conventional turtleneck style, the band is folded onto itself twice. This needs to be considered when calculating the initial width of the ribbed fabric strip.
Considering the final turtle neck will be a standard 4” width:
The initial ribbing strip is cut at four times the finished turtle neck width plus two seam allowances. In this case, 16” plus two ¼” seam allowances (belonging to each top and bottom strip band edge: 16.5" total.
The length of the strip band is calculated by subtracting 2" from the garment neckline length. Two (2) seam allowances of 1/4" each are also added to this length. Thus, the total length of the ribbing fabric used to construct the turtleneck is: 14.5".
|
Measure, mark and cut the fabric strip exactly as described in the crew neck section above. Use the turtleneck measurements calculated above: 16.5" x 14.5".
|
|
Fold, mark and stitch the turtleneck band following the identical steps described above.
|
Last but not least, iron the seam allowance down towards the inside of the garment, and fold the ribbed band once over the top edge to complete the 4” turtleneck.

|
All content, including images and text, may not be copied, replicated, or redistributed without express written permission. This website is regularly screened and monitored for content protection.
|
