
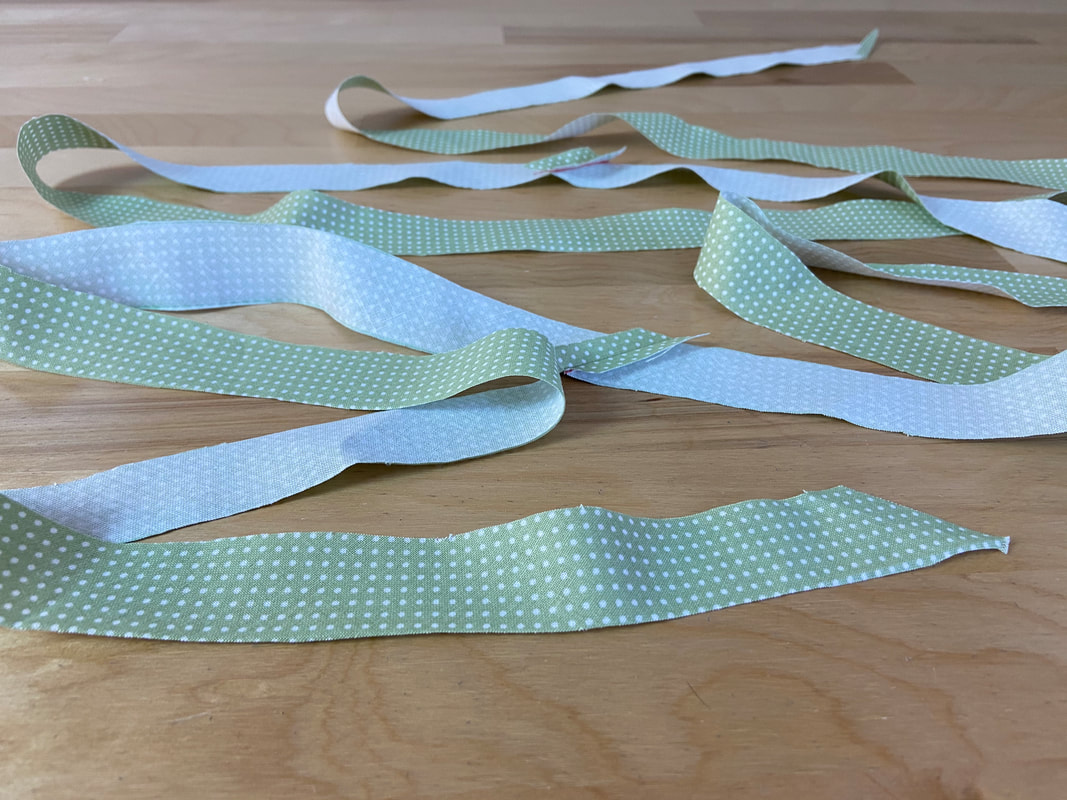
Bias binding is one of the most widely-used elements in dressmaking.

It provides a high-quality way to enclose fabric raw edges while sometimes, also becoming part of the garment design.
Bias binding is constructed of bias-cut fabric strips that are folded either beforehand or in the sewing process to enclose and finish garment edges.
|
The fabric strips have to be cut on the bias so that when sewn along curved fabric edges, they provide the necessary stretch and flexibility. The extra stretch allows for smooth, tension-free edges.
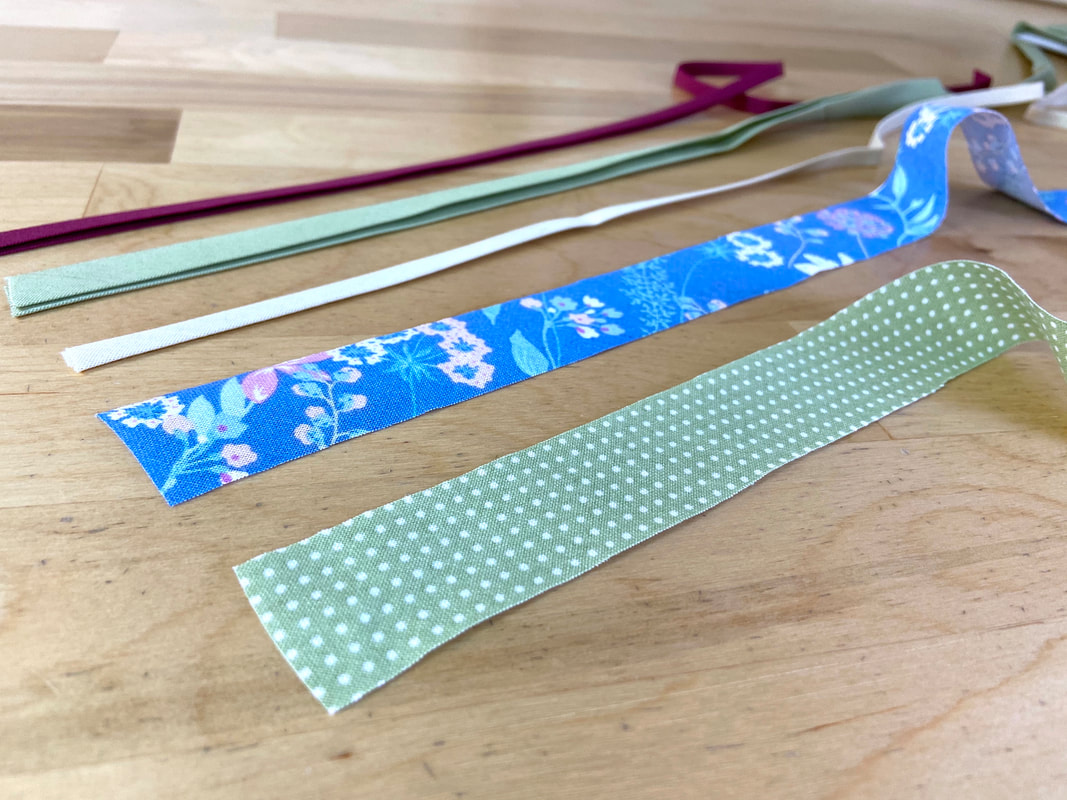
Bias binding is used in a variety of widths and folding styles to finish neckline, armhole, hemline and seam allowance edges. Contrast color binding can also be used as a cross between function and design to embellish ruffle edges, finish the inside of unlined jackets, finish sleeve hemlines, and serve as contrast casings.
|
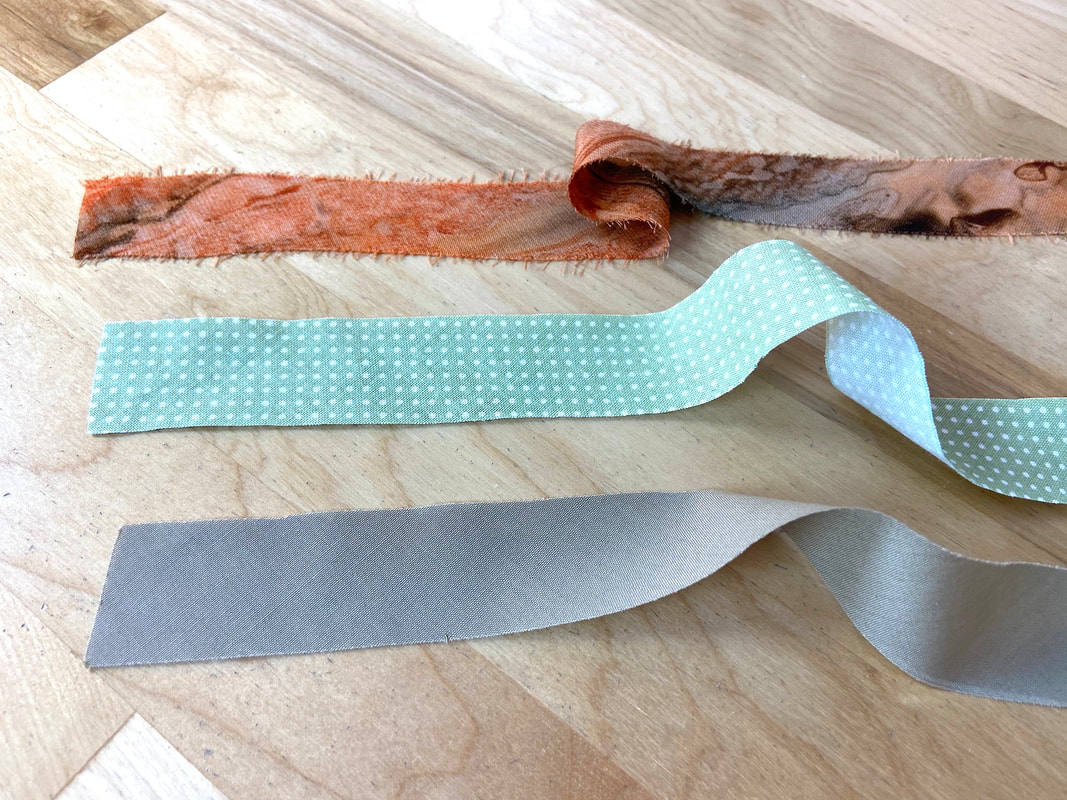
Bias binding can be made at home, cut from the fabric and width of your choice, or store-bought in a pre-folded style.
|
While pre-packaged binding is easy to work with and sew, it is limited by fabric and color availability.
|
Pre-packaged binding is conventionally constructed of a structured, plain cotton fabric which is often not suitable to use in combination with light, fine fabrics like silks and sheers.
Bias binding is easy to make at home, usually cut from the same fabric as the garment it finishes.
Making Continuous Bias Binding At Home
I. Determine the binding width:
Assuming you are making either single layer or double fold binding, the initial bias strip should be cut at four times the width of the finished binding.
The width of the finished binding itself is chosen based on the type of fabric, garment design, and whether the binding will be visible along the edge it finishes or tucked in on the inside of the garment.
Anywhere from ¼” to ½” are considered standard binding widths. ¼” is a great alternative for light to medium weight fabrics while ½” is mostly used with thick, bulky garments.
In this tutorial, the folded final binding width is ¼”. Thus, the initial fabric bias strip (prior to being folded) will have the total width of ¼” x 4, thus totaling 1”. In terms of length, the binding is measured and cut as needed based on the project at hand.
In this example, we are making continuous bias binding which is constructed of multiple bias strips sewn together to achieve a longer strip. Use this technique if a single cut will not cover the entire edge in your application.
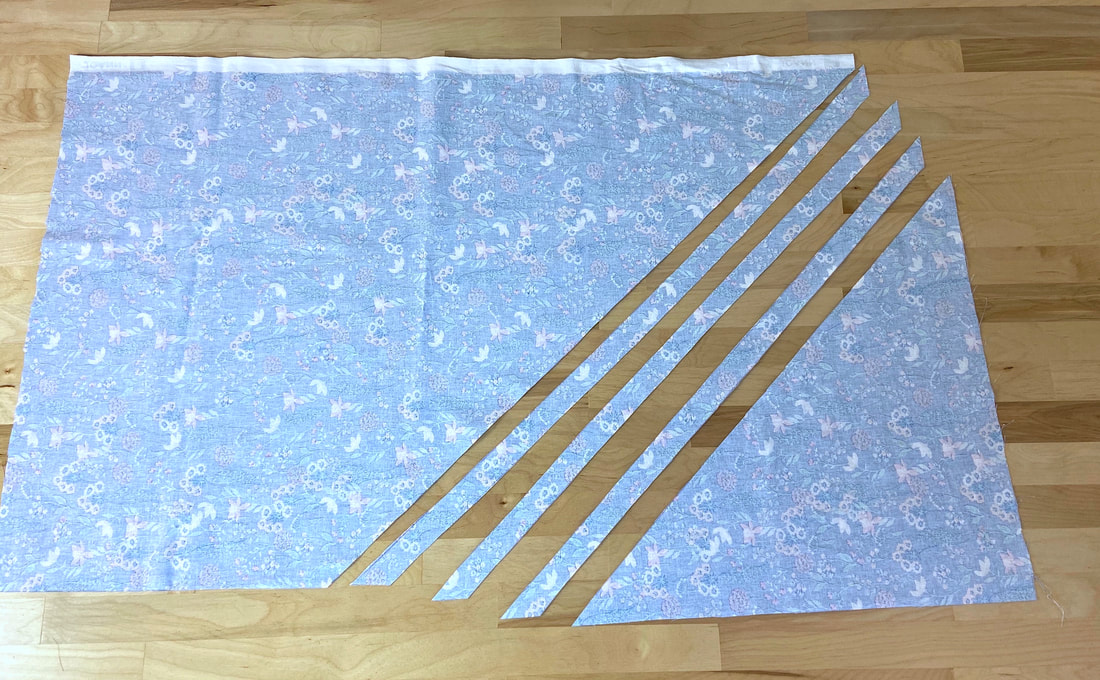
II. Measure And Mark The Bias Fabric Strips
To cut the fabric strips, it is important to first find the fabric’s true bias and mark it with a straight line. All the fabric strips are then generated from this initial bias line.
The fabric bias is located diagonally, at a 45-degree angle from the crosswise and lengthwise edges. Luckily, you do not need to use complicated geometry to figure out where this line is. Here is a simple way to determine the exact bias:
|
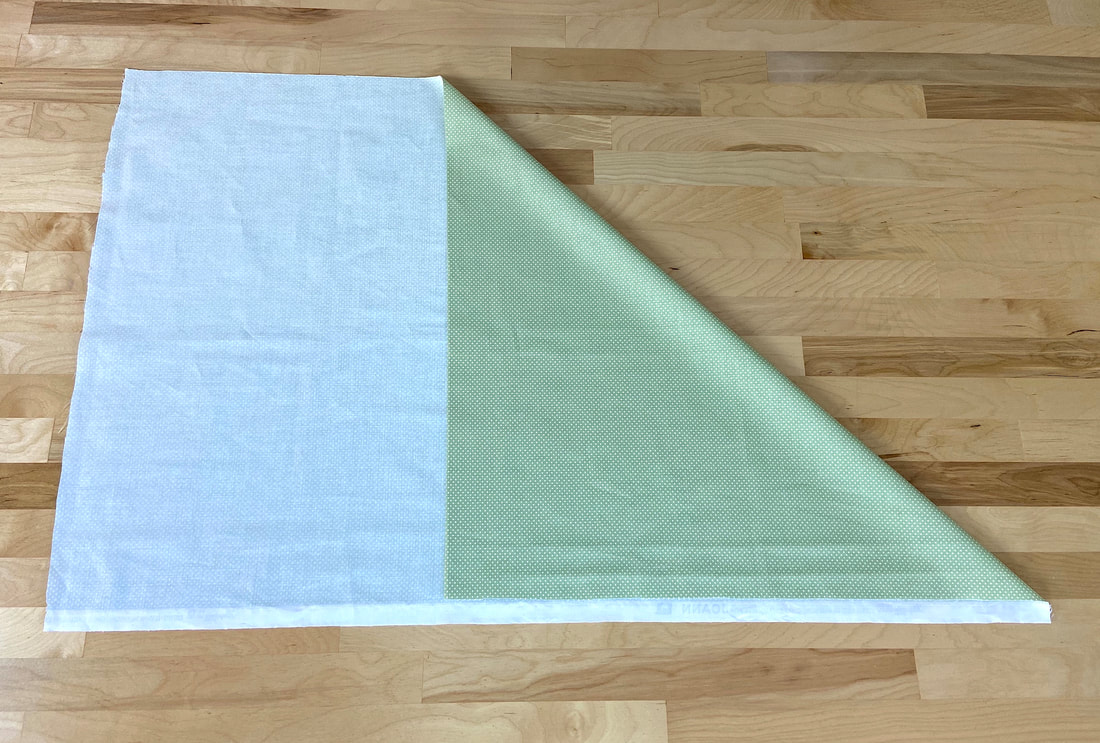
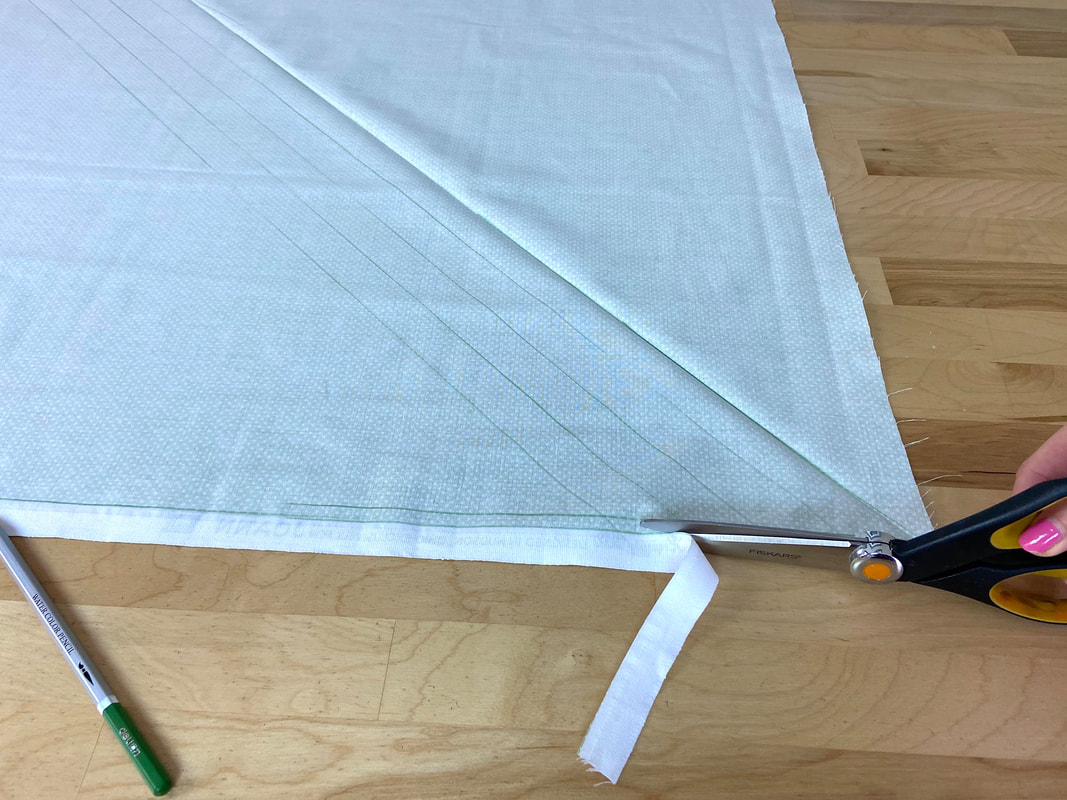
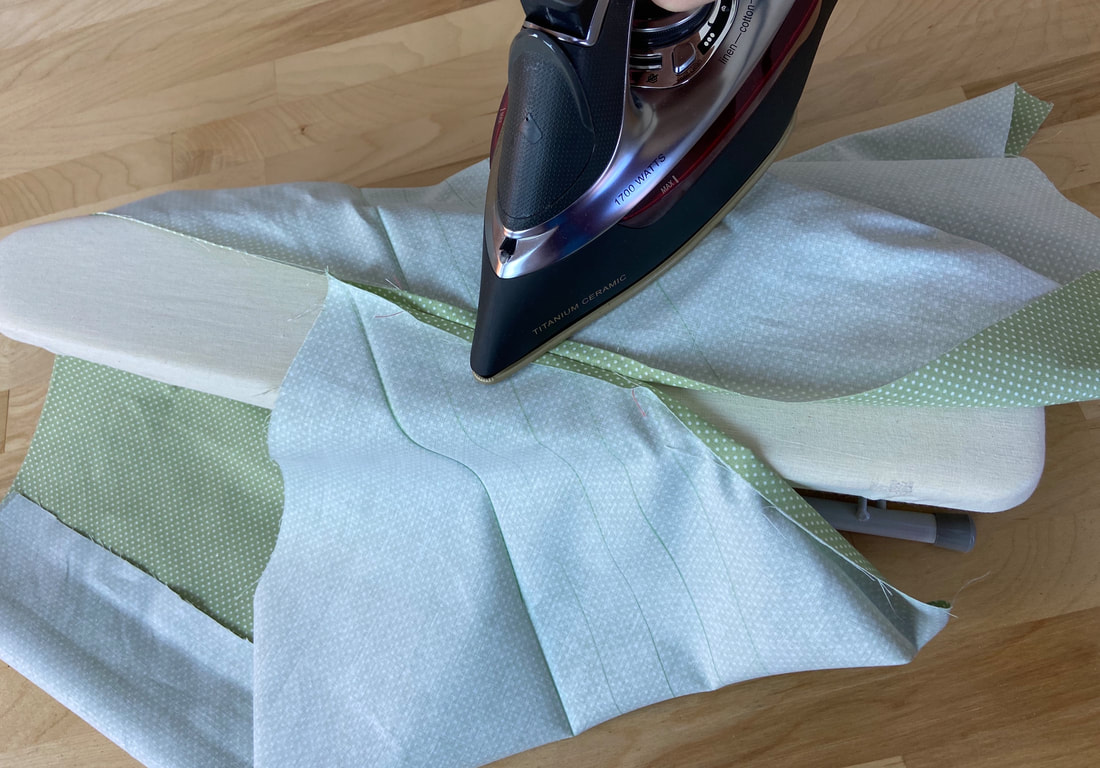
1. Keeping the fabric flat on the table, fold the crosswise edge over such that it is aligned parallel to the selvage edge (or the lengthwise grain). The resulting diagonal fold will naturally align with the true fabric bias.
|
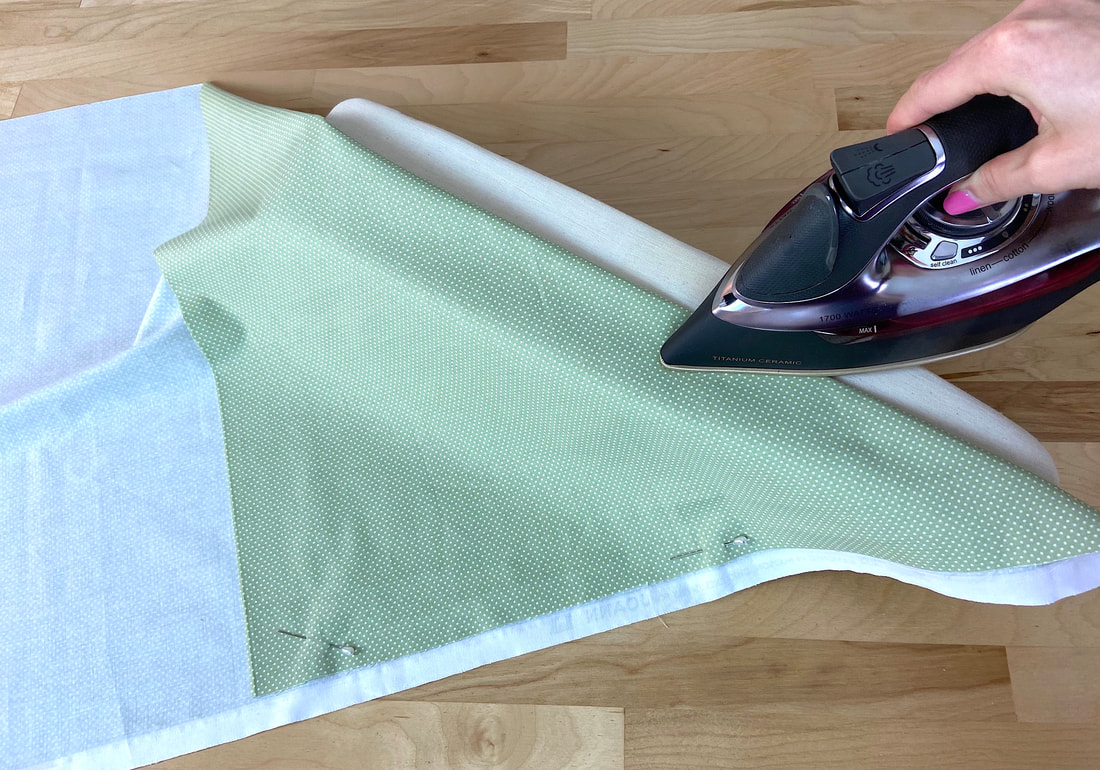
2. Iron the diagonal folded edge to crease the bias line. This crease line will serve as the initial starting point for measuring and marking the bias strips.
|
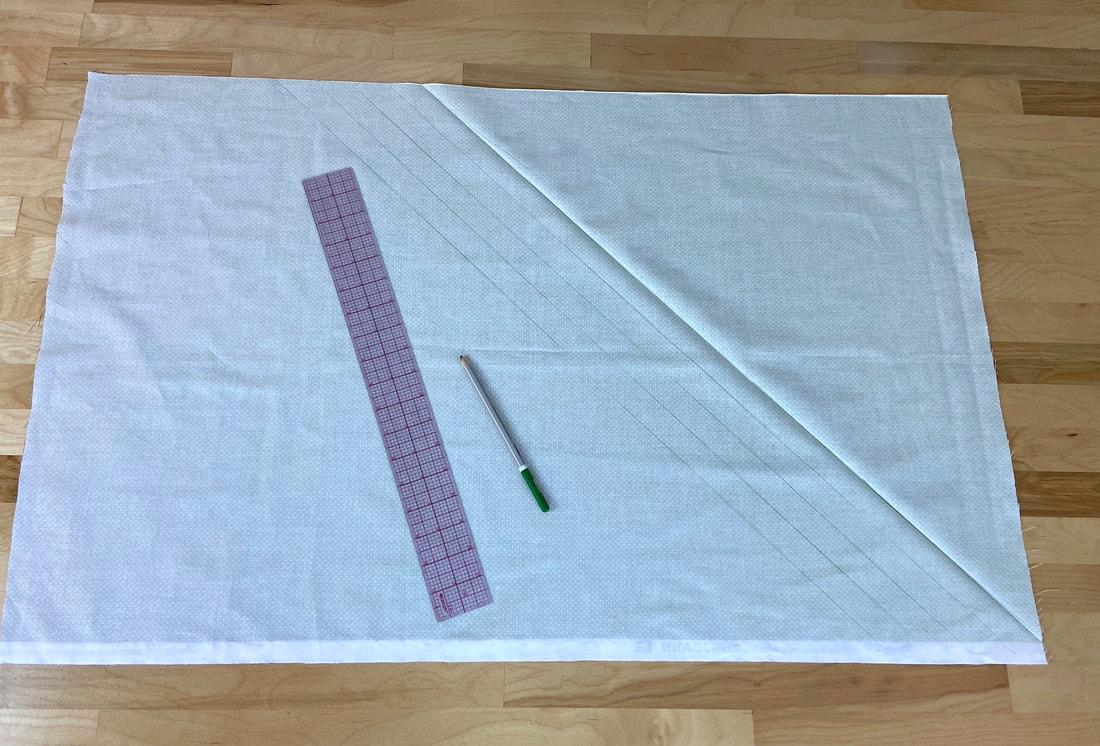
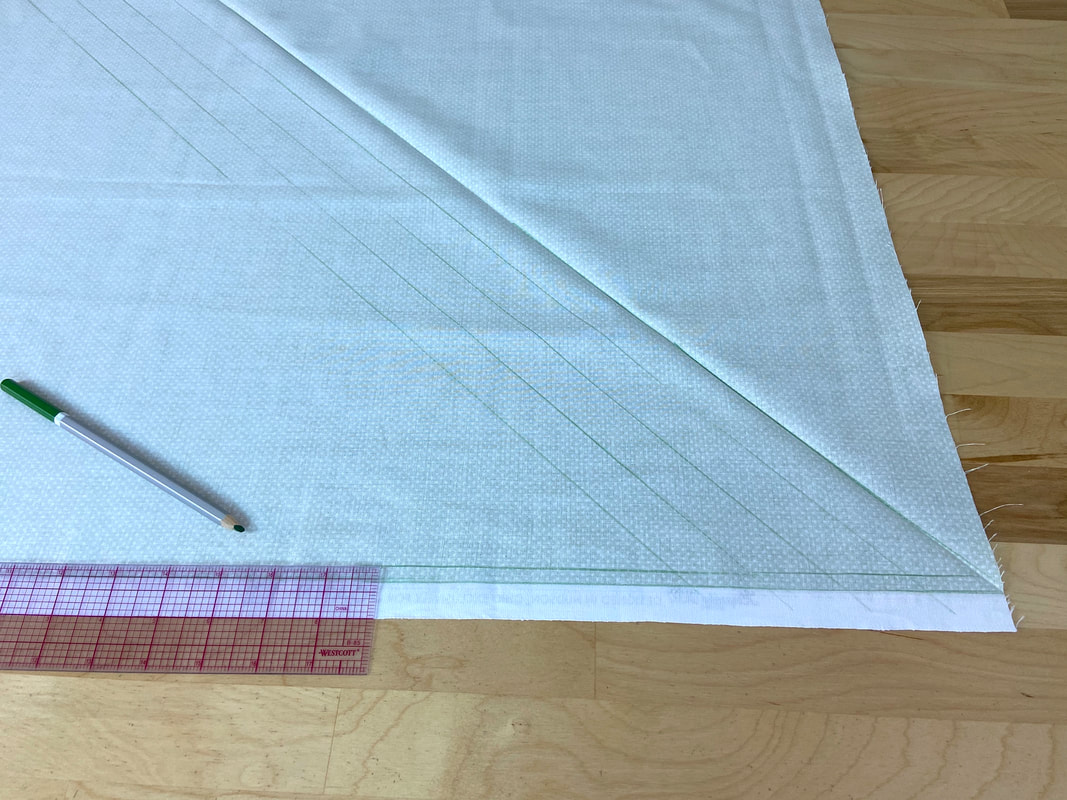
3. Open the fabric layer, and laying it flat on the table with the wrong side up, measure and draw parallel lines at 1” increments (or the desired width), starting from the ironed crease in Step 2.
Use a clear plastic ruler and tailor's chalk (or fabric pencil) for this marking portion. Draw as many strips as you need for the project at hand. They will be sewn together to create a continuous binding strip in the steps to follow.
Once all the strips have been drawn perfectly on the bias, you can connect the strips into one full binding piece in one of two ways:
Method 1: A faster, easier technique is to sew the edges of the fabric prior to the strips being cut. The final binding is then cut as one continuous piece at once. The steps for this method are shown below.
Method 2: This technique is the more time consuming of the two. It entails cutting each strip individually then sewing the strips to each other on the fabric’s lengthwise grain. This option is used when only a few bias strips are needed for the application at hand. The detailed steps are shown below.
Method 1: Aligning And Stitching The Binding Strips Prior To Cutting Them
|
|
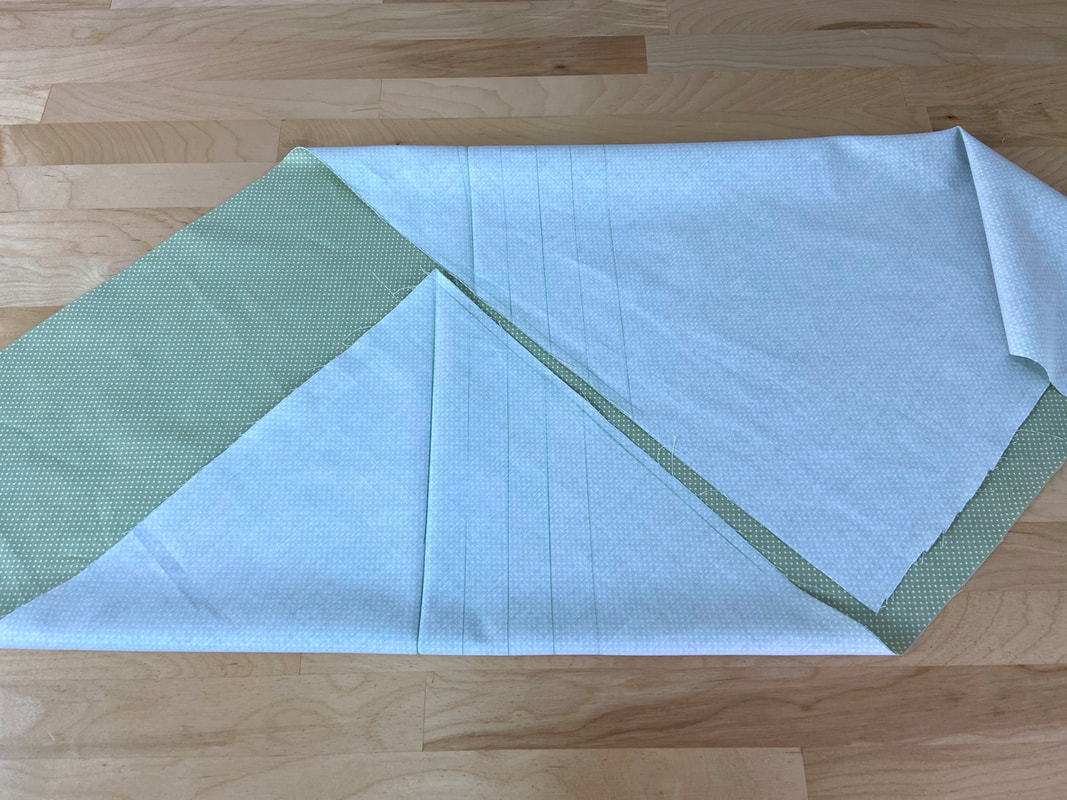
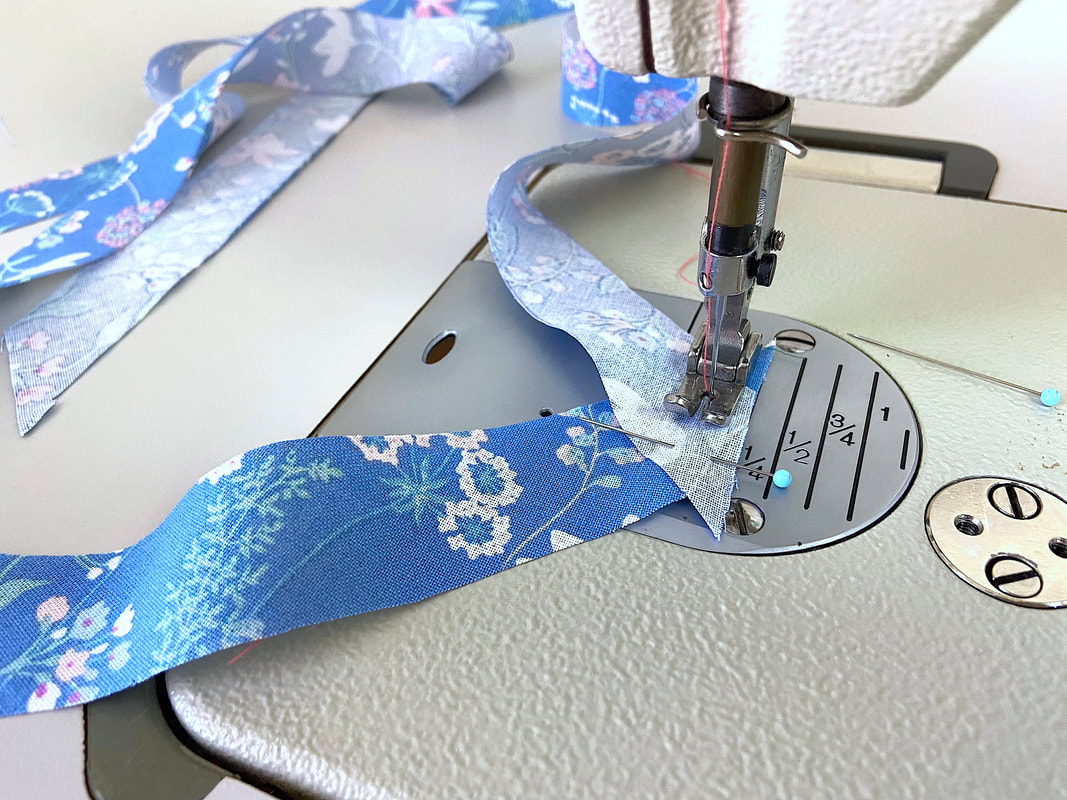
1. Keeping the fabric laid flat on the table with the wrong side and marked lines facing up, draw a straight line along each lengthwise edge, at ¼” distance from the fabric edge as shown.
|
2. Bring the two lengthwise fabric edges together such that the fabric face sides are touching.
The second bias strip on one fabric edge should align to the first bias strip on the other as shown above. When all bias ends are fully matched in this order, there should be one open bias strip end on each side.
|
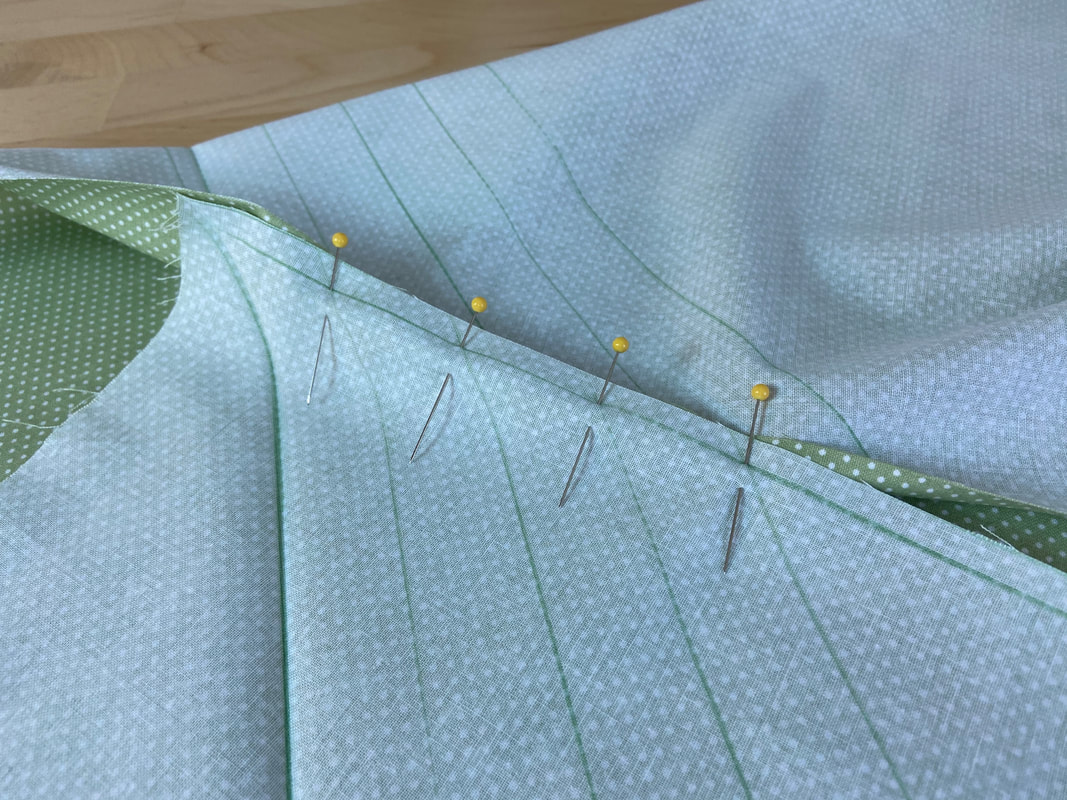
3. Pin the matching bias strip ends together horizontally as shown. Be sure to keep them perfectly aligned. You may need to hand baste for extra stability.
|
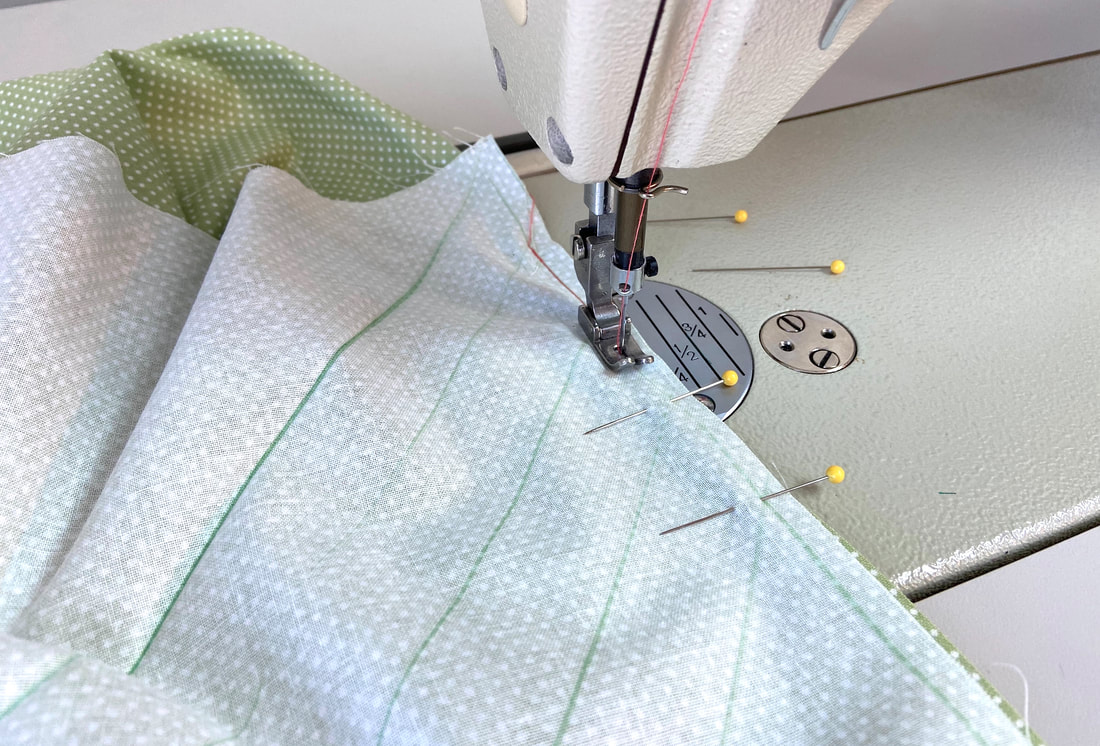
4. Stitch the two fabric edges together at ¼” seam allowance. Use a shorter stitch for added durability.
|
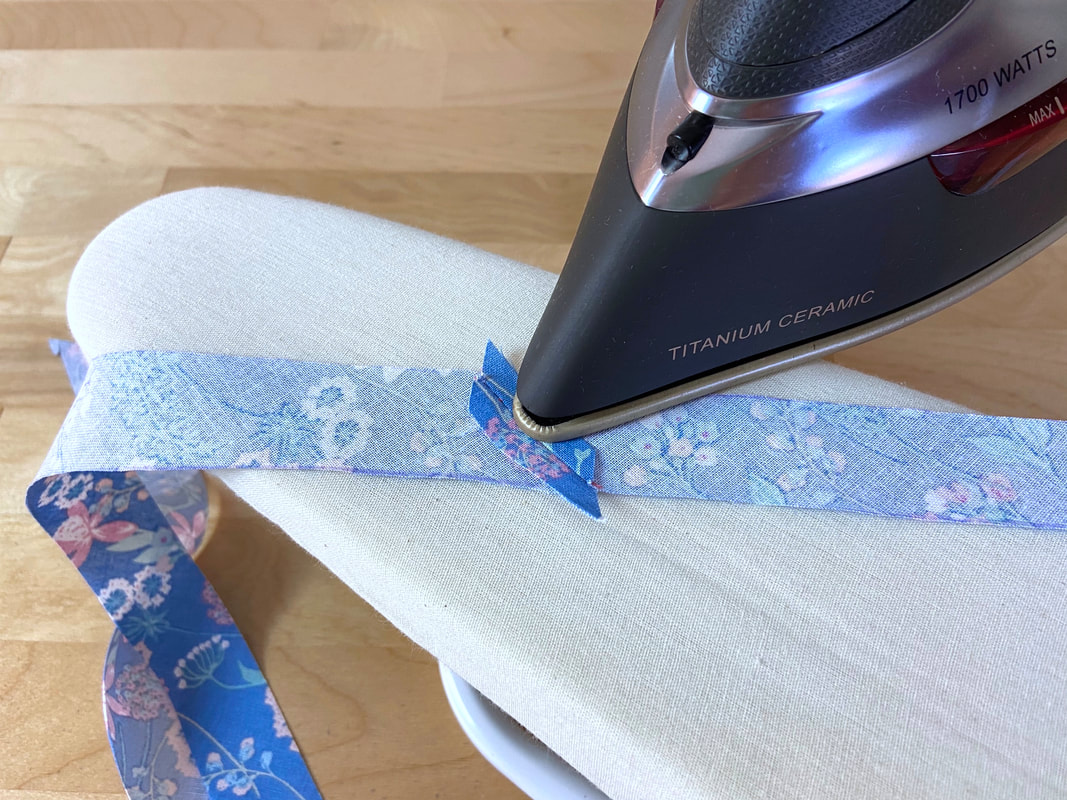
5. Iron the seam allowance open.
|
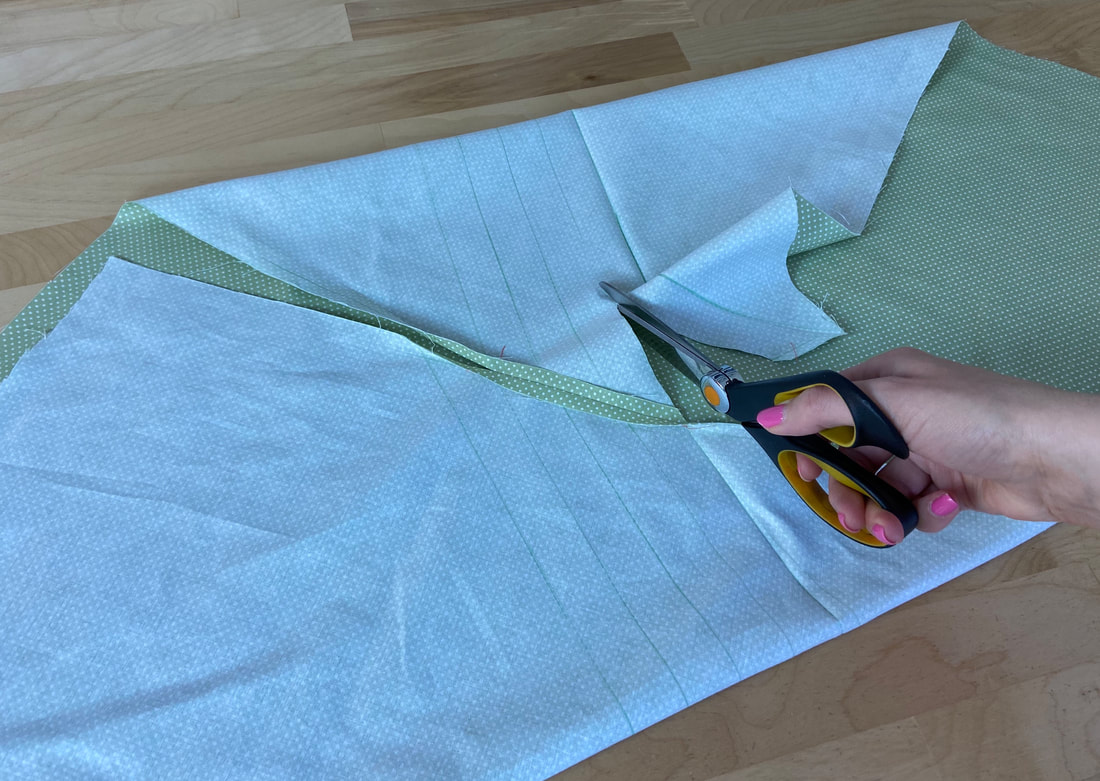
6. Next, starting at one open end of the bias strip, begin cutting down the marked lines, following the tubular orientation of the fabric. In this process, you will cut through the seam that connects the bias strips together.
|
Cut until you arrive at the other open end of the strip. The finished cut will result in a continuous bias strip with all the individual pieces stitched together on the lengthwise grain.
|
7. Reinforce each bias strip seam with extra stitching as needed.
|
The final bias strip should be carefully cut and connected by diagonal seams throughout.
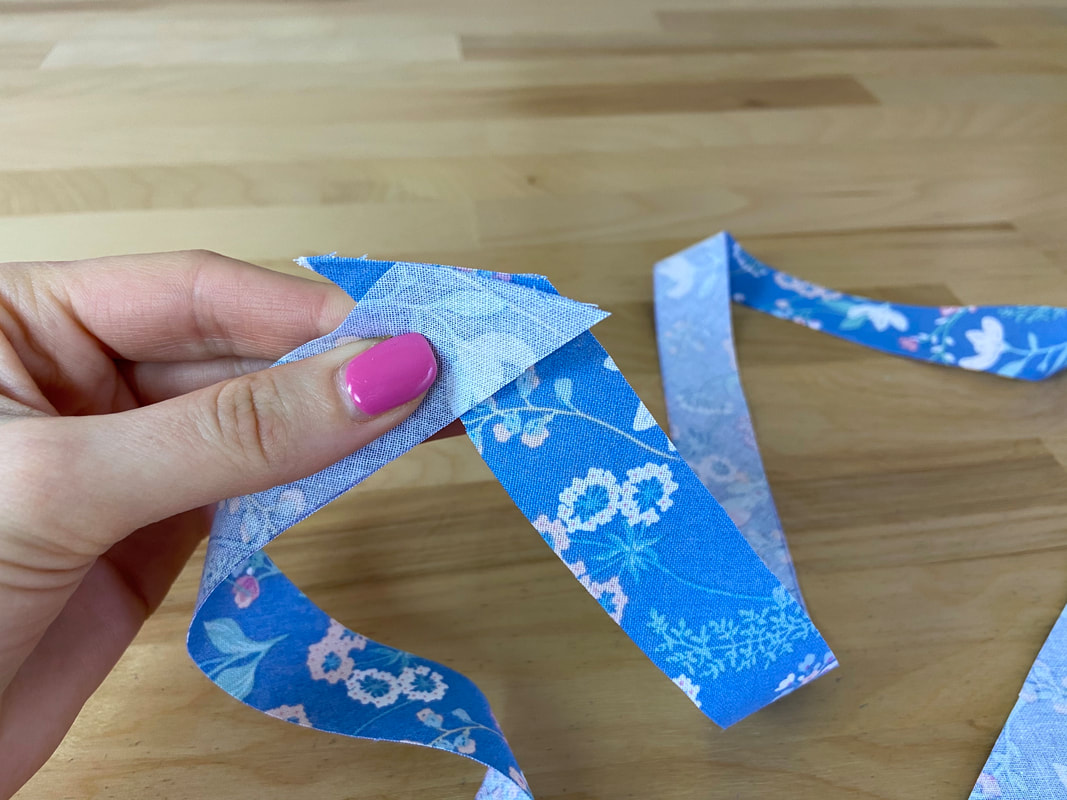
Method 2: Aligning And Stitching The Pre-Cut Bias Binding Strips Individually
Let’s say you only need to sew two or three bias strips together for your particular project. It would make no sense in this instance to make large amounts of continuous bias binding of you’ll never use it again. In this case, you can cut and sew the bias strips individually.
|
1. Mark the individual bias strip lines as described above. Carefully cut each individual strip as shown.
|
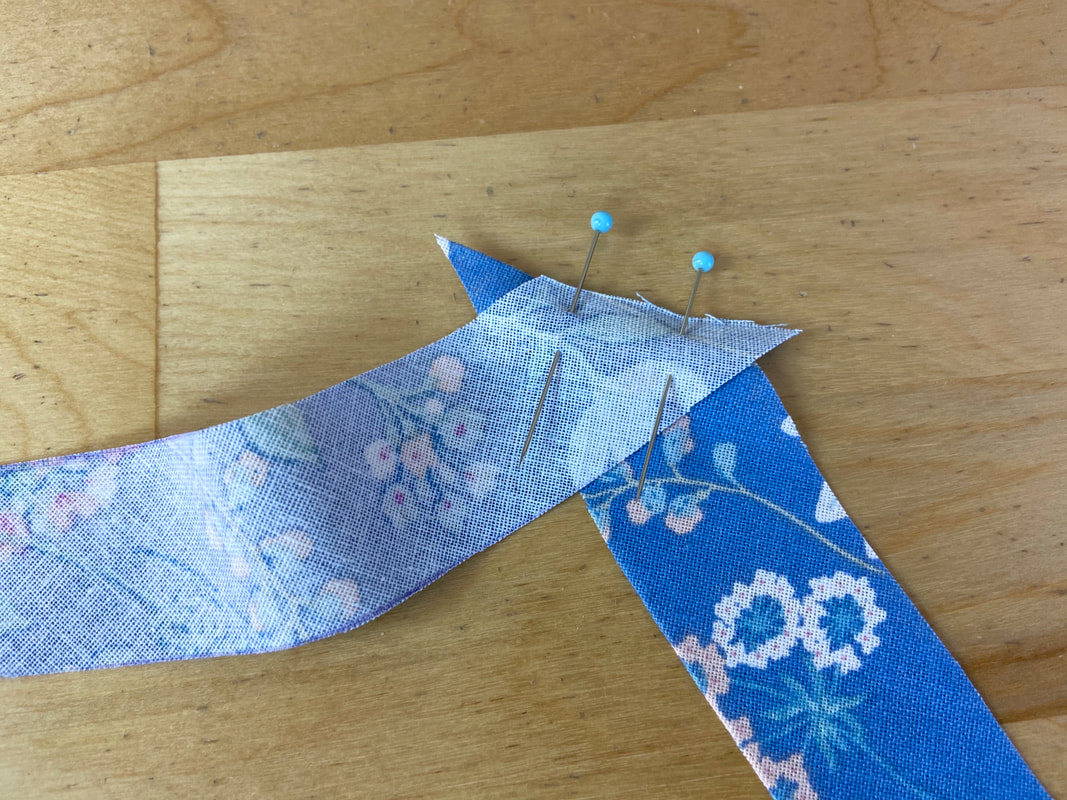
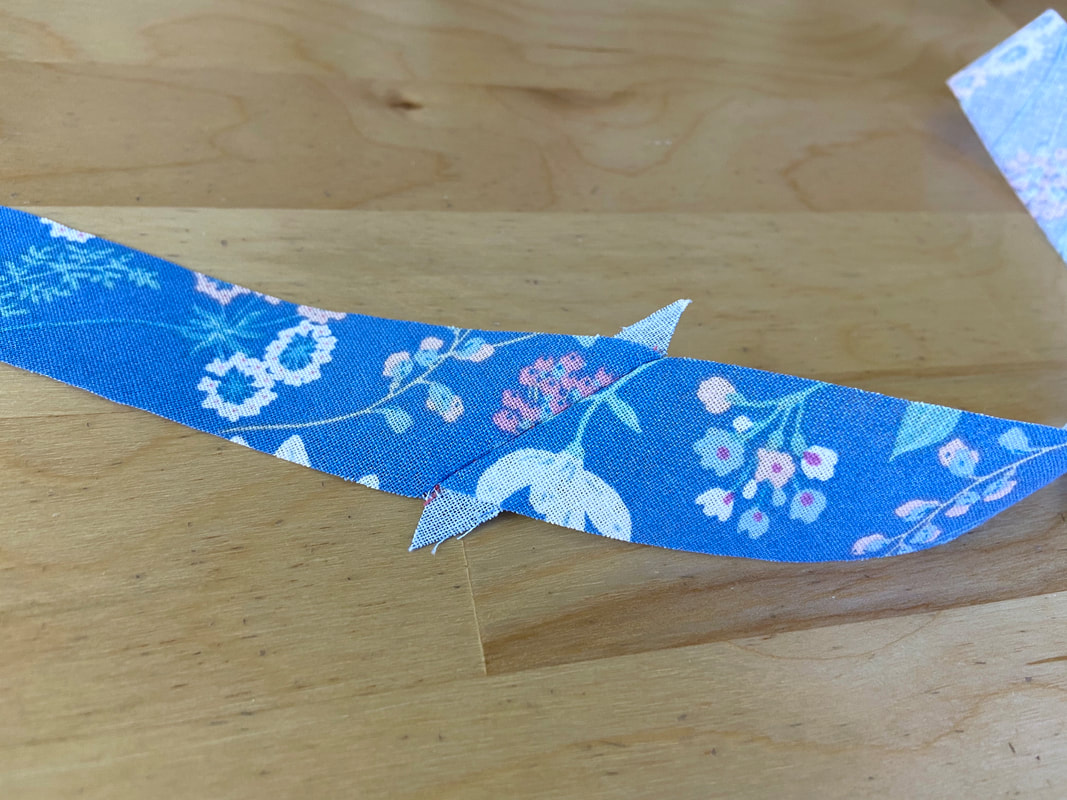
2. Align the end of one strip to the end of another such that the fabric face sides are touching and there are little triangle extensions protruding on each side as shown.
|
3. Pin the binding ends together horizontally in this position.
|
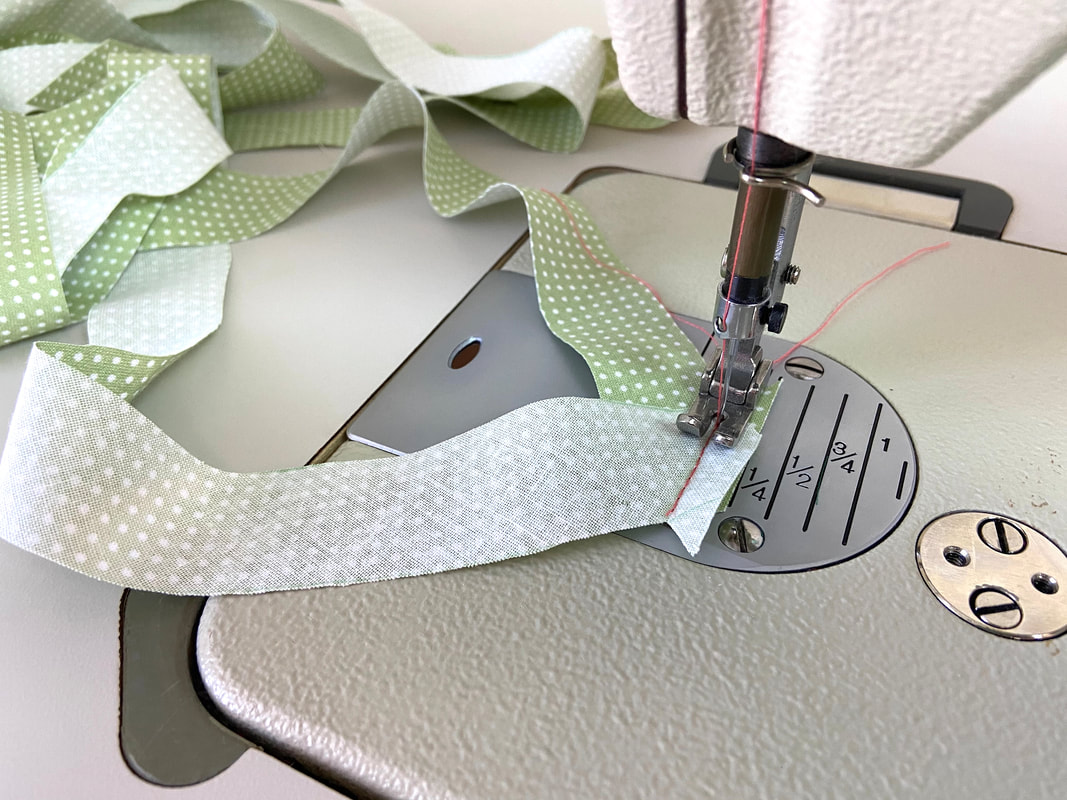
4. Stitch the bias strips together following a ¼” seam allowance. Backstitch at both beginning and end of the stitch. Doing so will provide more durability and comfort when attaching the binding to the garment later on.
|
5. After machine stitching, iron the seam allowance edges open.
|
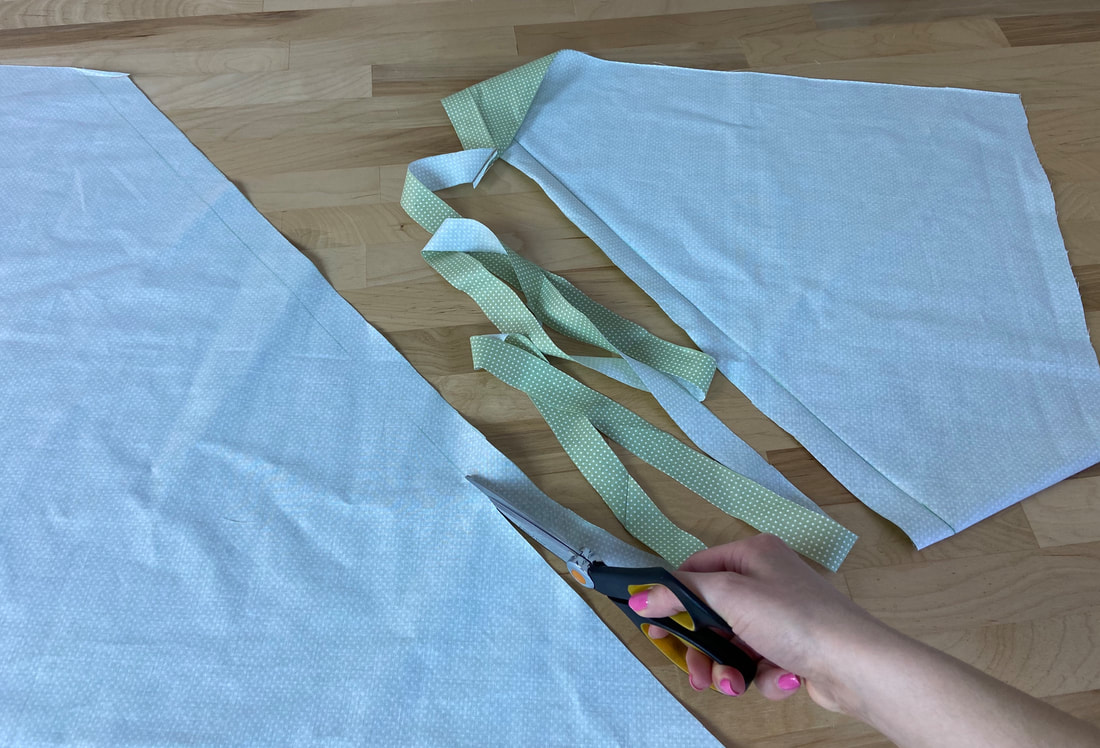
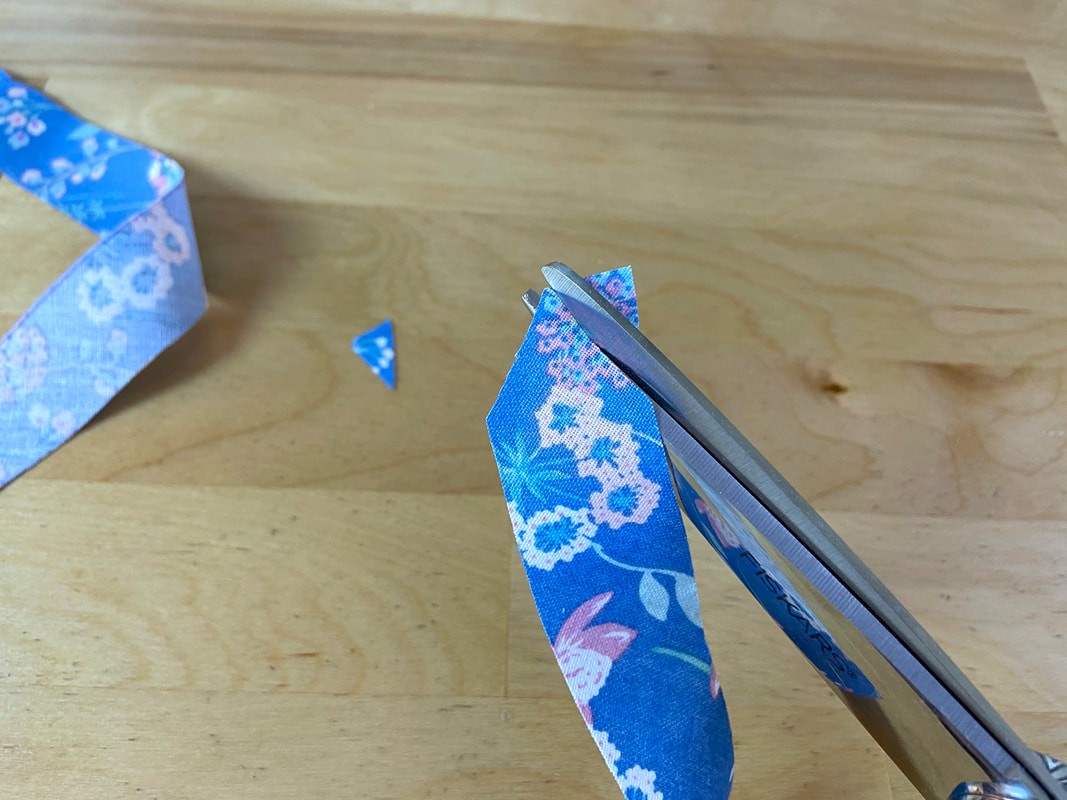
6. When the seam allowance is pressed open, you'll notice the triangle extensions protruding from both top and bottom of the seam.
|
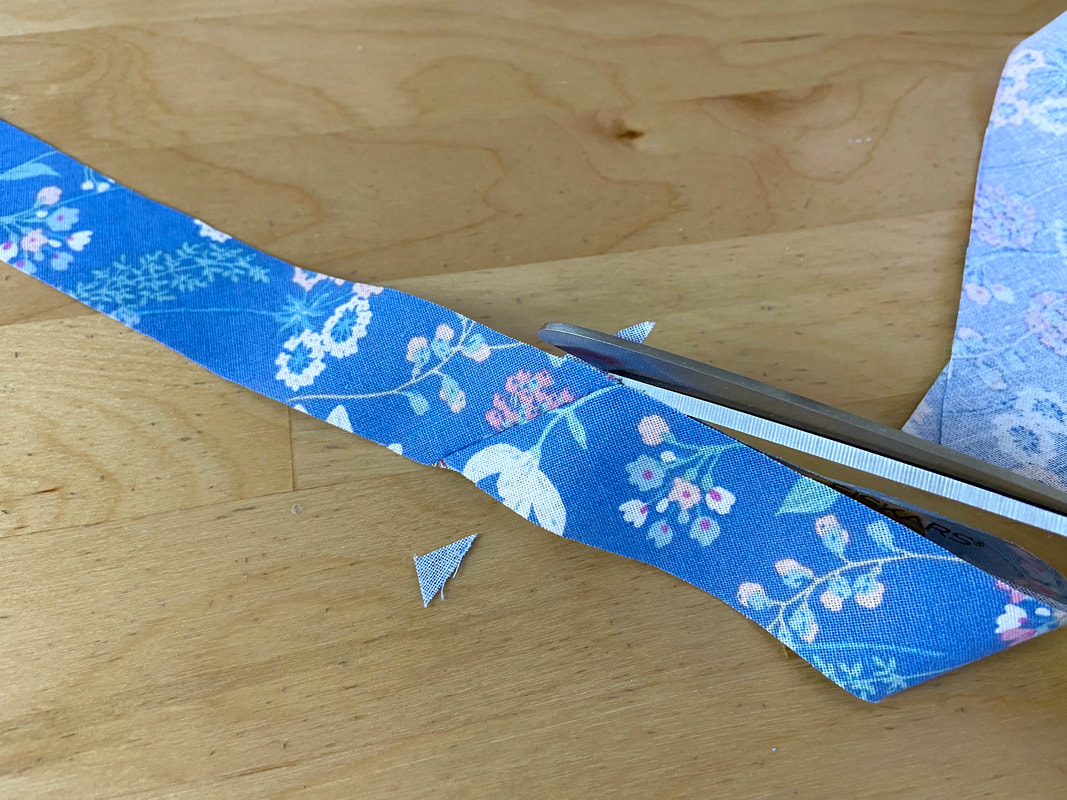
Trim each extension in line with the bias binding strip edge as shown.
|
Repeat the process described above to attach the rest of the bias strips.
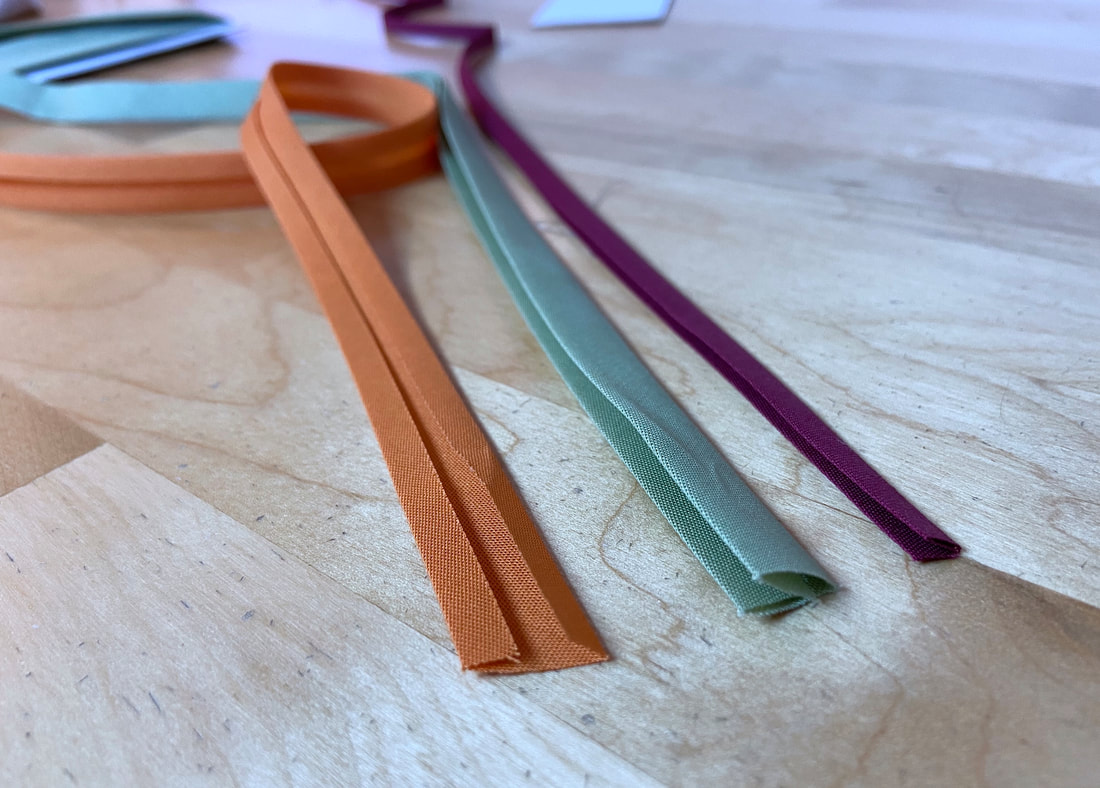
III. Iron The Bias Binding Into A Double Fold Style
Once the individual bias fabric strips are connected into a single bias binding piece, there are several techniques you can use to attach it to the garment. Depending on the end application, bias binding can be stitched as is, without the need for pre-folding, or may be pre-folded in various styles depending on the type of finish it is used for.
|
For example, a bias binding used to finish a hemline has just the top and bottom lengthwise edges folded in at about ¼”. Bias binding that clean finishes seam allowance, neckline and armhole edges are pre-folded in a double fold style.
To pre-fold binding in a double fold style by hand (more time consuming), follow these steps:
|
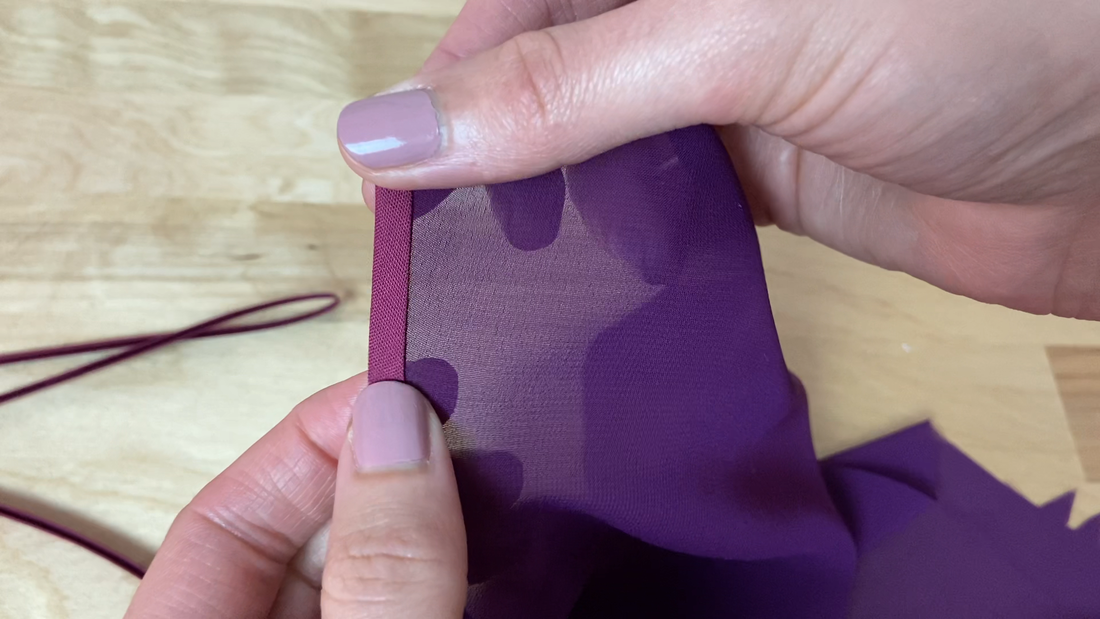
1. First, fold the binding lengthwise just slightly off center. The fabric wrong sides should be touching.
Iron as you fold at the highest setting appropriate for the fabric. Pressing as you fold will crease and maintain the folded crease.
|
|
2. Next, open the bias binding and fold each lengthwise edge in such that they align to the center fold line from Step 1 above. It is easiest to fold one edge at a time.
|
3. Last but not least, keeping the two lengthwise edges folded in, fold the binding down the initial center line and press again to crease. It may be helpful to use a light spray starch in the ironing process since some fabrics tend to unfold easily even after being ironed at a high heat setting.
|
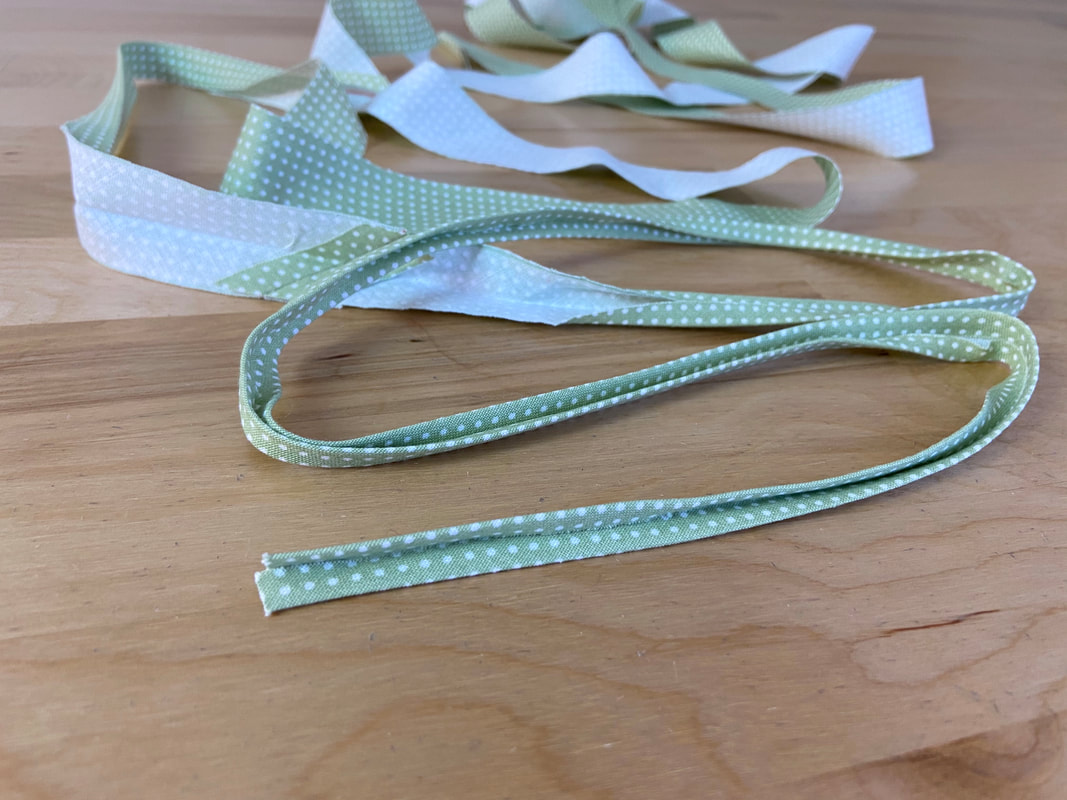
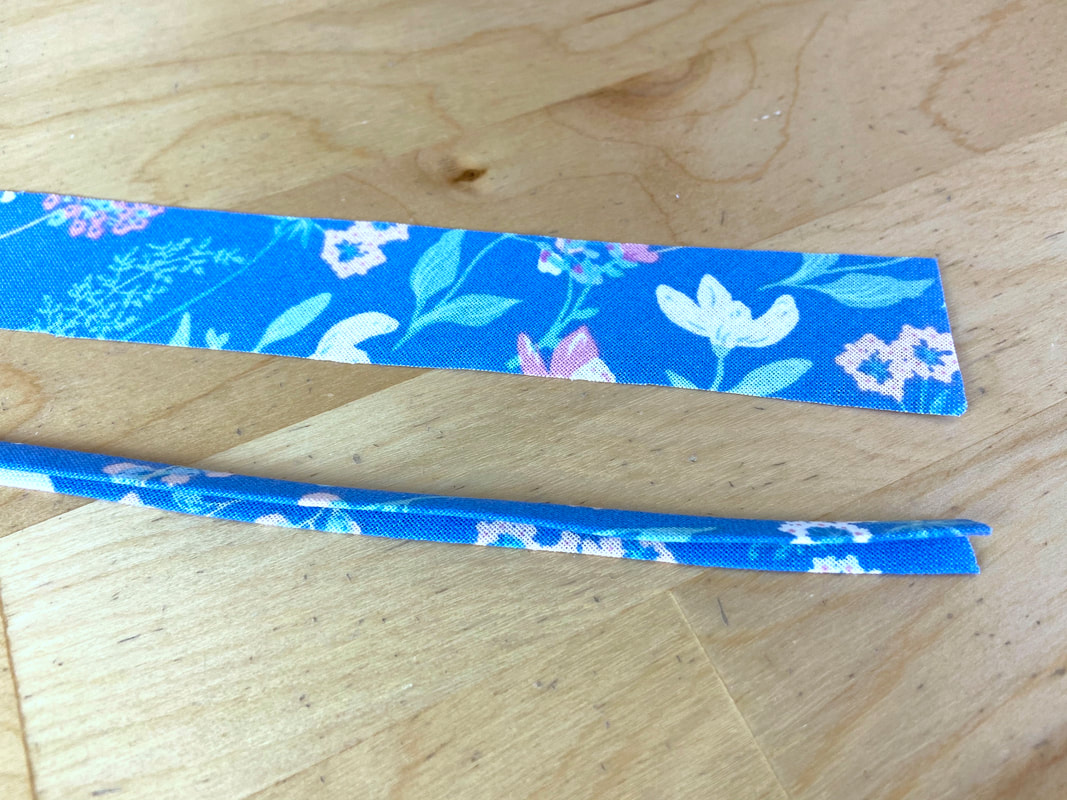
Treat the resulting double fold binding as you would any pre-packaged store-bought binding.
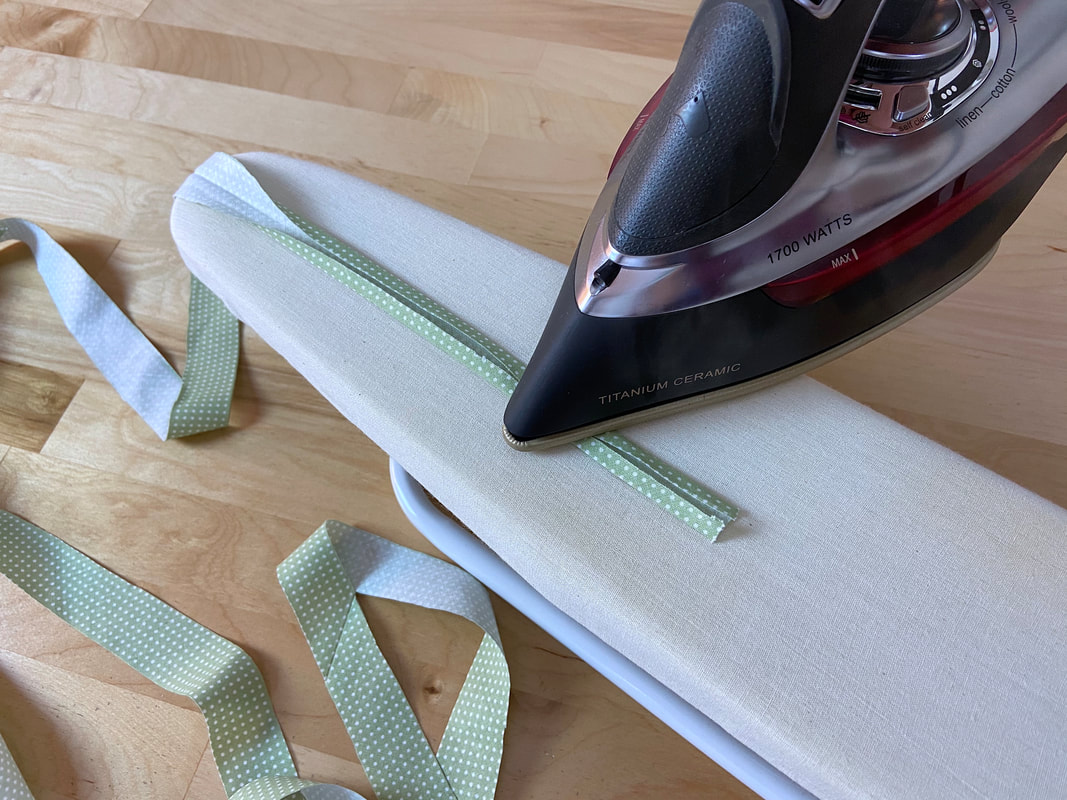
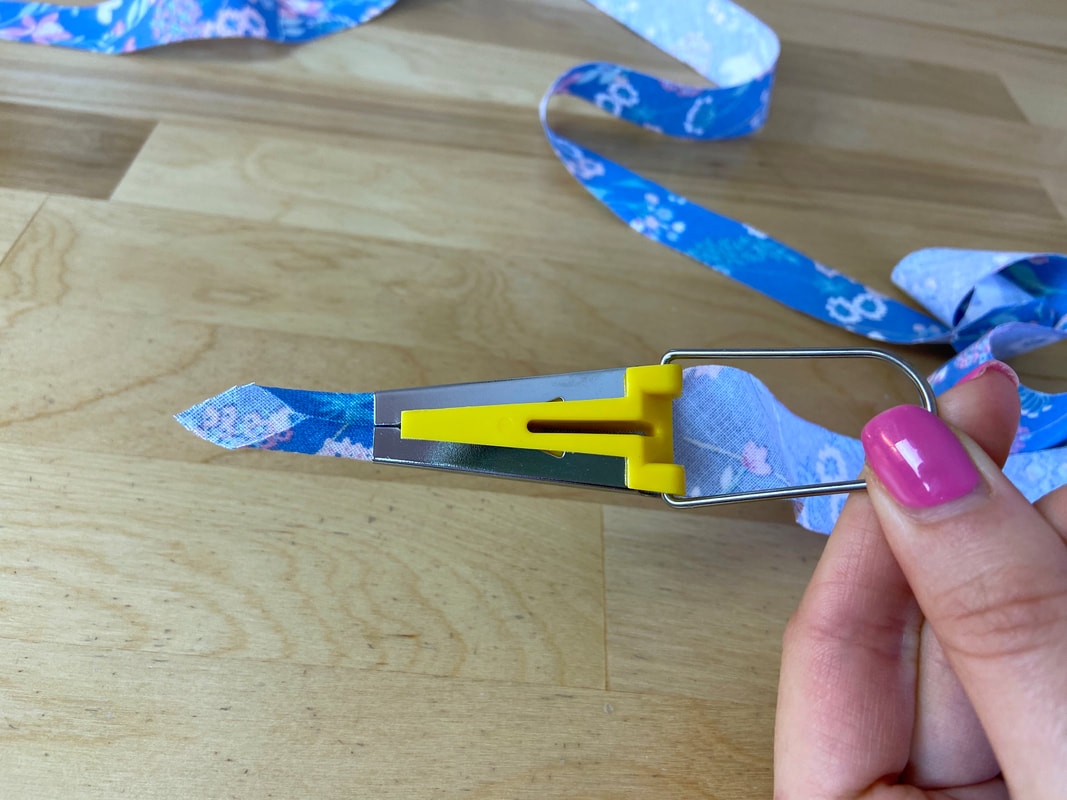
To fold the binding strip using a binding tape folding tool:
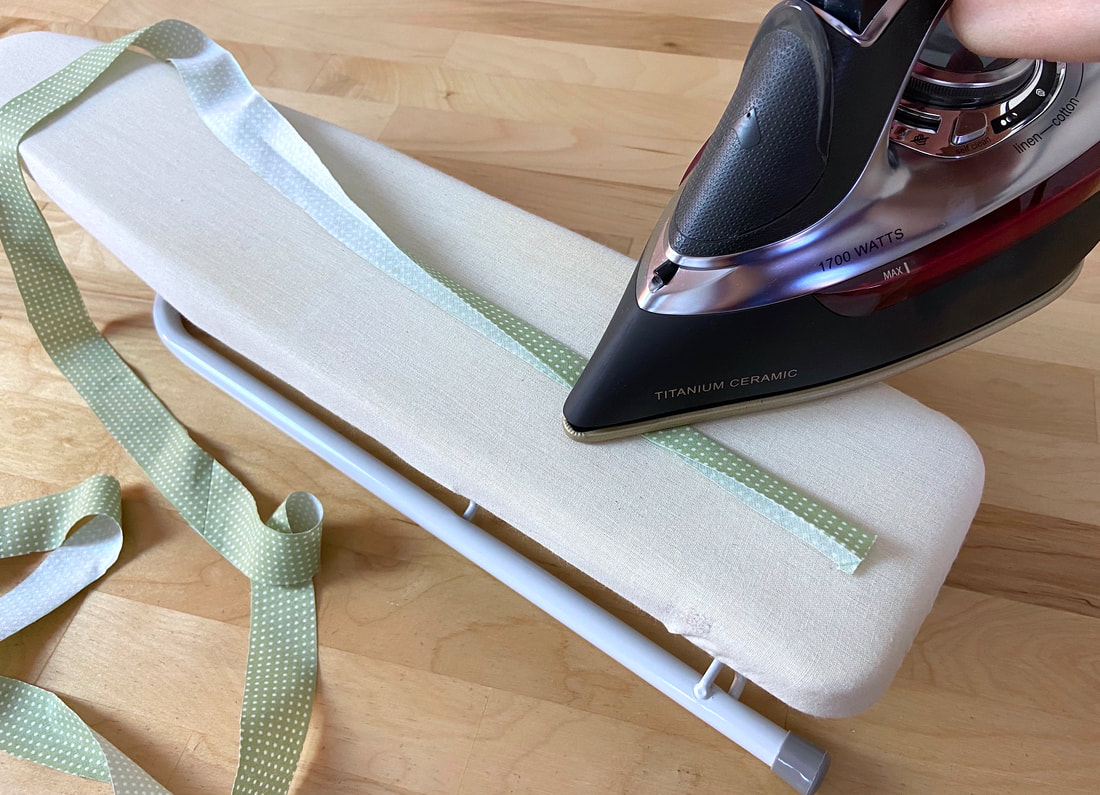
To speed up the folding and ironing process, you can use a binding ironing tool like the one pictured below. It can be purchased in a variety of sizes, depending on your desired binding width.
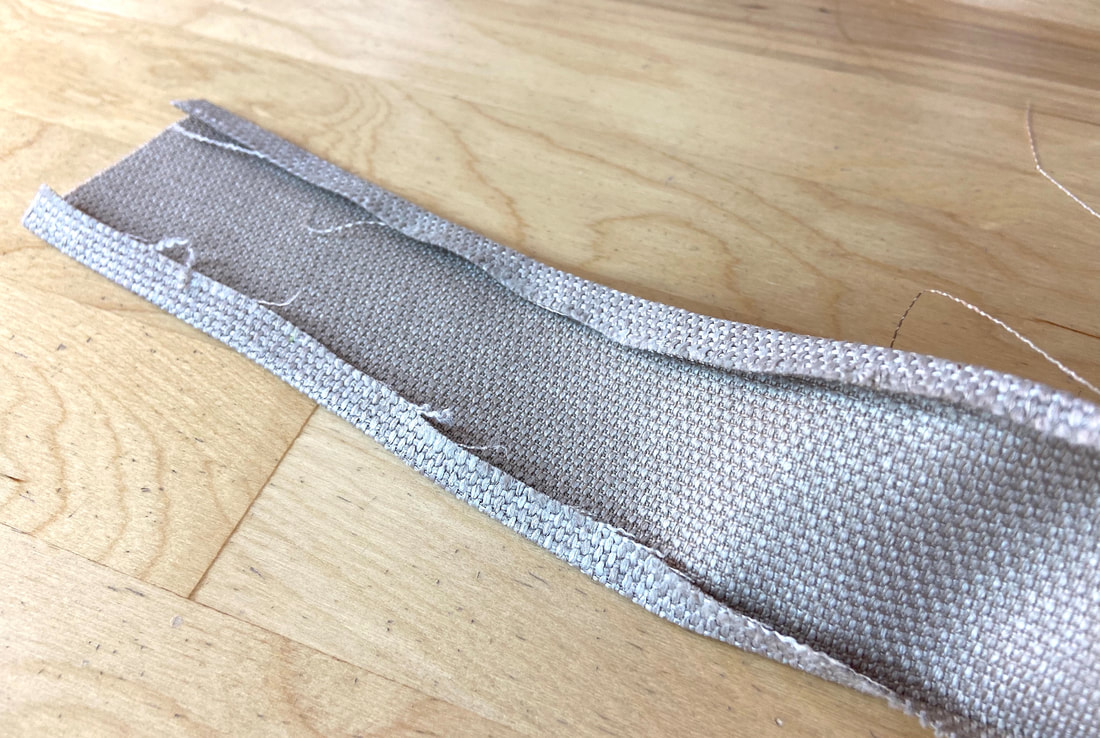
This heat resistant metal tool feeds the binding strip through two channels that fold each one of its lengthwise edges as it comes out on the other end.
|
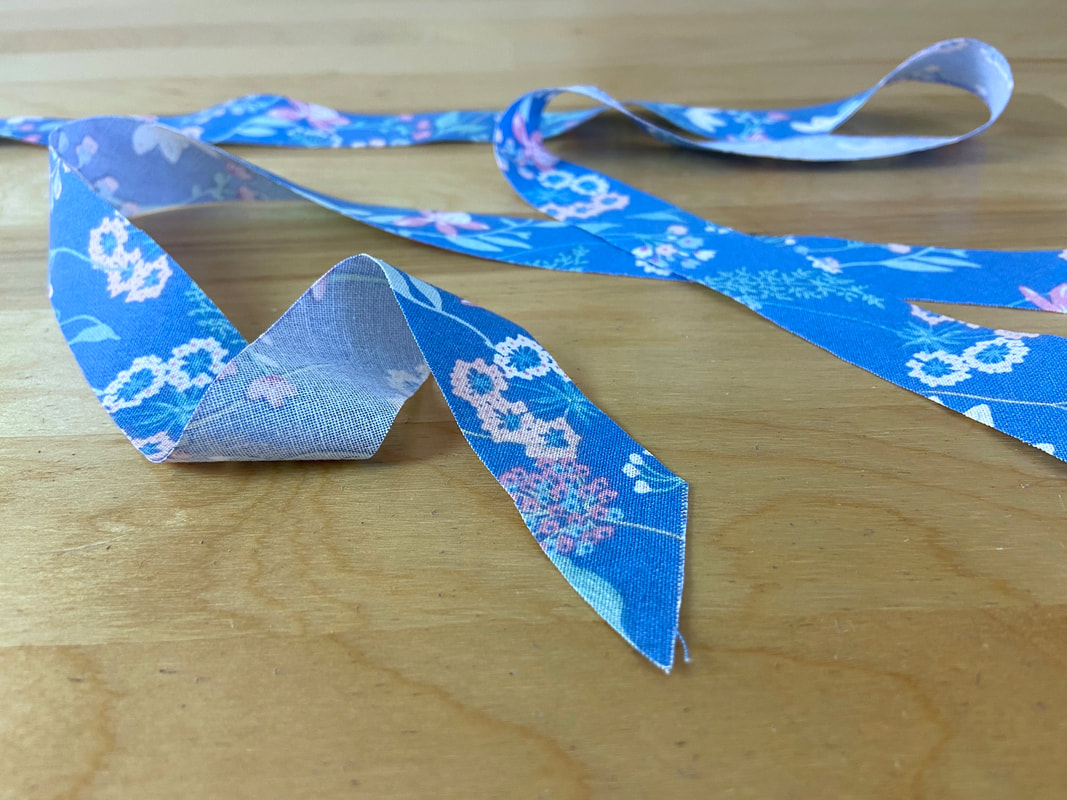
1. Start by cutting one end of the bias strip into a pointed triangular shape as shown.

|
|
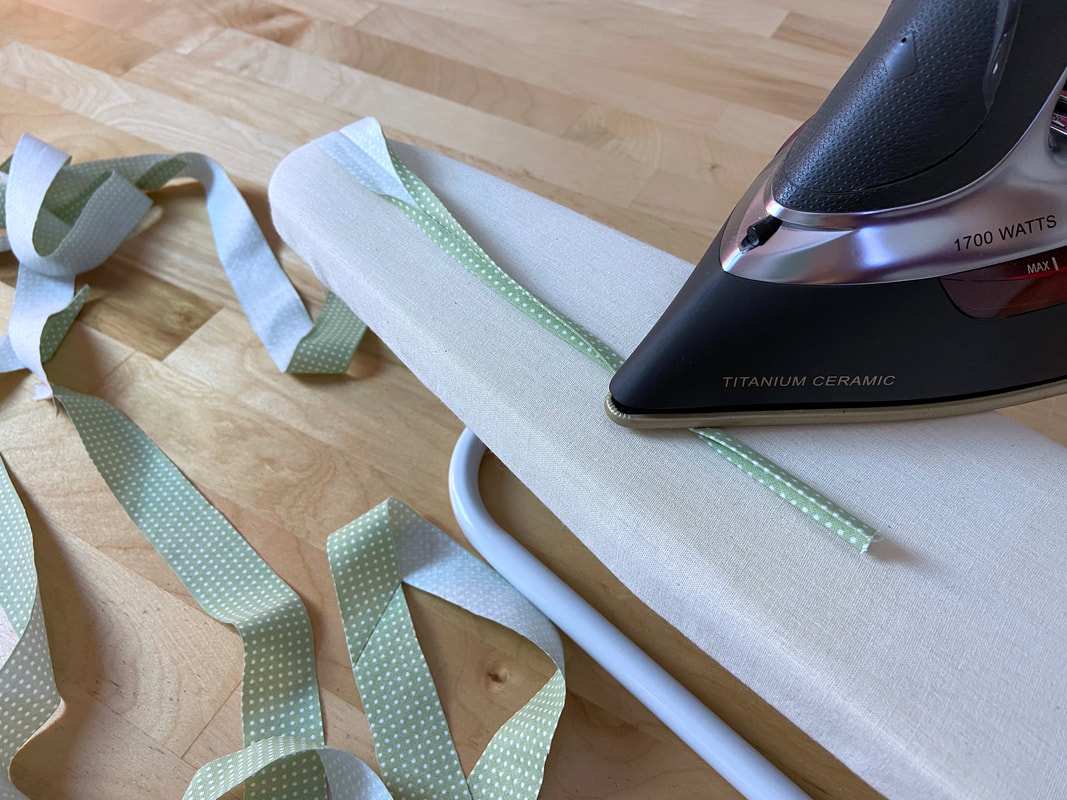
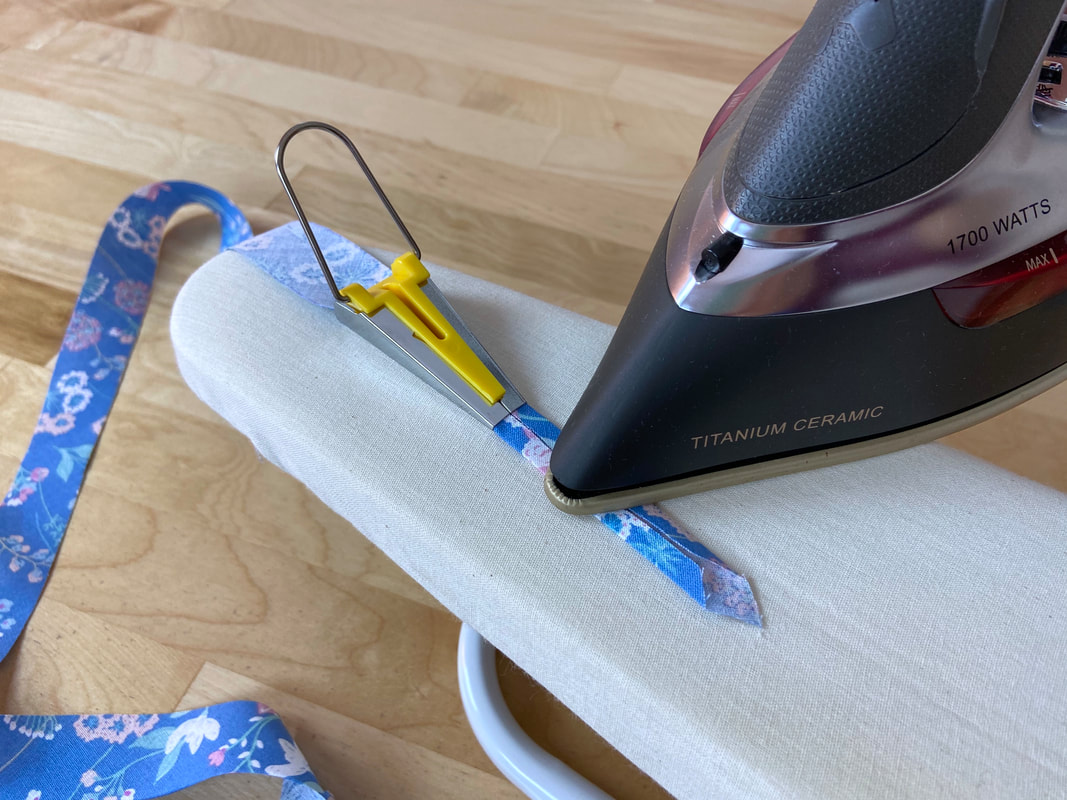
2. Feed the triangular edge through the folding guides and pull from the other side to extract the folded end.
|
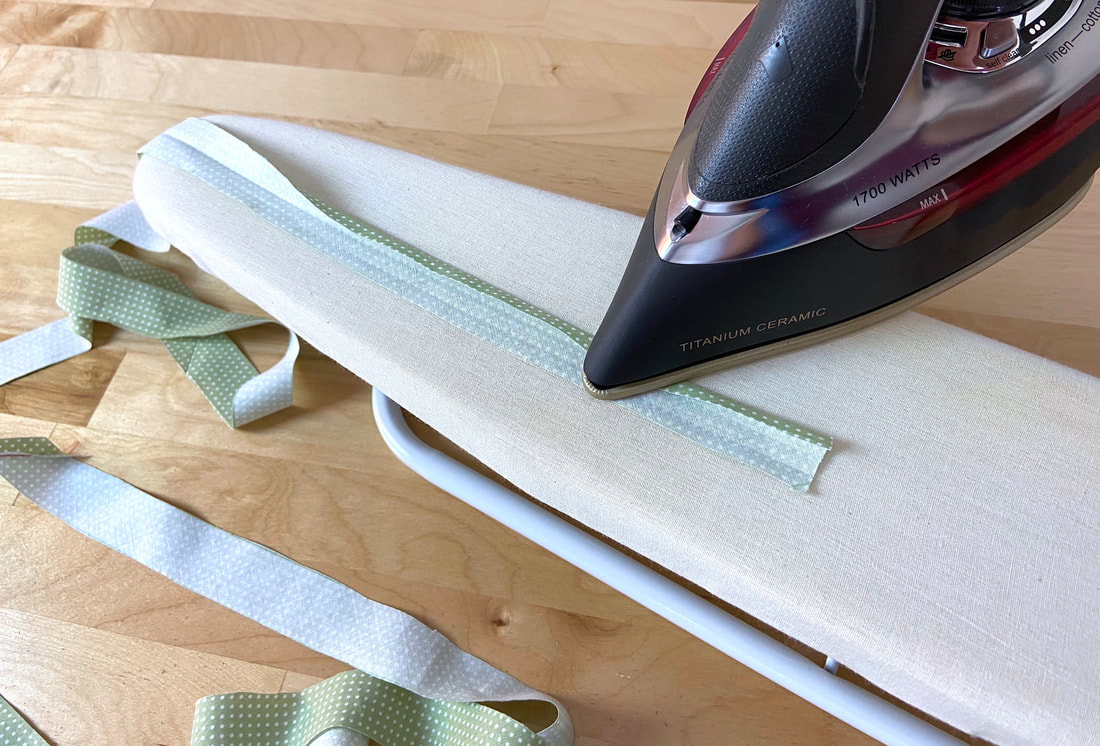
3. Iron the folded binding as it feeds through the bias tape maker.
|
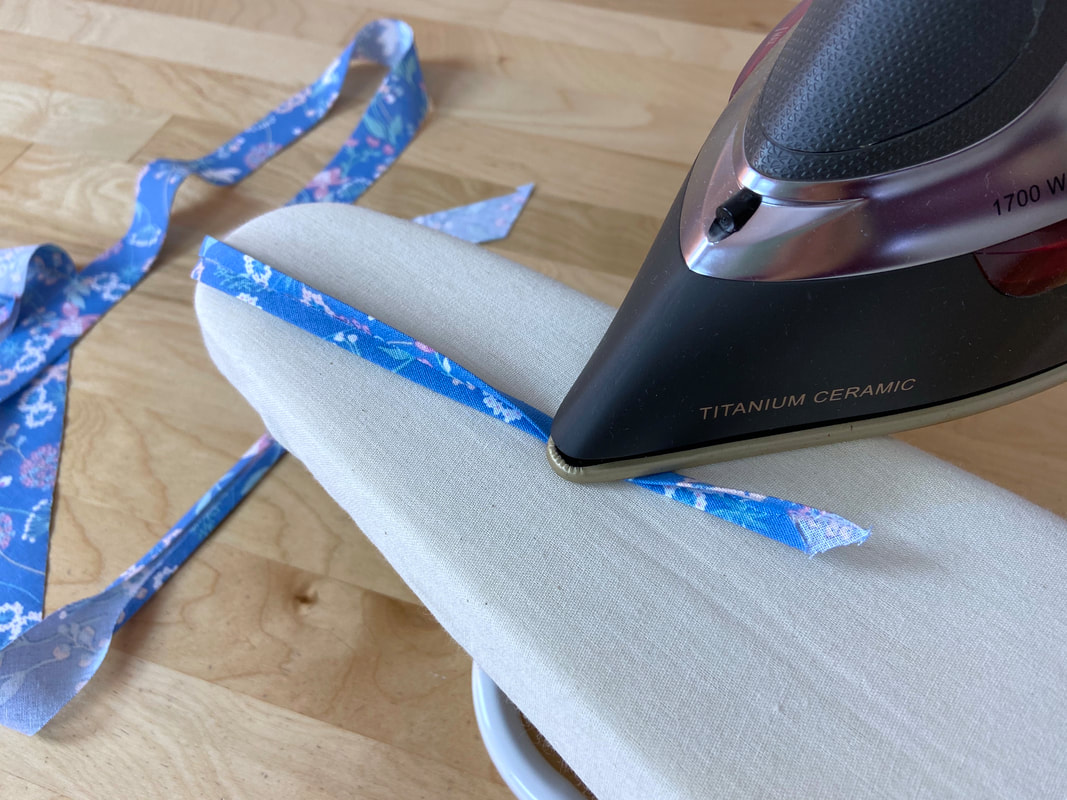
To complete the double fold style, fold and iron the binding one more time down the center as shown above.
|
 |
All content, including images and text, may not be copied, replicated, or redistributed without express written permission. This website is regularly screened and monitored for content protection.
|
