
A double welt pocket is another application that falls in the slashed pocket category. It looks identical to a bound pocket, but as opposed to the bound application, a double welt pocket uses separate pieces to form the welt opening. In a bound style, the larger pocket layer is folded to create the look and function of the pocket opening welts.
|
A double welt pocket works great with heavier fabric applications which often require that the pocket bag is constructed of lining material in order to minimize bulk. In the example below, you’ll learn how to sew a double-welt style with two pocket opening lips (or welts) and a flap. The individual welts can be hand stitched or machine stitched into the pocket opening.
The flap serves both a decorative and functional purpose. It is sewn within the top edge of the pocket opening, positioned underneath the top welt portion. It is fully stitched and finished before being attached to the pocket opening.
|
Flaps are interfaced and finished with an identically shaped facing. The facing can be constructed of the same fabric as the flap or a more lightweight lining fabric.
Flaps can have square, curved or angular bottom edges. However, the edge that is stitched to the pocket opening is always straight.
|
In terms of the pocket opening, the two welt pieces are cut separately and interfaced for stability and long-term durability. You can skip the interfacing part if your fabric is thick, structured and densely woven. As you’ll see below, the pieces are then folded with wrong sides touching and sewn to the garment to complete the pocket opening.
The pocket bag is then completed with two separate pocket pieces, one a little longer than the other. The smaller pocket piece is conventionally cut from lining fabric to achieve a lighter, less bulky application.
The best way to learn how to sew a double welt pocket with flap is to physically go through all its sewing steps, starting with figuring out the dimensions of each pocket piece. Start by drafting a set of patterns for all pocket portions including the welts, pocket bag and flap. You can then reuse them anytime you need to sew a double welt pocket without having to remeasure all the individual pieces.
How To Draft Patterns For A Double Welt Pocket With Flap
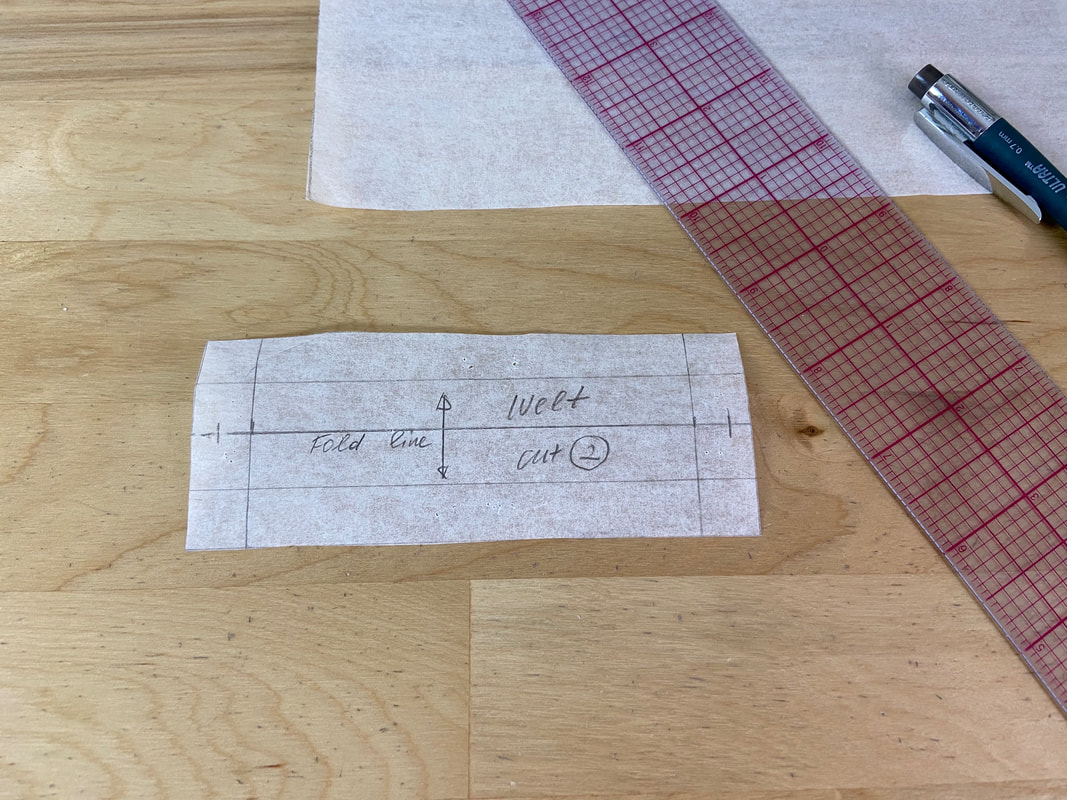
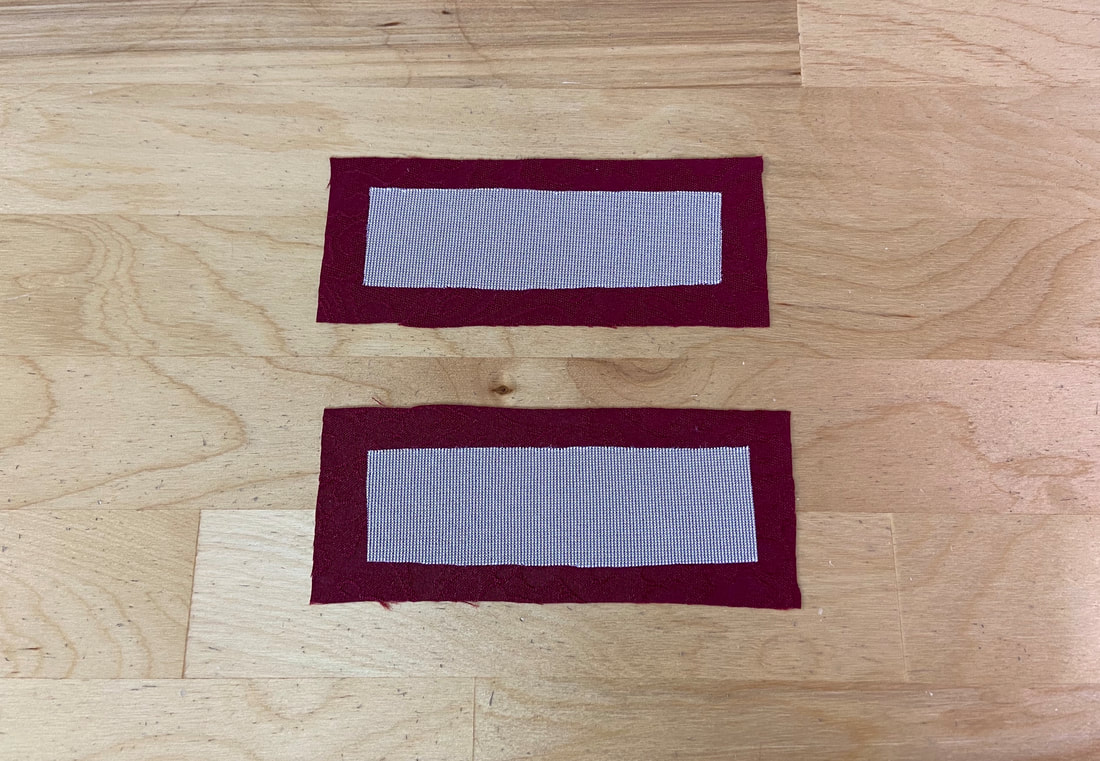
Determine the desired length and width of the welt pocket opening. For the purpose of this tutorial, the full pocket opening is 1” wide and 4” long.
Given these measurements, the initial welt strips are cut at twice the pocket width plus two seam allowances. They should also be 1” longer than the pocket opening length.
In this case, the welt fabric strips measure 3” in width (1”x 2 plus two seam allowances of ½”) and 5” in length (4” to account for the final pocket opening plus two ½” seam allowances on each end).
|
1. Draft the pocket welt pattern using the measurements described above (5" x 3"). The welt pattern is a simple rectangular shape with seam allowances along all edges and a center fold line. For this pocket style, we’ll be cutting two of these welts.
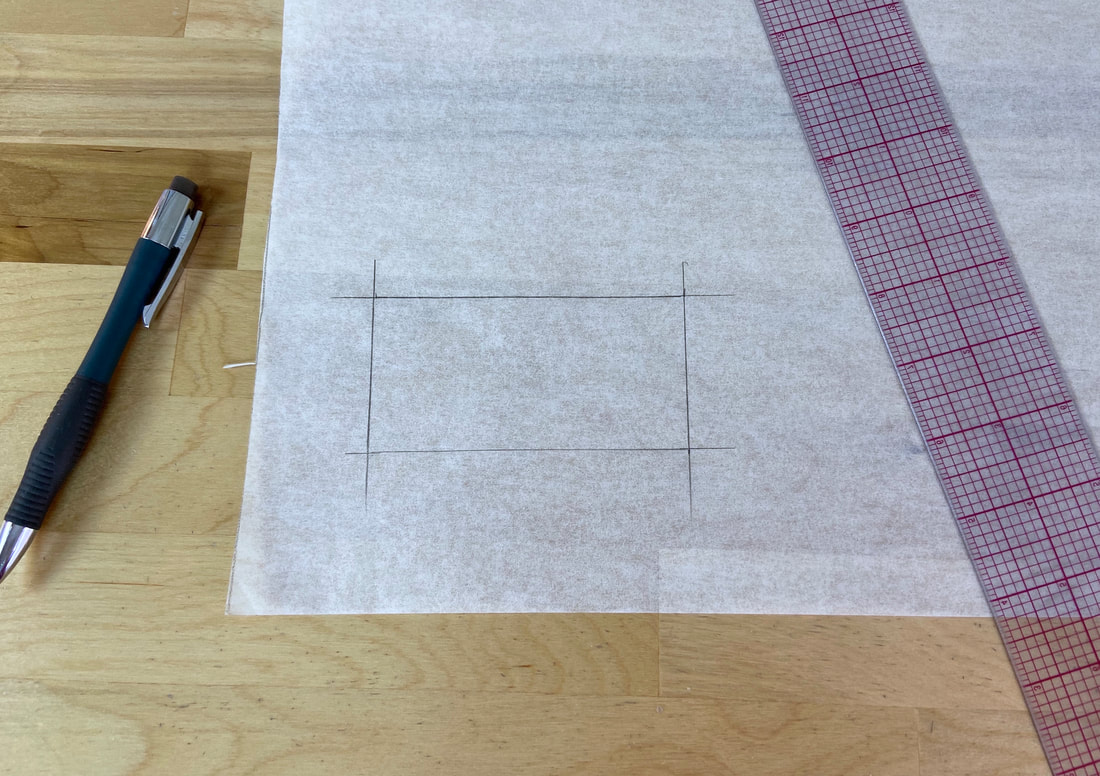
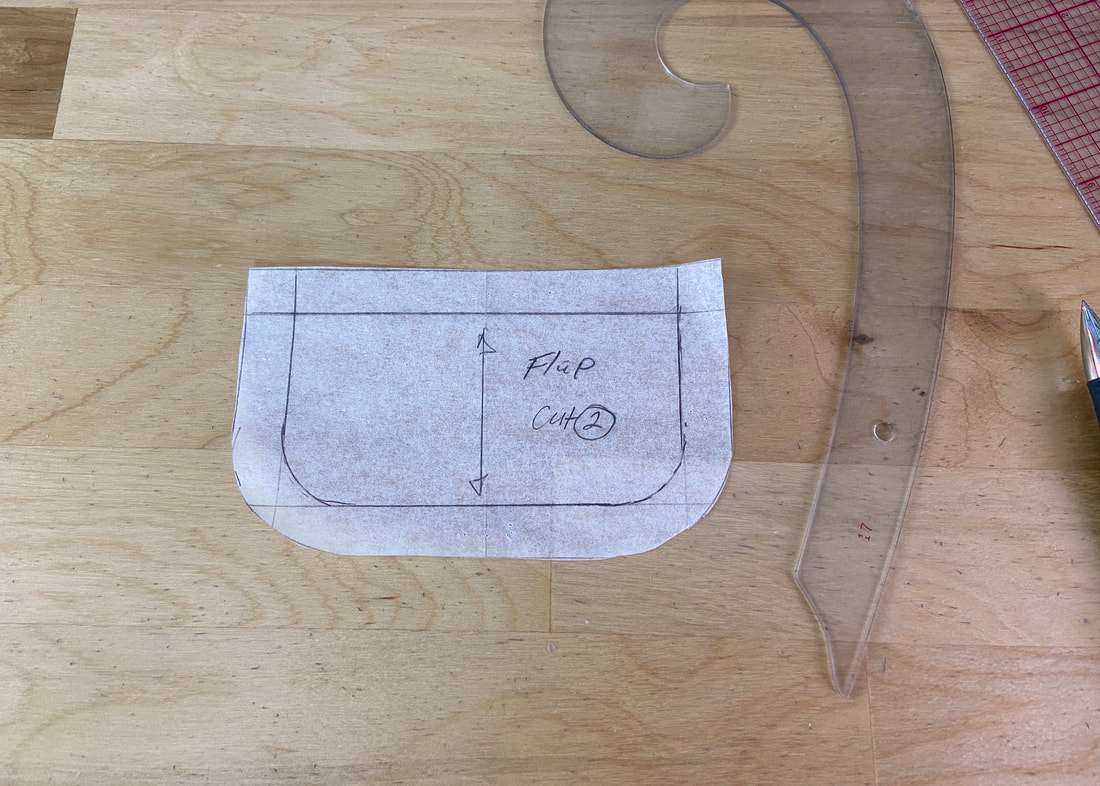
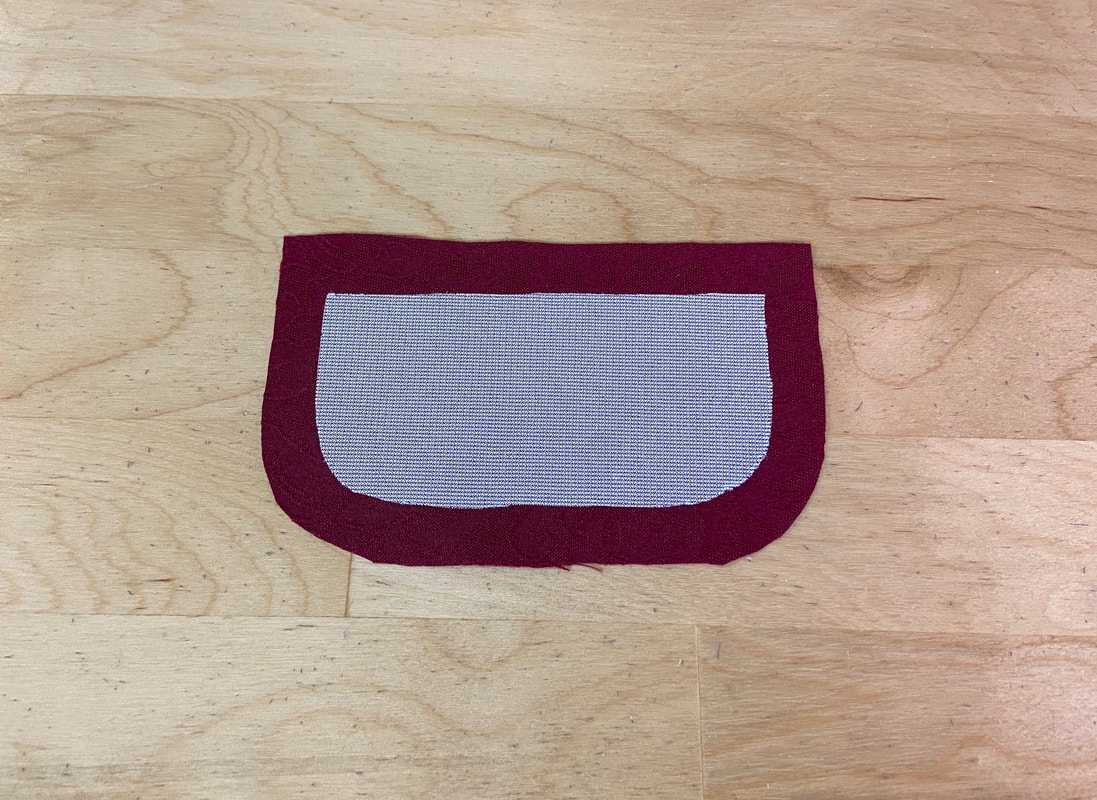
Next, draft the pocket flap pattern. The flap will be as wide as the pocket opening length and about 2”-3” in length. In this tutorial, the flap bottom edge is slightly curved.
|
|
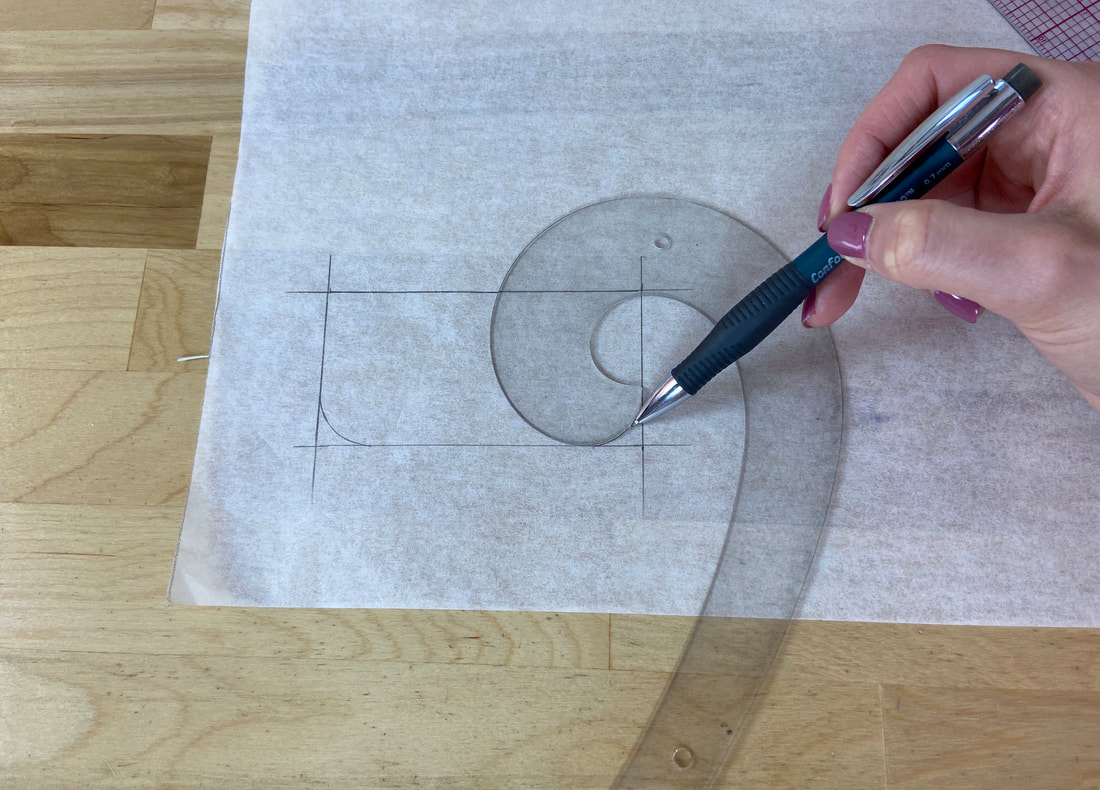
2. Using a ruler, draw a rectangle that measures 4”x 2”. Curve its bottom lengthwise edge (if desired) using a French curve.
|
Add ½” seam allowance along all edges, and cut out the final flap pattern piece.
3. Next, let’s draft the pocket bag pieces. The pocket bag in this case is formed from two separate pieces.
The longer piece should have the following measurements:
Length: pocket depth plus 1.5”. In this example, the pocket depth is 4.5”.
Width: length of the pocket opening (4” as noted above) plus 1”.
Width: length of the pocket opening (4” as noted above) plus 1”.
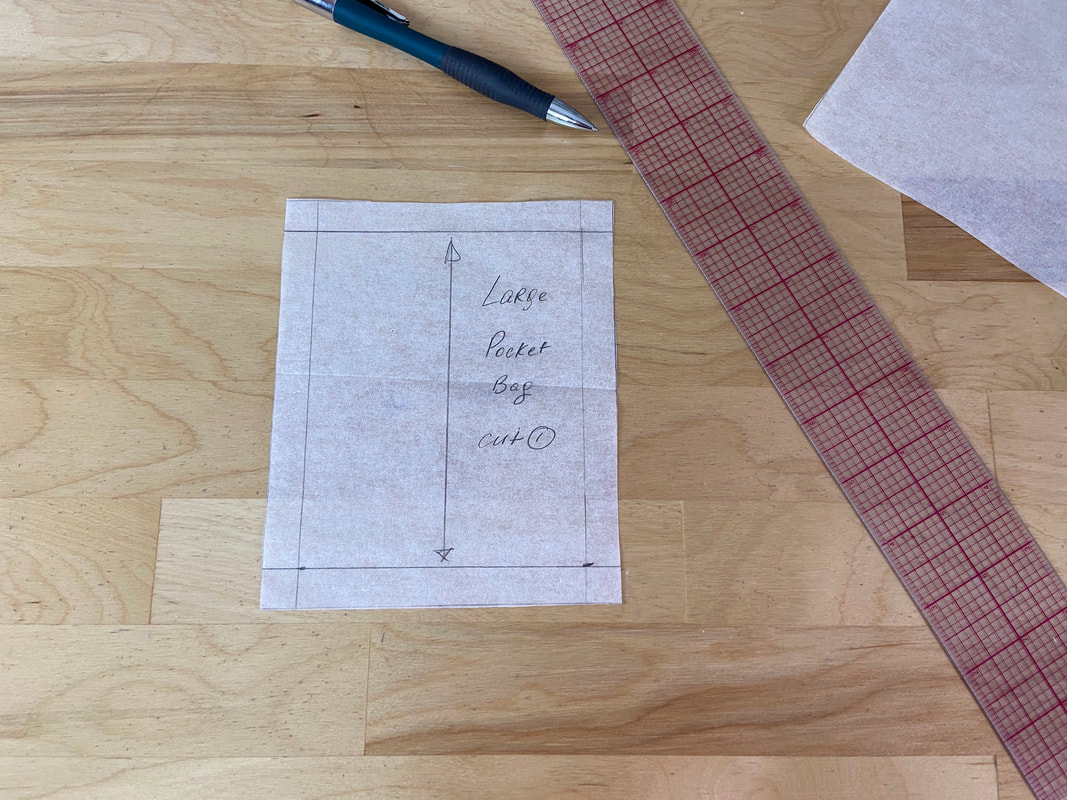
In this tutorial, the larger pocket piece measures 6” (4.5” pocket depth plus 1.5” extra) by 5” (4” pocket opening plus 1”).
|
Draw the rectangle following these dimensions. Keep in mind the seam allowance is already accounted for in the calculation above. Mark the ½” seam allowance within all edges as shown.
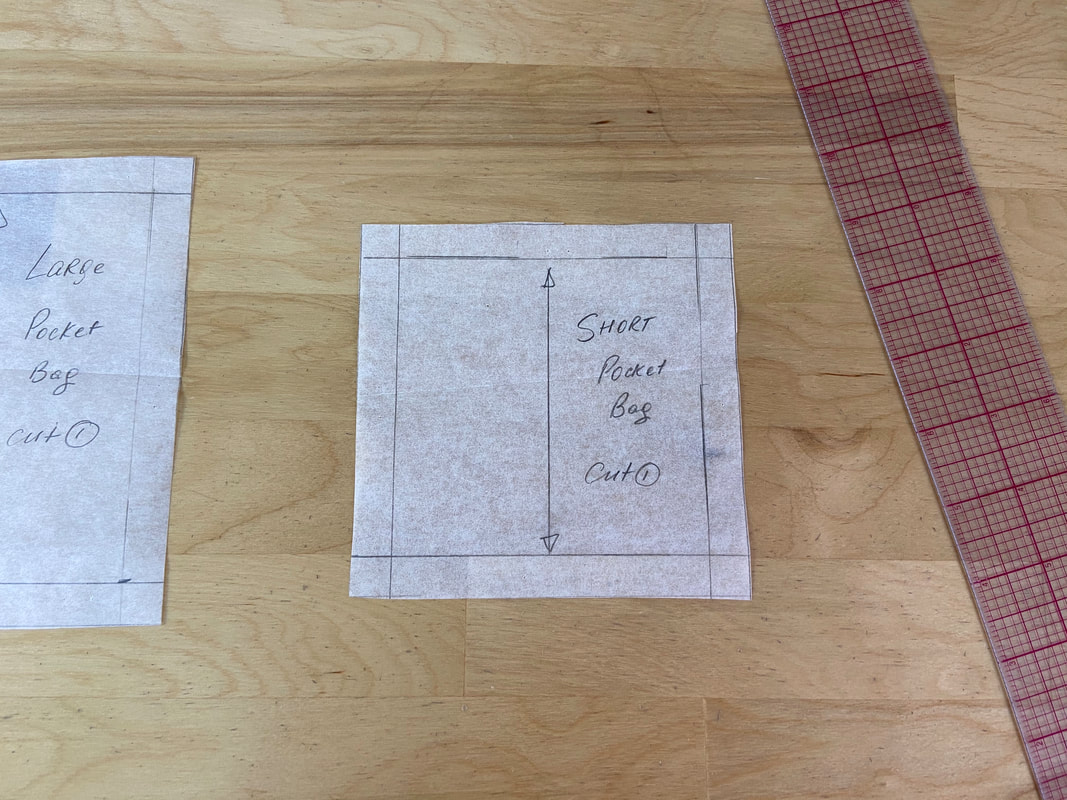
4. Pattern the small portion of the pocket bag using the same measurements as the larger portion described above with one exception: It should be 1” less in total length.
Taking this 1” difference into account, the small pocket portion will measure 5” by 5”.
|
Draw the smaller pocket piece rectangle (5” x 5”) on your pattern paper. Again, keep in mind that the seam allowance is already accounted for in this total measurement.
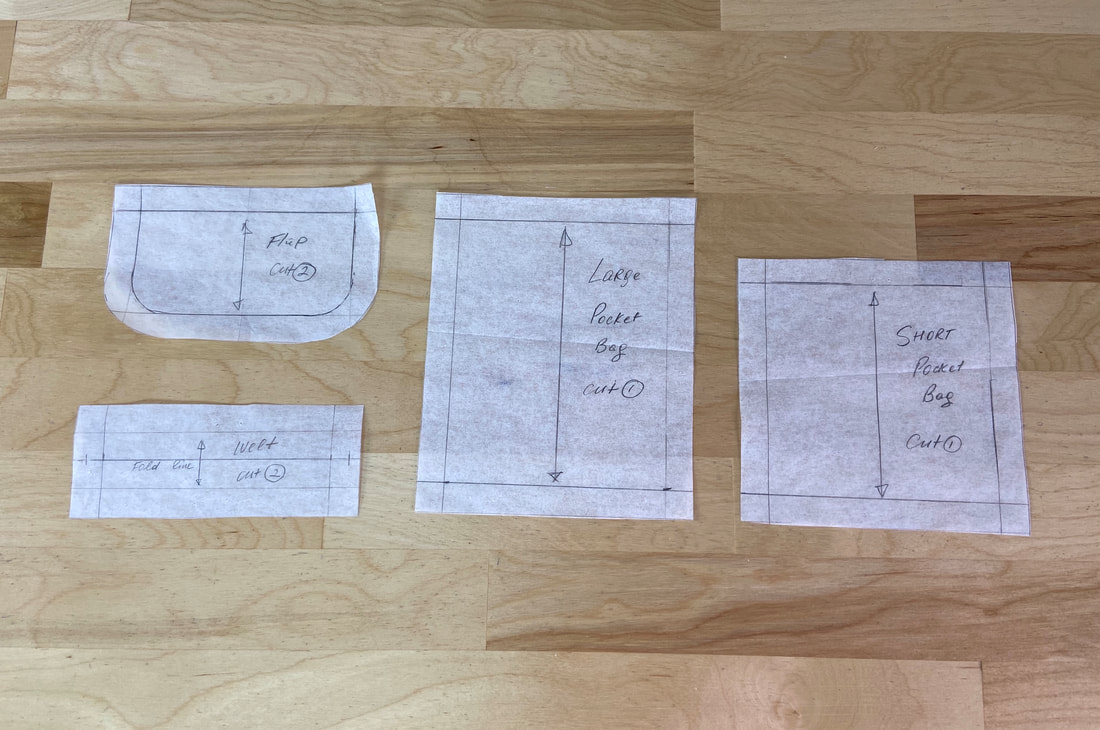
You should now have four completed pocket pieces:
|
The pocket flap
The pocket welt
The large pocket bag piece (6” x 5”)
The small pocket bag piece (5” x 5”)
The pocket welt
The large pocket bag piece (6” x 5”)
The small pocket bag piece (5” x 5”)
Use the same ratio and logic to draft the pocket size of your choice.
Sewing The Double Welt Pocket With Curved Flap
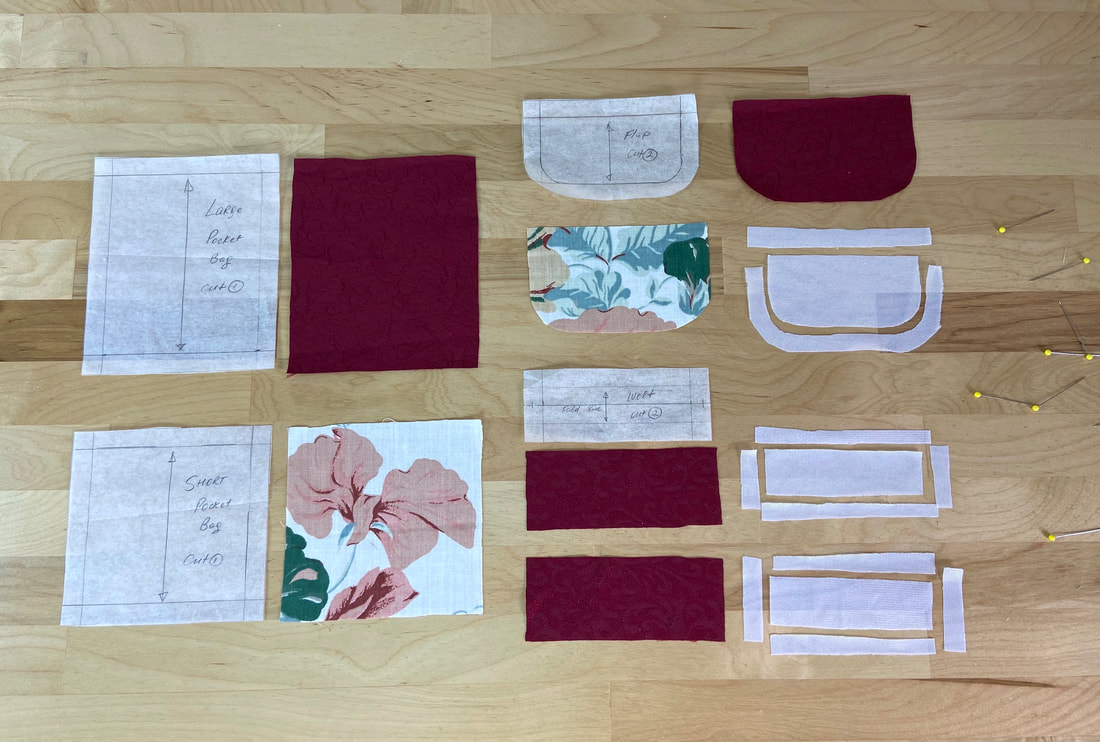
Cut out all your patterns as follows:
|
- Two welt pieces and two identical interfacing pieces
- Two flap pieces and an identical interfacing piece
- One large pocket piece (usually cut from the garment fabric)
- One small pocket piece (usually lining, but could be another lightweight fabric or the same fabric as the garment)
Start by sewing and prepping the flap and the two welts.
|
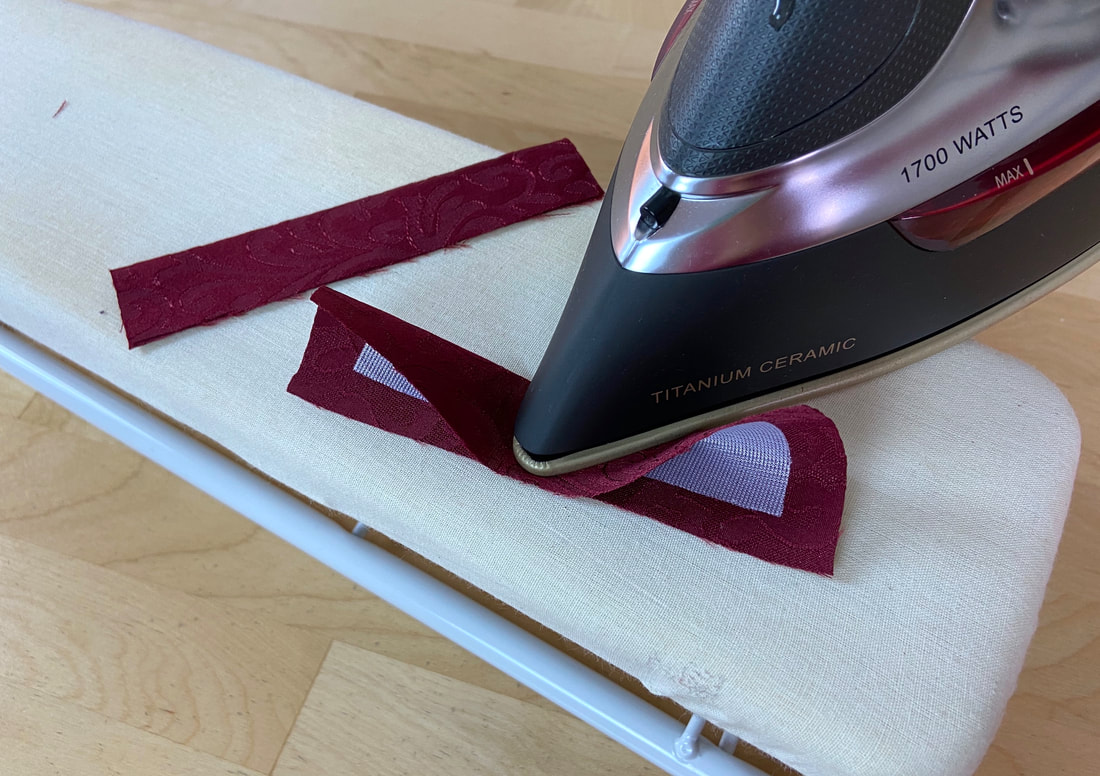
1. Fuse the interfacing to the wrong sides of both welt layers.
|
2. Fuse the interfacing to the wrong side of one of the flap layers.
|
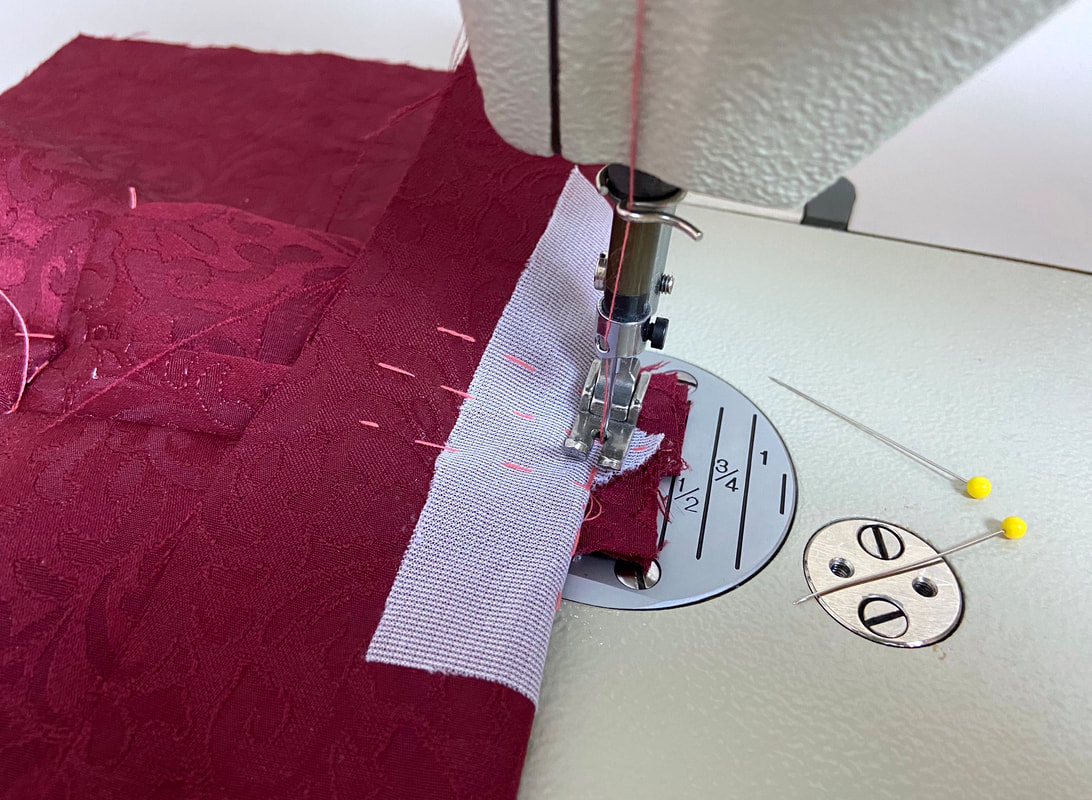
3. Fold the two welt pieces down the center lengthwise with wrong sides (interfacing sides) touching as shown. Iron the fold lines to crease.
|
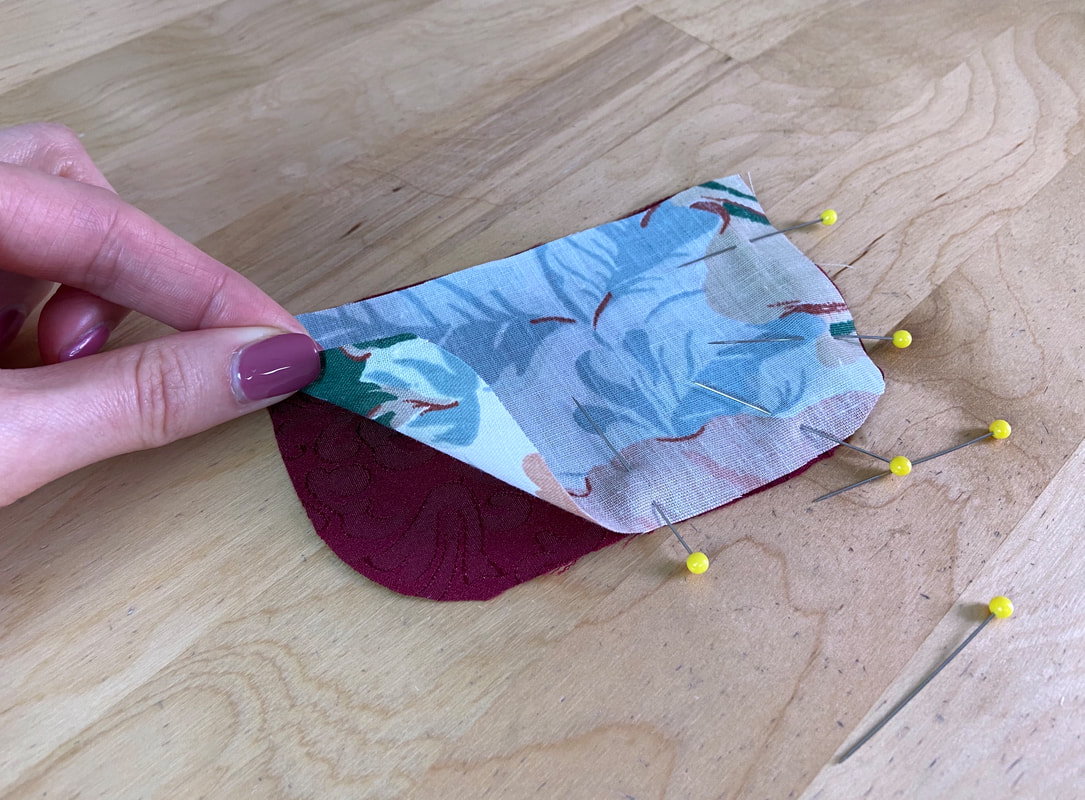
4. Align the two flap pieces together with face sides touching and all edges aligning. Insert pins horizontally as shown.
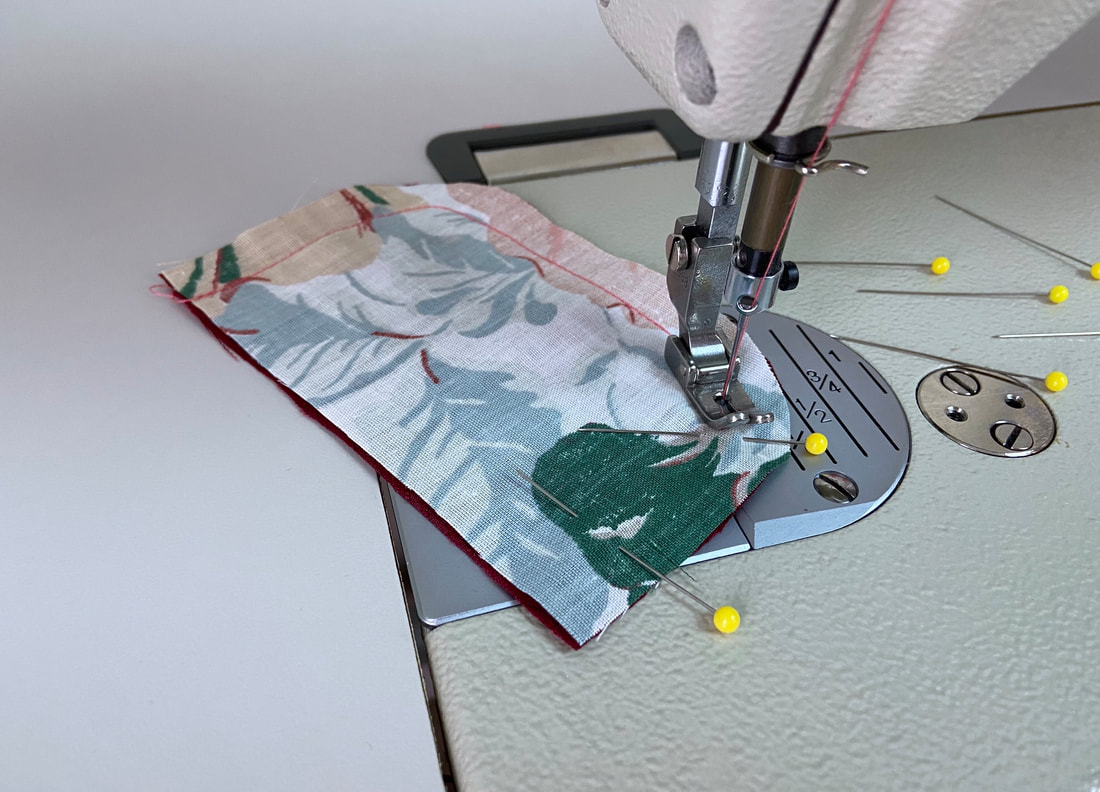
|
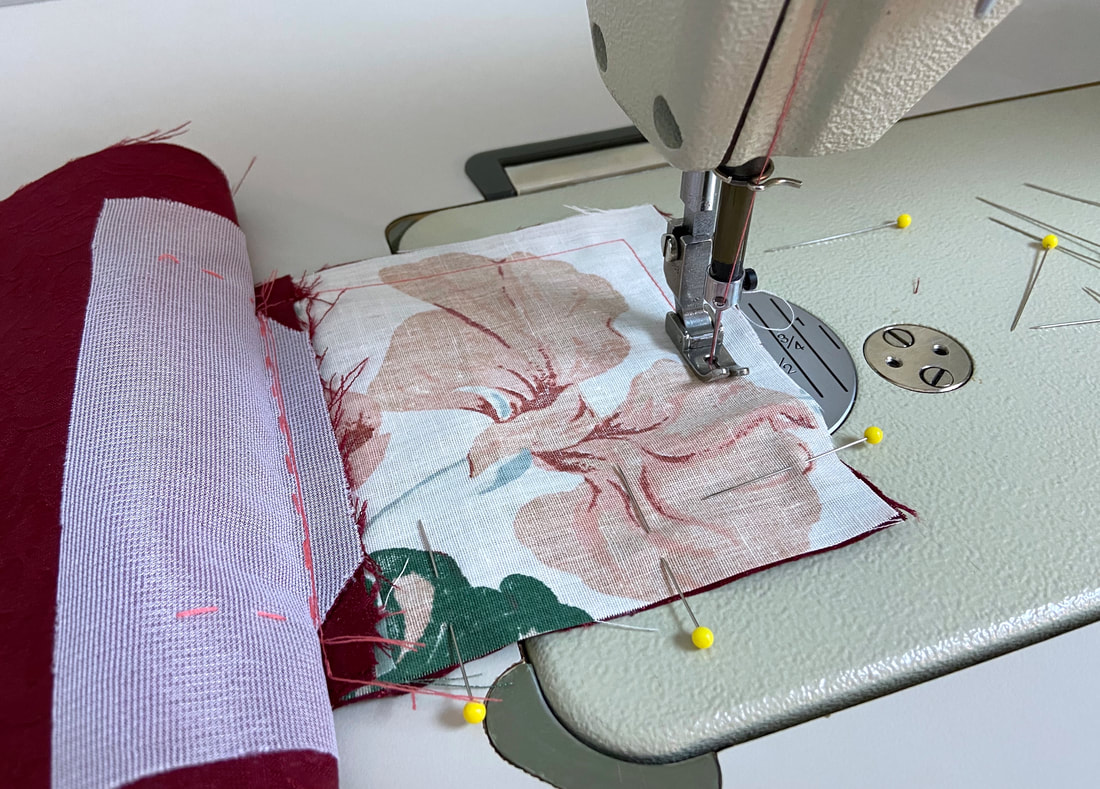
5. Stitch the flap layers along the side and bottom curved edges, leaving the top straight edges unstitched.
|
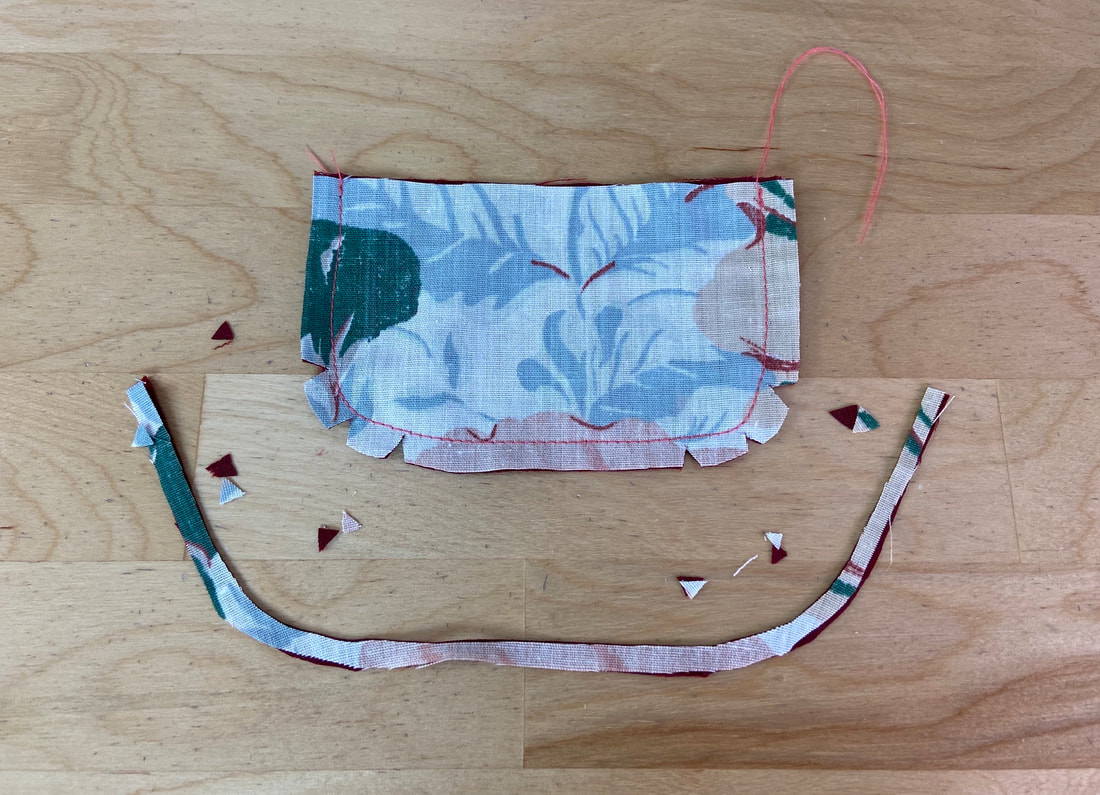
6. Trim the flap seam allowance down to ¼” and clip wedge notches into the curved areas of the bottom seam allowance as shown.
|
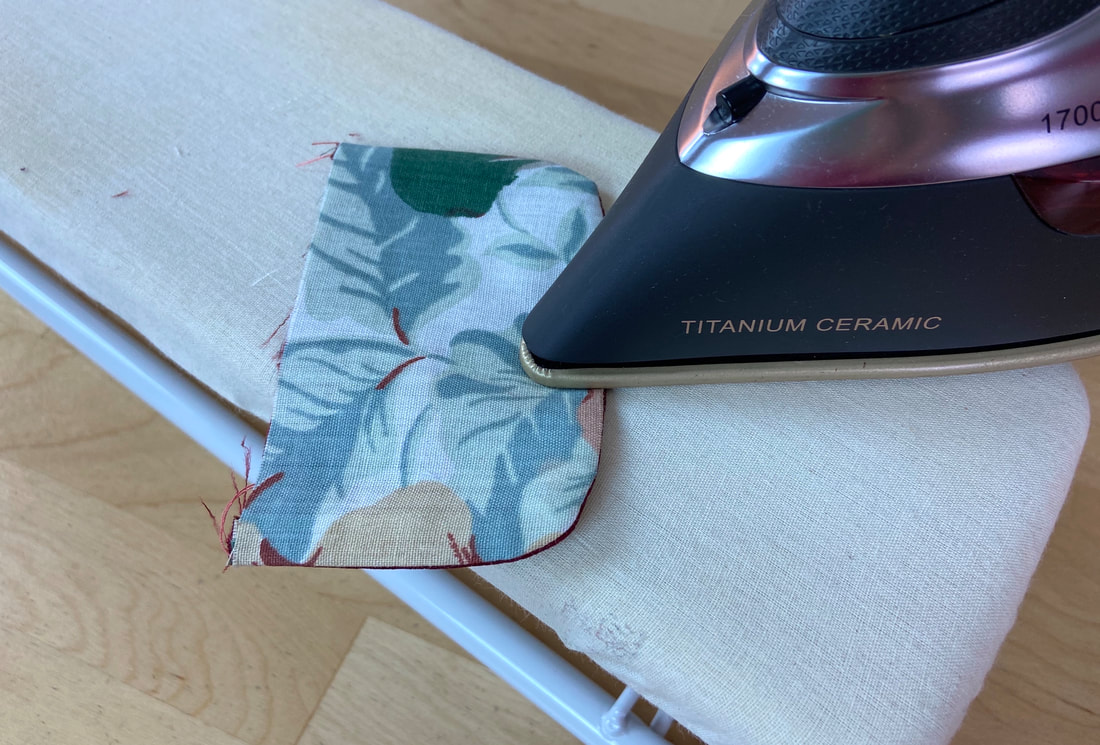
Turn the flap on its right side and iron the finished, enclosed edges. The seamlines should be perfectly aligned to the flap edges.
|
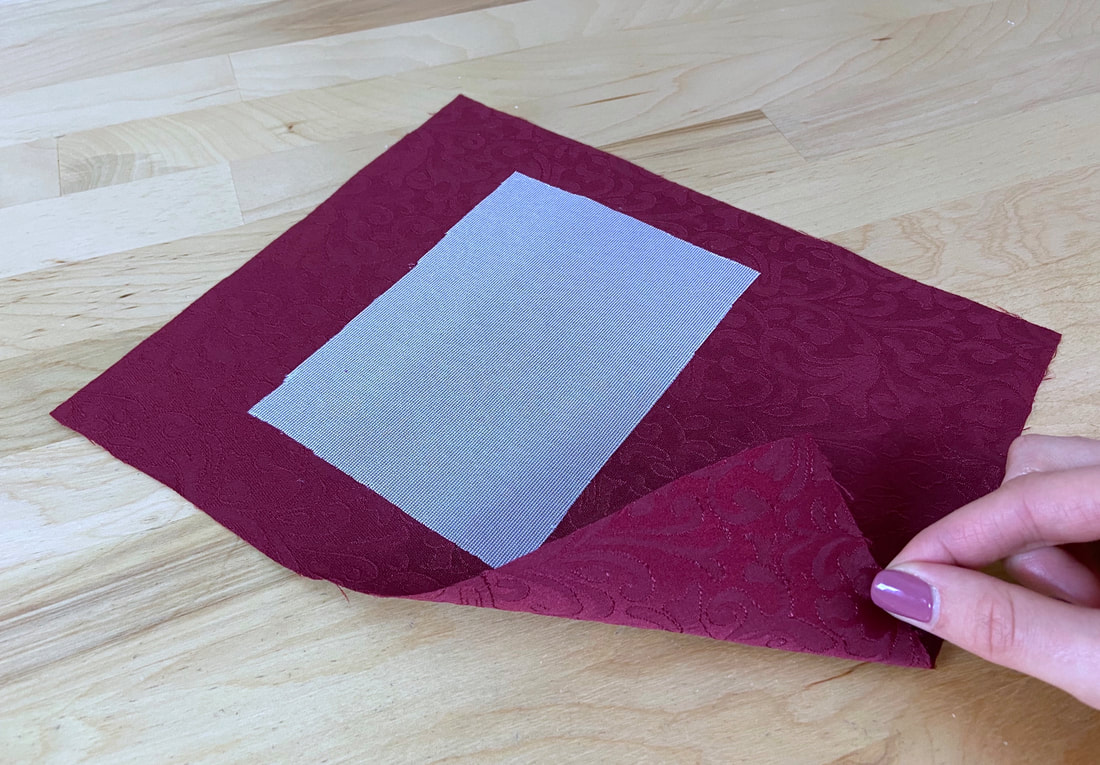
7. Add a rectangular piece of interfacing to the wrong side of the garment fabric, centered at the desired pocket location. The interfacing will keep the area stable during construction, while also increasing the pocket’s durability with prolonged wear.
|
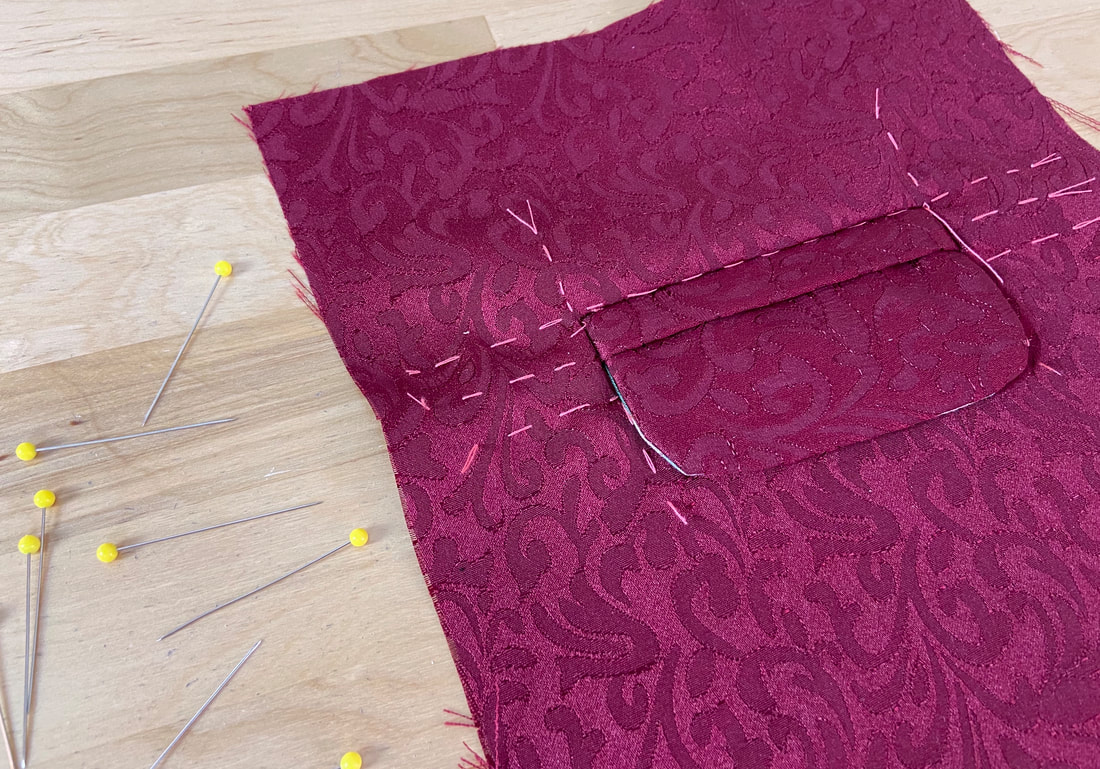
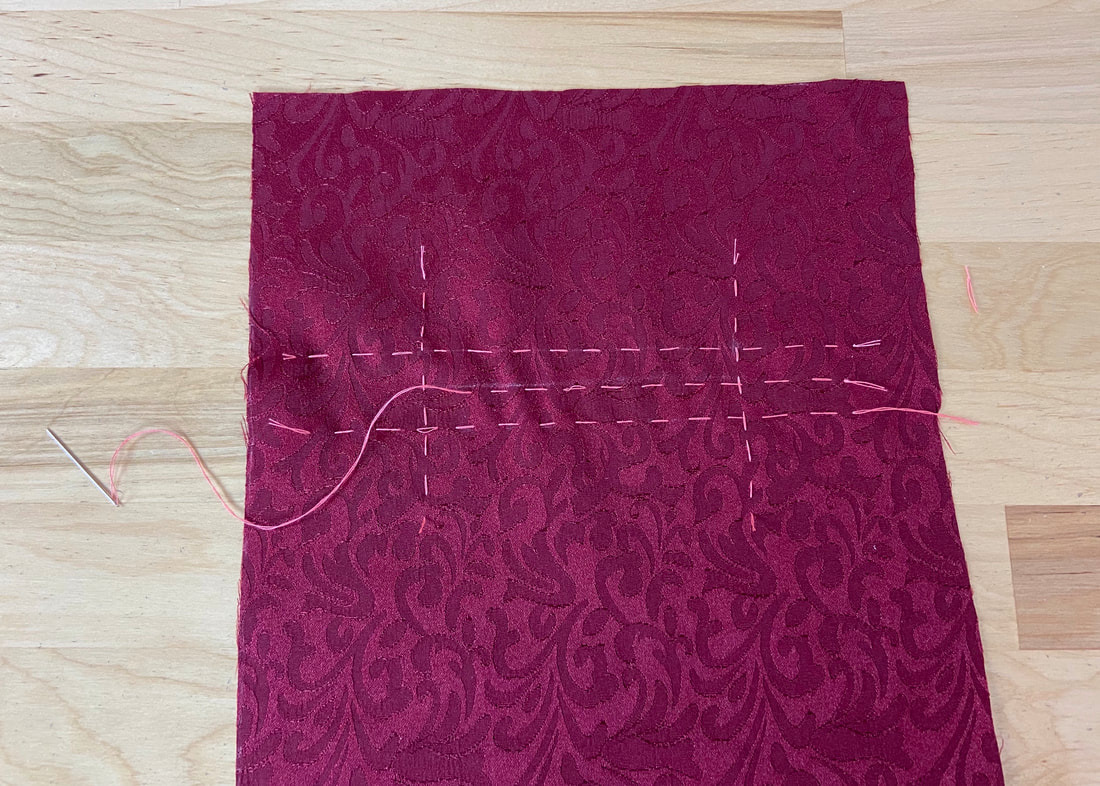
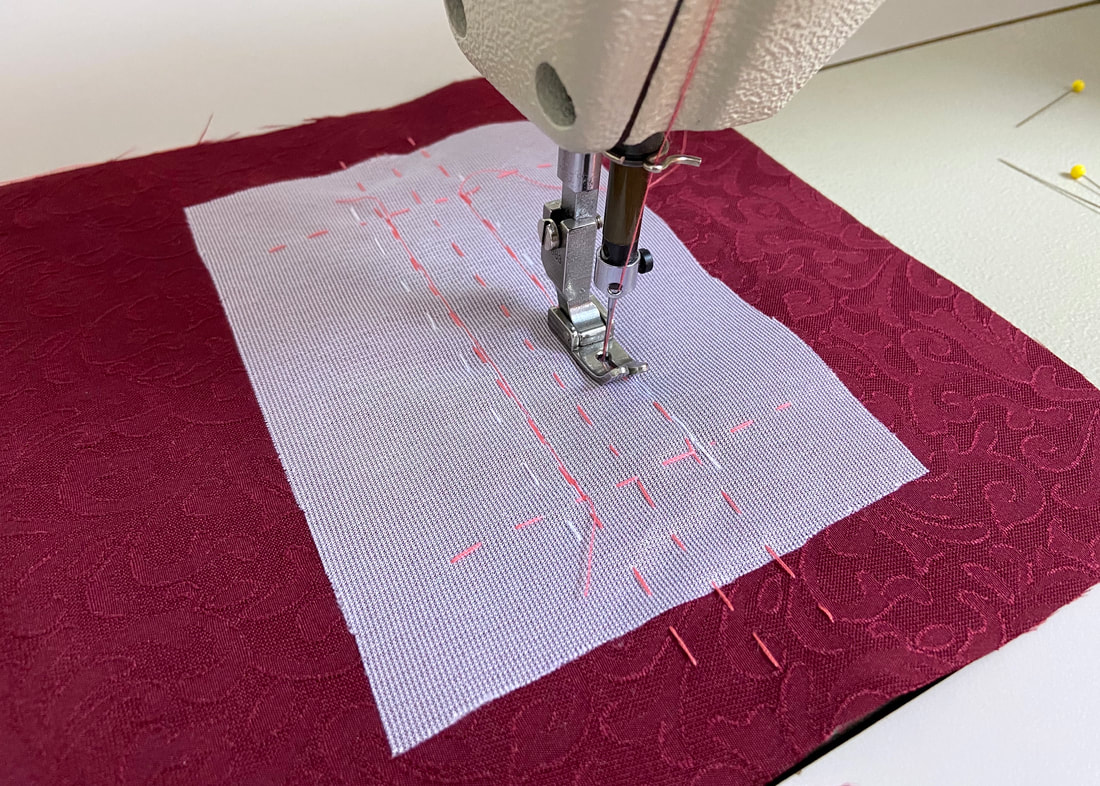
8. On the garment’s surface, mark the precise welt pocket lines using a hand basting stitch. Hand baste both the rectangular shape of the welt pocket and its center line (opening).
|
9. Align one of the folded welt pieces to the bottom hand basted line such that the welt seamline aligns with the basting stitch and there is ½” of welt excess on each end as shown.
The welt’s raw edge should be facing within the rectangle as shown. Insert pins to keep the welt aligned.
|
Hand baste the welt portion in this position. As time progresses, you will be able to use pins alone in the stitching process to follow, but for now, basting will provide a lot more stability.

|
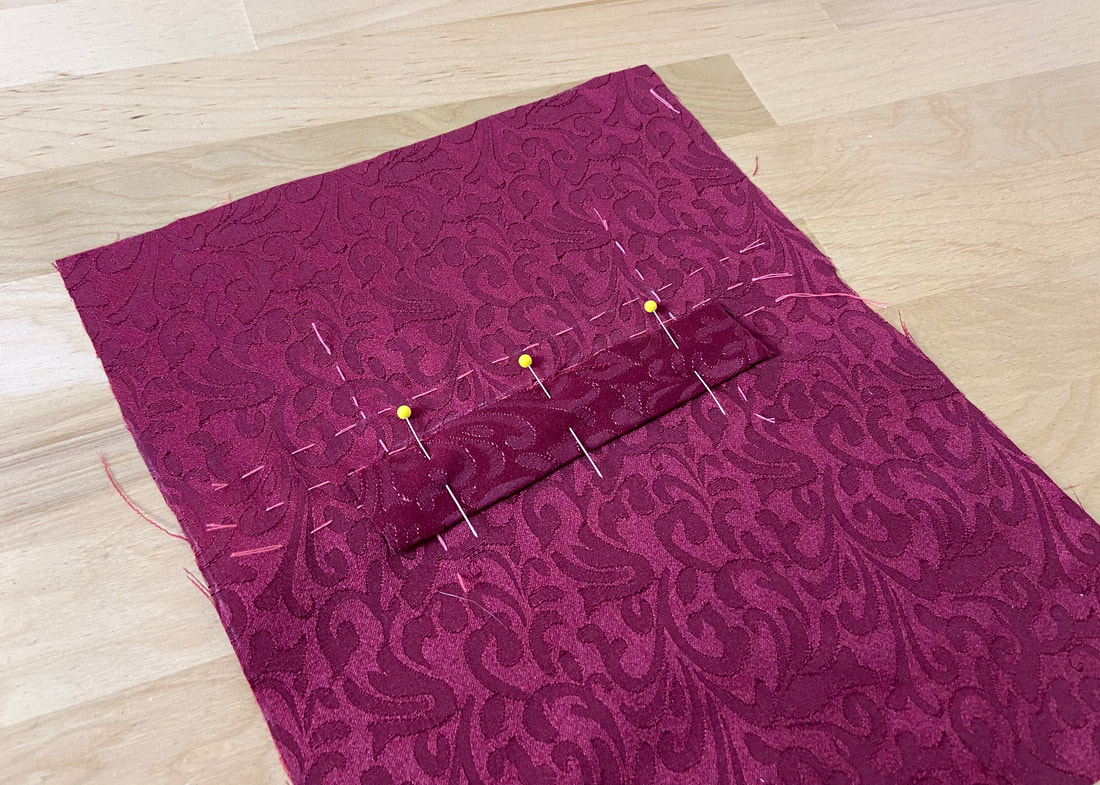
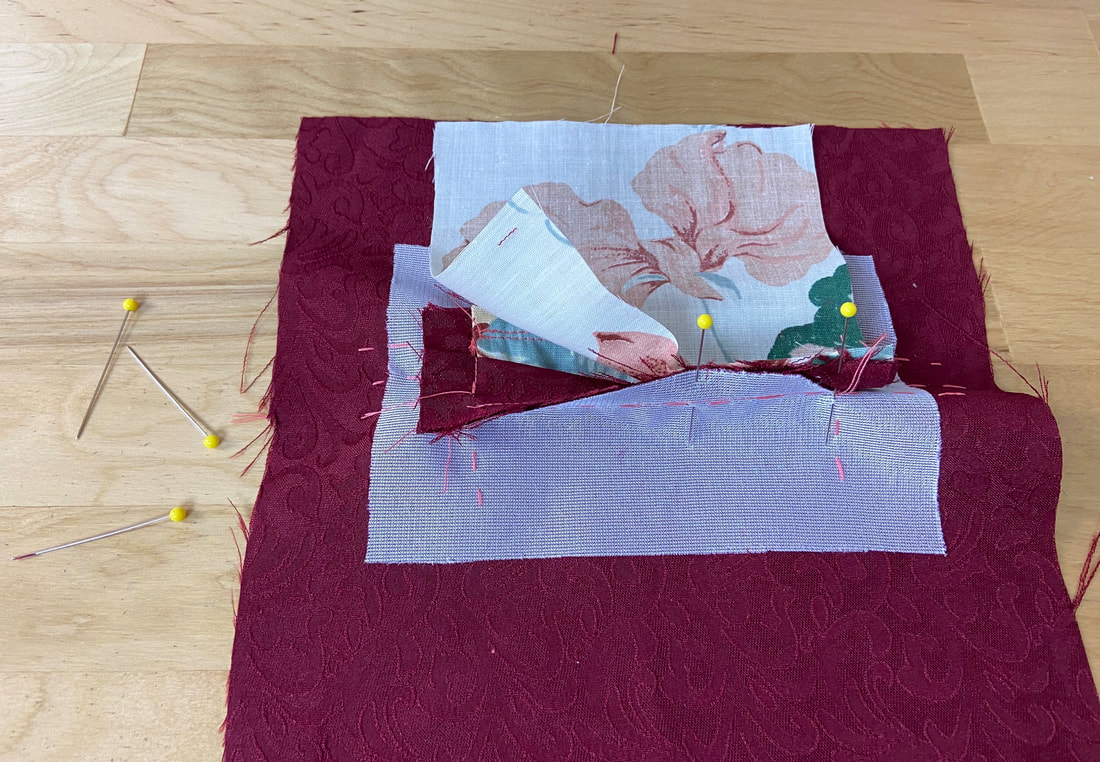
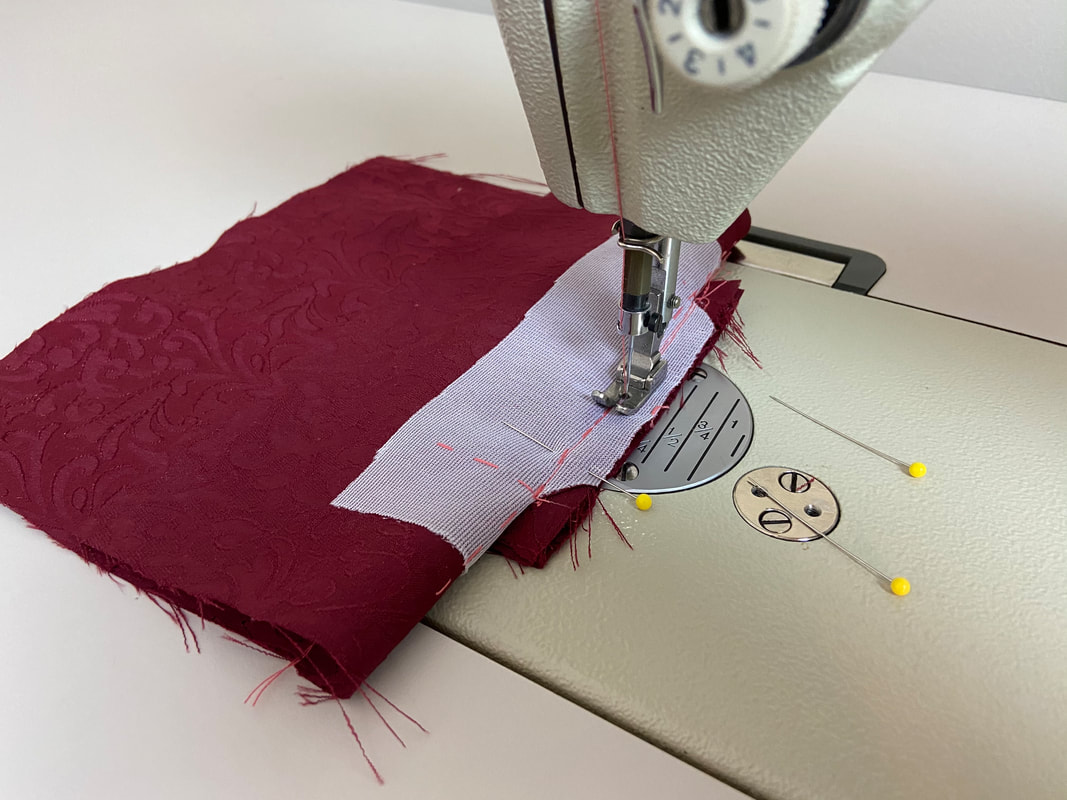
10. Next, place the flap on top of the unstitched welt such that all raw edges align. There should be ½” of excess on each side of the welt. Insert pins.

|
To keep the two pieces perfectly aligned, machine stitch along the raw edges at about ¼” seam allowance.
|
11. Align the connected flap and welt to the top hand basted line (of the rectangle) such that the welt seamline matches the basted line. All raw edges should be facing toward the inside of the rectangle. The ends of the second welt should align perfectly to those of the first welt. Hand baste all layers together.
|
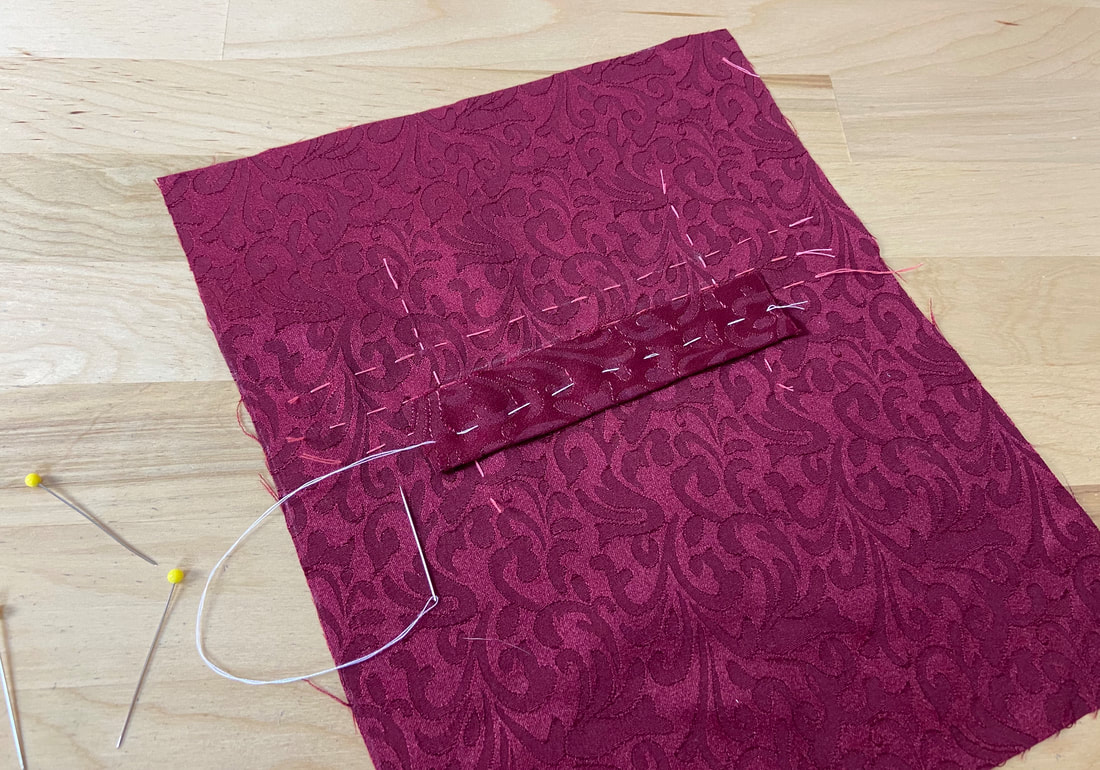
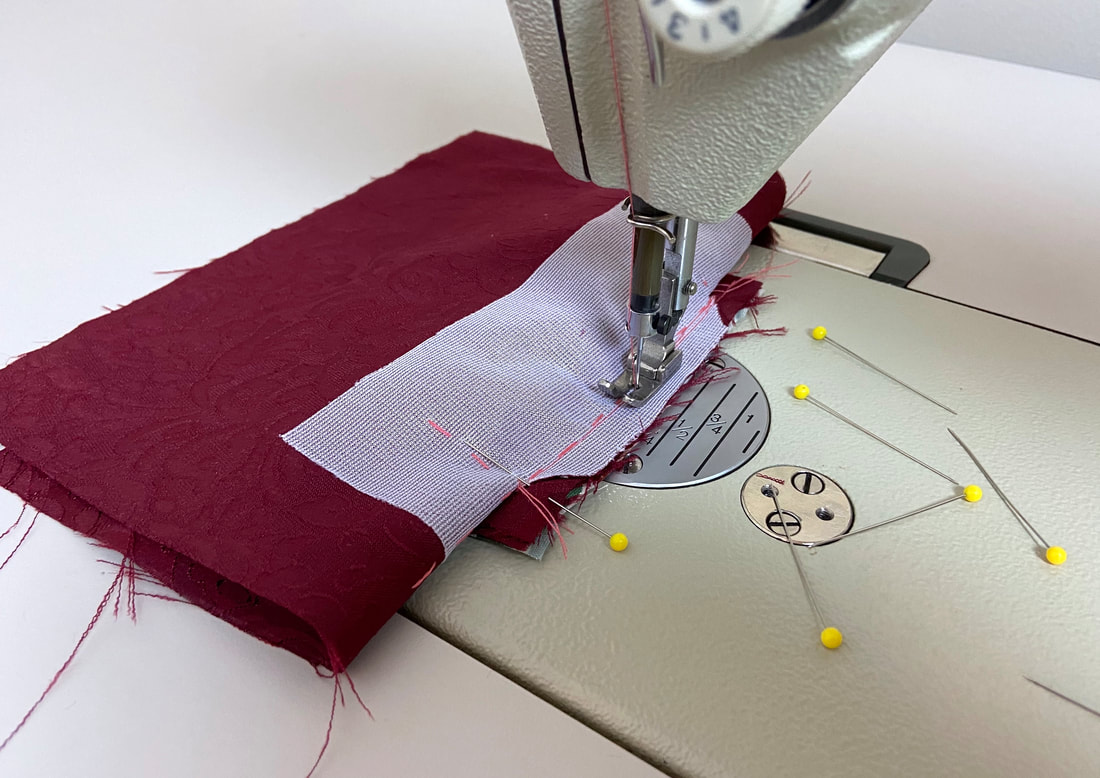
12. Turn the garment layer on its wrong side and stitch following the top and bottom rectangular basting applied as a first step in the marking process. Stop each stitch at the vertical (shorter) rectangle lines. Use a small stitch length for extra durability, and backsticth at each end.
|
|
As you stitch, you should catch all hand basted layers underneath but be very careful to keep them flat in the process. Remove the hand basting once complete.
|
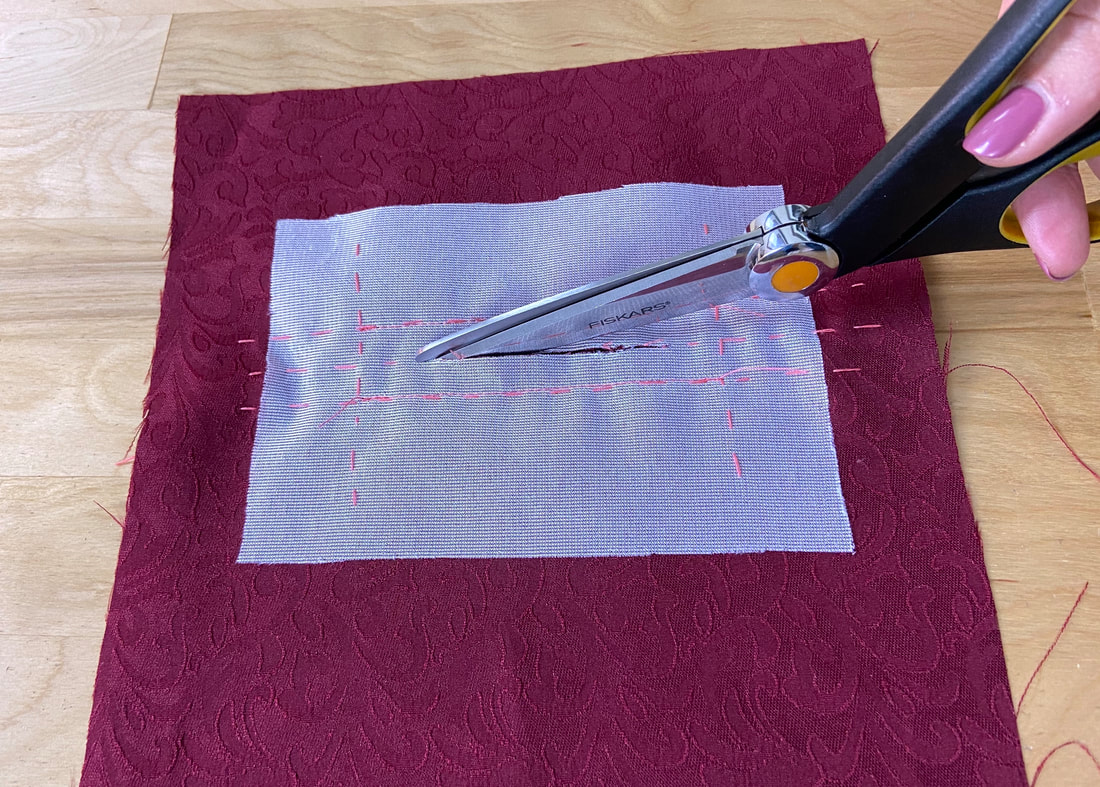
13. Cut down the marked center line stopping at ½” form each end.
|
|
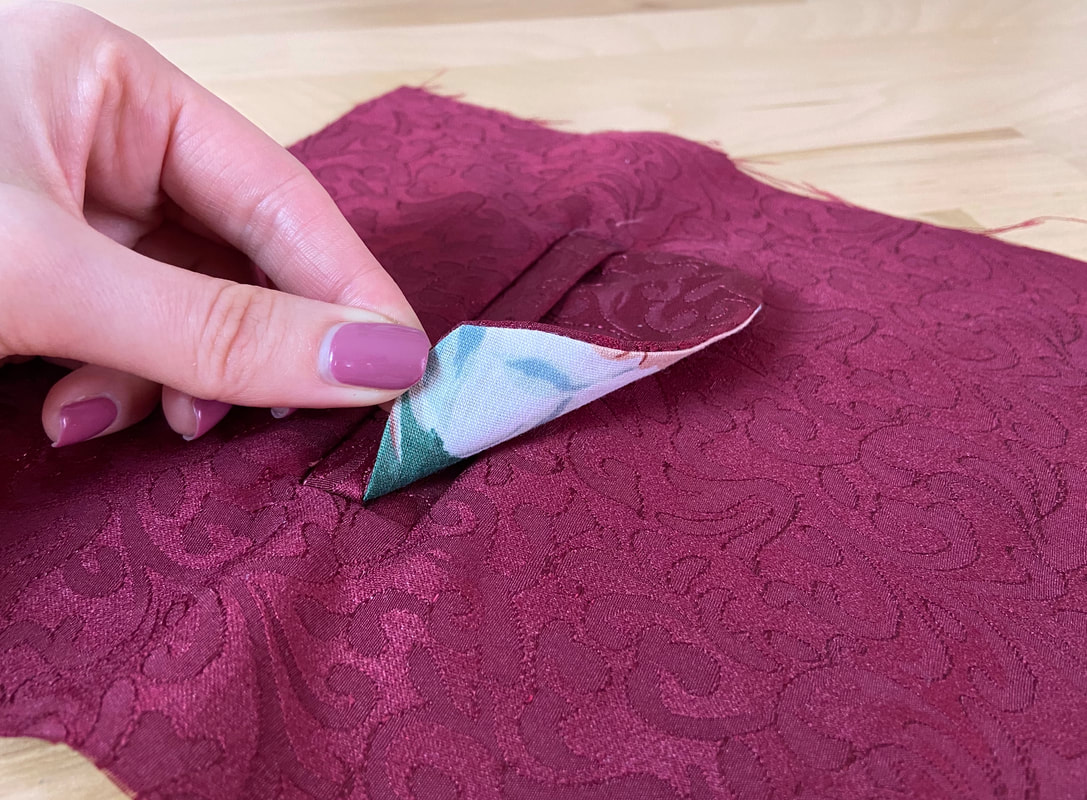
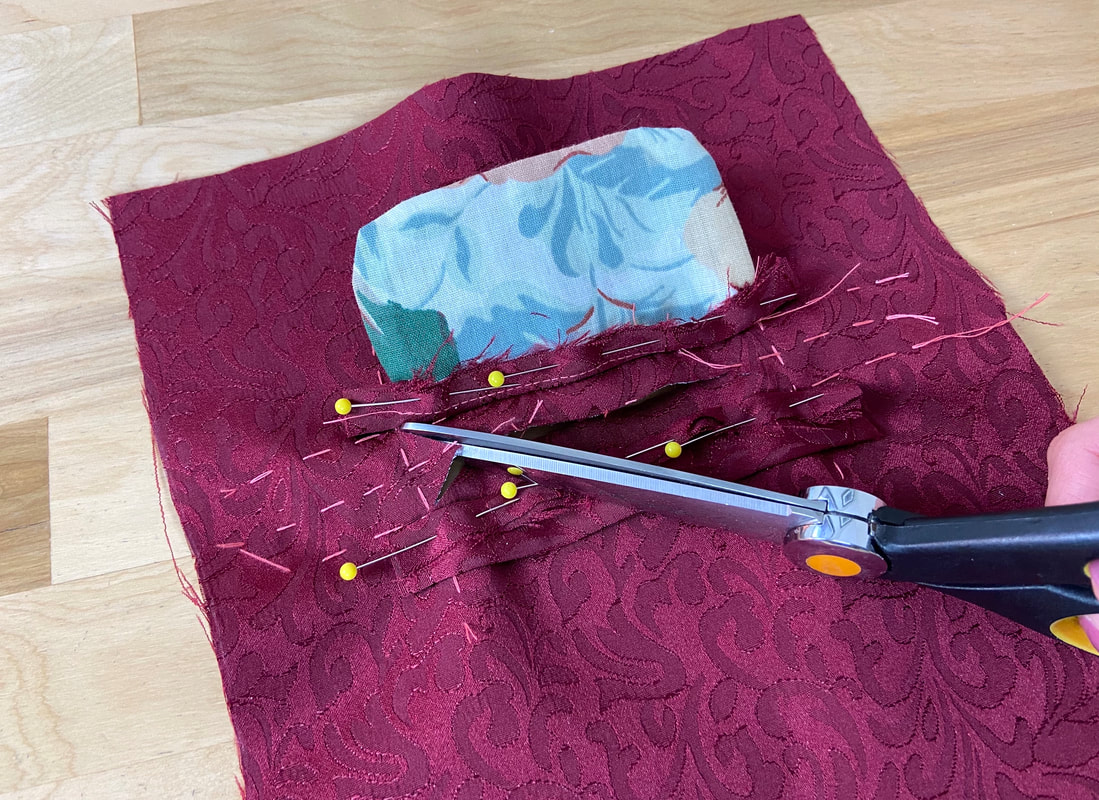
14. Turn the garment layer back on its right side and peel back the welt and flap raw edges. At this point, slash into each corner getting as close to the stitching as you can but being careful not to actually cut through it.
|
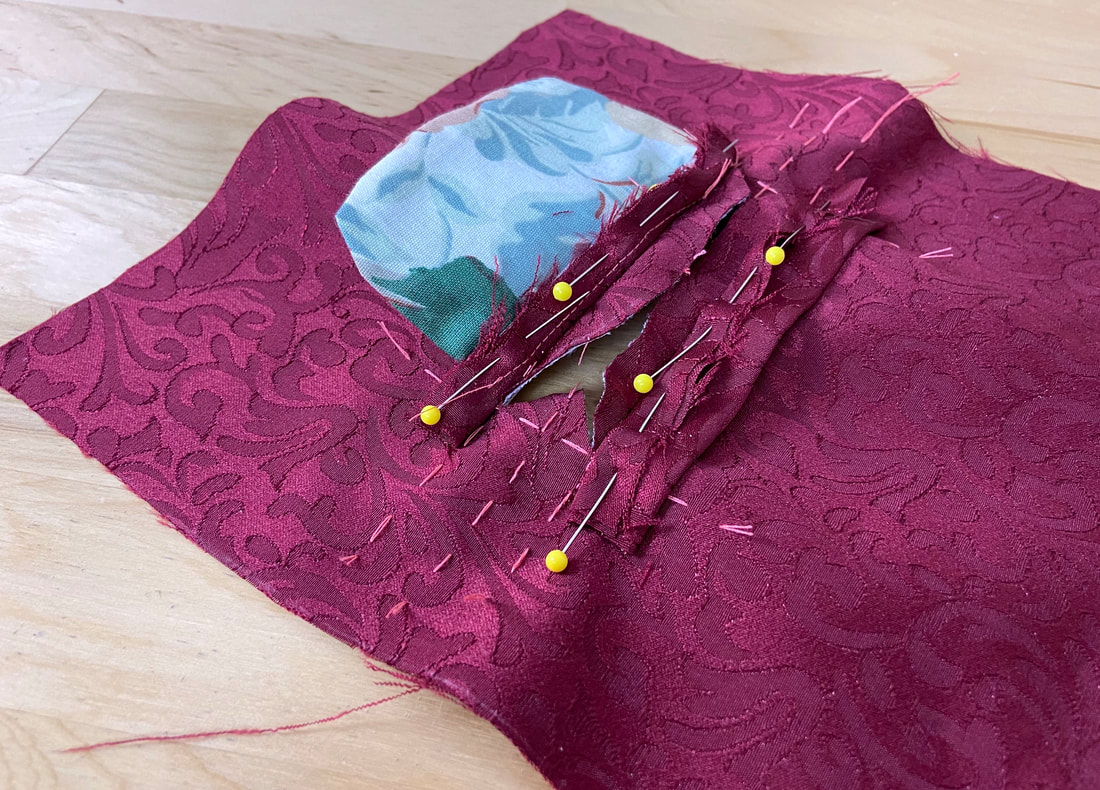
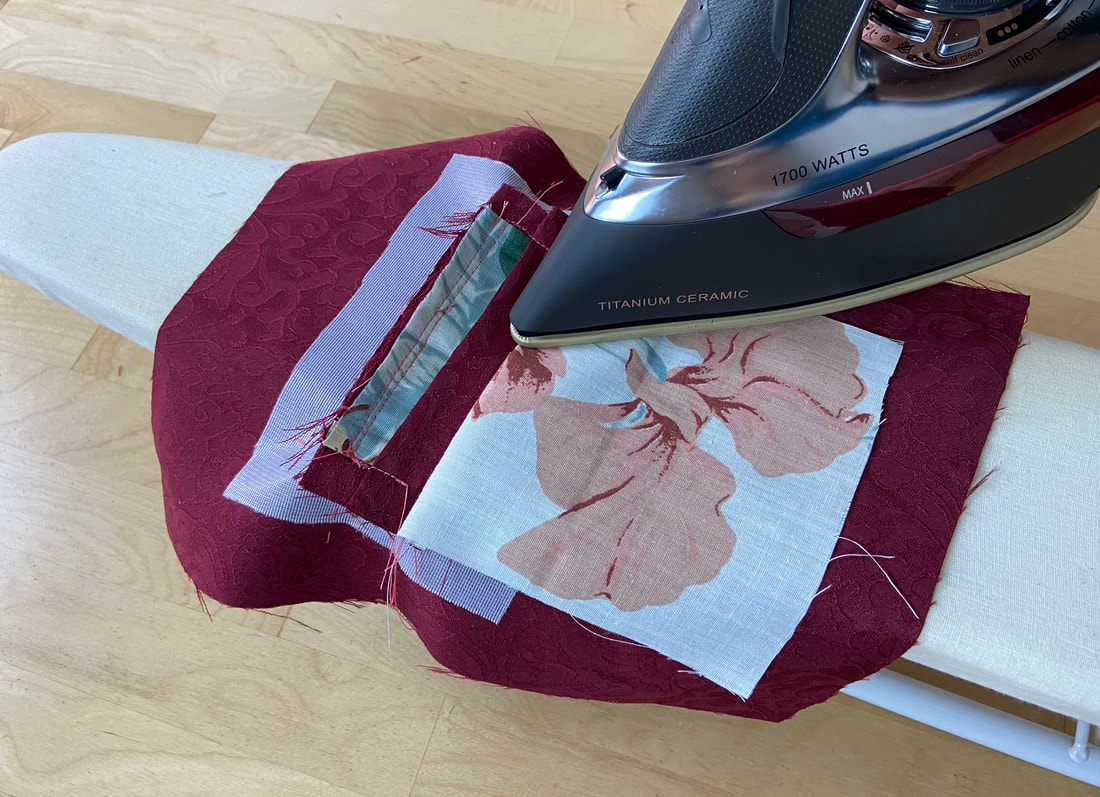
15. Flip the seam allowance to the wrong side of the garment. Doing so will naturally align the welt and flap pieces in final position. Pull to straighten and flatten the corner and all edges. Iron them in this position. It sometimes helps to hand baste the welts closed to assist with the next few steps.
|
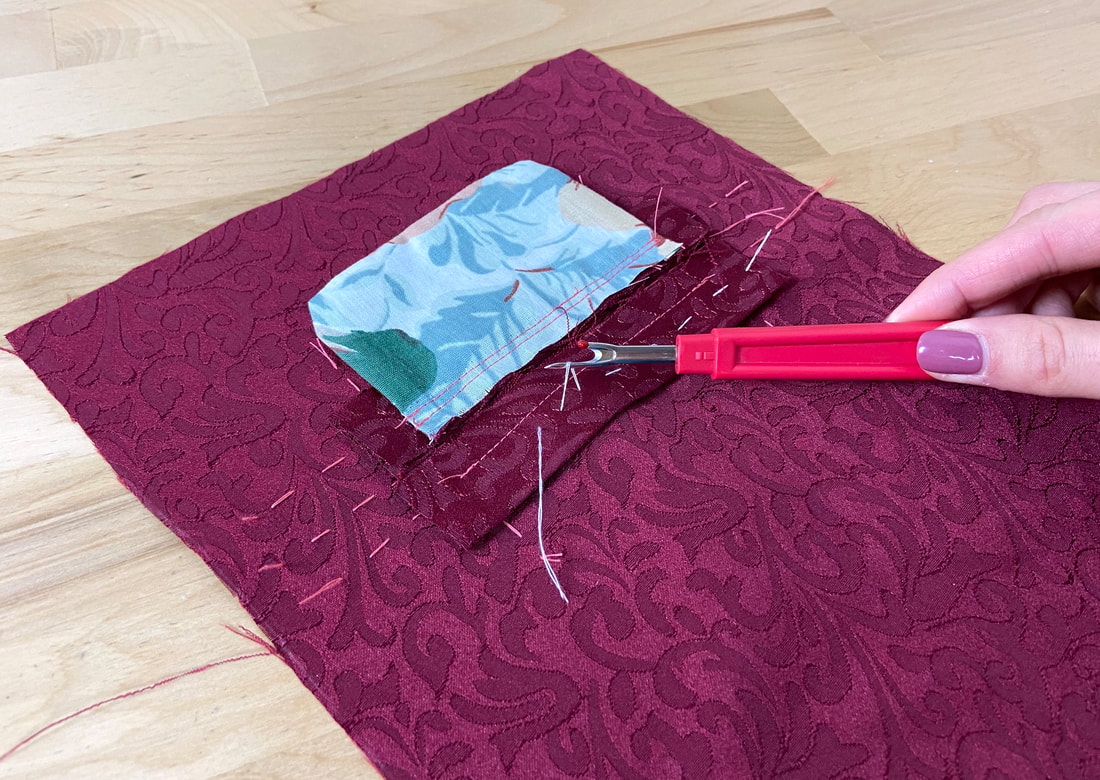
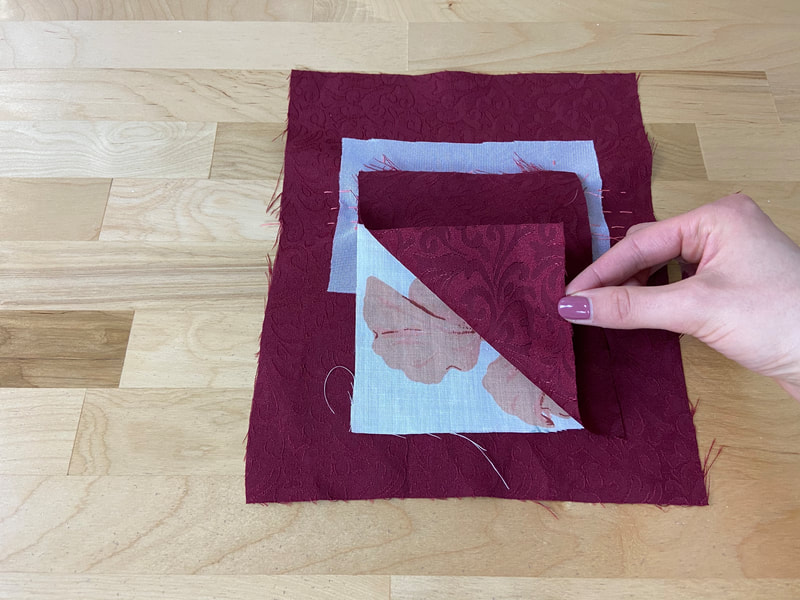
16. With the garment on its face side, peel back the side garment layer to expose the triangle cut and welt ends underneath.
|
17. Stitch at the base of the triangle and abutted welt ends to the left of the existing stitch. Repeat on both sides of the pocket.
|
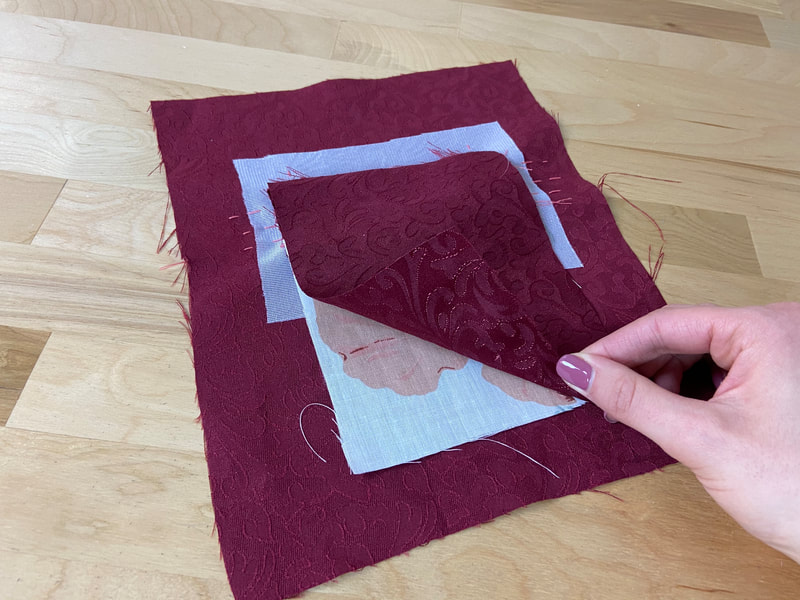
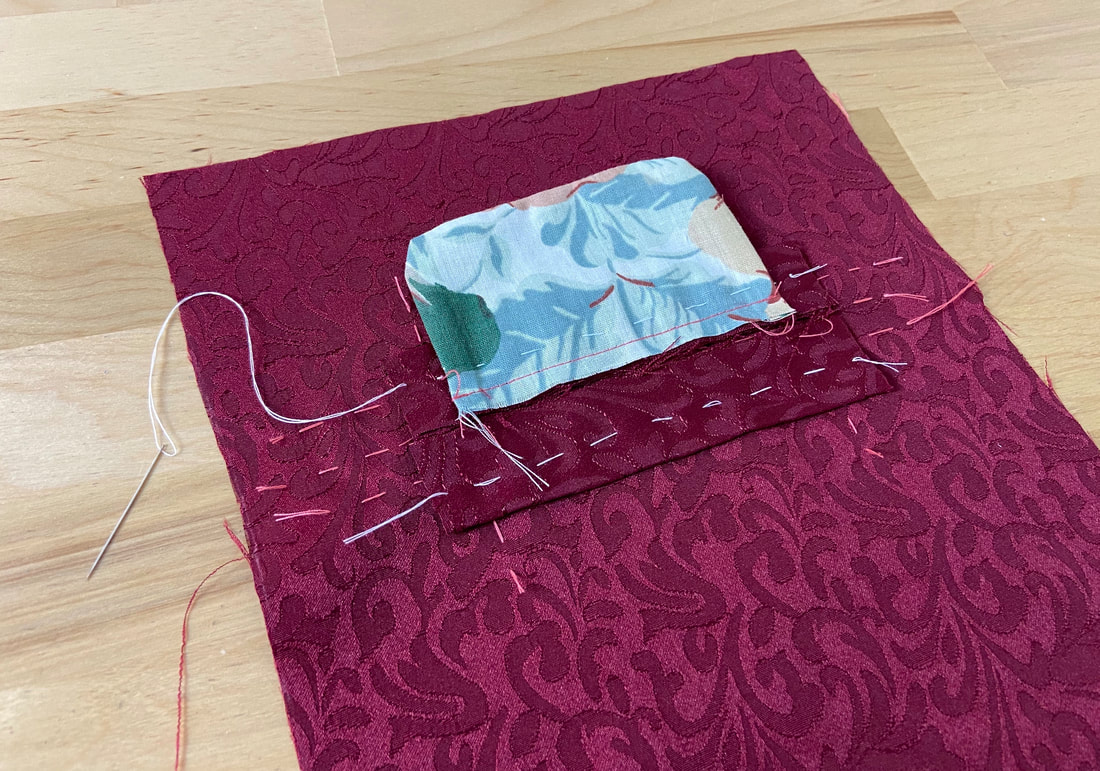
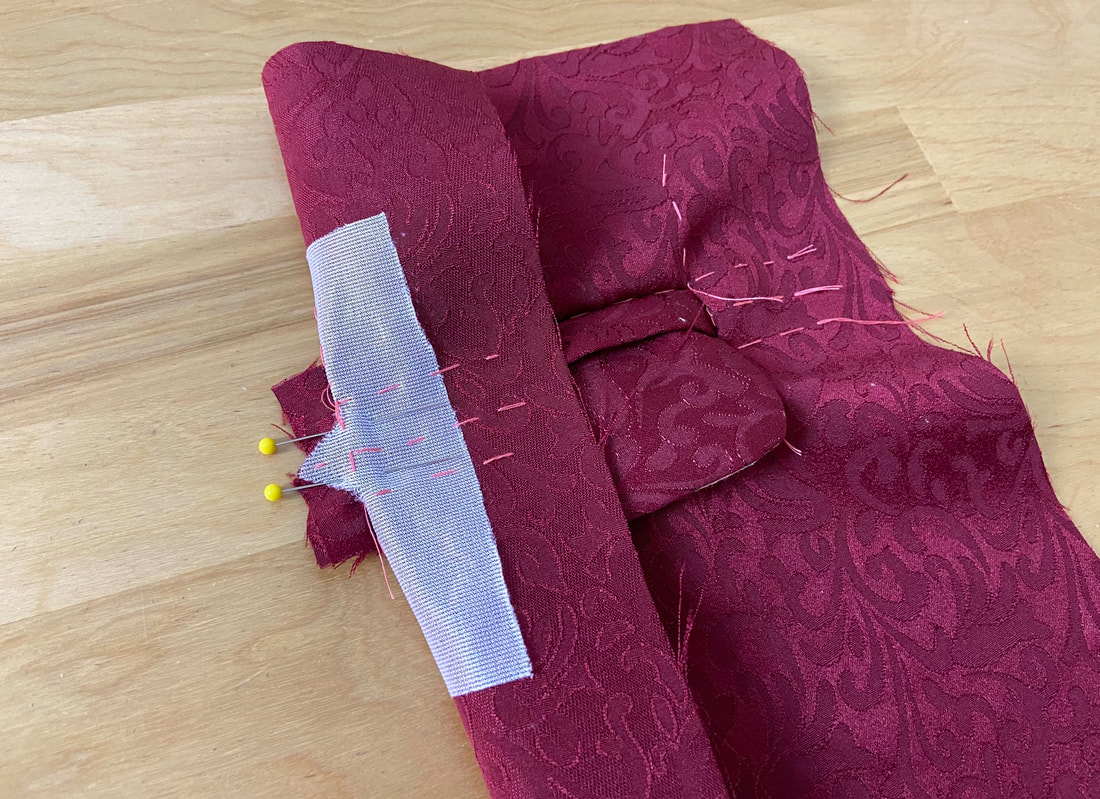
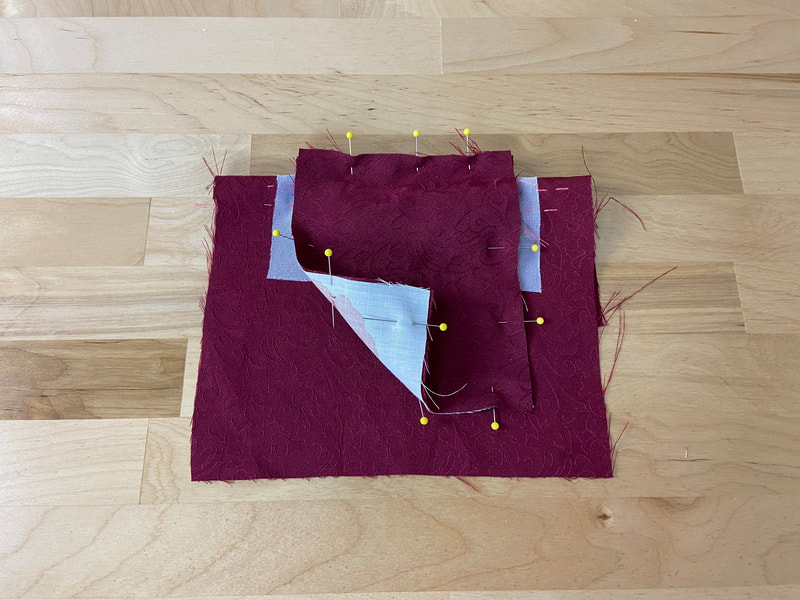
18. Align the small pocket layer to the bottom seam allowance and pin perpendicularly.
|
|
Stitch to the right of the existing stitchline as shown. Once complete, iron the pocket piece down.
|
|
19. Align the larger pocket piece on top of the small one such that the two pocket face sides are touching and all outer edges align. Insert pins along all edges of the pocket bag and top seam allowance edges.
|
|
20. With the garment on its face side, peel the garment layer back on all sides and stitch along all the layers of the seam allowance and overlapping pocket pieces to seal the pocket bag. You will have to stitch over the triangle cutouts again although this time, it is not necessary to get really close to the base stitch as you did in Step 17 above.
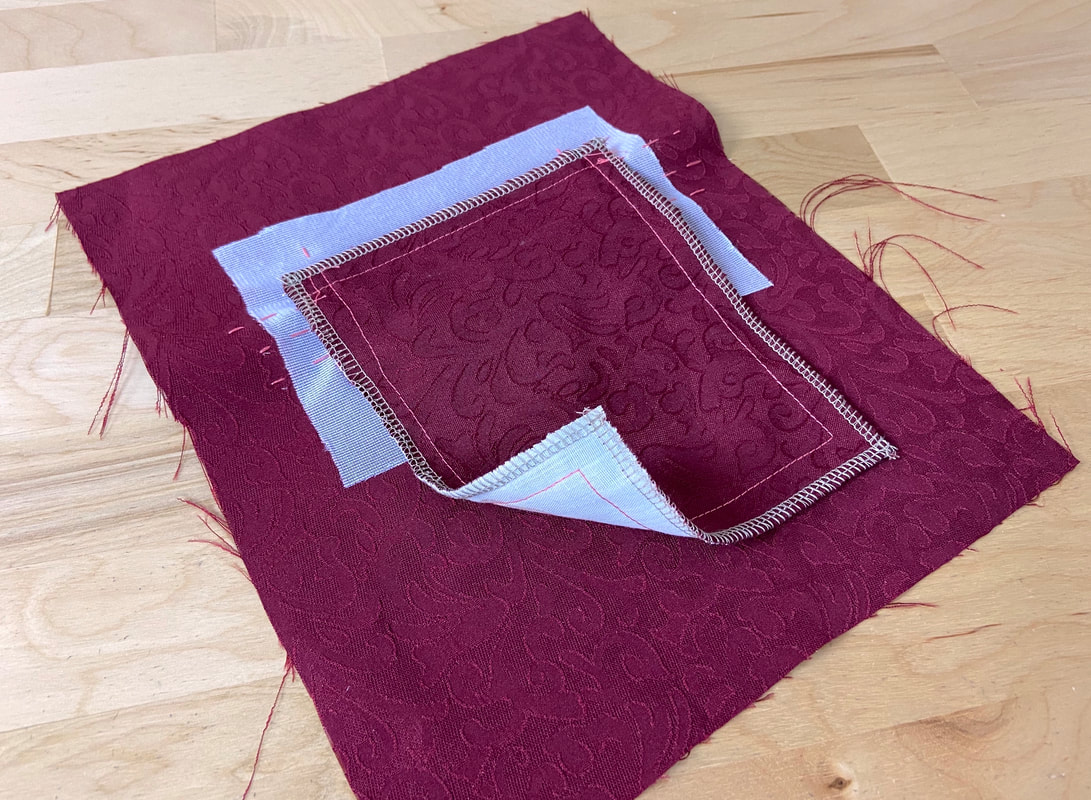
|
21. Apply and overedge stitch along the entire pocket bag to clean finish its raw edges. In this example, a serging stitch is used.
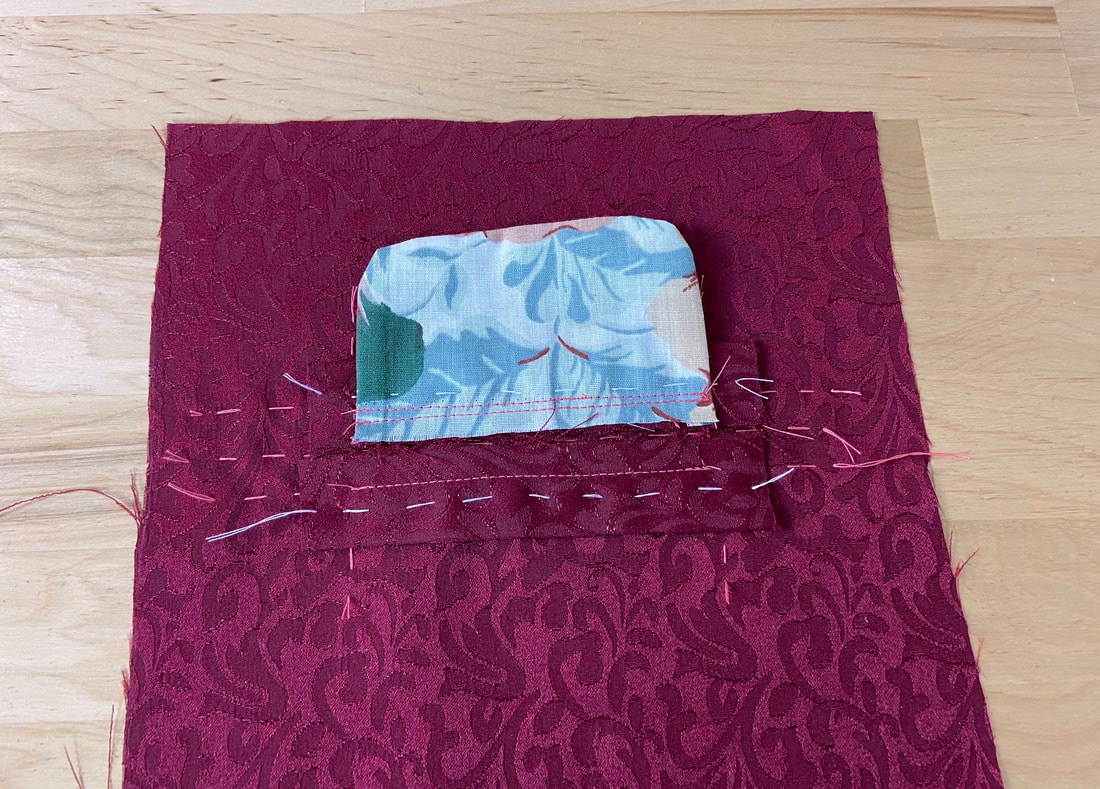
|
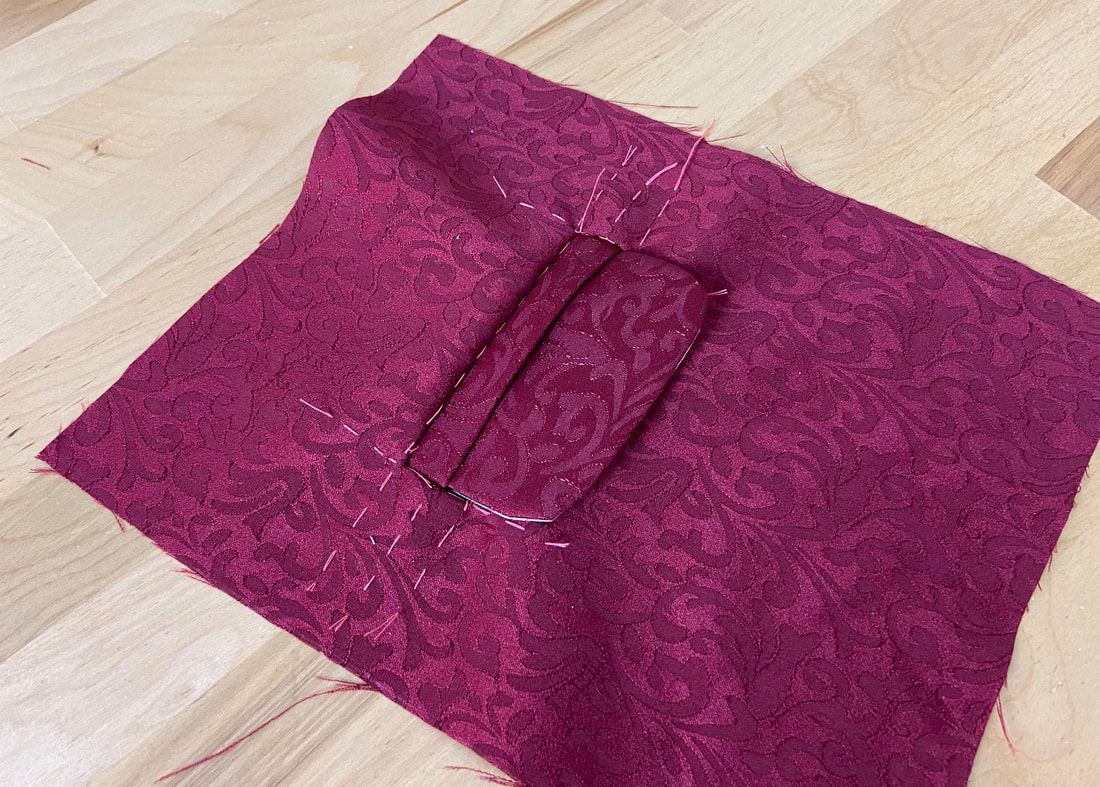
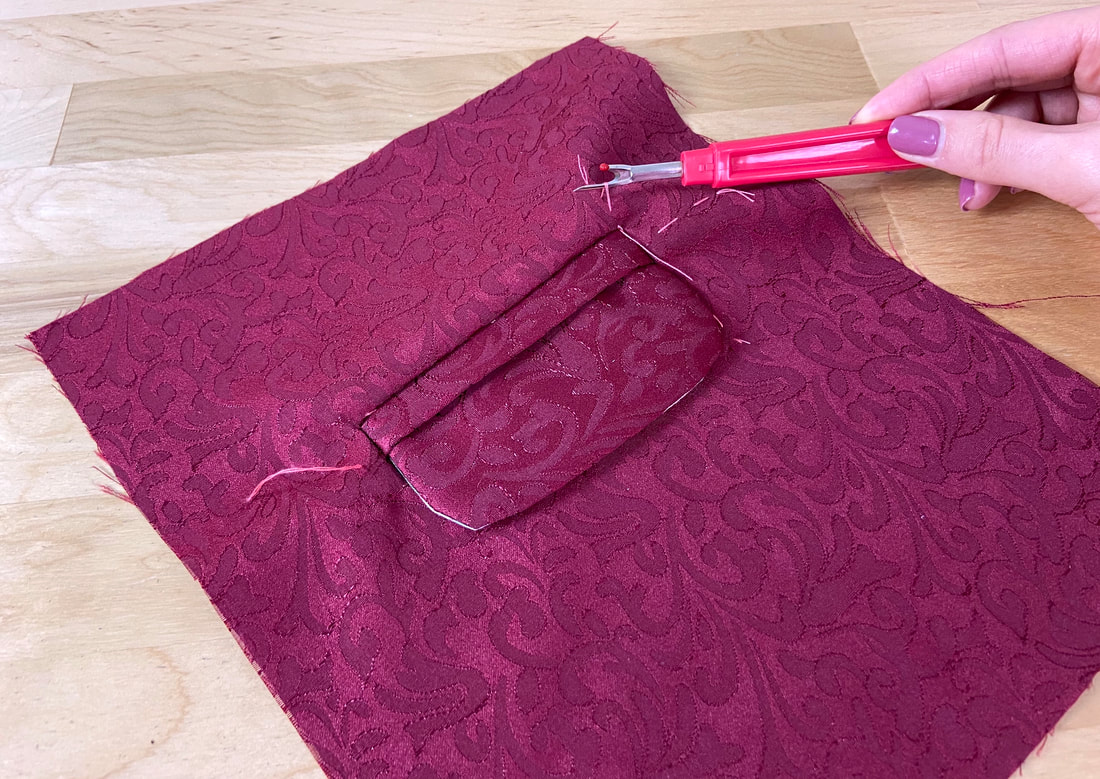
Remove all hand basting stitches at this point. The flap should extend from underneath the top welt piece covering the bottom welt as shown.
|
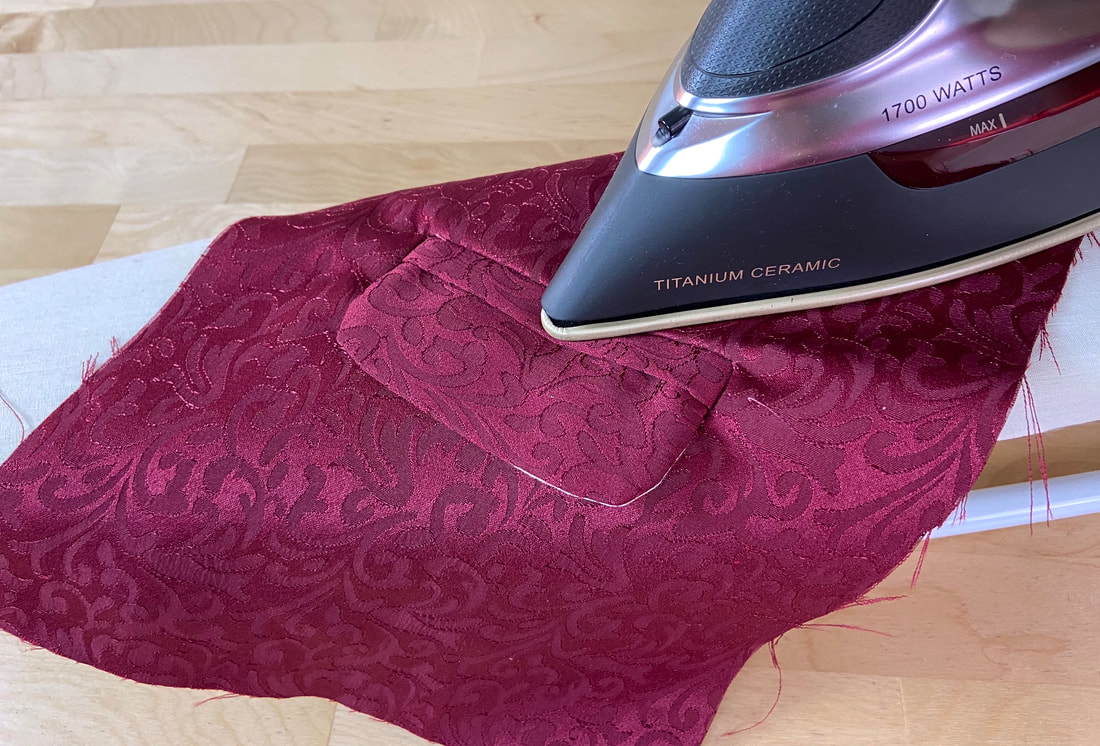
22. Last but not least, iron the finished welt pocket on both the right and wrong side of the application. Use a protective cloth if working with heat sensitive fabric.
 |
All content, including images and text, may not be copied, replicated, or redistributed without express written permission. This website is regularly screened and monitored for content protection.
|
