
An overcast finish is applied by hand as an alternative to a zigzag or a serging stitch. While a bit time consuming, it can be quite useful when your fabric is not compatible with your home sewing machine’s zigzag setting, or you don’t own an overlock machine to complete a serging application.
|
An overcast hand stitch is often used with very thick, bulky fabrics that are difficult to stitch on a regular home sewing machine.
|
Conversely, this hand-applied finish works great with very thin, flimsy fabrics that tend to bunch up or are damaged by the sewing machine needle and the machine’s tension.
An overcast stitch can also be applied to certain fabric raw edge portions that require to be clean finished but are difficult to reach using a sewing machine. In this case, it is more convenient to complete the finish by hand.
Just like a zigzag or serging stitch, the density and width of a hand overcast stitch can be controlled. These two important elements should be chosen based on type of fabric and how much its cut edges unravel.
Here are some general rules:
Here are some general rules:
|
- For high-fraying fabric, apply the overcast stitches closer together.
|
- For thick, bulky fabrics, apply longer stitches to enclose a wider area of the seam allowance edge.
|
- If working with loosely-woven materials, use larger stitches applying them densely to securely enclose the vulnerable fabric edges.
The truth is, overcast stitches are easy to apply once you get some practice under your belt. The goal is to keep individual stitches evenly distributed and equal in length. Keep in mind the concept of density and stitch length as this is very important when enclosing seam allowance edges with an overedge finish as such.
How To Sew A Hand-Applied Overcast Stitch
|
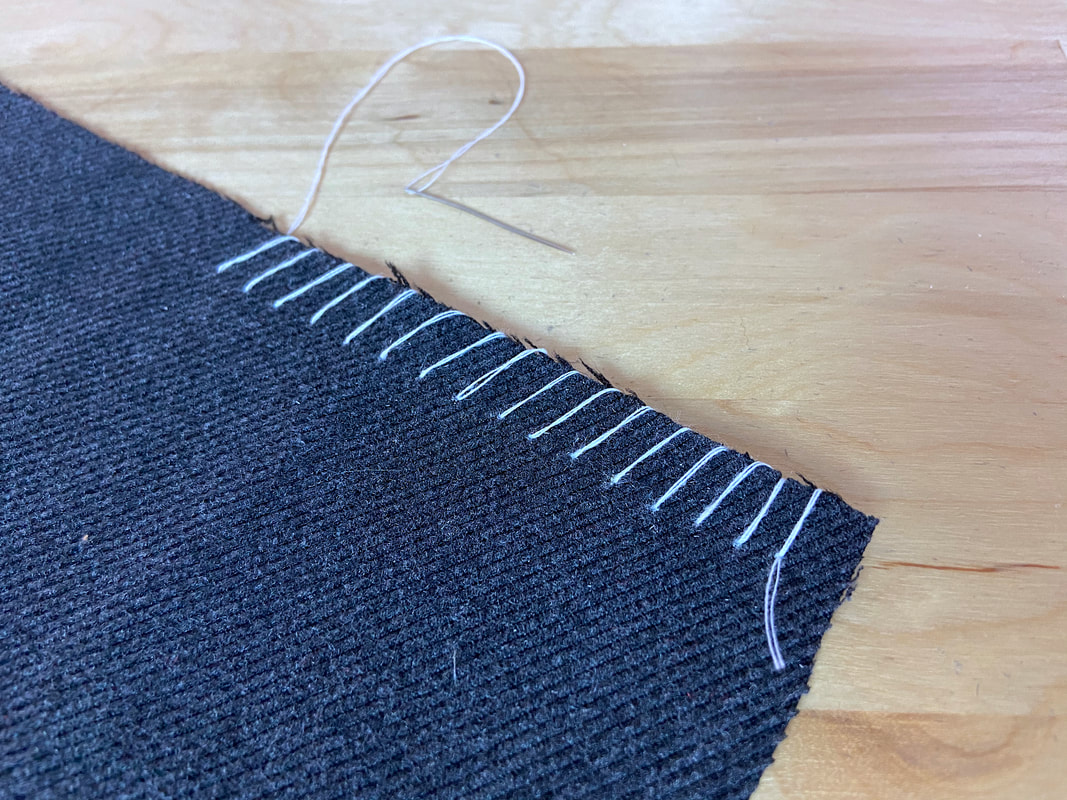
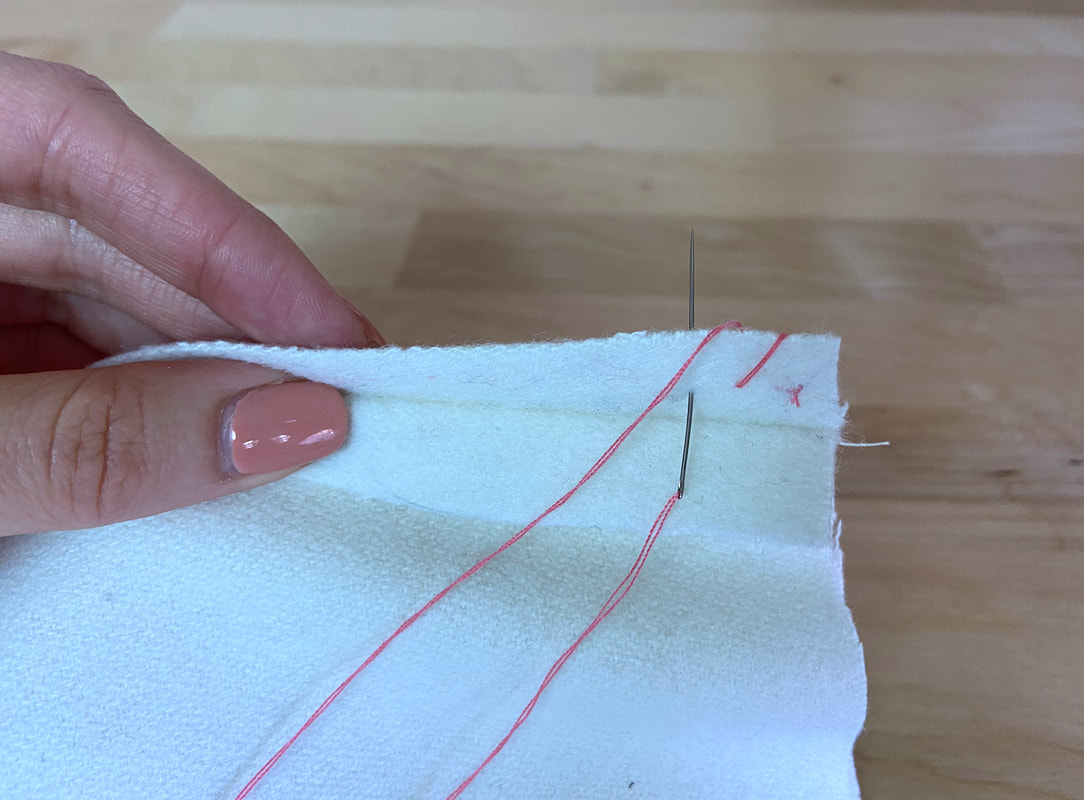
1. Using a single-threaded needle, stitch in place a few times through the seam allowance layer to lock the start of the stitch.
|
|
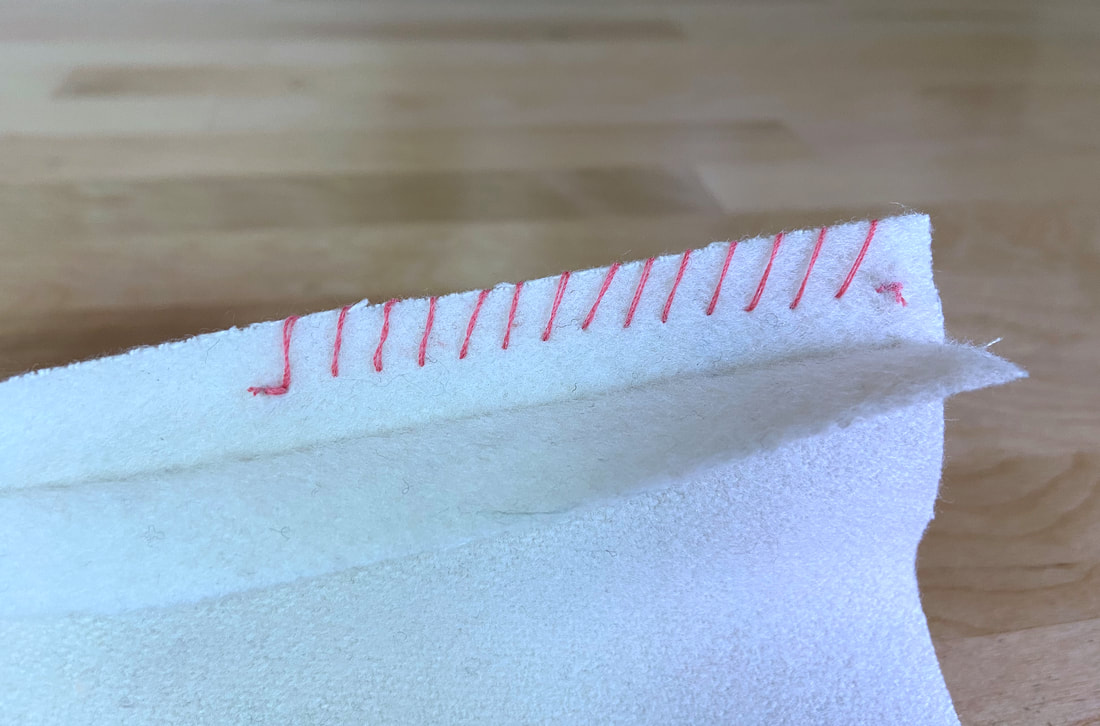
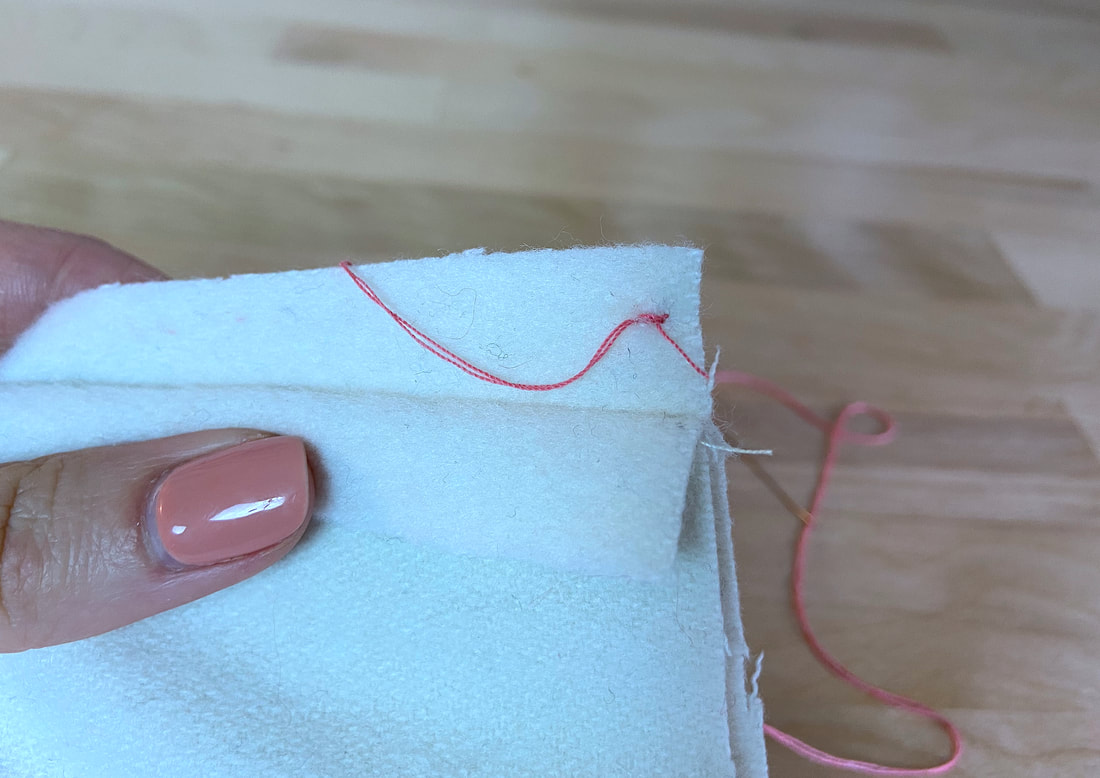
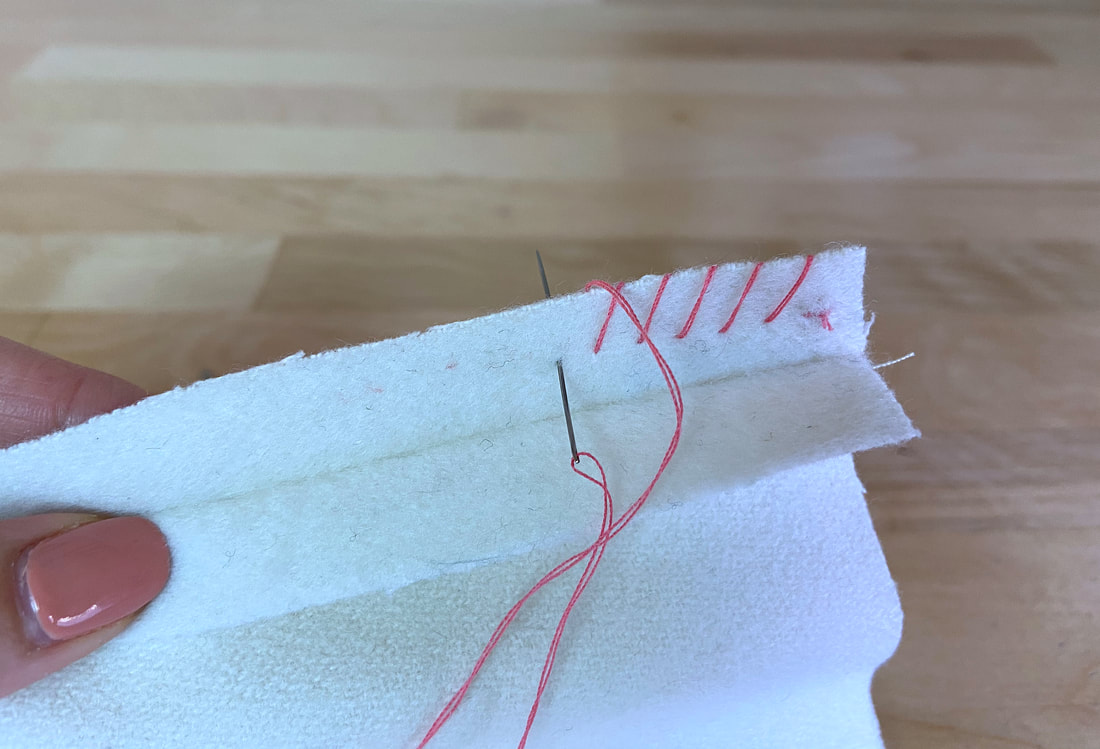
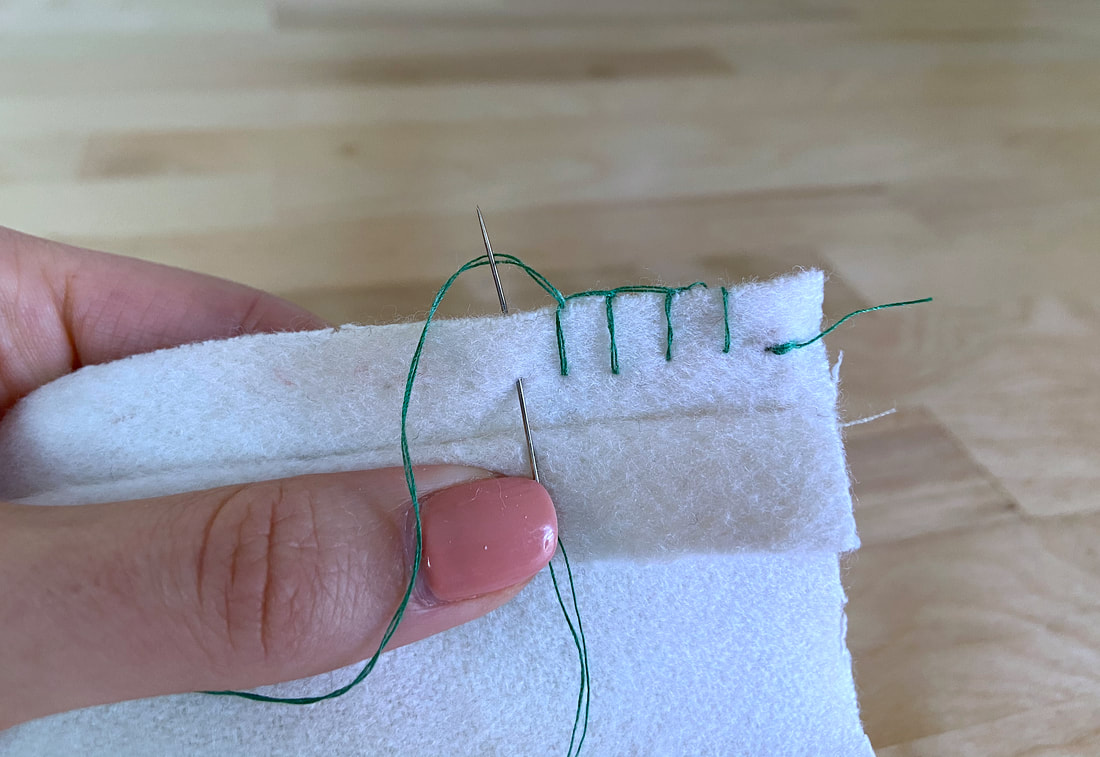
2. Next, apply a stitch to encase the seam allowance edge as shown above. This initial stitch should be applied at the desired stitch length, which for most fabrics, is anywhere from 1/4" to 3/8”. A 1/8” stitch length will also work well is working with low-fraying fabrics.
|
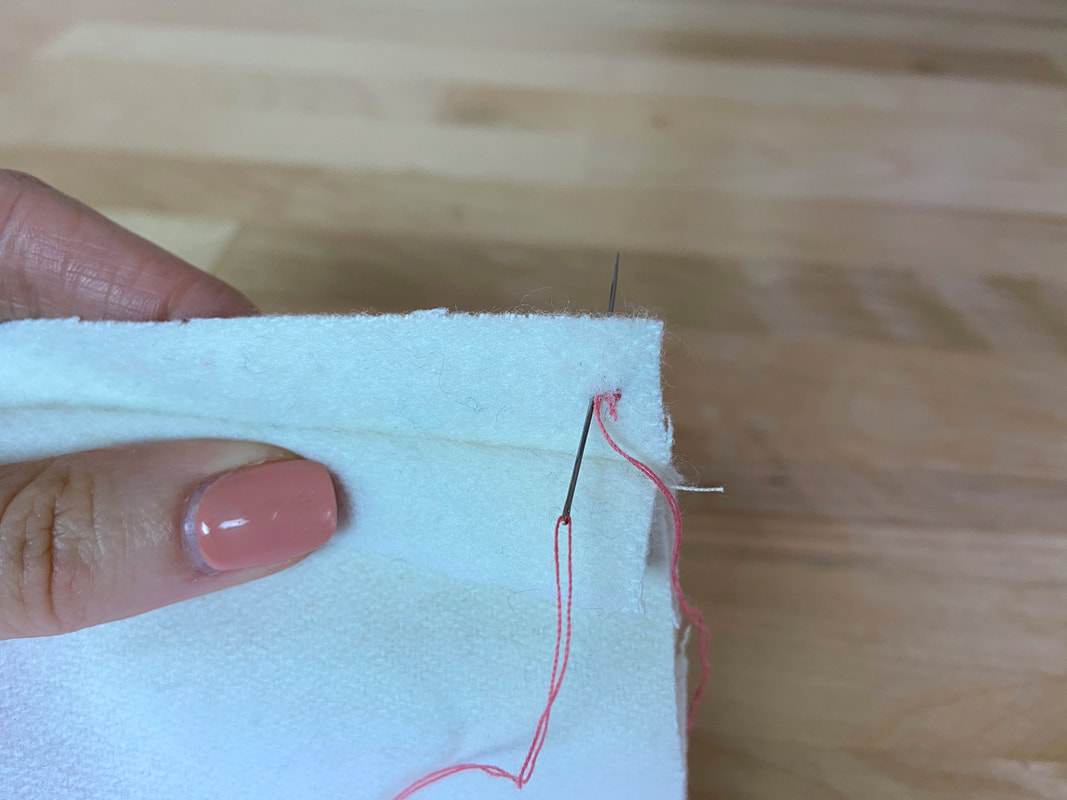
3. Insert the needle along the seam allowance edge at the point where the next overcast stitch will start. The distance from the first stitch to the second will mark the density of the overcasting and should be kept as consistent as possible throughout the application. For best results, the stitches should be placed about ¼” apart (or even less if working with highly-fraying fabrics).
|
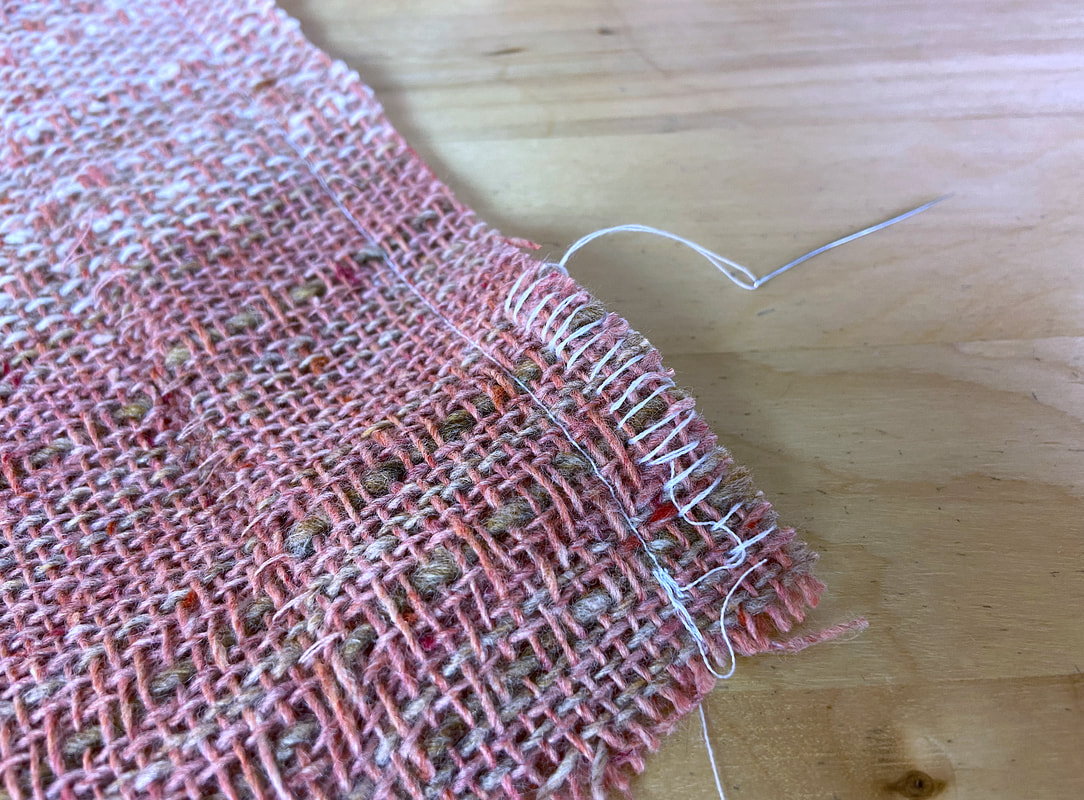
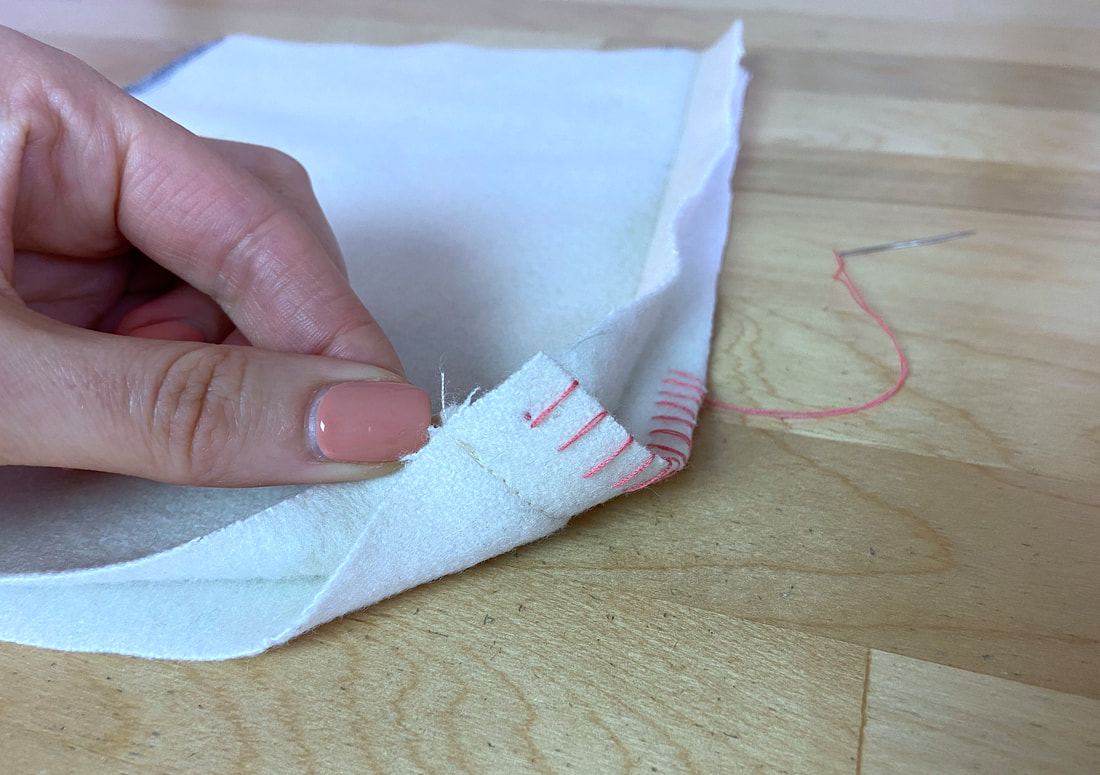
4. Continue stitching to enclose the entire seam allowance edge maintaining the same stitch length and distance between stitches (density) throughout.
|
It is very important not to pull the thread too hard as you stitch. Doing so will ensure that the fabric edges remain flat without causing strain or tension in the finished seam.
|
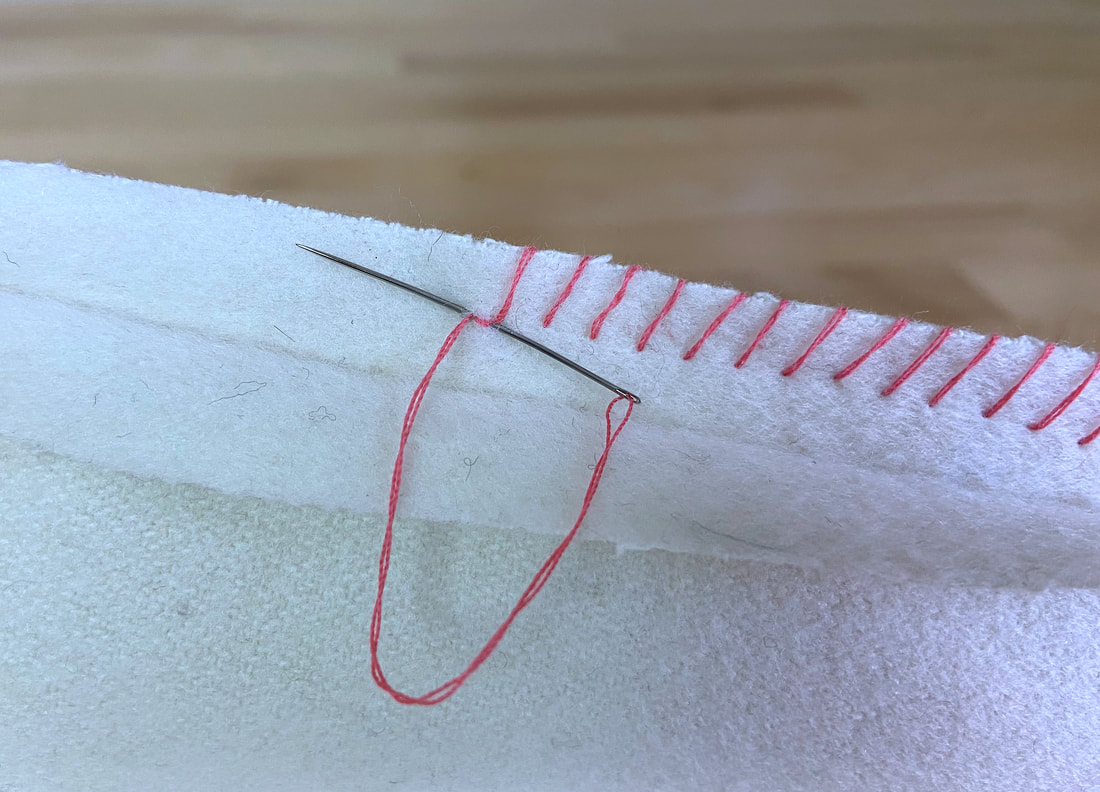
5. When complete, stitch in place a few times again to lock the thread. Like backstitching, this will prevent the end of the stitch from coming undone.
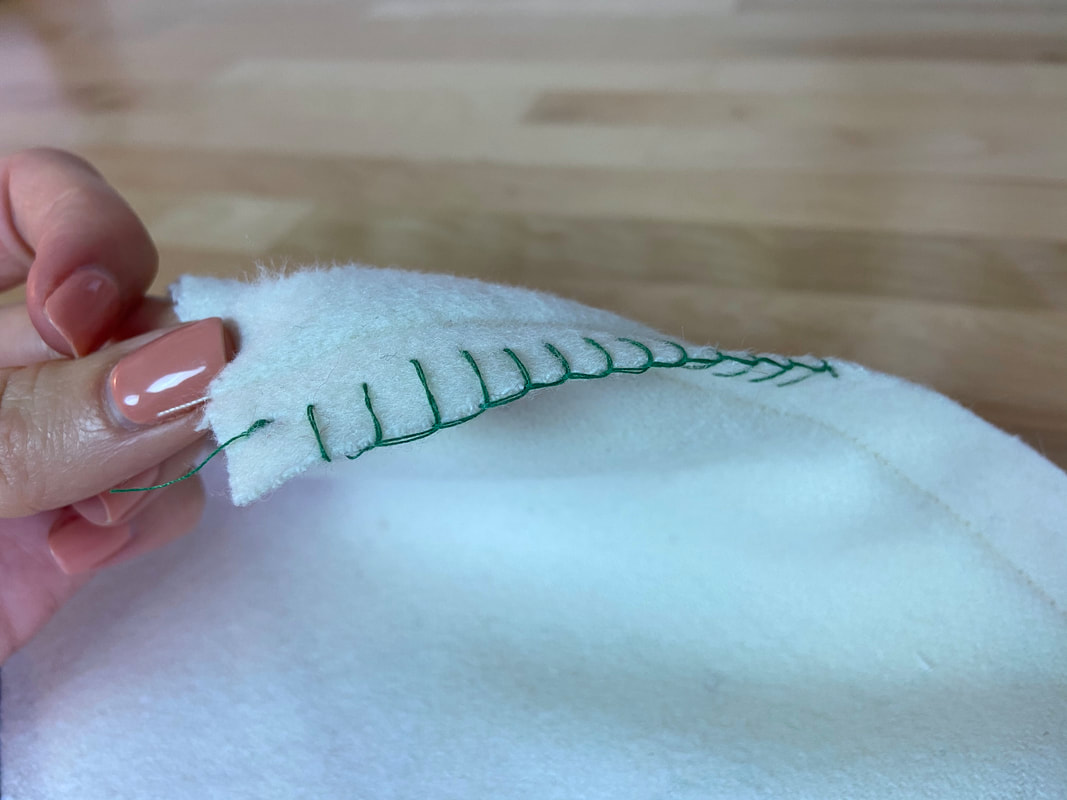
Sewing A Blanket Stitch Seam Finish
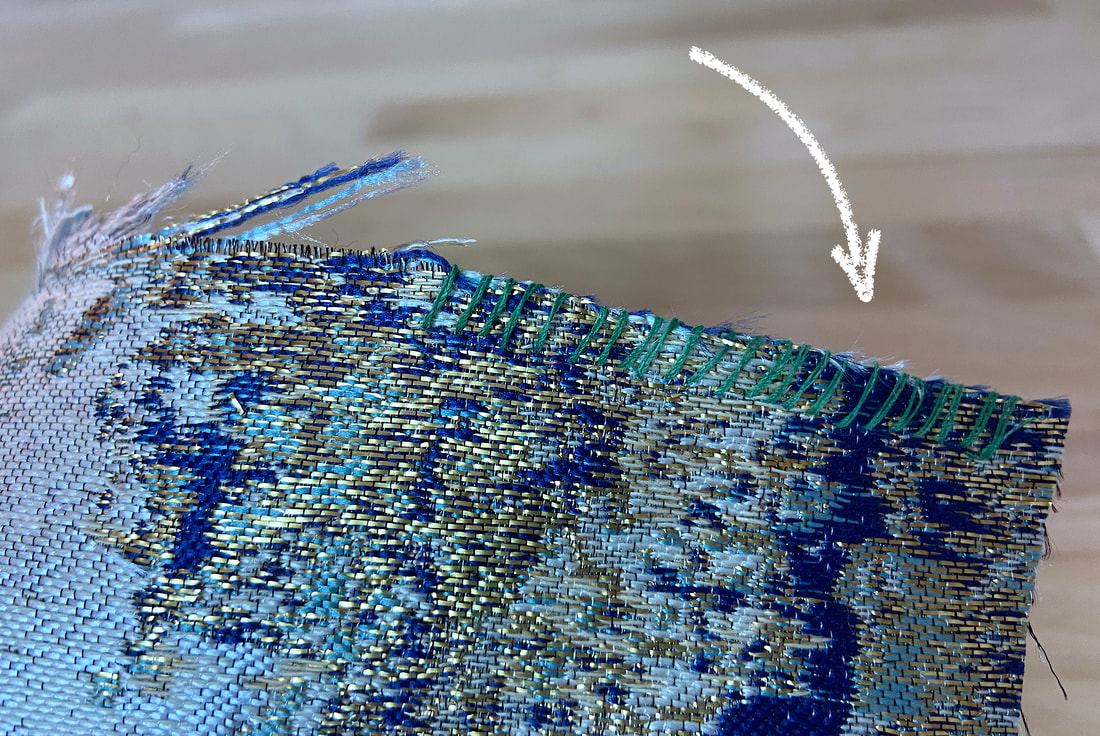
A blanket stitch is similar to an overcast stitch offering an even more effective way to contain fabric raw edges. It often also serves a decorative purpose.
|
A blanket stitch is applied in a similar fashion to an overcast stitch. The only difference is that a blanket stitch leaves a row of straight stitching along the fabric’s raw edge which makes it similar in structure to a serging stitch.
As opposed to an overcast stitch which runs diagonally, blanket stitches are aligned horizontally in relation the fabric edge.
|
1. Hand stitch in place a few times to lock the thread.
|
|
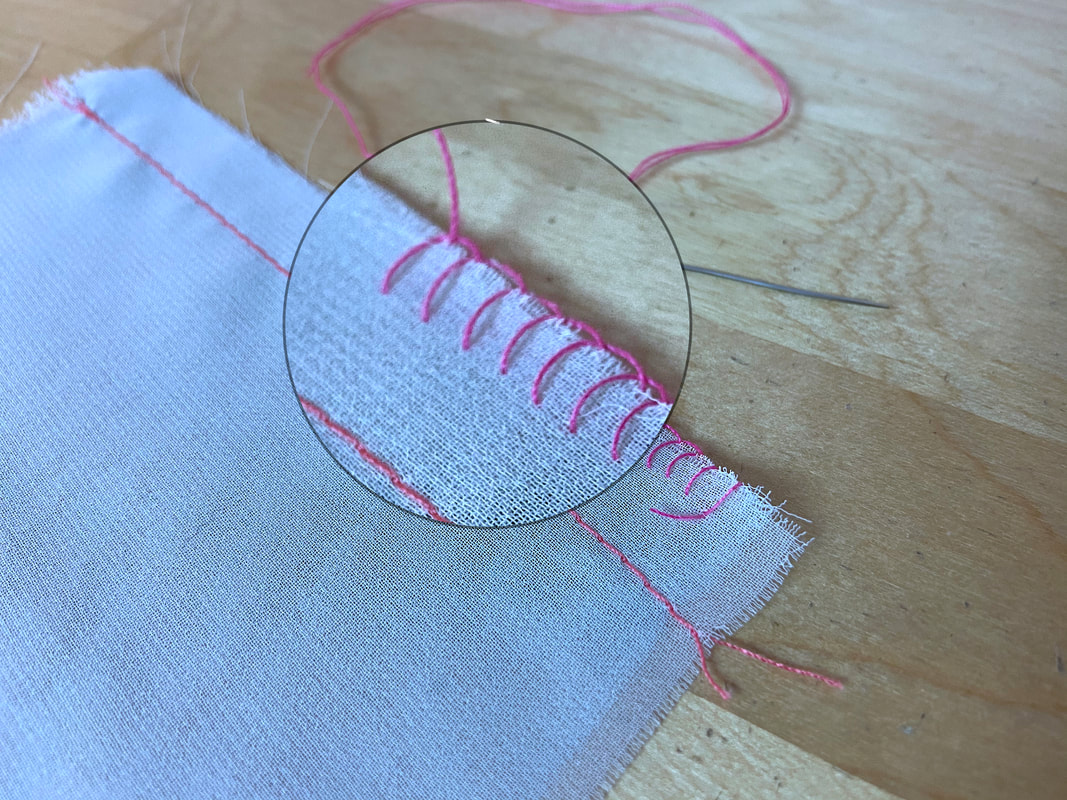
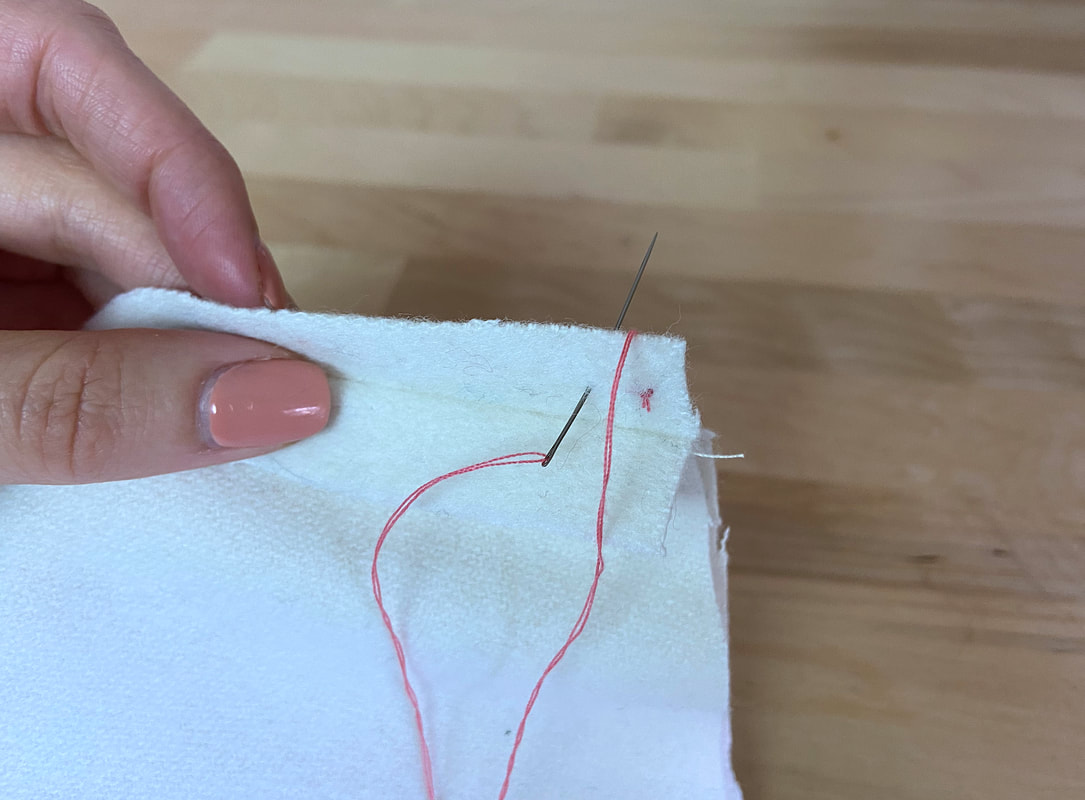
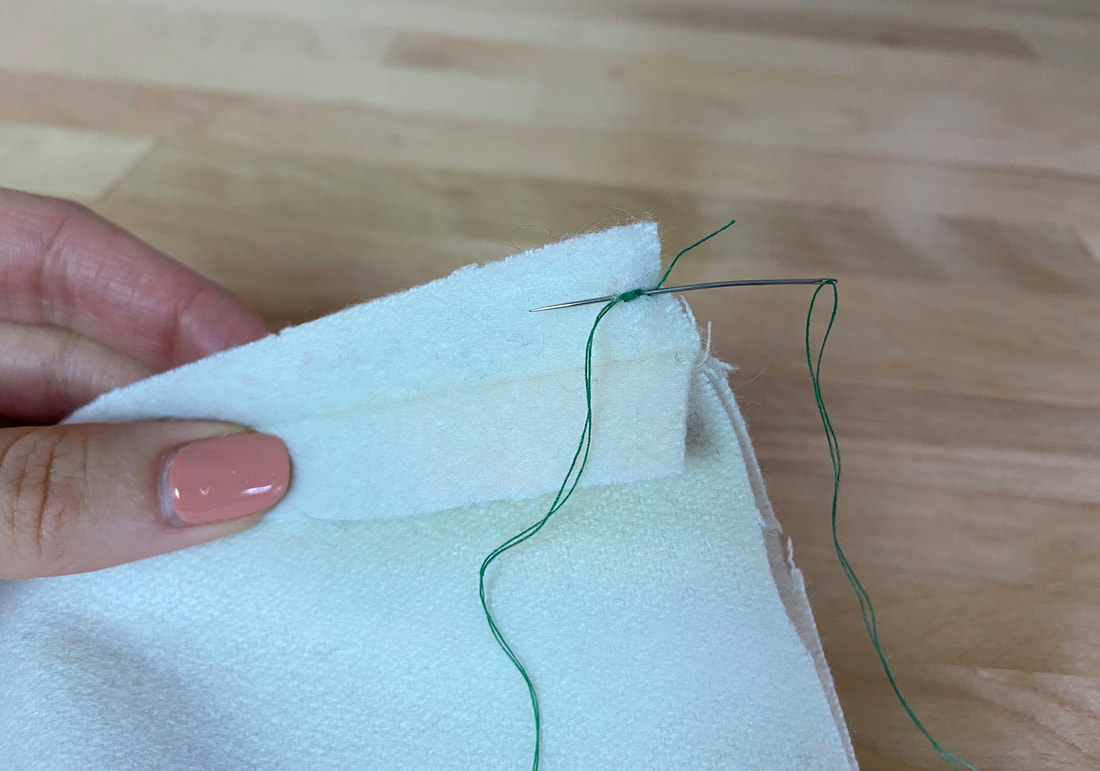
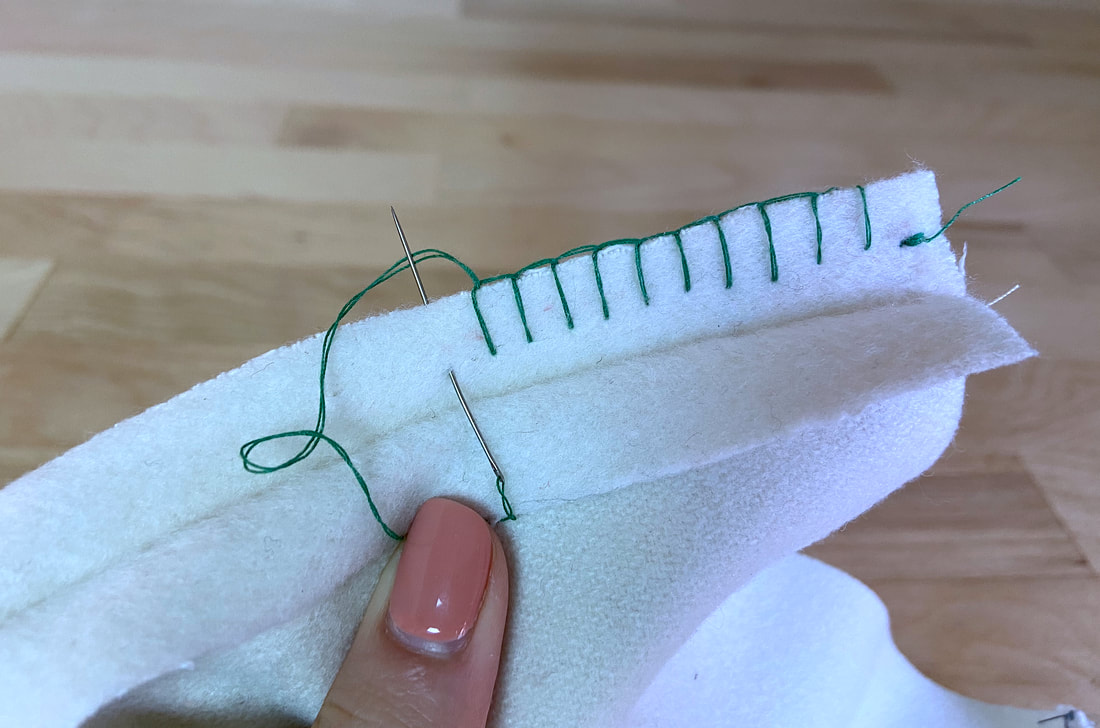
2. Keeping the fabric edge in horizontal position for comfort, loop the thread around the fabric's cut edge as shown above, inserting the needle through the seam allowance layer and then back out, placing the needle on top of the loop.
The point where the needle is inserted through the fabric layer will mark the depth (or length) of the stitch.
|
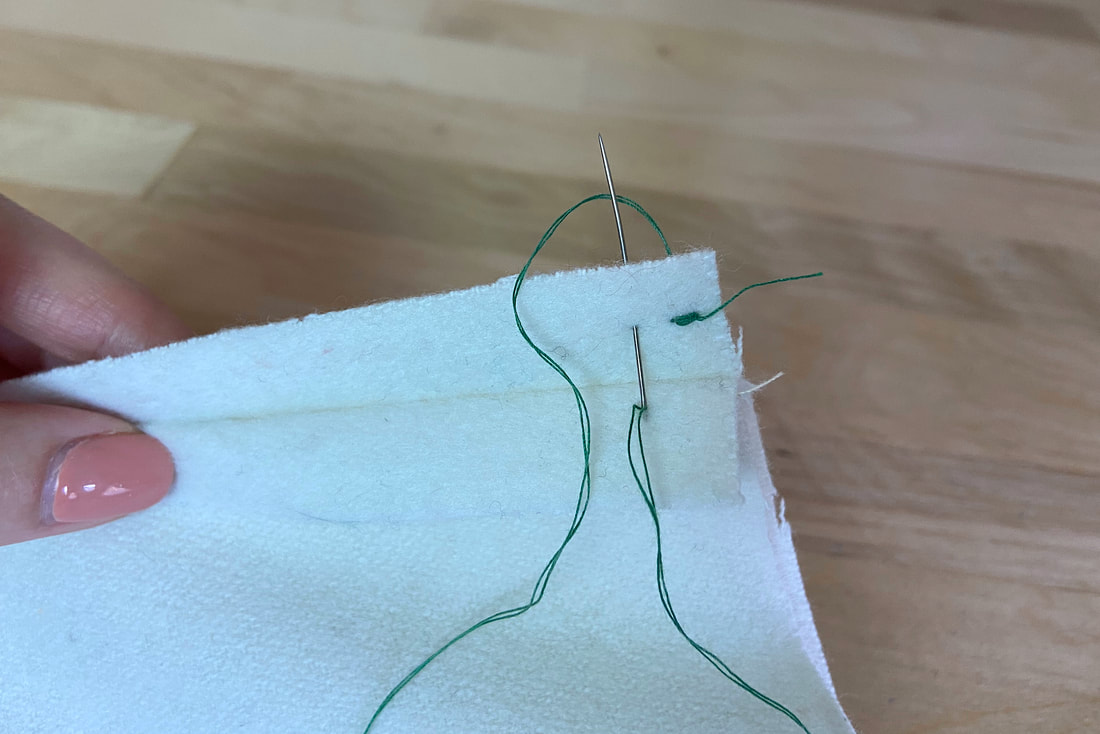
How close together the stitches are applied in the process will mark its density. Again, choose the blanket stitch width and density based on the type of fabric. Refer to the same principles described above.
|
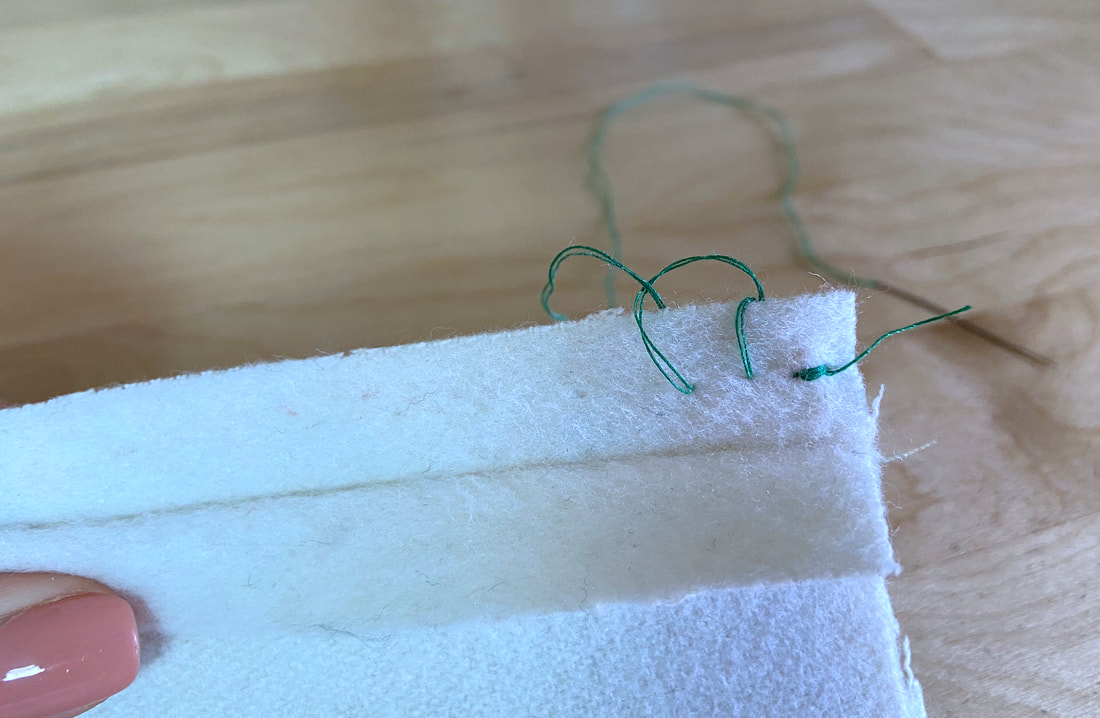
3. Continue stitching as described above until the entire fabric edge is encased. Be sure not to pull too hard on the stitches as this will cause tension and strain in the finished seam.
 |
All content, including images and text, may not be copied, replicated, or redistributed without express written permission. This website is regularly screened and monitored for content protection.
|
