
What Are Circle Ruffles

|
Compared to gathered ruffles, circle ruffles have a much softer, feminine drape. While a gathered ruffle flare is accomplished with the help of a gathering stitch, the circle ruffle’s flounce is due to the circular shape in which the ruffle strip is cut.
|
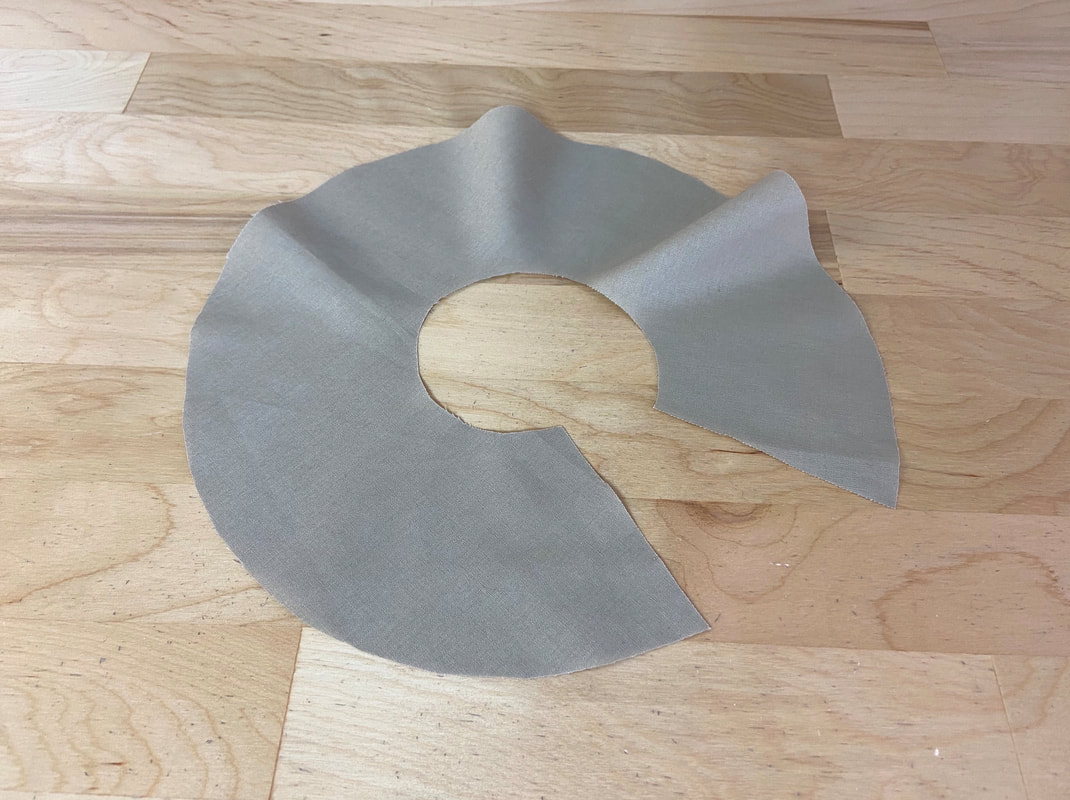
The ruffle is cut from a circle measuring the diameter of the desired ruffle width. To be more specific, a circle ruffle is formed from a large circle, which marks the ruffle’s free-hanging edge, and a smaller circle placed directly at the center of the larger one to mark the ruffle’s inner edge. This smaller edge is ultimately sewn to the garment.
Circle ruffles are less bulky and fairly simple to sew to garment edges and into seams. A circle ruffle is a more refined, mature style which works beautifully with both light and heavier-weight womenswear style. Conventionally, circle ruffles are most commonly used with lightweight dresses and blouses.
As is true for all ruffles, a circle ruffle’s free hanging edge should be fully clean-finished prior to sewing the ruffle to the garment.
|
Finishing a circular edge may pose a bit of a challenge, especially for sewing beginners. Perhaps the easiest way to enclose the ruffle’s outer edge is to finish the entire ruffle with lining. The lining technique results in a high quality finish but it is not appropriate for all fabrics. A lined circle ruffle works best with lightweight, thin fabrics.
In addition, the lining method may not be appropriate with your design. If that’s the case, the ruffle’s free-hanging edge can be finished with a rolled hem, baby hem, or an overedge stitch which is folded once and topstitched. The last option is considered a less expensive technique, and should not be used with circle ruffles that have an exposed underside.
How To Draft A Circle Ruffle Pattern
|
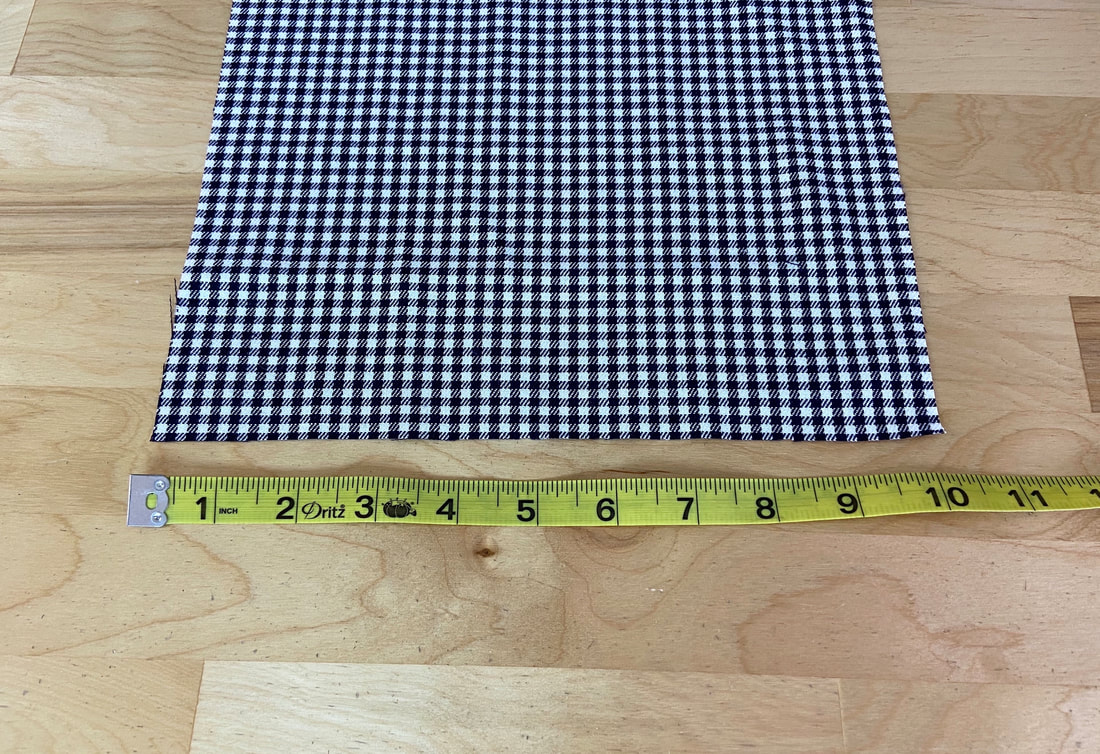
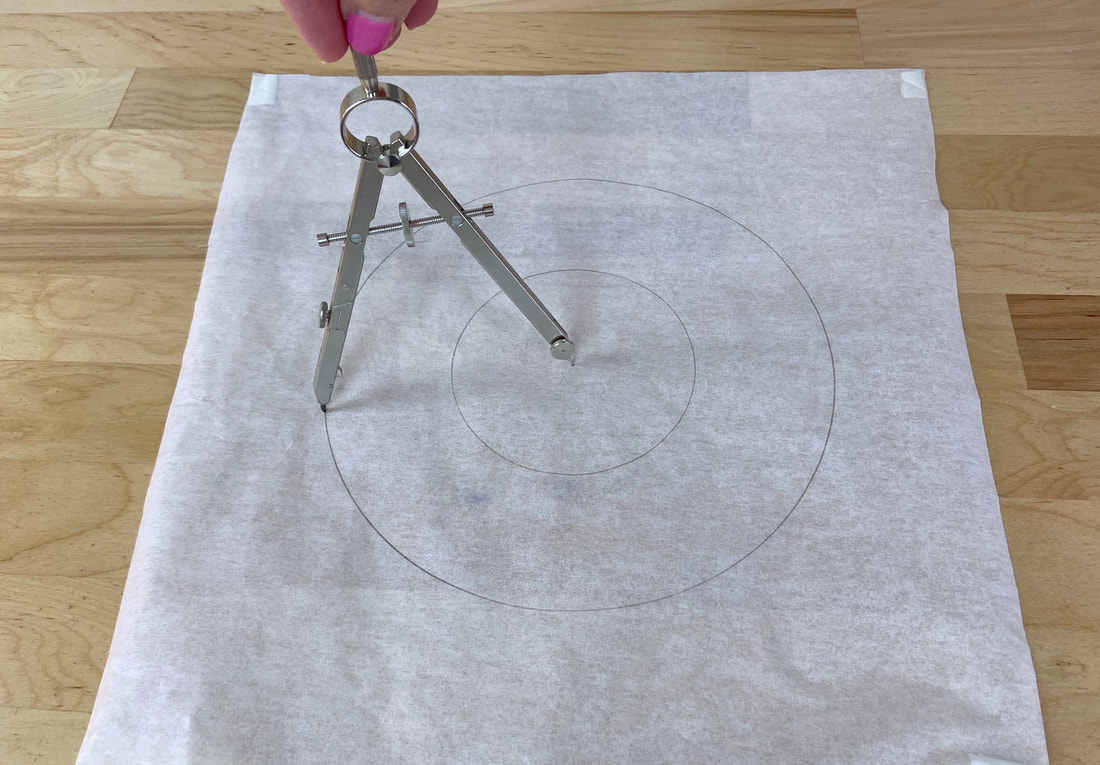
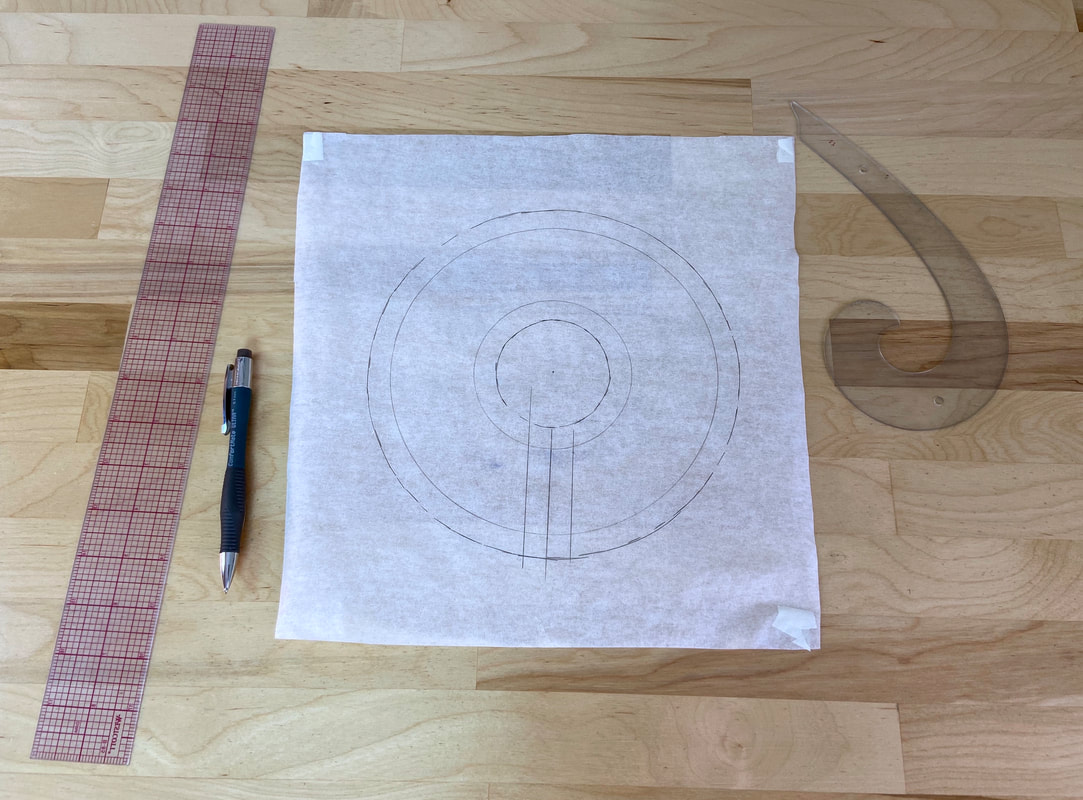
1. Measure the edge or seam that will house the circle ruffle.
|
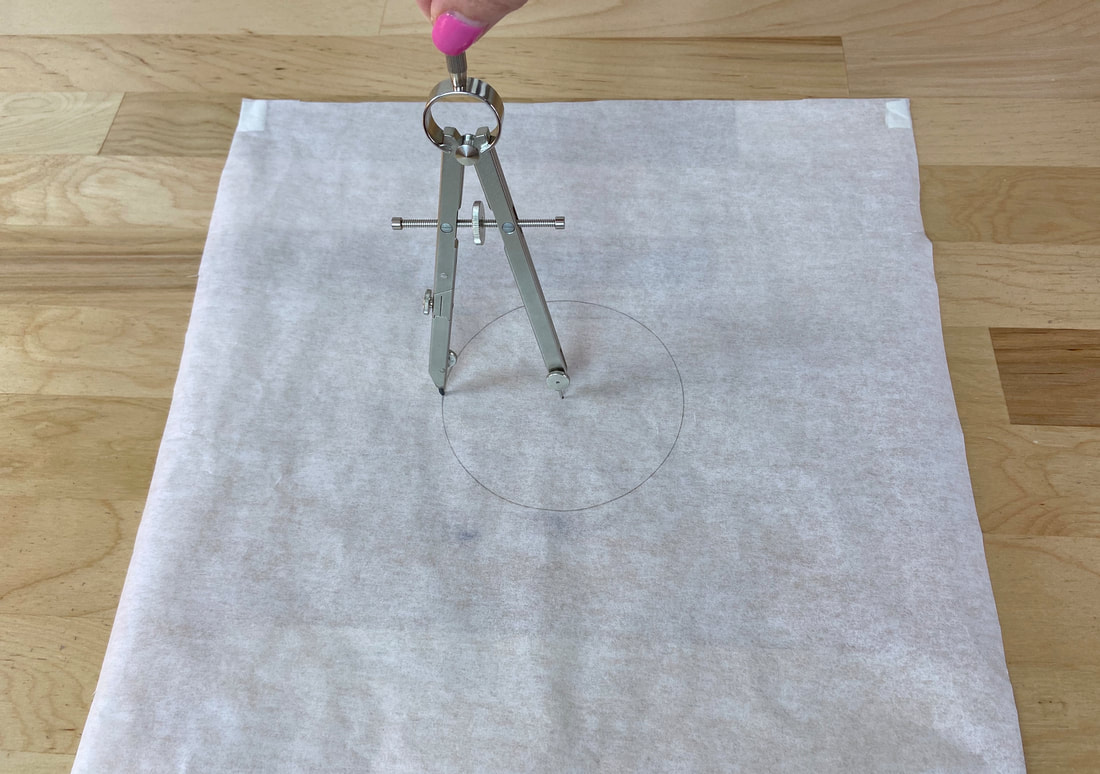
2. Using a compass, draw a circle with a circumference that is at least 1” longer than this measurement. This circumference can be a bit longer since the ruffle can always be trimmed down to size if needed. However, if it is too small, multiple circle ruffle strips will need to be cut and pieced together to cover the entire length of the garment edge/seam.
This initial circle marks the inner edge of the ruffle which will eventually be stitched to the garment.
|
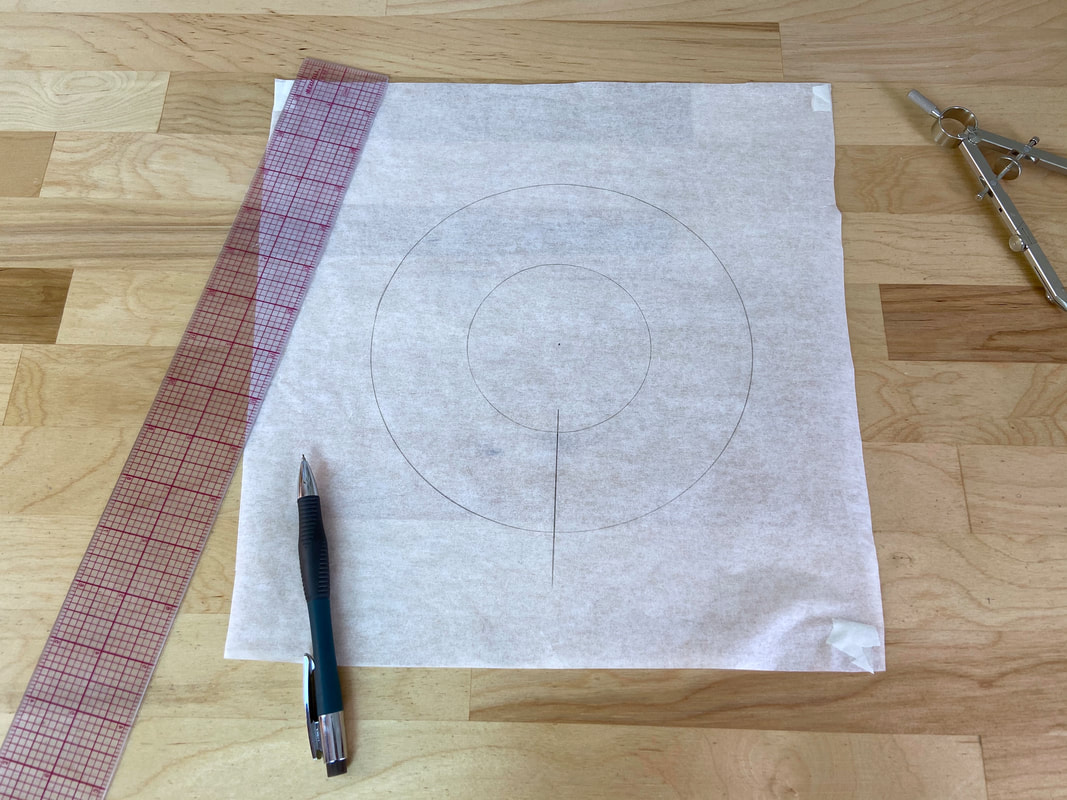
3. Next, determine the desired width of the final circle ruffle. In this example, the finished ruffle will be 2” wide. Radiating from the center of the smaller circle, draw a larger circle at 2” distance from the first one. This larger circle marks the circle ruffle’s free-hanging edge.
|
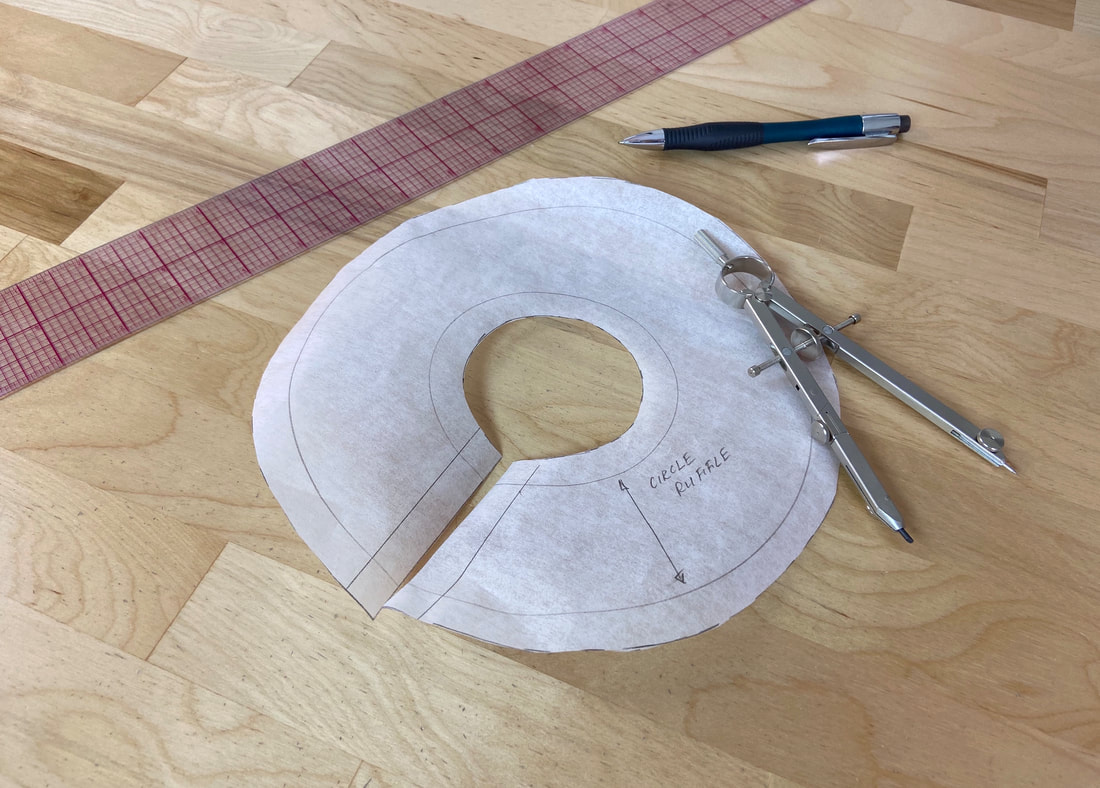
4. Add a straight line across the circle wheel to mark the ruffle’s seam allowance edges at each end.
|
|
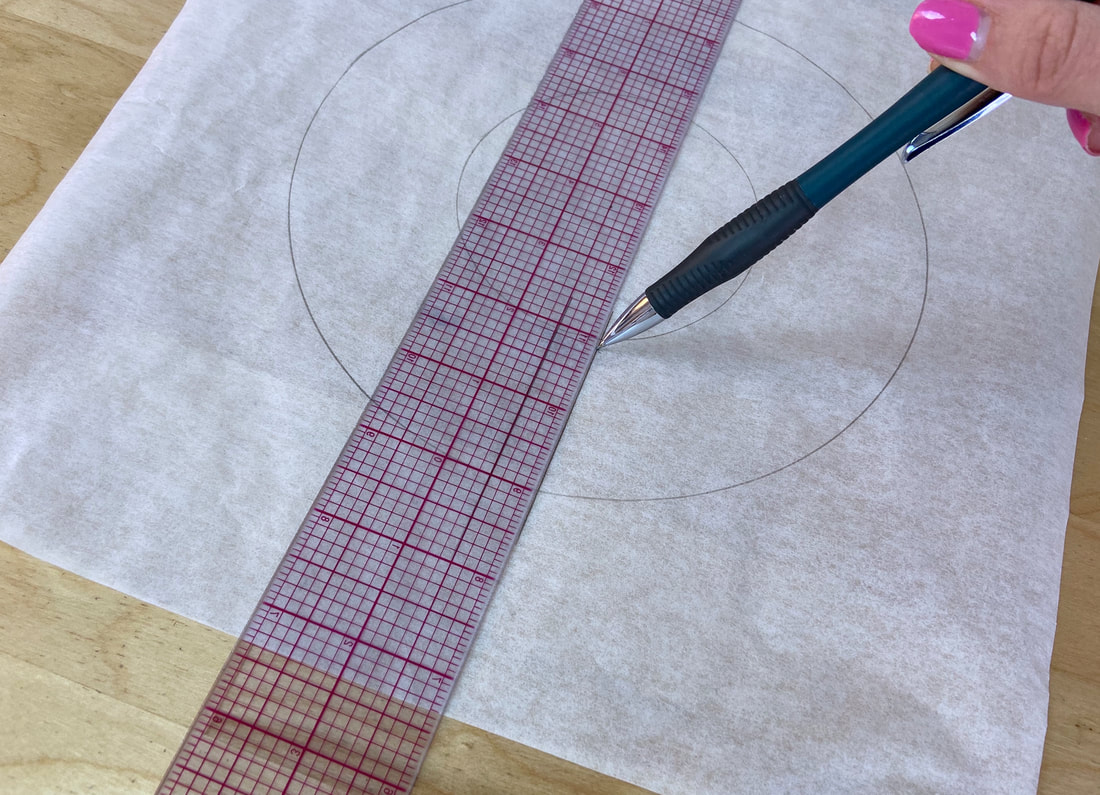
5. Add ½” seam allowance on both sides of the straight line separating the circle wheel.
|
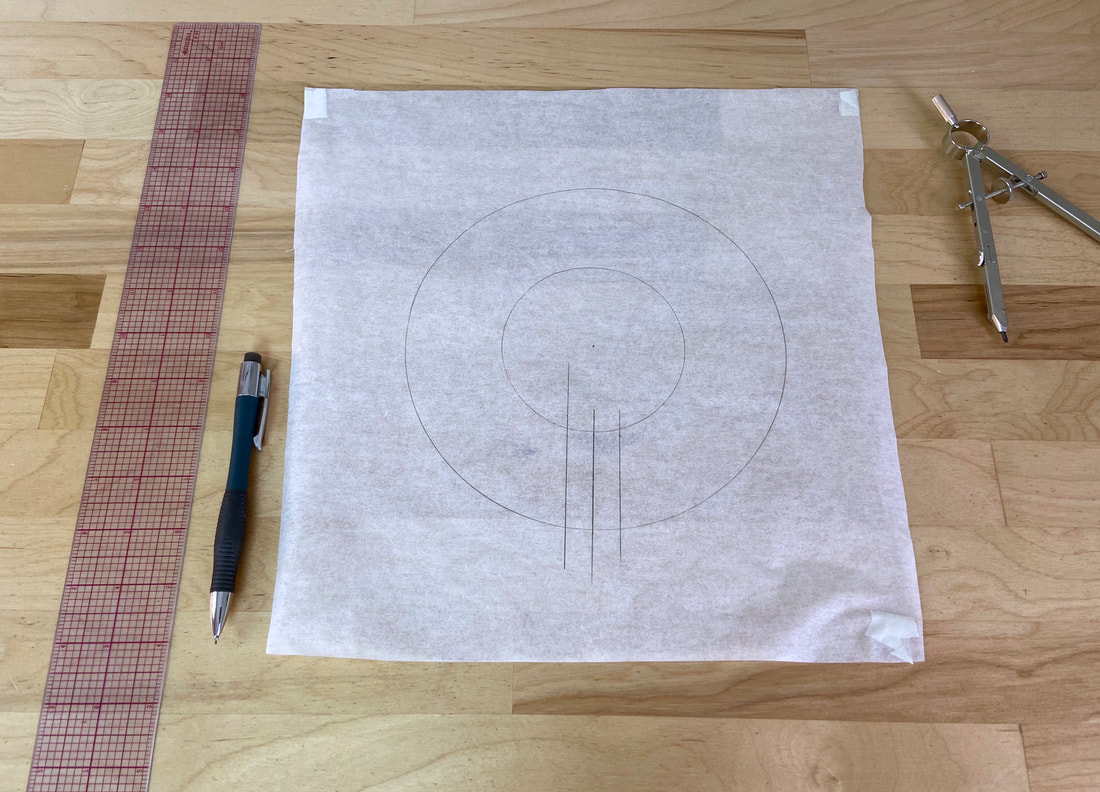
6. Add seam allowance along the inner and outer wheel edges as shown. In this tutorial, ½” seam allowance is used along all edges.
|
7. Cut the circle ruffle pattern along its outer seam allowance edges as shown.
Sewing A Circle Ruffle Into A Seam
|
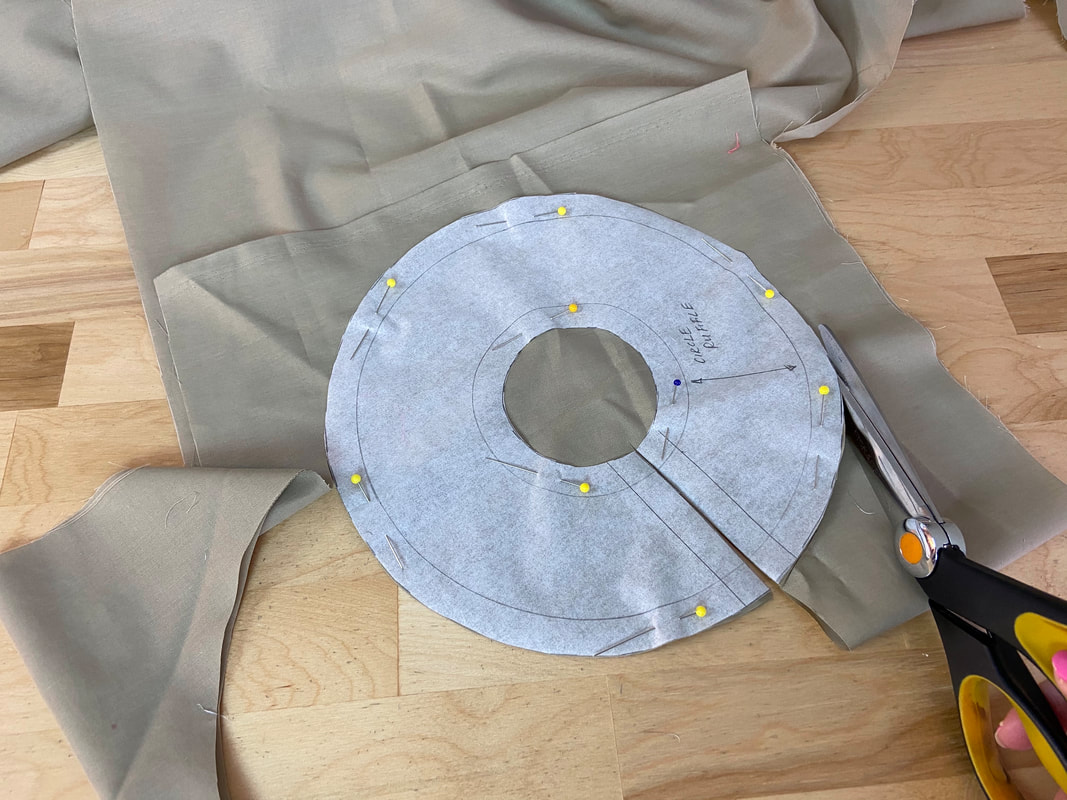
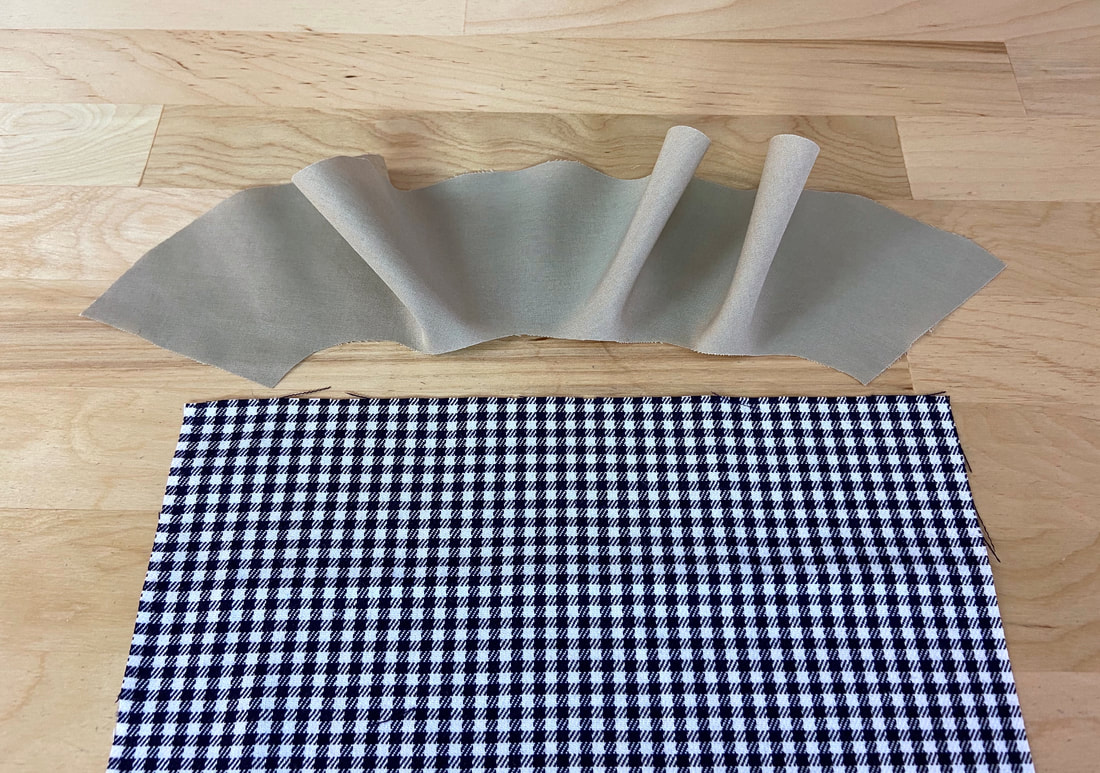
1. To start with, cut as many fabric pieces from the circle ruffle pattern as needed for the length of the seam or garment edge.
|
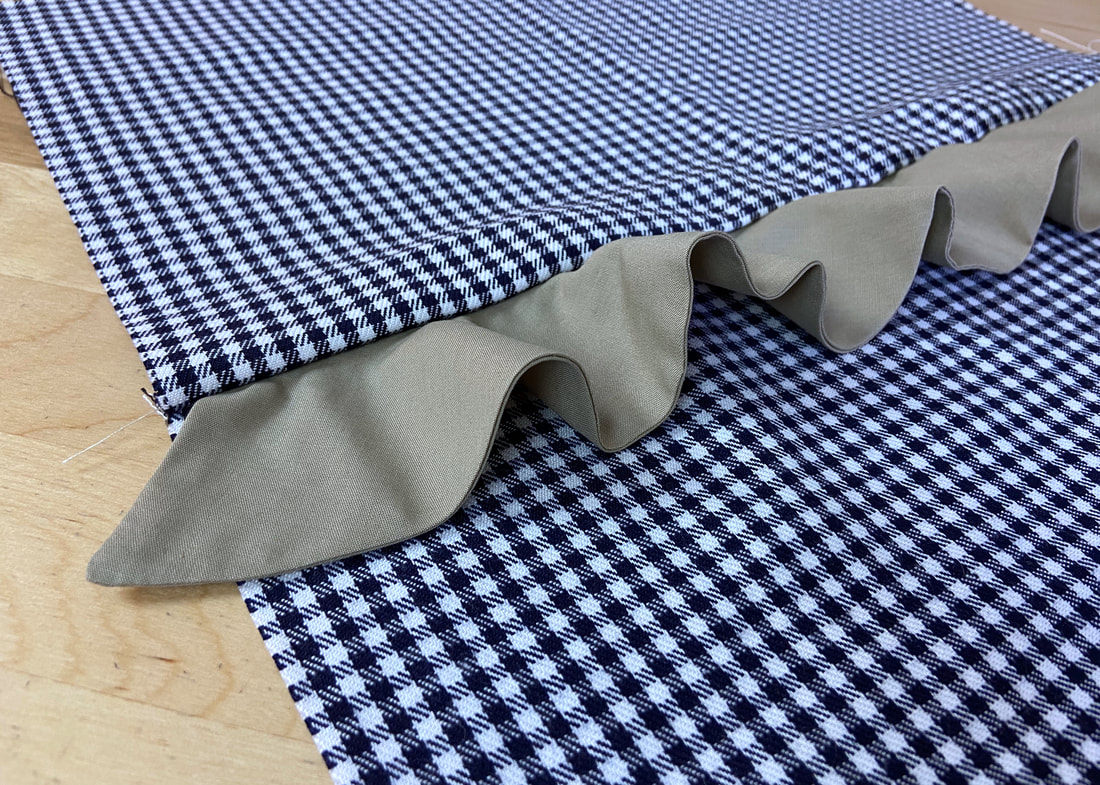
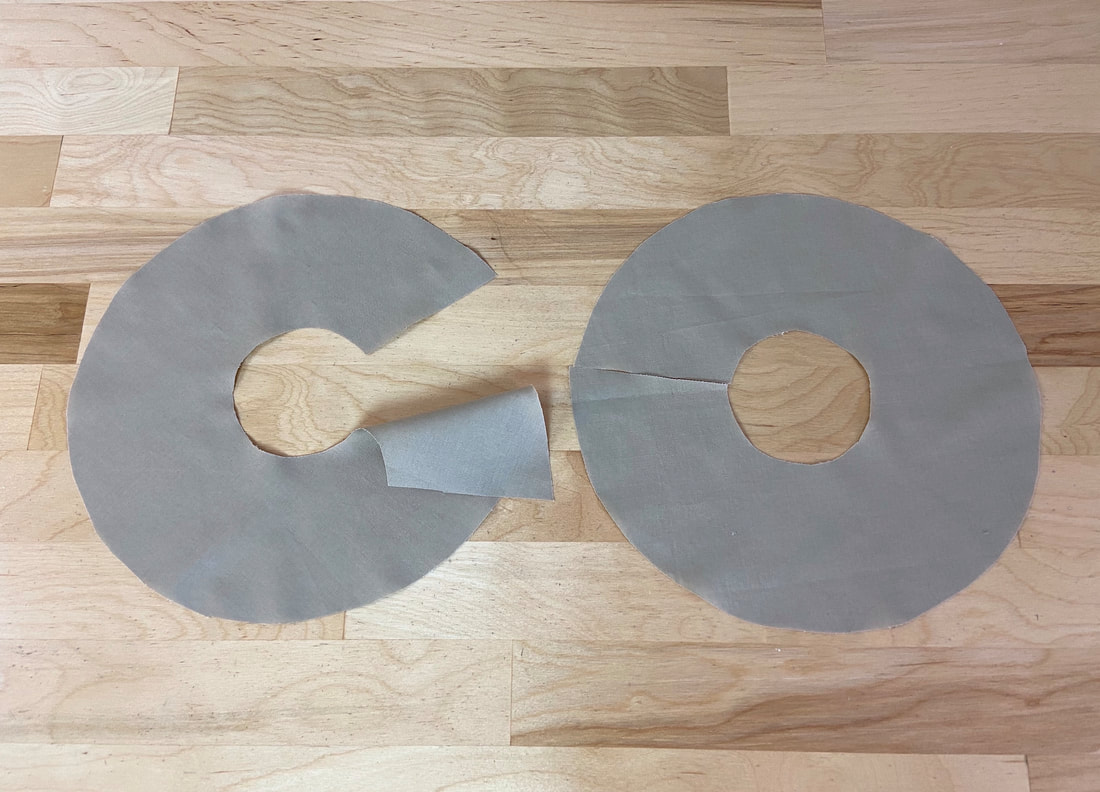
If your circle ruffle will be finished with lining (shown in this example), cut an equal amount of identical lining pieces out of the same fabric or a lining fabric of your choice. In this case, the circle ruffle is lined with an identical layer cut from the same fabric.
|
2. The circle ruffle has to be lined prior to being stitched to the garment. However, before attaching the lining, check the length of the notched ruffle edge against the garment seam or edge it will be sewn to. Make sure both edges match in length. Take into account the seam allowance on each end of the ruffle.
In this example, the circle ruffle is sewn into a straight seam. On one end, the ruffle is stitched into the seam of the garment while on the other, the ruffle has a free hanging corner. This corner will be clean finished individually as shown below.
|
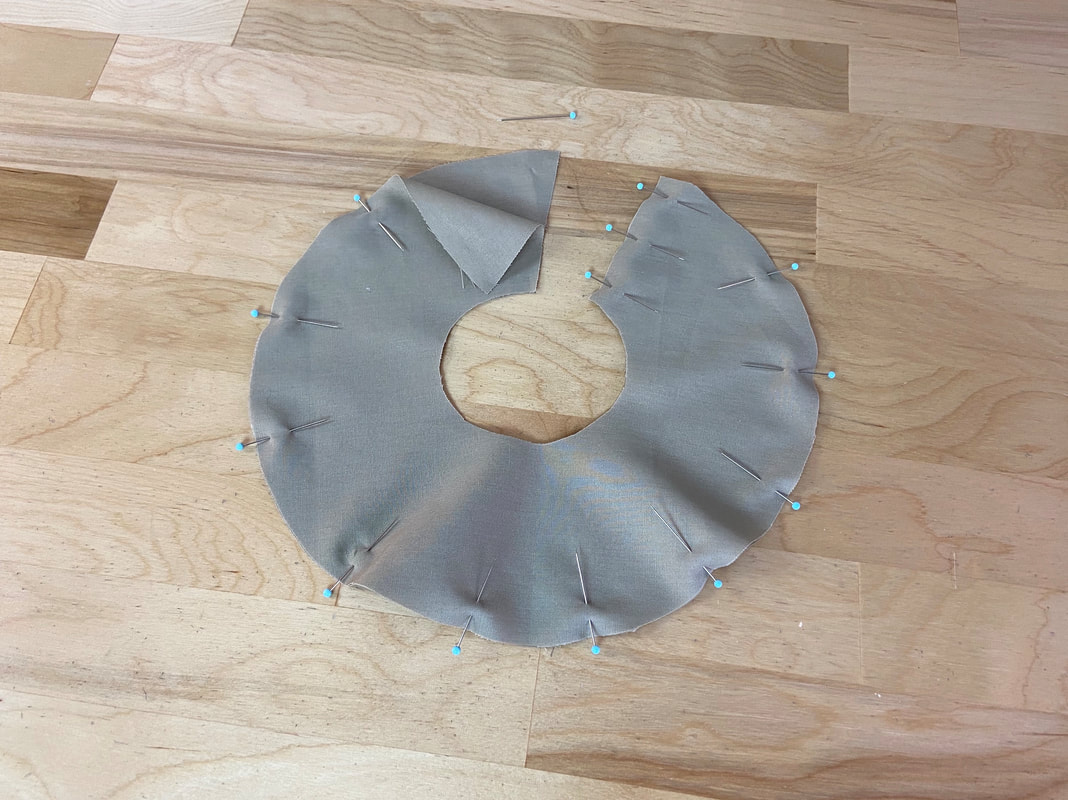
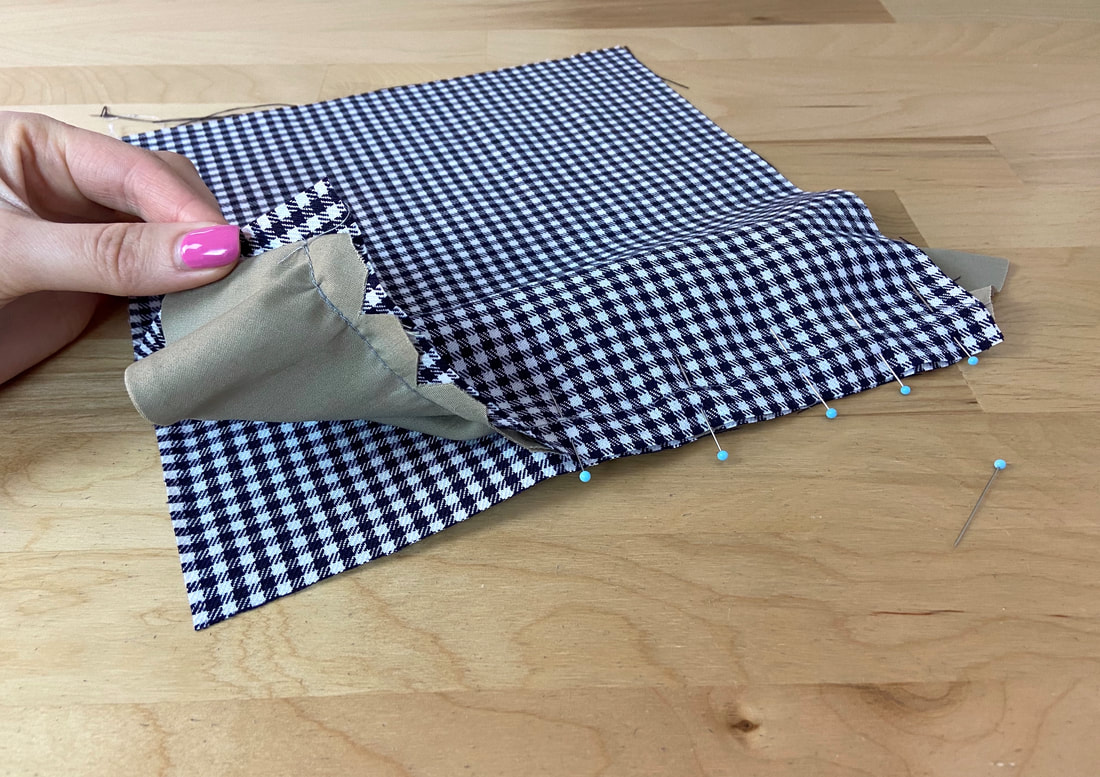
3. To sew the lining, place the ruffle layer on top of its corresponding lining layer such that the fabric face sides are touching, and all inner and outer circular edges align. Insert pins perpendicular to the edge along the outer circular edges as shown.
Pins are also inserted at the free hanging ruffle end – this portion will be finished individually while the other end will be sewn into the garment’s side seam.
|
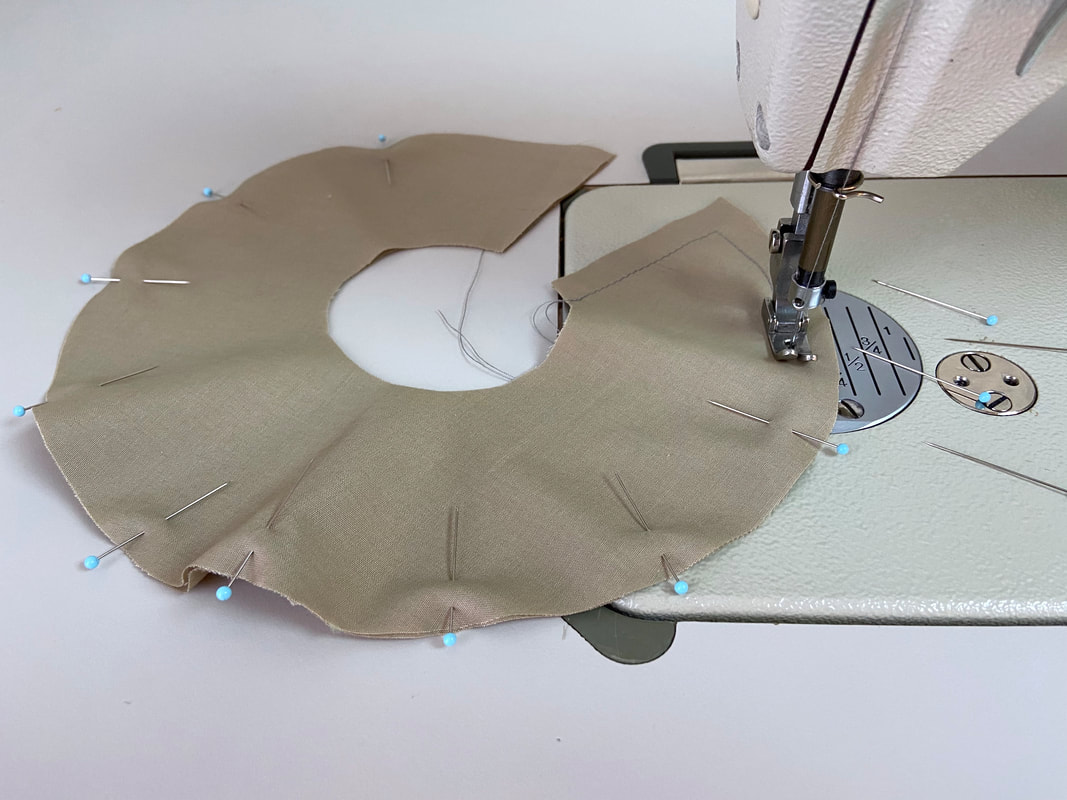
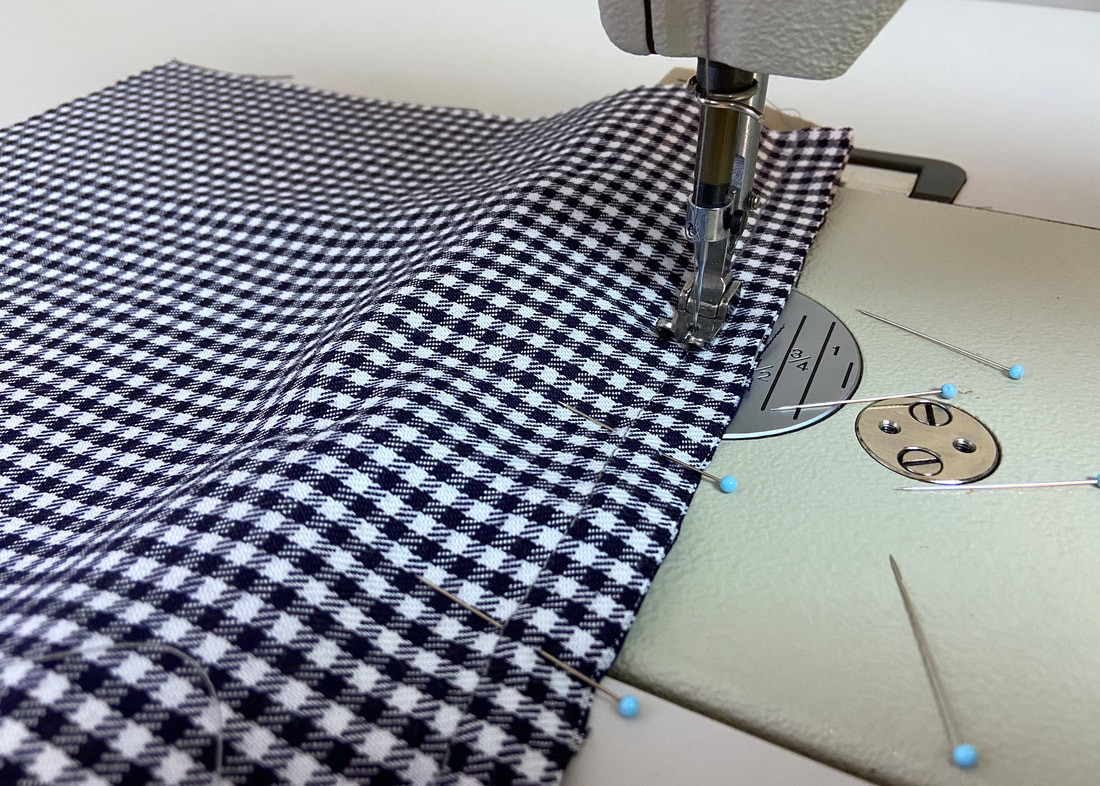
4. Stitch at ½” seam allowance (or whatever your designated seam allowance is) toward the bottom of the ruffle, then pivot to stitch onto its outer circular edges.
Continue stitching until you arrive at the other end of the ruffle. Leave this end open. As noted above, this portion will be enclosed within a seam.
|
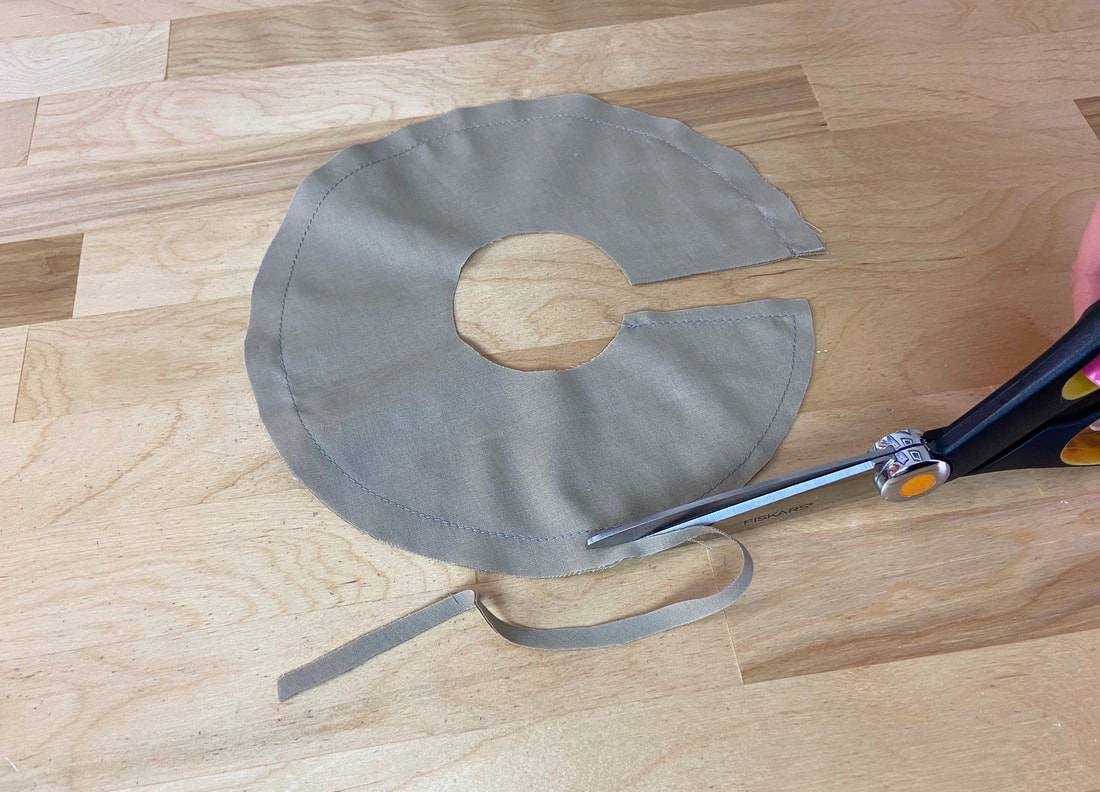
5. Trim all seam allowance edges down to ¼” along the entire outer edge and the closed ruffle end.
|
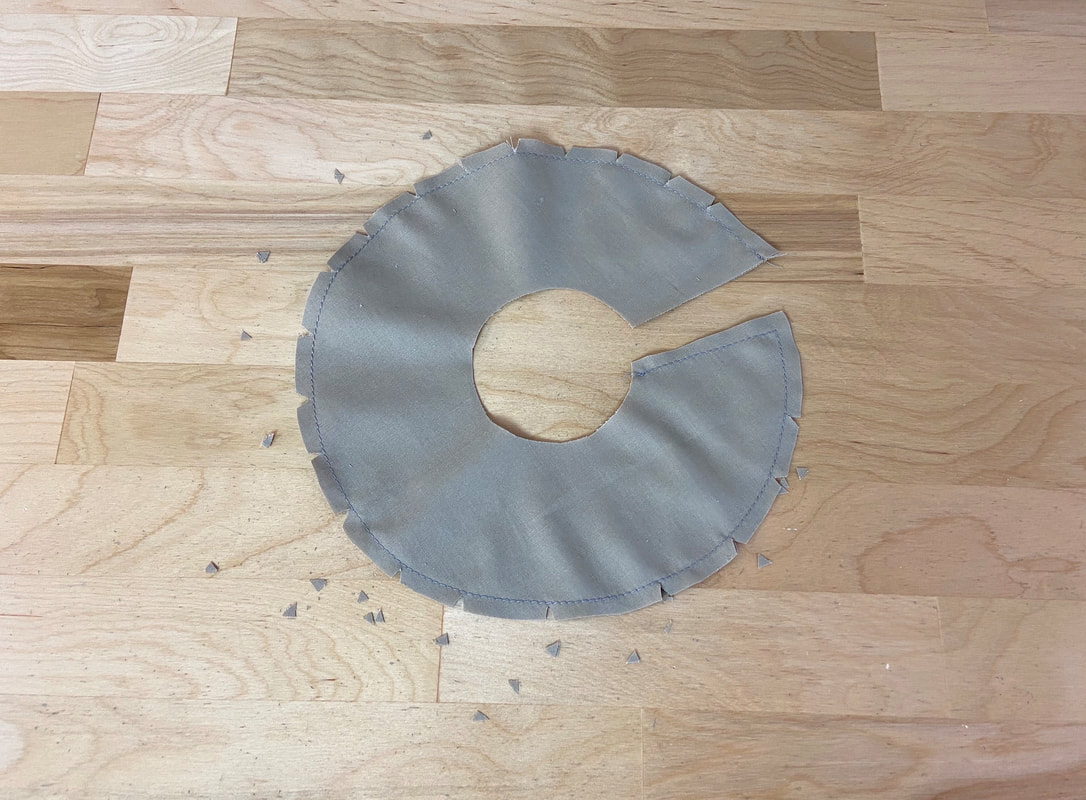
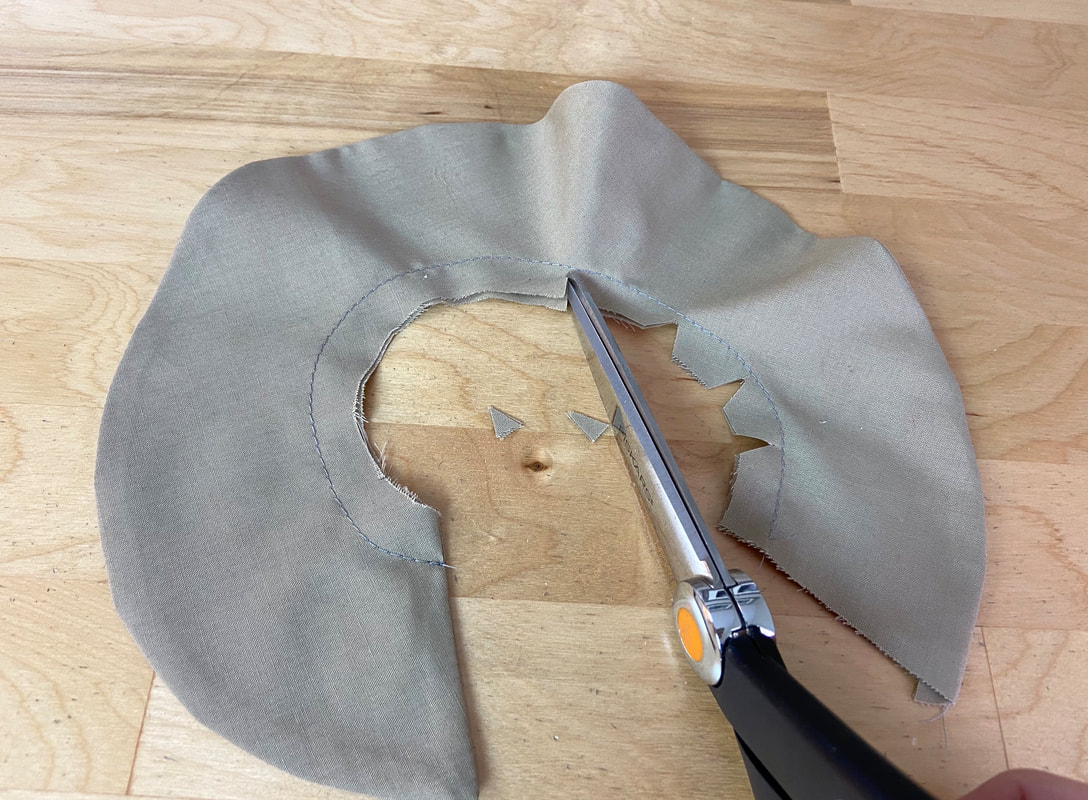
6. Clip wedge notches along the curved seam allowance. Notching will provide flexibility and eliminate additional bulk.
|
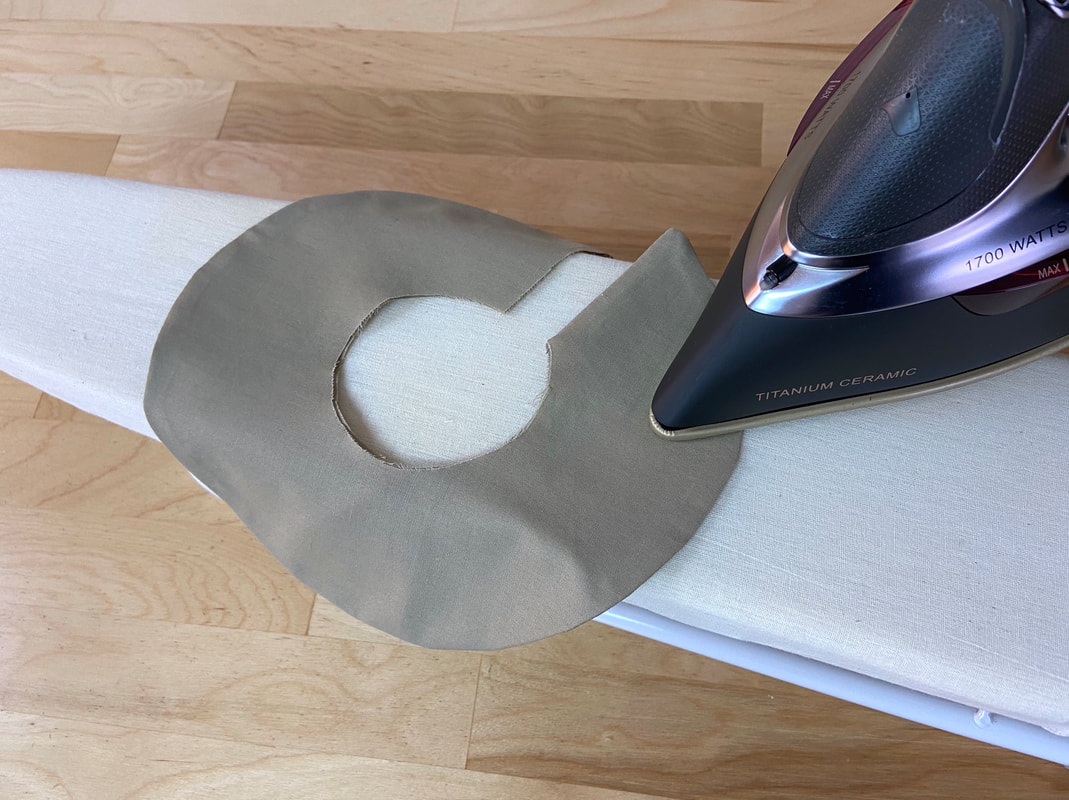
7. Turn the lined ruffle on its right side, and iron it such that the seamline corresponds to the outer edges as shown.
|
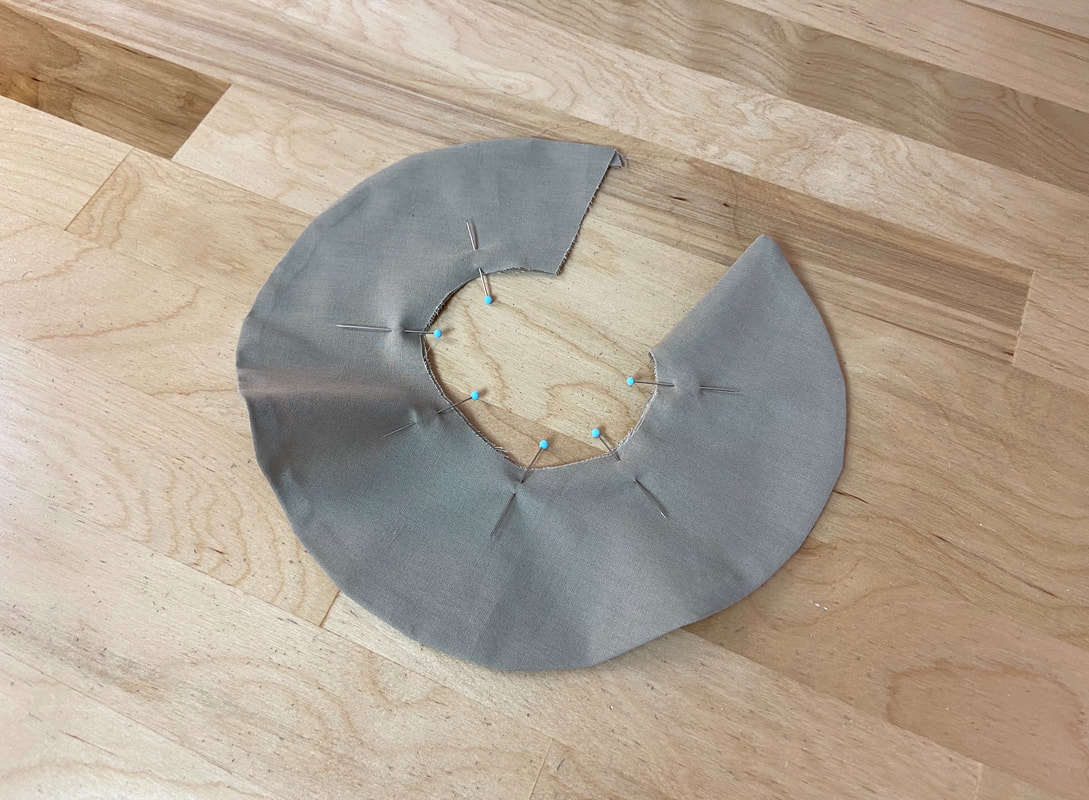
8. To facilitate the process of stitching the ruffle to the garment, align the ruffle’s (inner) open edges and insert a few pins perpendicularly to secure.
|
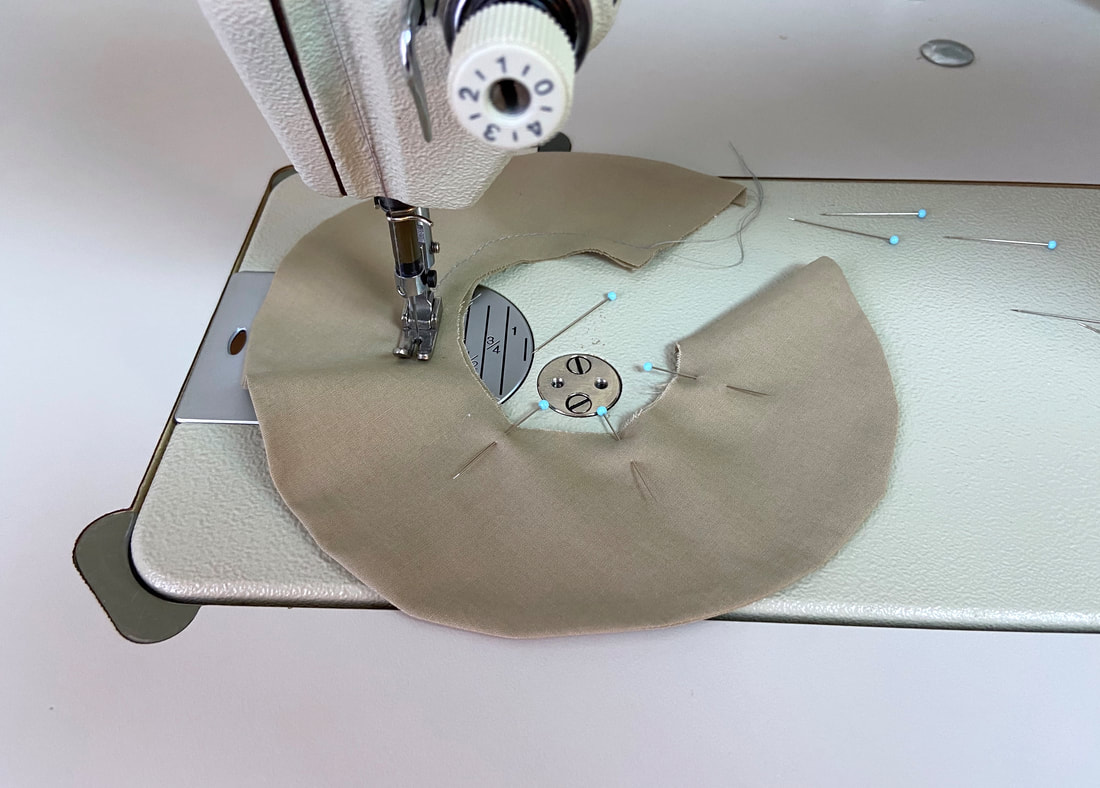
9. Stitch the ruffle shut at a little less than the seam allowance width.
|
10. Next, notch the ruffle’s inner seam allowance by cutting wedge clips along the entire circular edge, stopping at about 1/8” from the stitching applied in Step 9 above.
|
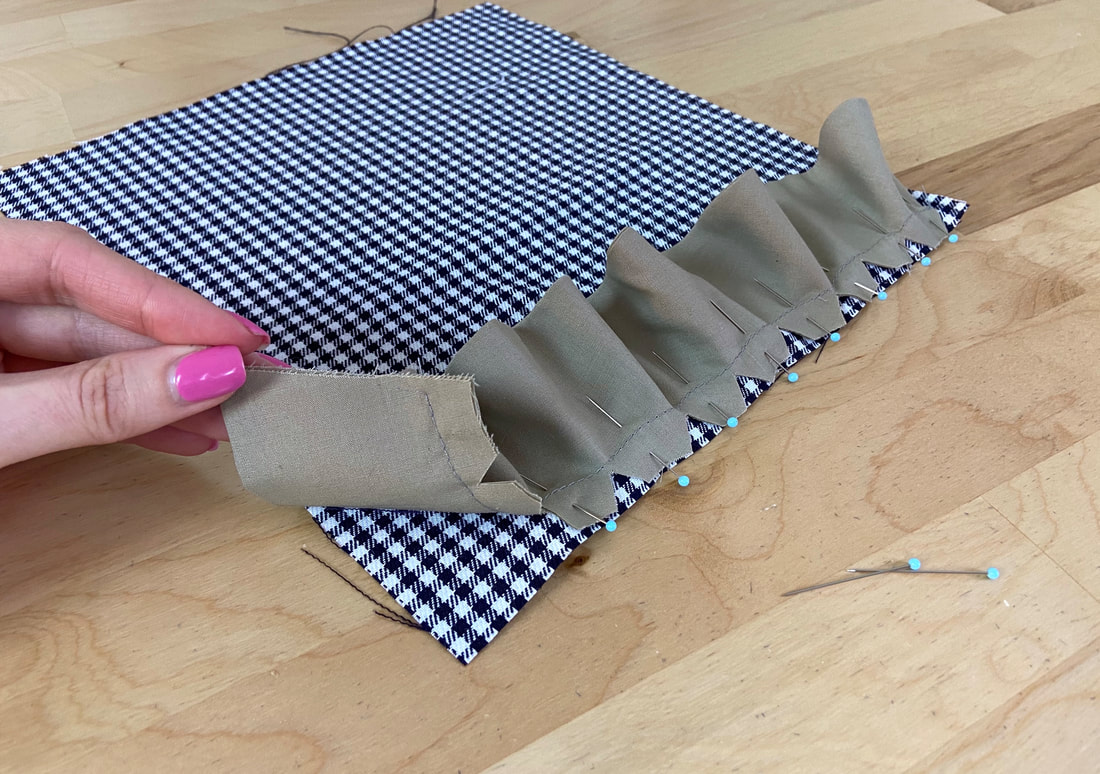
11. Next, extend the ruffle’s inner edge, and align it to the garment’s bottom seam edge. The right side of the garment should be touching the ruffle’s wrong side as shown. As you align the fabric layers, insert pins perpendicular to the edges.
|
12. Once aligned, hand baste the ruffle to the garment edge, especially if you’ve never sewn a circle ruffle before.

|
|
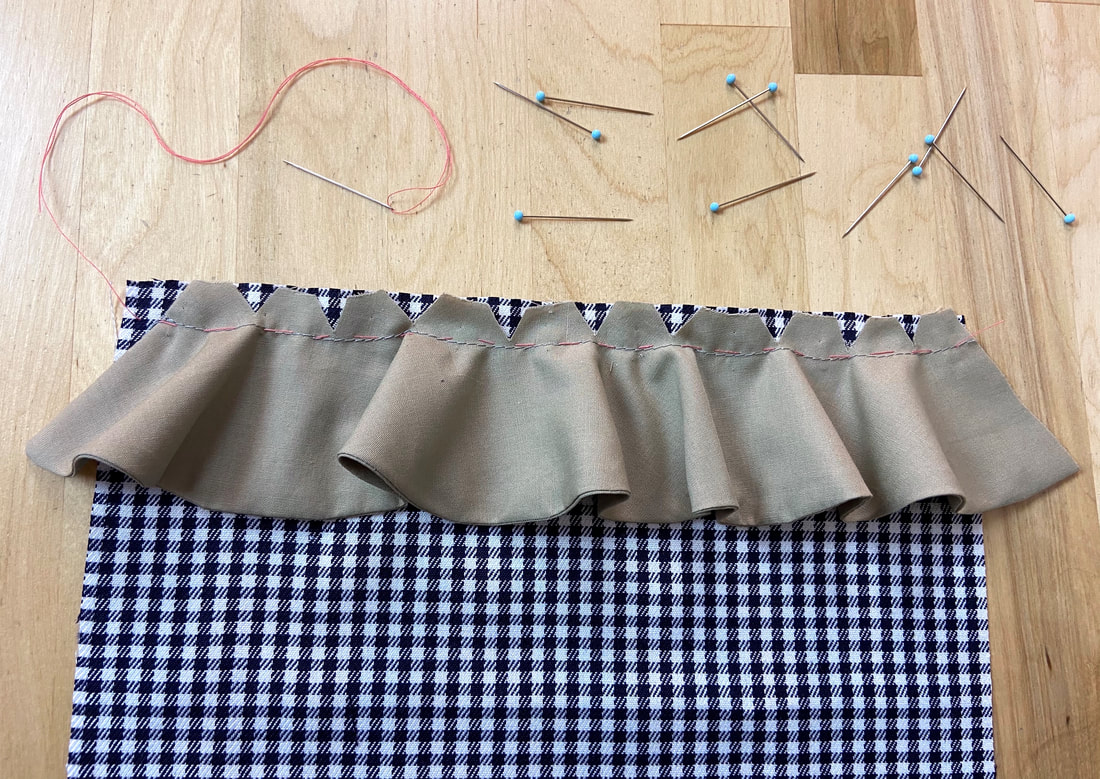
13. Stitch the ruffle edge to the garment seam edge next to the seamline - the seam allowance is ½” in this tutorial. Keep in mind that the seam allowance along the ruffle’s inner edge should be identical to that on the garment. Machine stitch with the ruffle side up. Be careful not to catch or pucker the ruffle portion in the sewing process. The notching should keep the layers fairly flat but you should still be cautious as you stitch.
|
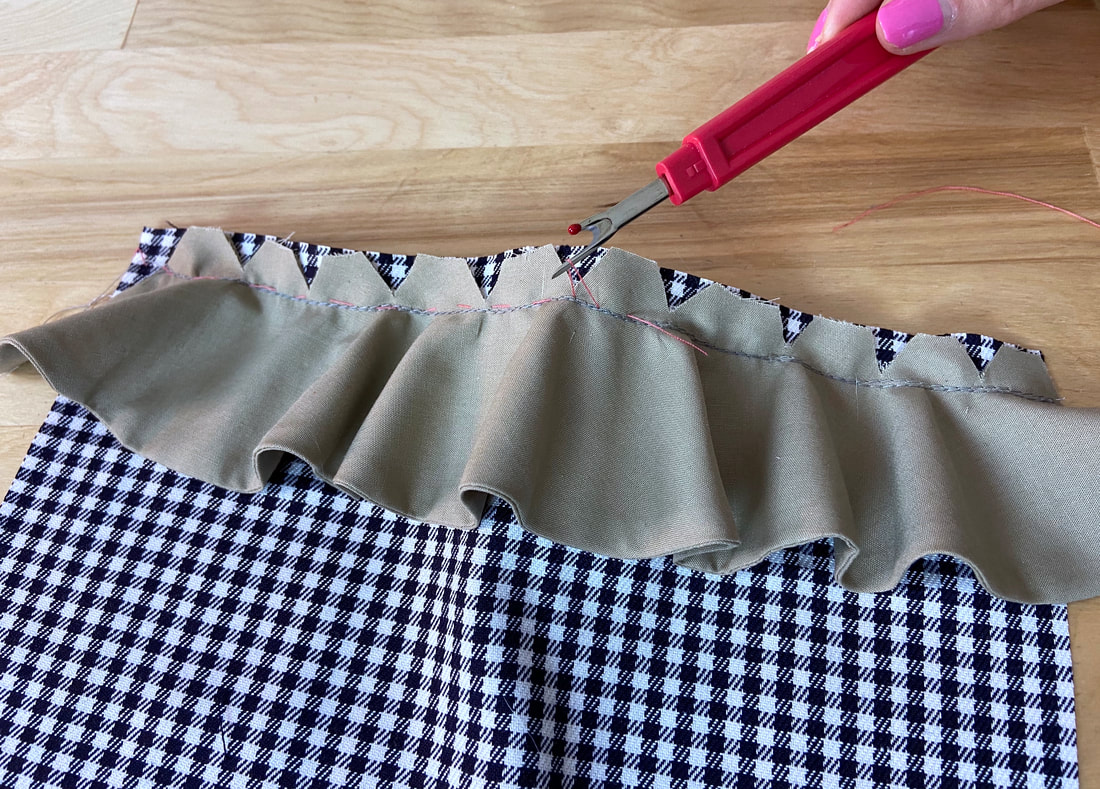
14. Align the ruffle edge to the other corresponding seam edge such that fabric face sides are touching and the ruffle is sandwiched in between. Insert pins from the side with the visible ruffle attachment stitch.
|
15. To complete the ruffle seam, stitch the layers together to the left of the existing ruffle stitch as shown. Doing so will ensure that all the preliminary construction-related stitching (applied above) is fully enclosed on the inside of the finished seam for a clean, professional finish.

|
16. To complete the ruffle application, trim the seam allowance down to about ¼” and clean finish it with an overedge stitch, or another finish of your choice (i.e. binding).

|
17. From the right side of the garment, carefully iron the completed ruffle seam with the seam allowance pointing upwards, away from the ruffle as shown. Iron with the tip of the iron making sure not to crease or fold the ruffle layer in the process.

|
All content, including images and text, may not be copied, replicated, or redistributed without express written permission. This website is regularly screened and monitored for content protection.
|
