
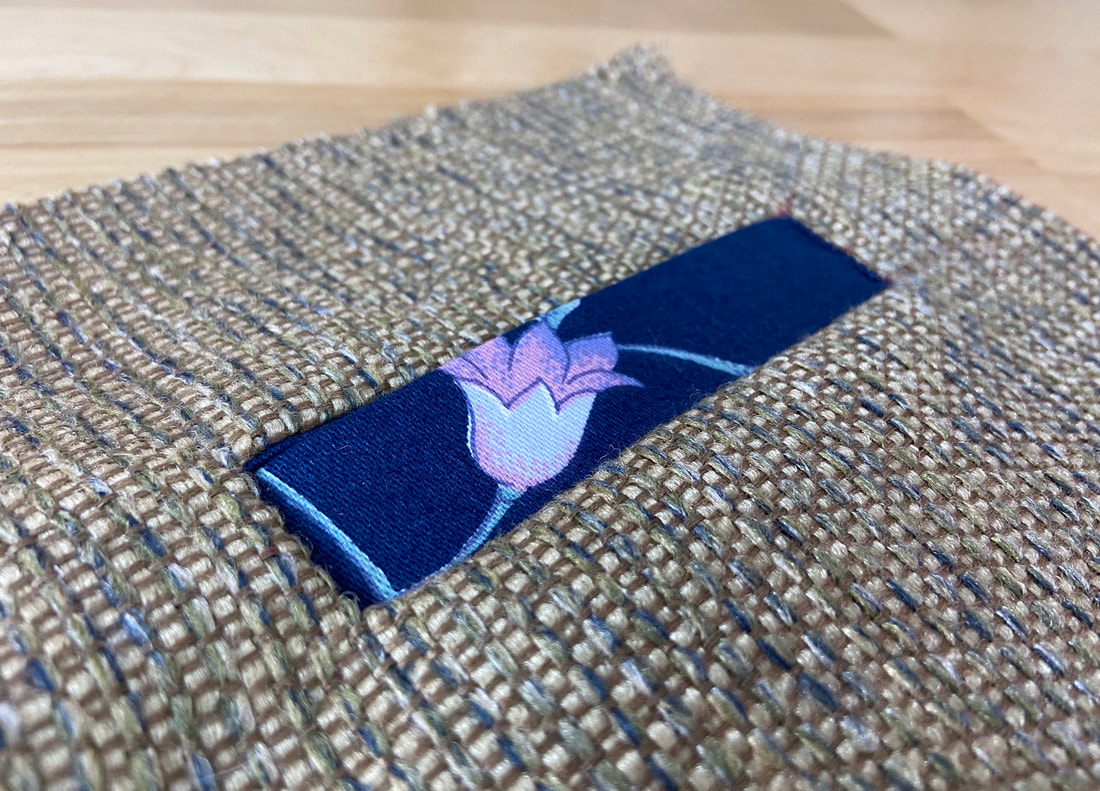
What Is A Self-Welt Pocket
|
When it comes to single welt pockets, there are lots of rich tutorials on the web covering various techniques for sewing this classic pocket style. Almost all of them use a separate welt and pocket piece to complete its application.
While this is a great technique, especially if your pocket bag fabric is different than that of the garment, there is actually a simpler alternative that skips a few construction steps in the process. It is called a self-welt and it is sewn very similar to a bound slash pocket.
|
This easy single-welt pocket application constructs the entire pocket with a simple pocket piece. Thanks to a simple folding process, this single pocket layer serves as both the welt and the pocket bag.
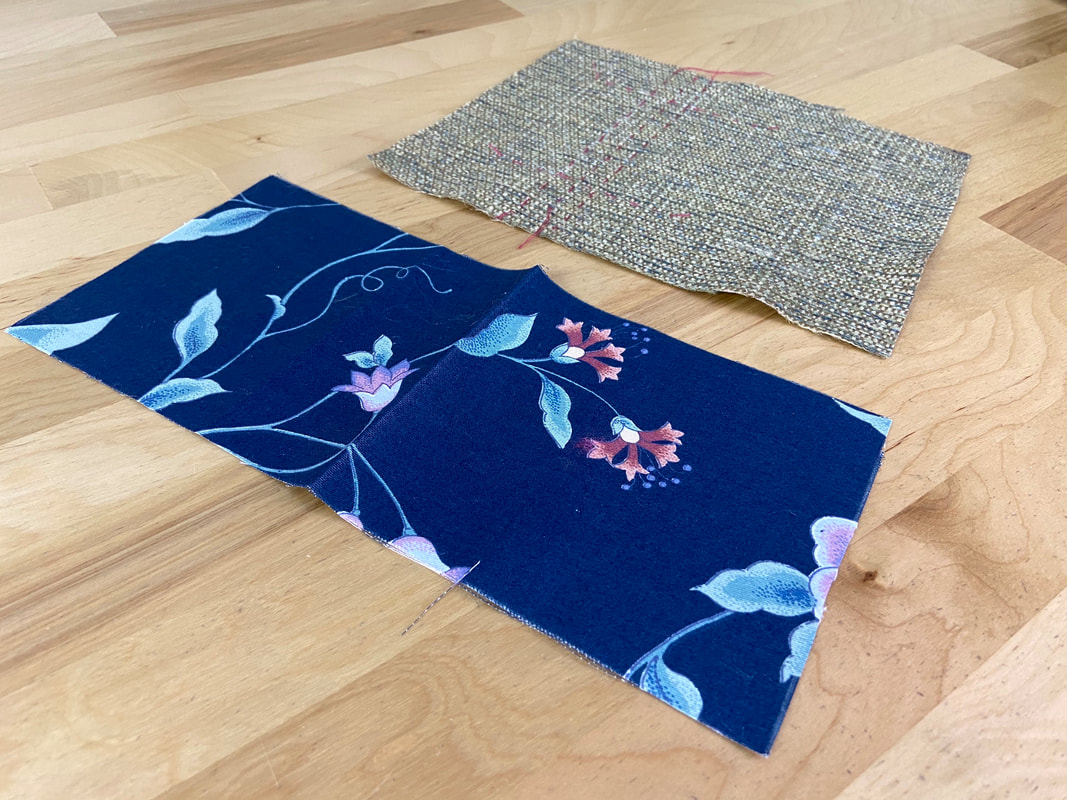
Given that the pocket layer is visible on the outside of the final pocket application (as the welt), it is traditionally cut from the same fabric as the garment. Of course, if you prefer a contrasting fabric/color effect, use any fabric of your choice as long as it doesn’t add unnecessary bulk to the finished garment.
|
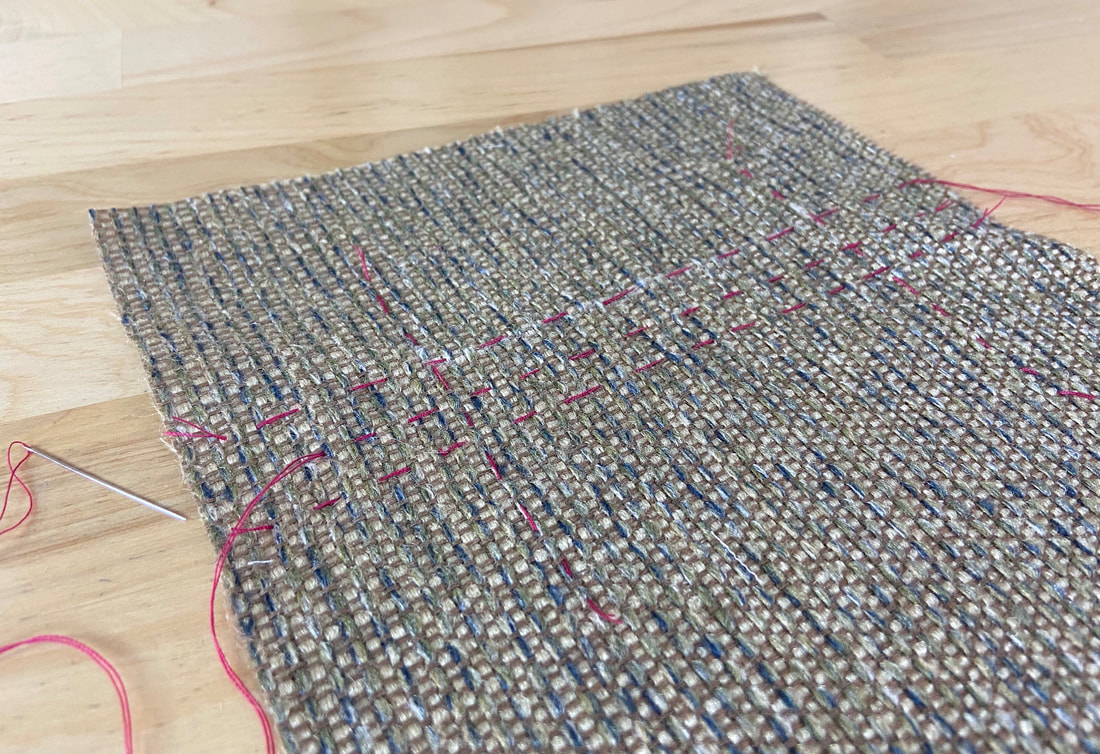
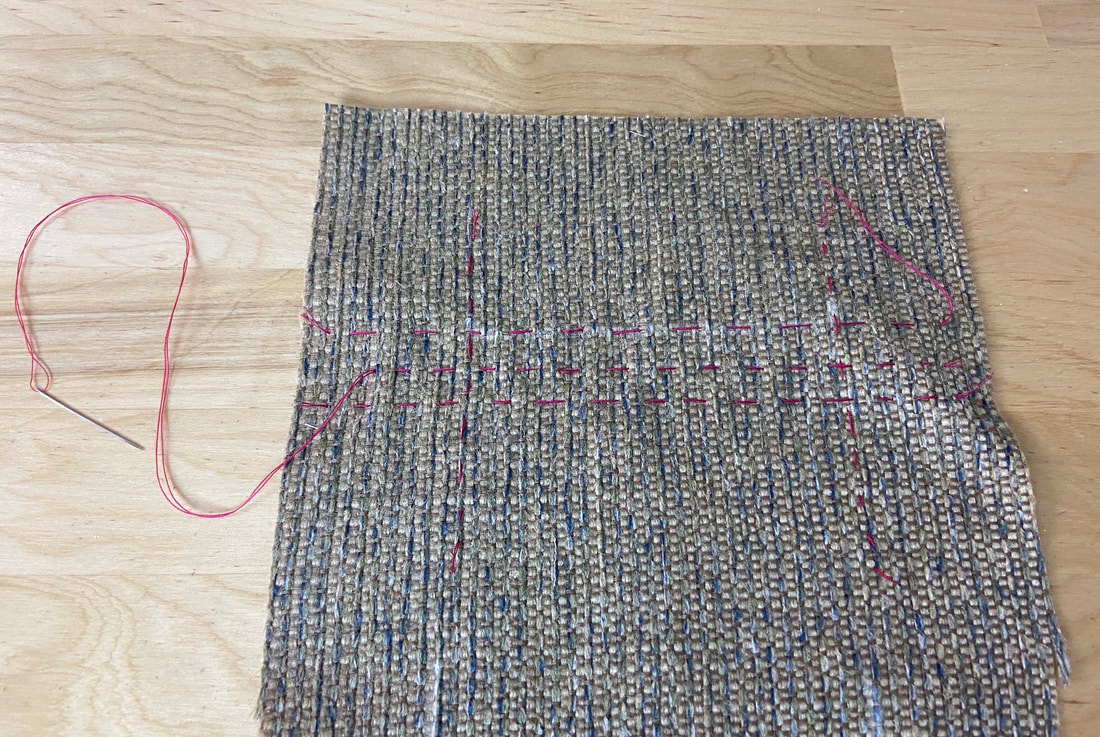
In the construction of a self-welt pocket, the pocket opening is measured and marked exactly as you would with any slash pocket style. As always, hand basting is used to precisely mark the exact pocket shape, its opening and measurements.
The hand basting is an important element in the construction process as it allows these basted stitch lines to be visible on both the right and wrong side of the garment’s fabric.
|
The single pocket piece is cut at double the desired pocket depth plus double the desired welt width.
The final pocket piece width is the desired pocket width plus 1” to account for a 1/2” seam allowance on each end.
As noted above, this single pocket layer is conventionally cut from the same fabric as the garment.

|
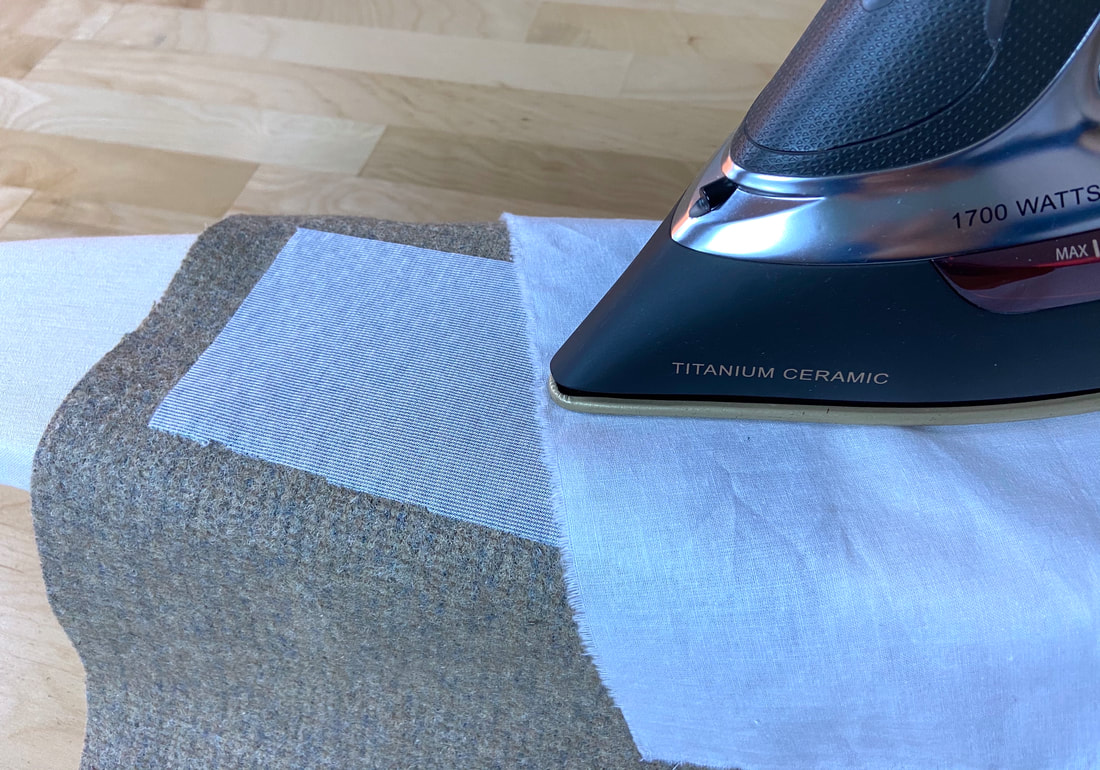
As always, it’s good practice to reinforce the back side of the garment layer with interfacing at the exact slash pocket location. The interfacing should be about 4” longer and 2” wider than the pocket opening itself.
Interfacing provides an important tool in maintaining the pocket’s structure and long-term durability. In addition, it keeps the fabric layers more stable during the slashing and stitching process.
How To Sew A Self-Welt Pocket Application: Contrast Fabric
|
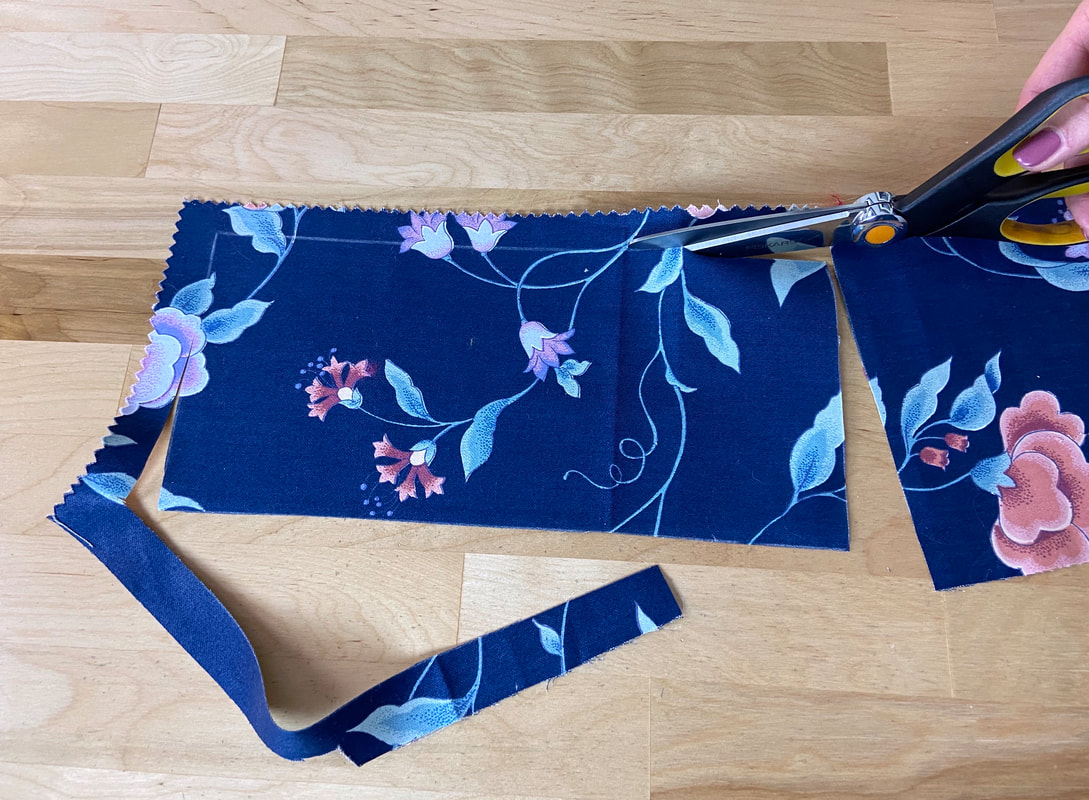
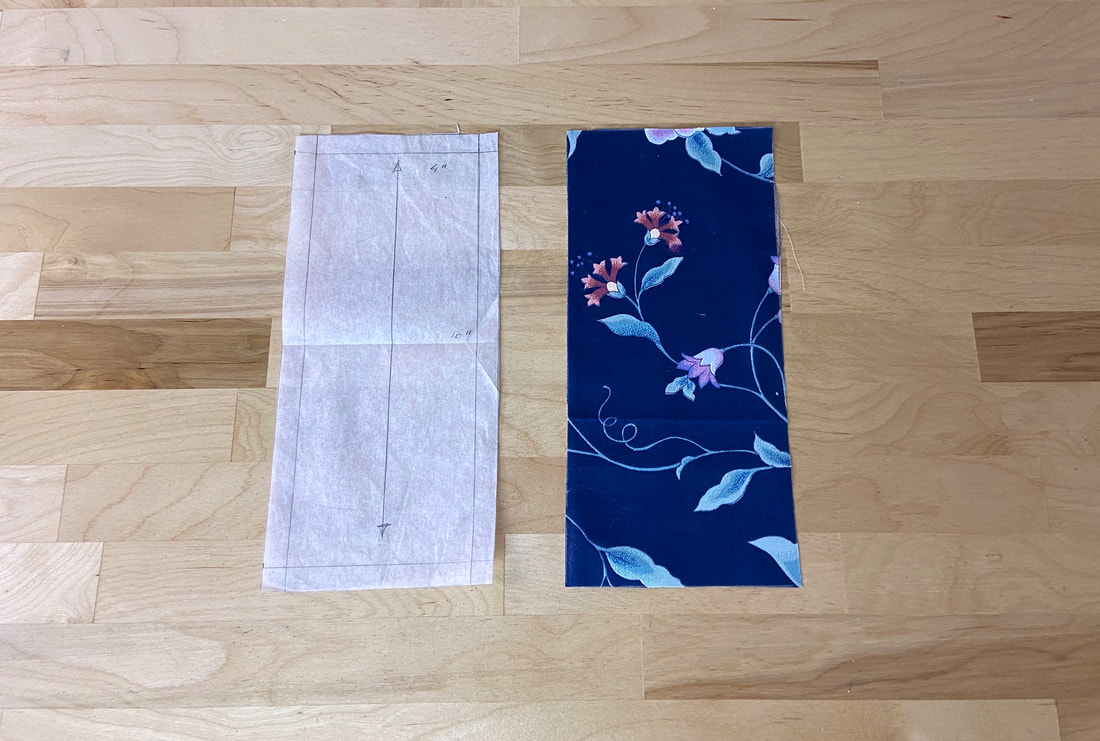
1. Measure, draw (using tailor’s chalk) and cut the pocket layer at twice the desired pocket and welt depth and 1” wider than the desired pocket width. The 1” extra in width will account for seam allowance of ½” on each side of the pocket bag.
In this example, the final pocket welt opening is ½” tall and 4” long. The pocket bag depth is 4”. Taking these measurements into account, the pocket piece dimensions are as follows:
|
Length: 11” (1” welt depth times 2, plus 4.5” pocket depth times 2)
Width: 5” (4” pocket opening length plus 1”).
Width: 5” (4” pocket opening length plus 1”).
|
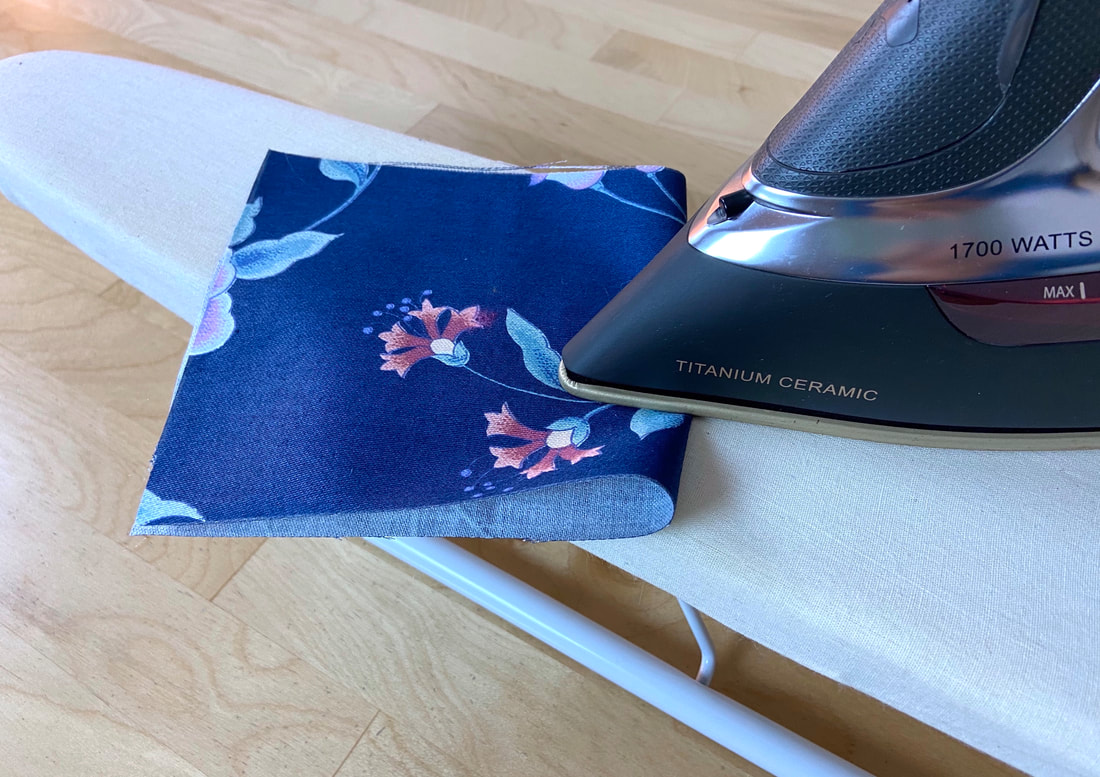
2. Fold the pocket layer in half and iron the fold line to mark a crease along the middle of the pocket piece.
|
3. Apply a piece of interfacing that is 4” longer and 2” wider than the desired pocket opening, centered on the garment’s wrong side, at the slash pocket location.
|
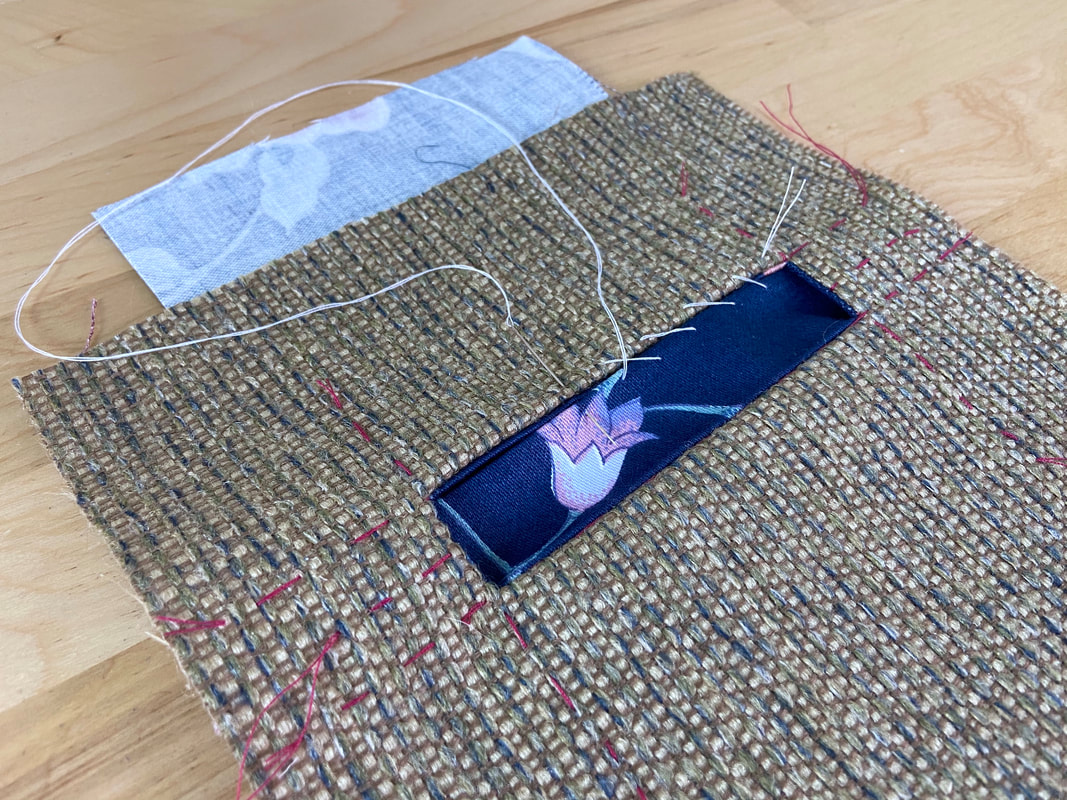
4. Using hand basting, mark the exact location and shape of the rectangular pocket opening as shown. Use contrast color thread for increased visibility.
Extend the hand basting lines out by about 1” on each end of the rectangle as shown.
In this case, the final pocket has a welt opening that is 1” tall and 4” long.

|
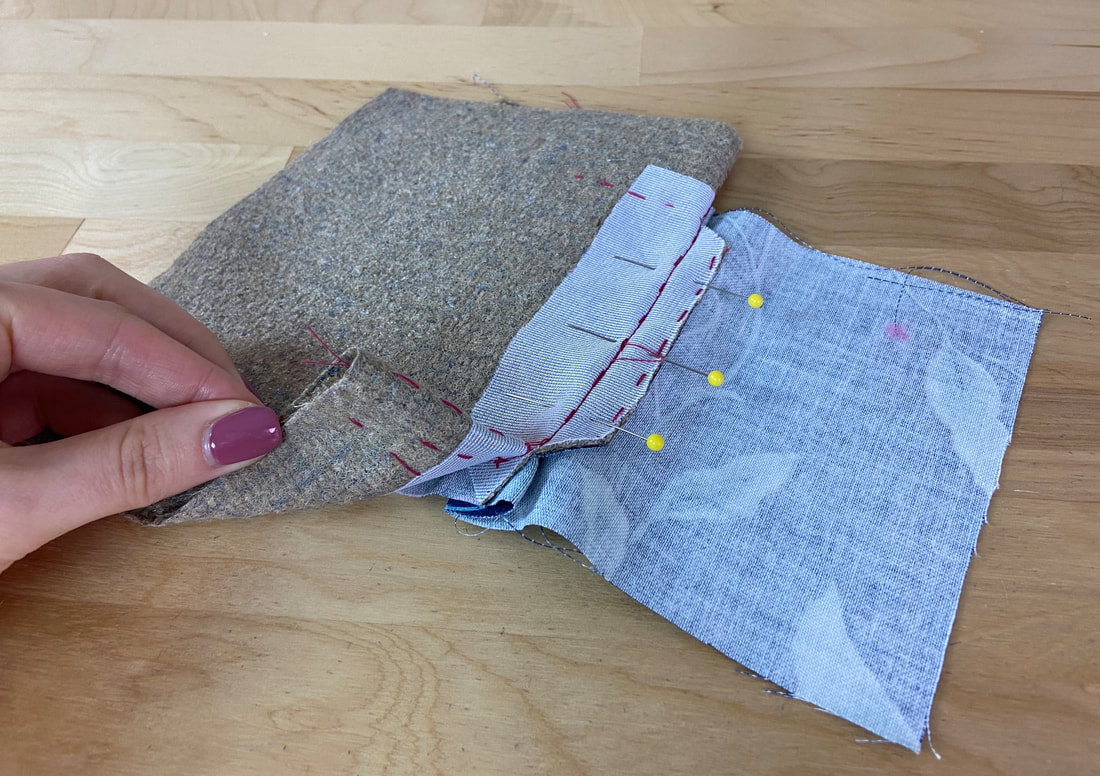
5. Align the pocket piece to the lower hand basted line such that the basting corresponds to the pocket piece crease line. Fabric face sides should be touching and there should be a ½” seam allowance on each side of the pocket layer as shown. Insert a few pins to secure the pocket layer to the garment layer in this position.
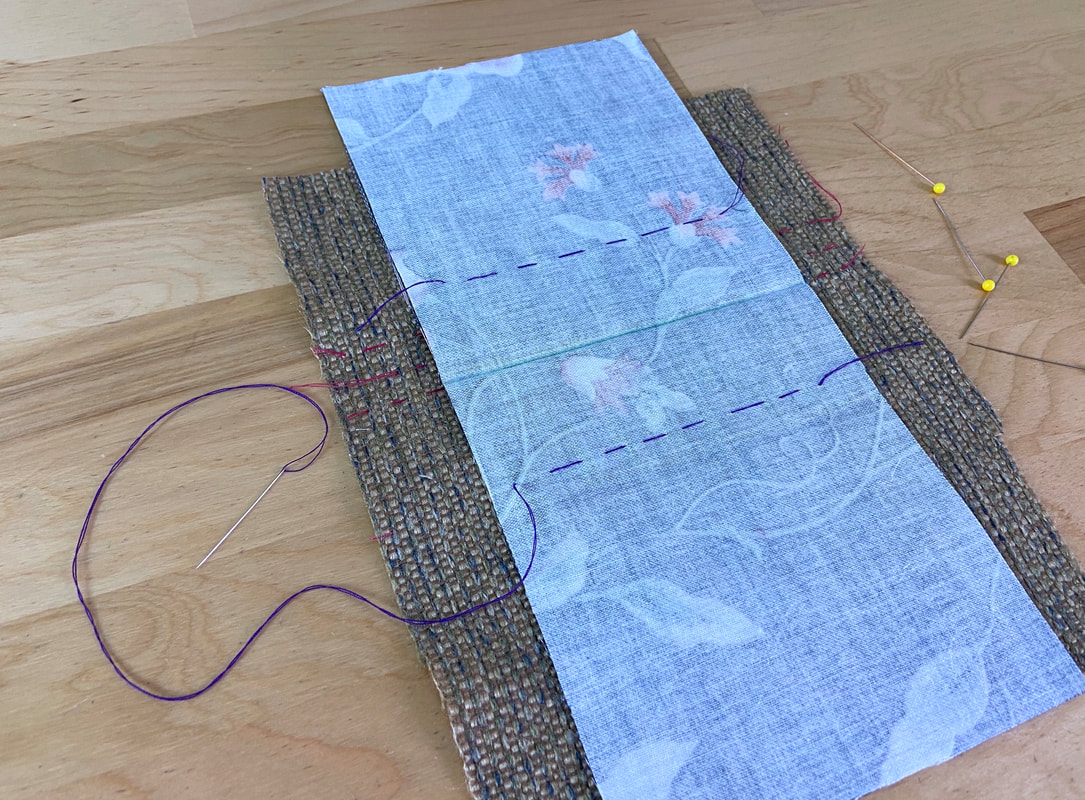
|
Consider hand basting around the outer edges to secure.
|
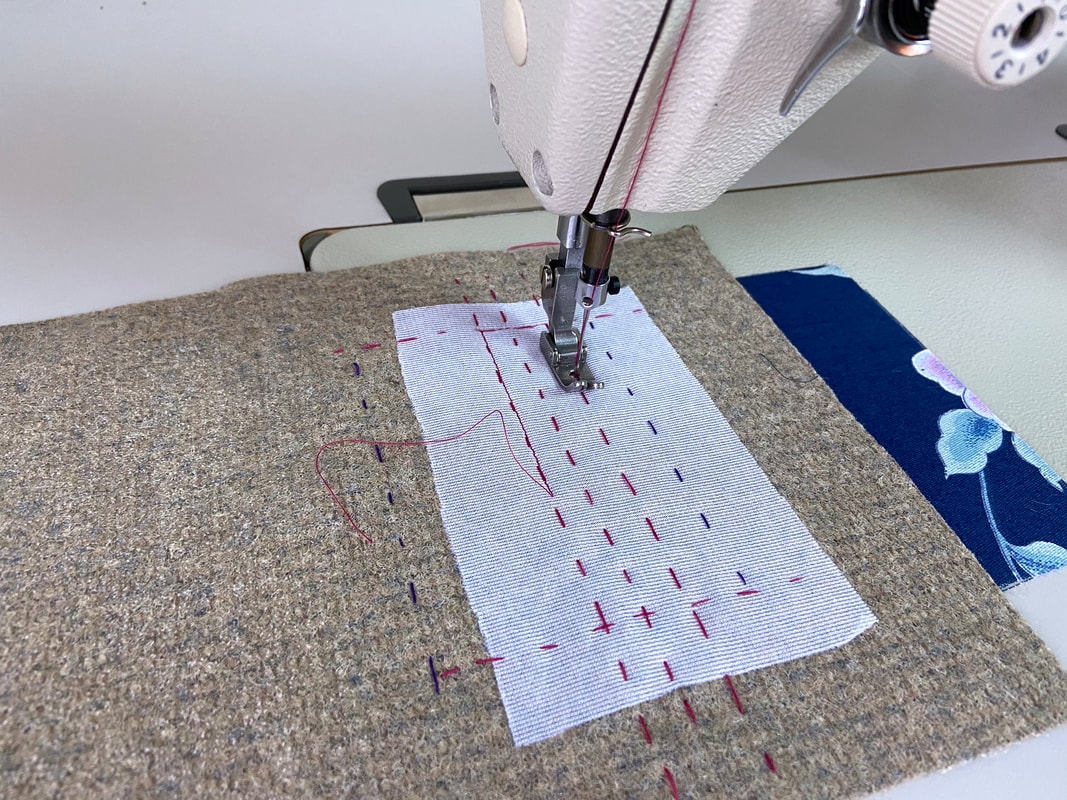
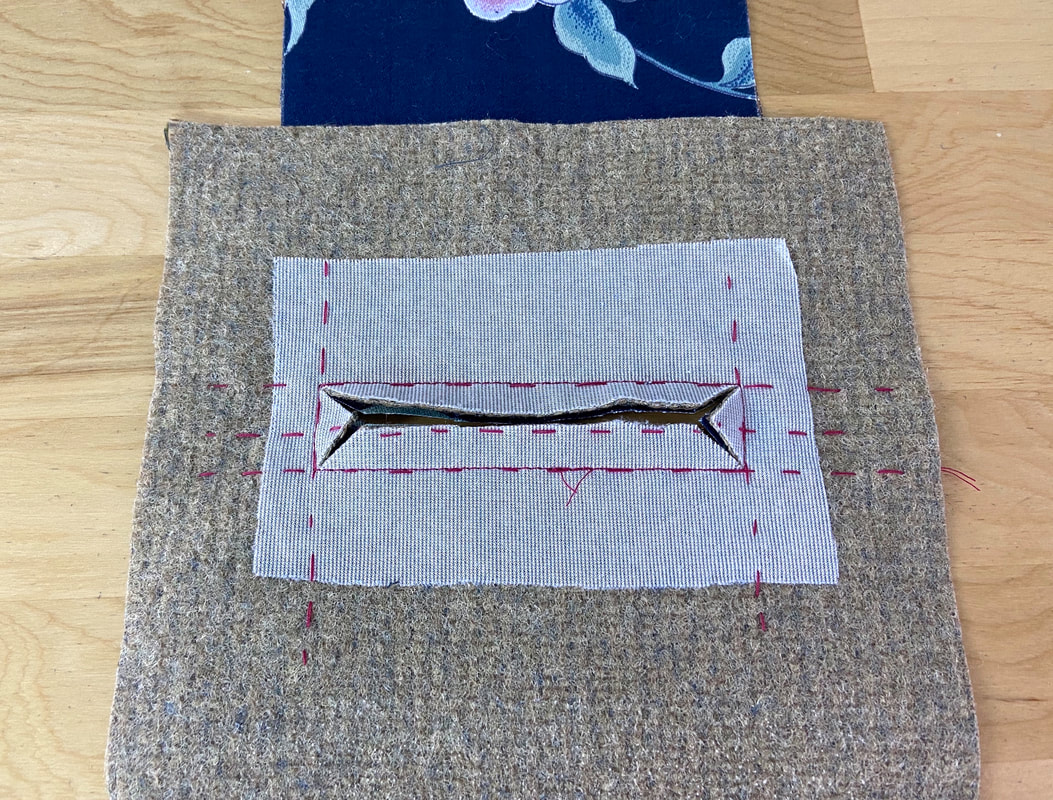
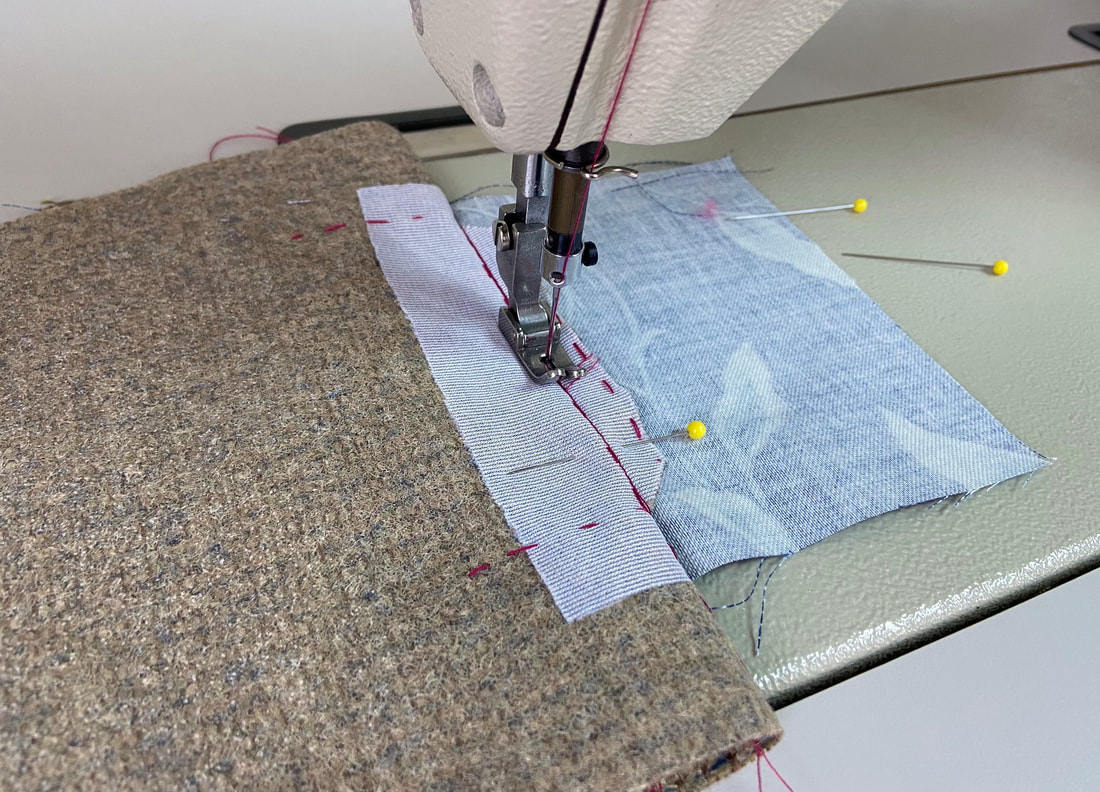
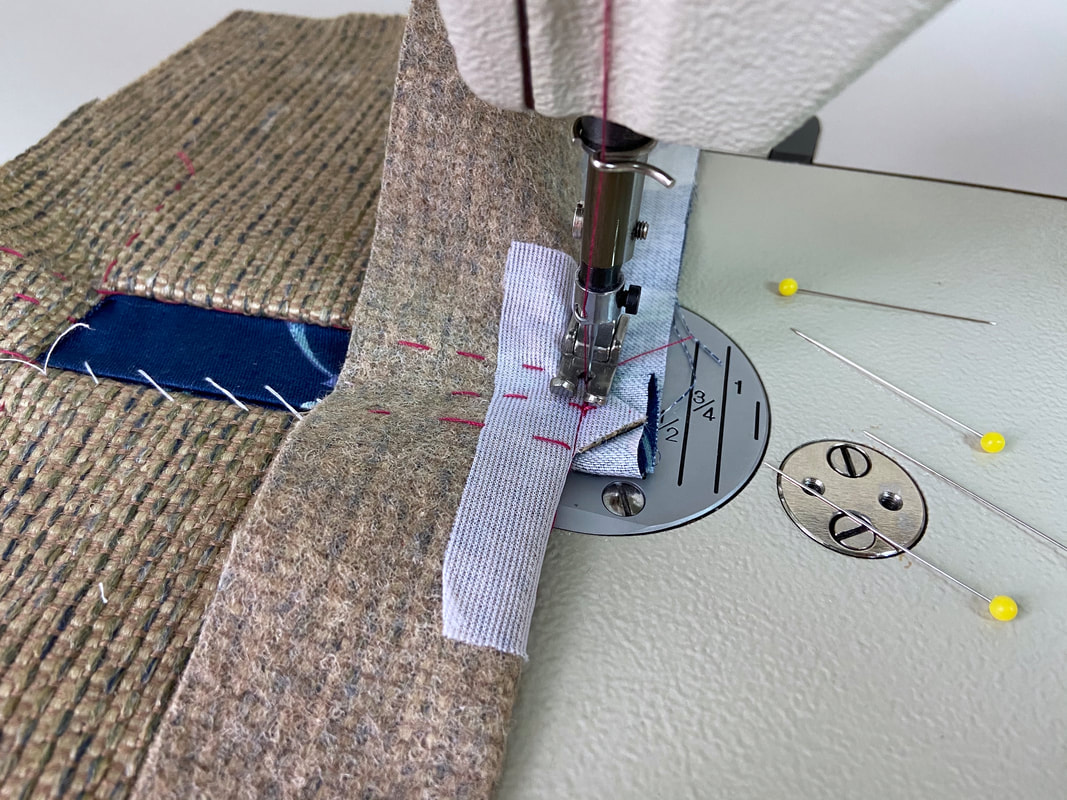
6. Turn the pinned garment layer on its wrong side, and stitch right next to the rectangular basting stitch through both fabric layers. Overlap the beginning and start of the stitches to lock the threads.
Use a short stitch length for increased durability and control.
|
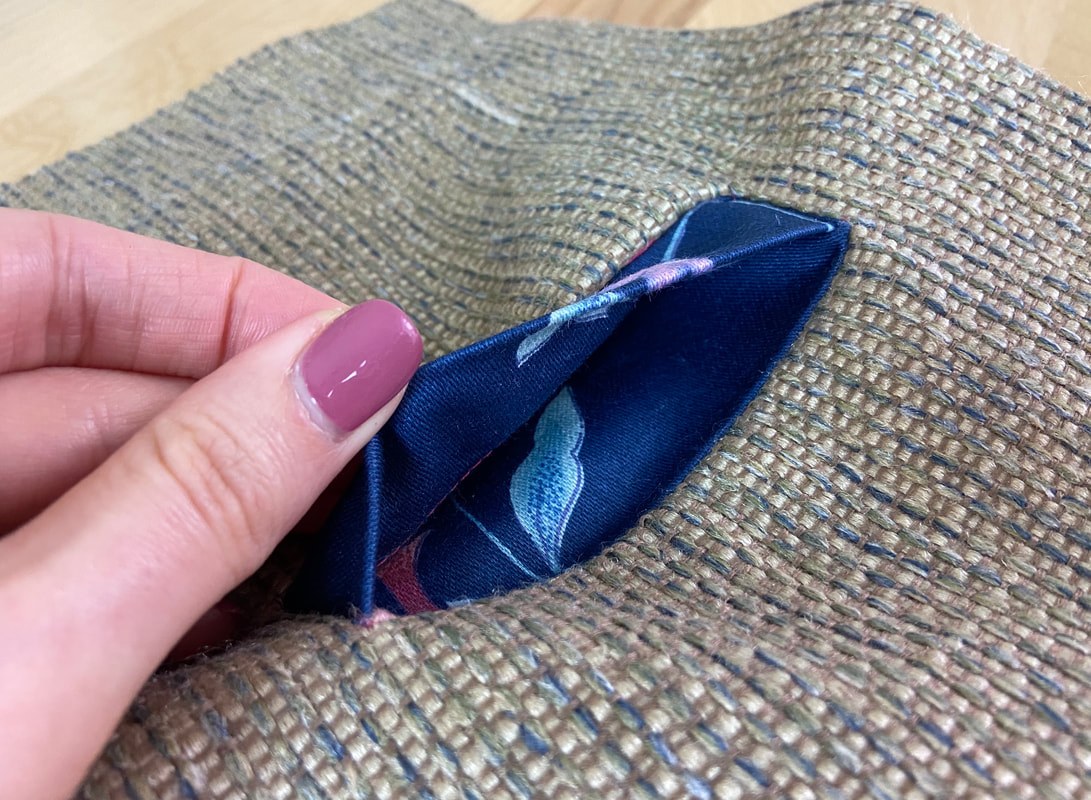
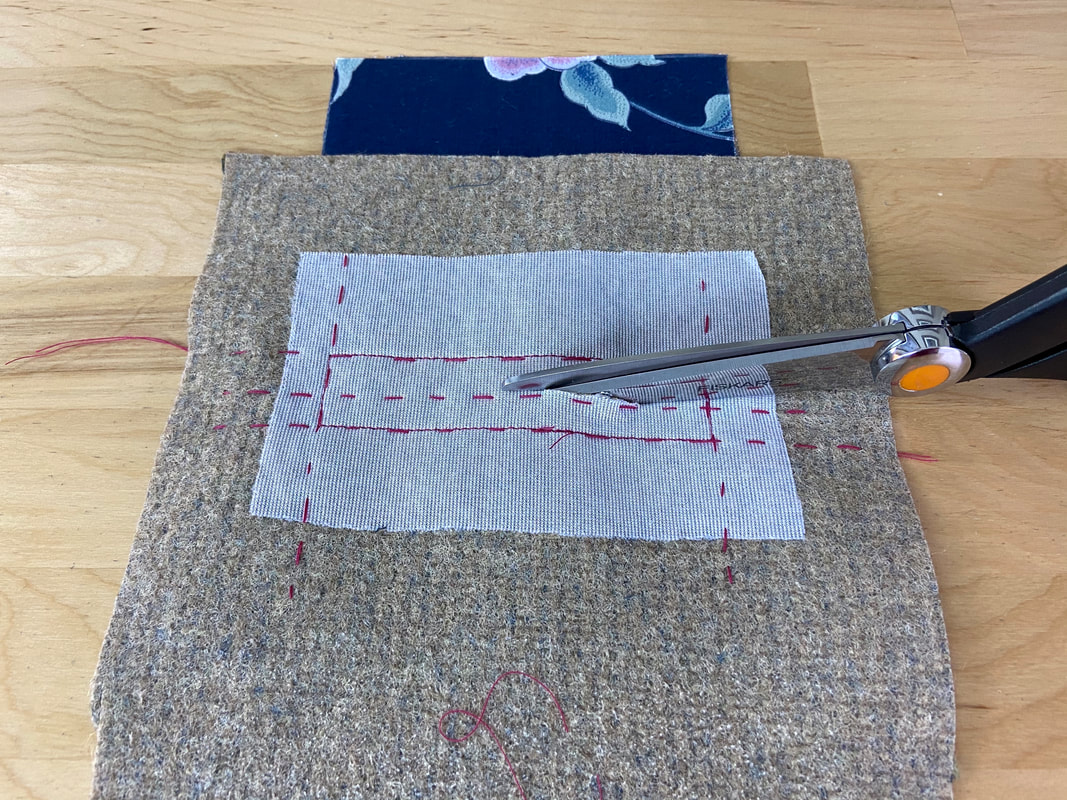
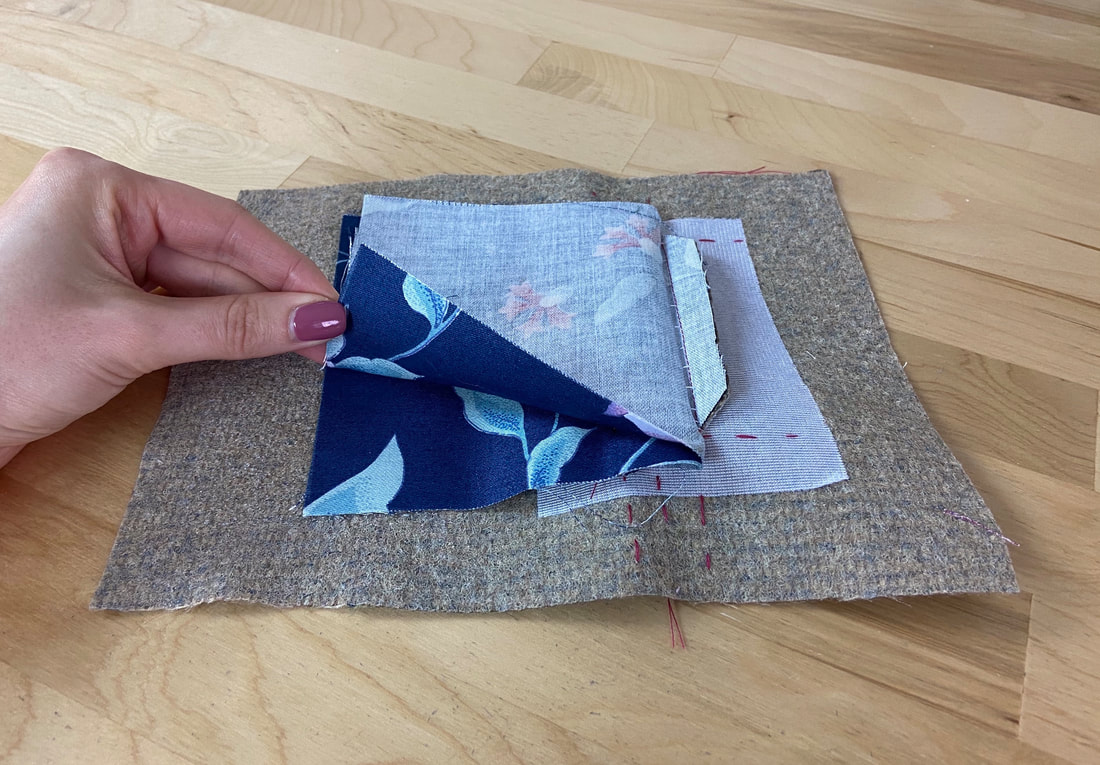
7. Cut lengthwise, down the center of the rectangle, through both garment and pocket layers, stopping at ½” away from each end.

|
|
From this distance, clip into each corner as close as you can to the stitch, but not so close that you accidentally slash through it.
|
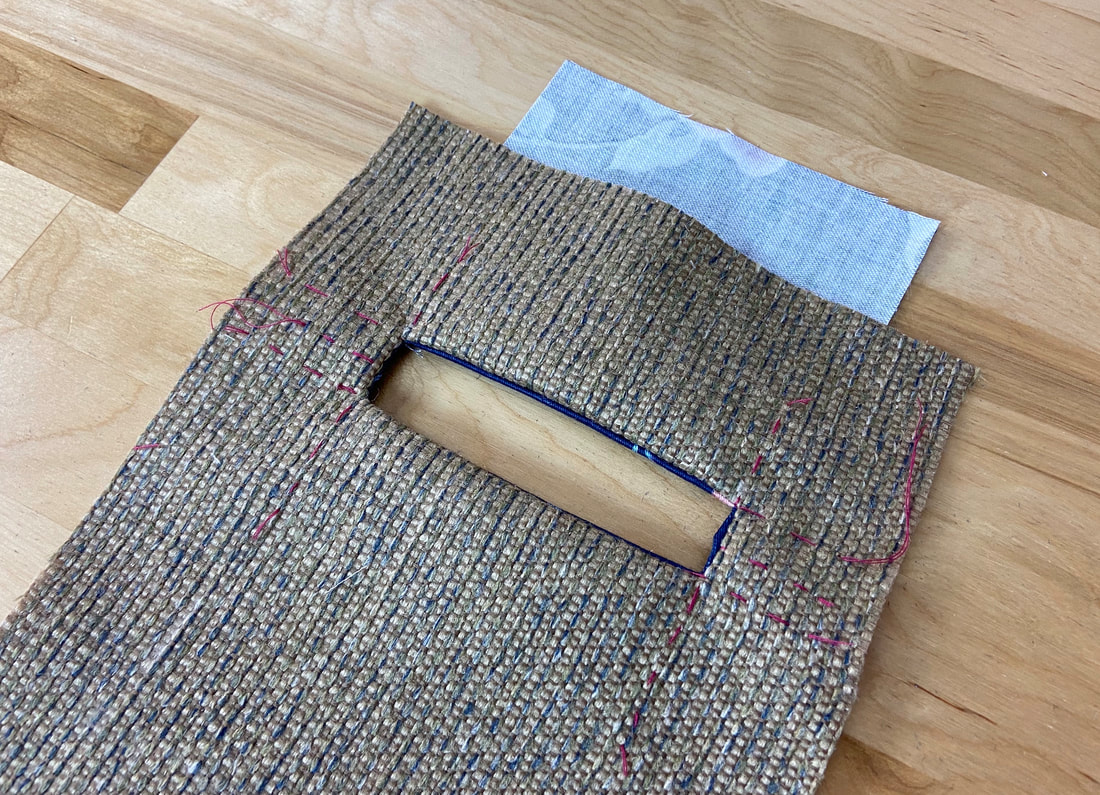
8. Flip the pocket layer to the wrong side of the garment. Pull the finished edges to flatten and straighten them.

|
9. Next, fold the pocket bottom portion such that it creates a welt that perfectly covers the entire rectangular opening. The fold edge created should abut the top finished edge of the rectangular pocket opening as shown.
|
|
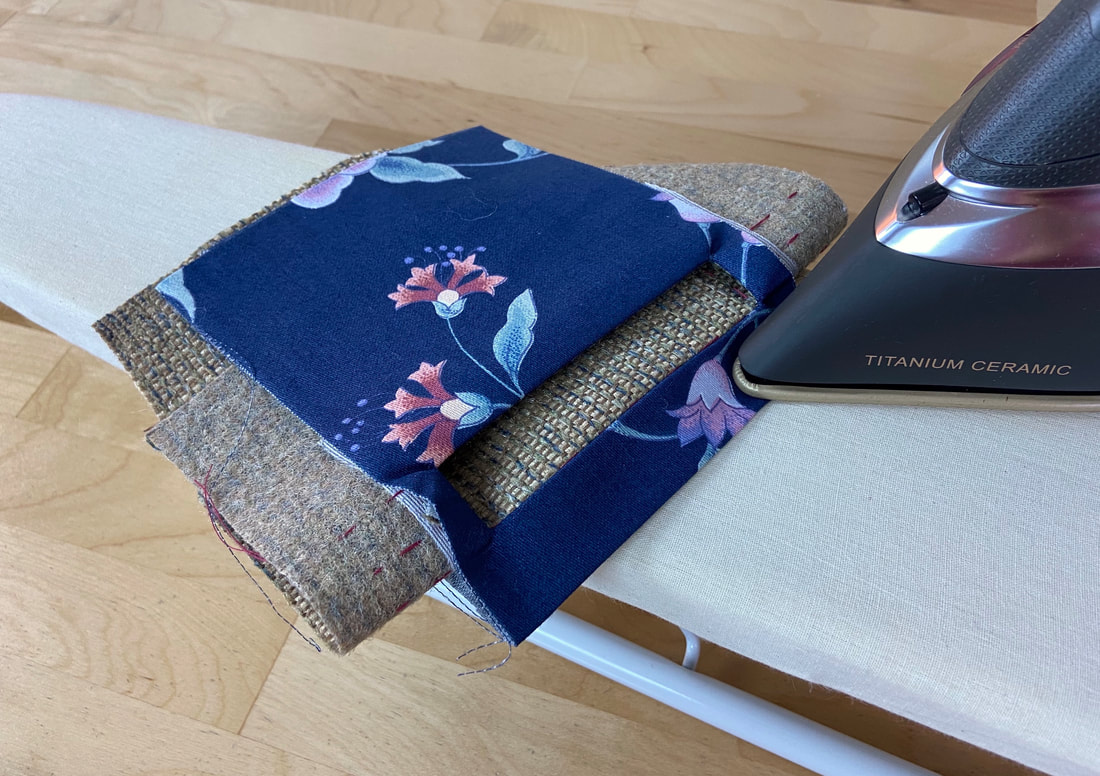
10. Iron the folded pocket layer in this position. In this case, it helps to iron the folded crease first before overlapping it to the pocket opening.
|
For extra stability, whipstitch the welt’s folded edge (created by the folded pocket) to the top edge of the pocket opening.
|
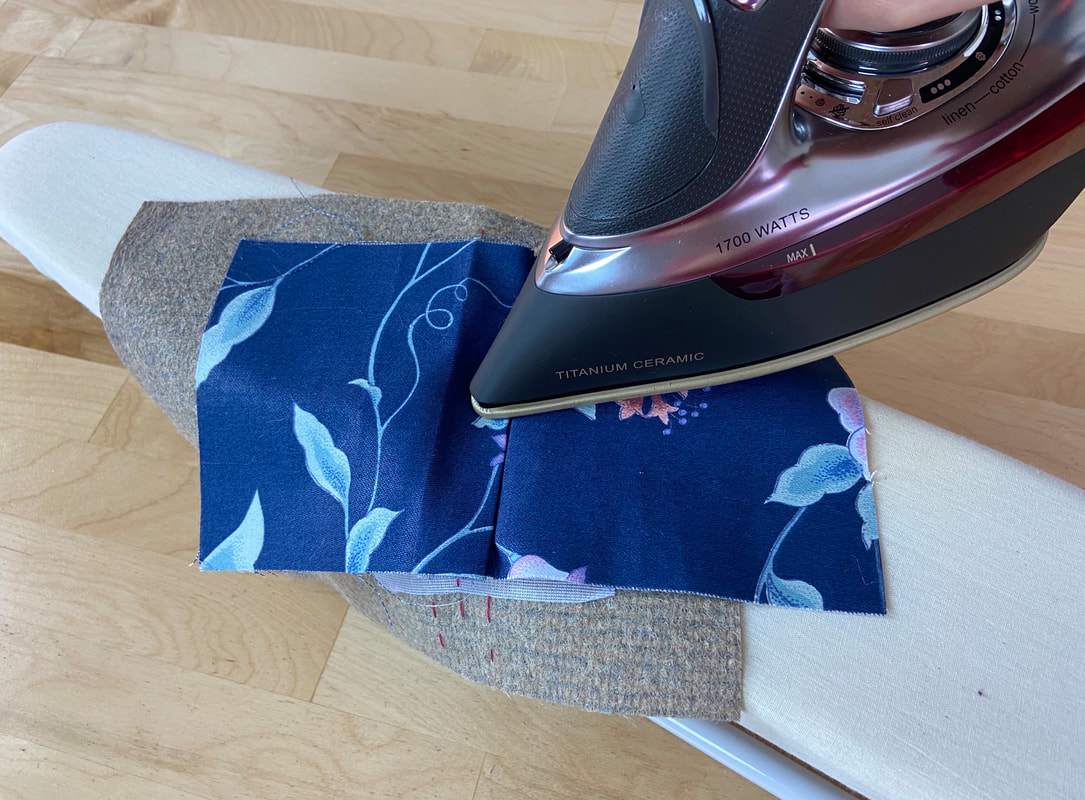
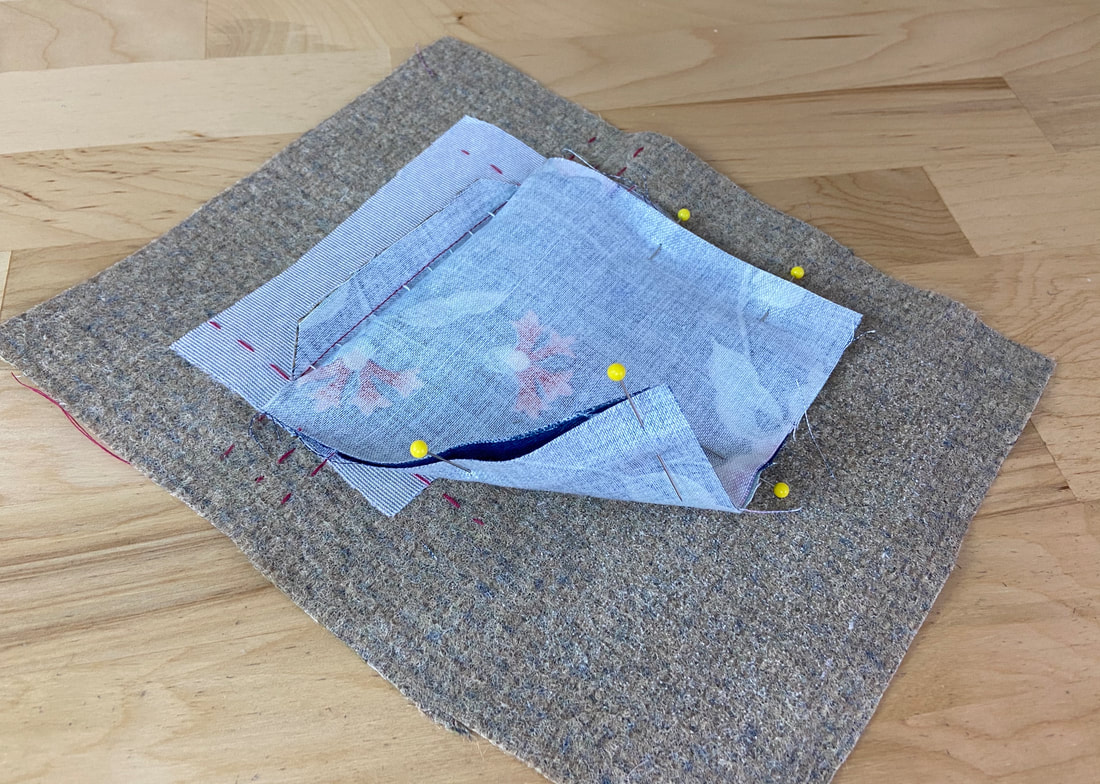
11. Turn the garment on its right side and flip the bottom garment portion up to expose the bottom seam allowance. Insert a few pins to hold the seam allowance to the pocket bag layer underneath.
|
12. Stitch through the seam allowance and bottom pocket layer next to the existing stitch as shown.
|
|
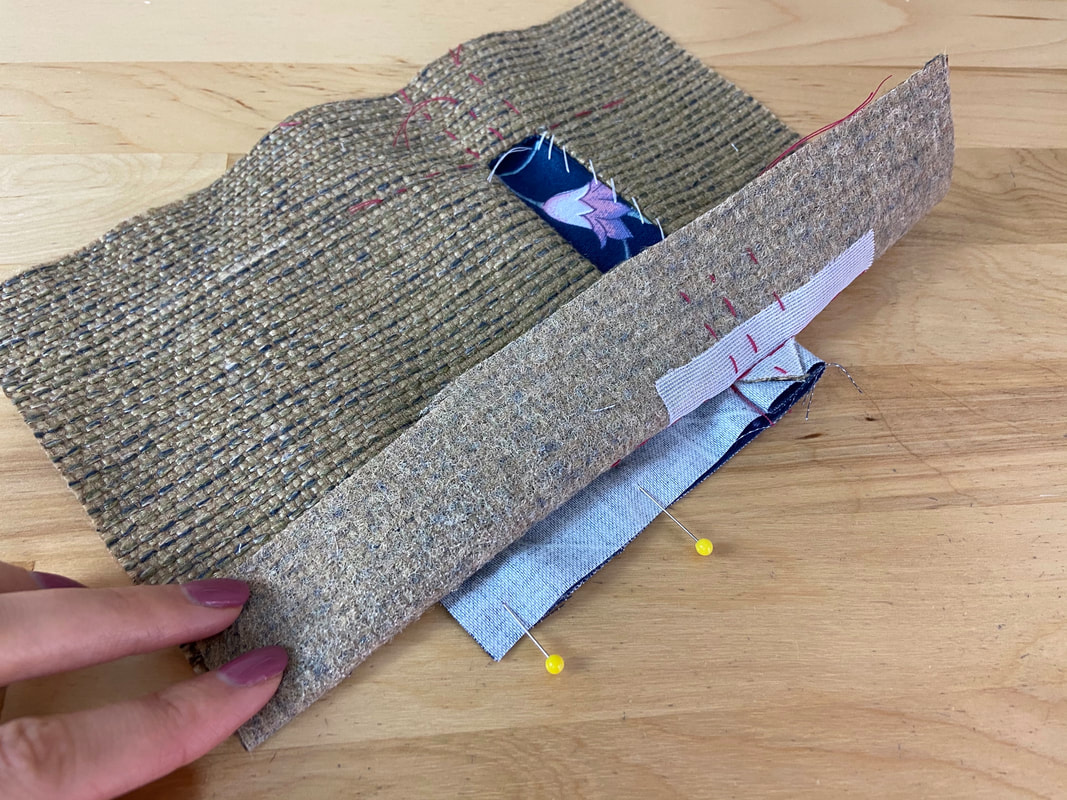
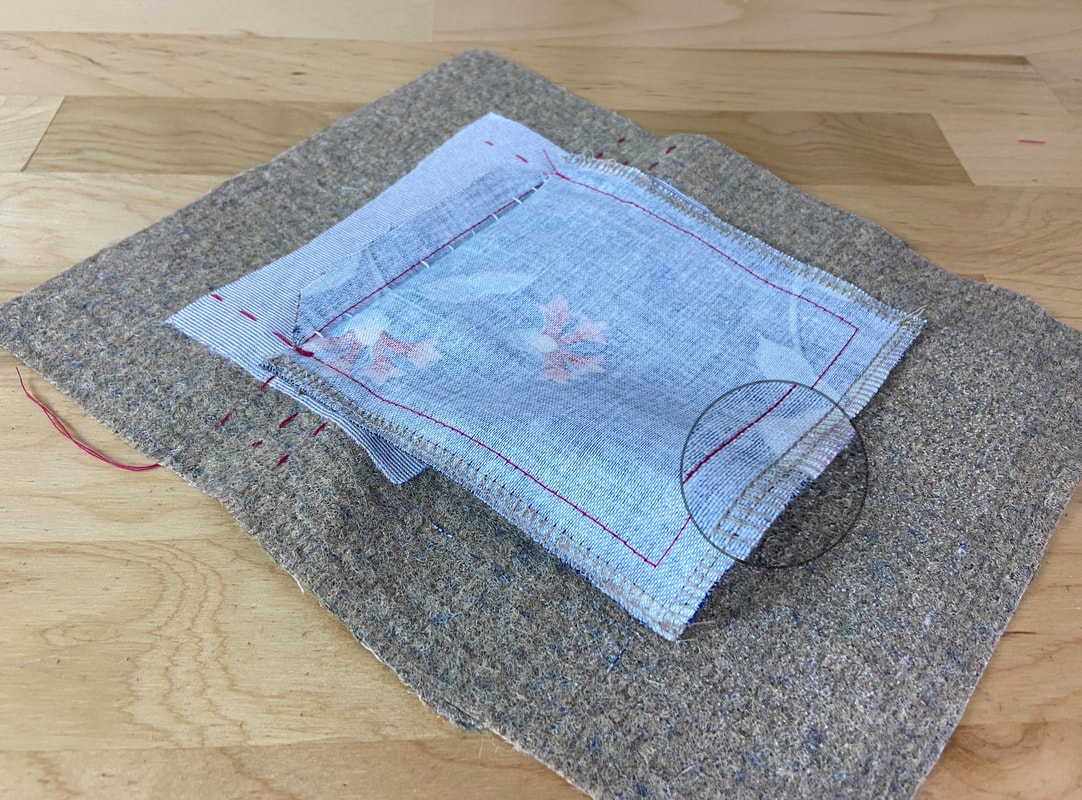
13. Flip the pocket application back on its wrong side and bring the top pocket layer down over the bottom portion such that all edges align. Insert pins perpendicular to these edges.
|
|
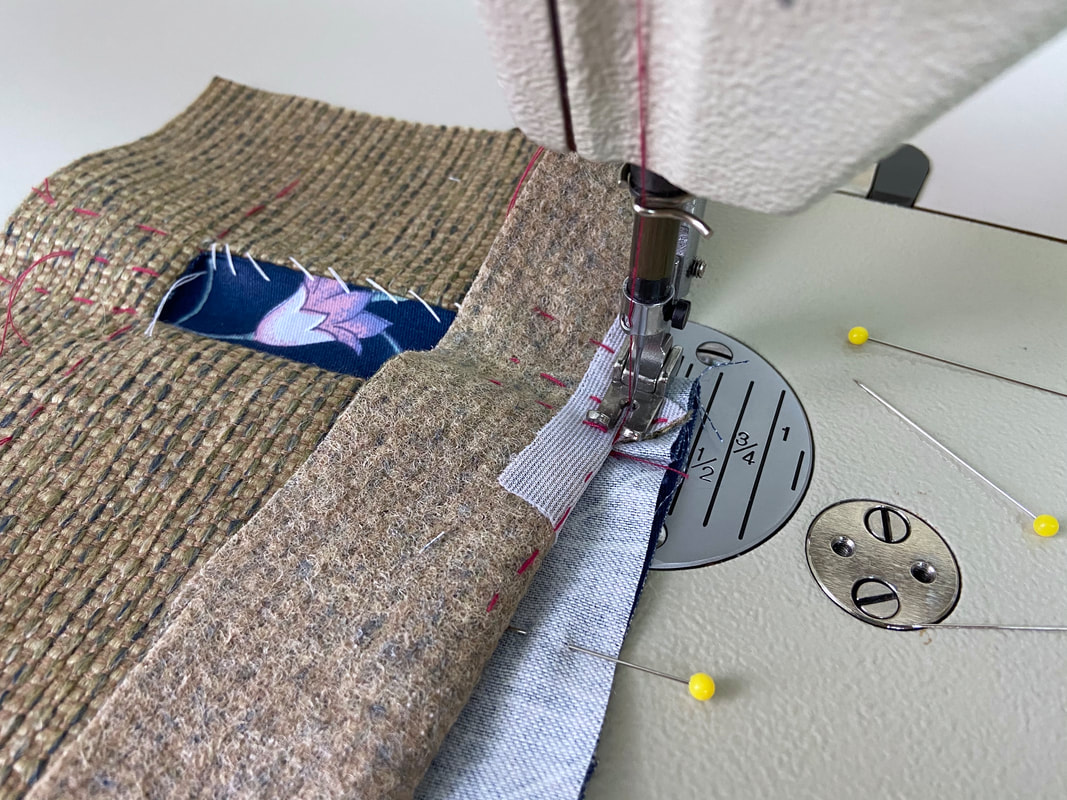
14. Peel back the garment layer on each side of the pocket, and stitch down at the base of the triangle catching all layers of the pocket ends underneath.
|
|
Continue stitching down around the bottom pocket bag then back up along the other pocket side, stitching the base of the other triangle extension in the process. This final stitch will complete the functional pocket bag.
|
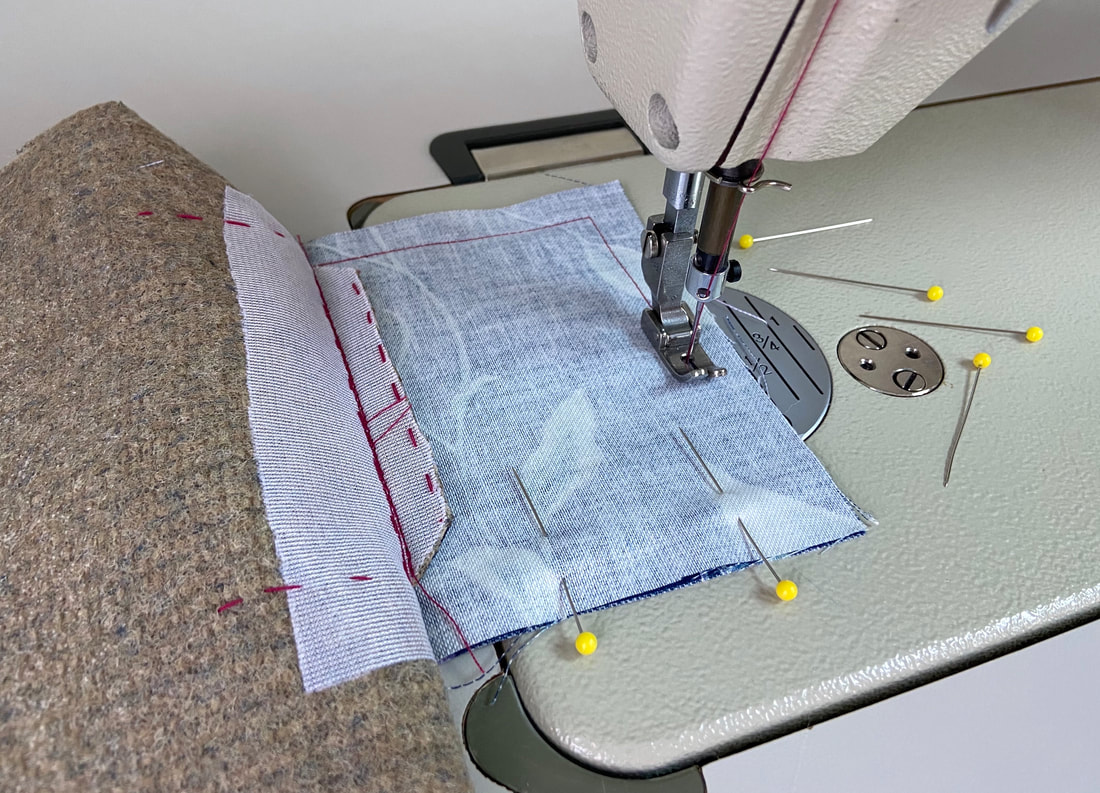
15. To complete the application, apply an overedge stitch to the pocket bag raw edges.
|
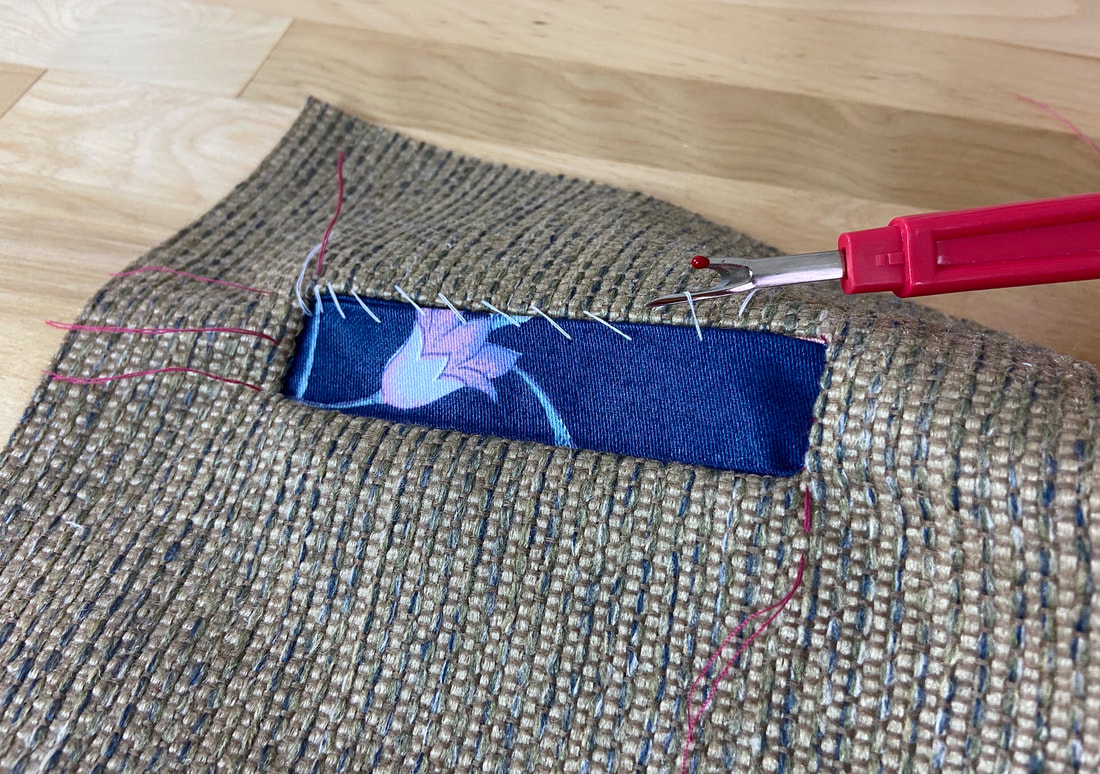
16. Last but not least, use a seam ripper to remove all hand basting and whipstitches.
|
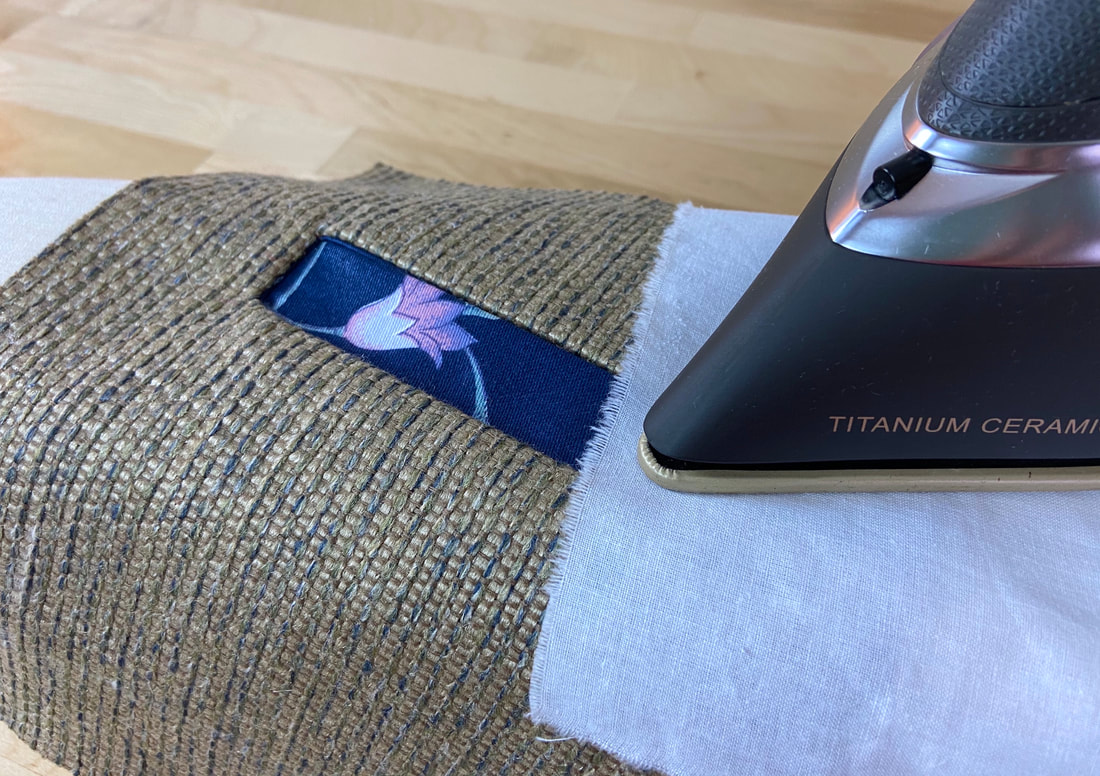
As a final step, iron the finished self-welt pocket using a heat protective cloth as needed.
 |
All content, including images and text, may not be copied, replicated, or redistributed without express written permission. This website is regularly screened and monitored for content protection.
|
