Doina Alexei
  • Sewing Tutorials
    • Basics >
      • Aligning Pattern Grainlines To Fabric
      • Preparing Fabrics For Sewing
      • Pinning Sewing Patterns To Fabric
      • Placing Sewing Patterns On Fabric For Cutting
      • Rotary Cutters or Fabric Scissors?
      • Cutting The Sewing Patterns
      • What Are Notches And How To Use Them In The Sewing Process
      • Transferring Notches From Pattern To Fabric
      • Transferring Seamlines to Fabric
      • Staystitching
      • Backstitching: A Complete Guide
      • Hand Basting: A Complete Guide
      • Sewing Continuous Bias Binding
    • Darts >
      • Marking And Transferring Darts To Fabric
      • What Are Darts And Dart Components
      • Folding, Pinning And Hand Basting Darts
      • Handling Dart Excess: Bulk And Tension
      • How To Sew A French Dart
      • How To Sew And Iron Single Pointed Darts
      • How To Sew And Iron Contour Darts
      • Sewing Darts With Decorative/Beaded Fabrics
    • Sewing Seams >
      • ​The Basics Of Seams And Seam Allowance
      • How To Sew A Straight Seam
      • Sewing Curved Seams
      • Sewing Corner Seams
      • Trimming And Grading Seam Excess
      • Notching/Clipping Seam Allowance for Tension Release
      • Sewing Topstitched Seams
      • Sewing Corded Seams
      • Sewing A Slot Seam
      • Sewing A Gathered Seam
      • Sewing Bias Seams
      • Sewing Seams With Ease
      • Sewing Seams With Crossing Seamlines
      • Sewing Unlike Fabric Seams
      • How To Iron Seams: Ironing Tools And Conventions
      • Sewing With Knit Fabrics
      • Understanding Stitch Length And Tension
      • Sewing Unique Fabric Seams
    • Seam Finishes >
      • Seam Finishing Techniques - Overview
      • Applying A Pinked Seam Finish
      • Applying A Bias Bound Seam Finish
      • Serging And Zigzag Seam Finishes
      • Sewing A Self-Bound Seam Finish
      • Sewing A French Seam Finish
      • Sewing A Hong Kong Seam Finish
      • Sewing A Mock French Seam Finish
      • Sewing A Turned-and-Stitched Seam Finish
      • Sewing Overcast Hand-Applied Seam Finishes
      • Sewing A Flat Felled Seam
      • Sewing A Hairline Seam Finish
    • Hem Finishes >
      • Garment Hem Finishes: Overview
      • ​Sewing A Double Fold Hem Finish
      • Sewing A Single Fold Hem Finish
      • Sewing Bound Hem Finishes
      • Sewing An Exposed Double Layer Bound Hem
      • Sewing A Folded-Up Bound Hem with Pre-folded Binding
      • Sewing A Hong Kong Hem Finish
      • Sewing A Band Hem Finish
      • Sewing A Bias Faced Hem Finish
      • Sewing A Twill Tape Hem Finish
      • Sewing A Rolled Hem Finish
      • Sewing A Shaped Hem Facing
      • Using Fusible Hem Tape And Webbing
      • Finishing A Lace Fabric Hem
      • Finishing A Leather Hem
      • Sewing Faced Hem Corners
      • How To Finish Lining At The Hem
      • Finishing Fabric Corners by Mitering >
        • Mitering Fabric Corners With A Full Bias Facing
        • Mitering Fabric Corners With Exposed Binding
      • Interfacing A Hemline: Lined And Unlined Examples
    • Sewing Pockets >
      • Curved Patch Pocket With Flap
      • Unlined Square Patch Pockets
      • Lined Patch Pockets: Two Ways
      • Extension On-Seam Pockets
      • Separate On-Seam Pocket
      • Front Hip Pockets
      • Bound Double Welt Pocket
      • Double Welt Pocket With Flap
      • Self-Welt Pocket (Using Single Fabric Layer)
      • Slanted Welt Pocket (Hand-Stitched)
      • Faced Slash Pockets: Overview >
        • Sewing A Faced Slit Pocket
        • Sewing A Rectangular Slash Pocket
        • Sew A Star-Shaped Faced Pocket
    • Sewing Zippers >
      • Sewing Zippers: General Information
      • Sewing A Centered Zipper
      • Sewing A Lapped Zipper
      • Sewing An Invisible Zipper
      • Sewing A Fly Front Zipper
      • Sewing A Closed-End Exposed Zipper (No Seam)
      • Sewing An Exposed Separating Zipper
      • Sewing Hand Stitched Zipper Applications
      • Sewing A Zipper Underlay
      • Sewing A Placket-Enclosed Separating Zipper
    • Sleeveless Finishes >
      • Sleeveless Armhole Finishes: General Information
      • Finishing Sleeveless Garments with Lining
      • Sewing A Folded-Under Bound Armhole Finish
      • Sewing A Shaped Armhole Facing
      • Finishing Armhole Edges With Exposed Binding
      • Finishing Armhole Edges With Decorative Trim
    • Neckline Finishes >
      • Sewing A Neck Shaped Facing
      • Sewing An All-In-One Neck Facing
      • Neck And Garment Opening Combination Facings >
        • Sewing An Extended Front-Neck Facing
        • Sewing A Separate Neck-Front Facing
      • Sewing A Bias Faced Neckline Finish
      • Sewing A Band Neckline Finish
      • Bound Neckline Finishes: Overview >
        • Sewing A Single Layer Bound Neckline
        • Finishing A Neckline With Pre-Folded Binding
        • Sewing A Double Layer Bound Neckline Finish
      • Sewing A Semi-Stretch Strip Band Neckline
      • Ribbed Neck Band And Classic Turtleneck
      • Decorative Neckline Finishes >
        • Sewing A Neckline With Decorative Inset
        • Sewing A Piped Cording Faced Neckline
        • Sewing Decorative Trim To A Finished Neckline
    • Finishing Facing Edges >
      • Finishing Facing Edges: Overview
      • Folded-And-Topstitched Overedge Facing Finish
      • Sewing A Bound Facing Edge Finish
      • Sewing A Hong Kong Facing Finish
      • Sewing A Rolled Edge Facing Finish
      • Sewing A Twill Tape Facing Edge Finish
      • Sewing An Overedge-Stitch Facing Finish
    • Extras >
      • A Complete Guide on Interfacing
      • Sewing Bound Spaghetti Straps
      • Sewing Spaghetti Straps To A Faced Neckline
      • Sewing Ruffles: Overview
      • Patterning And Sewing A Circle Ruffle
      • Sewing A Gathered Heading Ruffle
      • Sewing Double Layer Gathered Ruffles
      • Sewing A Gathered Ruffle Into A Seam
      • Sewing A Gathered Ruffle To A Fabric Edge
      • Sewing A Fabric Surface Slit
      • Sewing A Slit Seam
      • Hand-Applied Straight Stitches
      • Hand-Applied Blind Stitches
      • Hand-Applied Overedge Stitches
      • Hand-Applied Tack Stitches
      • Hand-Applied Decorative Stitches
  • Custom Apparel
    • Custom Bridal
  • Submit A Sewing Question
  • About
  • Blog

5 Unique Fabric Seams And How To Sew Them

As you become a more seasoned dressmaker, you will naturally start experimenting with different types of fabrics and trims. 
Picture
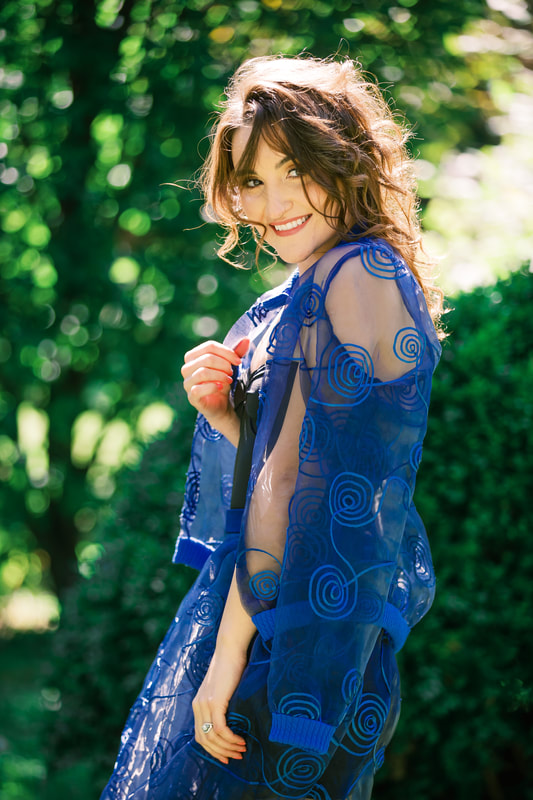
While the crisp, cotton fabrics used in the learning process provide a great canvas for practicing sewing techniques and machine stitching, other fabrics may prove to be difficult to handle both in the cutting and sewing process. ​
Picture
Fabrics like lightweight sheers, laces, leather, and vinyl require extra care and some additional sewing techniques. The truth is, regardless of how many of these techniques you know in theory, there is no better way to learn sewing with unique fabrics than practice. 
Once you review the tips and techniques described below, try your hand at some (or all) of the discussed fabrics. Note which sewing methods work best for you and your sewing machine. Over time, with lots of practice, you will be able to handle misbehaving, difficult-to-handle structures just as easily as any basic fabric. 

Sewing With Lightweight Sheer Fabrics

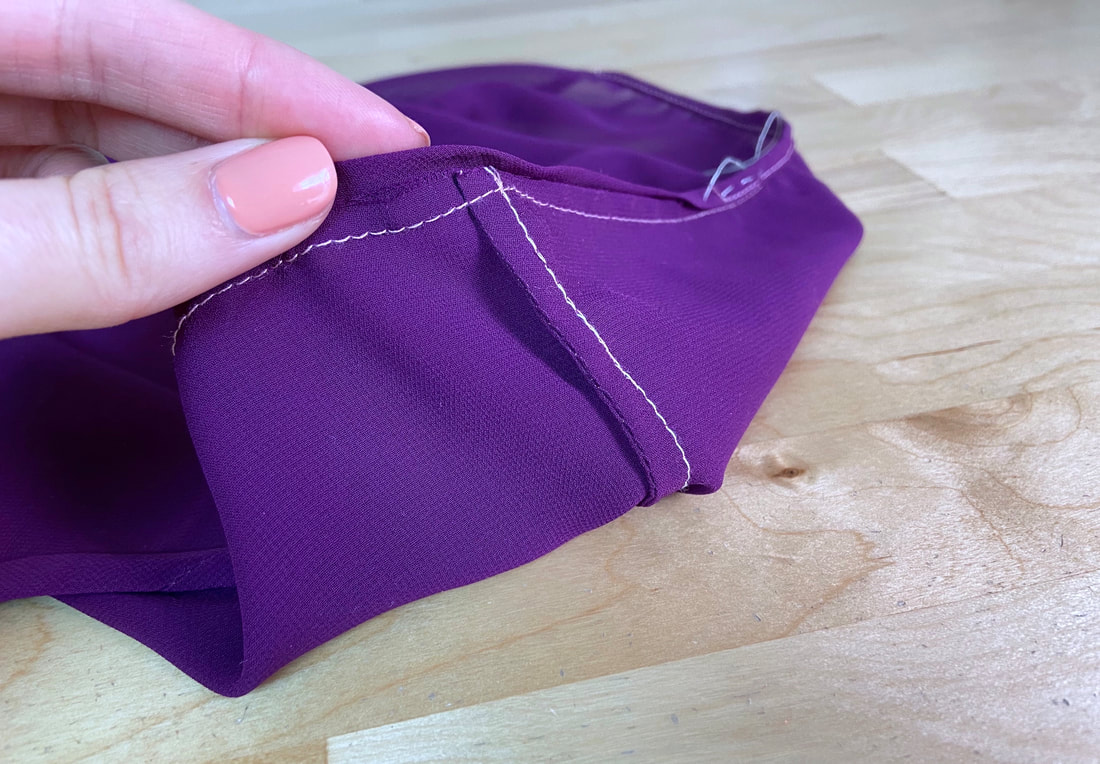
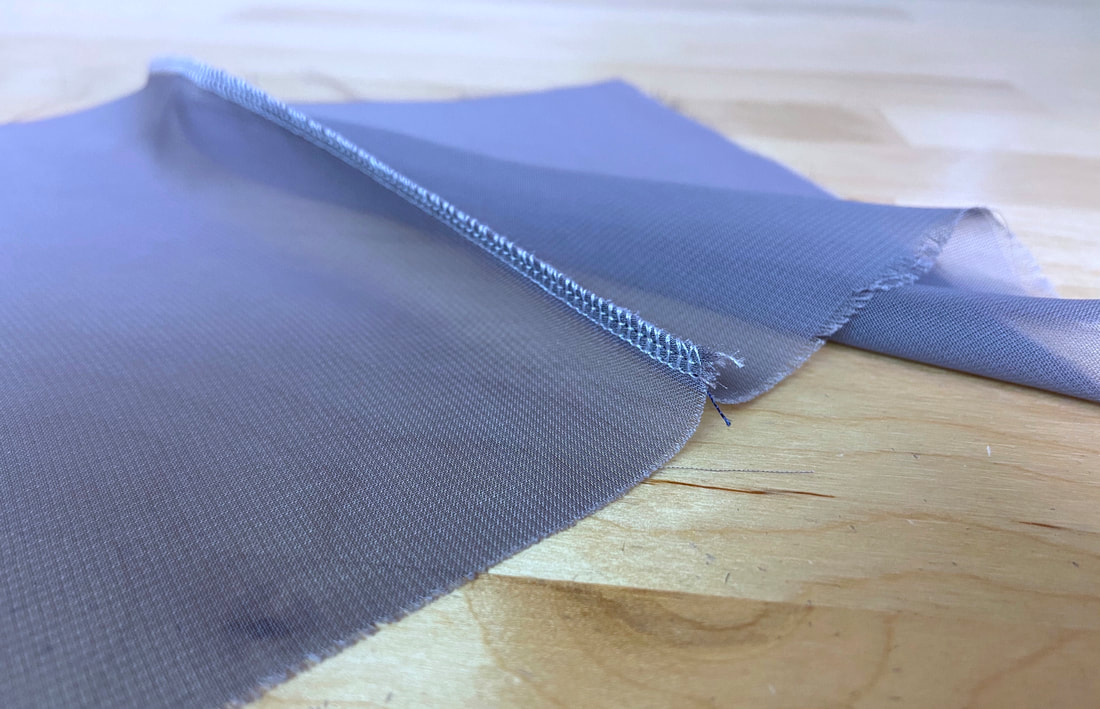
When sewing with sheer fabrics, it is important to finish the seam so that it is just as clean on the inside of the garment as it is on its right side. 
Picture
Given that sheers are see-through, seam finishes should be inconspicuous and narrow, usually self-enclosed, and look professional from the face of the garment. ​
Picture
French seams are commonly used for all structural seams. 
Picture
Hairline seam finishes are used with enclosed areas like collars, cuffs, and lapels that are visible on the outside of the finished garment. ​
Picture
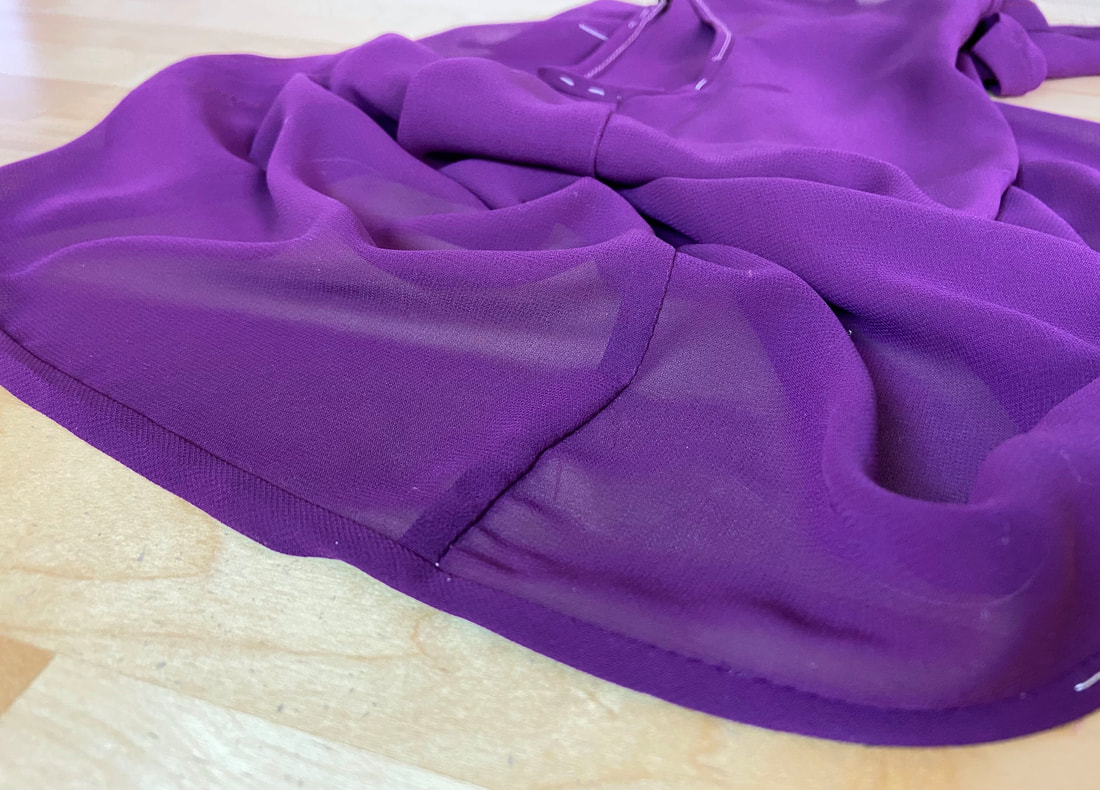
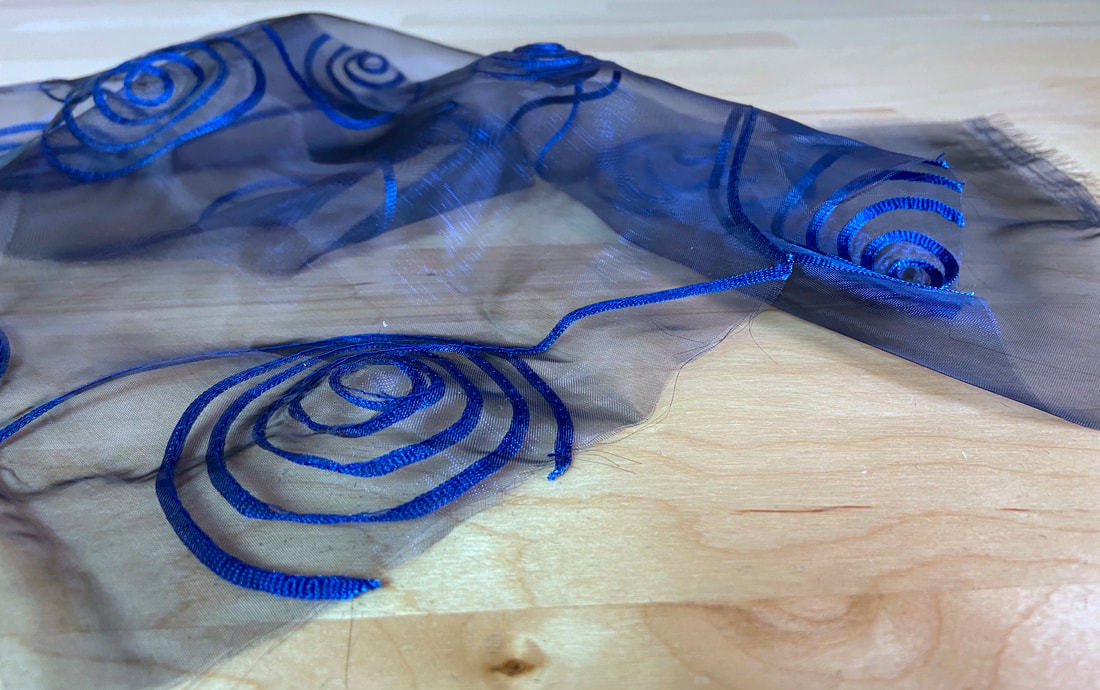
​Sheer fabrics are conventionally lightweight and thin. They may be drapey like chiffon or crisp like organza. Regardless of their structure, sheers are usually more difficult to handle during the cutting and sewing process, especially if made of silk. 
Silk sheers tend to slip and shift when the patterns are cut, as well as when the seams are later aligned in the sewing process. 
Picture
During the cutting process, you should be extra careful to keep the patterns as flat on the table surface as possible. To achieve more control both in the pattern cutting and sewing process, use thin silk pins, and insert them densely for added stability. ​
Picture
If you have little experience working with lightweight sheers, hand baste the seam prior to machine stitching it. Use an even, short basting stitch to keep the fabrics securely aligned and prevent them from shifting during the stitching process. 
When it comes to machine stitching sheer seams, you may choose to use silk thread if available. Regardless of thread choice, always use a silk machine needle with a fine, sharp point. A regular machine needle, if not sharp enough, may snag the fine threads, especially in a sheer silk structure. 
Your machine may already be equipped with an extra silk needle. If not provided, purchase silk needles that are compatible with your sewing machine model. 
Picture
For added durability and control, use a shorter stitch length, about 12-16 stitches per inch.
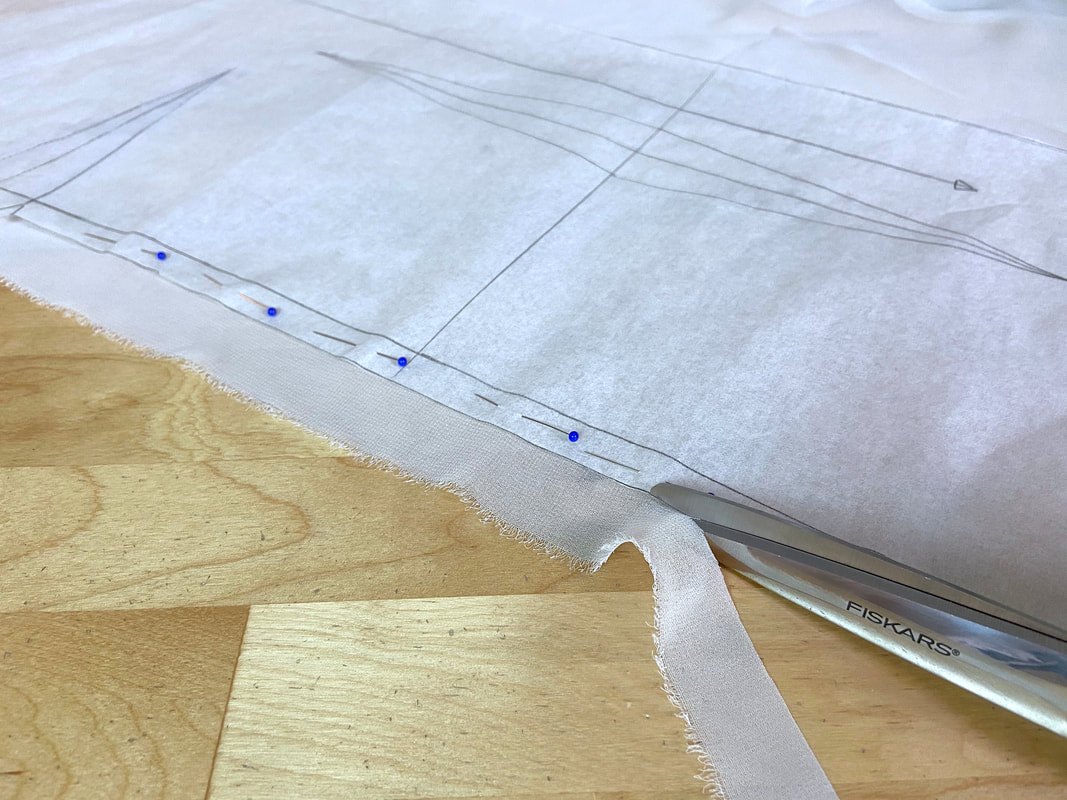
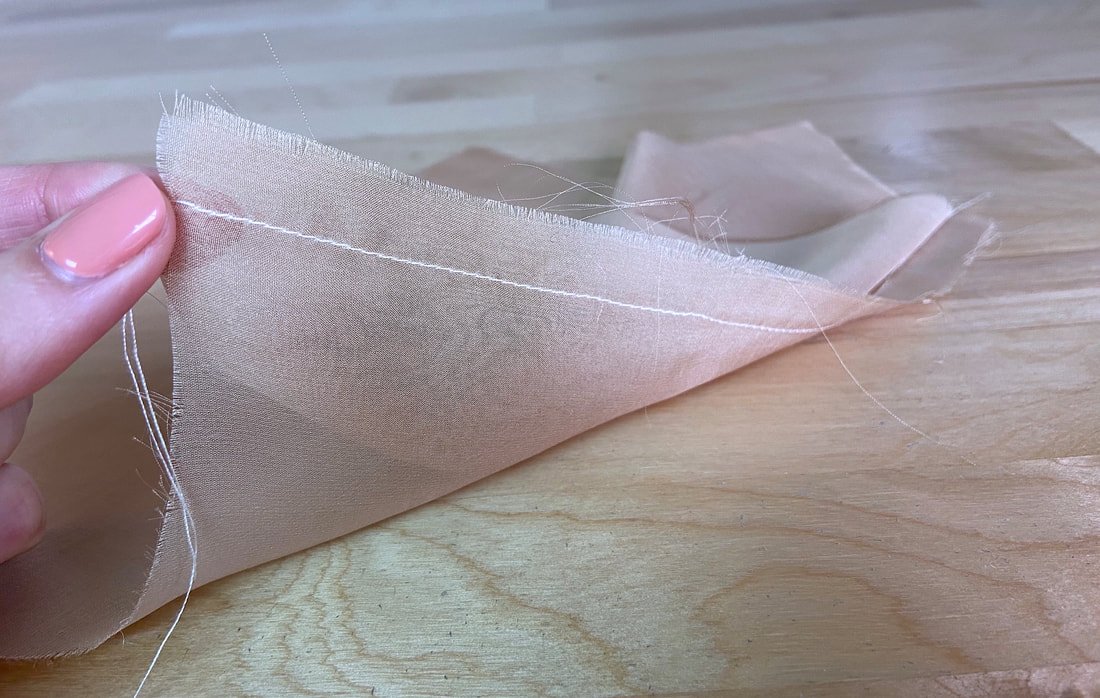
Another trick to stabilizing thin sheer fabrics is to align tissue paper under the seam during the stitching process. The addition of tissue helps fabric feed better, prevents sensitive fibers from getting snagged, adds stability, and feeds fabric easier under the presser foot. 
Picture
After the seam has been pinned, place a piece of tissue paper underneath the fabric layers to cover the entire seam edge. Treat the tissue as a third fabric layer aligning its edge carefully with the rest of the seam edges. Insert a few pins to secure. 
Picture
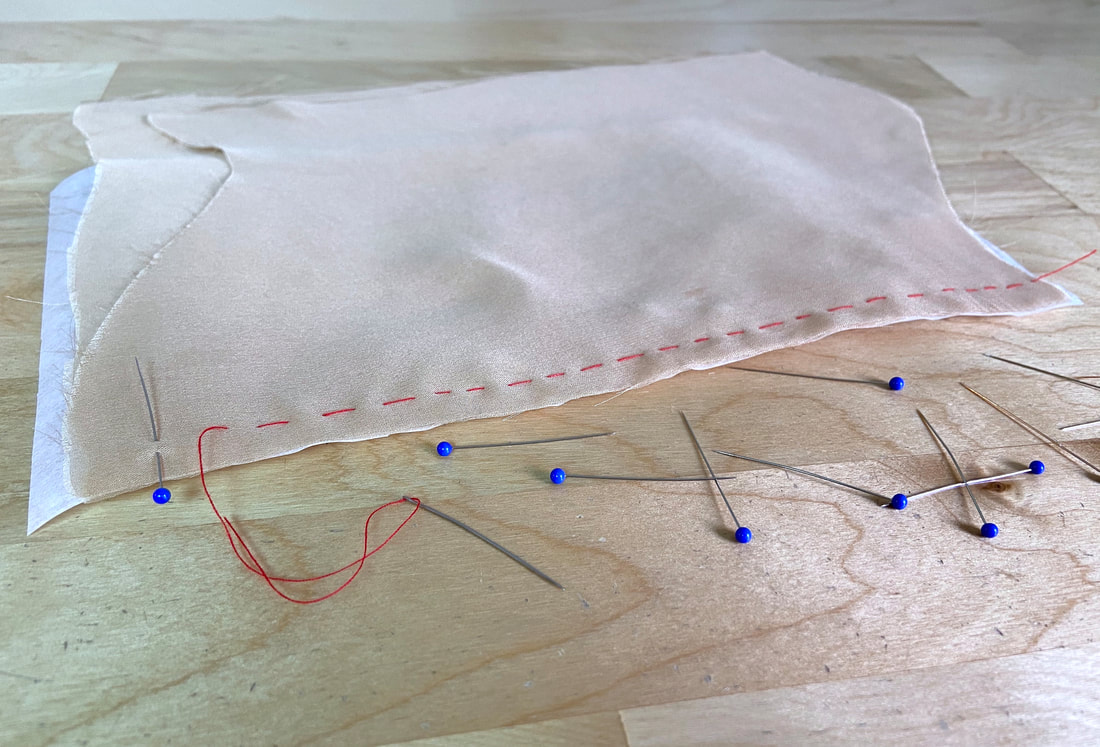
Carefully hand baste through all three layers (fabric and tissue paper underneath) maintaining the edges perfectly aligned. Use an even, shorter basting stitch for increased control. 
Picture
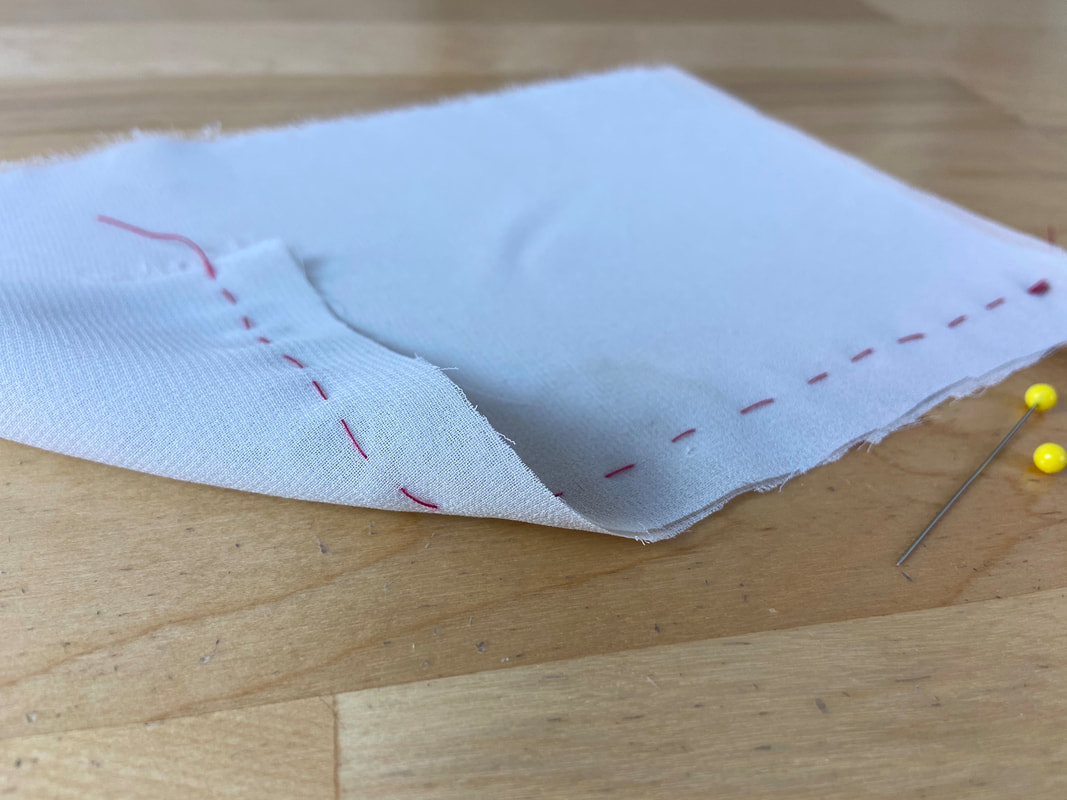
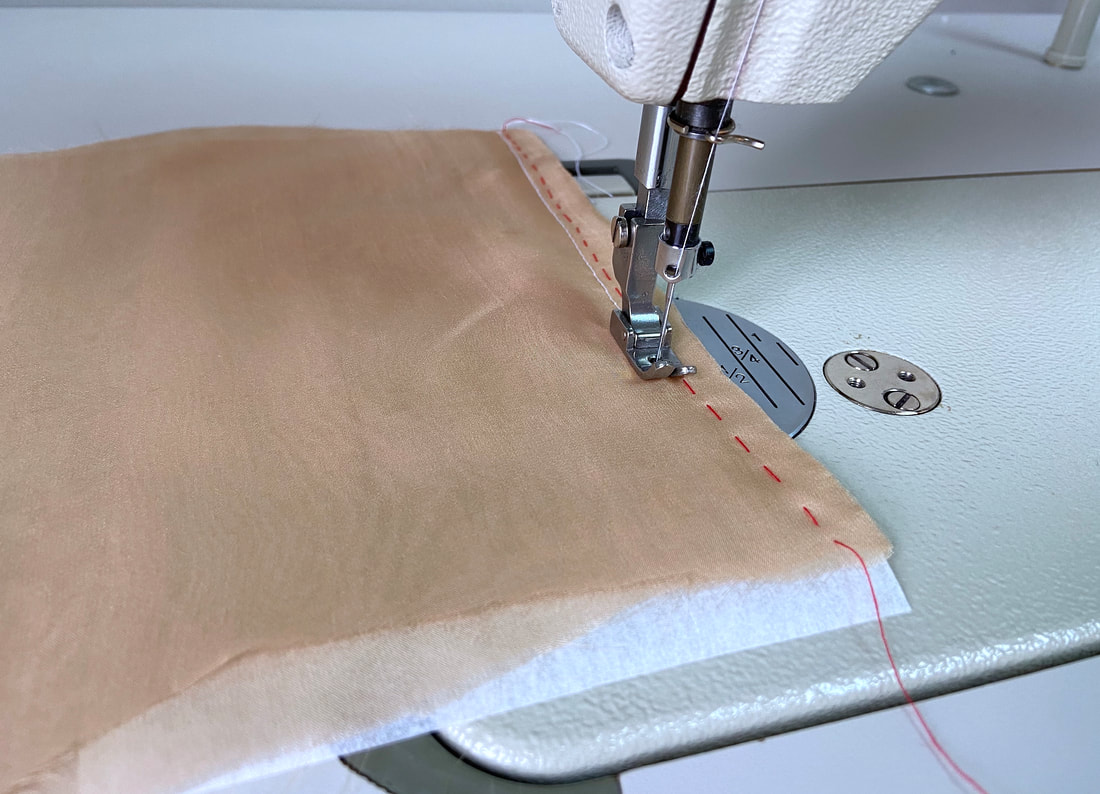
Machine stitch the seam through the fabric and tissue layers following the designated seam allowance.
Picture
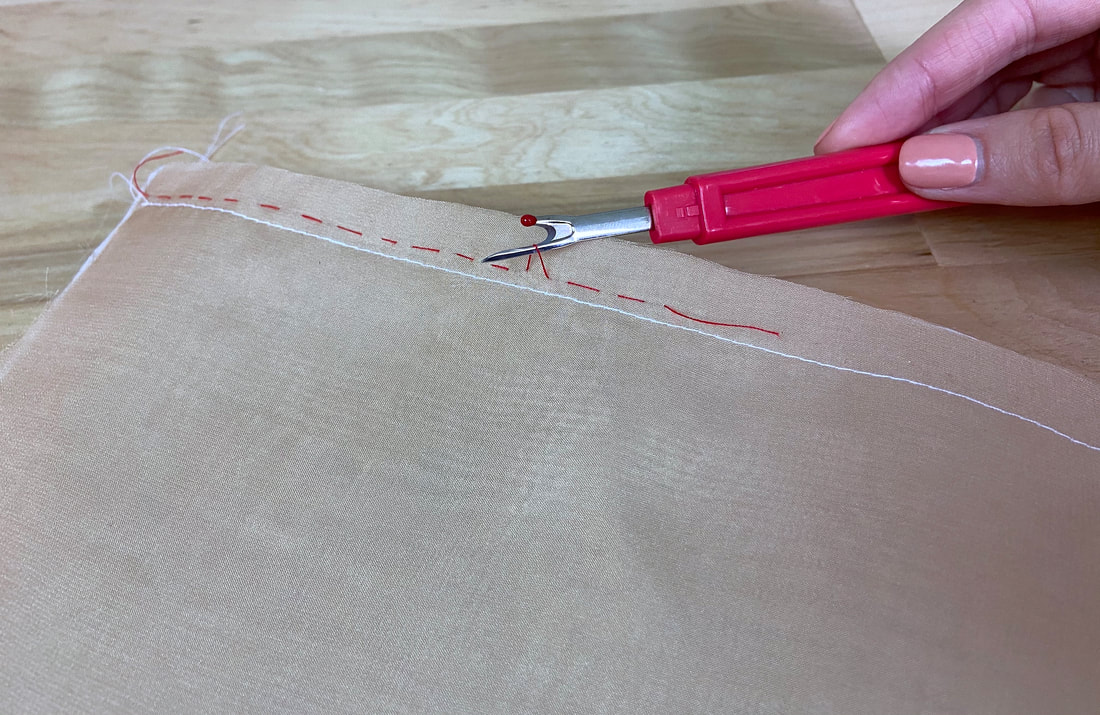
Once machine stitched, remove the basting stitches using a seam ripper. ​
Picture
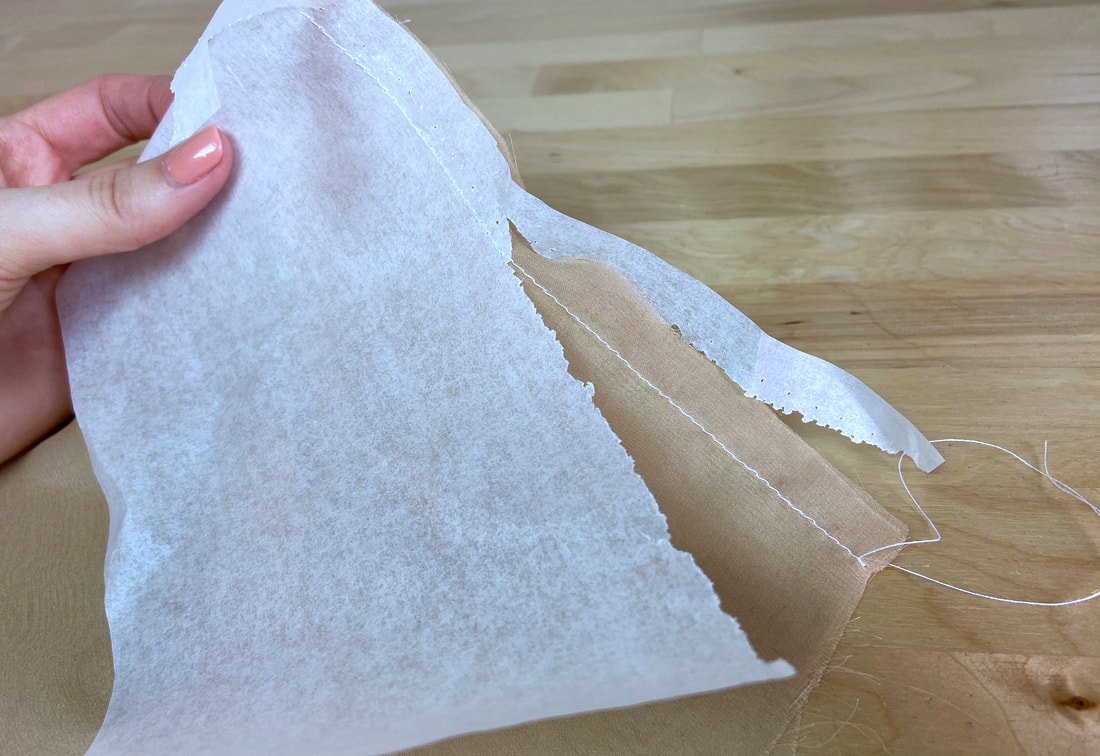
To remove the tissue paper, gently pull it from each side of the stitch. Be careful not accidentally damage the seam stitch in the process. ​

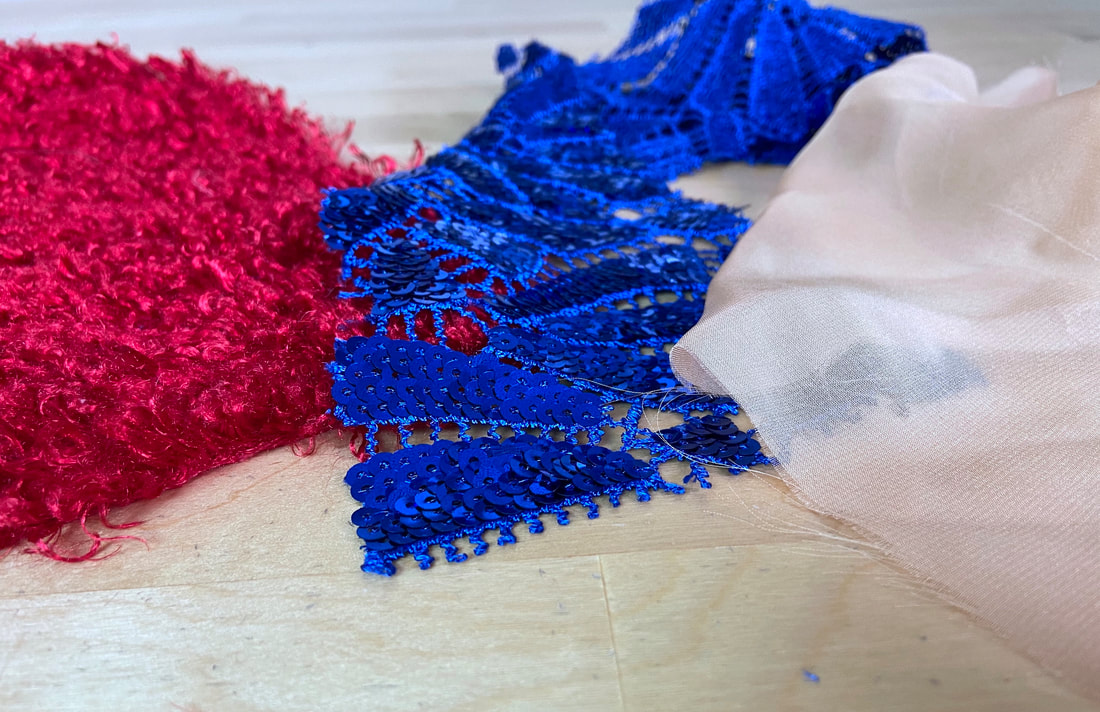
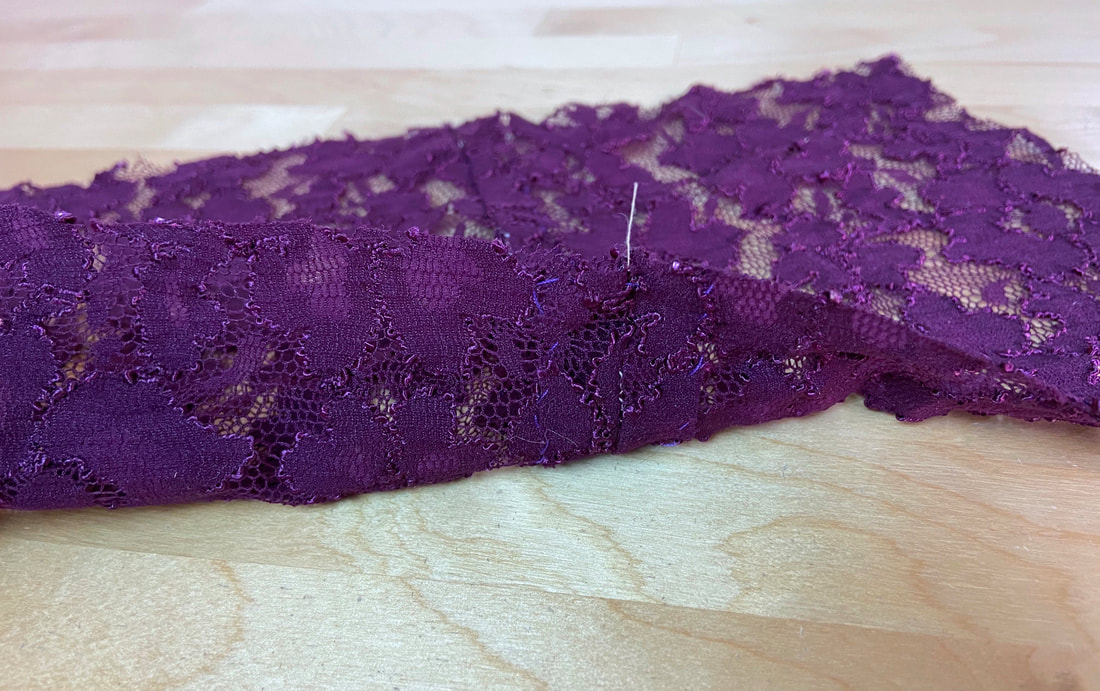
Sewing With Lace Fabrics

Lace fabric comes in a variety of textures, weaves and thicknesses. 
Picture
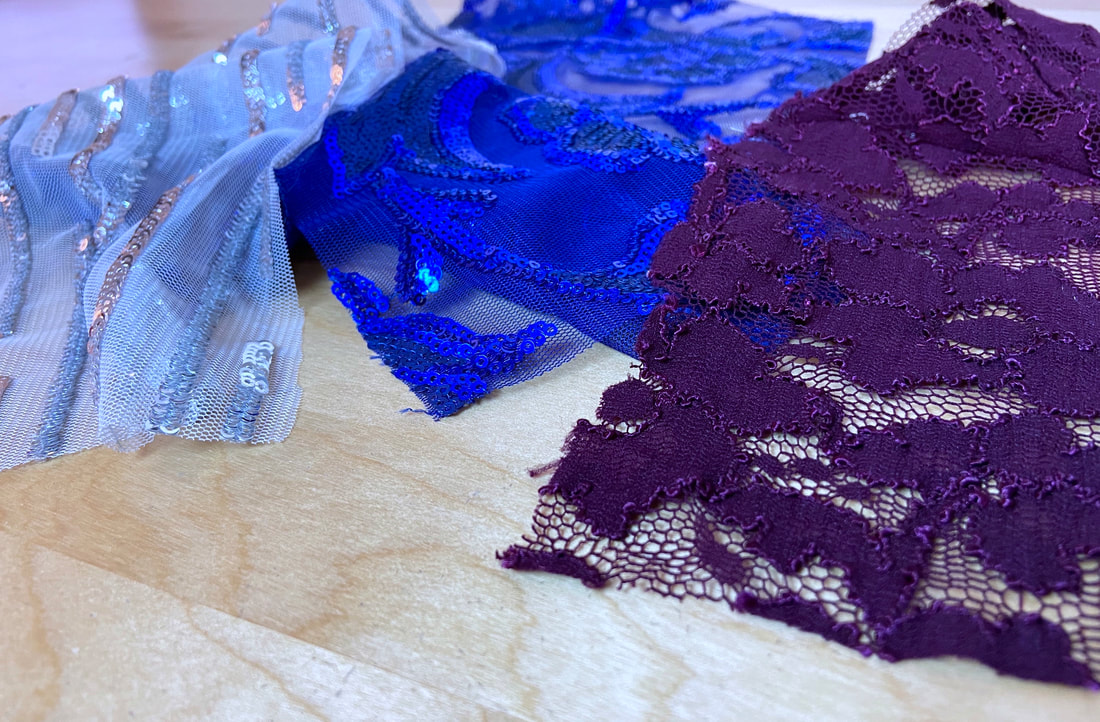
While each one of them will need to be treated with care in the sewing process, some require more attention than others. ​
Thin, sheer lace fabrics are often more difficult to handle and stitch. They often require backing with tissue paper and hand basting to provide additional control. 
Picture
Bulky, textured, or loosely-woven laces need stronger seams that are often constructed with a double stitch. 
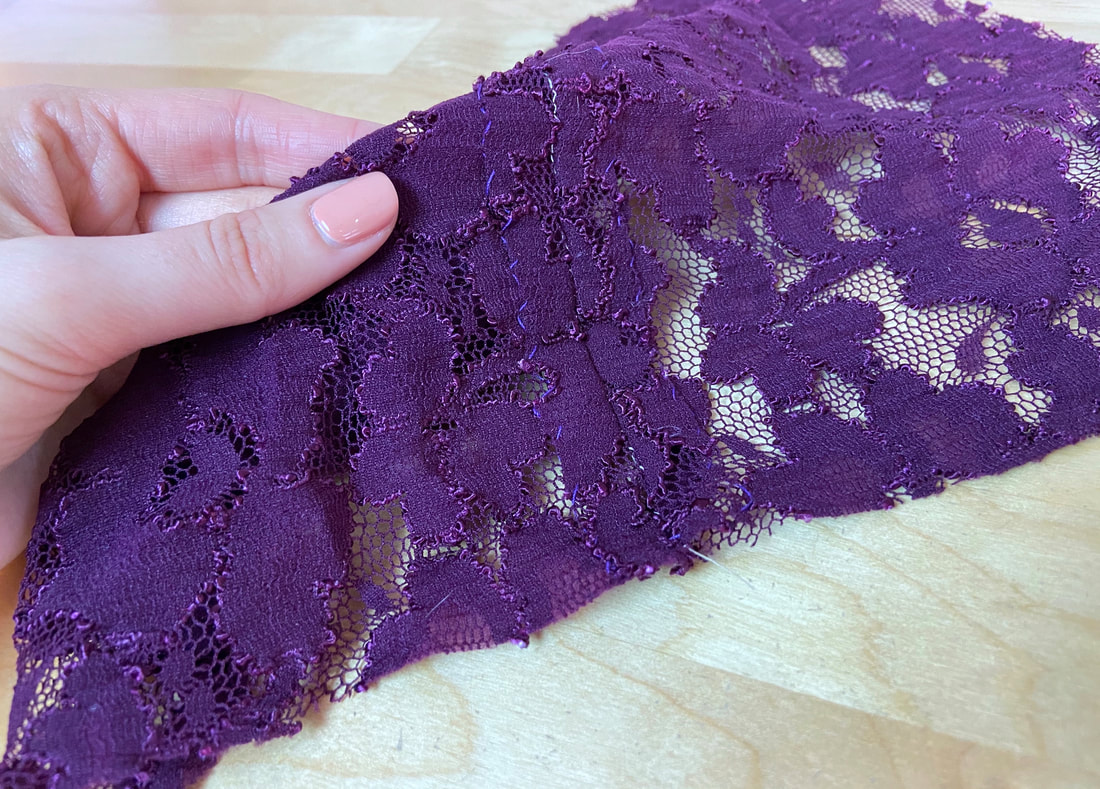
The beauty of most laces is that they often do not require a seam allowance finish. Like knits, lace cut edges rarely fray. These cut edges also blend naturally into the textured fabric without needing extra aesthetic finishes. ​
Lace fabrics have varying amounts of stretch depending on end use. 
Picture
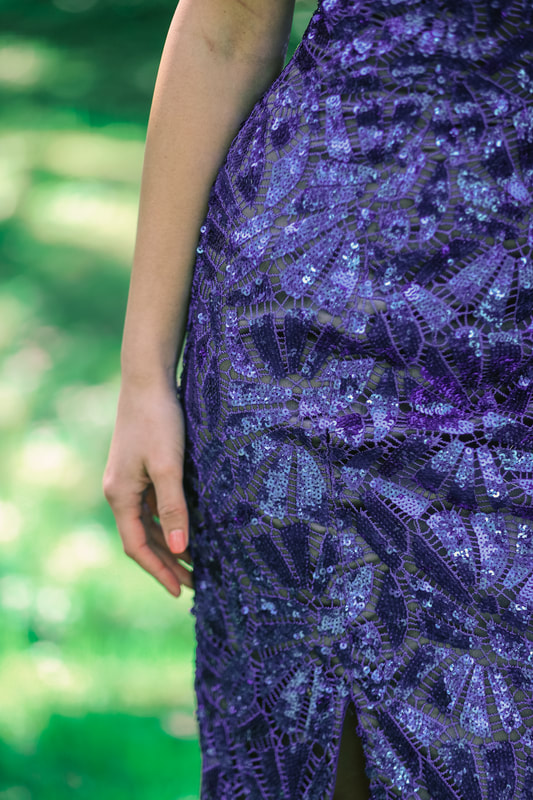
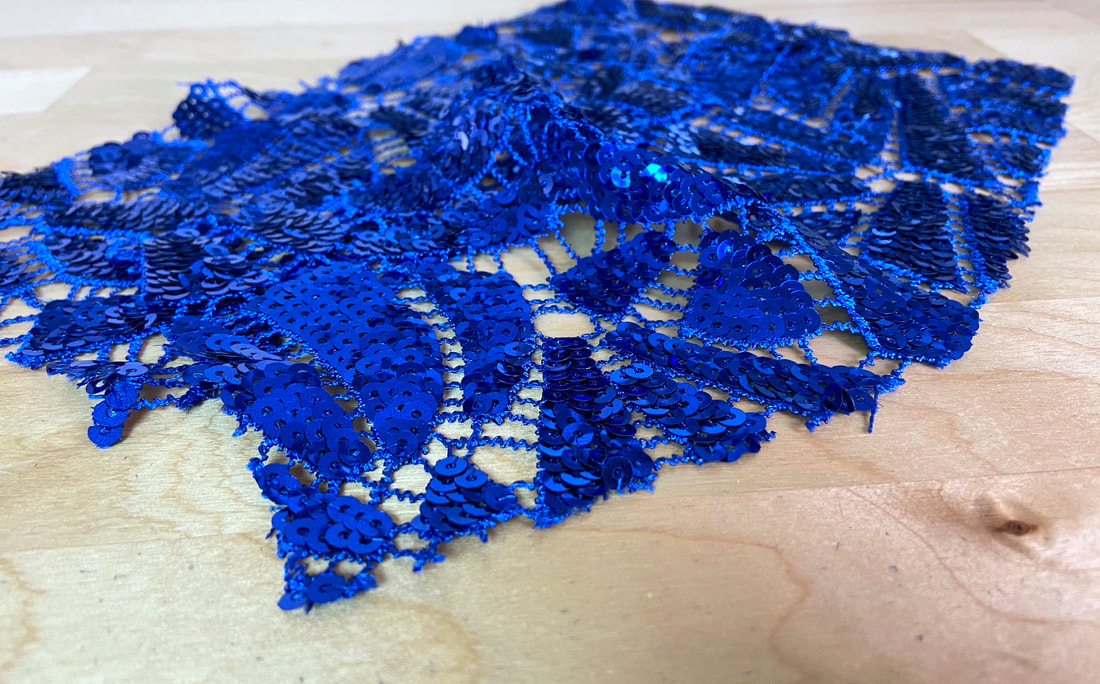
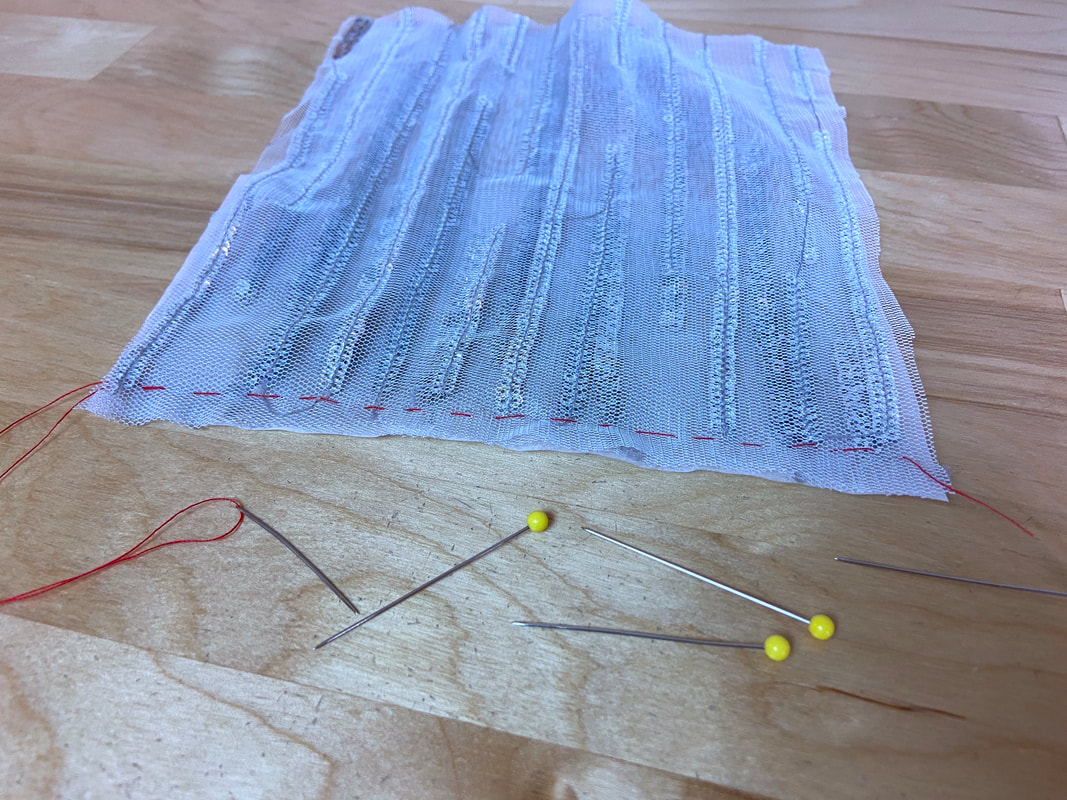
Laces used in eveningwear are often non-stretch and feature decorative elements like sequins and beading. 
Picture
Laces that are used in dance and costume wear are often quite stretchy, behaving much like knit fabrics. ​​
While techniques for sewing lace fabrics vary greatly depending on the type of lace, its stretch level and structure, here are some basic conventions to keep in mind in the sewing process: 
Picture
  • Use a smaller stitch and an extra row of stitching for open, loosely-woven laces. 
Picture
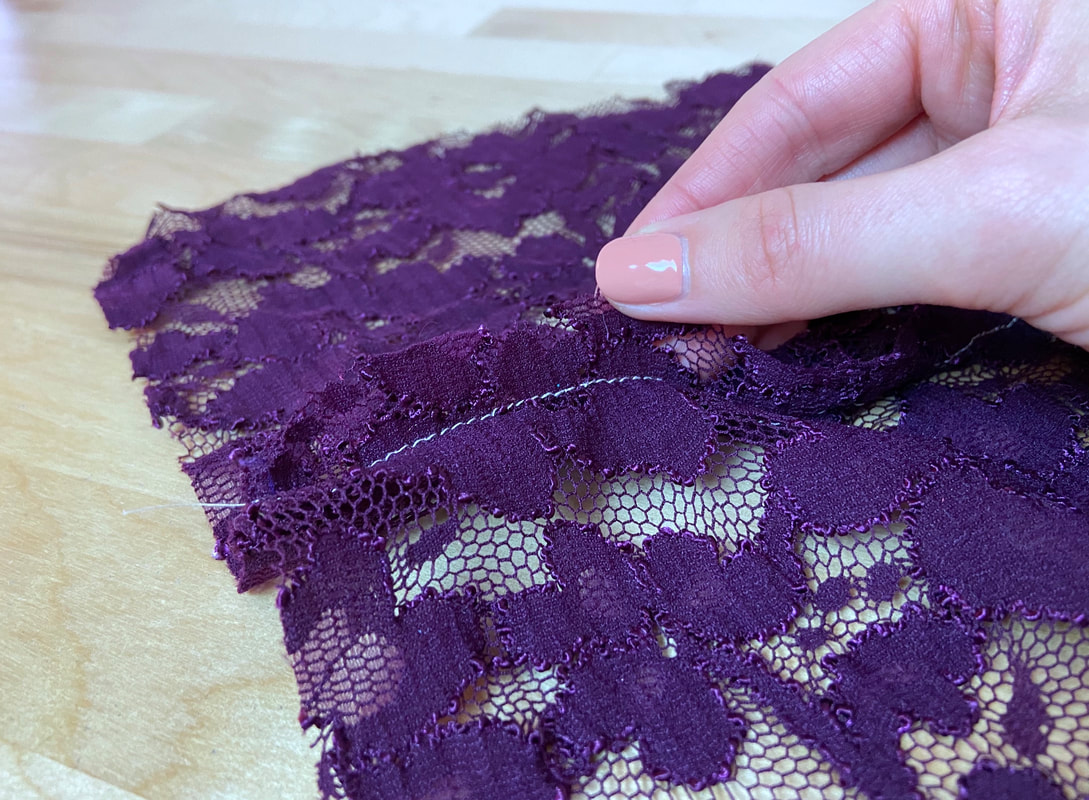
  • It is not necessary to add an overedge finish to thick, bulky laces if they don’t fray. 
Picture
Picture
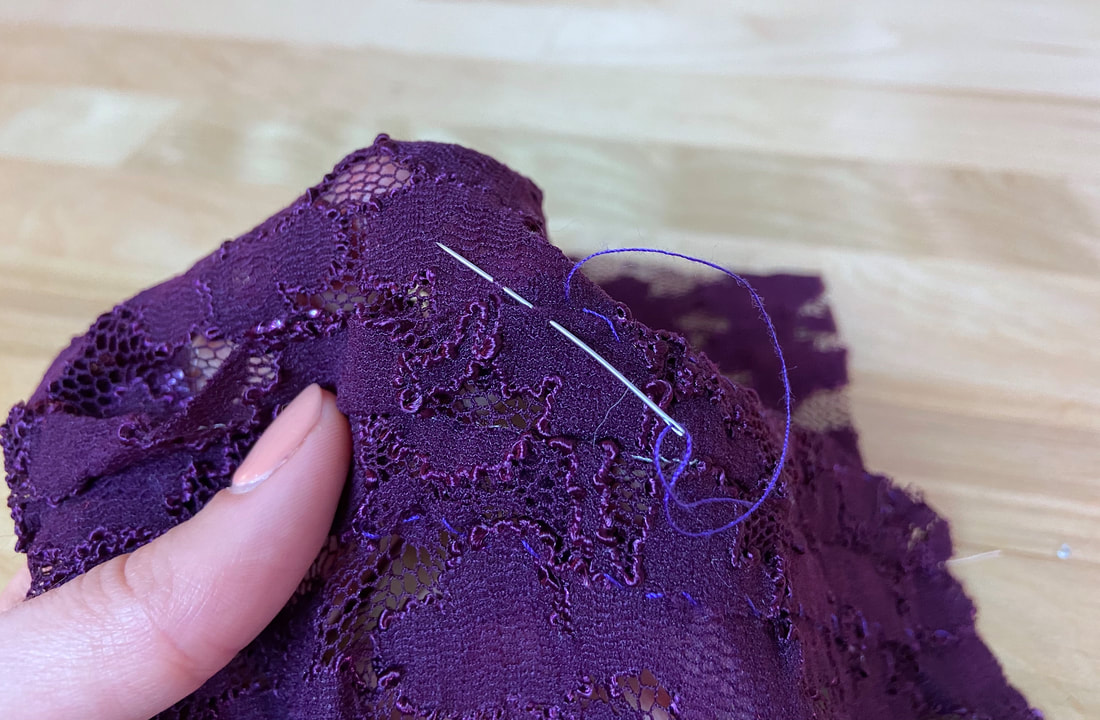
  • Ironing may not be effective in keeping lace seam allowance flat. For that reason, a slipstitch (or catchstitch) applied along all seam allowance edges, is often used to achieve flat, smooth seams.
Picture
  • Use the tissue paper trick described above when sewing very thin, sheer laces that are slippery and difficult to handle. 
Picture
In this case, always hand baste the fabric layers and tissue paper underneath prior to machine stitching the seam. ​
Picture
Picture
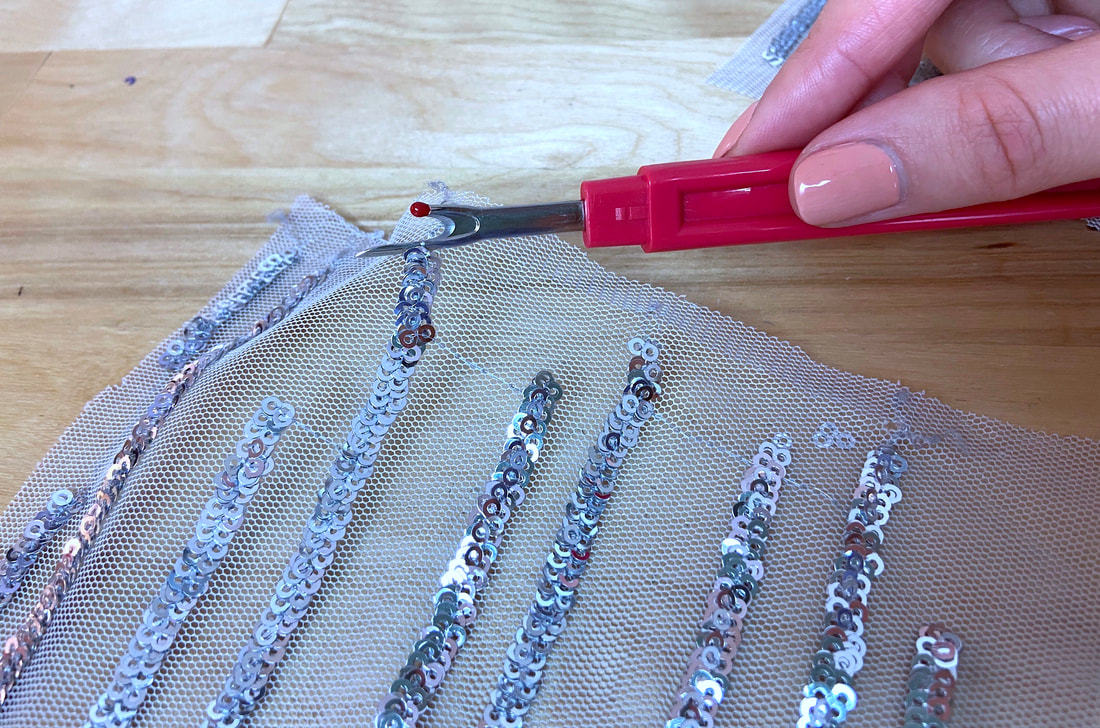
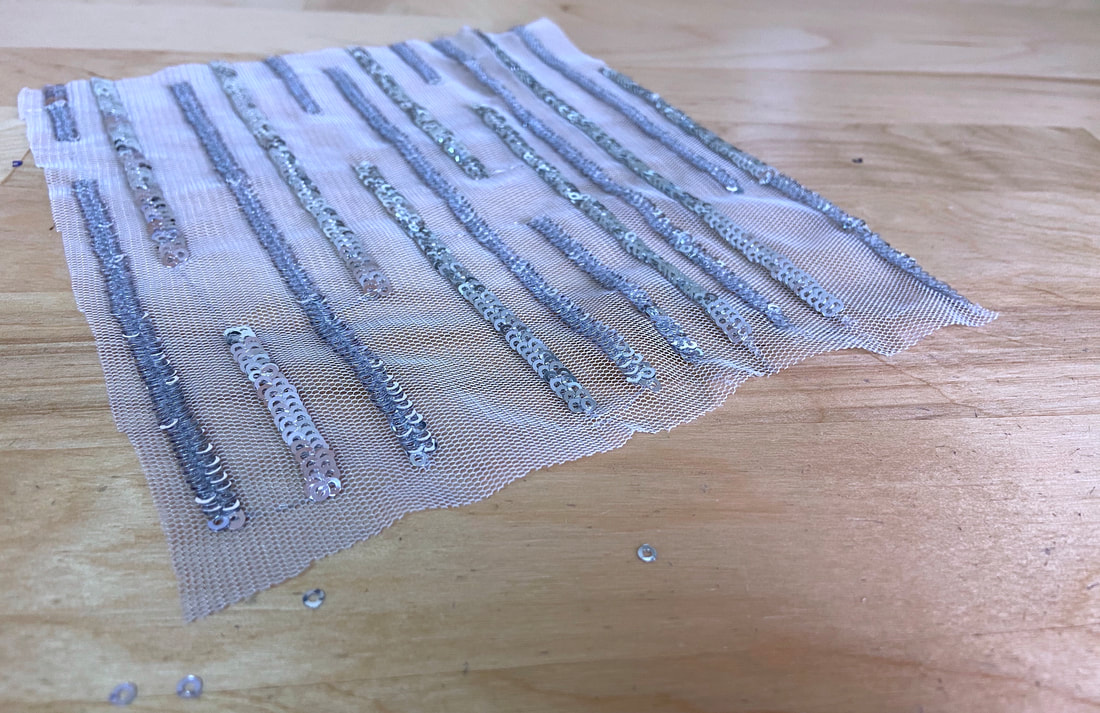
  • Prior to pinning and stitching heavily decorative laces, remove the individual decorative elements, like large sequins and beads, from the seam allowance surface. Stop at the seamlines. 
Picture
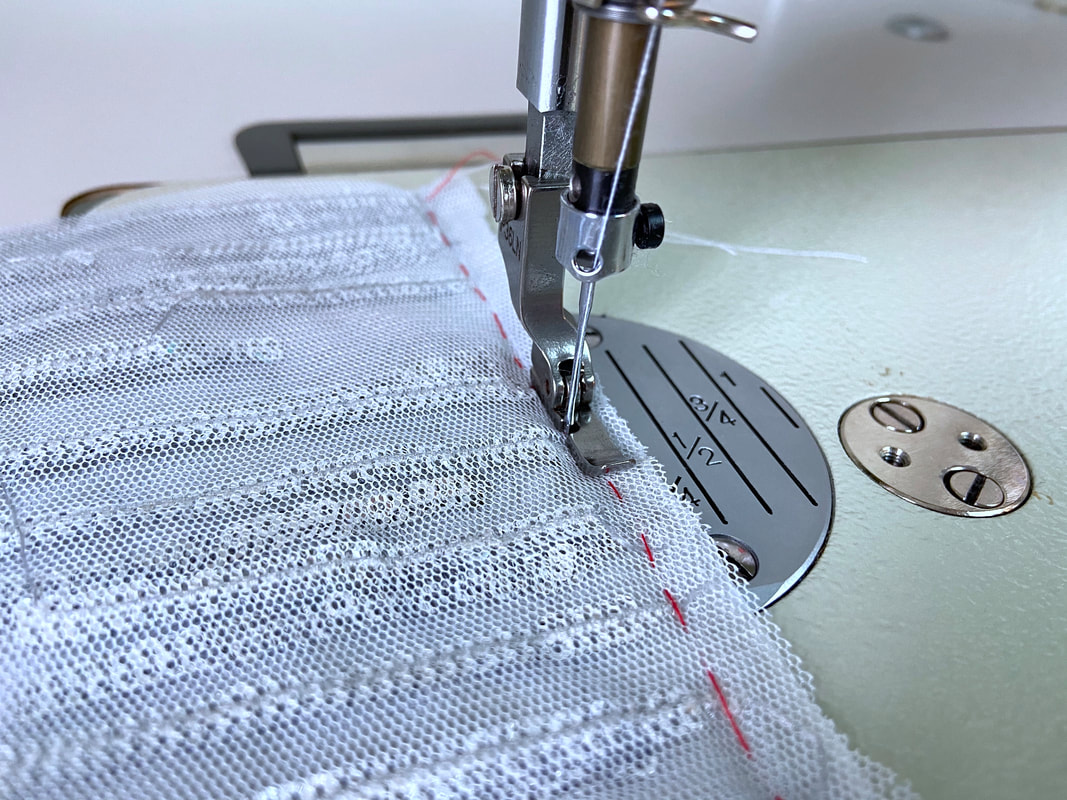
If the seam is difficult to stitch using a regular presser foot, use a zipper foot to stitch right next to the beading or sequins, while carefully following the seamline.

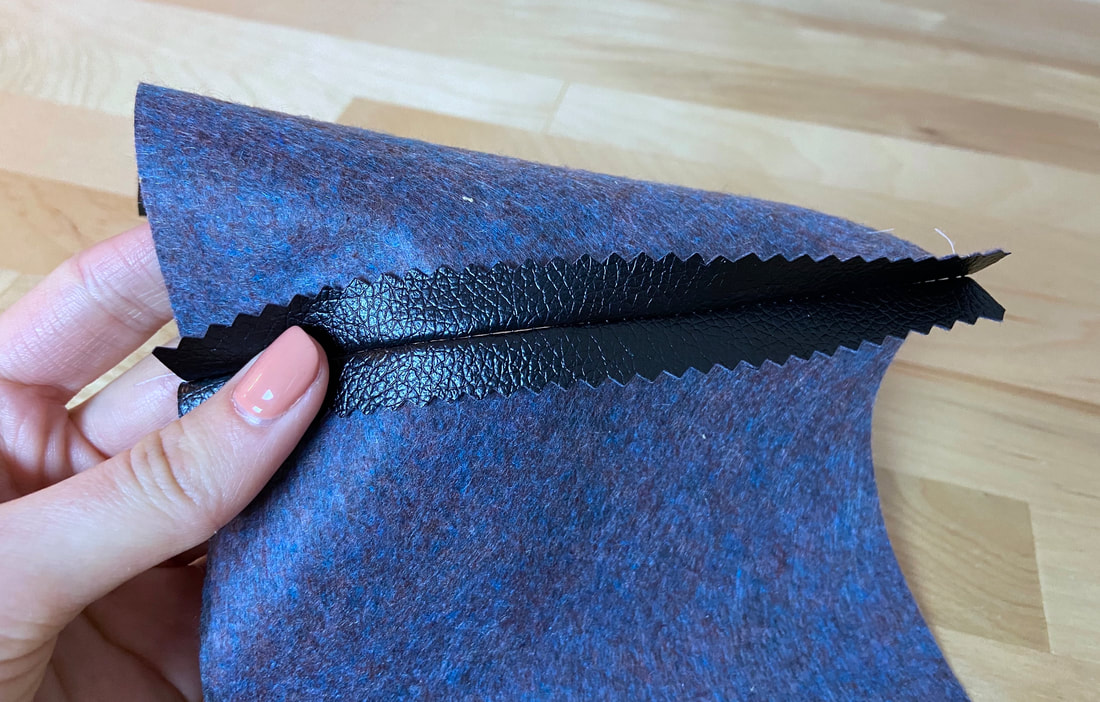
Sewing With Leather, Pleather And Vinyl Fabrics

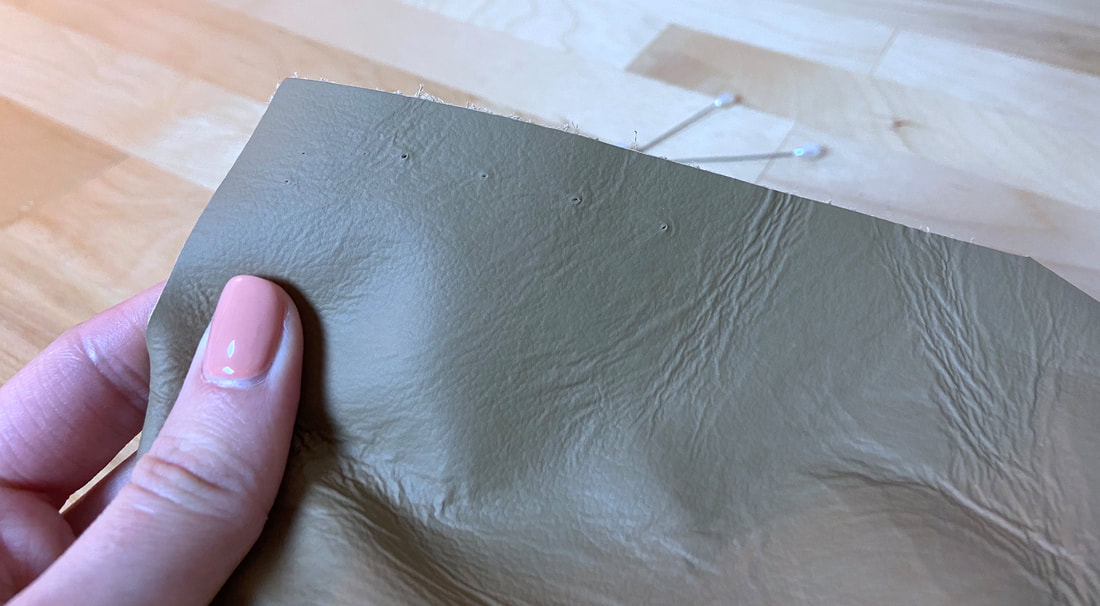
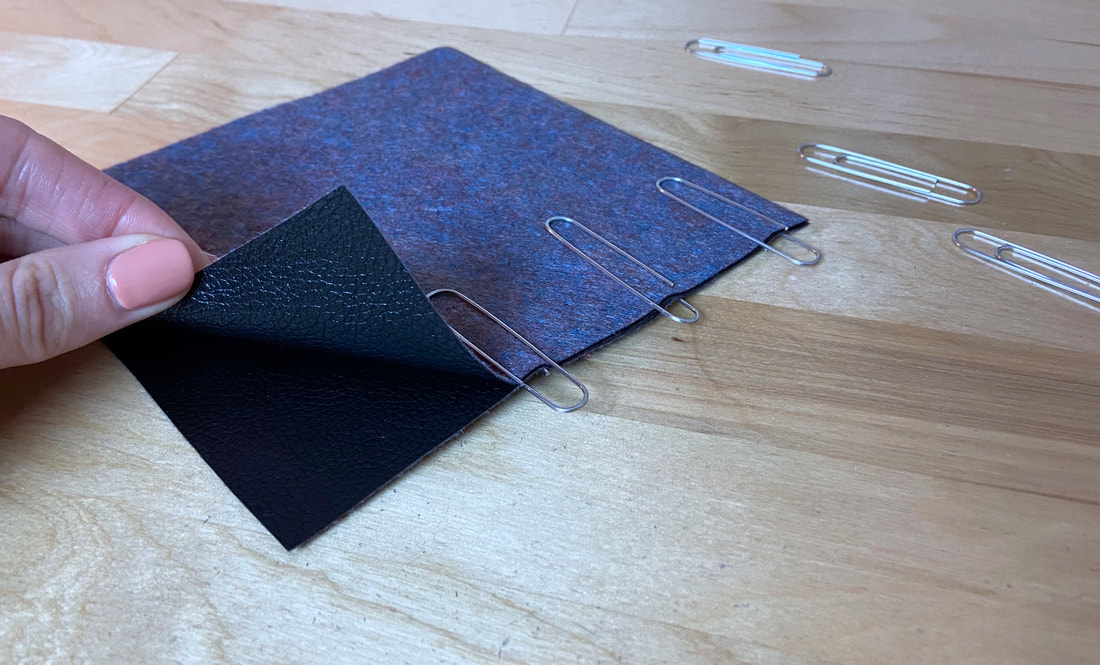
Leather, pleather, vinyls, and some natural suede fabrics are treated quite differently than regular fabrics. After all, these materials have a completely different structure, and are not prone to pinning and hand basting as you would with conventional seams. 
Picture
Leather and vinyl fabrics have a slippery surface, and show permanent puncture marks where they are pinned and stitched. If you do choose to pin the seams, which may be difficult to do, make sure to only insert the pins through the seam allowance such that any visible pinning marks are enclosed on the inside of the finished garment. 
Picture
If possible, avoid utilizing pins altogether. Instead, you can use no-puncture techniques like double stick tape or paper clips to hold the seam edges together prior to machine stitching. Hand basting will not only be difficult to apply, it is also not needed for such thick, structured materials.
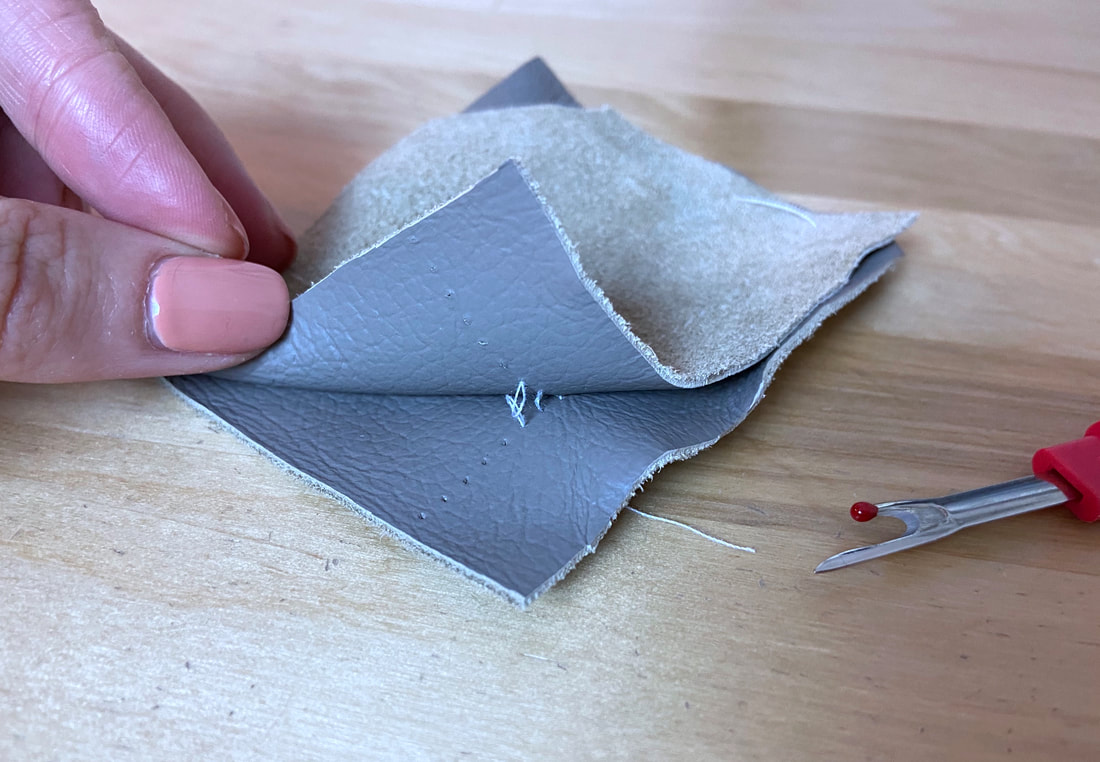
Always make sure the seams are final prior to stitching: double check your patterns, do a rough fit on the body and test that all seams are matched correctly. 
Picture
If you make a mistake and have to undo the machine stitching, the needle marks will show on the face of the garment and unfortunately, there is not much you could do to mend the fabric surface. ​
Since hand basting is not always appropriate, leather-like, slick surfaces that are touching will be difficult to control under the presser foot. You can actually coat the edges with talcum powder or corn starch to prevent unwanted movement between the two slick surfaces. However, make sure the product used comes off the leather surface easily.
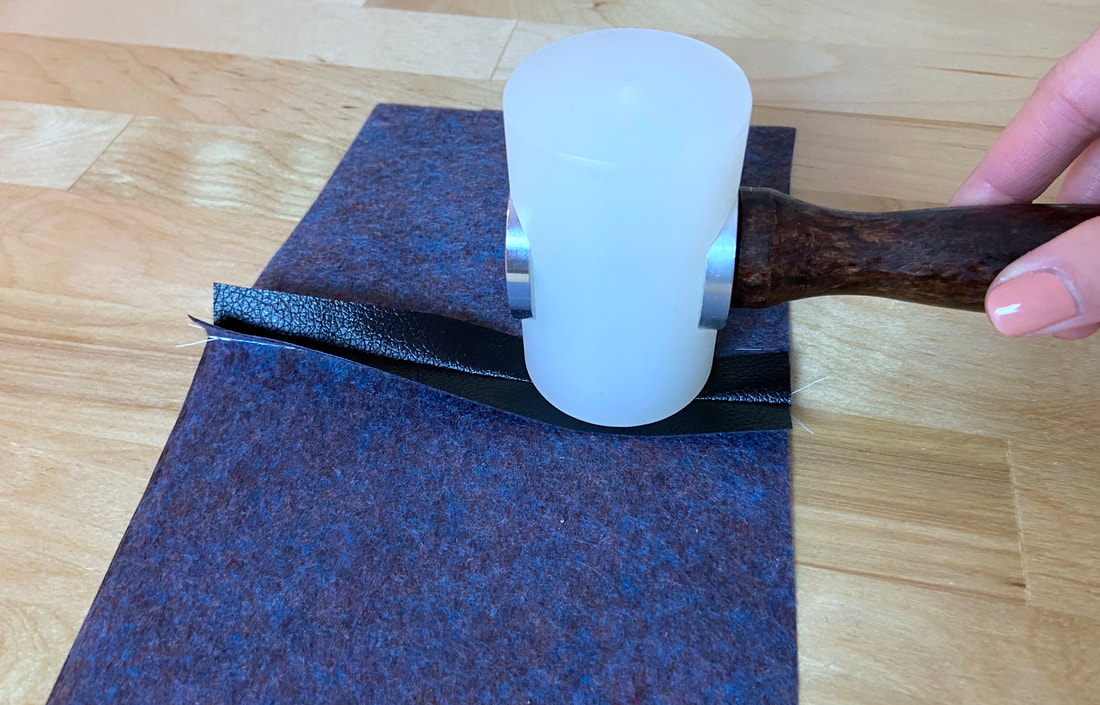
​Never iron leather, faux leather and vinyl seams. 
Picture
To flatten seam allowance edges, simply open the edges and hammer them down. ​
You can also use double sided stick/hem tape or spray adhesive to keep seam allowance flat. ​
The beauty of these unique materials is that their cut edges do not unravel and thus they rarely need to be finished and reinforced. 
Picture
If you prefer to add a decorative touch to the inside of a leather, pleather or suede garment, use pinking shears to add a zigzag motif along the seam allowance edges. ​

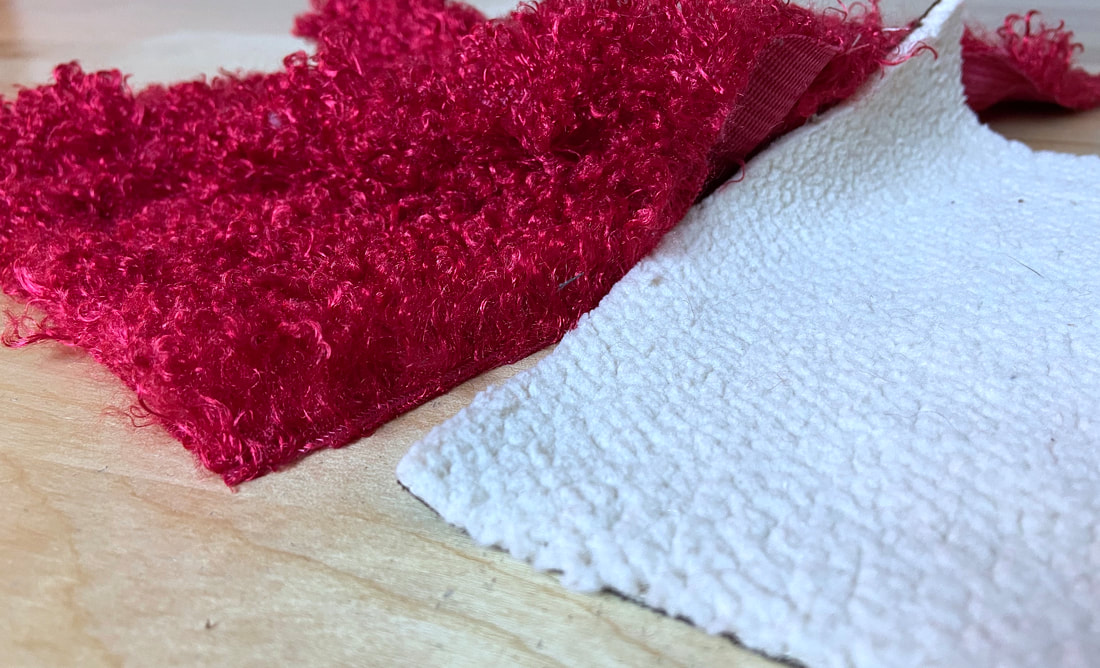
Sewing With High Pile Fabrics

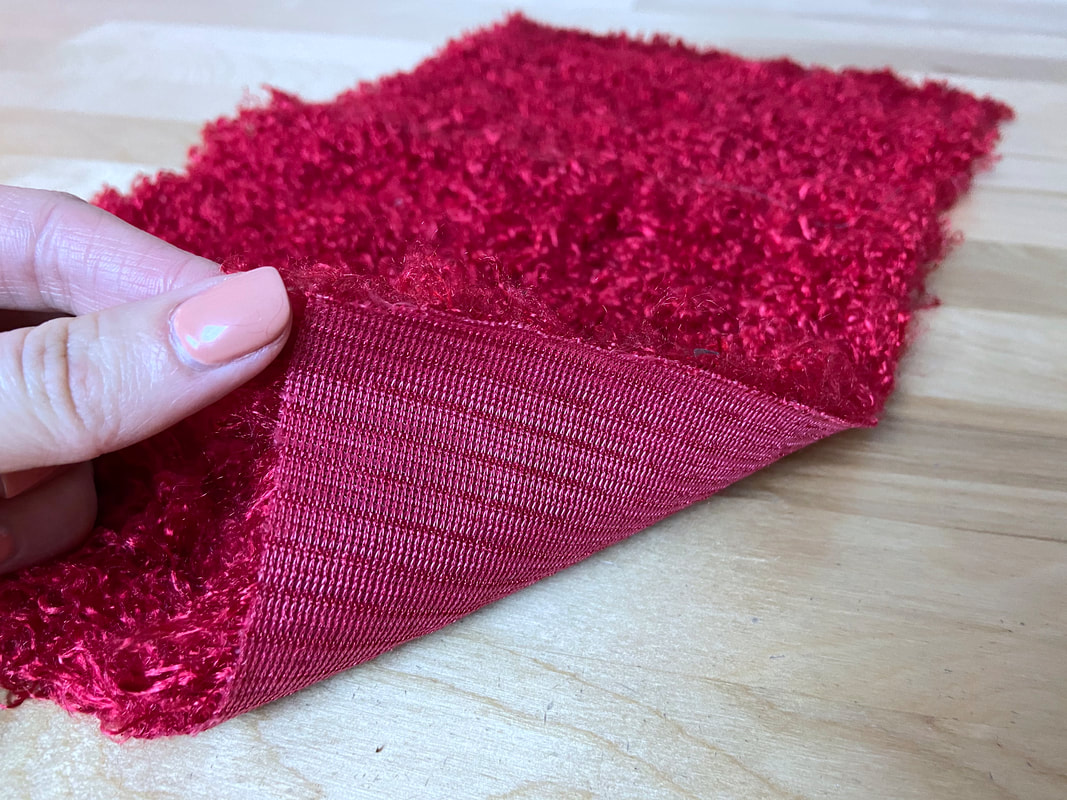
Pile fabrics are those that feature raised surface fibers of different lengths and densities. Examples of pile fabrics are fur (both faux and genuine), velvet,  shirring and other novelty fabrics. 
Picture
Pile can be a combination of short and long, dense and sparse. While all styles need to be handled with care, a fabric featuring very long, dense pile will present the biggest challenge.
Here are some techniques and concepts to keep in mind when working with high-pile fabrics:
  • Some pile fabrics are napped. When working with such fabrics, always stitch in the direction of the nap.
Picture
  • The back of the fabric can be a woven or a knit. The backing structure needs to be considered when choosing the right stitch, needle and sewing technique.
Picture
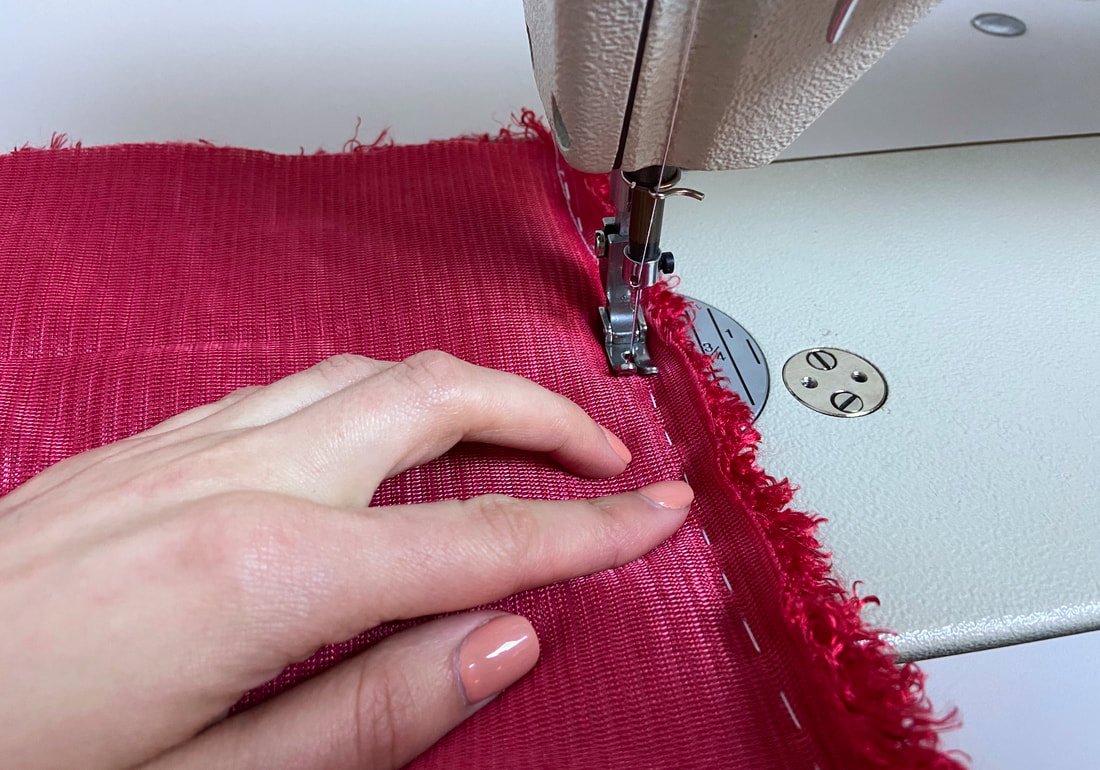
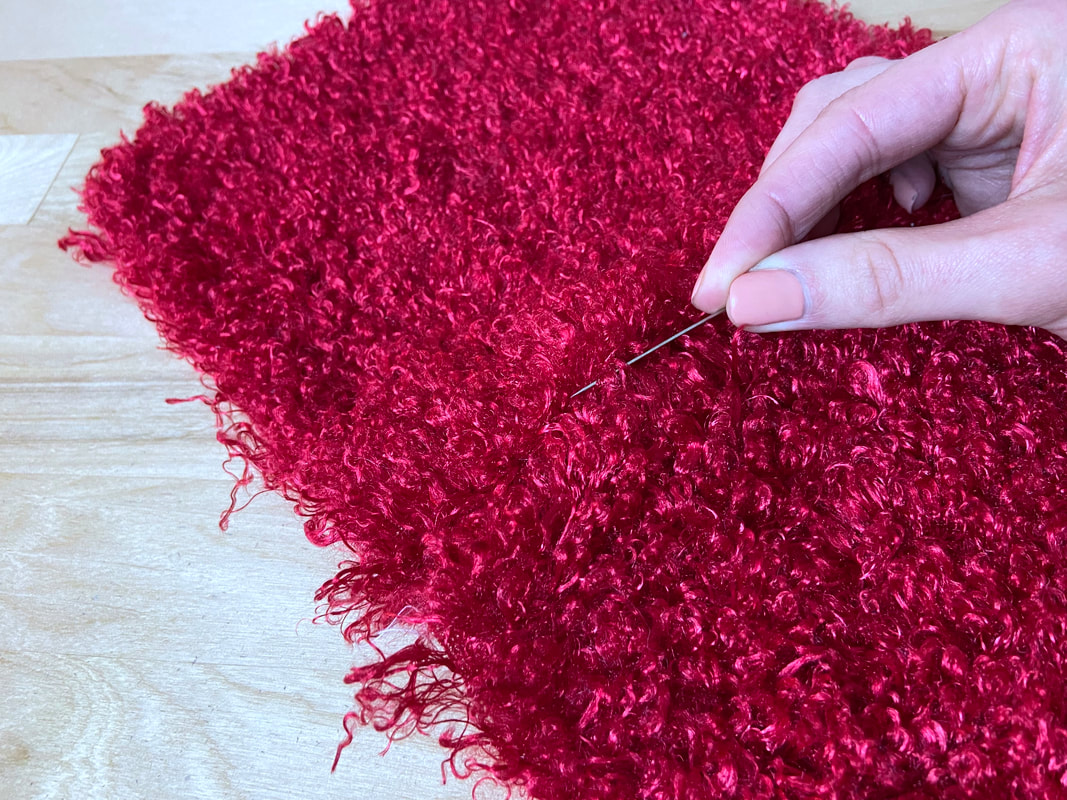
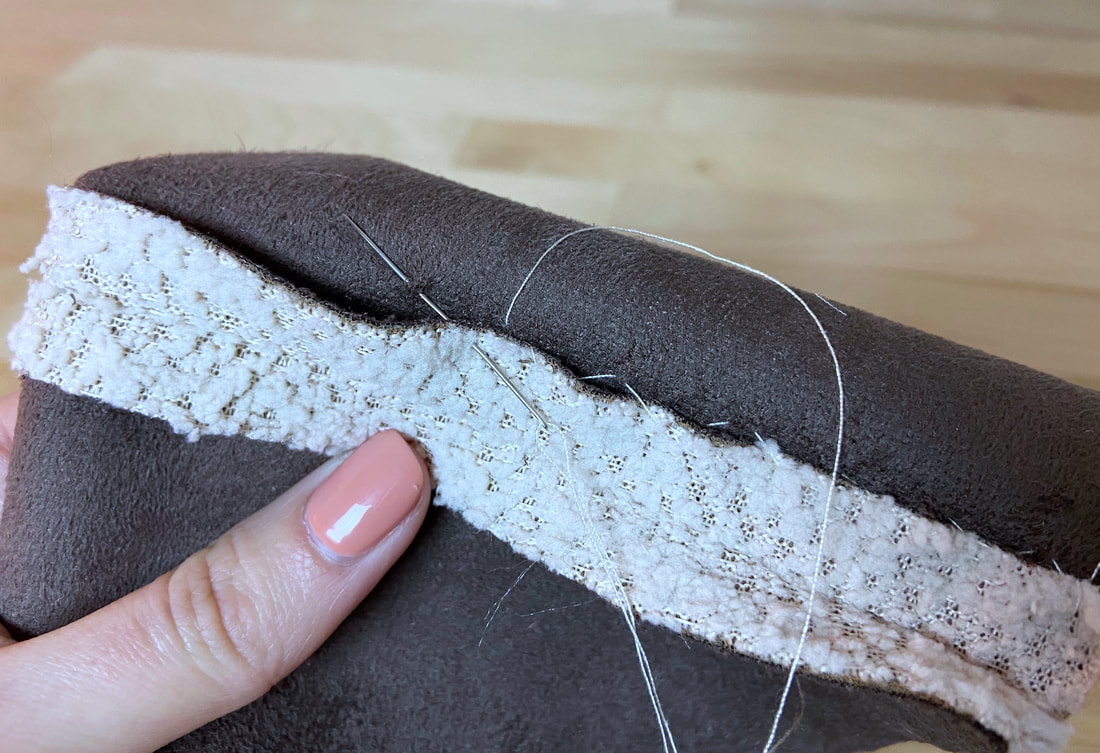
  • It is common for pile fabrics to slip away from each other during the stitching process. Always hand baste the seam layers prior to stitching, and apply pressure with your fingers as you stitch.
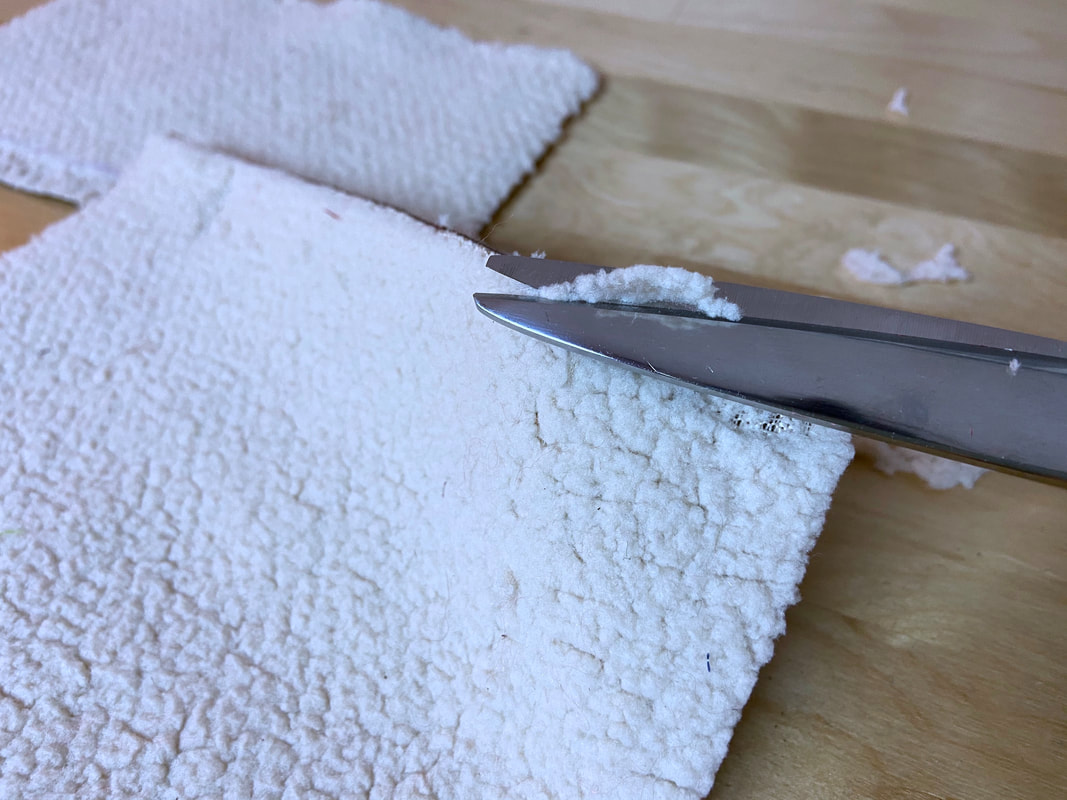
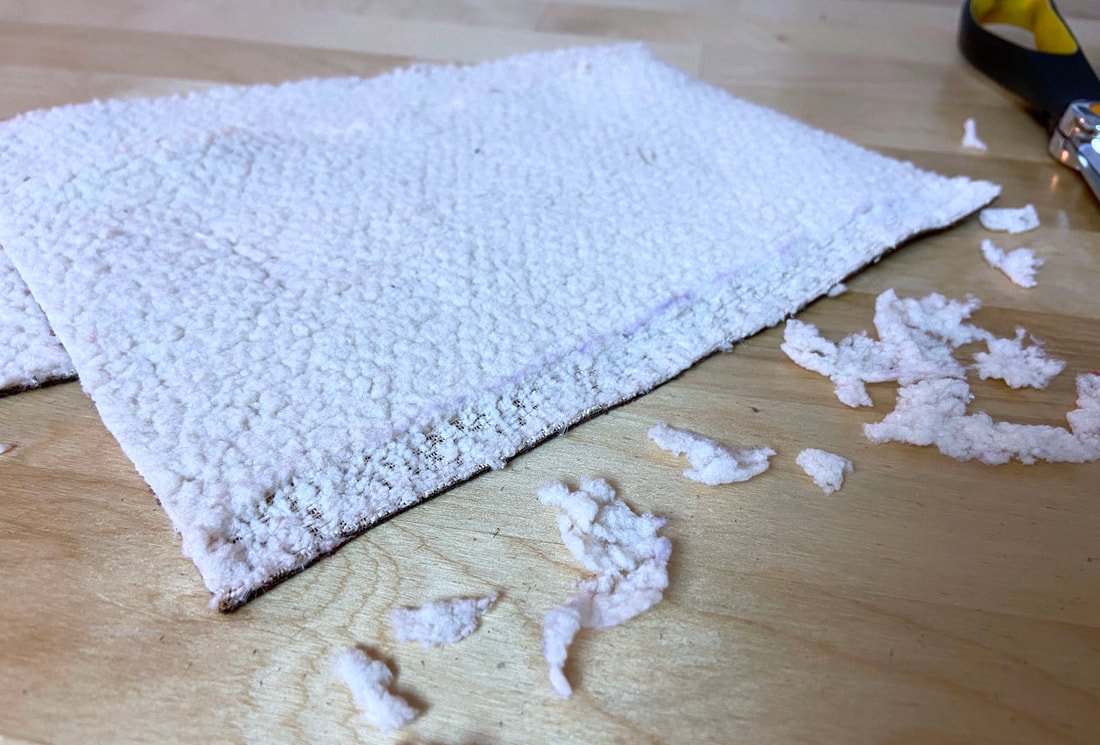
  • After the seams are stitched, bulk will need to be eliminated either by trimming seam allowance edges short (works best on short pile that is not very dense) or trimming/shaving pile from the fabric’s surface along the seam allowance portions.
Picture
Picture
For shorter pile fabrics, trim pile from the seam allowance areas prior to sewing the seam.
Picture
To keep the seam allowance layers flat, you can use a blind stitch to connect the fabric edge to the garment's surface as shown above. 
Picture
For higher pile fabrics, trim pile after the seam has been stitched. ​
Important: Always pull the pile fibers that are caught in the stitch seam outwards (towards the garment's right side) before shaving/removing pile from the seam allowance area. Use a pin or the end of a hand sewing needle in the process. 
  • When sewing with pile fabric, always use a straight stitch and clean finish the edges as needed.
Picture
  • Some pile fabrics do not withstand heat and are difficult to iron. In this case, thumb press the seam allowance open, pin it and blind stitch each edge to keep the seam flat as shown above. 
Note: You can use a specialized needle board to iron pile fabric seams. 
DMCA.com Protection Status
All content, including images and text, may not be copied, replicated, or redistributed without express written permission. This website is regularly screened and monitored for content protection.

Have A Personalized Sewing Question?

Ask It Here

Services

​Custom Apparel
Custom Bridal
​Sewing Tutorials
​

Company

About
Blog

Support

Contact
Terms of Service
DMCA.com Protection Status
© COPYRIGHT 2022. ALL RIGHTS RESERVED.
  • Sewing Tutorials
    • Basics >
      • Aligning Pattern Grainlines To Fabric
      • Preparing Fabrics For Sewing
      • Pinning Sewing Patterns To Fabric
      • Placing Sewing Patterns On Fabric For Cutting
      • Rotary Cutters or Fabric Scissors?
      • Cutting The Sewing Patterns
      • What Are Notches And How To Use Them In The Sewing Process
      • Transferring Notches From Pattern To Fabric
      • Transferring Seamlines to Fabric
      • Staystitching
      • Backstitching: A Complete Guide
      • Hand Basting: A Complete Guide
      • Sewing Continuous Bias Binding
    • Darts >
      • Marking And Transferring Darts To Fabric
      • What Are Darts And Dart Components
      • Folding, Pinning And Hand Basting Darts
      • Handling Dart Excess: Bulk And Tension
      • How To Sew A French Dart
      • How To Sew And Iron Single Pointed Darts
      • How To Sew And Iron Contour Darts
      • Sewing Darts With Decorative/Beaded Fabrics
    • Sewing Seams >
      • ​The Basics Of Seams And Seam Allowance
      • How To Sew A Straight Seam
      • Sewing Curved Seams
      • Sewing Corner Seams
      • Trimming And Grading Seam Excess
      • Notching/Clipping Seam Allowance for Tension Release
      • Sewing Topstitched Seams
      • Sewing Corded Seams
      • Sewing A Slot Seam
      • Sewing A Gathered Seam
      • Sewing Bias Seams
      • Sewing Seams With Ease
      • Sewing Seams With Crossing Seamlines
      • Sewing Unlike Fabric Seams
      • How To Iron Seams: Ironing Tools And Conventions
      • Sewing With Knit Fabrics
      • Understanding Stitch Length And Tension
      • Sewing Unique Fabric Seams
    • Seam Finishes >
      • Seam Finishing Techniques - Overview
      • Applying A Pinked Seam Finish
      • Applying A Bias Bound Seam Finish
      • Serging And Zigzag Seam Finishes
      • Sewing A Self-Bound Seam Finish
      • Sewing A French Seam Finish
      • Sewing A Hong Kong Seam Finish
      • Sewing A Mock French Seam Finish
      • Sewing A Turned-and-Stitched Seam Finish
      • Sewing Overcast Hand-Applied Seam Finishes
      • Sewing A Flat Felled Seam
      • Sewing A Hairline Seam Finish
    • Hem Finishes >
      • Garment Hem Finishes: Overview
      • ​Sewing A Double Fold Hem Finish
      • Sewing A Single Fold Hem Finish
      • Sewing Bound Hem Finishes
      • Sewing An Exposed Double Layer Bound Hem
      • Sewing A Folded-Up Bound Hem with Pre-folded Binding
      • Sewing A Hong Kong Hem Finish
      • Sewing A Band Hem Finish
      • Sewing A Bias Faced Hem Finish
      • Sewing A Twill Tape Hem Finish
      • Sewing A Rolled Hem Finish
      • Sewing A Shaped Hem Facing
      • Using Fusible Hem Tape And Webbing
      • Finishing A Lace Fabric Hem
      • Finishing A Leather Hem
      • Sewing Faced Hem Corners
      • How To Finish Lining At The Hem
      • Finishing Fabric Corners by Mitering >
        • Mitering Fabric Corners With A Full Bias Facing
        • Mitering Fabric Corners With Exposed Binding
      • Interfacing A Hemline: Lined And Unlined Examples
    • Sewing Pockets >
      • Curved Patch Pocket With Flap
      • Unlined Square Patch Pockets
      • Lined Patch Pockets: Two Ways
      • Extension On-Seam Pockets
      • Separate On-Seam Pocket
      • Front Hip Pockets
      • Bound Double Welt Pocket
      • Double Welt Pocket With Flap
      • Self-Welt Pocket (Using Single Fabric Layer)
      • Slanted Welt Pocket (Hand-Stitched)
      • Faced Slash Pockets: Overview >
        • Sewing A Faced Slit Pocket
        • Sewing A Rectangular Slash Pocket
        • Sew A Star-Shaped Faced Pocket
    • Sewing Zippers >
      • Sewing Zippers: General Information
      • Sewing A Centered Zipper
      • Sewing A Lapped Zipper
      • Sewing An Invisible Zipper
      • Sewing A Fly Front Zipper
      • Sewing A Closed-End Exposed Zipper (No Seam)
      • Sewing An Exposed Separating Zipper
      • Sewing Hand Stitched Zipper Applications
      • Sewing A Zipper Underlay
      • Sewing A Placket-Enclosed Separating Zipper
    • Sleeveless Finishes >
      • Sleeveless Armhole Finishes: General Information
      • Finishing Sleeveless Garments with Lining
      • Sewing A Folded-Under Bound Armhole Finish
      • Sewing A Shaped Armhole Facing
      • Finishing Armhole Edges With Exposed Binding
      • Finishing Armhole Edges With Decorative Trim
    • Neckline Finishes >
      • Sewing A Neck Shaped Facing
      • Sewing An All-In-One Neck Facing
      • Neck And Garment Opening Combination Facings >
        • Sewing An Extended Front-Neck Facing
        • Sewing A Separate Neck-Front Facing
      • Sewing A Bias Faced Neckline Finish
      • Sewing A Band Neckline Finish
      • Bound Neckline Finishes: Overview >
        • Sewing A Single Layer Bound Neckline
        • Finishing A Neckline With Pre-Folded Binding
        • Sewing A Double Layer Bound Neckline Finish
      • Sewing A Semi-Stretch Strip Band Neckline
      • Ribbed Neck Band And Classic Turtleneck
      • Decorative Neckline Finishes >
        • Sewing A Neckline With Decorative Inset
        • Sewing A Piped Cording Faced Neckline
        • Sewing Decorative Trim To A Finished Neckline
    • Finishing Facing Edges >
      • Finishing Facing Edges: Overview
      • Folded-And-Topstitched Overedge Facing Finish
      • Sewing A Bound Facing Edge Finish
      • Sewing A Hong Kong Facing Finish
      • Sewing A Rolled Edge Facing Finish
      • Sewing A Twill Tape Facing Edge Finish
      • Sewing An Overedge-Stitch Facing Finish
    • Extras >
      • A Complete Guide on Interfacing
      • Sewing Bound Spaghetti Straps
      • Sewing Spaghetti Straps To A Faced Neckline
      • Sewing Ruffles: Overview
      • Patterning And Sewing A Circle Ruffle
      • Sewing A Gathered Heading Ruffle
      • Sewing Double Layer Gathered Ruffles
      • Sewing A Gathered Ruffle Into A Seam
      • Sewing A Gathered Ruffle To A Fabric Edge
      • Sewing A Fabric Surface Slit
      • Sewing A Slit Seam
      • Hand-Applied Straight Stitches
      • Hand-Applied Blind Stitches
      • Hand-Applied Overedge Stitches
      • Hand-Applied Tack Stitches
      • Hand-Applied Decorative Stitches
  • Custom Apparel
    • Custom Bridal
  • Submit A Sewing Question
  • About
  • Blog