Doina Alexei
  • Sewing Tutorials
    • Basics >
      • Aligning Pattern Grainlines To Fabric
      • Preparing Fabrics For Sewing
      • Pinning Sewing Patterns To Fabric
      • Placing Sewing Patterns On Fabric For Cutting
      • Rotary Cutters or Fabric Scissors?
      • Cutting The Sewing Patterns
      • What Are Notches And How To Use Them In The Sewing Process
      • Transferring Notches From Pattern To Fabric
      • Transferring Seamlines to Fabric
      • Staystitching
      • Backstitching: A Complete Guide
      • Hand Basting: A Complete Guide
      • Sewing Continuous Bias Binding
    • Darts >
      • Marking And Transferring Darts To Fabric
      • What Are Darts And Dart Components
      • Folding, Pinning And Hand Basting Darts
      • Handling Dart Excess: Bulk And Tension
      • How To Sew A French Dart
      • How To Sew And Iron Single Pointed Darts
      • How To Sew And Iron Contour Darts
      • Sewing Darts With Decorative/Beaded Fabrics
    • Sewing Seams >
      • ​The Basics Of Seams And Seam Allowance
      • How To Sew A Straight Seam
      • Sewing Curved Seams
      • Sewing Corner Seams
      • Trimming And Grading Seam Excess
      • Notching/Clipping Seam Allowance for Tension Release
      • Sewing Topstitched Seams
      • Sewing Corded Seams
      • Sewing A Slot Seam
      • Sewing A Gathered Seam
      • Sewing Bias Seams
      • Sewing Seams With Ease
      • Sewing Seams With Crossing Seamlines
      • Sewing Unlike Fabric Seams
      • How To Iron Seams: Ironing Tools And Conventions
      • Sewing With Knit Fabrics
      • Understanding Stitch Length And Tension
      • Sewing Unique Fabric Seams
    • Seam Finishes >
      • Seam Finishing Techniques - Overview
      • Applying A Pinked Seam Finish
      • Applying A Bias Bound Seam Finish
      • Serging And Zigzag Seam Finishes
      • Sewing A Self-Bound Seam Finish
      • Sewing A French Seam Finish
      • Sewing A Hong Kong Seam Finish
      • Sewing A Mock French Seam Finish
      • Sewing A Turned-and-Stitched Seam Finish
      • Sewing Overcast Hand-Applied Seam Finishes
      • Sewing A Flat Felled Seam
      • Sewing A Hairline Seam Finish
    • Hem Finishes >
      • Garment Hem Finishes: Overview
      • ​Sewing A Double Fold Hem Finish
      • Sewing A Single Fold Hem Finish
      • Sewing Bound Hem Finishes
      • Sewing An Exposed Double Layer Bound Hem
      • Sewing A Folded-Up Bound Hem with Pre-folded Binding
      • Sewing A Hong Kong Hem Finish
      • Sewing A Band Hem Finish
      • Sewing A Bias Faced Hem Finish
      • Sewing A Twill Tape Hem Finish
      • Sewing A Rolled Hem Finish
      • Sewing A Shaped Hem Facing
      • Using Fusible Hem Tape And Webbing
      • Finishing A Lace Fabric Hem
      • Finishing A Leather Hem
      • Sewing Faced Hem Corners
      • How To Finish Lining At The Hem
      • Finishing Fabric Corners by Mitering >
        • Mitering Fabric Corners With A Full Bias Facing
        • Mitering Fabric Corners With Exposed Binding
      • Interfacing A Hemline: Lined And Unlined Examples
    • Sewing Pockets >
      • Curved Patch Pocket With Flap
      • Unlined Square Patch Pockets
      • Lined Patch Pockets: Two Ways
      • Extension On-Seam Pockets
      • Separate On-Seam Pocket
      • Front Hip Pockets
      • Bound Double Welt Pocket
      • Double Welt Pocket With Flap
      • Self-Welt Pocket (Using Single Fabric Layer)
      • Slanted Welt Pocket (Hand-Stitched)
      • Faced Slash Pockets: Overview >
        • Sewing A Faced Slit Pocket
        • Sewing A Rectangular Slash Pocket
        • Sew A Star-Shaped Faced Pocket
    • Sewing Zippers >
      • Sewing Zippers: General Information
      • Sewing A Centered Zipper
      • Sewing A Lapped Zipper
      • Sewing An Invisible Zipper
      • Sewing A Fly Front Zipper
      • Sewing A Closed-End Exposed Zipper (No Seam)
      • Sewing An Exposed Separating Zipper
      • Sewing Hand Stitched Zipper Applications
      • Sewing A Zipper Underlay
      • Sewing A Placket-Enclosed Separating Zipper
    • Sleeveless Finishes >
      • Sleeveless Armhole Finishes: General Information
      • Finishing Sleeveless Garments with Lining
      • Sewing A Folded-Under Bound Armhole Finish
      • Sewing A Shaped Armhole Facing
      • Finishing Armhole Edges With Exposed Binding
      • Finishing Armhole Edges With Decorative Trim
    • Neckline Finishes >
      • Sewing A Neck Shaped Facing
      • Sewing An All-In-One Neck Facing
      • Neck And Garment Opening Combination Facings >
        • Sewing An Extended Front-Neck Facing
        • Sewing A Separate Neck-Front Facing
      • Sewing A Bias Faced Neckline Finish
      • Sewing A Band Neckline Finish
      • Bound Neckline Finishes: Overview >
        • Sewing A Single Layer Bound Neckline
        • Finishing A Neckline With Pre-Folded Binding
        • Sewing A Double Layer Bound Neckline Finish
      • Sewing A Semi-Stretch Strip Band Neckline
      • Ribbed Neck Band And Classic Turtleneck
      • Decorative Neckline Finishes >
        • Sewing A Neckline With Decorative Inset
        • Sewing A Piped Cording Faced Neckline
        • Sewing Decorative Trim To A Finished Neckline
    • Finishing Facing Edges >
      • Finishing Facing Edges: Overview
      • Folded-And-Topstitched Overedge Facing Finish
      • Sewing A Bound Facing Edge Finish
      • Sewing A Hong Kong Facing Finish
      • Sewing A Rolled Edge Facing Finish
      • Sewing A Twill Tape Facing Edge Finish
      • Sewing An Overedge-Stitch Facing Finish
    • Extras >
      • A Complete Guide on Interfacing
      • Sewing Bound Spaghetti Straps
      • Sewing Spaghetti Straps To A Faced Neckline
      • Sewing Ruffles: Overview
      • Patterning And Sewing A Circle Ruffle
      • Sewing A Gathered Heading Ruffle
      • Sewing Double Layer Gathered Ruffles
      • Sewing A Gathered Ruffle Into A Seam
      • Sewing A Gathered Ruffle To A Fabric Edge
      • Sewing A Fabric Surface Slit
      • Sewing A Slit Seam
      • Hand-Applied Straight Stitches
      • Hand-Applied Blind Stitches
      • Hand-Applied Overedge Stitches
      • Hand-Applied Tack Stitches
      • Hand-Applied Decorative Stitches
  • Custom Apparel
    • Custom Bridal
  • Submit A Sewing Question
  • About
  • Blog

Rotary Cutters Or Fabric Scissors, Which To Use ?

In the pattern cutting process, it is really up to you whether you prefer to use rotary cutters or conventional fabric scissors. There are pros and cons for both and so it is a good idea to experiment with them individually prior to deciding which to use (or which you like more). 
Keep in mind that rotary cutters can provide a great alternative to fabric scissors in certain cutting scenarios, but they may not be suitable for all projects.  
Fabric scissors continue to be a necessary staple in dressmaking but are often hindered by their limited power to withstand cutting thick fabric layers and continuous straight edges. Thus, you may want to invest in both of these cutting tools, and use them interchangeably as needed. 
Picture
A detailed breakdown of how and when to use rotary cutters and scissors, including pros and cons for both, is listed below.

Rotary Cutters

How To Use Rotary Cutters:
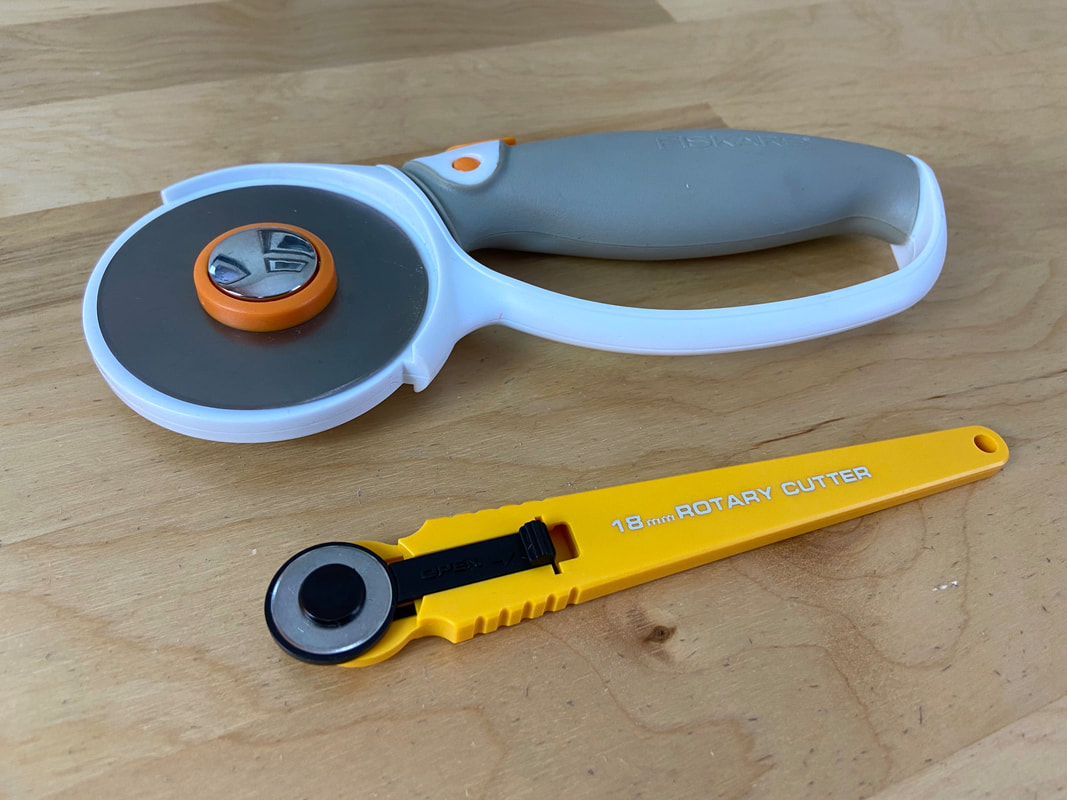
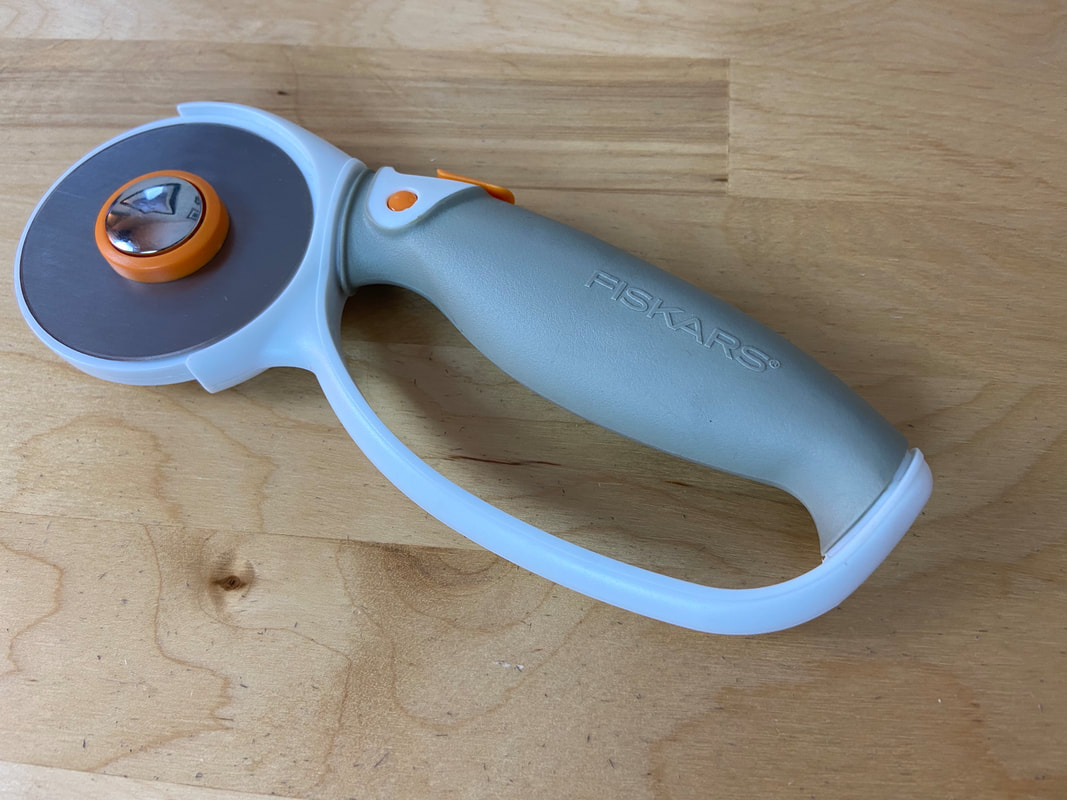
Rotary cutters have a sharp circle blade on one end and a comfortable handle on the other. When in use, the rotary blade is exposed free to move around in a circular motion like a pizza cutter. 
When not used, the blade should be locked or covered with a protective barrier or an actual blade cap. For safety measures, get in the habit of keeping the blade covered or in locked position at all times (when not in use). Keep your rotary cutters stored away from children and pets.
Picture
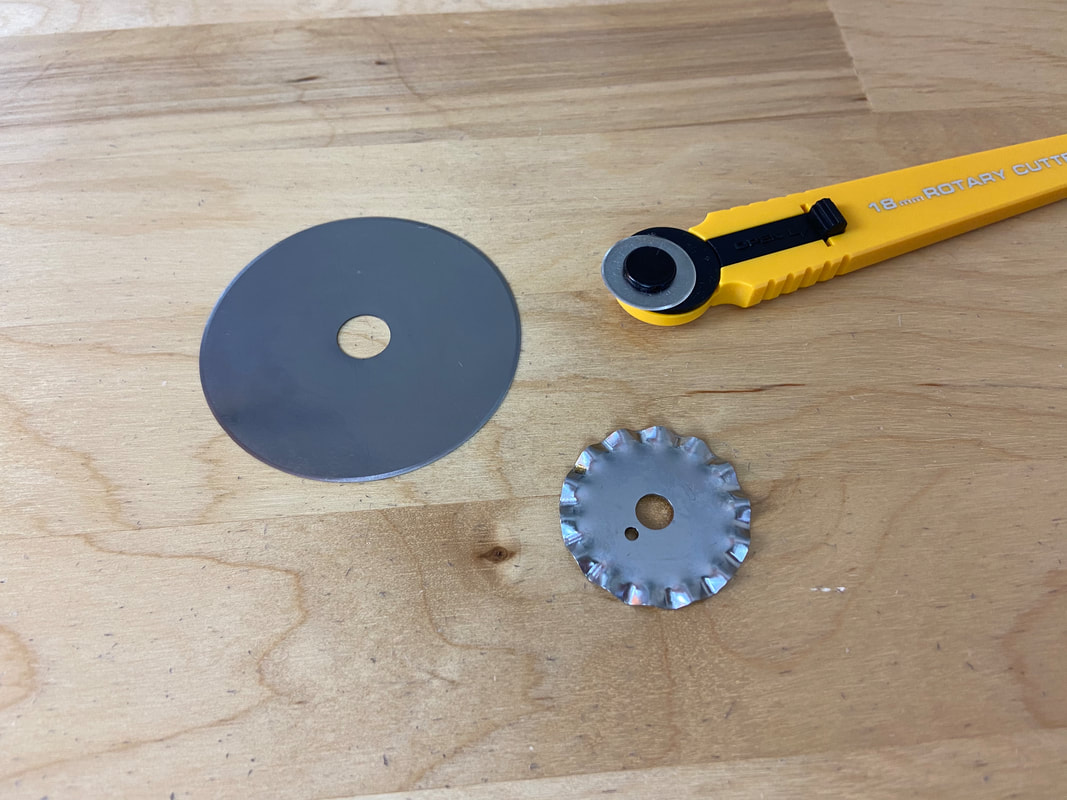
Rotary cutters come in a variety of blade diameters, thicknesses and edging styles. 
Picture
Smaller blades are used to maneuver around curved or irregular sewing pattern edges, providing increased control. ​
​Larger, thicker blades are used for straight edges when cutting thick or multiply stacked layers of fabric. 
Picture
Some rotary cutters provide scalloped or pinked edges for decorative purposes or to prevent raw fabric edges from fraying. Scalloped rotary cutters however, should not be used to cut out pattern pieces.
Like any conventional blade, rotary blades will become stale and worn after prolonged use. The good news is, all rotary cutters allow for blade replacement when the blade loses its sharpness or becomes damaged. 
Picture
​You can purchase rotary blade refills at your local fabric or craft store. A faster, less expensive option is to have your blade sharpened as you would with a kitchen knife. There are special sharpening tools that are safe and readily available on the market for use at home. You can also take the rotary cutter to your local fabric store and see if they can sharpen the blade for you.
Picture
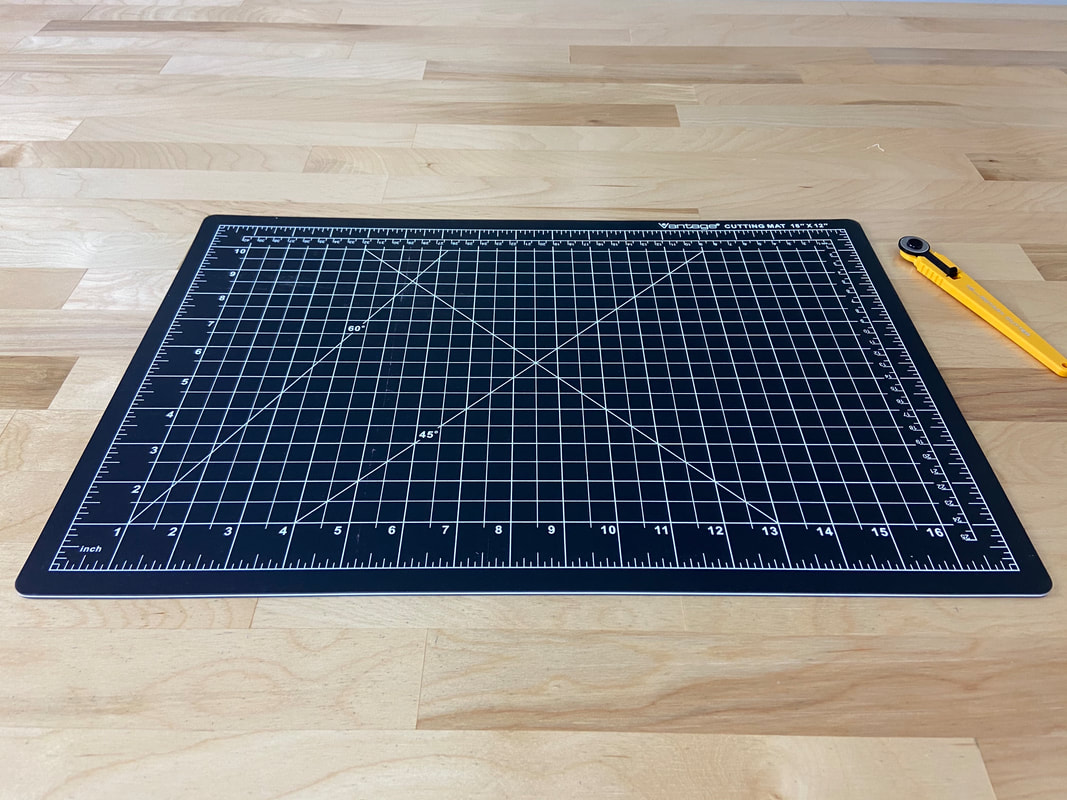
​An important element to protecting both your cutting surface and the blade itself is to always use a cutting mat between the fabric and your work surface. Using a cutting mat will protect and prolong the life of your blade and maintain its sharpness. Of course, using a cutting mat will also protect your cutting table. 
There are various cutting mat options available on the market providing a variety of surface styles and sizes. Using a larger mat will prevent you from continuously shifting the fabric layers onto it as you cut. 
Picture
Always store your cutting mat flat unless it is designed to be rolled up. Forcing a cutting mat into rolled position will cause it not to lay completely flat the next time you use it. It may also cause cracks and distort its surface, deeming it unusable over time.
Picture
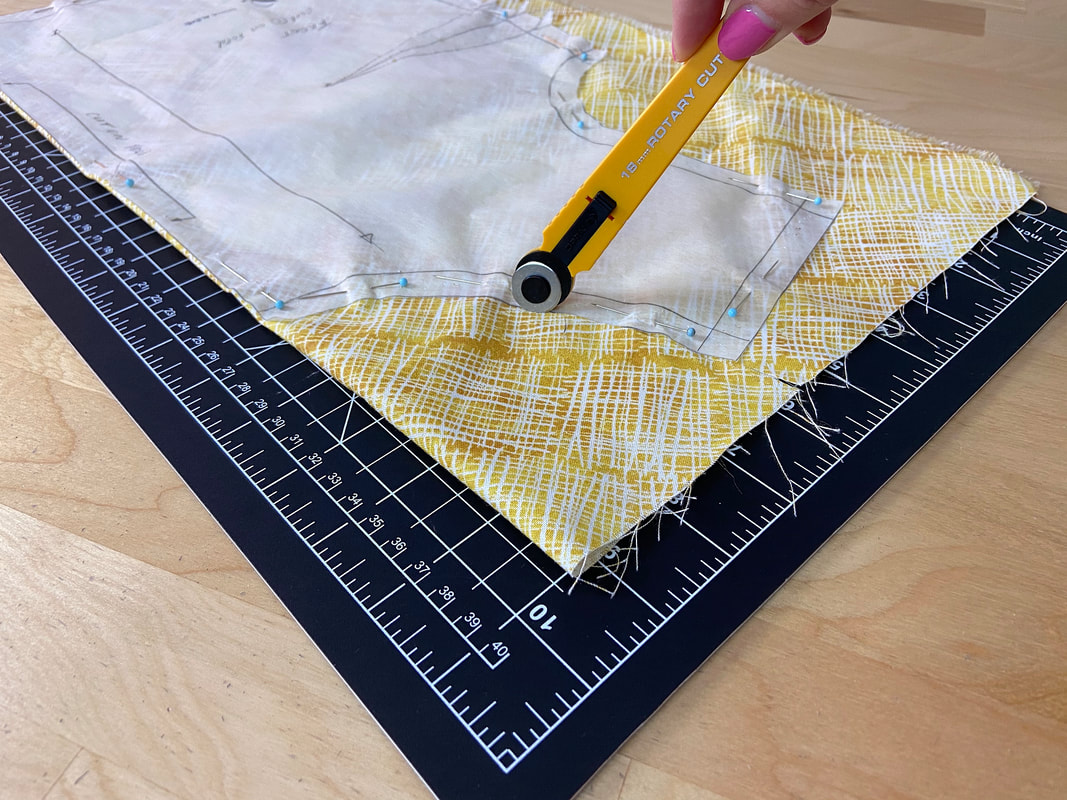
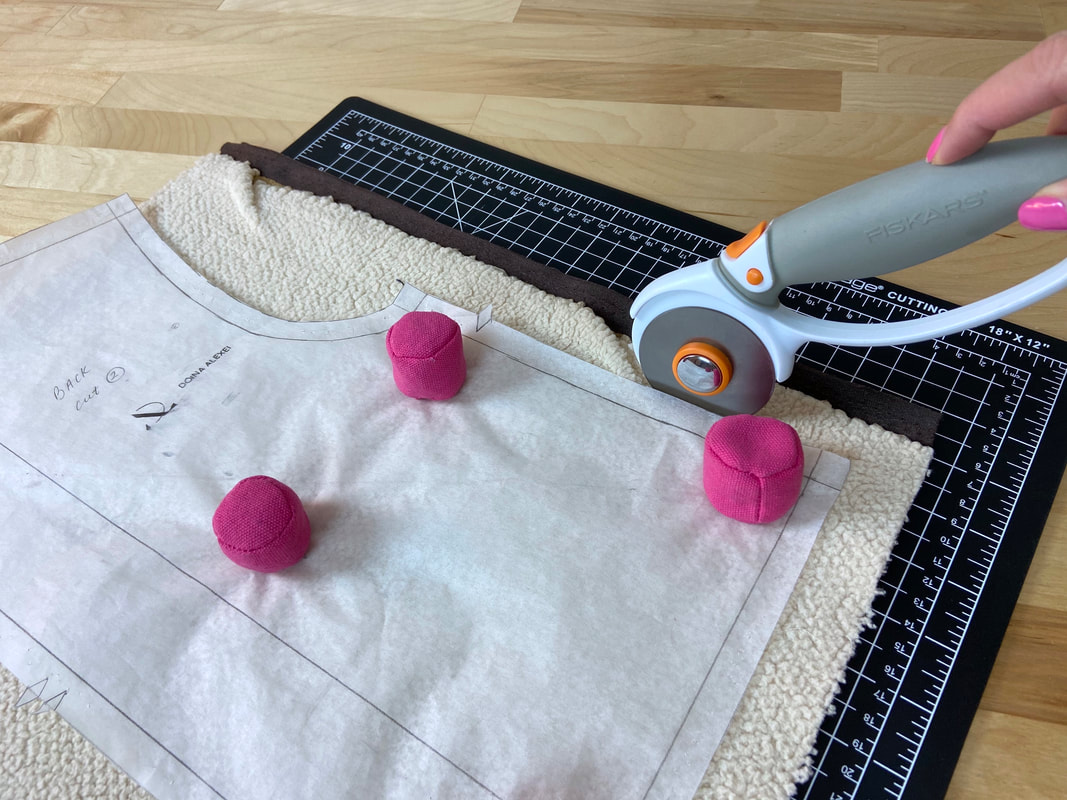
Keep in mind that rotary cutters are extremely sharp. Due to the entire blade being exposed during the cutting process, maximum awareness is required. Always keep your free hand out of the way of the blade. Use fabric weights instead of your hand to keep fabric layers in place.
​Always practice before cutting through your final fabric. It is important to feel comfortable balancing the rotary blade in order to achieve a smooth, accurate cut.
Picture
Luckily, rotary cutters are available in a variety of comfortable handle styles. 
Some provide grip others are shaped for hand containment and stability. Choose the handle that works best for your cutting style and project at hand.
When To Use Rotary Cutters:
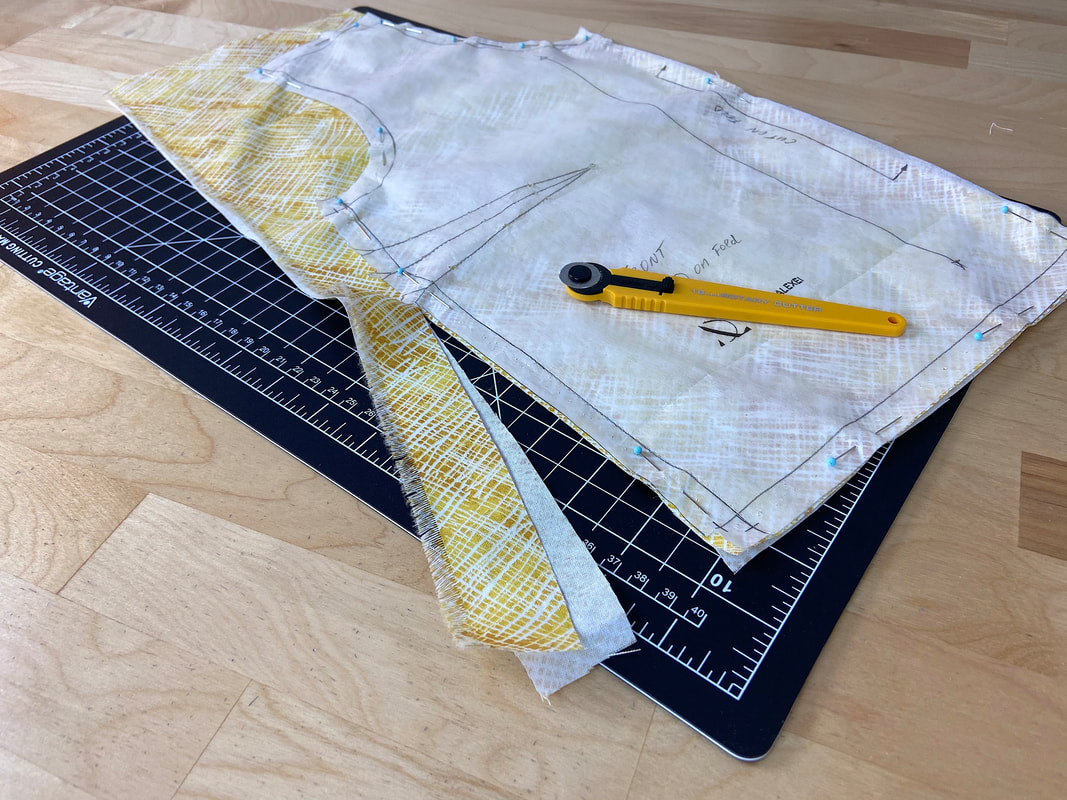
Use rotary cutters when cutting through multiple, thick layers of fabric. In this instance, using fabric weights will be necessary to keep the pattern and all fabric layers in place during the cutting process.
Use a rotary cutter when cutting fabric along straight or semi-curved edges/lines that are long and require a continuous smooth cut.
Use rotary cutters when you have arthritic conditions or experience difficulty holding or working with conventional fabric scissors.
​Use rotary cutters when you are unable to slightly lift the fabric pieces off the table in the cutting process. This can be due to very slippery, thin fabric layers or heavy decorative elements.
Pros of using rotary cutters:
  • Great if you have arthritis or sensitive wrists.
  • Very sharp so it cuts easily through thick or multiple fabric layers.
  • Keeps fabric layers completely flat during cutting, preventing the layers shifting underneath the paper pattern during cutting.
  • ​Perfect for straight edges or long semi-curved edges resulting in a smooth, evenly cut line.
  • ​Provides interchangeable blades of different styles and sizes for added versatility.
  • ​Comes in various comfort-oriented handles for a more enjoyable cutting process.
Cons of using rotary cutters:
  • Takes more time and practice to master.
  • Requires the use of a cutting mat.
  • ​If the cutting mat is not large enough, the fabric layer(s) need to be shifted in the process.
  • Requires switching blades when cutting around very curved areas/edges.
  • The blade wears out faster than fabric scissors.
  • ​Offers less precision around curved, inward corners.  
  • Easier to accidentally slit into the body of the pattern/fabric.
  • Less safe. With a very sharp blade, you risk accidentally cutting your free hand- stay highly alert in the cutting process.

Fabric Scissors

How To Use Fabric Scissors:
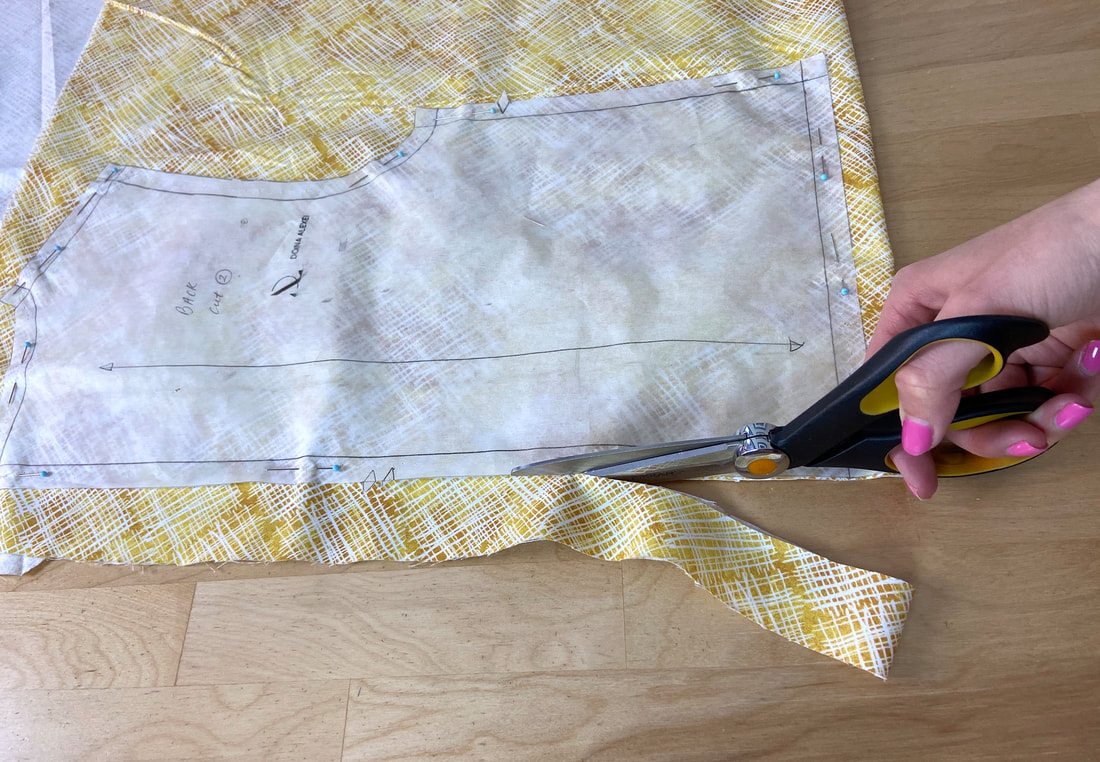
Fabric scissors are a mandatory tool in the sewing process regardless of whether you prefer a rotary cutter as an alternative. Scissors are more functional, adding increased precision around uneven edges and inward corners. 
Picture
Just like rotary cutters, it is important to find the right pair of scissors for you. Whether you are right or left handed or are sensitive to certain handle shapes and materials, you must experiment with a few styles before you find the right one for you.
Picture
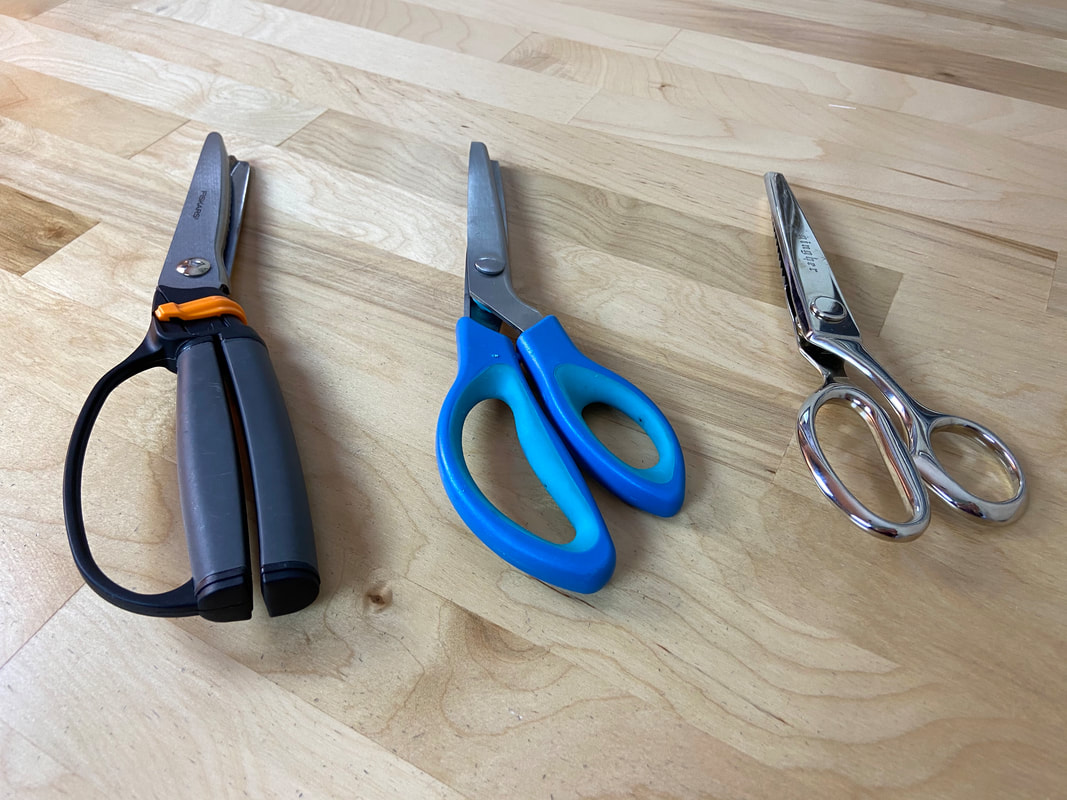
Start by choosing between left or right handed scissors, then narrow down your choice to whether you prefer a metal handle (tailor scissors) or a plastic/rubber handle. While they are considered of higher quality, metal scissors can feel a bit heavy in your hand and provide less grip. A plastic handle is molded for comfort and provides a lighter weight for prolonged cutting.
Picture
​The sharpness and long-lasting nature of the blade is another important factor to consider. The price of the scissors and the quality of the blade are often proportionally related. 
A mid-range price will provide a good quality pair of scissors for beginner-to-intermediate dressmakers. Be sure to check that the scissors are designed for fabric use specifically, and are the right size to accommodate your sewing projects.
It will take some experimentation before you find the perfect pair of scissors. As you become more advanced you may want to invest in a higher quality, more expensive pair.
​Just like rotary cutter blades, fabric scissor blades will become worn over time. Unless you prefer to purchase a new pair of scissors, you can have them sharpened at home or at your local fabric store. Sharpening tools are available for individual purchase. 
You may also experience some tension issues depending on fabric type and thickness. To fix tension issues, adjust the screw that holds the two blades together as needed.
​In terms of blade styles, there are a few different options based on end use and purpose:
Picture
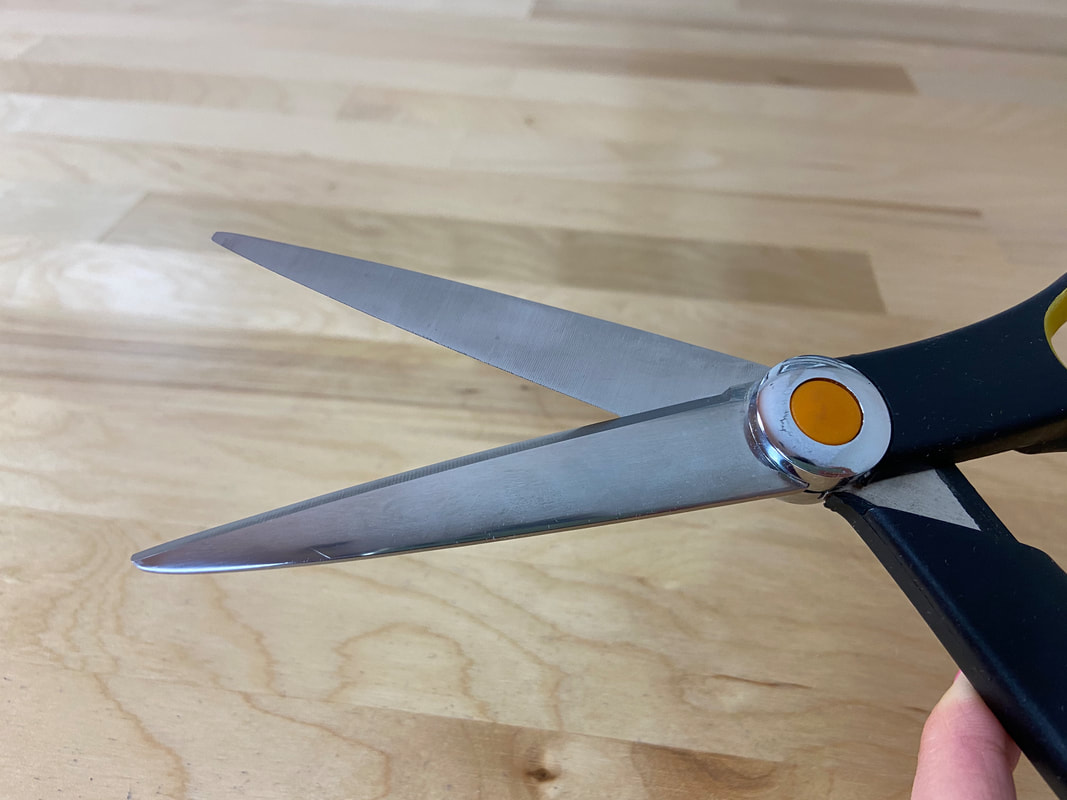
Plain Blade: Best for cutting out your pattern pieces and suitable with all woven fabrics and most knit fabrics.
Picture
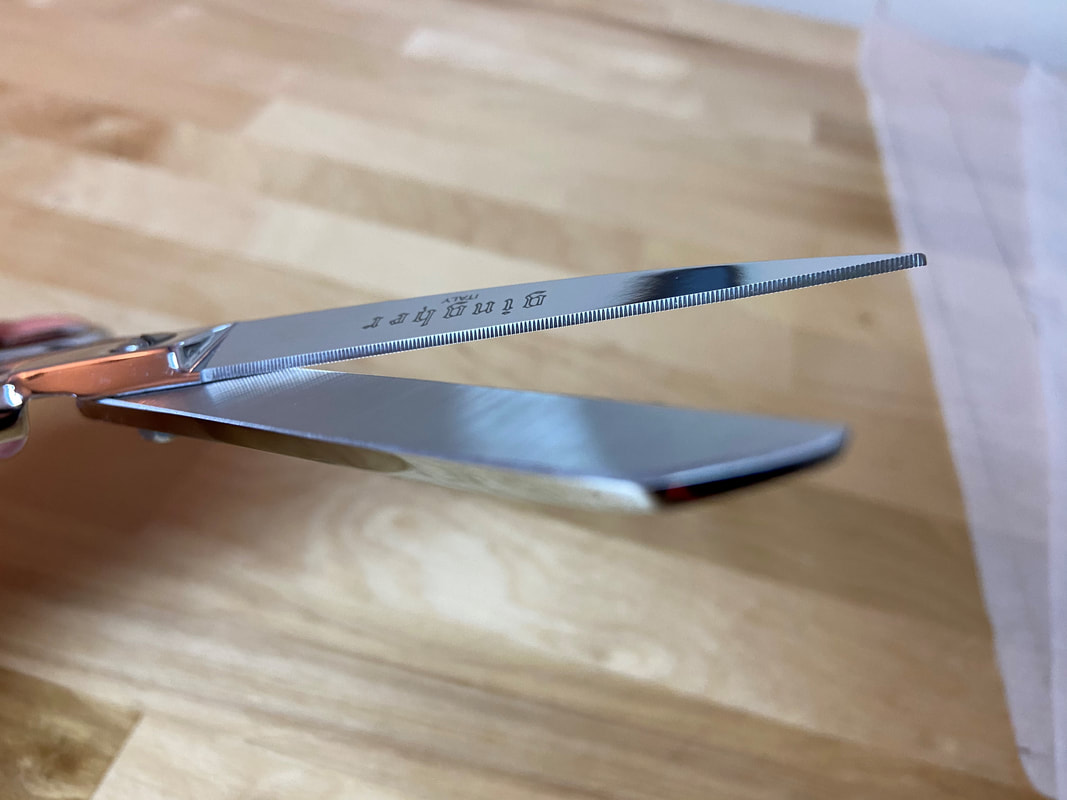
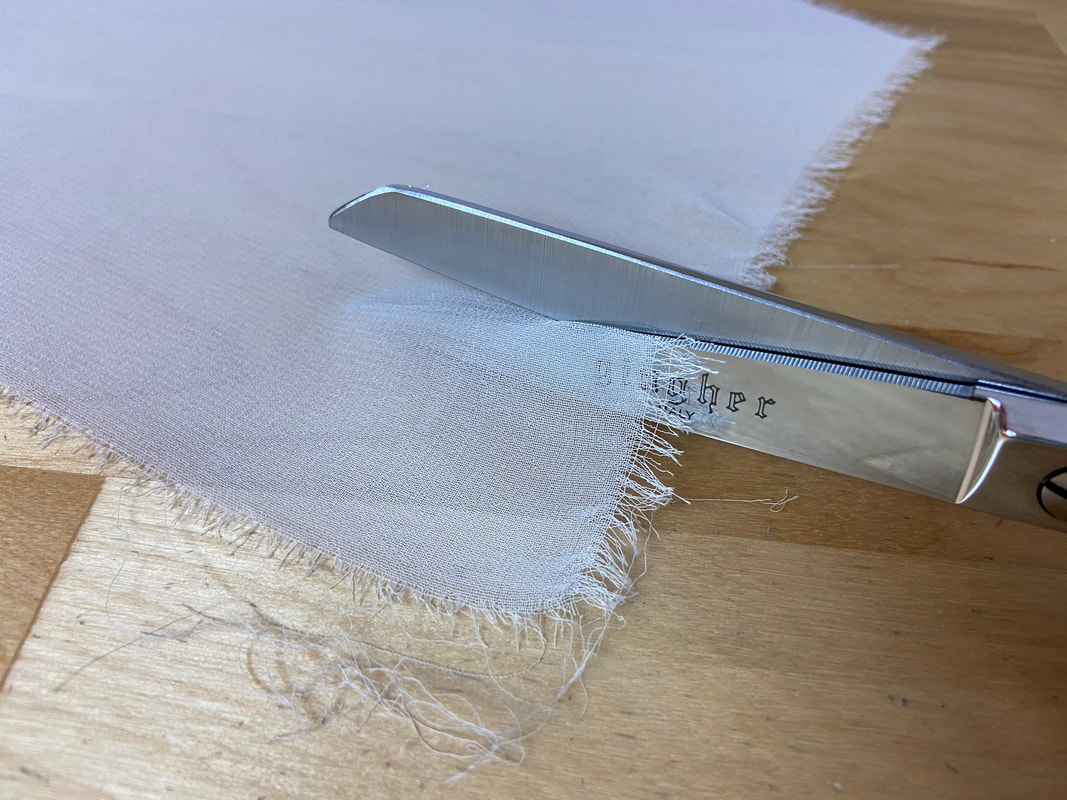
Serrated Blade:  Used for cutting knits and more sensitive fabrics, although plain scissors will also work depending on the type of knit. 
Picture
Serrated blades provide more grip which makes them perfect to cut through fabrics like satin and chiffon in a single, clean stroke. ​
Picture
Picture
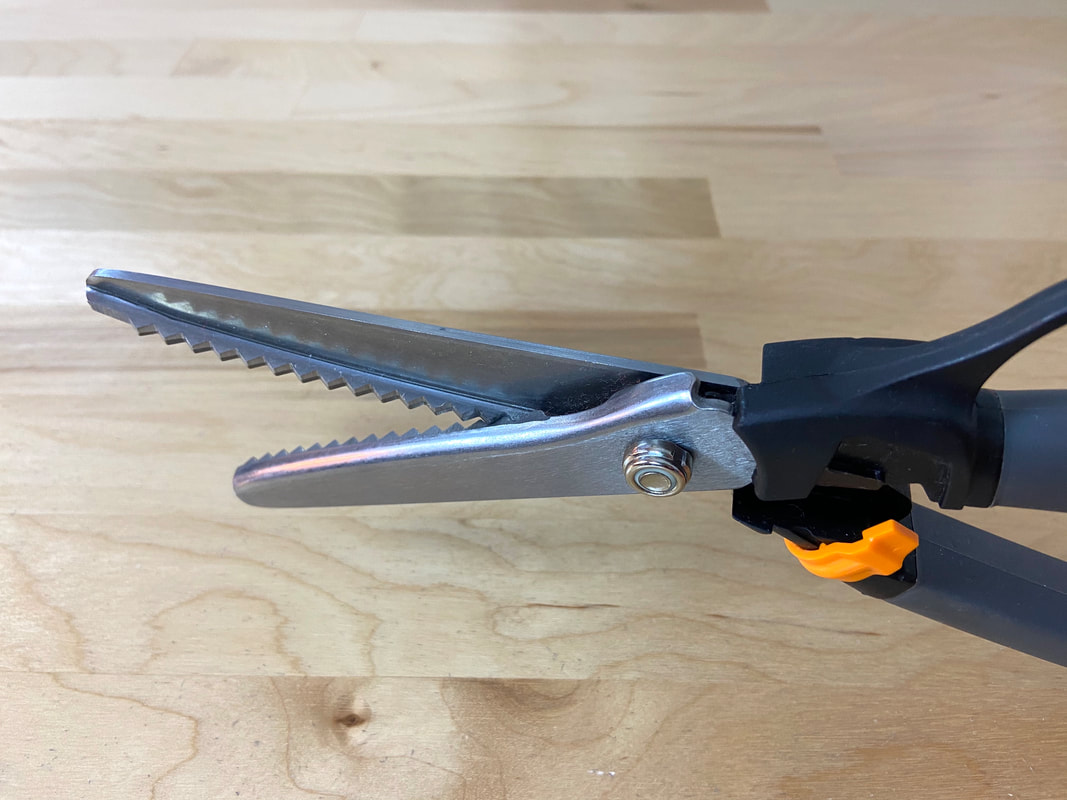
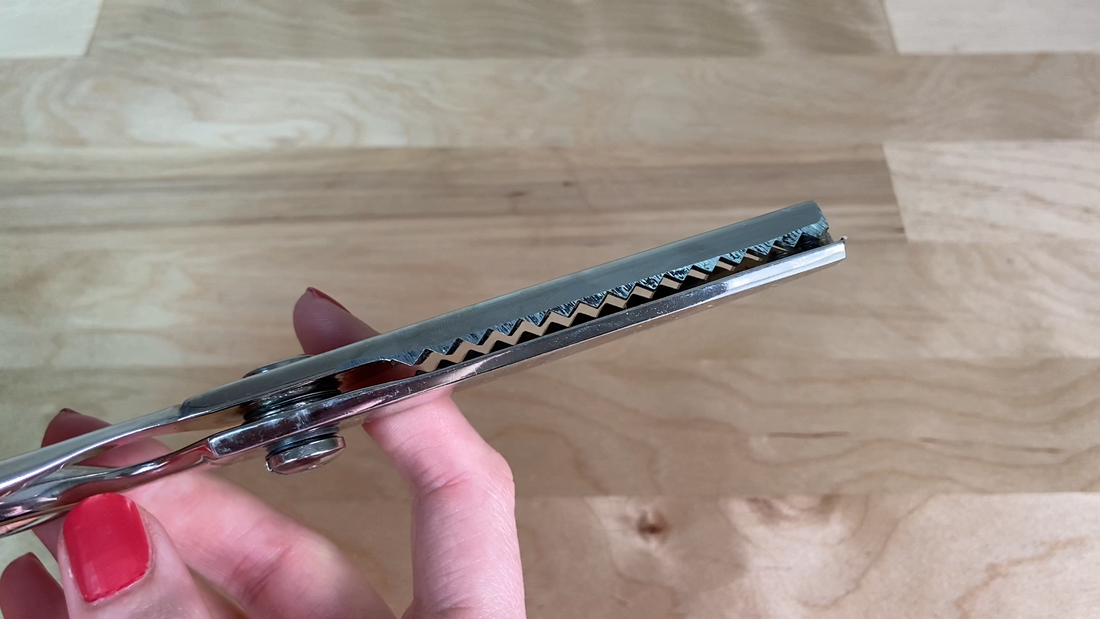
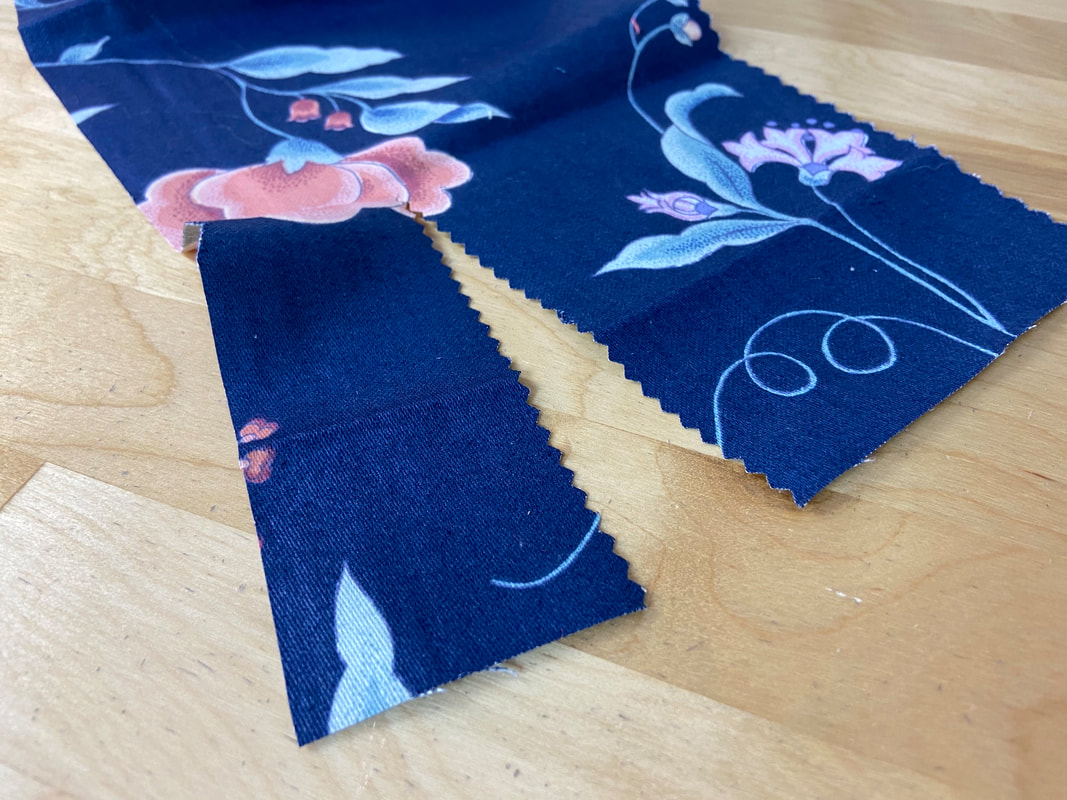
Pinking Blade: This cut results in a jagged chevron edge. It is not used for cutting out patterns but rather for clean finishing raw fabric edges in order to prevent them from fraying. 
Picture
​Never use pinking shears to actually cut your pattern pieces out. If you want to use a pinking finish on your seams, this should be done after the fabric pieces have been cut and separated from the paper patterns.
Scalloping Blade: Similar to pinking shears, a scalloped blade leaves a curved jagged edge and thus should also not be used to cut out sewing patterns. A scalloped edge is used as a decorative finish and in some cases, it prevents fabric edges from fraying. As is true for pinking (described above), this finish should only be applied after the fabric has been cut and separated from the paper patterns.
When To Use Fabric Scissors:
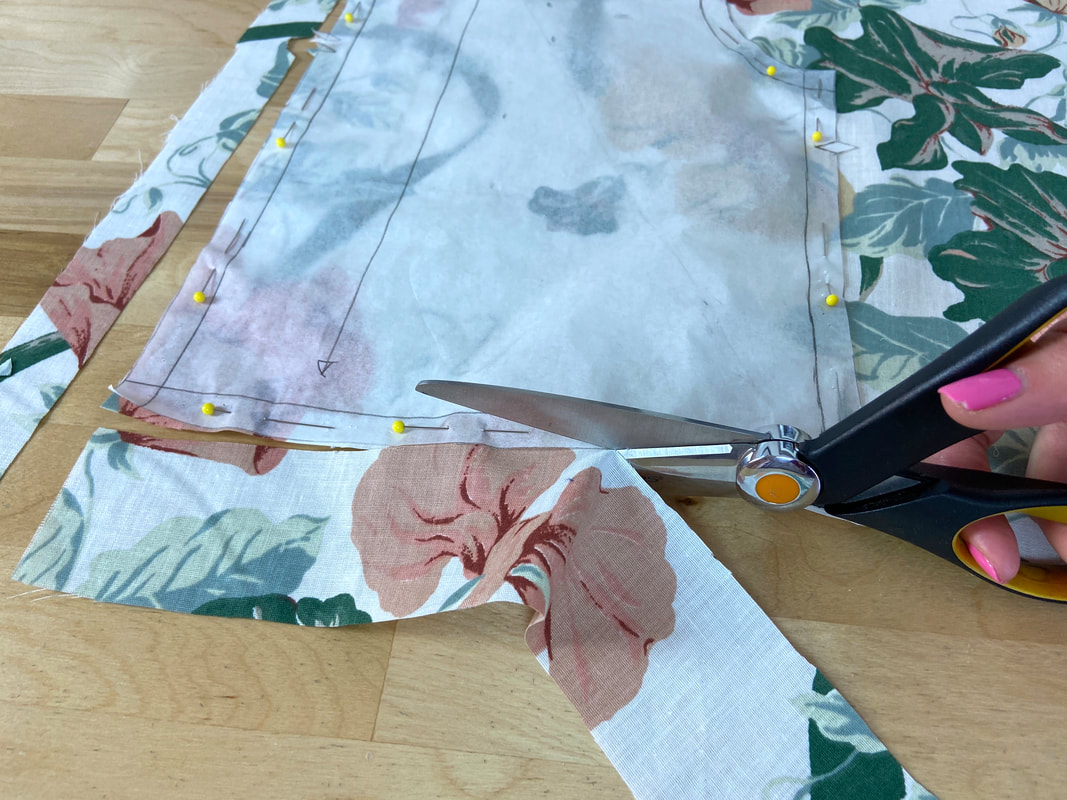
Use fabric scissors when cutting very curved edges and pronounced inner or outer corners.
​Use fabric scissors when cutting pinned patterns through thin fabric layers.
Use fabric scissors when the use of a cutting mat will slow down or impede the cutting process
Use fabric scissors when more accuracy, cutting control and grip is needed
Use fabric scissors when you feel they provide more comfort to you than rotary cutters
Use fabric scissors when you do not have the space or working conditions to use rotary cutters.
​Use fabric scissors when a safer cutting option is desired.
Pros of Using Fabric Scissors:
  • Safer to use in the cutting process. The blades are thicker, less sharp and enclosed at an angle.
  • Easier to use around curves, corners or angular edges.
  • Provides more precision, accuracy and fabric grip.
  • Less risk of accidentally slitting into the fabric/pattern surface.
  • Do not require the use of a cutting mat.
  • Provide a more tactile way to cut fabrics.
  • Offers a variety of different handle styles to optimize comfort.
Cons of Using Fabric Scissors:
  • Results in a less smooth, uneven finish along straight or semi curved edges.
  • Thick fabrics or multiple fabric layers are difficult to cut with scissors.
  • Are less comfortable for those with arthritic conditions.
  • Takes longer to cut large patterns, especially those with long straight edges.
  • Due to the need for lifting the fabric layers slightly off the table surface while cutting, some layers may shift in the process resulting in a less accurate finish.
DMCA.com Protection Status
All content, including images and text, cannot be copied, replicated, or redistributed without express written permission. This website is regularly screened and monitored for content protection.

Have A Personalized Sewing Question?

Ask It Here

Services

​Custom Apparel
Custom Bridal
​Sewing Tutorials
​

Company

About
Blog

Support

Contact
Terms of Service
DMCA.com Protection Status
© COPYRIGHT 2022. ALL RIGHTS RESERVED.
  • Sewing Tutorials
    • Basics >
      • Aligning Pattern Grainlines To Fabric
      • Preparing Fabrics For Sewing
      • Pinning Sewing Patterns To Fabric
      • Placing Sewing Patterns On Fabric For Cutting
      • Rotary Cutters or Fabric Scissors?
      • Cutting The Sewing Patterns
      • What Are Notches And How To Use Them In The Sewing Process
      • Transferring Notches From Pattern To Fabric
      • Transferring Seamlines to Fabric
      • Staystitching
      • Backstitching: A Complete Guide
      • Hand Basting: A Complete Guide
      • Sewing Continuous Bias Binding
    • Darts >
      • Marking And Transferring Darts To Fabric
      • What Are Darts And Dart Components
      • Folding, Pinning And Hand Basting Darts
      • Handling Dart Excess: Bulk And Tension
      • How To Sew A French Dart
      • How To Sew And Iron Single Pointed Darts
      • How To Sew And Iron Contour Darts
      • Sewing Darts With Decorative/Beaded Fabrics
    • Sewing Seams >
      • ​The Basics Of Seams And Seam Allowance
      • How To Sew A Straight Seam
      • Sewing Curved Seams
      • Sewing Corner Seams
      • Trimming And Grading Seam Excess
      • Notching/Clipping Seam Allowance for Tension Release
      • Sewing Topstitched Seams
      • Sewing Corded Seams
      • Sewing A Slot Seam
      • Sewing A Gathered Seam
      • Sewing Bias Seams
      • Sewing Seams With Ease
      • Sewing Seams With Crossing Seamlines
      • Sewing Unlike Fabric Seams
      • How To Iron Seams: Ironing Tools And Conventions
      • Sewing With Knit Fabrics
      • Understanding Stitch Length And Tension
      • Sewing Unique Fabric Seams
    • Seam Finishes >
      • Seam Finishing Techniques - Overview
      • Applying A Pinked Seam Finish
      • Applying A Bias Bound Seam Finish
      • Serging And Zigzag Seam Finishes
      • Sewing A Self-Bound Seam Finish
      • Sewing A French Seam Finish
      • Sewing A Hong Kong Seam Finish
      • Sewing A Mock French Seam Finish
      • Sewing A Turned-and-Stitched Seam Finish
      • Sewing Overcast Hand-Applied Seam Finishes
      • Sewing A Flat Felled Seam
      • Sewing A Hairline Seam Finish
    • Hem Finishes >
      • Garment Hem Finishes: Overview
      • ​Sewing A Double Fold Hem Finish
      • Sewing A Single Fold Hem Finish
      • Sewing Bound Hem Finishes
      • Sewing An Exposed Double Layer Bound Hem
      • Sewing A Folded-Up Bound Hem with Pre-folded Binding
      • Sewing A Hong Kong Hem Finish
      • Sewing A Band Hem Finish
      • Sewing A Bias Faced Hem Finish
      • Sewing A Twill Tape Hem Finish
      • Sewing A Rolled Hem Finish
      • Sewing A Shaped Hem Facing
      • Using Fusible Hem Tape And Webbing
      • Finishing A Lace Fabric Hem
      • Finishing A Leather Hem
      • Sewing Faced Hem Corners
      • How To Finish Lining At The Hem
      • Finishing Fabric Corners by Mitering >
        • Mitering Fabric Corners With A Full Bias Facing
        • Mitering Fabric Corners With Exposed Binding
      • Interfacing A Hemline: Lined And Unlined Examples
    • Sewing Pockets >
      • Curved Patch Pocket With Flap
      • Unlined Square Patch Pockets
      • Lined Patch Pockets: Two Ways
      • Extension On-Seam Pockets
      • Separate On-Seam Pocket
      • Front Hip Pockets
      • Bound Double Welt Pocket
      • Double Welt Pocket With Flap
      • Self-Welt Pocket (Using Single Fabric Layer)
      • Slanted Welt Pocket (Hand-Stitched)
      • Faced Slash Pockets: Overview >
        • Sewing A Faced Slit Pocket
        • Sewing A Rectangular Slash Pocket
        • Sew A Star-Shaped Faced Pocket
    • Sewing Zippers >
      • Sewing Zippers: General Information
      • Sewing A Centered Zipper
      • Sewing A Lapped Zipper
      • Sewing An Invisible Zipper
      • Sewing A Fly Front Zipper
      • Sewing A Closed-End Exposed Zipper (No Seam)
      • Sewing An Exposed Separating Zipper
      • Sewing Hand Stitched Zipper Applications
      • Sewing A Zipper Underlay
      • Sewing A Placket-Enclosed Separating Zipper
    • Sleeveless Finishes >
      • Sleeveless Armhole Finishes: General Information
      • Finishing Sleeveless Garments with Lining
      • Sewing A Folded-Under Bound Armhole Finish
      • Sewing A Shaped Armhole Facing
      • Finishing Armhole Edges With Exposed Binding
      • Finishing Armhole Edges With Decorative Trim
    • Neckline Finishes >
      • Sewing A Neck Shaped Facing
      • Sewing An All-In-One Neck Facing
      • Neck And Garment Opening Combination Facings >
        • Sewing An Extended Front-Neck Facing
        • Sewing A Separate Neck-Front Facing
      • Sewing A Bias Faced Neckline Finish
      • Sewing A Band Neckline Finish
      • Bound Neckline Finishes: Overview >
        • Sewing A Single Layer Bound Neckline
        • Finishing A Neckline With Pre-Folded Binding
        • Sewing A Double Layer Bound Neckline Finish
      • Sewing A Semi-Stretch Strip Band Neckline
      • Ribbed Neck Band And Classic Turtleneck
      • Decorative Neckline Finishes >
        • Sewing A Neckline With Decorative Inset
        • Sewing A Piped Cording Faced Neckline
        • Sewing Decorative Trim To A Finished Neckline
    • Finishing Facing Edges >
      • Finishing Facing Edges: Overview
      • Folded-And-Topstitched Overedge Facing Finish
      • Sewing A Bound Facing Edge Finish
      • Sewing A Hong Kong Facing Finish
      • Sewing A Rolled Edge Facing Finish
      • Sewing A Twill Tape Facing Edge Finish
      • Sewing An Overedge-Stitch Facing Finish
    • Extras >
      • A Complete Guide on Interfacing
      • Sewing Bound Spaghetti Straps
      • Sewing Spaghetti Straps To A Faced Neckline
      • Sewing Ruffles: Overview
      • Patterning And Sewing A Circle Ruffle
      • Sewing A Gathered Heading Ruffle
      • Sewing Double Layer Gathered Ruffles
      • Sewing A Gathered Ruffle Into A Seam
      • Sewing A Gathered Ruffle To A Fabric Edge
      • Sewing A Fabric Surface Slit
      • Sewing A Slit Seam
      • Hand-Applied Straight Stitches
      • Hand-Applied Blind Stitches
      • Hand-Applied Overedge Stitches
      • Hand-Applied Tack Stitches
      • Hand-Applied Decorative Stitches
  • Custom Apparel
    • Custom Bridal
  • Submit A Sewing Question
  • About
  • Blog