
What Is Pre-Folded (Pre-Packaged) Binding
|
If you are looking to save some time, or perhaps the process of cutting and folding your own bias binding intimidates you, you can purchase pre-folded packaged binding at any of your local fabric stores.
|
While convenient and easy to work with, pre-packaged binding is unfortunately not available in many fabric choices. It is however available in lots of color variations. Nevertheless, you may still not be able to find one that perfectly matches the color of your garment.
Regardless, pre-packaged bias binding is much easier to work with not only because it is already folded for you, but also due to the natural stability and structure of the binding’s cotton fabric. A regular cotton binding is easy to iron and a lot more manageable than one made from a slippery, lightweight fabric.
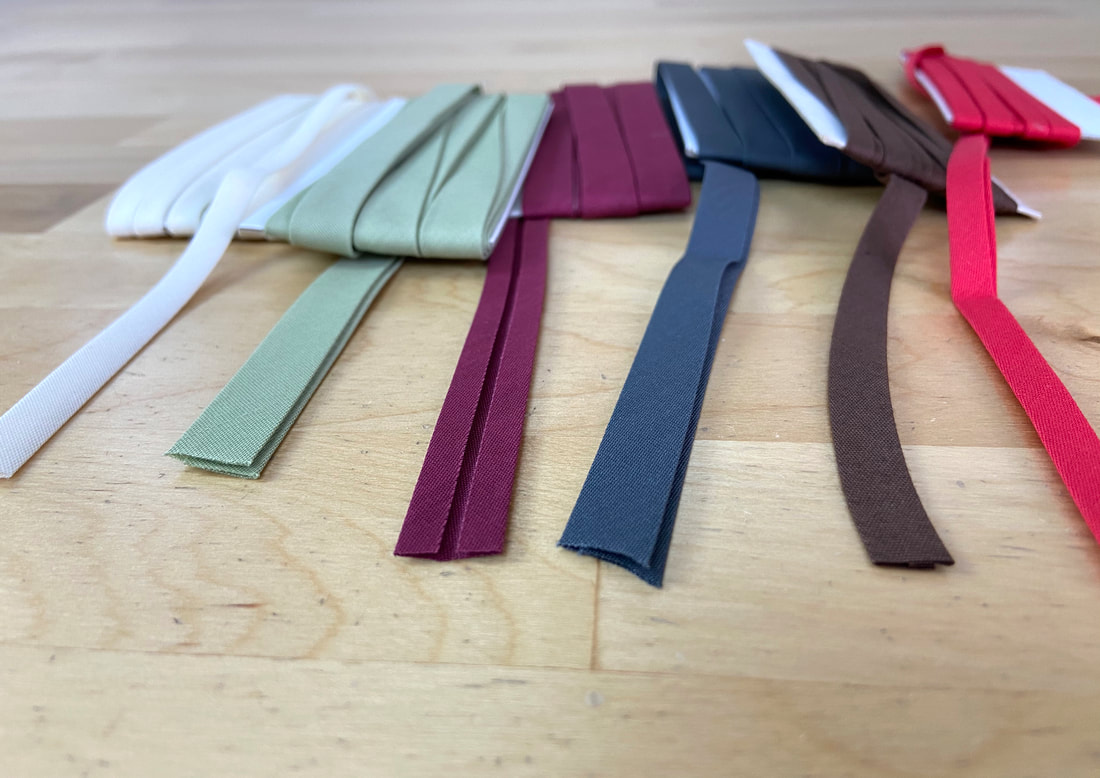
Choices, choices, choices… So how should you choose the most suitable binding for your project? Two things should be considered: binding width and binding color.
|
The width of the binding is perhaps more important than color. The appropriate width should be chosen based on the garment’s fabric. Specifically, its thickness and structure.

|
A wide binding (1/2”) is used with thick, bulky fabrics, or to clean-finish neckline edges comprised of multiple, thick layers. Wider binding should also be used with loosely woven fabrics that unravel easily.
|
A narrow pre-packaged binding (1/4”) is used with lightweight fabrics, especially those that have a little more structure. Examples include light/mediumweight cotton, voile, synthetic blends and lightweight wools (to name just a few).
Some fine fabrics, like silk chiffon, organza and laces are not compatible with cotton pre-packaged binding. From a functional standpoint, the structure and thickness of the binding will add bulk and create tension in the final garment. Design wise, a pre-packaged bias binding is not visually pleasing when used with fine silk or lace fabrics.
When shopping for pre-packed binding, you’ll notice a single fold option and a double fold option.
|
A double fold is conventionally used with neckline finishes. The bias strip is folded three times to enclose all raw edges within a semi-centered fold.

|
Single fold binding has each one of its lengthwise edge folded in, but does not have the 3rd fold that encloses all the raw edges.
|
However, if you find the perfect color in a single fold option, you can actually convert it to a double fold style by ironing the center fold at home. Remember, cotton is not heat sensitive and thus it is really easy to iron.
When it comes to sewing binding, the following two rules should be followed:
|
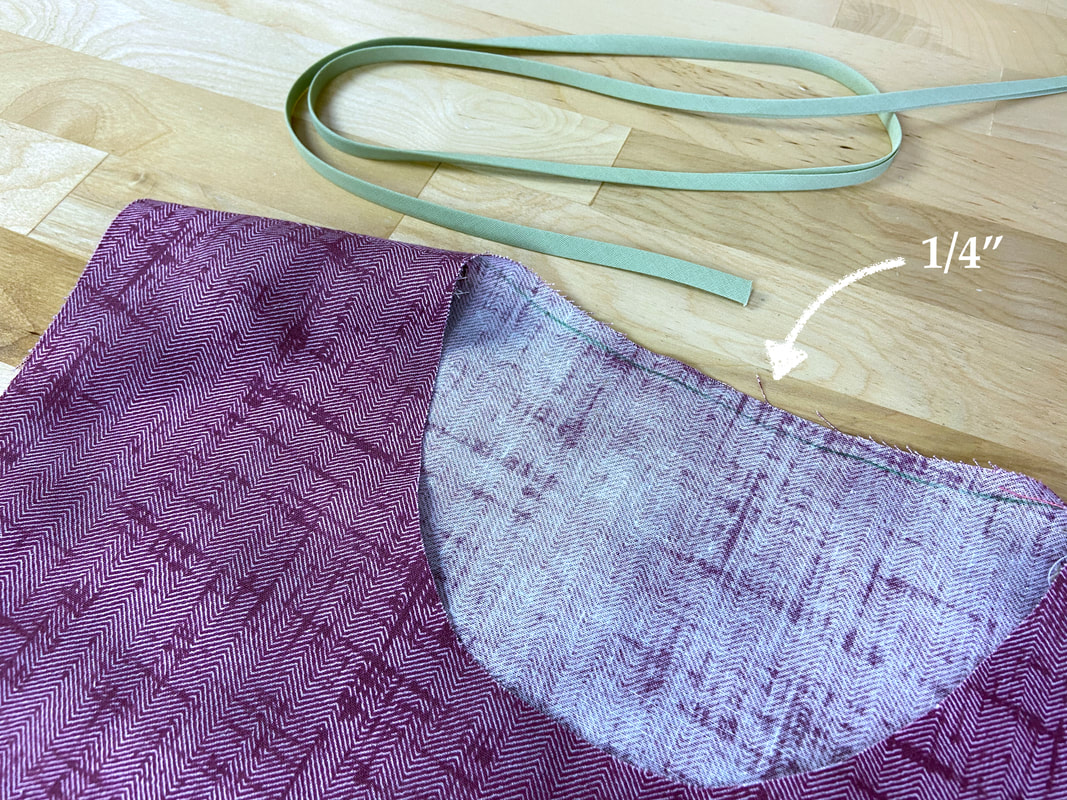
Rule 1: If the final binding will be exposed along the finished neckline edge, the neck’s raw edge should not have seam allowance. In this case, the neck’s cut edge corresponds to the finished neckline edge. If your pattern’s include seam allowance, trim it off along both front and back neckline edges after the pattern pieces have been cut.
|
Rule 2: If the binding will be folded inwards and topstitched (or slipstitched) and not exposed on the face of the garment, the neck edges should have seam allowance that is as wide as the final width of the binding. For example, if attaching ¼” binding that will be turned under, the neckline seam allowance should be ¼”. If your seam allowance is wider, trim it down to ¼”.
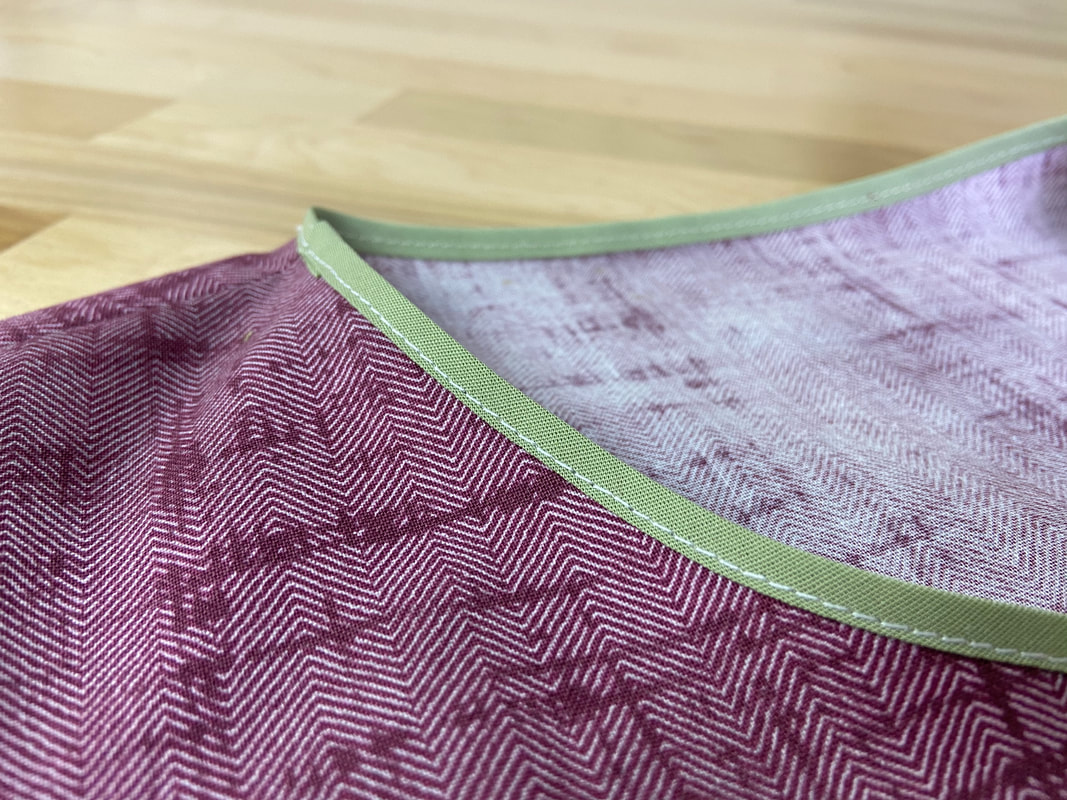
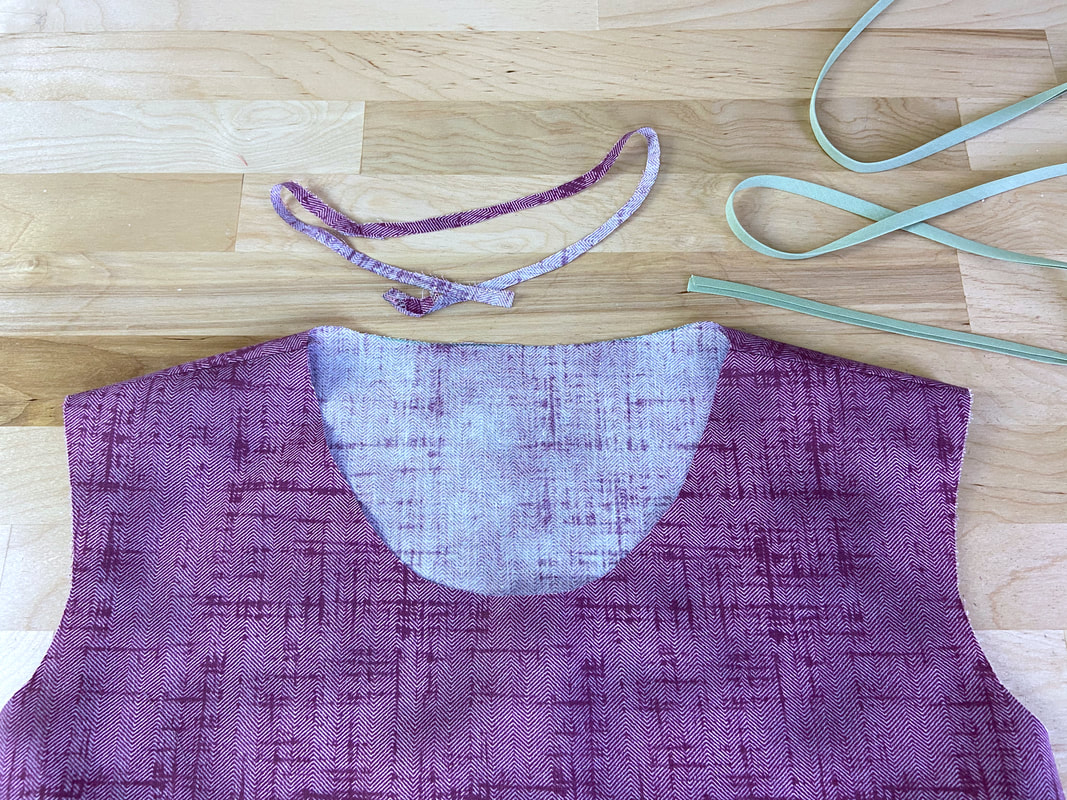
Sewing Exposed Pre-Folded Binding To A Neckline Edge
Start by choosing the most appropriate double fold binding for your garment in terms of color and width.
Measure the neck edge with a flexible measuring tape or the binding itself, and add 3” to this measurement. This final measurement will mark how long the bias binding needs to be to finish the entire neckline.
|
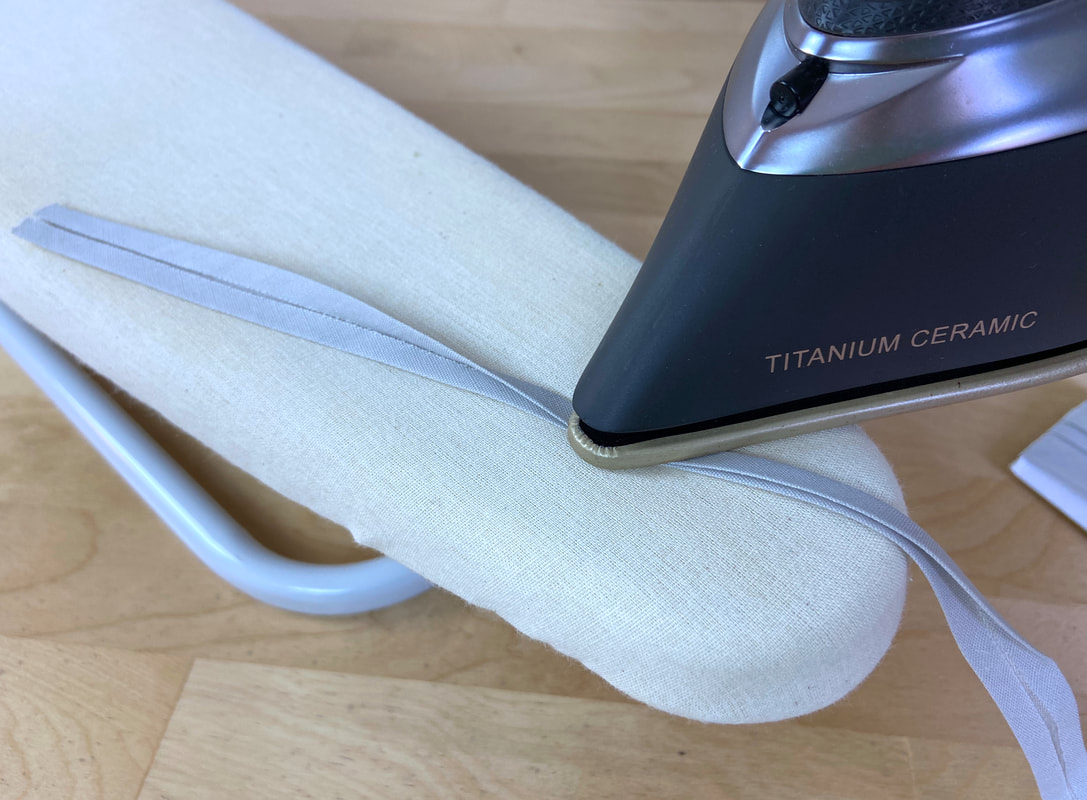
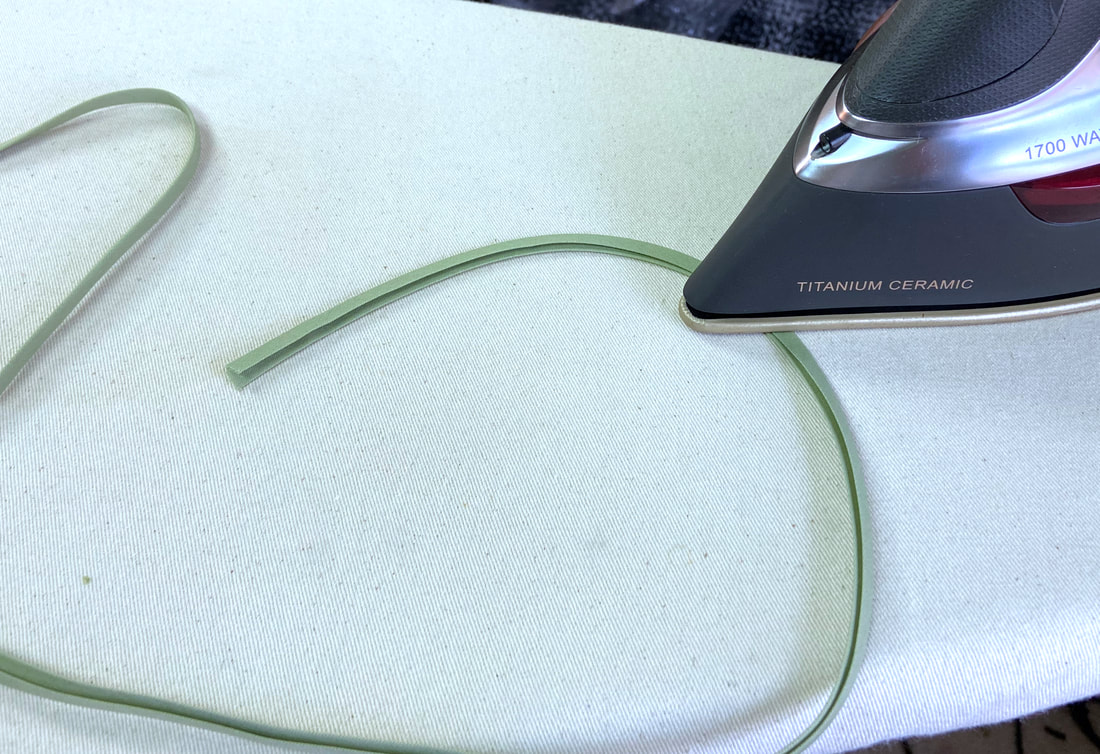
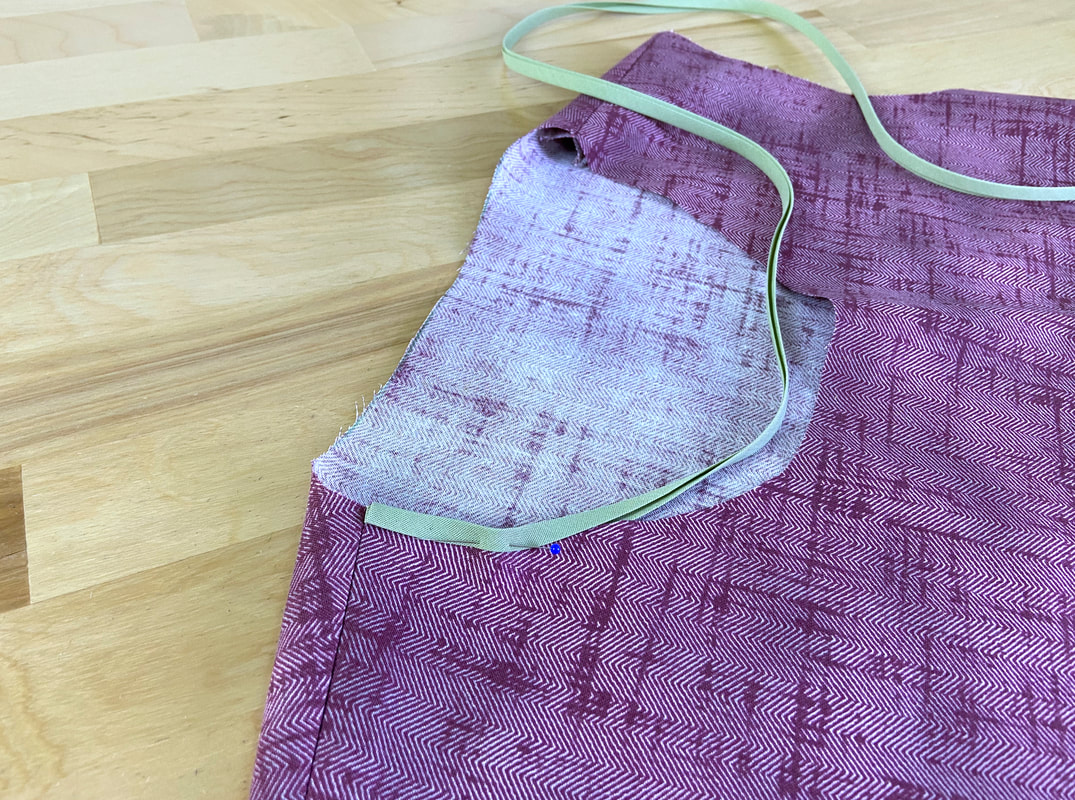
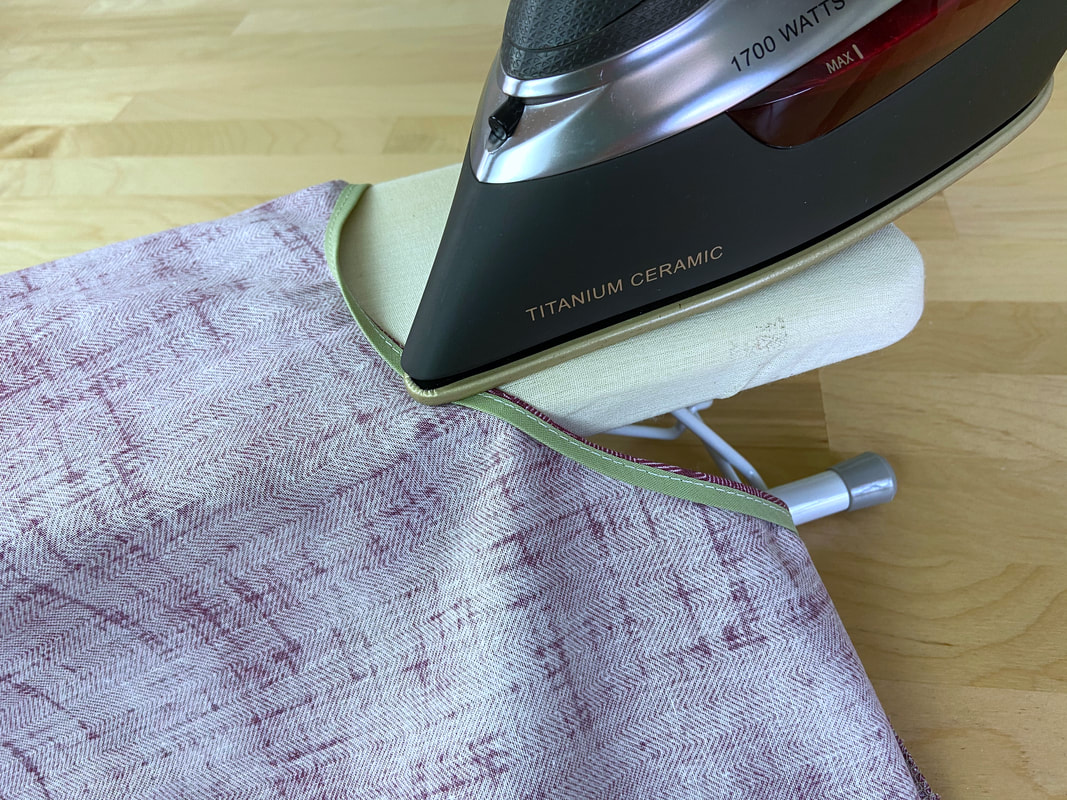
1. To make the binding easier to attach, stretch it into an inward curve to match the shape of the neckline, and iron it in this position as you stretch. This will give it a predefined shape that is easier to align with the neck's inward curve.
|
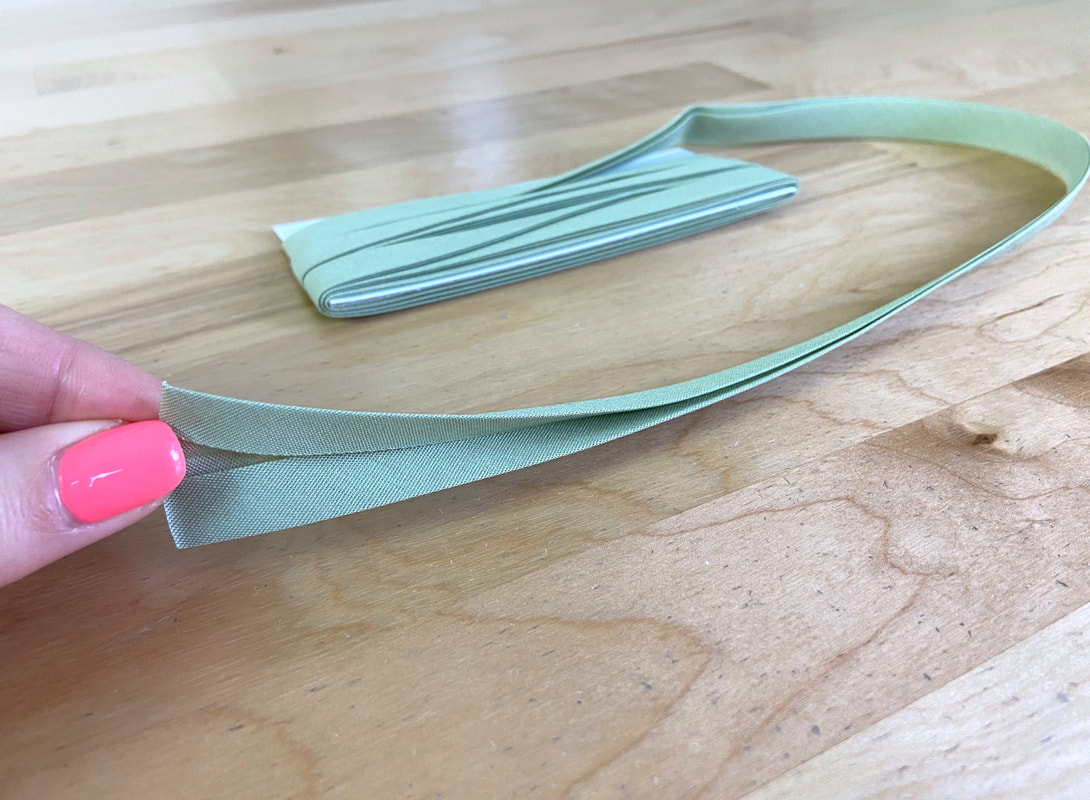
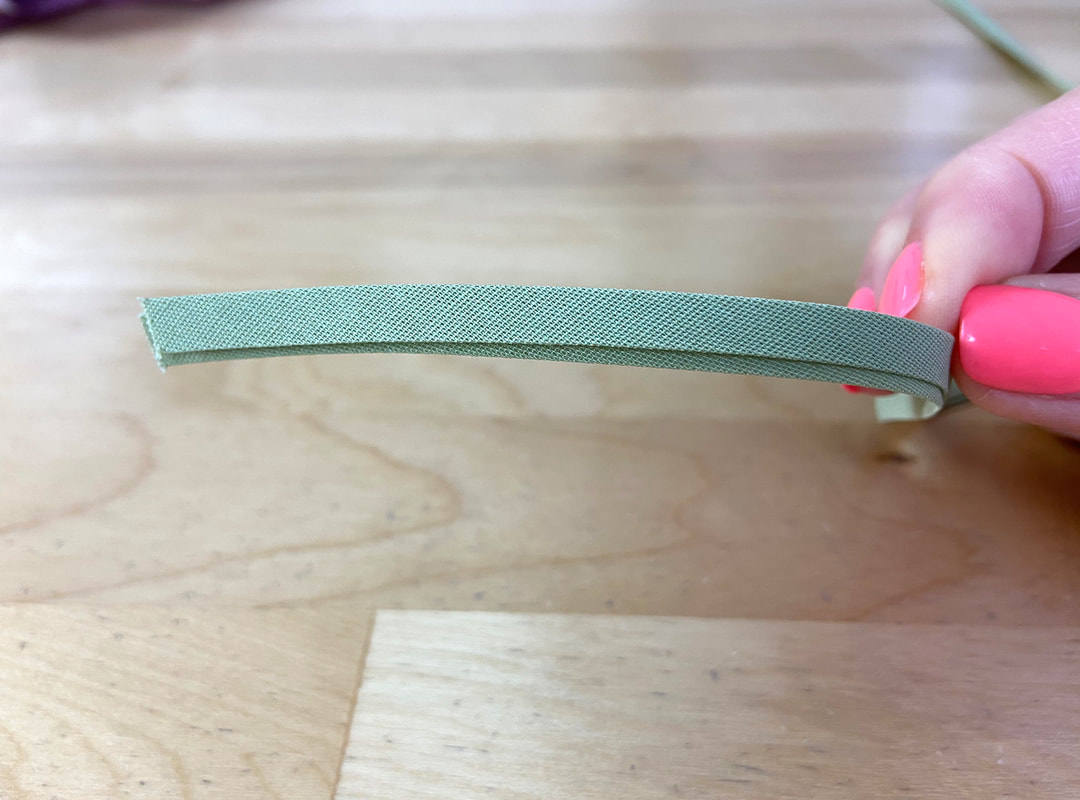
If you take a closer look at your pre-packaged binding, you will notice that one of its layers is a little longer than the other- the binding is intentionally folded this way.
|
When aligning it to the neckline edge, the longer side will correspond to the wrong side of the garment such that when the binding is topstitched from the face side, the longer edge is caught underneath even if the layers shift a little out of place in the process.
|
|
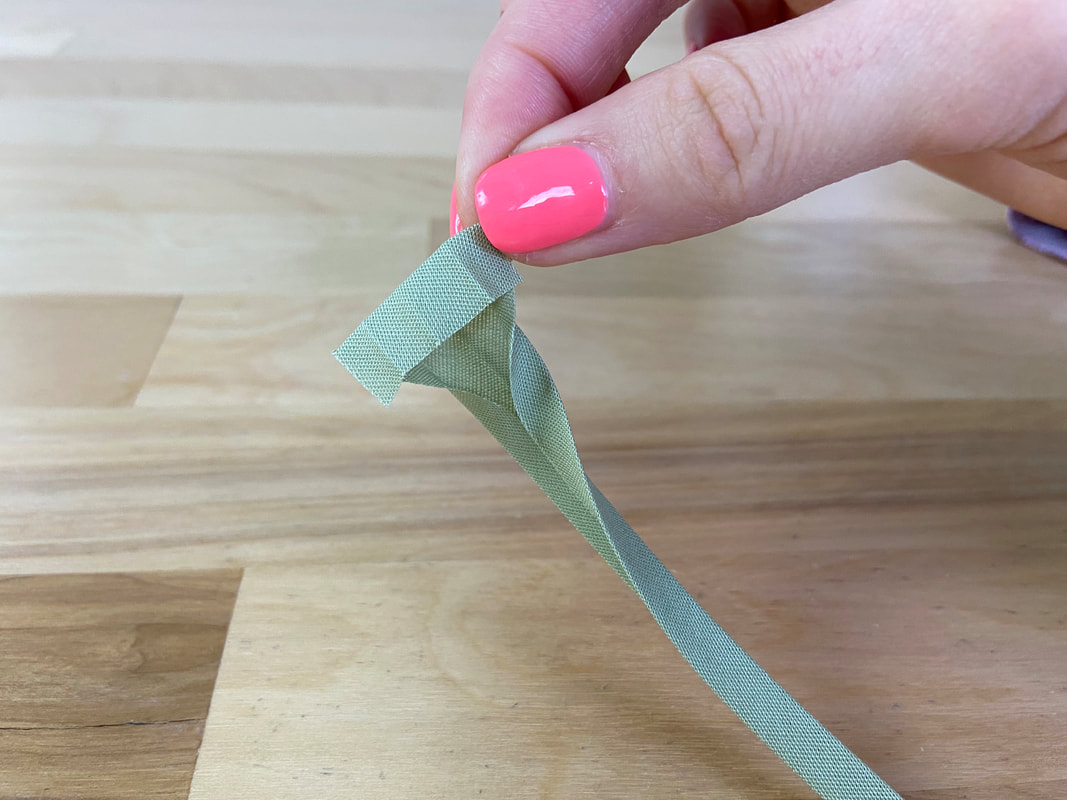
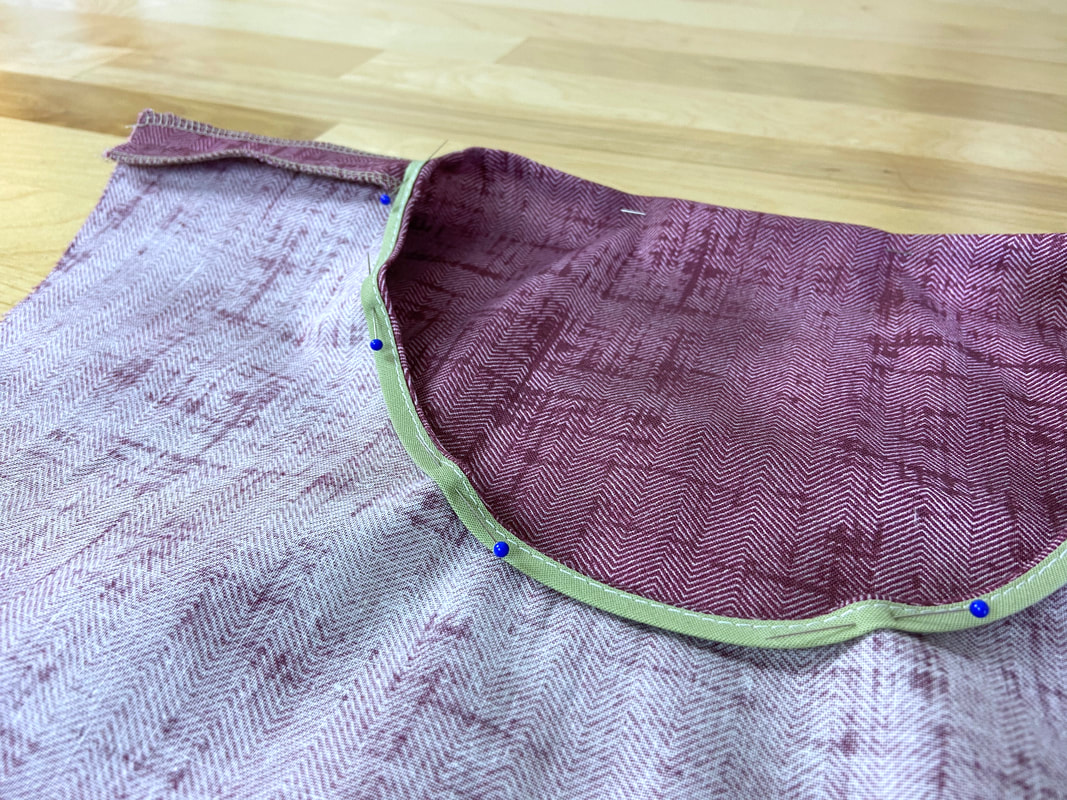
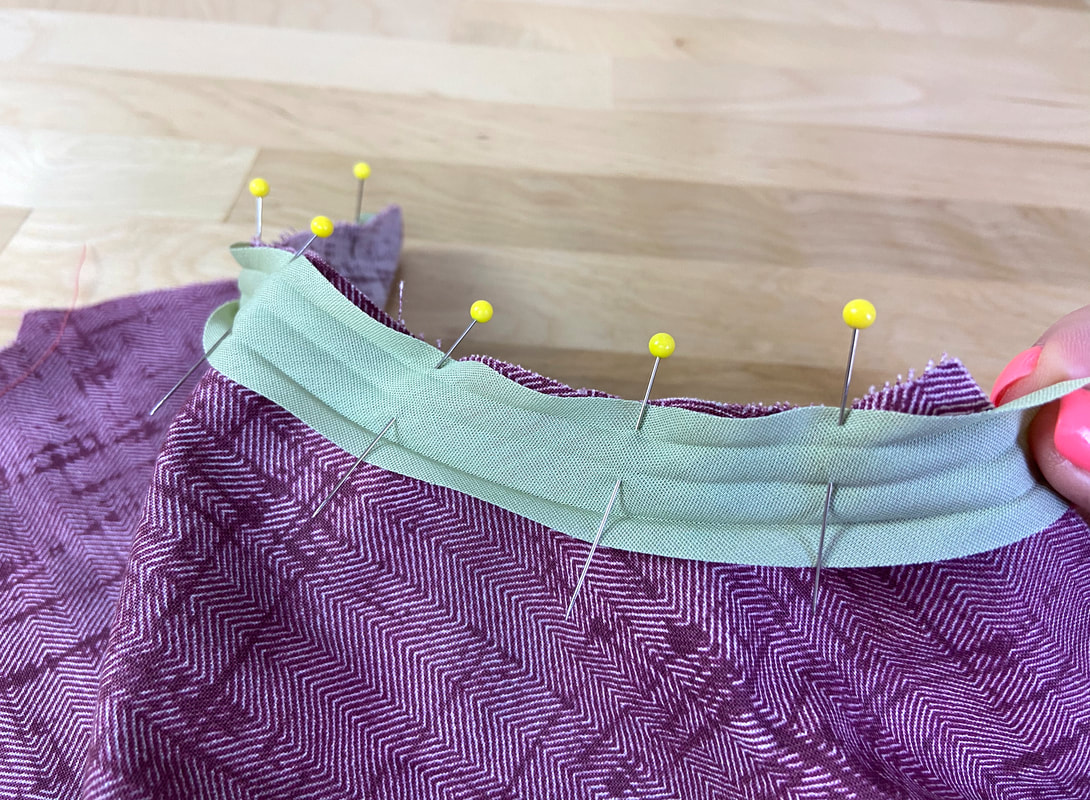
2. Fold one of the binding ends in at about ¼”, and align the binding such that the raw neckline edge is enclosed by the two binding layers.
Make sure the longer binding layer is placed on the wrong side of the neckline.
|
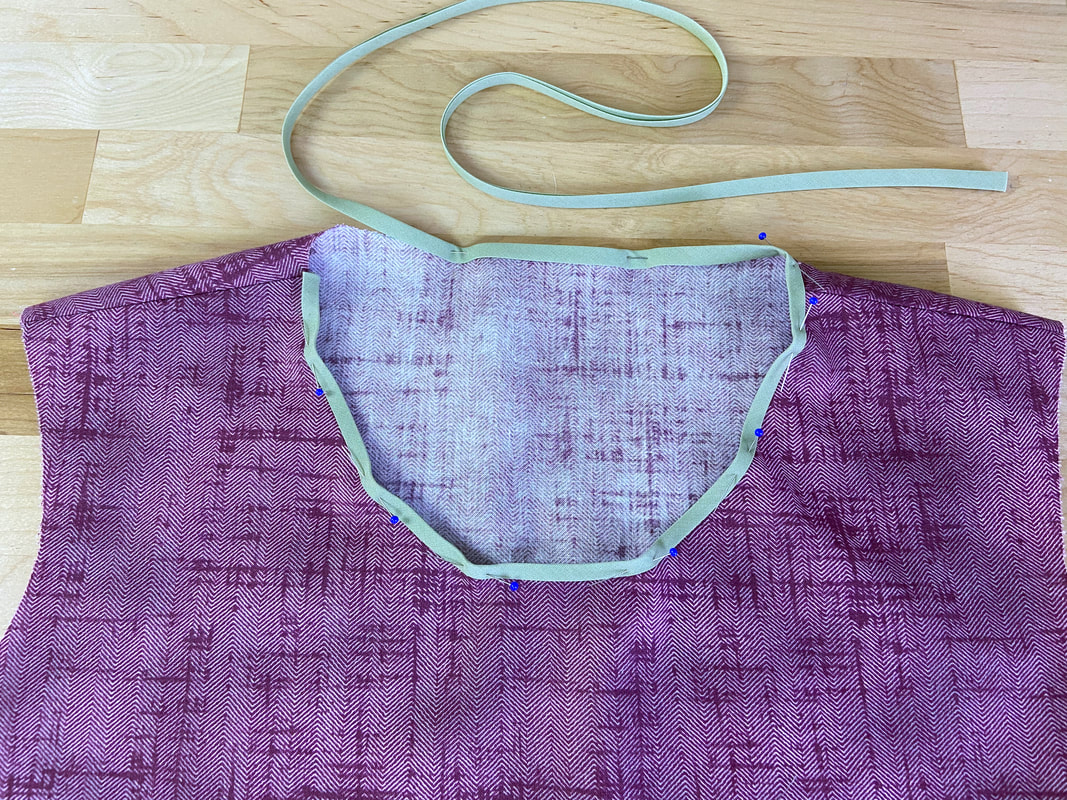
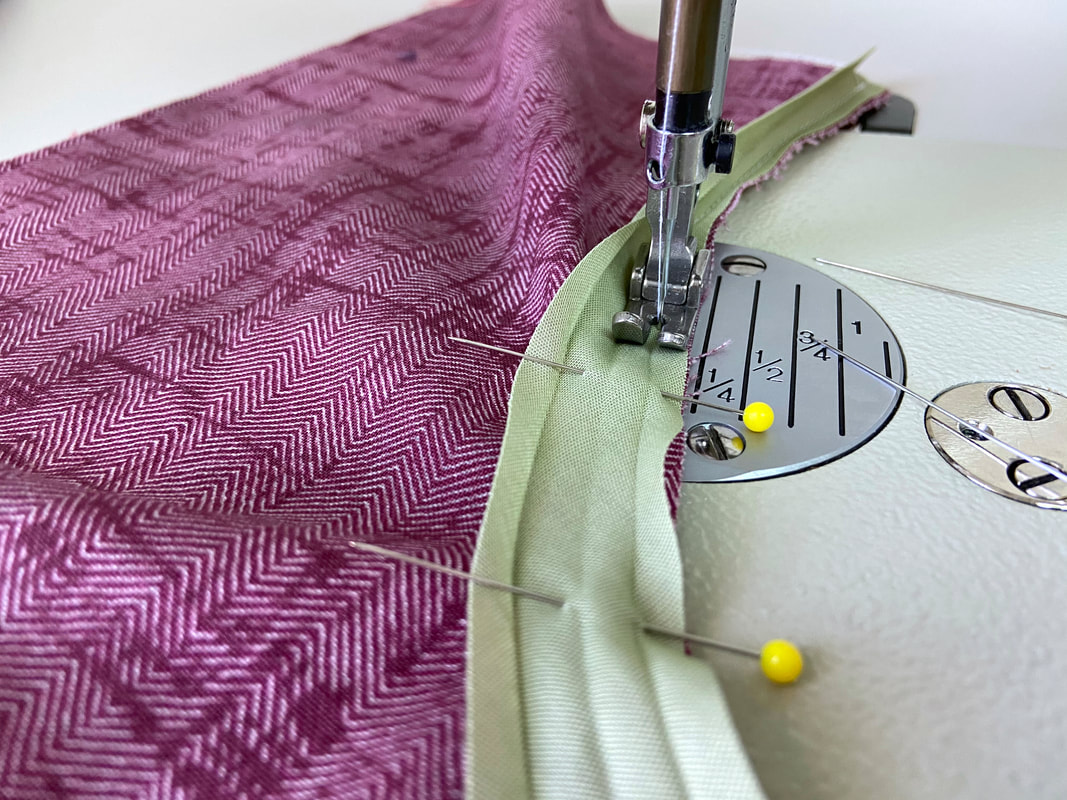
3. Insert pins to hold the binding in this position, and continue enclosing the neckline edge within the binding until you arrive at the folded starting end. Insert pins closer together if you notice that the neckline is slipping out of the encased binding.
|
|
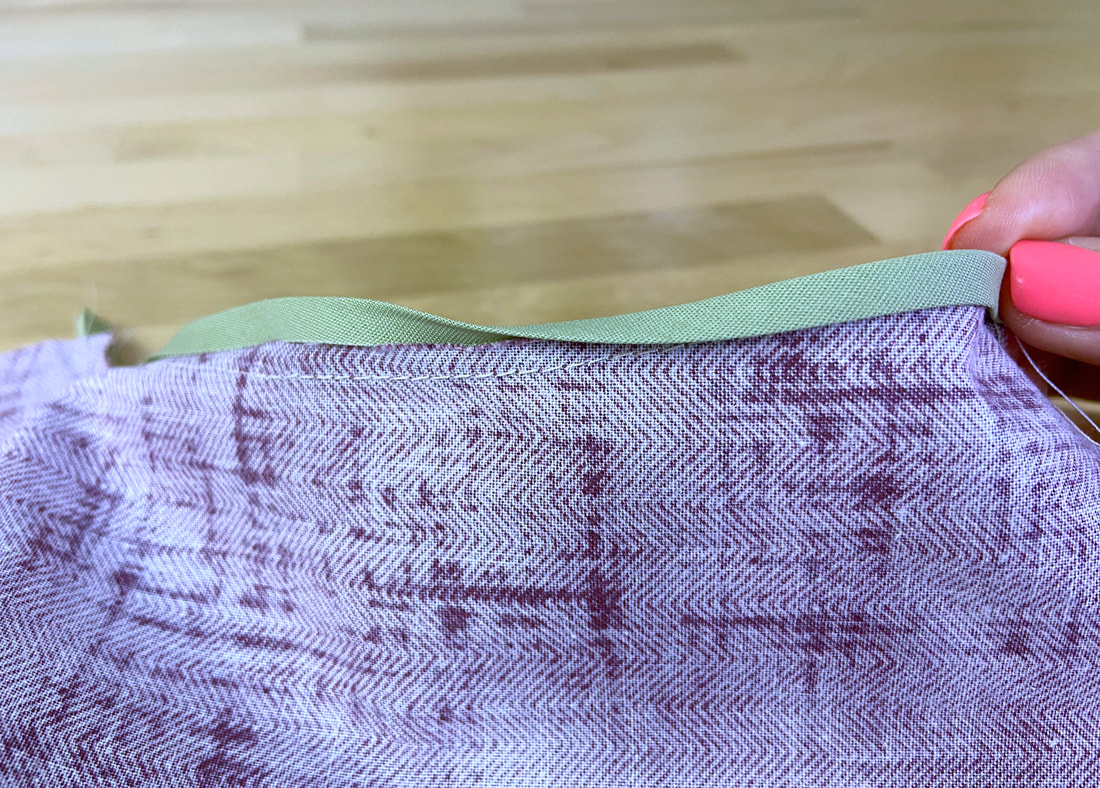
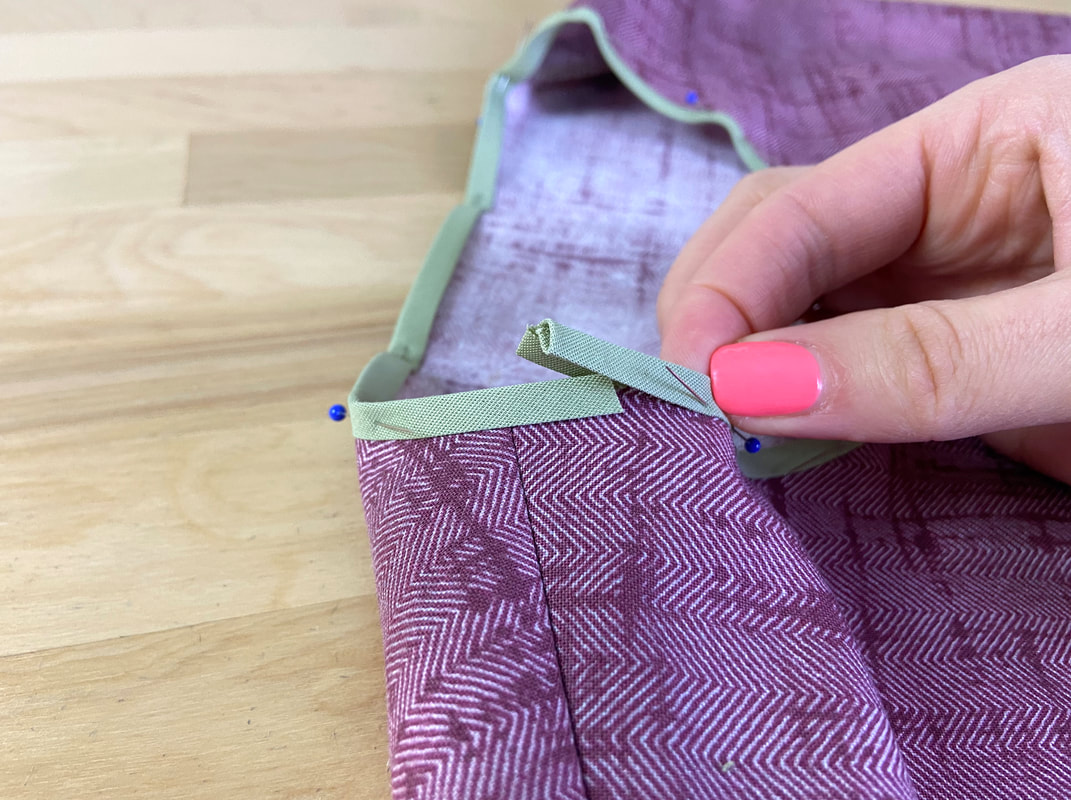
4. Overlap the end of the binding by about 1/4”- 1/2”, trim the excess, and place it underneath the folded end as shown.
|
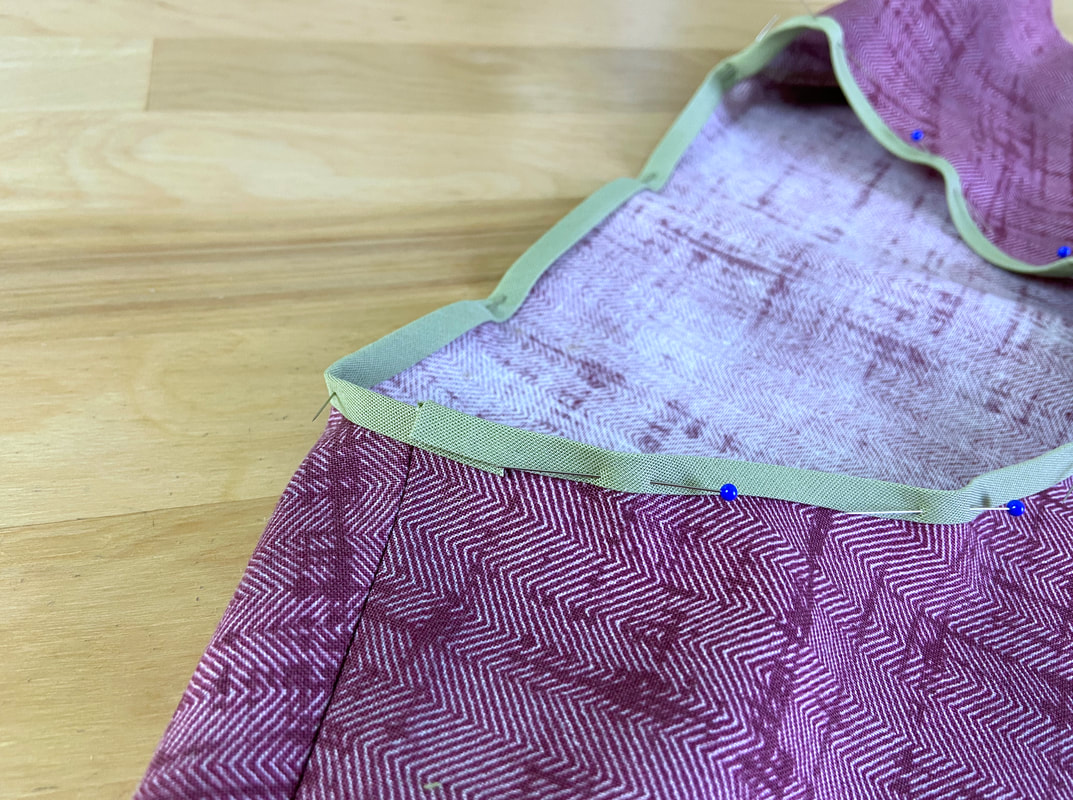
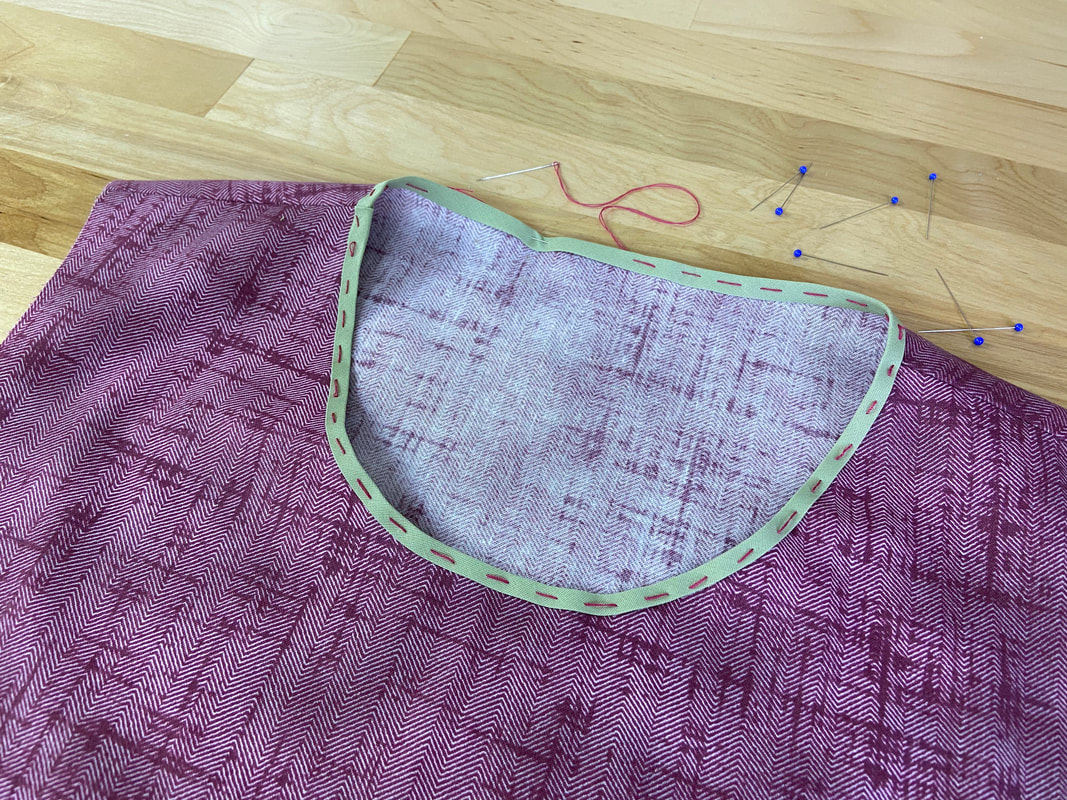
5. At this point, hand baste the binding in this position prior to machine stitching it.
|
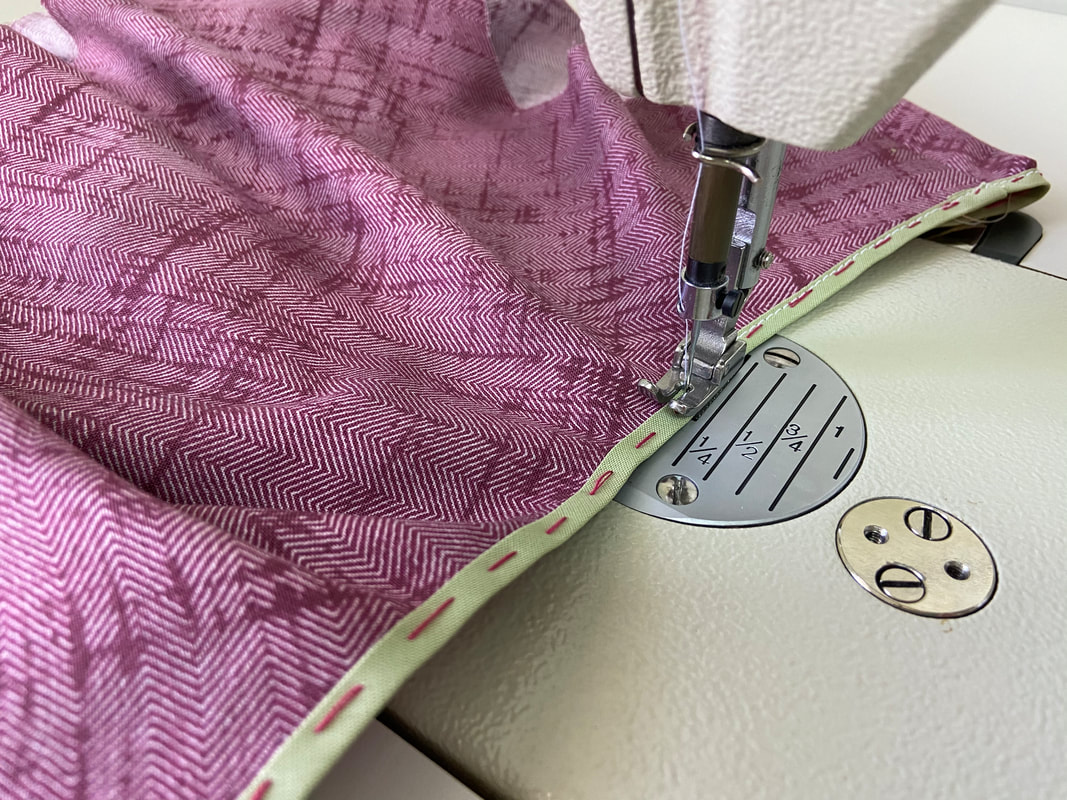
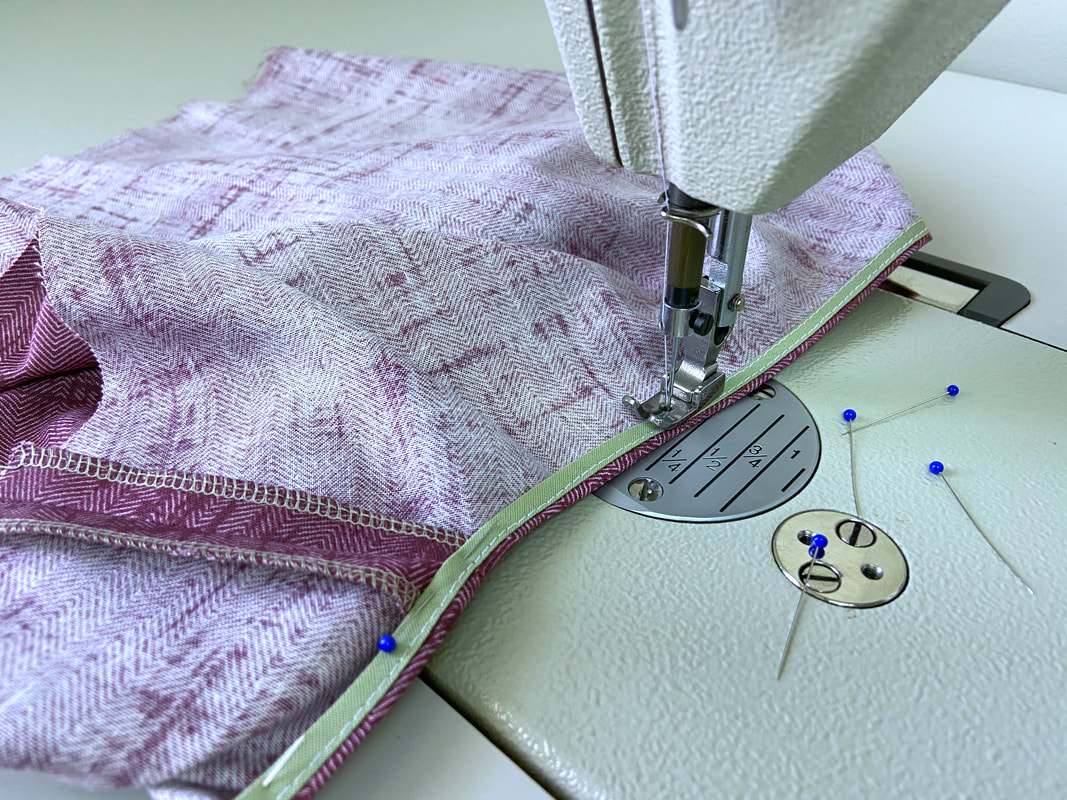
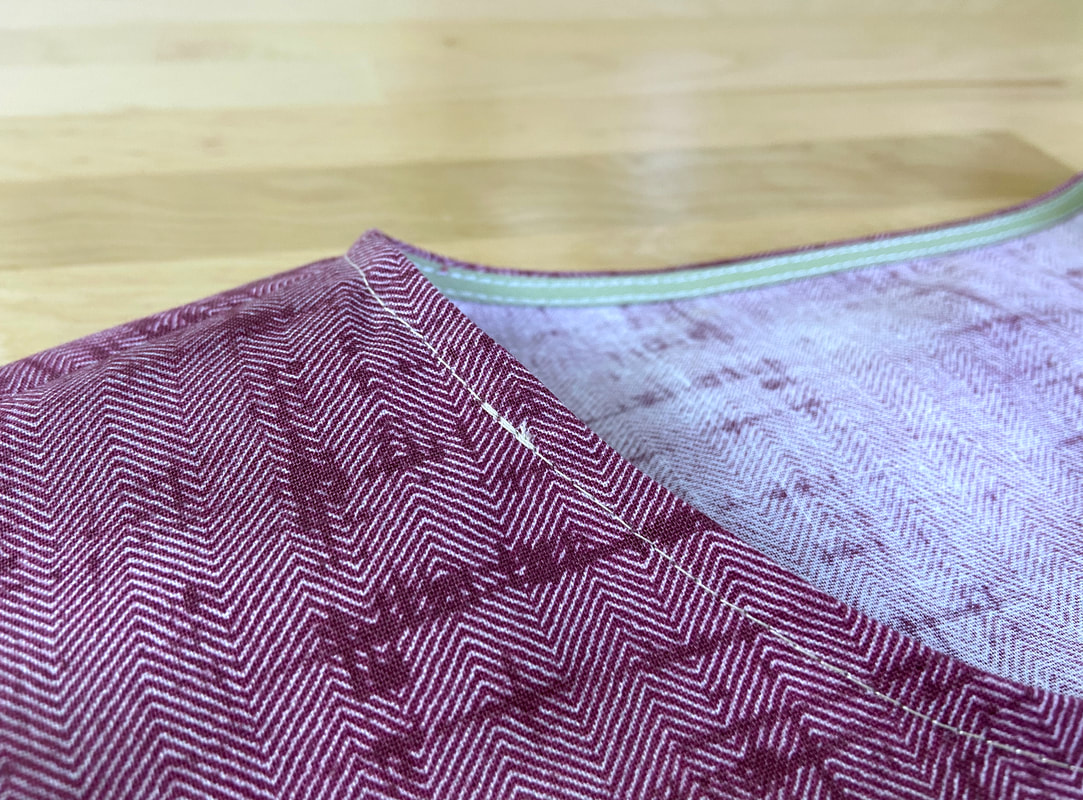
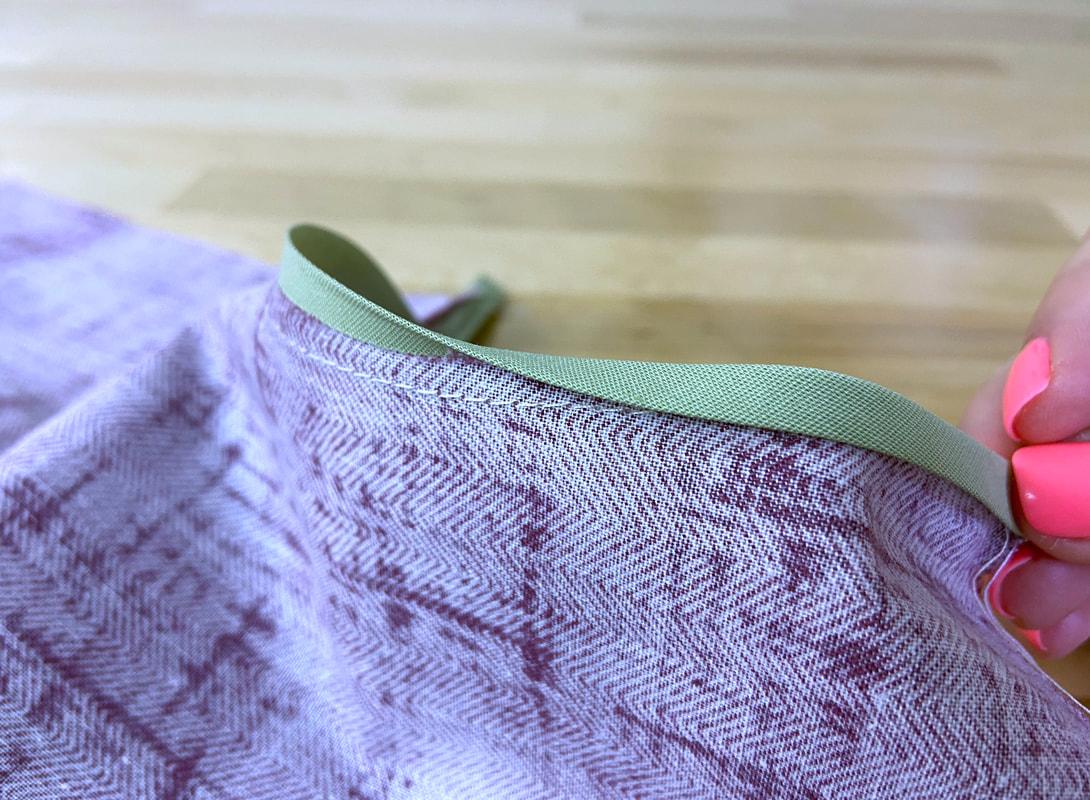
6. From the face side of the garment, topstitch along the binding's bottom fold carefully, keeping the stitch as even along the folded edge as possible.
|
|
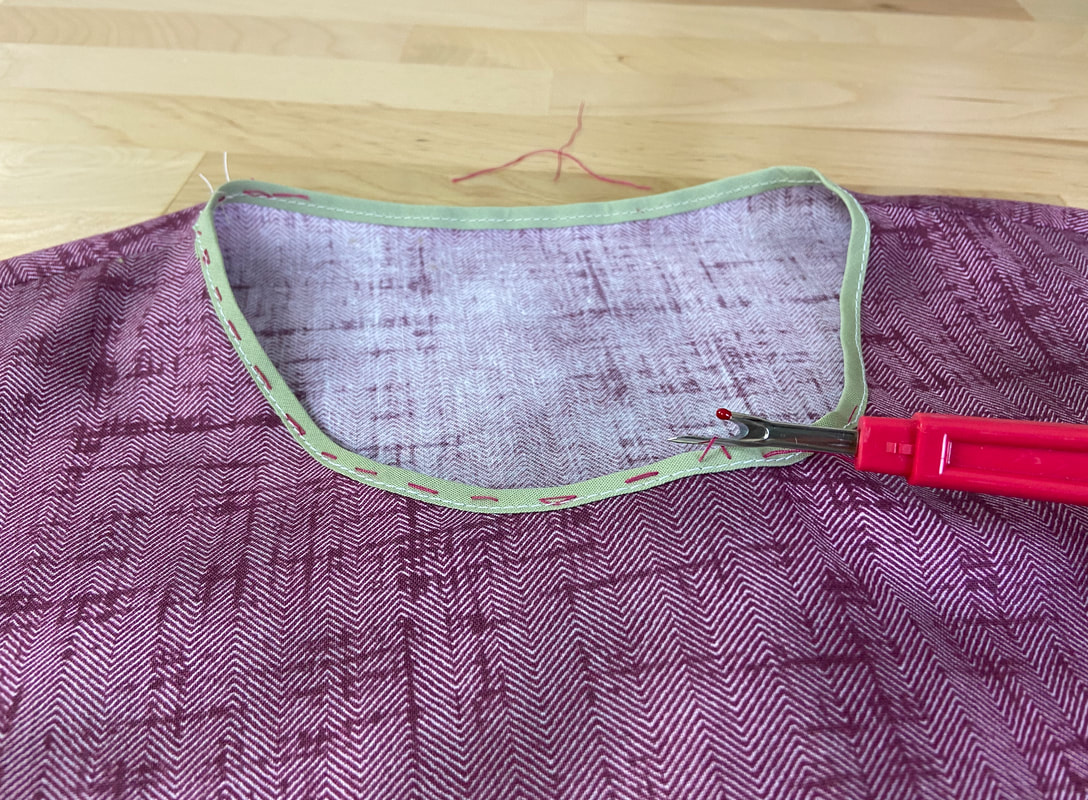
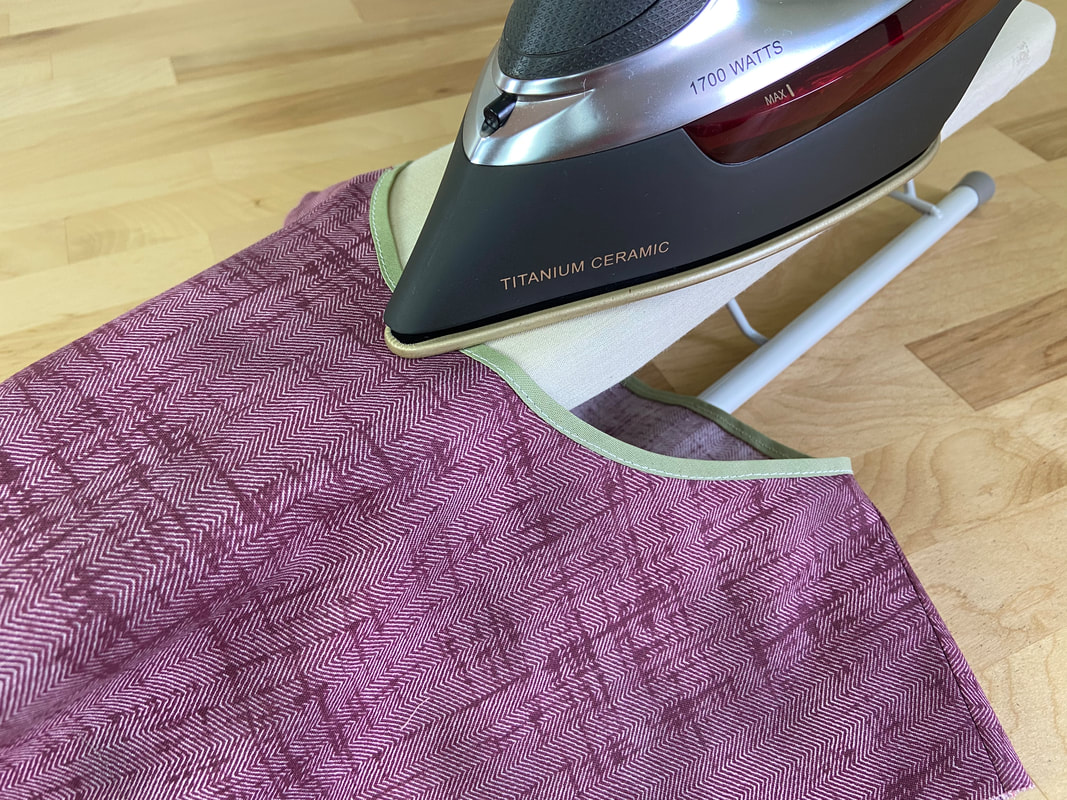
7. Once complete, remove the hand basting stitch and press the finished binding in the direction it was stitched.
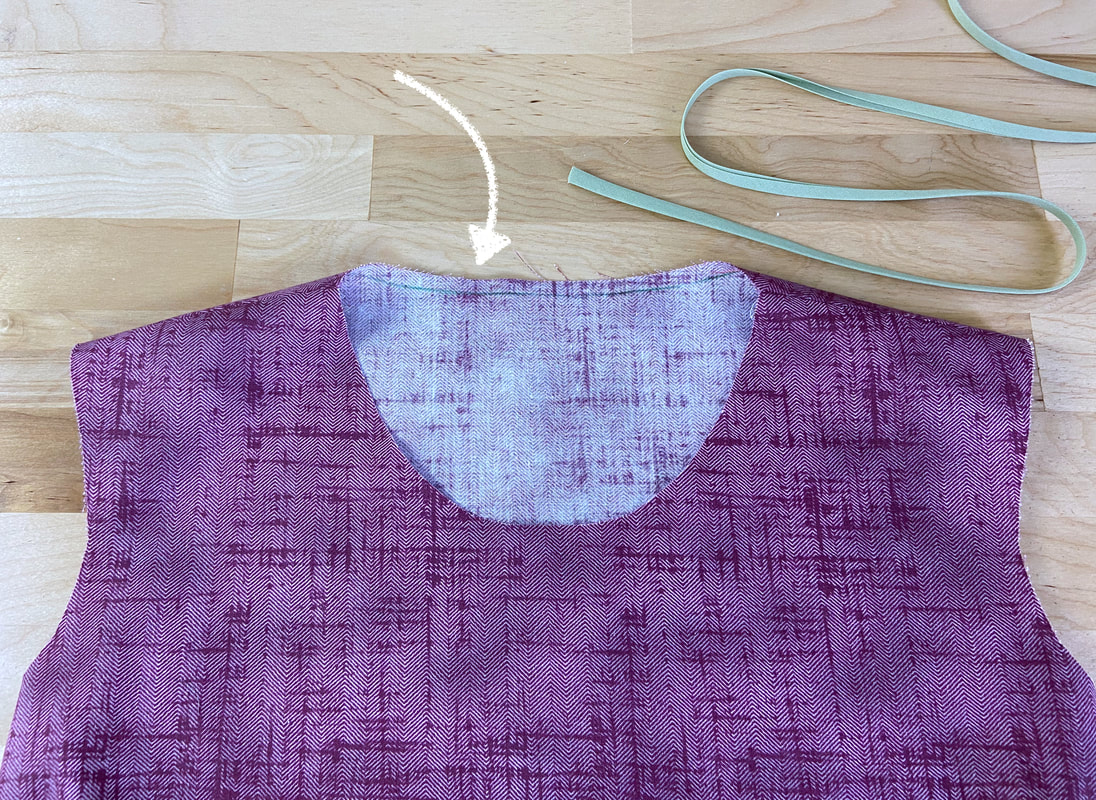
Sewing A Neckline With Hidden Pre-Folded Binding (Topstitched)
|
If you want to sew a pre-folded binding into a non-exposed style, make sure your neckline edge has a seam allowance the same width as that of the folded binding. For example, if using a ¼” double fold binding, the neckline seam allowance should also be ¼”.
1. To sew the binding such that it is enclosed on the inside, with just a topstitch visible along the edge of the neckline, repeat Steps 1-7 described above first.
|
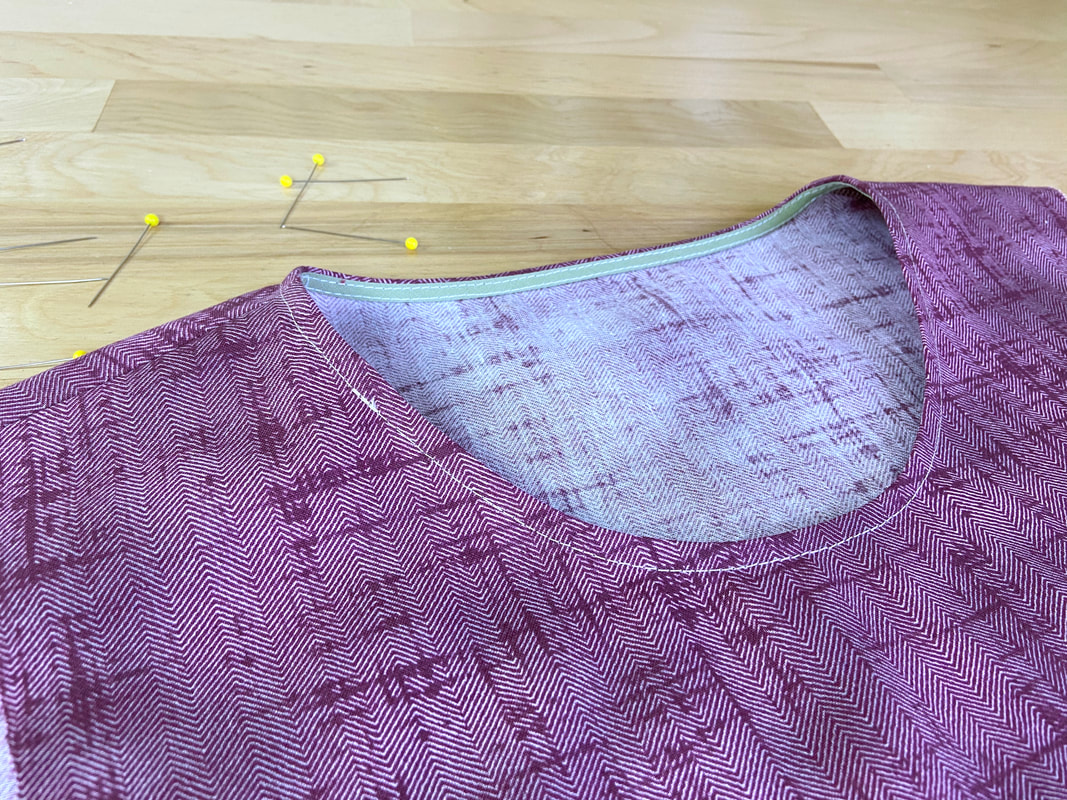
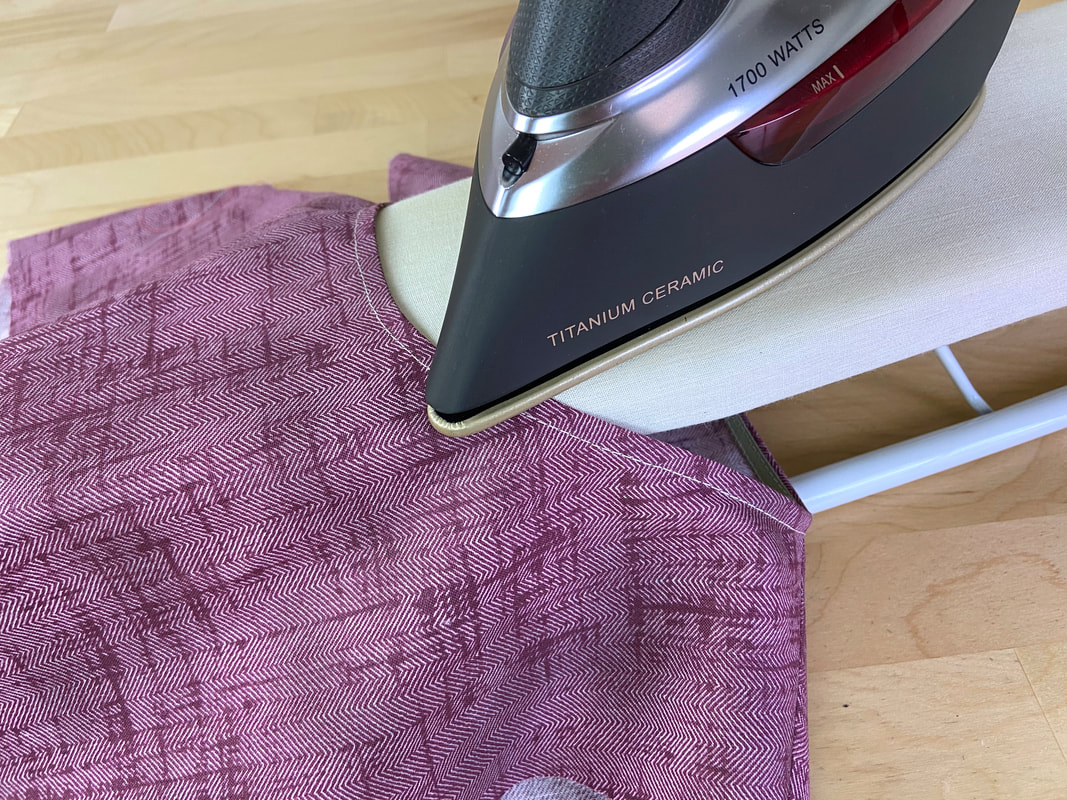
2. Once the binding is attached to the neckline's outer edge (as described above), fold it in one more time towards the inside of the garment. Iron along the neck edge as you fold.
|
3. Insert pins to keep the binding in this position.
Note: For extra stability, hand baste the binding prior to topstitching.
|
4. Working from the wrong side of the garment, stitch the binding along its bottom folded edge as shown.
|
Stitch close to the fold and be careful to keep the stitch as even and smooth as you can in the process. In this case, practice makes perfect!
|
Overlap the end of the stitch with the beginning to lock the threads. This is a cleaner alternative to backstitching.
|
5. Last but not least, iron the finished neckline in the direction the topstitch was applied.
Another Way To Sew Pre-Folded Binding (Suitable For Sewing Beginners)
If you are a sewing beginner, you may find that encasing the edge of a curved neckline into a pre-folded binding is not as easy as it looks. The curved neck edge, especially if the garment is made of slippery, lightweight fabric, can slip out of the binding fold both in the alignment and/or stitching process. If you experience this issue, you may find it easier to attach the pre-packaged binding the same way as you would a single layer binding.
For detailed steps on sewing a single layer binding, check out this tutorial: Sewing A Single Layer Bound Neckline
|
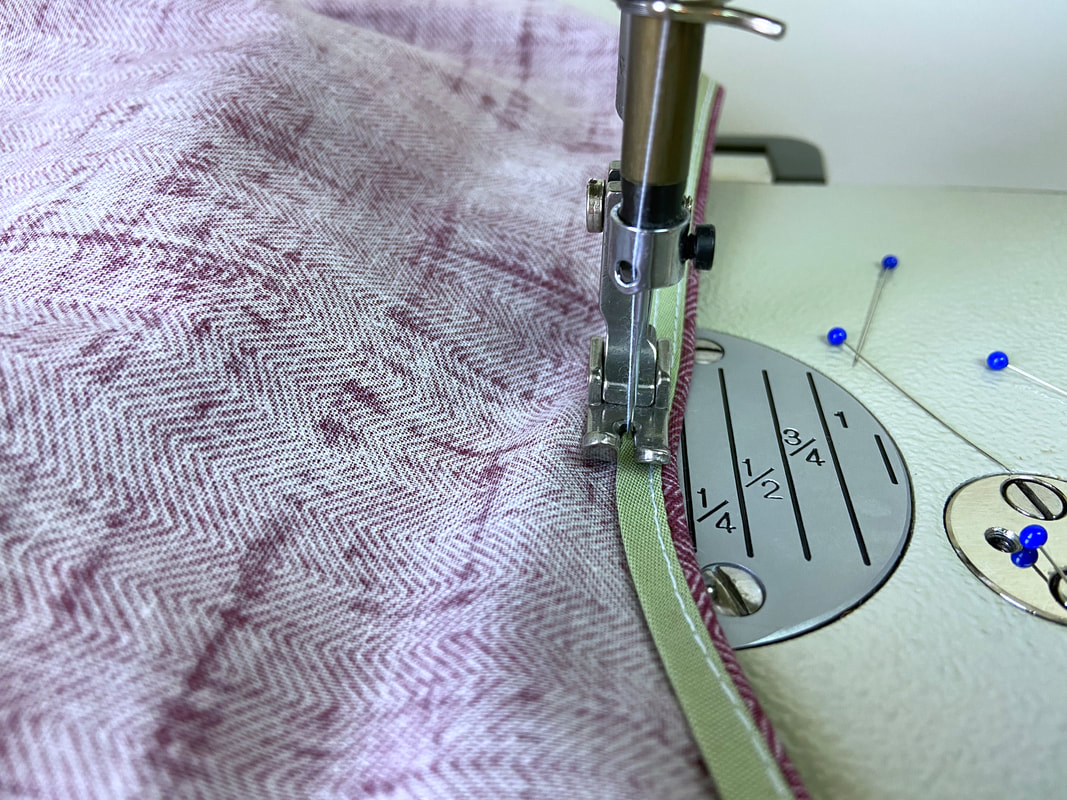
Open the pre-folded binding and align/pin it as a single layer binding.
|
Stitch the binding using the fold lines as a guideline. Remove each pin as you approach it.
|
Since the folds are already creased, they will naturally direct the binding inward, in its natural position. At this point, either topstitch or slipstitch to complete the binding application.
Sewing pre-packaged binding this way is actually easier than sewing single layer binding since the binding's crease lines provide a convenient stitching guide.
Sewing pre-packaged binding this way is actually easier than sewing single layer binding since the binding's crease lines provide a convenient stitching guide.

|
All content, including images and text, may not be copied, replicated, or redistributed without express written permission. This website is regularly screened and monitored for content protection.
|
