
A garment made from the same type of fabric throughout poses less of a sewing challenge than one featuring various fabrics, each behaving differently in the construction process.
If you find yourself in the latter scenario, keep in mind that all fabrics comprising a clothing item should be considered individually in the dressmaking process. Some common examples of unlike fabric seams, and best practices for sewing these special seams, is described in more detail below.
Sewing A Stretchy Knit To A Non-Stretch Woven Fabric
You may be asking yourself- when would I ever need to sew a knit to a woven fabric? After all, if a garment is designed to be fully stretch, it is usually constructed in its entirety from a knit fabric. Vice versa, a garment that requires no stretch is conventionally made from non-stretch woven fabrics. Nevertheless, merging these two structures does occur, and it occurs quite often.
The best example of blending knits with wovens is when rib knit fabric is used on sleeve cuffs, collars and other edge finishes on non-stretch garments.
|
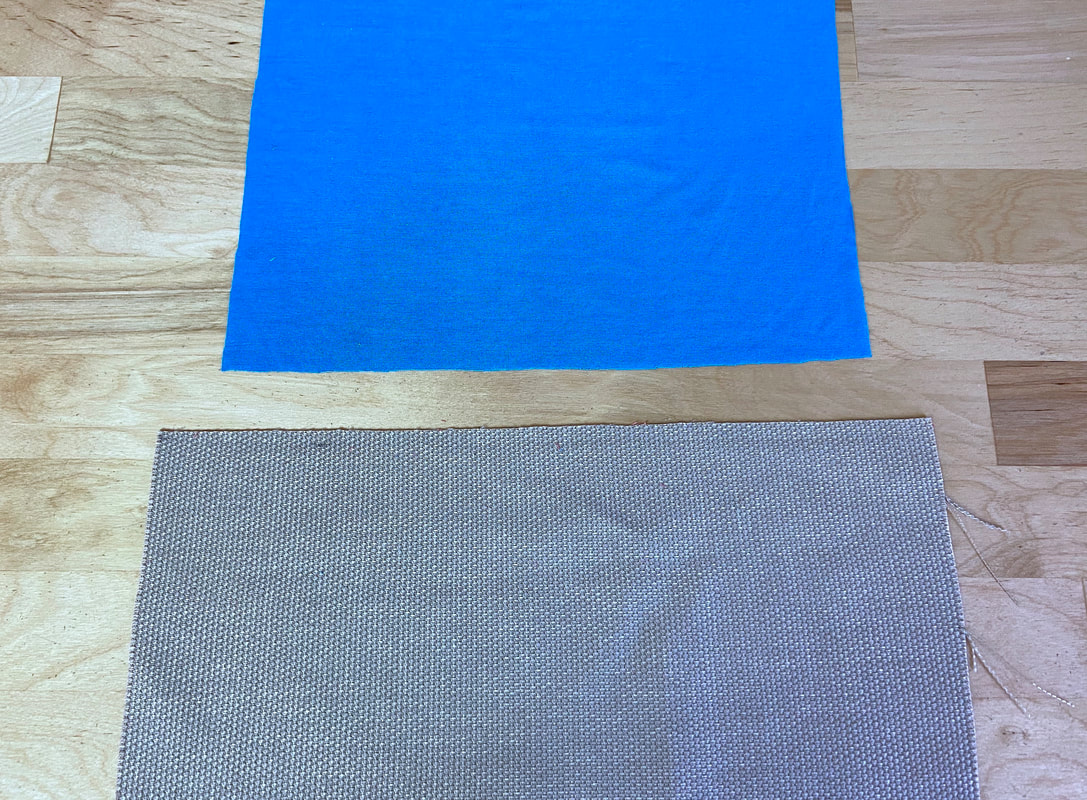
After the knit and woven garment pieces have been cut, you’ll notice that the knit edge is much shorter than its corresponding woven edge. That is because the knit will actually be stretched to the length of the non-stretch fabric edge in the sewing process.
|
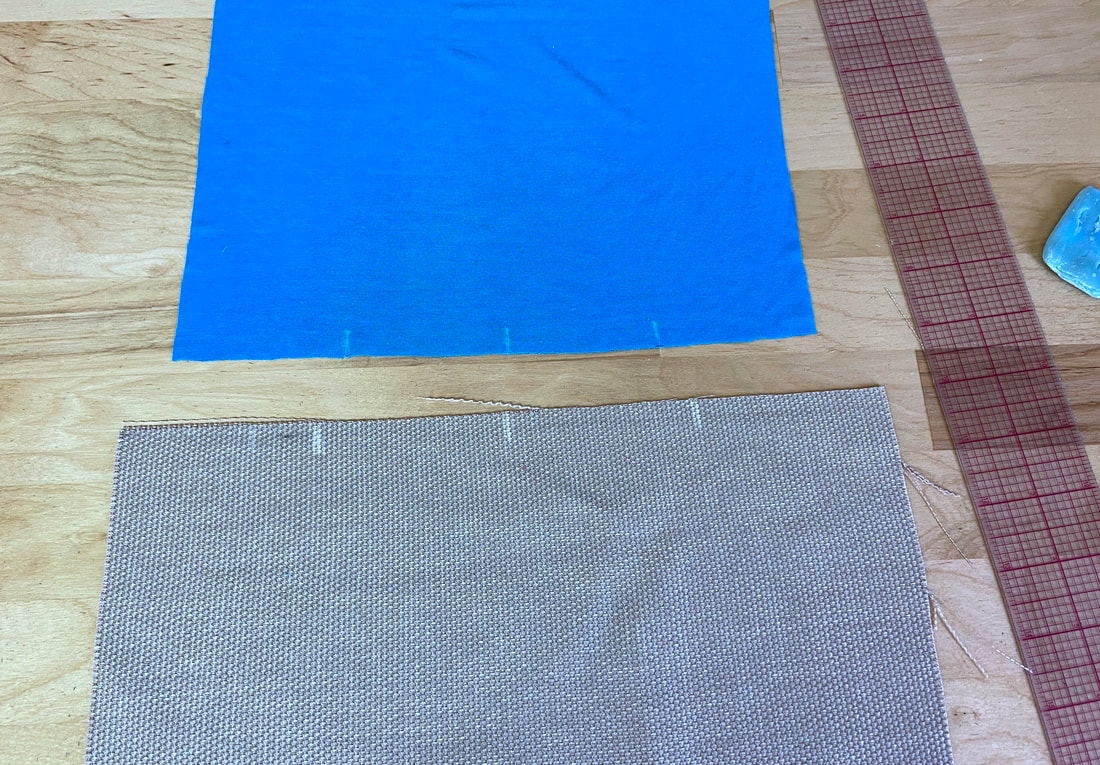
1. Divide both the woven and the knit edges into 4 equal parts (or more, depending on how long the seam is).
To mark these points, you can use a pin, a slash notch or tailor’s chalk. Be careful with the slash notch as this is irreversible and should be done only if it will not affect the seam finishing techniques applied to the finished seam later. In this case, tailor's chalk was used.
|
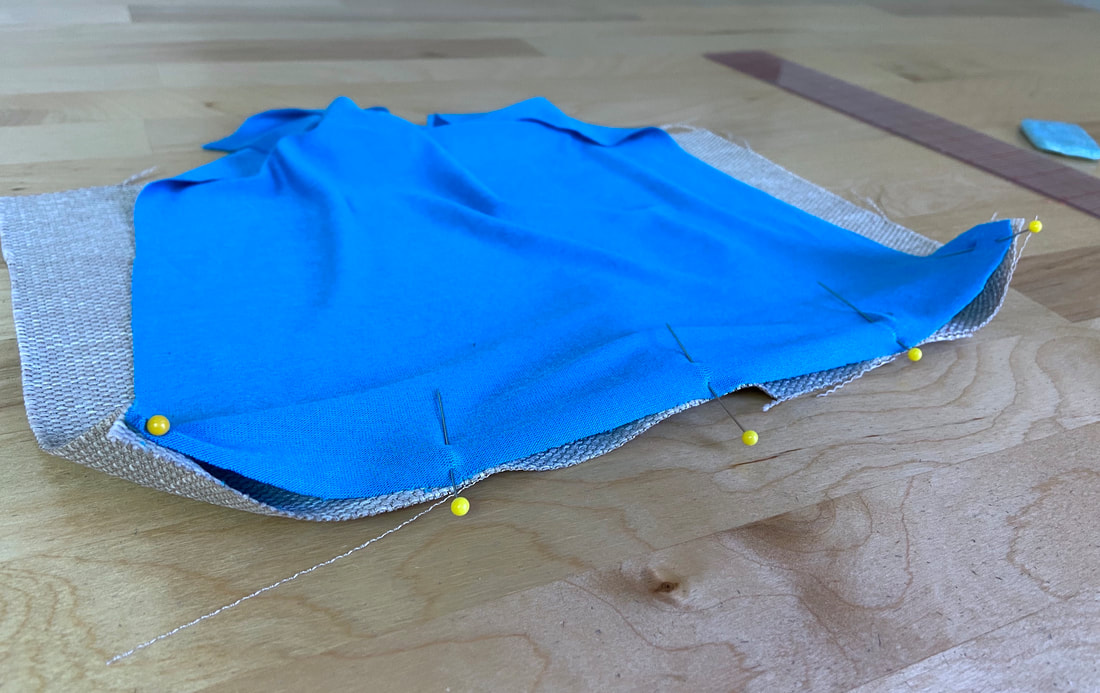
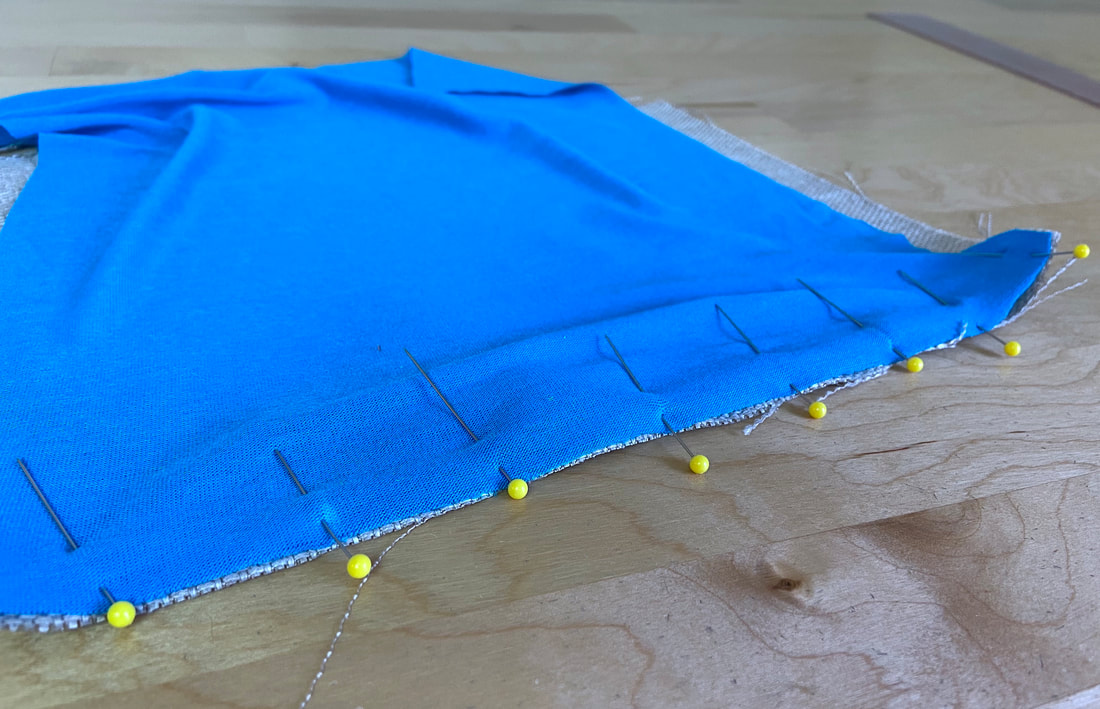
2. Next, place the knit fabric on top of the non-stretch one, and align the corresponding marks to one another as shown. Insert a pin horizontally at each location.
As you match the points on the knit to the ones on the woven fabric, the woven will bunch up underneath when the knit isn’t stretched. On the other hand, when the knit is stretched, the edges should match up perfectly between each pin.
|
3. Stretch the knit from pin to pin to match the two edges, and insert additional pins perpendicularly while the knit is in this outstretched position. The extra pins will add stability to the seam layers in the machine stitching process, while also maintaining the correct knit distribution in between each central pin.
You may also choose to hand baste for extra stability. As you hand baste, be sure to keep the knit stretched to match the non-stretch edge underneath.
|
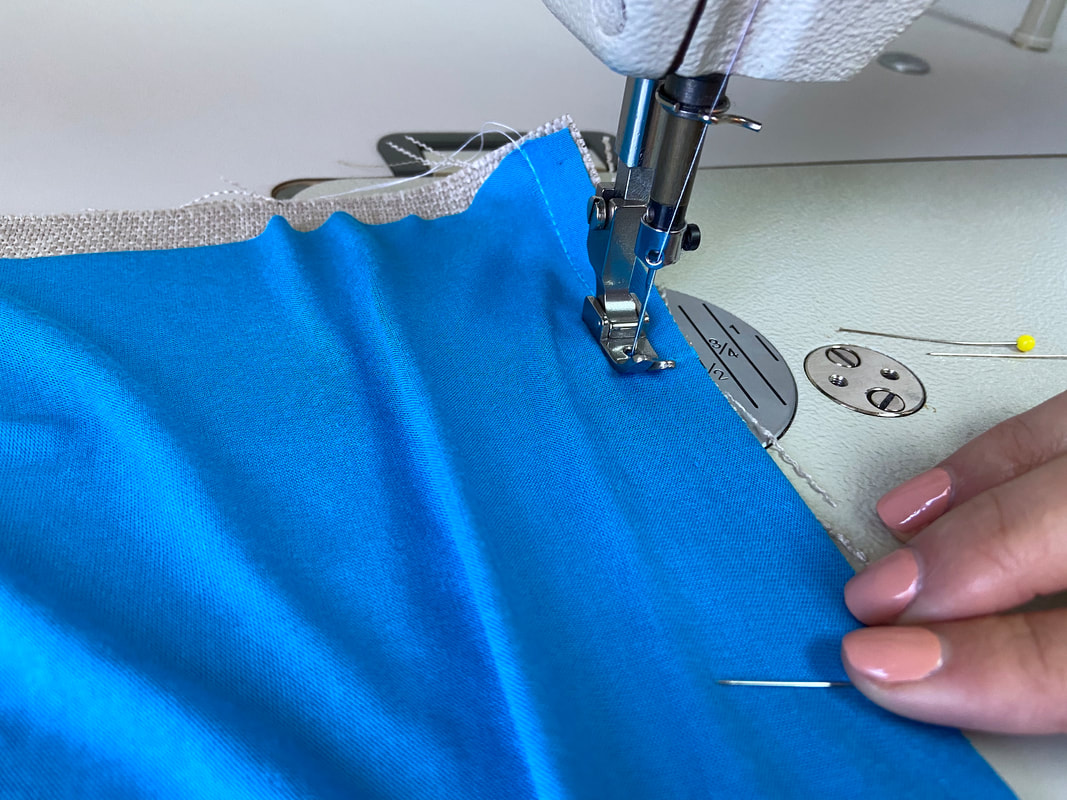
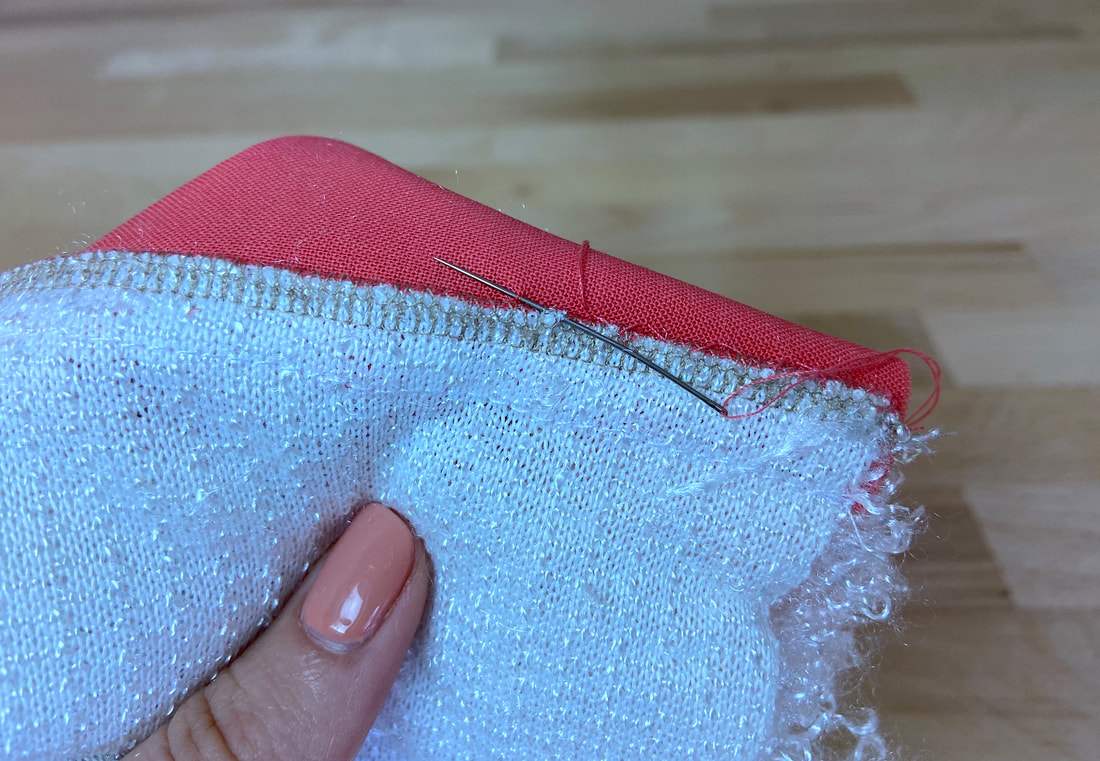
4. With the knit layer facing up, stitch the seam at the designated seam allowance (1/2” in this case), stretching the top knit layer gently until the plain edge underneath is smooth and lays flat. Continue stretching and stitching until the seam is completed.
|
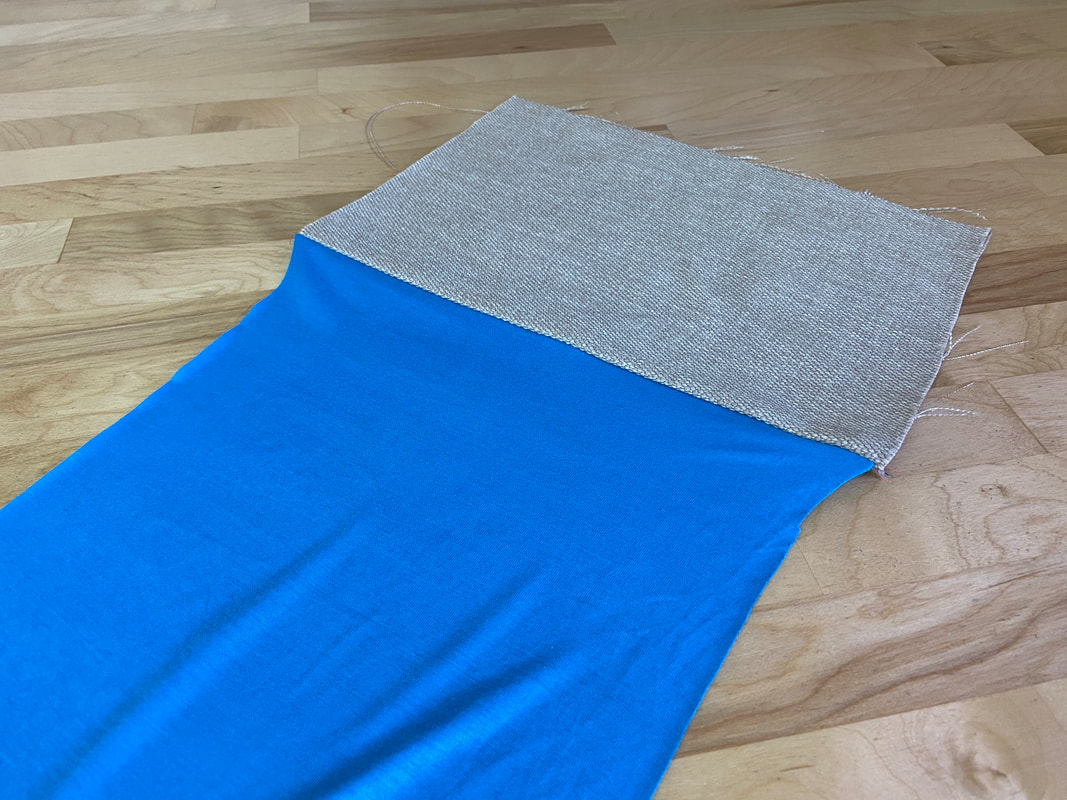
5. The stitched seam will not pucker or gather but rather gently transition to a narrower stretch portion.
|
The seam allowance edges are conventionally trimmed and finished together with an overedge stitch.

|
As a final step, the seam allowance edges are ironed toward the non-stretch fabric layer as shown.
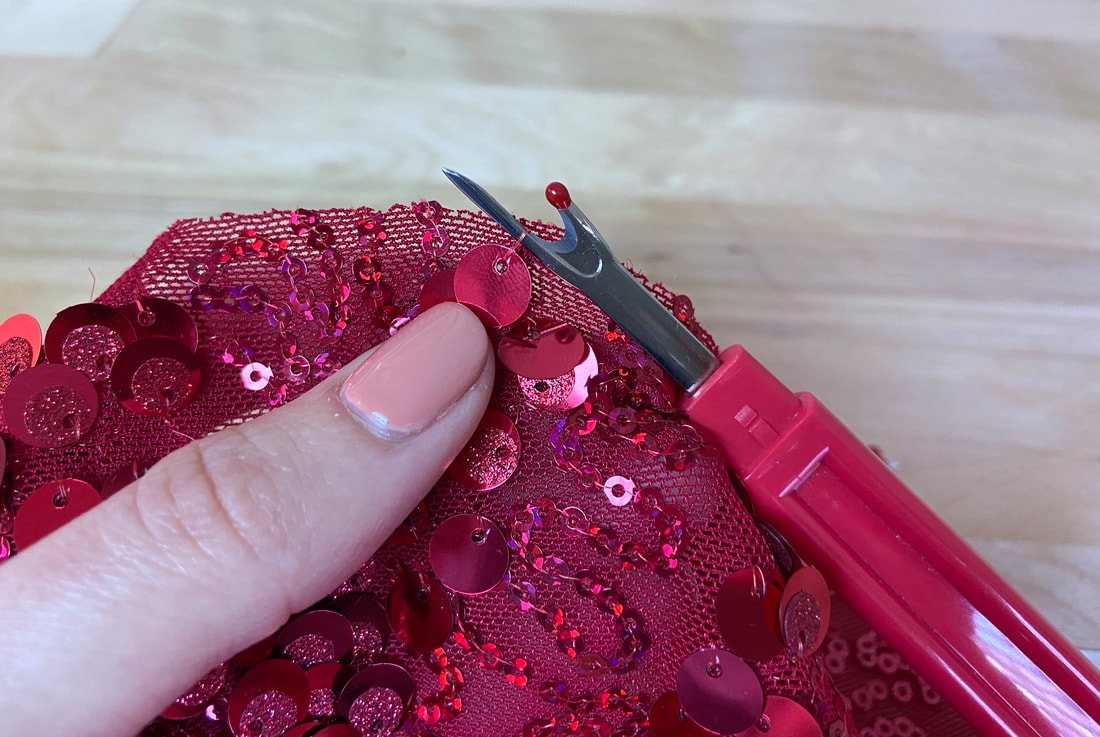
Sewing Decorative Fabric To Plain Fabric
What happens when two fabrics have the same amount of stretch but one is heavily decorated while the other is not? This type of seam may be somewhat limiting in terms of seam allowance finishes. However, with a little preparation, the seam itself can be aligned and stitched like any regular seam.
|
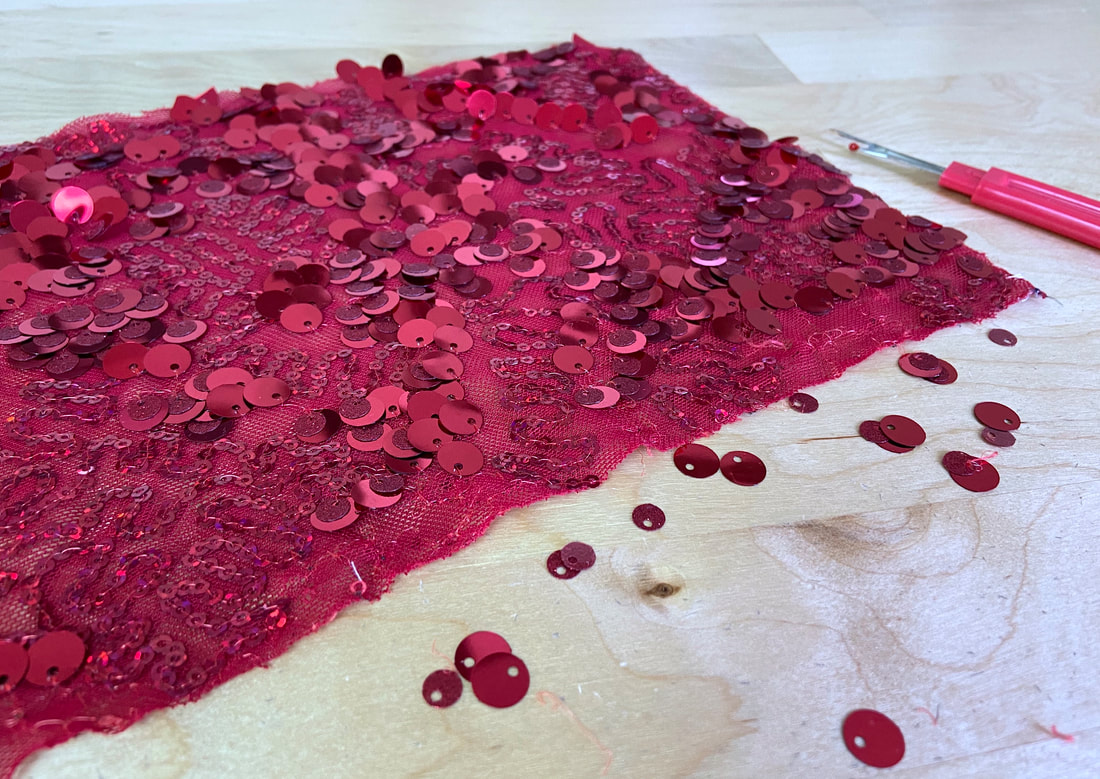
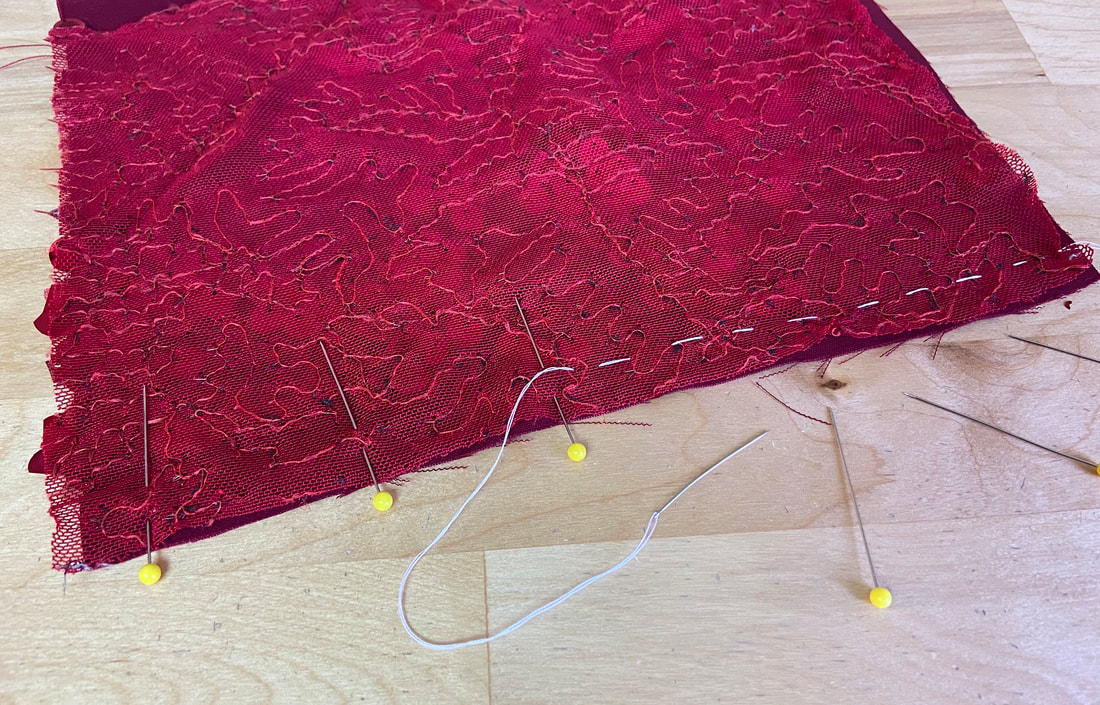
1. Remove the decorative elements, such as thick sequins and/or beading, from the seam allowance area of the decorative edge. They should be pretty easy to remove using a seam ripper.
|
Stop removing the decorative elements right along the seamline.
|
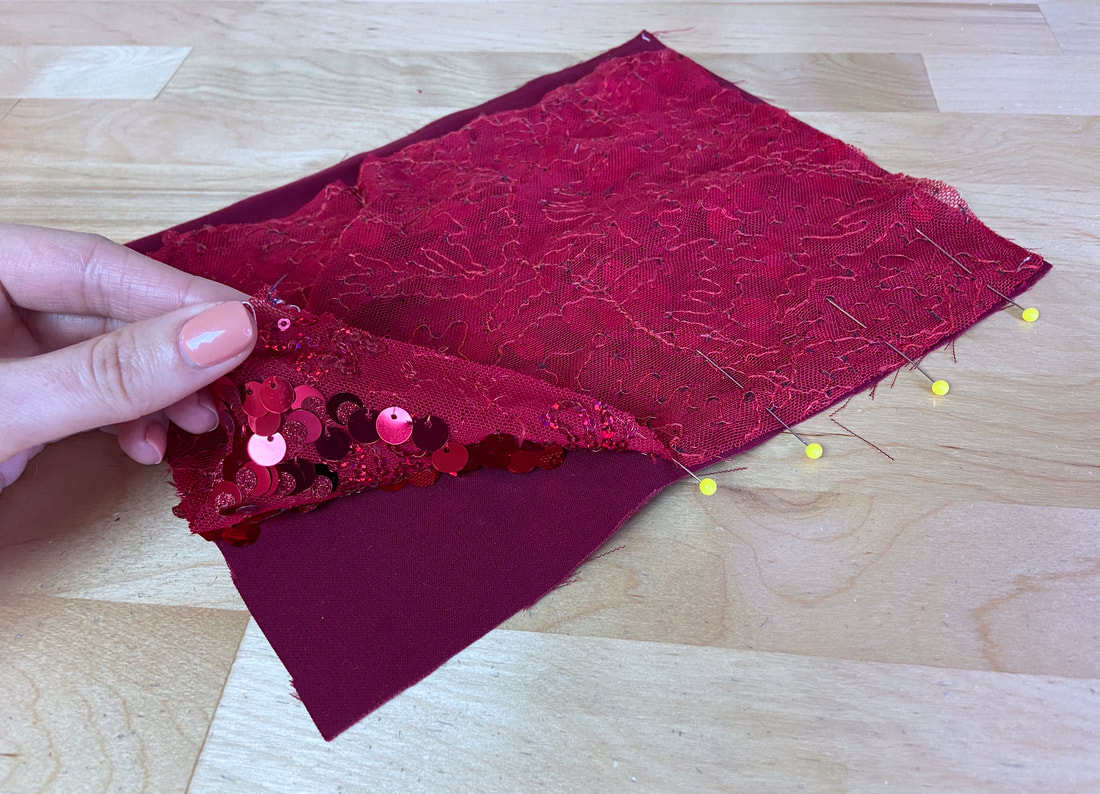
2. Align the plain fabric edge to the corresponding decorative edge with face sides touching as shown. Insert pins perpendicular to the edge to keep the layers together.
|
Due to the bulky nature of the decorative fabric, the layers will slip away from each other in the stitching process if they are only held by pins alone. It is good practice to hand baste the two layers together to keep them perfectly aligned during machine stitching.
If working with flimsy, slippery fabrics, use a denser basting stitch for extra stability.
|
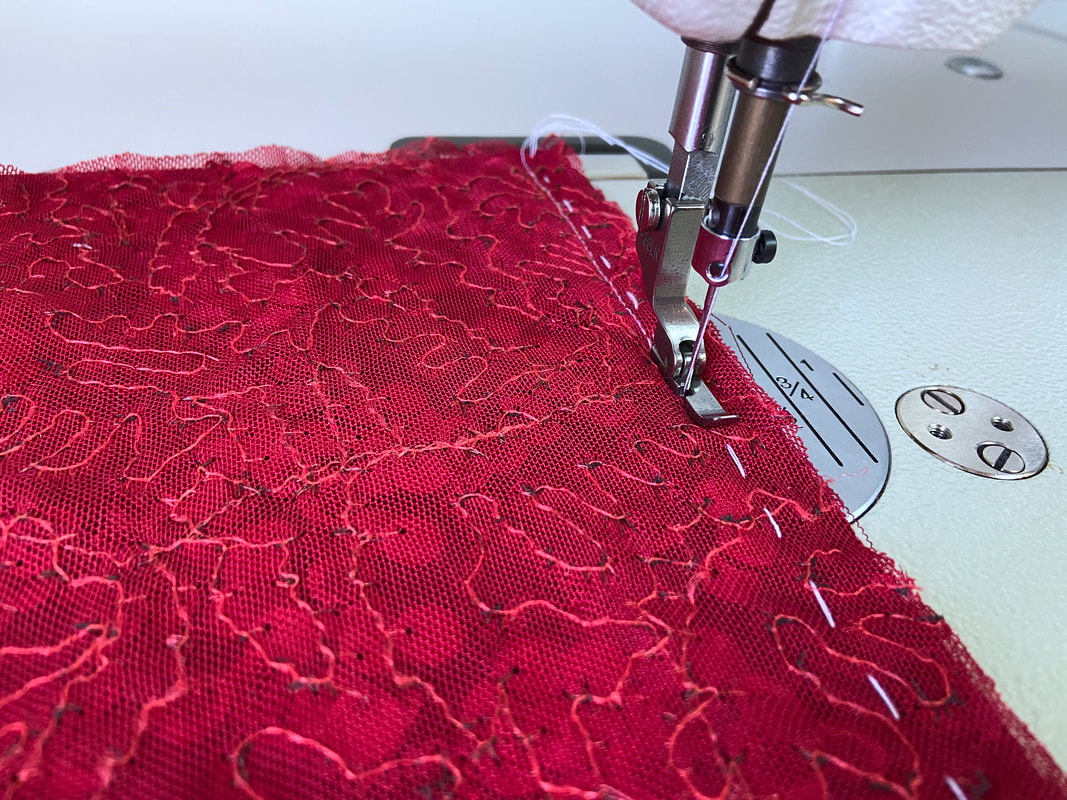
3. With the decorative fabric layer facing up, stitch the seam using a zipper foot. A zipper foot allows you to stitch right next to raised edges by aligning the machine needle to the left or right of the presser foot edge.
In this case, since the decorative fabric layer is positioned on top, the machine needle should be aligned to the left of the presser foot edge as shown.
Stitch right next to the decorative elements (you will feel them in between the two layers as you stitch) following the seamline and machine seam allowance guides.
Be careful not to catch any of the decorative elements as you stitch or you risk breaking the needle in the process. With a zipper foot, the machine needle will align intuitively next to raised decorative edges.
|
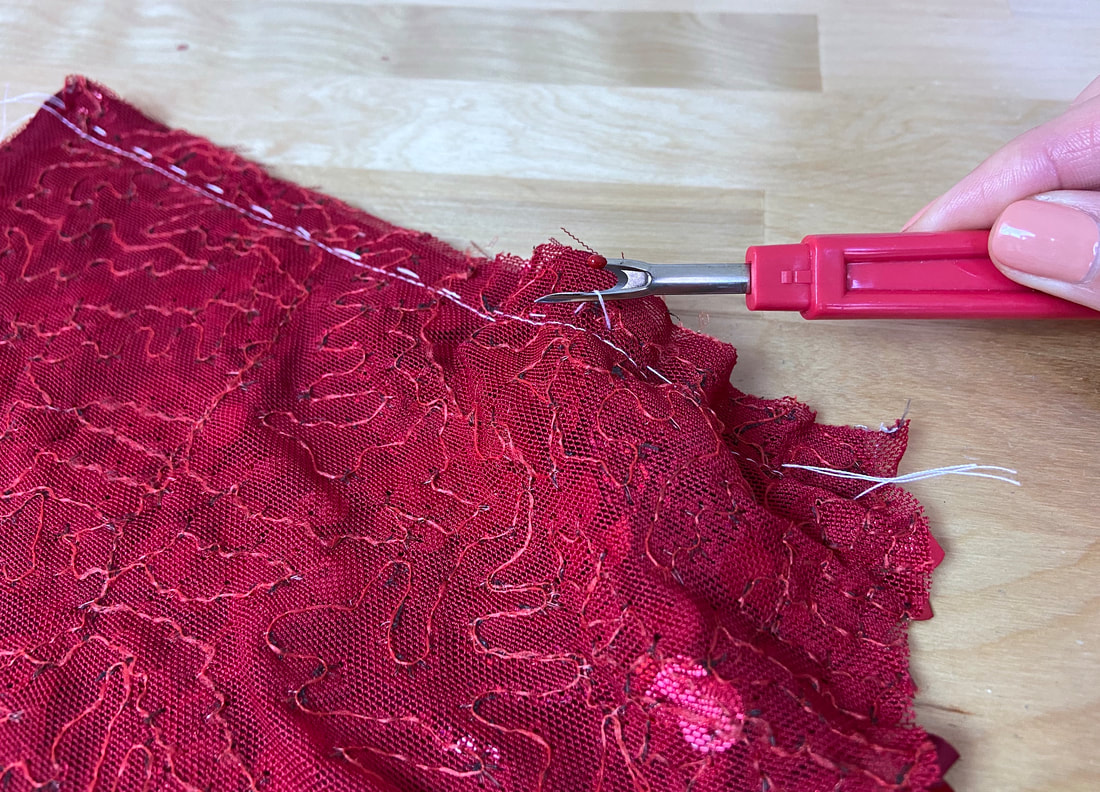
4. Once the stitch is applied, remove the hand basting using a seam ripper.
|
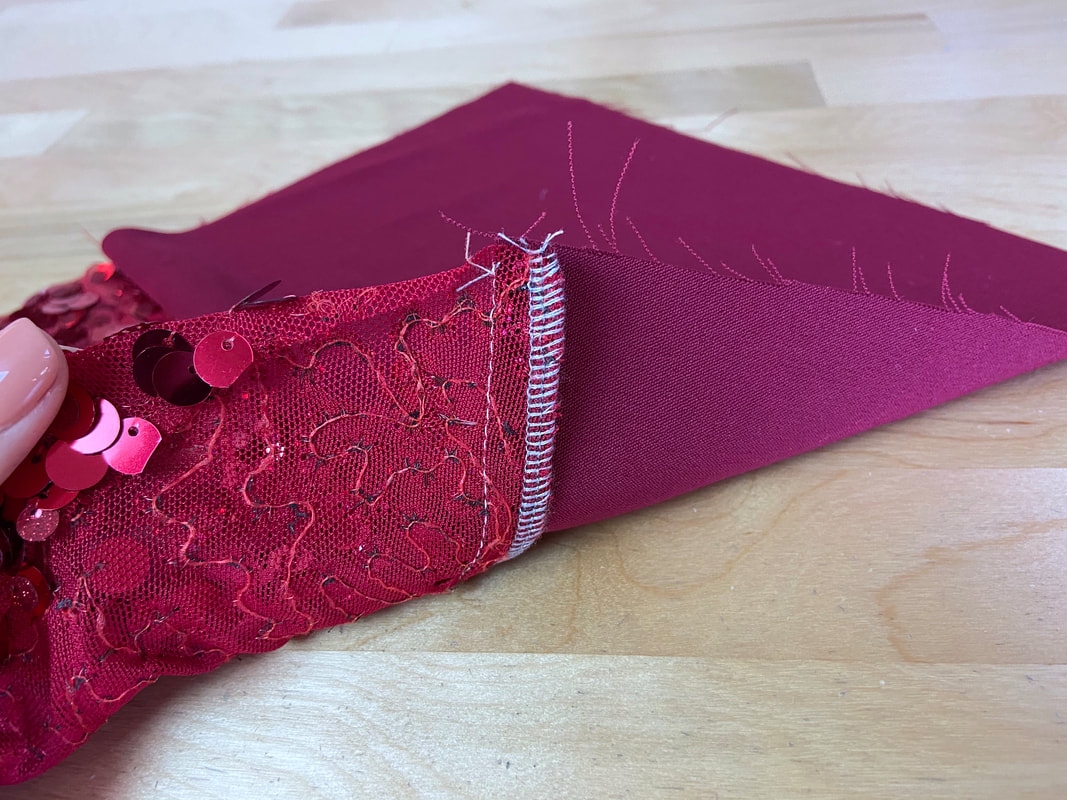
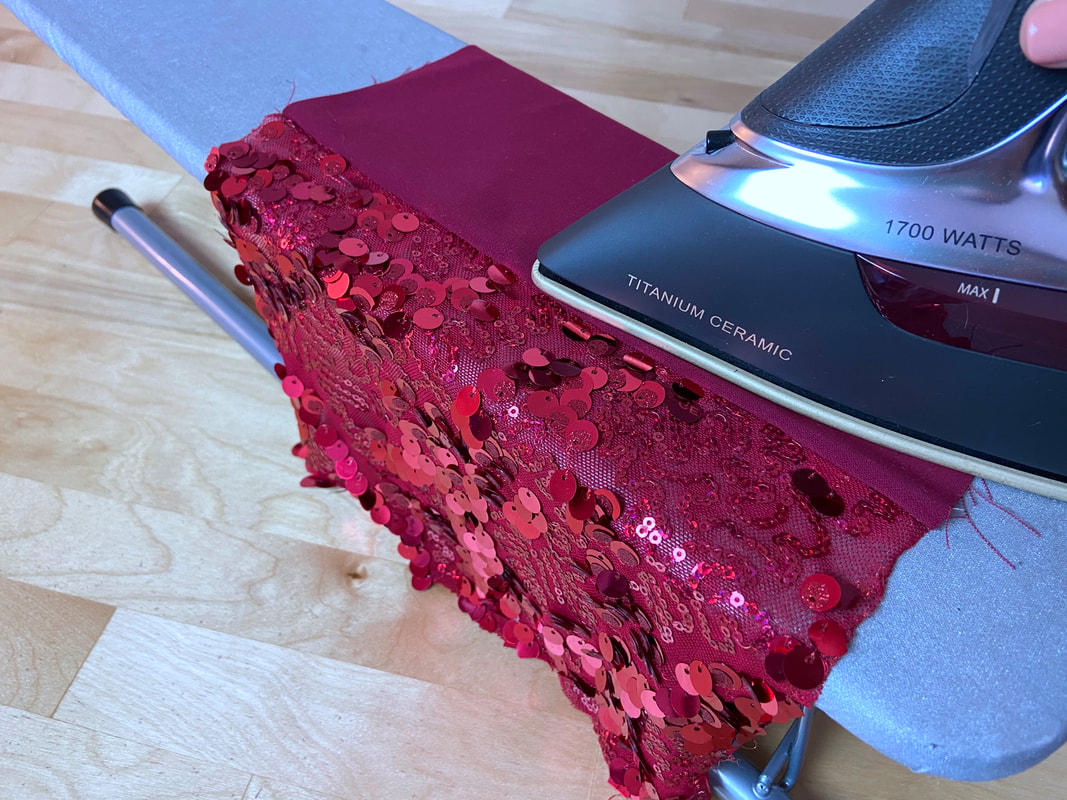
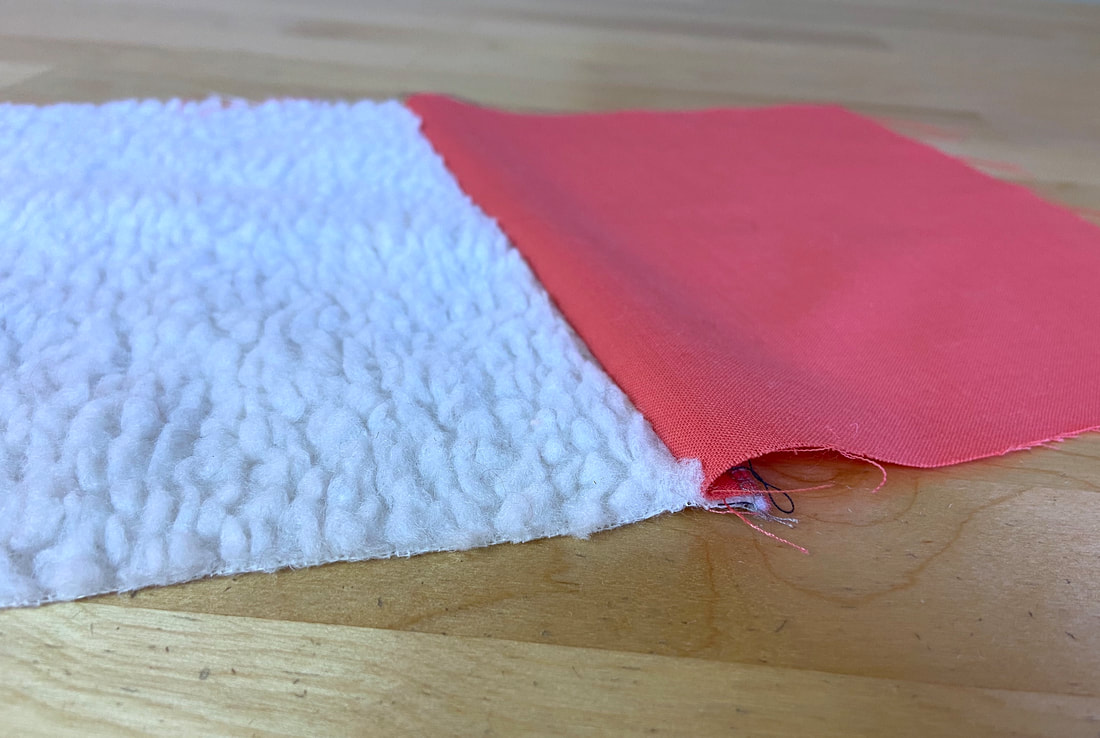
5. With a decorative-plain seam, the seam allowance edges are usually finished together and directed towards the plain fabric layer.
|
You will not be able to iron directly on the beading or sequins, so be very careful when pressing the finished seam.
Keep in mind that you will also not be able to topstitch directly on the decorative side.
The seam finishing technique you choose should be considered based on both fabrics, with particular consideration of the plain one since the seam allowance will be located underneath it.
Sewing High Pile Fabric To Plain Fabric
Similar to sewing decorative-to-plain seams, stitching a high-pile fabric to a plain one requires some extra preparation.
If the pile is long, you can trim it before or after the seam is stitched. It is up to you to decide at which stage to remove it. Traditionally, long pile is trimmed after the seam has been stitched.
|
|
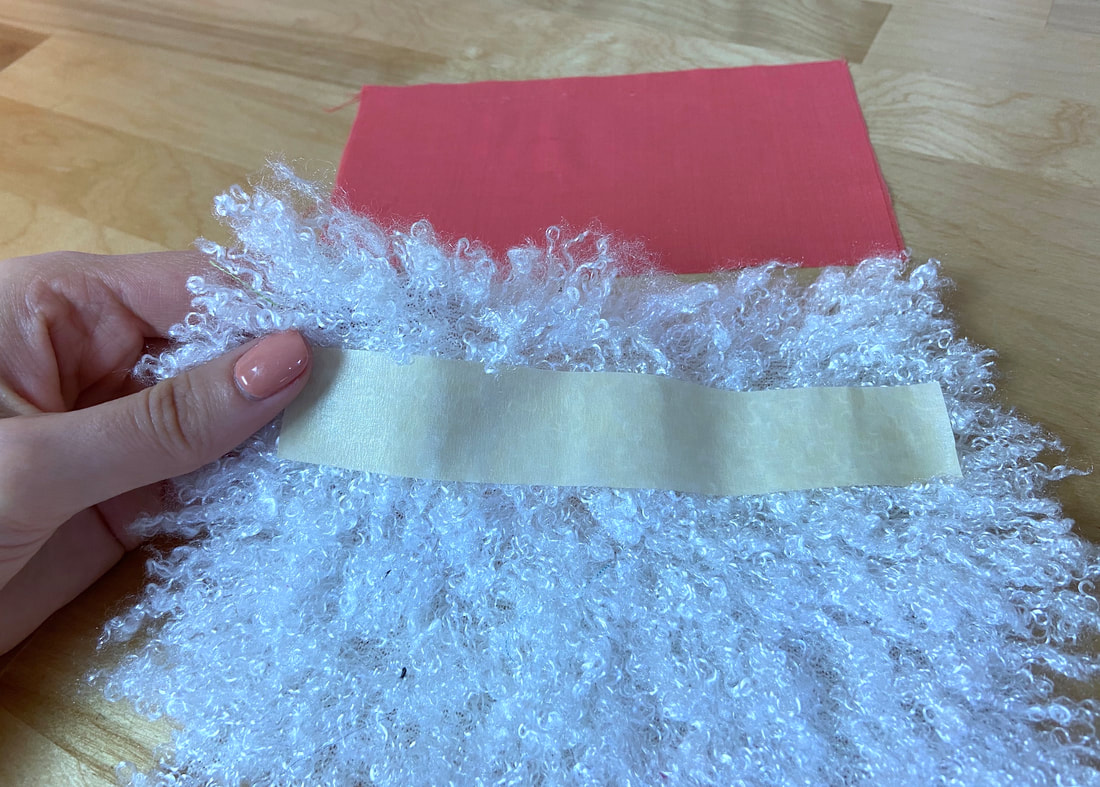
1. It may be helpful to use masking tape along the seamline of the high pile to keep the fibers pointing away from the seam allowance area during stitching. Doing so will prevent the long fibers from accidentally getting caught in the machine stitch.
|
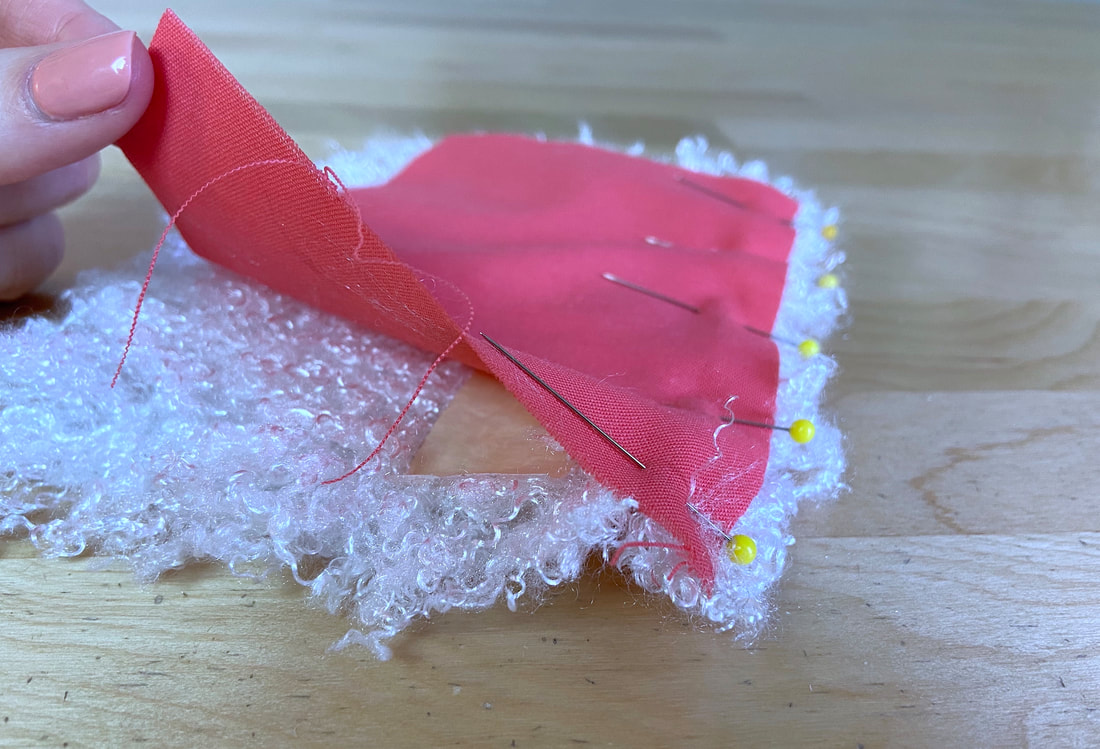
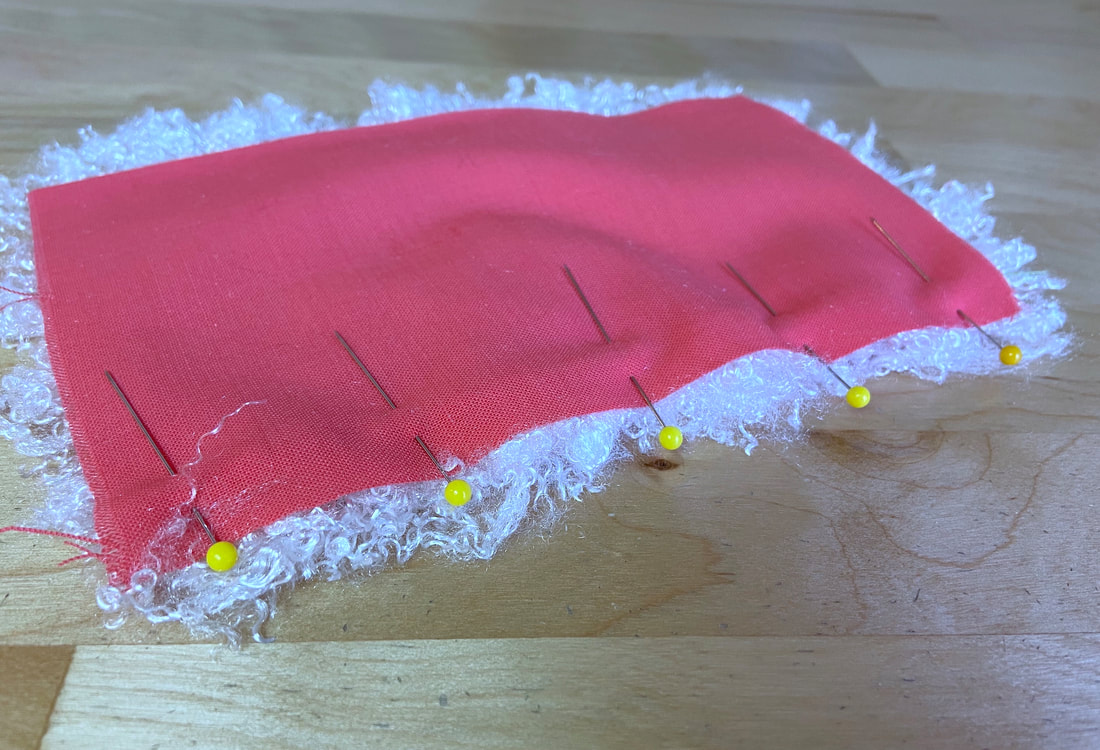
2. Align the two seam edges with face sides touching as shown. Insert pins perpendicularly to keep this alignment in place.
|
3. The face side of pile fabric is often slippery so it is good practice to use a hand basting stitch to keep the seam layers together during the stitching process.
|
4. Machine stitch the seam with the plain fabric on top. If the pile fabric is napped, always stitch in the direction of the nap.
|
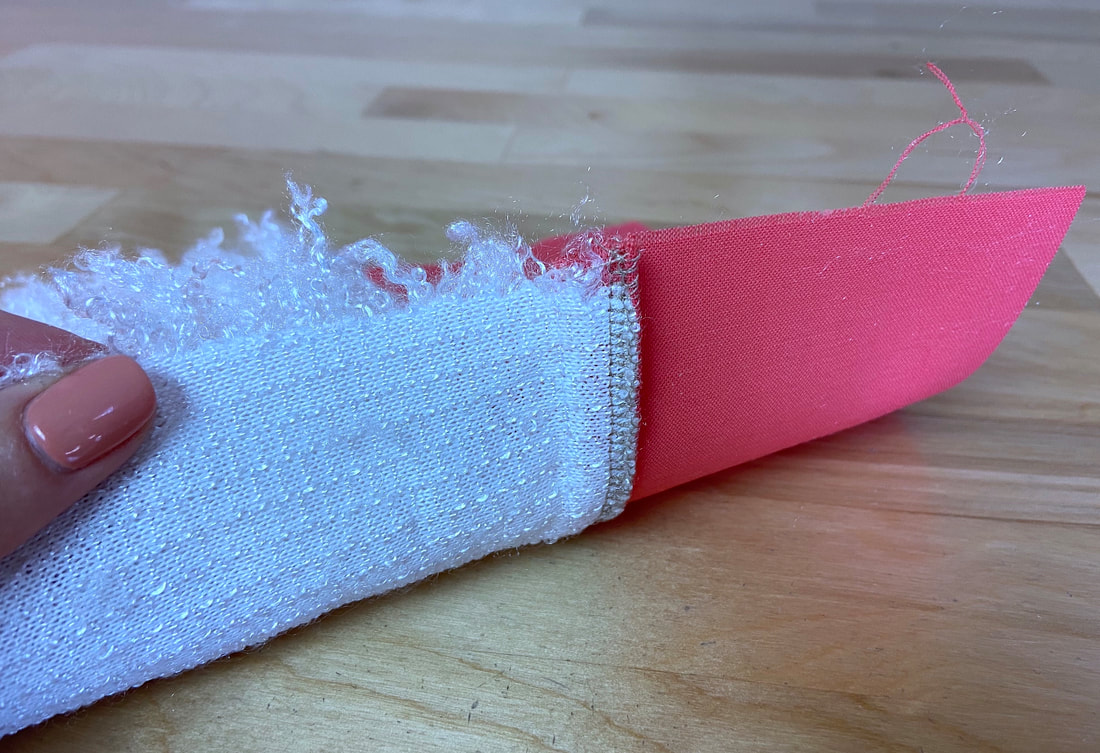
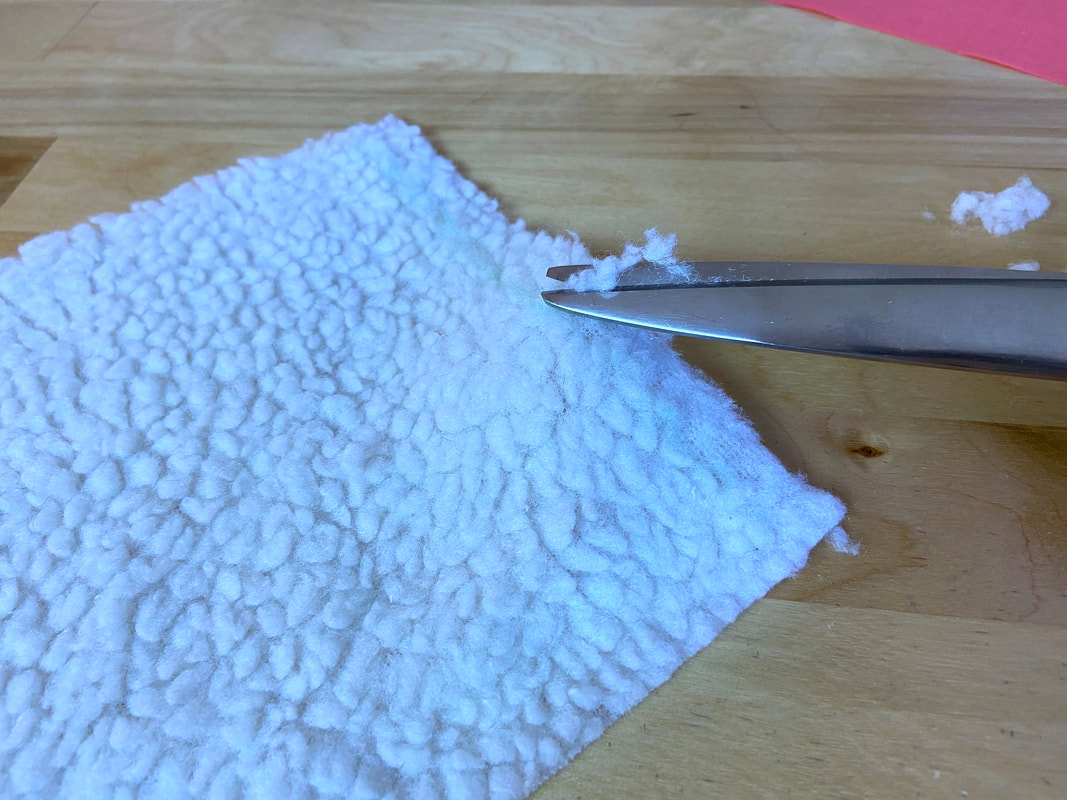
5. Once machine stitched, remove the hand basting using a seam ripper. If you haven’t trimmed the pile in Step 1, do it now prior to applying a seam finish.
|
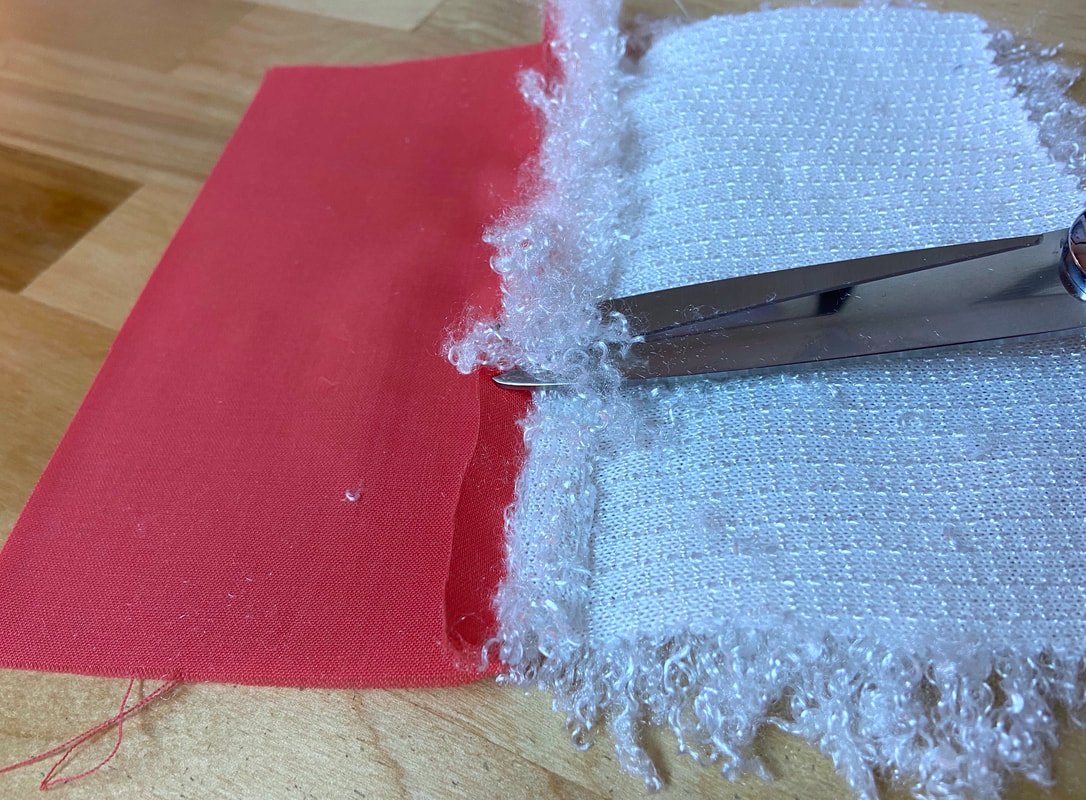
However, before you trim the pile, it is imperative that you pull any pile fibers that are caught in the seamline toward the right side of the seam. To do this, use a pin or the end of a hand sewing needle to gently pull the pile that is caught within the stitching.
|
Important: Only after the seam is cleared from excess fibers, you can finally trim or shave the pile from the seam allowance layer.
|
|
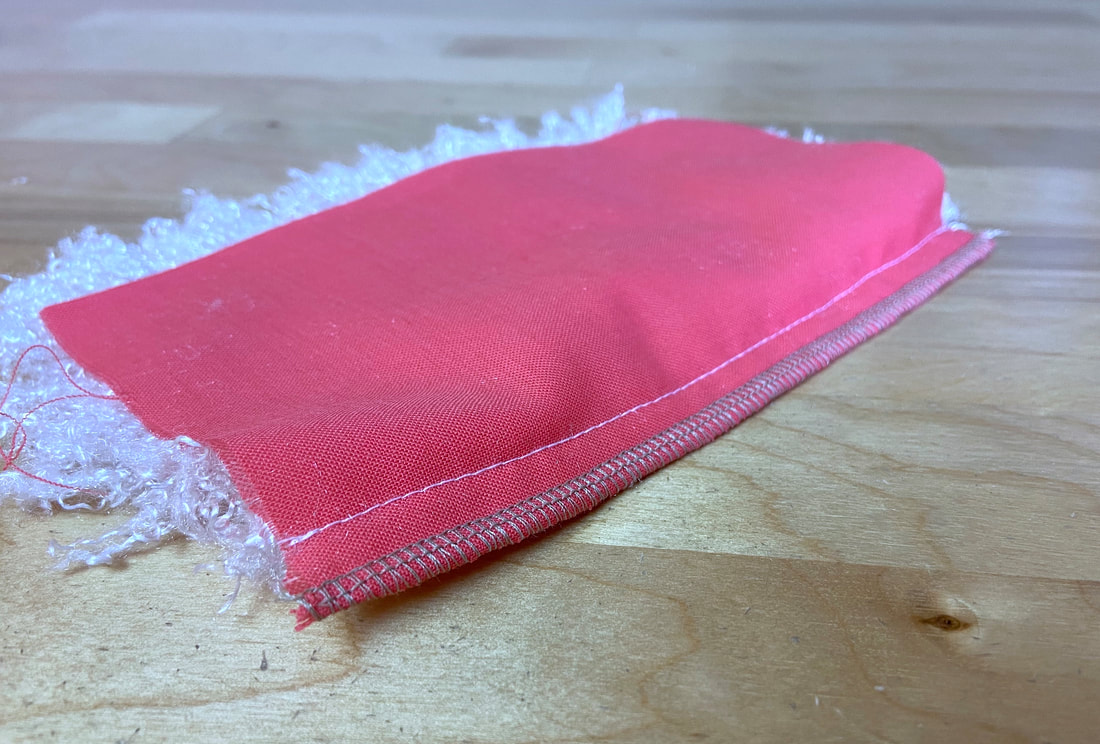
6. To further reduce bulk, you may need to trim the seam allowance layers before clean finishing them. If they will be finished together, as they usually are for this kind of seam, always direct them towards the plain fabric edge. This will distribute the bulk evenly within the seam.
|
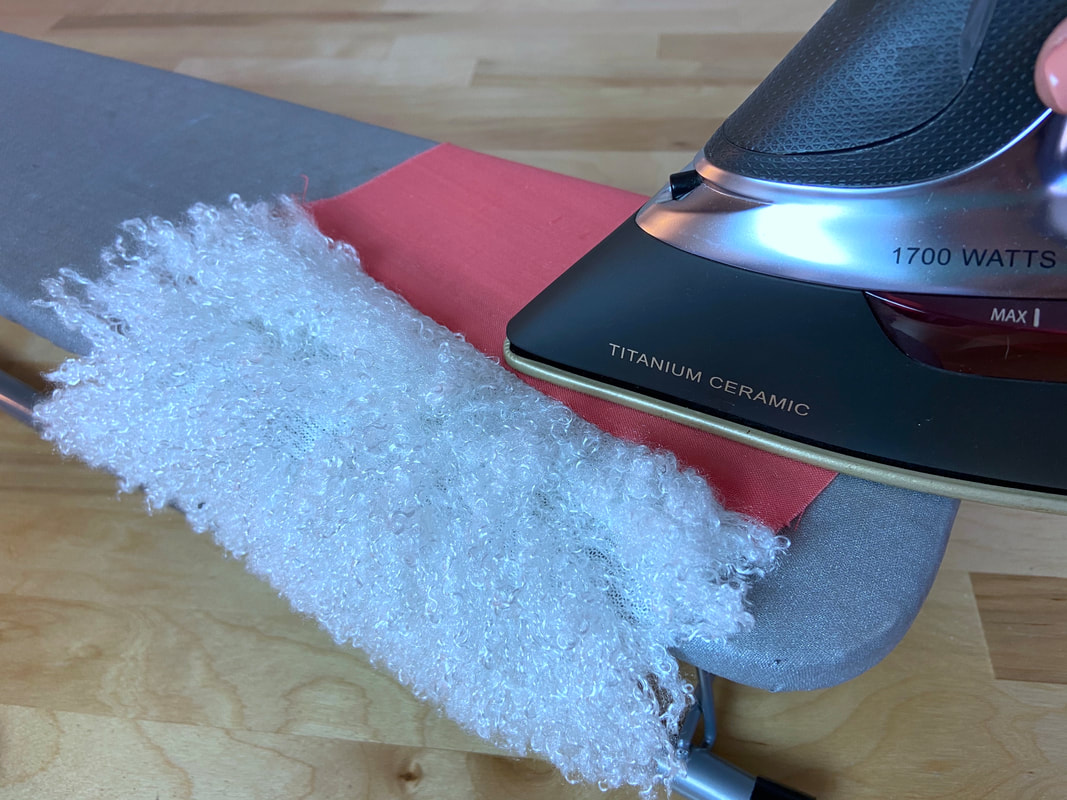
7. Similar to sewing a heavily decorative seam (described above), you may not be able to iron directly on top of the pile. In this case, you can carefully press the seamline with the tip of the iron on the plain fabric side only.
|
If ironing is not an option, thumb press and blindstitch the seam allowance to the wrong side of the garment layer as shown above.
|
|
Note: If the pile is dense and short, trim or shave it from the seam allowance surface prior to aligning and stitching the seam.
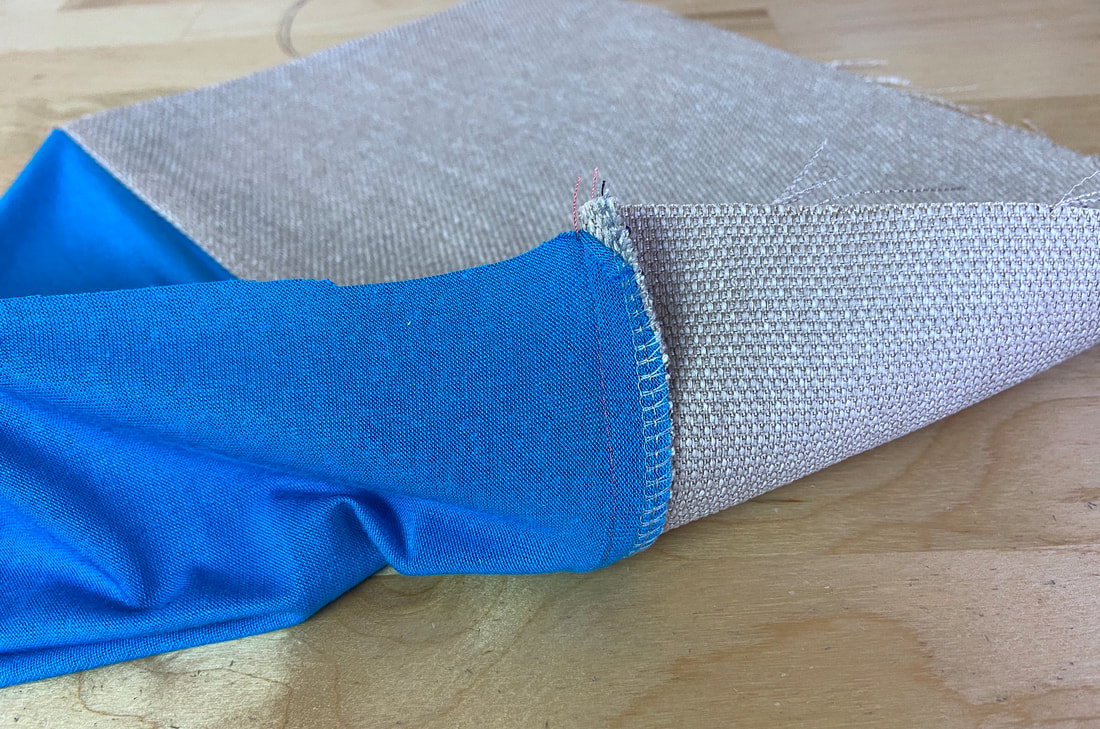
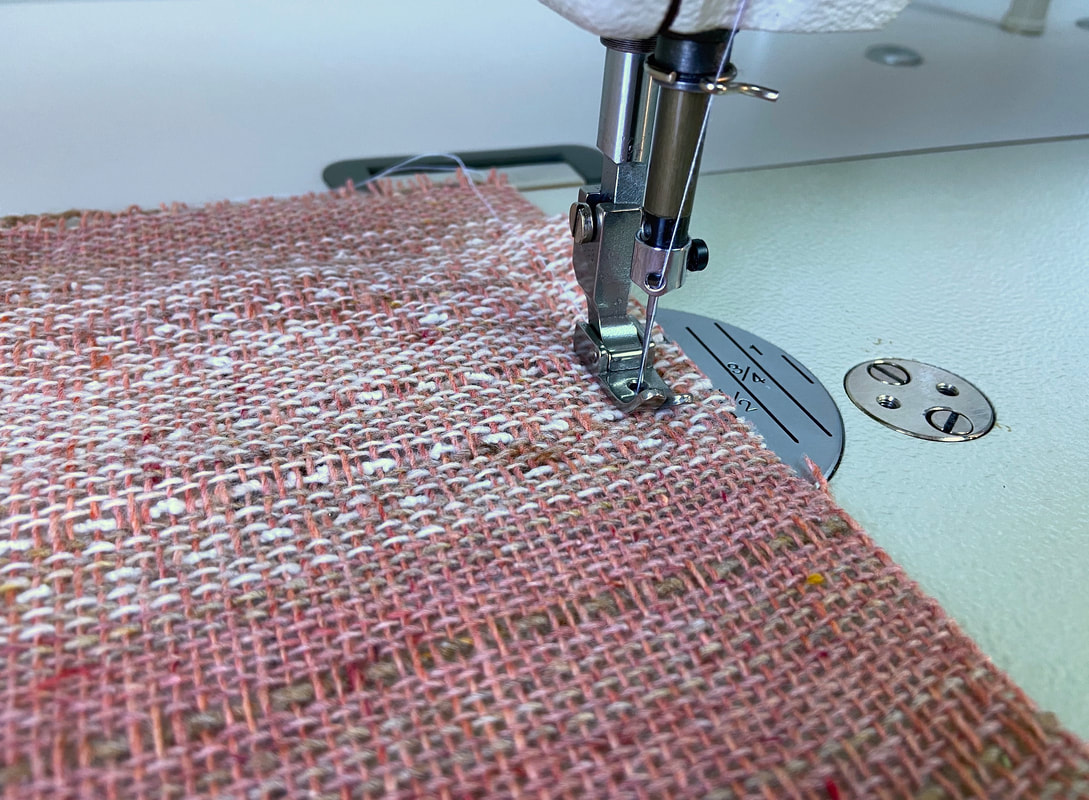
Sewing Loosely-Woven Fabric To Plain Fabric
Sewing a loosely-woven fabric edge to a plain one is accomplished similar to sewing a regular, plain seam with just a few exceptions. Two things need to be considered:
|
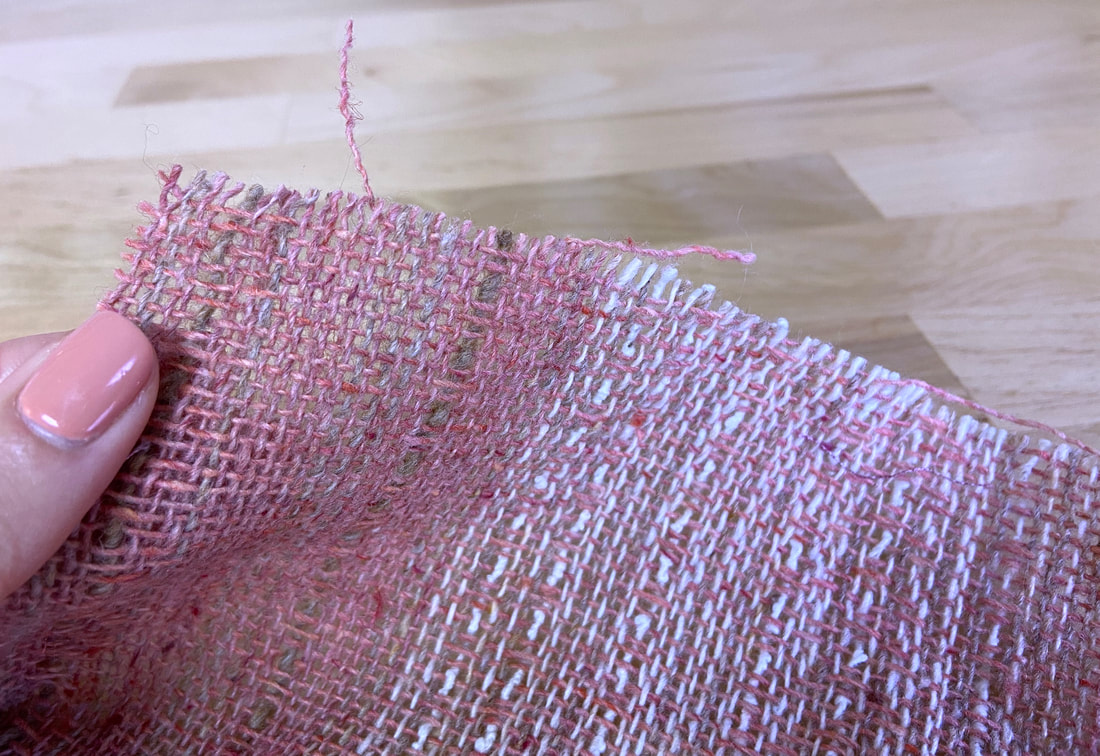
- When cut, loosely-woven fabrics unravel a lot more than plain ones do.
- To achieve a durable seam, loosely-woven fabric requires the application of a stronger, denser stitch.
Keep these two factors in mind when choosing the most appropriate stitch length and seam finishing technique. When working with vulnerable fabrics, stitch length and the seam's edge finishing technique work in tandem to construct the perfect seam.

|
|
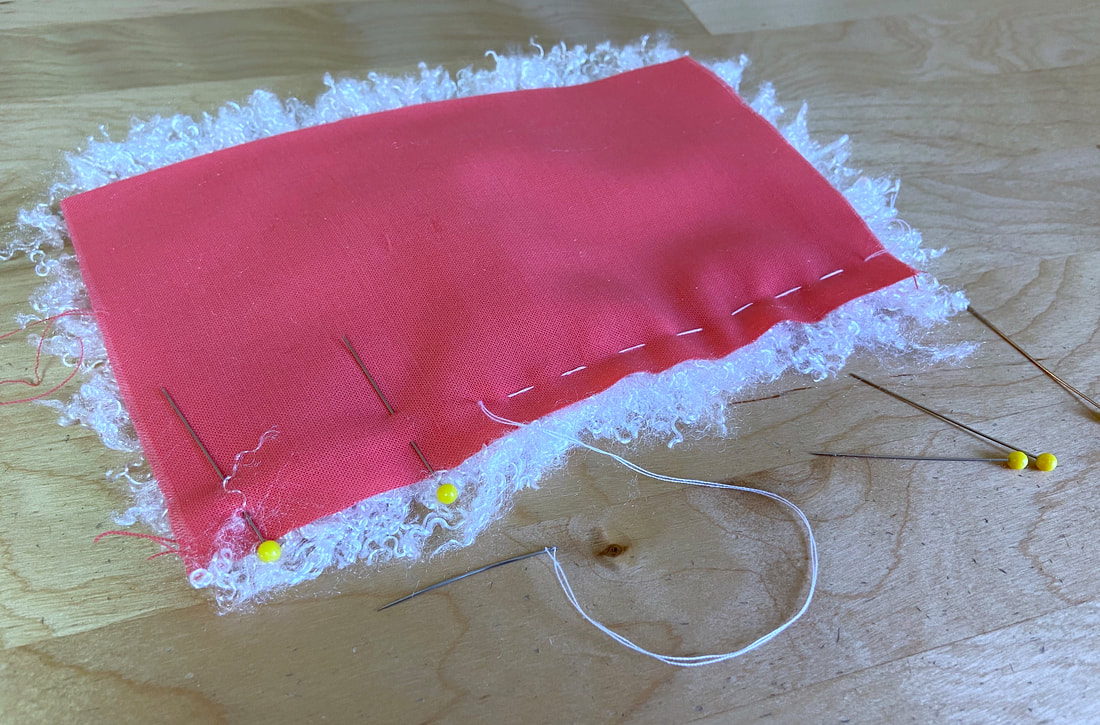
1. First, staystitch the loosely woven edge next to the seamline (within the seam allowance) in order to stabilize the loosely-woven threads. This stabilizing stitch is especially helpful when used on extra long edges to prevent them from stretching out of shape prior to seam construction.
Keep in mind that staystitching is the first thing you should do after separating the pattern from the fabric.
Learn more about staystitching in this tutorial: Staystitching
|
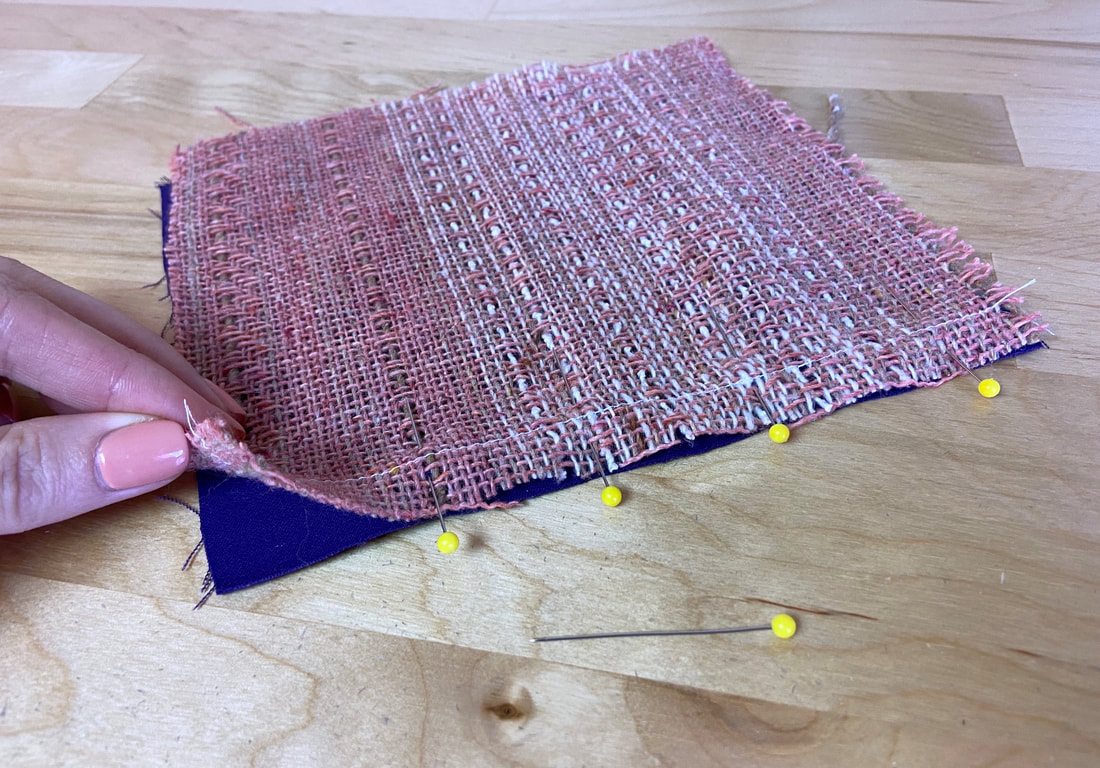
2. Next, align the plain fabric edge to the loosely-woven edge, being careful not to handle the loosely-woven layer too much as it usually frays quite easily. Insert pins horizontally to keep the edges together.
|
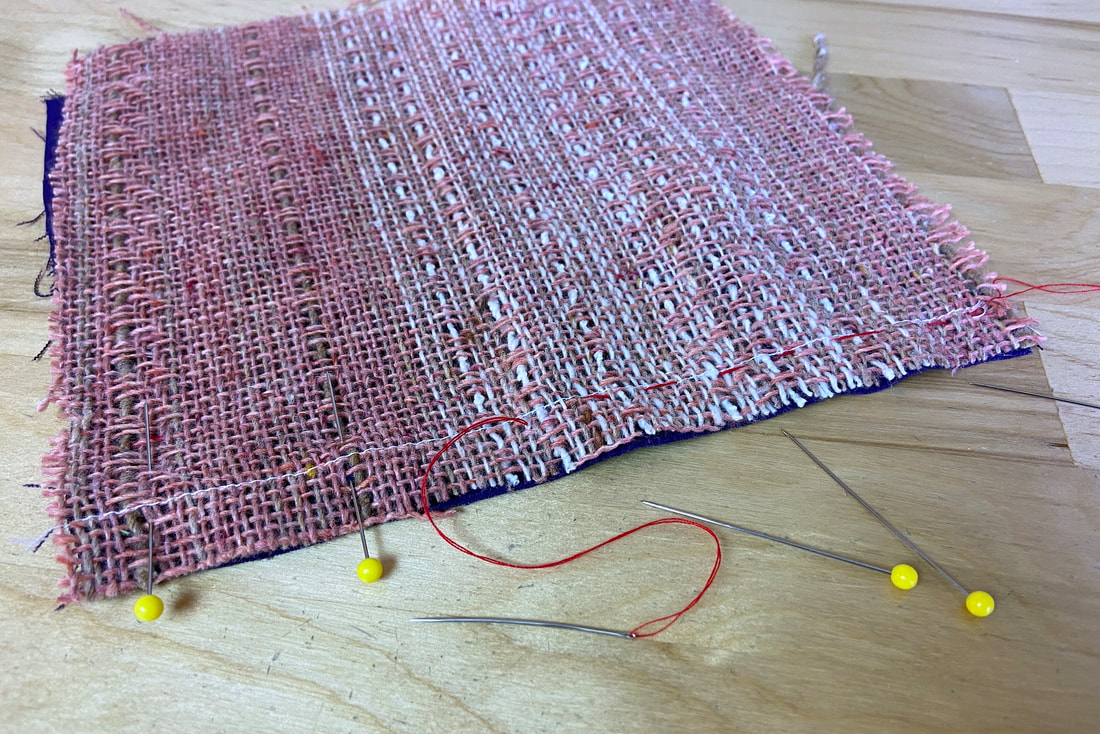
Hand baste the two layers next to the seamline (within the seam allowance) for extra stability.
|
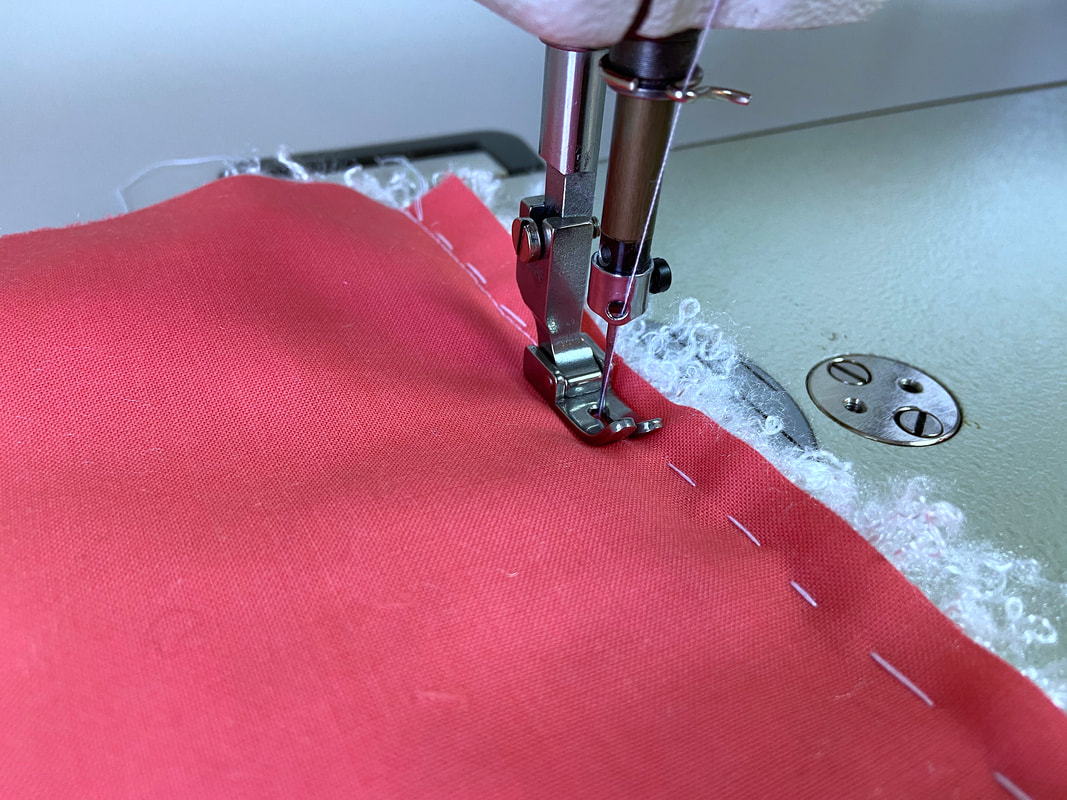
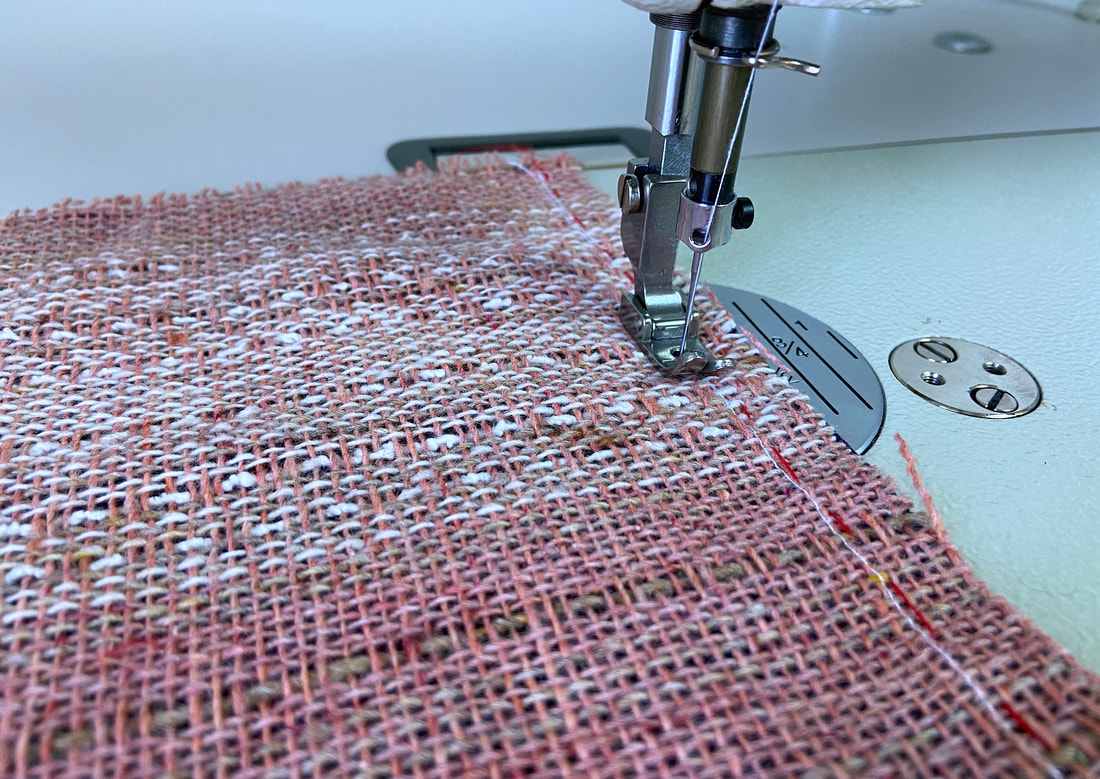
3. Switch your stitch to a shorter length setting, and machine stitch the seam with the loosely-woven fabric layer facing up.
|
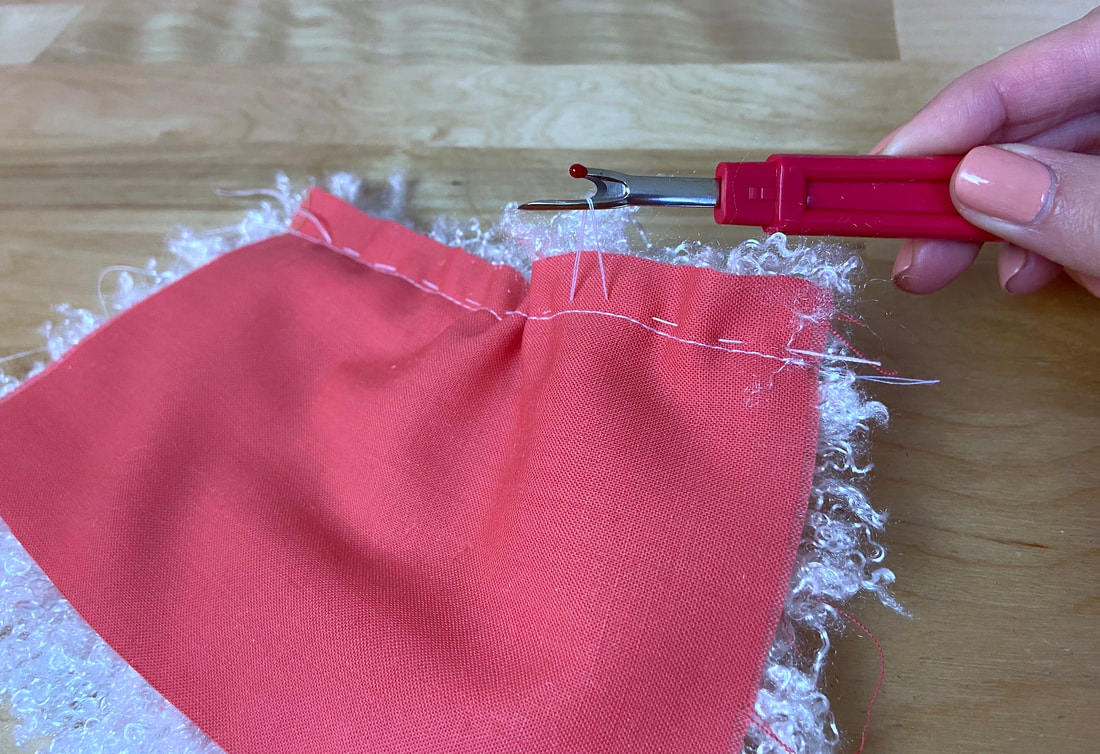
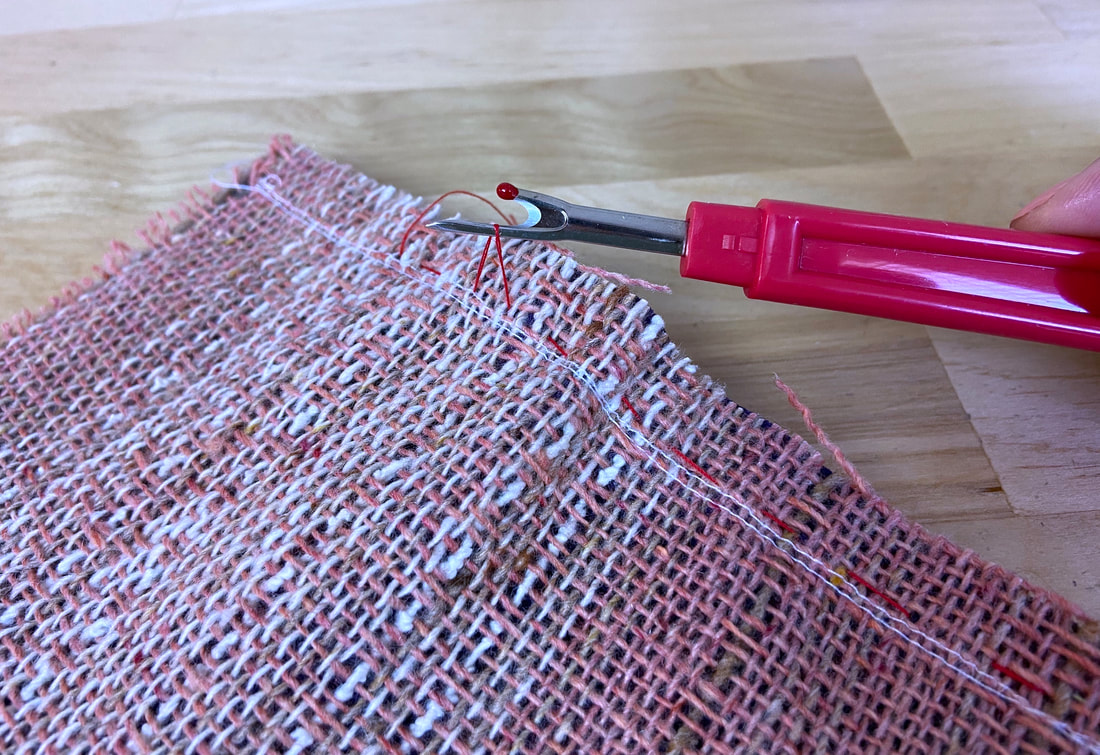
4. Remove the hand basting stitch at this point.
|
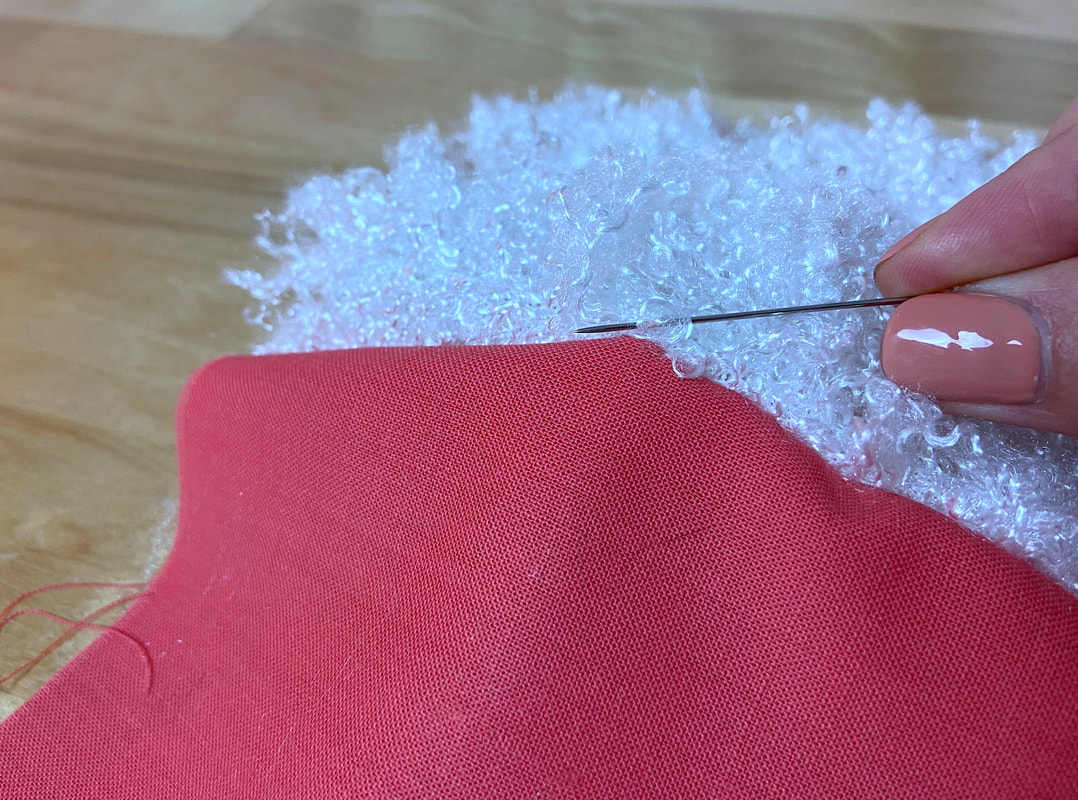
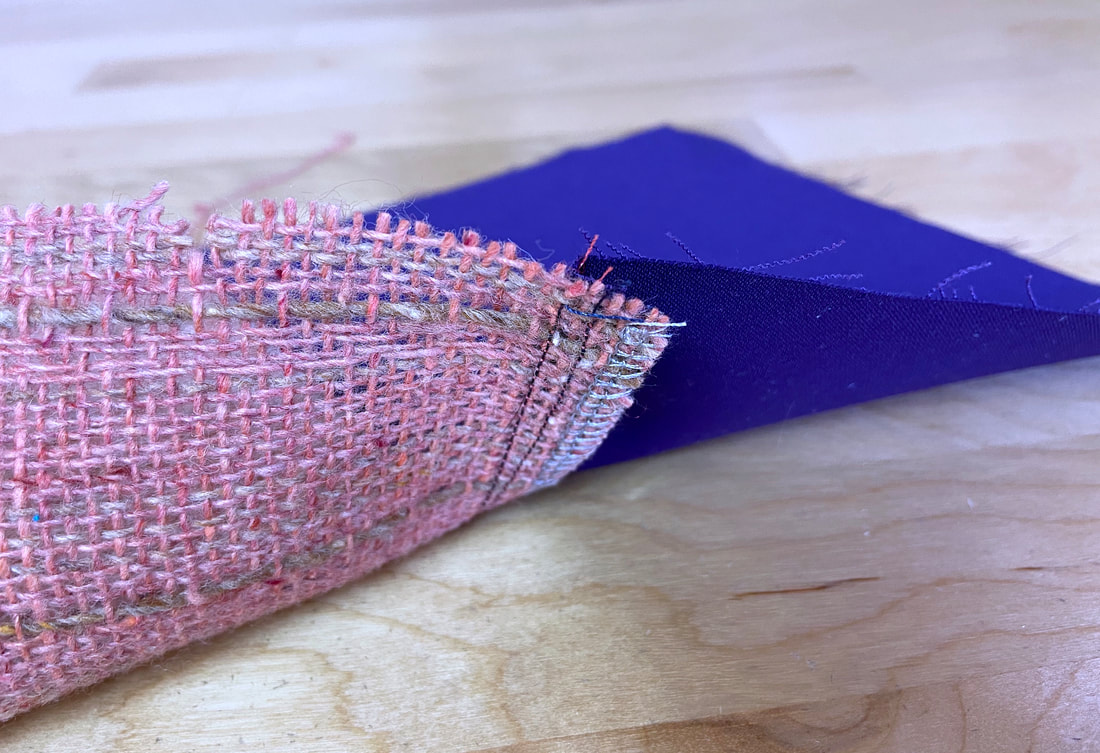
5. Finish the seam allowance edges with a technique that encases fraying edges best. The easiest and most appropriate option in this case is finishing the seam allowance edges together with an overedge stitch. Serging or a dense zigzag stitch on your home sewing machine work best in this instance.
You may need to trim the seam allowance prior to clean finishing if it is too wide or creates bulk in the seam. However, be careful not to trim loosely-woven fabrics too close to the stitch as this can cause them to unravel heavily and as a result, weaken the seam.
|
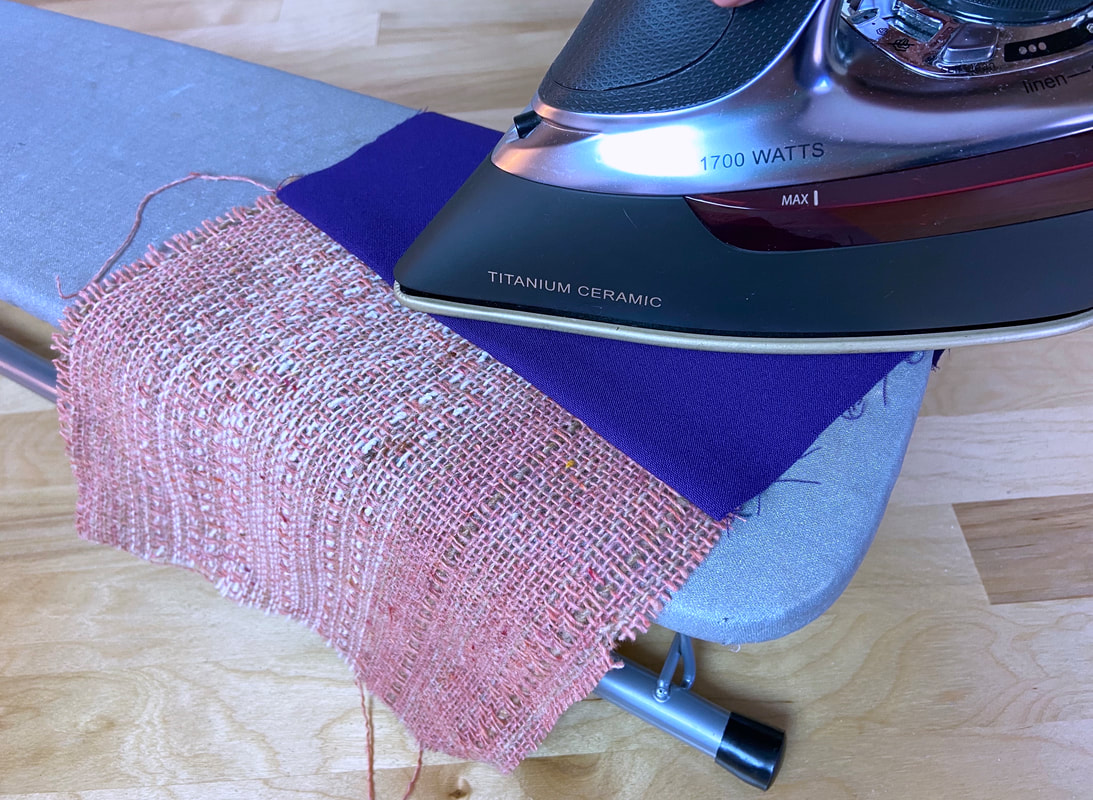
6. As a final step, the finished seam allowance should be ironed towards the plain fabric layer a shown.
