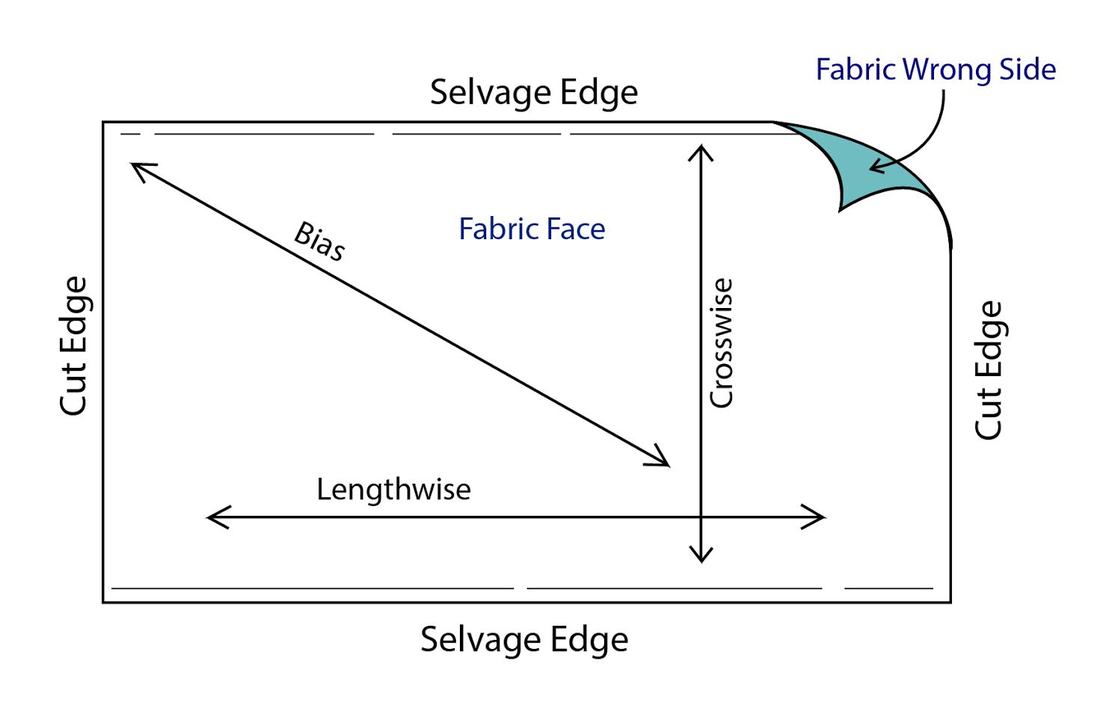
4 Ways To Lay Out a Sewing Pattern For Cutting: Understanding Fabric Grain And The Selvage Edge.12/29/2017 The most important steps in the process of making a clothing item comes at the beginning with the drafting of the sewing pattern then cutting it properly according to its grainline. If you are a sewing beginner, you might feel a bit overwhelmed by some of the terms used when discussing the process of aligning, pinning and cutting a sewing pattern. Terms like grainline, selvage edge, cut edge, or cut-on-fold can all seem like a big blur for someone who is just starting out. However, once you understand the importance of these elements when preparing your fabric and eventually cutting your sewing patterns, you'll be glad you put in some extra effort to understand them. Below, we'll walk you through 4 basic ways to align and cut your sewing patterns according to fabric grain but first, lets start with the basic understanding of grainline and selvage edge- the two most important elements used in the fabric cutting process. The grainline on a sewing pattern is depicted by a double pointed arrow. It is positioned within the body of the sewing pattern (as opposed to the edge) and essential in the pattern alignment process. The grainline on the sewing pattern should match the grain of the fabric which can be identified using the selvage edge. Here it is, another term- the selvage edge is depicted by the finished lengthwise edges of the fabric piece. These edges do not fray and are used as a guide in the pattern cutting process. When the fabric is taken off the bolt or roll, you'll notice it is woven such that it has two selvage edges on both its lengthwise sides. Vise versa, the width edges perpendicular to the selvage edge are called cut edges representing the direction in which fabric is cut off the bolt or roll. At the fabric store, the length of the fabric (in yards) is measured along the selvage edge and cut perpendicular to it (cut edge). It is incorrect to cut a fabric piece along the selvage edges as this edge should remain intact and is an essential tool for aligning your sewing patterns in the sewing process correctly. Lengthwise Grain: How to Align A Sewing Pattern On The Lengthwise Grain. The lengthwise grain of fabric is positioned parallel to the selvage edge. Due to the nature of the lengthwise grain's durability and drape, this is the most common direction in which sewing patterns are cut.
The first step in understanding whether your sewing patterns are meant to be cut on the lengthwise grain or otherwise is by identifying the grainline mark on the sewing pattern. As mentioned above, this is depicted by a double pointed arrow positioned somewhere within the body of the sewing pattern. This arrow is essential in pattern-making and pattern-cutting thus you will seldom come across a professional sewing pattern that doesn't have a grainline marking.
16 Comments
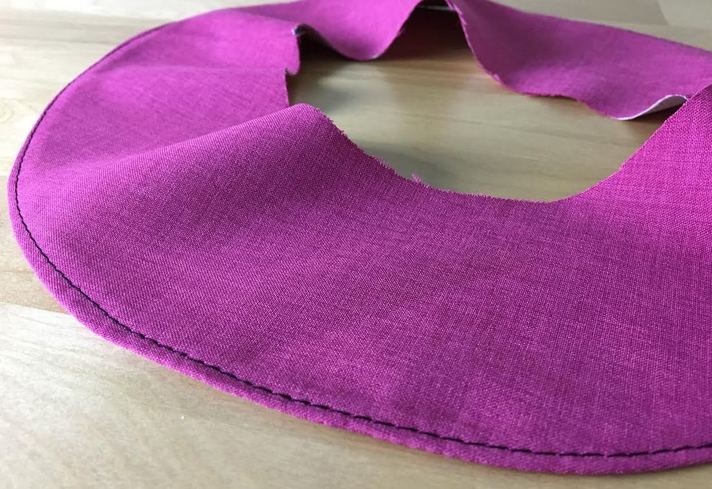
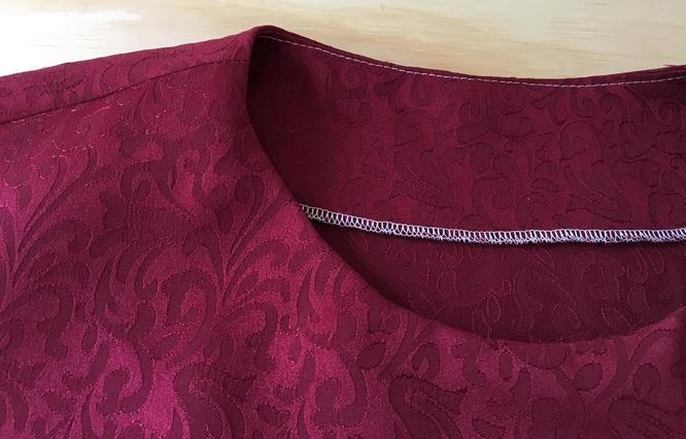
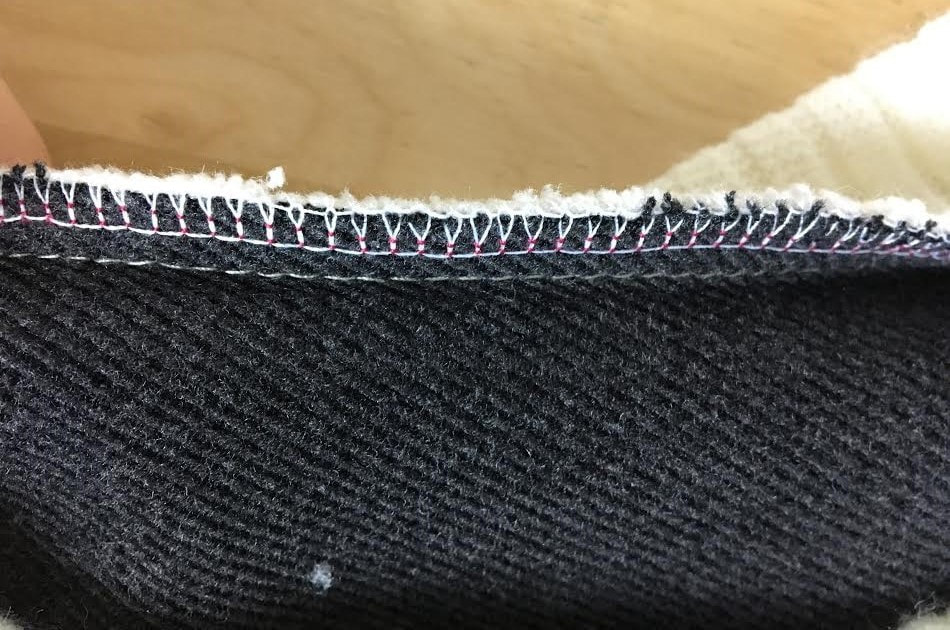
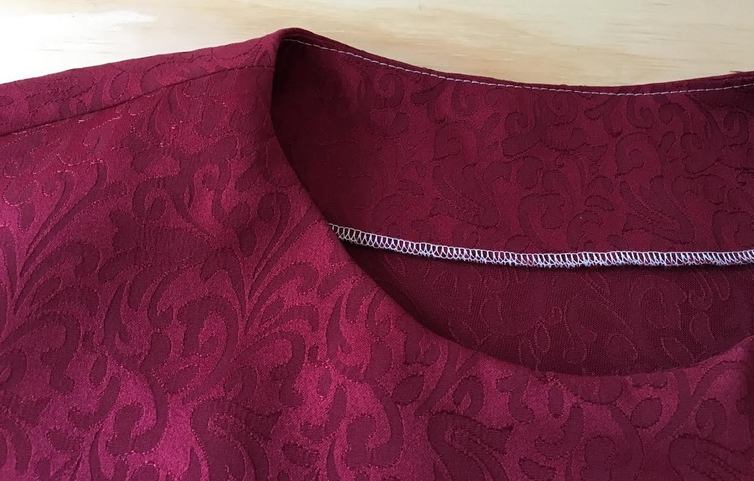
Finishing fabric raw edges makes up for about 50% of the total sewing process. It is a necessary step in garment construction that creates a clean, durable finish able to last through daily use and consistent washing. Clean finishing raw edges is required on most seams, hems, armholes and necklines. Thankfully, there is a variety of techniques to choose from based on garment style, type of fabric or your sewing level. Just as important as clean finishing visible raw edges on the outside of the garment is clean finishing the inside elements of a garment. This includes seam allowance and the outer edges of facings and lining. In the steps below, we'll focus on facings- More specifically, the curved outer edges of classic neckline facings. The examples below display basic sewing techniques used to finish the raw edges of almost all other facing types including those of armholes, Center Front/Center Back or sleeve cuffs. What Are Facings? Facings are duplicate shapes of the garment's portions that require edge finishing. They get stitched to the raw edge after which they are turned towards the inside of the garment to provide a backing and a clean, smooth finish along the edge. The most common facing applications are along necklines, lapels, armholes, and center front opening of jackets and cardigans. For some styles, sleeve hems can also feature a facing although today, this finish is less common. 1. Finishing a Facing Edge with Serging or a Zig Zag Stitch. A simple, serging finish is perhaps the most affordable, common method for clean finishing the raw edge of a facing. I classic serging stitch requires the use of an overlock sewing machine (or serger). If you're a sewing beginner you most likely do not own a serging machine yet. For this finish, use the zig zag stitch on your home sewing machine instead.
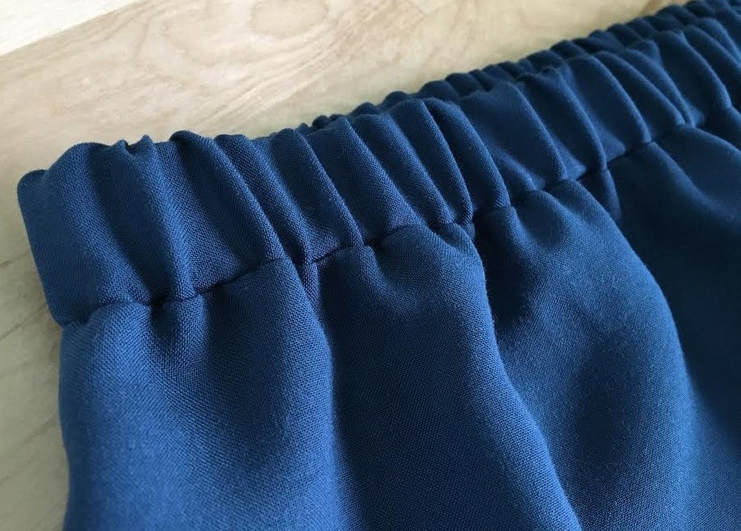
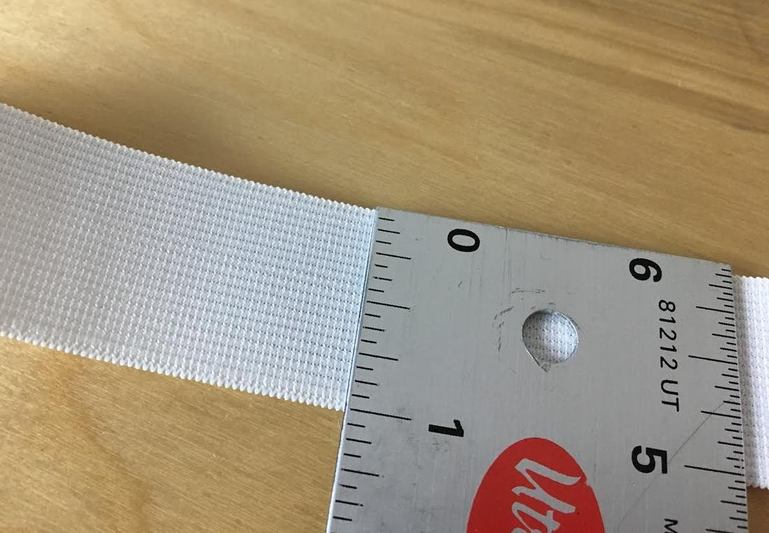
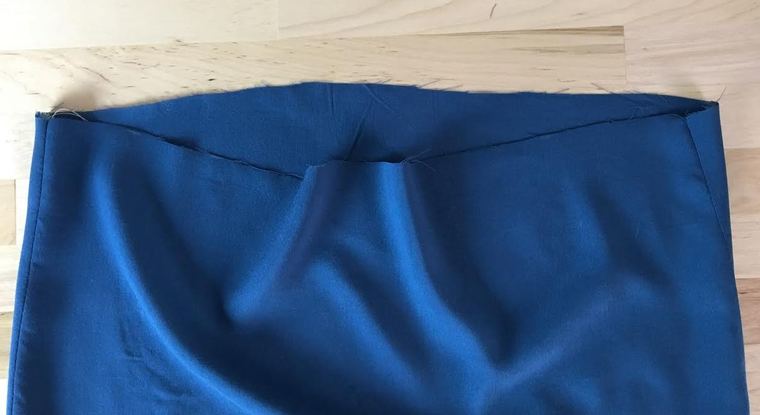
For more durability, make sure it is set to a dense setting. A zig zag or serged finish will eliminate bulk and allow the facing to lay flatter on the inside of the garment. Thus, if you are working with a thinner fabric, the outline of the edge of the facing will not show on the face side of the garment. An elastic waistband is casual and in most cases, simple to sew. In fact, inserting elastic into a waistband and the end result of a stretchy, comfortably adjustable garment at the waist is quite rewarding and fun to do, especially if you are a sewing beginner. Of course, there are different levels of difficulty depending on the style of elastic and where it is applied on the garment, but for the most part, this is a great finish to learn if you dream of being able to make your own clothing. If you are just learning how to sew, don’t be intimidated by working with elastic. It is actually quite easy to handle once you get the hang of it. Elastic can provide a nice shortcut for a variety of fit issues. We’ll dive deeper into working with elastic later, but since you’re still at the beginning of the road with learning how to sew, let’s start with the most common (and simple way) elastic is used: in a waistband. An elasticized waistband is simple and affordable to sew if you follow all its construction steps properly. It is often found on casual skirts, sweatpants and shorts, and sometimes used around the waist of casual dresses and tunics. For the purpose of learning some basic steps associated with applying elastic, we'll show you how to add a simple elastic waistband to a skirt in the tutorial below. Drafting a Simple Pattern For A Skirt Elastic Waistband Step 1: Choose the width of the waistband. It is up to you how wide you want the final waistband. Commonly, elastic waistbands range anywhere from ¾” to 2” depending on the style. For the purpose of this tutorial, we’re using a 1” waistband. To sew a 1” waistband use 1” wide elastic. You can buy elastic in a variety of different widths at your local fabric store. To draft an elastic waistband pattern, measure along the edge of the garment's waist (or the edge that the waistband will be sewn to) and note this measurement.
If you are in the process of learning how to sew, no doubt you already know the two main rules of dressmaking: Iron every seam as you go AND don’t leave any fraying raw edges of fabric unfinished. The ironing part is pretty self-explanatory right? But what about fabric raw edges? Although this is a choice left to the designer's discretion, it is important to note that not all fabric edges on a garment are suitable to be left unfinished regardless of design. Leaving fabric edges unfinished on a clothing item is something that needs to be decided cautiously contingent on the vulnerability and fraying of the fabric weave at hand. Most woven fabrics are susceptible to fraying thus they must receive some form of edge reinforcement. Fabrics that don't fray due to their weave (such as knits) should still be clean finished either with a serging stitch or zig zag application on your home sewing machine in order to achieve a longer lasting, durable finish. There are, of course, instances where you can forgo fabric edge finishing all together. Examples of these include leather and some suede fabrics that can sustain structure and durability without the need for additional reinforcement. Despite being able to use your discretion regarding edge finishing, necklines should never be left unfinished regardless the fabric. Why? Mainly because if a neckline is not reinforced by some kind of finish, it will stretch and eventually lose its shape and structure. In addition, tears and rips will occur from wear, especially from taking the garment on and off over time, creating major functional and durability issues. Now that you know to never leave the edge of a neckline unfinished, here are 4 common sewing techniques you can use to clean-finish them properly depending on fabric and design. You can access a step-by-step tutorial of each by clicking on the titles bellow. 1. Sewing a Curved Neck FacingIf you haven’t done so already, check out our tutorial on how to draft your own neck facing pattern. Once you have drafted the facing sewing pattern based on your garment, you can learn how to cut and sew it by following the steps in: How To Cut and Sew a Neckline Facing. A curved neck facing is perhaps the first technique you will learn as a sewing beginner. Although it sounds a bit difficult to sew, if you follow all the steps correctly from the beginning, you'll find that sewing a facing has a very intuitive quality to it. Perhaps what matters most when deciding what neckline finish technique to apply is the style of the clothing item itself, the fabric it is constructed of and whether your design must not include any topstitching, collars or bands. To break it down a bit further, neck facings are commonly used on tailored garments that require a smoother, more structured finish. For that reason, you'll find them on business-wear like women's tailored dresses, tops and some blazers.
|
The Blog:A journey into our design process, sewing tutorials, fashion tips, and all the inspiring people and things we love. Doina AlexeiDesigner by trade and dressmaker at heart. I spend most of my days obsessing over new fabrics and daydreaming new ideas. Sadie
Executive Assistant & Client Relations Manager Archives
November 2019
Categories
All
|
-
Sewing Tutorials
-
Basics
>
- Aligning Pattern Grainlines To Fabric
- Preparing Fabrics For Sewing
- Pinning Sewing Patterns To Fabric
- Placing Sewing Patterns On Fabric For Cutting
- Rotary Cutters or Fabric Scissors?
- Cutting The Sewing Patterns
- What Are Notches And How To Use Them In The Sewing Process
- Transferring Notches From Pattern To Fabric
- Transferring Seamlines to Fabric
- Staystitching
- Backstitching: A Complete Guide
- Hand Basting: A Complete Guide
- Sewing Continuous Bias Binding
- Darts >
-
Sewing Seams
>
- The Basics Of Seams And Seam Allowance
- How To Sew A Straight Seam
- Sewing Curved Seams
- Sewing Corner Seams
- Trimming And Grading Seam Excess
- Notching/Clipping Seam Allowance for Tension Release
- Sewing Topstitched Seams
- Sewing Corded Seams
- Sewing A Slot Seam
- Sewing A Gathered Seam
- Sewing Bias Seams
- Sewing Seams With Ease
- Sewing Seams With Crossing Seamlines
- Sewing Unlike Fabric Seams
- How To Iron Seams: Ironing Tools And Conventions
- Sewing With Knit Fabrics
- Understanding Stitch Length And Tension
- Sewing Unique Fabric Seams
-
Seam Finishes
>
- Seam Finishing Techniques - Overview
- Applying A Pinked Seam Finish
- Applying A Bias Bound Seam Finish
- Serging And Zigzag Seam Finishes
- Sewing A Self-Bound Seam Finish
- Sewing A French Seam Finish
- Sewing A Hong Kong Seam Finish
- Sewing A Mock French Seam Finish
- Sewing A Turned-and-Stitched Seam Finish
- Sewing Overcast Hand-Applied Seam Finishes
- Sewing A Flat Felled Seam
- Sewing A Hairline Seam Finish
-
Hem Finishes
>
- Garment Hem Finishes: Overview
- Sewing A Double Fold Hem Finish
- Sewing A Single Fold Hem Finish
- Sewing Bound Hem Finishes
- Sewing An Exposed Double Layer Bound Hem
- Sewing A Folded-Up Bound Hem with Pre-folded Binding
- Sewing A Hong Kong Hem Finish
- Sewing A Band Hem Finish
- Sewing A Bias Faced Hem Finish
- Sewing A Twill Tape Hem Finish
- Sewing A Rolled Hem Finish
- Sewing A Shaped Hem Facing
- Using Fusible Hem Tape And Webbing
- Finishing A Lace Fabric Hem
- Finishing A Leather Hem
- Sewing Faced Hem Corners
- How To Finish Lining At The Hem
- Finishing Fabric Corners by Mitering >
- Interfacing A Hemline: Lined And Unlined Examples
-
Sewing Pockets
>
- Curved Patch Pocket With Flap
- Unlined Square Patch Pockets
- Lined Patch Pockets: Two Ways
- Extension On-Seam Pockets
- Separate On-Seam Pocket
- Front Hip Pockets
- Bound Double Welt Pocket
- Double Welt Pocket With Flap
- Self-Welt Pocket (Using Single Fabric Layer)
- Slanted Welt Pocket (Hand-Stitched)
- Faced Slash Pockets: Overview >
-
Sewing Zippers
>
- Sewing Zippers: General Information
- Sewing A Centered Zipper
- Sewing A Lapped Zipper
- Sewing An Invisible Zipper
- Sewing A Fly Front Zipper
- Sewing A Closed-End Exposed Zipper (No Seam)
- Sewing An Exposed Separating Zipper
- Sewing Hand Stitched Zipper Applications
- Sewing A Zipper Underlay
- Sewing A Placket-Enclosed Separating Zipper
- Sleeveless Finishes >
-
Neckline Finishes
>
- Sewing A Neck Shaped Facing
- Sewing An All-In-One Neck Facing
- Neck And Garment Opening Combination Facings >
- Sewing A Bias Faced Neckline Finish
- Sewing A Band Neckline Finish
- Bound Neckline Finishes: Overview >
- Sewing A Semi-Stretch Strip Band Neckline
- Ribbed Neck Band And Classic Turtleneck
- Decorative Neckline Finishes >
- Finishing Facing Edges >
-
Extras
>
- A Complete Guide on Interfacing
- Sewing Bound Spaghetti Straps
- Sewing Spaghetti Straps To A Faced Neckline
- Sewing Ruffles: Overview
- Patterning And Sewing A Circle Ruffle
- Sewing A Gathered Heading Ruffle
- Sewing Double Layer Gathered Ruffles
- Sewing A Gathered Ruffle Into A Seam
- Sewing A Gathered Ruffle To A Fabric Edge
- Sewing A Fabric Surface Slit
- Sewing A Slit Seam
- Hand-Applied Straight Stitches
- Hand-Applied Blind Stitches
- Hand-Applied Overedge Stitches
- Hand-Applied Tack Stitches
- Hand-Applied Decorative Stitches
-
Basics
>
- Custom Bridal
- Custom Apparel
- About
- Blog
Services |
Company |
|



 RSS Feed

