|
If you are taking in a clothing item at the seams, use the existing stitch line as a guide to sew the new seam. Cut the old seam and excess fabric after the new seam stitch has been applied. Taking in certain areas of a garment to make it smaller is a one of the most common alterations that can be performed by just about anyone who owns a sewing machine, regardless of sewing skill level. It is easy to do, without the need for complex sewing techniques, or tools, for that matter. To make things even easier, there are some tricks you can use to maintain the balance of the garment while also simplifying the measuring and sewing process. Today's sewing tip covers a simple seam alteration method that should hopefully take the headache out of some of your future projects! 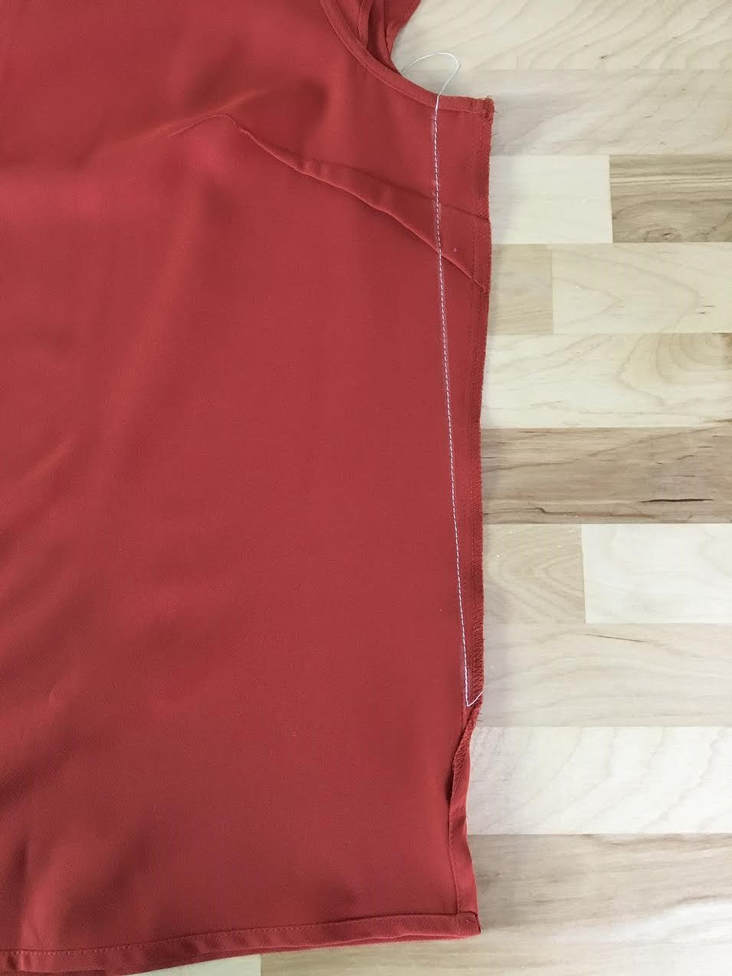
3 Comments
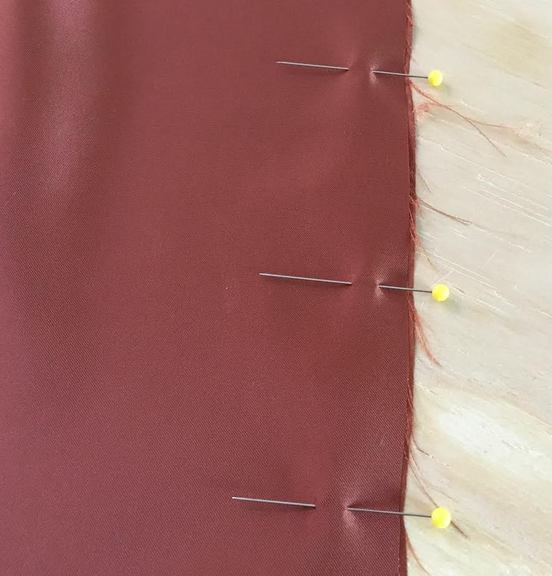
Today's Sewing Tip: Pin Fabric Layers Perpendicular To The Fabric Edge(s) Instead Of Parallel.10/30/2018 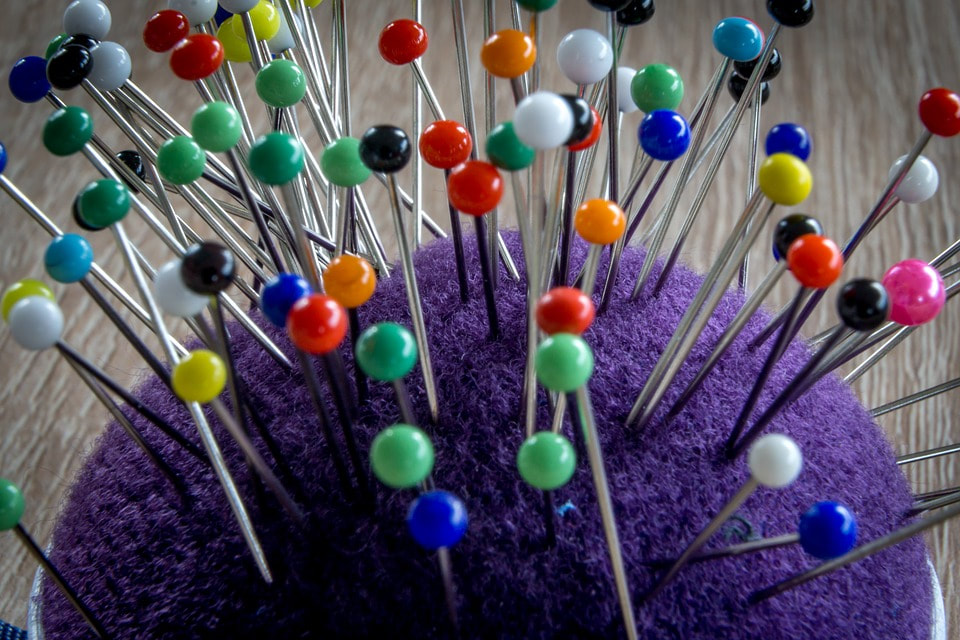 The best way to keep fabric layers together before and during machine stitching is to pin perpendicular to the fabric edge instead of parallel (when possible). How To Pin Fabric Edges:Place the fabric pieces together, aligning the corresponding edges to be stitched. Insert pins horizontally, perpendicular to these edges such that the pin ball/bead corresponds to their (edges) right, and the needle is pointing inward, to the left of the fabric edges.
Why Pin In Perpendicular Direction?Easy Pin Removal. If you think about the fabric edges to be sewn in relation to the sewing machine needle, you'll come to the realization that having the pins placed in perpendicular relation to these edges provides much easier removal during machine stitching. As you stitch down, removing the pins from left to right feels more natural, comfortable and intuitive than in downwards or upwards motion. Sliding pins out from left to right also provides more pin containment on the table surface, avoiding less dropped pins on the floor.
The idea of drafting your own patterns can feel pretty intimidating. After all, it takes some acquired technical skill and understanding. It is true that there is a greater learning curve associated with learning pattern making. However, if you start the right way, learning just a few important principles, you can actually start making your own sewing patterns in no time! 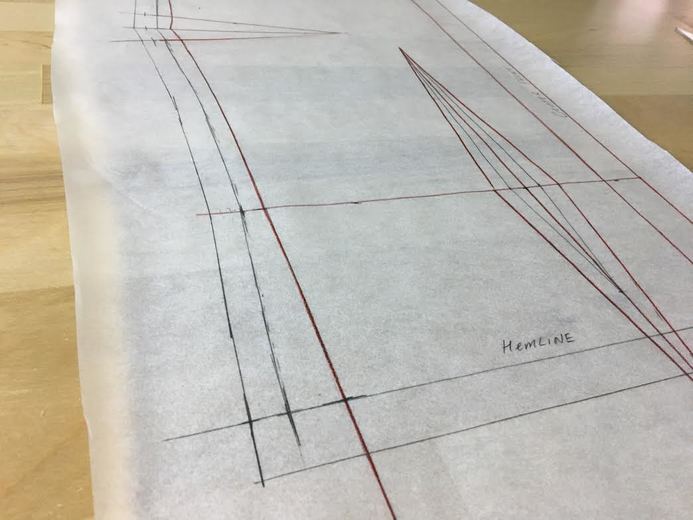 The whole idea of patternmaking is based on altering basic patterns. Every dressmaker/patternmaker should have a basic set of patterns they work from. These basic sewing patterns are called slopers or blocks in the fashion industry. If your goal is to make patterns for yourself, then all you really need is a good basic dress pattern with a simple curved neckline. When it comes to a basic dress pattern, keep in mind that it should include all appropriate darts (bust and waist darts) and form a well fitted garment for your body type. I personally like to work from a good dress pattern (form fitted to my body type) because it allows me to see the transition from waist to hip, providing a way to make longer tops and outerwear without having to physically piece together a bodice pattern and skirt pattern. A basic dress pattern keeps things simple and can be separated to create both tops and bottoms.
|
The Blog:A journey into our design process, sewing tutorials, fashion tips, and all the inspiring people and things we love. 
Doina AlexeiDesigner by trade and dressmaker at heart. I spend most of my days obsessing over new fabrics and daydreaming new ideas. 
Sadie
Executive Assistant & Client Relations Manager Archives
November 2019
Categories
All

|

-
Sewing Tutorials
-
Basics
>
- Aligning Pattern Grainlines To Fabric
- Preparing Fabrics For Sewing
- Pinning Sewing Patterns To Fabric
- Placing Sewing Patterns On Fabric For Cutting
- Rotary Cutters or Fabric Scissors?
- Cutting The Sewing Patterns
- What Are Notches And How To Use Them In The Sewing Process
- Transferring Notches From Pattern To Fabric
- Transferring Seamlines to Fabric
- Staystitching
- Backstitching: A Complete Guide
- Hand Basting: A Complete Guide
- Sewing Continuous Bias Binding
- Darts >
-
Sewing Seams
>
- The Basics Of Seams And Seam Allowance
- How To Sew A Straight Seam
- Sewing Curved Seams
- Sewing Corner Seams
- Trimming And Grading Seam Excess
- Notching/Clipping Seam Allowance for Tension Release
- Sewing Topstitched Seams
- Sewing Corded Seams
- Sewing A Slot Seam
- Sewing A Gathered Seam
- Sewing Bias Seams
- Sewing Seams With Ease
- Sewing Seams With Crossing Seamlines
- Sewing Unlike Fabric Seams
- How To Iron Seams: Ironing Tools And Conventions
- Sewing With Knit Fabrics
- Understanding Stitch Length And Tension
- Sewing Unique Fabric Seams
-
Seam Finishes
>
- Seam Finishing Techniques - Overview
- Applying A Pinked Seam Finish
- Applying A Bias Bound Seam Finish
- Serging And Zigzag Seam Finishes
- Sewing A Self-Bound Seam Finish
- Sewing A French Seam Finish
- Sewing A Hong Kong Seam Finish
- Sewing A Mock French Seam Finish
- Sewing A Turned-and-Stitched Seam Finish
- Sewing Overcast Hand-Applied Seam Finishes
- Sewing A Flat Felled Seam
- Sewing A Hairline Seam Finish
-
Hem Finishes
>
- Garment Hem Finishes: Overview
- Sewing A Double Fold Hem Finish
- Sewing A Single Fold Hem Finish
- Sewing Bound Hem Finishes
- Sewing An Exposed Double Layer Bound Hem
- Sewing A Folded-Up Bound Hem with Pre-folded Binding
- Sewing A Hong Kong Hem Finish
- Sewing A Band Hem Finish
- Sewing A Bias Faced Hem Finish
- Sewing A Twill Tape Hem Finish
- Sewing A Rolled Hem Finish
- Sewing A Shaped Hem Facing
- Using Fusible Hem Tape And Webbing
- Finishing A Lace Fabric Hem
- Finishing A Leather Hem
- Sewing Faced Hem Corners
- How To Finish Lining At The Hem
- Finishing Fabric Corners by Mitering >
- Interfacing A Hemline: Lined And Unlined Examples
-
Sewing Pockets
>
- Curved Patch Pocket With Flap
- Unlined Square Patch Pockets
- Lined Patch Pockets: Two Ways
- Extension On-Seam Pockets
- Separate On-Seam Pocket
- Front Hip Pockets
- Bound Double Welt Pocket
- Double Welt Pocket With Flap
- Self-Welt Pocket (Using Single Fabric Layer)
- Slanted Welt Pocket (Hand-Stitched)
- Faced Slash Pockets: Overview >
-
Sewing Zippers
>
- Sewing Zippers: General Information
- Sewing A Centered Zipper
- Sewing A Lapped Zipper
- Sewing An Invisible Zipper
- Sewing A Fly Front Zipper
- Sewing A Closed-End Exposed Zipper (No Seam)
- Sewing An Exposed Separating Zipper
- Sewing Hand Stitched Zipper Applications
- Sewing A Zipper Underlay
- Sewing A Placket-Enclosed Separating Zipper
- Sleeveless Finishes >
-
Neckline Finishes
>
- Sewing A Neck Shaped Facing
- Sewing An All-In-One Neck Facing
- Neck And Garment Opening Combination Facings >
- Sewing A Bias Faced Neckline Finish
- Sewing A Band Neckline Finish
- Bound Neckline Finishes: Overview >
- Sewing A Semi-Stretch Strip Band Neckline
- Ribbed Neck Band And Classic Turtleneck
- Decorative Neckline Finishes >
- Finishing Facing Edges >
-
Extras
>
- A Complete Guide on Interfacing
- Sewing Bound Spaghetti Straps
- Sewing Spaghetti Straps To A Faced Neckline
- Sewing Ruffles: Overview
- Patterning And Sewing A Circle Ruffle
- Sewing A Gathered Heading Ruffle
- Sewing Double Layer Gathered Ruffles
- Sewing A Gathered Ruffle Into A Seam
- Sewing A Gathered Ruffle To A Fabric Edge
- Sewing A Fabric Surface Slit
- Sewing A Slit Seam
- Hand-Applied Straight Stitches
- Hand-Applied Blind Stitches
- Hand-Applied Overedge Stitches
- Hand-Applied Tack Stitches
- Hand-Applied Decorative Stitches
-
Basics
>
- Custom Bridal
- Custom Apparel
- About
- Blog
 RSS Feed
Services |
Company |
|
