|
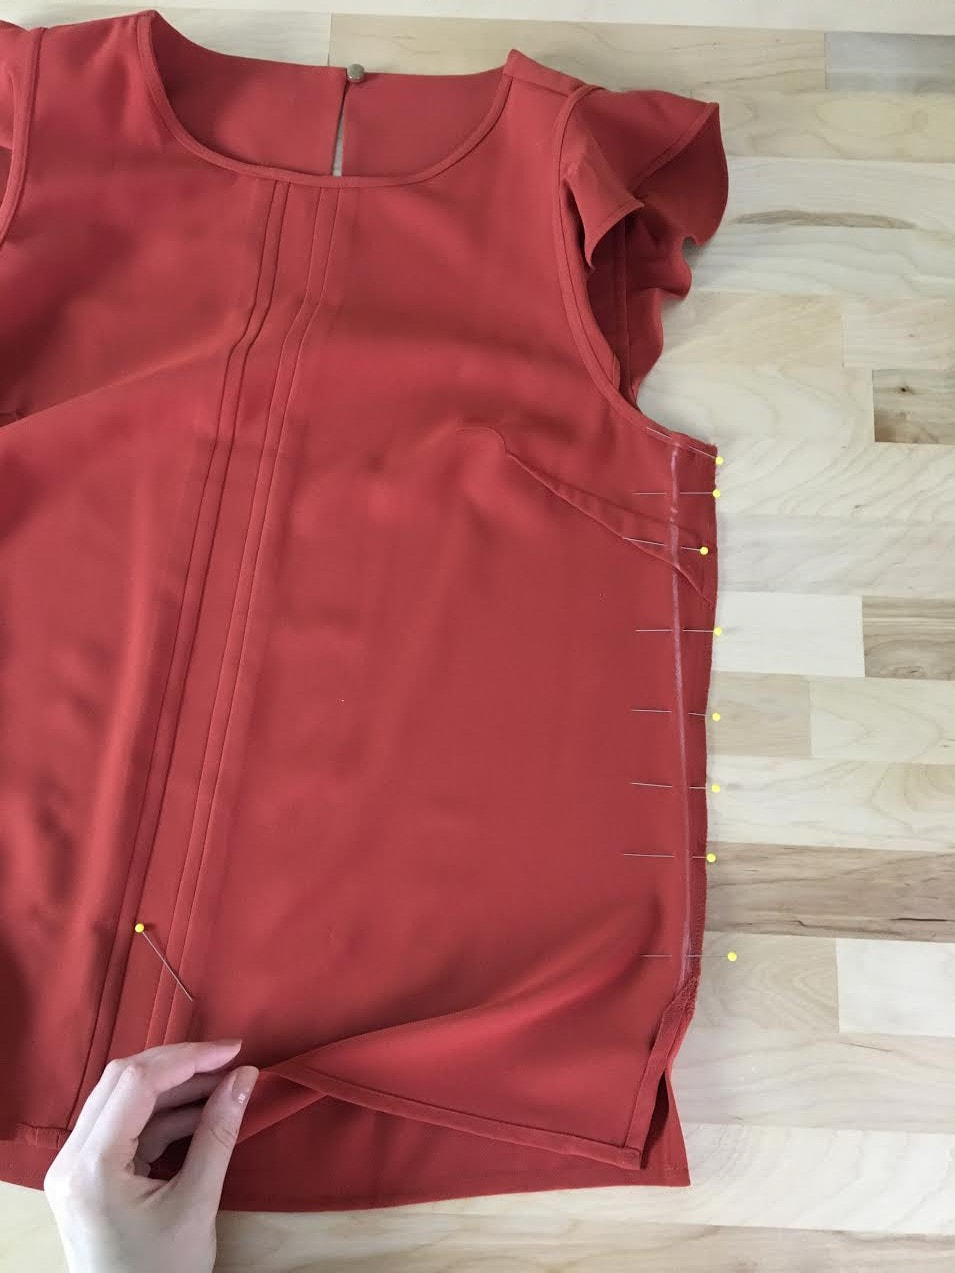
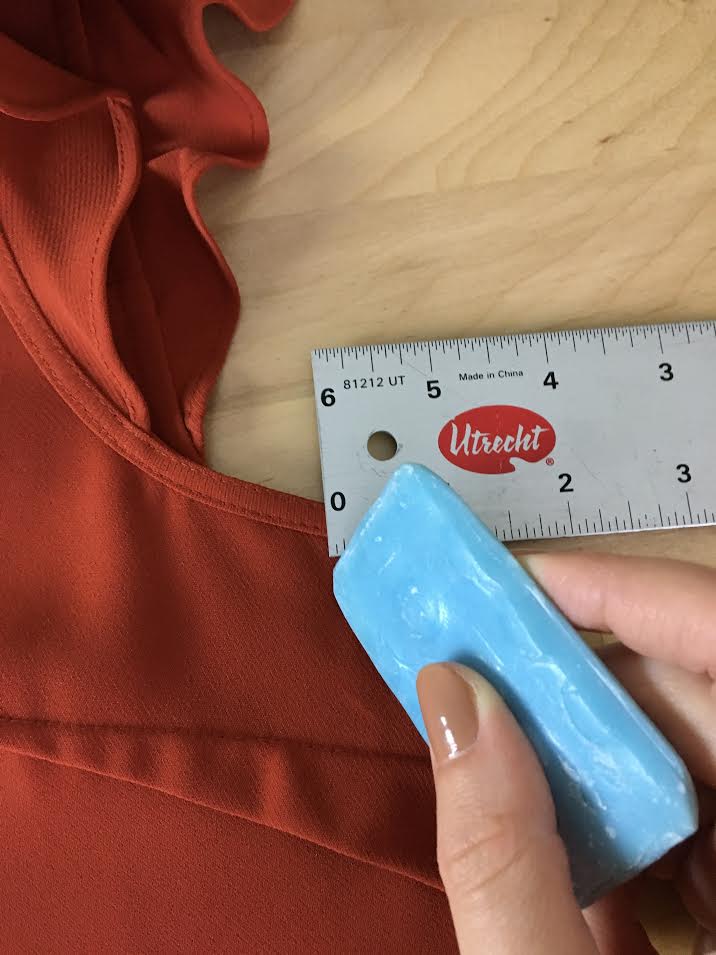
If you are taking in a clothing item at the seams, use the existing stitch line as a guide to sew the new seam. Cut the old seam and excess fabric after the new seam stitch has been applied. Taking in certain areas of a garment to make it smaller is a one of the most common alterations that can be performed by just about anyone who owns a sewing machine, regardless of sewing skill level. It is easy to do, without the need for complex sewing techniques, or tools, for that matter. To make things even easier, there are some tricks you can use to maintain the balance of the garment while also simplifying the measuring and sewing process. Today's sewing tip covers a simple seam alteration method that should hopefully take the headache out of some of your future projects! 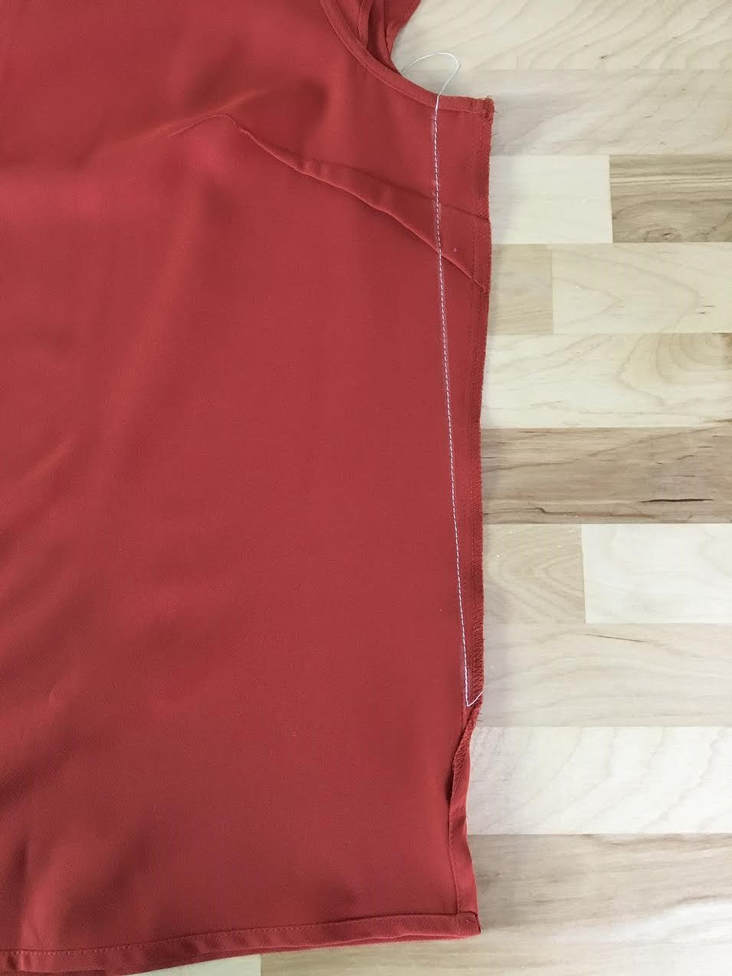 How To Take In A Seam Correctly:Let's say you are making a blouse smaller at the seams, or perhaps altering a pair of pants into a straighter (or skinny) style. Assuming you know how much you want to take in at the designated seams (keep in mind this measurement has to be equal on both sides), follow this technique to apply the new seam: 1. Turn the garment inside out and lay the seam flat on the table. 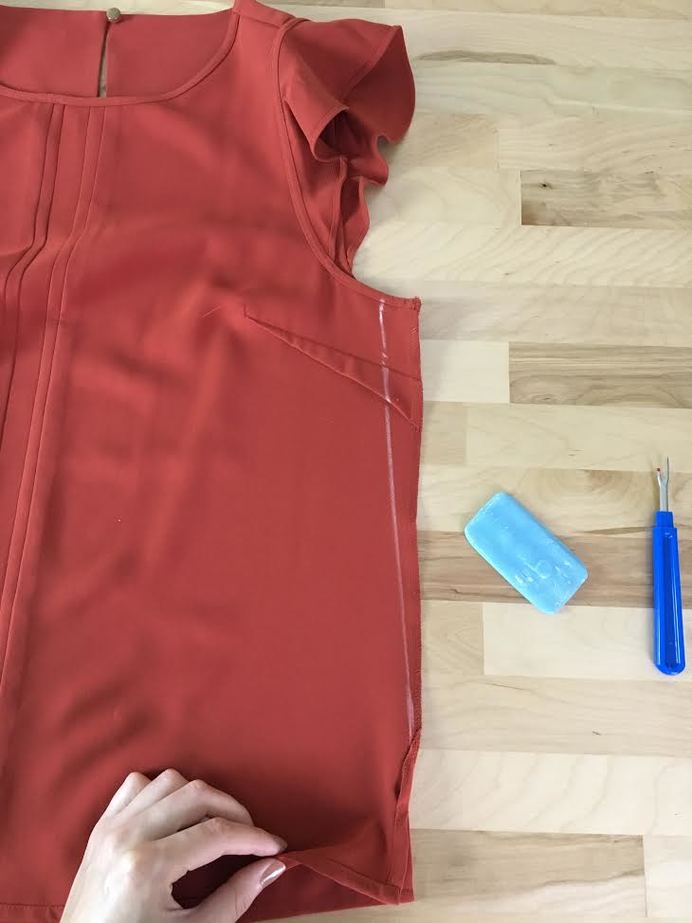 2. Using a fabric marking pencil, tailor's chalk (or just a piece of dry soap) and a ruler, blend in the existing seamline into the point where you'd like the new seam to start. For example, if you are taking in a blouse at the sides, under the armhole, but would like the bottom to stay the same, blend the existing stitch line at the bottom with the new desired seam placement at the top. Use the same technique for straightening pant legs or any other similar side seams. Don't undo the old stitch line. You can spend a lot of time removing the serging and old seam stitches, but that is totally unnecessary when taking in a seam. Leave the old stitch as is for now- the excess fabric, including the old seam, will be removed as one of the last steps in the process.
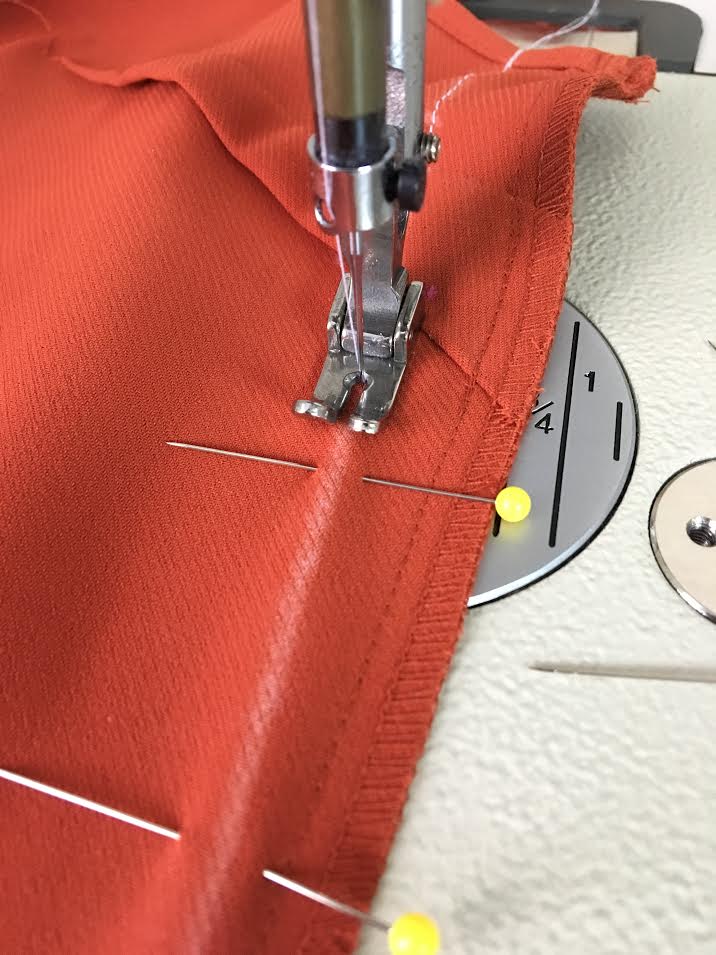
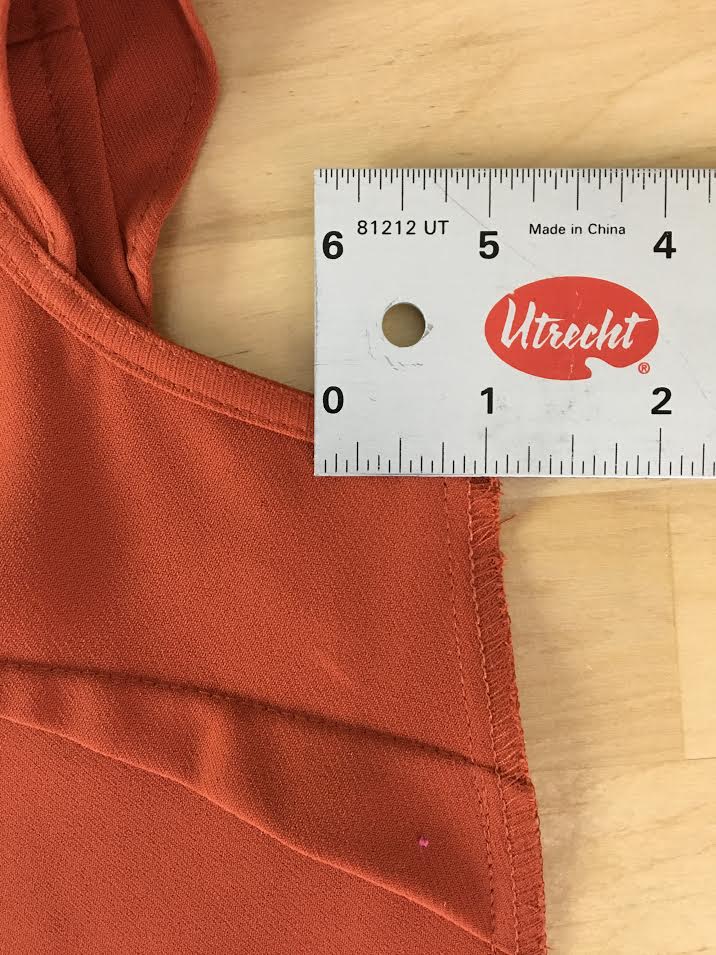
3. Stitch directly on top of the drawn line (from step 2) corresponding to the new desired seam, blending into the old stitch line where necessary. 4. At this point, try the garment on and see if additional excess should be removed. Vise versa, check if you took in too much. In the latter case, you can re-stitch to give the seam a bit more ease. This is the beauty of not cutting the old seam and excess fabric until the very end! 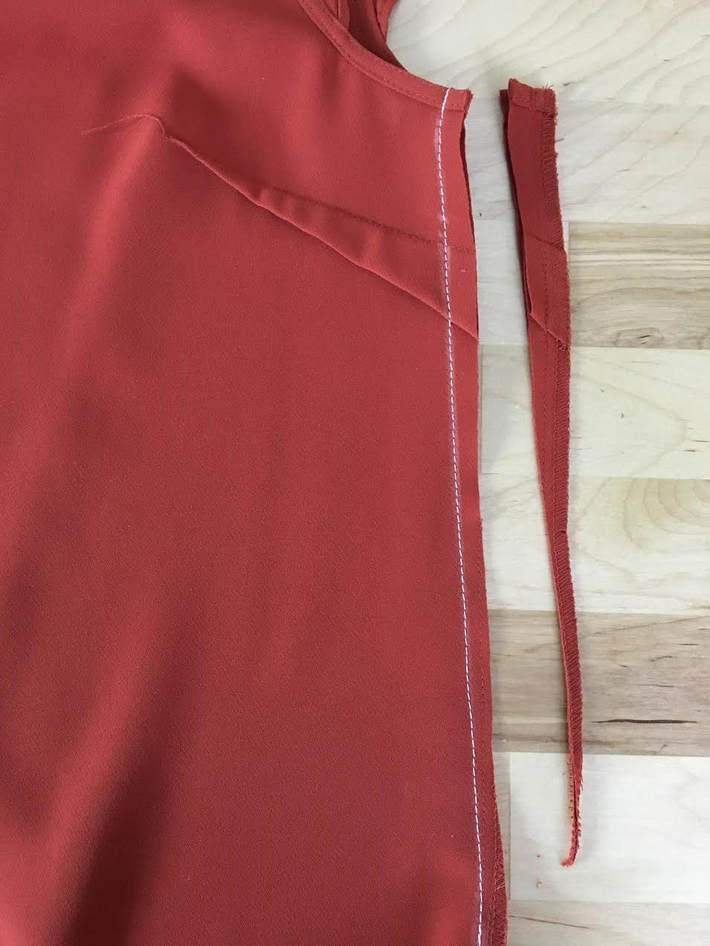 5. If happy with the new seams, cut the excess fabric (which in this case will include some of the old seam), following an even distance from the new stitch line. Think of this distance as seam allowance for the new seam.  6. Last but not least, clean finish the new seam raw edges. Use a zig zag stitch on your home sewing machine, a serging stitch (if you own an overlock machine) or any other method you find suitable. Why leave the old seam in until the very end?Provides a guideline to follow. The old seam stitch provides a line you can measure against to relocate the new seam. Applying the alteration in terms of the existing seams is the best way to measure the amount to be taken in on the physical garment without disrupting its fit and balance. Serving as a guideline, the old stitch lines provide a way to measure equal distances on both sides of the garment- keep in mind, this is an important aspect of maintaining the correct garment balance and structure in the alteration process. 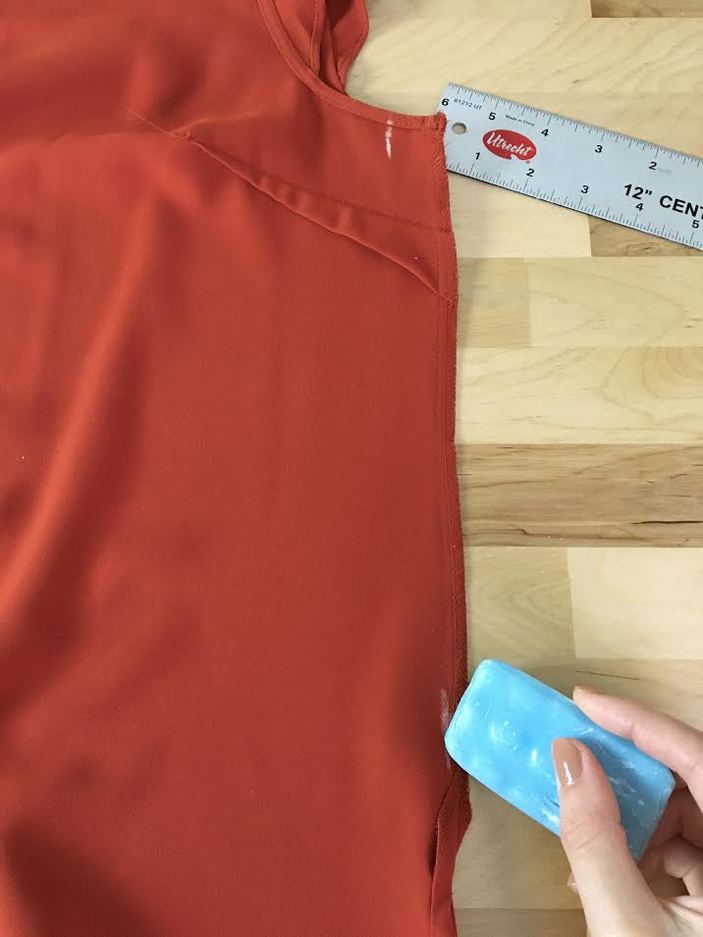 The old seamline also allows for a blending line in areas where this seam will not be altered. It is very common that when making a clothing item smaller, some areas may need to be taken in as much as others (blouse example above). Using a ruler, you can blend into the existing stitch line in areas where you wish to keep the seam unchanged. It's sort of like drawing on a flat sheet of paper, using this stitch as a reference. Maintains more accurate measurements. Measuring on a flat surface in relation to an existing line is as accurate as you can get when altering seams. The ability to use a ruler and measure down to the 1/8th of an inch would otherwise be difficult to achieve if you remove the old seam first and then re-measure and sew the new seam. As mentioned above, a garment should always be taken in equally at the sides. Having the old stitch lines there will provide a way to measure the new desired seam symmetrically on both sides, thus maintaining a higher level of accuracy.
Much faster and easier. While symmetry and shape is imperative in the alteration process, lets not discount the importance of keeping things simple and saving some time in the process. Taking in account that the old stitch line serves as such a convenient guide for marking and sewing the new seam, you will not only save lots of time in the process bot also avoid over-complicating a task that is actually meant to be fairly easy. Imagine if you undo the seam, taking into account removing serging stitches (which can be time consuming), measure the excess that needs to be removed (allowing extra for the new seam allowance), and cutting the excess fabric while also ensuring the cuts are perfectly even on both sides. After this painstaking process, you can finally sew the new seam. If you follow this lengthy process, you'll be handling fabric raw edges, which in the case of high fraying fabrics, can be a bit of an imposition. That being said, you can avoid some of these unnecessary inconveniences by reversing the steps: Measure and stitch the new seam first then use it as a guide to trim all excess down to the desired seam allowance. You can actually eyeball the seam allowance in relation to this new stitch so no need to measure! The best part about this technique is that you don't actually have to undo the old seam stitch as it becomes part of the excess that gets cut off. 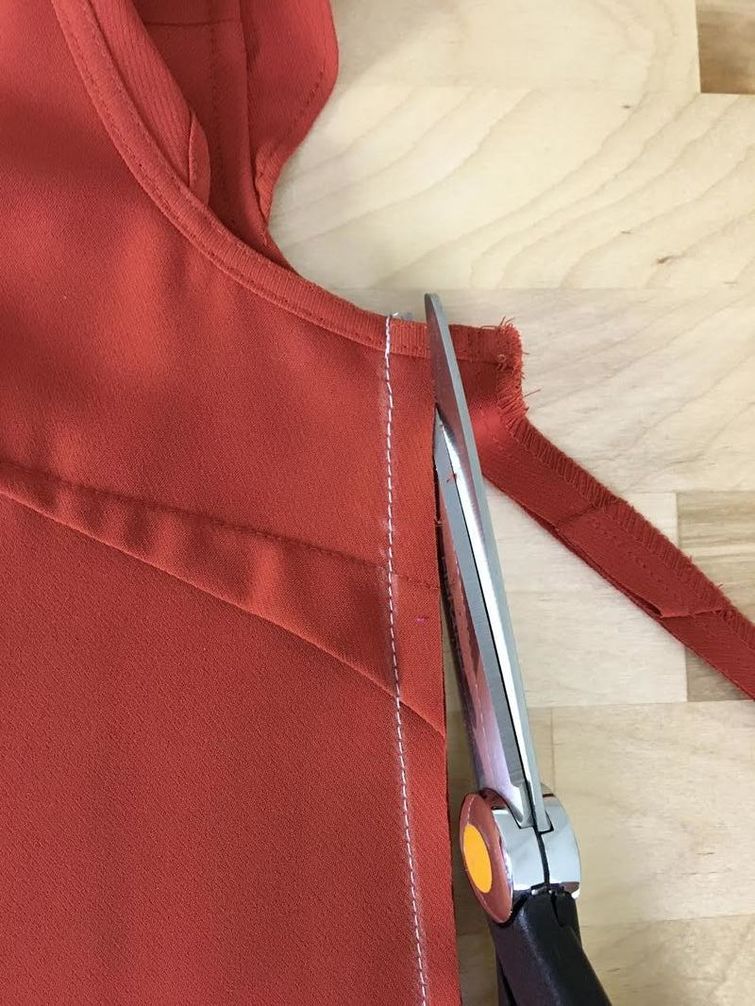 The new seam can be re-altered to add additional excess. So let's go back to the scenario described above. Let's say you take out the old seam, measure and remove excess and finally re-stitch the new seam together. What happens if you made an error in the measuring process and somehow ended up taking in too much? Unfortunately, if you've already cut the old seam and additional fabric excess, you will be limited to the seam allowance alone to release the seam and add ease. For that reason, cutting the old seam excess should be performed as a last step, after the new seam has been stitched and you've tried on the garment to ensure it fits properly. Using this simple method, you can remove the new stitch with a seam ripper and redo it to add a bit more ease. Only after you achieve that prefect fit should you trim the unwanted excess, including the old seam.
3 Comments
Ariel
4/14/2022 06:15:13 am
this was very helpful! thank you! 4/20/2022 01:22:57 am
I appreciate that you explained that one of the most typical alterations that can be created is taking in certain areas of a apparel to make it shorter. Last night, my missis told me that she was hoping to find a custom sewing that could do a custom football apron for our kids, and she asked me if I had any idea what would be the best option to do. Thanks to this instructive article, I’ll be sure to tell her that we can try to consult a trusted custom sewing service as they can provide more information about the process. 1/25/2023 10:18:23 am
My uncle accidentally bought some clothes for his kids that are just a little too big. He would really like to have them sewn up in order to make sure that they fit the kids better. Having a professional sew them for him could be really useful. I'll be sure to tell him about how they won't need to measure the seam allowance with will help prevent them from handling raw fabric edges. Leave a Reply. |
The Blog:A journey into our design process, sewing tutorials, fashion tips, and all the inspiring people and things we love. 
Doina AlexeiDesigner by trade and dressmaker at heart. I spend most of my days obsessing over new fabrics and daydreaming new ideas. 
Sadie
Executive Assistant & Client Relations Manager Archives
November 2019
Categories
All

|

-
Sewing Tutorials
-
Basics
>
- Aligning Pattern Grainlines To Fabric
- Preparing Fabrics For Sewing
- Pinning Sewing Patterns To Fabric
- Placing Sewing Patterns On Fabric For Cutting
- Rotary Cutters or Fabric Scissors?
- Cutting The Sewing Patterns
- What Are Notches And How To Use Them In The Sewing Process
- Transferring Notches From Pattern To Fabric
- Transferring Seamlines to Fabric
- Staystitching
- Backstitching: A Complete Guide
- Hand Basting: A Complete Guide
- Sewing Continuous Bias Binding
- Darts >
-
Sewing Seams
>
- The Basics Of Seams And Seam Allowance
- How To Sew A Straight Seam
- Sewing Curved Seams
- Sewing Corner Seams
- Trimming And Grading Seam Excess
- Notching/Clipping Seam Allowance for Tension Release
- Sewing Topstitched Seams
- Sewing Corded Seams
- Sewing A Slot Seam
- Sewing A Gathered Seam
- Sewing Bias Seams
- Sewing Seams With Ease
- Sewing Seams With Crossing Seamlines
- Sewing Unlike Fabric Seams
- How To Iron Seams: Ironing Tools And Conventions
- Sewing With Knit Fabrics
- Understanding Stitch Length And Tension
- Sewing Unique Fabric Seams
-
Seam Finishes
>
- Seam Finishing Techniques - Overview
- Applying A Pinked Seam Finish
- Applying A Bias Bound Seam Finish
- Serging And Zigzag Seam Finishes
- Sewing A Self-Bound Seam Finish
- Sewing A French Seam Finish
- Sewing A Hong Kong Seam Finish
- Sewing A Mock French Seam Finish
- Sewing A Turned-and-Stitched Seam Finish
- Sewing Overcast Hand-Applied Seam Finishes
- Sewing A Flat Felled Seam
- Sewing A Hairline Seam Finish
-
Hem Finishes
>
- Garment Hem Finishes: Overview
- Sewing A Double Fold Hem Finish
- Sewing A Single Fold Hem Finish
- Sewing Bound Hem Finishes
- Sewing An Exposed Double Layer Bound Hem
- Sewing A Folded-Up Bound Hem with Pre-folded Binding
- Sewing A Hong Kong Hem Finish
- Sewing A Band Hem Finish
- Sewing A Bias Faced Hem Finish
- Sewing A Twill Tape Hem Finish
- Sewing A Rolled Hem Finish
- Sewing A Shaped Hem Facing
- Using Fusible Hem Tape And Webbing
- Finishing A Lace Fabric Hem
- Finishing A Leather Hem
- Sewing Faced Hem Corners
- How To Finish Lining At The Hem
- Finishing Fabric Corners by Mitering >
- Interfacing A Hemline: Lined And Unlined Examples
-
Sewing Pockets
>
- Curved Patch Pocket With Flap
- Unlined Square Patch Pockets
- Lined Patch Pockets: Two Ways
- Extension On-Seam Pockets
- Separate On-Seam Pocket
- Front Hip Pockets
- Bound Double Welt Pocket
- Double Welt Pocket With Flap
- Self-Welt Pocket (Using Single Fabric Layer)
- Slanted Welt Pocket (Hand-Stitched)
- Faced Slash Pockets: Overview >
-
Sewing Zippers
>
- Sewing Zippers: General Information
- Sewing A Centered Zipper
- Sewing A Lapped Zipper
- Sewing An Invisible Zipper
- Sewing A Fly Front Zipper
- Sewing A Closed-End Exposed Zipper (No Seam)
- Sewing An Exposed Separating Zipper
- Sewing Hand Stitched Zipper Applications
- Sewing A Zipper Underlay
- Sewing A Placket-Enclosed Separating Zipper
- Sleeveless Finishes >
-
Neckline Finishes
>
- Sewing A Neck Shaped Facing
- Sewing An All-In-One Neck Facing
- Neck And Garment Opening Combination Facings >
- Sewing A Bias Faced Neckline Finish
- Sewing A Band Neckline Finish
- Bound Neckline Finishes: Overview >
- Sewing A Semi-Stretch Strip Band Neckline
- Ribbed Neck Band And Classic Turtleneck
- Decorative Neckline Finishes >
- Finishing Facing Edges >
-
Extras
>
- A Complete Guide on Interfacing
- Sewing Bound Spaghetti Straps
- Sewing Spaghetti Straps To A Faced Neckline
- Sewing Ruffles: Overview
- Patterning And Sewing A Circle Ruffle
- Sewing A Gathered Heading Ruffle
- Sewing Double Layer Gathered Ruffles
- Sewing A Gathered Ruffle Into A Seam
- Sewing A Gathered Ruffle To A Fabric Edge
- Sewing A Fabric Surface Slit
- Sewing A Slit Seam
- Hand-Applied Straight Stitches
- Hand-Applied Blind Stitches
- Hand-Applied Overedge Stitches
- Hand-Applied Tack Stitches
- Hand-Applied Decorative Stitches
-
Basics
>
- Custom Bridal
- Custom Apparel
- About
- Blog
 RSS Feed
Services |
Company |
|
