|
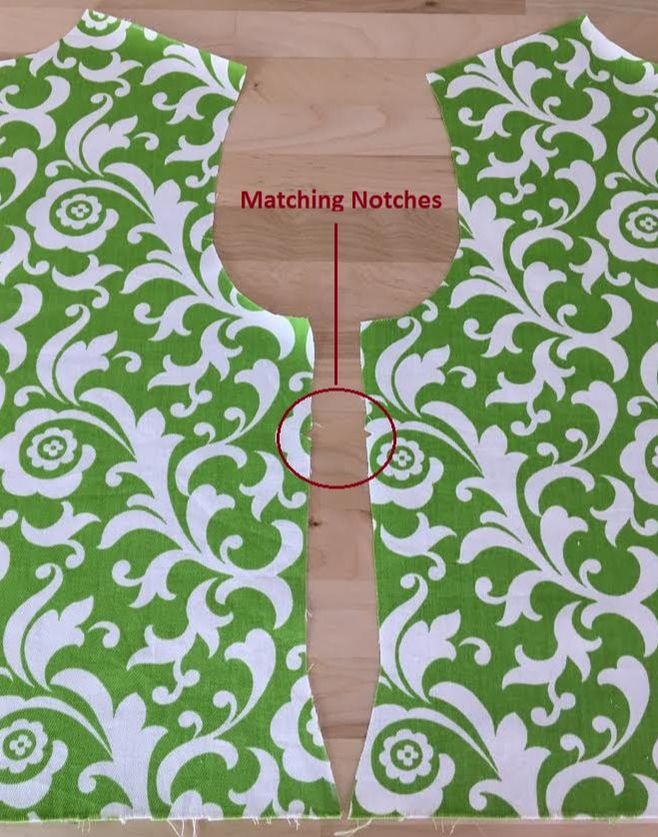
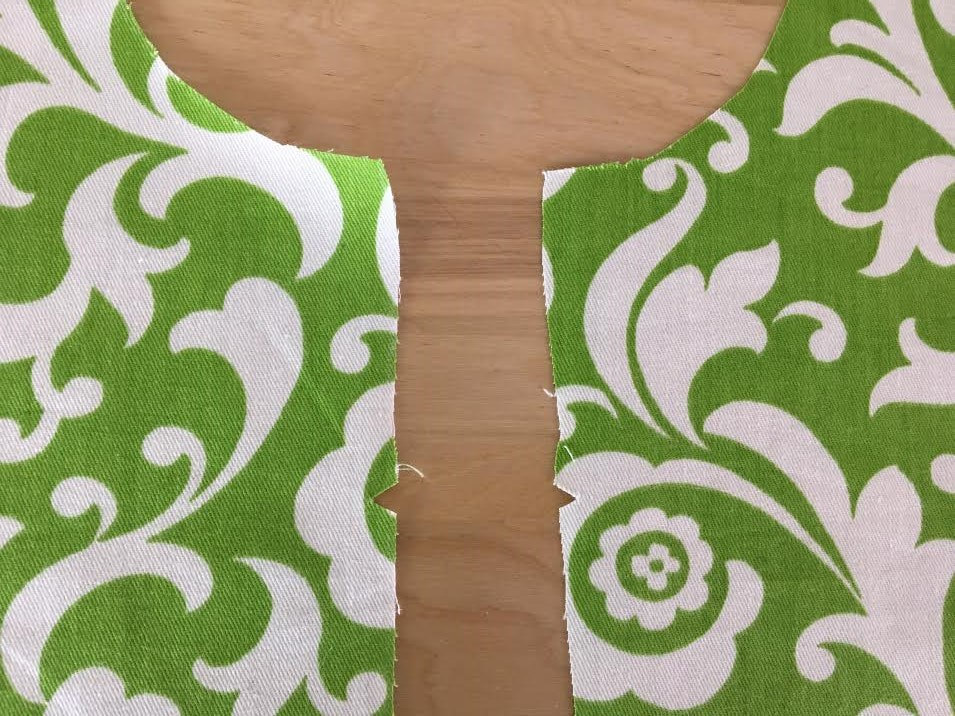
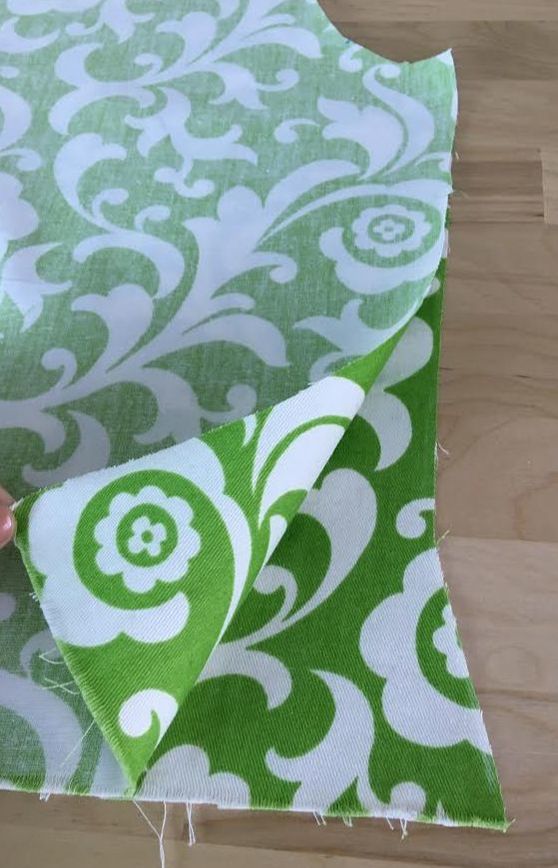
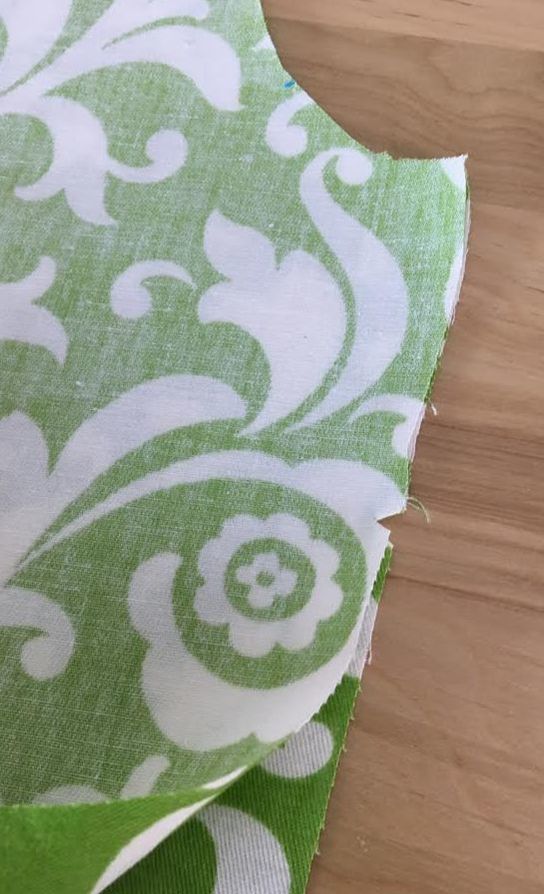
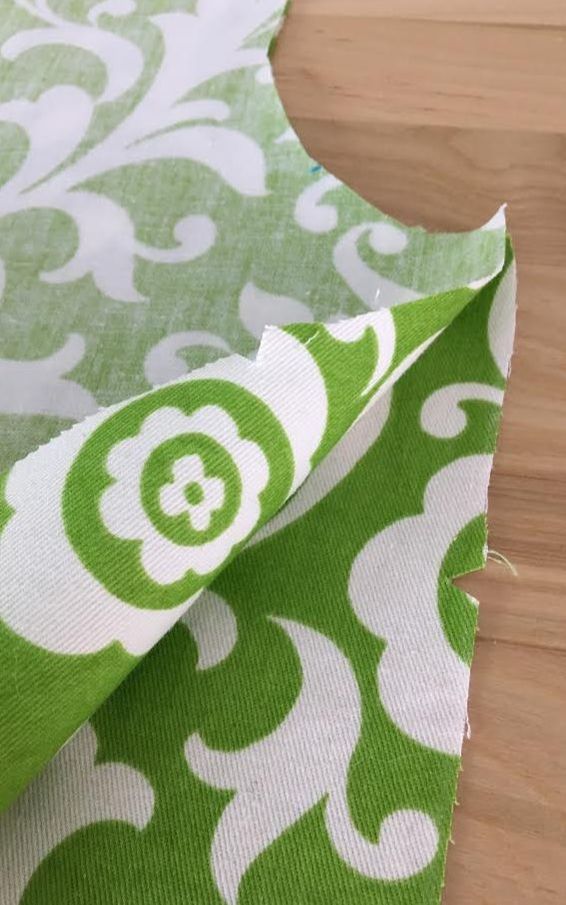
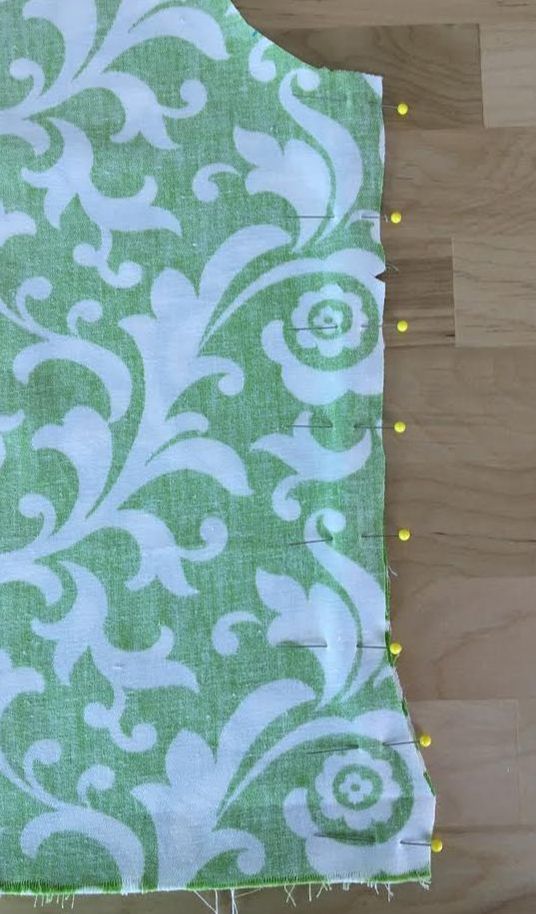
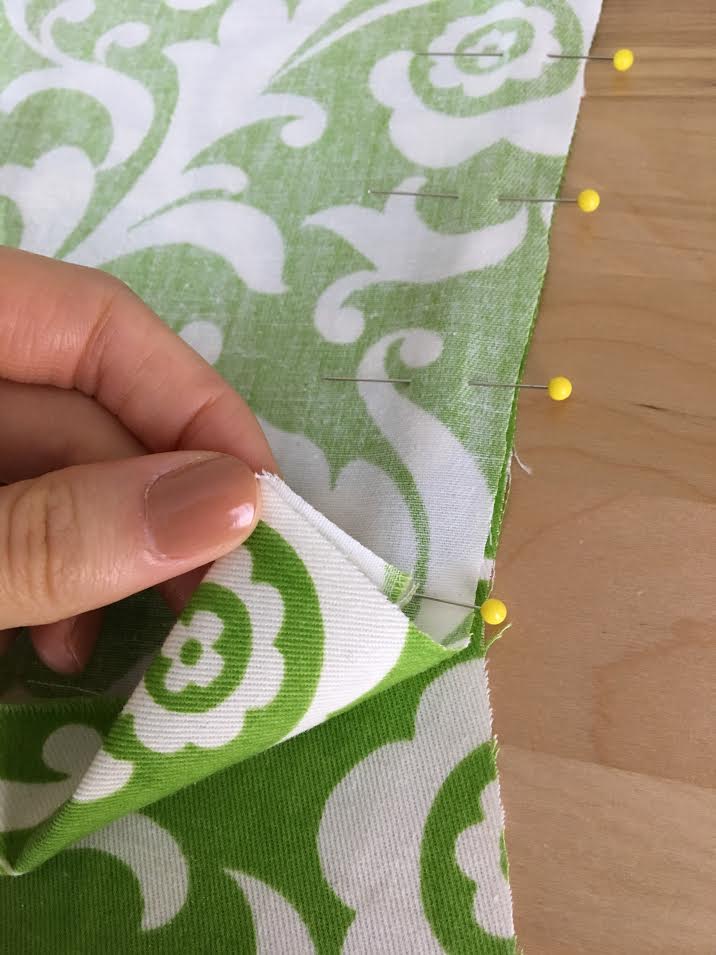
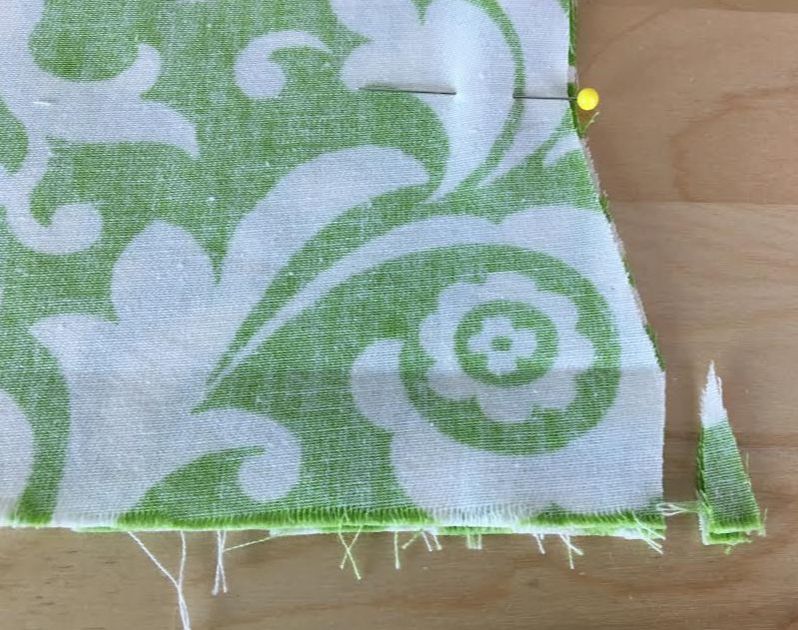
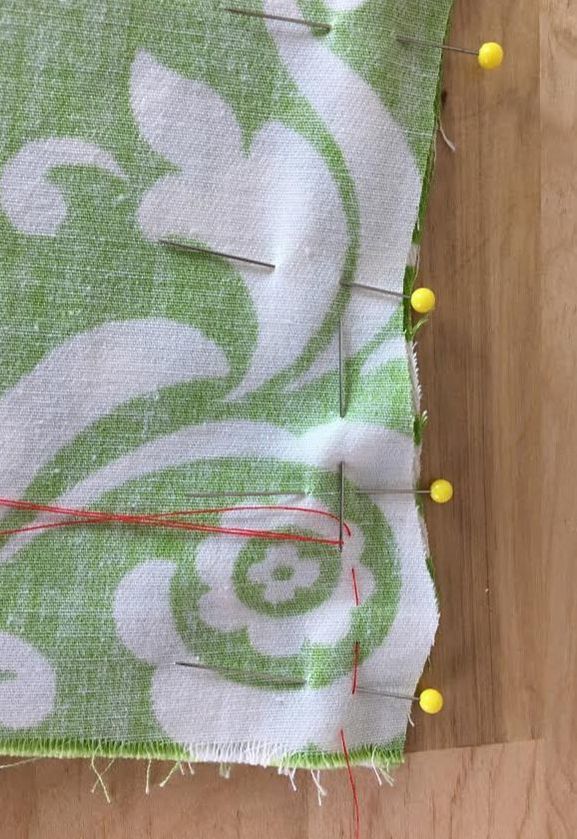
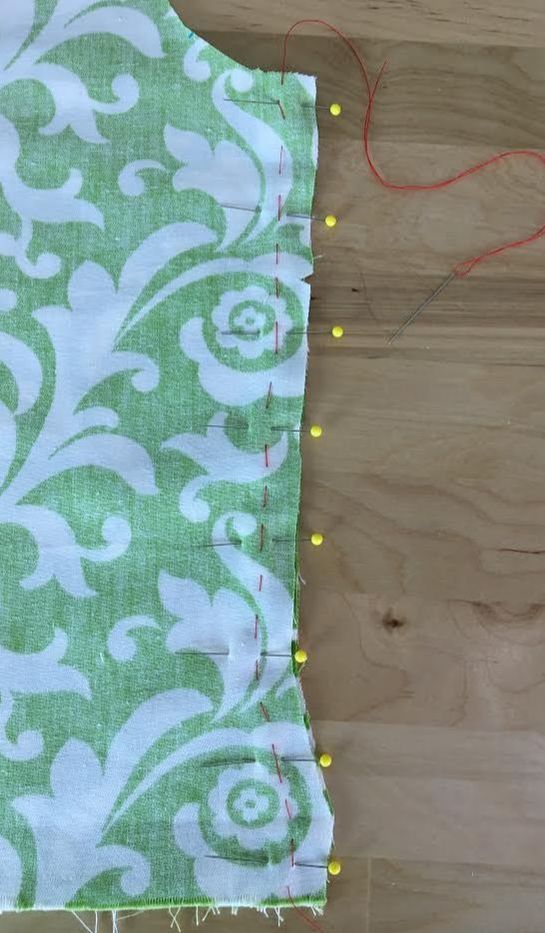
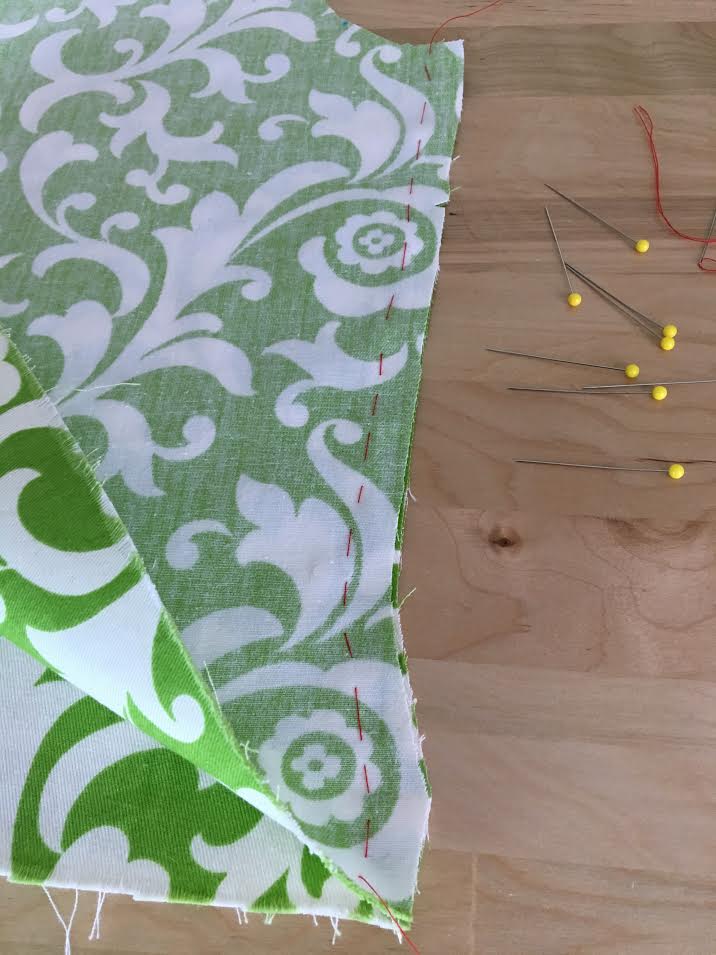
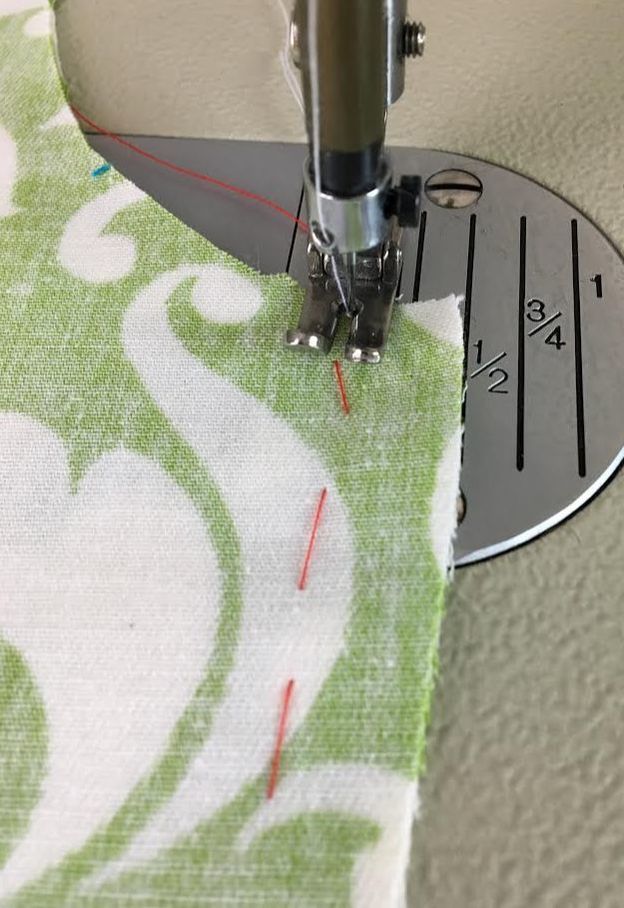
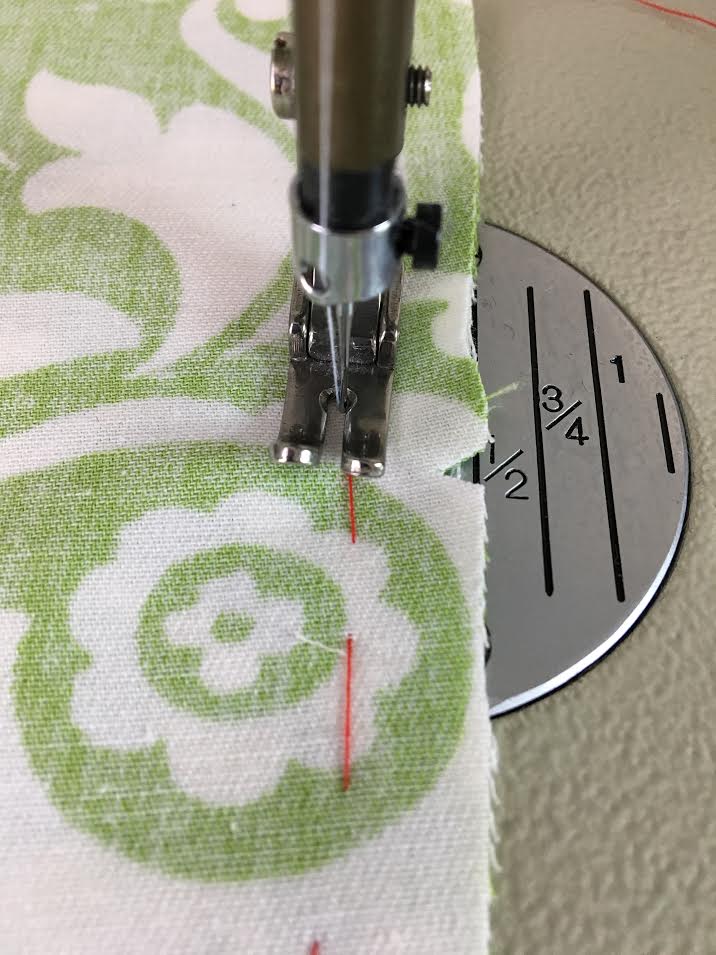
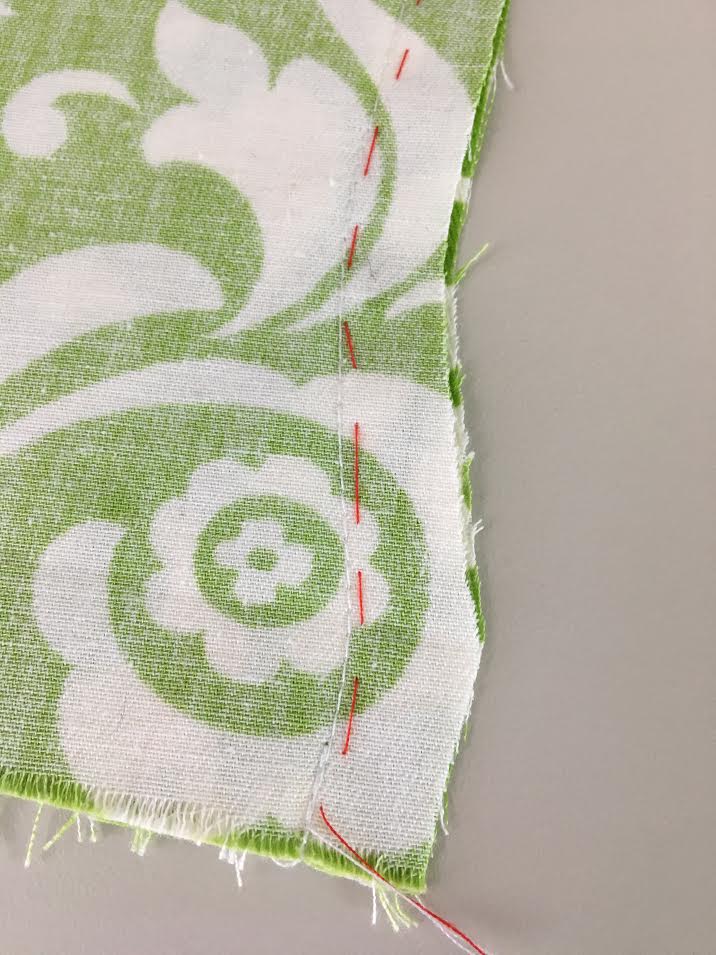
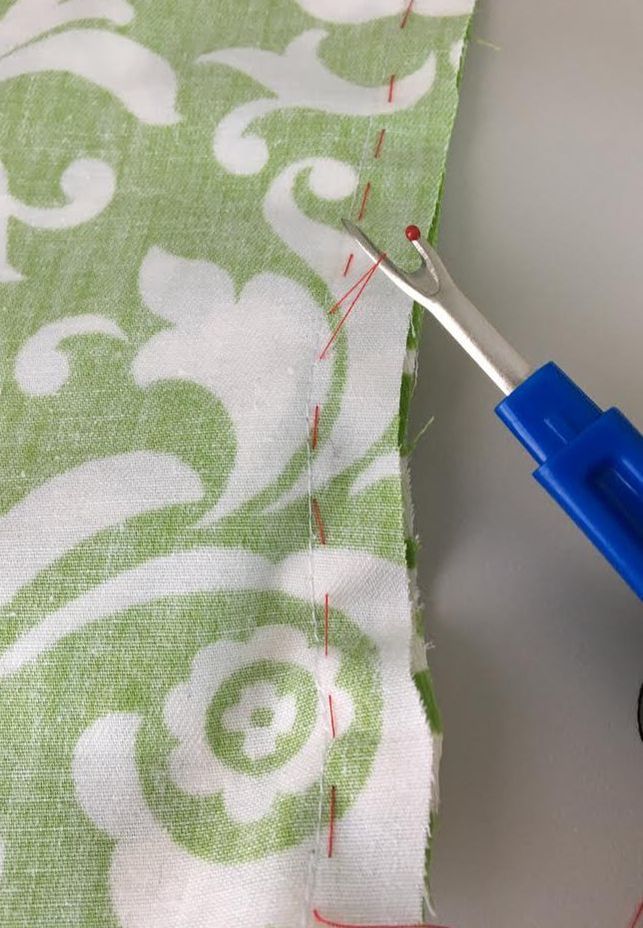
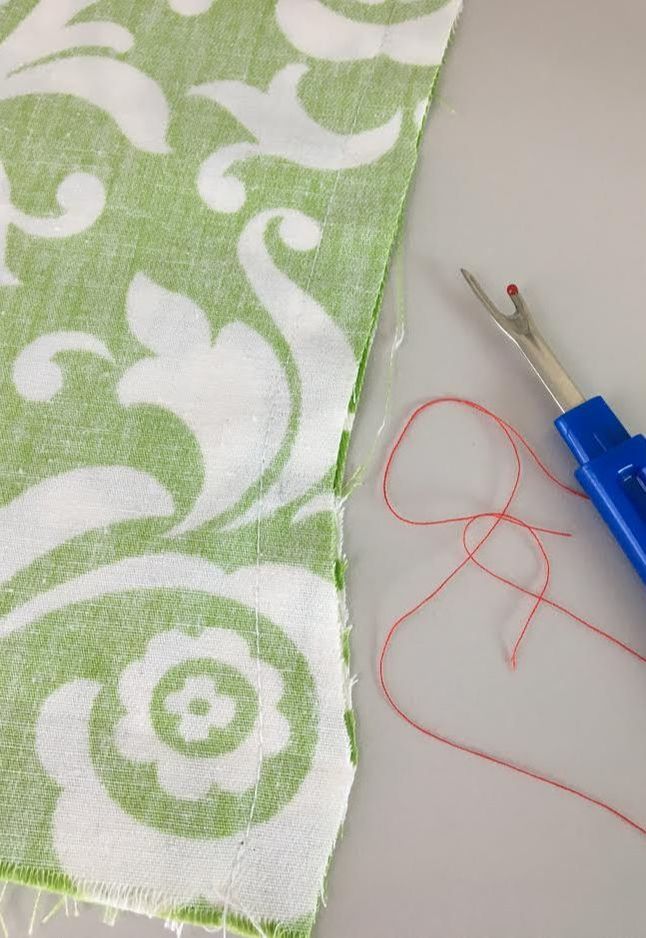
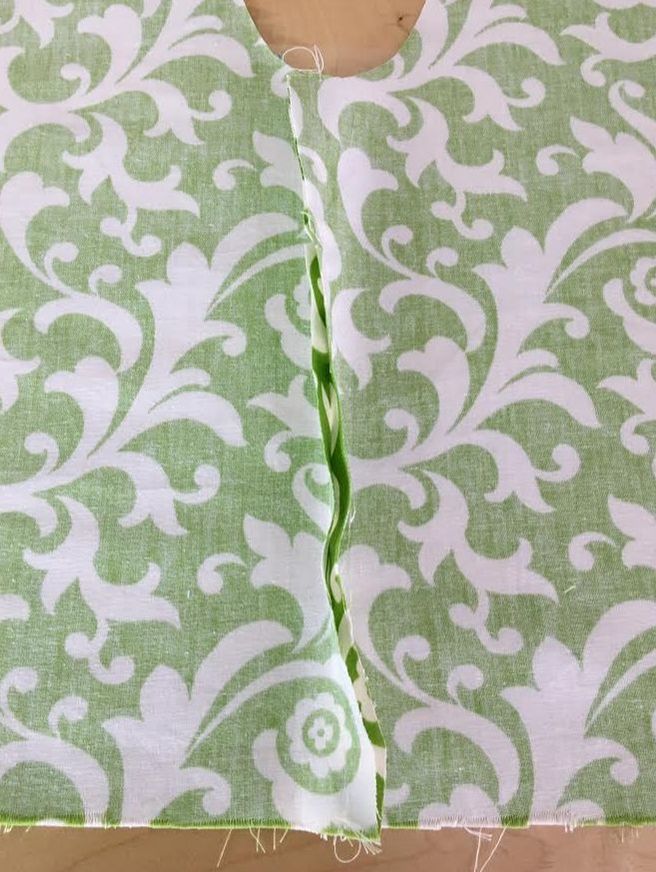
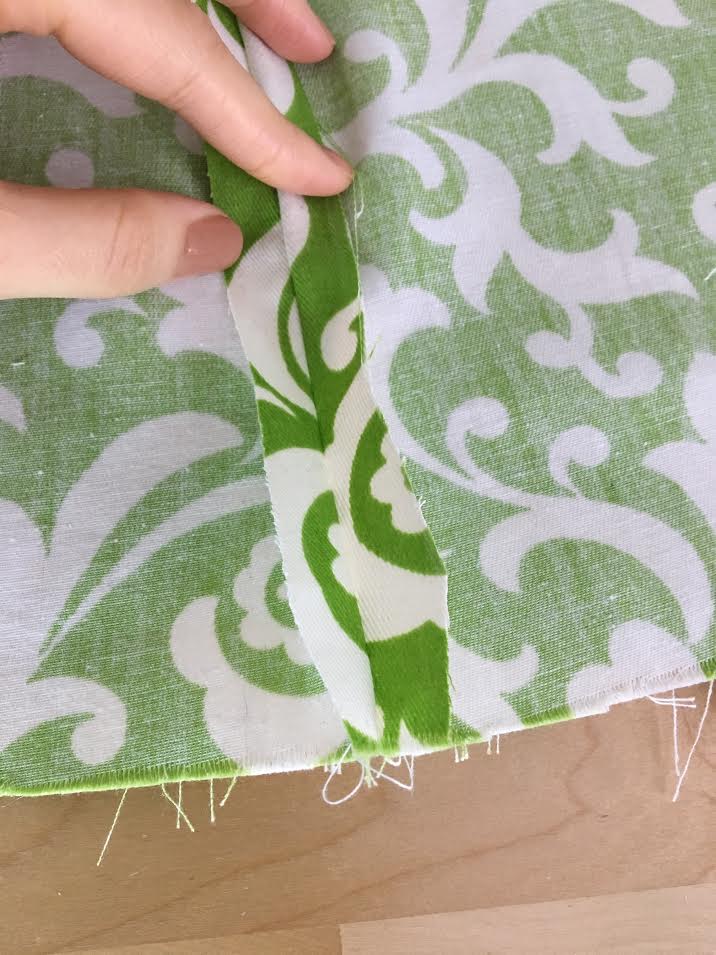
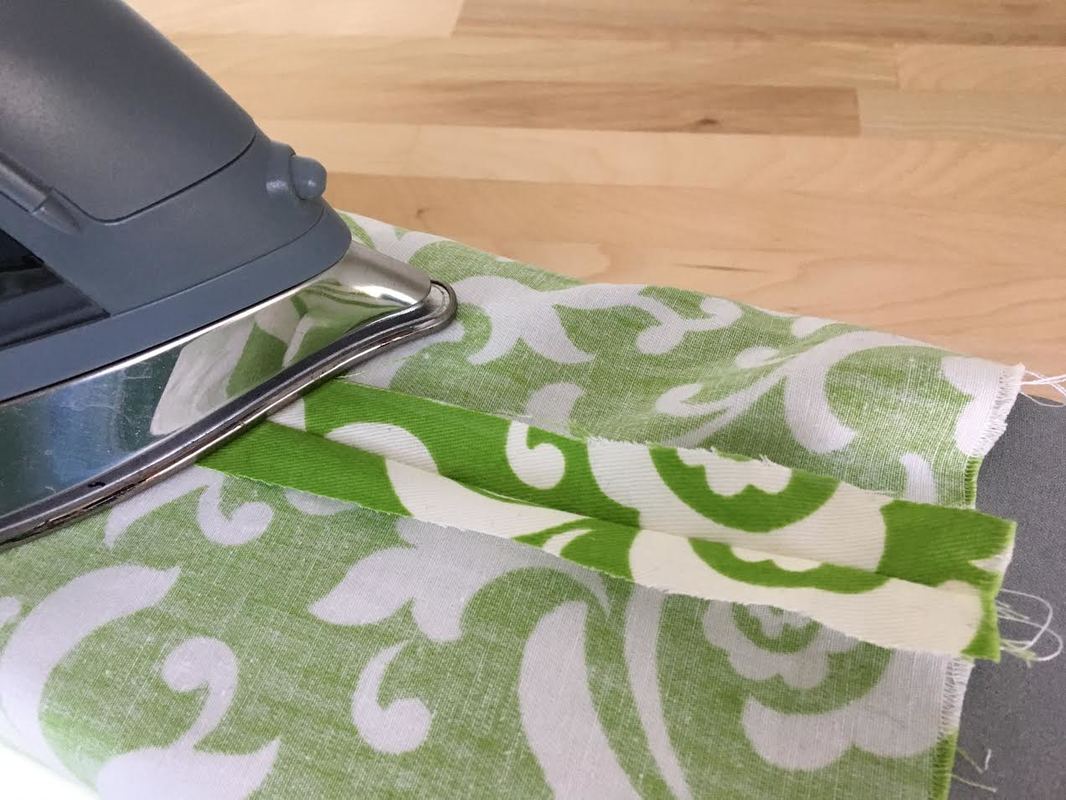
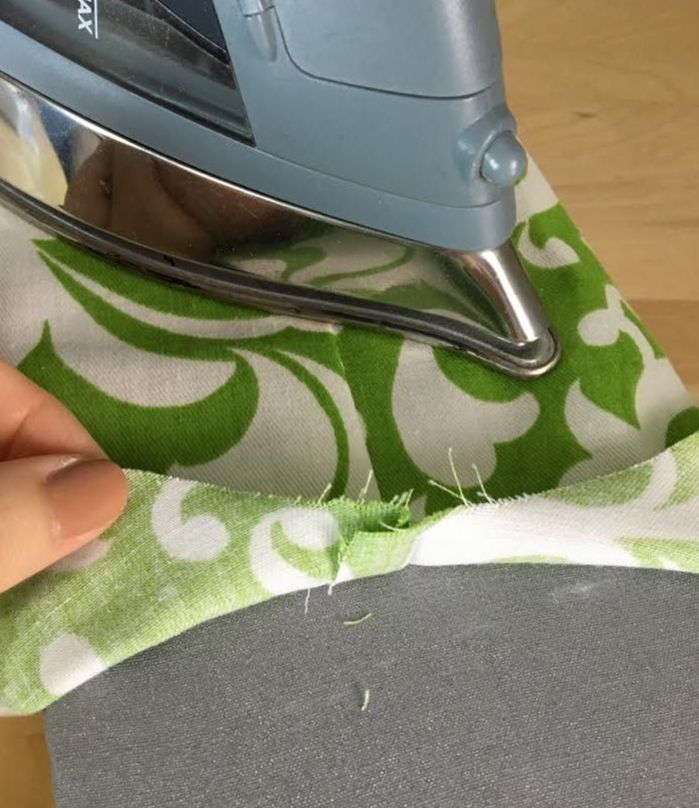
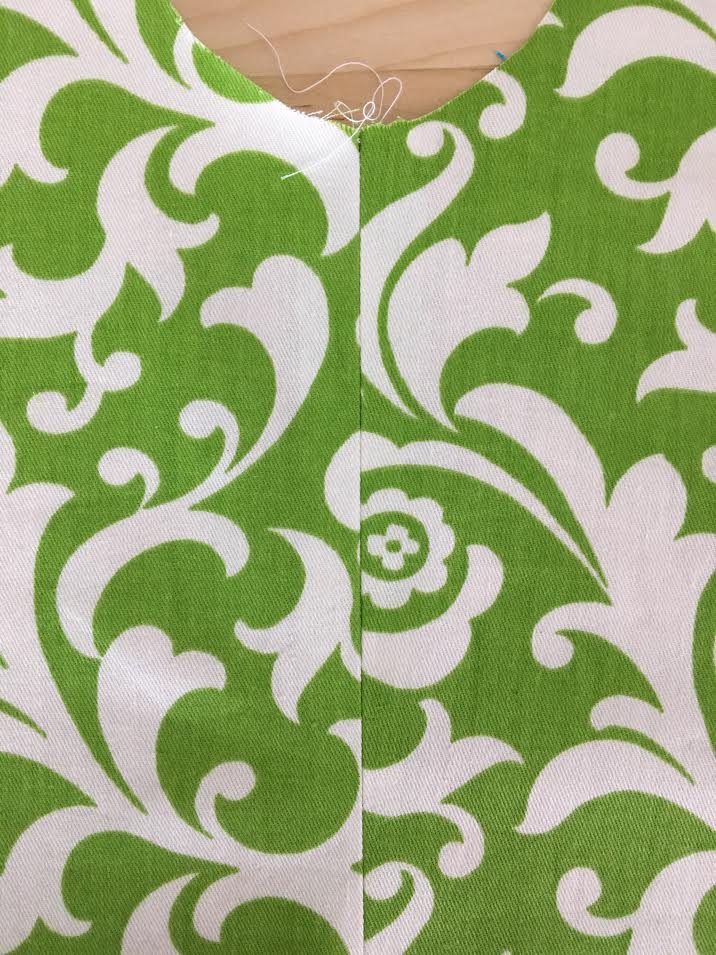
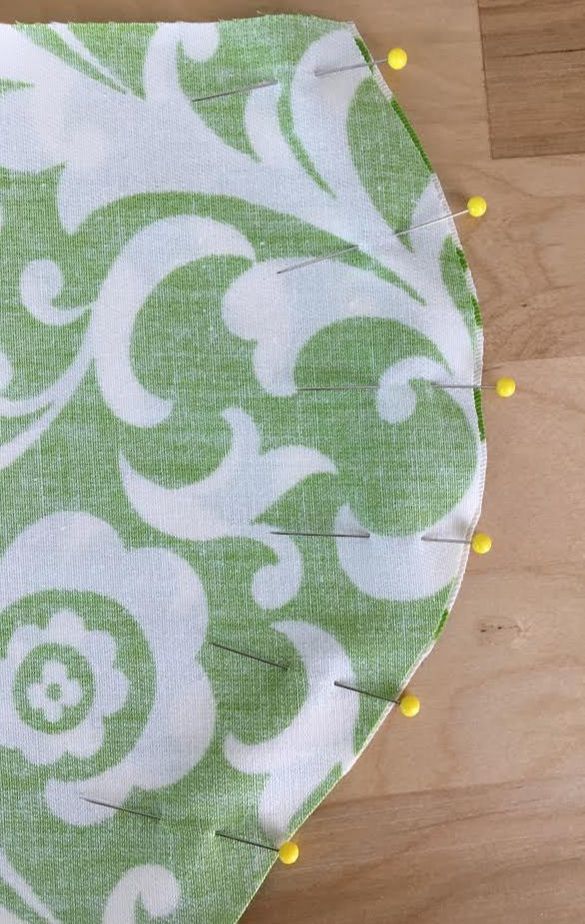
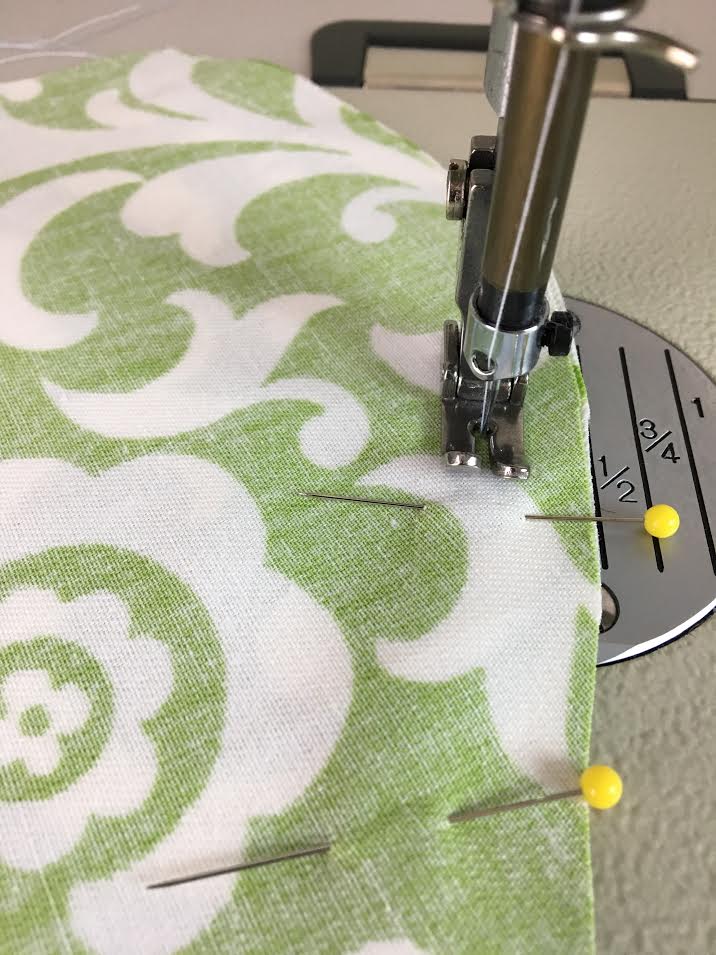
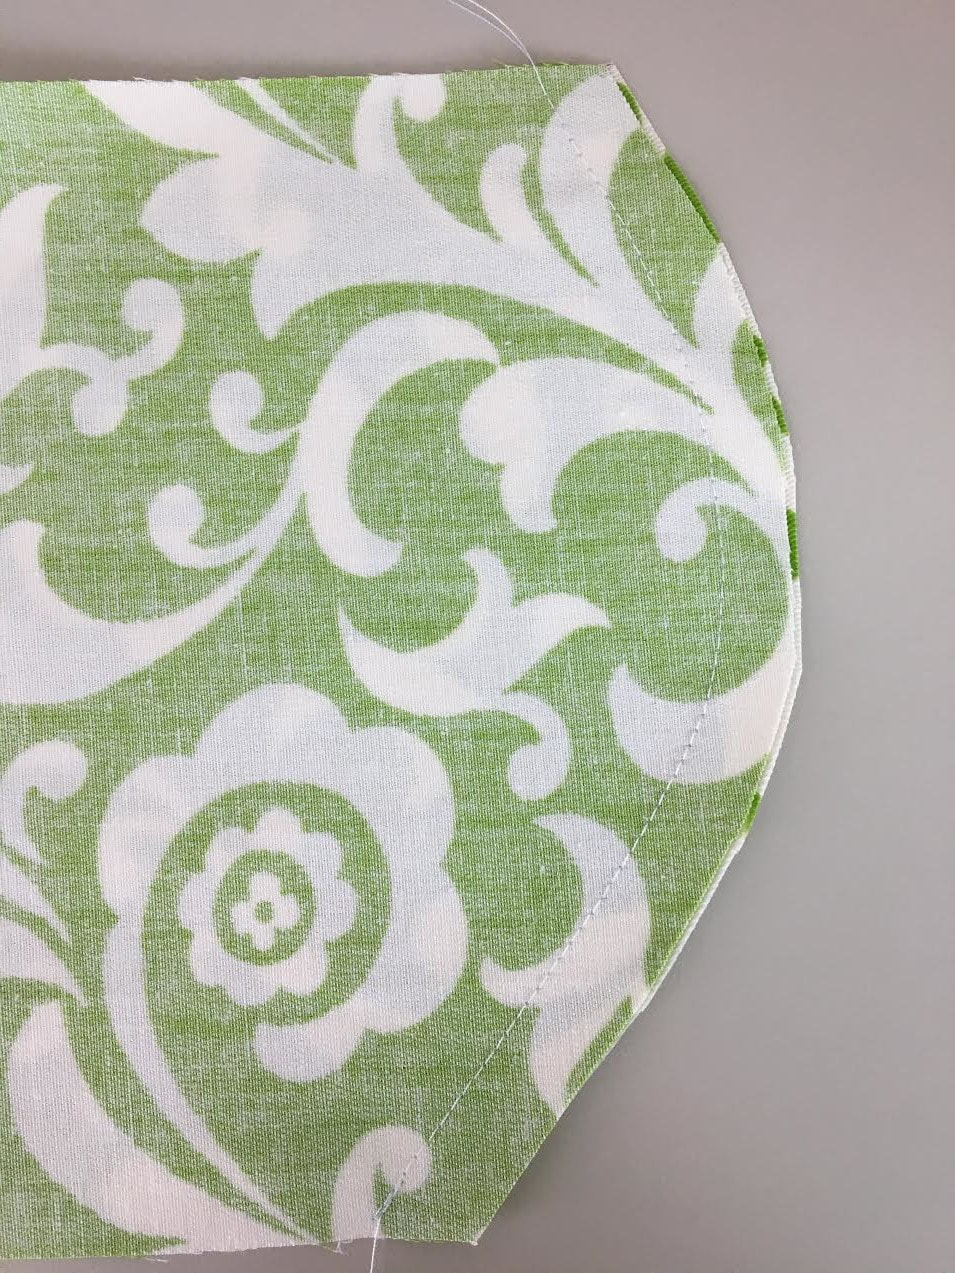
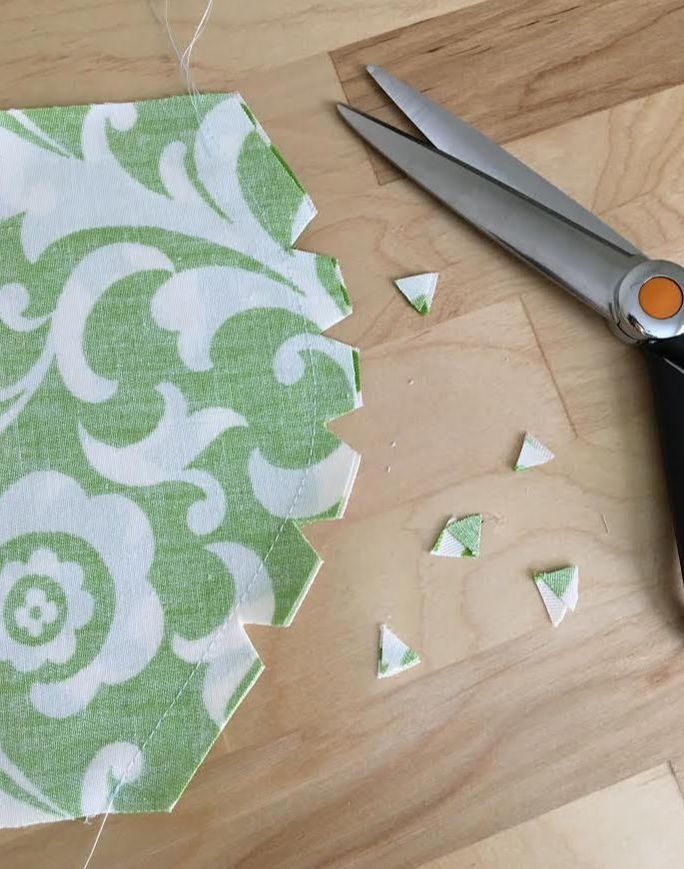
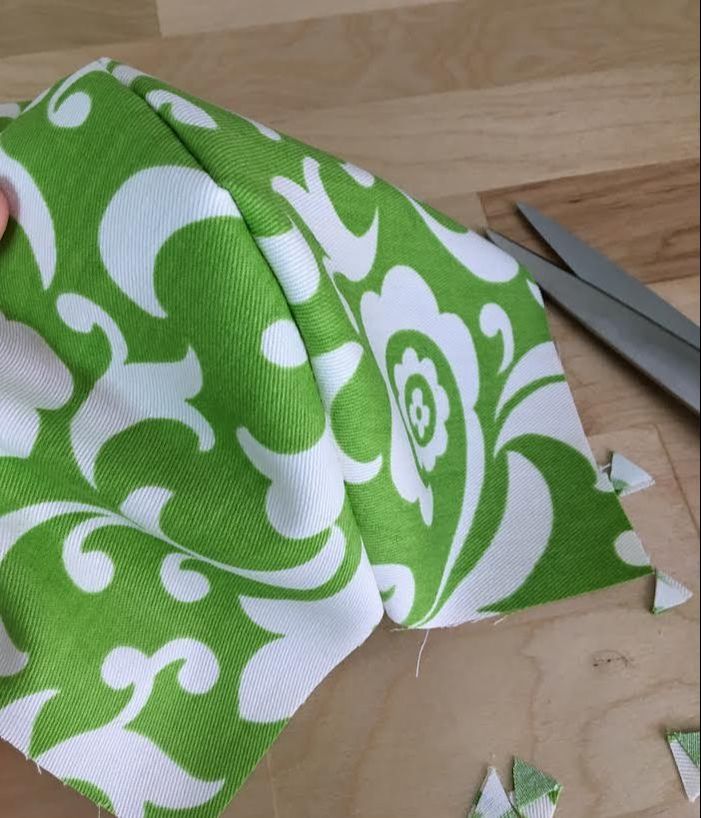
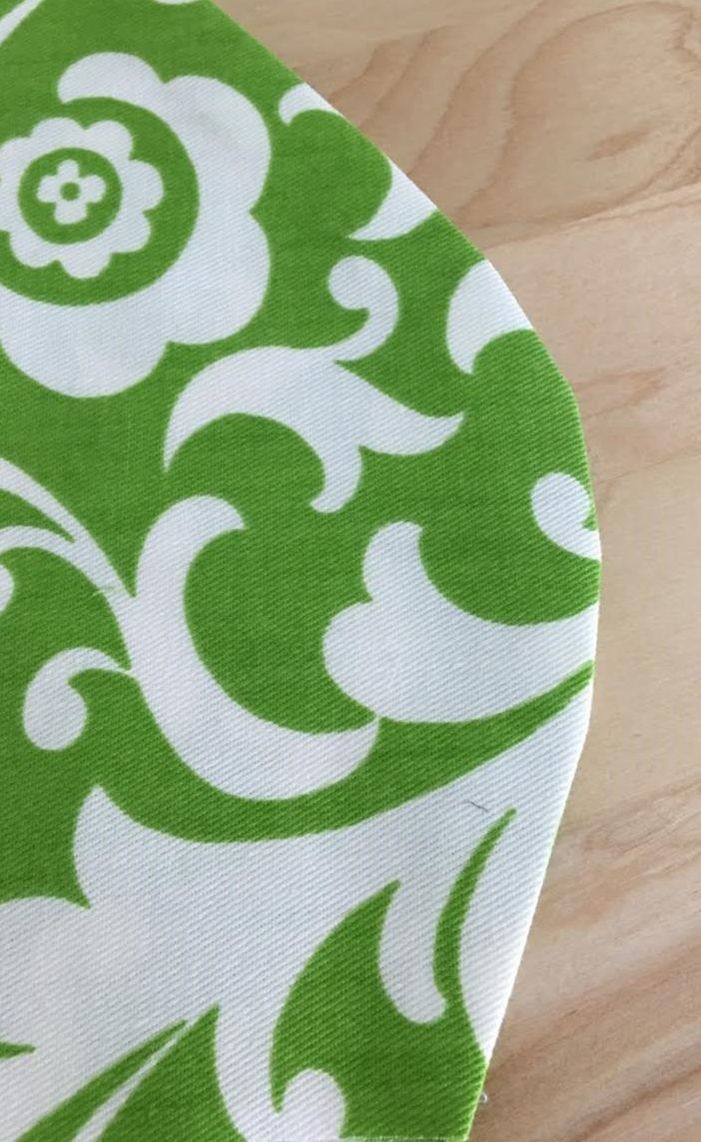
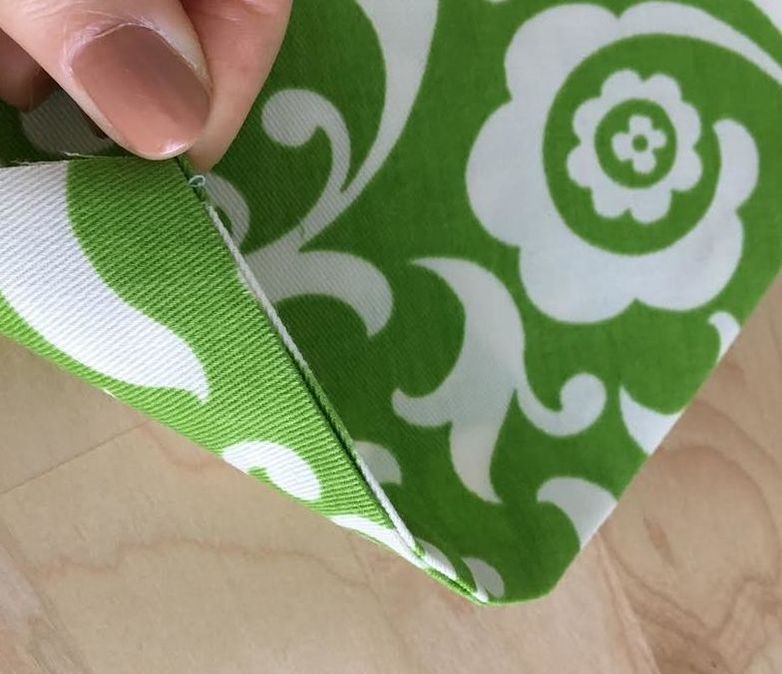
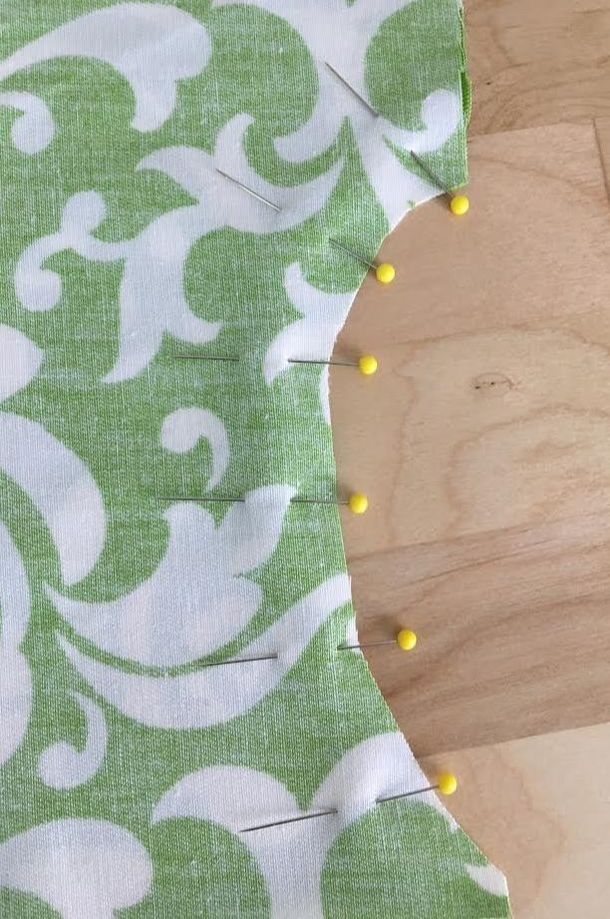
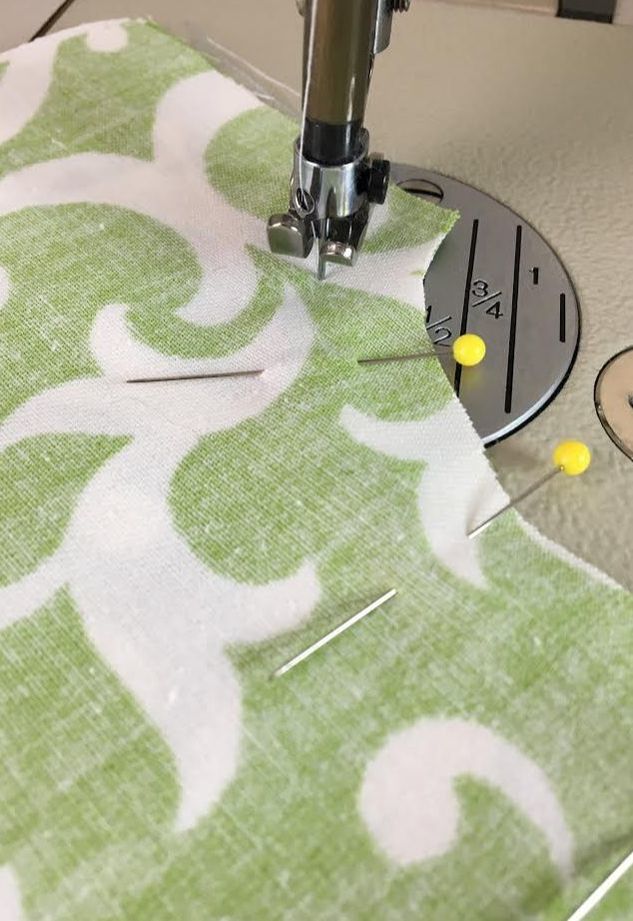
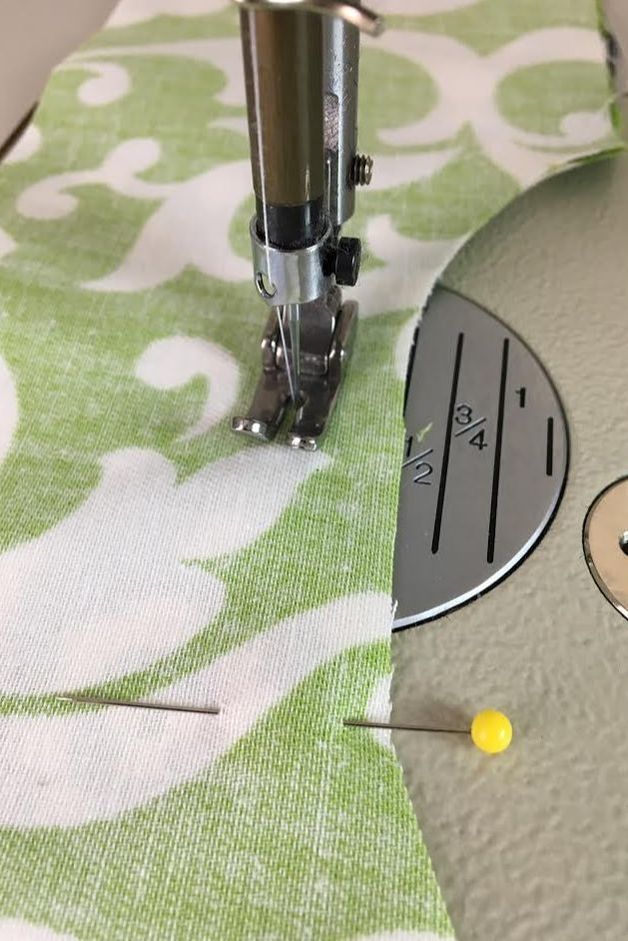
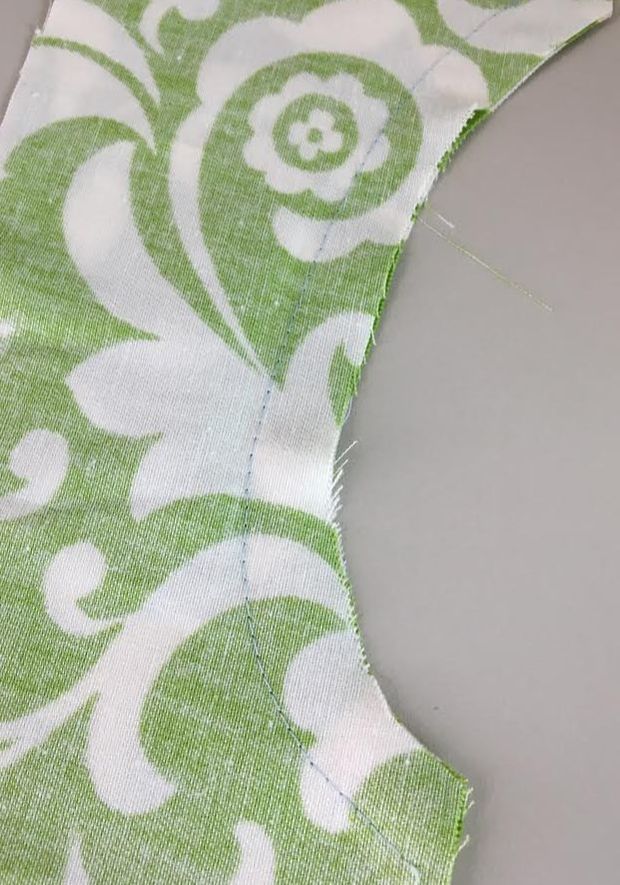
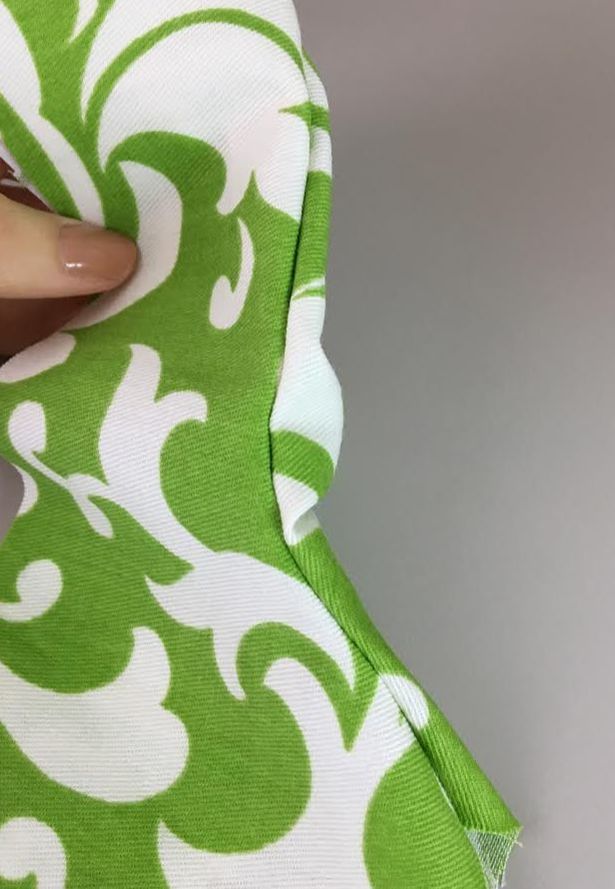
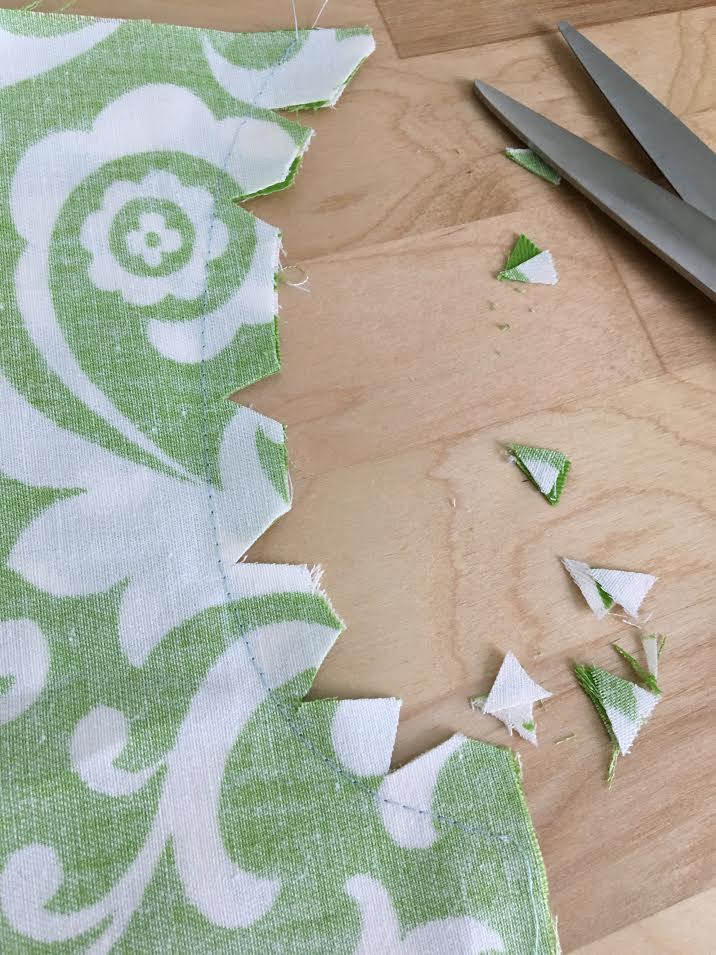
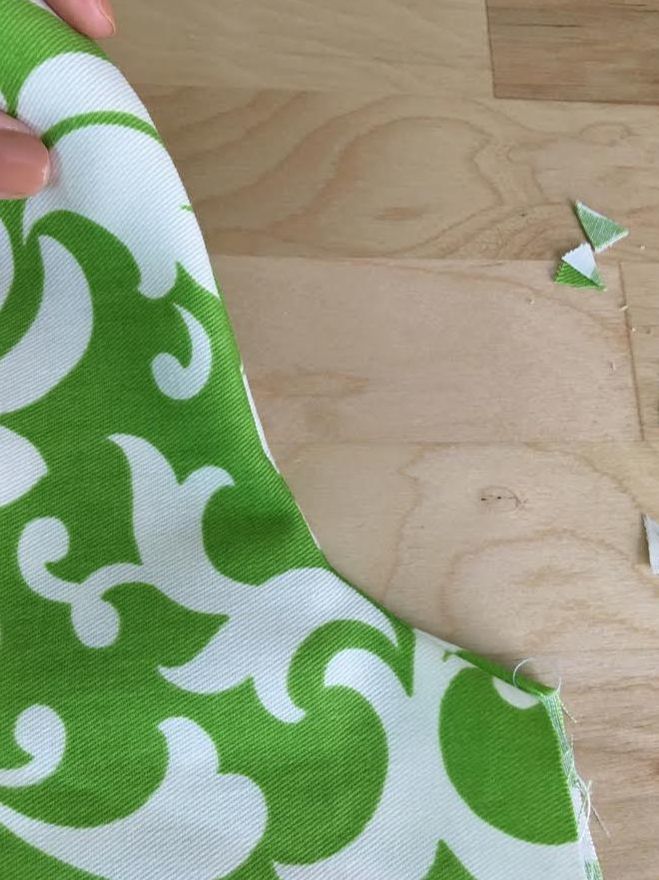
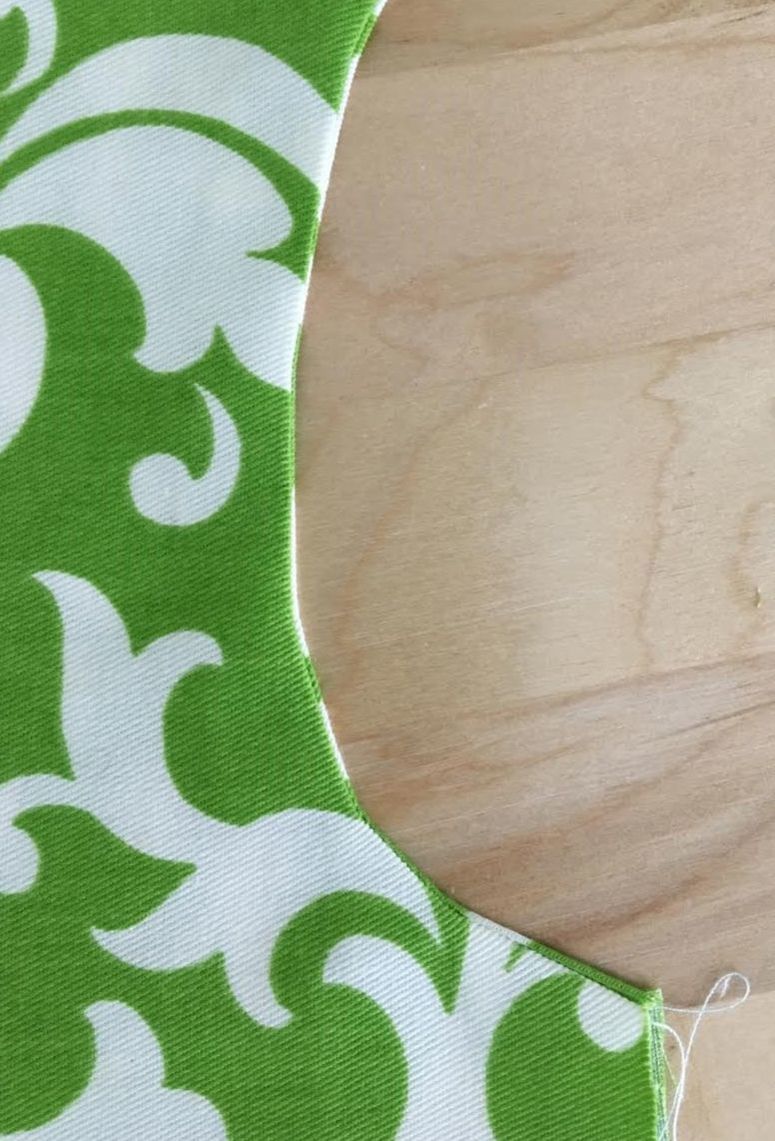
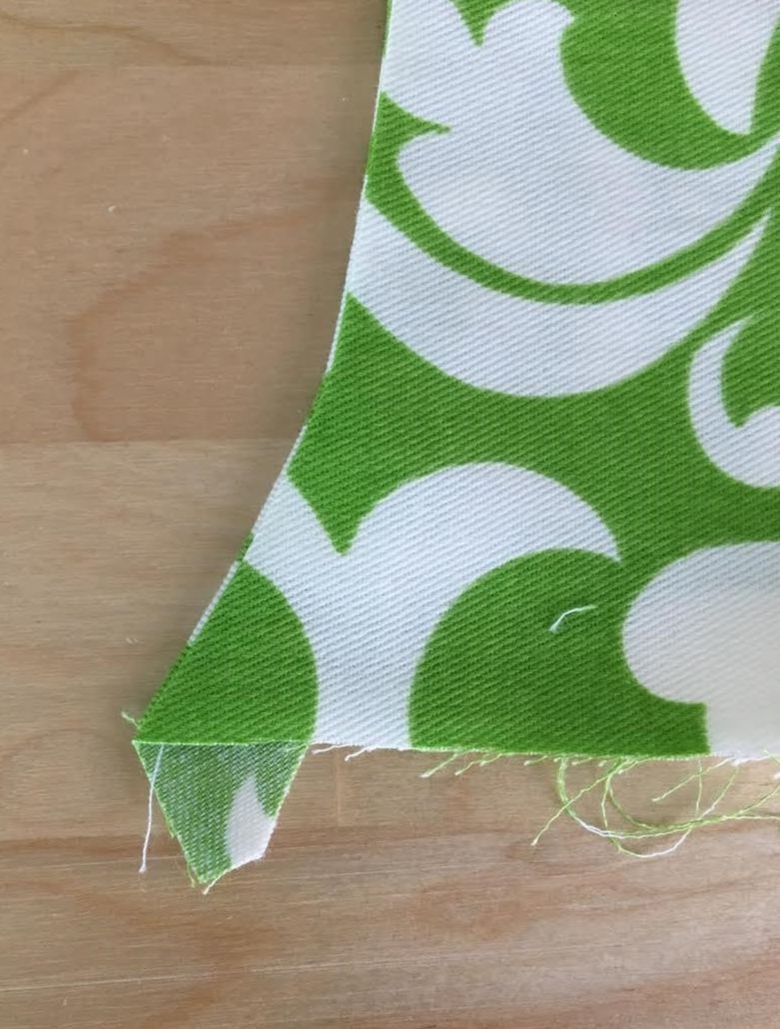
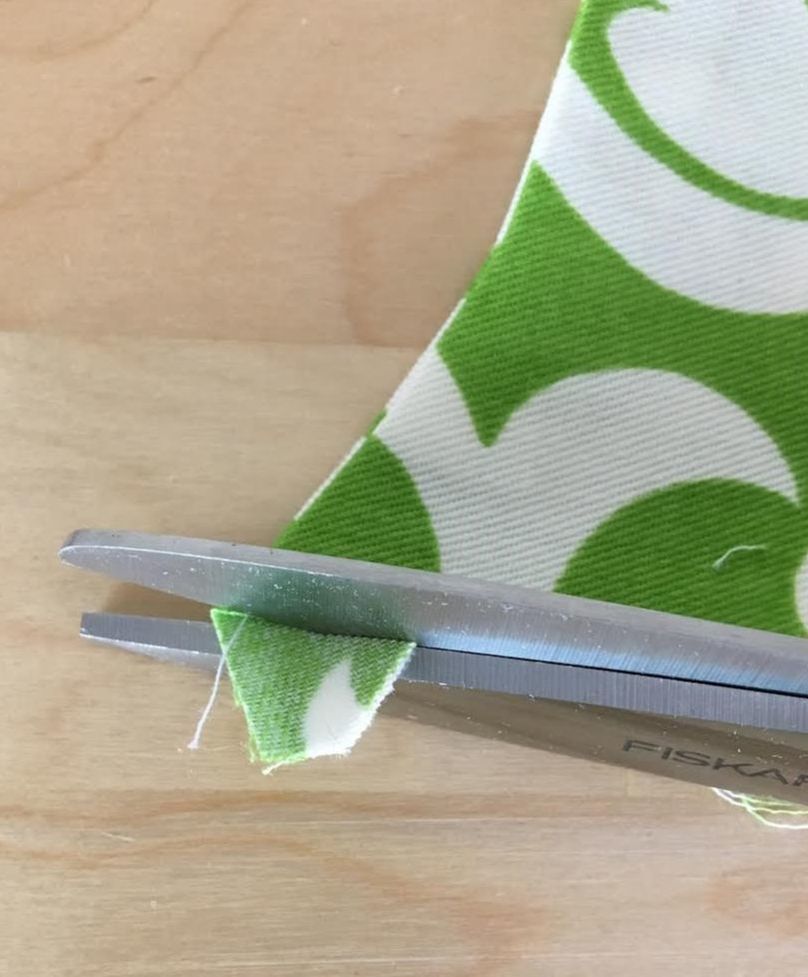
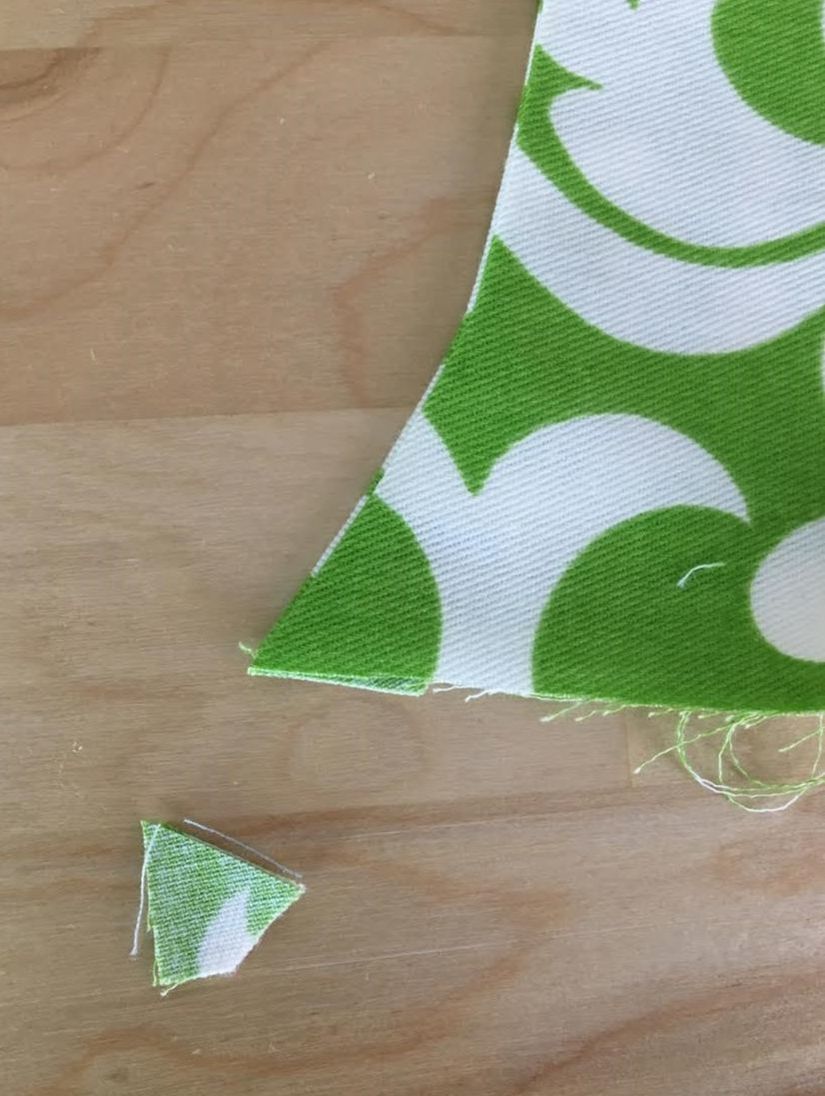
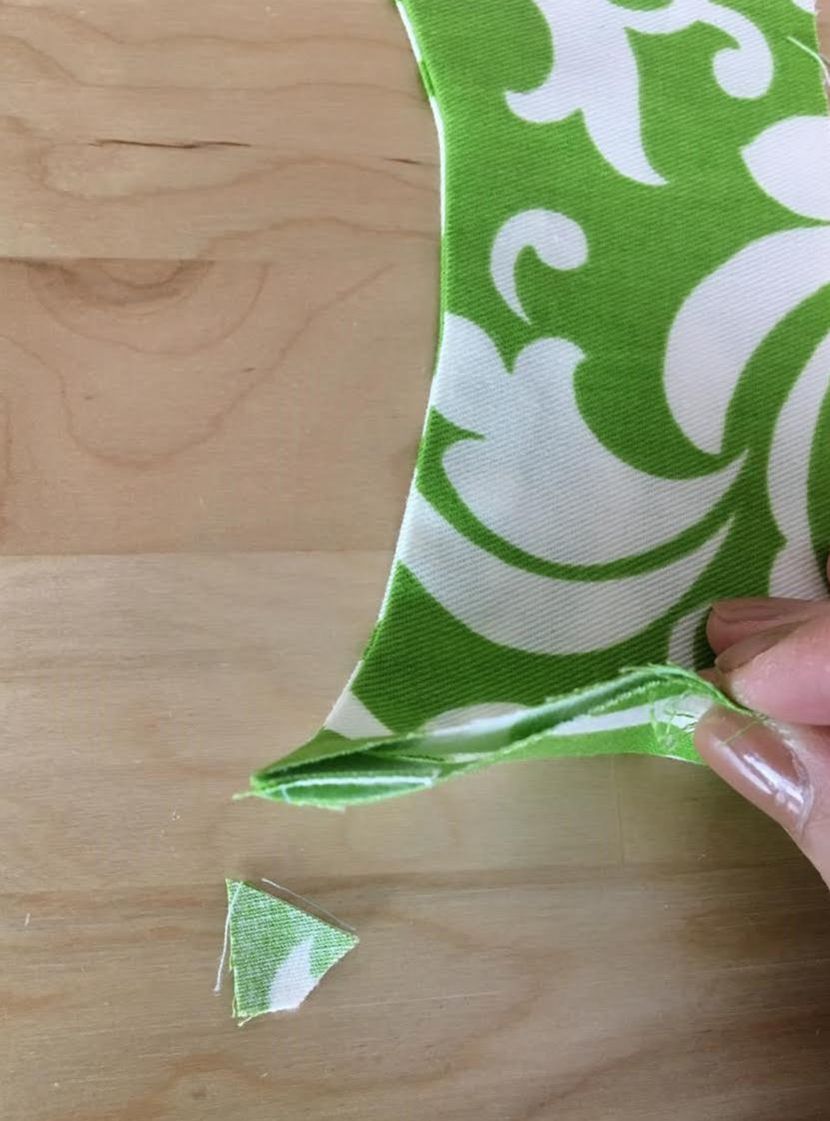
What are seams? Seams are the building blocks of a clothing item. A seam is the point of connection between the fabric pieces that make up a garment. As a sewing beginner, the first thing you will learn how to do is sew a basic seam. If you can master sewing simple seams, you'll find it much easier to move on to more complicated sewing techniques. In dressmaking, almost all sewing reverts back to the same construction methods used for sewing basic seams. You cannot sew a seam without seam allowance. Seam allowance is the distance from the seamline to the raw edge of the fabric, allowing for the fabric pieces to be durably connected without jeopardizing the size and/or fit of the garment. In order to successfully sew a seam, it is important to understand some basic seam allowance concepts. We'll give you the nitty-gritty on seam allowance in next week's blog, but for now, here are a few basic seam allowance "rules" you should be familiar with (especially if you've never tried your hand at sewing before): - The length of seam allowance used is mainly decided on the type of fabric and seam finishing technique used. A thicker, bulkier fabric requires larger seam allowance while thinner, lightweight fabrics work well with shorter seam allowance. - The most commonly used seam allowance measures 5/8" to 1/2", and is used mainly on light to medium weight fabrics. - Seam allowance is usually clean finished to ensure seam durability and prevent the raw fabric edges form fraying. The type of clean finishing technique used for seam allowance is decided on weight and type of fabric, as well as design/style of the garment. - After the seam is stitched, the seam allowance should always be ironed down in a specified direction in order for the seam to lay flat (you'll see a demonstration of this in the sewing tutorial below). - Due to the fact that the seam allowance is enclosed on the inside of a garment, it can withstand various marks such as notches, clips and wedges necessary in the construction process. Since these marks are added to seam allowance, they are never visible on the face of the garment. - All conventional sewing machines have a seam allowance guide to the right of the sewing machine needle. In order to sew each seam at the proper seam allowance, the raw edge of the fabric is aligned with the appropriate seam allowance guide line according to the required seam allowance length. You will get a a look at the application process behind these seam allowance basics in the tutorial below. Types Of Seams: 3 Basic Seams. Due to the fact that seams form the building block of a garment, we can probably break them down into extensive categories starting with simple straight seams and ending at complex cornered seams. As a beginner however, you should really focus your attention on just 3 types of basic seams: Straight seams, inner curved seam, and outer curved seams. If you feel comfortable sewing these 3 seam styles, you should have no issues sewing a clothing item from start to finish. A straight seam of course, is the most basic and should be the first project you tackle as a beginner. Curved seams, whether inner or outer positioned, can be a bit more challenging for beginners and require some tension release in order for the seam to lay flat. In the tutorial below, we'll walk you through the step-by-step process of sewing each one of these individual seams. How are basic seams matched? This is perhaps one of the most common questions from sewing beginners. A sewing pattern displays a lot more construction information than the fabric pieces alone (once the patterns are removed). While it can be pretty straightforward to visually match each seam when looking at the sewing patterns, once the fabric has been cut and the patterns have been removed, the seam-lines become somewhat of a blur, especially if you have little experience sewing. To help you match seams in the construction process, most seam edges feature specially placed notches within the seam allowance, essentially transforming each fabric piece into a puzzle piece. Notches can be marked as wedges, clips, or triangle extensions along the seam allowance. Each notch on one portion of the seam should match a corresponding notch on the other portion of the seam. To better visualize it, take a look at the image below: The two portions of the bodice will be sewn at 1/2" seam allowance to form the side seam of the blouse. The notches, which are marked by v-wedge clips, are present on each side of the seam allowance, falling at the same distance from the armhole curve at the top. Once the edges are aligned for sewing, the two notches will overlap and match perfectly, thus serving as a guide in the seam-matching process. Localized wedges and clips applied within the seam allowance may also be used for curved and cornered seams to eliminate tension and allow the seam to lay flat. Clipping the seam allowance for tension release is a very common technique used in the sewing process. In almost all cases, the face of both fabric pieces should be touching when sewing a seam. If you are in the process of learning how to sew, it is very normal to mismatch seams and have to redo them. Don't get disappointed! This is a very natural part of the learning process, especially when it comes to sewing. Invest in a good seam ripper and keep practicing! Machine Stitch Tension And Stitch Length Although it may seem unimportant (initially), stitch length is an essential part of the sewing process and should be adjusted according to type of fabric or amount of thickness you are sewing through. The general rule is that thinner, lightweight and loosely woven fabrics should be sewn at a shorter stitch length. Thicker fabrics or multiple layers of fabric that do not feature a loose weave should be sewn at a longer stitch length. In most cases, when this general rule isn't followed, you may experience some tension issues and wrinkling along the seam, especially in the case where the stitch length is too dense/short for the fabric at hand. Vise versa, if the stitch is too long when sewing loosely woven or thin fabrics, the seam may be less durable. In addition, the stitch thread may pull apart and show on the face of the garment. Due to the fact that all sewing machines are somewhat different, you may not initially know what stitch length works best for what fabrics until you've experimented a bit with your machine. Use scrap fabric to test different stitch lengths. If you still feel you are not 100% comfortable using your sewing machine, try these suggested exercises and remember that practice makes perfect: 4 Practice Exercises For Getting Comfortable With Your Sewing Machine. How To Sew A Regular Straight Seam for Beginners: Step-By-Step Guide. As mentioned above, sewing a straight seam is most likely the first step you'll take in the learning process. Although it is simple, if you've never sewn before, there are a few elements you might find challenging. First, having to align the edges of each fabric piece accurately and ultimately, keeping them from moving apart during stitching can prove to be a bit difficult. Additionally, ensuring that the stitch is straight and evenly distributed is another task that takes some practice to perfect. The good news is, there are a few tricks you can use to minimize error and facilitate the sewing process- We'll show you a few of them in the steps to follow. 1. Match the edges of the two fabric pieces by locating the matching notches along each edge. Overlap both seam edges such that the face of both fabric pieces are touching- the wrong side of the fabric should be on the outside. Align the edges to each other making sure the notches are overlapping and matching perfectly as shown above. Matching the notches will also ensure that both bottom and top edges of the fabric pieces are aligned properly. As mentioned above, the notches will also help with aligning the correct fabric edges to one another. 2. Pin the two layers of fabric horizontally, perpendicular to the fabric edges as shown above. This pin placement will allow for faster and easier pin removal during stitching. It is also important to look at the side edge of the hem. If the finished hem will be folded up, then you should trim the bottom side edges such that when the hem allowance is folded up, the hem remains flat and smooth throughout. To do this, hold the hem up, folding it at the correct hem allowance as shown in the image above. Next, use a pair of scissors to trim the excess fabric on the side, following the side edge of the fabric accurately. Now that the side fabric excess is trimmed at the bottom, the hem will lay flat when folded up for clean finishing. As you sew, you will have to follow this side angle evenly throughout. It may feel a bit weird if you are a sewing beginner, but it is a necessary step when working with longer hem allowance. 3. Basting the two layers of fabric together before applying the final machine stitch is highly recommended for sewing beginners. Not only will it ensure that the two layers of fabric don't slip away from each other during stitching, it will also allow you to feel more comfortable applying an straight machine stitch. Using uneven basting, apply a stitch at a little less than what the seam allowance is from the edge. For example, in this tutorial, the seam allowance is 1/2". This means that the basting stitch will be applied at a shorter distance from the edge (1/8" or 1/16" less). Doing so will ensure that the basting thread is easy to remove once the permanent machine stitch is applied. Now that you have a basting stitch to keep the two layers of fabric together, you can remove the pins. Eventually, you should be able to use the pins alone to hold the fabric layers in place during machine stitching. However, it is highly recommended that you use basting until you feel comfortable enough to graduate to using pins alone. 4. Machine stitch to the left of the basting stitch, following the correct seam allowance. Use the guide on your sewing machine to apply a straight, even stitch. Avoiding to stitch directly on top of the basting will make it much easier to remove once the permanent machine stitch is applied. If you stitch directly on top of the basting stitches, they can get caught underneath the machine stitch making them more difficult to remove. In the image above, the basting is positioned at about 1/16" less than the seam allowance of 1/2". Thus, the machine stitch will be positioned very close to the basting stitch but not actually overlap it. Continue stitching following the correct seam allowance as shown. Once the stitch is complete, backstitch on your sewing machine to lock the threads and prevent them from unraveling. In the image above, you'll see that the permanent machine stitch is aligned to the left of the basting stitch without overlapping it. In addition, you'll also notice that the machine stitch maintains the same seam allowance at the bottom side angle of the hem. 5. Using a seam ripper (or a pair of scissors) pull the basting thread to remove it. Ironing the seam allowance: The direction in which the seam allowance is ironed depends on the type of clean finishing technique it will receive. Traditionally, if the seam allowance edges are clean-finished individually (using a serging stitch or binding, for example), they should be ironed open. Vise versa, if the seam allowance edges are clean finished together, they will be ironed in a single direction, usually towards the back in the case of vertical seams and towards the waistline in the case of horizontal seams. Of course, there are additional clean finishing techniques that are a bit more complex. We won't worry about them in this tutorial. It is sufficient to know just the two ironing techniques described below. To learn how to clean finish seam allowance raw edges, check out this tutorial: How To Finish Seam Raw Edges: 4 Ways. As mentioned, the seam allowance has to be ironed flat in order to achieve a smooth, flat seam on the face of the garment. To iron the seam allowance open (used when the edges are clean finished individually), pull the seam allowance apart and iron directly on top of the seam allowance/seam maintaining the edges open. For best results, iron in the same direction of the stitch, and work on the wrong side of the seam as shown above. Meaning that if the seam stitch was applied from top of the garment to bottom, you should iron in the same direction. This isn't a make or break step and it can be skipped. However, you'll find that if you stitch and iron directionally, the seam will be much smoother and lay flatter requiring less ironing effort. To iron all seam allowance edges towards one side (used when the seam allowance is finished together), you may find it easier to work on the right side of the seam. Iron directly on top of the seam, making sure all seam allowance layers are pointing in a single direction underneath. Apply steam as needed. The finished seam should lay flat and feature a smooth, wrinkle-free finish. Applying the appropriate stitch length for the fabric at hand, as well as ironing the seam after stitching will ensure that you sew a professional, good quality seam every time! How To Sew Outer Curved Seams: Sewing curved seams may be a bit dreadful for those that are not yet comfortable with their sewing machine. However, if you follow the basting process described above and stitch very slowly, you should have no problem achieving smooth, even results. 1. Align the curved edges to one another such that the face of both fabric pieces are touching. Pin the edges horizontally as you did for the straight seam above. Once the pins are inserted, it is recommended that you add a temporary basting stitch to hold the curved layers together better. In the steps below however, we won't be using a basting stitch and will rely solely on pins during machine stitching. 2. Carefully stitch along the curved edge, following the correct seam allowance guide on your sewing machine. Remove the pins as you approach them- DO NOT SEW THROUGH THE PINS. If you find it difficult to keep the stitch smoothly curved, stitch slower and lift the presser foot occasionally to realign the fabric. It can be challenging to sew curved edges at first, but with enough practice you'll be able to stitch them in a single go! As displayed in the image above, the curved stitch is evenly distributed at the same seam allowance from the edge of the fabric throughout. 3. In most cases, curved edges may require to be clipped for tension release. This is especially necessary for a woven fabric seam that is turned onto itself. You'll find that the more curved a seam is, the more it has to be clipped in order to achieve a smooth finish on the front of the garment. To release tension, cut localized wedges into the seam allowance adding them closer together in the areas where the seam is most curved. Clip close to the stitch but be very careful not to cut through the actual stitch. After the seam allowance has been clipped, the seam will be flexible and easy to manipulate allowing you to turn it on its face side. 4. Iron the seamed edge down for a smooth, flat finish. To pull the curved seam outwards into a smooth line, you can use pins to gently pull on the stitches thus bringing the curved edge out. This sort of finish is used a lot when adding facings or lining to a garment featuring curved or semi-curved edges. How to Sew Inner Curved Seams Inner curved seams can be a bit more tricky to sew. However, if you take some precautions and follow the same steps as sewing an outer curve, you'll find that there's plenty of ways you can facilitate the process and achieve a high quality professional finish. 1. Pin the two fabric pieces perpendicular to the edge as shown above. It is highly recommended that if you are a sewing beginner, you add a temporary hand basting stitch to keep these two layers of fabric together. 2. Stitch according to the designated seam allowance, following the seam allowance guide on your sewing machine. It may be a bit challenging to do this on an inner curve. To facilitate the process, keep lifting the presser foot occasionally and adjust the fabric edge to match the seam allowance guide. If you are using only pins to keep the fabric pieces together, make sure you remove each pin as you approach it. Remember not to sew through the pins or you risk breaking the machine needle. Just like the outer curved stitch, the inner curved one should be smooth and evenly distributed from the edge. Depending on where it is located on the garment, it will also need to be clipped for tension release, especially when working with a non-stretch woven fabric. If you try to turn the seam on its face side without clipping the seam allowance appropriately, you'll find that there is too much tension for the seam to lay flat. It will pull, pucker and the curved line will have no definition or structure (shown above). 3. Similarly to the outer curve, it is important to clip the seam allowance edges in order to release tension. Apply clipped wedges along the most curved areas of the seam allowance stopping at about 1/16" away from the actual stitch. Be careful not to accidentally cut through the stitch. Now that the seam allowance has been trimmed, you'll find that it is much easier to turn the seam on it face side achieving a perfectly defined inner curve that lays flat. 4. As you did for the outer curve, iron the folded seamline to achieve a smooth, flat finish. Use a pin to gently pull the curved seamline out for a more defined inner curve. If there is any excess seam allowance poking out from the edges, trim it following the fabric's edge as shown above. Trimming unnecessary seam allowance extensions will eliminate bulk and provide a clean, professional finish.
0 Comments
Leave a Reply. |
The Blog:A journey into our design process, sewing tutorials, fashion tips, and all the inspiring people and things we love. Doina AlexeiDesigner by trade and dressmaker at heart. I spend most of my days obsessing over new fabrics and daydreaming new ideas. Sadie
Executive Assistant & Client Relations Manager Archives
November 2019
Categories
All
|
-
Sewing Tutorials
-
Basics
>
- Aligning Pattern Grainlines To Fabric
- Preparing Fabrics For Sewing
- Pinning Sewing Patterns To Fabric
- Placing Sewing Patterns On Fabric For Cutting
- Rotary Cutters or Fabric Scissors?
- Cutting The Sewing Patterns
- What Are Notches And How To Use Them In The Sewing Process
- Transferring Notches From Pattern To Fabric
- Transferring Seamlines to Fabric
- Staystitching
- Backstitching: A Complete Guide
- Hand Basting: A Complete Guide
- Sewing Continuous Bias Binding
- Darts >
-
Sewing Seams
>
- The Basics Of Seams And Seam Allowance
- How To Sew A Straight Seam
- Sewing Curved Seams
- Sewing Corner Seams
- Trimming And Grading Seam Excess
- Notching/Clipping Seam Allowance for Tension Release
- Sewing Topstitched Seams
- Sewing Corded Seams
- Sewing A Slot Seam
- Sewing A Gathered Seam
- Sewing Bias Seams
- Sewing Seams With Ease
- Sewing Seams With Crossing Seamlines
- Sewing Unlike Fabric Seams
- How To Iron Seams: Ironing Tools And Conventions
- Sewing With Knit Fabrics
- Understanding Stitch Length And Tension
- Sewing Unique Fabric Seams
-
Seam Finishes
>
- Seam Finishing Techniques - Overview
- Applying A Pinked Seam Finish
- Applying A Bias Bound Seam Finish
- Serging And Zigzag Seam Finishes
- Sewing A Self-Bound Seam Finish
- Sewing A French Seam Finish
- Sewing A Hong Kong Seam Finish
- Sewing A Mock French Seam Finish
- Sewing A Turned-and-Stitched Seam Finish
- Sewing Overcast Hand-Applied Seam Finishes
- Sewing A Flat Felled Seam
- Sewing A Hairline Seam Finish
-
Hem Finishes
>
- Garment Hem Finishes: Overview
- Sewing A Double Fold Hem Finish
- Sewing A Single Fold Hem Finish
- Sewing Bound Hem Finishes
- Sewing An Exposed Double Layer Bound Hem
- Sewing A Folded-Up Bound Hem with Pre-folded Binding
- Sewing A Hong Kong Hem Finish
- Sewing A Band Hem Finish
- Sewing A Bias Faced Hem Finish
- Sewing A Twill Tape Hem Finish
- Sewing A Rolled Hem Finish
- Sewing A Shaped Hem Facing
- Using Fusible Hem Tape And Webbing
- Finishing A Lace Fabric Hem
- Finishing A Leather Hem
- Sewing Faced Hem Corners
- How To Finish Lining At The Hem
- Finishing Fabric Corners by Mitering >
- Interfacing A Hemline: Lined And Unlined Examples
-
Sewing Pockets
>
- Curved Patch Pocket With Flap
- Unlined Square Patch Pockets
- Lined Patch Pockets: Two Ways
- Extension On-Seam Pockets
- Separate On-Seam Pocket
- Front Hip Pockets
- Bound Double Welt Pocket
- Double Welt Pocket With Flap
- Self-Welt Pocket (Using Single Fabric Layer)
- Slanted Welt Pocket (Hand-Stitched)
- Faced Slash Pockets: Overview >
-
Sewing Zippers
>
- Sewing Zippers: General Information
- Sewing A Centered Zipper
- Sewing A Lapped Zipper
- Sewing An Invisible Zipper
- Sewing A Fly Front Zipper
- Sewing A Closed-End Exposed Zipper (No Seam)
- Sewing An Exposed Separating Zipper
- Sewing Hand Stitched Zipper Applications
- Sewing A Zipper Underlay
- Sewing A Placket-Enclosed Separating Zipper
- Sleeveless Finishes >
-
Neckline Finishes
>
- Sewing A Neck Shaped Facing
- Sewing An All-In-One Neck Facing
- Neck And Garment Opening Combination Facings >
- Sewing A Bias Faced Neckline Finish
- Sewing A Band Neckline Finish
- Bound Neckline Finishes: Overview >
- Sewing A Semi-Stretch Strip Band Neckline
- Ribbed Neck Band And Classic Turtleneck
- Decorative Neckline Finishes >
- Finishing Facing Edges >
-
Extras
>
- A Complete Guide on Interfacing
- Sewing Bound Spaghetti Straps
- Sewing Spaghetti Straps To A Faced Neckline
- Sewing Ruffles: Overview
- Patterning And Sewing A Circle Ruffle
- Sewing A Gathered Heading Ruffle
- Sewing Double Layer Gathered Ruffles
- Sewing A Gathered Ruffle Into A Seam
- Sewing A Gathered Ruffle To A Fabric Edge
- Sewing A Fabric Surface Slit
- Sewing A Slit Seam
- Hand-Applied Straight Stitches
- Hand-Applied Blind Stitches
- Hand-Applied Overedge Stitches
- Hand-Applied Tack Stitches
- Hand-Applied Decorative Stitches
-
Basics
>
- Custom Bridal
- Custom Apparel
- About
- Blog
Services |
Company |
|



 RSS Feed

