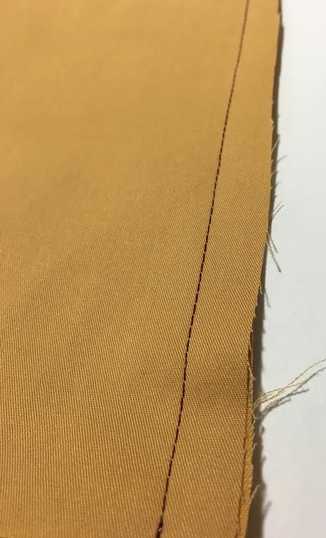
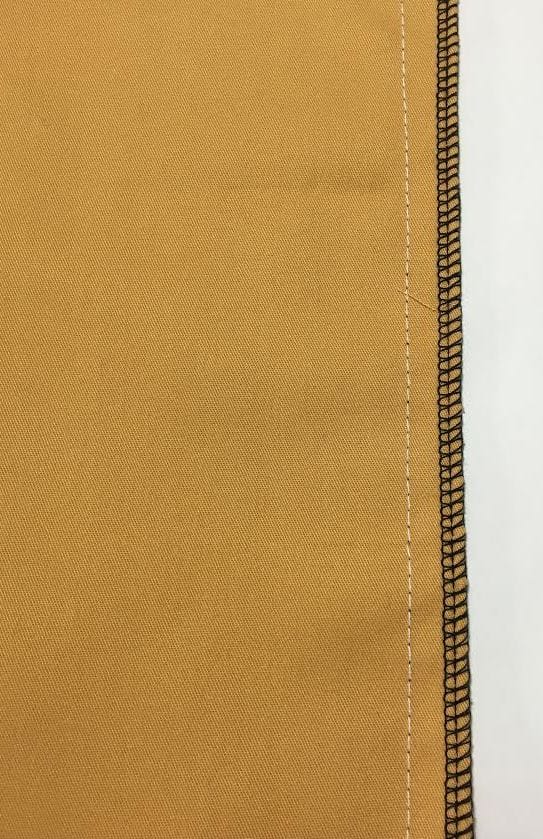
 Just as important as knowing how to cut your pattern and stitching the seams together is the need to clean finish all the raw edges of a garment. Why do we need to do this? Well because most fabric weave edges fray, which causes threads to come undone at the edge affecting the durability of a seam, as well as the “cleanliness” of a clothing item. Nobody wants to walk around with small pieces of thread hanging everywhere, right? Luckily, there is a variety of different ways you can finish the raw edges of your seams, and some of the most common ones are done directly with your sewing machine. Bellow, we are going to walk you through 4 most common methods to clean-finish seams on the inside of the garment step by step with picture demonstrations. Let’s get started: 1. Serging or Zig Zag (on a home sewing machine)1. Serging or Zig Zag (on a home sewing machine) This is the most common seam finishing and is done directly on the machine. For the serging stitch, you will need a serger (or overlock machine). If you are a more seasoned dressmaker, we highly recommend a serger, because it will become your go-to for finishing all raw fabric edges in a professional, clean manner. If you are just beginning to learn how to sew, you can substitute the serging stitch for a Zig Zag stitch on your home sewing machine. Step 1: Once your seam is stitched together, run a serging or zig zag stitch along the edge of the raw fabric.
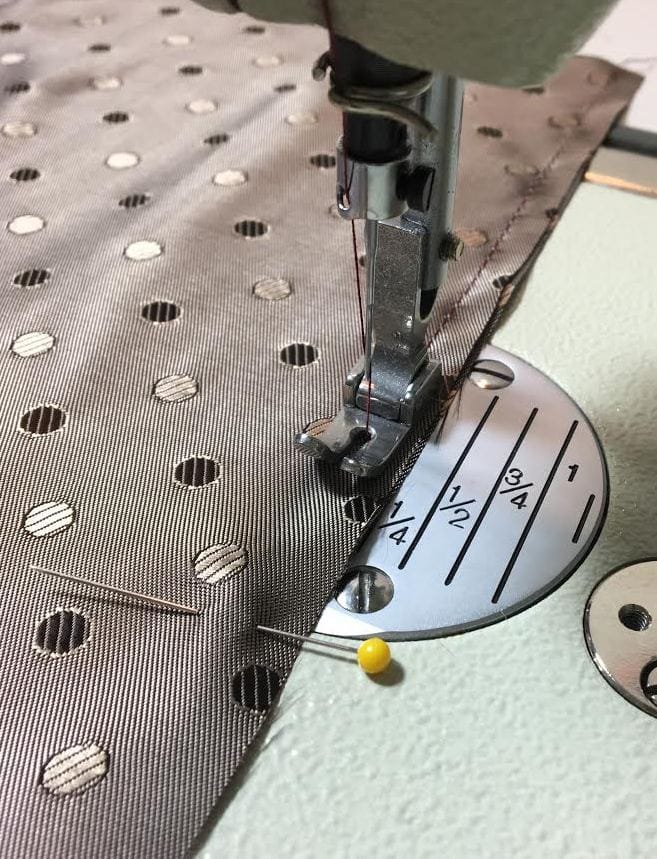
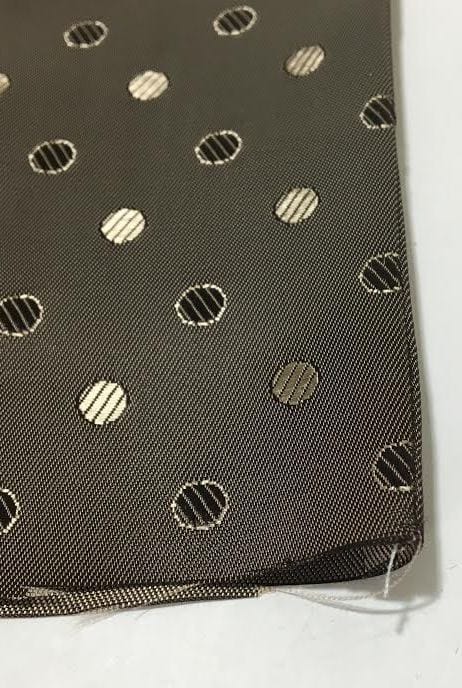
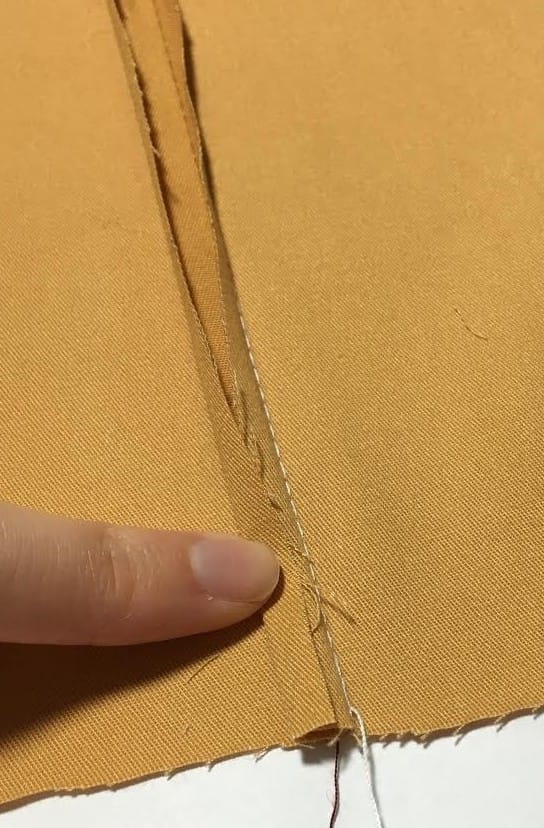
Step 2: Iron excess seam allowance towards the back of the clothing item you are sewing. The easiest way is to iron the seam on the face of the garment. 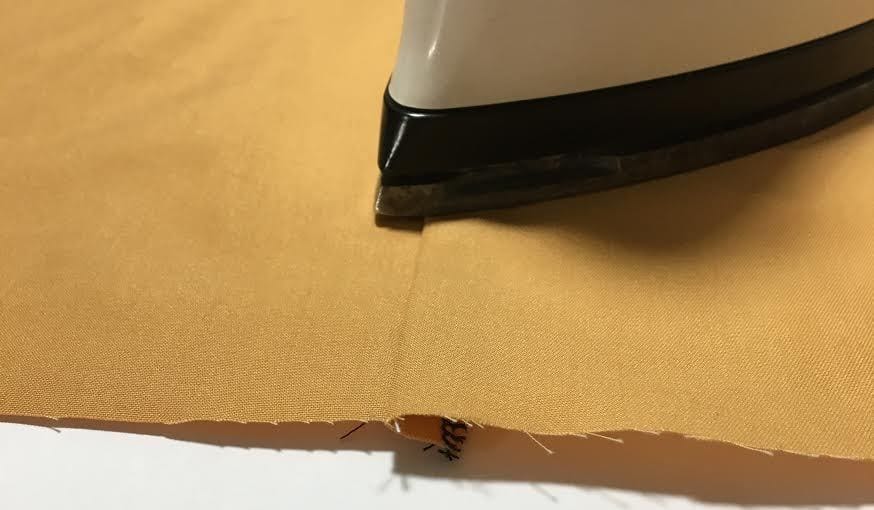 2. French SeamThis is a more expensive seam finish and is most commonly found on higher priced silk blouses and dresses, and a variety of different chiffon fabrics. It is not a seam you will find in outerwear or heavier pieces- it is a very dainty finish that requires a thin, delicate fabric. While you should learn how to do the french seam on a regular sewing machine, there are new sewing machines on the industrial level that can sew a french seam in a single step, but you don’t have to worry about that unless you are an apparel manufacturer! So why should you use this as opposed to a regular serged seam? Well, it will be a more durable, clean finish that doesn’t run the risk of bunching up under the rough stitch of the serger. If you are working with 100% silk fabrics that are delicate, a serging or zig zag finish can risk catching some of the threads in the weave and bulking up the seam on the outside (if the needle is not sharp and thin enough). A french seam is also a more durable, high quality option for thinner fabrics. Assuming your seam allowance is ½” Step 1: Align the edges of the fabric at the corresponding seam with the back side of the fabric touching. The face of the fabric should be on the outside. Sew at ¼” seam allowance. Note: In the fabric sample bellow, the darker side of the print is the back of the fabric. 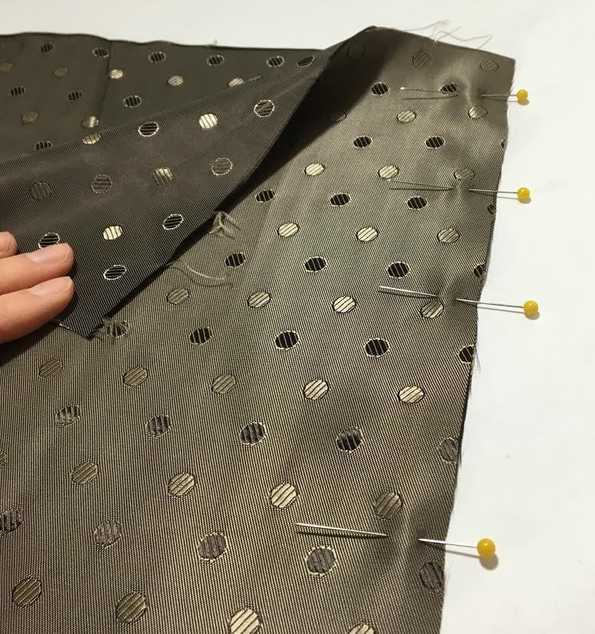
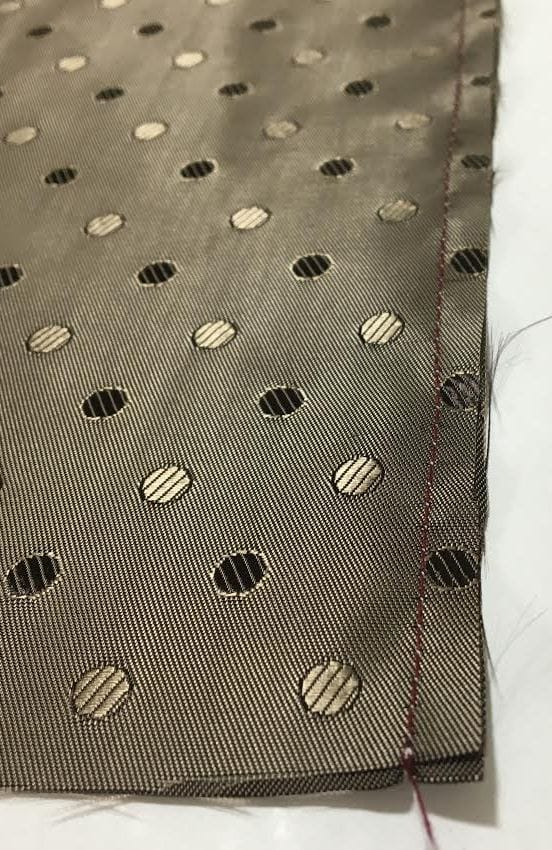
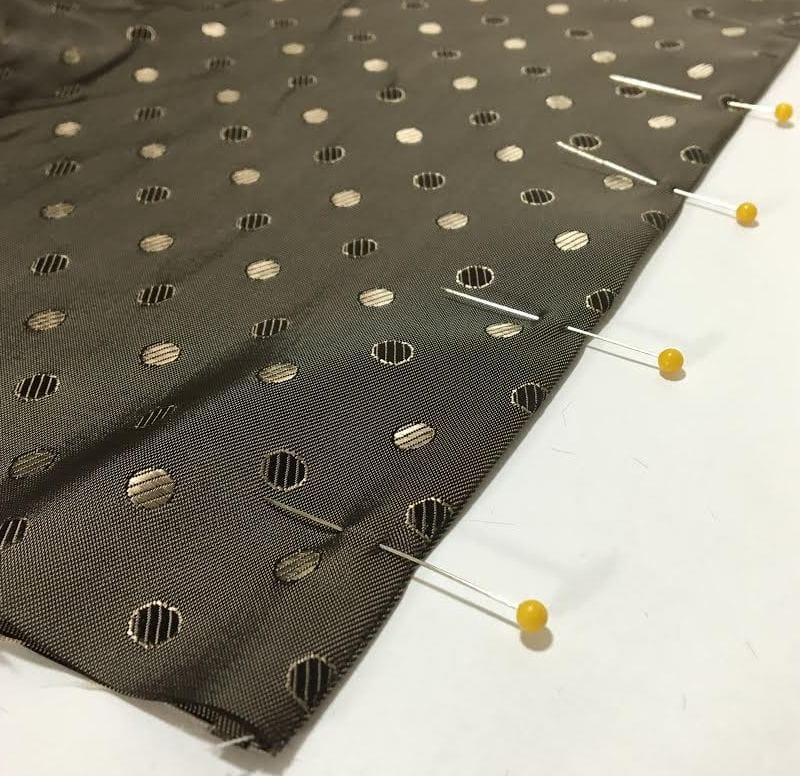
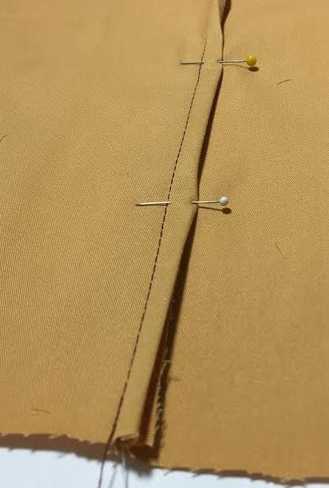
Step 2: Iron excess to one side, then fold and iron seam to enclose the raw edges of the fabric as shown in the image bellow. Pin to reinforce this fold. 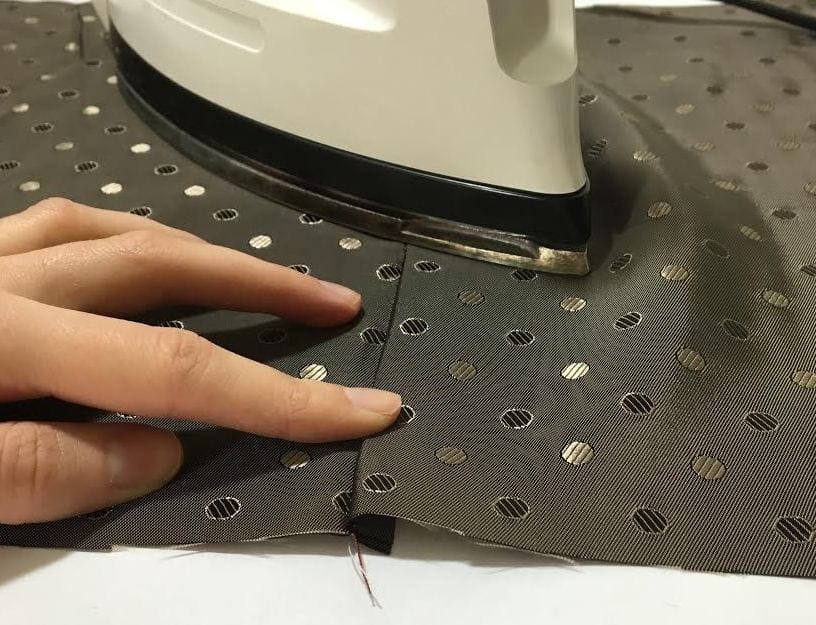
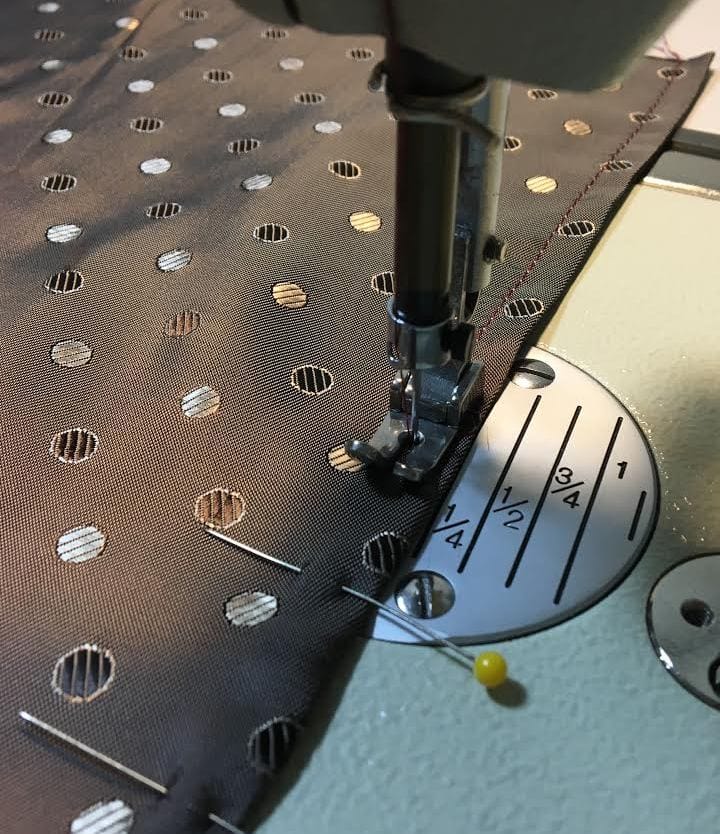
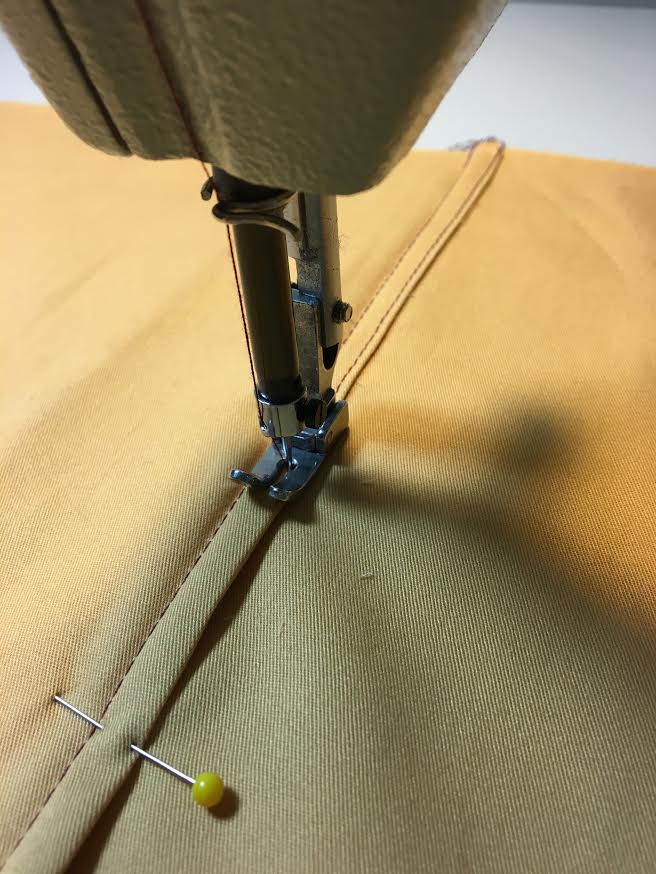
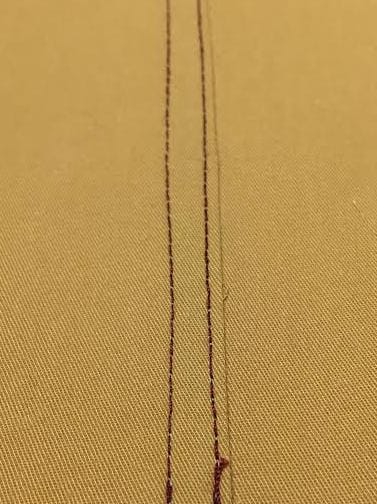
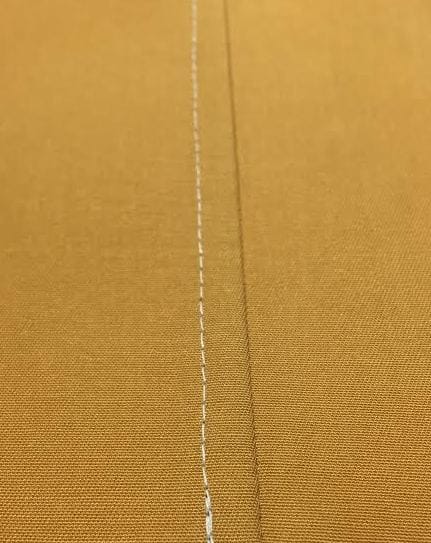
Step 3: Sew along the fold at ¼" seam allowance again. You will notice that the fold will remain on the inside and the outside will be a clean finished seam. This finish will ensure raw edges are enclosed and a clean finish, both on the inside and outside of the garment, is achieved.
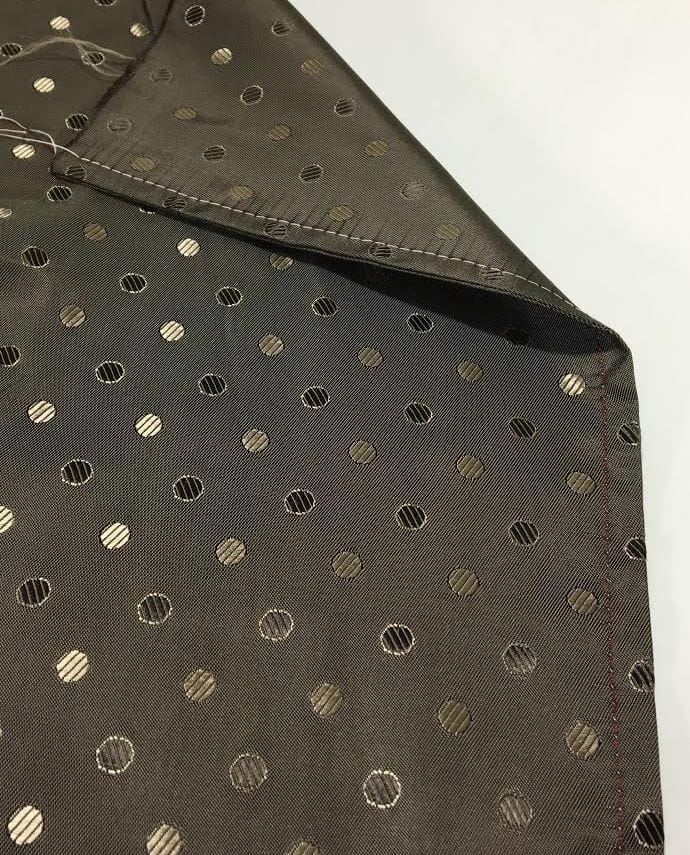
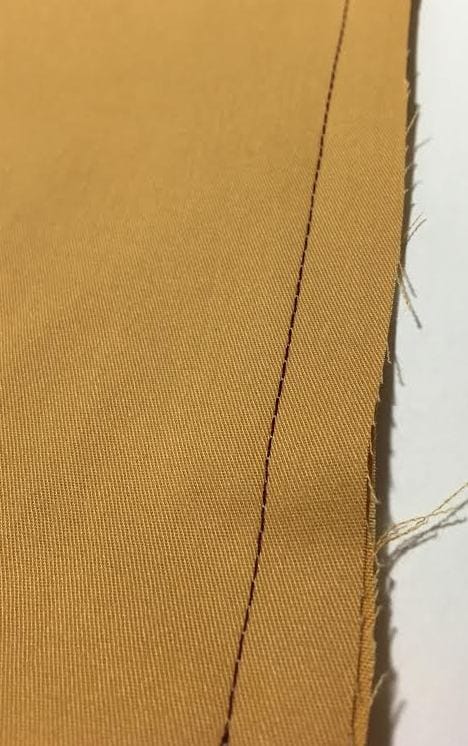
Step 4: Iron the fold towards the back of the garment. Iron on the face side of the seam as shown bellow. 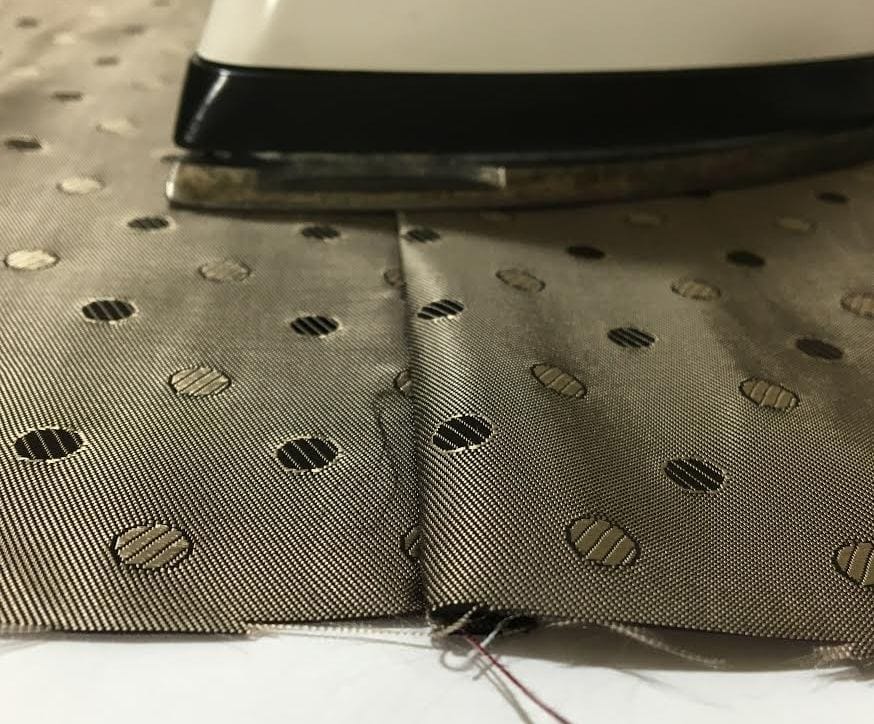 3. Flat FellA very common finish used with denim fabric. You will see the flat fell seam used on jeans, denim jackets, casual jackets and blazers that have a lot of top stitching. This is also a seam that requires enclosure of the raw edges, but as opposed to the french seam, it is a lot more heavy-duty and used with thicker wovens that are easy. So how do you sew a flat fell seam? We’ll show you! 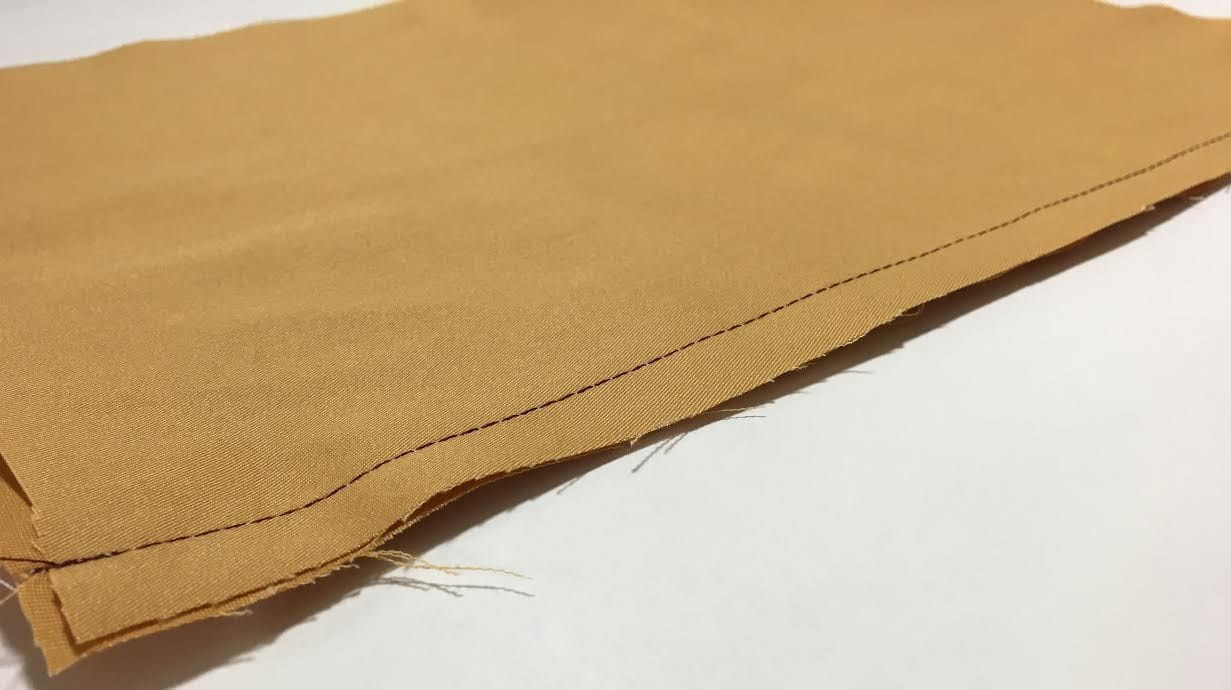 Our edges have ½” seam allowance. Step 1: Stitch the seams together at ½” seam allowance making sure the face of both fabric pieces are touching. (The back-side of the fabric should be on the outside). Once done stitching, iron the seam allowance open as shown below- This will facilitate the next few steps. 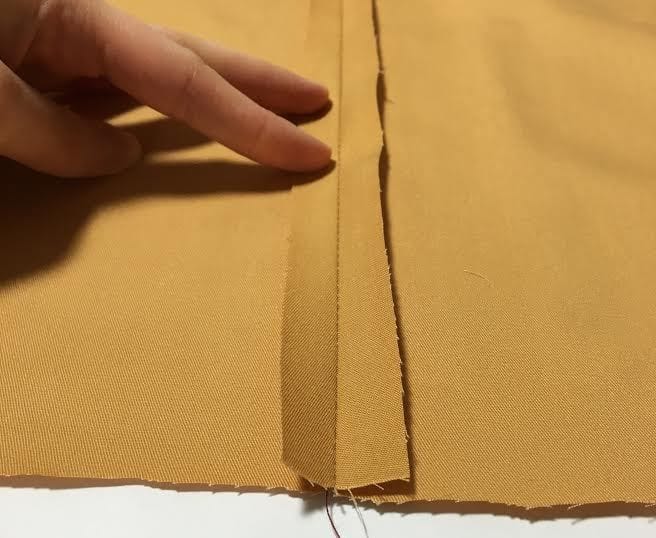 Step 2: Trim one side of the seam allowance excess at a ¼” (or in half). 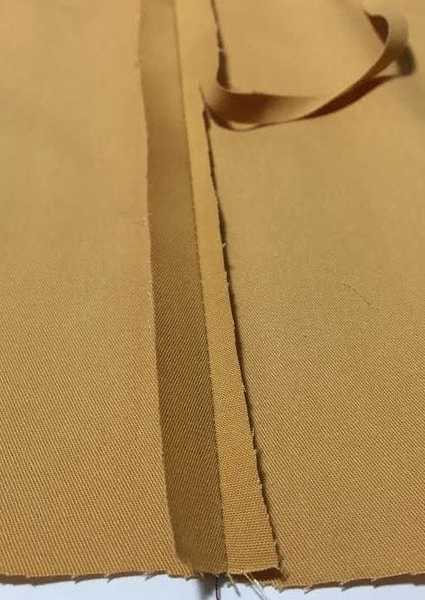 Step 3: Fold the larger, untrimmed seam allowance at a ¼” in, and iron down this fold. Overlap to enclose the trimmed raw edge. Iron again and pin to secure the overlapped fold in place.
Step 4: Stitch close to the edge of the fold, using it as a guide. Iron the seam on the face of the garment for a clean, professional look.
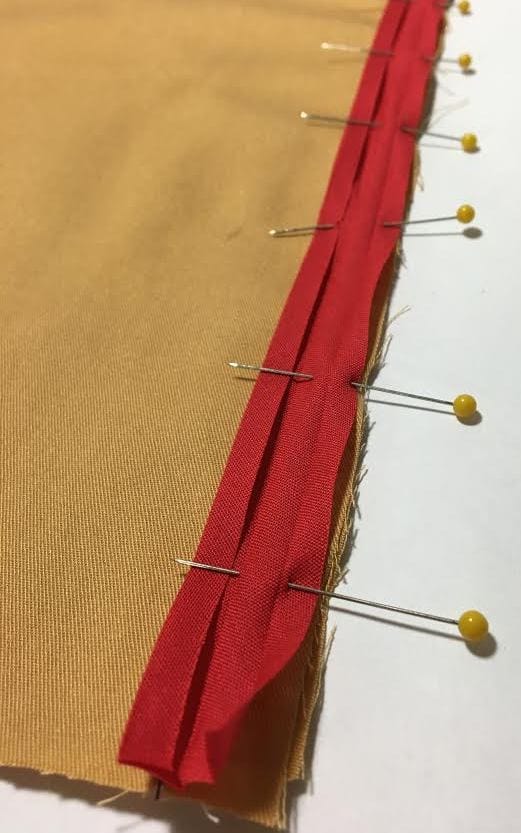
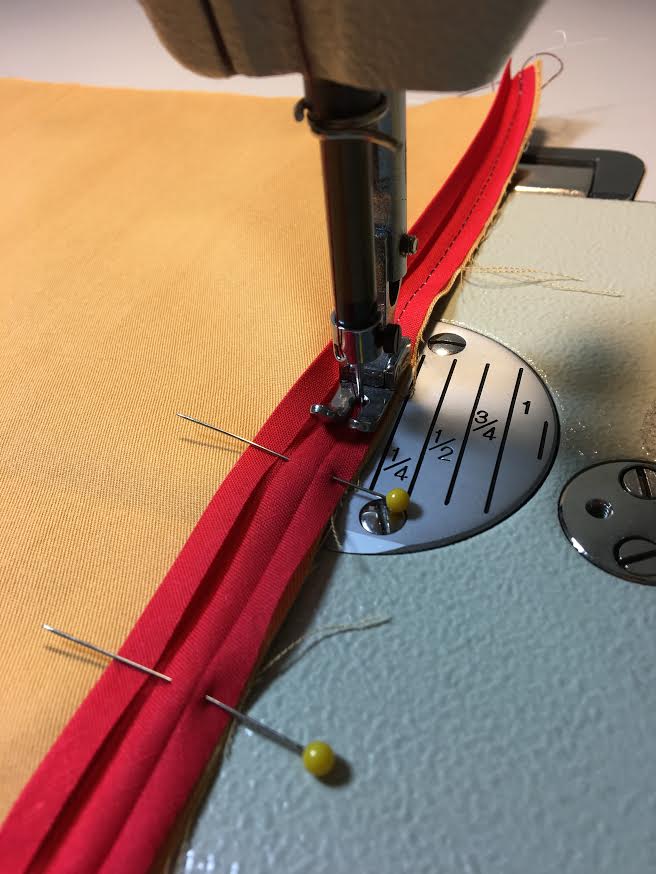
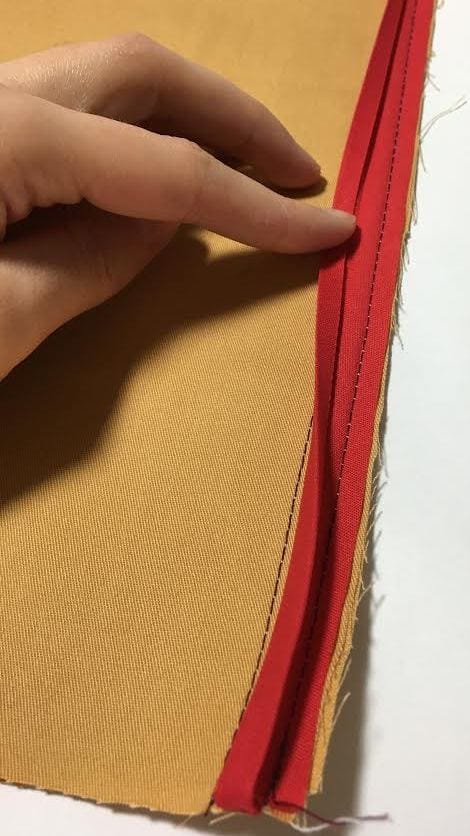
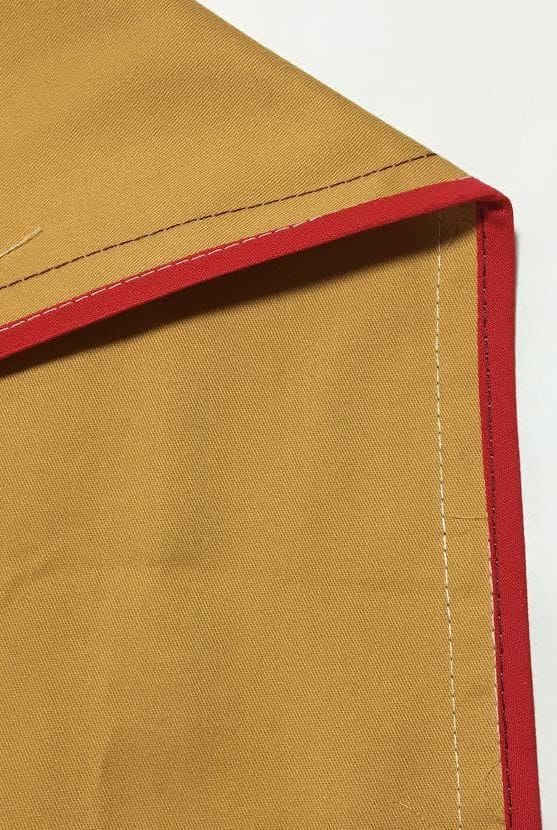
4. Using Binding: Bound SeamYou will find this seam finish on outerwear styles like unlined jackets, trench coats and heavier cardigans and vests. Back in the day, bound seam finishes were very commonly seen in dress skirts/pants and business suits. Today unfortunately, this is a more costly finish so it is only used when necessary on heavier pieces. You can purchase a presser foot to sew a bound seam using a pre-cut strip of fabric in a single step on your sewing machine, but we won't recommend that until you feel comfortable sewing one the long way- using a regular straight stitch presser foot. You can make your own binding by cutting a strip of fabric on bias and triple folding it. As a sewing beginner however, we recommend buying pre-cut, pre-folded binding from your local fabric store. It comes in a variety of different widths from ¼” to ¾”. For light to medium fabrics with ½” seam allowances we recommend using ¼” binding as a finish. For thicker, bulkier fabrics you a 1/2" wide double folded binding works best. In the demo bellow, we are working with a ½” seam allowance again. Step 1: Stitch the seam together with the face of the fabric touching at ½” seam allowance. Step 2: Unfold the binding and align one of its edges exactly to the raw edge of the fabric. Pin it horizontally to keep the fabric and binding together. Stitch at ¼” on top of the binding’s fold line as shown below.
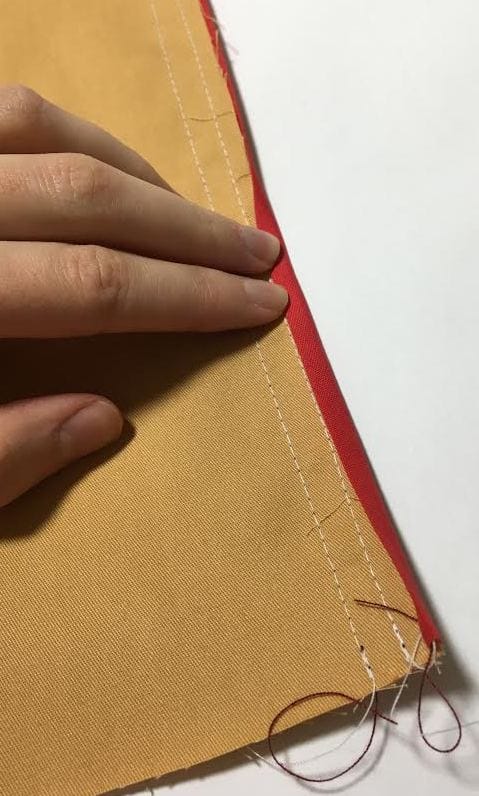
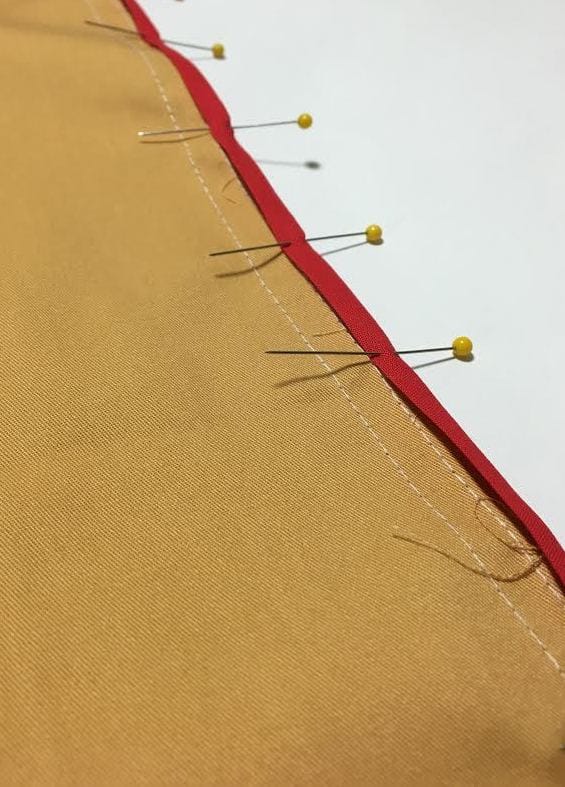
Step 3: Close the binding’s fold over the raw edges to enclose it. You can iron this fold down to make it more stable for sewing. Put a few pins through to makes sure the fold doesn’t move.
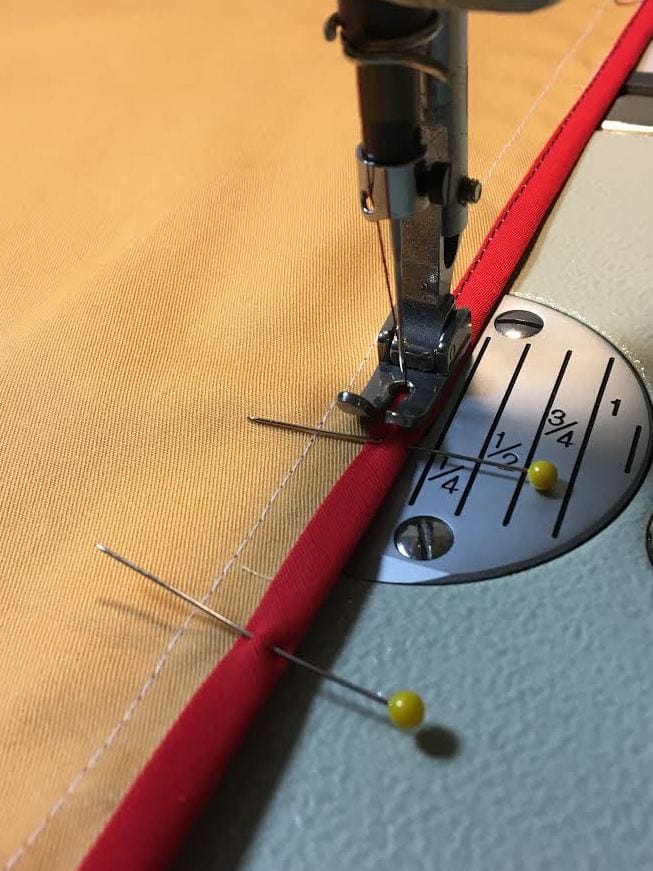
Step 4: On the side where the binding’s fold is open and not yet stitched to the fabric, sew a straight stitch on top of the binding as close to the edge of the fold-line as you can. Use the fold's edge as a guide while sewing.
Step 5: Iron down the seam with the seam allowance pointing towards the back. Iron on the face side of the seam. 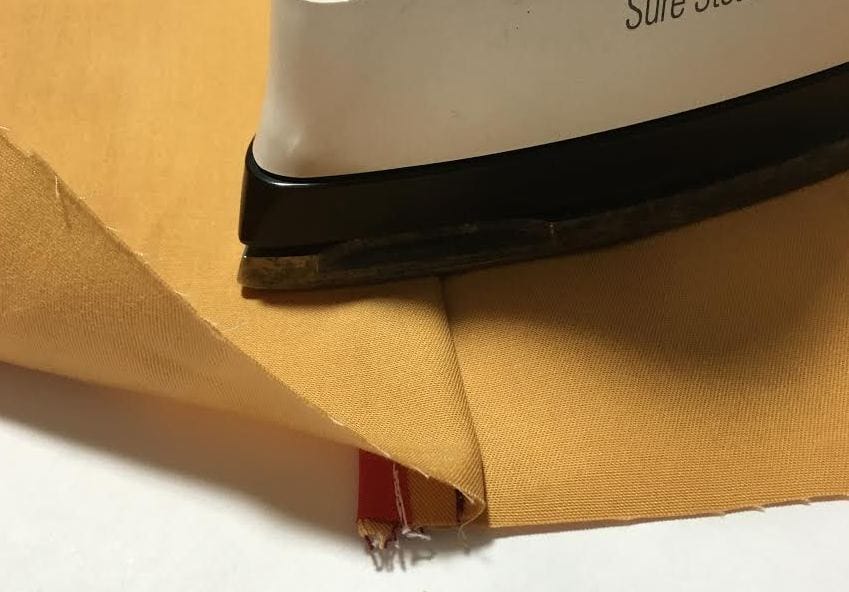
0 Comments
Leave a Reply. |
The Blog:A journey into our design process, sewing tutorials, fashion tips, and all the inspiring people and things we love. 
Doina AlexeiDesigner by trade and dressmaker at heart. I spend most of my days obsessing over new fabrics and daydreaming new ideas. 
Sadie
Executive Assistant & Client Relations Manager Archives
November 2019
Categories
All

|

-
Sewing Tutorials
-
Basics
>
- Aligning Pattern Grainlines To Fabric
- Preparing Fabrics For Sewing
- Pinning Sewing Patterns To Fabric
- Placing Sewing Patterns On Fabric For Cutting
- Rotary Cutters or Fabric Scissors?
- Cutting The Sewing Patterns
- What Are Notches And How To Use Them In The Sewing Process
- Transferring Notches From Pattern To Fabric
- Transferring Seamlines to Fabric
- Staystitching
- Backstitching: A Complete Guide
- Hand Basting: A Complete Guide
- Sewing Continuous Bias Binding
- Darts >
-
Sewing Seams
>
- The Basics Of Seams And Seam Allowance
- How To Sew A Straight Seam
- Sewing Curved Seams
- Sewing Corner Seams
- Trimming And Grading Seam Excess
- Notching/Clipping Seam Allowance for Tension Release
- Sewing Topstitched Seams
- Sewing Corded Seams
- Sewing A Slot Seam
- Sewing A Gathered Seam
- Sewing Bias Seams
- Sewing Seams With Ease
- Sewing Seams With Crossing Seamlines
- Sewing Unlike Fabric Seams
- How To Iron Seams: Ironing Tools And Conventions
- Sewing With Knit Fabrics
- Understanding Stitch Length And Tension
- Sewing Unique Fabric Seams
-
Seam Finishes
>
- Seam Finishing Techniques - Overview
- Applying A Pinked Seam Finish
- Applying A Bias Bound Seam Finish
- Serging And Zigzag Seam Finishes
- Sewing A Self-Bound Seam Finish
- Sewing A French Seam Finish
- Sewing A Hong Kong Seam Finish
- Sewing A Mock French Seam Finish
- Sewing A Turned-and-Stitched Seam Finish
- Sewing Overcast Hand-Applied Seam Finishes
- Sewing A Flat Felled Seam
- Sewing A Hairline Seam Finish
-
Hem Finishes
>
- Garment Hem Finishes: Overview
- Sewing A Double Fold Hem Finish
- Sewing A Single Fold Hem Finish
- Sewing Bound Hem Finishes
- Sewing An Exposed Double Layer Bound Hem
- Sewing A Folded-Up Bound Hem with Pre-folded Binding
- Sewing A Hong Kong Hem Finish
- Sewing A Band Hem Finish
- Sewing A Bias Faced Hem Finish
- Sewing A Twill Tape Hem Finish
- Sewing A Rolled Hem Finish
- Sewing A Shaped Hem Facing
- Using Fusible Hem Tape And Webbing
- Finishing A Lace Fabric Hem
- Finishing A Leather Hem
- Sewing Faced Hem Corners
- How To Finish Lining At The Hem
- Finishing Fabric Corners by Mitering >
- Interfacing A Hemline: Lined And Unlined Examples
-
Sewing Pockets
>
- Curved Patch Pocket With Flap
- Unlined Square Patch Pockets
- Lined Patch Pockets: Two Ways
- Extension On-Seam Pockets
- Separate On-Seam Pocket
- Front Hip Pockets
- Bound Double Welt Pocket
- Double Welt Pocket With Flap
- Self-Welt Pocket (Using Single Fabric Layer)
- Slanted Welt Pocket (Hand-Stitched)
- Faced Slash Pockets: Overview >
-
Sewing Zippers
>
- Sewing Zippers: General Information
- Sewing A Centered Zipper
- Sewing A Lapped Zipper
- Sewing An Invisible Zipper
- Sewing A Fly Front Zipper
- Sewing A Closed-End Exposed Zipper (No Seam)
- Sewing An Exposed Separating Zipper
- Sewing Hand Stitched Zipper Applications
- Sewing A Zipper Underlay
- Sewing A Placket-Enclosed Separating Zipper
- Sleeveless Finishes >
-
Neckline Finishes
>
- Sewing A Neck Shaped Facing
- Sewing An All-In-One Neck Facing
- Neck And Garment Opening Combination Facings >
- Sewing A Bias Faced Neckline Finish
- Sewing A Band Neckline Finish
- Bound Neckline Finishes: Overview >
- Sewing A Semi-Stretch Strip Band Neckline
- Ribbed Neck Band And Classic Turtleneck
- Decorative Neckline Finishes >
- Finishing Facing Edges >
-
Extras
>
- A Complete Guide on Interfacing
- Sewing Bound Spaghetti Straps
- Sewing Spaghetti Straps To A Faced Neckline
- Sewing Ruffles: Overview
- Patterning And Sewing A Circle Ruffle
- Sewing A Gathered Heading Ruffle
- Sewing Double Layer Gathered Ruffles
- Sewing A Gathered Ruffle Into A Seam
- Sewing A Gathered Ruffle To A Fabric Edge
- Sewing A Fabric Surface Slit
- Sewing A Slit Seam
- Hand-Applied Straight Stitches
- Hand-Applied Blind Stitches
- Hand-Applied Overedge Stitches
- Hand-Applied Tack Stitches
- Hand-Applied Decorative Stitches
-
Basics
>
- Custom Bridal
- Custom Apparel
- About
- Blog

 RSS Feed
Services |
Company |
|
