How to Shop For Long-Lasting Apparel: Key Elements to Consider When Searching For a Wardrobe Staple.8/25/2017 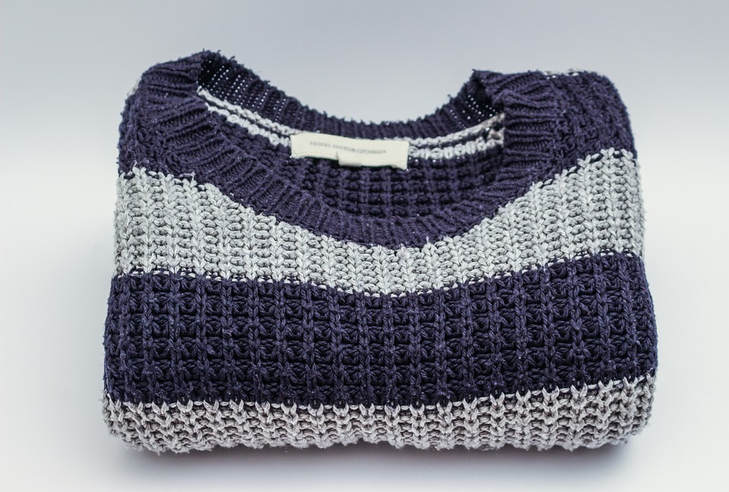 Via Pixabay A classic wardrobe staple requires the perfect balance of design, fit and versatility. Lets face it, in this fast-fashion market consumers have a short interest span. Clothing companies focus mainly on trend and how fast they can bring new, low-priced clothing to market. What used to be seasonal has turned into monthly and even large department stores are having a hard time keeping up with the need for constant inventory replenishment. Trendiness has caused clothing to become somewhat dispensable, making it that much more difficult to find a long-lasting style worthy of becoming that true go-to in your closet. When you are lucky enough to find it however, chances are you'll hold on to it with dear life.  Via Pixabay If you have your eye on finding long-lasting, versatile clothing items that stand the test of time, it is best to be on the look out for some specific qualities at the shopping stage. Bellow, we'll give you a few suggestions and factors to consider as you shop for good quality, long-wearing clothing. Since the Sweater Blouse is designed with that concept in mind, we'll use it as an example as we walk you through some important elements every wardrobe essential should feature.
4 Comments
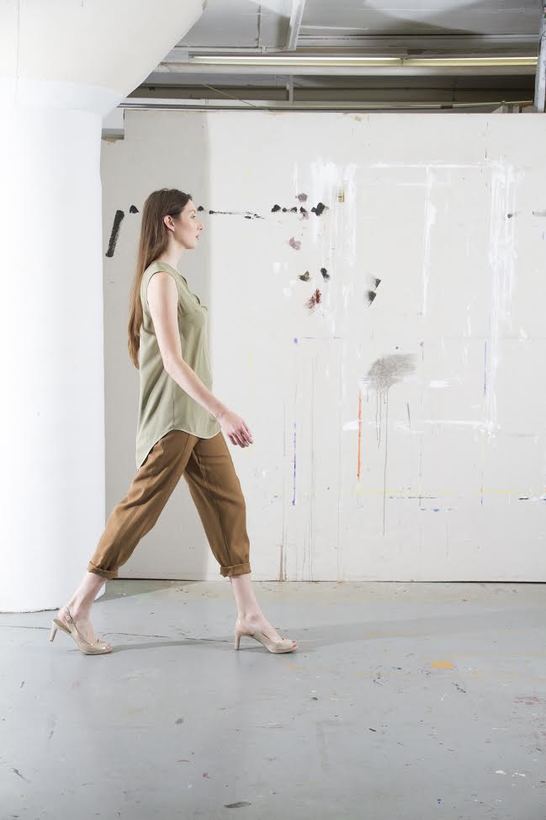 A round hem on blouses, tunics and even dresses can be quite flattering. There is something very functional about a curved hem, especially one that is extended in the back. It is elongating and slandering to the figure while still maintaining immense comfort. Round hems work best with lighter weight fabrics having a flowey nature because it allows the garment to drape naturally and comfortably while molding to the body's organic shape. While they look and feel beautiful, if you've ever tried to sew a garment with a curved hem, you'll find that clean finishing one is much challenging than it looks. Almost all methods for sewing and clean finishing a rounded edge on fabric involve some style of folding and stitching. It is actually the folding part that can prove to be quite problematic if you don't have enough practice or maybe are not following the correct steps. In this tutorial, we'll teach you two common and easy methods (and a few tricks) for clean-finishing a difficult-to-work-with curved hem. The secret to sewing a rounded hem starts with the pattern-making process and specifically, hem allowance. Hem allowance is the excess fabric used to clean finish the hem. The trick to rounded hem allowance is that the smaller it is the easiest it will be to fold it around the curved edges. The best excess allowance to work with for a double folded round hem is 1/2" (especially as a beginner)- this gives you enough room to comfortably fold the edges by hand. If you have a serging/overlock machine and would like to do a serged and folded method, the best seam allowance to work with in that case is 1/4". Double folded and machine stitched method with a 1/2" hem allowance: Your best friend when it comes to accomplishing a good quality rounded hem is the iron. Before sewing a hem, fold it in place first and then use your iron and a few pins to hold this fold in place. It is very difficult to achieve good stability with just pins- it is the use of an iron that really maintains a clean, even fold throughout both in the construction process and the finished hem respectively. 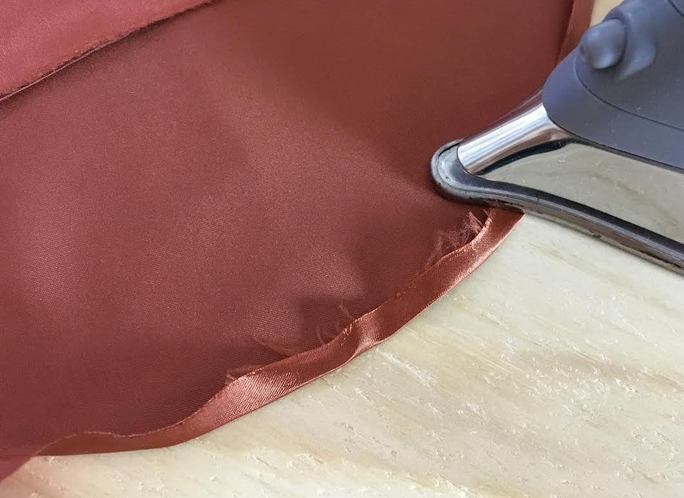 Step 1: Fold the raw edge of the hem in at 1/4" throughout and iron as you fold. As you get to the rounder curves, it will take a bit more time to turn the edges in. The secret here is folding and ironing very small portions at a time. You might notice that there are a few small wrinkles gathered up along the roundest parts. Don't worry too much about this- it is just a little excess of fabric that you will be able to enclose in the second fold and iron out once you've stitched the hem on your machine.
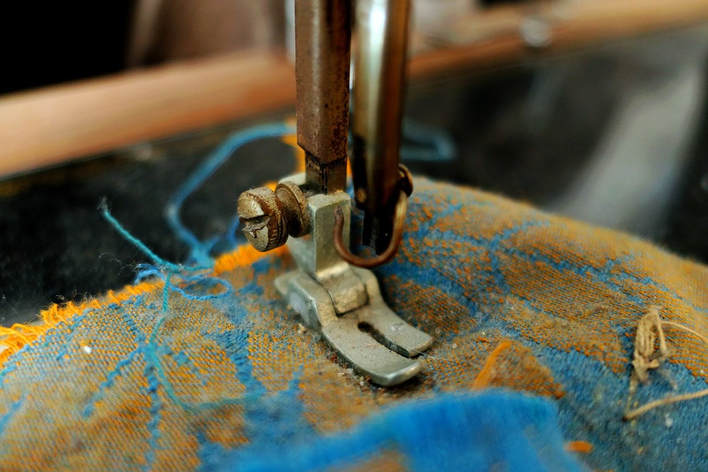 Via Pixabay As you delve deeper into learning how to sew, the process can be just as much rewarding as it is frustrating. After all, it does take lots of time, patience, and a little bit of persistence to learn the ins and outs of making your own clothing. The good news is, if you get started the right way, building good habits as you learn, you will find sewing to be one of the most rewarding hobbies. Building a good foundation and developing the correct practices from the get-go will save you lots of time and frustration as you start experimenting with more complex sewing tasks in the future. To help you get started on the right foot, here are 5 helpful habits to start developing now in the learning process: Pinning seams correctly during sewing:Ah, the pin mystery... Many beginners wonder if there really is a correct way to pin seams and layers of fabric together before machine stitching. Realistically, most beginners don't pay much attention to it and just go by what feels comfortable. However, learning how to pin in the correct direction from the beginning will save you time, add comfort to your sewing process, prevent you from making a pin mess all over your working space, and keep your fingers safe from pin pricks. 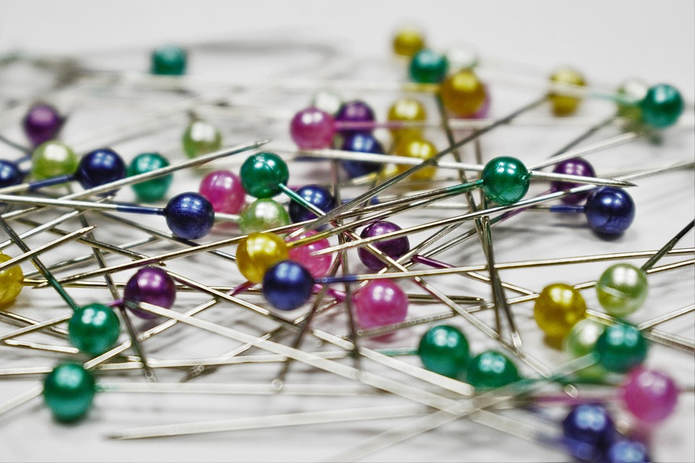 Via Pixabay There are really two ways/directions you can pin seams together: perpendicular to the fabric's edge/seam, and parallel to the seam/fabric's edge. The perpendicular method is the one recommended for sewing most seams, especially regular straight seams normally consisting of two layers of fabric. Placing the pins perpendicular to the seam's edge allows you to easily and comfortably remove the pins in a horizontal orientation as you machine stitch. 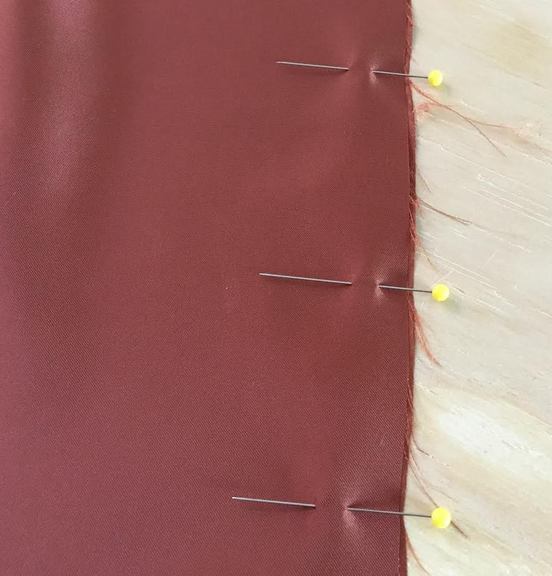 If you are right-handed, place the pins so that the ball head of the pin is aligned on the right side, towards the fabric's edge. If you are left-handed, it might feel more comfortable to place the pins such that the ball-head is aligned left, away from the seam's edge. A perpendicular (or horizontal) pin placement allows for more control and locks the vertical layers of the seam in place more efficiently than a parallel pin placement, especially in a straight seam. Additionally, it provides you a safety measure against accidentally pricking your fingers with the pin's needle- the sharpest edge is pointing away from your hands providing a means for comfortably removing the pins from the closed edge. There are however instances when a vertical/parallel pin placement simply cannot be avoided. When you are sewing through very thick layers of fabric or very curved, folded edges, aligning the pins parallel in relation to the edge provides more control. Specific examples when a parallel pin placement is desired include: sewing along a double-folded curved hem, top stitching double-folded binding (especially along very curved areas of the armhole and neckline), and during certain decorative or functional applications that may benefit from a vertical pin placement.
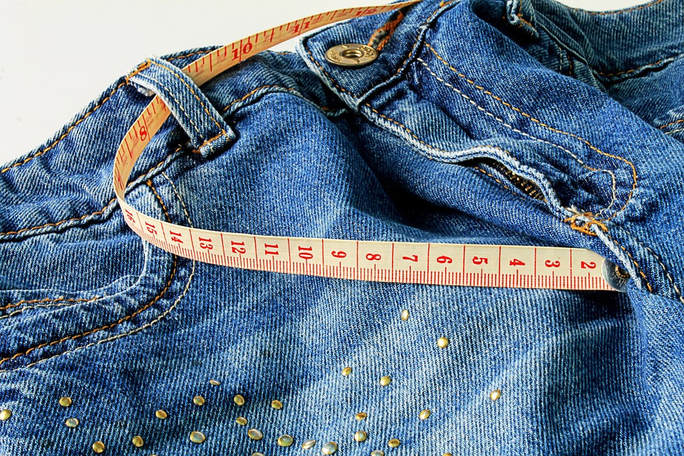 Via Pixabay As perhaps the most common of sewing alterations, converting a pair of jeans into a shiny new pair of shorts is actually quite simple to do. If you have a good pair of scissors and some means of taking precise measurements (like a ruler or measuring tape), you'll find the whole process fun and pretty rewarding. For many that have tried to do this simple alteration, the issue is always about using the proper measuring technique. As is true for any sewing alteration that requires trimming or cutting the garment, it is always a good idea to allow yourself enough room for error no matter how confident you feel. This is especially true when converting pants into shorts. Stay on the safe side by allowing yourself enough room for error. The great thing about transforming a pair of pants into shorts is that you have control over the final design. Denim is quite fun to work with and withstands a variety of different decorative and finishing techniques. You may choose to simply cut the pant legs at your preferred length and leave them to fray a bit at the bottom for a more causal style. You can do that with denim due to the fabric's ability to lock the threads after a few rows of fraying thus stopping the edge from unraveling further. If you like the causal look of a raw denim edge but want to take the design a bit further, rolling the edge up and tacking it at the sides allows for a more "store-bought" look. On the other hand, if you like a clean-finished edge, you may use a variety if hemming techniques to finish the raw edge of fabric for a more elevated look. Converting pants into shorts allows you to experiment with a variety of decorative techniques like patching, distressing and adding lace and embroidery finishes. All of it is possible once you know how to measure and cut the pant legs to achieve the desired overall length, and an even length on both legs. Whether you own a sewing machine or not, learning some basic hand stitches will prove to be quite useful in the long haul. You can't physically take your sewing machine with you everywhere you go, so knowing how to do a few quick fixes by hand can sometimes be a life-saver. In the case you do not actually own a sewing machine, you can use hand stitching not only to fix rips but also sew smaller permanent seams. If you do own a sewing machine, taking it out just for a quick fix can be a hassle sometimes, so learning how to imitate a machine stitch by hand will prove to be quite handy. 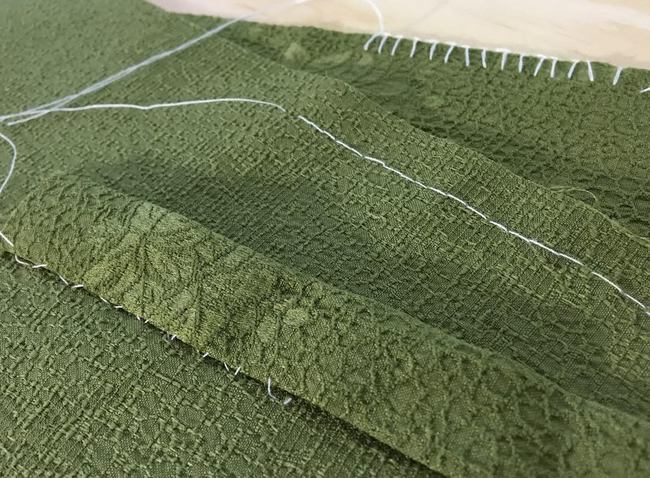 Other instances when hand sewing is necessary in the sewing process is for stitching areas that are difficult to access with the machine needle, attaching patches, trims and other appliques manually, and completing blind finishes like a slip stitch and catch stitch. Another important hand stitch worth knowing is the blanket stitch which can be used to replace the zig zag stitch on a home sewing machine. It can be applied along raw edges of fabric to contain fraying as well commonly as used for decorative purposes. This is an important hand stitch to know often used in apparel and especially quilting. If you find that you enjoy the therapeutic aspect of stitching by hand, there are also plenty of intricate hand embroidery stitches you can experiment with as you become more comfortable in the process. For now, if you are a still in the beginning stages, we suggest you focus on just a few basic but necessary hand stitches applicable to almost any project. We'll introduce you to 4 such stitches below. If you were to use these 4 stitches together, you would actually be able to sew a clothing item from start to finish without the need for a sewing machine. 1. The Blanket Hand Stitch (Oversewn/Overcast) This is a great stitch to use as a zig zag substitute when needed. Just as the name suggests, the blanket stitch (also commonly referred to as oversewing or overcasting) is often applied along the edges of blankets, certain towels and comforters in order to smooth and prevent them from rolling. It is also used quite often in quilting along the fabric's edge both for decoration purposes as well as to keep the edge from unraveling. Just as you would on a sewing machine, you can actually control the density and length/size of the blanket stitch while hand sewing it. A denser, shorter stitch works better for lighter fabrics that fray easier. On the other hand, a larger, less dense blanket stitch is applied along the edges of thicker fabrics with lower fraying. 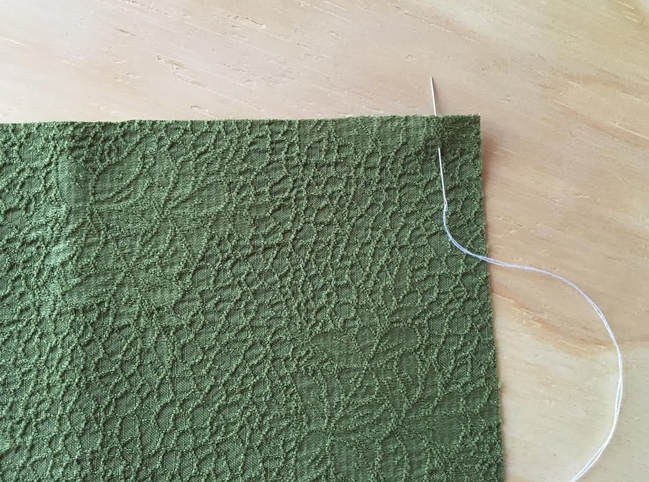 1. Choose the desired length for your blanket stitch and insert the needle at that measurement down from the fabric's edge. In this tutorial, our blanket stitch is approximately 1/4". The length you choose depends on the fabric at hand. The thinner and lighter-weight the fabric, the shorter and denser the stitch should be. 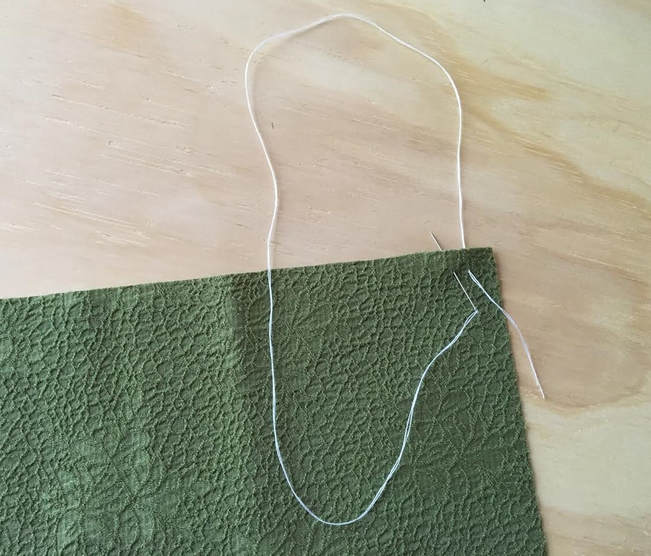 2. Position the thread in a loop/circular shape and insert the needle again at the same distance down from the fabric's edge. Where you insert the second stitch will determine the density of the blanket stitch. The closer the bottom stitches are together, the denser the blanket stitch will be. It is always a good idea to practice a few different lengths and densities on different fabric types.
|
The Blog:A journey into our design process, sewing tutorials, fashion tips, and all the inspiring people and things we love. 
Doina AlexeiDesigner by trade and dressmaker at heart. I spend most of my days obsessing over new fabrics and daydreaming new ideas. 
Sadie
Executive Assistant & Client Relations Manager Archives
November 2019
Categories
All

|

-
Sewing Tutorials
-
Basics
>
- Aligning Pattern Grainlines To Fabric
- Preparing Fabrics For Sewing
- Pinning Sewing Patterns To Fabric
- Placing Sewing Patterns On Fabric For Cutting
- Rotary Cutters or Fabric Scissors?
- Cutting The Sewing Patterns
- What Are Notches And How To Use Them In The Sewing Process
- Transferring Notches From Pattern To Fabric
- Transferring Seamlines to Fabric
- Staystitching
- Backstitching: A Complete Guide
- Hand Basting: A Complete Guide
- Sewing Continuous Bias Binding
- Darts >
-
Sewing Seams
>
- The Basics Of Seams And Seam Allowance
- How To Sew A Straight Seam
- Sewing Curved Seams
- Sewing Corner Seams
- Trimming And Grading Seam Excess
- Notching/Clipping Seam Allowance for Tension Release
- Sewing Topstitched Seams
- Sewing Corded Seams
- Sewing A Slot Seam
- Sewing A Gathered Seam
- Sewing Bias Seams
- Sewing Seams With Ease
- Sewing Seams With Crossing Seamlines
- Sewing Unlike Fabric Seams
- How To Iron Seams: Ironing Tools And Conventions
- Sewing With Knit Fabrics
- Understanding Stitch Length And Tension
- Sewing Unique Fabric Seams
-
Seam Finishes
>
- Seam Finishing Techniques - Overview
- Applying A Pinked Seam Finish
- Applying A Bias Bound Seam Finish
- Serging And Zigzag Seam Finishes
- Sewing A Self-Bound Seam Finish
- Sewing A French Seam Finish
- Sewing A Hong Kong Seam Finish
- Sewing A Mock French Seam Finish
- Sewing A Turned-and-Stitched Seam Finish
- Sewing Overcast Hand-Applied Seam Finishes
- Sewing A Flat Felled Seam
- Sewing A Hairline Seam Finish
-
Hem Finishes
>
- Garment Hem Finishes: Overview
- Sewing A Double Fold Hem Finish
- Sewing A Single Fold Hem Finish
- Sewing Bound Hem Finishes
- Sewing An Exposed Double Layer Bound Hem
- Sewing A Folded-Up Bound Hem with Pre-folded Binding
- Sewing A Hong Kong Hem Finish
- Sewing A Band Hem Finish
- Sewing A Bias Faced Hem Finish
- Sewing A Twill Tape Hem Finish
- Sewing A Rolled Hem Finish
- Sewing A Shaped Hem Facing
- Using Fusible Hem Tape And Webbing
- Finishing A Lace Fabric Hem
- Finishing A Leather Hem
- Sewing Faced Hem Corners
- How To Finish Lining At The Hem
- Finishing Fabric Corners by Mitering >
- Interfacing A Hemline: Lined And Unlined Examples
-
Sewing Pockets
>
- Curved Patch Pocket With Flap
- Unlined Square Patch Pockets
- Lined Patch Pockets: Two Ways
- Extension On-Seam Pockets
- Separate On-Seam Pocket
- Front Hip Pockets
- Bound Double Welt Pocket
- Double Welt Pocket With Flap
- Self-Welt Pocket (Using Single Fabric Layer)
- Slanted Welt Pocket (Hand-Stitched)
- Faced Slash Pockets: Overview >
-
Sewing Zippers
>
- Sewing Zippers: General Information
- Sewing A Centered Zipper
- Sewing A Lapped Zipper
- Sewing An Invisible Zipper
- Sewing A Fly Front Zipper
- Sewing A Closed-End Exposed Zipper (No Seam)
- Sewing An Exposed Separating Zipper
- Sewing Hand Stitched Zipper Applications
- Sewing A Zipper Underlay
- Sewing A Placket-Enclosed Separating Zipper
- Sleeveless Finishes >
-
Neckline Finishes
>
- Sewing A Neck Shaped Facing
- Sewing An All-In-One Neck Facing
- Neck And Garment Opening Combination Facings >
- Sewing A Bias Faced Neckline Finish
- Sewing A Band Neckline Finish
- Bound Neckline Finishes: Overview >
- Sewing A Semi-Stretch Strip Band Neckline
- Ribbed Neck Band And Classic Turtleneck
- Decorative Neckline Finishes >
- Finishing Facing Edges >
-
Extras
>
- A Complete Guide on Interfacing
- Sewing Bound Spaghetti Straps
- Sewing Spaghetti Straps To A Faced Neckline
- Sewing Ruffles: Overview
- Patterning And Sewing A Circle Ruffle
- Sewing A Gathered Heading Ruffle
- Sewing Double Layer Gathered Ruffles
- Sewing A Gathered Ruffle Into A Seam
- Sewing A Gathered Ruffle To A Fabric Edge
- Sewing A Fabric Surface Slit
- Sewing A Slit Seam
- Hand-Applied Straight Stitches
- Hand-Applied Blind Stitches
- Hand-Applied Overedge Stitches
- Hand-Applied Tack Stitches
- Hand-Applied Decorative Stitches
-
Basics
>
- Custom Bridal
- Custom Apparel
- About
- Blog
 RSS Feed
Services |
Company |
|
