|
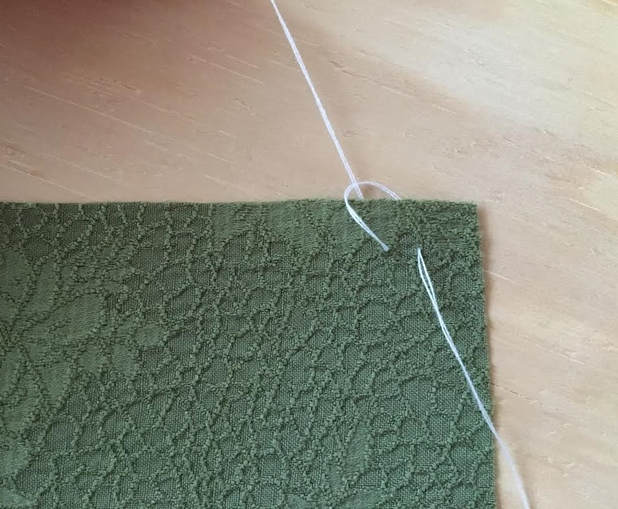
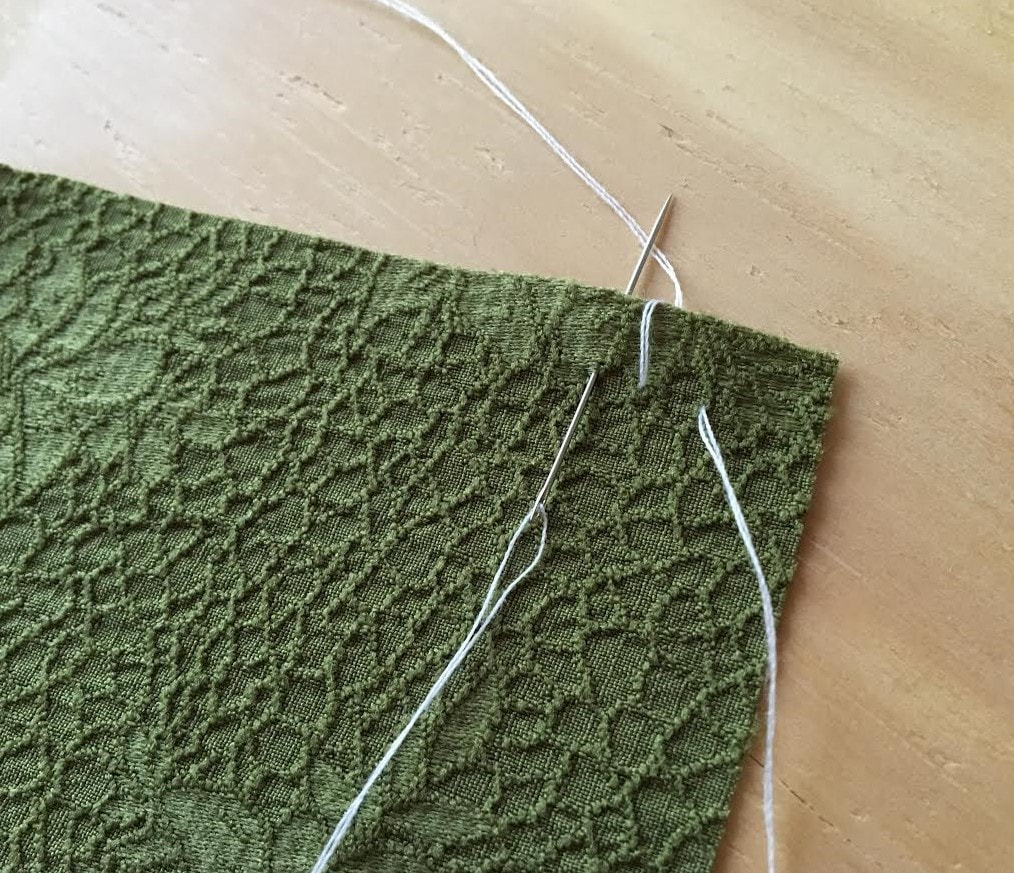
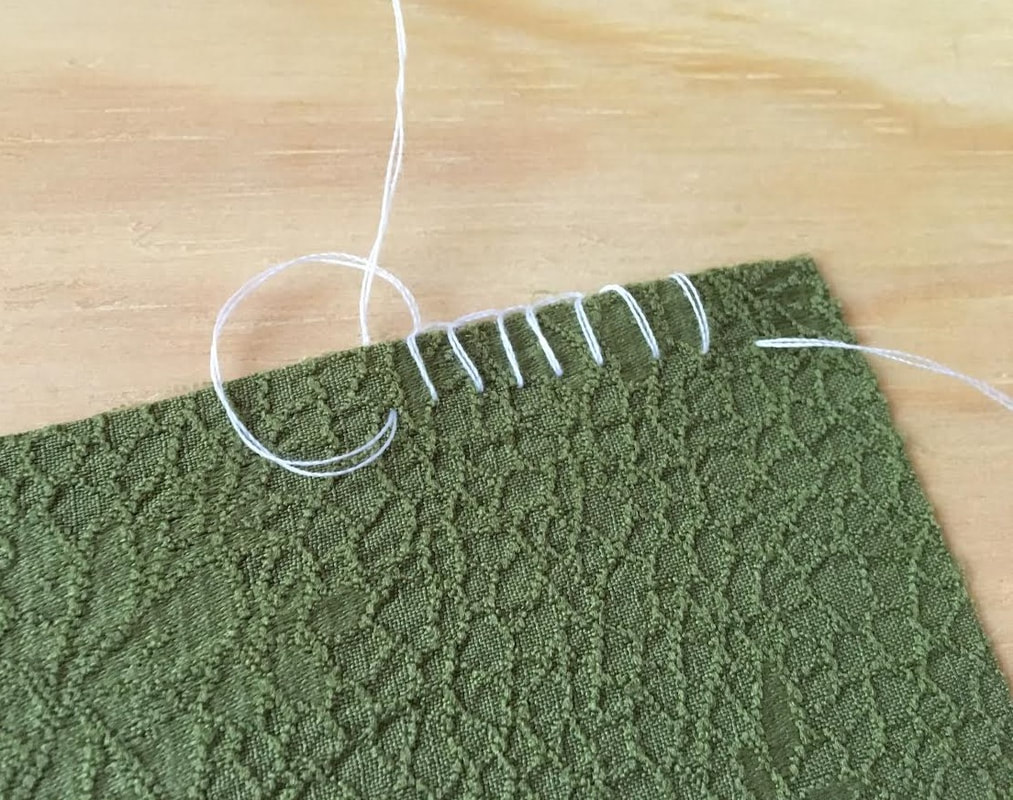
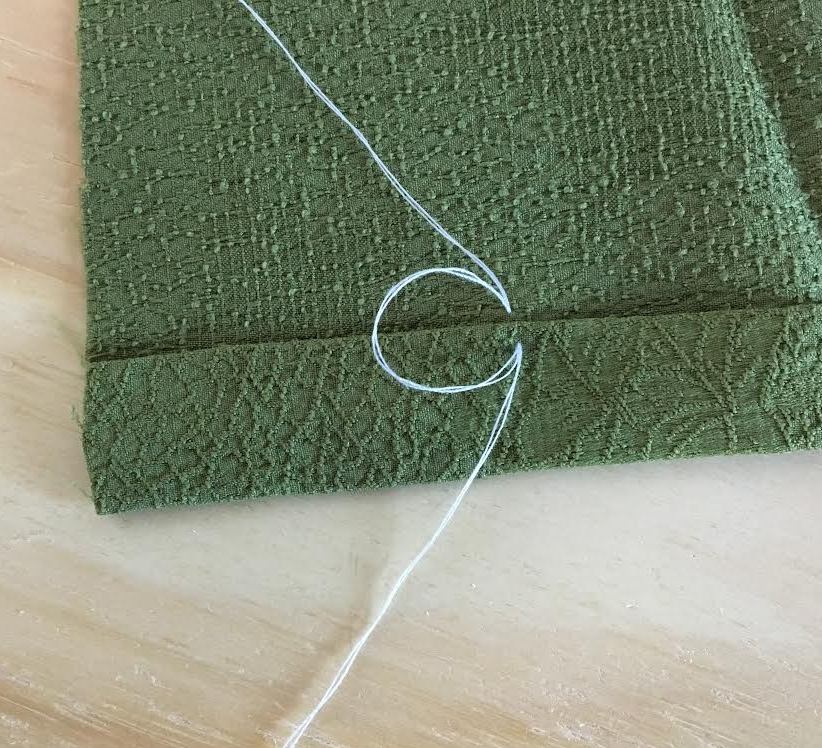
Whether you own a sewing machine or not, learning some basic hand stitches will prove to be quite useful in the long haul. You can't physically take your sewing machine with you everywhere you go, so knowing how to do a few quick fixes by hand can sometimes be a life-saver. In the case you do not actually own a sewing machine, you can use hand stitching not only to fix rips but also sew smaller permanent seams. If you do own a sewing machine, taking it out just for a quick fix can be a hassle sometimes, so learning how to imitate a machine stitch by hand will prove to be quite handy. 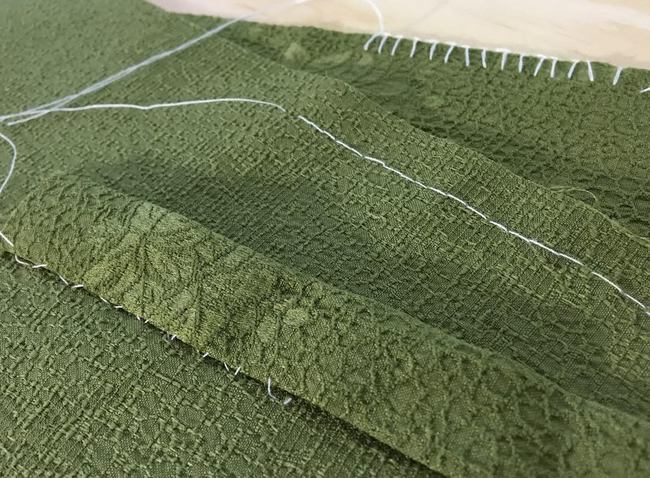 Other instances when hand sewing is necessary in the sewing process is for stitching areas that are difficult to access with the machine needle, attaching patches, trims and other appliques manually, and completing blind finishes like a slip stitch and catch stitch. Another important hand stitch worth knowing is the blanket stitch which can be used to replace the zig zag stitch on a home sewing machine. It can be applied along raw edges of fabric to contain fraying as well commonly as used for decorative purposes. This is an important hand stitch to know often used in apparel and especially quilting. If you find that you enjoy the therapeutic aspect of stitching by hand, there are also plenty of intricate hand embroidery stitches you can experiment with as you become more comfortable in the process. For now, if you are a still in the beginning stages, we suggest you focus on just a few basic but necessary hand stitches applicable to almost any project. We'll introduce you to 4 such stitches below. If you were to use these 4 stitches together, you would actually be able to sew a clothing item from start to finish without the need for a sewing machine. 1. The Blanket Hand Stitch (Oversewn/Overcast) This is a great stitch to use as a zig zag substitute when needed. Just as the name suggests, the blanket stitch (also commonly referred to as oversewing or overcasting) is often applied along the edges of blankets, certain towels and comforters in order to smooth and prevent them from rolling. It is also used quite often in quilting along the fabric's edge both for decoration purposes as well as to keep the edge from unraveling. Just as you would on a sewing machine, you can actually control the density and length/size of the blanket stitch while hand sewing it. A denser, shorter stitch works better for lighter fabrics that fray easier. On the other hand, a larger, less dense blanket stitch is applied along the edges of thicker fabrics with lower fraying. 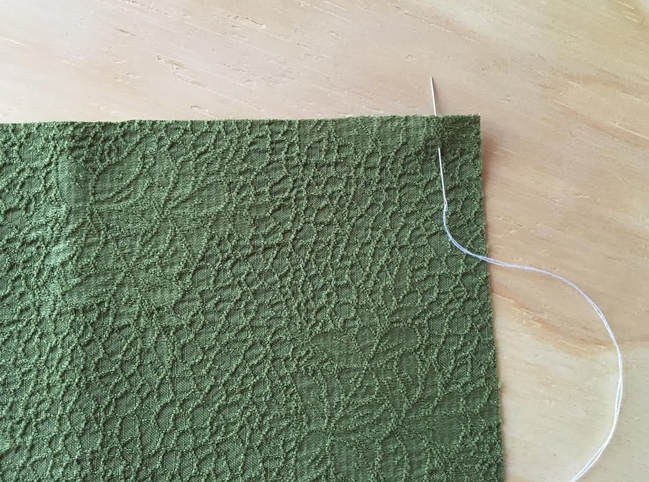 1. Choose the desired length for your blanket stitch and insert the needle at that measurement down from the fabric's edge. In this tutorial, our blanket stitch is approximately 1/4". The length you choose depends on the fabric at hand. The thinner and lighter-weight the fabric, the shorter and denser the stitch should be. 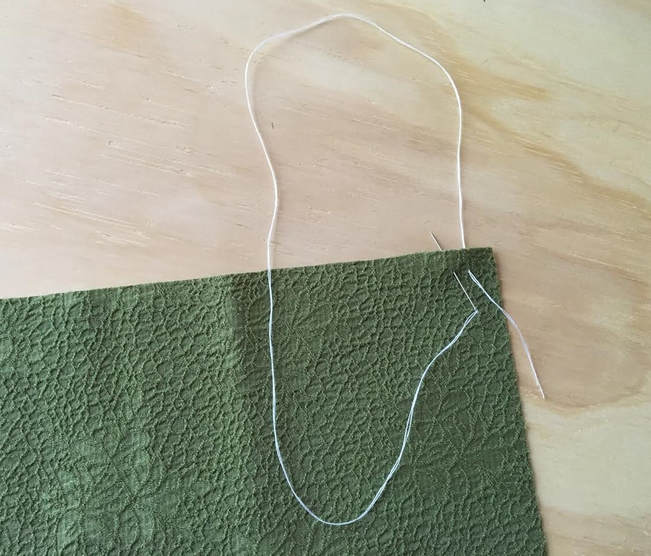 2. Position the thread in a loop/circular shape and insert the needle again at the same distance down from the fabric's edge. Where you insert the second stitch will determine the density of the blanket stitch. The closer the bottom stitches are together, the denser the blanket stitch will be. It is always a good idea to practice a few different lengths and densities on different fabric types. 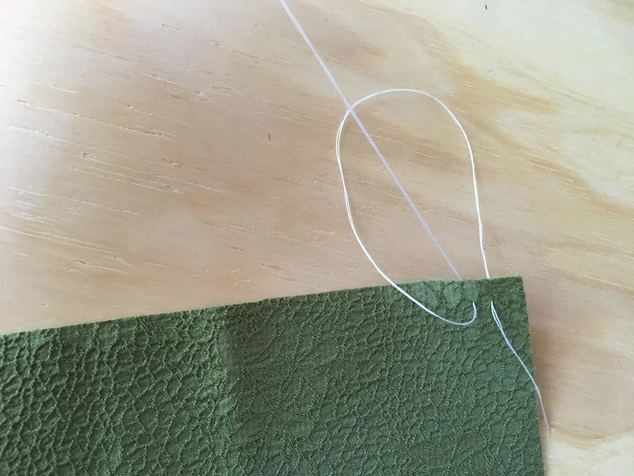 3. As you pull the needle out, position it so that it goes thorough the thread loop as shown. The thread loop should be at the bottom and the needle should go on top.
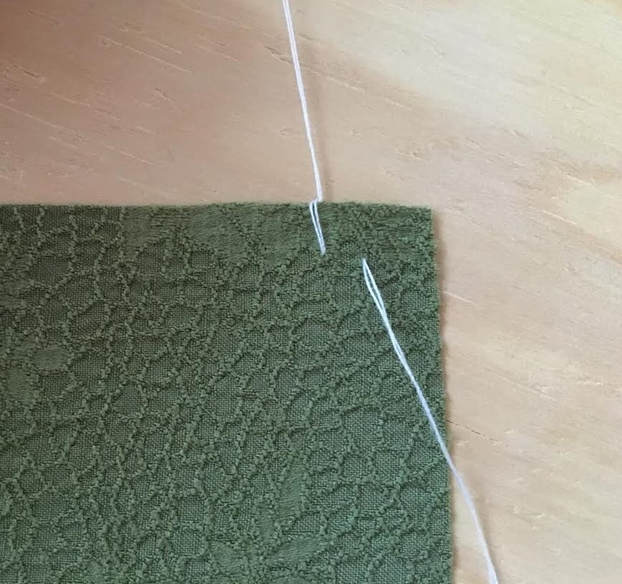
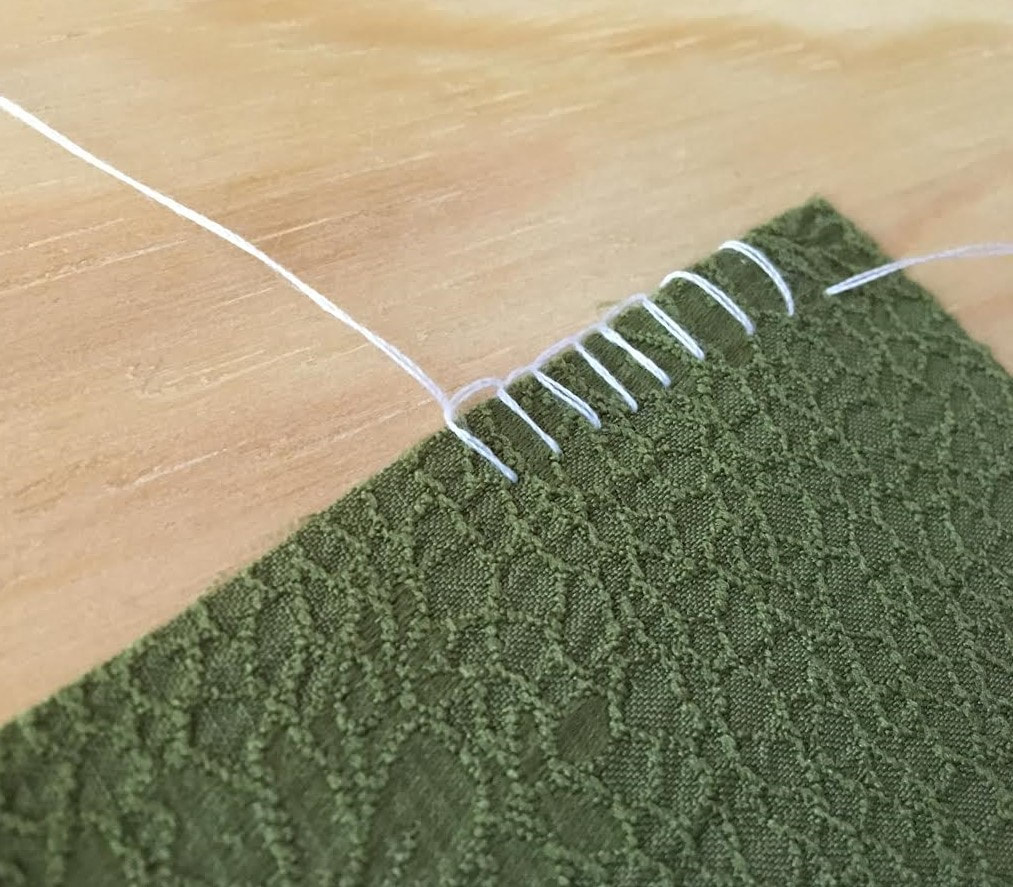
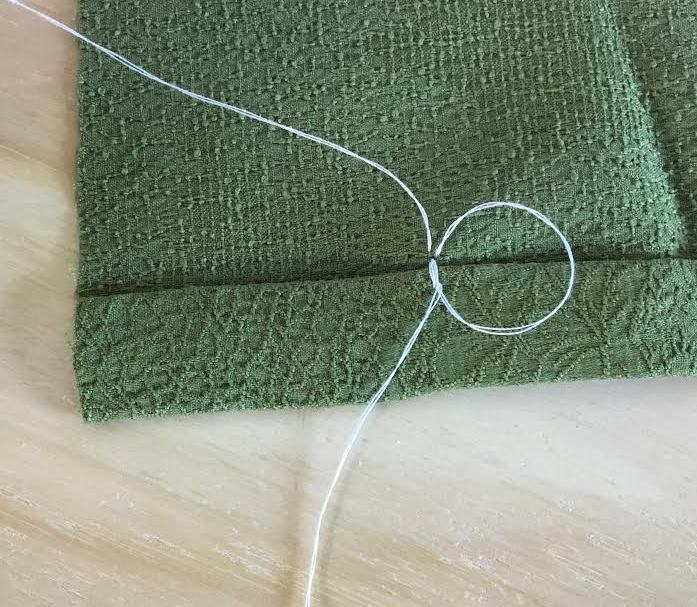
4. Pull the thread gently until the stitch aligns with the fabric's edge. Be careful not to pull so hard that the fabric wrinkles and creates tension along the edge.
5. Repeat the steps described above making sure to follow the same measurements throughout. The density and the length of the stitch should be distributed evenly along the edge. 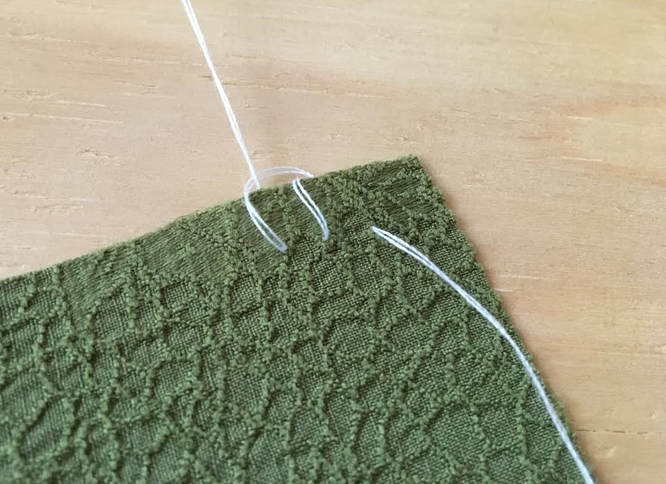 As you continue stitching, be cautious not to pull on the thread too tightly or you risk creating tension issues along the edge.
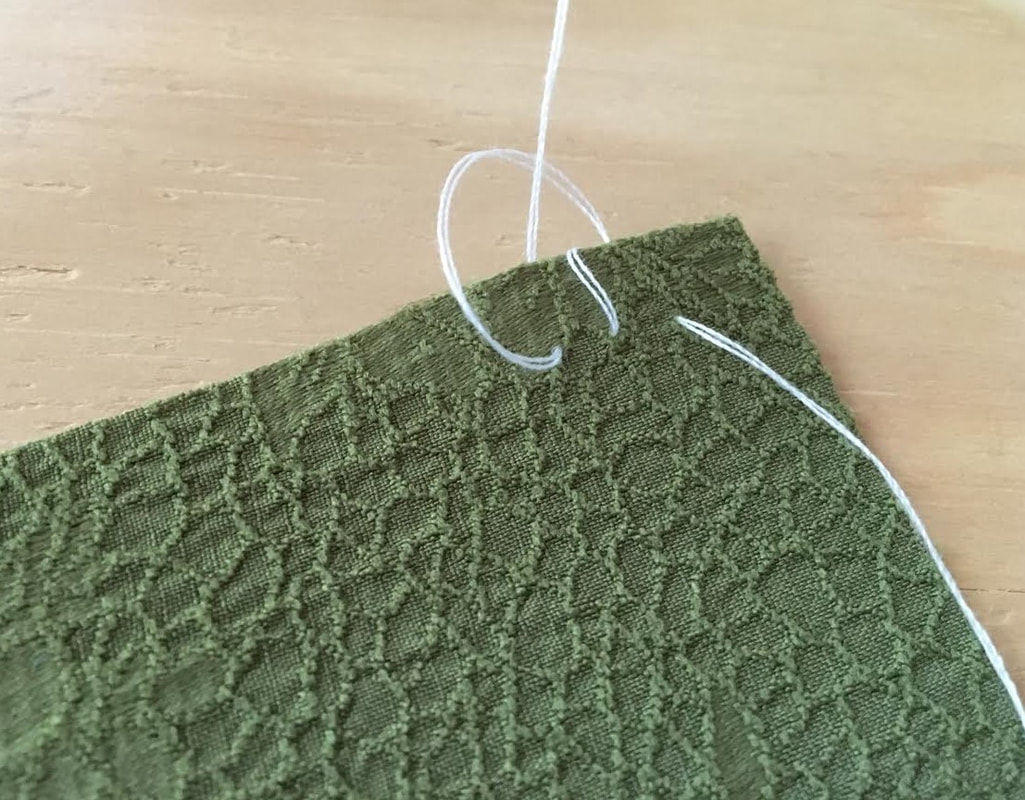
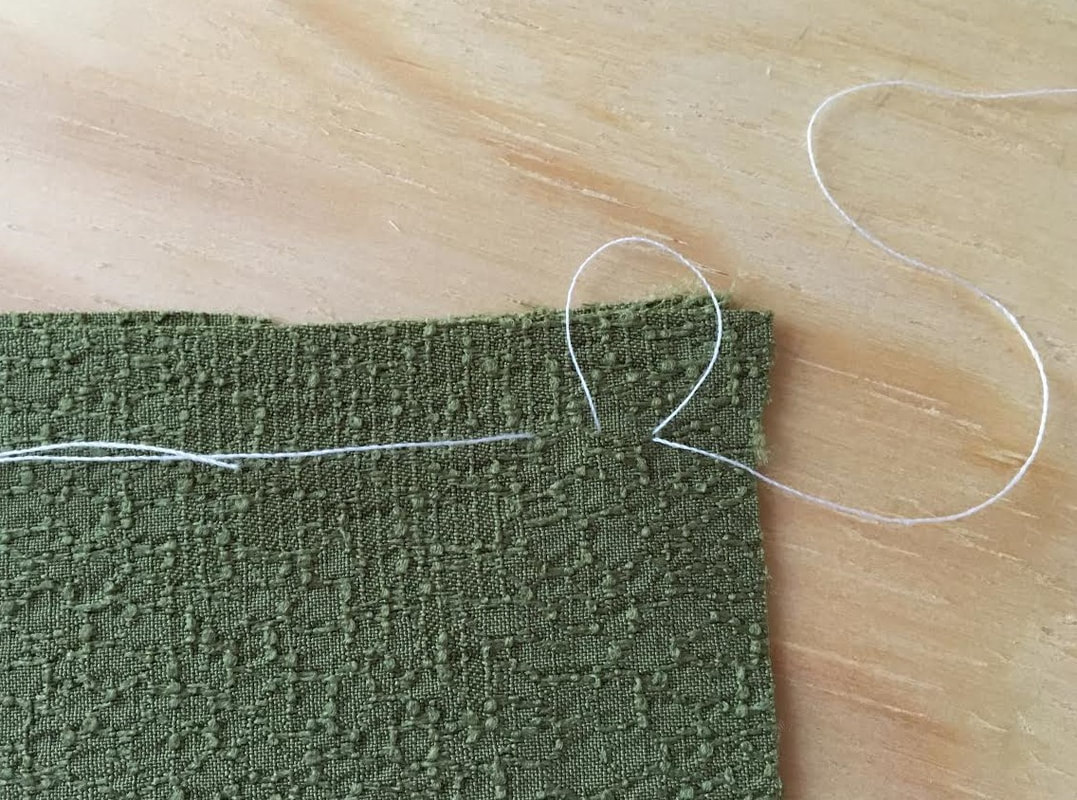
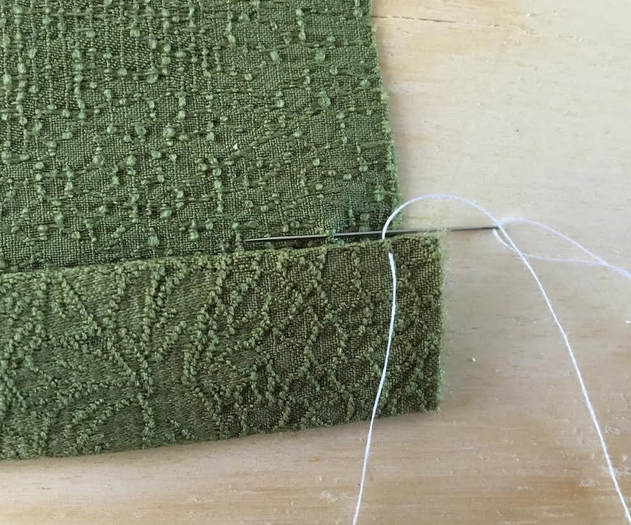
As you apply the blanket stitch, you'll notice that the edge becomes contained within the thread loops thus preventing the fabric edge from unraveling or rolling. This allows the blanket stitch to be the perfect hand sewing substitute for a zig zag or serged machine finish. 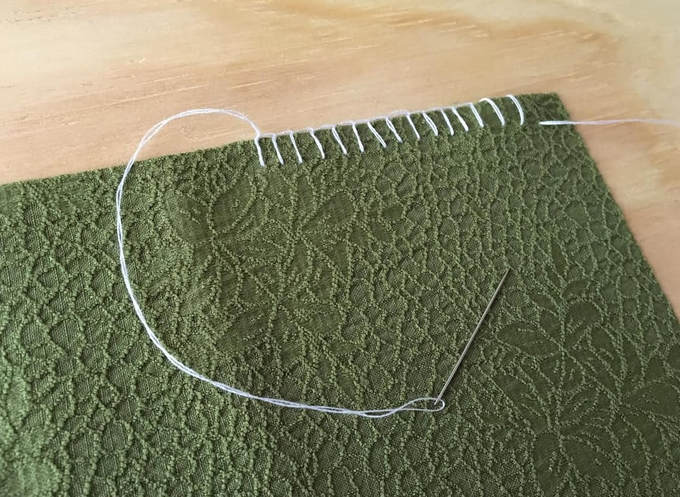 2. The Hand Backstitch A backstitch done by hand is perhaps the most durable straight stitch you can achieve by hand. You can actually substitute this for a regular machine straight stitch if needed. The reason it is so durable is because the process requires constant backstitching which doubles the stitching layers. Just like the straight stitch setting on your sewing machine, you can control the length and density of this hand stitch. Keep in mind that a shorter backstitch will create a stronger, more dense finish. This is a great hand stitch for sewing or fixing small seams. You can also use it to top-stitch by hand or stitch in areas that are difficult to reach with your sewing machine. In the example below, we'll show you how to use a hand backstitch to sew a seam by hand. 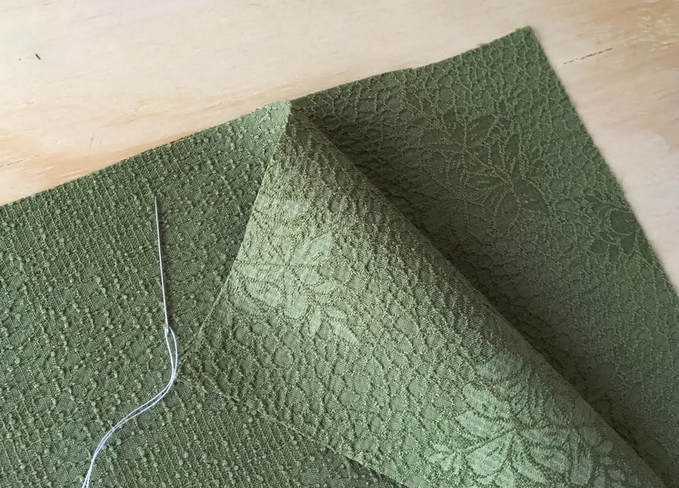 1. As is customary for any time you prepare a seam for sewing, align the edges of the seam so that the face of both layers of fabric are touching. 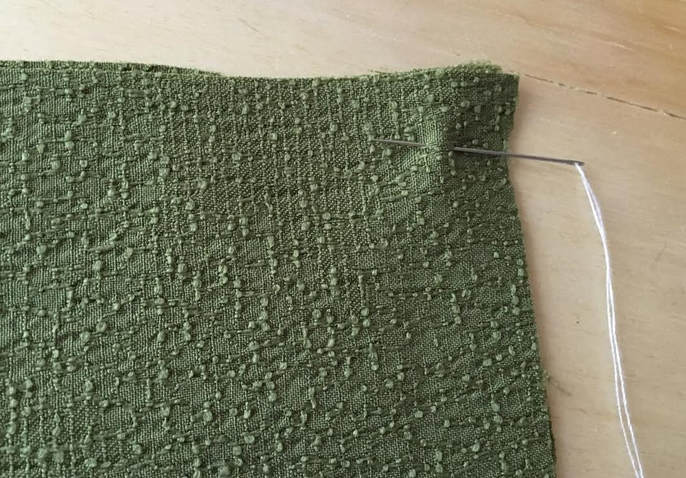 2. Decide on the stitch length and insert the needle lengthwise through both layers of fabric at the chosen length. Make sure you position the stitch at the correct seam allowance from the fabric's edge. 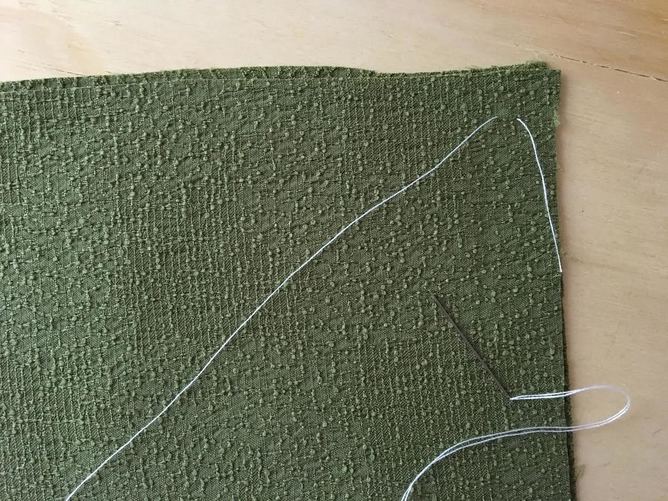 In this tutorial the stitch length is approximately 1/4" thus the needle is inserted at a 1/4" interval. 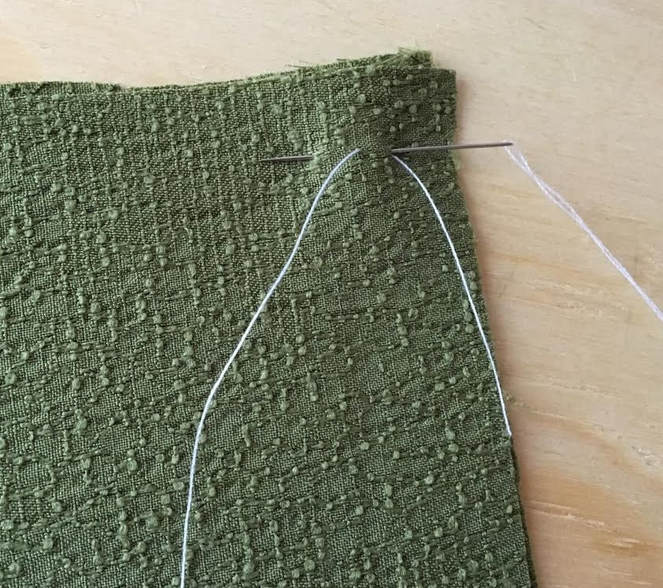 3. Return to the point where the first stitch begins, and insert the needle forward at double the stitch distance as shown. The needle should go past where the last stitch ends.
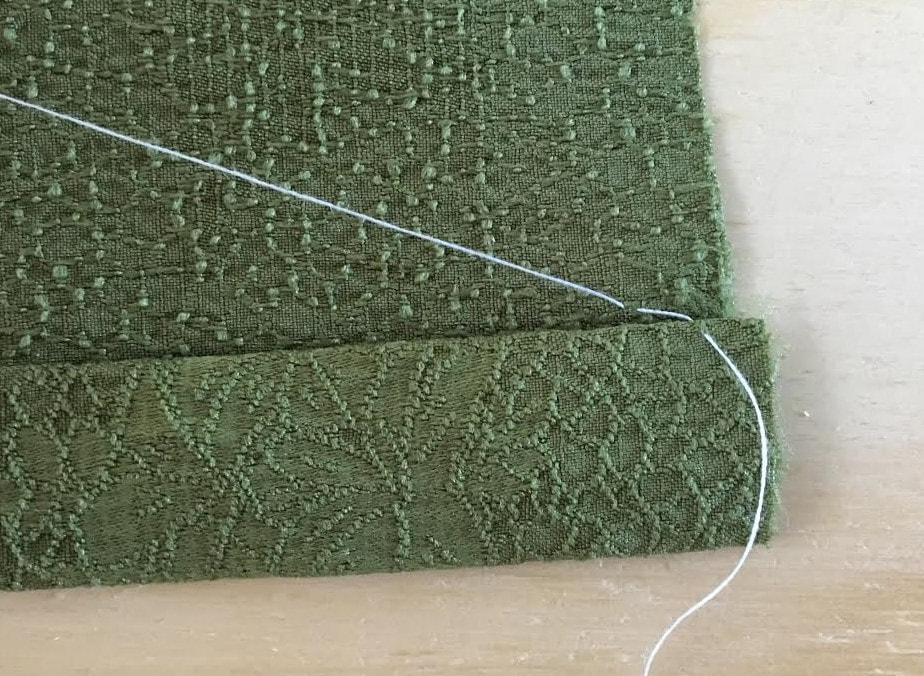
4. Pull the thread gently. Ensure that you don't stitch too tightly as this can cause the final seam to pucker and create tension issues. 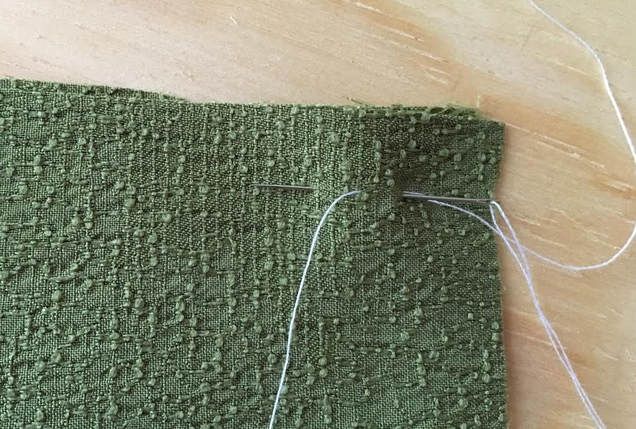 5. Repeat the process by inserting the needle back through where the last stitch ends at double the distance of the stitch again. 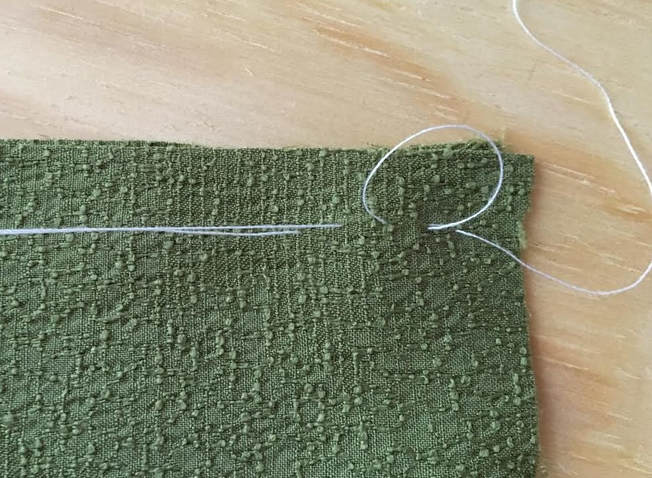 Maintain the stitches as even as you can ensuring that you follow the correct seam allowance throughout. 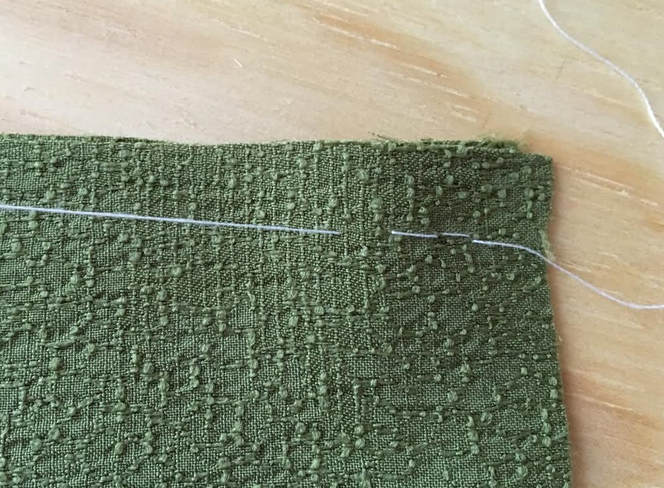 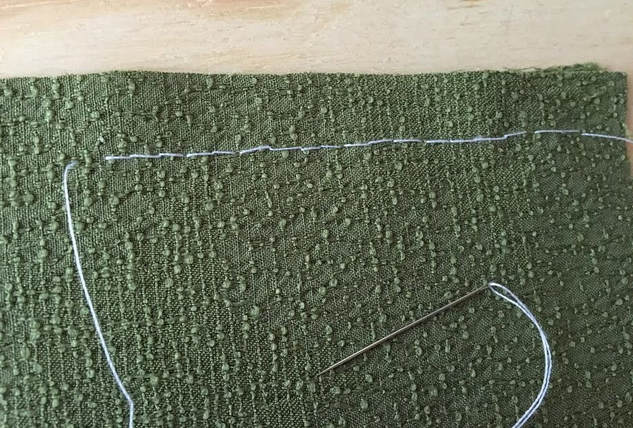 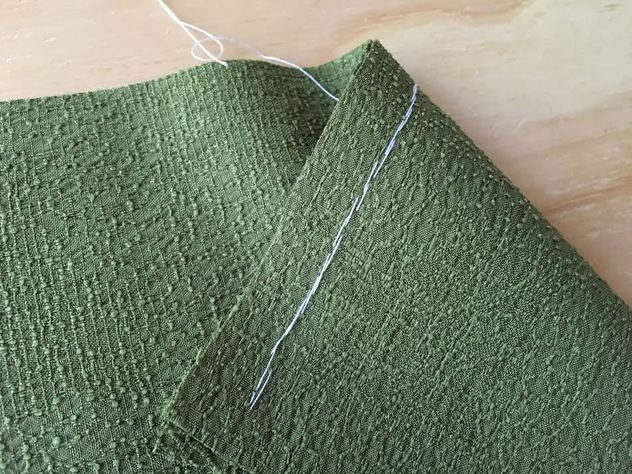 You will notice that a hand backstitch resembles a straight machine stitch very closely. However, if you look on the back side of the stitch, you'll find double stitched layers with a slightly different look. These stitch layers contribute to the seam's durability and long term wear. 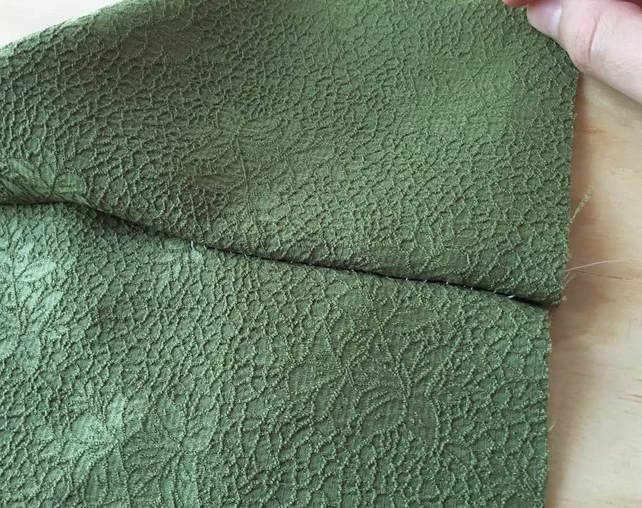 If you do not have a sewing machine available, the hand backstitch works just as well for sewing permanent seams. 3. The Slip Stitch A slip stitch is great hand stitch to master whether you own a sewing machine or not. It is often used in conjunction with other machine applications to sew difficult to reach areas or apply a blind finish. You can use a slip stitch to finish the inside of waistbands, collars and cuffs. Most commonly however, you will find it as a blind hemming method used on a variety of different garments. Slip stitching is also a great technique for fixing surface tears or connecting seams on the face side of the fabric. It is a hidden stitch that should not be noticeable on the face of the garment and difficult to see on the wrong side, if applied correctly. Below, we'll walk you through the process of applying a slip stitch on a hem to create a blind finish. 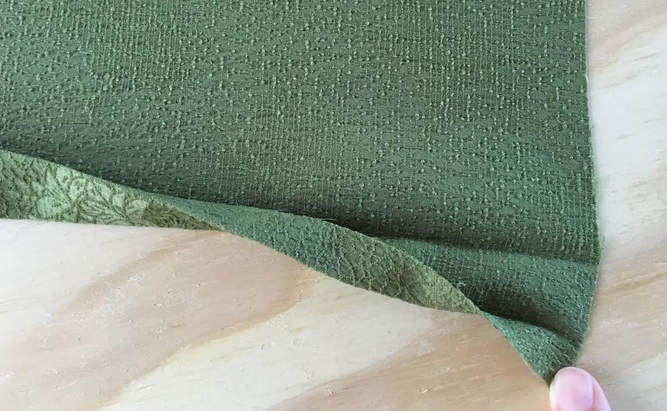 1. Double fold and iron the fabric towards the wrong side to enclose the raw edge. You can also insert a few pins to hold this fold in place. 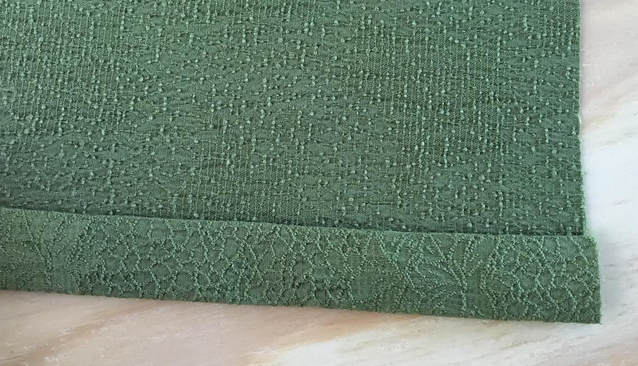 This folding method is the most common technique for finishing hems. Make sure the fold stays aligned properly and folded at an even distance throughout. Follow the hem allowance. 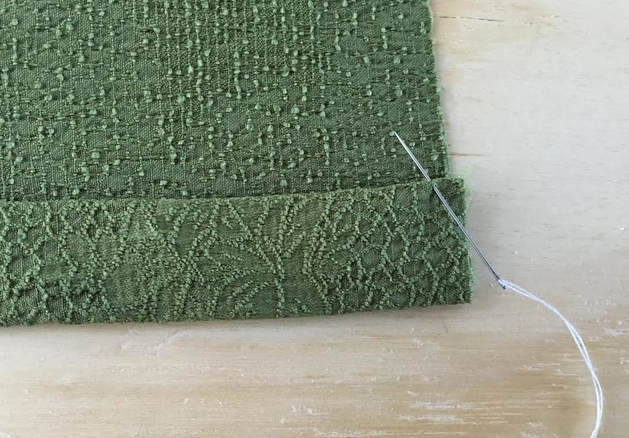 2. Insert the needle though the edge of the fold as shown above.
3. Next, catch 1 or 2 threads from the fabric surface right above the fold. Catching just a few threads will result in an invisible stitch on the face side of the garment, especially when applied with matching color thread. 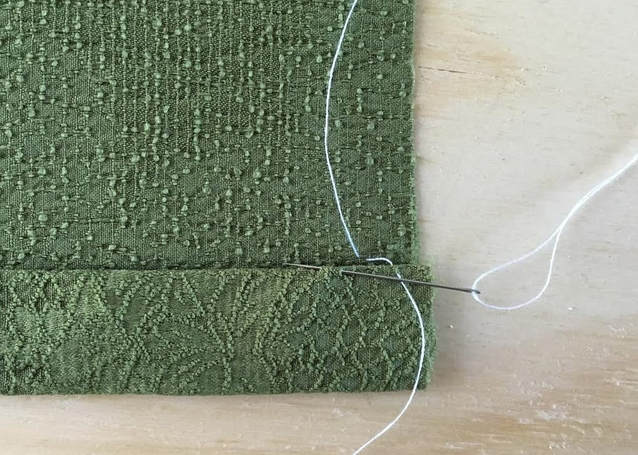 4. Insert the needle back through the fold at approximately 1/4" in length. You can control how loose or closely together you want the stitches to be. A denser, smaller stitch will allow for a more durable, tight finish. 
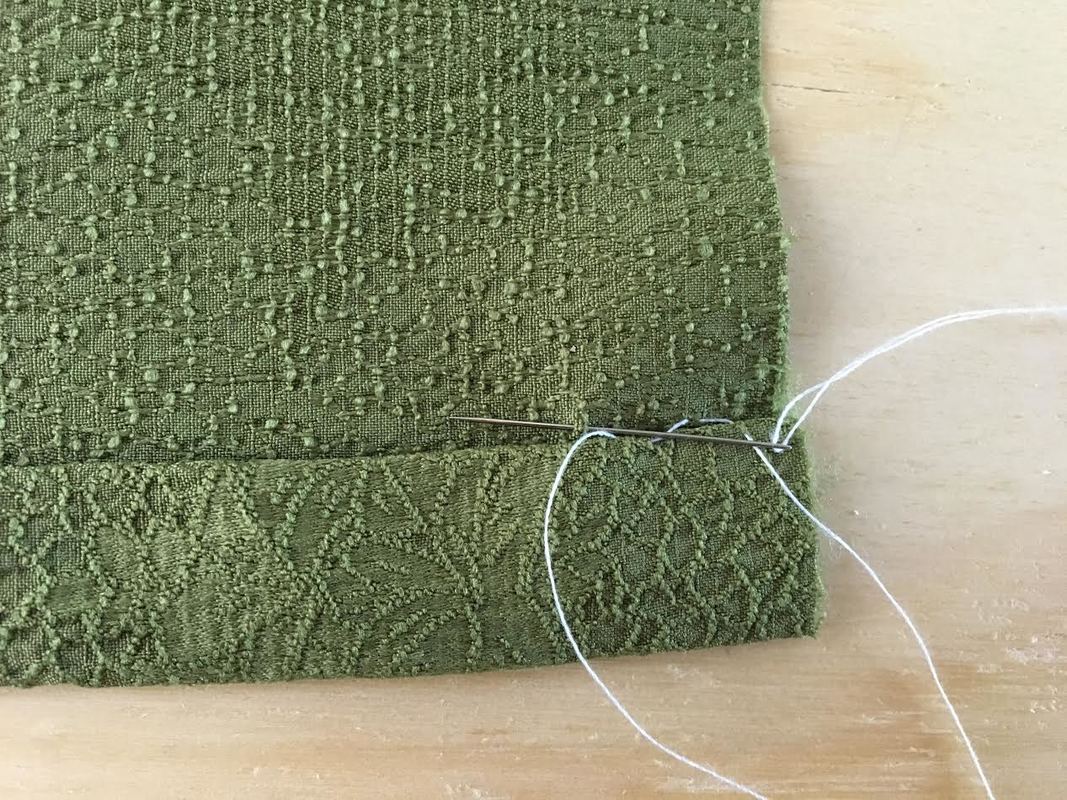
5. Repeat Step 3 again by catching a few threads from the surface of the fabric. 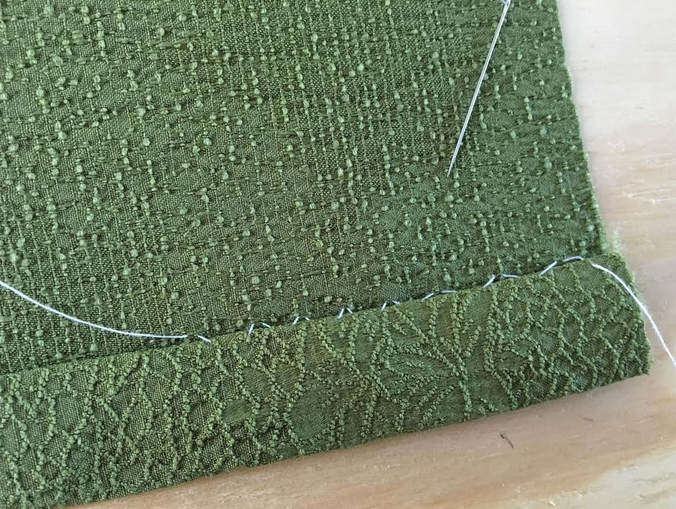 6. Repeat the stitching process described above until the fold is attached to the fabric throughout. You'll notice that the slip stitch resembles small "v" shapes aligned next to one another. 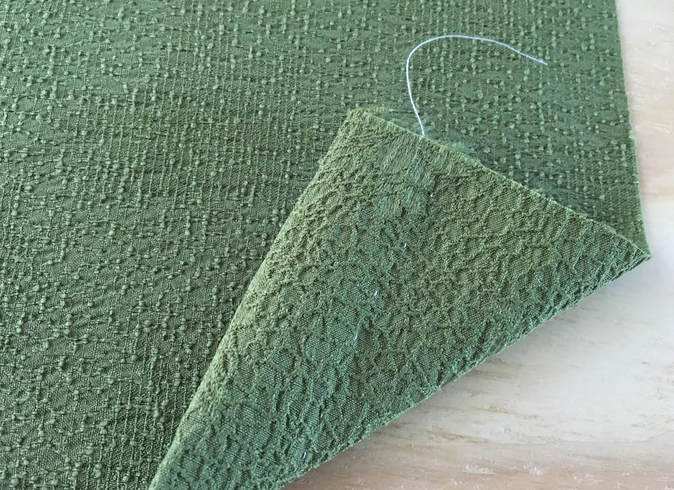 Only small points from the slip stitch are visible on the outside of the fabric. When the thread matches in color, these stitches blend in to look invisible on the face of the garment. 4. A Permanent Tack Stitch A permanent tack stitch looks quite subtle and is easy to apply. It is used as a stabilizer to hold certain layers of fabric from shifting or to link separate garment sections together. A permanent tack stitch is localized and applied most commonly on the inside of facings and lining to stop them from shifting out of alignment or flipping to the face side of the garment. It is also a great way to keep rolled cuffs in place through wear and care. You might have already spotted this stitch on cuffed jean shorts and cuffed blouses. There are a few different styles of tack stitches both permanent and temporary that are used for various purposes. The most common are cross tacks, bar tacks (which we'll discuss below), heavy duty tacks and french tacks. The most commonly used are cross tacks and bar tacks thus it is a good idea to start with mastering one of the two. Applying a simple bar tack:  1. Insert the needle through all layers of fabric that require a tack stitch. In this case, the edge of the fold is being attached to the surface of the fabric- a common technique for stabilizing rolled cuffs. 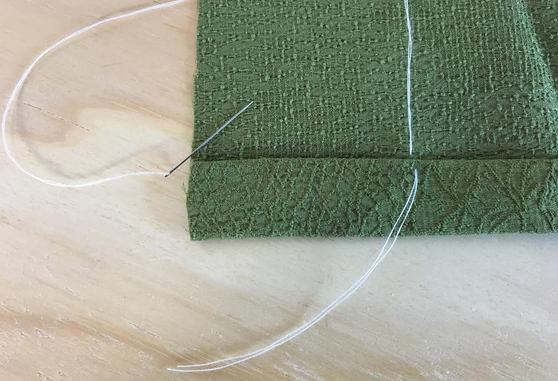 2. Leave some excess thread to use for completing the stitch with a knot at the end.
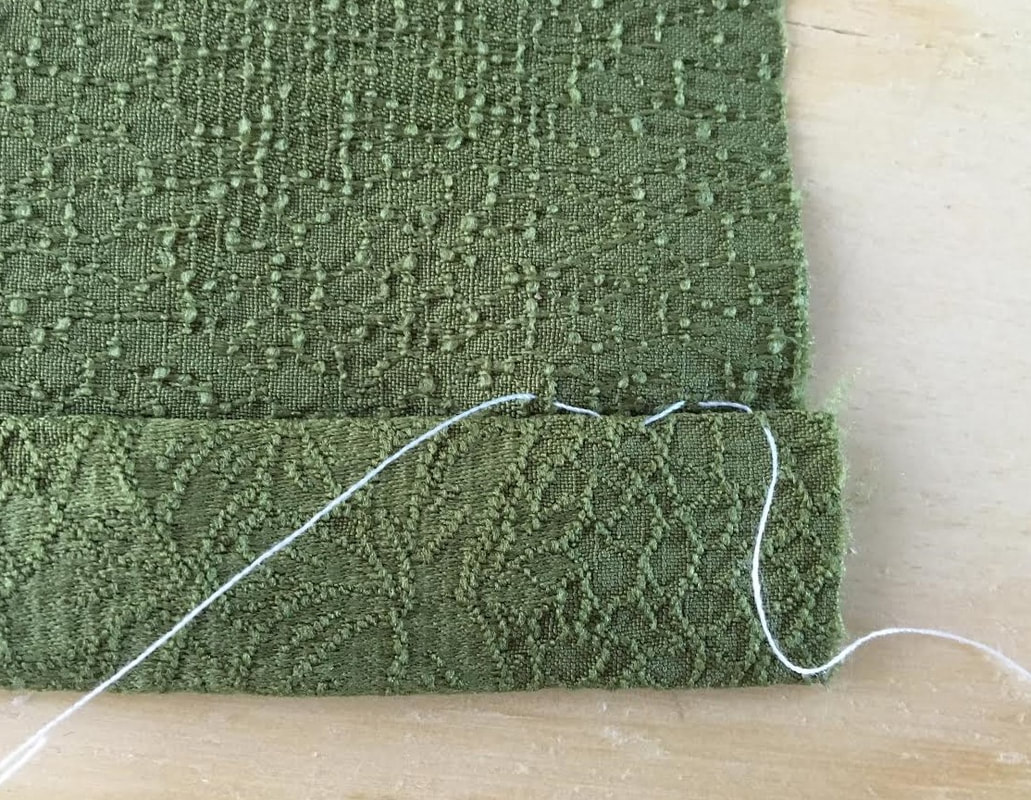
3. Stitch in place a few times forming overlapping loops until a tight, durable layered stitch is achieved. 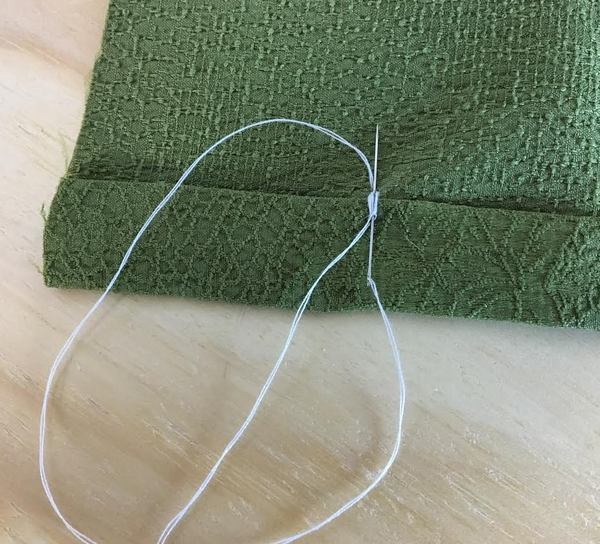 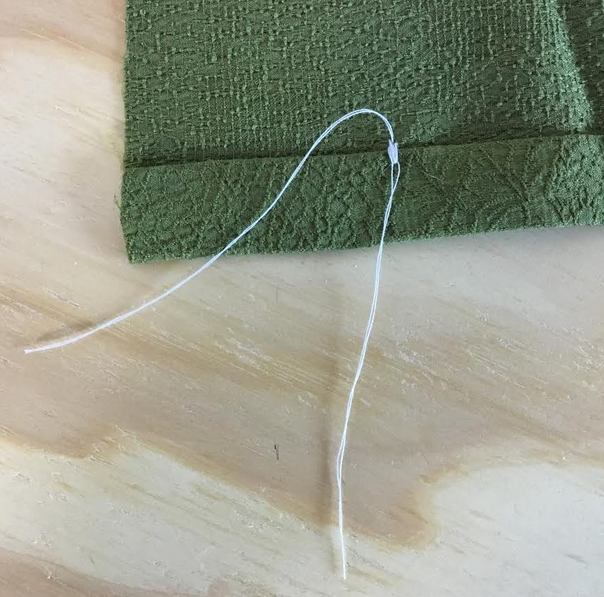 4. When cutting the thread, make sure to leave enough excess so that you can tie the two loose threads together for a more durable, clean finish. 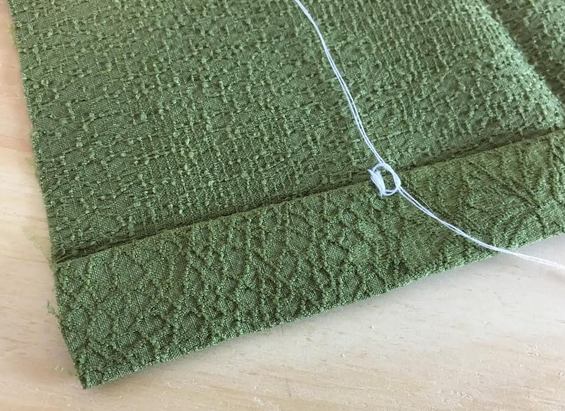 5. Tie the threads together 2-3 times and carefully trim close to the knot. 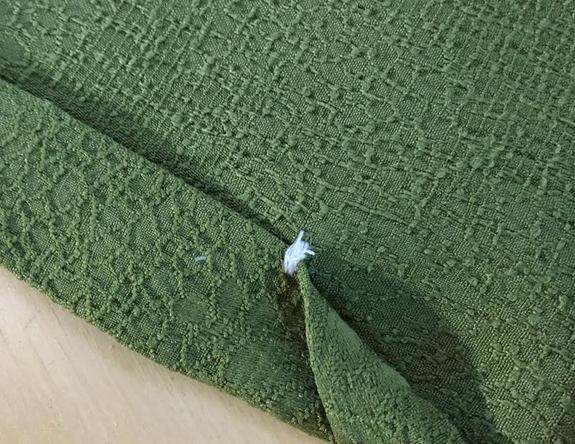 
2 Comments
1/6/2022 01:27:23 am
I never knew that learning some basic hand stitches will prove to be quite useful in the long haul. I never thought that it would be like this, it is an intriguing article to read and I will also share this with my aunt. Thank you for the information about sewing machine repair. 6/28/2023 09:45:08 am
Thanks for sharing this. I am a guy that just needs some jeans 👖 and socks 🧦 sewn. So with this information I will save so much on clothing. I have plenty of them to sew. So I am sure I will master this skill and have it as part of my skills box. Maybe I can attempt a patch on my truck seat and stop ripping out my pants when I get out. Anyways thanks a lot. Bless you and yours. Leave a Reply. |
The Blog:A journey into our design process, sewing tutorials, fashion tips, and all the inspiring people and things we love. 
Doina AlexeiDesigner by trade and dressmaker at heart. I spend most of my days obsessing over new fabrics and daydreaming new ideas. 
Sadie
Executive Assistant & Client Relations Manager Archives
November 2019
Categories
All

|

-
Sewing Tutorials
-
Basics
>
- Aligning Pattern Grainlines To Fabric
- Preparing Fabrics For Sewing
- Pinning Sewing Patterns To Fabric
- Placing Sewing Patterns On Fabric For Cutting
- Rotary Cutters or Fabric Scissors?
- Cutting The Sewing Patterns
- What Are Notches And How To Use Them In The Sewing Process
- Transferring Notches From Pattern To Fabric
- Transferring Seamlines to Fabric
- Staystitching
- Backstitching: A Complete Guide
- Hand Basting: A Complete Guide
- Sewing Continuous Bias Binding
- Darts >
-
Sewing Seams
>
- The Basics Of Seams And Seam Allowance
- How To Sew A Straight Seam
- Sewing Curved Seams
- Sewing Corner Seams
- Trimming And Grading Seam Excess
- Notching/Clipping Seam Allowance for Tension Release
- Sewing Topstitched Seams
- Sewing Corded Seams
- Sewing A Slot Seam
- Sewing A Gathered Seam
- Sewing Bias Seams
- Sewing Seams With Ease
- Sewing Seams With Crossing Seamlines
- Sewing Unlike Fabric Seams
- How To Iron Seams: Ironing Tools And Conventions
- Sewing With Knit Fabrics
- Understanding Stitch Length And Tension
- Sewing Unique Fabric Seams
-
Seam Finishes
>
- Seam Finishing Techniques - Overview
- Applying A Pinked Seam Finish
- Applying A Bias Bound Seam Finish
- Serging And Zigzag Seam Finishes
- Sewing A Self-Bound Seam Finish
- Sewing A French Seam Finish
- Sewing A Hong Kong Seam Finish
- Sewing A Mock French Seam Finish
- Sewing A Turned-and-Stitched Seam Finish
- Sewing Overcast Hand-Applied Seam Finishes
- Sewing A Flat Felled Seam
- Sewing A Hairline Seam Finish
-
Hem Finishes
>
- Garment Hem Finishes: Overview
- Sewing A Double Fold Hem Finish
- Sewing A Single Fold Hem Finish
- Sewing Bound Hem Finishes
- Sewing An Exposed Double Layer Bound Hem
- Sewing A Folded-Up Bound Hem with Pre-folded Binding
- Sewing A Hong Kong Hem Finish
- Sewing A Band Hem Finish
- Sewing A Bias Faced Hem Finish
- Sewing A Twill Tape Hem Finish
- Sewing A Rolled Hem Finish
- Sewing A Shaped Hem Facing
- Using Fusible Hem Tape And Webbing
- Finishing A Lace Fabric Hem
- Finishing A Leather Hem
- Sewing Faced Hem Corners
- How To Finish Lining At The Hem
- Finishing Fabric Corners by Mitering >
- Interfacing A Hemline: Lined And Unlined Examples
-
Sewing Pockets
>
- Curved Patch Pocket With Flap
- Unlined Square Patch Pockets
- Lined Patch Pockets: Two Ways
- Extension On-Seam Pockets
- Separate On-Seam Pocket
- Front Hip Pockets
- Bound Double Welt Pocket
- Double Welt Pocket With Flap
- Self-Welt Pocket (Using Single Fabric Layer)
- Slanted Welt Pocket (Hand-Stitched)
- Faced Slash Pockets: Overview >
-
Sewing Zippers
>
- Sewing Zippers: General Information
- Sewing A Centered Zipper
- Sewing A Lapped Zipper
- Sewing An Invisible Zipper
- Sewing A Fly Front Zipper
- Sewing A Closed-End Exposed Zipper (No Seam)
- Sewing An Exposed Separating Zipper
- Sewing Hand Stitched Zipper Applications
- Sewing A Zipper Underlay
- Sewing A Placket-Enclosed Separating Zipper
- Sleeveless Finishes >
-
Neckline Finishes
>
- Sewing A Neck Shaped Facing
- Sewing An All-In-One Neck Facing
- Neck And Garment Opening Combination Facings >
- Sewing A Bias Faced Neckline Finish
- Sewing A Band Neckline Finish
- Bound Neckline Finishes: Overview >
- Sewing A Semi-Stretch Strip Band Neckline
- Ribbed Neck Band And Classic Turtleneck
- Decorative Neckline Finishes >
- Finishing Facing Edges >
-
Extras
>
- A Complete Guide on Interfacing
- Sewing Bound Spaghetti Straps
- Sewing Spaghetti Straps To A Faced Neckline
- Sewing Ruffles: Overview
- Patterning And Sewing A Circle Ruffle
- Sewing A Gathered Heading Ruffle
- Sewing Double Layer Gathered Ruffles
- Sewing A Gathered Ruffle Into A Seam
- Sewing A Gathered Ruffle To A Fabric Edge
- Sewing A Fabric Surface Slit
- Sewing A Slit Seam
- Hand-Applied Straight Stitches
- Hand-Applied Blind Stitches
- Hand-Applied Overedge Stitches
- Hand-Applied Tack Stitches
- Hand-Applied Decorative Stitches
-
Basics
>
- Custom Bridal
- Custom Apparel
- About
- Blog
 RSS Feed
Services |
Company |
|
