|
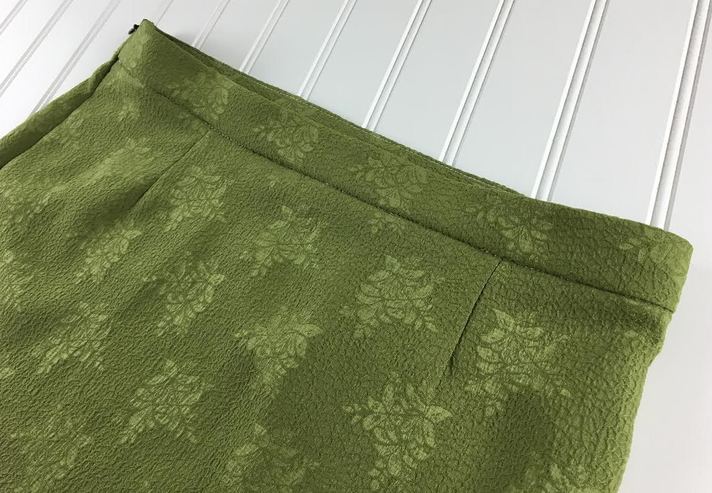
When it comes to learning how to sew, most people start with a simple sleeveless dress or a skirt and move on to more labor-intensive pieces like pants, formfitting blouses/dresses and styles that require sleeves. There are certainly hiccups along the way and a learning curve that takes some time. Sewing however, is like math- once you know the most basic techniques, you can apply them to more complicated projects. However, techniques for sewing zippers, pockets and waistbands (to name just a few) can take a bit longer to fully absorb. As for waistbands, things can get a little more intimidating when it comes to attaching a non-stretch waistband to items like pants and skirts. It is however, a necessary addition to all functional woven bottoms. As opposed to a stretchy waistband that functions with the help of elastic, a non-stretch waistband requires some extra sewing steps and a little bit of tailoring. It can appear to be complex at first, but we'll show you an easy technique for attaching any non-stretch woven waistband with an invisible zipper closure. Methods for Finishing Pant/Skirt WaistlinesAlthough adding a straight waistband is the most common option for finishing the waistlines of woven bottoms, there are few other efficient finishes used depending on fabric type and garment design. For woven waistlines that are non-stretch, alternatives include a drawstring casing, elastic waistband, a stretch waistband and a faced waist finish. All of these options should be considered in relation to the type of fabric and the garment's design. For example, a faced waistline doesn't have a visible waistband and features a clean line along the edge of the waistline. In order to achieve the right amount of stability and structure, a faced waistline finish is used on non-stretch fabrics with more structure and thickness. On the other hand, a drawstring waist finish works better with light to medium weight fabrics that are not too bulky when the casing is gathered by the drawstring. As a sewing beginner, focus on learning a straight waistband with a facing first. Although it's not the easiest to sew for a beginner, it will teach you a few techniques you can apply to other parts of a garment in the sewing process.
1 Comment
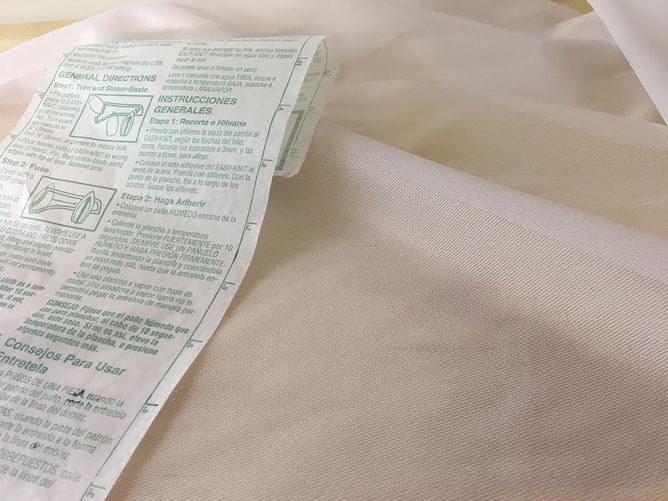
If you’re just beginning to learn how to sew, or maybe you have been involved in crafts for a while you are probably already familiar with interfacing. Most likely, you know what it looks like and where to find it in the fabric store. You have probably already used basic iron-on (fusible) interfacing for some of your craft projects. Understanding the use of interfacing in the apparel industry is not always easy especially in the beginning stages of teaching yourself how to sew. For that reason, we've put together some basic information about interfacing that will hopefully clear some of the initial confusing and maybe even avoid some pitfalls in the learning process. What Is Interfacing?Interfacing is added to parts of a garment in order to increase shape, body, stability and support, as well as add durability. Its application can add structure to tailored apparel and keep some fabrics from stretching and losing their shape during long term wear. Interfacing is used in enclosed areas of a clothing item and should never be visible even when the garment is turned inside out. It is most commonly added to the inside of collars, buttonholes, facings, hems, tailored shirt and jacket cuffs, pockets, yokes and other individualized uses depending on the design. The clean, structured aspect of all business suits, blazers and tailored coats is the result of the effective use of interfacing. It is able to stiffen and maintain the shape of key areas necessary for achieving a good quality tailored finish. Types of InterfacingInterfacing can be divided into three large groups: non-woven interfacing, woven interfacing and knit interfacing. Woven and non-woven interfacing is used for non-stretch woven fabrics, while knit interfacing is used for stretch knit fabrics or woven fabrics that have stretch due to the addition of spandex. No matter what interfacing you choose for finishing your garment, you should always ensure that the interfacing you use complements and reinforces the garment as possessed to overwhelming it or not offering enough support. In addition, your chosen interfacing should have the same care instructions as the garment itself- This eliminates the risk of it being damaged and coming undone in the wash. As a sewing beginner, you will most likely experience some trial and error with using the correct interfacing. Certain types of fusible interfacing can't withstand regular machine washing so make sure you always check the interfacing's care instructions before adding it to a clothing item. Note that aside from the specified care instructions, interfacing can also come undone in the wash due to incorrect application so always make sure to follow the proper steps to ensure that the interfacing is properly sewn or adhered to the wrong side of the garment's fabric in the construction process.
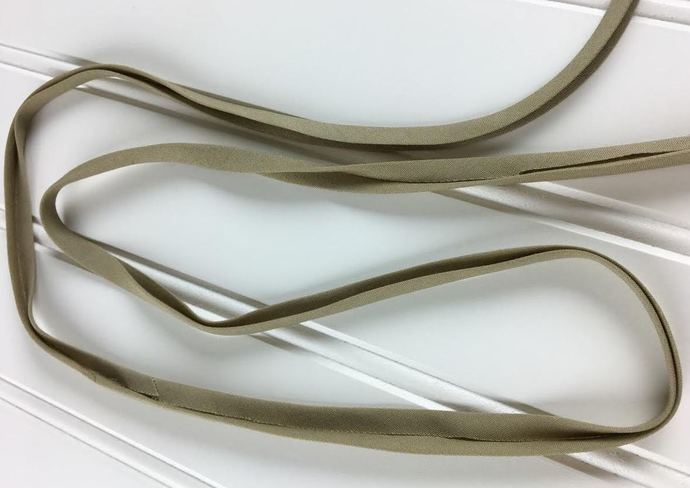
The most common way to clean finish necklines, armholes, seams and other raw edges is by using double folded bias binding. It is affordable and actually quite easy to work with once you get some practice. Binding (also called bias tape) is cut on the bias, diagonal to the selvage edge. Binding needs to be cut on the bias due to the fact that it requires semi-stretch and more flexibility to mold easily along curved edges. The bias of woven fabrics provides natural stretch and a more draped, luxurious feel. Diagonally cut binding is also much easier to work with and easy to pin and handle during machine stitching. How to Make Continuous Bias Double Folded Binding Hand-in-hand with learning how to cut and fold your own binding is also learning the correct way to make continuous binding. Continuous binding features diagonal seams that connect fabric strips together, thus forming binding at any desired length. Using a single strip of binding, as opposed to separate ones, results in an easier sewing process with less interruptions, saving more fabric and creating a smooth, less bulky bound finish. Just as it is cut, the seams that connect the fabric strips together are also sewn diagonally on the bias. You can find double folded binding at your local fabric/craft store. It comes in a few different widths and colors and if you're just looking for a quick finish, you might find exactly what you're looking for. Pre-folded binding available at fabric or craft stores is usually made of 100% cotton with a stiffer feel simply because it is meant for use with quilting rather than dressmaking. That is not to say that you can't use it to finish raw edges on dresses or blouses. You might run into a few issues however, if you are working with a very fine, lightweight fabric that cannot withstand the stiffness of pre-bought cotton binding. Usually, lighter weight silk fabrics, chiffon and some crepe de chines will require a very soft, pliable binding to match the rest of the fabric's fluidity and drape. So what do you do? The answer is quite simple- make your own double folded binding from your choice of fabric (usually the same as the garment you're sewing) in whatever width and length you need!
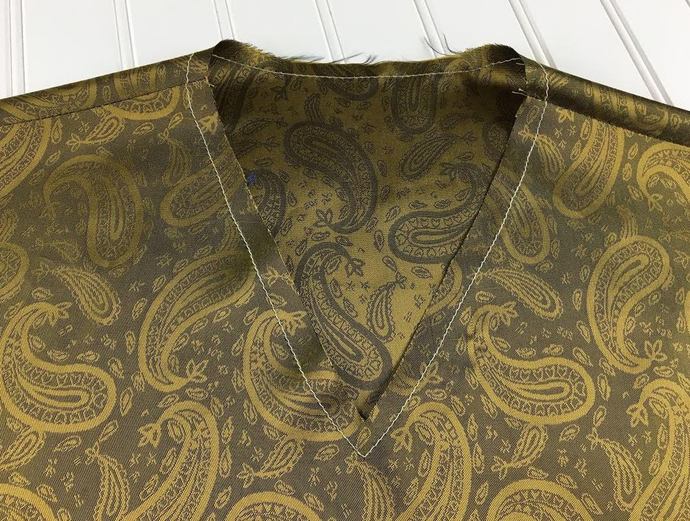
Bellow, we'll show you how to sew 1/4"-wide continuous double folded binding out of 1" strips of bias cut fabric. If you are still a sewing novice and learning the proper steps to constructing a garment, "understitching" is something you will definitely need to master. Understitiching is the key to making sure all your faced and lined garments lay correctly and maintain smooth, flat edges. What Is Understitching? Understitching is a straight stitch applied to facings and linings on the inside of the garment in order to keep them flat and aligned once the garment is complete. This stitch is usually placed on top of the facing/lining layer at about 1/8" to 1/4" distance from the finished edge/seamline. It is the final finishing step completed after the facing or lining has been connected to the raw edges of the item being sewn which has already been snipped to release tension and graded if needed. By understitching, you avoid having excess fabric from the lining/facing peeking at the finished edges of the garment or completely roll to the face side of the garment. Understitching is a sewing must when you choose facings or linings as a clean finishing method. It is a stitch not visible on the outside but that plays a key role in the clean, professional look and fit of a clothing item. Hand understitching is applied by hand on very fine fabrics and tailored items that risk being damaged by a regular machine stitch. It features hand sewing techniques like pick-stitching which is more precise and less visible on the garment. Hand understitching using a pick-stitch is most commonly found on tailored collars and lapels. When To Understitch ? Understitching is necessary along all edges that have a facing or lining attached. At the point where the raw edge of the garment is sewn to the facing or lining's edge (seamline), you will need to apply a machine stitch (understitch) in order to keep this connection stable and laying flat. For that reason, understitching along faced/lined necklines, armholes and front openings (that are faced) is mandatory.
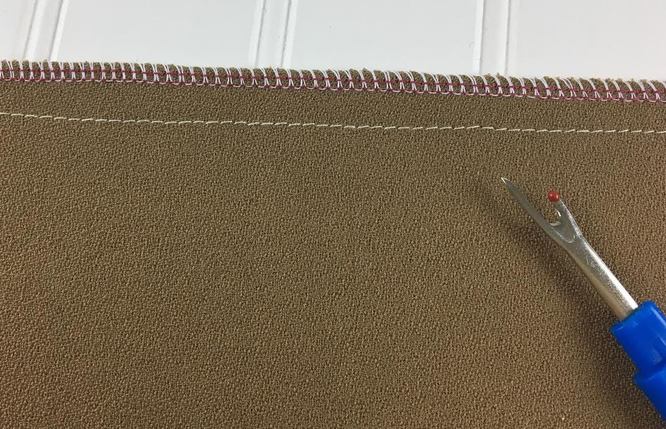
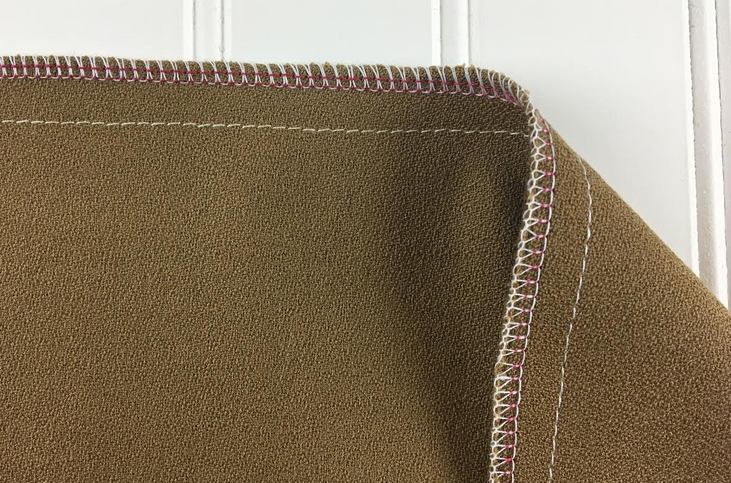
Other common areas where understitching is needed are: -Along the inner layer of a waistband. -Along the underlay of most pockets. -Various types of cuffs like sleeve and pant cuffs. -Some styles of skirt/dress slits and vents that require lining or backing. -On binding when using it to clean-finish raw edges. If you like to do your own sewing alterations, you are probability already familiar with the difficulty of removing serging stitches from the inside edges of a garment. Altering seams will often require the removal of all existing clean-finishing prior to applying the new changes. Serging is the most common and inexpensive way to finish the raw edges of seams, thus you'll probably find it on 90% of your clothing items. Learning the easiest way to remove it, will save you time and frustration when you need to undo those meticulous stitches and start from scratch. A serging stitch is done on an overlock sewing machine and usually applied along the raw edges of a seam. It uses a blade to trim along the raw edge as you sew and features a combination of overlock stitches and straight stitches to permanently encase the raw edge of the fabric. The quality and look of a serging sticth depends on the serger that was used to sew it. In the image bellow, the straight stitches are displayed by the pink color, while the overlock stitches are white. You can differentiate between serging stitches by the ratio of overlock and straight stitches it has. A serging stitch done on a more expensive overlock machine will have 3 overlock stitches and 2 straight stitches, and the serging stitch alone can be used as a 2-in-1 substitute for sewing and clean-finishing a seam. This particular serging stitch is durable and maintains a smoother, denser surface.
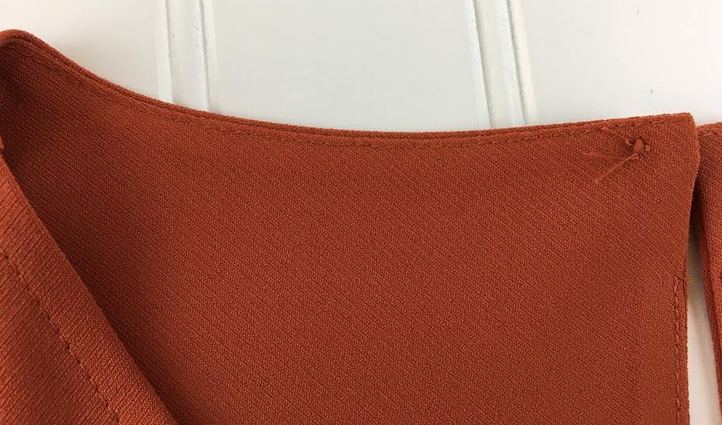
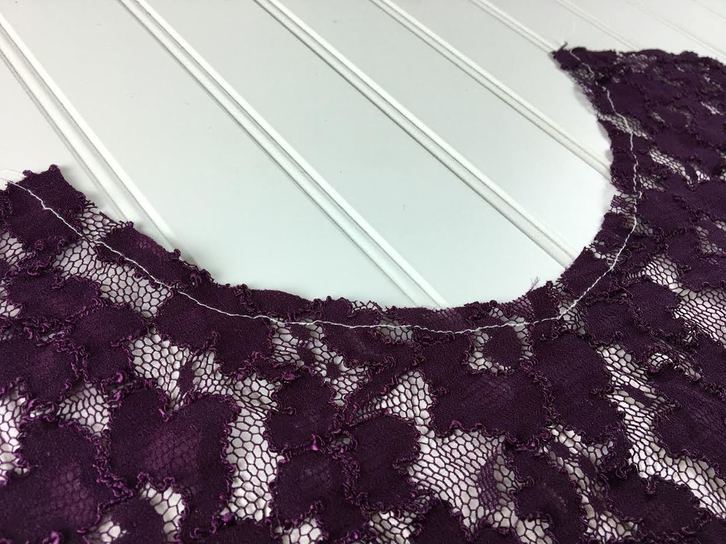
The least expensive serging stitch uses 1 straight stitch and 2 overlock stitches to clean-finish raw edges. It is still a full finish, but less durable requiring the use of a separate straight stitch to fully complete the seam. Most home sergers fall somewhere in between depending on the price and quality of the machine. More advanced sergers will also allow you to control the tension feed which can be adjusted to woven or knit fabrics accordingly, featuring the ability to also apply gathering or create a ruffle. If you are in the process of learning how to sew, staystitching is definitely a term you've already come across. Just as it sounds, the words stay and stitch combined mean stitching something that has to stay in place. While the meaning of the word is quite clear, understanding the use of staystitching in sewing can be a bit more tricky. In this sewing tutorial, we'll teach you everything you need to know about staystitching: When to use it; how to stitch it; and the areas that staystitching is required on a garment in the sewing process. What Is Staysticthing? Staystitching, used on woven and knit fabrics, is a straight directional machine stitch applied during the sewing process along edges that run the risk of stretching or losing their shape during handling in the sewing process. Staystitching should be applied as a first step in sewing- right after you've unpinned the fabric from the pattern and before you begin sewing or adding interfacing. You will have to staystitch all the vulnerable edges of your fabric pieces. Staystitching is not actually a stitch or "seam" that is visible on the finished garment. It is simply a step used in the construction process in order to keep curved or sensitive edges from loosing their designated shape. Once the garment is complete, the staystitch will either be hidden on the inside of the garment or enclosed in binding, facing or lining. Here are some areas of a garment that you should never forget to staystitch:
-All raw neckline edges (includes curved, V-neck, sweetheart, square etc.) -Along corners (like V-necks) with clipped seam allowance. -Raw fabric edges of curved waistlines on bottoms and tops. -Some bias-cut side seam edges that are prone to stretching and pulling in the sewing process: Staystitching is applied to maintain the grain. -The seam edges of vulnerable/fine fabrics like specialty lace and silk chiffon. -All seams of very stretchy knits or loosely woven fabrics. |
The Blog:A journey into our design process, sewing tutorials, fashion tips, and all the inspiring people and things we love. Doina AlexeiDesigner by trade and dressmaker at heart. I spend most of my days obsessing over new fabrics and daydreaming new ideas. Sadie
Executive Assistant & Client Relations Manager Archives
November 2019
Categories
All
|
-
Sewing Tutorials
-
Basics
>
- Aligning Pattern Grainlines To Fabric
- Preparing Fabrics For Sewing
- Pinning Sewing Patterns To Fabric
- Placing Sewing Patterns On Fabric For Cutting
- Rotary Cutters or Fabric Scissors?
- Cutting The Sewing Patterns
- What Are Notches And How To Use Them In The Sewing Process
- Transferring Notches From Pattern To Fabric
- Transferring Seamlines to Fabric
- Staystitching
- Backstitching: A Complete Guide
- Hand Basting: A Complete Guide
- Sewing Continuous Bias Binding
- Darts >
-
Sewing Seams
>
- The Basics Of Seams And Seam Allowance
- How To Sew A Straight Seam
- Sewing Curved Seams
- Sewing Corner Seams
- Trimming And Grading Seam Excess
- Notching/Clipping Seam Allowance for Tension Release
- Sewing Topstitched Seams
- Sewing Corded Seams
- Sewing A Slot Seam
- Sewing A Gathered Seam
- Sewing Bias Seams
- Sewing Seams With Ease
- Sewing Seams With Crossing Seamlines
- Sewing Unlike Fabric Seams
- How To Iron Seams: Ironing Tools And Conventions
- Sewing With Knit Fabrics
- Understanding Stitch Length And Tension
- Sewing Unique Fabric Seams
-
Seam Finishes
>
- Seam Finishing Techniques - Overview
- Applying A Pinked Seam Finish
- Applying A Bias Bound Seam Finish
- Serging And Zigzag Seam Finishes
- Sewing A Self-Bound Seam Finish
- Sewing A French Seam Finish
- Sewing A Hong Kong Seam Finish
- Sewing A Mock French Seam Finish
- Sewing A Turned-and-Stitched Seam Finish
- Sewing Overcast Hand-Applied Seam Finishes
- Sewing A Flat Felled Seam
- Sewing A Hairline Seam Finish
-
Hem Finishes
>
- Garment Hem Finishes: Overview
- Sewing A Double Fold Hem Finish
- Sewing A Single Fold Hem Finish
- Sewing Bound Hem Finishes
- Sewing An Exposed Double Layer Bound Hem
- Sewing A Folded-Up Bound Hem with Pre-folded Binding
- Sewing A Hong Kong Hem Finish
- Sewing A Band Hem Finish
- Sewing A Bias Faced Hem Finish
- Sewing A Twill Tape Hem Finish
- Sewing A Rolled Hem Finish
- Sewing A Shaped Hem Facing
- Using Fusible Hem Tape And Webbing
- Finishing A Lace Fabric Hem
- Finishing A Leather Hem
- Sewing Faced Hem Corners
- How To Finish Lining At The Hem
- Finishing Fabric Corners by Mitering >
- Interfacing A Hemline: Lined And Unlined Examples
-
Sewing Pockets
>
- Curved Patch Pocket With Flap
- Unlined Square Patch Pockets
- Lined Patch Pockets: Two Ways
- Extension On-Seam Pockets
- Separate On-Seam Pocket
- Front Hip Pockets
- Bound Double Welt Pocket
- Double Welt Pocket With Flap
- Self-Welt Pocket (Using Single Fabric Layer)
- Slanted Welt Pocket (Hand-Stitched)
- Faced Slash Pockets: Overview >
-
Sewing Zippers
>
- Sewing Zippers: General Information
- Sewing A Centered Zipper
- Sewing A Lapped Zipper
- Sewing An Invisible Zipper
- Sewing A Fly Front Zipper
- Sewing A Closed-End Exposed Zipper (No Seam)
- Sewing An Exposed Separating Zipper
- Sewing Hand Stitched Zipper Applications
- Sewing A Zipper Underlay
- Sewing A Placket-Enclosed Separating Zipper
- Sleeveless Finishes >
-
Neckline Finishes
>
- Sewing A Neck Shaped Facing
- Sewing An All-In-One Neck Facing
- Neck And Garment Opening Combination Facings >
- Sewing A Bias Faced Neckline Finish
- Sewing A Band Neckline Finish
- Bound Neckline Finishes: Overview >
- Sewing A Semi-Stretch Strip Band Neckline
- Ribbed Neck Band And Classic Turtleneck
- Decorative Neckline Finishes >
- Finishing Facing Edges >
-
Extras
>
- A Complete Guide on Interfacing
- Sewing Bound Spaghetti Straps
- Sewing Spaghetti Straps To A Faced Neckline
- Sewing Ruffles: Overview
- Patterning And Sewing A Circle Ruffle
- Sewing A Gathered Heading Ruffle
- Sewing Double Layer Gathered Ruffles
- Sewing A Gathered Ruffle Into A Seam
- Sewing A Gathered Ruffle To A Fabric Edge
- Sewing A Fabric Surface Slit
- Sewing A Slit Seam
- Hand-Applied Straight Stitches
- Hand-Applied Blind Stitches
- Hand-Applied Overedge Stitches
- Hand-Applied Tack Stitches
- Hand-Applied Decorative Stitches
-
Basics
>
- Custom Bridal
- Custom Apparel
- About
- Blog
Services |
Company |
|



 RSS Feed

