|
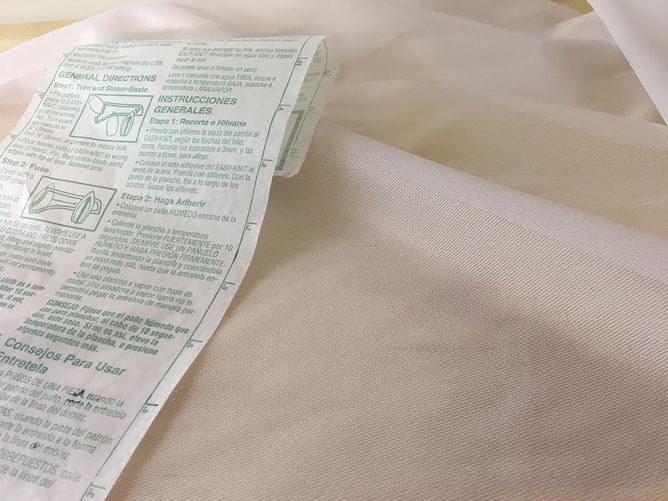
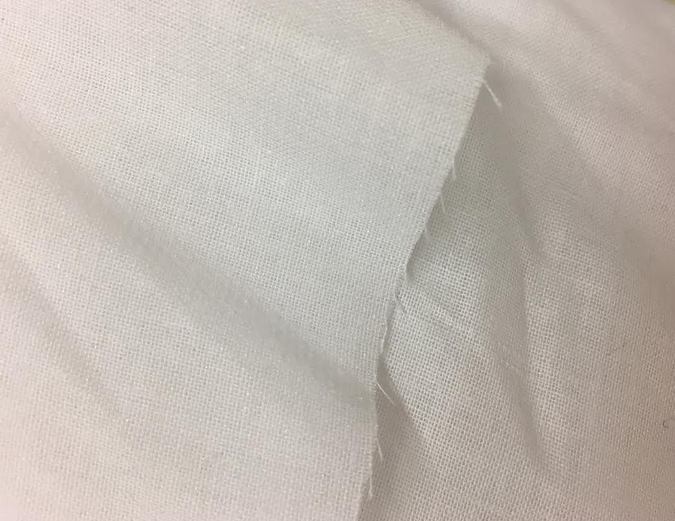
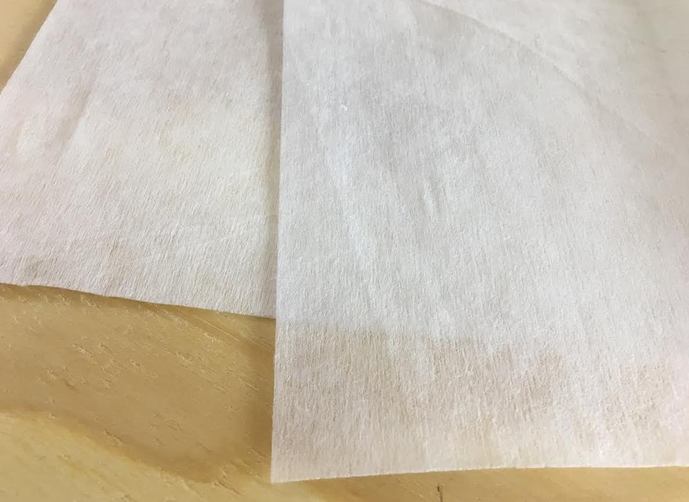
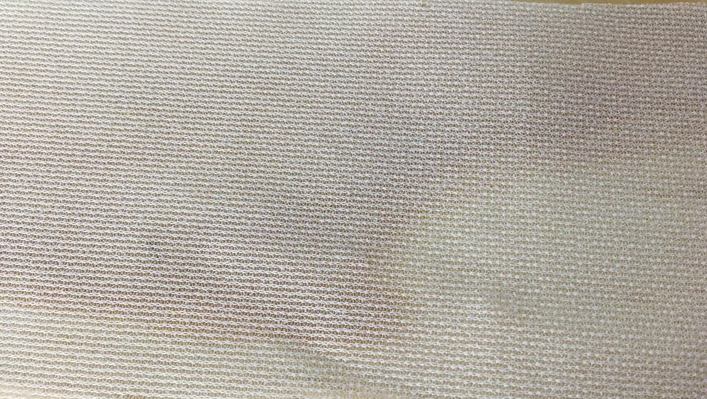
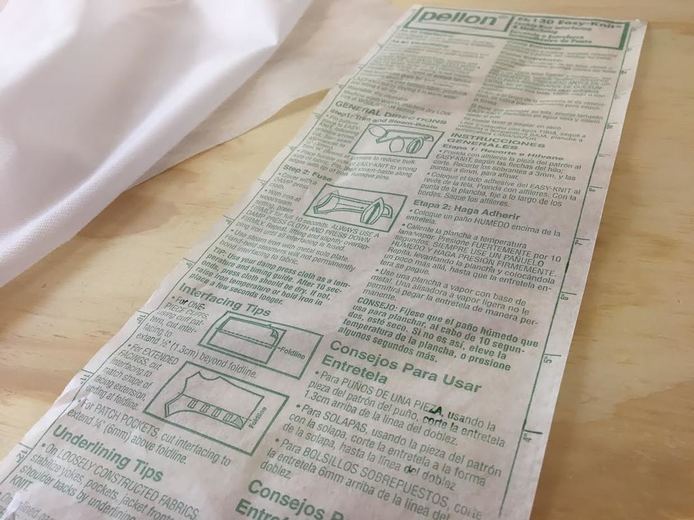
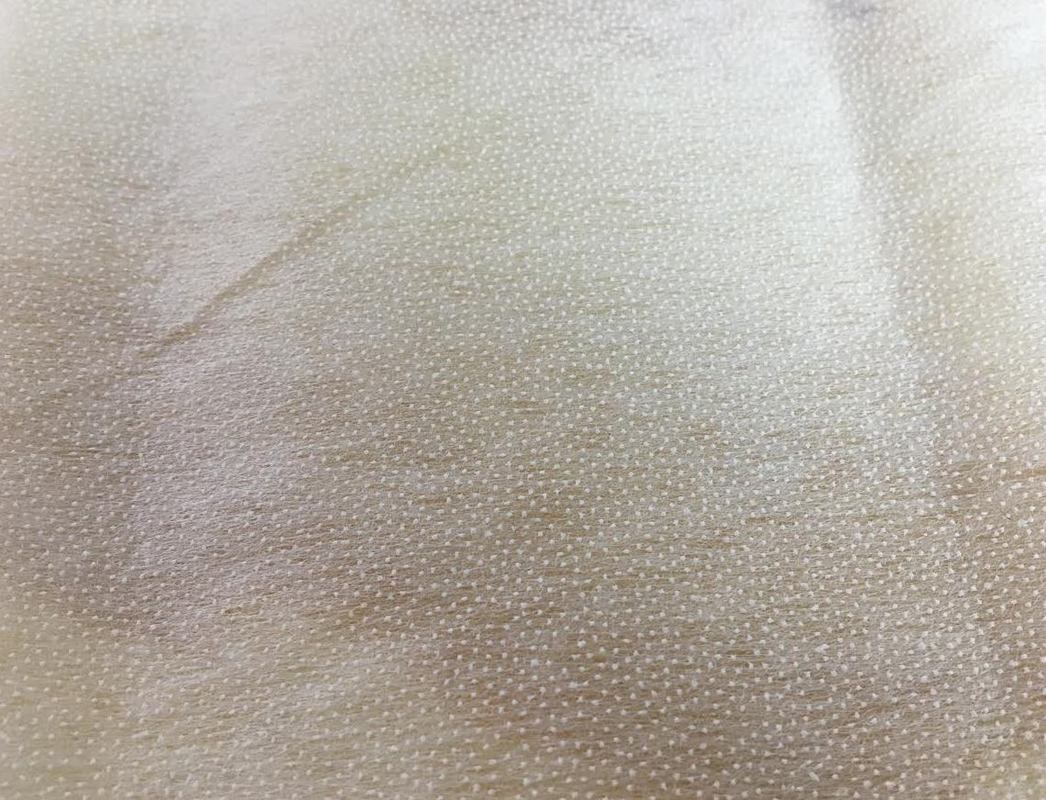
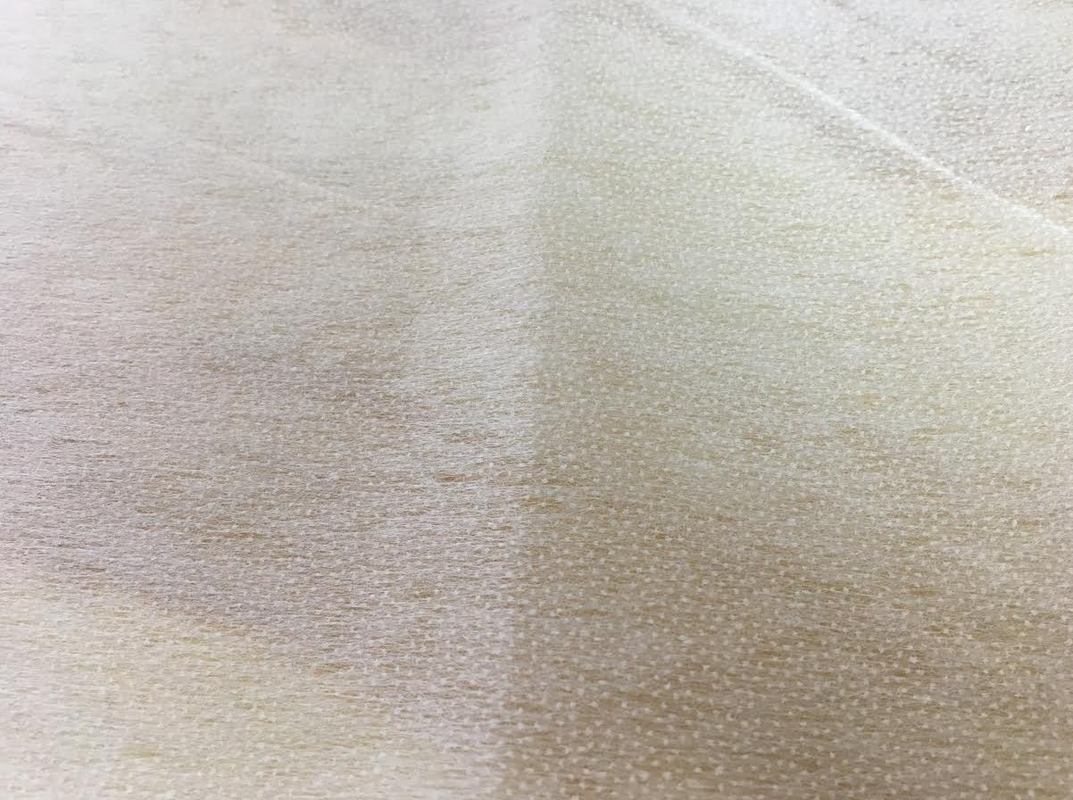
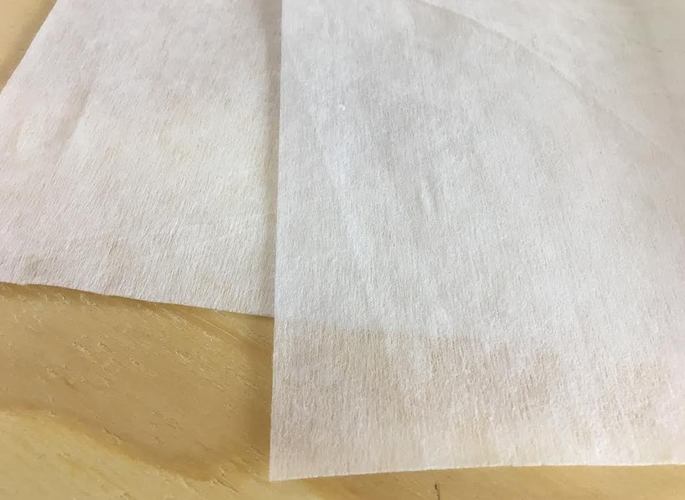
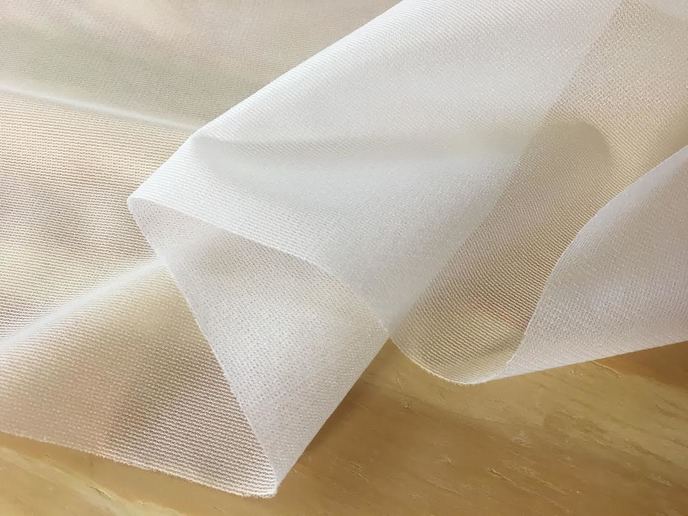
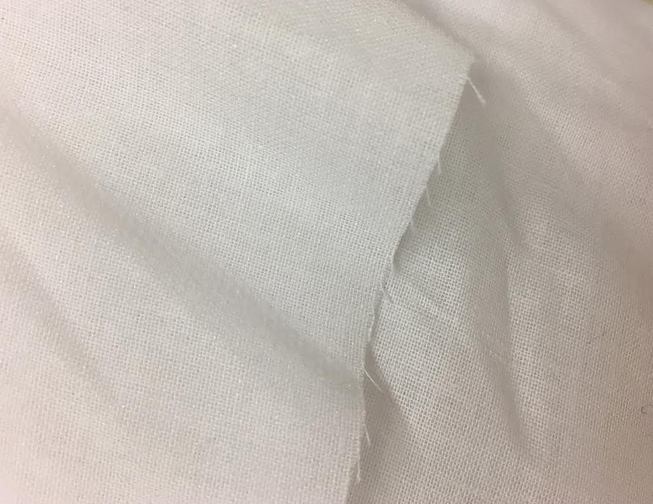
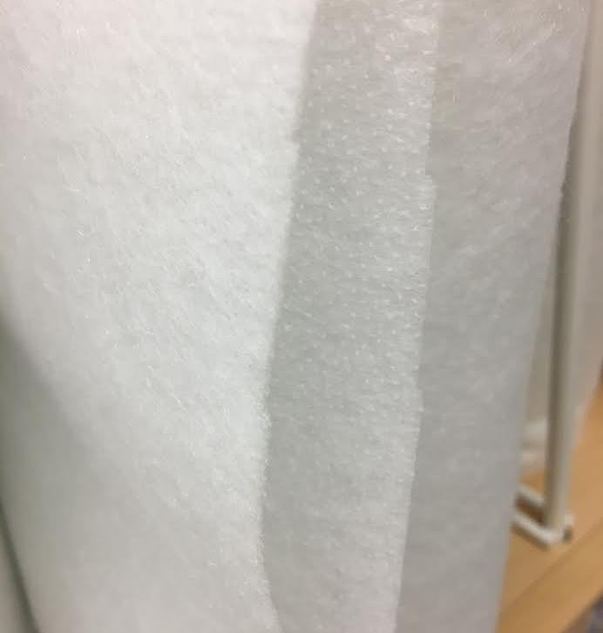
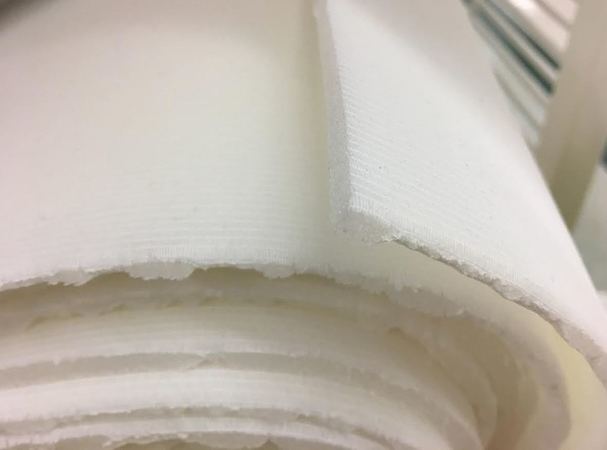
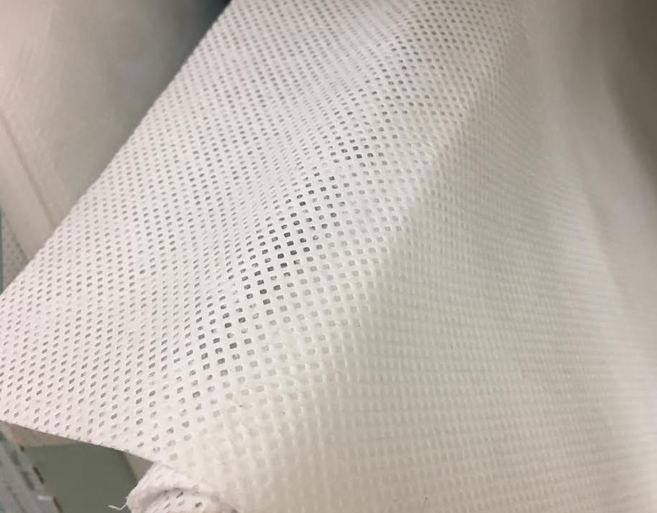
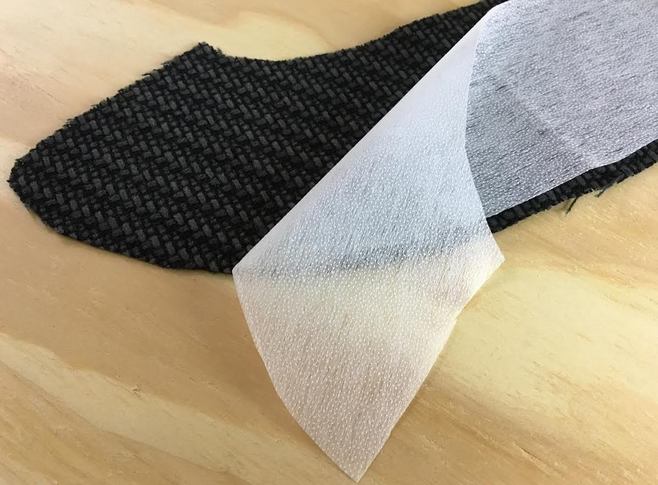
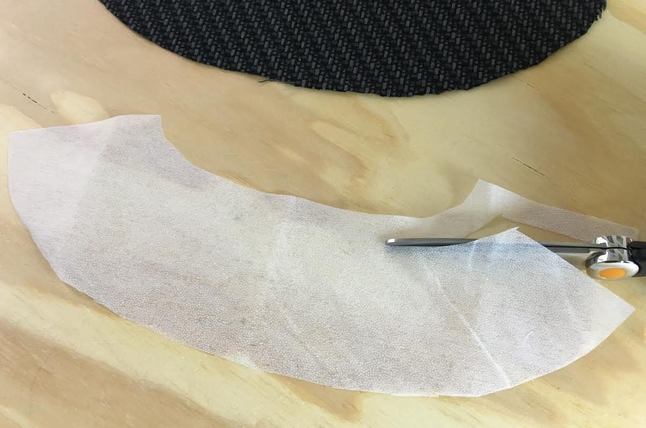
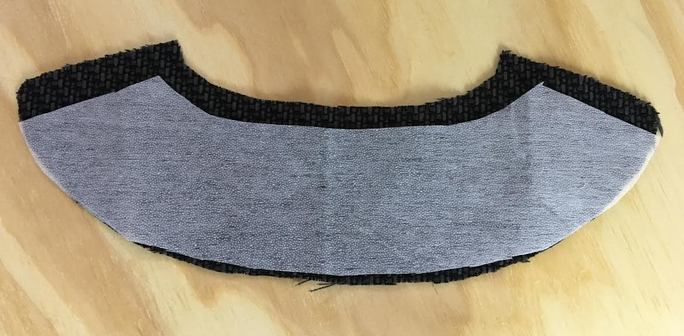
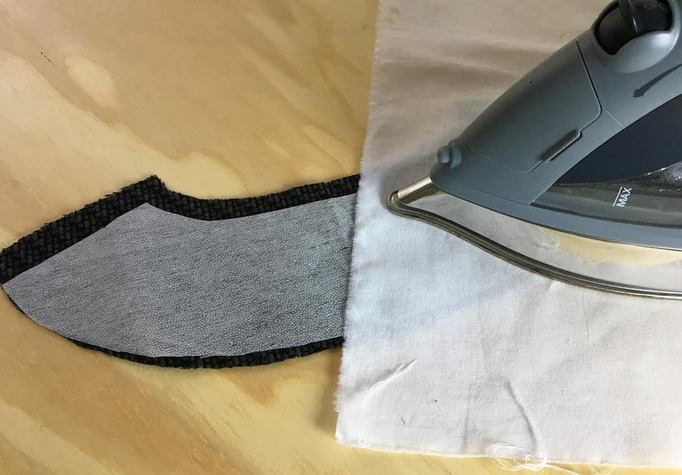
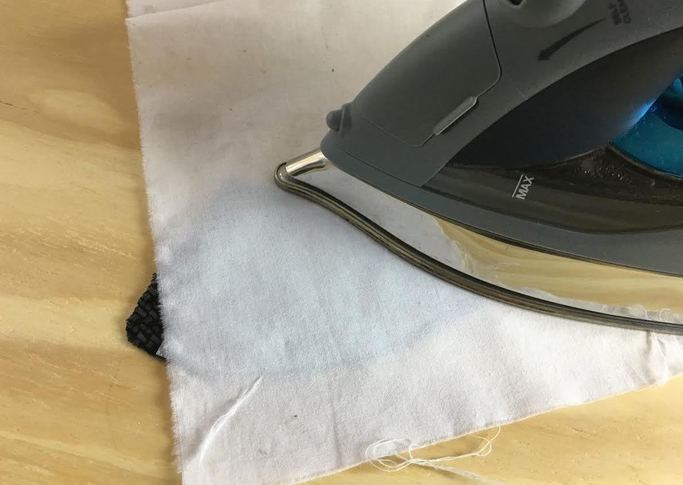
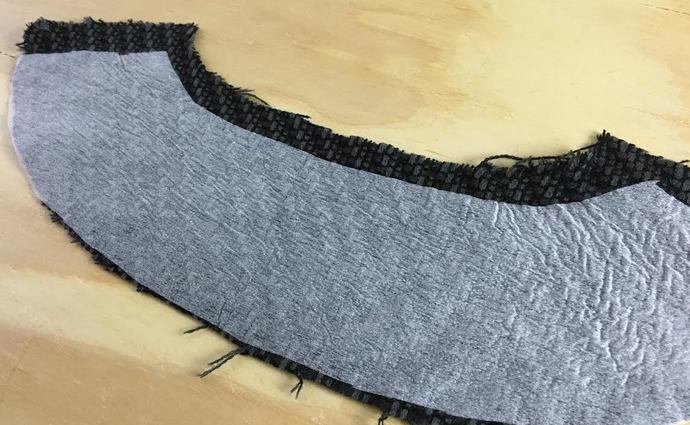
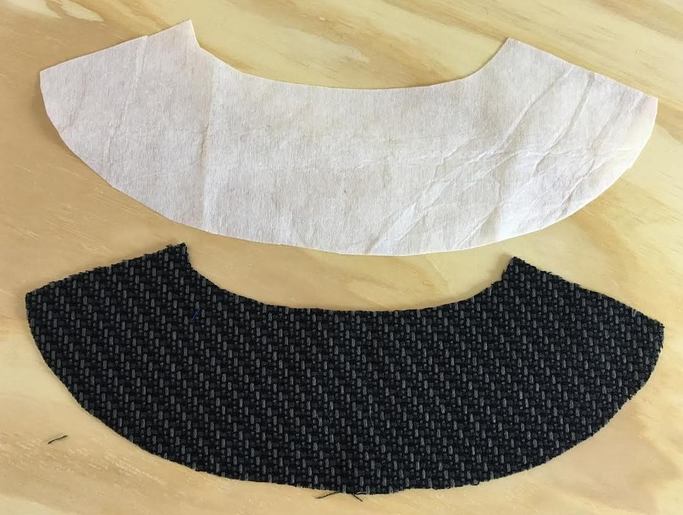
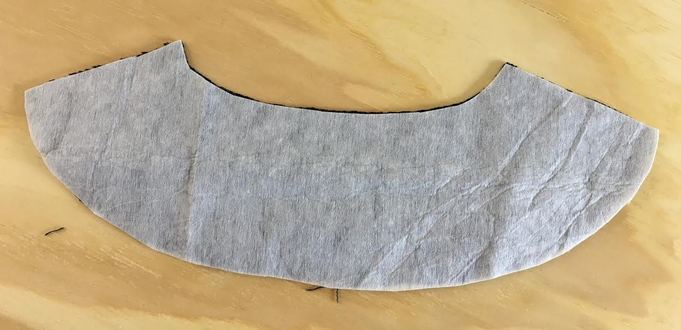
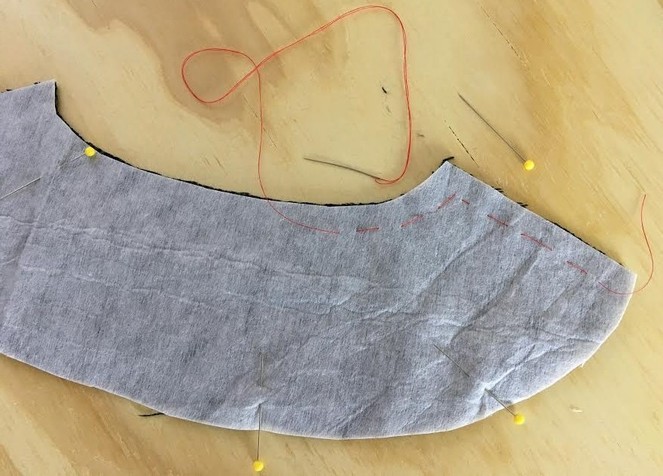
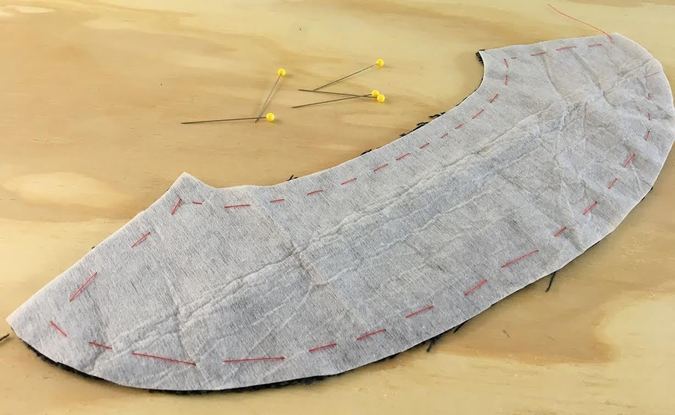
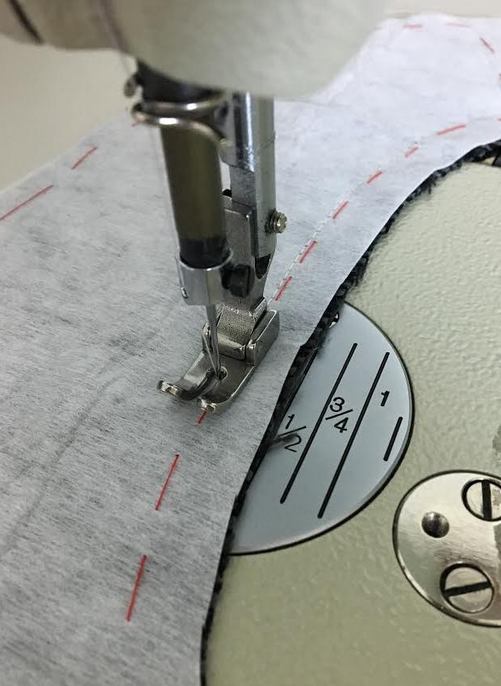
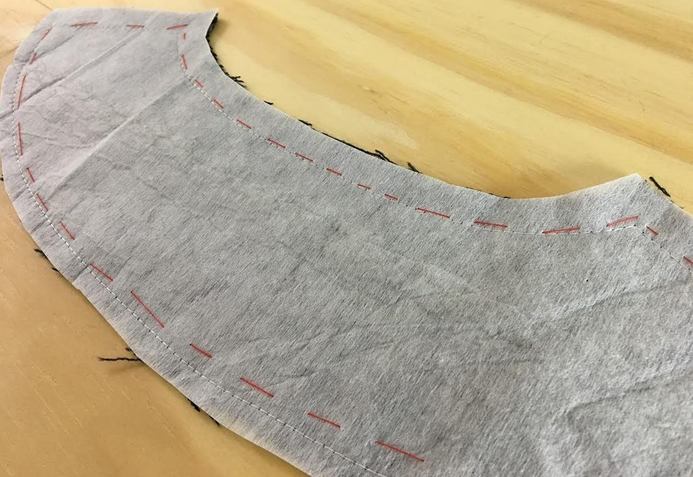
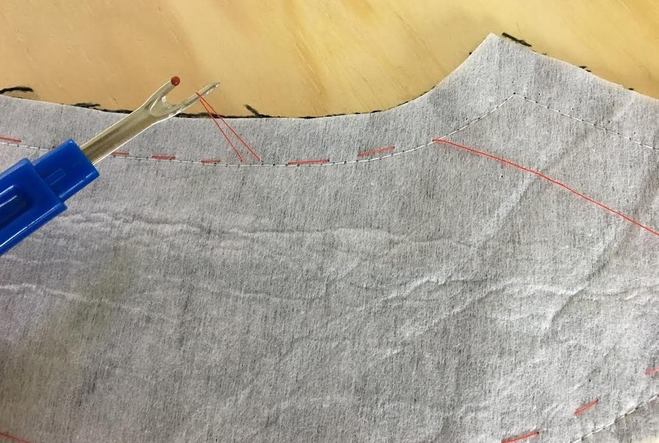
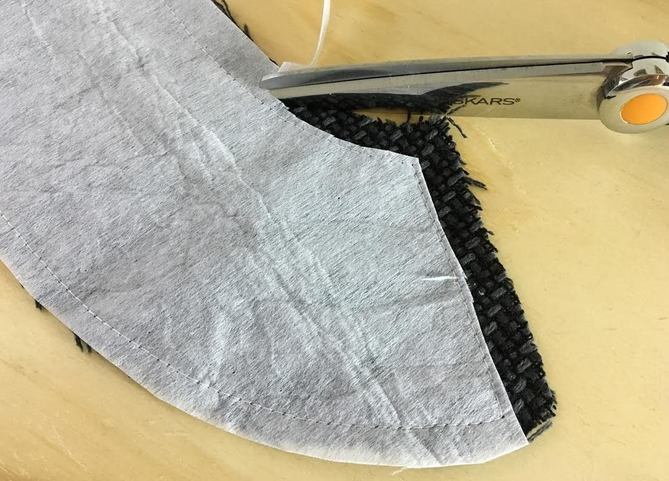
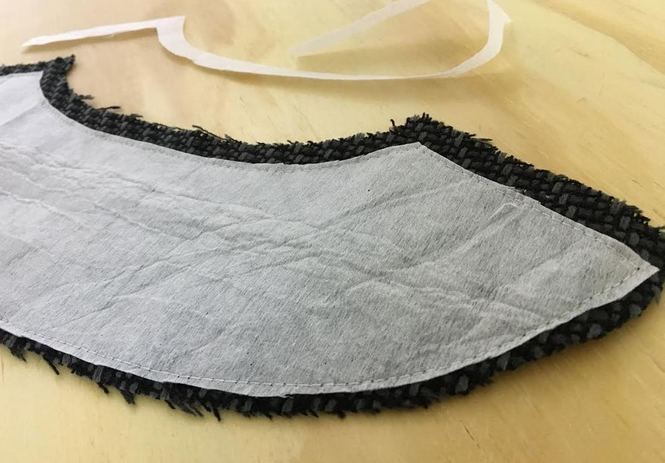
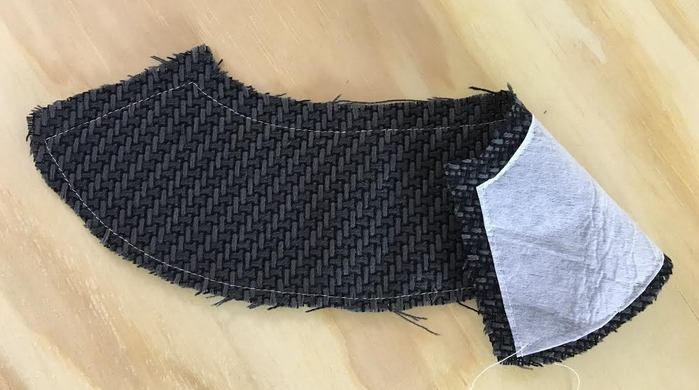
If you’re just beginning to learn how to sew, or maybe you have been involved in crafts for a while you are probably already familiar with interfacing. Most likely, you know what it looks like and where to find it in the fabric store. You have probably already used basic iron-on (fusible) interfacing for some of your craft projects. Understanding the use of interfacing in the apparel industry is not always easy especially in the beginning stages of teaching yourself how to sew. For that reason, we've put together some basic information about interfacing that will hopefully clear some of the initial confusing and maybe even avoid some pitfalls in the learning process. What Is Interfacing?Interfacing is added to parts of a garment in order to increase shape, body, stability and support, as well as add durability. Its application can add structure to tailored apparel and keep some fabrics from stretching and losing their shape during long term wear. Interfacing is used in enclosed areas of a clothing item and should never be visible even when the garment is turned inside out. It is most commonly added to the inside of collars, buttonholes, facings, hems, tailored shirt and jacket cuffs, pockets, yokes and other individualized uses depending on the design. The clean, structured aspect of all business suits, blazers and tailored coats is the result of the effective use of interfacing. It is able to stiffen and maintain the shape of key areas necessary for achieving a good quality tailored finish. Types of InterfacingInterfacing can be divided into three large groups: non-woven interfacing, woven interfacing and knit interfacing. Woven and non-woven interfacing is used for non-stretch woven fabrics, while knit interfacing is used for stretch knit fabrics or woven fabrics that have stretch due to the addition of spandex. No matter what interfacing you choose for finishing your garment, you should always ensure that the interfacing you use complements and reinforces the garment as possessed to overwhelming it or not offering enough support. In addition, your chosen interfacing should have the same care instructions as the garment itself- This eliminates the risk of it being damaged and coming undone in the wash. As a sewing beginner, you will most likely experience some trial and error with using the correct interfacing. Certain types of fusible interfacing can't withstand regular machine washing so make sure you always check the interfacing's care instructions before adding it to a clothing item. Note that aside from the specified care instructions, interfacing can also come undone in the wash due to incorrect application so always make sure to follow the proper steps to ensure that the interfacing is properly sewn or adhered to the wrong side of the garment's fabric in the construction process. Woven InterfacingJust like regular fabrics, woven interfacing is found in a variety of different fiber compositions, and it has a grain which requires it to be cut accordingly. Woven interfacing is cut on the lengthwise grain. It has no stretch and is respectively suitable for garments that aren't stretch. However, if more stretch is required/desired you may cut your woven interfacing on the bias (diagonally in relation to the selvage edge) which will allow for a little more movement in the grain. As you'll learn bellow, woven interfacing is found in various weights like light, medium and heavy weight and can be fusible or non fusible. Non-Woven InterfacingNon woven interfacing is composed of fibers (usually polyester) that have been bound together to create a fabric-like composition. As opposed to woven interfacing, non-woven interfacing does NOT have a grain which means it can be cut in whichever direction you wish. This allows for more efficient use of the interfacing surface as well as preventing you from needing to re-stock too often. Non-woven interfacing is not recommended for use with knit fabrics containing a high amount of stretch. Not only will it prevent knits from stretching properly but the interfacing can also break apart and cause the stretch knit garment to lose it's shape during wear resulting in some major fit/design issues. Knit InterfacingKnit interfacing is composed of fibers that are put together with a knit weave allowing for one-way or all-way stretch (depending on the weave). Knit interfacing is used specifically on knit fabrics like jersey, interlock and ponte knits (to name just a few). This stretch interfacing offers stability without compromising movement and should be cut on the same grain as the knit fabric it is used for. For example: since most knit fabrics have more of a crosswise stretch, the knit interfacing should also be cut to match the crosswise stretch. Most knit clothing items don't require the use of interfacing due to their casual, free-flowing aspect. However, when working with thicker knits like ponte knit for example, interfacing is a necessary addition to waistbands, some styles of pockets, cuffs, collars and facings. Knit interfacing, especially the fusible kind, can also be successfully used on woven fabrics. Woven garments that have some stretch either due to a spandex component or the way they are cut (on the bias) can sometimes benefit from a knit interfacing which still adds stability but allows for more movement and stretch in the finished garment. Woven, non-woven and knit interfacings described above fall into two other major categories: Fusible and non-fusible. Fusible (Iron-On) Interfacing Light to medium weight iron-on interfacing is the most commonly used in garment construction. It is used on light to medium weight blouses, dresses, pockets, cuffs and waistbands (to name a few) and made in a variety of different contents from polyester fiber to 100% cotton. Fusible interfacing is applied with a a hot iron, hence the word "iron-on". If you check the back side of fusible interfacing you'll notice that it has small, evenly distributed specks of a specialized adhesive that are dry until they come in contact with the heat of the iron. Once they become heat activated, they adhere to the surface of the fabric. As we'll discuss bellow, the iron should never come in direct contact with the actual glue particles and an ironing cloth (preferably a little damp) should be used as a protective shield on the interfacing's face side while the adhesive on the back attaches to the garment's fabric. Although all fusible interfacing needs heat in order to adhere to the garment, always consult the instructions that come with your purchase as different fusible interfacing will require specific steps depending on style and content. As mentioned above, always test the fusible on the garment's fabric before final application. Fusible interfacing is the easiest and more convenient to use as a sewing beginner. As opposed to sew-in interfacing which we'll discuss bellow, fusible interfacing requires less knowledge about fit and garment structure in order to be applied properly. Sew-in interfacing on the other hand, can affect the drape and balance of a garment if not applied correctly. That being said, keep in mind that not all fabrics are compatible with iron-on interfacing. Fabrics that are very textured, have a nap (like velvet, fur and some suede), or have very open waving cannot be backed with fusible interfacing- The interfacing will simply not adhere properly to these fabrics. In addition, heat sensitive fabrics like various beaded laces, some acetate fabrics, sequins etc, can be damaged in the application process of fusible interfacing thus it should be avoided. Minimizing bulk also applies to fusible interfacing. When backing the garment make sure that you avoid applying interfacing to the inside of the darts, pleats, tucks or gathers. In most cases, the seam allowance of the fusible interfacing piece will need to be trimmed down to the seam-lines before being adhered to the garment piece. This step will avoid adding stiffness or bulkiness to the garment's seam allowance allowing it to lay flat and be less visible. In some cases however, you may choose to add interfacing on the back of the entire garment piece including the seam allowance in order to add more stability or thickness. You should add interfacing along some seam allowance fold lines on the inside of a woven waistband, collars and hems. If this sounds confusing, don't worry- we'll walk you through a practice exercise bellow! Non-Fusible (Sew-in) InterfacingNon-fusible interfacing has to be sewn into the garment and its surface does not adhere to the inside surface of the garment like fusible interfacing does. Non-fusible interfacing takes a little more time to be attached using various sewing techniques for minimizing bulk and achieving the correct drape. In the case of very thick, bulky interfacing a hand sewing cat-stitch is sometimes required. Other methods for minimizing bulk in heavier woven interfacing is by overlapping the interfacing seams and attaching them with a zig-zag stitch, or by grading and trimming the seam allowance. As a sewing beginner, you don't have to worry too much about these techniques. Often times, they are more commonly used for tailored clothing items featuring facings and heavier linings like coats, heavier jackets and blazers. As mentioned above, sew-in interfacing takes a little more knowledge and practice and if not attached correctly, can throw off the balance, drape and fit of a garment. Heavier sew-in interfacing is also commonly used for quilting. Light, Medium and Heavy Weight InterfacingSince interfacing is applied to a large variety of styles, all the categories of interfacing described above are offered in a range of weights from light to medium to heavy weight. Choosing the correct weight and type of interfacing will take some experimentation at the beginning. A good rule of thumb to use however, is to pay attention to drape and thickness. Drape the interfacing over your arm and if it drapes similarly to the garment's fabric without being too thick or too thin it is probably the more suitable choice. Sometimes, it is a better idea to go for a lighter interfacing than a heavier one as this can prevent the garment from becoming too rigid, causing drape and structural issues. In addition, don't forget to check the care instructions and ensure that they share the same care guidelines. If you are unsure of what style of fusible or non-fusible interfacing to use, try a few different applications on scrap fabric that is the same as the garment. Once you apply the interfacing, wash the scrap fabric to check how well the interfacing withstands care. This is a great exercise to try with a variety of different interfacing-fabric combinations since different fabrics will attach and react differently to interfacing depending on their texture, surface and weight. We recommend starting with fusible (iron-on) interfacing if you're in the process of learning how to sew. Fusible interfacing is easy to find at your local fabric store and is much easier to apply, requiring less steps then sew-in interfacing. Differentiating between the most common iron-on (fusible) interfacings: Web Fusible Interfacing: A non woven interfacing that consists of loosely inter-connected fibers and available in sheer weight, lightweight and medium weight. Depending on the type of web interfacing, the adhesive is applied to the back using a few different methods. It doesn't have a grain so it can be cut in any direction desired. Knit Fusible Interfacing: Knit fusible interfacing is constructed of mostly polyester/nylon fibers that are woven into a knit weave. This allows it to stretch thus making it most appropriate for stretchy knit fabrics like jersey and interlock. Knit interfacing has a grain line so the interfacing should be cut according to the garment's grain. If the garment stretches crosswise, as most knit fabrics do, then the interfacing that backs it should be cut so that it also stretches crosswise. Plain Weave Fusible Interfacing: A plain weave fusible resembles a regular plain weave fabric (usually cotton) but it is coated with an adhesive on one side that allows for it to be bonded to the garment's fabric. Just like all woven fabric, this type of fusible interfacing has a grain and should be cut according to the garment's grain. If more stretch is desired, it can be cut on the bis. Using a plain weave fusible can be a bit more costly due to the fact that it can't be cut in all directions and it is more expensive to manufacture. Fleece Fusible Interfacing: An interfacing that is heavier weight and usually made of polyester fibers, fleece fusible adds softness, thickness and stability to apparel and craft projects. In apparel, it is more commonly used in the construction of outerwear and can be single-sided (only one side adheres to fabric) or double-side (both sides of the interfacing have adhesive). Fleece fusible can also successfully bonded to other materials like wood or cardboard making it perfect for use with upholstery and other craft projects. One-sided or Double-Sided Foam Fusible Interfacing: Consists of a layer of foam positioned between two layers of fabric. It can be 1-sided with only one side having adhesive, or 2-sides with both sides containing adhesive. Although it is light weight, foam fusible interfacing is thicker and used for crafts, accessories and some apparel outerwear. It is often used as a shaper and adds body to craft and accessory items. Foam interfacing is also often used as batting. Special Interfacing: Stitch-n-Tear Interfacing: It is used as a stabilizer preventing fabric from puckering during embroidery and other decorative applications. Once the embroidery stitches are in, you can easily tear away the interfacing without damaging the stitches. Bonding Vinyl Fusible Interfacing: An iron-on interfacing that creates a water resistant finish when applied to the surface of fabric. How to apply fusible (iron-on) interfacing Before applying the final fusible interfacing, make sure you test a scrap of it on the garment's fabric to make sure it adheres properly and it is the appropriate weight and thickness. This will also help you feel more confident when applying it on the final project. Identify the face and wrong side of the interfacing. The face side has a smooth surface, while the wrong side has the bumpy adhesive that bonds to the fabric. Always pay attention to the face and wrong side as this is important in the cutting process- you always want to make sure that the wrong side of the interfacing connects to the wrong side of the garment's fabric during application. Once the interfacing is adhered it cannot be pealed off. Even if your able to peal it off it leaves the adhesive behind which is almost impossible to clean/remove. Below, we'll show you how to apply interfacing both fusible and sew-in interfacing on a basic round neck facing. 1. Cut a replica of the facing out of the interfacing so that its adhesive side corresponds to the wrong side of the facing's fabric. 2. Trim all the seam allowance along the interfacing's edge. In this tutorial, the seam allowance is 1/2" along all seam edges and 1/4" along the facing's bottom edge. 3. Place the facing on the ironing board so that the wrong side of the fabric is facing you. Place the matching piece of the interfacing on top with the interfacing's adhesive side touching the fabric (also wrong side). The adhesive bumpy surface should always touch the wrong side of the fabric. 4. Once you've laid out the interfacing correctly on top of the garment's fabric, layer a piece of plain weave cotton cloth (white muslin works great) on top. Set your iron at a slightly higher setting than what you would normally use for the fabric alone. Apply the hot iron on top of the cloth and hold it down for about 10 to 15 second. Use some steam in the process or dampen the layering cloth if a steam setting isn't available on your iron. You'll have a better idea of what level of heat to apply in order to efficiently bond the interfacing when testing out the interfacing as described above. 5. Move the iron across, holding the it down for 10-15 seconds at different positions until you've covered the entire surface of the interfacing. 6. As a final step, lift up the cloth on one end and check a corner of the fusible interfacing to ensure that it has been bonded properly. If it hasn't adhered all the way to the fabric, try increasing the temperature setting on the iron or repeat the application process described above for a second time. How to attach sew-in interfacing Non-fusible interfacing, also called sew-in interfacing does not adhere to the fabric and requires to be stitched to the garment piece instead. It requires a few more application steps than fusible interfacing and is not always most appropriate for sewing beginners. Sew-in interfacing takes a bit more knowledge and additional work to apply. Before working with sew-in interfacing you should have a strong understanding of drape and fabric weight. It is important that you know where bulk should be avoided in garment construction, such as darts, pleats, various corners and excess seam allowance. Below, we'll show you the most common way to attach and grade sew-in interfacing. 1. Just as you did for the fusible interfacing above, cut a replica of the facing out of the sew-in interfacing. Since non-fusible interfacing doesn't have an adhesive side you don't have to cut it on any particular side. 2. Layer the interfacing on top the wrong side of the facing's fabric. 3. Place a few pins along the edge to hold the two layers of fabric in place and apply an uneven baste right above seam line as shown. This will ensure that the interfacing is held perfectly in place while it is machine stitched for permanent application later. Once the entire edge is basted, remove all the pins. 4. Apply a machine stitch right bellow the basting stitch (not directly on top of it). This stitch is usually positioned right above the seam line (still within the seam allowance) 5. Once the interfacing is permanently stitched to the facing, remove all the basting stitches with a seam ripper. 6. Trim the interfacing's excess seam allowance at about 1/8" away from the stitch (or as close to the stitch as you can). Be careful not to accidentally clip the fabric or actual stitching in the process. Trimming the sew-in interfacing's seam allowance minimizes bulk while the stitch holds it together evenly across the surface of the facing. The right side of the facing should have a machine stitch positioned right above the seam line as shown above. When stitching the facing to the neckline, this stitch-line can be used as a seam allowance guide.
2 Comments
Hi friend,
Reply
Leave a Reply. |
The Blog:A journey into our design process, sewing tutorials, fashion tips, and all the inspiring people and things we love. Doina AlexeiDesigner by trade and dressmaker at heart. I spend most of my days obsessing over new fabrics and daydreaming new ideas. Sadie
Executive Assistant & Client Relations Manager Archives
November 2019
Categories
All
|
-
Sewing Tutorials
-
Basics
>
- Aligning Pattern Grainlines To Fabric
- Preparing Fabrics For Sewing
- Pinning Sewing Patterns To Fabric
- Placing Sewing Patterns On Fabric For Cutting
- Rotary Cutters or Fabric Scissors?
- Cutting The Sewing Patterns
- What Are Notches And How To Use Them In The Sewing Process
- Transferring Notches From Pattern To Fabric
- Transferring Seamlines to Fabric
- Staystitching
- Backstitching: A Complete Guide
- Hand Basting: A Complete Guide
- Sewing Continuous Bias Binding
- Darts >
-
Sewing Seams
>
- The Basics Of Seams And Seam Allowance
- How To Sew A Straight Seam
- Sewing Curved Seams
- Sewing Corner Seams
- Trimming And Grading Seam Excess
- Notching/Clipping Seam Allowance for Tension Release
- Sewing Topstitched Seams
- Sewing Corded Seams
- Sewing A Slot Seam
- Sewing A Gathered Seam
- Sewing Bias Seams
- Sewing Seams With Ease
- Sewing Seams With Crossing Seamlines
- Sewing Unlike Fabric Seams
- How To Iron Seams: Ironing Tools And Conventions
- Sewing With Knit Fabrics
- Understanding Stitch Length And Tension
- Sewing Unique Fabric Seams
-
Seam Finishes
>
- Seam Finishing Techniques - Overview
- Applying A Pinked Seam Finish
- Applying A Bias Bound Seam Finish
- Serging And Zigzag Seam Finishes
- Sewing A Self-Bound Seam Finish
- Sewing A French Seam Finish
- Sewing A Hong Kong Seam Finish
- Sewing A Mock French Seam Finish
- Sewing A Turned-and-Stitched Seam Finish
- Sewing Overcast Hand-Applied Seam Finishes
- Sewing A Flat Felled Seam
- Sewing A Hairline Seam Finish
-
Hem Finishes
>
- Garment Hem Finishes: Overview
- Sewing A Double Fold Hem Finish
- Sewing A Single Fold Hem Finish
- Sewing Bound Hem Finishes
- Sewing An Exposed Double Layer Bound Hem
- Sewing A Folded-Up Bound Hem with Pre-folded Binding
- Sewing A Hong Kong Hem Finish
- Sewing A Band Hem Finish
- Sewing A Bias Faced Hem Finish
- Sewing A Twill Tape Hem Finish
- Sewing A Rolled Hem Finish
- Sewing A Shaped Hem Facing
- Using Fusible Hem Tape And Webbing
- Finishing A Lace Fabric Hem
- Finishing A Leather Hem
- Sewing Faced Hem Corners
- How To Finish Lining At The Hem
- Finishing Fabric Corners by Mitering >
- Interfacing A Hemline: Lined And Unlined Examples
-
Sewing Pockets
>
- Curved Patch Pocket With Flap
- Unlined Square Patch Pockets
- Lined Patch Pockets: Two Ways
- Extension On-Seam Pockets
- Separate On-Seam Pocket
- Front Hip Pockets
- Bound Double Welt Pocket
- Double Welt Pocket With Flap
- Self-Welt Pocket (Using Single Fabric Layer)
- Slanted Welt Pocket (Hand-Stitched)
- Faced Slash Pockets: Overview >
-
Sewing Zippers
>
- Sewing Zippers: General Information
- Sewing A Centered Zipper
- Sewing A Lapped Zipper
- Sewing An Invisible Zipper
- Sewing A Fly Front Zipper
- Sewing A Closed-End Exposed Zipper (No Seam)
- Sewing An Exposed Separating Zipper
- Sewing Hand Stitched Zipper Applications
- Sewing A Zipper Underlay
- Sewing A Placket-Enclosed Separating Zipper
- Sleeveless Finishes >
-
Neckline Finishes
>
- Sewing A Neck Shaped Facing
- Sewing An All-In-One Neck Facing
- Neck And Garment Opening Combination Facings >
- Sewing A Bias Faced Neckline Finish
- Sewing A Band Neckline Finish
- Bound Neckline Finishes: Overview >
- Sewing A Semi-Stretch Strip Band Neckline
- Ribbed Neck Band And Classic Turtleneck
- Decorative Neckline Finishes >
- Finishing Facing Edges >
-
Extras
>
- A Complete Guide on Interfacing
- Sewing Bound Spaghetti Straps
- Sewing Spaghetti Straps To A Faced Neckline
- Sewing Ruffles: Overview
- Patterning And Sewing A Circle Ruffle
- Sewing A Gathered Heading Ruffle
- Sewing Double Layer Gathered Ruffles
- Sewing A Gathered Ruffle Into A Seam
- Sewing A Gathered Ruffle To A Fabric Edge
- Sewing A Fabric Surface Slit
- Sewing A Slit Seam
- Hand-Applied Straight Stitches
- Hand-Applied Blind Stitches
- Hand-Applied Overedge Stitches
- Hand-Applied Tack Stitches
- Hand-Applied Decorative Stitches
-
Basics
>
- Custom Bridal
- Custom Apparel
- About
- Blog
Services |
Company |
|



 RSS Feed

