Want To Learn How To Sew And Make Your Own Patterns? These Are The Basic Supplies You Need To Have.12/26/2016 Congratulations on deciding to learn how to sew! You’ll finally be able to make and even design your own clothing, not to mention fixing some older ones waiting in the back of your closet! We always hear from newcomers to the sewing-game how difficult it is to get started… For a sewing beginner, patterns are confusing and fabrics are difficult to align and cut. Worst of all, beginners get so overwhelmed by the supplies they need to get for both drafting their sewing patterns and putting the garment together, that they give up right from the start. It is true that sewing requires patience and practice and if you don’t have the correct initial guidance, it is quite difficult to get started. As you’ll learn from our Learn To Sew Box, our goal is to teach you how to sew by keeping it extremely simple! If you’re a newcomer this is a great way you can feel inspired to stick to learning in the long run. We apply the same concept when recommending sewing and patterning supplies: There is absolutely no need to start with complicated measuring tools, complicated presser feet and unnecessary marking tools. Below is a complete, comprehensive list of the tools you will need to draft and cut your own patterns and sew your garment together: Patternmaking/Drafting Supplies Dotted/Numbered Pattern Paper We recommend using marked pattern paper because it makes it easier and faster to draw straight lines on it work with 1" increments without having to measure constantly. You can always work on tracing paper or just regular white paper from a roll, but make sure it is not too thick as you will need to pin it and transfer the sewing pattern’s markings onto fabric easily (Check out these pattern paper subsitutes for more options). Numbered/dotted pattern paper is used in the fashion industry and once you get used to it, it makes a huge difference in the speed and convenience it provides. You can find some good deals on numbered pattern paper rolls on Ebay or Amazon 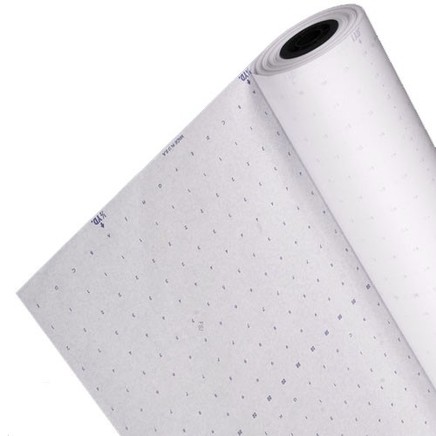 Image via www.ebay.com A mechanical Pencil Why mechanical? Well because precision is necessary for good pattern making. A mechanical pencil maintains a fine point and does not need to be sharpened every few minutes. If you plan on drafting your own patterns often, invest in a good quality mechanical pencil with a durable tip. 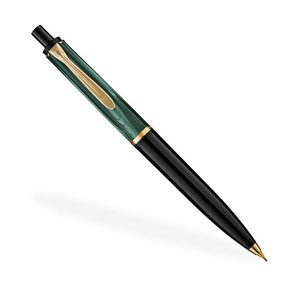 Image via Levenger
0 Comments
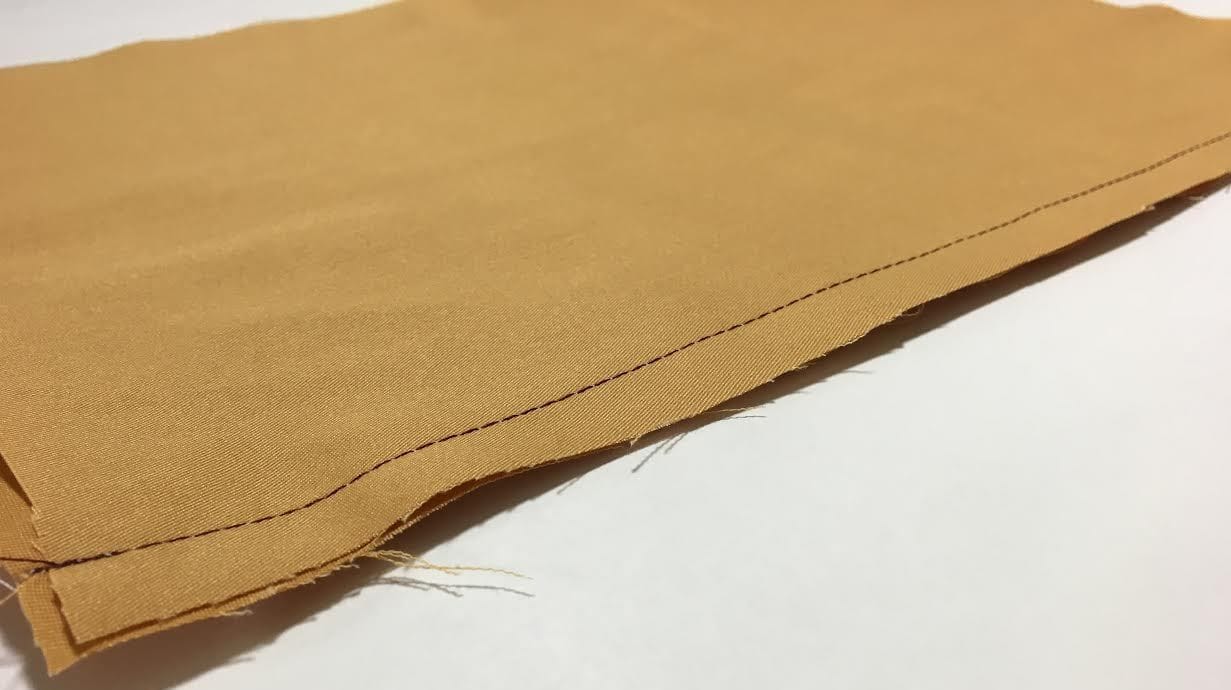 Just as important as knowing how to cut your pattern and stitching the seams together is the need to clean finish all the raw edges of a garment. Why do we need to do this? Well because most fabric weave edges fray, which causes threads to come undone at the edge affecting the durability of a seam, as well as the “cleanliness” of a clothing item. Nobody wants to walk around with small pieces of thread hanging everywhere, right? Luckily, there is a variety of different ways you can finish the raw edges of your seams, and some of the most common ones are done directly with your sewing machine. Bellow, we are going to walk you through 4 most common methods to clean-finish seams on the inside of the garment step by step with picture demonstrations. Let’s get started: 1. Serging or Zig Zag (on a home sewing machine)1. Serging or Zig Zag (on a home sewing machine) This is the most common seam finishing and is done directly on the machine. For the serging stitch, you will need a serger (or overlock machine). If you are a more seasoned dressmaker, we highly recommend a serger, because it will become your go-to for finishing all raw fabric edges in a professional, clean manner. If you are just beginning to learn how to sew, you can substitute the serging stitch for a Zig Zag stitch on your home sewing machine. Step 1: Once your seam is stitched together, run a serging or zig zag stitch along the edge of the raw fabric.
Step 2: Iron excess seam allowance towards the back of the clothing item you are sewing. The easiest way is to iron the seam on the face of the garment.
If you’re in the beginning stages of learning how to sew, even stitching together a simple seam can be confusing. Sewing is overwhelming for many people mainly because they don’t start the right way. There is too much overwhelming information out there and without some serious sewing courses, it is difficult to know where to start. For that reason, we put together the Learn To Sew Box, which includes full size patterns in your choice of size, your choice of fabric, and the main sewing supplies you need to sew a dress from start to finish- The box will not only teach you how to sew, it will also give you the satisfaction of wearing a dress you made in your perfect size! Giving you a sneak peek into the Learn to Sew Box, we put together a step by step guide to sewing a seam properly following three important rules! Once you know these rules you can apply them to any kind of seams, garment details, pockets etc.- anything you wish to sew!  Rule #1: When stitching a seam together the face of both fabric pieces should be touching.
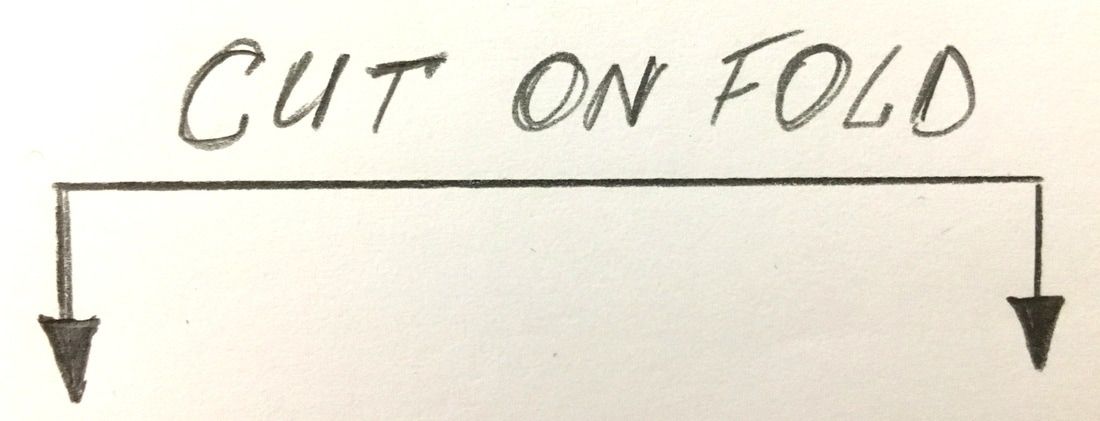
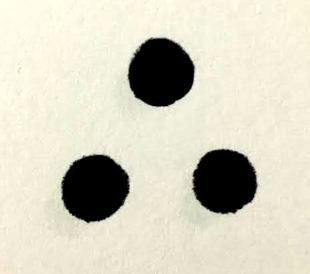
This is a simple rule that will ensure you don’t have to worry about sewing on the wrong side of the fabric. When you’re pinning together the seams getting it ready for stitching, make sure the face of the fabric on both pieces is touching. When your seam is stitched, the clean side of the seam will correspond to the face of the fabric and the excess seam allowance will remain on the inside of the garment, corresponding to the back side of your fabric. If you get used to following this rule, you will never need to redo any seams just because of a simple error in sewing on the wrong side. How do you know what is traditionally considered the face side of the fabric? You can figure it out visually by comparing what side has the more detailed weaving or vibrant color. However, it is actually up to you what side of the fabric you want to use for the garment you’re sewing- Don’t be intimidated by what is “supposed” to be the face of the fabric. If you really like a fabric’s look on the back better than the front, feel free to use that as the face of your garment. Additionally, for many solid and print fabrics that look the same on both sides, this rule doesn’t apply. 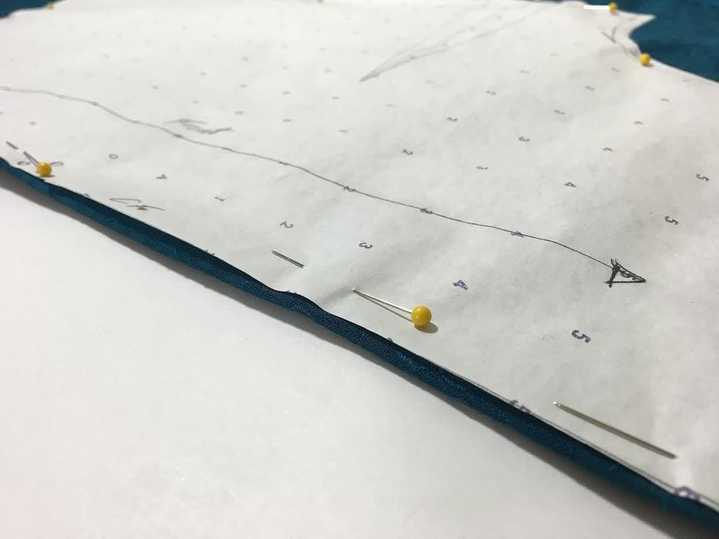 What does cutting on fold mean?If you’re just starting to learn the logistics and techniques of sewing, you’ll soon come across the term “Cut On fold”. A sewing pattern that has two symmetric sides can be slashed in half and cut on the fold of your fabric. This method is most commonly used for simple front or back patterns and facings where the Center Front or the Center Back corresponds to the fabric’s fold. On your pattern, you can spot a line that needs to be placed on the fold by the fact that it has no seam allowance, appearing as the actual edge of the pattern. This line is marked with one of the symbols shown below, sometimes even having the words “cut on fold” printed along the edge. Once you fold your fabric properly (we’ll go over this below) and align the edge of your pattern perfectly with the fabric’s fold, the double layer is then cut according to the sewing pattern, leaving the fold intact! Once the fabric is cut and all necessary marking are transferred from the pattern, you’ll notice that when you open the fabric’s fold you have a full piece with two identical sides. This not only saves you money, but it also saves you lots of space and time.
Why do we need to cut on fold?There are a few main reasons why many seamstresses choose to draft and cut their patterns on fold. Although this isn’t a common practice in the apparel manufacturing industry mainly because the machines used cut dozens of single layers that require full patterns and not cut-on-fold.
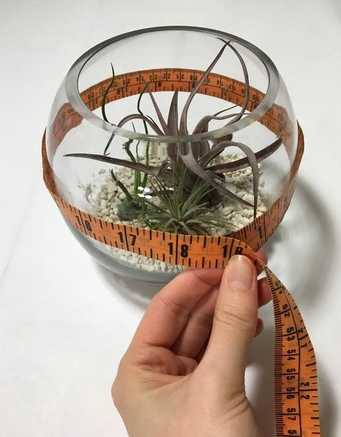
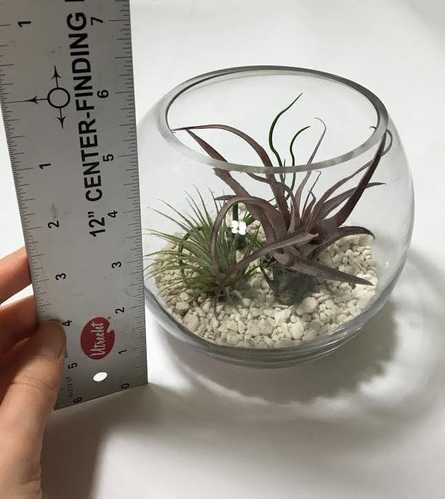
So what are the pros of making and cutting your patterns on fold? Here are 3 main reasons bellow: Once you have a good understanding of your pattern, the next step is to cut it out of your chosen fabric. It sounds simple right? Although it follows very simple rules, cutting out your sewing pattern requires some specific steps to be followed in order to be done correctly. Making sure you are cutting with a steady hand and in a really clean line, especially around curves, will take some extra getting used to. If you want to learn how to sew properly, cutting your sewing patterns and marking them correctly will make it much easier as you dive deeper into various sewing techniques. So let’s begin with the correct layout of your sewing pattern on fabric:  Selvage edge of fabric: It shows the direction of the fabric grain. The selvage edge displays the direction of the warp threads which run vertically in a fabric weave. Weft threads run perpendicular to the warp threads and are perpendicular to the selvage edge. The reason why most sewing patterns are cut parallel to the selvage edge is the fact that this direction offers the most strength and durability. If you want to convince yourself, take your fabric and stretch along the selvage edge, you will notice that it is almost impossible to stretch. Now, try pulling perpendicular to the selvage edge- you will find that the fabric offers somewhat of a stretch.   This Christmas has been hectic in the best kind of way! As is true for any Christmas-obsessed fanatic, I got all my Christmas shopping done early. In true form, I tried to keep it as unique and personal as possible which left me with some Christmas presents that were a bit more challenging to wrap... or maybe the word "awkward" describes it better. Needless to say, I was up for the challenge. You're probably thinking "what is she talking about? How difficult can it be to wrap a Christmas present?" Well, let me explain  For the plant/nature lovers in my life (and there are lots of them) I thought it would only be appropriate to get them something that is naturally, "a plant". Instead of opting out for a boring old indoor plant, I thought why not get some whimsical air plant terrariums (I kind of have an obsession with them..). Glass terrariums come in all shapes and sizes but I opted for the classic spherical glass bowl at about 5x5 inches in size. Since I finished my Christmas shopping a bit earlier, I knew I had to assemble the terrarium and keep the air plants happy in their habitat. Naturally, that means I couldn't just throw the terrarium in a box, wrap it and toss it under the tree (Ouch!). Our family Christmas tradition (just like everyone else's) entails that every present should be wrapped (somehow), randomly picked from under the tree, and opened in front of everyone. Needless to say, this was probably one of the most awkward things I've ever had to wrap. The solution? A handmade Christmas-printed cotton fabric pouch with draw-string ribbon that is gentle on the terrarium and still maintains the element of surprise. Cotton is a natural fiber that is also one of the most breathable making it perfect for not distorting the air flow in the terrarium. Most air plants do require light as long as it's not direct, so when I went shopping for Christmas-themed cotton fabrics I opted for a white or very light color. A very light colored fabric will allow the terrarium to maintain a decent amount of natural light coming through without disturbing it's living conditions. 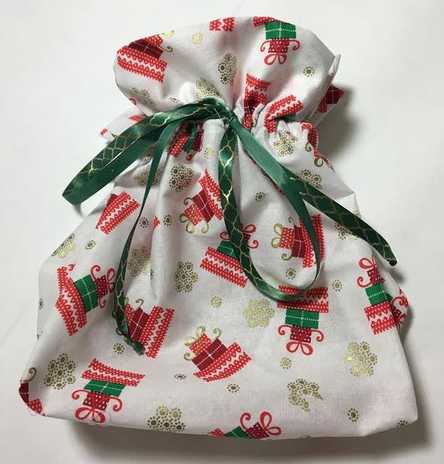 So let's get started! I'll show you the easiest way to make the pouch and hopefully this little training will come in handy next time you find yourself limited on wrapping options. You can use this method for any size pouch and make a perfect little enclosure for many of your Christmas gift this holiday season. 1. Find the horizontal and vertical measurements you'll need for the pouch. Use a measuring tape around the terrarium and note the circumference. Ours is about 19". Next, use a ruler to measure the approximate height of the terrarium (or whatever object you're working with) and give yourself about 2" in excess at the top and 2" at the bottom to cover the top and bottom surface of the terrarium when the pouch is closed. Remember, the terrarium is a spherical, 3-dimensional object so you have to give yourself enough ease on both top and bottom in order to enclose it properly. In our case, the height of the terrarium is 6" plus 4" in ease so the total comes to 10"
|
The Blog:A journey into our design process, sewing tutorials, fashion tips, and all the inspiring people and things we love. 
Doina AlexeiDesigner by trade and dressmaker at heart. I spend most of my days obsessing over new fabrics and daydreaming new ideas. 
Sadie
Executive Assistant & Client Relations Manager Archives
November 2019
Categories
All

|

-
Sewing Tutorials
-
Basics
>
- Aligning Pattern Grainlines To Fabric
- Preparing Fabrics For Sewing
- Pinning Sewing Patterns To Fabric
- Placing Sewing Patterns On Fabric For Cutting
- Rotary Cutters or Fabric Scissors?
- Cutting The Sewing Patterns
- What Are Notches And How To Use Them In The Sewing Process
- Transferring Notches From Pattern To Fabric
- Transferring Seamlines to Fabric
- Staystitching
- Backstitching: A Complete Guide
- Hand Basting: A Complete Guide
- Sewing Continuous Bias Binding
- Darts >
-
Sewing Seams
>
- The Basics Of Seams And Seam Allowance
- How To Sew A Straight Seam
- Sewing Curved Seams
- Sewing Corner Seams
- Trimming And Grading Seam Excess
- Notching/Clipping Seam Allowance for Tension Release
- Sewing Topstitched Seams
- Sewing Corded Seams
- Sewing A Slot Seam
- Sewing A Gathered Seam
- Sewing Bias Seams
- Sewing Seams With Ease
- Sewing Seams With Crossing Seamlines
- Sewing Unlike Fabric Seams
- How To Iron Seams: Ironing Tools And Conventions
- Sewing With Knit Fabrics
- Understanding Stitch Length And Tension
- Sewing Unique Fabric Seams
-
Seam Finishes
>
- Seam Finishing Techniques - Overview
- Applying A Pinked Seam Finish
- Applying A Bias Bound Seam Finish
- Serging And Zigzag Seam Finishes
- Sewing A Self-Bound Seam Finish
- Sewing A French Seam Finish
- Sewing A Hong Kong Seam Finish
- Sewing A Mock French Seam Finish
- Sewing A Turned-and-Stitched Seam Finish
- Sewing Overcast Hand-Applied Seam Finishes
- Sewing A Flat Felled Seam
- Sewing A Hairline Seam Finish
-
Hem Finishes
>
- Garment Hem Finishes: Overview
- Sewing A Double Fold Hem Finish
- Sewing A Single Fold Hem Finish
- Sewing Bound Hem Finishes
- Sewing An Exposed Double Layer Bound Hem
- Sewing A Folded-Up Bound Hem with Pre-folded Binding
- Sewing A Hong Kong Hem Finish
- Sewing A Band Hem Finish
- Sewing A Bias Faced Hem Finish
- Sewing A Twill Tape Hem Finish
- Sewing A Rolled Hem Finish
- Sewing A Shaped Hem Facing
- Using Fusible Hem Tape And Webbing
- Finishing A Lace Fabric Hem
- Finishing A Leather Hem
- Sewing Faced Hem Corners
- How To Finish Lining At The Hem
- Finishing Fabric Corners by Mitering >
- Interfacing A Hemline: Lined And Unlined Examples
-
Sewing Pockets
>
- Curved Patch Pocket With Flap
- Unlined Square Patch Pockets
- Lined Patch Pockets: Two Ways
- Extension On-Seam Pockets
- Separate On-Seam Pocket
- Front Hip Pockets
- Bound Double Welt Pocket
- Double Welt Pocket With Flap
- Self-Welt Pocket (Using Single Fabric Layer)
- Slanted Welt Pocket (Hand-Stitched)
- Faced Slash Pockets: Overview >
-
Sewing Zippers
>
- Sewing Zippers: General Information
- Sewing A Centered Zipper
- Sewing A Lapped Zipper
- Sewing An Invisible Zipper
- Sewing A Fly Front Zipper
- Sewing A Closed-End Exposed Zipper (No Seam)
- Sewing An Exposed Separating Zipper
- Sewing Hand Stitched Zipper Applications
- Sewing A Zipper Underlay
- Sewing A Placket-Enclosed Separating Zipper
- Sleeveless Finishes >
-
Neckline Finishes
>
- Sewing A Neck Shaped Facing
- Sewing An All-In-One Neck Facing
- Neck And Garment Opening Combination Facings >
- Sewing A Bias Faced Neckline Finish
- Sewing A Band Neckline Finish
- Bound Neckline Finishes: Overview >
- Sewing A Semi-Stretch Strip Band Neckline
- Ribbed Neck Band And Classic Turtleneck
- Decorative Neckline Finishes >
- Finishing Facing Edges >
-
Extras
>
- A Complete Guide on Interfacing
- Sewing Bound Spaghetti Straps
- Sewing Spaghetti Straps To A Faced Neckline
- Sewing Ruffles: Overview
- Patterning And Sewing A Circle Ruffle
- Sewing A Gathered Heading Ruffle
- Sewing Double Layer Gathered Ruffles
- Sewing A Gathered Ruffle Into A Seam
- Sewing A Gathered Ruffle To A Fabric Edge
- Sewing A Fabric Surface Slit
- Sewing A Slit Seam
- Hand-Applied Straight Stitches
- Hand-Applied Blind Stitches
- Hand-Applied Overedge Stitches
- Hand-Applied Tack Stitches
- Hand-Applied Decorative Stitches
-
Basics
>
- Custom Bridal
- Custom Apparel
- About
- Blog
 RSS Feed
Services |
Company |
|
