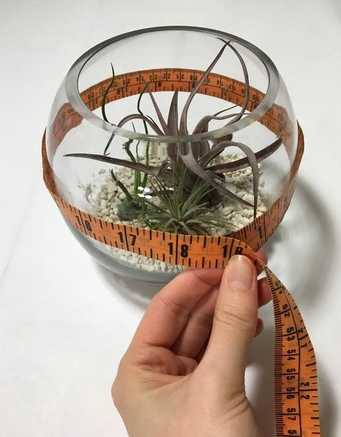
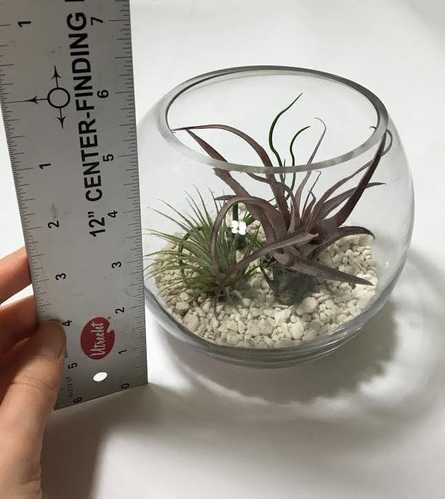
 This Christmas has been hectic in the best kind of way! As is true for any Christmas-obsessed fanatic, I got all my Christmas shopping done early. In true form, I tried to keep it as unique and personal as possible which left me with some Christmas presents that were a bit more challenging to wrap... or maybe the word "awkward" describes it better. Needless to say, I was up for the challenge. You're probably thinking "what is she talking about? How difficult can it be to wrap a Christmas present?" Well, let me explain 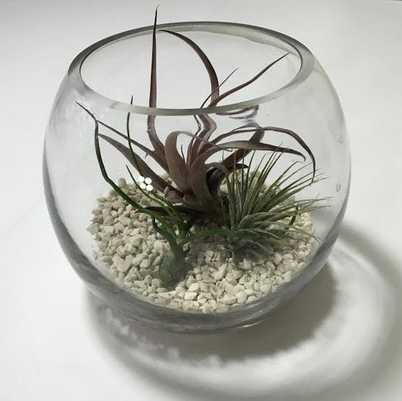 For the plant/nature lovers in my life (and there are lots of them) I thought it would only be appropriate to get them something that is naturally, "a plant". Instead of opting out for a boring old indoor plant, I thought why not get some whimsical air plant terrariums (I kind of have an obsession with them..). Glass terrariums come in all shapes and sizes but I opted for the classic spherical glass bowl at about 5x5 inches in size. Since I finished my Christmas shopping a bit earlier, I knew I had to assemble the terrarium and keep the air plants happy in their habitat. Naturally, that means I couldn't just throw the terrarium in a box, wrap it and toss it under the tree (Ouch!). Our family Christmas tradition (just like everyone else's) entails that every present should be wrapped (somehow), randomly picked from under the tree, and opened in front of everyone. Needless to say, this was probably one of the most awkward things I've ever had to wrap. The solution? A handmade Christmas-printed cotton fabric pouch with draw-string ribbon that is gentle on the terrarium and still maintains the element of surprise. Cotton is a natural fiber that is also one of the most breathable making it perfect for not distorting the air flow in the terrarium. Most air plants do require light as long as it's not direct, so when I went shopping for Christmas-themed cotton fabrics I opted for a white or very light color. A very light colored fabric will allow the terrarium to maintain a decent amount of natural light coming through without disturbing it's living conditions. 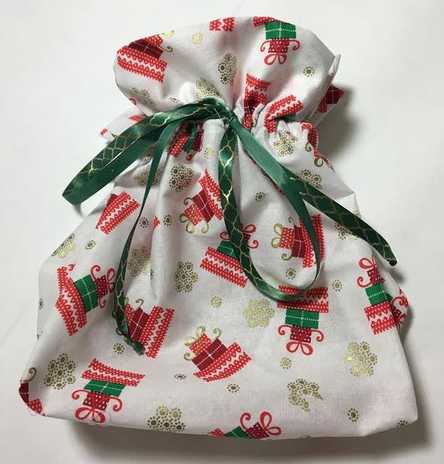 So let's get started! I'll show you the easiest way to make the pouch and hopefully this little training will come in handy next time you find yourself limited on wrapping options. You can use this method for any size pouch and make a perfect little enclosure for many of your Christmas gift this holiday season. 1. Find the horizontal and vertical measurements you'll need for the pouch. Use a measuring tape around the terrarium and note the circumference. Ours is about 19". Next, use a ruler to measure the approximate height of the terrarium (or whatever object you're working with) and give yourself about 2" in excess at the top and 2" at the bottom to cover the top and bottom surface of the terrarium when the pouch is closed. Remember, the terrarium is a spherical, 3-dimensional object so you have to give yourself enough ease on both top and bottom in order to enclose it properly. In our case, the height of the terrarium is 6" plus 4" in ease so the total comes to 10"
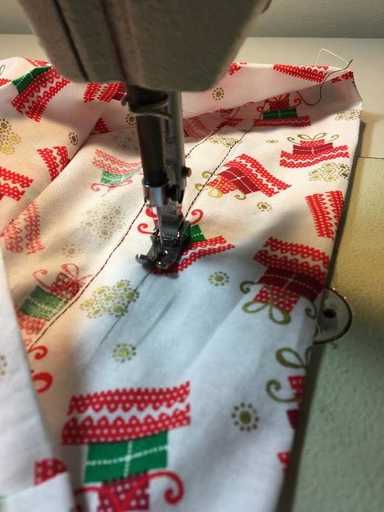
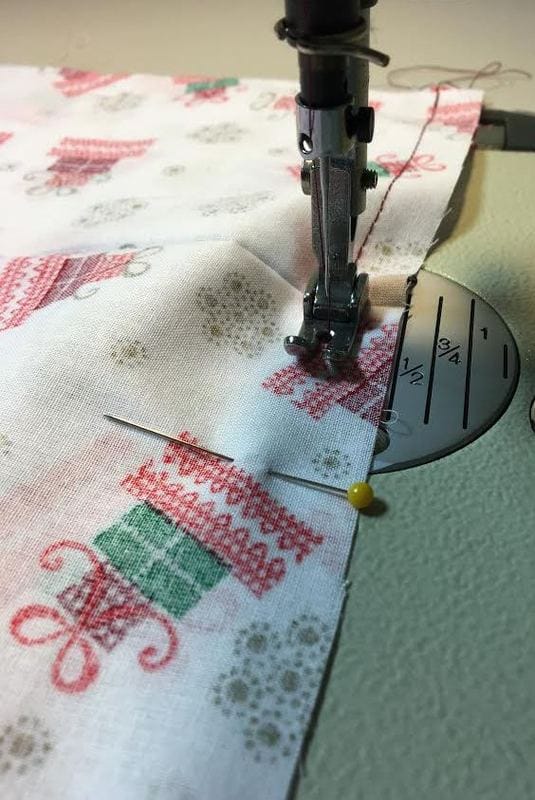
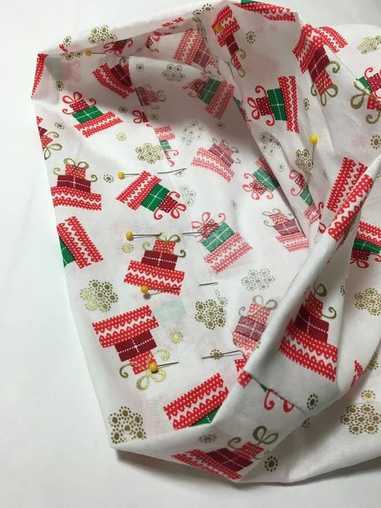
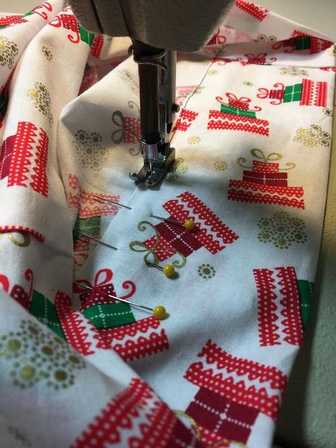
2. Use the measurements above to mark and cut the fabric for the pouch. This step will require a little bit of basic math, but nothing too complicated. So we know that the circumference of our terrarium is 19". Since we'll have two seams on both sides you will need to divide this measurement by 2 and add 1" total for seam allowance (1/2" of seam allowance on each side). So 19" divided by 2 is 9.5" plus 1" (seam allwance) is 10.5". You will also need to allow yourself additional half an inch excess fabric on each side sides (also called ease) in order to comfortably insert and remove the terrarium from the pouch- since we're adding 1/2" of ease on each side, total excess fabric will be an 1". Thus, 10.5" from above plus 1" of ease is 11.5", which will be the total horizontal measurement for the pouch's initial fabric cut. Now, for the vertical measurement: We know that the terraium plus the 4" we left as excess is 10". Multiply this number by 2, since you will need to cover the terrarioum on both sides (10" x 2= 20"). You will also need to add extra fabric at the top to accomodate the draw-string ribbon and have some extra for design purposes. You will need 1/2" seam allowance to clean finish the raw edge, and 6" total that will be folded to create the extra fabric gathering at the top. So the total vertical measurement will be 26.5" (20" + 6" + 1/2"). If it sounds confusing, don't worry! You'll get a better understanding in the steps that follow. This model for taking measurements works best on more difficult shapes like larger spherical or cube objects. You can use it as a general idea for how you can get rough estimate measurements for making a gift pouch. 3. Draw and cut the rectangular shape for the pouch using the measurements described above. In our tutorial, the vertical measurement is 26.5" and horizontal measurement ended up being 11.5". Draw a rectangle on your fabric using these measurements (11.5" x 26.5") 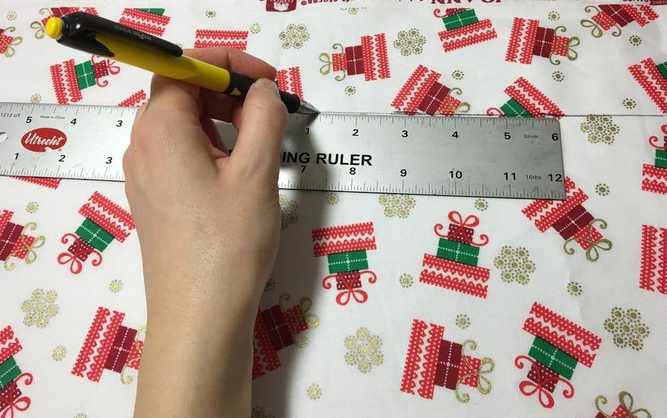 4. Cut out the rectangular shape. This is the piece you will use to sew your fabric pouch. 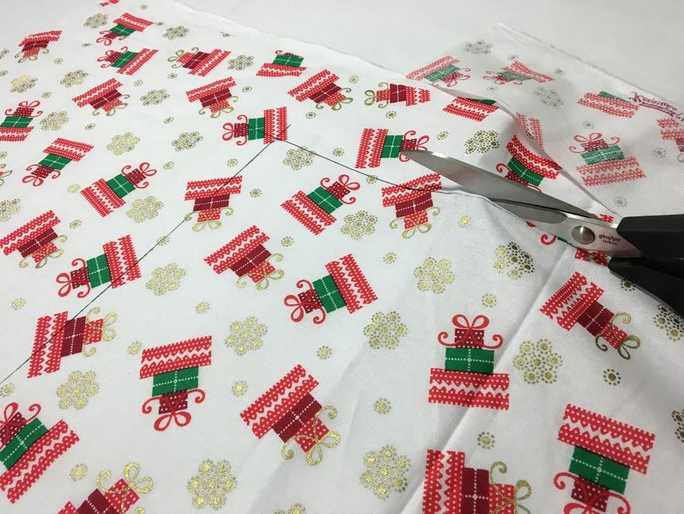 5. Fold the rectangle vertically making sure the face side of the fabric is touching. Pin both edges horizontally as shown bellow- These two edges will be your side seams. 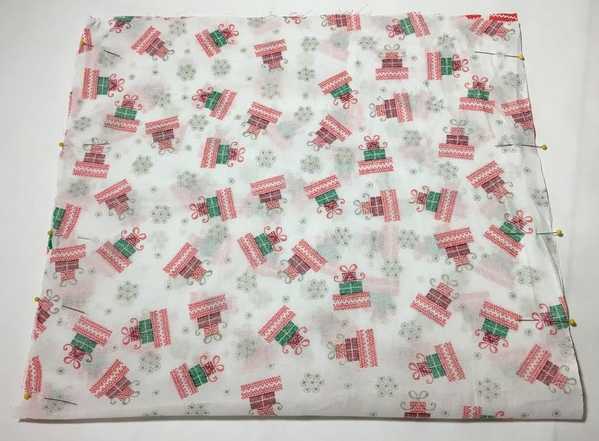 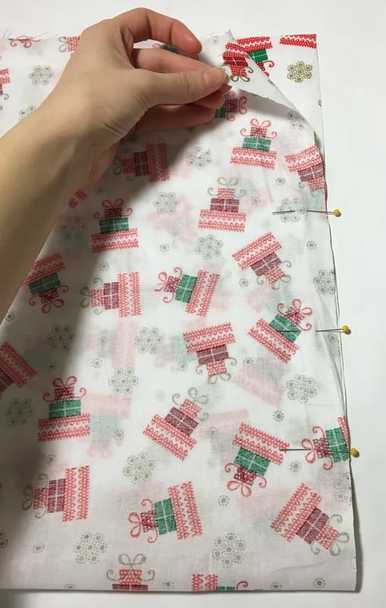 6. Stitch both edges on your sewing machine at 1/2" seam allowance.
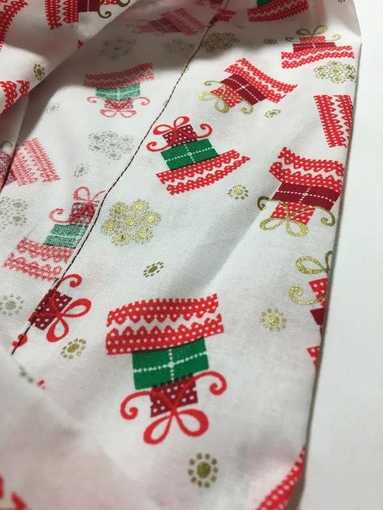
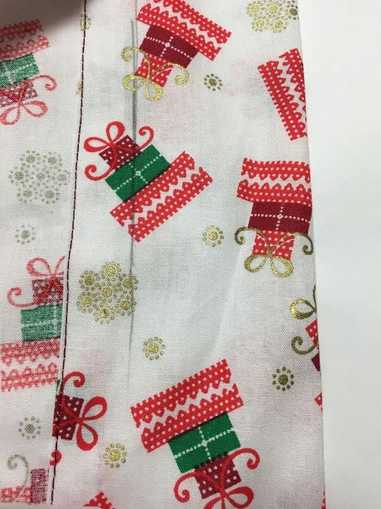
7. You now have a rough draft of your pouch! Turn it on the face side and iron both seams flat with the excess pointing to one side. 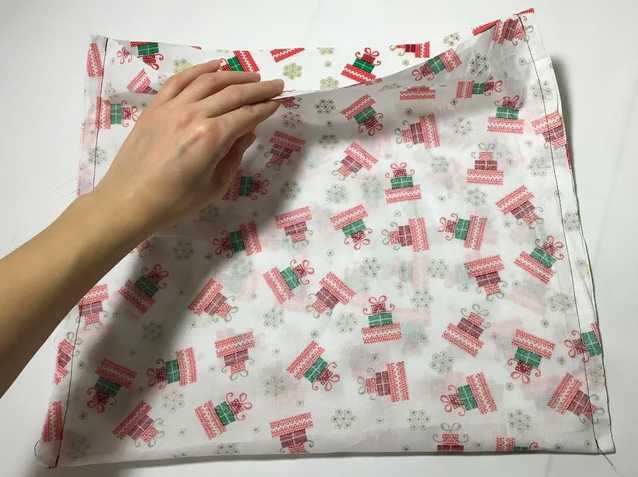 8. After ironing, turn the pouch inside out again so that the inside of the pouch is facing you. Fold each corner so that the side seam is aligned vertically down the middle as shown below. Pin this fold horizontally. Using a ruler and a pen or pencil, draw a straight horizontal line intersecting perpendicularly to the seam (forming a triangular shape). This will be your sew line. It is up to you where you want to place this horizontal sew line. Keep in mind that the lower you place it the more 3-dimensional the pouch will be at the bottom. 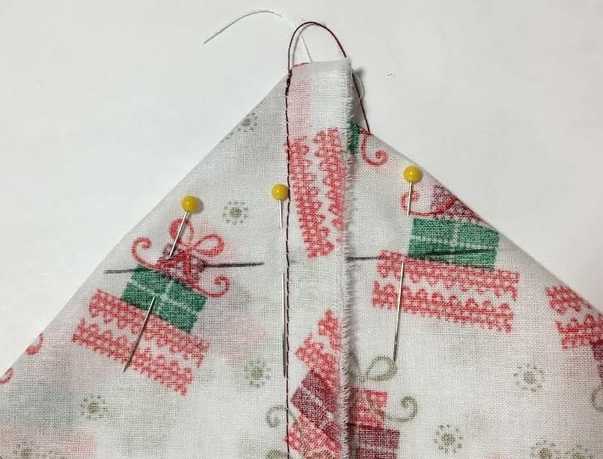 9. Use your sewing machine to stitch along this pen/pencil line. Don't forget to back-stitch on both ends for a durable finish. 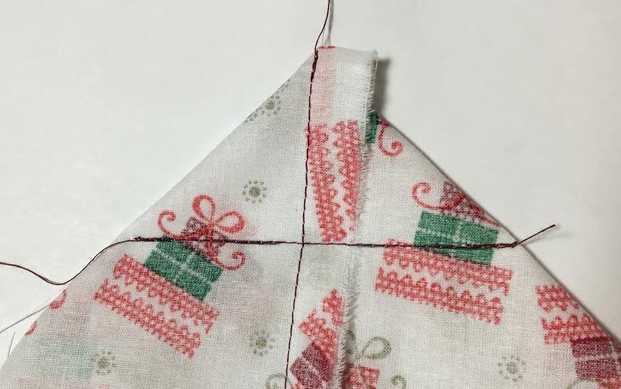 Now, if you turn the pouch back on its face side you will notice that due to the horizontal stitches we placed at both edges, the bottom of the pouch has a more 3-dimensional look. This works great with larger objects like the terrarium by giving it enough room at the bottom. 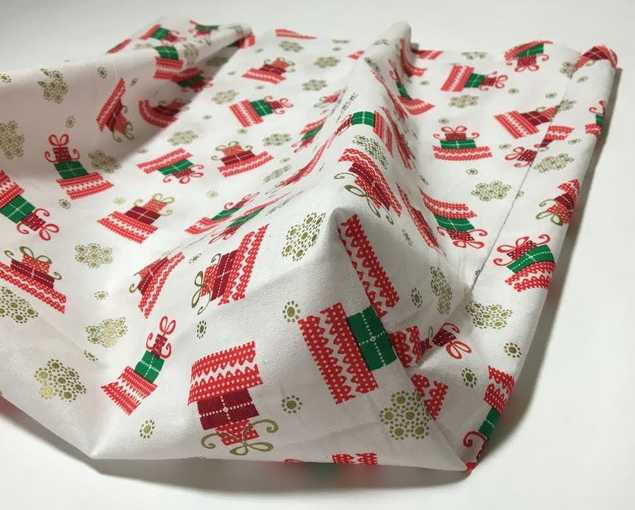 10. At the opening of the pouch, fold the raw edge in towards the inside at 1/2". Iron down to secure. 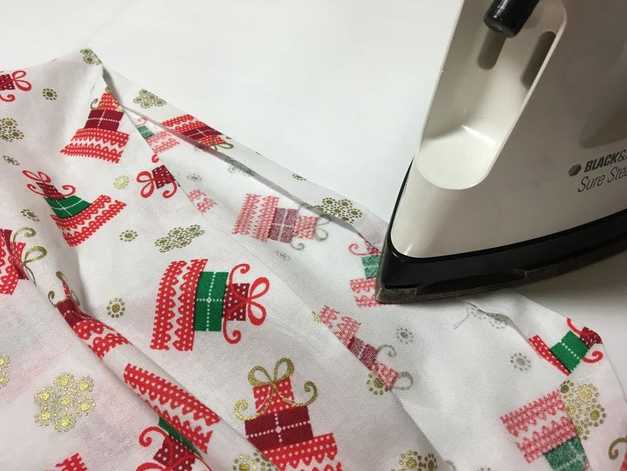 11. Fold in once more along the edge, but this time at 3". Use a ruler for precision. Place a few pins along the fold to keep it in place. 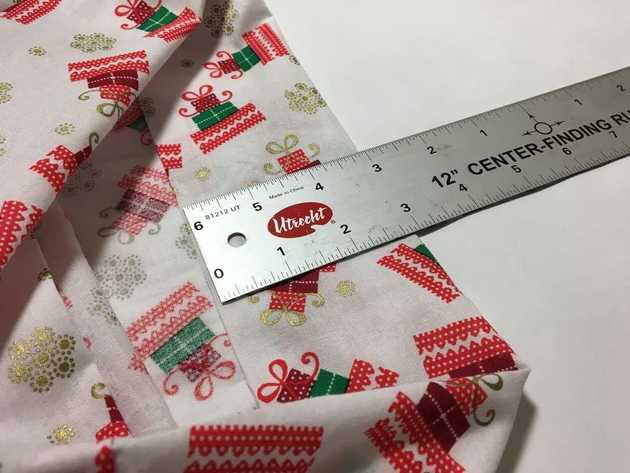
13. The ribbon used for this tutorial is about 5/8" in width. This means that when sewing the tunnel that it will be inserted into it has to be 5/8" in width and have at least 1/4" excess so that the ribbon can be inserted smoothly and easily. To make sure we have enough space to accommodate the ribbon, we're going to do a 3/4" wide tunnel for it. Measure from the stitch line you just made along the fold up 3/4" and mark along with a pencil/pen. Once marked, stitch along this second line to create the tunnel for the draw string ribbon. This will be your final stitch.
 14. Lay the pouch flat on the table and find the approximate middle point between the two side seams Draw a vertical dash between the two stitch lines. 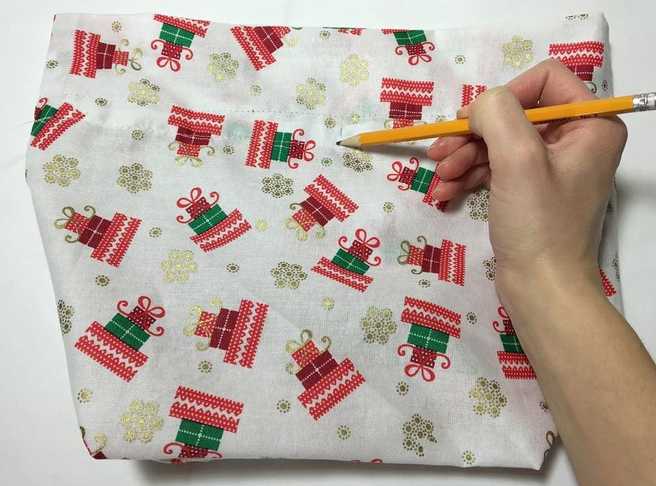 15. Cut only through the TOP LAYER OF FABRIC along the vertical dash making sure you don't go past the stitch lines at the top and bottom. This will be the opening for the draw-string ribbon. 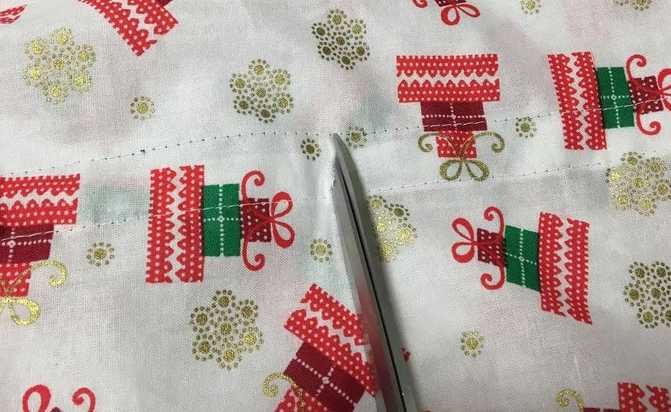 16. Last but not least, inserting the ribbon into the little tunnel you've created is actually quite fun! If you've ever sewn elastic waistbands before, this is very similar to how you would insert elastic into the waistband tunnel. Attach the edge of the ribbon to a medium sized safety pin as shown below. 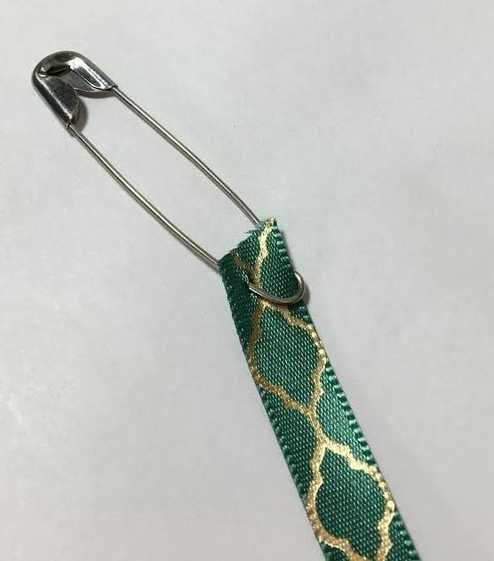 Insert the safety pin with the ribbon attached through the opening of the slit and pull through gradually until the safety pin comes out on the other side of the slit. 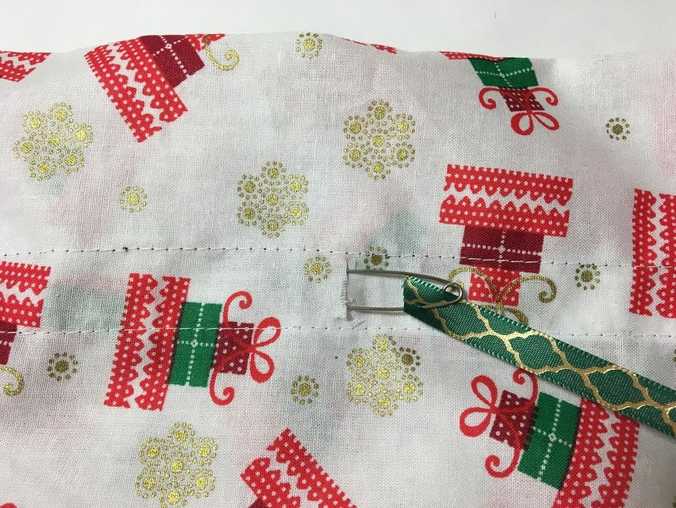 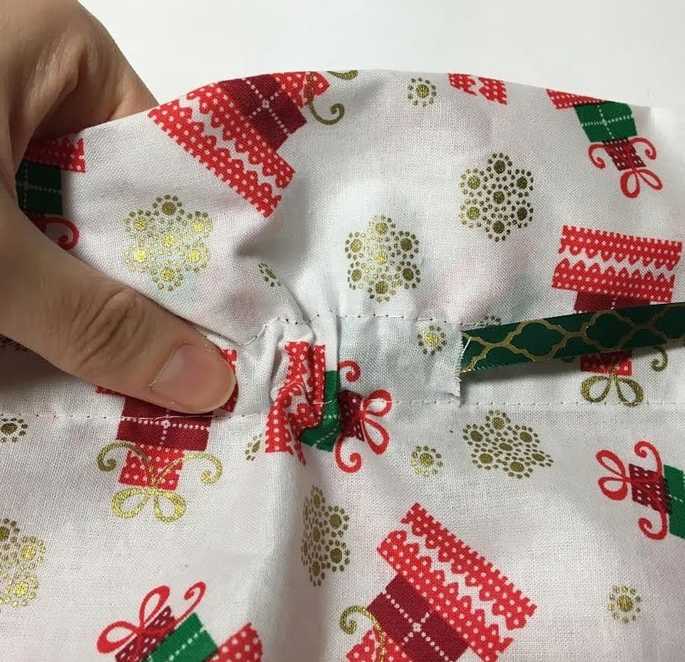 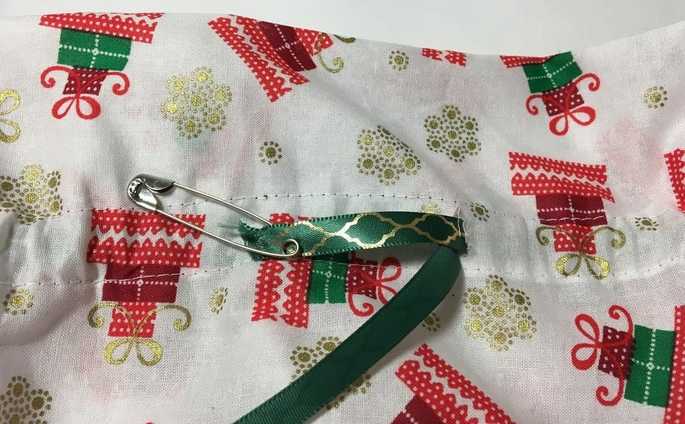 Pull both ends of the ribbon until they are aligned equally in length at the front. There are a few ways to finish the raw edges of the ribbon- You can use a match to melt the ends slightly until the weave is sealed; or the easiest, simply tie knots to stop the edges from fraying. 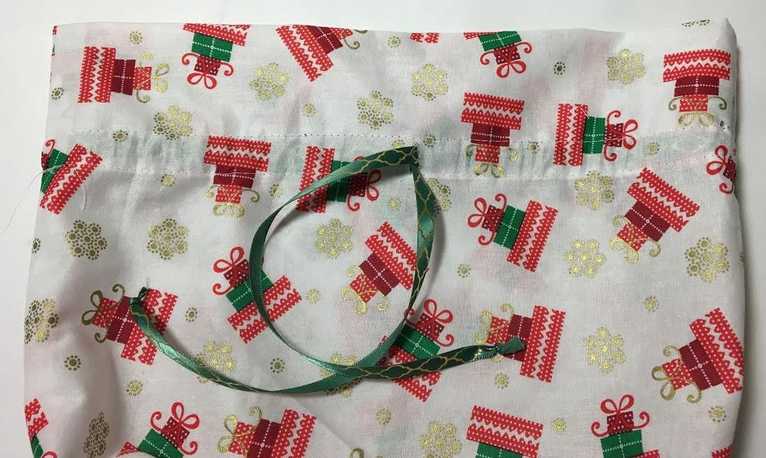 Here it is! This 100% breathable cotton Christmas pouch will be the best addition to the collection of presents you have waiting under the Christmas tree. Best of all, the air plants will get enough air and light to survive the day in the pouch until finally being opened. 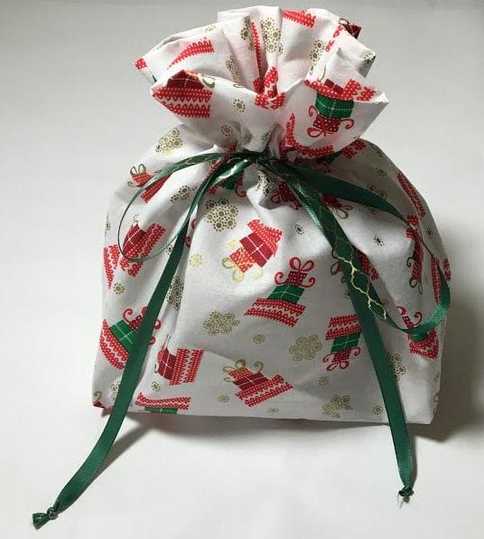
0 Comments
Leave a Reply. |
The Blog:A journey into our design process, sewing tutorials, fashion tips, and all the inspiring people and things we love. 
Doina AlexeiDesigner by trade and dressmaker at heart. I spend most of my days obsessing over new fabrics and daydreaming new ideas. 
Sadie
Executive Assistant & Client Relations Manager Archives
November 2019
Categories
All

|

-
Sewing Tutorials
-
Basics
>
- Aligning Pattern Grainlines To Fabric
- Preparing Fabrics For Sewing
- Pinning Sewing Patterns To Fabric
- Placing Sewing Patterns On Fabric For Cutting
- Rotary Cutters or Fabric Scissors?
- Cutting The Sewing Patterns
- What Are Notches And How To Use Them In The Sewing Process
- Transferring Notches From Pattern To Fabric
- Transferring Seamlines to Fabric
- Staystitching
- Backstitching: A Complete Guide
- Hand Basting: A Complete Guide
- Sewing Continuous Bias Binding
- Darts >
-
Sewing Seams
>
- The Basics Of Seams And Seam Allowance
- How To Sew A Straight Seam
- Sewing Curved Seams
- Sewing Corner Seams
- Trimming And Grading Seam Excess
- Notching/Clipping Seam Allowance for Tension Release
- Sewing Topstitched Seams
- Sewing Corded Seams
- Sewing A Slot Seam
- Sewing A Gathered Seam
- Sewing Bias Seams
- Sewing Seams With Ease
- Sewing Seams With Crossing Seamlines
- Sewing Unlike Fabric Seams
- How To Iron Seams: Ironing Tools And Conventions
- Sewing With Knit Fabrics
- Understanding Stitch Length And Tension
- Sewing Unique Fabric Seams
-
Seam Finishes
>
- Seam Finishing Techniques - Overview
- Applying A Pinked Seam Finish
- Applying A Bias Bound Seam Finish
- Serging And Zigzag Seam Finishes
- Sewing A Self-Bound Seam Finish
- Sewing A French Seam Finish
- Sewing A Hong Kong Seam Finish
- Sewing A Mock French Seam Finish
- Sewing A Turned-and-Stitched Seam Finish
- Sewing Overcast Hand-Applied Seam Finishes
- Sewing A Flat Felled Seam
- Sewing A Hairline Seam Finish
-
Hem Finishes
>
- Garment Hem Finishes: Overview
- Sewing A Double Fold Hem Finish
- Sewing A Single Fold Hem Finish
- Sewing Bound Hem Finishes
- Sewing An Exposed Double Layer Bound Hem
- Sewing A Folded-Up Bound Hem with Pre-folded Binding
- Sewing A Hong Kong Hem Finish
- Sewing A Band Hem Finish
- Sewing A Bias Faced Hem Finish
- Sewing A Twill Tape Hem Finish
- Sewing A Rolled Hem Finish
- Sewing A Shaped Hem Facing
- Using Fusible Hem Tape And Webbing
- Finishing A Lace Fabric Hem
- Finishing A Leather Hem
- Sewing Faced Hem Corners
- How To Finish Lining At The Hem
- Finishing Fabric Corners by Mitering >
- Interfacing A Hemline: Lined And Unlined Examples
-
Sewing Pockets
>
- Curved Patch Pocket With Flap
- Unlined Square Patch Pockets
- Lined Patch Pockets: Two Ways
- Extension On-Seam Pockets
- Separate On-Seam Pocket
- Front Hip Pockets
- Bound Double Welt Pocket
- Double Welt Pocket With Flap
- Self-Welt Pocket (Using Single Fabric Layer)
- Slanted Welt Pocket (Hand-Stitched)
- Faced Slash Pockets: Overview >
-
Sewing Zippers
>
- Sewing Zippers: General Information
- Sewing A Centered Zipper
- Sewing A Lapped Zipper
- Sewing An Invisible Zipper
- Sewing A Fly Front Zipper
- Sewing A Closed-End Exposed Zipper (No Seam)
- Sewing An Exposed Separating Zipper
- Sewing Hand Stitched Zipper Applications
- Sewing A Zipper Underlay
- Sewing A Placket-Enclosed Separating Zipper
- Sleeveless Finishes >
-
Neckline Finishes
>
- Sewing A Neck Shaped Facing
- Sewing An All-In-One Neck Facing
- Neck And Garment Opening Combination Facings >
- Sewing A Bias Faced Neckline Finish
- Sewing A Band Neckline Finish
- Bound Neckline Finishes: Overview >
- Sewing A Semi-Stretch Strip Band Neckline
- Ribbed Neck Band And Classic Turtleneck
- Decorative Neckline Finishes >
- Finishing Facing Edges >
-
Extras
>
- A Complete Guide on Interfacing
- Sewing Bound Spaghetti Straps
- Sewing Spaghetti Straps To A Faced Neckline
- Sewing Ruffles: Overview
- Patterning And Sewing A Circle Ruffle
- Sewing A Gathered Heading Ruffle
- Sewing Double Layer Gathered Ruffles
- Sewing A Gathered Ruffle Into A Seam
- Sewing A Gathered Ruffle To A Fabric Edge
- Sewing A Fabric Surface Slit
- Sewing A Slit Seam
- Hand-Applied Straight Stitches
- Hand-Applied Blind Stitches
- Hand-Applied Overedge Stitches
- Hand-Applied Tack Stitches
- Hand-Applied Decorative Stitches
-
Basics
>
- Custom Bridal
- Custom Apparel
- About
- Blog

 RSS Feed
Services |
Company |
|
