|
There are many instances in dressmaking when you’ll be forced to replace that convenient machine sewing needle with a much slower hand sewing one. In the case of sewing decorative appliques, you may be asking yourself- why would I ever need to attach them by hand when I can easily topstitch them on the sewing machine? When it comes to decorative garment applications, things are not always as simple as they appear. In many instances, the only way to safely sew an applique is by hand using a sort of modified slip stitch method. In some scenarios, you may even save some time by opting for hand stitching in lieu of machine stitching altogether. Here are some situations when hand sewing appliques is not only recommended but also essential to the structure, finish and look of a garment:
In today’s tutorial, I’ll go a step further by showing you how to actually extract an applique from a lace or ornamental fabric and hand stitch it to the surface of a silk crepe de chine. The need for this comes up quite often when you can’t find the right pre-cut appliques on the market. In that case, it is totally acceptable to cut your own from a suitable fabric. I’ll show you this simple process below.
2 Comments
When it comes to clothing design, there’s nothing more feminine and playful than a ruffle. Ruffles are very simple design elements yet can completely shift the mood and style of a garment. I touched a bit on ruffles months ago, yet I still haven’t shown you the patterning side. For those that are interested in learning more pattern drafting techniques, today’s tutorial will cover another application of my all-time favorite technique: the slash and spread method. In the steps to follow, I’ll show you a simple way to draft a circle ruffle from scratch at the desired width and length.
There are two main types of ruffles: gathered ruffles and circle ruffles. They look and drape very differently not to mention the sewing techniques used to apply them vary greatly. A gathered ruffle as you might have guessed, is first gathered to create the ruffle flounce, after which the gathered edge is sewn into the correspond seam. A circle ruffle on the other hand, has flounces that are localized, applied individually on the sewing pattern depending on the desired ruffle density. The patterning process for the latter ruffle style is what we’ll discuss today! As opposed to a gathered ruffle, a circle ruffle has a smoother, more flexible quality.
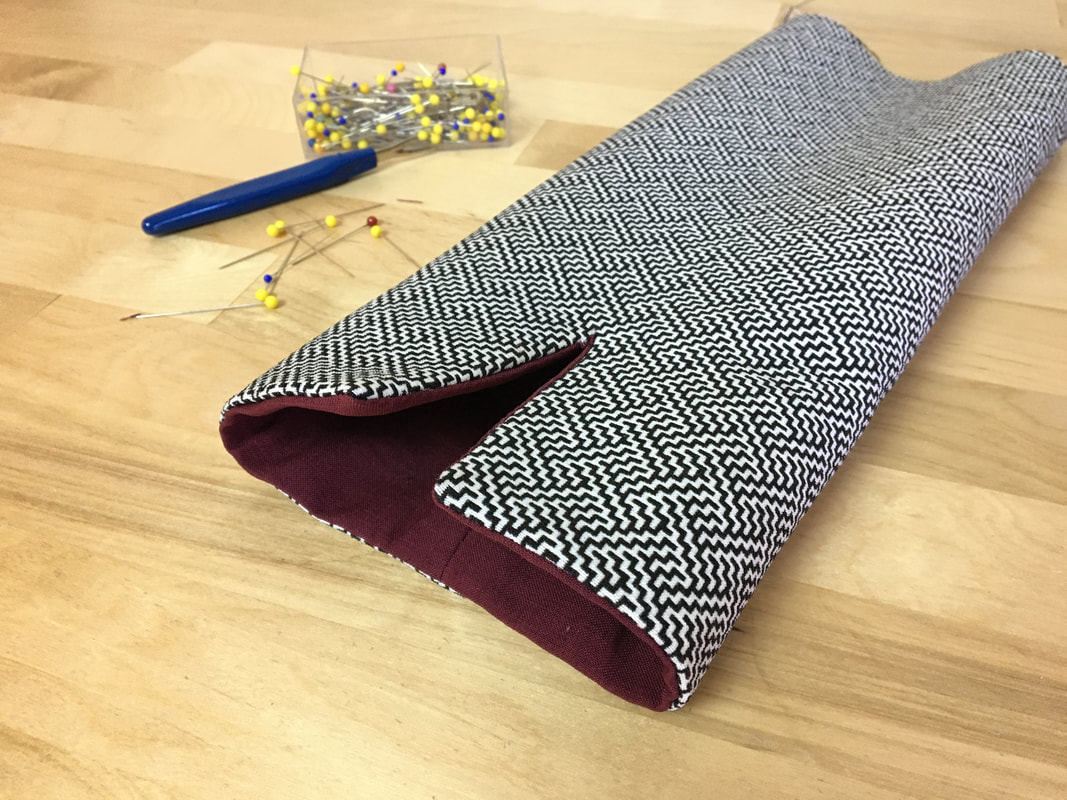
Don’t you love simple sewing techniques that when finished, look like hours of hard work? In today’s tutorial, I’ll show you one such technique- sewing a faced slit to the bottom edge of a sleeve. I chose to add this finish to a sleeve as this is one of its most conventional uses. A faced slit looks beautiful on heavier weight pieces like blazers and coats. There is undeniably a clean, tailored aspect to anything that features a facing. Using a facing to add a slit not only provides an elevated, high quality finish, it is also a great way to add an opening into the surface of fabric without relying on an actual seam. There is no argument that slits which open from a seam are certainly more durable, but as in the case of a sleeve cuff, a shorter faced slit is a great option for areas that don’t require as much movement and stretch. The key word here is “shorter”. Seamless faced slits usually function and hang best at a shorter length as they are more tailored and structured in nature. Of course, a slit that originates from an actual seam can also be faced or lined. This sort of slit style however is an entirely different technique than what we’ll talk about today. Here are some important notes on facings before we move on to the sewing steps below:
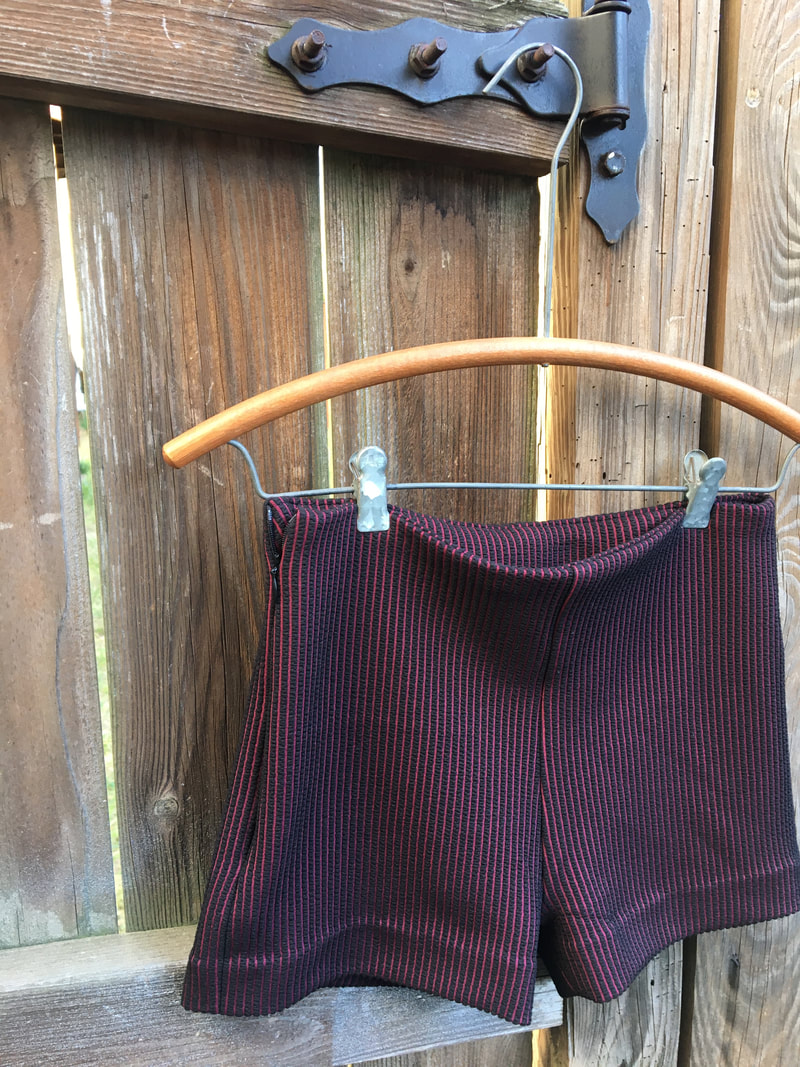
While it may seem initially intimidating, sewing a pair of shorts or trousers is not as difficult as you may think. If you adhere to a few basic sets of rules, sewing pant-style bottoms should really never pose a big challenge. In today’s tutorial I’ll show you how to sew a very simple pair of shorts with a faced waistline and invisible side zipper. For a more tailored look, I will also add a hand slip stitch to clean finish the hem. Let’s start by discussing some of the general rules of sewing trousers. To begin with, it is important to be able to differentiate between the front and back pant leg pieces. Given that they often look very similar (especially to the inexperienced eye), an easy way to accomplish this is to look at the J curve which is the crotch seam edge. The two back portions will always have a deeper curved edge while the front has a softer, shorter curve. To further differentiate between the front and back pieces, you could also take a look at the darts. Conventionally, the back darts are always deeper and/or longer than the front ones. In my shorts example below, the front does not include darts yet the back does. Keeping this in mind, I can easily spot the difference between my front and back pieces. In a conventional pant style, the front is always comprised of two or more identical pieces. Similarly, the back is also composed of two or more identical pieces. Both the front and the back pieces are separate by a J seam. Always keep an eye out for notches- your pattern pieces are most likely marked with notches along their J curves. A single notch marks the front pieces and conventionally, a double notch marks the back pieces. The front J curved edges get sewn to each other. Similarly, the back J curves also get sewn to each other. As you’ll see below, these are some of the first seams you should complete in the sewing process. Darts of course, always come at the very beginning so don’t forget to get those out of the way before starting on the J seams. Speaking of the front and back J seam- these curved seams correspond to the pant’s crotch line and thus should be comfortable and easy to move in. As you’ll see below, the seam allowance along the most curved area of the J seam should be graded and/or trimmed to improve flexibility and eliminate bulk. Never clip these curved seams for tension release! Doing so will weaken the seam not to mention that it defeats the purpose of it’s overall functionality. As you would with any style bottoms, think carefully about the type of closure you would like to us. Even stretch fabric may require a full zipper, snaps or buttons to provide the shorts/pants with the proper functionality. Zippers are the easiest to incorporate into shorts or trouser seams. They don’t pose as big of a challenge in terms of fit, added bulk, flaps or plackets.
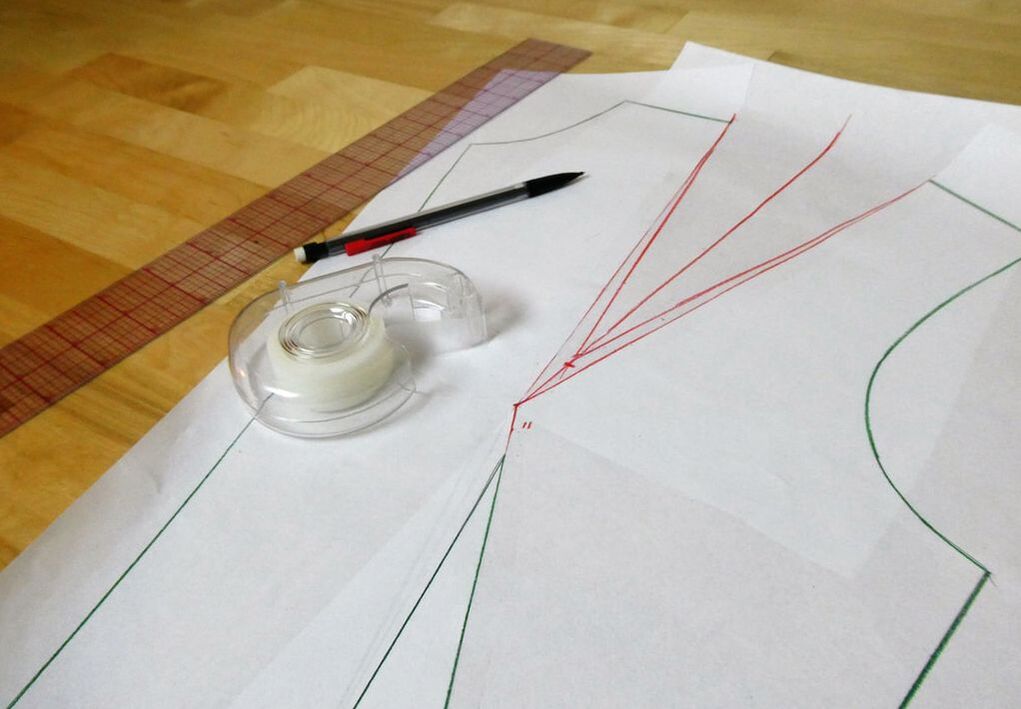
I recently got a great question from someone who is getting more into pattern drafting but not surprisingly, experiencing some setbacks with dart placement. Darts are undeniably one of the most complicated elements to maneuver around when altering or drafting sewing patterns from scratch. It comes as no surprise given that darts alone provide the transition from flat to 3-dimensional. The organic shape of the human form is complicated and not a single one is made exactly the same as the other. That being said, understanding dart placement and dart manipulation comprises the most essential part of learning patternmaking. It is also a great starting point for those that want to learn how to alter and draft patterns from scratch! Today, I will show you how to shift darts around on a pattern using the slash and spread method- the single most important beginner technique in patternmaking, in my opinion. I don’t know why I waited so long to write this tutorial! After all, I use the slash and spread technique on almost all the patterns I draft from scratch. From adding gathers and pleats to altering fullness on sleeve caps, I can't work without this simple method. The best part about it? It is actually fun, and along with “funness” (not a real word), comes simplicity. If you’ve struggled with shifting darts around on a sewing pattern, or feel intimidated by darts altogether, follow the simple steps below and you will hopefully no longer feel like a prisoner to it. By learning the slash and spread logic with darts, you will be able to individually apply this technique to other patterning challenges. Darts are just a great, basic way to start. In today's tutorial, I will show you two different but common scenarios you may encounter when drafting a pattern that has darts:
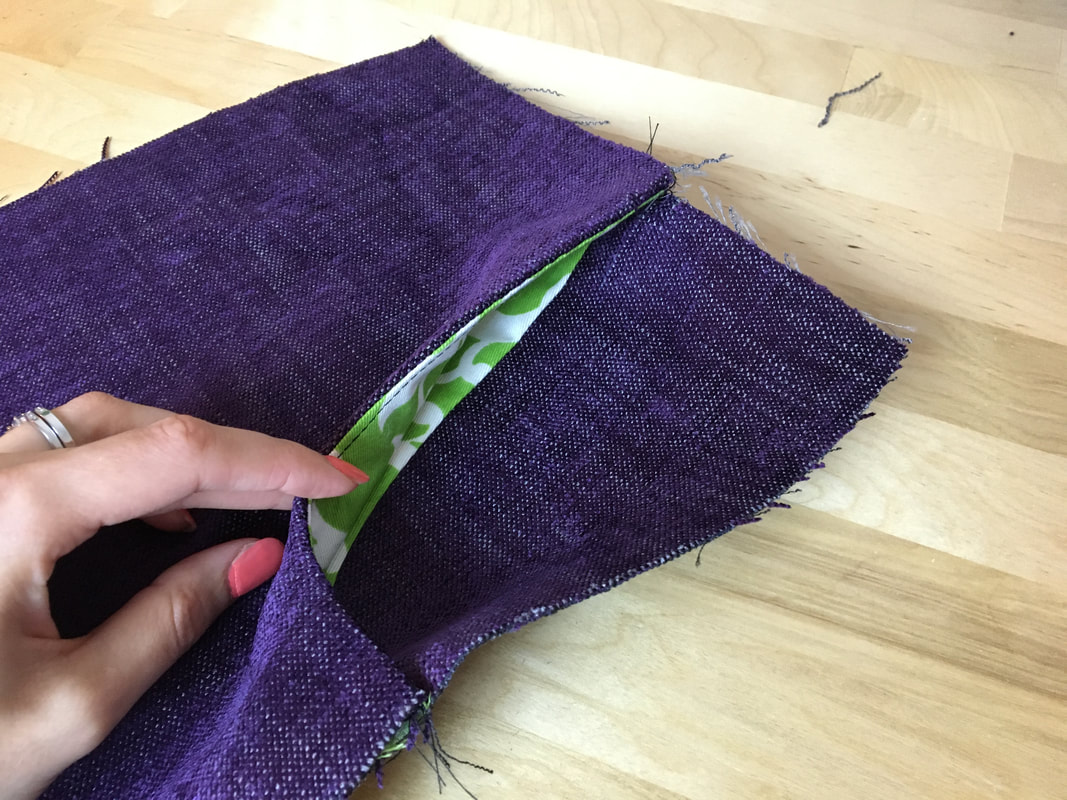
1. How to split a single waist dart into two separate darts: one vertical waist dart and another horizontal bust dart. 2. How to transfer an entire dart from one area of the garment to another. In this particular example, I will show you how to shift full excess from the waist dart to a shoulder dart. You may or may not have noticed, but I am absolutely obsessed with pockets. There is nothing more functional and comfortable than a pair of pockets placed perfectly on a garment. Pockets are those simple elements that always work overtime, elevating both the quality and versatility of a garment. While I have a couple tutorials on the simplest of all pockets: on-seam pockets, I haven’t challenged you with something a bit more complex yet. For that reason, in today’s tutorial, I will be walking you through the process of sewing front hip pockets. If you own a pair of jeans (and you most likely do), you have seen and enjoyed the convenience of this very functional pocket style. In the example below, I'll show you the detailed steps for sewing a jean pocket which as opposed to conventional options, has an extra seam within the pocket piece. Front hip pockets are visibly positioned on the front of the garment connecting at the waist (or any horizontal seam on the front) and a side seam (or an appropriate vertical seam on the front/side of the garment). As opposed to an on-seam pocket that is comprised of two identical pocket bag pieces, a front hip pocket is made of two differently shaped pieces: a facing and a pocket piece.
The pocket piece becomes part of the garment at the waist, or the horizontal seam it is sewn into. Its upper part is visible on the face of the garment so for that reason, the pocket piece is cut of the same fabric as the garment. In this tutorial however, I will show you a pocket piece that is divided into two pieces: the upper half is cut from the same fabric as the garment while the bottom half is cut from lining or your choice of pocket bag fabric. This style is conventionally used for jeans or other styles of casual and formal trousers. Having the bottom piece cut of a thinner lining fabric eliminates bulk and ensures added flexibility and comfort. A pocket facing is used to clean finish the inner curve of the pocket opening. The facing is usually cut from a lining fabric or your choice of fabric for the actual pocket bag. While they are different shapes, once sewn into each corresponding garment areas, the outer edge of each facing and pocket piece should match perfectly thus completing the pocket bag container. If this sounds confusing now, don't worry! The sewing steps below will clarify the process. |
The Blog:A journey into our design process, sewing tutorials, fashion tips, and all the inspiring people and things we love. Doina AlexeiDesigner by trade and dressmaker at heart. I spend most of my days obsessing over new fabrics and daydreaming new ideas. Sadie
Executive Assistant & Client Relations Manager Archives
November 2019
Categories
All
|
-
Sewing Tutorials
-
Basics
>
- Aligning Pattern Grainlines To Fabric
- Preparing Fabrics For Sewing
- Pinning Sewing Patterns To Fabric
- Placing Sewing Patterns On Fabric For Cutting
- Rotary Cutters or Fabric Scissors?
- Cutting The Sewing Patterns
- What Are Notches And How To Use Them In The Sewing Process
- Transferring Notches From Pattern To Fabric
- Transferring Seamlines to Fabric
- Staystitching
- Backstitching: A Complete Guide
- Hand Basting: A Complete Guide
- Sewing Continuous Bias Binding
- Darts >
-
Sewing Seams
>
- The Basics Of Seams And Seam Allowance
- How To Sew A Straight Seam
- Sewing Curved Seams
- Sewing Corner Seams
- Trimming And Grading Seam Excess
- Notching/Clipping Seam Allowance for Tension Release
- Sewing Topstitched Seams
- Sewing Corded Seams
- Sewing A Slot Seam
- Sewing A Gathered Seam
- Sewing Bias Seams
- Sewing Seams With Ease
- Sewing Seams With Crossing Seamlines
- Sewing Unlike Fabric Seams
- How To Iron Seams: Ironing Tools And Conventions
- Sewing With Knit Fabrics
- Understanding Stitch Length And Tension
- Sewing Unique Fabric Seams
-
Seam Finishes
>
- Seam Finishing Techniques - Overview
- Applying A Pinked Seam Finish
- Applying A Bias Bound Seam Finish
- Serging And Zigzag Seam Finishes
- Sewing A Self-Bound Seam Finish
- Sewing A French Seam Finish
- Sewing A Hong Kong Seam Finish
- Sewing A Mock French Seam Finish
- Sewing A Turned-and-Stitched Seam Finish
- Sewing Overcast Hand-Applied Seam Finishes
- Sewing A Flat Felled Seam
- Sewing A Hairline Seam Finish
-
Hem Finishes
>
- Garment Hem Finishes: Overview
- Sewing A Double Fold Hem Finish
- Sewing A Single Fold Hem Finish
- Sewing Bound Hem Finishes
- Sewing An Exposed Double Layer Bound Hem
- Sewing A Folded-Up Bound Hem with Pre-folded Binding
- Sewing A Hong Kong Hem Finish
- Sewing A Band Hem Finish
- Sewing A Bias Faced Hem Finish
- Sewing A Twill Tape Hem Finish
- Sewing A Rolled Hem Finish
- Sewing A Shaped Hem Facing
- Using Fusible Hem Tape And Webbing
- Finishing A Lace Fabric Hem
- Finishing A Leather Hem
- Sewing Faced Hem Corners
- How To Finish Lining At The Hem
- Finishing Fabric Corners by Mitering >
- Interfacing A Hemline: Lined And Unlined Examples
-
Sewing Pockets
>
- Curved Patch Pocket With Flap
- Unlined Square Patch Pockets
- Lined Patch Pockets: Two Ways
- Extension On-Seam Pockets
- Separate On-Seam Pocket
- Front Hip Pockets
- Bound Double Welt Pocket
- Double Welt Pocket With Flap
- Self-Welt Pocket (Using Single Fabric Layer)
- Slanted Welt Pocket (Hand-Stitched)
- Faced Slash Pockets: Overview >
-
Sewing Zippers
>
- Sewing Zippers: General Information
- Sewing A Centered Zipper
- Sewing A Lapped Zipper
- Sewing An Invisible Zipper
- Sewing A Fly Front Zipper
- Sewing A Closed-End Exposed Zipper (No Seam)
- Sewing An Exposed Separating Zipper
- Sewing Hand Stitched Zipper Applications
- Sewing A Zipper Underlay
- Sewing A Placket-Enclosed Separating Zipper
- Sleeveless Finishes >
-
Neckline Finishes
>
- Sewing A Neck Shaped Facing
- Sewing An All-In-One Neck Facing
- Neck And Garment Opening Combination Facings >
- Sewing A Bias Faced Neckline Finish
- Sewing A Band Neckline Finish
- Bound Neckline Finishes: Overview >
- Sewing A Semi-Stretch Strip Band Neckline
- Ribbed Neck Band And Classic Turtleneck
- Decorative Neckline Finishes >
- Finishing Facing Edges >
-
Extras
>
- A Complete Guide on Interfacing
- Sewing Bound Spaghetti Straps
- Sewing Spaghetti Straps To A Faced Neckline
- Sewing Ruffles: Overview
- Patterning And Sewing A Circle Ruffle
- Sewing A Gathered Heading Ruffle
- Sewing Double Layer Gathered Ruffles
- Sewing A Gathered Ruffle Into A Seam
- Sewing A Gathered Ruffle To A Fabric Edge
- Sewing A Fabric Surface Slit
- Sewing A Slit Seam
- Hand-Applied Straight Stitches
- Hand-Applied Blind Stitches
- Hand-Applied Overedge Stitches
- Hand-Applied Tack Stitches
- Hand-Applied Decorative Stitches
-
Basics
>
- Custom Bridal
- Custom Apparel
- About
- Blog
Services |
Company |
|


 RSS Feed

