|
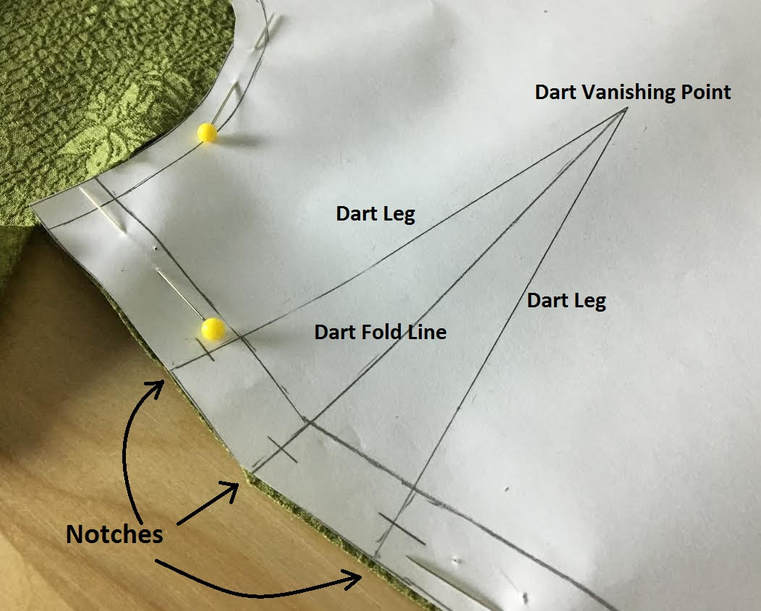
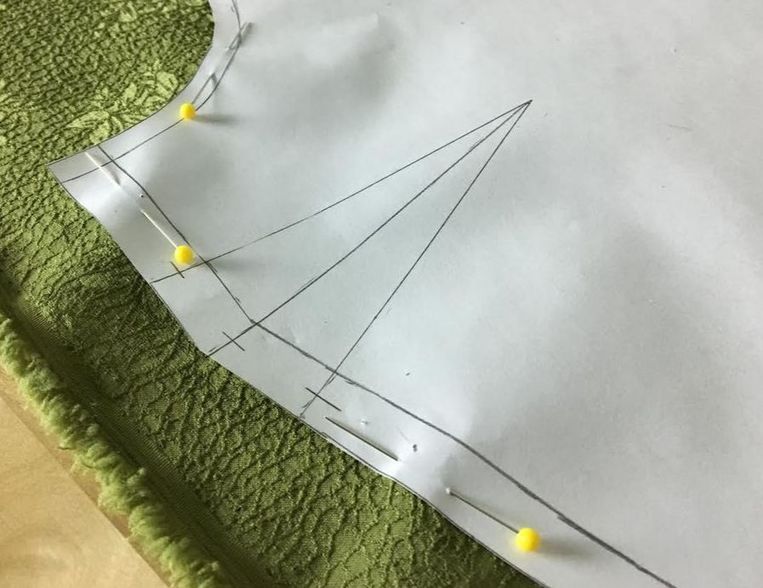
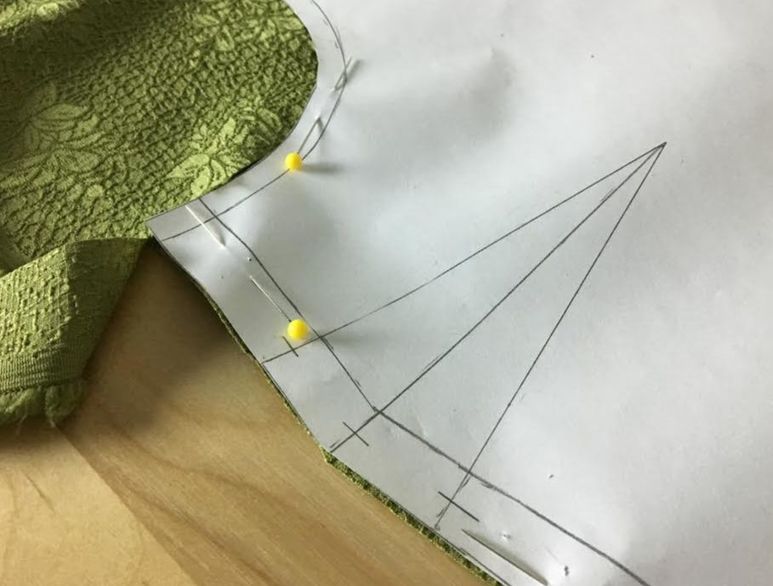
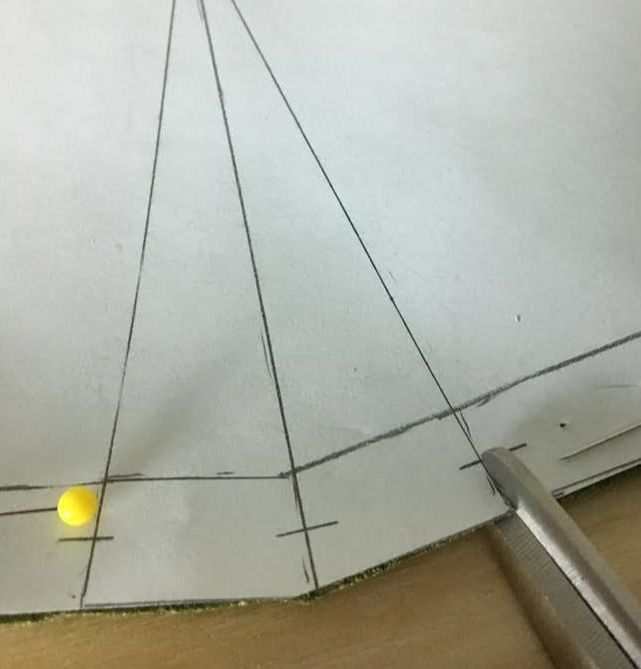
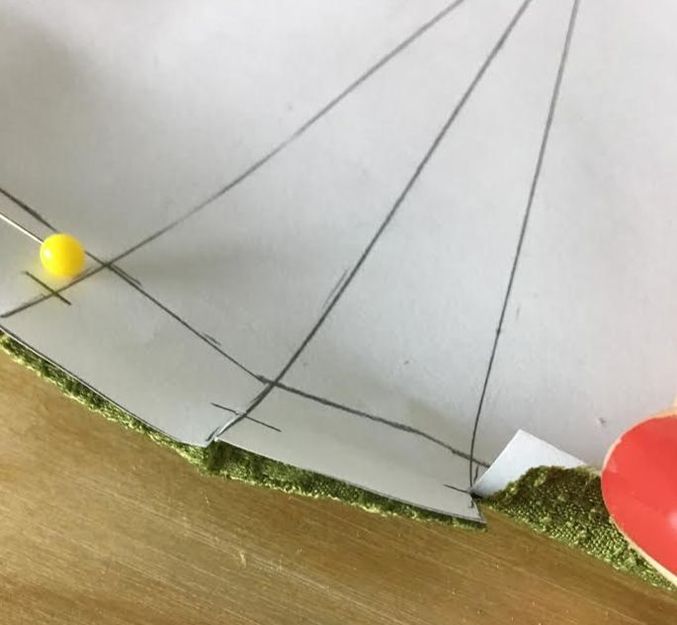
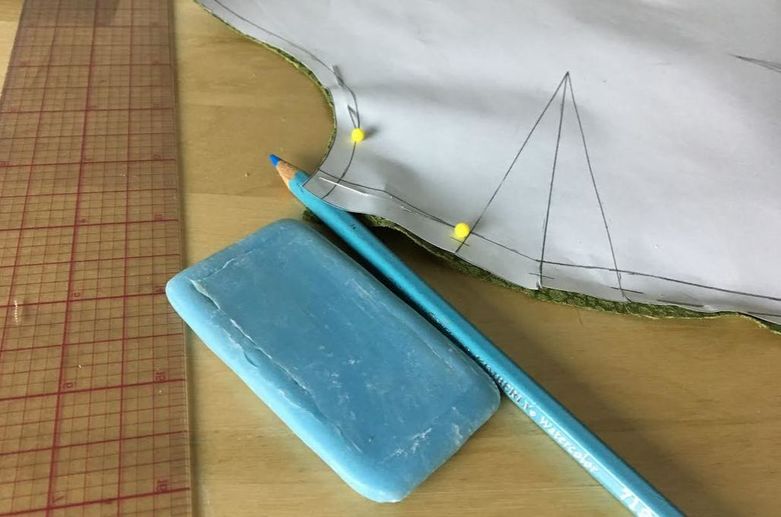
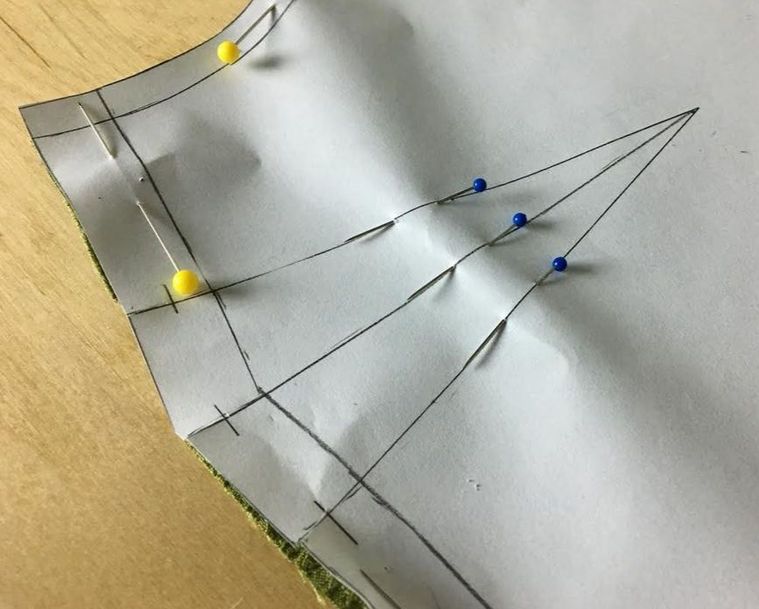
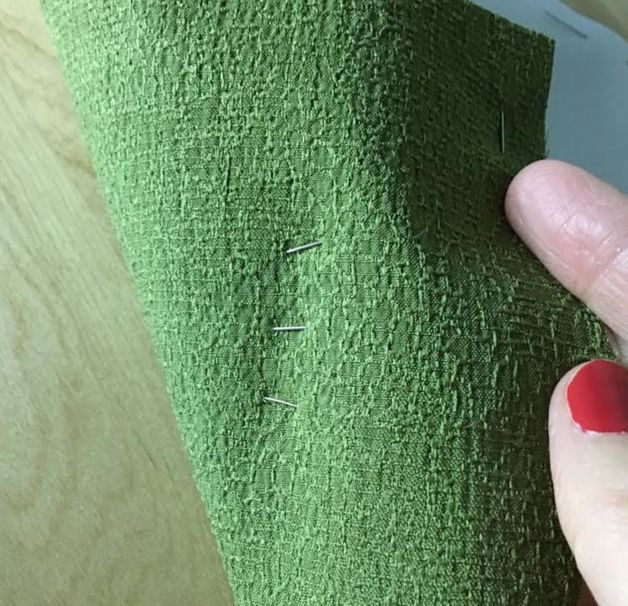
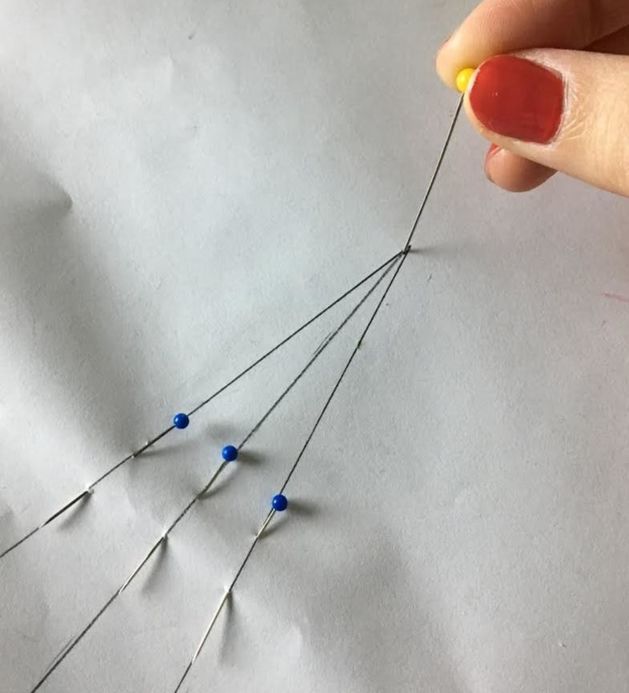
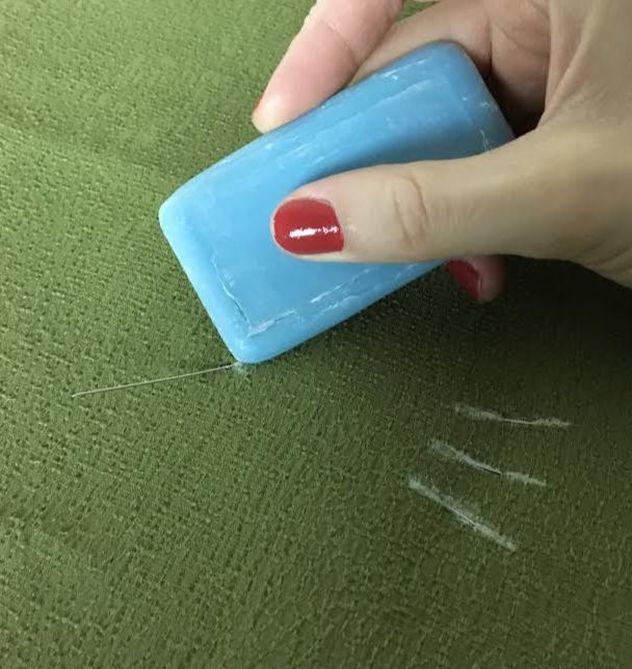
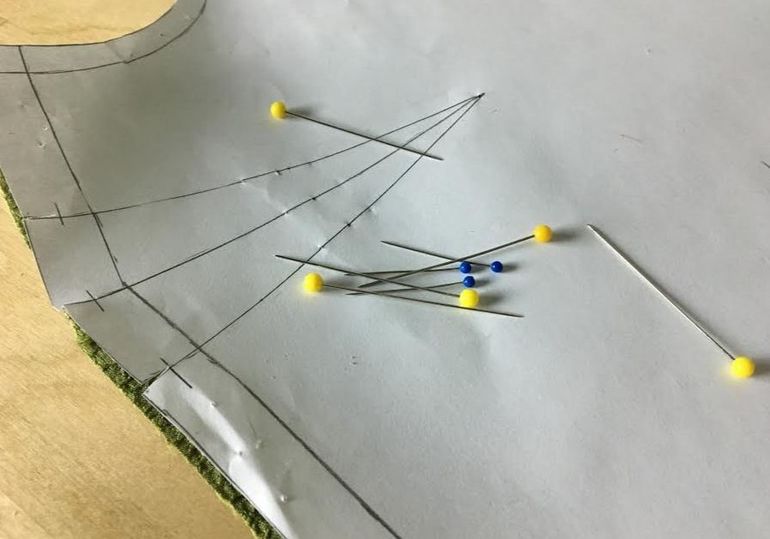
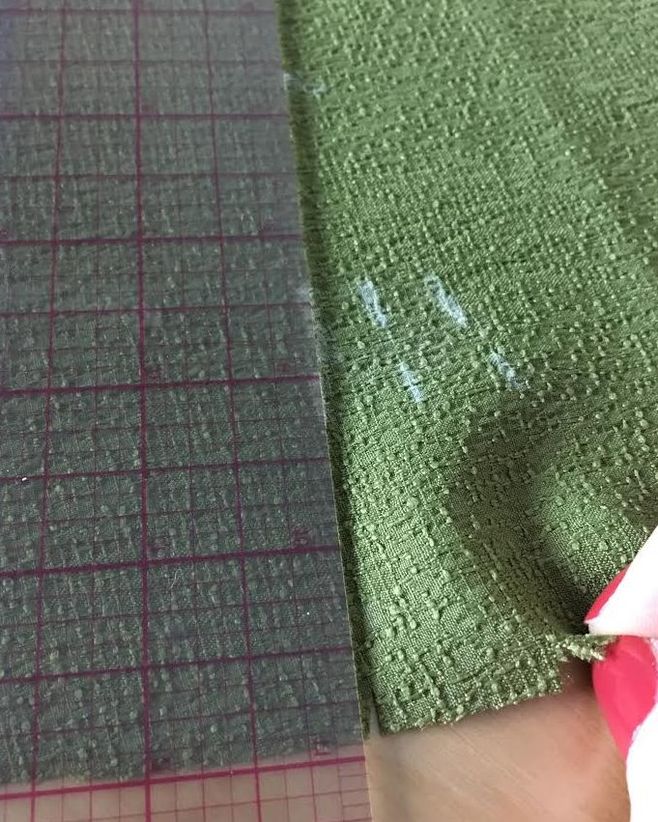
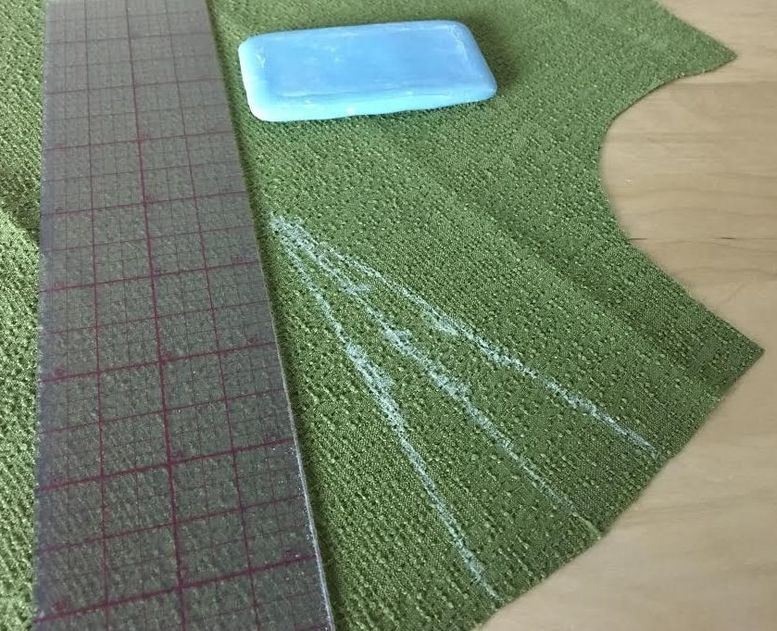
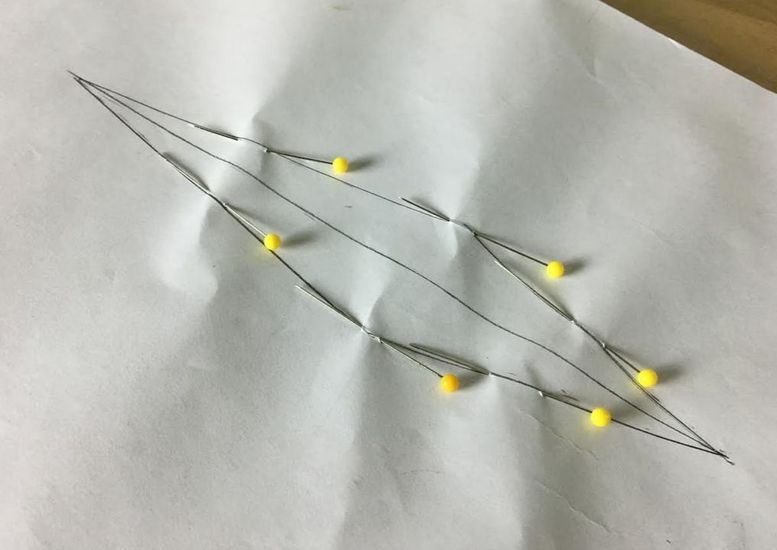
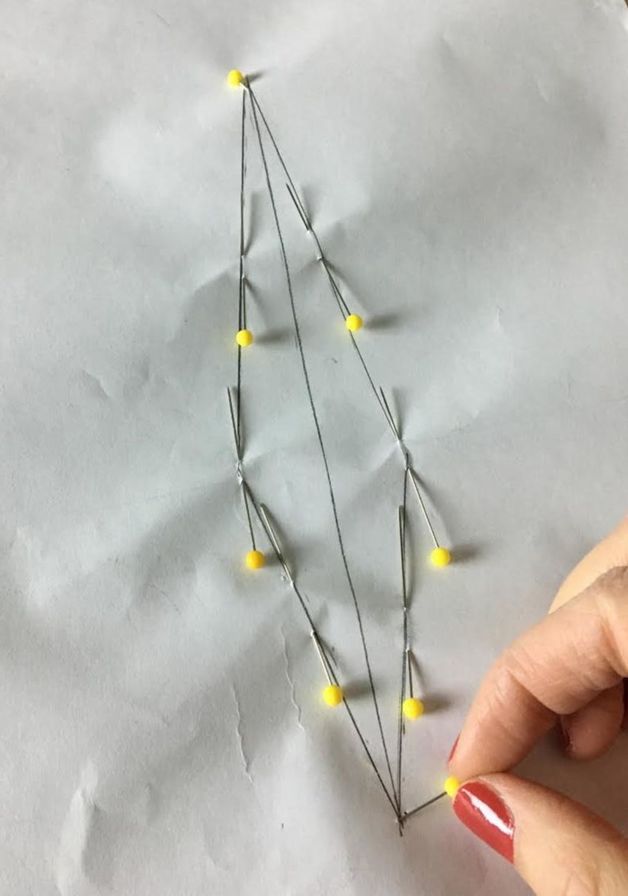
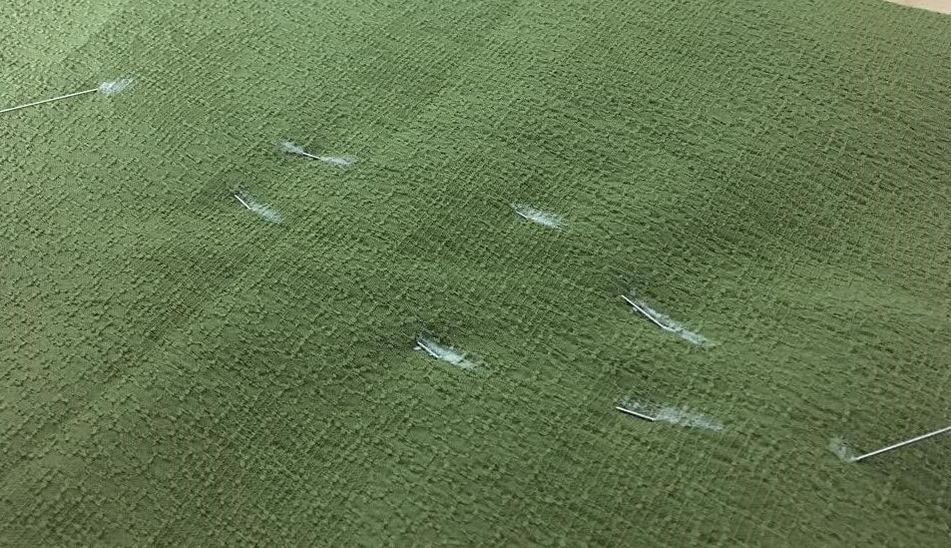
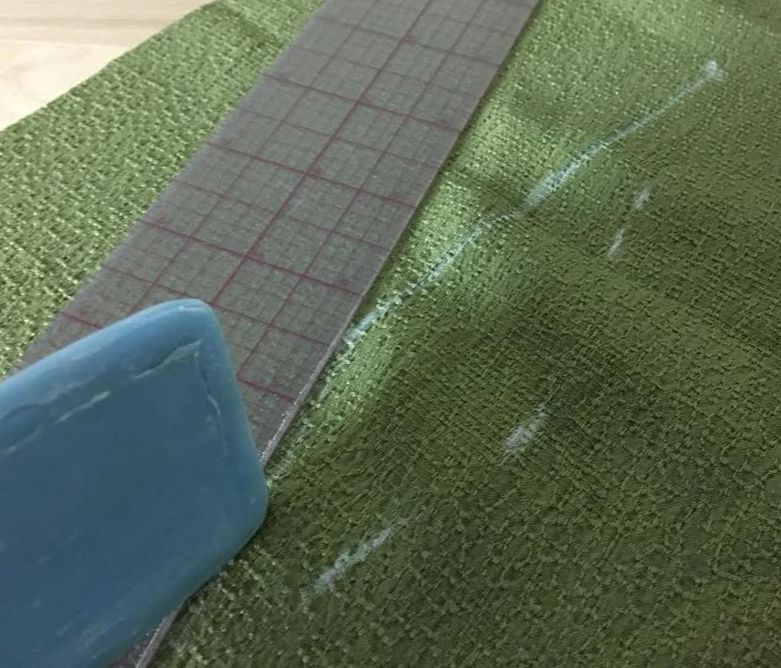
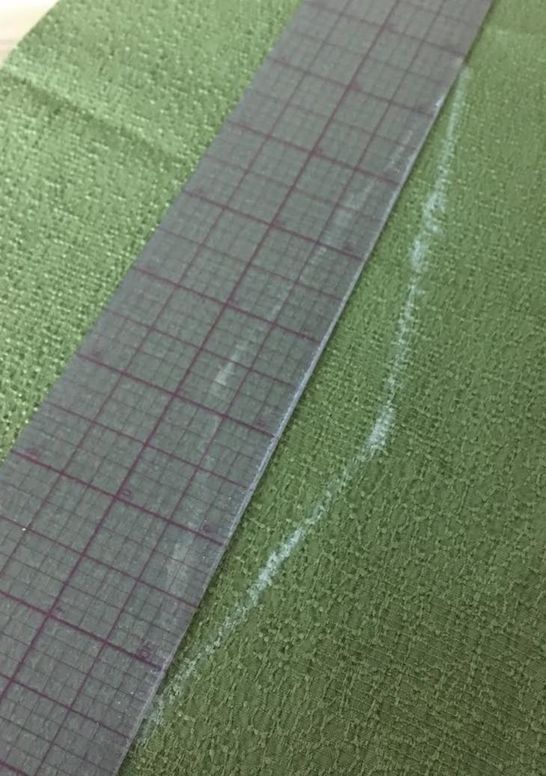
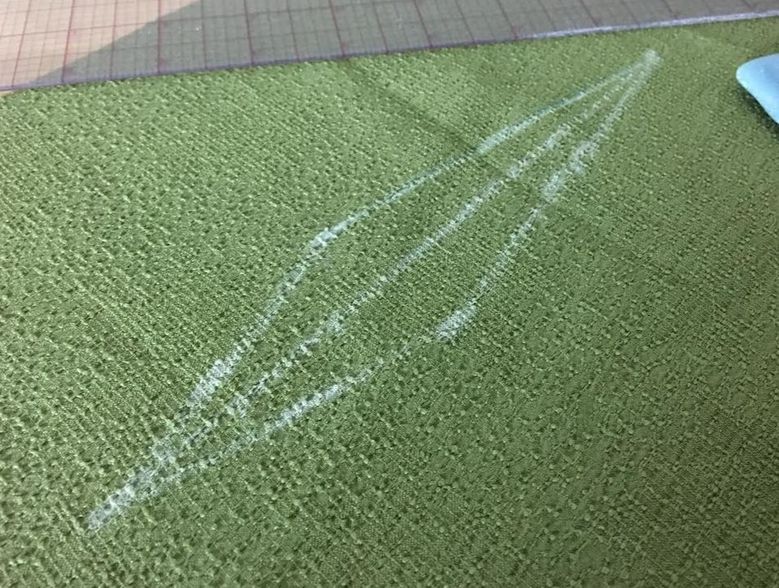
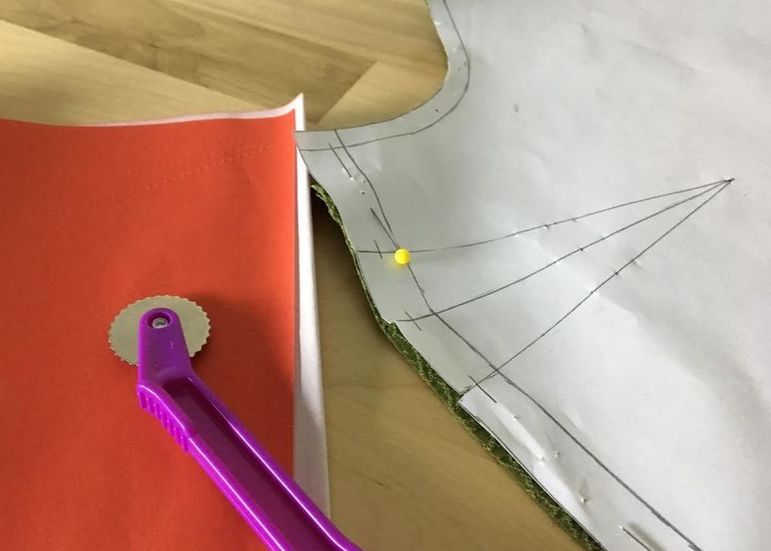
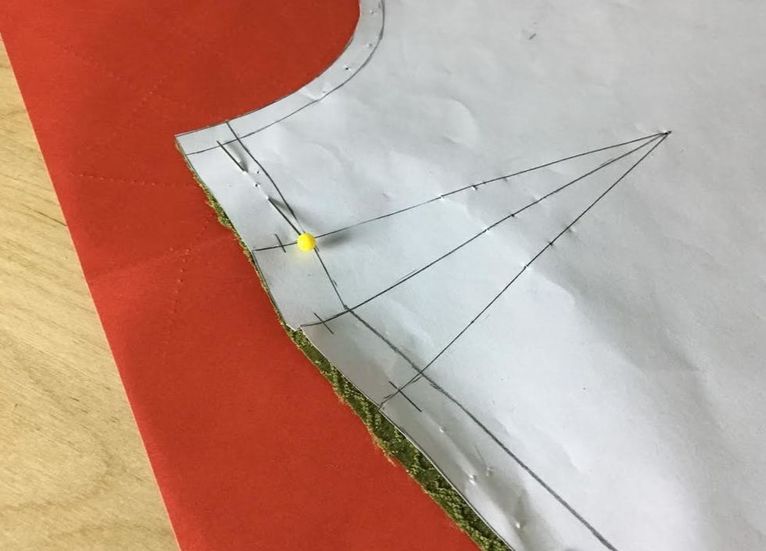
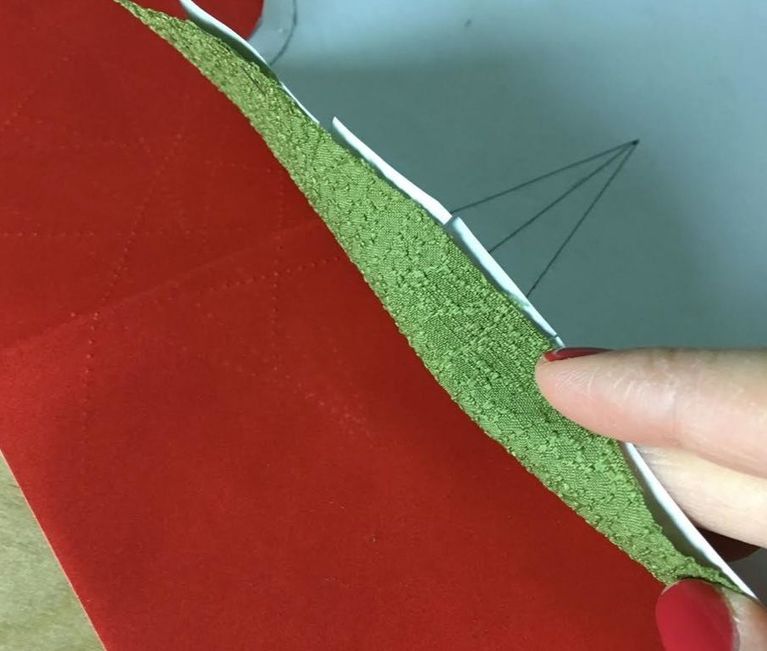
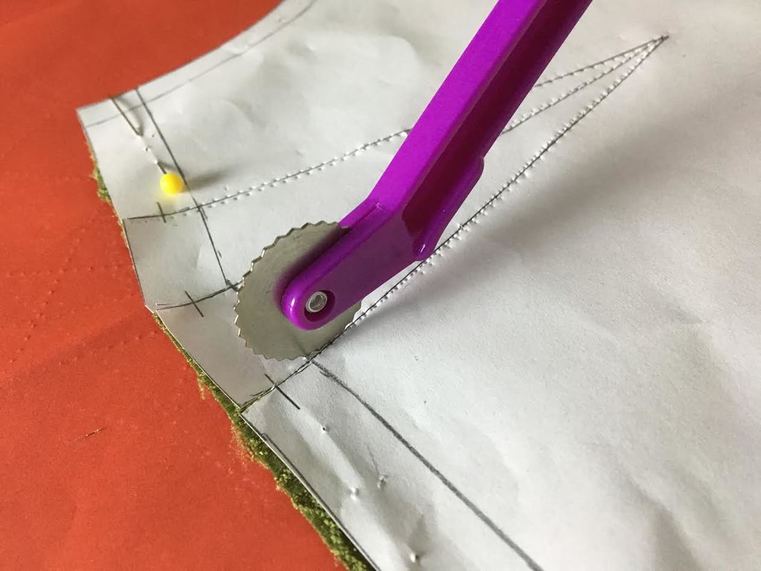
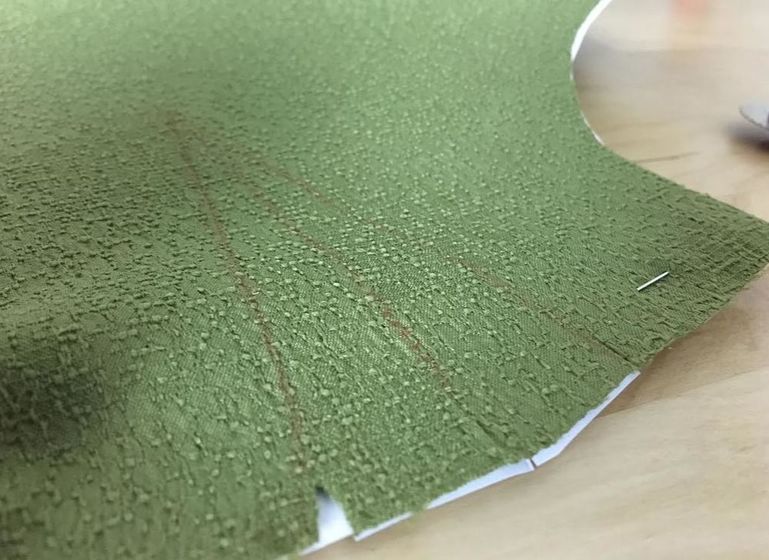
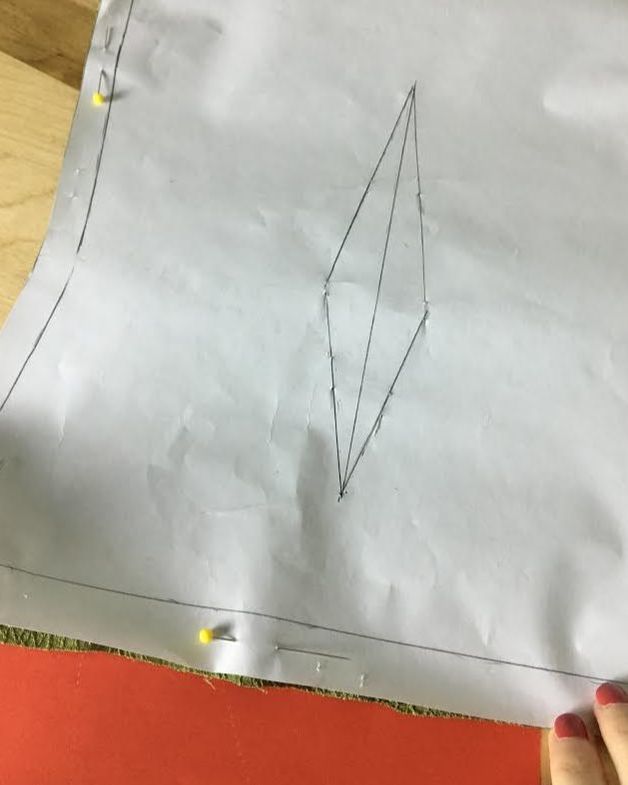
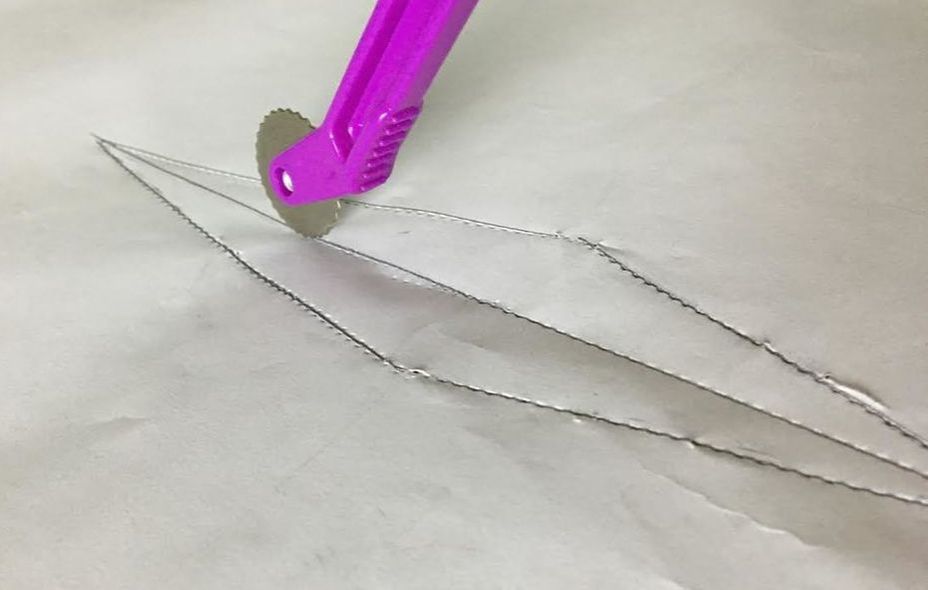
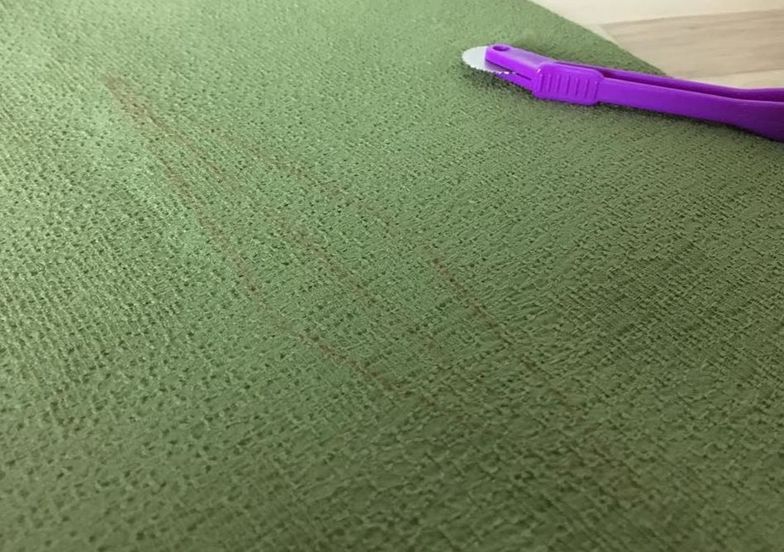
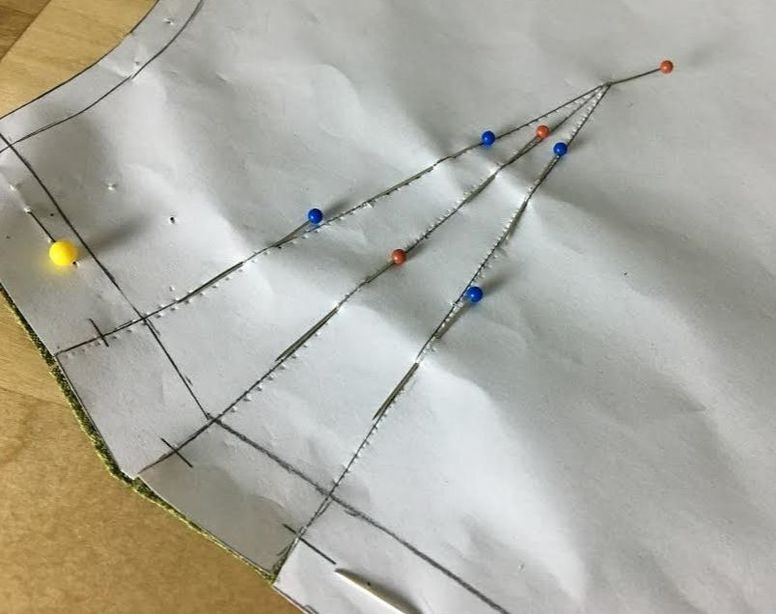
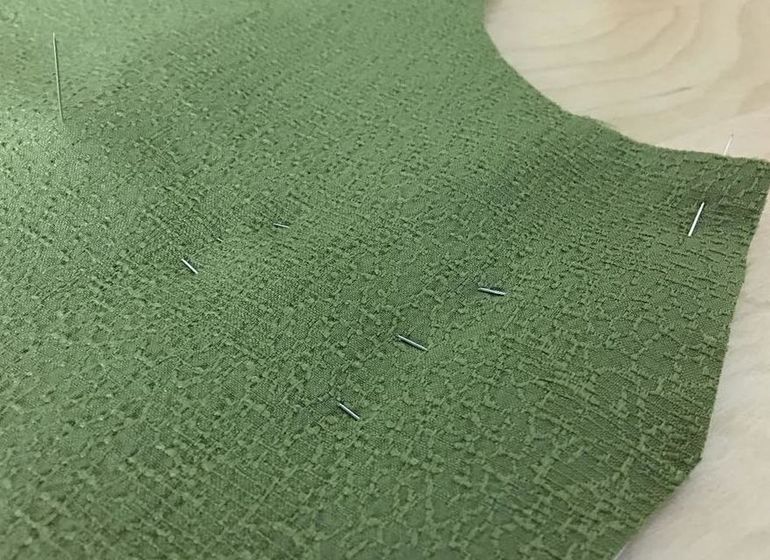
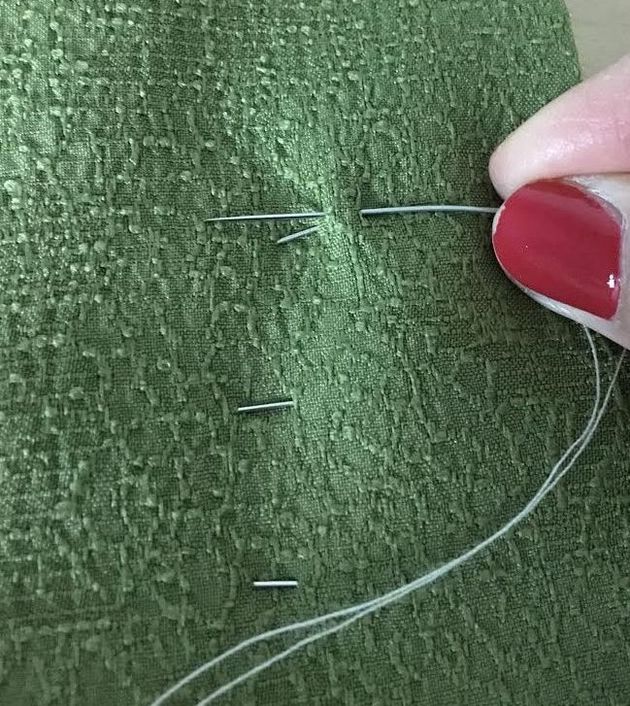
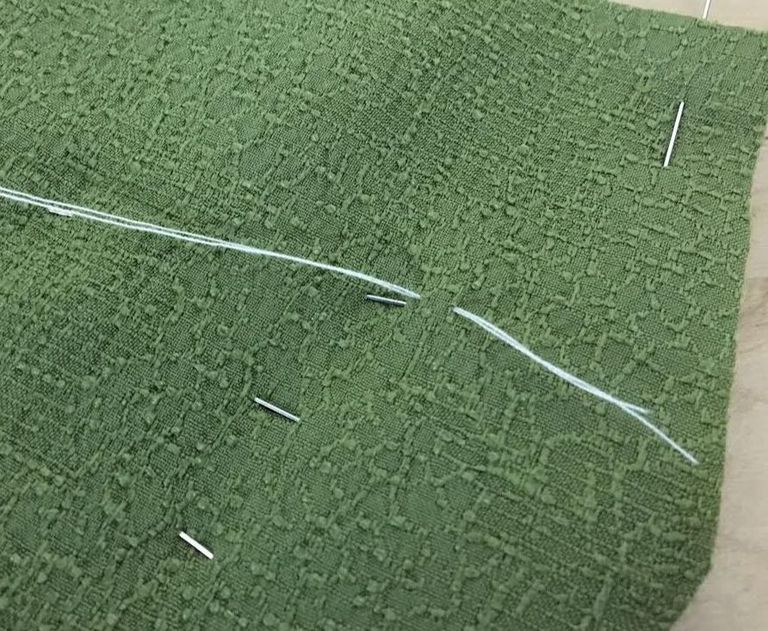
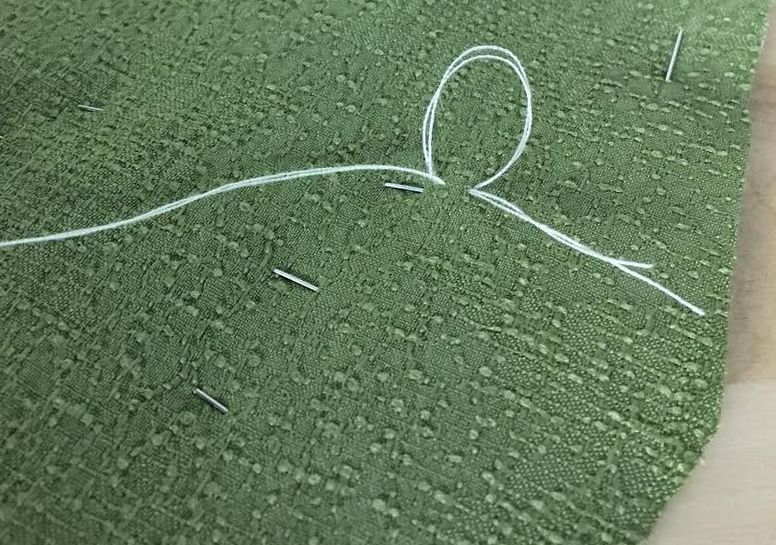
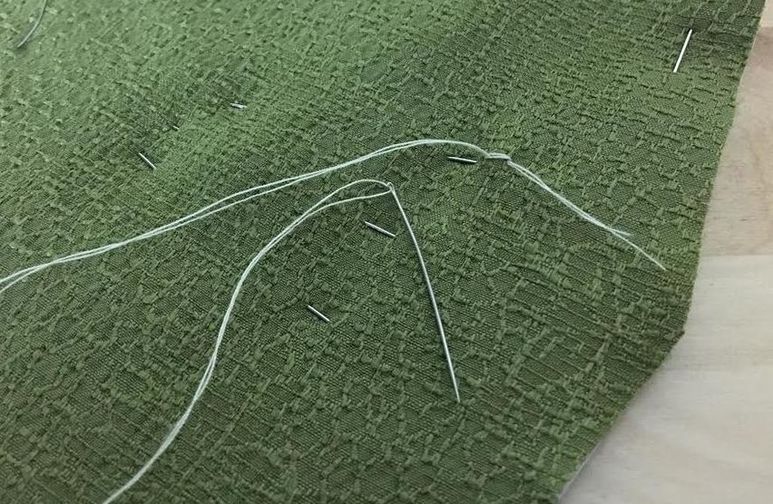
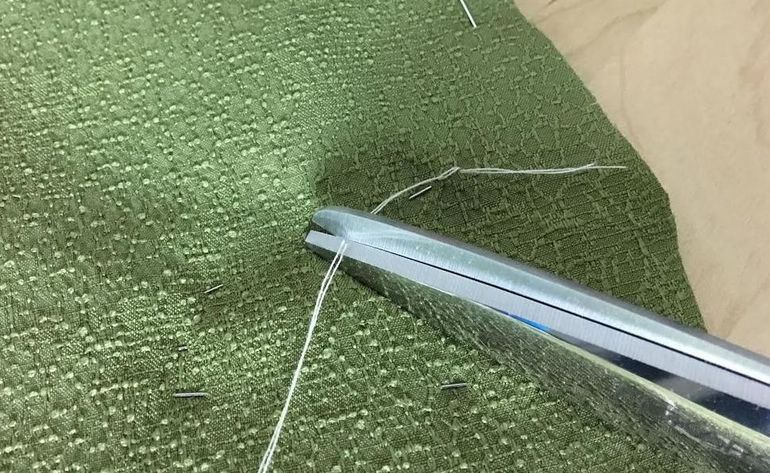
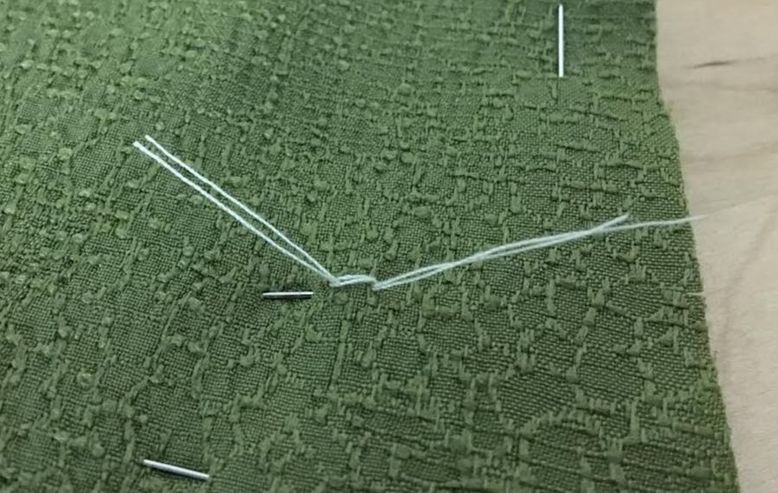
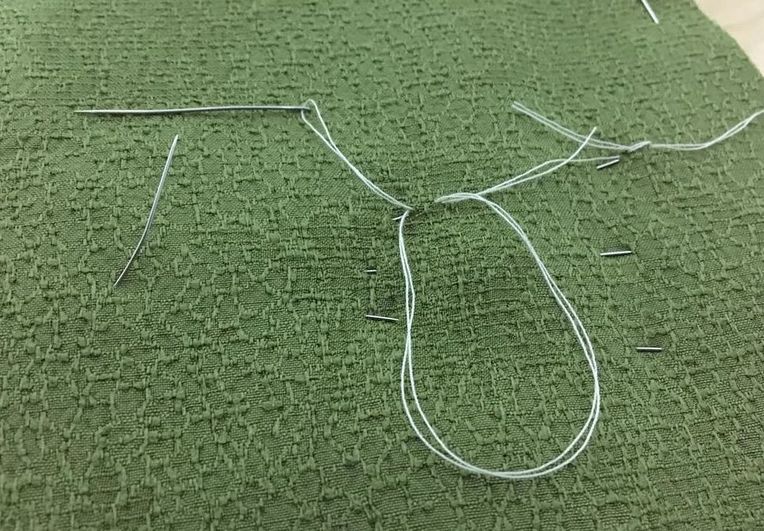
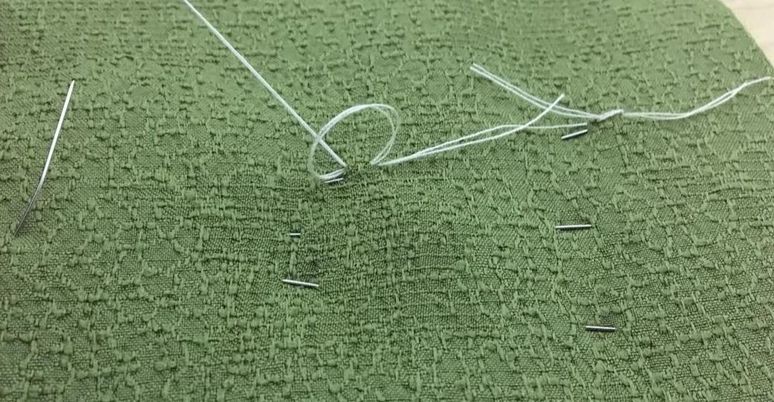
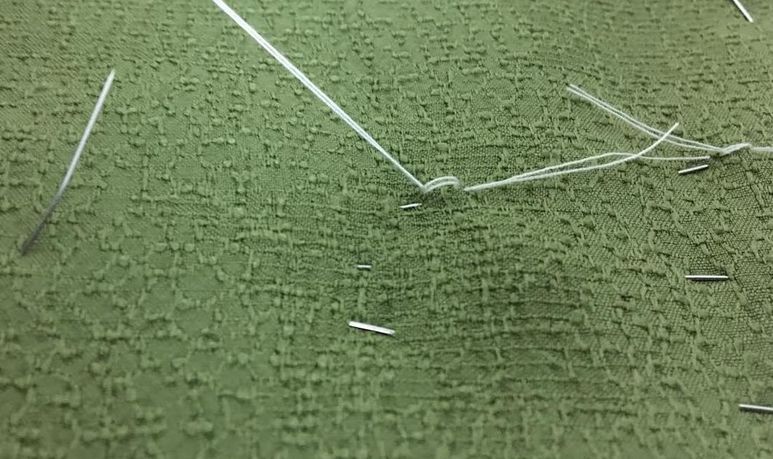
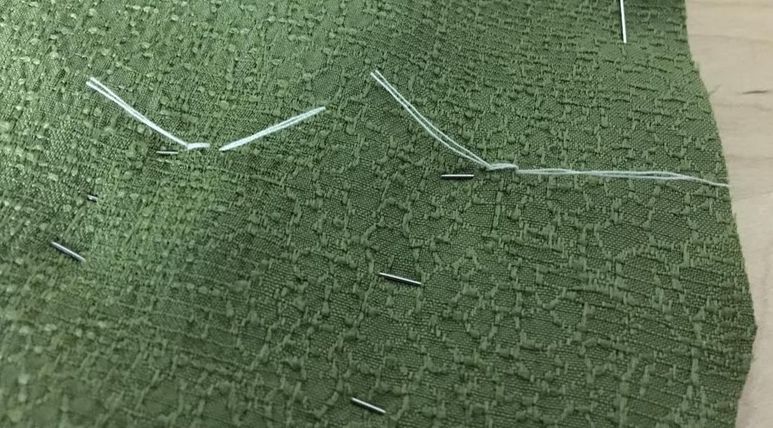
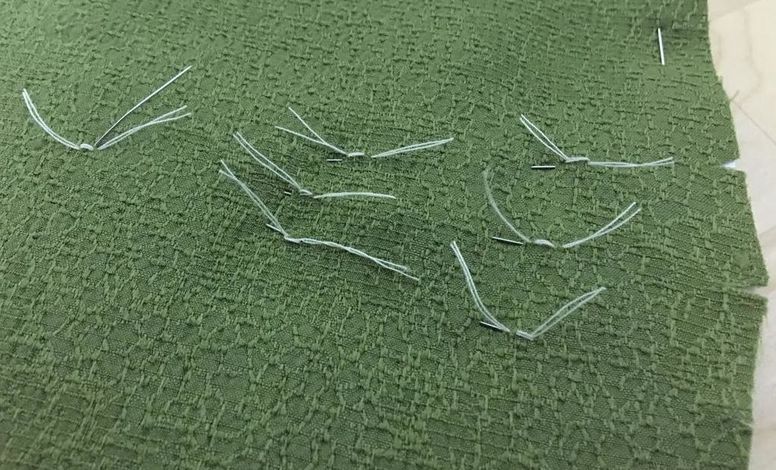
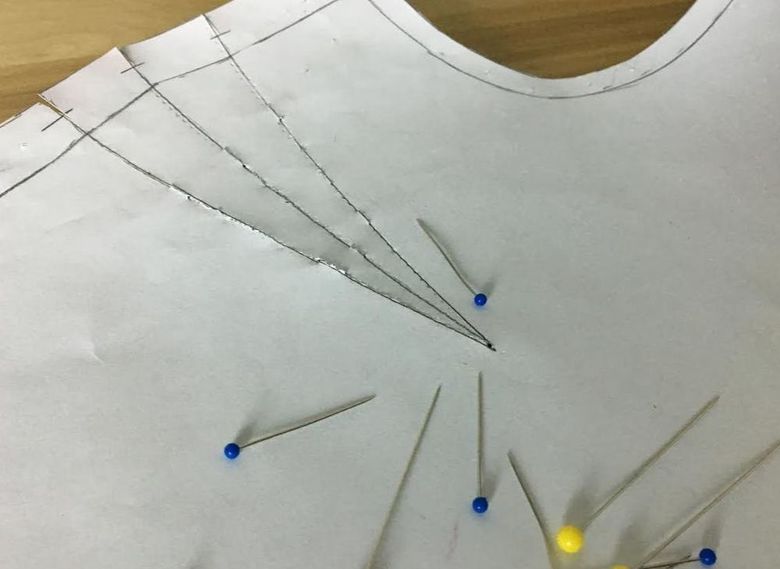
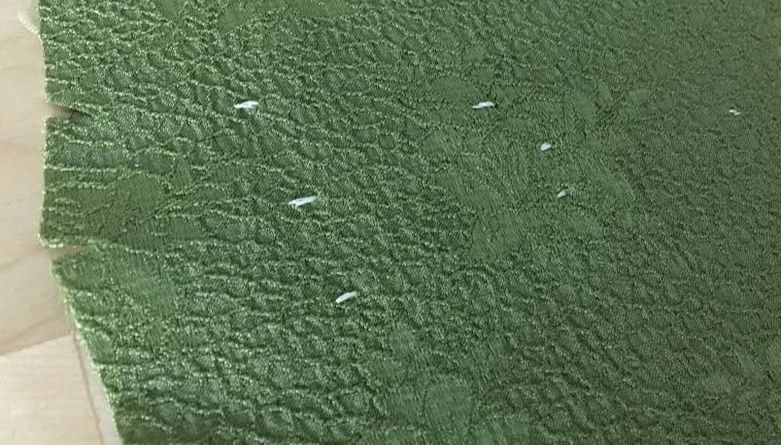
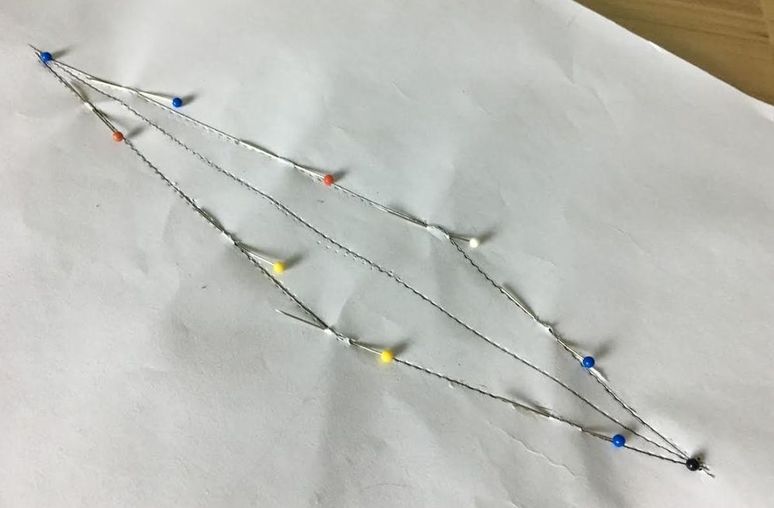
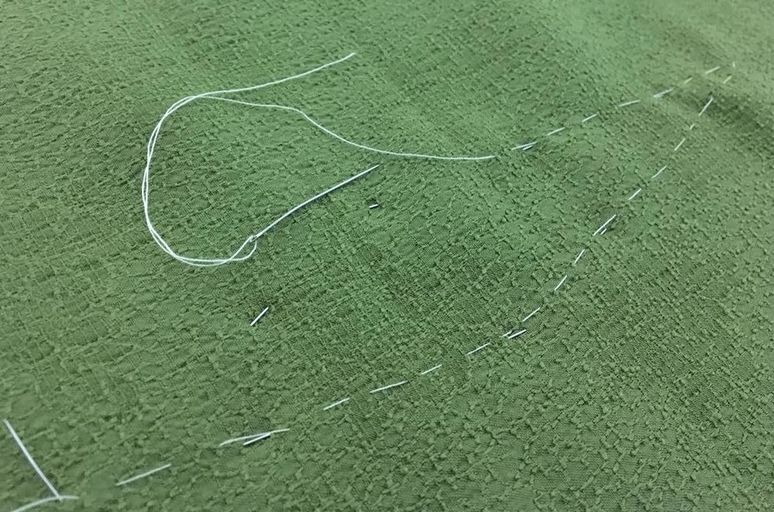
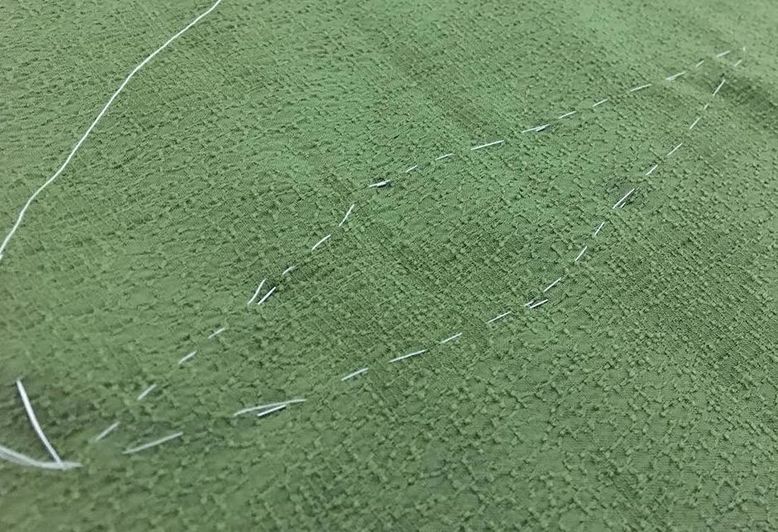
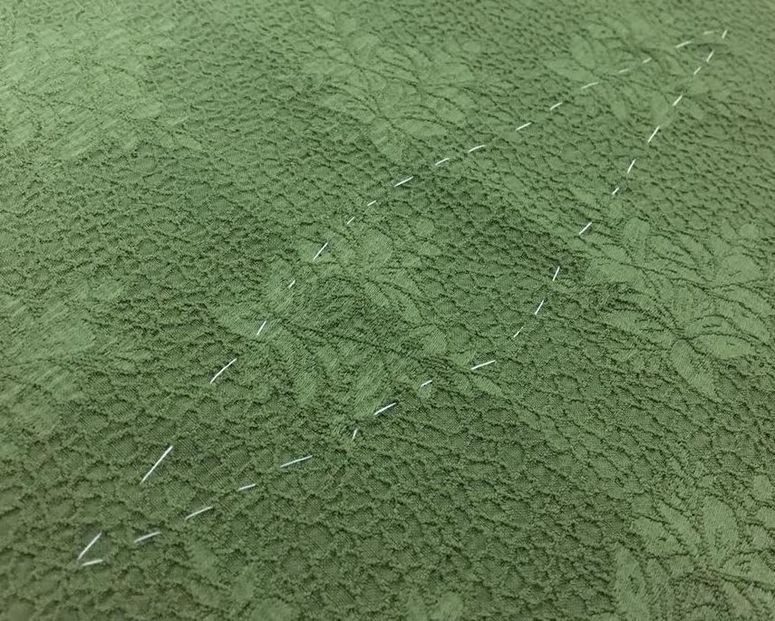
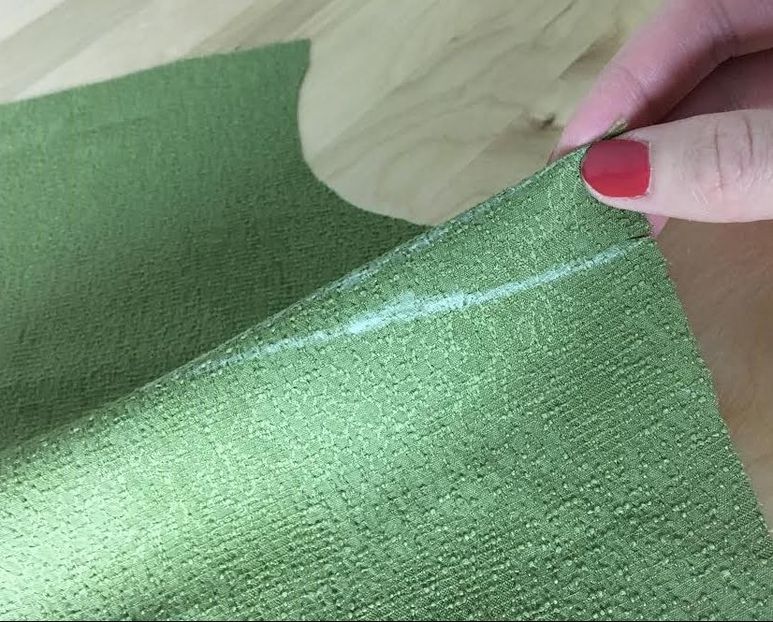
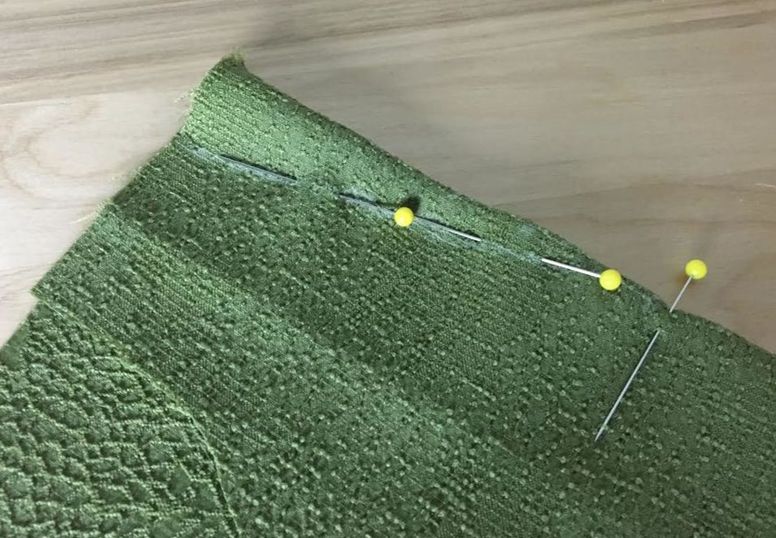
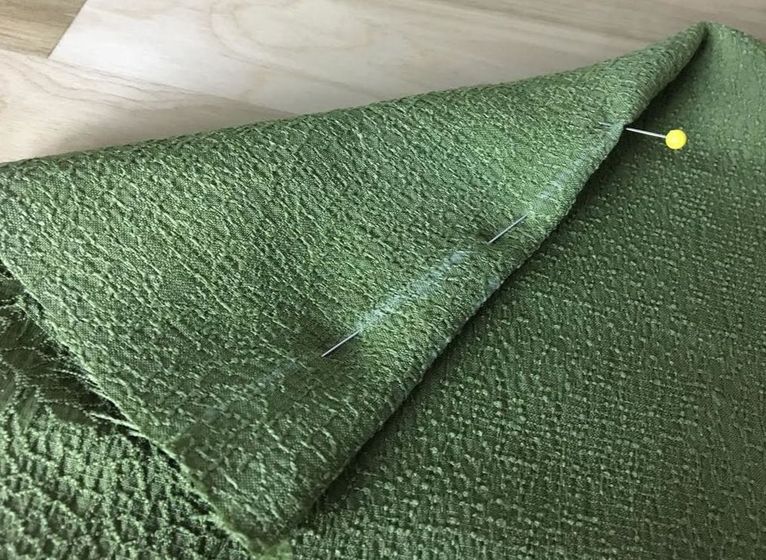
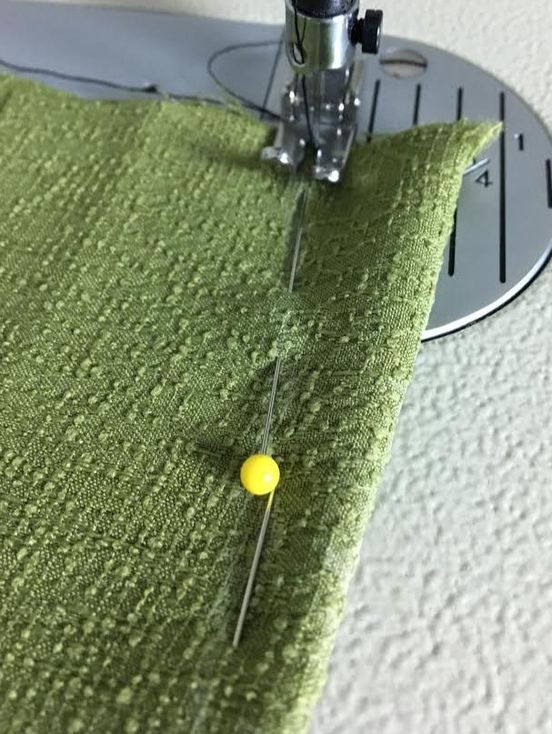
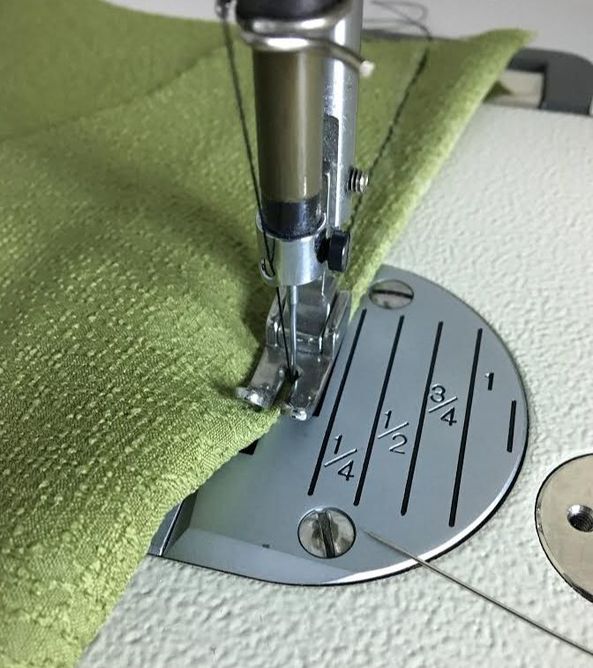
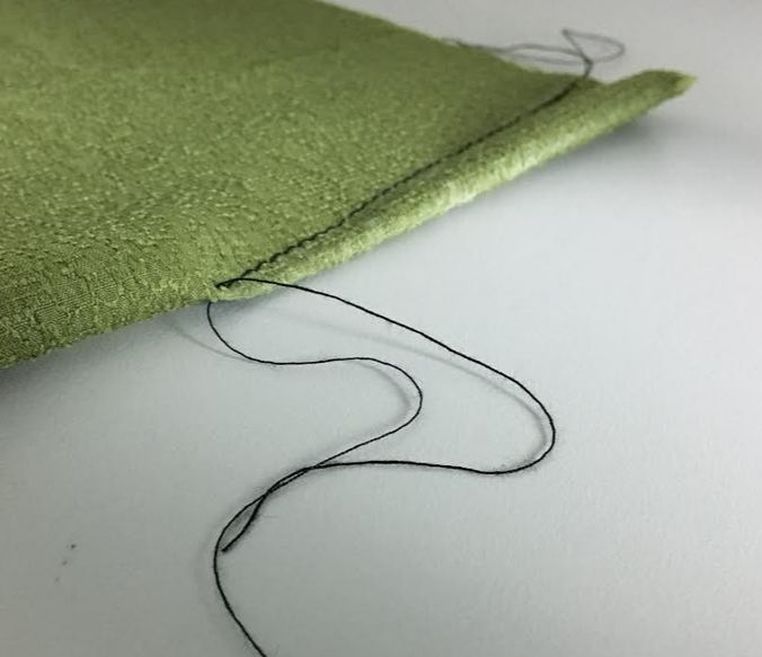
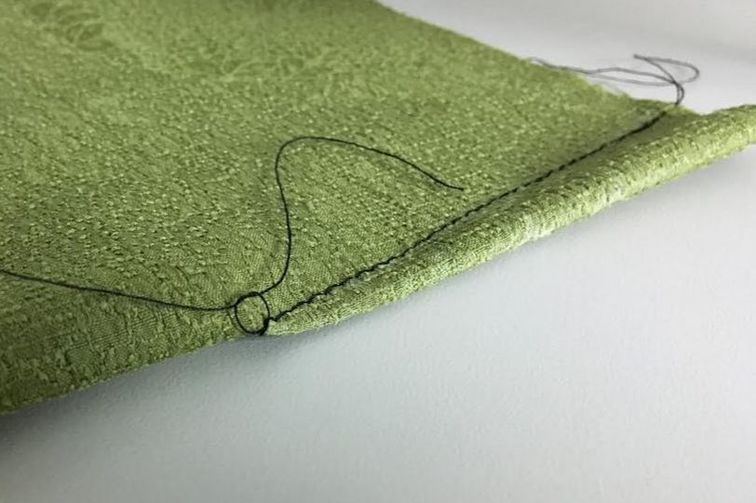
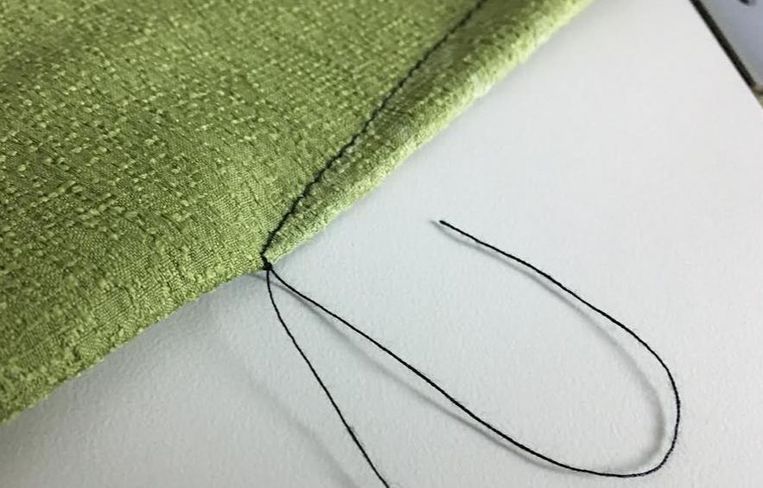
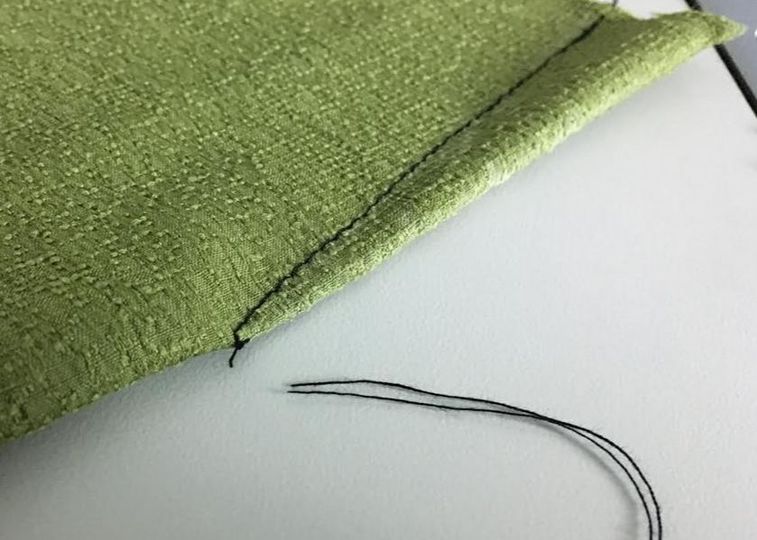
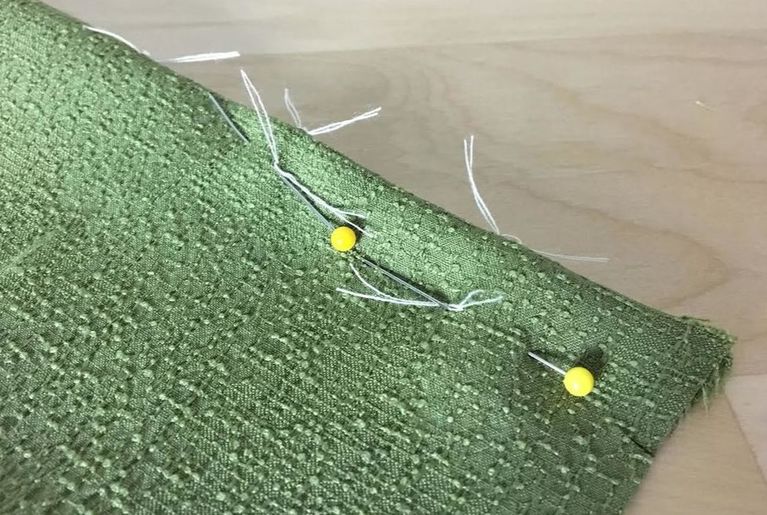
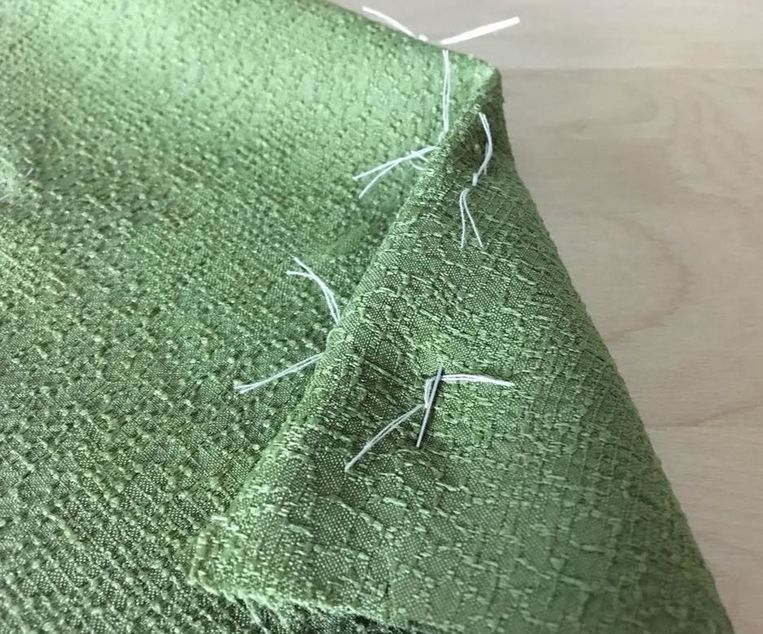
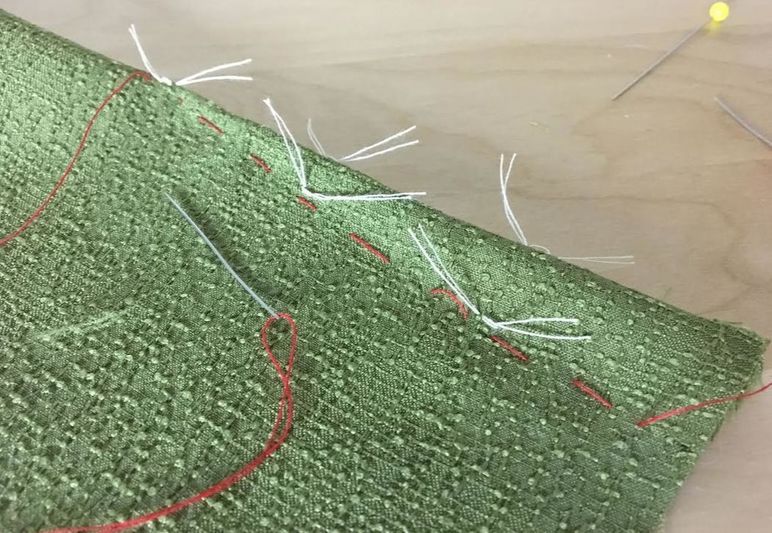
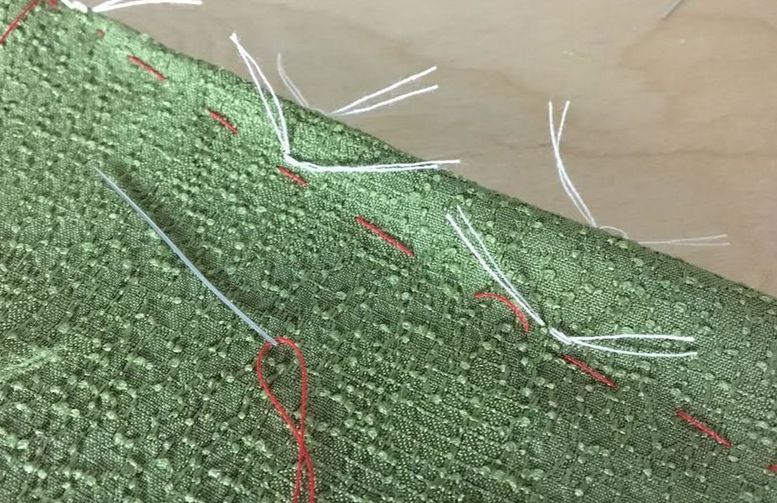
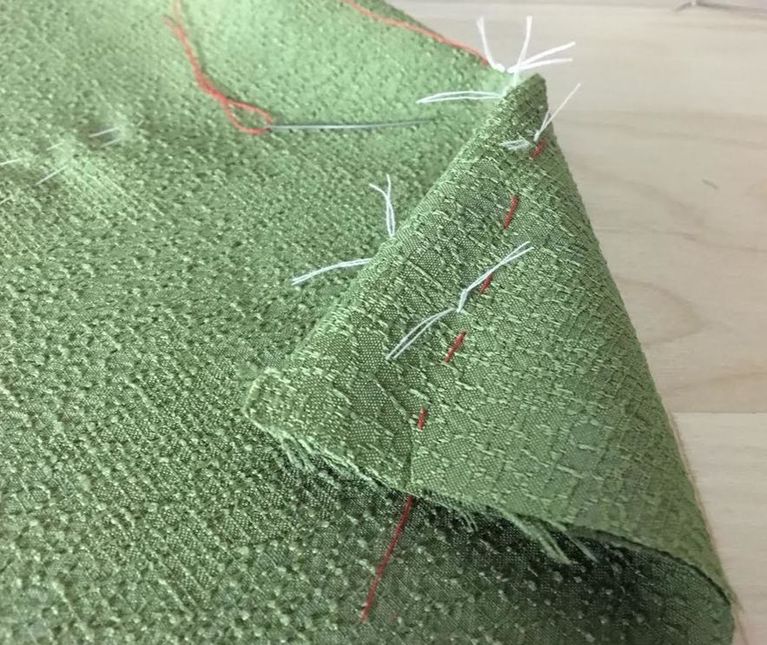
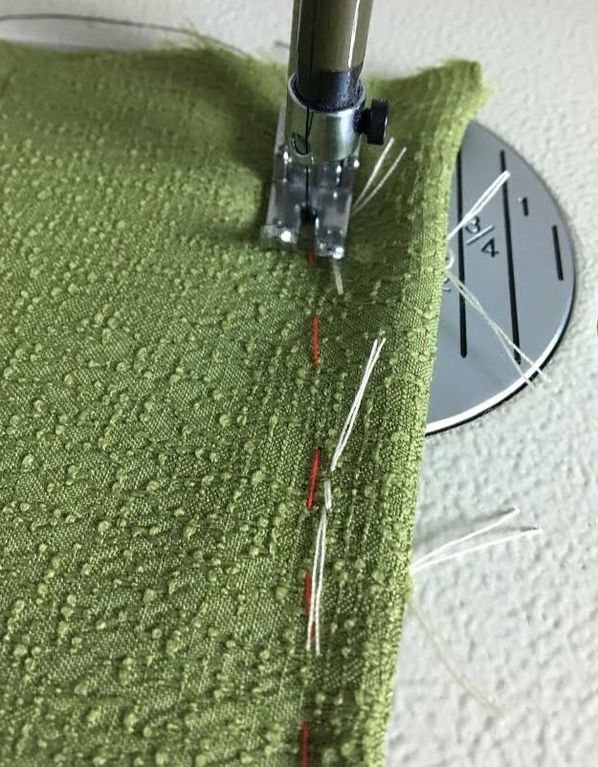
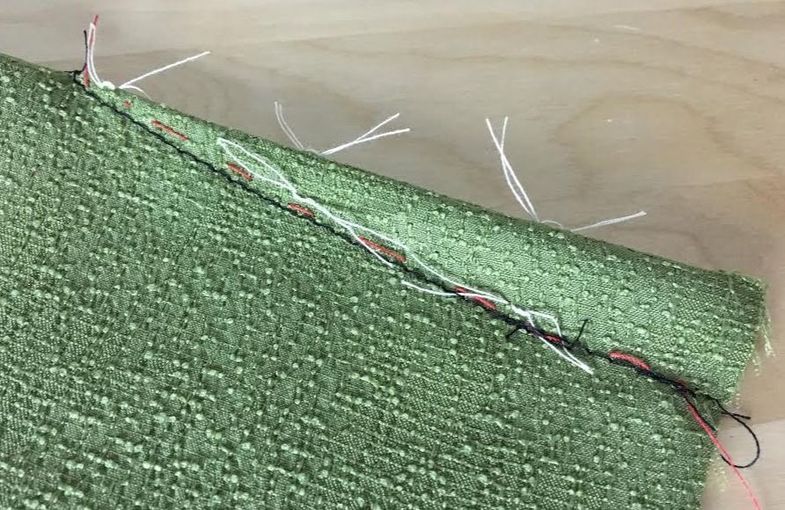
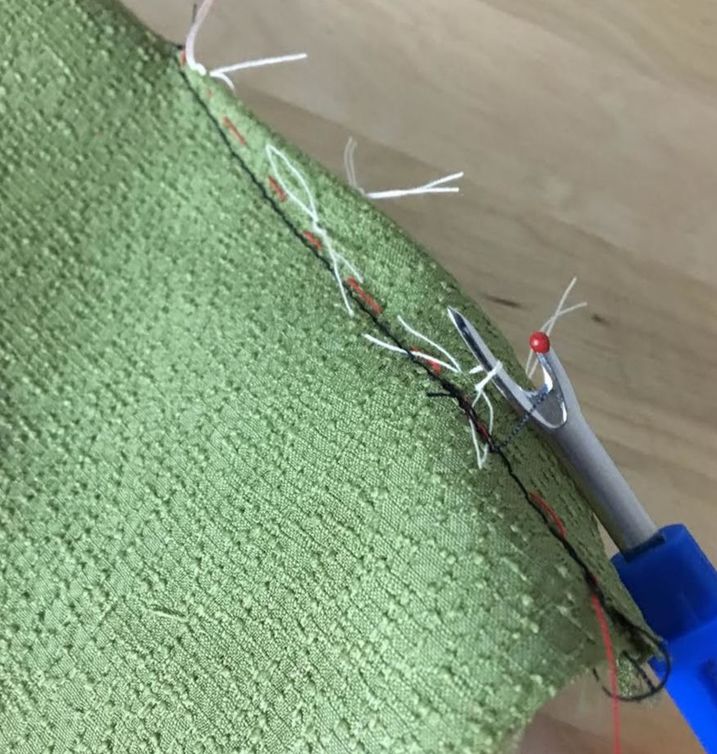
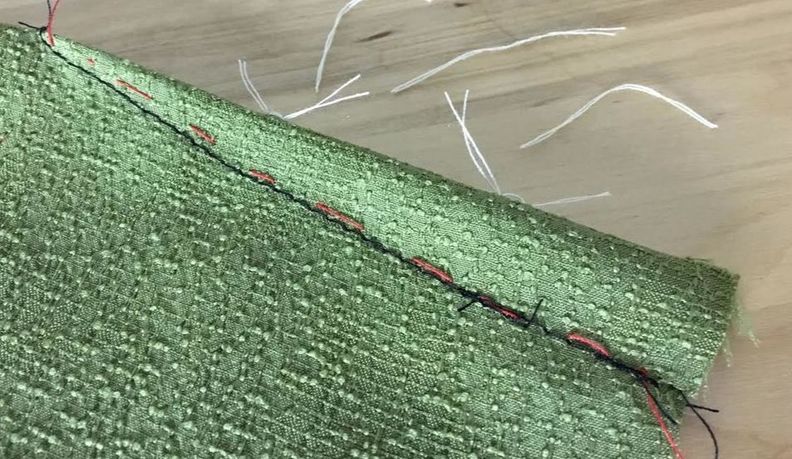
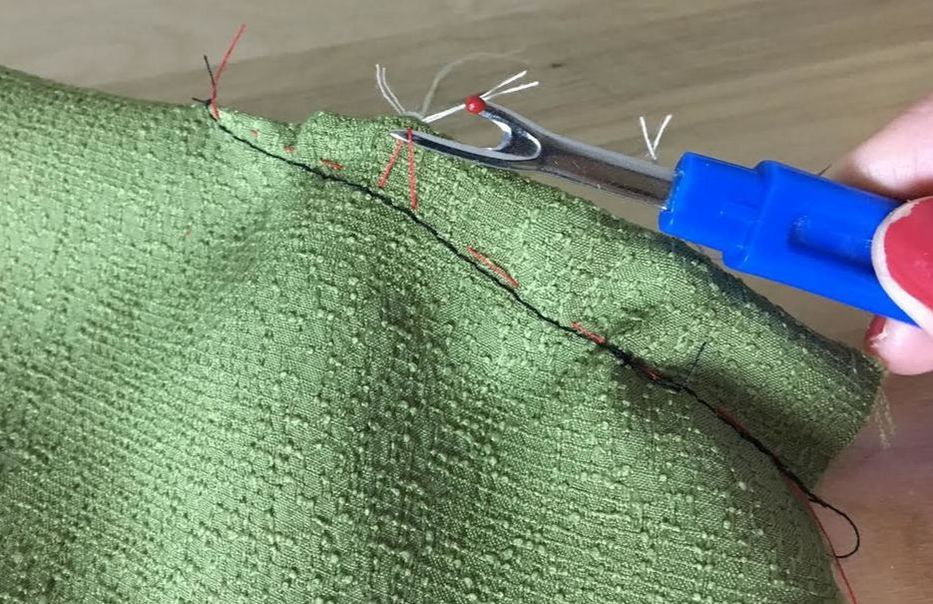
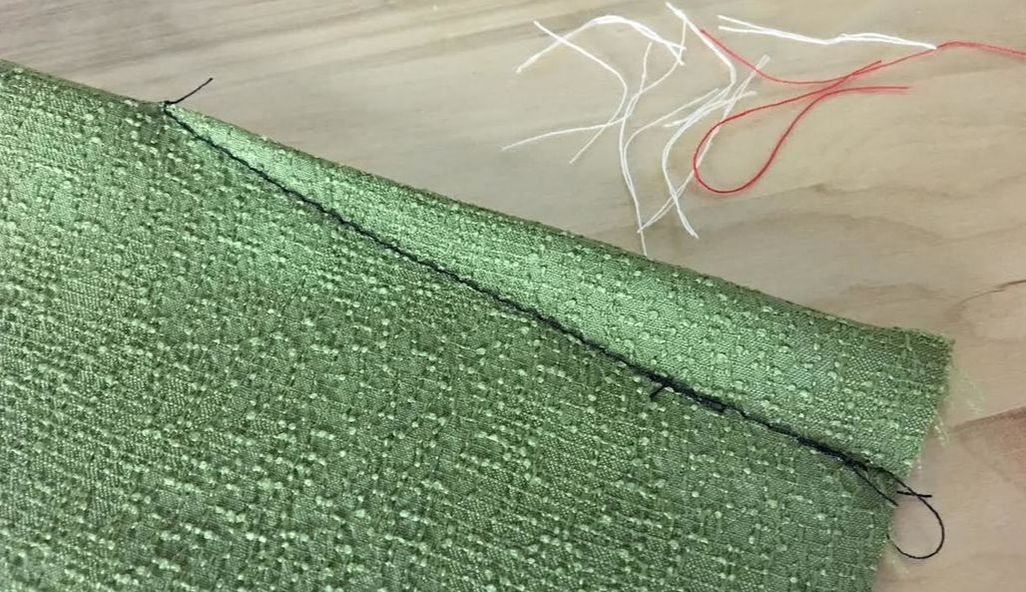
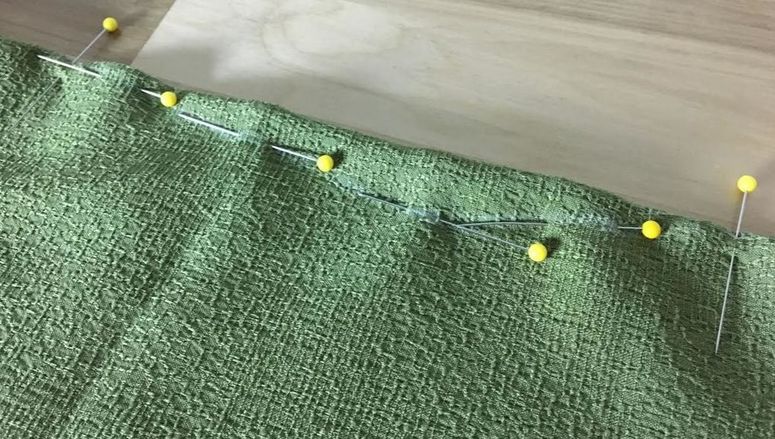
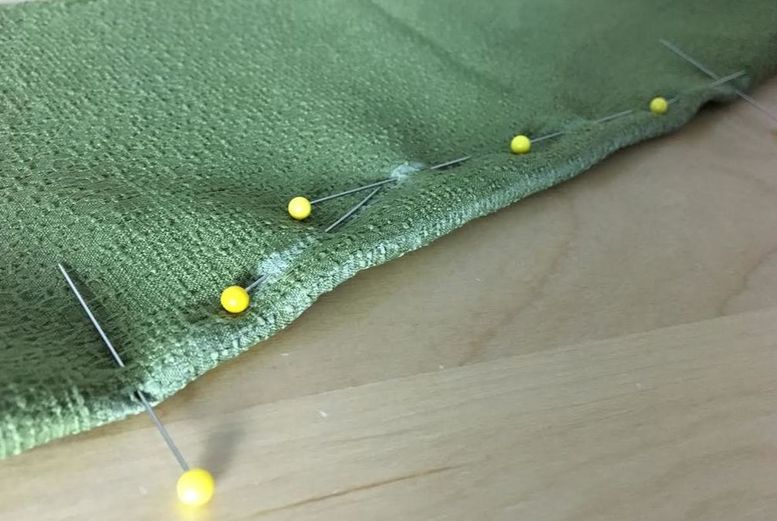
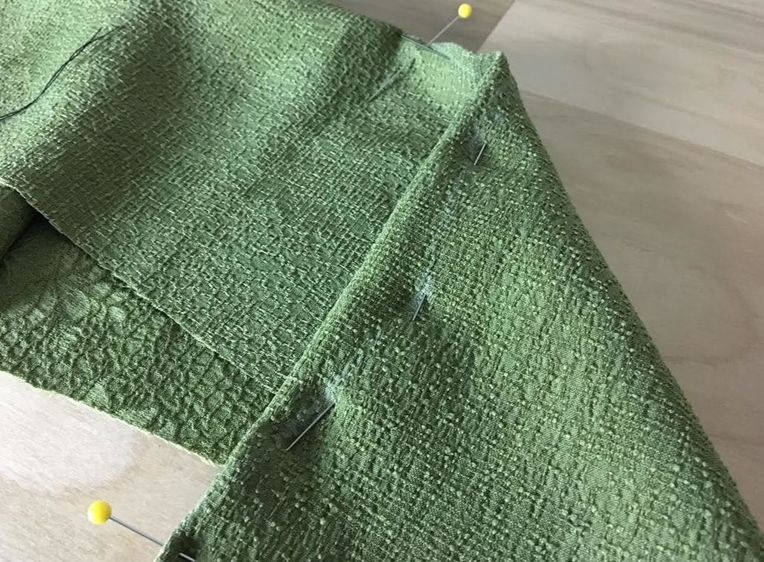
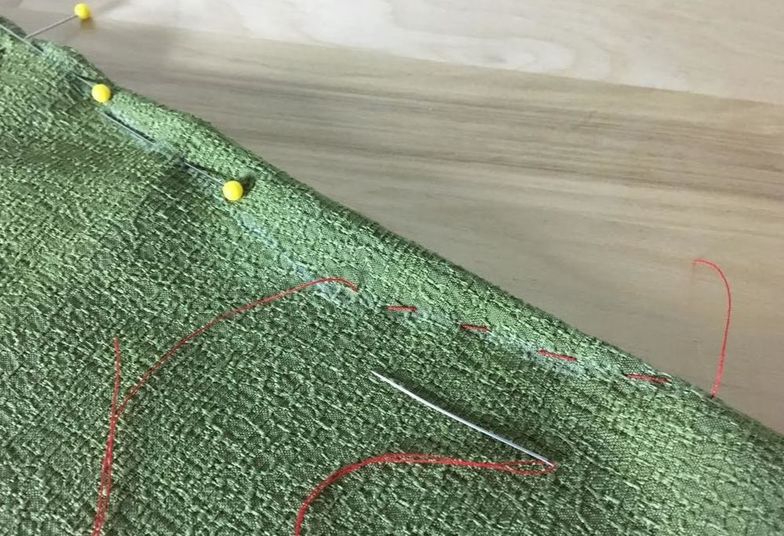
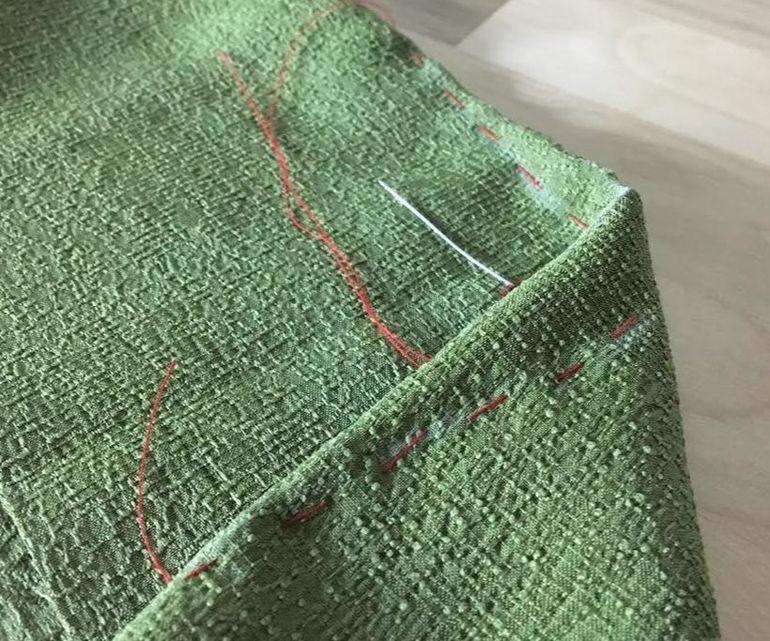
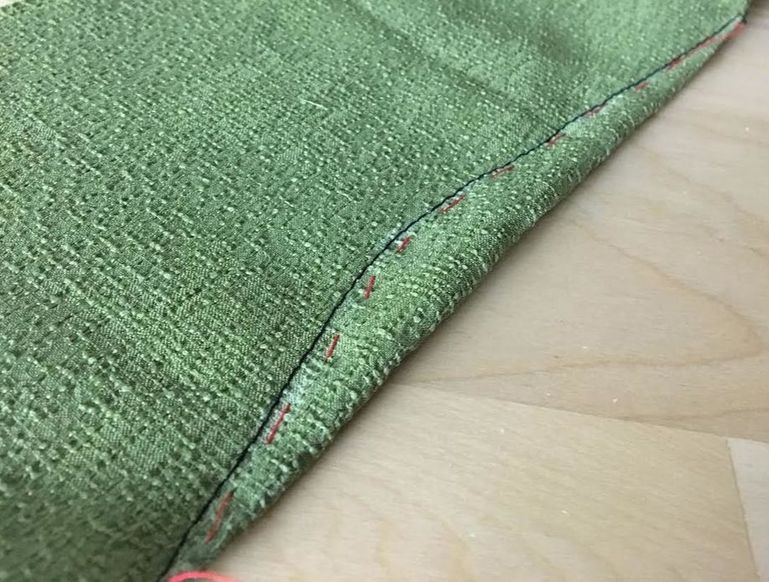
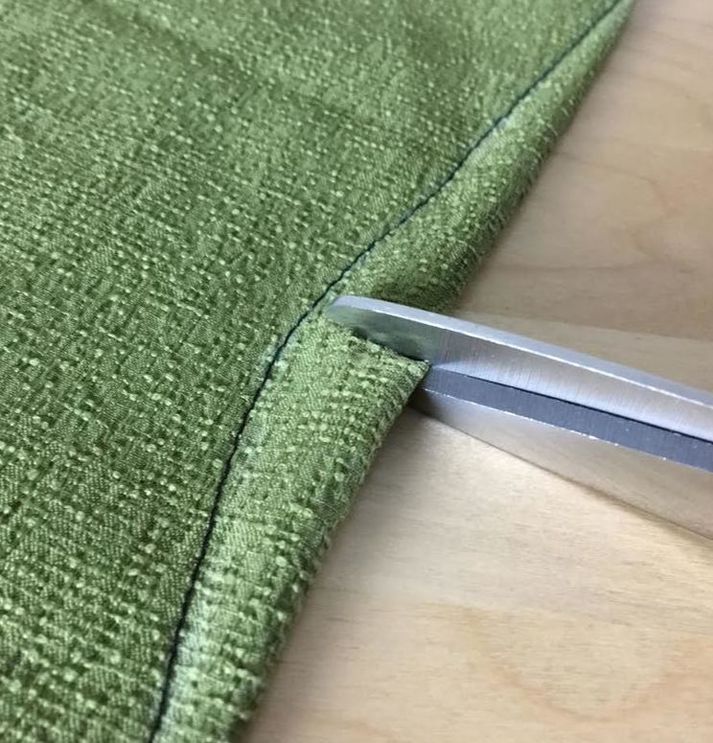
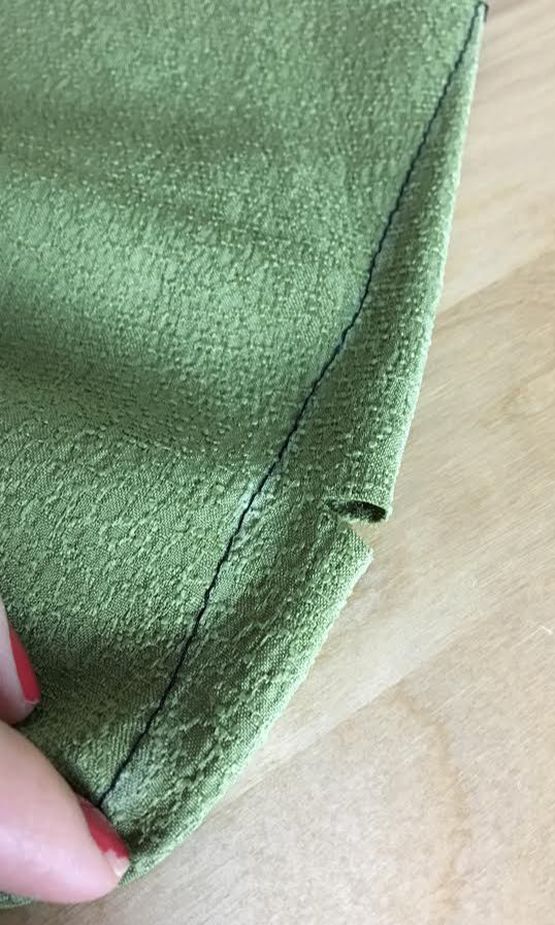
Darts are triangle-like shapes that constitute the most basic, structural element in sewing. You can think of darts as triangular intakes of excess fabric that get shaped according to the contour of the body. It is thanks to darts that we can turn a 2-dimensional element like fabric into a 3-dimensional shape that is able to accommodate the curves and contour of the human form comfortably. A Single Pointed Bust Dart Darts are normally added to the most curved areas of the body, most commonly along the bust, waist, hips and back shoulder. The amount of excess taken into a dart depends on how much shaping and contouring is necessary or the design at the hand. This excess variation also depends on where the dart is located on the garment. For example, darts at the front waist are often thinner and shorter than those at the back waist. This difference has to do with the body's shape and more specificity, the fact that the natural curve of a women's back is more pronounced and has more depth, thus requiring more excess to be take into the dart. Before getting into the dart structure itself, it is important to note that there are two main type of darts: Single pointed Darts and Double Pointed Darts also knows as Contour Darts. Single Pointed Darts Single pointed darts are the most common darts used in dressmaking, and perhaps the first type of drat you will learn as a sewing beginner. A single pointed dart has the triangular shape of an angle featuring two dart lines and a single dart point. These simple darts are most commonly found at the bust area of woven dresses and tops, as well as the waistline of woven separates such as non-stretch pants, skirts and form-fitting not stretch tops. To understand the structure of a single pointed dart it is important to take a look at it's basic constructive elements: A single pointed dart has 2 dart legs, 1 fold line, a 1 vanishing point or dart point. As you'll see in the tutorial steps below, the dart gets folded along the fold line such that both dart legs overlap after which both layers of fabric or sewn together into an triangular shape. The stitch line is applied following the dart leg mark, starting from the wider area of the dart and ending at the dart vanishing point. You will actually get to learn how to do this following the sewing steps provided in this tutorial. Double Pointed Darts Double pointed darts are also traditionally knows as contour darts. These darts are a bit more complicated than single pointed darts but are nevertheless constructed of very similar elements. Just like single pointed darts, double pointed darts have 2 dart legs, 1 fold line, but instead of 1 vanishing point, they have 2 vanishing points (or dart points). Think of a double pointed dart as two single pointed darts (usually different sizes and lengths)that are connected to each other at their widest parts. The horizontal line where the dart lines switch direction corresponds to the waistline on the human form. In other words, if you took a single pointed waistline dart on a blouse and connected it to a single pointed waist dart on a skirt, you would achieve a double pointed dart that gets sewn into a dress. Speaking of teh use of double pointed drats, they are most commonly used on dresses taht don't feature a wasit seamline, blazers, coats and jackets, and other tailoring items etc. To understand the positioning of darts on a garment, it is important to understand the placement of the dart vanishing point. It is the dart point that determines the length and direction of the darts. On the front of a top, the vanishing point of a dart is always directed towards each bust point. Think of it this way: If you were to extend the fold line of a dart, regardless of where it is located on the front of a garment, this line should eventually hit the bust point (also called apex). This rule is important in maintaining the correct balance and fit of a garment on the front. It is also an important concept if you want to learn how to manipulate or draft your own patterns from scratch Dart Sewing and Marking Rules: #1. Always choose the dart transferring method from pattern to fabric according to the type of fabric being used. You do not want to risk damaging the fabric by using the wrong method, or vise versa, not have clear enough marks to see the dart on the fabric. #2. A single pointed drat should always be sewn from the wider part towards the dart point (vanishing point). #3. You may backstitch at the wider end of of the dart to reinforce it, but never at backstitch at the dart vanishing point. #4. Always transfer darts from the sewing pattern onto the wrong side of the fabric. To ensure this is always the case, make sure that when you lay out the fabric for cutting, the right side of the fabric is facing up. How To Align and Cut a Sewing Pattern With a Single Pointed Dart: Before we get into the various options for transferring the dart onto fabric (described below), it is imperative that you understand the logic behind darts and their alignment on fabric. As mentioned in the list of dart rules above, a pattern with a dart should always be placed on the right side of the fabric such that when the dart legs and fold line are transferred to the fabric, the marks are left on the wrong side of the fabric thus keeping the right side of the garment clean. In the image above, the pattern is pinned directly on top of the face of the fabric. Cut carefully along the edged of the dart keeping both the fabric and pinned pattern as flat as possible. You will notice that at the seam allowance, the dart extends outwards into an angular shape. This is necessary excess added to the edge of the dart at the seam allowance so that when the dart is sewn and ironed with the excess pointing down, the side edge of the dart excess aligns comfortably to the edge of the garment's seam allowance. If this little detail is skipped in the patterning process, the dart will pull at the sides resulting in fit and tension issues. Last but not least, the notches! The dart legs and fold line have to be marked with notches at the seam allowance. Before even starting the dart-to-fabric transfer process, you have to transfer each notch. The notches displayed in this tutorial are "T" shaped which requires they be clipped from the outer edge to the vertical dash mark of the "T". Be careful not to cut too far beyond this mark or you risk cutting through the actual seam line of the garment. Don't forget to clip though both the fabric and pattern on top as shown above. It is important that the notches are long enough to be noticeable on the edge of the seam allowance but not so long as to damage the actual seamline of the garment. Note: You patterns might feature triangle notches as opposed to "T" shaped notches. The concept is exactly the same, except that triangle notches require to be cut into the shape of triangular wedges as opposed to simple clips. The fabric has been cut. The notches are transferred. Now it's time to transfer the actual drat lines onto the wrong side of the fabric. Below are 4 marking transfer techniques you can use. Pins and Tailor's Chalk (or Fabric Pencil) Transfer Method This is a fast, simple method that works on most fabrics. This versatile technique works just as well on smooth-surface fabrics as it does for more textured ones. It requires you to actually draw the dart lines which allows for more control over line thickness and quantity. In fact, this might become your preferred method for transferring darts to fabric due to its convenience and simplicity. What you'll need: For this technique you will need a ruler, regular sewing pins, tailor's chalk or a fabric marking pencil. You can actually use a small piece of dry bar soap as a substitute for tailor's chalk, especially if the fabric is of darker color. To learn more sewing hacks like the soap trick, check out this blog post: 6 Sewing Hacks For The Creative Seamstress. 1. Place pins horizontally through both the paper pattern and the fabric layer underneath, right on top of the two dart legs and the fold line as shown above. Make sure the pins are inserted such that they are clearly visible on the wrong side of the fabric when the fabric and sewing pattern are flipped over. 2. Insert a pin through the paper pattern and fabric right at the dart point as shown above. Remember that at this point, the pattern is still pinned to the fabric- do not remove the pins until the next step. 3. Using your tailors chalk (or fabric pencil/dry soap) mark with a dash line at each pin placement. Follow the pin guideline as accurately as possible. To transfer the vanishing point, add a small dot mark right where the pin intersects the fabric as shown above. Now that you have a general guideline of the dart elements marked on the wrong side of the fabric, it is safe to remove the pins and separate the pattern from the fabric. 4. Now that the pins and pattern have been removed, you have a flatter surface to finalize the dart legs and fold line. To do this, position your ruler from the dart point to each seam allowance notch, making sure the dash marks align with the ruler's edge as shown. Complete the lines using tailors chalk and the ruler. The same technique is used on double pointed darts except that it requires a few additional pins and marks to be made. Insert pins horizontally directly on top of each dart line through both the pattern and fabric layer underneath. It is especially important that pins are inserted at the outer most sides of the dart (widest section)- this is the transitional area where the double pointed dart switches direction. Insert a pin at each dart point through both pattern and fabric layers as shown above. Turn the pattern and fabric over (the pattern should still be pinned to the fabric at this point) and use your tailor's chalk to mark at each visible pin thus transferring the shape of the double pointed dart on the wrong side of the fabric as shown. Remove all the pins and separate the pattern from the fabric. Next, use the ruler and tailor's chalk to mark from one vanishing dart point to the outer most side and from this side to the second vanishing dart point. Repeat the same steps on the other side to complete the dart. To make the sewing process easier, draw the fold line by connecting the drat points with a straight line using your ruler and tabor's chalk. The double pointed dart is now ready to sew! We'll show you how to do this a bit later in this tutorial. Tracing Paper and Tracing Wheel Transfer Method This is perhaps the best transfer method for sewing beginners. It does require some extra tools, but it is simple and easy to accomplish. Keep in mind that transfer methods should be chosen based on fabric type. That being said, not all fabric surfaces work well with tracing paper. Some fabrics that are very textured or have a darker combination of colors may not show the tracing paper/tracing wheel marks on their surface. Vise versa, a sheer, delicate fabric may become damaged from the tracing paper dye and harshness of the tracing wheel edges. The tracing paper-tracing wheel technique works bets on opaque, sturdy fabrics that have a smoother surface and feature a lighter color. What you'll need: Fabric tracing paper, tracing wheel, and pins. Make sure the tracing paper used has water soluble ink designed for fabric. Don't use graphite tracing paper. Fabric tracing paper can be found at your local fabric/craft store. 1. After cutting the fabric according to the pattern, place both layers of fabric and pattern (prior to removing the pins) right on top of the ink-side of the tracing paper. The ink-side of the tracing paper should be touching the wrong side of the fabric. Make sure that the tracing paper covers the entire surface of the dart. 2. Using your tracing wheel, trace right on top of the dart legs and the fold line as shown. You won't have to press too hard during this process depending on the fabric. However, if the fabric is a bit more textured you may have to apply a bit more force with your tracing wheel or go over each line an additional time. Each transferred line should lead back to each notch at the seam allowance and connect into the vanishing point of the dart. This tells you that the pattern has been transferred accurately without erroneous shifting in the process. Follow the same alignment for a double pointed dart, making sure that the tracing paper is facing ink-up and covers the entire surface of the dart on the back. Trace each individual line from one dart point to the other. Don't forget to also transfer the fold line located in the middle as this will be very helpful later in the sewing process. Tailor's Tacks Transfer Method: Used For Delicate Fabrics As you might have guessed by the name, tailor's tacks are a technique used commonly in tailoring. This method is bit more time consuming and requires a little hand stitching. You might be thinking- why would I need to learn this technique if I know the other two described above? This is an extremely important transfer method used when working with very delicate fabrics that risk being damaged if marked with any type of fabric chalk or ink. The best example is in the case of very fine, transparent lace that not only risks being damaged by the use of a tracing wheel, ink transfer marks can also show on the face side of the garment. On the other hand, tailors chalk or tracing paper doesn't always transfer/show on the surface of certain types of fabrics, especially if they feature a highly shinny finish or are extremely textured. Learning how to sew tailor's tacks is an important technique not only for transferring darts but also marking other surface lines on a fabric that cannot withstand the conventional transfer methods described above. 1. Insert pins horizontally through both pattern and fabric right on top of the dart legs and fold line. Insert two sets of of pins on each line as this will give you more precise guidelines for applying the tailor's tacks. Insert a pin through the paper and fabric right at the vanishing point as shown. 2. Flip the fabric and pattern on the other side such that the wrong side of the fabric is facing you. You'll notice that the extra pins help in better defining the shape of the dart. 3. Double the thread on a hand sewing needle. Insert the needle horizontally at about 1/4" length through the fabric layer only, right next to each visible pin. After inserting the pin through the fabric, leave about 3/4"-1" of thread at the end as shown above. 4. Insert the needle back through where the first insertion was made and pull the thread to apply a single stitch. This single stitch is called a tack. It marks the fabric gently without damaging it. 5. To complete the tailor's tack, cut the other end of the thread at 3/4"-length" One tailor's tack is now complete, but you're not done yet! 6. Repeat this stitching process next to each additional pin mark on the fabric. Don't forget- you should be stitching only though the layer of the fabric and not the pattern! As you get more practice, you'll find that these tacks are very easy and fast to apply and provide a really stable and efficient way to mark the fabric without damaging it. As you apply the tacks, you may find yourself trimming the thread ends shorter if they appear too long and get in the way of sewing. This is perfectly OK to do as long as you don't cut them so short that it weakens the structure of the tacks causing them to come undone. Continue applying all the tailor's tacks next to each pin mark until each pin has a tack adjacent to it as shown. Don't forget about the dart vanishing point! Looking at the tacks above, you should be able clearly define the shape of the dart including both its dart legs and fold line. Once all the tacks are applied, you can unpin and separate the pattern from the fabric. If you look on the face side of the fabric (once the pattern is removed), you'll notice the little dash stitches left by the tailor's tacks in the back. They will be removed once the dart is permanently sewn (see steps below). Uneven Temporary Hand Basting Stitch Transfer Method Similarly to tailor's tacks, transferring a dart with an uneven basting stitch works well on fabrics that cannot withstand conventional transfer methods. It follow similar steps to the tailor's tack technique. Below, we'll show you this method on a double pointed (contour) dart. If you want to learn more about basting, check out this tutorial: What Is Basting? How And When To Use It. 1. Apply pins horizontally through both pattern and fabric along the each dart leg (and fold line). Insert a pin at each one of the dart points. It is very important that you mark the outer-most area of each dart leg as shown above. If you are a sewing beginner, use the image above as a pin-placement guide. 2. Flip the pattern and fabric on the fabric side such that the wrong side of the fabric is facing you. Starting at one of the dart points, add uneven hand basting following each pin mark in a linear fashion. Try to apply the basting as straight as possible making sure to follow the pin marks accurately. Once all the basting is applied, the stitches should reflect the exact replica of the double pointed dart on the pattern. In this example, we did not transfer the fold line. You can do this very easily by pinning through the pattern and fabric along the fold line and transferring this line to the fabric using the same bating method described above. You may now separate the pattern from the paper. The image above displays a view of the basting stitches on the face of the fabric. They look identical on both sides. These stitches will be removed once the double pointed dart is permanently stitched on the sewing machine. How To Sew Single Pointed Darts Now that you know all the methods for transferring darts, it is only natural that you also learn how to sew them! We went over some dart rules above and now you'll get to actually apply some of these concepts in the sewing process. It's important to remember that the excess of the dart should always be on the wrong side of the garment so be careful when you fold the dart in preparation for stitching. To reiterate an important rule from above, always sew starting at the widest are of the dart towards the vanishing point. Before getting started, make sure the 3 seam allowance notches are transferred from pattern to fabric. You'll get to know these concepts much better following the dart sewing steps below, so let's get started: 1. Fold the dart along the dart fold line (middle line) making sure both dart leg notches are matching. The fold line notch should correspond to the fold itself. The dart legs should overlap directly on top of each other. 2. Pin directly on top of the dart leg through both layers of fabric. Apply the pins horizontally along the dart leg to keep the fold in place. At the dart vanishing point, it helps to insert a pin perpendicular to the fold as this will give it more stability during sewing. Make sure that the pins are placed directly on top of the dart leg on both sides of the fabric as shown above. If the dart legs don't match and overlap, shift them up or down until they match perfectly and re-pin. 3. Starting a the widest part of the dart (where the notches are located) begin stitching directly on top of the dart leg removing each pin as you approach it. Stitch smoothly and gradually into the vanishing point as shown. Do not backstitch on your sewing machine at the dart vanishing point as this can case tension, wrinkles and tacks on the face side of the garment. 4. After stitching, cut the sewing machine threads such that they are long enough to be able to hand tie at the dart vanishing point. Since backstitching at the dart vanishing point should not be used, you need an option for locking the stitch in place that wont damage the fabric or the structure of the dart. A simple hand-knot is the best option to use in this instance. To do so, simply hand-knot the threads together 2-3 times to lock them in place. Trim the thread ends at about 1/4" from the knot as shown. Be careful not to cut too close to the knot as this can cause it to come undone. While you should not backstitch at the dart vanishing point, you are more than welcome to backstitch at the beginning of your stitch where the widest part of the dart is. This is good practice for locking the sticth-line thus keeping the dart fully closed and stable during the sewing process. Sewing A Dart That Is Marked With Tailor's Tacks: 1. Fold the darts using the middle line of tailors tacks as a guide- these middle tacks will serve as the dart fold line guide. Pin the dart horizontally from notches to the dart vanishing point tack, using the dart leg tailor tacks as a guide. Sewing a dart marked with tailor's tacks will require you to use a bit of imagination piecing together the dart leg lines visually using the direction of the tacks. Make sure that the dart leg tailor tacks are overlapping and matched perfectly such that when the pins are inserted, each pin aligns with the tailor tacks on both fabric layers as shown above. 2. If you don't have a lot of experience sewing darts, it might be difficult to stitch the dart straight on the sewing machine, especially in this case where the dart lacks a guide line. For that reason, it is good practice that until you feel perfectly comfortable sewing darts, you hand baste the layers of the dart together thus creating a sewing guideline for yourself. Apply a basting stitch through both layers of the dart starting at the notches and ending at the dart vanishing point, making sure to maintain a straight, gradual line throughout and following the tailor tack marks accordingly. You don't have to stitch directly on top of the tailor tacks. Stay right below them to avoid overcrowding. Just as you did when pinning, check that the basting stitch is aligned with the direction of the tailor tacks on the other side of the dart (other fabric layer) 3. Starting at the widest section of the dart, where the notches are located, stitch towards the vanishing point following the basting stitch as a guide. Don't stitch directly on top of the basting stitch but rather right next to it- this will allow you to remove the temporary basting threads much easier once the dart is completed. As you can see in the image above, the final machine stitch (black) is positioned right below the basting stitch (red) but not overlapping it. 4. Using a pin or a seam ripper as shown above, remove the tailor tacks by pulling on the stitch as shown. Tailor's tacks are very easy to remove and can actually be pulled out by hand once the stitch is loosened with a pin or seam ripper. 5. Next, use your seam ripper (or a pin) to remove the basting stitch (red). Simply pull on one of the stitches and the rest of the basting should come out easily. If the machine stitch has accidentally overlapped the basting in the sewing process, the basting might rip and take a bit longer to remove. For that reason, it is good practice to never stitch directly on top of the basting. The dart is now complete! Don't forget to hand-knot the thread ends at the dart vanishing point for a durable, smooth finish. How To Sew Double Pointed (Contour) Darts Sewing a double pointed dart requires a few additional steps. Nevertheless, if you feel comfortable with a single pointed dart, you should be able to handle a double pointed dart just as well. As you'll see in the sewing steps to follow, a double pointed dart is folded along its fold line and sewn along its overlapping dart legs from one dart point to the next. Once stitched, a double pointed dart (also knows as a contour darts) conforms to the shape of the body at the waist to create a gradual transition from the waist up towards the bust line, and from waist down into the hips- hence, the necessity for two dart points. 1. Fold the double pointed dart along the fold line and pin horizontally on top of the overlapping dart legs. Insert a pin perpendicular to the fold at each vanishing point as this will help keep the fold more securely in place. If you look at the fold, you shouldbe able to see the marked fold line coresponding to the fold as shown above. It is extremely important that you make sure that both dart legs are perfectly matched and overlapping on each side by confirming that each pin aligns with the top of each dart leg. 2. It is a good idea to add an uneven hand basting stitch through both layers of fabric on top of the dart leg in order to keep the dart fold from shifting during sewing. If you feel comfortable sewing a double pointed dart that is secured with pins alone, you may skip the basting step. However, if you are reading this tutorial, chances are you might not feel perfectly comfortable using pins alone- hand basting the dart to secure it before machine stitching is highly recommended and will save you the headache of having to undo the stitch if the fabric layers shift in the stitching process. Make sure the basting stitch is applied on both sides evenly, right on top of each dart leg mark as shown above. 3. Start at one of the vanishing points and stitch towards the other point, using the basting stitch as a guide. Stitch as close to the basting as possible but not directly on top of the basting stitch as this will make it more difficult to remove once the drat is sewn. Remember, one of the important dart sewing rules above: Never backstitch at the dart vanishing point. In this case (for a double pointed dart), do not backstitch at the beginning or end of your stitch since the stitch starts and ends at a dart point. Once the machine stitch is applied, the loose ends should be hand-knotted on each end as described above. This last step may not always be necessary depending on how much excess the contour dart takes in. If there is a lot of excess and the dart is more pronounced, then the excess will have to be clipped horizontally at its widest section (waist) as shown above. Don't clip too close to the stitch line as this can weaken the dart causing durability issue. Clip about halfway into the dart excess. This clip releases tension and allows for more movement when the dart excess is ironed to one side. It also allows the dart seam line to maintain a smooth appearance on the face side of the garment thus improving fit and comfort. How To Iron Darts It might seem a bit unimportant at first glance, but understanding which direction to iron a dart can pose a significant question for a sewing beginner. Ironing is an extremely important part of the sewing process, and in the case of darts, it should be used religiously after each dart has been sewn BEFORE the rest of the garment seams are sewn. For that reason, here are some simple dart ironing rules/concepts you should learn as a completion step for your dart: Always iron a dart on the face side of the garment. This ensures that the dart seam-line is visible to you and is ironed properly avoiding accidental folds and puckers. All horizontal/diagonal darts should be ironed with excess pointing DOWN. In very rare cases, the dart excess can be ironed to point upwards. Such instances are common when the design at hand calls for it, or when the fabric being used works better with this option. Double pointed darts are also ironed on the face of the garment, carefully pressing on top of the dart seam line. The excess is usually pointed to the center, towards one another (towards Center Front and Center Back). It is possible to iron the excess facing in opposite directions (away from the center) but this is decided upon the design and fabric being used. When in doubt, iron the excess facing inwards towards the center of the garment.
2 Comments
Mercy
3/17/2019 10:14:23 am
Wow. Thank you for this detailed explanation and points to note while sewing darts. Blessings.
Reply
Leave a Reply. |
The Blog:A journey into our design process, sewing tutorials, fashion tips, and all the inspiring people and things we love. Doina AlexeiDesigner by trade and dressmaker at heart. I spend most of my days obsessing over new fabrics and daydreaming new ideas. Sadie
Executive Assistant & Client Relations Manager Archives
November 2019
Categories
All
|
-
Sewing Tutorials
-
Basics
>
- Aligning Pattern Grainlines To Fabric
- Preparing Fabrics For Sewing
- Pinning Sewing Patterns To Fabric
- Placing Sewing Patterns On Fabric For Cutting
- Rotary Cutters or Fabric Scissors?
- Cutting The Sewing Patterns
- What Are Notches And How To Use Them In The Sewing Process
- Transferring Notches From Pattern To Fabric
- Transferring Seamlines to Fabric
- Staystitching
- Backstitching: A Complete Guide
- Hand Basting: A Complete Guide
- Sewing Continuous Bias Binding
- Darts >
-
Sewing Seams
>
- The Basics Of Seams And Seam Allowance
- How To Sew A Straight Seam
- Sewing Curved Seams
- Sewing Corner Seams
- Trimming And Grading Seam Excess
- Notching/Clipping Seam Allowance for Tension Release
- Sewing Topstitched Seams
- Sewing Corded Seams
- Sewing A Slot Seam
- Sewing A Gathered Seam
- Sewing Bias Seams
- Sewing Seams With Ease
- Sewing Seams With Crossing Seamlines
- Sewing Unlike Fabric Seams
- How To Iron Seams: Ironing Tools And Conventions
- Sewing With Knit Fabrics
- Understanding Stitch Length And Tension
- Sewing Unique Fabric Seams
-
Seam Finishes
>
- Seam Finishing Techniques - Overview
- Applying A Pinked Seam Finish
- Applying A Bias Bound Seam Finish
- Serging And Zigzag Seam Finishes
- Sewing A Self-Bound Seam Finish
- Sewing A French Seam Finish
- Sewing A Hong Kong Seam Finish
- Sewing A Mock French Seam Finish
- Sewing A Turned-and-Stitched Seam Finish
- Sewing Overcast Hand-Applied Seam Finishes
- Sewing A Flat Felled Seam
- Sewing A Hairline Seam Finish
-
Hem Finishes
>
- Garment Hem Finishes: Overview
- Sewing A Double Fold Hem Finish
- Sewing A Single Fold Hem Finish
- Sewing Bound Hem Finishes
- Sewing An Exposed Double Layer Bound Hem
- Sewing A Folded-Up Bound Hem with Pre-folded Binding
- Sewing A Hong Kong Hem Finish
- Sewing A Band Hem Finish
- Sewing A Bias Faced Hem Finish
- Sewing A Twill Tape Hem Finish
- Sewing A Rolled Hem Finish
- Sewing A Shaped Hem Facing
- Using Fusible Hem Tape And Webbing
- Finishing A Lace Fabric Hem
- Finishing A Leather Hem
- Sewing Faced Hem Corners
- How To Finish Lining At The Hem
- Finishing Fabric Corners by Mitering >
- Interfacing A Hemline: Lined And Unlined Examples
-
Sewing Pockets
>
- Curved Patch Pocket With Flap
- Unlined Square Patch Pockets
- Lined Patch Pockets: Two Ways
- Extension On-Seam Pockets
- Separate On-Seam Pocket
- Front Hip Pockets
- Bound Double Welt Pocket
- Double Welt Pocket With Flap
- Self-Welt Pocket (Using Single Fabric Layer)
- Slanted Welt Pocket (Hand-Stitched)
- Faced Slash Pockets: Overview >
-
Sewing Zippers
>
- Sewing Zippers: General Information
- Sewing A Centered Zipper
- Sewing A Lapped Zipper
- Sewing An Invisible Zipper
- Sewing A Fly Front Zipper
- Sewing A Closed-End Exposed Zipper (No Seam)
- Sewing An Exposed Separating Zipper
- Sewing Hand Stitched Zipper Applications
- Sewing A Zipper Underlay
- Sewing A Placket-Enclosed Separating Zipper
- Sleeveless Finishes >
-
Neckline Finishes
>
- Sewing A Neck Shaped Facing
- Sewing An All-In-One Neck Facing
- Neck And Garment Opening Combination Facings >
- Sewing A Bias Faced Neckline Finish
- Sewing A Band Neckline Finish
- Bound Neckline Finishes: Overview >
- Sewing A Semi-Stretch Strip Band Neckline
- Ribbed Neck Band And Classic Turtleneck
- Decorative Neckline Finishes >
- Finishing Facing Edges >
-
Extras
>
- A Complete Guide on Interfacing
- Sewing Bound Spaghetti Straps
- Sewing Spaghetti Straps To A Faced Neckline
- Sewing Ruffles: Overview
- Patterning And Sewing A Circle Ruffle
- Sewing A Gathered Heading Ruffle
- Sewing Double Layer Gathered Ruffles
- Sewing A Gathered Ruffle Into A Seam
- Sewing A Gathered Ruffle To A Fabric Edge
- Sewing A Fabric Surface Slit
- Sewing A Slit Seam
- Hand-Applied Straight Stitches
- Hand-Applied Blind Stitches
- Hand-Applied Overedge Stitches
- Hand-Applied Tack Stitches
- Hand-Applied Decorative Stitches
-
Basics
>
- Custom Bridal
- Custom Apparel
- About
- Blog
Services |
Company |
|




 RSS Feed

