|
Back-stitching… what is it and why do we need it? In the process of learning how to sew, back-stitching is probably one of the first terms you’ve heard. Back-stitching is the act of stitching backwards on a sewing machine or by hand in order to lock the stitch in place so that it doesn’t unravel or come apart with use. It is perhaps one of the most important habits you should develop as a dressmaker/seamstress. The devil is in the details and this is certainly a detail that matters in the sewing process. The good news is that once you get into the habit of back-stitching at the beginning and/or end of a stitch you will start doing it automatically, without thinking. So why is back-stitching important anyways? Backstitching contributes to the durability of a clothing item. It is not a secret that our clothing goes through a lot of push and pull throughout its lifetime. From stretching, to constant washing and drying and exposure to all the daily elements that contribute to a garment’s age, we can all agree that clothing has a pretty stressful life. By blocking stitches from coming apart with use, back-stitching is able to lengthen a garment’s life span. A simple locking of a stitch can make the difference between good and bad quality when it comes to apparel. Back-stitching also facilitates the sewing process. When you’re sewing and putting all the pieces of fabric together, you often find yourself matching up seams and pulling on them in the stitching process. You need to iron every seam as you sew it which requires you to put some strain on the seam by ironing the excess down the middle or to a particular side. When your seams are back-stitched, you can pull and adjust them easily without having to worry about anything coming undone in the process. Having stitch stability in your seams is very important in sewing comfortably and efficiently. You’ll have to do a lot less damage control later on if all the seams are securely held in place during the sewing process. How to Backstitch Using a Sewing Machine Backstitching On An Industrial Sewing Machine: If you own an industrial sewing machine, your sewing is most likely advanced enough to know how to do a back-stitch on it. However, even as a beginner you should be able to recognize the back-stitching "button" on any sewing machine. It is for this reason we'll show you this simple process on both an industrial and home sewing machine. The first thing you'll notice is that even though these two types of machines come from two different families, the back-stitching button looks and works almost identically.
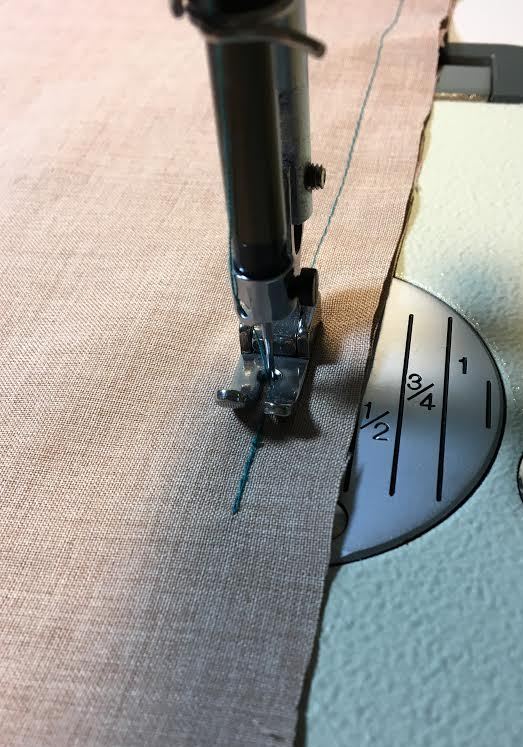
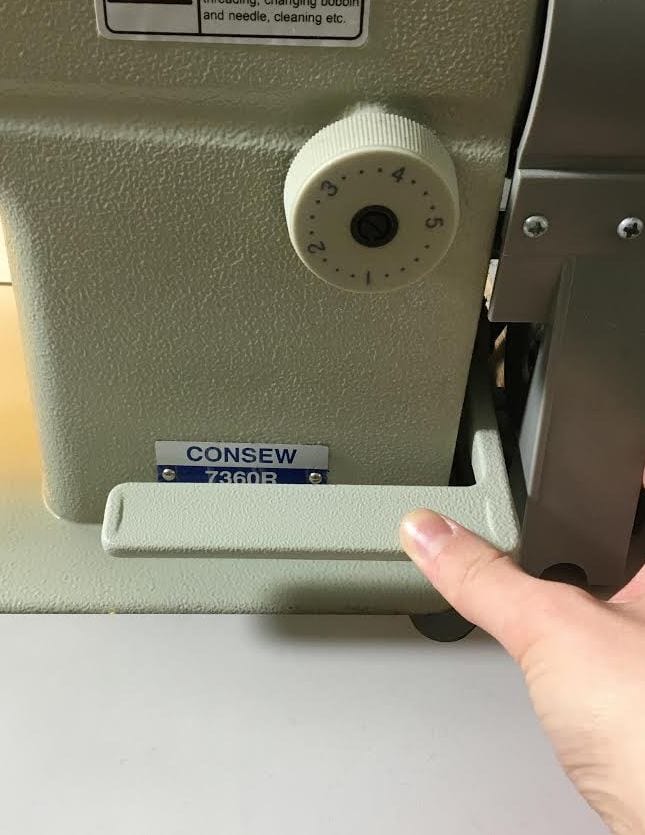
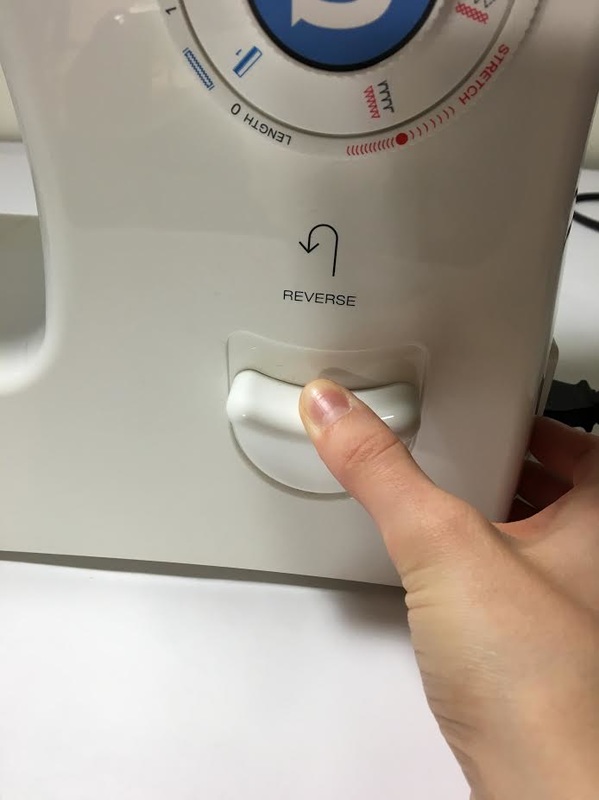
To backstitch on an industrial machine, press and hold down on the back-stitching button and press on the foot control. You will notice your machine will start sewing backwards. Maintain the fabric straight so that the backwards stitch goes right on top of the forward stitch you sewed previously. Let go of the foot control and back-stitch button once the backwards stitch reaches anywhere from 1/2-3/4" in average length. For added security you may sew another regular straight stitch on top of the back-stitching. 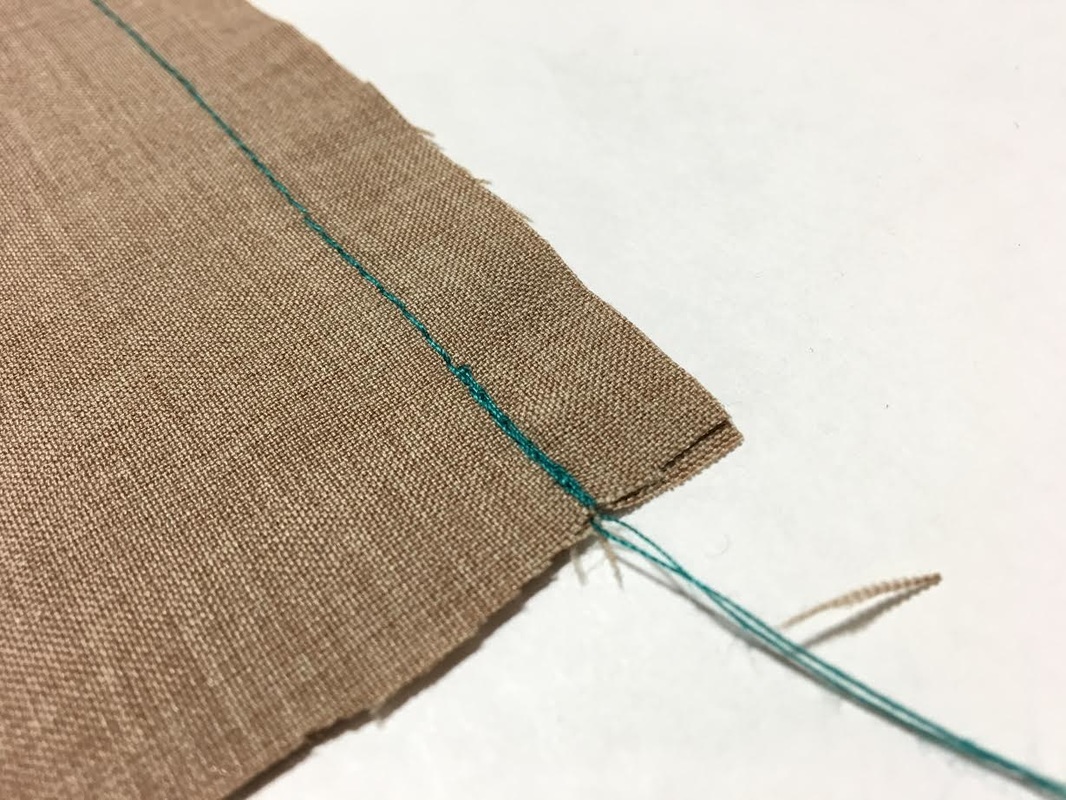 Back-Stitching On a Home Sewing Machine: You'll be pleasantly surprised to find out that back-stitching on a home sewing machine is an identical process to that of an industrial sewing machine. This means that you'll be able to recognize the back-stitching button as well as know how to use it on any type of sewing machine you might end up working with in the future- With back-stitching, you wont need to re-learn anything so you can focus on perfecting it!
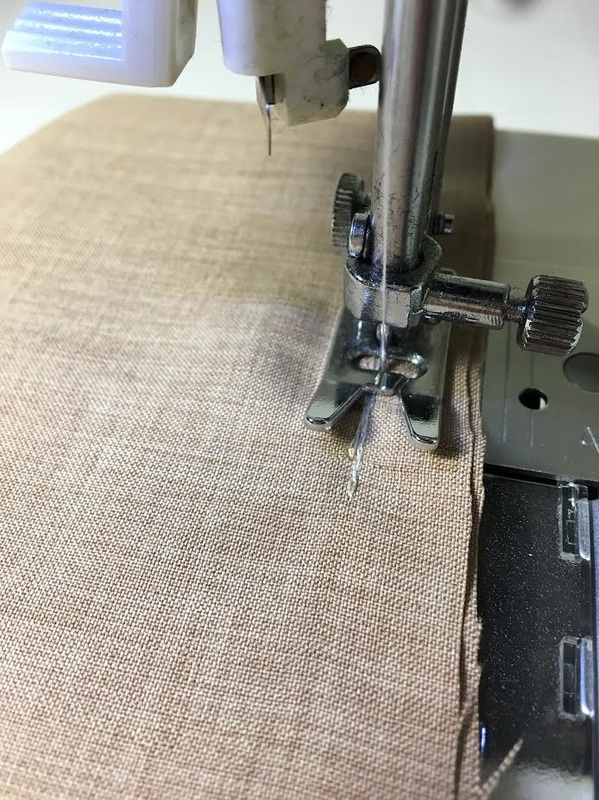
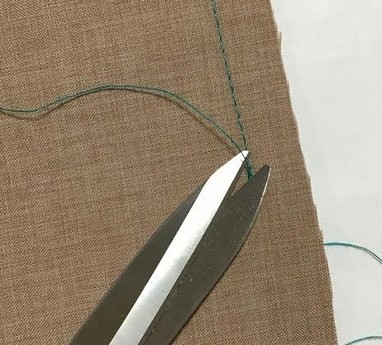
Just like in the steps described above, you will need to hold down the reverse stitch button while pressing the foot control. This will get the machine to start sewing backwards. As described above, hold the fabric still so that the back stitch goes on top of the existing forward stitch- this will lock the sew line in place and create that durable finish you want. 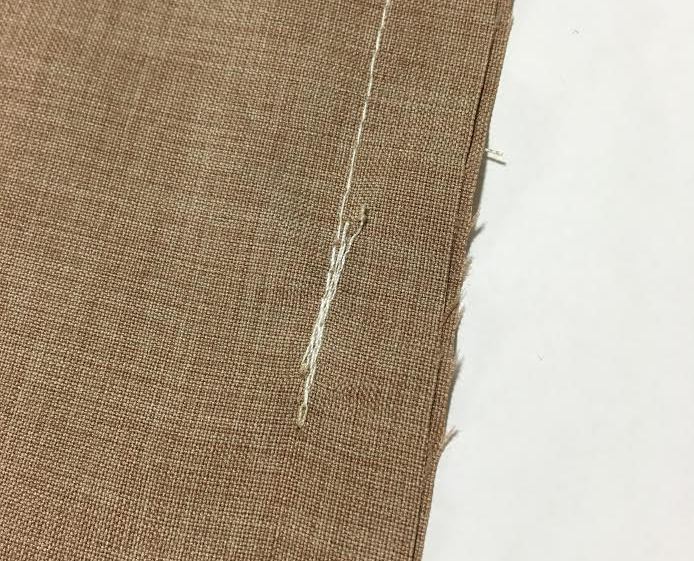 Backstitching By Hand: You might be asking yourself- why would I need to back-stitch by hand if I can do it on the machine? Well, there are a few instances when back-stitching by hand will certainly come in handy. When you're working with very delicate, thin fabrics like silks and chiffon, back-stitching on the sewing machine can be too rough and disruptive to these fine weaves. Back-stitching on delicate fabrics can cause them to bunch-up or even tear (if your machine needle isn't sharp enough). In this case, it is best to use the loose ends of your machine stitch threads to back-stitch by hand with a hand sewing needle. In addition, if you simply forget to back-stitch at the end of a straight stitch and you've already cut the threads, you can always back-stitch by hand to fix the problem! 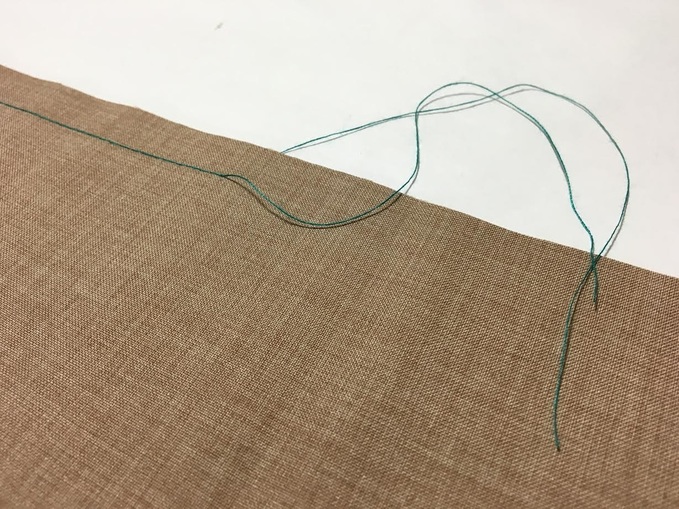 Step 1: Once you've completed your regular straight stitch on the sewing machine, leave yourself some extra thread length to work with for back-stitching. You will use one of the two extra threads with a hand-sewing needle to lock the stitch in place by hand. 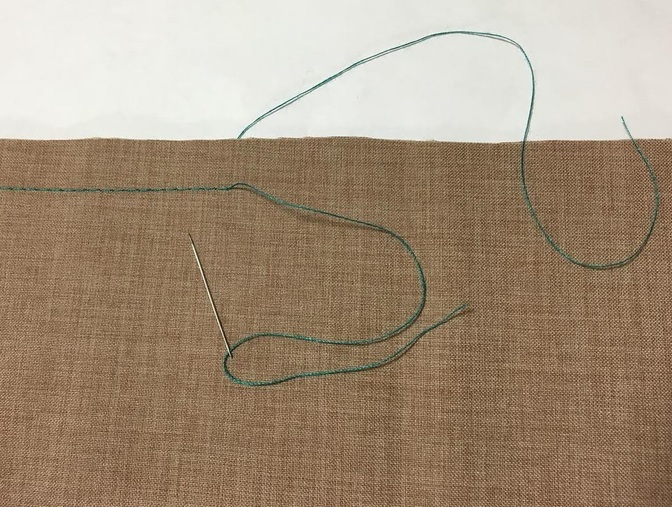 Step 2: Thread a hand sewing needle with one of the two loose threads. 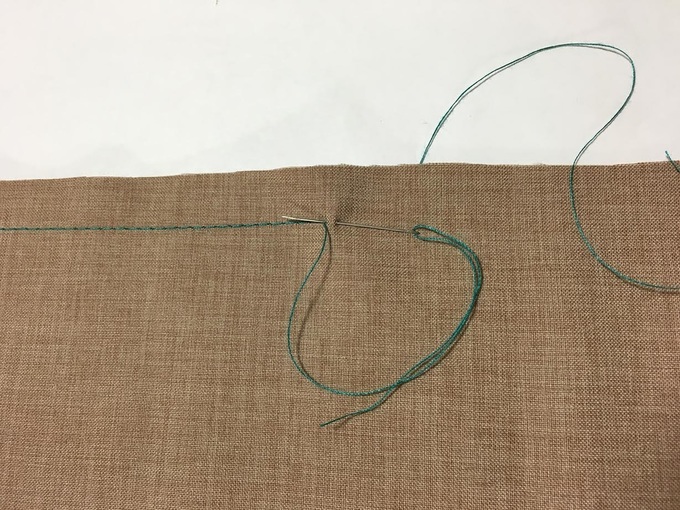 Step 3: Apply a small stitch, about 1/8" in length to the area where the machine stitch ends and the thread connects. Use the images bellow as a guide 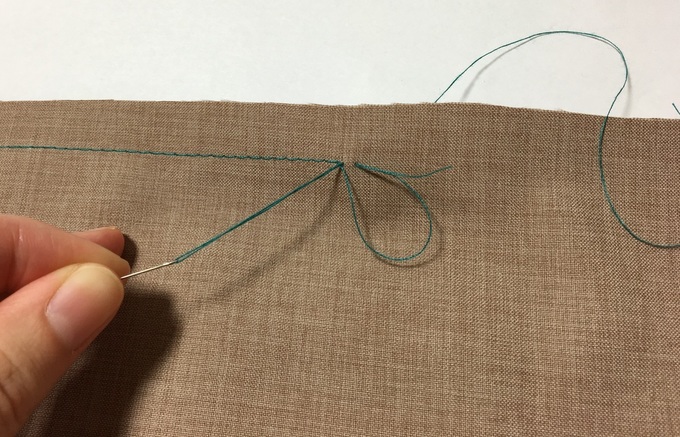 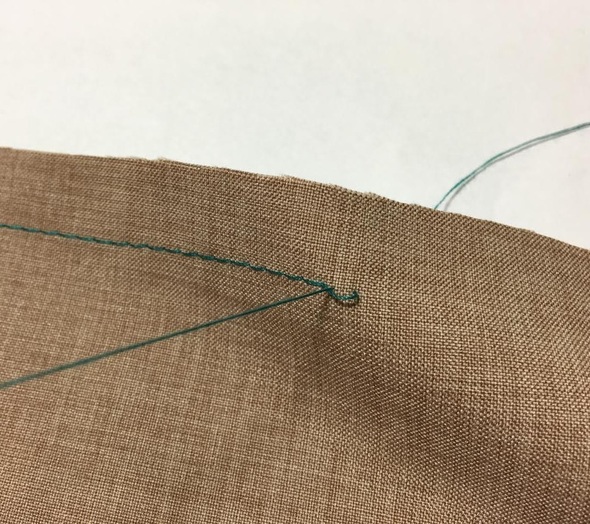 Step 4: Repeat Step 3 but this time, sew directly on top of the hand-sewn stitch you just applied. 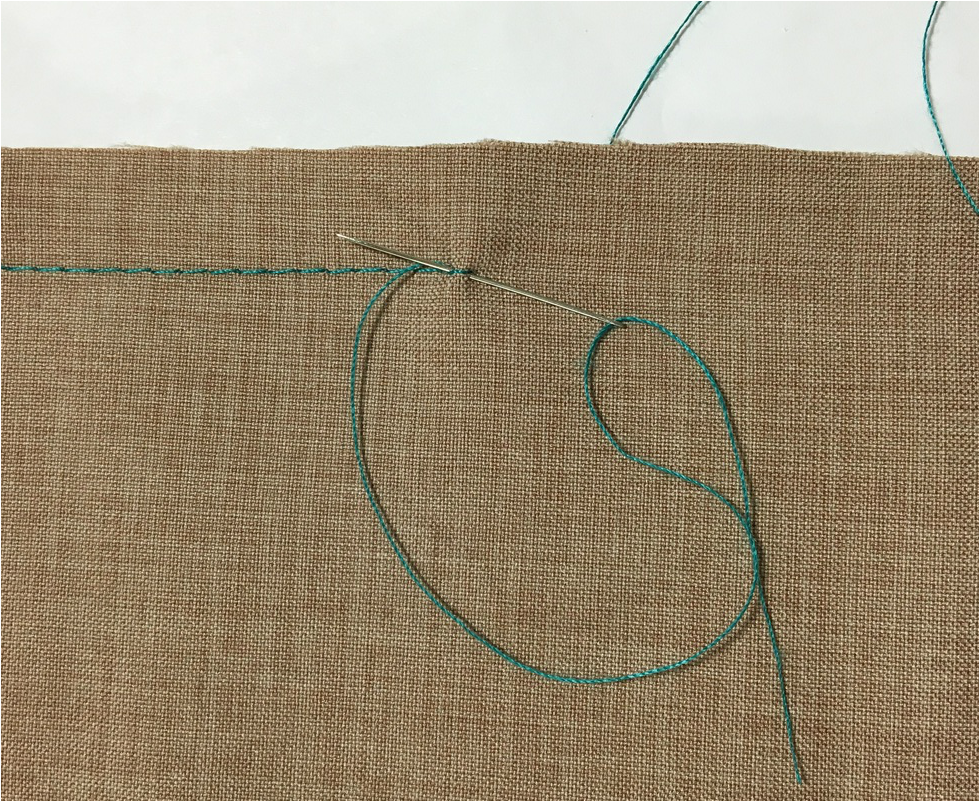  Sew in place by continuing this step for an additional 5 or 6 stitches until the machine straight stitch is locked in place. See the Image bellow for what the final hand-sewn backstitch should look like. 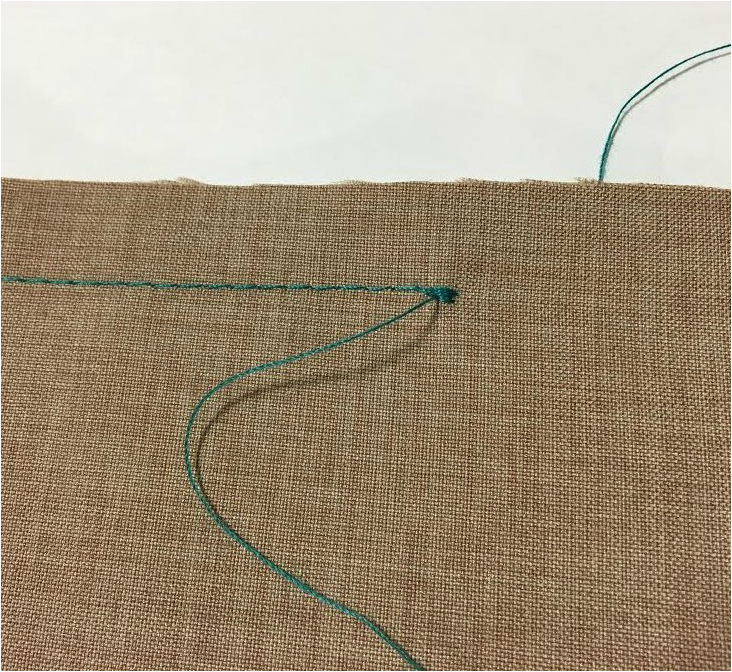 Step 5: Use a sharp pair of scissors to trim the excess threads close to the back-stitch as displayed bellow.
3 Comments
Praveen
9/23/2021 04:51:20 am
Hey there is more informative notes in your blog, which is very useful to me. Form more details regarding <a href="sewingmachinebazar.com">sewing machine dealers in chennai</a> visit this page. Thank you. Leave a Reply. |
The Blog:A journey into our design process, sewing tutorials, fashion tips, and all the inspiring people and things we love. 
Doina AlexeiDesigner by trade and dressmaker at heart. I spend most of my days obsessing over new fabrics and daydreaming new ideas. 
Sadie
Executive Assistant & Client Relations Manager Archives
November 2019
Categories
All

|

-
Sewing Tutorials
-
Basics
>
- Aligning Pattern Grainlines To Fabric
- Preparing Fabrics For Sewing
- Pinning Sewing Patterns To Fabric
- Placing Sewing Patterns On Fabric For Cutting
- Rotary Cutters or Fabric Scissors?
- Cutting The Sewing Patterns
- What Are Notches And How To Use Them In The Sewing Process
- Transferring Notches From Pattern To Fabric
- Transferring Seamlines to Fabric
- Staystitching
- Backstitching: A Complete Guide
- Hand Basting: A Complete Guide
- Sewing Continuous Bias Binding
- Darts >
-
Sewing Seams
>
- The Basics Of Seams And Seam Allowance
- How To Sew A Straight Seam
- Sewing Curved Seams
- Sewing Corner Seams
- Trimming And Grading Seam Excess
- Notching/Clipping Seam Allowance for Tension Release
- Sewing Topstitched Seams
- Sewing Corded Seams
- Sewing A Slot Seam
- Sewing A Gathered Seam
- Sewing Bias Seams
- Sewing Seams With Ease
- Sewing Seams With Crossing Seamlines
- Sewing Unlike Fabric Seams
- How To Iron Seams: Ironing Tools And Conventions
- Sewing With Knit Fabrics
- Understanding Stitch Length And Tension
- Sewing Unique Fabric Seams
-
Seam Finishes
>
- Seam Finishing Techniques - Overview
- Applying A Pinked Seam Finish
- Applying A Bias Bound Seam Finish
- Serging And Zigzag Seam Finishes
- Sewing A Self-Bound Seam Finish
- Sewing A French Seam Finish
- Sewing A Hong Kong Seam Finish
- Sewing A Mock French Seam Finish
- Sewing A Turned-and-Stitched Seam Finish
- Sewing Overcast Hand-Applied Seam Finishes
- Sewing A Flat Felled Seam
- Sewing A Hairline Seam Finish
-
Hem Finishes
>
- Garment Hem Finishes: Overview
- Sewing A Double Fold Hem Finish
- Sewing A Single Fold Hem Finish
- Sewing Bound Hem Finishes
- Sewing An Exposed Double Layer Bound Hem
- Sewing A Folded-Up Bound Hem with Pre-folded Binding
- Sewing A Hong Kong Hem Finish
- Sewing A Band Hem Finish
- Sewing A Bias Faced Hem Finish
- Sewing A Twill Tape Hem Finish
- Sewing A Rolled Hem Finish
- Sewing A Shaped Hem Facing
- Using Fusible Hem Tape And Webbing
- Finishing A Lace Fabric Hem
- Finishing A Leather Hem
- Sewing Faced Hem Corners
- How To Finish Lining At The Hem
- Finishing Fabric Corners by Mitering >
- Interfacing A Hemline: Lined And Unlined Examples
-
Sewing Pockets
>
- Curved Patch Pocket With Flap
- Unlined Square Patch Pockets
- Lined Patch Pockets: Two Ways
- Extension On-Seam Pockets
- Separate On-Seam Pocket
- Front Hip Pockets
- Bound Double Welt Pocket
- Double Welt Pocket With Flap
- Self-Welt Pocket (Using Single Fabric Layer)
- Slanted Welt Pocket (Hand-Stitched)
- Faced Slash Pockets: Overview >
-
Sewing Zippers
>
- Sewing Zippers: General Information
- Sewing A Centered Zipper
- Sewing A Lapped Zipper
- Sewing An Invisible Zipper
- Sewing A Fly Front Zipper
- Sewing A Closed-End Exposed Zipper (No Seam)
- Sewing An Exposed Separating Zipper
- Sewing Hand Stitched Zipper Applications
- Sewing A Zipper Underlay
- Sewing A Placket-Enclosed Separating Zipper
- Sleeveless Finishes >
-
Neckline Finishes
>
- Sewing A Neck Shaped Facing
- Sewing An All-In-One Neck Facing
- Neck And Garment Opening Combination Facings >
- Sewing A Bias Faced Neckline Finish
- Sewing A Band Neckline Finish
- Bound Neckline Finishes: Overview >
- Sewing A Semi-Stretch Strip Band Neckline
- Ribbed Neck Band And Classic Turtleneck
- Decorative Neckline Finishes >
- Finishing Facing Edges >
-
Extras
>
- A Complete Guide on Interfacing
- Sewing Bound Spaghetti Straps
- Sewing Spaghetti Straps To A Faced Neckline
- Sewing Ruffles: Overview
- Patterning And Sewing A Circle Ruffle
- Sewing A Gathered Heading Ruffle
- Sewing Double Layer Gathered Ruffles
- Sewing A Gathered Ruffle Into A Seam
- Sewing A Gathered Ruffle To A Fabric Edge
- Sewing A Fabric Surface Slit
- Sewing A Slit Seam
- Hand-Applied Straight Stitches
- Hand-Applied Blind Stitches
- Hand-Applied Overedge Stitches
- Hand-Applied Tack Stitches
- Hand-Applied Decorative Stitches
-
Basics
>
- Custom Bridal
- Custom Apparel
- About
- Blog

 RSS Feed
Services |
Company |
|
