|
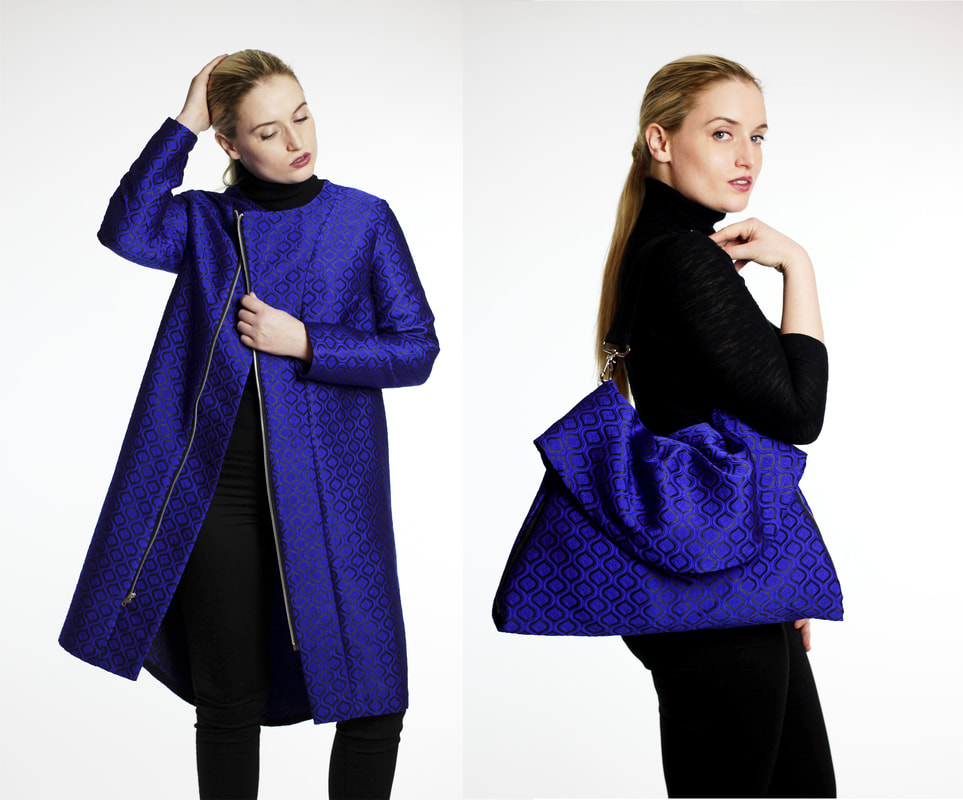
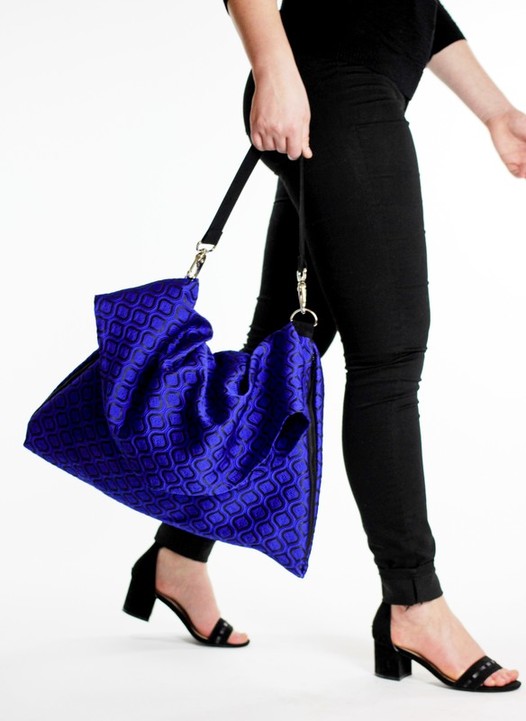
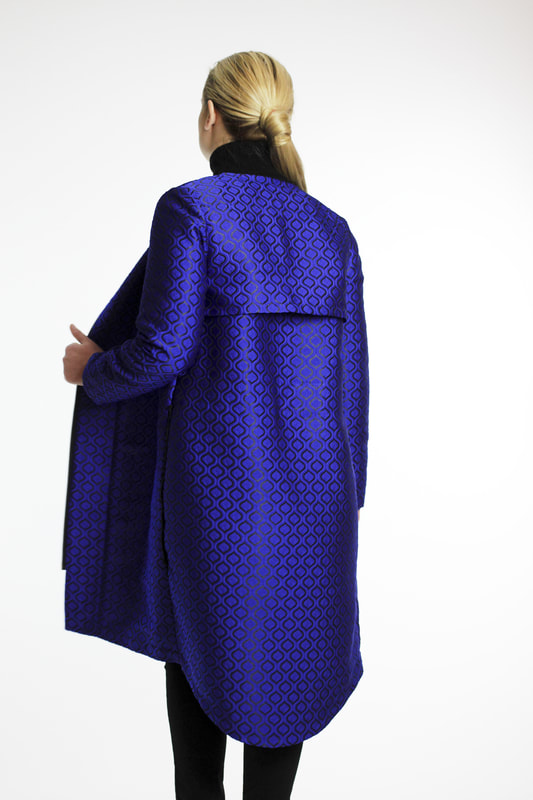
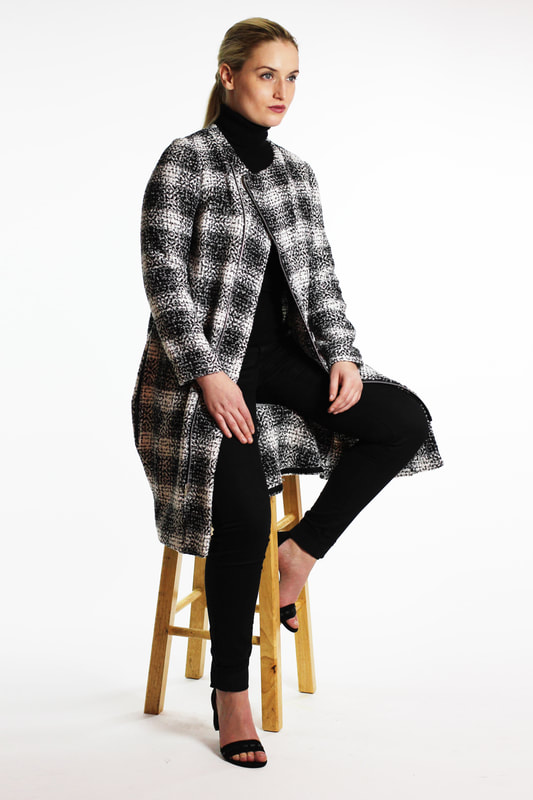
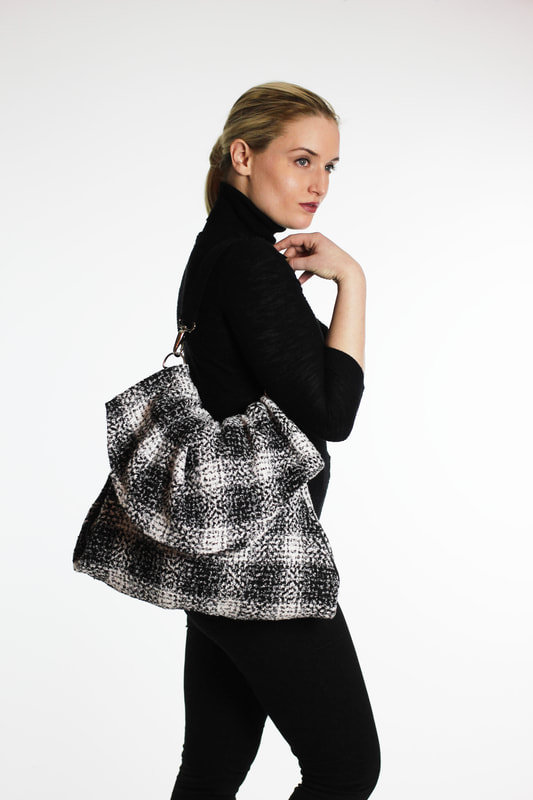
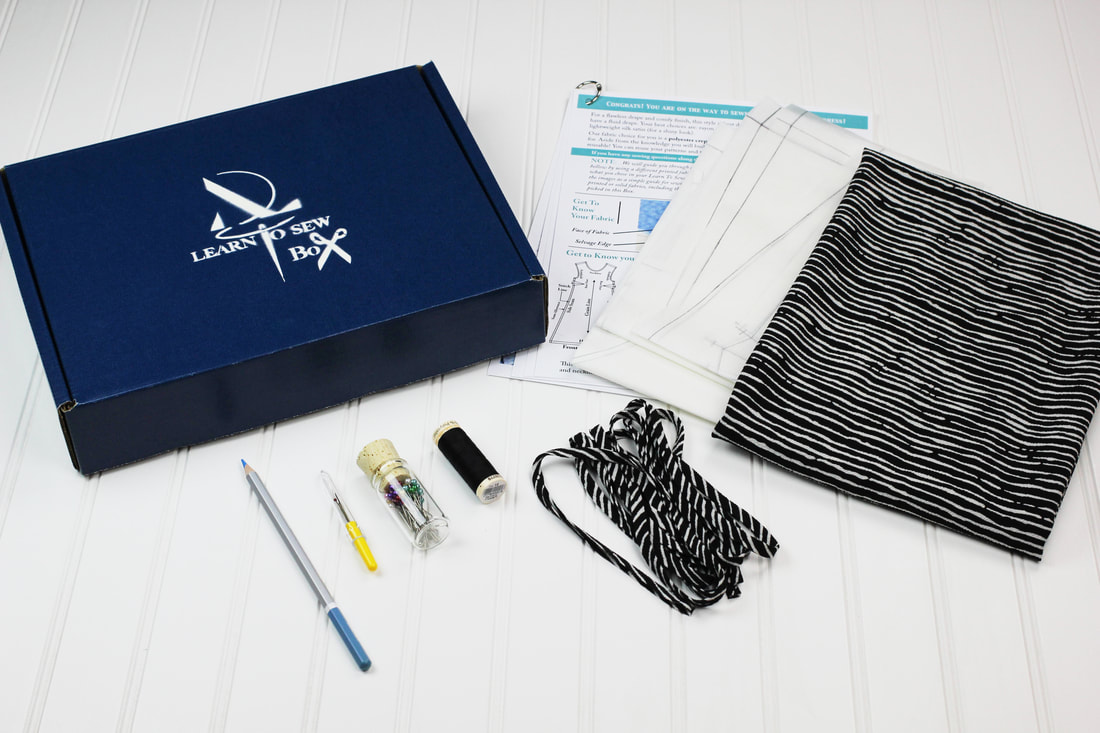
If you are the kind of person that loves surprising loved ones with one-of-a-kind, special gifts, you are probably always going the extra mile in your search for unique products. What catches your eye is most likely something that is seldom available in brick and mortar stores and quite difficult to come across in general. Whether you enjoy being the best gift-giver in your family or the smile on that loved one's face, putting some thought into that special gift, especially around the holiday season, can be truly rewarding. Needless to say, if you are reading this, you love to give that special woman in your life gifts that she is sure to remember. The good news is that while you love gifting them, we have the passion for creating them at Doina Alexei. These fashion products (as we like to call them) have truly inspired us and are all about YOU. They are constructed with your needs, your passions and your little indulgences in mind. Whether you are searching for something educational, functional, unique, or simply aesthetically flattering, the special gift items we hand picked below might prove to be just what you are looking for this gift-giving season. There is a sense of whimsy and excitement about every single one of them. It is worth to note of course, that every item is handmade and individually tagged and packaged with care to safely arrive at your doorstep right before Christmas (or that special birthday!). Whether it is for a wife, girlfriend, mother, grandmother or your favorite aunt, here are the three fashion products that will prove to be some of the most one-of-a-kind, successful gifts this Christmas season. The 11:11 Jacket- A Jacket Convertible To Shoulder BagThe 11:11 Jacket- the convertible jacket to bag is bound to put a smile on the face of everyone gathered around the Christmas tree. The name of it has already partially given away its secret- As you might have guessed, it transforms from fully functional jacket to fully functional shoulder bag in just a few easy steps. We've all been fascinated by convertible products especially in the apparel industry. Quite often however, we shy away from wearing them due to their heavyweight, hardware-rich characteristic. The goal with the 11:11 Jacket was to construct a piece of apparel with no overwhelmingly visible hardware which risks being heavy and aesthetically uncomfortable to wear. When in jacket form, it resembles more of a trench coat giving no impression that it is a convertible garment. If you do look very carefully, the separating zippers, which are sleekly sewn into the side seams, give you a little hint that this isn't just another boring jacket. A clothing item that serves us in more than one way is always a great investment and worthy of becoming a life-long item in your closet. For that reason, the 11:11 Jacket offers a classic silhouette that is appropriate to style with just about anything in your closet. It is not bulky or thick but rather lightweight, making it interchangeable through transitioning seasons. The length stops right above the knee featuring a subtly curved hem at the back which adds softness and increases flattery. Now for the fun part: How does it work? How does a seemingly classic jacket with no visible heavy hardware on its surface transform into a fully functional, roomy bag? The secret is in the back panel. The back panel itself provides for a hidden compartment that houses two light yet extremely durable D-rings. Once the side separating zippers are zipped fully to form the bag compartment, the back panel is simply flipped over the neckline and shoulders to expose the D-rings hiding the neckline underneath. This panel not only creates a straight bag opening edge, it also provides a clean look on the inside of the shoulder bag by hiding the neckline opening underneath. Each clip on the bag strap, which is naturally housed inside the jacket, is then attached to each one of the D-rings completing the formation of the bag. Because no bag is complete without a means to close it, the bottom of the jacket folds over the bag opening in a unique fashion to create a beautiful ruffle flap. The curved edge of the back hem hides all the layers of the jacket's bottom underneath, which increases the authenticity and functionality of the bag. As you play around with the conversion steps, you'll find that you cannot tell either item is of the convertible type whether it is in jacket or bag form. That was truly the goal in the creation of this design- being able to interchange the two whenever necessary without compromising their ability to fully serve their functional purpose. When you are out on a walk, running errands, or simply going to work in the morning you may be faced with changing temperatures throughout the day. Start with the jacket during those cool early mornings and convert it to a bag as you deem necessary. We think that this simple idea of interchangeable products is the true beauty of functionality. The Learn To Sew BoxThe Learn To Sew Box is perfect for those that steer more towards educational gifts. It is just as enticing for a student as it is for the person looking to add an extra skill to his/her repertoire. How many times have you heard the phrase: "I wish I could make my own clothes..."? Well, now you can with the Learn To Sew Box as it includes all the basic necessities to get started.
1 Comment
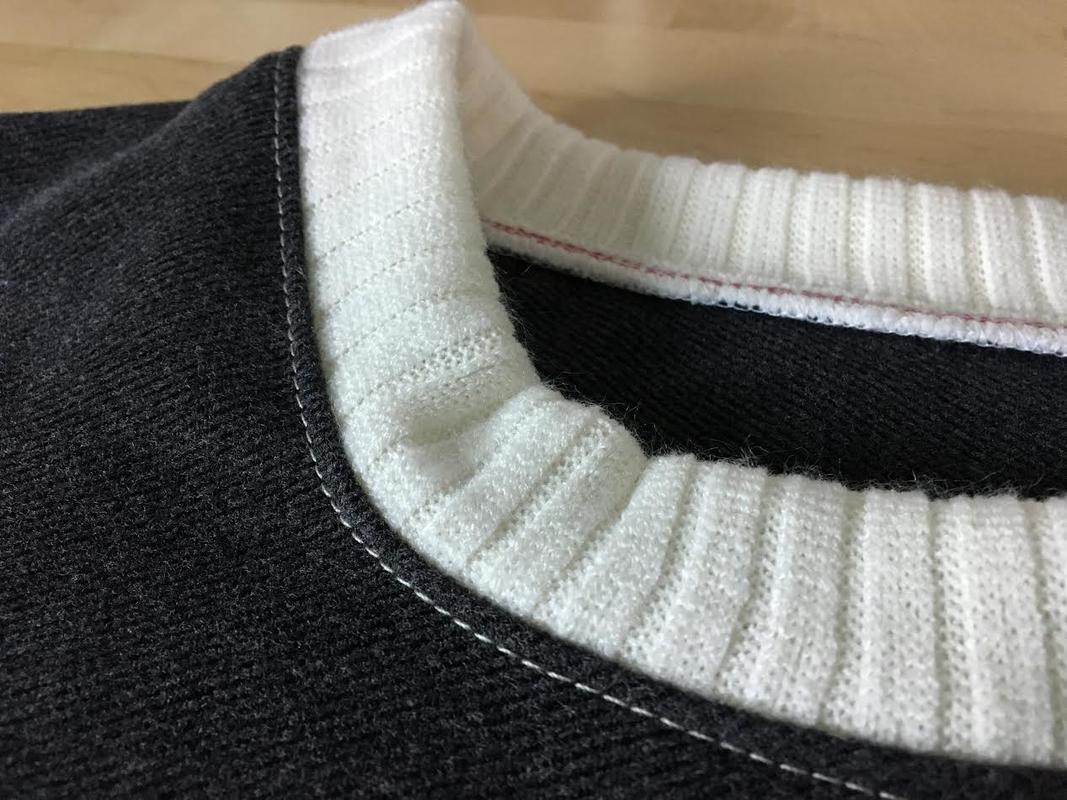
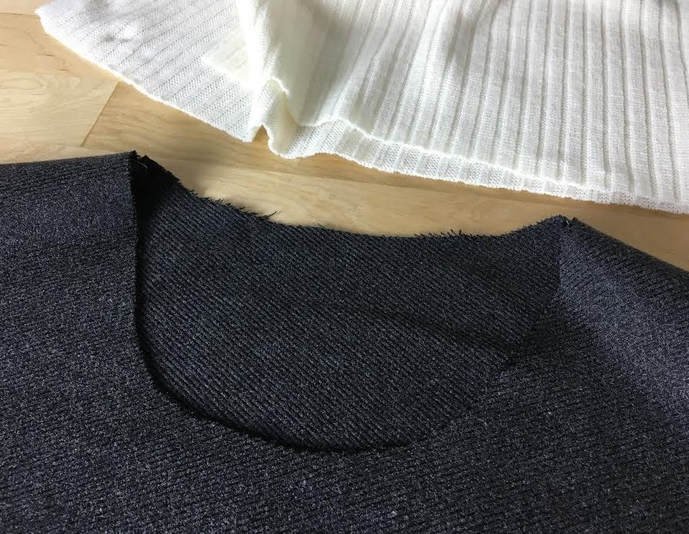
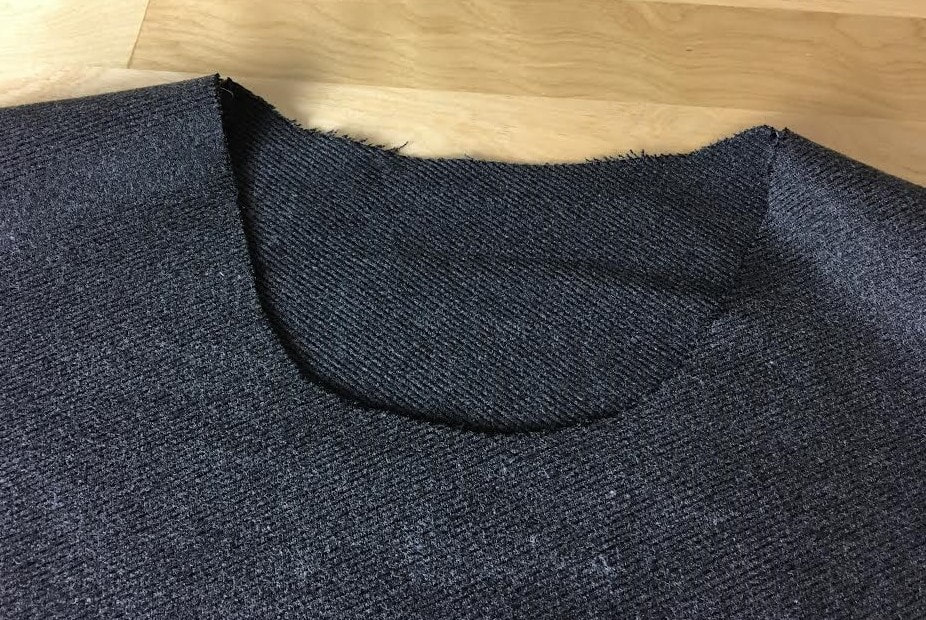
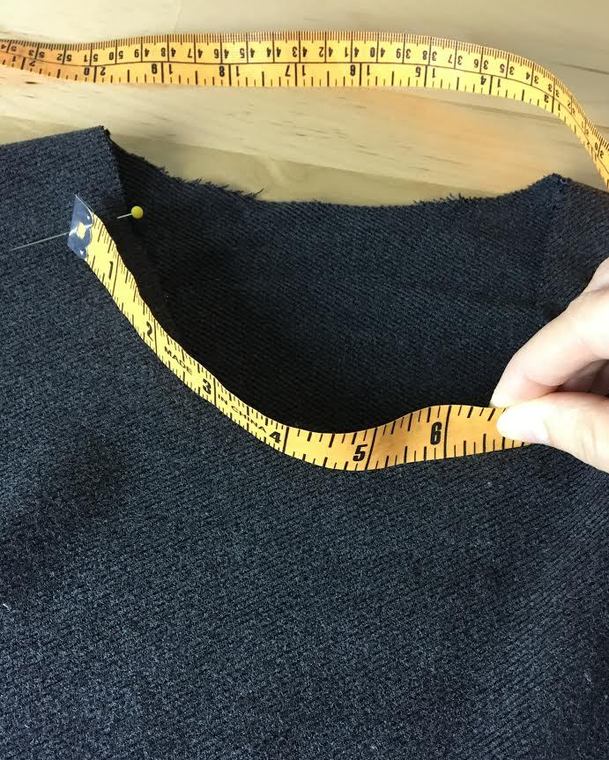
As the perfect blend of casual and sporty, a ribbed collar can be the perfect addition to a garment that requires an everyday stylistic element. Combing knit with woven fabrics has always been a favorite technique at Doina Alexei- The play on stretch and texture allows for uniqueness without compromising comfort. This concept of juxtaposing knits with wovens works great especially when adding a ribbed collar to a non stretch woven garment. It is a classic look yet carries a certain one-of-a-kindness particularly in the case of color blocking or combining opposite fabric weights and textures. From a sewing perspective, it is actually quite easy to do and you might like it so much that you'll want to apply this neckline finish to almost all curved necklines (when suitable, of course). While it is entirely up to you what style ribbing you choose to work with, we find that a thicker rib knit is not only better suited structurally as a neckline collar, it is also less difficult to sew. The added thickness allows for more stability while allowing more room for error when the fabric is stretched and stitched. As you'll find from the tutorial bellow, the secret to sewing a ribbed band to a woven neckline is that the rib fabric has to be stretched during the sewing process.This means that the length of the ribbing band is always smaller than the measurement of the neckline.This concept is important anytime you sew a stretch band whether it is a sleeve cuff, waist band or neckline collar. Sewing the ribbed fabric while stretching it will allow the final collar to lay flat when the garment is worn. If the band is not stretched enough during the stitching process, it tends to be flimsy and unable to maintain the correct structure and needed comfort. Cutting And Sewing The Ribbed Collar 1. Place a pin anywhere along the neckline and use it as a starting point to measure the length of the neckline.
The easiest way to do this is with a flexible measuring tape. Walk the measuring tape along the neckline edge ensuring that you maintain an accurate placement at all times. Vivienne So's Story: A Full Time Jobholder And Single Mom With An Inspiring Passion For Blogging.11/20/2017 We might not all have the courage to start a blog but almost all of us love to read and browse them from time to time. Whether it is fashion, beauty, food, DIY, or just about anything you can think of, blogs give us a little glimpse into the life of those daring enough to share. Vivienne So is one of the courageous ones that allows her readers a little window into her life whether by reviewing the products she loves or sharing heartwarming glimpses of precious moments with her son. Years ago, she started her first blog based on her, as she describes it, "tragic and humorous dating life". Today, the blog remains a mystery as it is no longer live. The good news? We might expect to read the juicy stories all compiled in a book at some point in the future. Even as life got in the way, she never lost her passion for writing which she now shares with the world on her current blog- Jollie Pagaille. On Jolie Pagaille, a blog that was born at the persuasion of a friend sharing the same fashion and beauty interests, Vivienne still does not shy away from sharing little personal stories here and there. Her writing style makes you feel as if you are sitting on a comfy couch with her while she tells you all about the new shoes she loves or a new beauty product she recently came across. From food to fashion, Vivienne is not limited by what the (sometimes) cookie-cutter world of blogging expects of her but rather sharing what she truly loves with the world when she has the urge to do so. As a single mother working a full time job, Vivienne appeals to just about any woman out there that does not allow her job to get in the way of her passion for writing, beauty and fashion. If you've ever considered starting a blog but find the idea impossible to fathom due to time constraints, Vivienne So gives us some precious insight into what it is like to juggle a busy life as a single mom and still find time and inspiration to blog. When and how did you get into blogging? Is there a specific event or moment in your life that inspired you to get started? I actually started blogging when it was still fairly new. People were writing more about their lives than about products back then. I had always wanted to do creative writing and blogging was a great outlet for it. I first started with a very personal blog, but it was rather boring. So I started another blog that was loosely based on my tragic and humorous dating life. It was exciting and was a bit fictional at times, but it garnered a nice following. It no longer exist, but I've often thought about turning it into a book. I started Jolie Pagaille later when I became heavily involved with a guy who's interests were in line with mine- Beauty and fashion. He actually encouraged me to create a blog that catered to beauty and fashion! There are sprinkles of personal stories on there, but that's part of blogging. Is there a message that you try to portray with your blog whether personal or on a larger scale, socially? On Jolie Pagaille, I try to give my honest review of products. I try everything and if I don't like a product, I'll write my honest opinion and sometimes I won't write a review of it. I think it's important to be authentic when it comes to writing about products. I'm not going to promote a product favorably if it's uncomfortable or gives me a rash. There's not value in it for me to do that. Your blog clearly shows your individual personality and style. Does it get difficult to maintain your identity without being influenced by the outpouring of ideas and work from other bloggers? How do you keep your individual style intact? It can be hard! If I see a celebrity blogger carrying an "it" piece/bag, of course I'll be tempted to want it. For the most part though, I'm pretty true to my style. I love comfort, but I also like to dress according to my mood or weather. During summertime, I tend to be a little bohemian. At work I'm a bit more reserved in my attire and tend to choose outfits with clean lines. I'm currently into white, even after Labor Day!
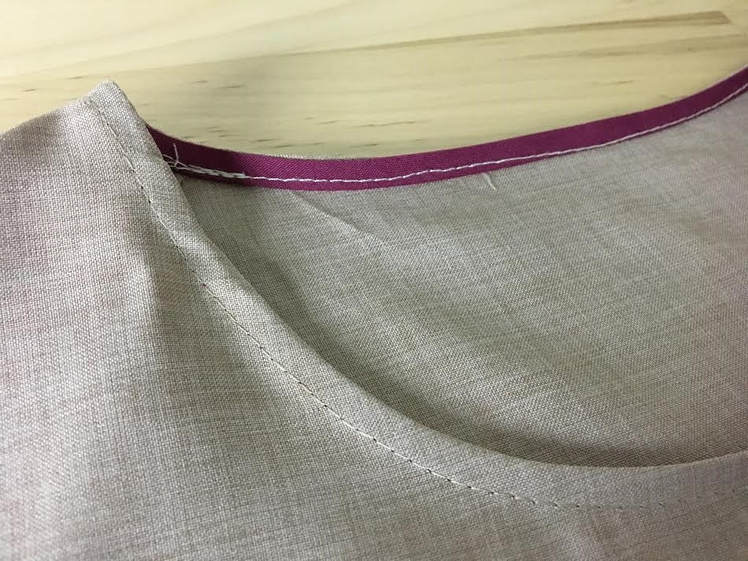
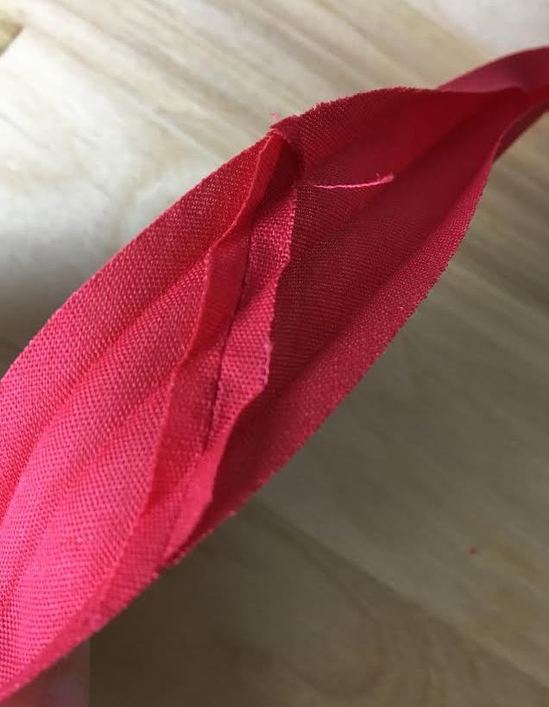
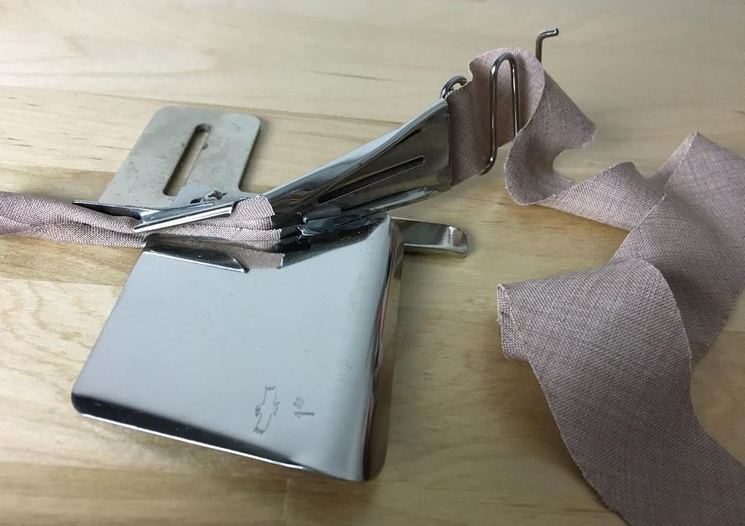
Binding is perhaps one of the most commonly used sewing techniques to clean finish curved edges of necklines and armholes. It is a multifaceted tool used both in apparel and quilting to encase raw fabric edges for both functional and decorative purposes. With regards to apparel, you'll find that binding is used on almost all lightweight to medium weight fabrics as it provides a less bulky, inexpensive and easy-to-work-with technique. Bound finishes are considered a bit on the casual side stylistically due to he fact that there is a visible top stitch on the face of the garment on almost every application. What is binding? Binding is constructed of a strip (or strips of) fabric that are cut on the bias (diagonally to the grain line) and folded to encase fabric edges. Due to the fact that it is mostly used along curved edges, binding requires to be cut on the bis as this provides enough stretch and flexibility to mold along more curved edges. Don't believe us? Take larger piece of fabric and stretch it vertically, horizontally and diagonally in relation to the selvage edge. You'll notice that when the fabric is pulled diagonally it provides a lot more flexibility even though the fabric itself lacks stretch. Keep in mind that this concept works mainly with regards to woven fabrics and may not be relevant to knits that feature a lot more stretch crosswise (horizontally). Binding has to be continuous such that there are no unnecessary interruptions in the application process. To make continuous binding, the strips are sewn together using diagonal seams. The continuous binding strip is then pre-folded so that it is easier to work with during the sewing process. The binding can be folded in a couple of different styles depending on the finish it is used for. The most common options you'll come across at the fabric store are double fold and single fold binding styles. There are actually some specialty presser feet you can purchase that feed the strip and fold it automatically in the sewing process without the need for pre-folding. If you find yourself using binding finishes very often, it might be a good idea to look into a binding presser foot as this will save you a ton of time (and maybe some frustration) in the process. If you are a sewing beginner however, keep in mind that you should learn how to apply a pre-folded bound finish by hand first as this will give you a basic understanding of how bound finishes work. That being said, there is a range of pre-folded and pre-cut binding available on the market. If you have some basic experience with sewing apparel and crafts, you have probably already used pre-made binding at point. It is available in almost all fabric stores (and some craft stores) and comes in a variety of different widths and folds. Single folded and double folded binding are the two you'll come across most and both used in quilting and apparel.
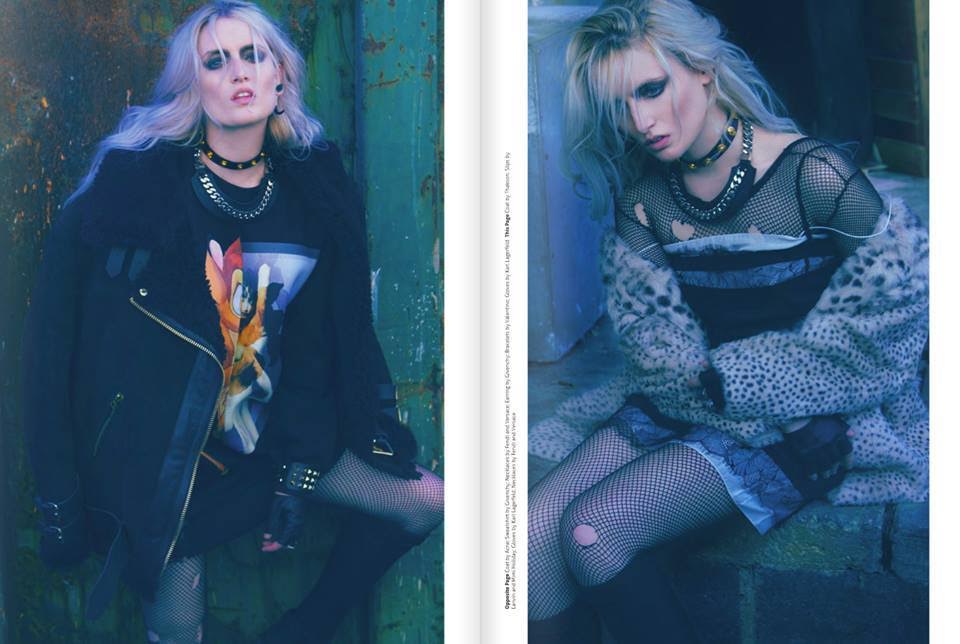
An Interview With Melanie Blankenship: Rewards, Challenges And a Peek Into The Modeling Industry.11/8/2017 The world of modeling is just as much glamour and mystery as it is hard work. What we don't see in an ad campaign or the final images of an editorial are the long hours of behind-the-scenes work in grueling weather conditions using sometimes uncomfortable garments and props. What truly separates the weak from the strong is the ability to produce beautifully crafted and effortless images regardless of the unpredictable conditions endured behind the camera. A model that works great under pressure, adjusting to different settings and offering variety in her/his look is the result of not only talent but years of practice and experience. On the "strong" list is Melanie Blankenship-A talented, versatile model we've had the pleasure of working with on numerous occasions. Whether it is beauty, bridal or fashion, there isn't a topic not covered in Melanie's portfolio. She can do commercial just as well as she does editorial easily transitioning from classic-feminine to punk-rocker without losing her personal edge. As you'll see in some examples of her work below, Melanie's ability to adapt to different styles and conceptual looks allow her to be greatly sought after both in the Washington DC area, where she currently lives and works, as well as various major cities across the US and abroad. In the array of questions to follow, Melanie lets us in on her background and work, piquing the curiosity of anyone interested in learning a bit more about the modeling industry. Topics like what it is like to work as a freelance model, should you work with an agency, and what are the industry moments that have helped her build thick skin are just a few that Melanie Blankenship shares with us in the interview below. How did you get involved in modeling? How old were you when you did your first photo shoot and what was that experience like? One of my really good friends and photographer Stephen Archer got me into modeling in high school. He would always ask me to model for him for his college portfolio. Stephen interned with photographer Roy Cox, and when I was 17, Roy asked me to come into his studio for a professional photo shoot with a makeup artist. I was hooked on modeling and the whole experience of it from there. The first shoot was a beauty shoot with a few different makeup looks and also the first time I worked with a makeup artist- it was really fun!
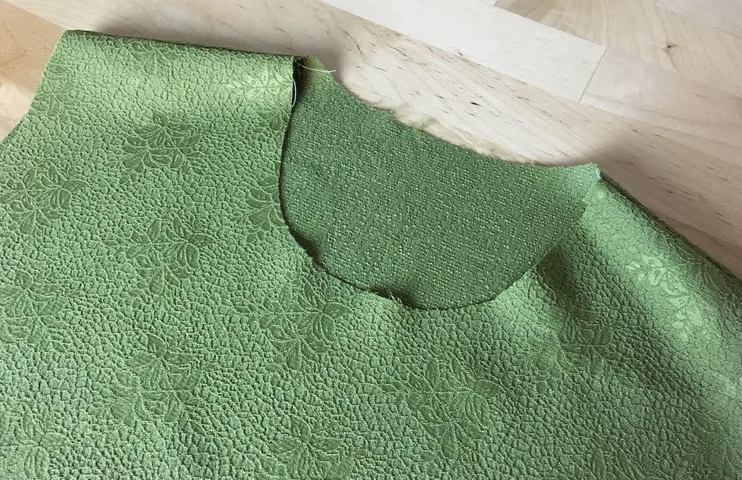
Clean finishing a round neckline is one of the more challenging tasks for sewing beginners. As much as we try to avoid it, almost all dresses and blouses feature necklines that require sewing along a round or curved edge. When you are in the process of learning how to sew, even sewing a straight seam can be quite an undertaking. Now, imagine running your machine needle along a very circular, curved edge- a bit intimidating, right? Although nothing gets better without practice over time, especially when it comes to sewing, mastering a few sewing techniques like understitching, staystitching and ironing as you go, will eliminate some of the frustration associated with the first few steps of the learning process. When it comes to the art of sewing necklines, there are plenty of techniques used to clean finish those pesky curved edges. The most commonly used techniques are: with binding (known as a bound neckline), using a neckline facing (faced), with a stretch band (usually ribbed knit), adding a collar, and using a top-stitched band (the method we'll show you below) It is true that sewing a topstitched band along a curved neckline is perhaps one of the more difficult methods for finishing a round edge. However, this is a great technique to master if you want to avoid sewing a neck facing. As opposed to a facing, a topstitched band will not flop to the outside of the garment and is one of the more durable, functional and washer-friendly neckline finishes. Due to the addition of the topstitch, a neckline band is more casual in nature yet still features a somewhat tailored look. If you have never attempted to sew a neckline band before, keep in mind that this finish is often more suitable for textured, medium-to-heavy weight fabrics. Working with a thicker, textured fabric, especially in the learning process if you are a sewing beginner, will allow you more room for error without jeopardizing the final product. As a side note: When clean-finsihing the neckline on lightweight, fine fabrics, we recommend using a bound finish instead. This technique features a folded binding along the more vulnerable, round edges of the neckline making them much easier to manipulate without adding unnecessary bulk to the entire neckline area. Now, back to our task at hand: Clean finishing a raw neckline edge using a top-stitched band.
Here are 5 important sewing techniques you will practice when applying this neckline finish: |
The Blog:A journey into our design process, sewing tutorials, fashion tips, and all the inspiring people and things we love. Doina AlexeiDesigner by trade and dressmaker at heart. I spend most of my days obsessing over new fabrics and daydreaming new ideas. Sadie
Executive Assistant & Client Relations Manager Archives
November 2019
Categories
All
|
-
Sewing Tutorials
-
Basics
>
- Aligning Pattern Grainlines To Fabric
- Preparing Fabrics For Sewing
- Pinning Sewing Patterns To Fabric
- Placing Sewing Patterns On Fabric For Cutting
- Rotary Cutters or Fabric Scissors?
- Cutting The Sewing Patterns
- What Are Notches And How To Use Them In The Sewing Process
- Transferring Notches From Pattern To Fabric
- Transferring Seamlines to Fabric
- Staystitching
- Backstitching: A Complete Guide
- Hand Basting: A Complete Guide
- Sewing Continuous Bias Binding
- Darts >
-
Sewing Seams
>
- The Basics Of Seams And Seam Allowance
- How To Sew A Straight Seam
- Sewing Curved Seams
- Sewing Corner Seams
- Trimming And Grading Seam Excess
- Notching/Clipping Seam Allowance for Tension Release
- Sewing Topstitched Seams
- Sewing Corded Seams
- Sewing A Slot Seam
- Sewing A Gathered Seam
- Sewing Bias Seams
- Sewing Seams With Ease
- Sewing Seams With Crossing Seamlines
- Sewing Unlike Fabric Seams
- How To Iron Seams: Ironing Tools And Conventions
- Sewing With Knit Fabrics
- Understanding Stitch Length And Tension
- Sewing Unique Fabric Seams
-
Seam Finishes
>
- Seam Finishing Techniques - Overview
- Applying A Pinked Seam Finish
- Applying A Bias Bound Seam Finish
- Serging And Zigzag Seam Finishes
- Sewing A Self-Bound Seam Finish
- Sewing A French Seam Finish
- Sewing A Hong Kong Seam Finish
- Sewing A Mock French Seam Finish
- Sewing A Turned-and-Stitched Seam Finish
- Sewing Overcast Hand-Applied Seam Finishes
- Sewing A Flat Felled Seam
- Sewing A Hairline Seam Finish
-
Hem Finishes
>
- Garment Hem Finishes: Overview
- Sewing A Double Fold Hem Finish
- Sewing A Single Fold Hem Finish
- Sewing Bound Hem Finishes
- Sewing An Exposed Double Layer Bound Hem
- Sewing A Folded-Up Bound Hem with Pre-folded Binding
- Sewing A Hong Kong Hem Finish
- Sewing A Band Hem Finish
- Sewing A Bias Faced Hem Finish
- Sewing A Twill Tape Hem Finish
- Sewing A Rolled Hem Finish
- Sewing A Shaped Hem Facing
- Using Fusible Hem Tape And Webbing
- Finishing A Lace Fabric Hem
- Finishing A Leather Hem
- Sewing Faced Hem Corners
- How To Finish Lining At The Hem
- Finishing Fabric Corners by Mitering >
- Interfacing A Hemline: Lined And Unlined Examples
-
Sewing Pockets
>
- Curved Patch Pocket With Flap
- Unlined Square Patch Pockets
- Lined Patch Pockets: Two Ways
- Extension On-Seam Pockets
- Separate On-Seam Pocket
- Front Hip Pockets
- Bound Double Welt Pocket
- Double Welt Pocket With Flap
- Self-Welt Pocket (Using Single Fabric Layer)
- Slanted Welt Pocket (Hand-Stitched)
- Faced Slash Pockets: Overview >
-
Sewing Zippers
>
- Sewing Zippers: General Information
- Sewing A Centered Zipper
- Sewing A Lapped Zipper
- Sewing An Invisible Zipper
- Sewing A Fly Front Zipper
- Sewing A Closed-End Exposed Zipper (No Seam)
- Sewing An Exposed Separating Zipper
- Sewing Hand Stitched Zipper Applications
- Sewing A Zipper Underlay
- Sewing A Placket-Enclosed Separating Zipper
- Sleeveless Finishes >
-
Neckline Finishes
>
- Sewing A Neck Shaped Facing
- Sewing An All-In-One Neck Facing
- Neck And Garment Opening Combination Facings >
- Sewing A Bias Faced Neckline Finish
- Sewing A Band Neckline Finish
- Bound Neckline Finishes: Overview >
- Sewing A Semi-Stretch Strip Band Neckline
- Ribbed Neck Band And Classic Turtleneck
- Decorative Neckline Finishes >
- Finishing Facing Edges >
-
Extras
>
- A Complete Guide on Interfacing
- Sewing Bound Spaghetti Straps
- Sewing Spaghetti Straps To A Faced Neckline
- Sewing Ruffles: Overview
- Patterning And Sewing A Circle Ruffle
- Sewing A Gathered Heading Ruffle
- Sewing Double Layer Gathered Ruffles
- Sewing A Gathered Ruffle Into A Seam
- Sewing A Gathered Ruffle To A Fabric Edge
- Sewing A Fabric Surface Slit
- Sewing A Slit Seam
- Hand-Applied Straight Stitches
- Hand-Applied Blind Stitches
- Hand-Applied Overedge Stitches
- Hand-Applied Tack Stitches
- Hand-Applied Decorative Stitches
-
Basics
>
- Custom Bridal
- Custom Apparel
- About
- Blog
Services |
Company |
|





 RSS Feed

