An Interview With Melanie Blankenship: Rewards, Challenges And a Peek Into The Modeling Industry.11/8/2017 The world of modeling is just as much glamour and mystery as it is hard work. What we don't see in an ad campaign or the final images of an editorial are the long hours of behind-the-scenes work in grueling weather conditions using sometimes uncomfortable garments and props. What truly separates the weak from the strong is the ability to produce beautifully crafted and effortless images regardless of the unpredictable conditions endured behind the camera. A model that works great under pressure, adjusting to different settings and offering variety in her/his look is the result of not only talent but years of practice and experience. On the "strong" list is Melanie Blankenship-A talented, versatile model we've had the pleasure of working with on numerous occasions. 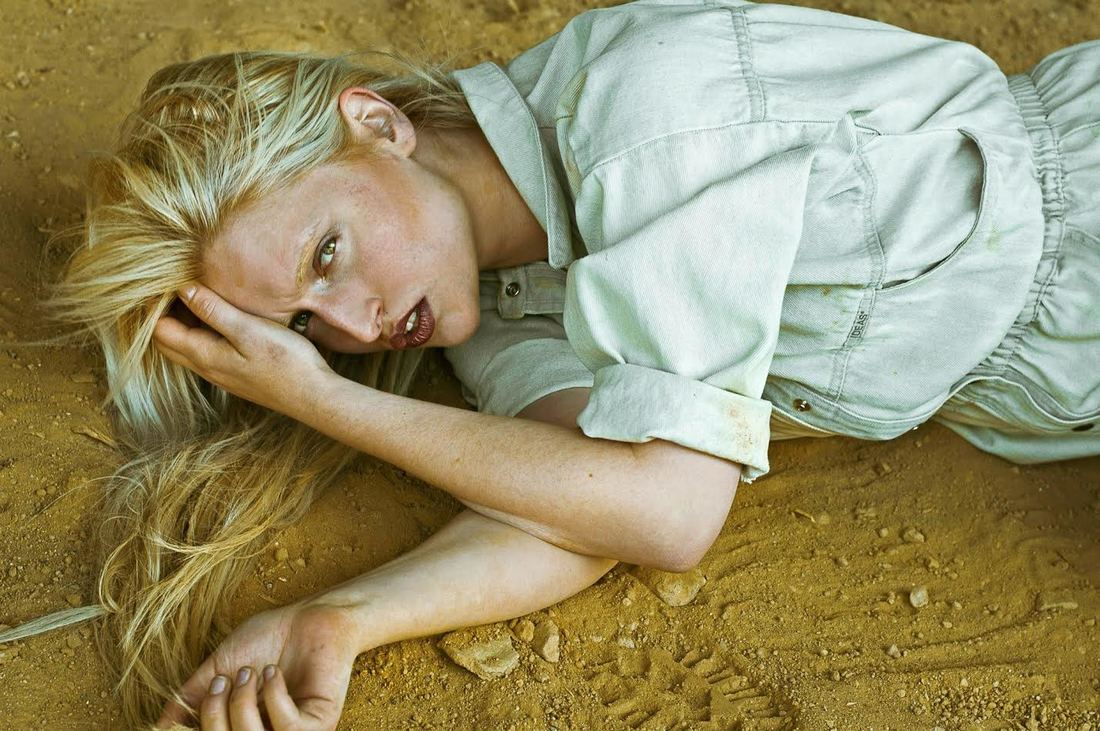 Courtesy of Melanie Blankenship Whether it is beauty, bridal or fashion, there isn't a topic not covered in Melanie's portfolio. She can do commercial just as well as she does editorial easily transitioning from classic-feminine to punk-rocker without losing her personal edge. As you'll see in some examples of her work below, Melanie's ability to adapt to different styles and conceptual looks allow her to be greatly sought after both in the Washington DC area, where she currently lives and works, as well as various major cities across the US and abroad. In the array of questions to follow, Melanie lets us in on her background and work, piquing the curiosity of anyone interested in learning a bit more about the modeling industry. Topics like what it is like to work as a freelance model, should you work with an agency, and what are the industry moments that have helped her build thick skin are just a few that Melanie Blankenship shares with us in the interview below. 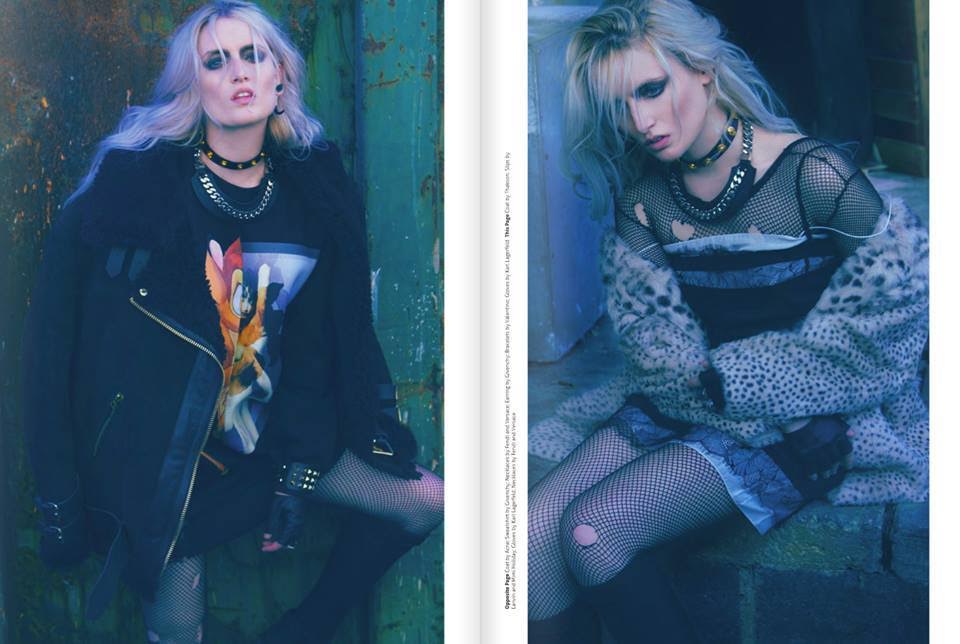 Courtesy of Melanie Blankenship How did you get involved in modeling? How old were you when you did your first photo shoot and what was that experience like? One of my really good friends and photographer Stephen Archer got me into modeling in high school. He would always ask me to model for him for his college portfolio. Stephen interned with photographer Roy Cox, and when I was 17, Roy asked me to come into his studio for a professional photo shoot with a makeup artist. I was hooked on modeling and the whole experience of it from there. The first shoot was a beauty shoot with a few different makeup looks and also the first time I worked with a makeup artist- it was really fun! Was there a moment in your life or perhaps a specific project/photo shoot that prompted you to pursue modeling full time? Shooting with photographer Stephen Archer is what inspired and motivated me to model more and do it professionally. He coached me with finding agencies and helped me figure out which photographers could produce photos that would benefit my branding and portfolio. 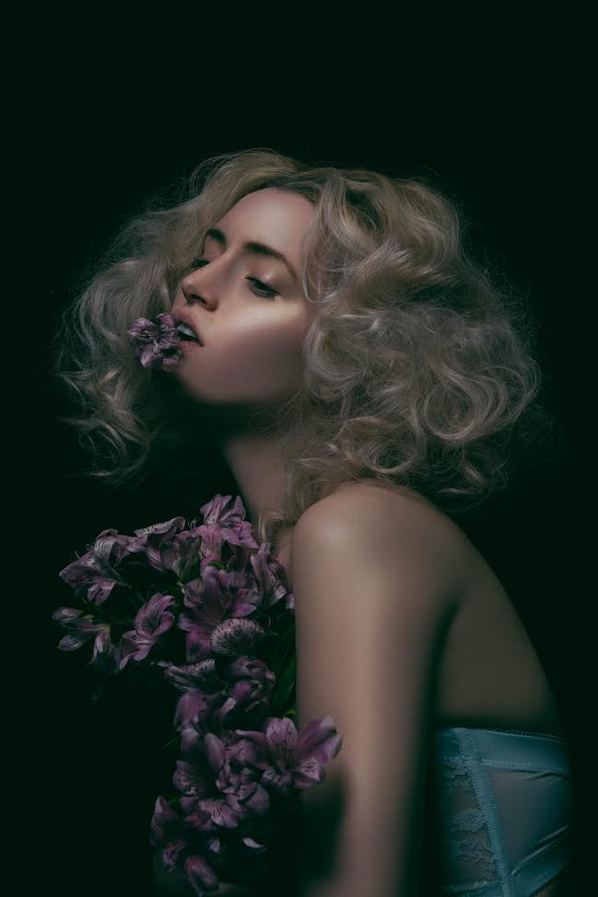 Courtesy of Melanie Blankenship What is the most rewarding part of your work? I love seeing the way different photographers/makeup artists/stylists can make an image look. The creative expression and ability to transform a set, makeup look, etc. is what is most satisfying to me. I also love meeting new wonderful people in the industry and certainly appreciate all the opportunities I've been given. What is the most challenging aspect of modeling for you, especially with regards to the fashion industry? People are sometimes insulting about my look but I don't take it nearly as personally as I used to. Even when I was a size "2" I was too large in the modeling industry. That's why I decided to freelance. I maintain a healthy weight and don't feel the pressure to fit an "agency standard" type of look anymore. I've always been a bit rebellious so when people tell me I can't do something, I try to make it a point to prove them wrong. I enjoy being able to be different than the agency norm while still get consistent modeling work. 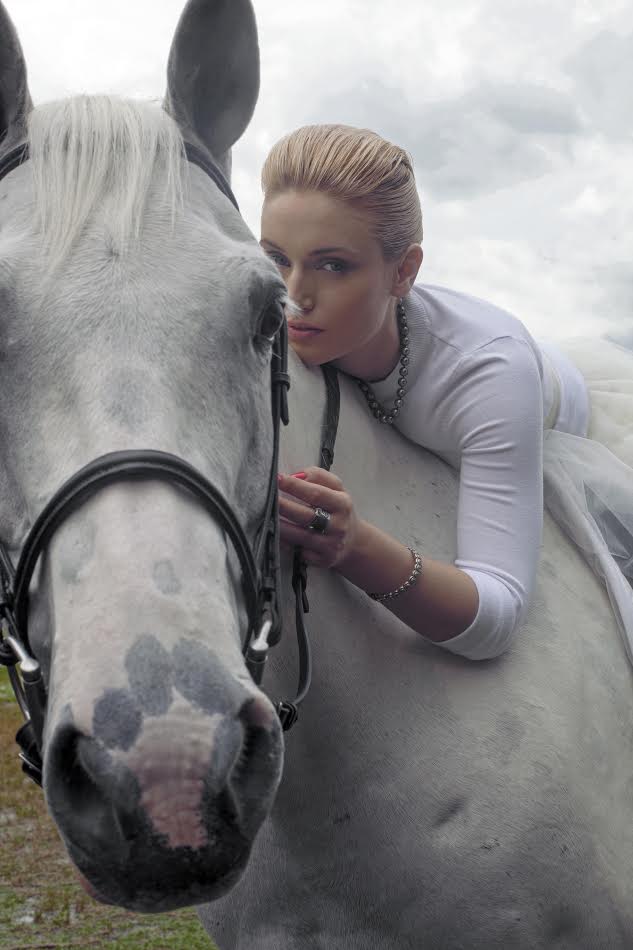 Courtesy of Melanie Blankenship What are 3 main things that you learned about yourself from your work throughout the years? 1. Not all photos of me are good. Actually, a majority are in my little black book no one will ever see. 2. I can't please everyone I work with and that's okay. 3. I'm exactly what someone is looking for somewhere. The cornerstone of a good model is the ability to offer variety and adapt to different settings and looks. This unique ability to adjust your style and look to any theme shows clearly in your portfolio- is this something that requires effort and practice or does it come naturally for you? During the first year of modeling, my friend and mentor Stephen Archer came to shoots with me and directed me during my first photo shoots. I felt so awkward in front of the camera. Over time, I became a lot more comfortable and was able to get in character or give a certain look or expression specifically aimed at the theme. I always ask the photographer/client what type of look they're going for before a shoot to make sure I'm prepared to give them what they want. Some people provide a mood board with different poses/expressions prior to the shoot and I find that to be helpful. If no direction is given, I just give them a slow motion dance with a variety of looks.  Courtesy of Melanie Blankenship "I'm exactly what someone is looking for somewhere. " We live in a socially conscious world and modeling is a craft that seems to always get caught in the firestorm. Do you think we are becoming more accepting of different shapes and body types in the fashion industry or do we still have more work to do? Slowly, I think our society is becoming more accepting of all body types in the modeling world. I'd like to see more variety of people, ethnicities and body types in fashion campaigns or advertisements in general- All sorts of "real" people need to be represented. There is a perception that you have to start modeling at a very young age to “make it”. While this allows for more years of practice and experience, is it necessary to start that early? Why? Some agencies have an age cut off...some don't. Modeling is suitable for every age because it's not just young people that wear fashionable clothing or are represented in commercials for beauty products and clothing for example. Modeling might have an age cut off with some agencies, but there's plenty of work out there past age 23. 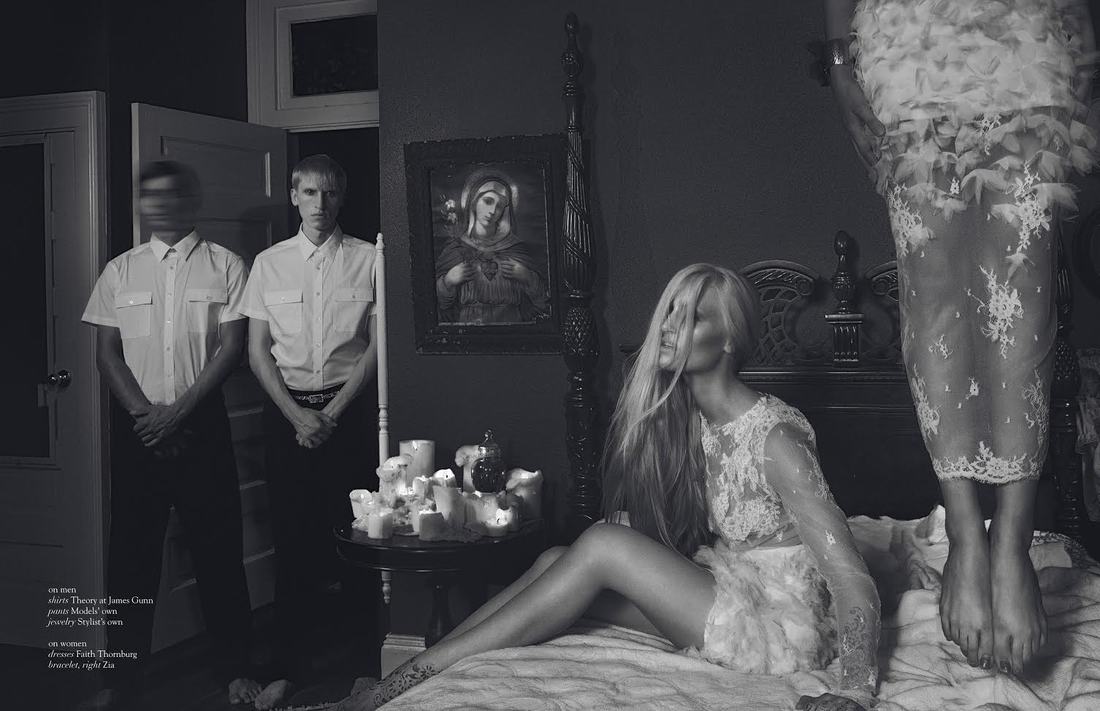 Courtesy of Melanie Blankenship In this globalized, digital environment, does location still matter when it comes to modeling? From your experience, what is the difference between modeling in the Washington DC area and other major cities like NYC, for example? I've had a lot of great modeling work in NYC, Los Angeles, Atlanta, Philadelphia, and Washington D.C. A majority of the best work I've done has been in major cities. On the other hand, I had some amazing gigs in other places that aren't as "city-like". I usually know who I am going to be working with in DC because I am from this area and it's a small industry around here. When I visit NYC, I usually only work with someone once or twice because they like to work with NYC-based models as it's more convenient for them. 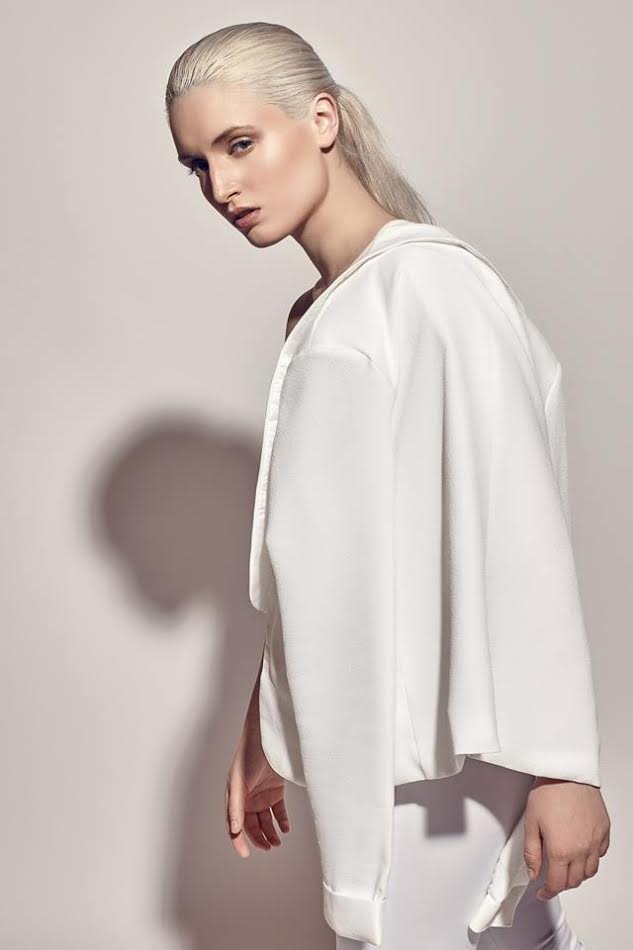 Courtesy of Melanie Blankenship Have you worked on a photo shoot abroad and what was that experience like? I did a few shoots in China. I loved them. I didn't speak the same language as the photographer but we were still able to get our ideas across and communicate with hand motions and face emotions. Such a fun time! " I maintain a healthy weight and don't feel the pressure to fit an "agency standard" type of look anymore." Do you have a favorite photo shoot, project or even single photo? What resonates with you in this particular work? I have so many favorite photoshoots. I wish I could frame all of my favorite shots and put them on my walls without looking like I have a shrine of myself or am just super narcissistic [ :) ]. Oriana Layendecker, An Le, Holly Burnham, Stephen Archer, and Aaron Bernstein are some of the favorite photographers I've worked with. What resonates with me in those photos is simply the fun I had shooting them: I smashed berries on my face, rolled around in the dirt, wore expensive wardrobe that I could never afford, and joked around with the team while working in truly awesome locations. 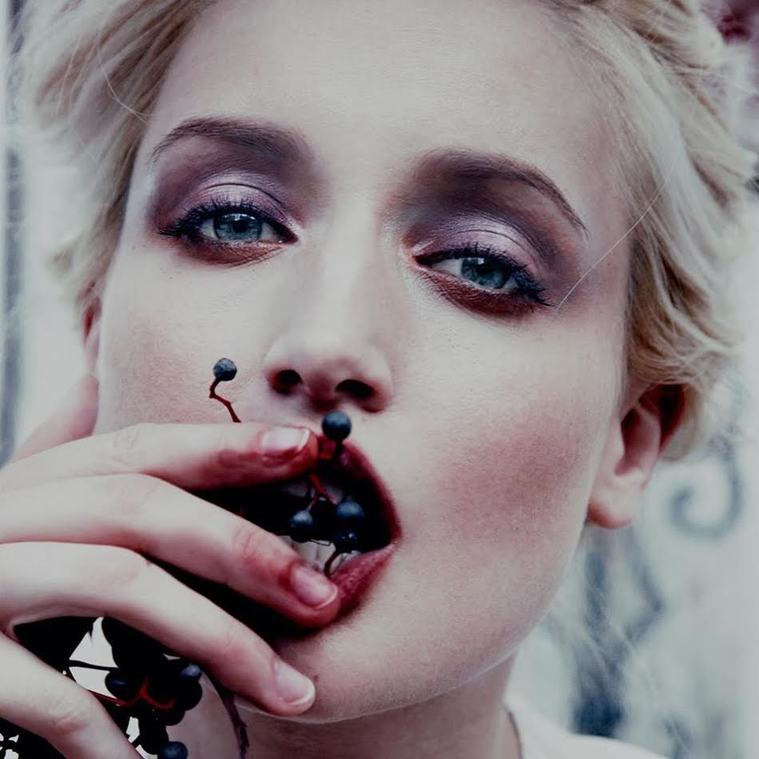 Courtesy of Melanie Blankenship " I smashed berries on my face, rolled around in the dirt, wore expensive wardrobe that I could never afford..." What are the moments in your rich modeling experience that have helped you build thicker skin and become stronger in your work? An agency in Philadelphia told me I was too fat and too short to ever model. Even though they still signed me, I terminated the contract within a week. That moment inspired me to get a decent agent, travel, model, make money, and prove them wrong. I've met all sorts of people in this industry who are just mean and I don't take it personally anymore. If someone wants to be insulting, then I assume something bad is going on in their life to make them act that way. I just carry on and do me! What advice would you give to someone who is starting out in the modeling industry today? Be prepared. Ask other models what their experience has been and if they have any advice. Don't get into it because you think you'll make a lot of money- do it because you enjoy the experience. 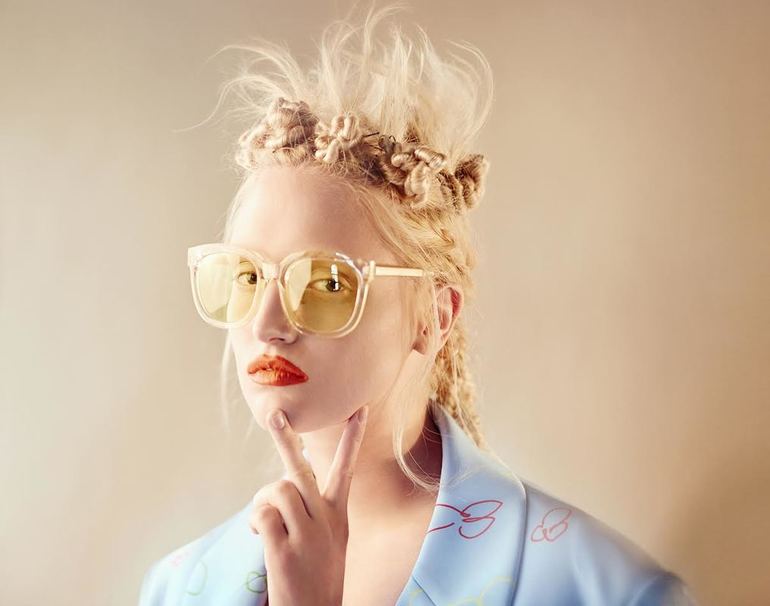 Courtesy of Melanie Blankenship "Don't get into it because you think you'll make a lot of money- do it because you enjoy the experience."
1 Comment
11/22/2022 04:01:03 am
Valuable tips! Thanks for sharing your advice. I'll keep it in my mind. Leave a Reply. |
The Blog:A journey into our design process, sewing tutorials, fashion tips, and all the inspiring people and things we love. 
Doina AlexeiDesigner by trade and dressmaker at heart. I spend most of my days obsessing over new fabrics and daydreaming new ideas. 
Sadie
Executive Assistant & Client Relations Manager Archives
November 2019
Categories
All

|

-
Sewing Tutorials
-
Basics
>
- Aligning Pattern Grainlines To Fabric
- Preparing Fabrics For Sewing
- Pinning Sewing Patterns To Fabric
- Placing Sewing Patterns On Fabric For Cutting
- Rotary Cutters or Fabric Scissors?
- Cutting The Sewing Patterns
- What Are Notches And How To Use Them In The Sewing Process
- Transferring Notches From Pattern To Fabric
- Transferring Seamlines to Fabric
- Staystitching
- Backstitching: A Complete Guide
- Hand Basting: A Complete Guide
- Sewing Continuous Bias Binding
- Darts >
-
Sewing Seams
>
- The Basics Of Seams And Seam Allowance
- How To Sew A Straight Seam
- Sewing Curved Seams
- Sewing Corner Seams
- Trimming And Grading Seam Excess
- Notching/Clipping Seam Allowance for Tension Release
- Sewing Topstitched Seams
- Sewing Corded Seams
- Sewing A Slot Seam
- Sewing A Gathered Seam
- Sewing Bias Seams
- Sewing Seams With Ease
- Sewing Seams With Crossing Seamlines
- Sewing Unlike Fabric Seams
- How To Iron Seams: Ironing Tools And Conventions
- Sewing With Knit Fabrics
- Understanding Stitch Length And Tension
- Sewing Unique Fabric Seams
-
Seam Finishes
>
- Seam Finishing Techniques - Overview
- Applying A Pinked Seam Finish
- Applying A Bias Bound Seam Finish
- Serging And Zigzag Seam Finishes
- Sewing A Self-Bound Seam Finish
- Sewing A French Seam Finish
- Sewing A Hong Kong Seam Finish
- Sewing A Mock French Seam Finish
- Sewing A Turned-and-Stitched Seam Finish
- Sewing Overcast Hand-Applied Seam Finishes
- Sewing A Flat Felled Seam
- Sewing A Hairline Seam Finish
-
Hem Finishes
>
- Garment Hem Finishes: Overview
- Sewing A Double Fold Hem Finish
- Sewing A Single Fold Hem Finish
- Sewing Bound Hem Finishes
- Sewing An Exposed Double Layer Bound Hem
- Sewing A Folded-Up Bound Hem with Pre-folded Binding
- Sewing A Hong Kong Hem Finish
- Sewing A Band Hem Finish
- Sewing A Bias Faced Hem Finish
- Sewing A Twill Tape Hem Finish
- Sewing A Rolled Hem Finish
- Sewing A Shaped Hem Facing
- Using Fusible Hem Tape And Webbing
- Finishing A Lace Fabric Hem
- Finishing A Leather Hem
- Sewing Faced Hem Corners
- How To Finish Lining At The Hem
- Finishing Fabric Corners by Mitering >
- Interfacing A Hemline: Lined And Unlined Examples
-
Sewing Pockets
>
- Curved Patch Pocket With Flap
- Unlined Square Patch Pockets
- Lined Patch Pockets: Two Ways
- Extension On-Seam Pockets
- Separate On-Seam Pocket
- Front Hip Pockets
- Bound Double Welt Pocket
- Double Welt Pocket With Flap
- Self-Welt Pocket (Using Single Fabric Layer)
- Slanted Welt Pocket (Hand-Stitched)
- Faced Slash Pockets: Overview >
-
Sewing Zippers
>
- Sewing Zippers: General Information
- Sewing A Centered Zipper
- Sewing A Lapped Zipper
- Sewing An Invisible Zipper
- Sewing A Fly Front Zipper
- Sewing A Closed-End Exposed Zipper (No Seam)
- Sewing An Exposed Separating Zipper
- Sewing Hand Stitched Zipper Applications
- Sewing A Zipper Underlay
- Sewing A Placket-Enclosed Separating Zipper
- Sleeveless Finishes >
-
Neckline Finishes
>
- Sewing A Neck Shaped Facing
- Sewing An All-In-One Neck Facing
- Neck And Garment Opening Combination Facings >
- Sewing A Bias Faced Neckline Finish
- Sewing A Band Neckline Finish
- Bound Neckline Finishes: Overview >
- Sewing A Semi-Stretch Strip Band Neckline
- Ribbed Neck Band And Classic Turtleneck
- Decorative Neckline Finishes >
- Finishing Facing Edges >
-
Extras
>
- A Complete Guide on Interfacing
- Sewing Bound Spaghetti Straps
- Sewing Spaghetti Straps To A Faced Neckline
- Sewing Ruffles: Overview
- Patterning And Sewing A Circle Ruffle
- Sewing A Gathered Heading Ruffle
- Sewing Double Layer Gathered Ruffles
- Sewing A Gathered Ruffle Into A Seam
- Sewing A Gathered Ruffle To A Fabric Edge
- Sewing A Fabric Surface Slit
- Sewing A Slit Seam
- Hand-Applied Straight Stitches
- Hand-Applied Blind Stitches
- Hand-Applied Overedge Stitches
- Hand-Applied Tack Stitches
- Hand-Applied Decorative Stitches
-
Basics
>
- Custom Bridal
- Custom Apparel
- About
- Blog
 RSS Feed
Services |
Company |
|
