|
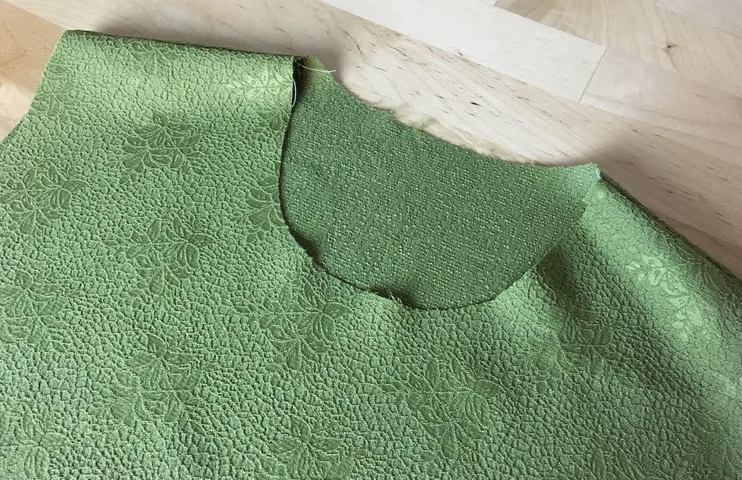
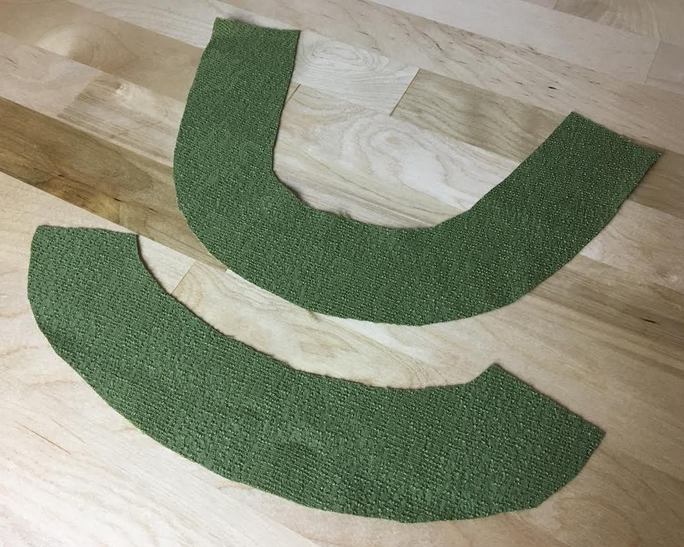
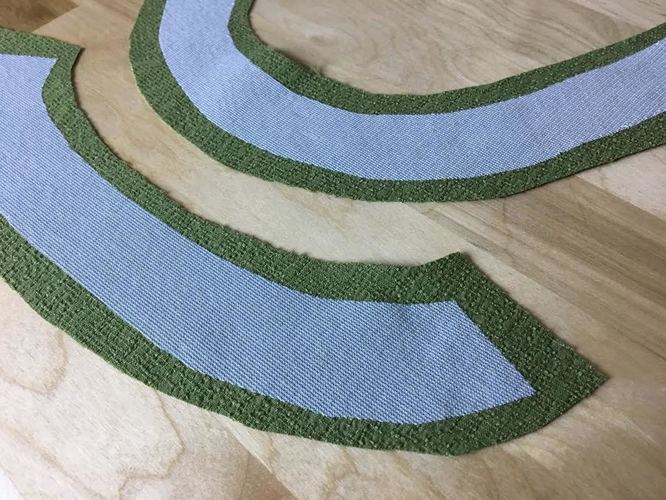
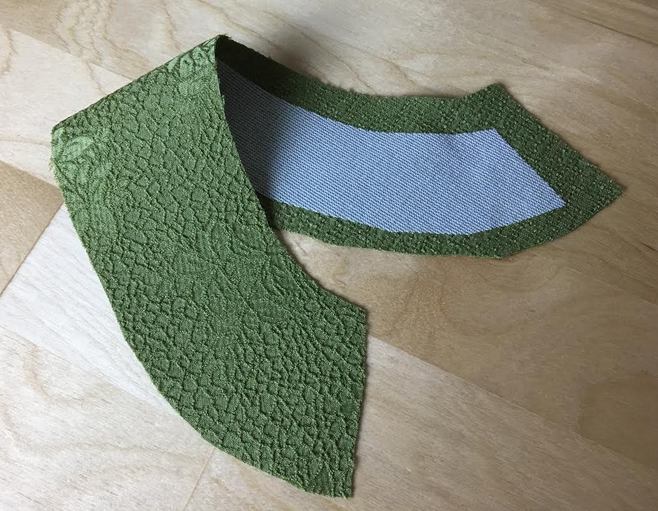
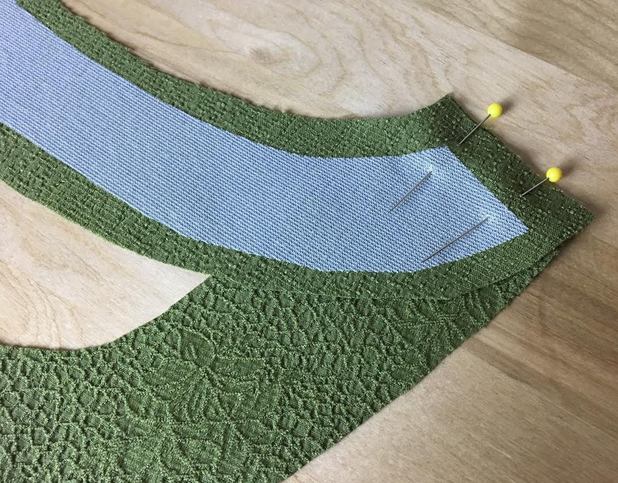
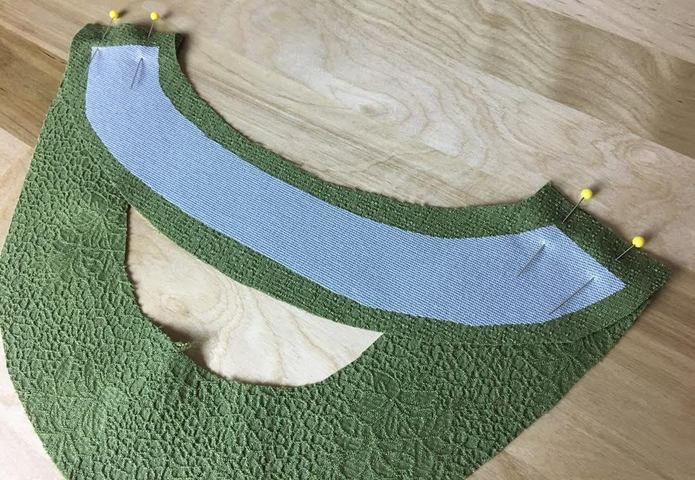
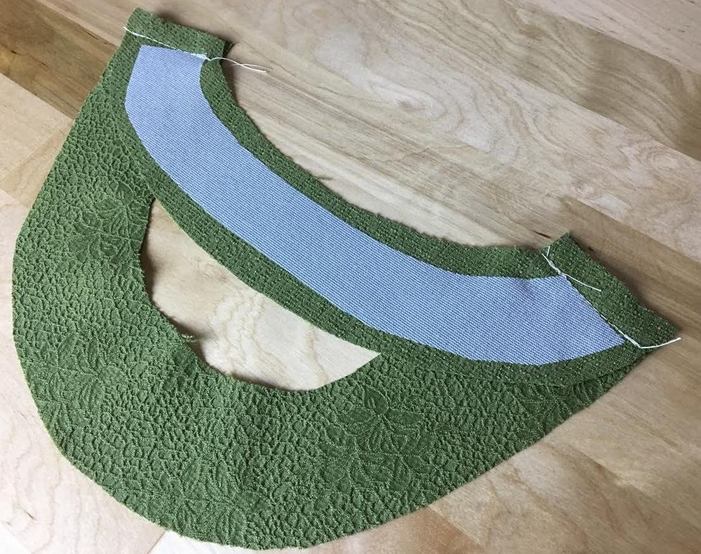
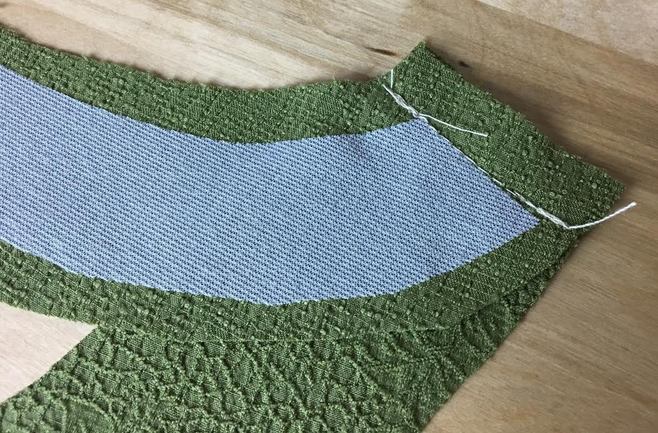
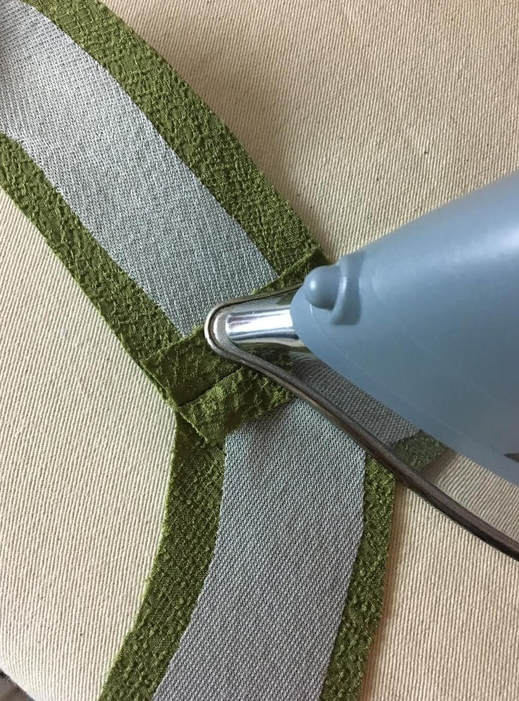
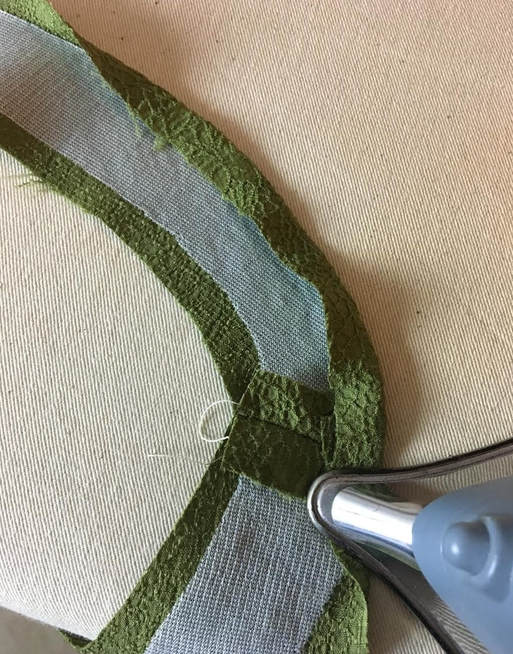
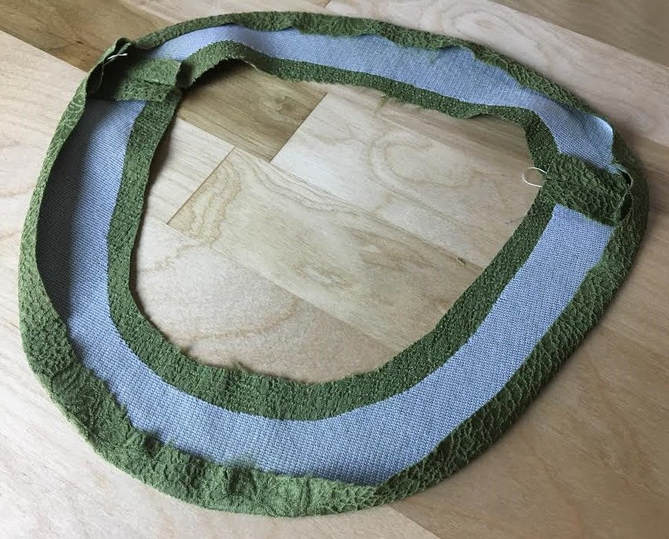
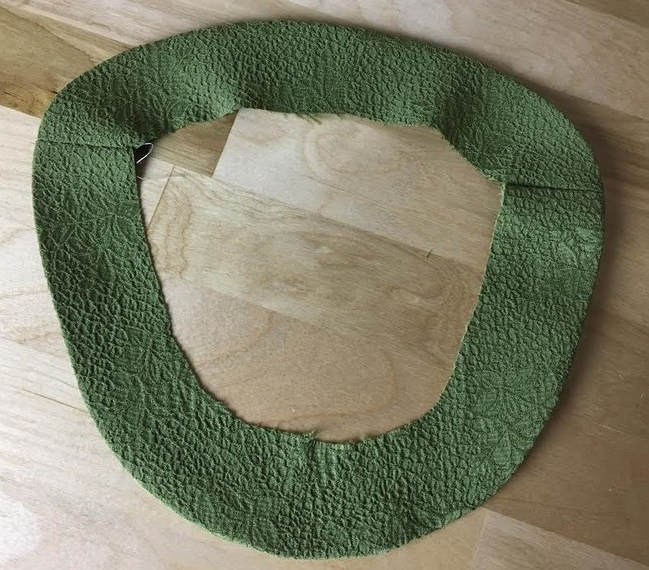
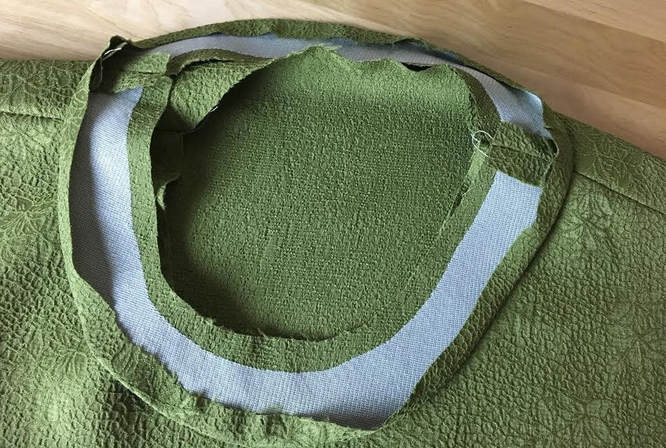
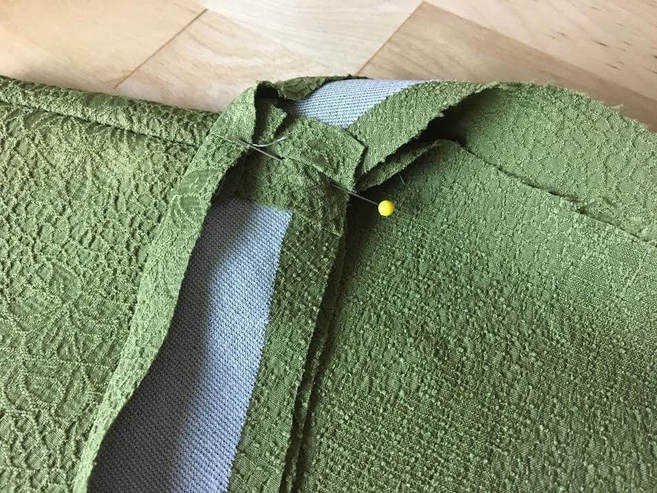
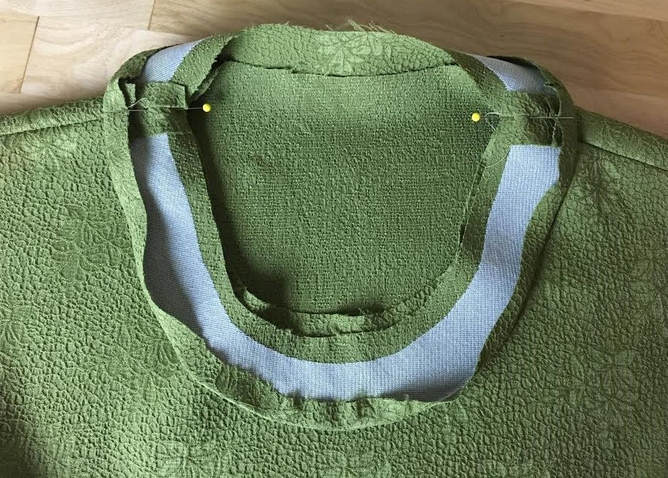
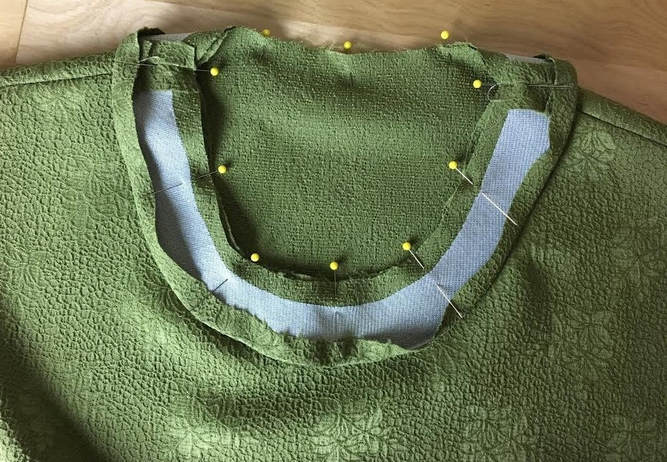
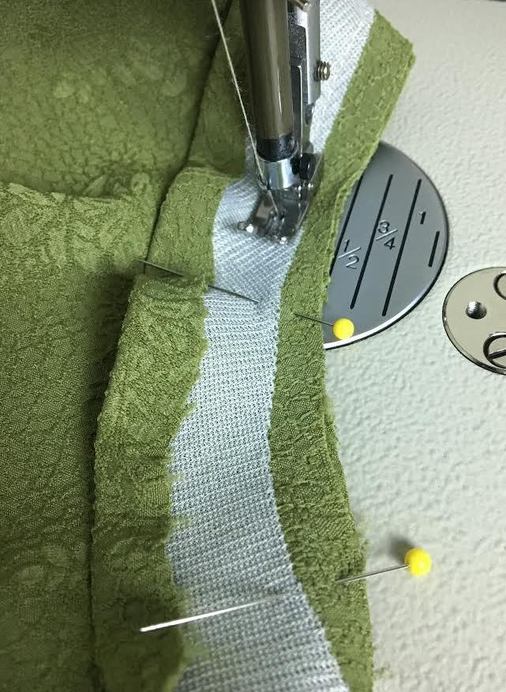
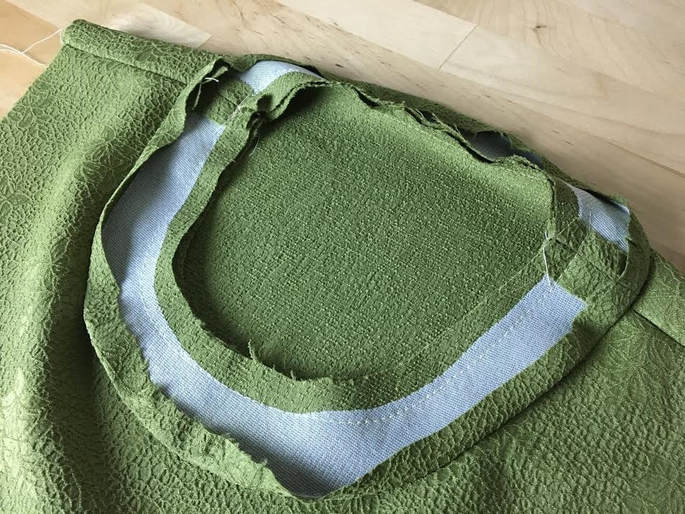
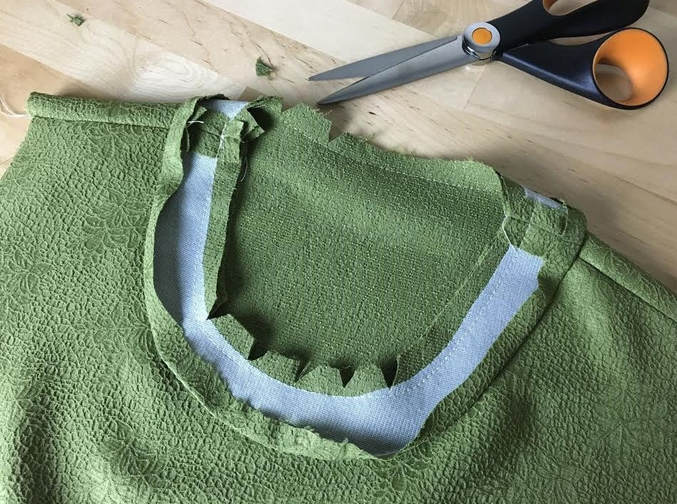
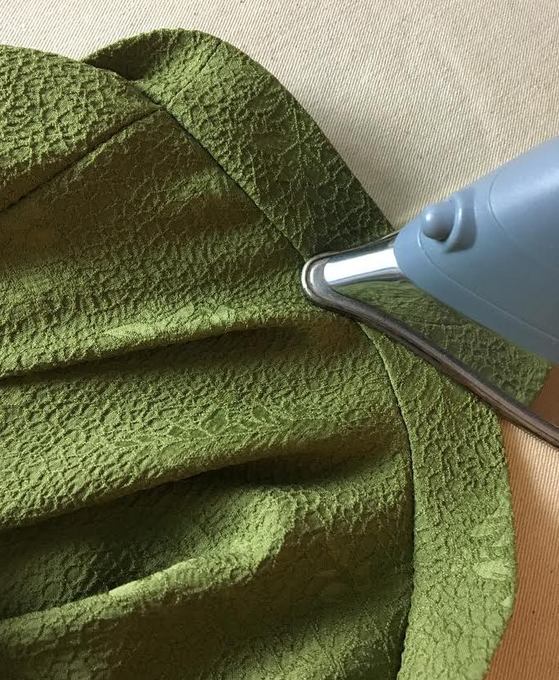
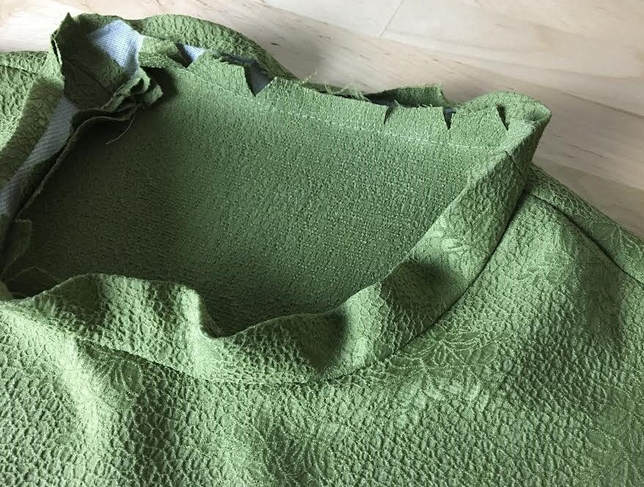
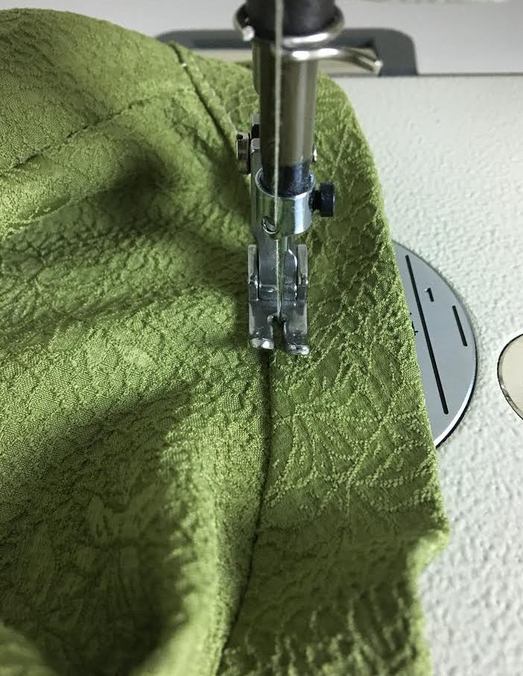
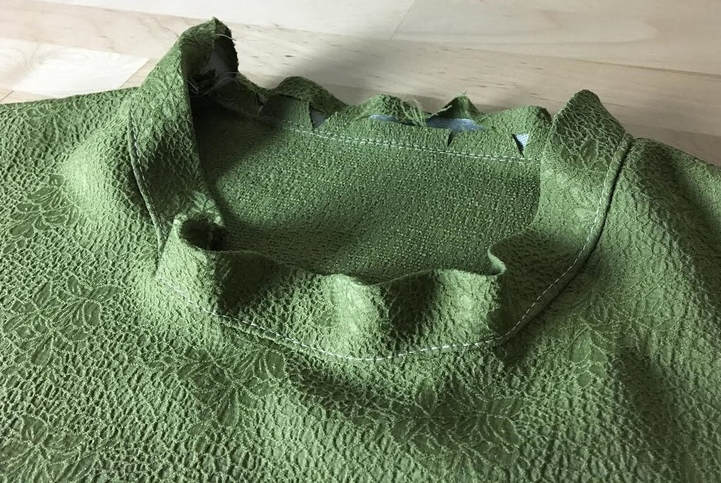
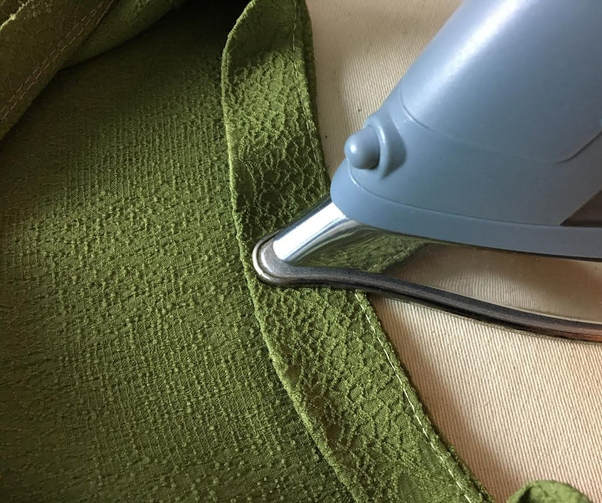
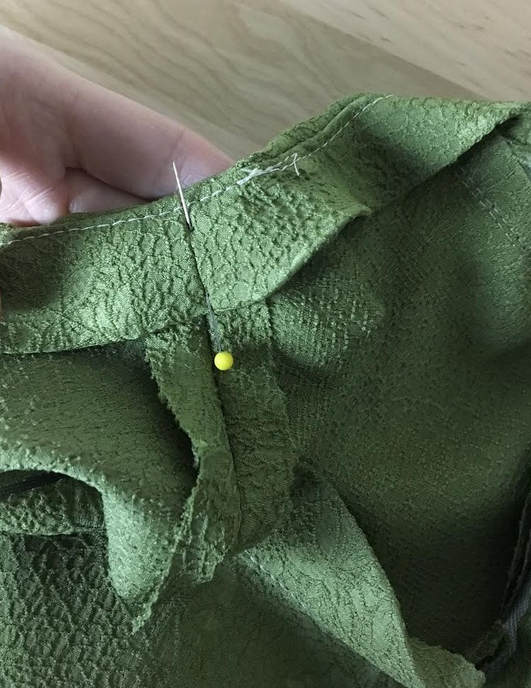
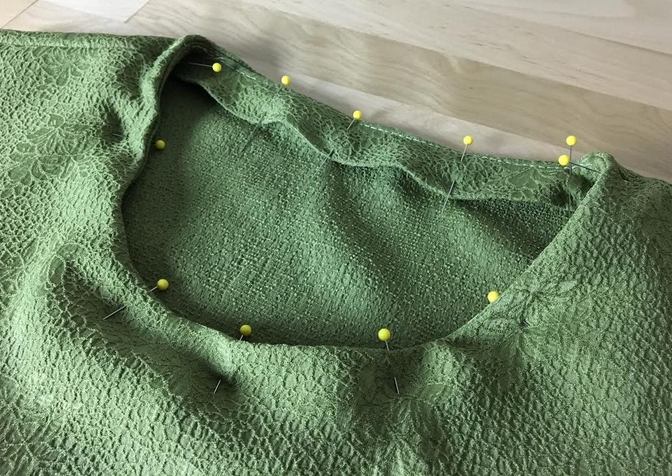
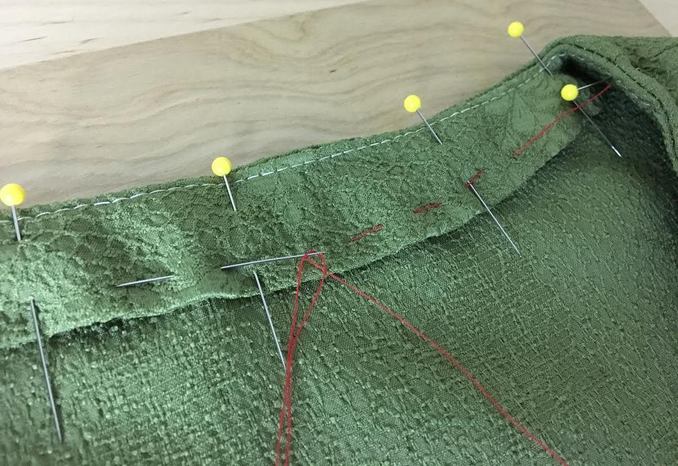
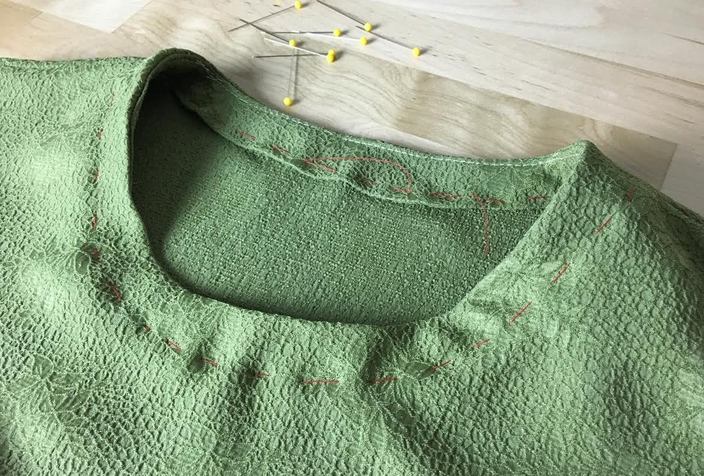
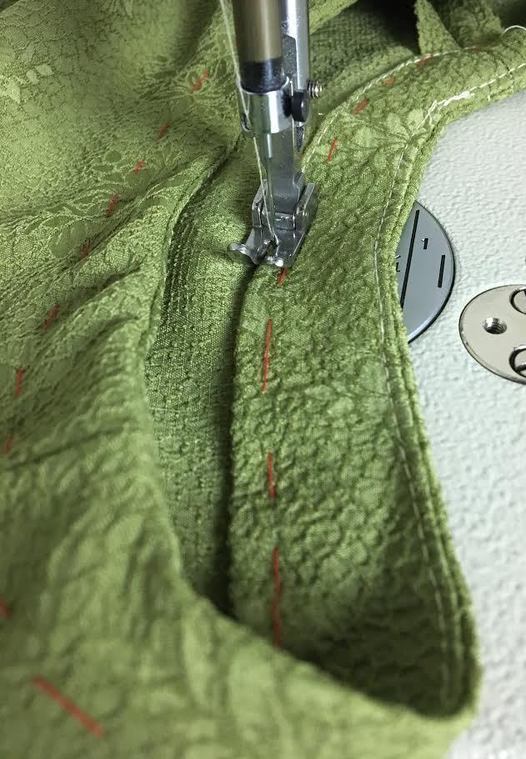
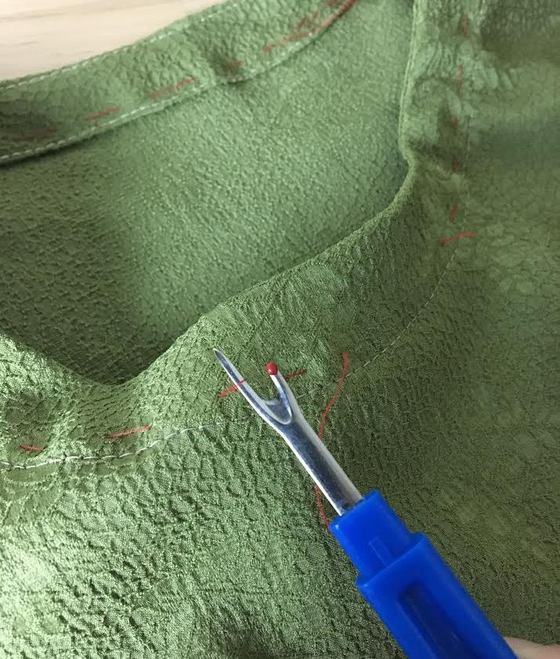
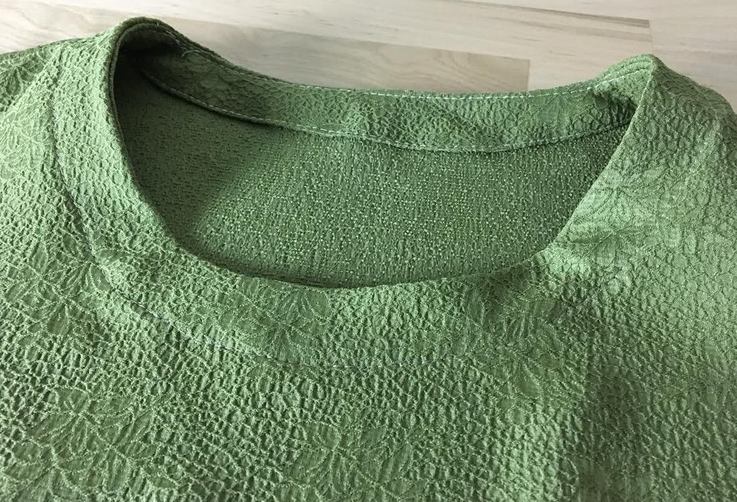
Clean finishing a round neckline is one of the more challenging tasks for sewing beginners. As much as we try to avoid it, almost all dresses and blouses feature necklines that require sewing along a round or curved edge. When you are in the process of learning how to sew, even sewing a straight seam can be quite an undertaking. Now, imagine running your machine needle along a very circular, curved edge- a bit intimidating, right? Although nothing gets better without practice over time, especially when it comes to sewing, mastering a few sewing techniques like understitching, staystitching and ironing as you go, will eliminate some of the frustration associated with the first few steps of the learning process. When it comes to the art of sewing necklines, there are plenty of techniques used to clean finish those pesky curved edges. The most commonly used techniques are: with binding (known as a bound neckline), using a neckline facing (faced), with a stretch band (usually ribbed knit), adding a collar, and using a top-stitched band (the method we'll show you below) It is true that sewing a topstitched band along a curved neckline is perhaps one of the more difficult methods for finishing a round edge. However, this is a great technique to master if you want to avoid sewing a neck facing. As opposed to a facing, a topstitched band will not flop to the outside of the garment and is one of the more durable, functional and washer-friendly neckline finishes. Due to the addition of the topstitch, a neckline band is more casual in nature yet still features a somewhat tailored look. If you have never attempted to sew a neckline band before, keep in mind that this finish is often more suitable for textured, medium-to-heavy weight fabrics. Working with a thicker, textured fabric, especially in the learning process if you are a sewing beginner, will allow you more room for error without jeopardizing the final product. As a side note: When clean-finsihing the neckline on lightweight, fine fabrics, we recommend using a bound finish instead. This technique features a folded binding along the more vulnerable, round edges of the neckline making them much easier to manipulate without adding unnecessary bulk to the entire neckline area. Now, back to our task at hand: Clean finishing a raw neckline edge using a top-stitched band. Here are 5 important sewing techniques you will practice when applying this neckline finish: - Understitching: A stitch applied to the inside of the band to keep it stable and facing towards the inside of the garment. This is an important technique to learn any time you face a task similar in nature to facings and lining. - Notching and clipping the seam allowance along the most curved edges: This is especially necessary when applying a neckline band (or facing) in order to release tension and allow for a smooth curve in the final edge. - Ironing every fold and seam as you go: Perhaps the number one rule in sewing- You should get in the habit of always ironing folds and seams during the actual sewing process. Doing so will allow them to remain flat and stable thus making the garment easier to manipulate in the sewing process. Not only does this facilitate sewing, it also allows for a well-made, professional final product. -Temporary hand basting: As you'll see in the example below, a quick temporary hand basting stitch will keep the neckline band flat and aligned during machine stitching. As a sewing beginner, it is imperative that you use hand basting to hold multiple layers of fabric and more tricky edges in place before final stitching. Doing so will minimize errors until you get more comfortable with your sewing machine. Over time, you will naturally graduate to using just pins. For now however, a temporary hand baste will eliminate the stress of puckering and miss-alignment which often requires a frustrating re-do. - Lifting the presser foot during machine stitching while leaving the needle inserted in the fabric: Sounds confusing? This one applies mainly to sewing beginners, especially in the case of minimal experience with sewing a very curved seam. The goal when stitching along a curved edge is to follow the seam allowance precisely without jeopardizing the smoothness of the final stitch. As a beginner, achieving this will most likely feel a bit impossible at first. A useful trick is to lift the presser foot during sewing but leave the machine needle inserted in the fabric. Once the fabric is free to move (with the needle still in) re-position the neckline edge in relation to the seam allowance guide for more comfortable stitching. Never stitch with the presser foot up. Once re-aligned, drop the presser foot back down and continue stitching until you feel the need to repeat the process. Every single one of these elements are important not only for facilitating the sewing process, but also achieving the correct neckline finish. If you understand and learn to apply these basic techniques on curved seams along the neckline, armholes or princess seams, you shouldn't run into any major sewing issues. The great aspect of mastering a topstitched neckline band finish is that its all-in-one construction process will actually allow you to practice all the sewing techniques listed above. Keep in mind that the easy way is always the correct way. You might be tempted to cut corners, but in reality, by-the-book sewing methods are tried and true to give you the best results with the least headache. How To Sew a Top Stitched Neckline Band: Step-By-Step Visual Guide1. Cut out the neckline band pieces. Note that just like the neckline itself, you can distinguish between the back and the front band piece by the fact that the front will always be longer and more curved than the back piece which is traditionally straighter in shape. You can draft a neckline band pattern using the same method as a neckline facing, except it should be thinner in width. A good width to start with (including the seam allowance on all edges) is 2 inches. If the neckline seam allowance is 1/2" and the folded bottom edge is 1/2", a 2" total width will result in a 1" finished band. It is up to you how wide you want the neckline band to be but try not go bellow 1" or too wide until you get some practice under your belt. A neckline band that is too thin or too wide will be a little difficult to manipulate along the curved edge. 2. Using your sewing patterns or the fabric pieces of the band, cut out matching interfacing for both front and back. Trim the interfacing at approximately the seam allowance length along all edges. Doing so will minimize bulk when the band is folded and topstitched along the neckline. Always ensure that when you cut the interfacing pieces, the adhesive part corresponds to the wrong side of the fabric. 3. Align the back and front band pieces at the shoulder seam such that the face of the fabric on both pieces is touching. As a reference, keep in mind that the interfacing should always face the outside. Place a few pins perpendicular to the edge for easy removal during stitching. Repeat the alignment and pinning process on the second shoulder seam. 4. Apply a straight stitch at each shoulder seam at the designated seam allowance(according to your patterns) from the edge. The seam allowance in this tutorial is 1/2" along every edge. Don't forget to backstitch on each end of the stitch. This essential step will keep the seam stable and prevent it from coming undone during the rest of the sewing process. 5. Iron both shoulder seams open as shown above. 6. At this point, fold the outer edge (not the inner neckline edge) in at the proper seam allowance (1/2" in this example) and iron as you fold. Apply steam where necessary. The goal is to pre-fold the outer edge so that you can skip this step when the band is already sewn to the garment. The reason? Working with a small fabric piece is much easier than manipulating a whole garment on the ironing board. The final, pre-ironed band should look like the image above on its wrong side. The outer edge is folded evenly at the seam allowance throughout. On the other hand, the inner edge gets sewn to the garment's neckline and thus does not require folding. On its right side, the neckline band should have a smoothly folded outer edge. This is where you can visually test if the band maintains the same width throughout. Keep in mind that it may be a bit challenging to fold and iron the more curved areas. It is quite OK if the raw edge of the fabric puckers or wrinkles a bit- Once the band is topstitched to the garment, these slight imperfections will be encased on the inside of the neckline band. 7. Align the neck band to the neckline of the garment such that the face side of both pieces are touching. The easiest way is to turn the garment on its right side and position the band along the raw edge of the neckline with the wrong side of the band facing up. 8. As a first step in the pinning process, match the shoulder seam of the garment to the corresponding shoulder seam of the band and insert a pin horizontally, perpendicular to the edge as shown. 9. Repeat the step above on both shoulder seams. Aligning the shoulder seams first will make it much easier to than match the front and back pieces. Starting at the seam will also give you a preview of any errors in length or alignment that may require immediate attention. Note: No matter what sewing project you face, always match and pin corresponding seams first. Sometimes, fabric pieces may stretch in the pinning process or small length errors occur during pattern cutting. If the seams are matched and pinned first, the edges in between are easier to match and pinned to fit properly. 10. Match the rest of the garment neckline to the neck band and apply pins horizontally along the edge as displayed above. To facilitate the stitching process, it is best for the pin ball to face out, to the right of the raw edge of the fabric. 11. Apply a straight stitch following the correct seam allowance. Referring back to the previous step, the horizontal placement of the pins with the pin ball aligned on the right side of the raw edge will allow you to remove them easily and safely as you stitch. The curved stitch that bonds the neckline to the neck band should be smooth and follow the seam allowance evenly throughout. Sewing a curved neck seam will take lots of practice and some patience. Use the presser foot lifting method described above to realign the edge to the seam allowance guide during sewing. Don't forget to leave the machine needle in when you shift the fabric around for realignment or you risk jeopardizing the smoothness of the neckline seam. 12. Notch and/or clip the seam allowance to release tension along the curved edge of the neckline. Get as close as you can to the stitch but be very careful not to accidentally snip through it. Applying these tension release notches will allow the band to be shifted towards the inside of the garment resulting in a smooth neckline that maintains a smooth, flat edge. 13. After notching/clipping the seam allowance, iron the seam with the seam allowance pointing towards the neck band and away form the garment. Make sure that you continue to keep the outer edges folded in the ironing process as displayed above. Keep in mind that it might feel a bit uncomfortable to apply this ironing step on a regular ironing board. To facilitate the process, use the thinner corner of the ironing board by inserting it through the neckline opening. This should allow you to iron the band more comfortably. If you are getting serious about learning how to sew, invest in a sleeve ironing board as it will come in handy on all future projects moving forward. The image above is an example of what the neck band should look like once ironed. It will not be completely flat until it receives a much needed understitch- described in the step below. 14. Stitch on top of the neck band through the seam allowance at about 1/8" away from the neckline seam as displayed above. It is important to stitch through all layers of the seam allowance evenly underneath and make sure that it is pointing towards the neckline band. This sewing technique is called understitching and will ensure that the neckline band lays flat on the inside of the garment allowing for a smooth final neckline. For best results, the understitch should be applied evenly throughout at the same distance away from the neckline seam as displayed above. 15. Fold the neckline band inwards and iron along the neckline edge. You'll find that the addition of the seam allowance notches and understitching, the ironing process will be quite easy. Ironing the neckline edge at this point (before final topstitching) will provide extra stability and facilitate the rest of the sewing steps. This is also the first step used to align the neck band properly in relation to the neckline edge. 16. On the inside of the garment, match the shoulder seam of the garment to the corresponding seam on the band. To keep the two seams perfectly aligned, insert a pin through all layers of the fabrics underneath. Repeat the same step on the other shoulder seam. Remember you should always align and pin corresponding seams first before pinning the rest of the neckline band in place. 16. Pin the rest of the band horizontally on the inside of the garment as shown in the image above. Horizontal pin placement will hold the band in place better and allow for easy pin removal during the stitching process. 17. For best results, add a temporary hand baste close to the bottom folded edge of the neck band. The basting stitch will keep the neckline band stable and properly aligned in the sewing process. Hand basting in the sewing process is highly recommended for sewing beginners, especially when working with more challenging curved edges and seams. Once the basting stitch is added, you may remove the pins. The basting stitch alone is secure enough to hold the neckline band in place. 18. Working on the inside of the neckline, machine stitch at about 1/8" away from the folded edge. Use the fold as a guide. Backstitch or overlap the end stitches to prevent them from coming undone. 19. Once the final machine stitch is applied, use a seam ripper (or a pair of scissors) to remove the temporary basting stitch. As a final step, iron the entire area of the neckline for a smooth, professional finish. Use steam if necessary.
1 Comment
Luanne Rolly
4/11/2022 09:27:03 am
Thank you for this tutorial, it is very well done! I am working on a top where I want to apply this type of finish to the facings (neck, arm hole) - and am trying to find some help on recommended width range - min/max? Min could be as narrow as 1/2" - I've seen bound edges like that, where the facing could be on the inside, or turned to the outside even. But what about how wide? 1 1/2"? 2"? 1 1/4" - I'm worried to make it too skinny it wouldn't be a nice design feature, but too wide could make it difficult to sew nicely. Thoughts?
Reply
Leave a Reply. |
The Blog:A journey into our design process, sewing tutorials, fashion tips, and all the inspiring people and things we love. Doina AlexeiDesigner by trade and dressmaker at heart. I spend most of my days obsessing over new fabrics and daydreaming new ideas. Sadie
Executive Assistant & Client Relations Manager Archives
November 2019
Categories
All
|
-
Sewing Tutorials
-
Basics
>
- Aligning Pattern Grainlines To Fabric
- Preparing Fabrics For Sewing
- Pinning Sewing Patterns To Fabric
- Placing Sewing Patterns On Fabric For Cutting
- Rotary Cutters or Fabric Scissors?
- Cutting The Sewing Patterns
- What Are Notches And How To Use Them In The Sewing Process
- Transferring Notches From Pattern To Fabric
- Transferring Seamlines to Fabric
- Staystitching
- Backstitching: A Complete Guide
- Hand Basting: A Complete Guide
- Sewing Continuous Bias Binding
- Darts >
-
Sewing Seams
>
- The Basics Of Seams And Seam Allowance
- How To Sew A Straight Seam
- Sewing Curved Seams
- Sewing Corner Seams
- Trimming And Grading Seam Excess
- Notching/Clipping Seam Allowance for Tension Release
- Sewing Topstitched Seams
- Sewing Corded Seams
- Sewing A Slot Seam
- Sewing A Gathered Seam
- Sewing Bias Seams
- Sewing Seams With Ease
- Sewing Seams With Crossing Seamlines
- Sewing Unlike Fabric Seams
- How To Iron Seams: Ironing Tools And Conventions
- Sewing With Knit Fabrics
- Understanding Stitch Length And Tension
- Sewing Unique Fabric Seams
-
Seam Finishes
>
- Seam Finishing Techniques - Overview
- Applying A Pinked Seam Finish
- Applying A Bias Bound Seam Finish
- Serging And Zigzag Seam Finishes
- Sewing A Self-Bound Seam Finish
- Sewing A French Seam Finish
- Sewing A Hong Kong Seam Finish
- Sewing A Mock French Seam Finish
- Sewing A Turned-and-Stitched Seam Finish
- Sewing Overcast Hand-Applied Seam Finishes
- Sewing A Flat Felled Seam
- Sewing A Hairline Seam Finish
-
Hem Finishes
>
- Garment Hem Finishes: Overview
- Sewing A Double Fold Hem Finish
- Sewing A Single Fold Hem Finish
- Sewing Bound Hem Finishes
- Sewing An Exposed Double Layer Bound Hem
- Sewing A Folded-Up Bound Hem with Pre-folded Binding
- Sewing A Hong Kong Hem Finish
- Sewing A Band Hem Finish
- Sewing A Bias Faced Hem Finish
- Sewing A Twill Tape Hem Finish
- Sewing A Rolled Hem Finish
- Sewing A Shaped Hem Facing
- Using Fusible Hem Tape And Webbing
- Finishing A Lace Fabric Hem
- Finishing A Leather Hem
- Sewing Faced Hem Corners
- How To Finish Lining At The Hem
- Finishing Fabric Corners by Mitering >
- Interfacing A Hemline: Lined And Unlined Examples
-
Sewing Pockets
>
- Curved Patch Pocket With Flap
- Unlined Square Patch Pockets
- Lined Patch Pockets: Two Ways
- Extension On-Seam Pockets
- Separate On-Seam Pocket
- Front Hip Pockets
- Bound Double Welt Pocket
- Double Welt Pocket With Flap
- Self-Welt Pocket (Using Single Fabric Layer)
- Slanted Welt Pocket (Hand-Stitched)
- Faced Slash Pockets: Overview >
-
Sewing Zippers
>
- Sewing Zippers: General Information
- Sewing A Centered Zipper
- Sewing A Lapped Zipper
- Sewing An Invisible Zipper
- Sewing A Fly Front Zipper
- Sewing A Closed-End Exposed Zipper (No Seam)
- Sewing An Exposed Separating Zipper
- Sewing Hand Stitched Zipper Applications
- Sewing A Zipper Underlay
- Sewing A Placket-Enclosed Separating Zipper
- Sleeveless Finishes >
-
Neckline Finishes
>
- Sewing A Neck Shaped Facing
- Sewing An All-In-One Neck Facing
- Neck And Garment Opening Combination Facings >
- Sewing A Bias Faced Neckline Finish
- Sewing A Band Neckline Finish
- Bound Neckline Finishes: Overview >
- Sewing A Semi-Stretch Strip Band Neckline
- Ribbed Neck Band And Classic Turtleneck
- Decorative Neckline Finishes >
- Finishing Facing Edges >
-
Extras
>
- A Complete Guide on Interfacing
- Sewing Bound Spaghetti Straps
- Sewing Spaghetti Straps To A Faced Neckline
- Sewing Ruffles: Overview
- Patterning And Sewing A Circle Ruffle
- Sewing A Gathered Heading Ruffle
- Sewing Double Layer Gathered Ruffles
- Sewing A Gathered Ruffle Into A Seam
- Sewing A Gathered Ruffle To A Fabric Edge
- Sewing A Fabric Surface Slit
- Sewing A Slit Seam
- Hand-Applied Straight Stitches
- Hand-Applied Blind Stitches
- Hand-Applied Overedge Stitches
- Hand-Applied Tack Stitches
- Hand-Applied Decorative Stitches
-
Basics
>
- Custom Bridal
- Custom Apparel
- About
- Blog
Services |
Company |
|



 RSS Feed

