Want To Learn How To Sew And Make Your Own Patterns? These Are The Basic Supplies You Need To Have.12/26/2016 Congratulations on deciding to learn how to sew! You’ll finally be able to make and even design your own clothing, not to mention fixing some older ones waiting in the back of your closet! We always hear from newcomers to the sewing-game how difficult it is to get started… For a sewing beginner, patterns are confusing and fabrics are difficult to align and cut. Worst of all, beginners get so overwhelmed by the supplies they need to get for both drafting their sewing patterns and putting the garment together, that they give up right from the start. It is true that sewing requires patience and practice and if you don’t have the correct initial guidance, it is quite difficult to get started. As you’ll learn from our Learn To Sew Box, our goal is to teach you how to sew by keeping it extremely simple! If you’re a newcomer this is a great way you can feel inspired to stick to learning in the long run. We apply the same concept when recommending sewing and patterning supplies: There is absolutely no need to start with complicated measuring tools, complicated presser feet and unnecessary marking tools. Below is a complete, comprehensive list of the tools you will need to draft and cut your own patterns and sew your garment together: Patternmaking/Drafting Supplies Dotted/Numbered Pattern Paper We recommend using marked pattern paper because it makes it easier and faster to draw straight lines on it work with 1" increments without having to measure constantly. You can always work on tracing paper or just regular white paper from a roll, but make sure it is not too thick as you will need to pin it and transfer the sewing pattern’s markings onto fabric easily (Check out these pattern paper subsitutes for more options). Numbered/dotted pattern paper is used in the fashion industry and once you get used to it, it makes a huge difference in the speed and convenience it provides. You can find some good deals on numbered pattern paper rolls on Ebay or Amazon 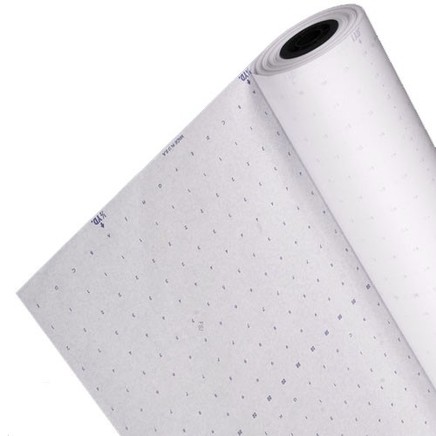 Image via www.ebay.com A mechanical Pencil Why mechanical? Well because precision is necessary for good pattern making. A mechanical pencil maintains a fine point and does not need to be sharpened every few minutes. If you plan on drafting your own patterns often, invest in a good quality mechanical pencil with a durable tip. 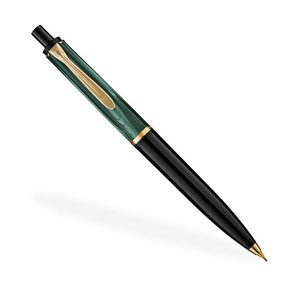 Image via Levenger Simple, Unmarked French Curve As we mentioned above, if you’re a beginner you shouldn’t overwhelm yourself with a variety of different types of marked french curves. There is a common misconception that you need french curves of different sizes and shapes in order to draft a sewing pattern. In reality, those complicated french curve kits you come across at the craft stores are usually more for graphic design, architectural and interior design. All you need as a beginner is just a simple unmarked french curve (image bellow) which you can buy at a very reasonable cost either at your local sewing supply store or an art store. This will be used to draft the very curved lines of the armhole, neckline, hips (sometimes), and other curved seams on your pattern. 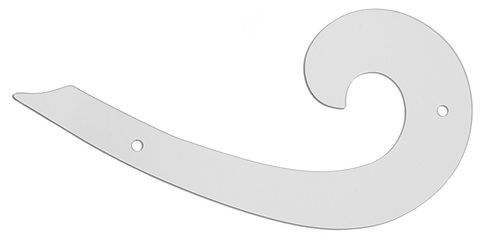 Image via www.goldstartool.com Clear Marked Plastic Ruler Once you start drafting your own patterns, you will not be able to survive without this ruler (pictured bellow). It is 2” wide and 18” in length and marked down to 1/16th of an inch. You can gently bend it to measure around curves with it and easily slide it across the paper from one line to the other. You can use this ruler not just for your sewing projects, but for all your crafting needs that require measuring. Once you buy it, you will never want to use another ruler! You can find it at your local fabric and art stores. 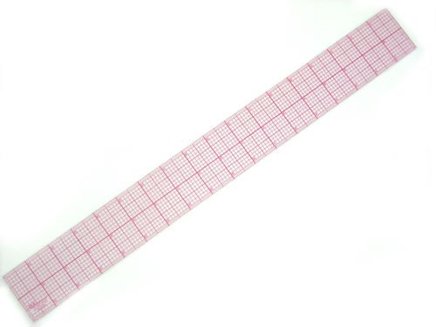 Image via Amazon Tracing wheel Although you want need to use this constantly, it will be a necessity for transferring pattern marking like darts, tucks, notches and more complicated style lines. A tracing wheel is also used to transfer darts to your fabric using tracing paper (although our Learn to Sew Box provides an easy way to do this without the need for these tools!). 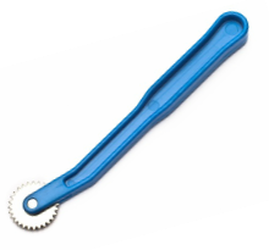 Image via www.craftwinner.com Supplies For Transferring Pattern Markings To Fabric Tracing Paper (used with tracing wheel): Tracing paper and tracing wheels are most commonly used together to transfer darts from pattern to fabric. To let you in on a little secret, we teach you how to transfer your markings to fabric without the use of these two supplies in our Learn To Sew Box. However, it never hurts to have some tracing paper for more complicated style-lines you’ll occasionally need to transfer. You can find it at your local fabric or art store. 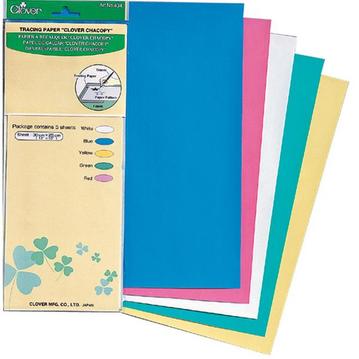 Image via Kmart Water Soluble Fabric Pencil: We highly recommend getting a water soluble fabric pencil. It allows you to mark your fabric in a more clean, precise way without having to handle messy tracing paper and a tracing wheel. 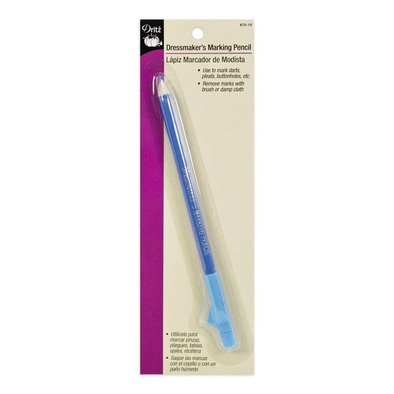 Image via Michaels Optional Supplies: For the advanced pattern maker.
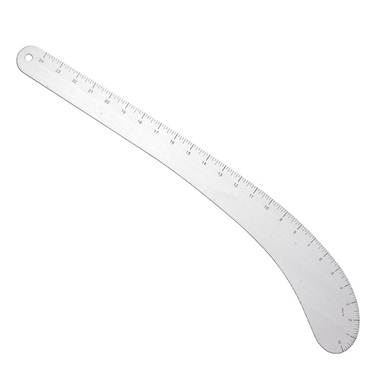 Image via www.wawak.com
 Image via www.bblackandsons.com
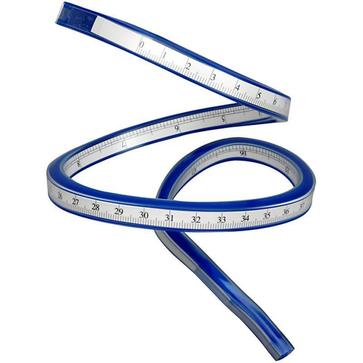 Image via Ebay Sewing Supplies If you’re just learning how to sew, you will most likely purchase already-made patterns before learning how to draft your own. The good news is that there aren’t too many supplies you need to worry about when it comes to putting a garment together, especially if you already own a sewing machine and a good pair of scissors. Sewing machine/ Matching Thread: This big purchase serves as a first step for anyone who wants to learn to make his/her own clothing. Your first sewing machine doesn’t have to be too complicated and expensive. On the contrary, we recommend buying a sewing machine that doesn’t have too many complex stitch options. As long as it has a straight stitch, zig-zag stitch and a buttonhole option, you’ll be just fine. It is also highly recommended that you learn how to thread it and feel comfortable with its speed and how it stitches before diving into more complicated projects. The more comfortable and familiar you are with your sewing machine, the smoother and straighter your final stitches will be! 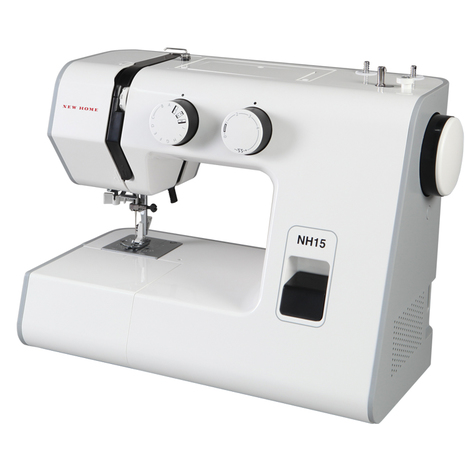 Image via www.avenuevacuum.com An Iron (Important!): When you’re at the beginning of the road, nobody ever mentions how important a simple iron is in the sewing process. In fact, the number one rule in sewing (that you’ll learn as you train with us!) is iron every seam as you go- Do not wait to sew the whole garment before ironing the seams down. An iron that has good steam options is the best! 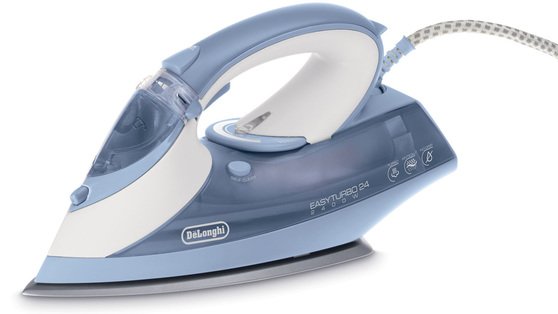 Image via Good Housekeeping Fabric Scissors (Or a pair of sharp all-purpose scissors): Yes, it is a good idea to invest in a good pair of fabric scissors. You can now find some affordable options that work just as well for a sewing beginner. Although we do recommend buying scissors that cut well through fabric layers, any sharp pair of scissors that will do the job well works. The end result of cutting your sewing patterns out should be a very consistently smooth edge, so keep that in mind when using your scissors of choice. If you go to your local fabric store, you’ll have a very large range of prices to pick from so make your selection wisely! 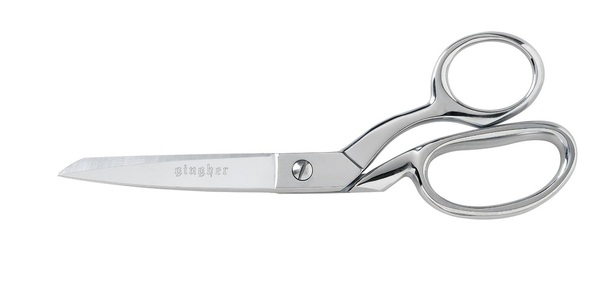 Image via Amazon Ball Head Pins: There used to be a misconception about the professionalism of ball head pins. A lot of older methods required professionals and designers in the fashion industry to use traditional dressmaker pins that don’t have the plastic bead on one end. Ball head pins are normally reffered to as quilter’s pins thus traditionally used for quilting and crafts. However, things have changed. Fashion design schools and professional brands now like to use ball headed pins, unless they are draping or working on a complicated couture piece. Why? Simple- They are so much more comfortable to handle and don’t hurt your fingers. They usually come in a longer length which adds to their comfort. For a sewing beginner, we recommend all-purpose 2” long ball head pins form your local fabric store. 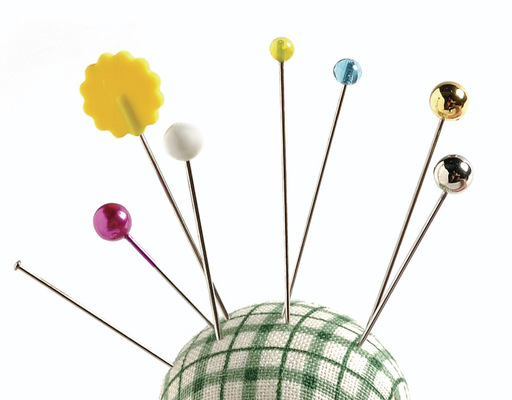 Image via www.threadsmagazine.com Hand Sewing Needles: You’re probably asking yourself: Why do I need hand sewing needles if I’ll be using a sewing machine? Even if you use your sewing machine on all seams and finishes, you should always have hand-sewing needles available for when you need to baste, blindstitch or transfer loose threads from the face to the back side of your garment. A hand sewing needle can also come in handy when you need to do a quick fix weather its something you made or purchased. The good news is that you probably already have some so you wont need to make any additional purchases. 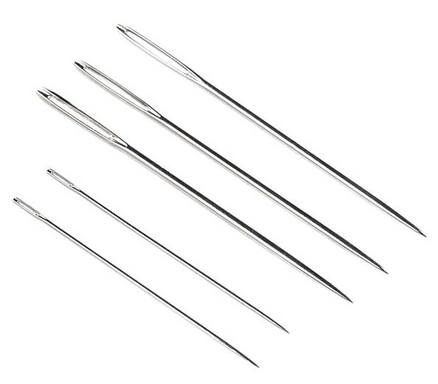 Image via www.jayshreetraders.in Now that you have a simple checklist of all the supplies you need, it’s time to get started on the really fun part- actually sewing clothing item from start to finish. If you don’t know how to get started try the Learn To Sew Box, the easy, more efficient way to learn how to sew by making your first A-line dress! 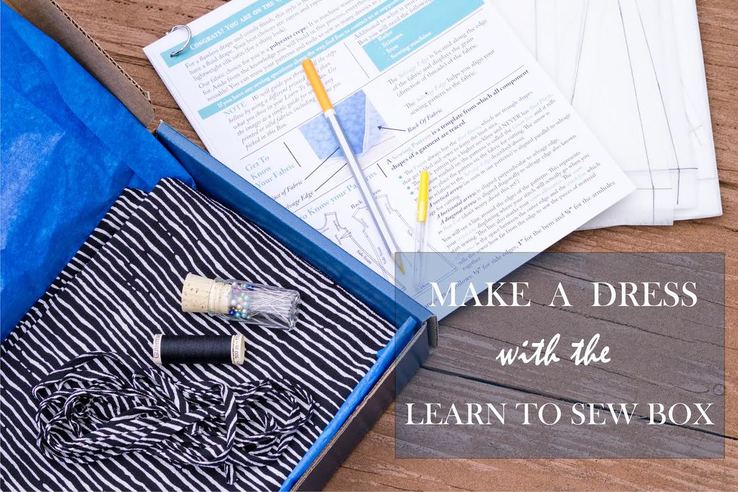
0 Comments
Leave a Reply. |
The Blog:A journey into our design process, sewing tutorials, fashion tips, and all the inspiring people and things we love. 
Doina AlexeiDesigner by trade and dressmaker at heart. I spend most of my days obsessing over new fabrics and daydreaming new ideas. 
Sadie
Executive Assistant & Client Relations Manager Archives
November 2019
Categories
All

|

-
Sewing Tutorials
-
Basics
>
- Aligning Pattern Grainlines To Fabric
- Preparing Fabrics For Sewing
- Pinning Sewing Patterns To Fabric
- Placing Sewing Patterns On Fabric For Cutting
- Rotary Cutters or Fabric Scissors?
- Cutting The Sewing Patterns
- What Are Notches And How To Use Them In The Sewing Process
- Transferring Notches From Pattern To Fabric
- Transferring Seamlines to Fabric
- Staystitching
- Backstitching: A Complete Guide
- Hand Basting: A Complete Guide
- Sewing Continuous Bias Binding
- Darts >
-
Sewing Seams
>
- The Basics Of Seams And Seam Allowance
- How To Sew A Straight Seam
- Sewing Curved Seams
- Sewing Corner Seams
- Trimming And Grading Seam Excess
- Notching/Clipping Seam Allowance for Tension Release
- Sewing Topstitched Seams
- Sewing Corded Seams
- Sewing A Slot Seam
- Sewing A Gathered Seam
- Sewing Bias Seams
- Sewing Seams With Ease
- Sewing Seams With Crossing Seamlines
- Sewing Unlike Fabric Seams
- How To Iron Seams: Ironing Tools And Conventions
- Sewing With Knit Fabrics
- Understanding Stitch Length And Tension
- Sewing Unique Fabric Seams
-
Seam Finishes
>
- Seam Finishing Techniques - Overview
- Applying A Pinked Seam Finish
- Applying A Bias Bound Seam Finish
- Serging And Zigzag Seam Finishes
- Sewing A Self-Bound Seam Finish
- Sewing A French Seam Finish
- Sewing A Hong Kong Seam Finish
- Sewing A Mock French Seam Finish
- Sewing A Turned-and-Stitched Seam Finish
- Sewing Overcast Hand-Applied Seam Finishes
- Sewing A Flat Felled Seam
- Sewing A Hairline Seam Finish
-
Hem Finishes
>
- Garment Hem Finishes: Overview
- Sewing A Double Fold Hem Finish
- Sewing A Single Fold Hem Finish
- Sewing Bound Hem Finishes
- Sewing An Exposed Double Layer Bound Hem
- Sewing A Folded-Up Bound Hem with Pre-folded Binding
- Sewing A Hong Kong Hem Finish
- Sewing A Band Hem Finish
- Sewing A Bias Faced Hem Finish
- Sewing A Twill Tape Hem Finish
- Sewing A Rolled Hem Finish
- Sewing A Shaped Hem Facing
- Using Fusible Hem Tape And Webbing
- Finishing A Lace Fabric Hem
- Finishing A Leather Hem
- Sewing Faced Hem Corners
- How To Finish Lining At The Hem
- Finishing Fabric Corners by Mitering >
- Interfacing A Hemline: Lined And Unlined Examples
-
Sewing Pockets
>
- Curved Patch Pocket With Flap
- Unlined Square Patch Pockets
- Lined Patch Pockets: Two Ways
- Extension On-Seam Pockets
- Separate On-Seam Pocket
- Front Hip Pockets
- Bound Double Welt Pocket
- Double Welt Pocket With Flap
- Self-Welt Pocket (Using Single Fabric Layer)
- Slanted Welt Pocket (Hand-Stitched)
- Faced Slash Pockets: Overview >
-
Sewing Zippers
>
- Sewing Zippers: General Information
- Sewing A Centered Zipper
- Sewing A Lapped Zipper
- Sewing An Invisible Zipper
- Sewing A Fly Front Zipper
- Sewing A Closed-End Exposed Zipper (No Seam)
- Sewing An Exposed Separating Zipper
- Sewing Hand Stitched Zipper Applications
- Sewing A Zipper Underlay
- Sewing A Placket-Enclosed Separating Zipper
- Sleeveless Finishes >
-
Neckline Finishes
>
- Sewing A Neck Shaped Facing
- Sewing An All-In-One Neck Facing
- Neck And Garment Opening Combination Facings >
- Sewing A Bias Faced Neckline Finish
- Sewing A Band Neckline Finish
- Bound Neckline Finishes: Overview >
- Sewing A Semi-Stretch Strip Band Neckline
- Ribbed Neck Band And Classic Turtleneck
- Decorative Neckline Finishes >
- Finishing Facing Edges >
-
Extras
>
- A Complete Guide on Interfacing
- Sewing Bound Spaghetti Straps
- Sewing Spaghetti Straps To A Faced Neckline
- Sewing Ruffles: Overview
- Patterning And Sewing A Circle Ruffle
- Sewing A Gathered Heading Ruffle
- Sewing Double Layer Gathered Ruffles
- Sewing A Gathered Ruffle Into A Seam
- Sewing A Gathered Ruffle To A Fabric Edge
- Sewing A Fabric Surface Slit
- Sewing A Slit Seam
- Hand-Applied Straight Stitches
- Hand-Applied Blind Stitches
- Hand-Applied Overedge Stitches
- Hand-Applied Tack Stitches
- Hand-Applied Decorative Stitches
-
Basics
>
- Custom Bridal
- Custom Apparel
- About
- Blog
 RSS Feed
Services |
Company |
|
