|
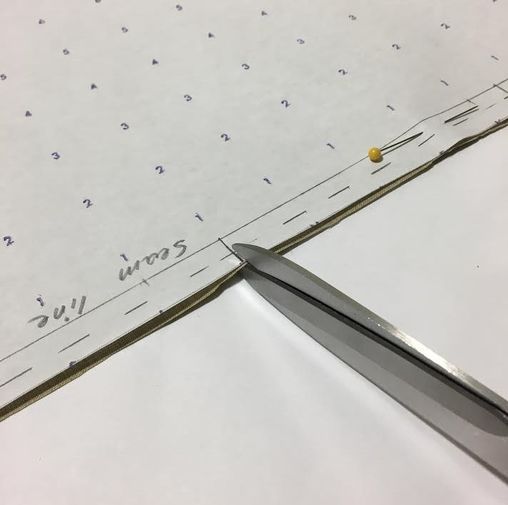
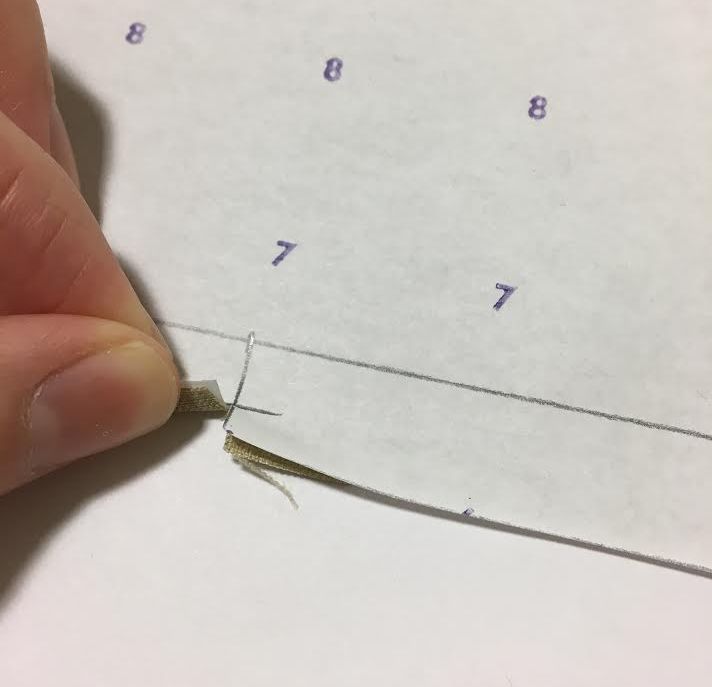
Gathering is the act of bundling up a portion of fabric to fit onto a smaller, pre-measured length of fabric, thus creating fullness. Gathering is normally achieved by using a longer machine stitch that allows for the threads to be manually pulled which consequently gathers up the fabric. Usually, gathering is done at either one third or a half of the original width depending on the fabric and the amount of fullness you want to achieve. Gathering is most commonly found along the waistline, sleeve cuffs, shoulder seams, yokes and ruffles. Depending on the fabric you are using, you should pay close attention to the thickness of your thread and your sewing machine's tension and stitch length. If you are working with a very thick fabric, use a thicker thread as you will have to manually pull the threads of the stitch and you wouldn't wont the thread to break! When it comes to the length of stitch you should use, the answer lies again in the thickness and weight of the fabric you are working with. The thicker and heavier your fabric is, the longer your machine stitch will have to be- This will ensure that the stitch can be pulled easily when gathering. If the fabric is lightweight and thin, your stitch will be shorter than that of a heavier fabric but longer than what you would normally use on a regular seam. If it sounds a bit confusing, don't worry! Practicing makes perfect which is why we'll show you all the (simple) steps necessary to sew a gathered seam from start to finish. Understanding Gathering Notation On a Sewing PatternOn your sewing patterns, gathering is usually marked on the seam allowance by a single or double row of dashed lines. You should also find notches spaced out along the seam allowance that will help you align the gathers perfectly to the non-gathered edge. 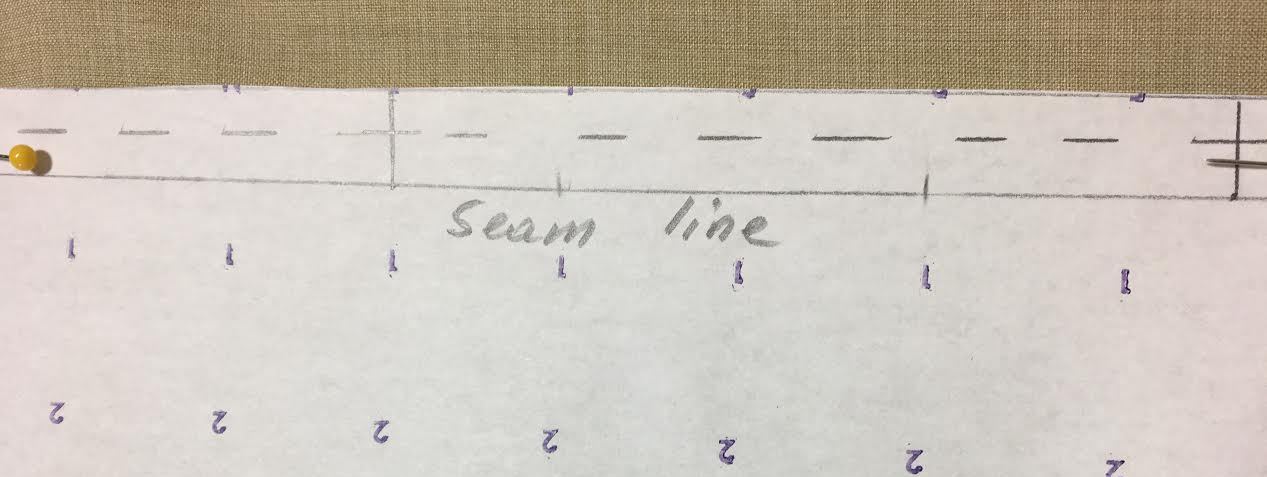 Below are the two pattern pieces that will be sewn together into a gathered seam. The top on is plain and the bottom pattern has the gathered seam. On both edges (closest to each other), you can see three separate notches spaced out evenly. These notches will help you align your seam properly so that you achieve evenly distributed gathering. 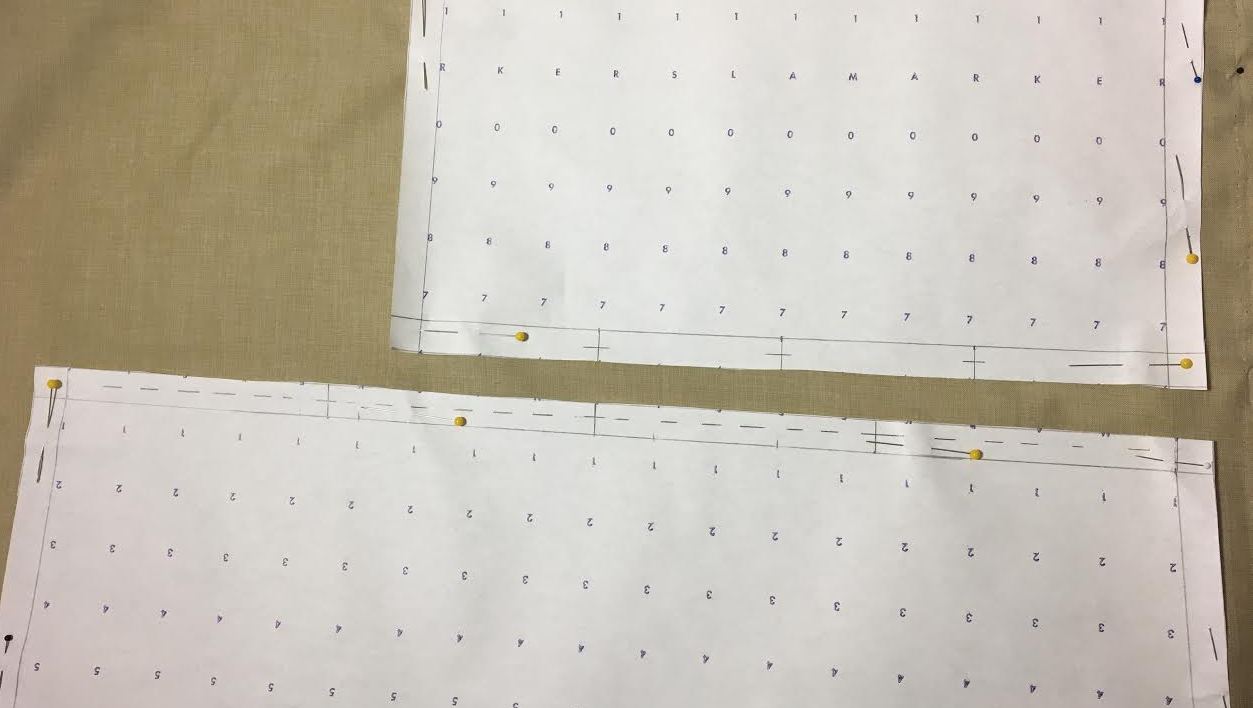 Once the sewing patterns are cut, clip the notches on both pattern pieces as shown bellow. Our notches are in a T shape, yours might be a triangle shape- you can use whichever markings work best for you!
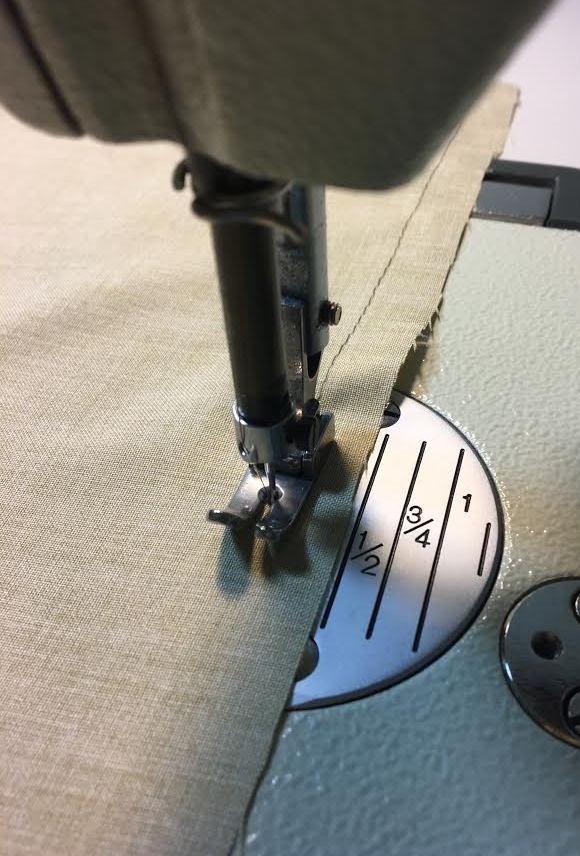
Gathering The Fabric 1. Figure out your stitch length: Once the notches are transferred onto your fabric, it is time to add the two gathering stitches using your sewing machine. As mentioned above, the stitch length that is best for achieving gathering depends on the type of fabric you're using, but it should always be longer than what you normally use on a regular seam- it is more similar to a basting stitch and usually has about 6-12 stitches per inch. Use a scrap piece of fabric to test the different stitch lengths before working on the final project. Because we're working with a medium weight fabric, we've set our sewing machine at about 8 stitches per inch.
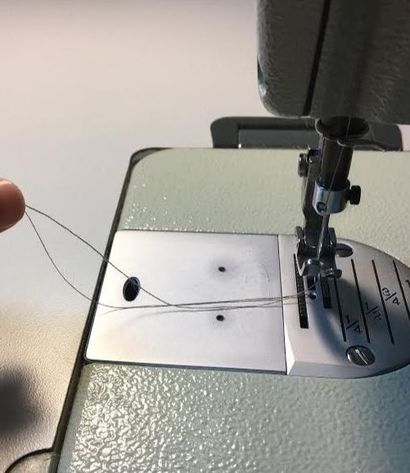
2. On the right side of the fabric, sew a straight stitch right above seam line, maybe less than a mm above. Add an additional stitch parallel to it about 1/4" above. Make sure you leave enough thread length on your sewing machine before stitching. 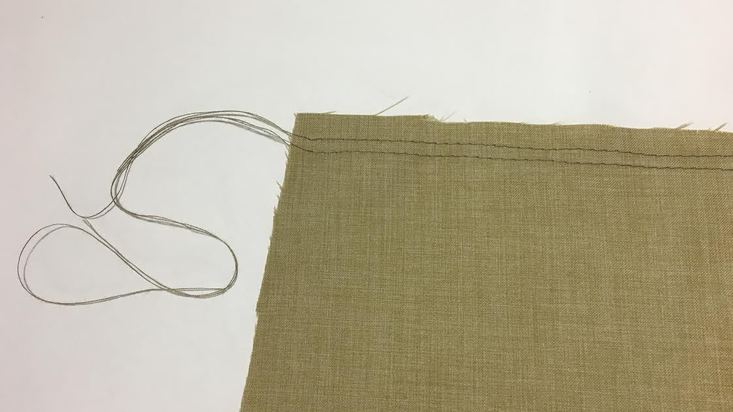 Leave longer portions of the stitch threads at both ends. You will manually pull them to create gathering It is also necessary that you stitch on the face side of the fabric because in order to gather easily, you need to pull on the bobbin threads located at the bottom of your sewing machine. Stitching on the face side will ensure that the bobbin threads end up on the wrong side of your fabric and are facing you when aligning the gathered seam edges. If you have side seams or other seams placed vertically along the gathered edge, stitch individually between the seams never going through the actual seam- it is very difficult to pull the threads through multiple layers of fabric. 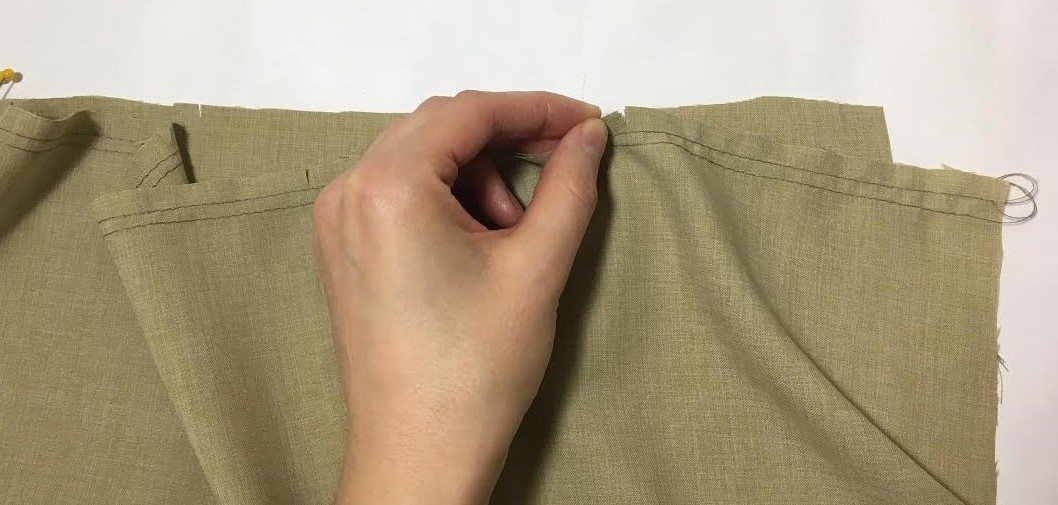 3. Align the notches of the stitched edge to the notches on the regular edge and secure with pins. If you have other seams or details that need to match, make sure you align those properly as well. 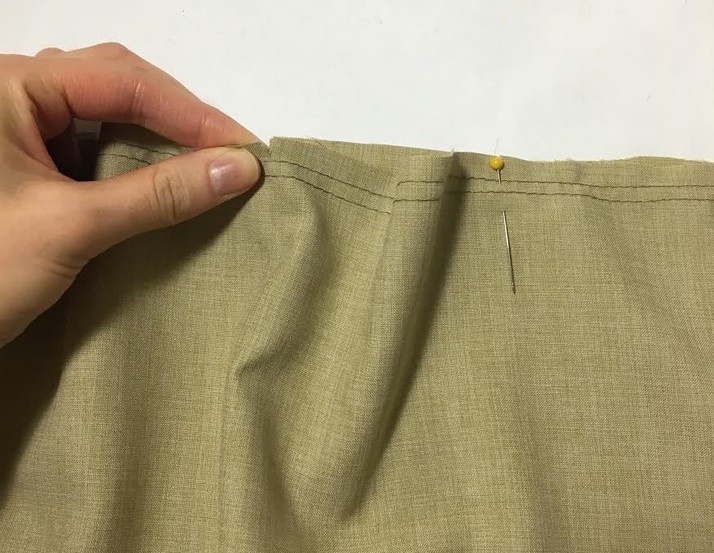 Match all the notches and place a pin at every notch to secure. 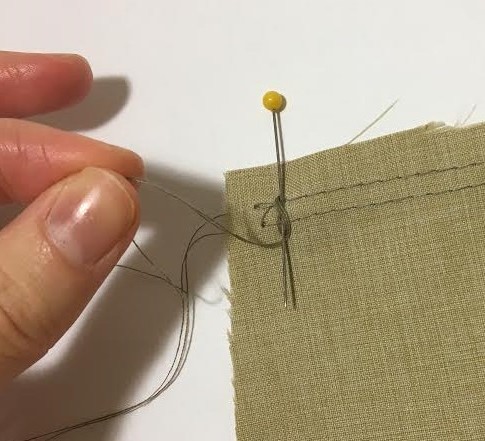 4. At one end of the stitching, wrap the loose threads around a pin as shown. This will ensure that when you pull from the opposite end, the stitch stays in place and doesn't come out. 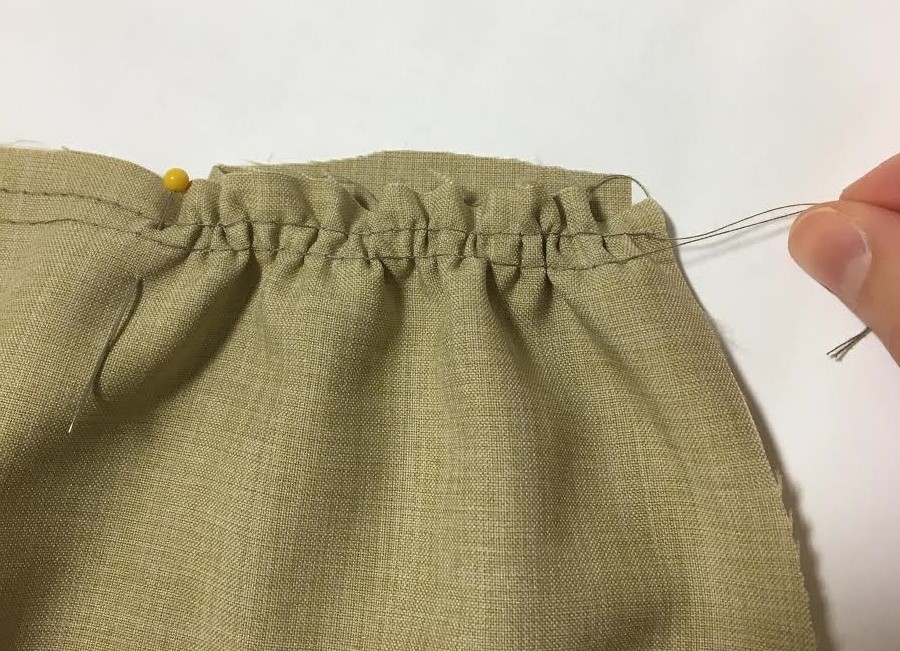 5. Starting at the opposite end of the pin mentioned above, gently pull on both bobbin threads until the gathering matches the adjoining regular edge. 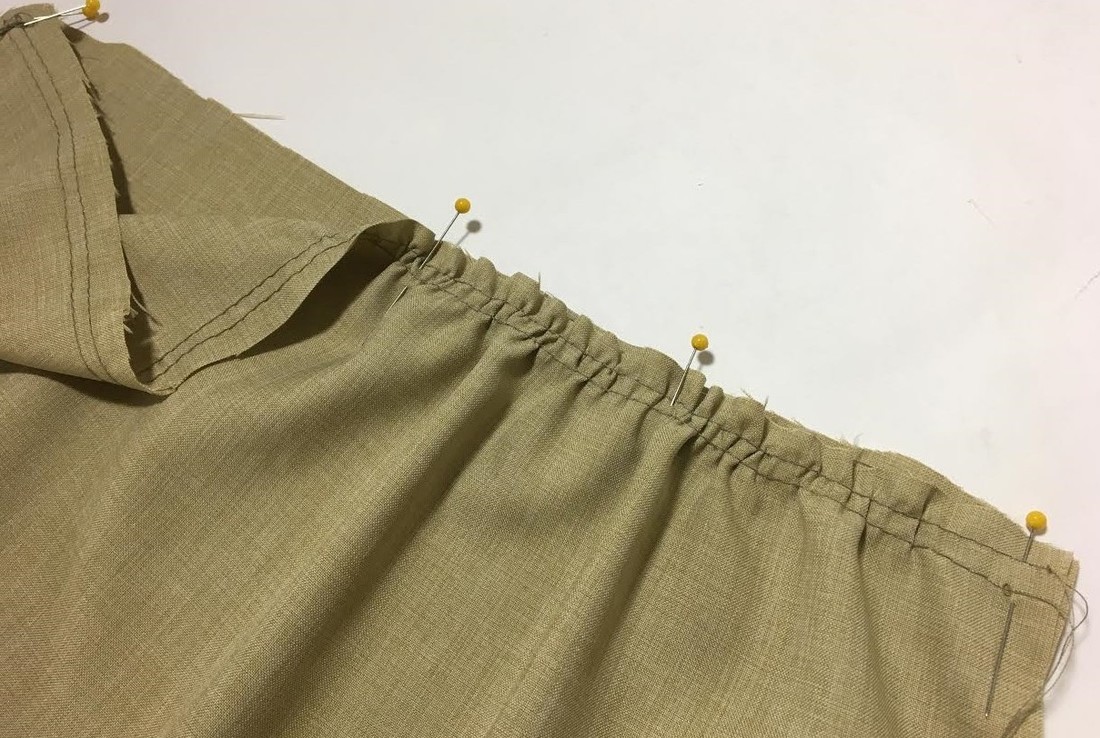 Use your other hand to spread the gathers evenly across the fabric. 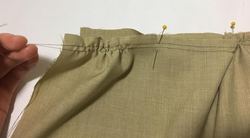 Repeat step 3 and 4 on the other end of the gathering. 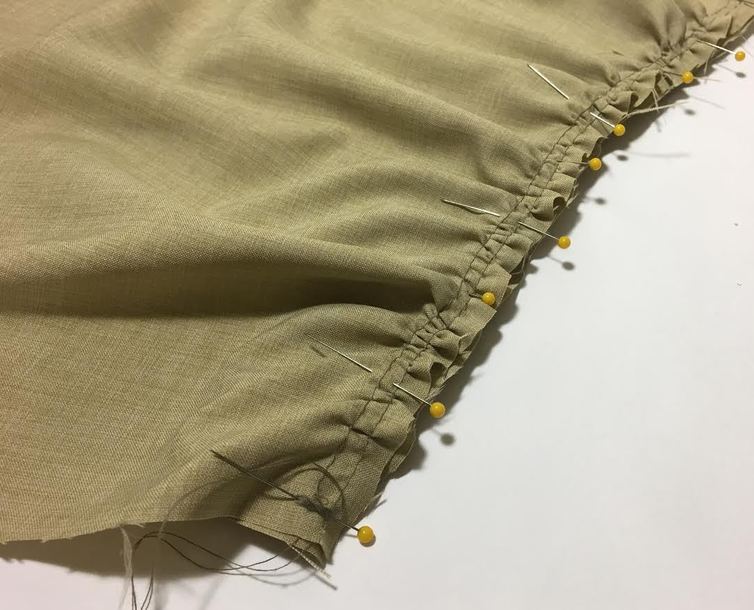 6. Pin the gathered edge to the regular edge on the gathering side. Place pins horizontally as shown bellow. Sewing the Gathered Seam Together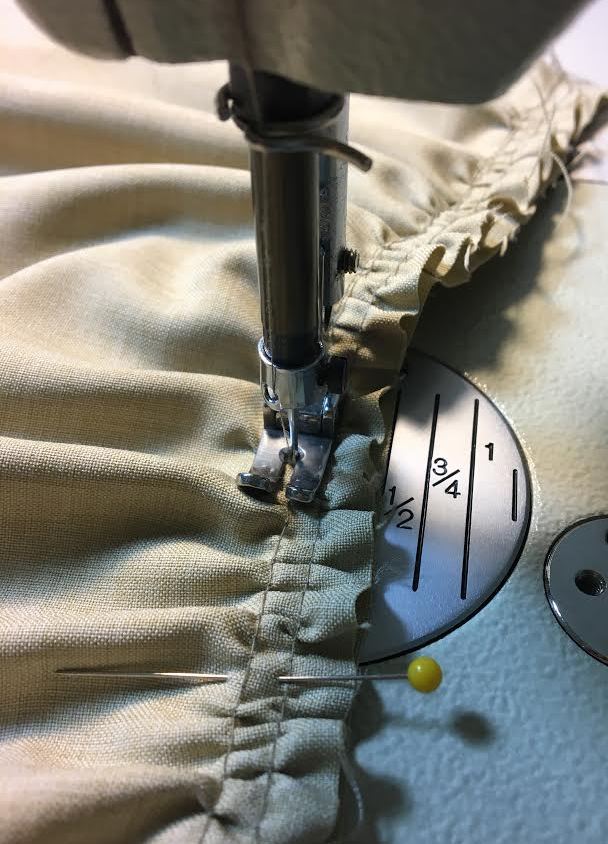 7. At this point, your machine is probably still set at the gathering stitch length. Make sure that before you get started, you switch the length to a regular stitch normally used to sew the fabric you are working with. Once adjusted, stitch right bellow the bottom gathering stitch (on the seamline) spreading the gathers evenly as you sew, and holding the fabric straight on both sides of the presser foot in order to avoid unnecessary folds and pleats. 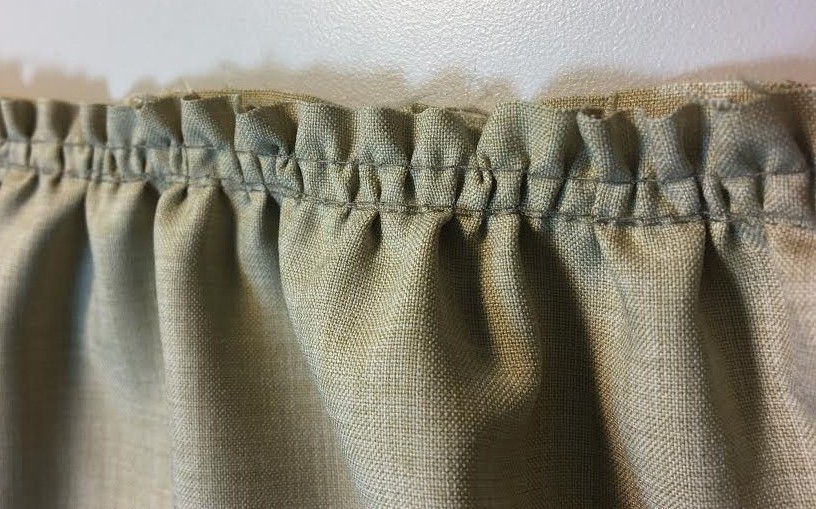 The regular seam stitch is placed very close to the bottom gathering stitch, about 1 mm bellow. Ironing Gathering ProperlyWhen ironing a gathered seam, the seam allowance should be pointing towards the side that isn't gathered. This will minimize bulk and maintain the seam allowance naturally in place. 8. Iron the gathering only at the seam allowance using the point of your iron so that the gathered seam allowance stays flat and not bulky. Use a serger or a dense zigzag stitch to clean finish the raw edge of the gathered seam. 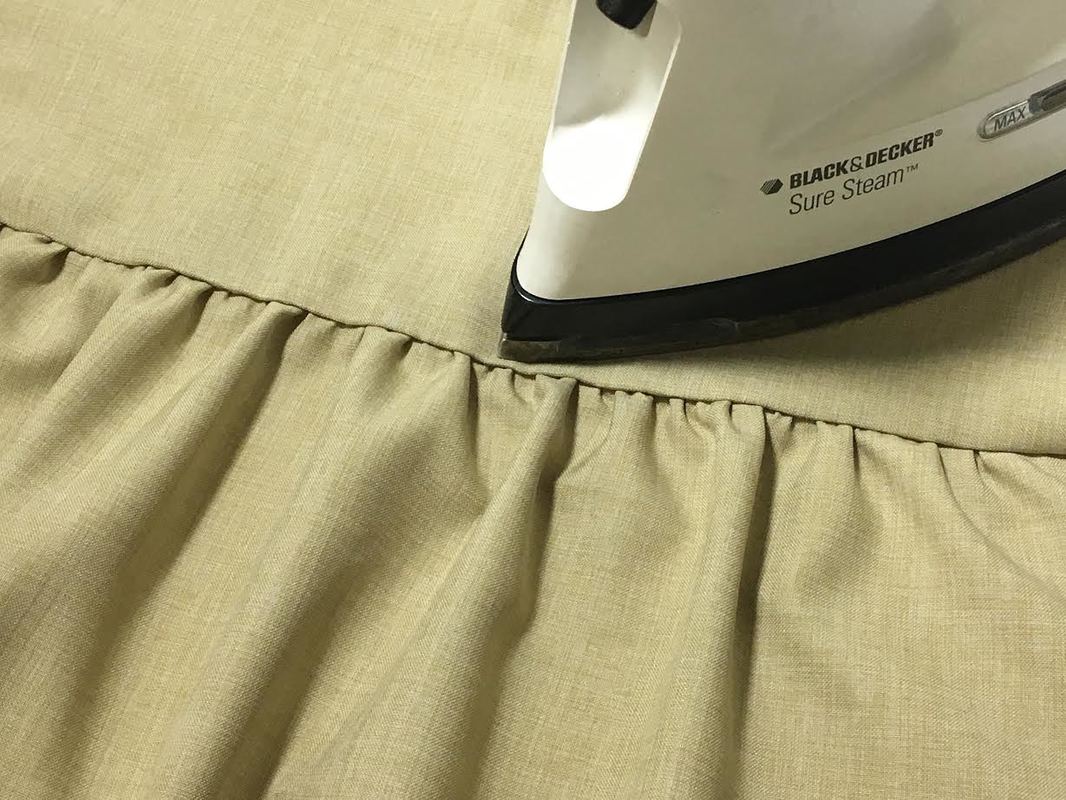 DO NOT iron across the gathers directly on top or they will flatten and the seam will loose it's fullness. Ironing gathers properly should be done by using the point of your iron and moving up towards the seam in between the gathers. 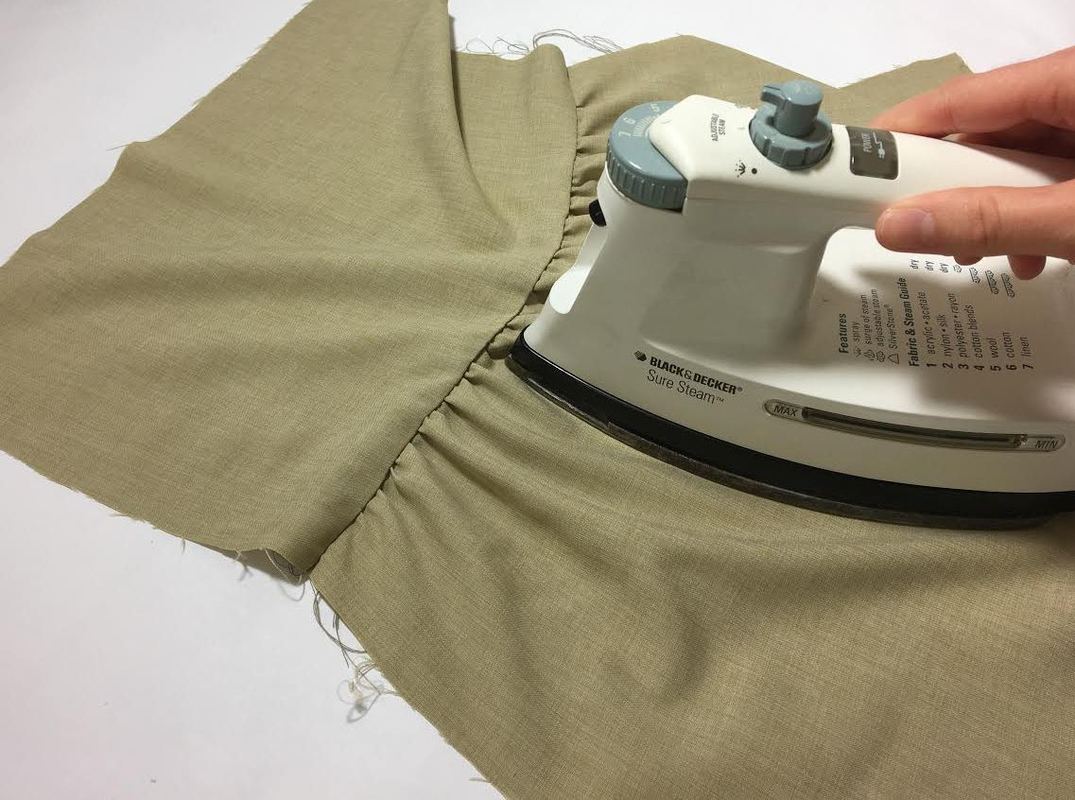
1 Comment
|
The Blog:A journey into our design process, sewing tutorials, fashion tips, and all the inspiring people and things we love. 
Doina AlexeiDesigner by trade and dressmaker at heart. I spend most of my days obsessing over new fabrics and daydreaming new ideas. 
Sadie
Executive Assistant & Client Relations Manager Archives
November 2019
Categories
All

|

-
Sewing Tutorials
-
Basics
>
- Aligning Pattern Grainlines To Fabric
- Preparing Fabrics For Sewing
- Pinning Sewing Patterns To Fabric
- Placing Sewing Patterns On Fabric For Cutting
- Rotary Cutters or Fabric Scissors?
- Cutting The Sewing Patterns
- What Are Notches And How To Use Them In The Sewing Process
- Transferring Notches From Pattern To Fabric
- Transferring Seamlines to Fabric
- Staystitching
- Backstitching: A Complete Guide
- Hand Basting: A Complete Guide
- Sewing Continuous Bias Binding
- Darts >
-
Sewing Seams
>
- The Basics Of Seams And Seam Allowance
- How To Sew A Straight Seam
- Sewing Curved Seams
- Sewing Corner Seams
- Trimming And Grading Seam Excess
- Notching/Clipping Seam Allowance for Tension Release
- Sewing Topstitched Seams
- Sewing Corded Seams
- Sewing A Slot Seam
- Sewing A Gathered Seam
- Sewing Bias Seams
- Sewing Seams With Ease
- Sewing Seams With Crossing Seamlines
- Sewing Unlike Fabric Seams
- How To Iron Seams: Ironing Tools And Conventions
- Sewing With Knit Fabrics
- Understanding Stitch Length And Tension
- Sewing Unique Fabric Seams
-
Seam Finishes
>
- Seam Finishing Techniques - Overview
- Applying A Pinked Seam Finish
- Applying A Bias Bound Seam Finish
- Serging And Zigzag Seam Finishes
- Sewing A Self-Bound Seam Finish
- Sewing A French Seam Finish
- Sewing A Hong Kong Seam Finish
- Sewing A Mock French Seam Finish
- Sewing A Turned-and-Stitched Seam Finish
- Sewing Overcast Hand-Applied Seam Finishes
- Sewing A Flat Felled Seam
- Sewing A Hairline Seam Finish
-
Hem Finishes
>
- Garment Hem Finishes: Overview
- Sewing A Double Fold Hem Finish
- Sewing A Single Fold Hem Finish
- Sewing Bound Hem Finishes
- Sewing An Exposed Double Layer Bound Hem
- Sewing A Folded-Up Bound Hem with Pre-folded Binding
- Sewing A Hong Kong Hem Finish
- Sewing A Band Hem Finish
- Sewing A Bias Faced Hem Finish
- Sewing A Twill Tape Hem Finish
- Sewing A Rolled Hem Finish
- Sewing A Shaped Hem Facing
- Using Fusible Hem Tape And Webbing
- Finishing A Lace Fabric Hem
- Finishing A Leather Hem
- Sewing Faced Hem Corners
- How To Finish Lining At The Hem
- Finishing Fabric Corners by Mitering >
- Interfacing A Hemline: Lined And Unlined Examples
-
Sewing Pockets
>
- Curved Patch Pocket With Flap
- Unlined Square Patch Pockets
- Lined Patch Pockets: Two Ways
- Extension On-Seam Pockets
- Separate On-Seam Pocket
- Front Hip Pockets
- Bound Double Welt Pocket
- Double Welt Pocket With Flap
- Self-Welt Pocket (Using Single Fabric Layer)
- Slanted Welt Pocket (Hand-Stitched)
- Faced Slash Pockets: Overview >
-
Sewing Zippers
>
- Sewing Zippers: General Information
- Sewing A Centered Zipper
- Sewing A Lapped Zipper
- Sewing An Invisible Zipper
- Sewing A Fly Front Zipper
- Sewing A Closed-End Exposed Zipper (No Seam)
- Sewing An Exposed Separating Zipper
- Sewing Hand Stitched Zipper Applications
- Sewing A Zipper Underlay
- Sewing A Placket-Enclosed Separating Zipper
- Sleeveless Finishes >
-
Neckline Finishes
>
- Sewing A Neck Shaped Facing
- Sewing An All-In-One Neck Facing
- Neck And Garment Opening Combination Facings >
- Sewing A Bias Faced Neckline Finish
- Sewing A Band Neckline Finish
- Bound Neckline Finishes: Overview >
- Sewing A Semi-Stretch Strip Band Neckline
- Ribbed Neck Band And Classic Turtleneck
- Decorative Neckline Finishes >
- Finishing Facing Edges >
-
Extras
>
- A Complete Guide on Interfacing
- Sewing Bound Spaghetti Straps
- Sewing Spaghetti Straps To A Faced Neckline
- Sewing Ruffles: Overview
- Patterning And Sewing A Circle Ruffle
- Sewing A Gathered Heading Ruffle
- Sewing Double Layer Gathered Ruffles
- Sewing A Gathered Ruffle Into A Seam
- Sewing A Gathered Ruffle To A Fabric Edge
- Sewing A Fabric Surface Slit
- Sewing A Slit Seam
- Hand-Applied Straight Stitches
- Hand-Applied Blind Stitches
- Hand-Applied Overedge Stitches
- Hand-Applied Tack Stitches
- Hand-Applied Decorative Stitches
-
Basics
>
- Custom Bridal
- Custom Apparel
- About
- Blog
 RSS Feed
Services |
Company |
|
