|
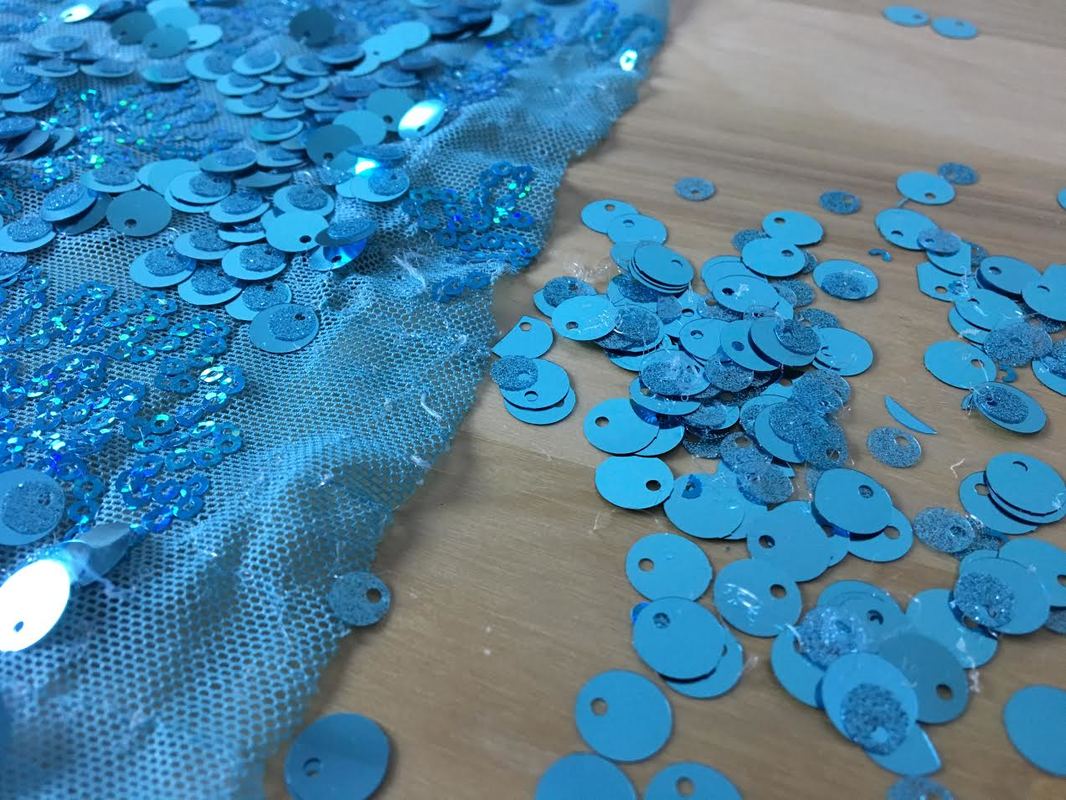
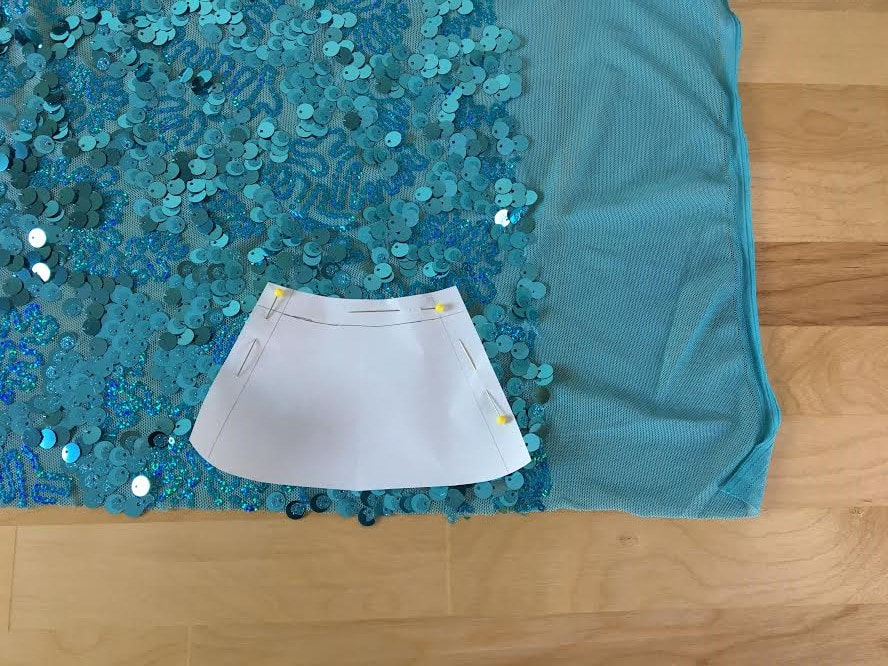
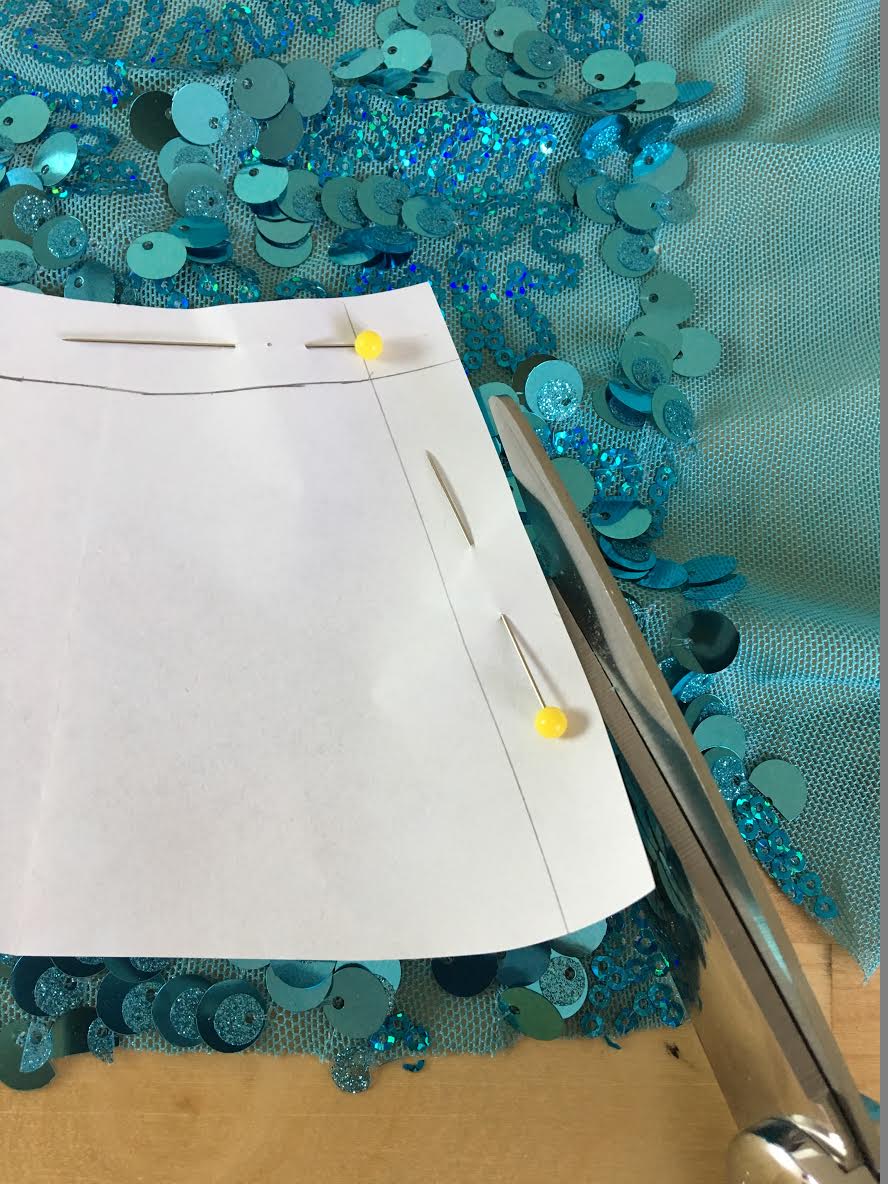
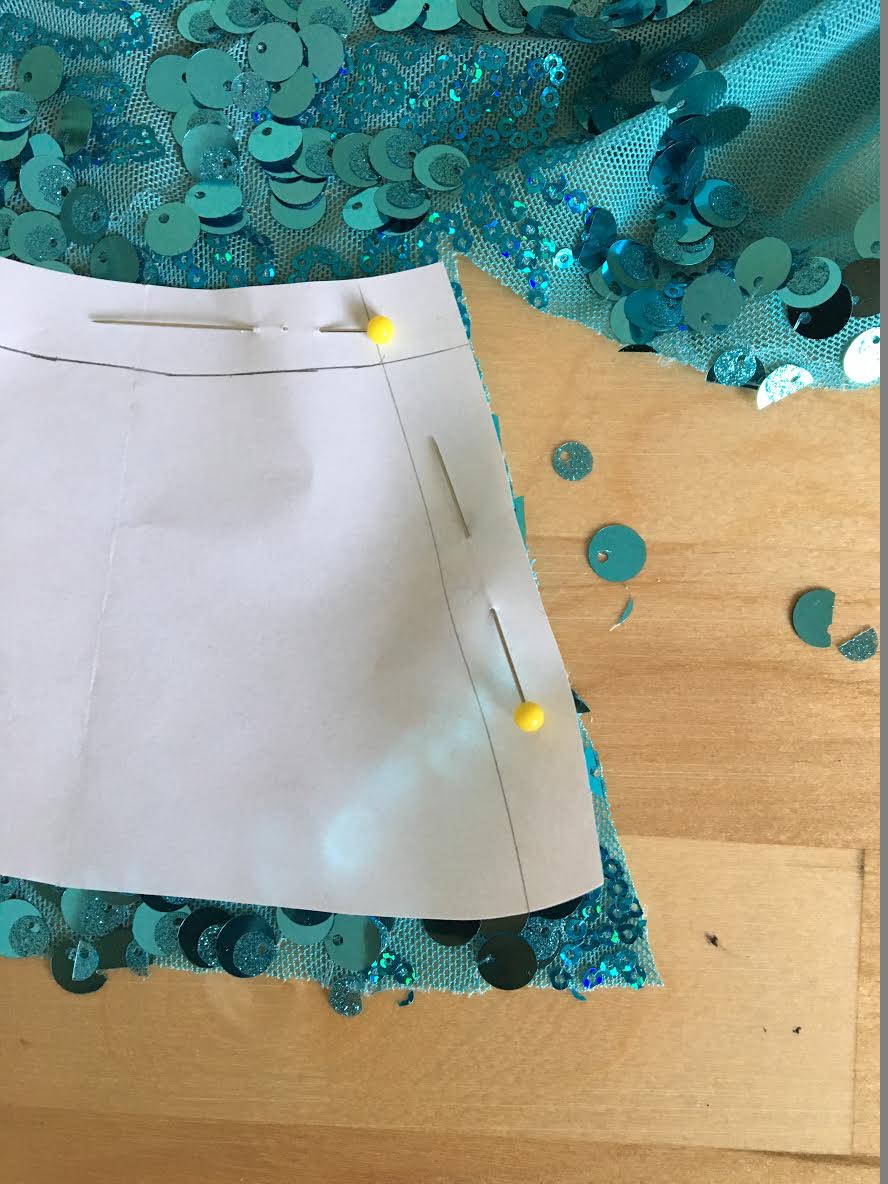
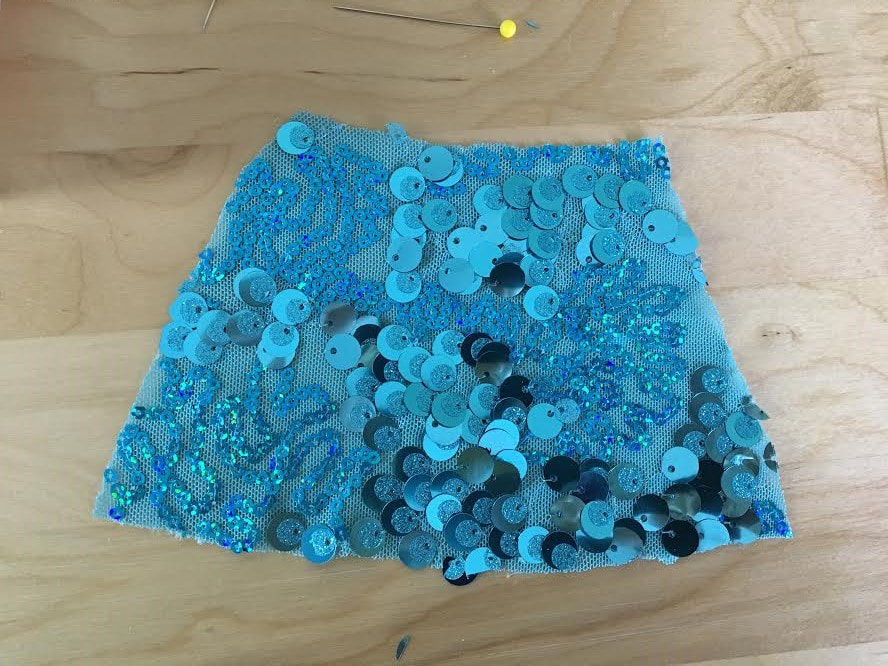
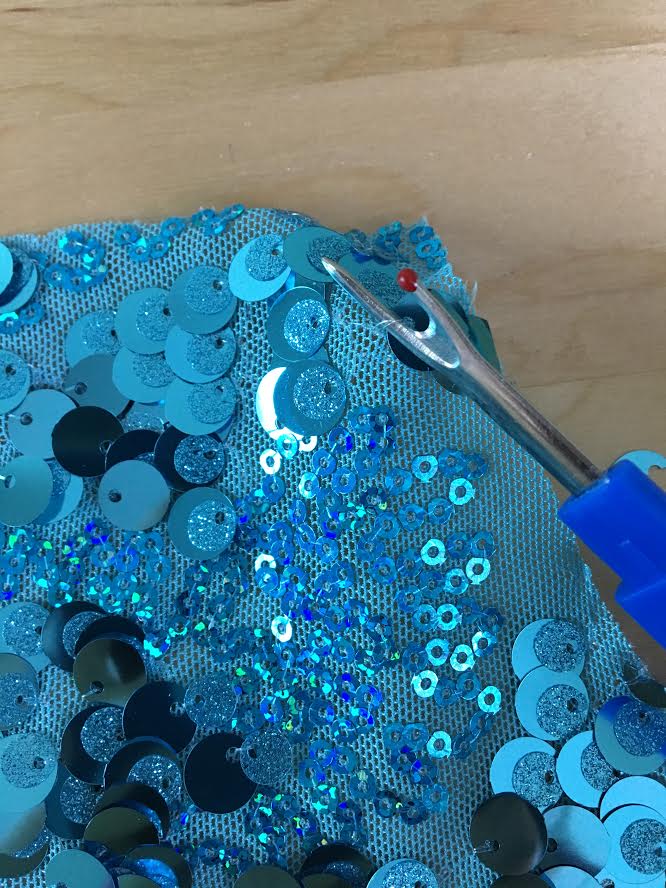
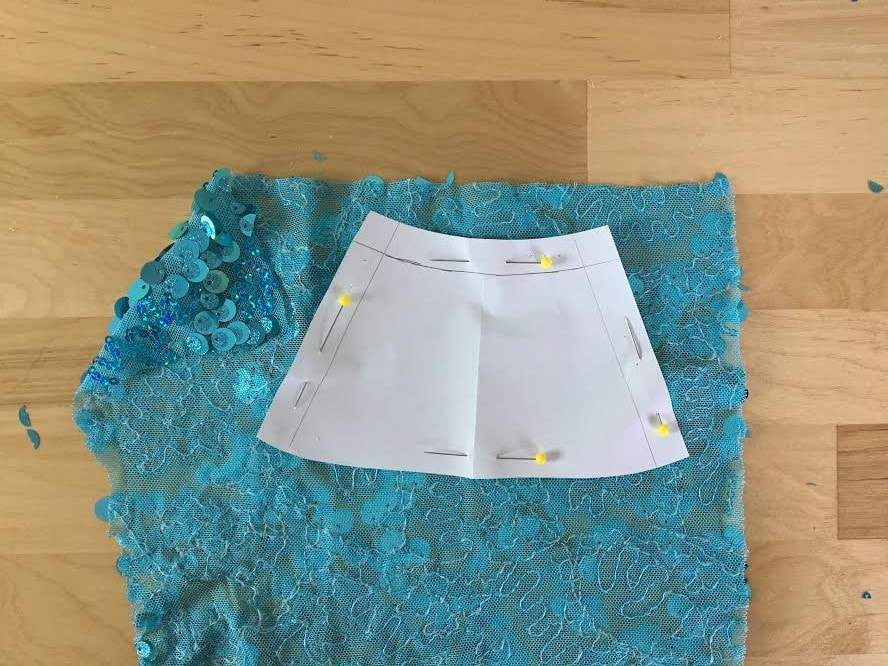
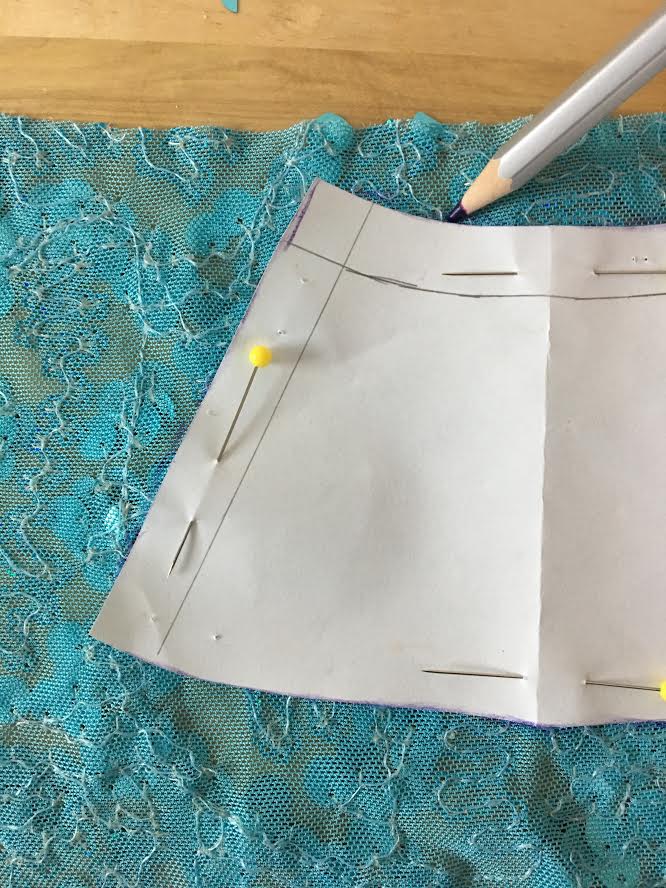
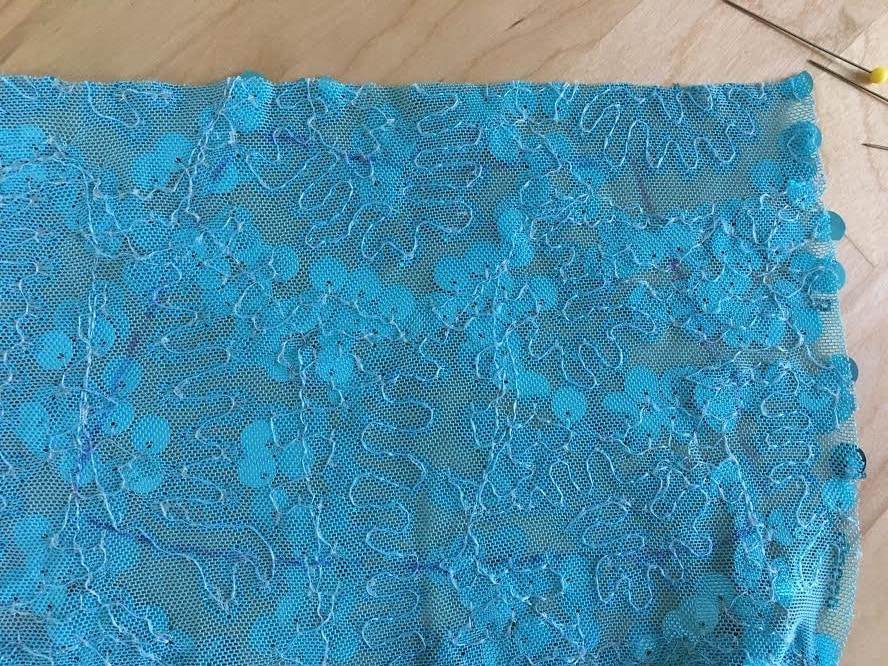
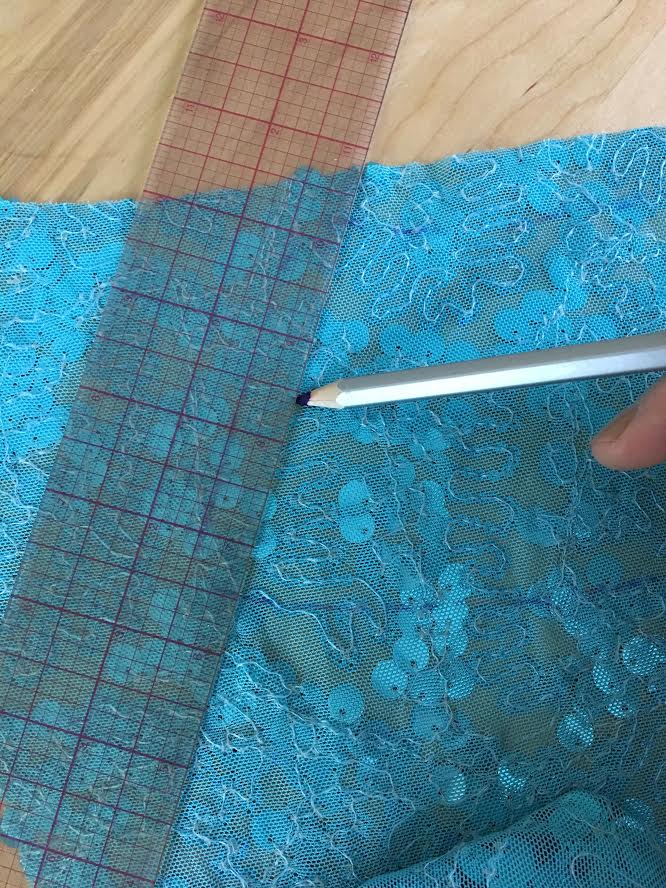
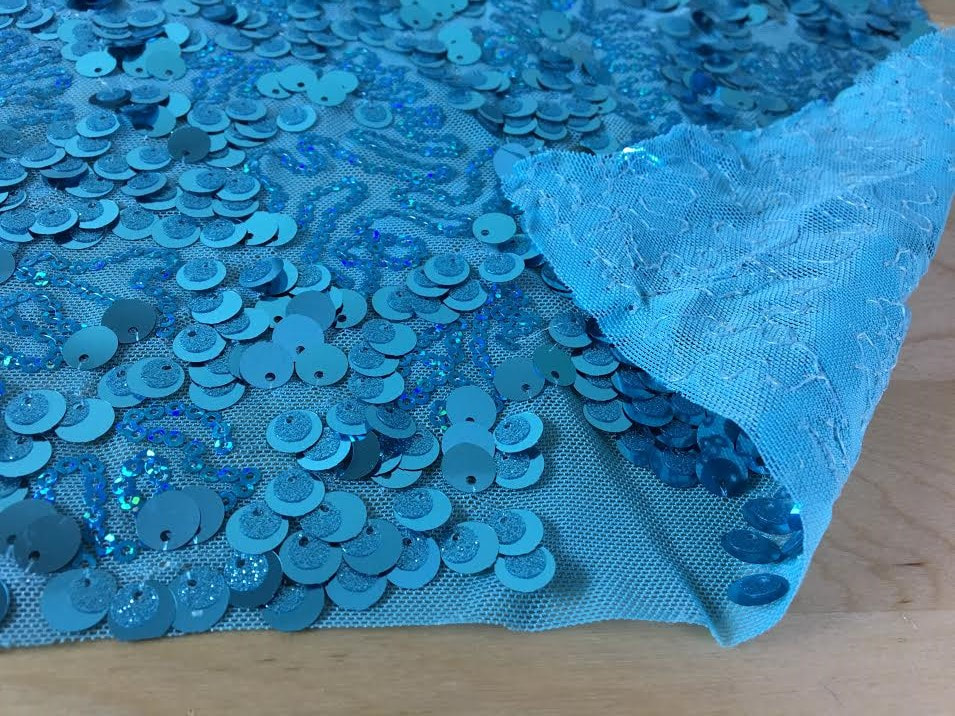
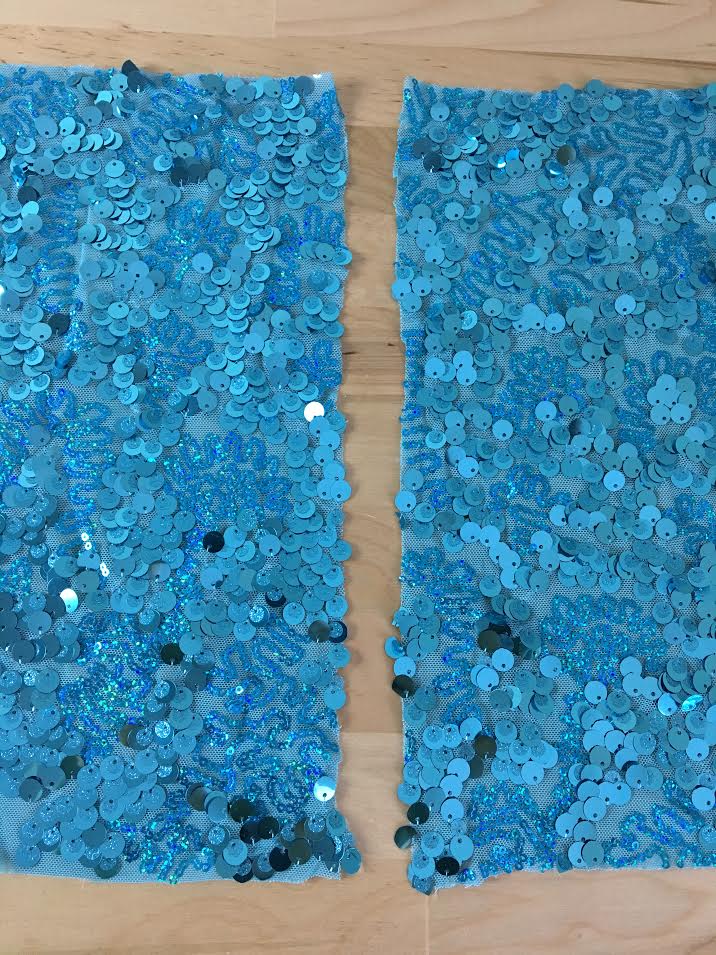
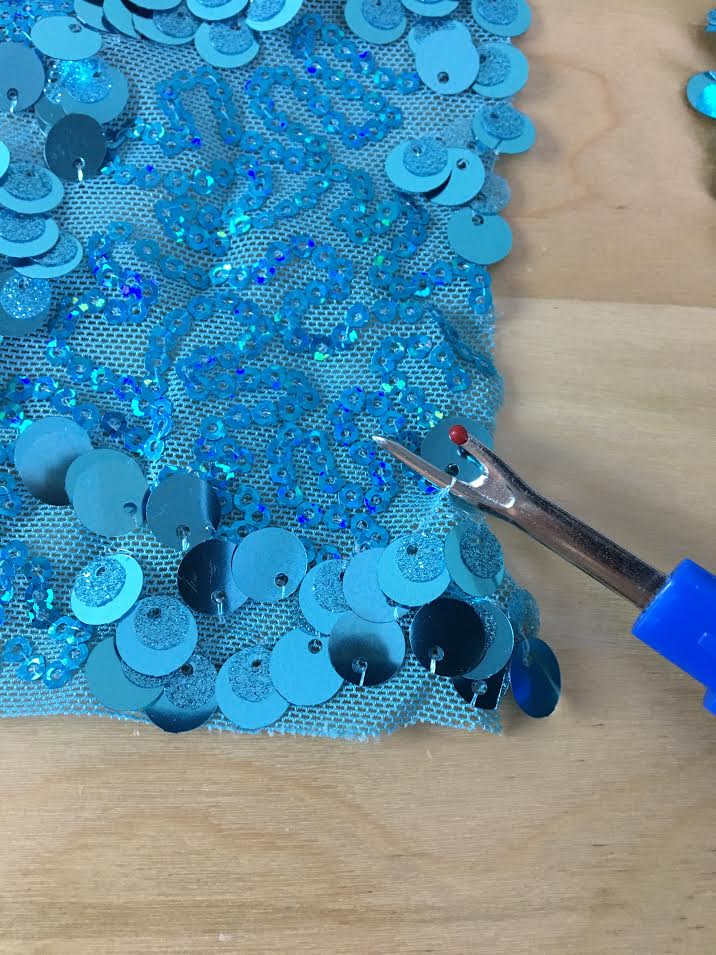
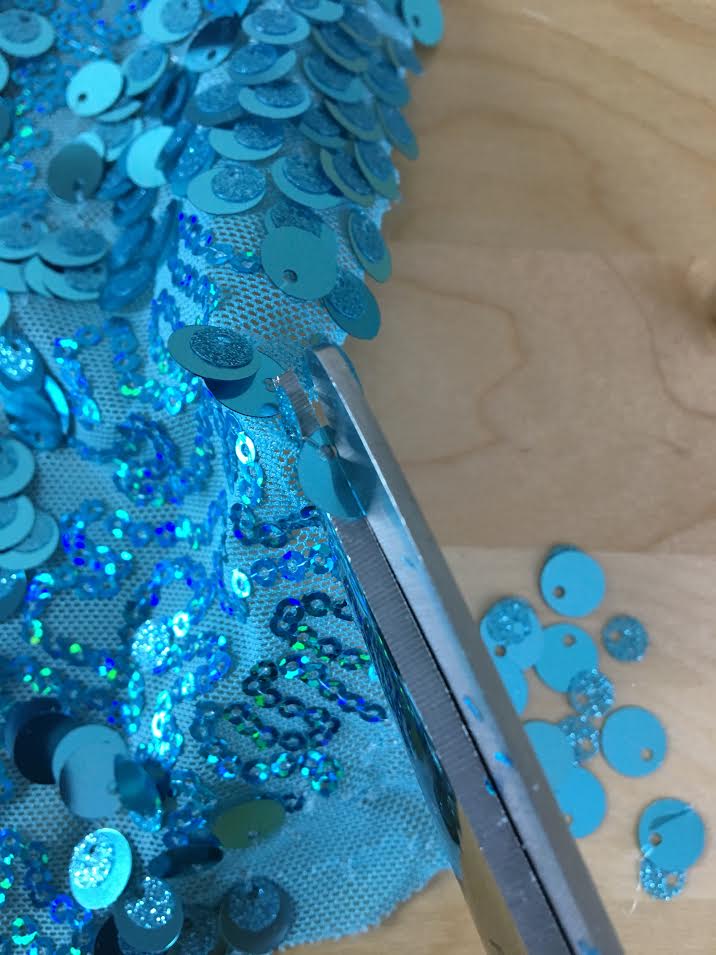
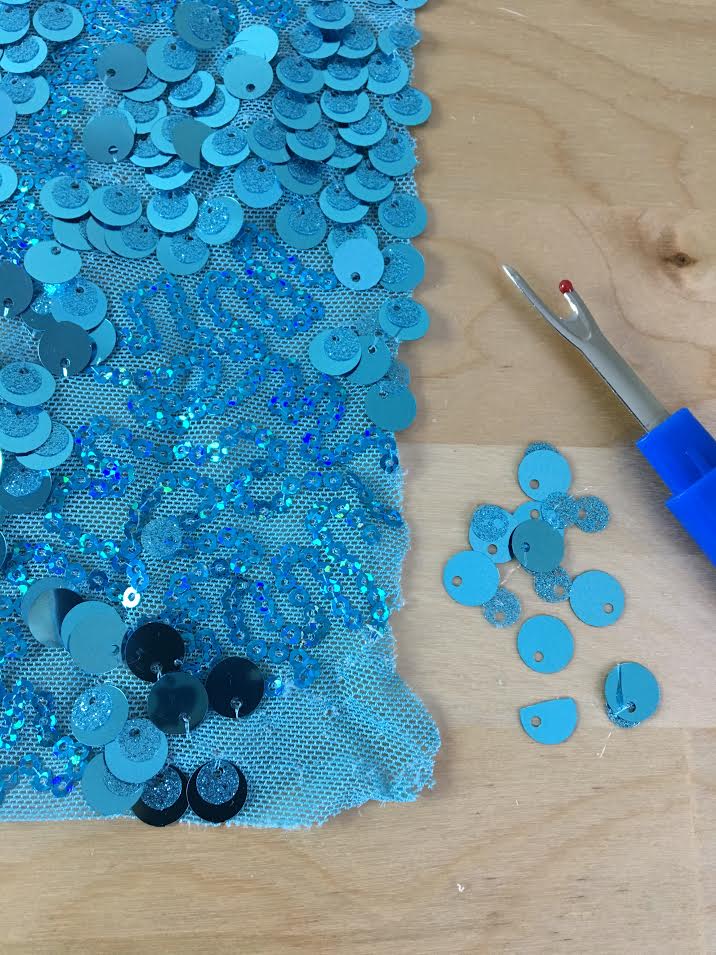
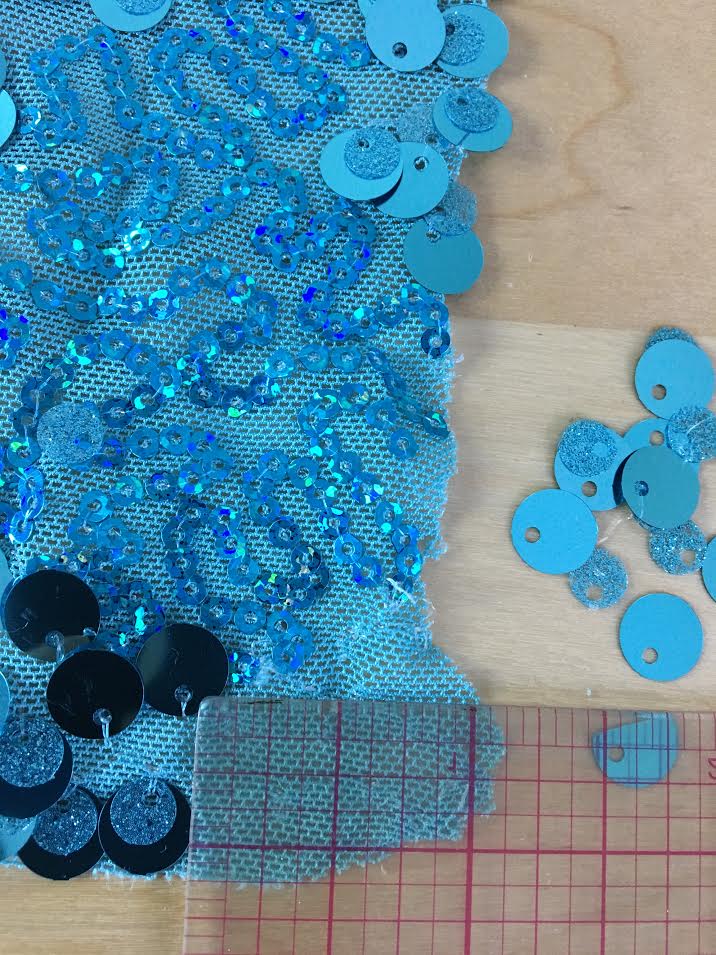
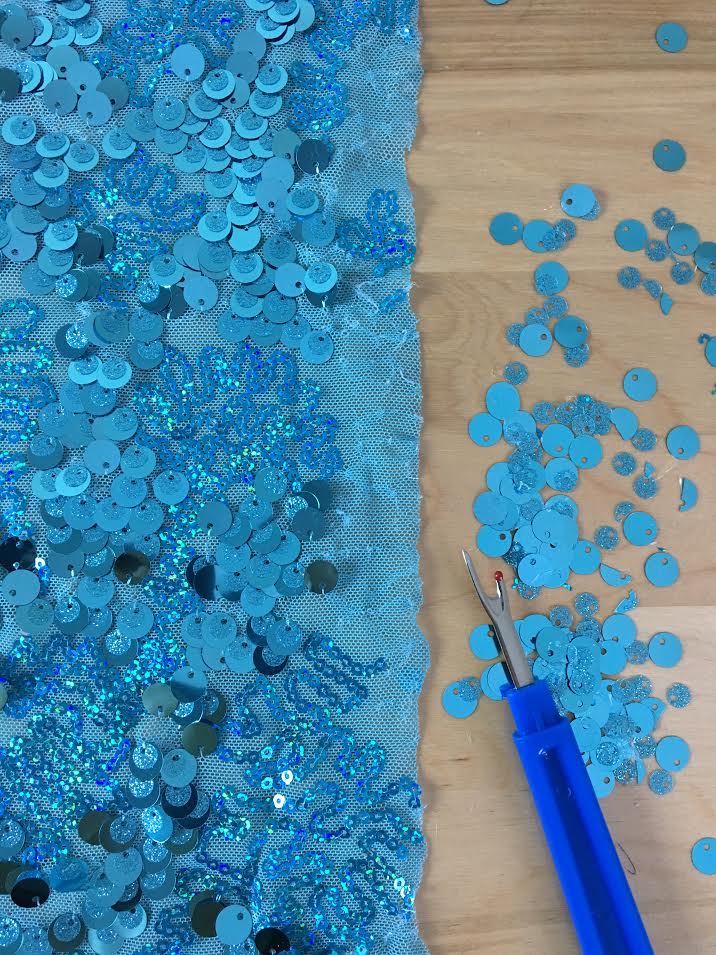
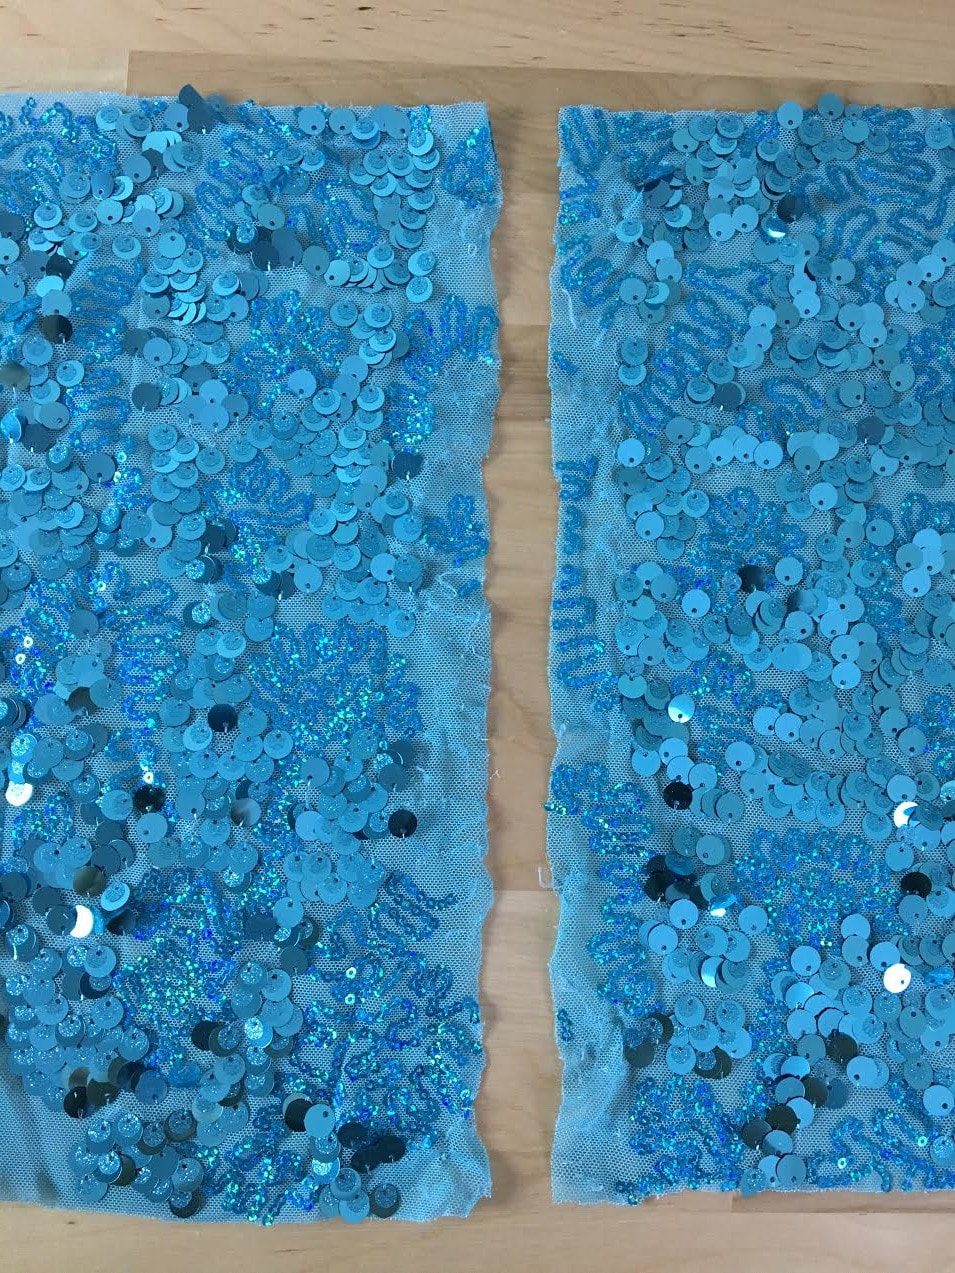
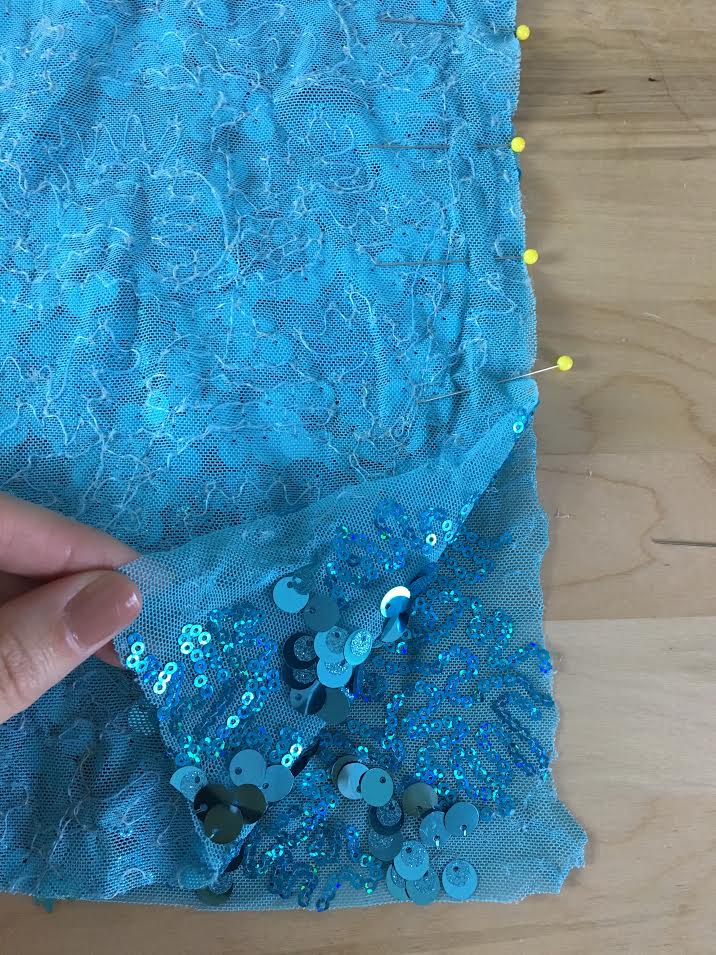
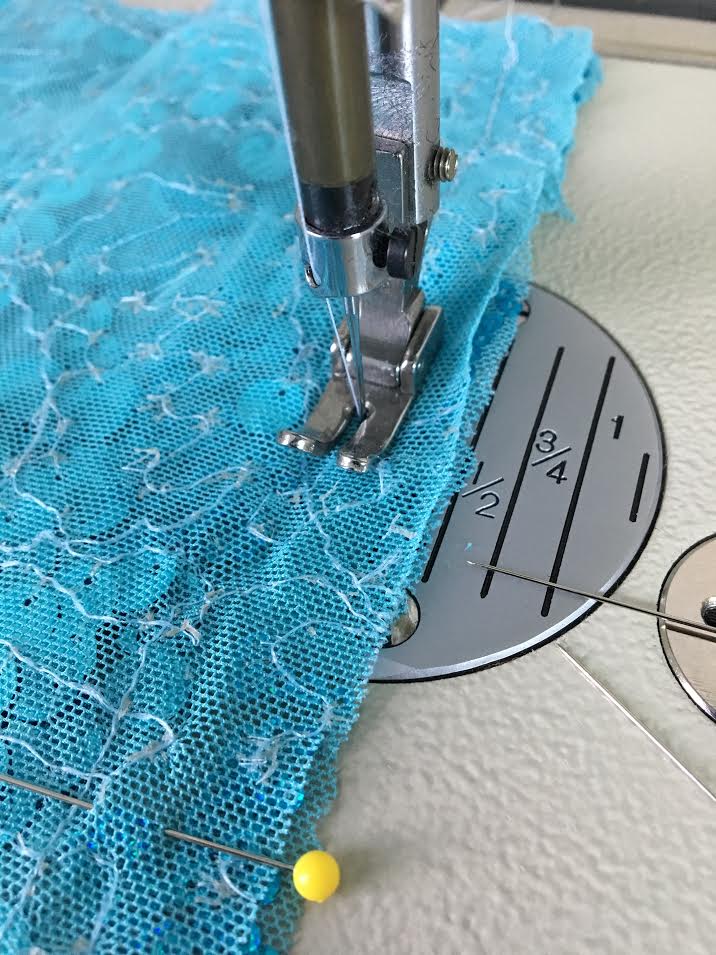
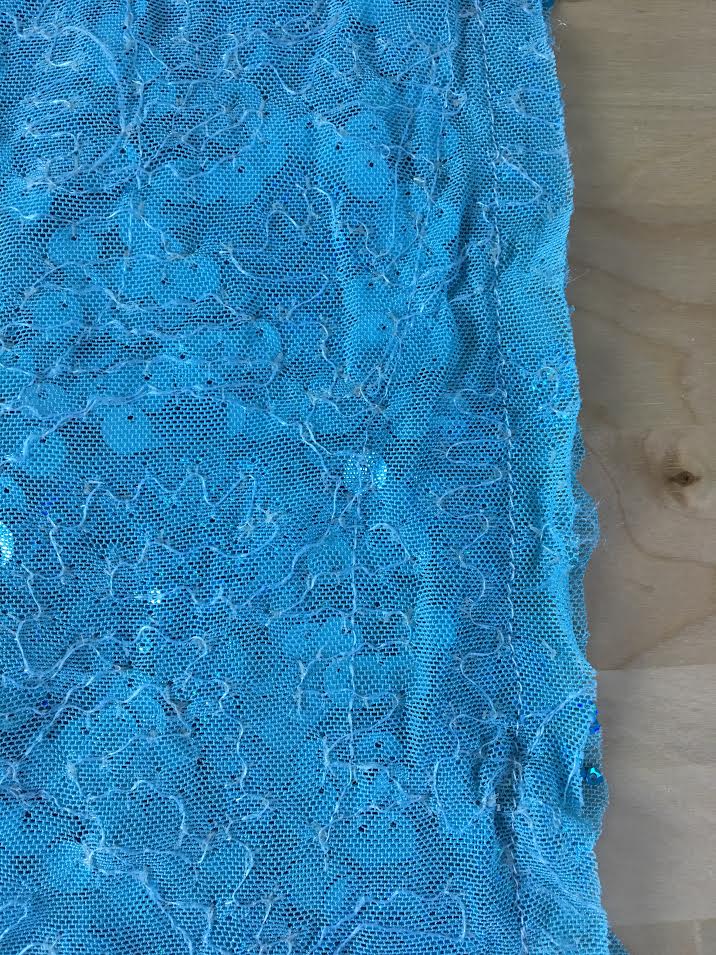
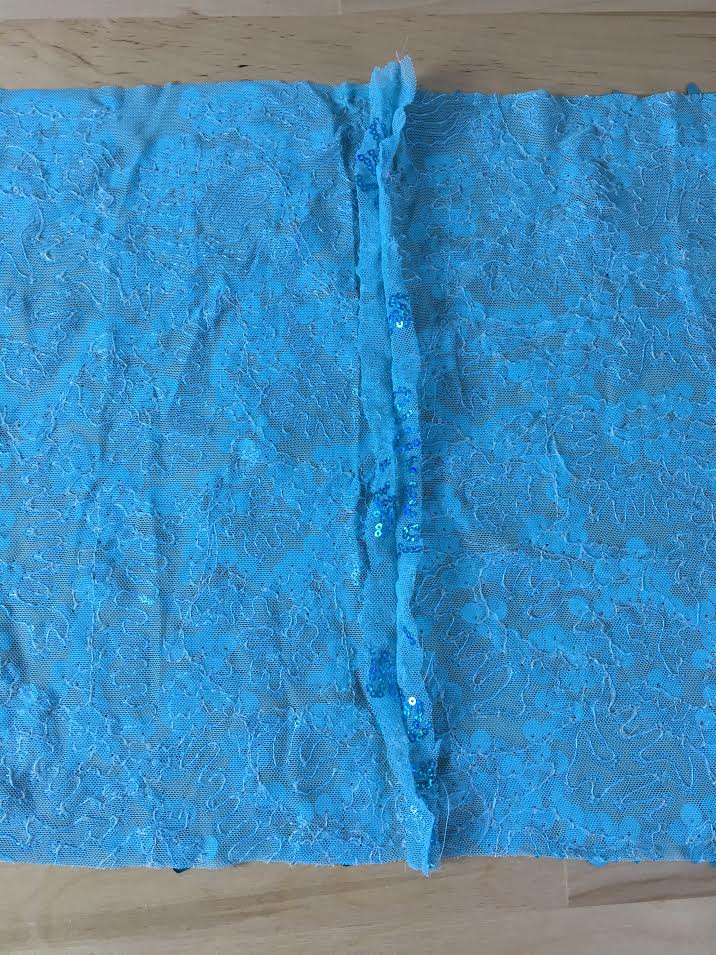
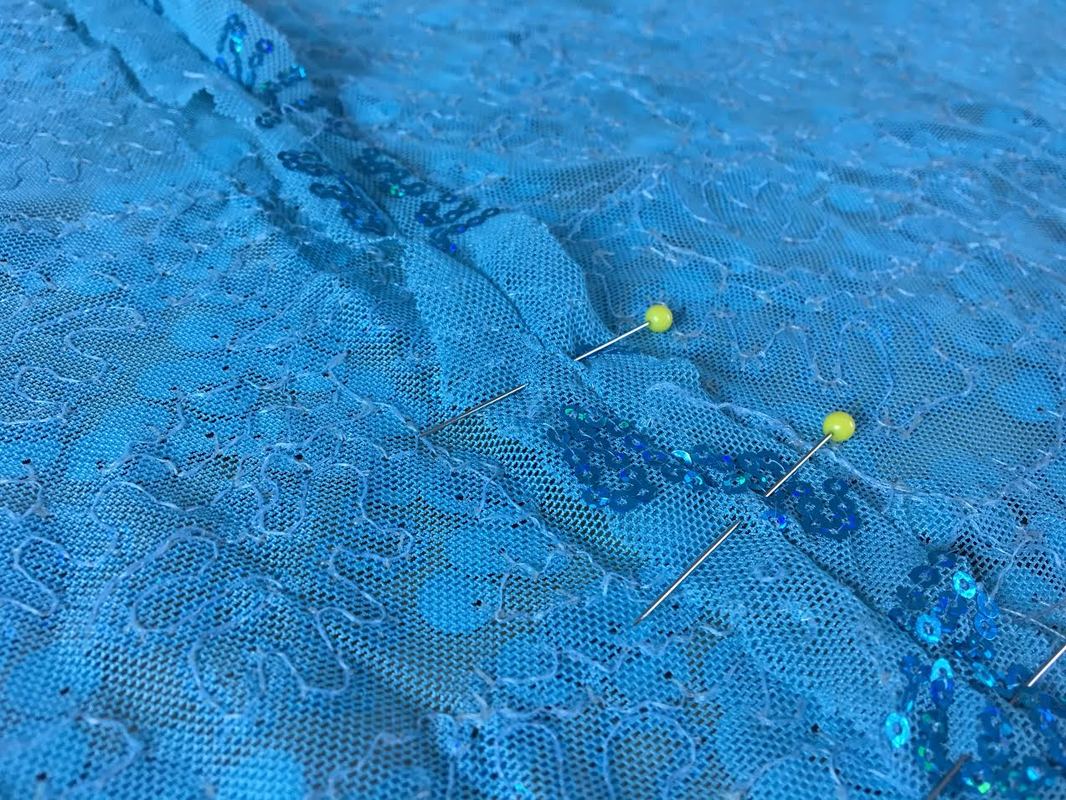
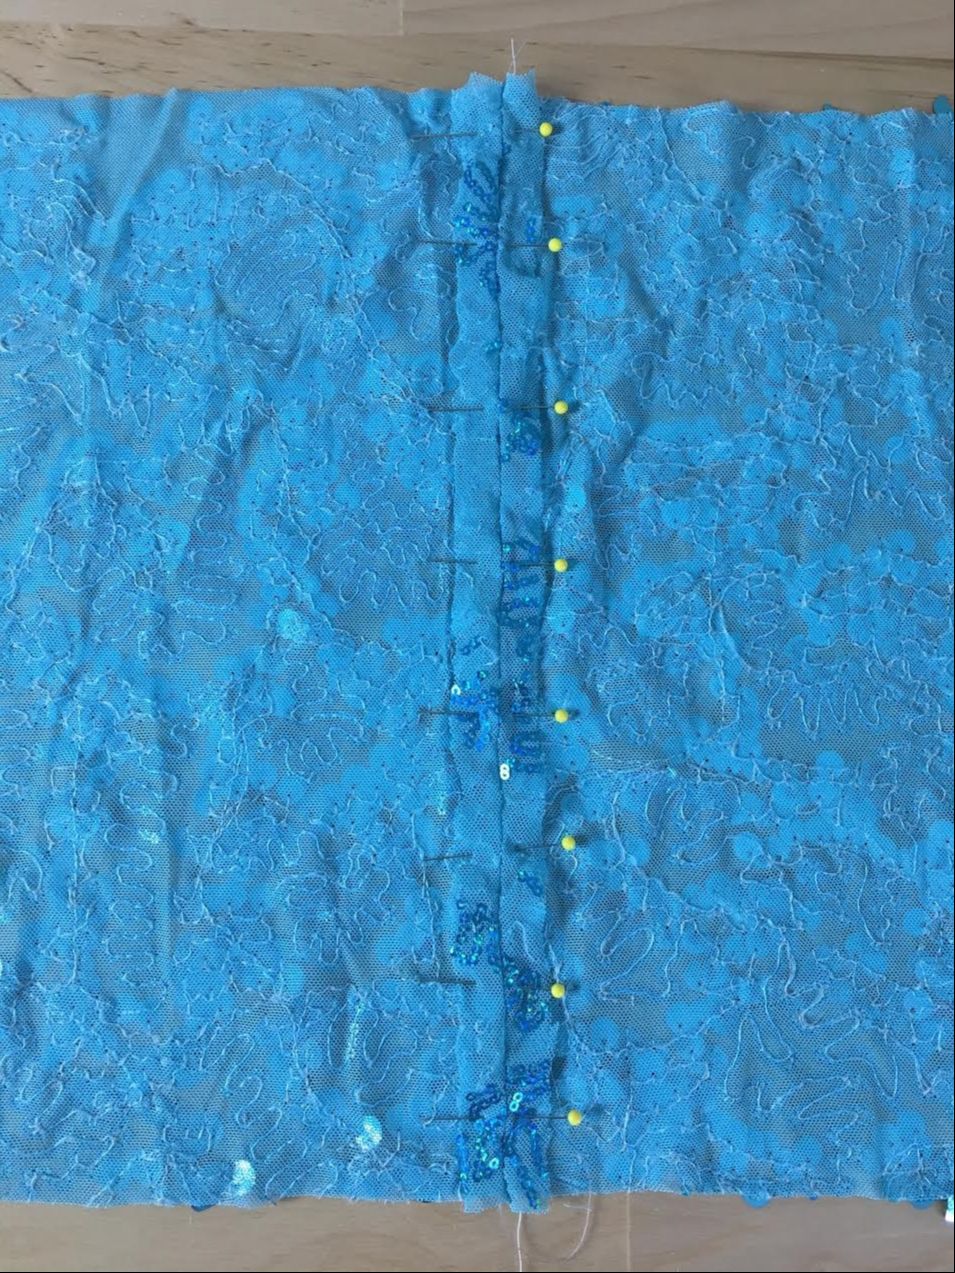
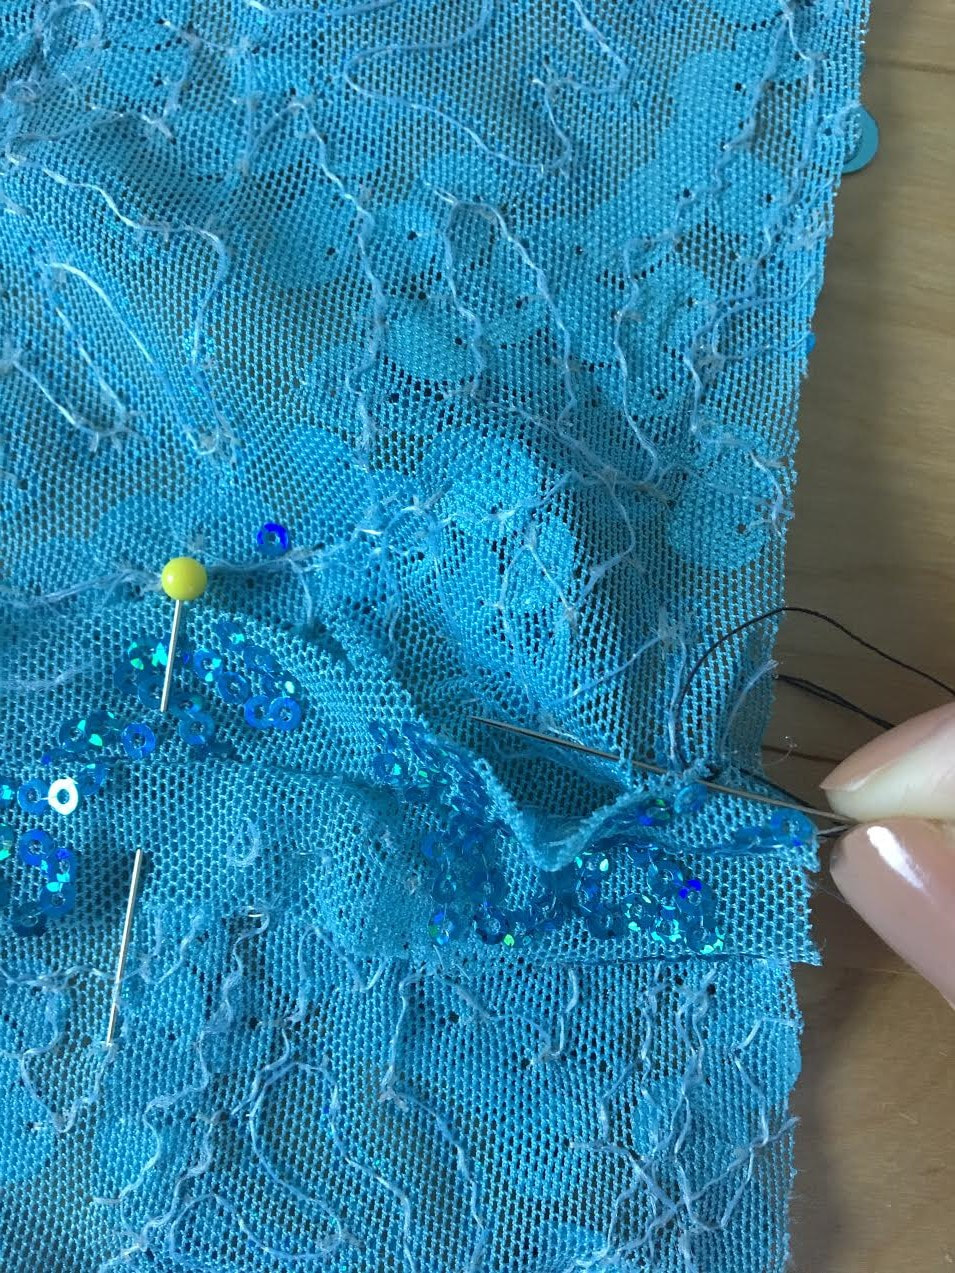
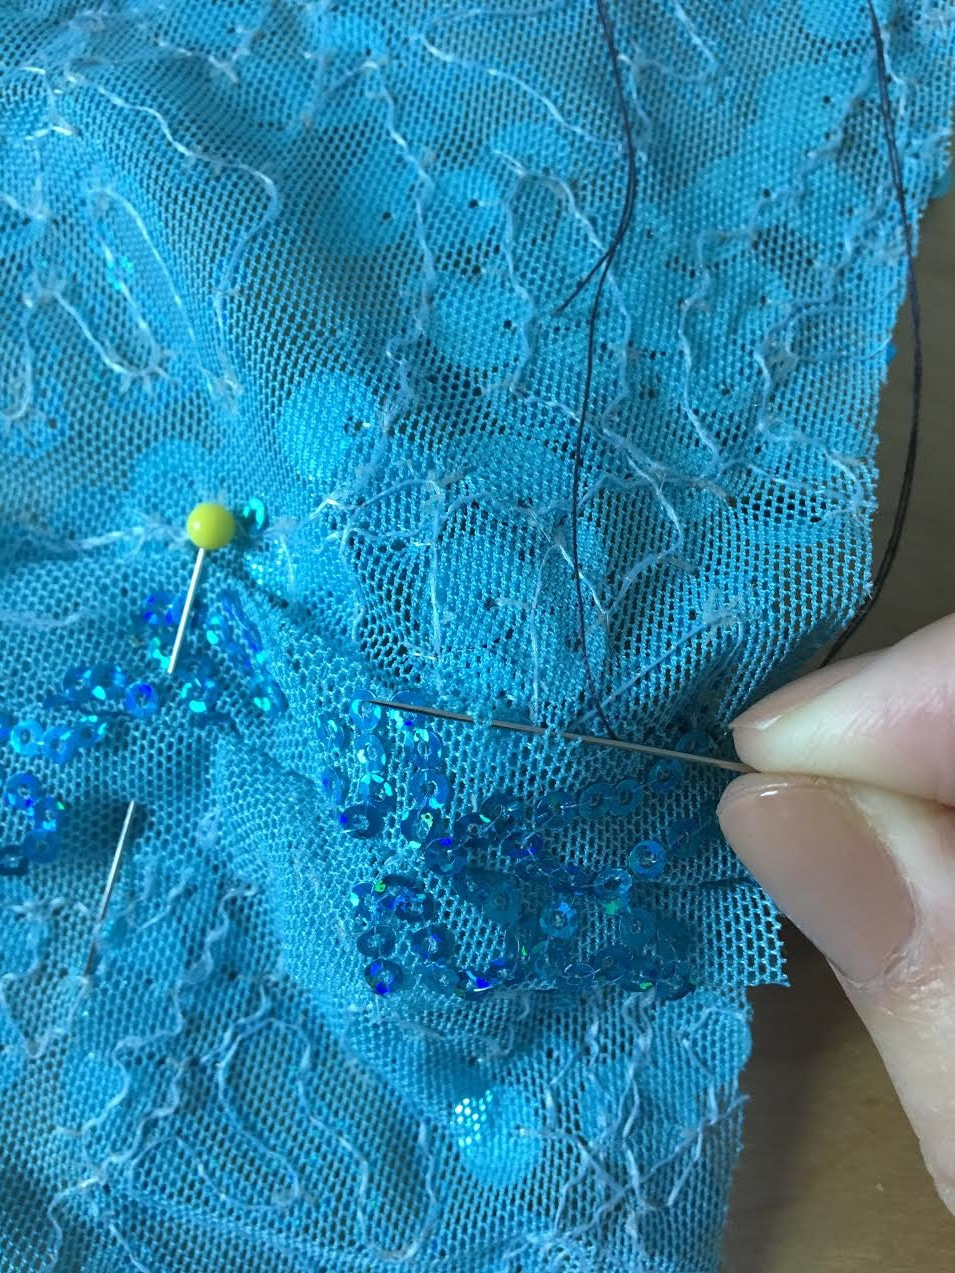
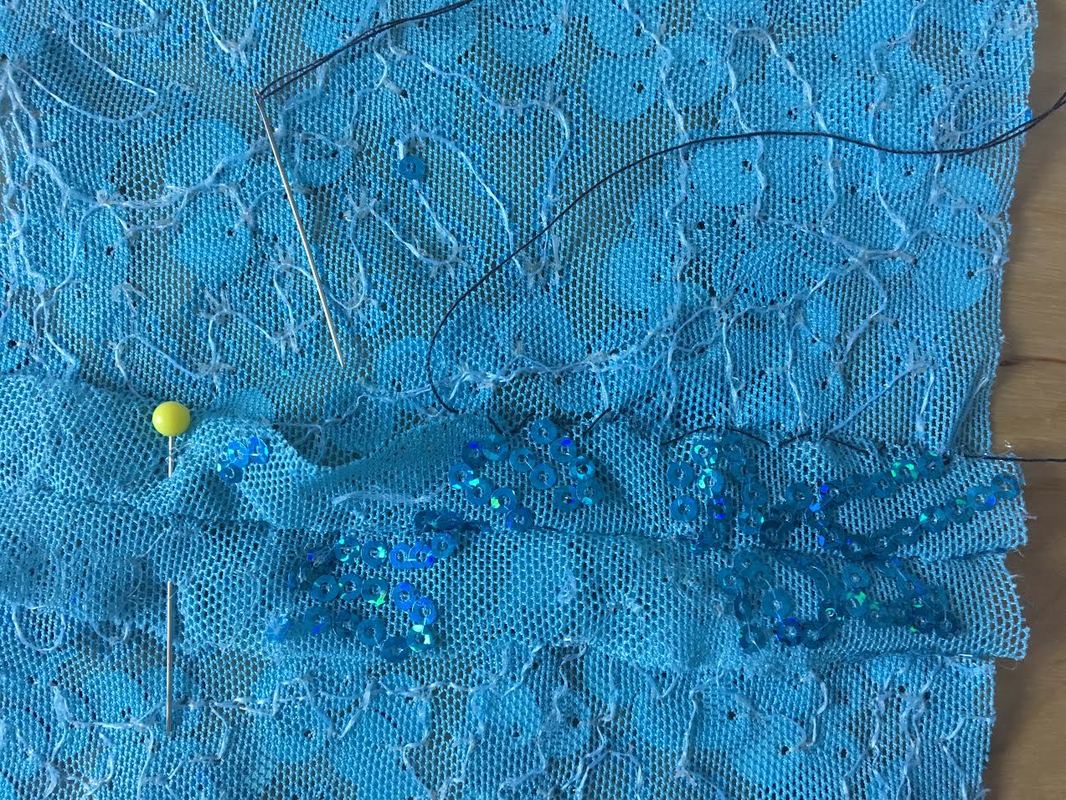
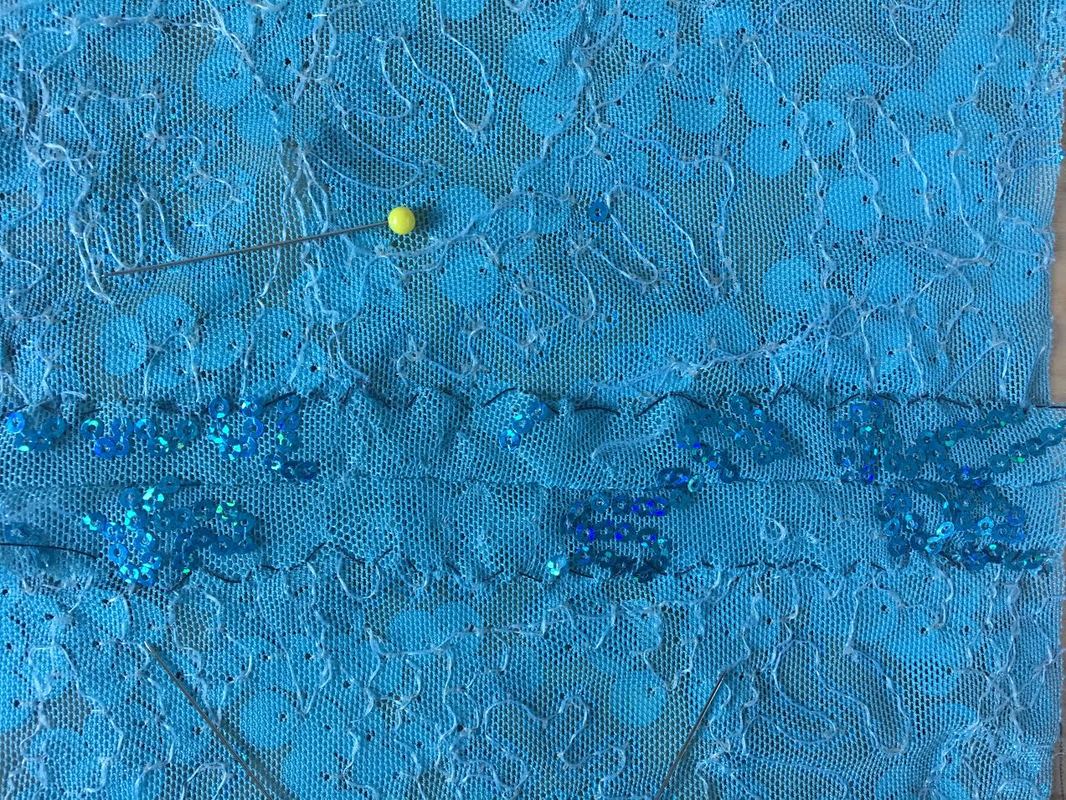
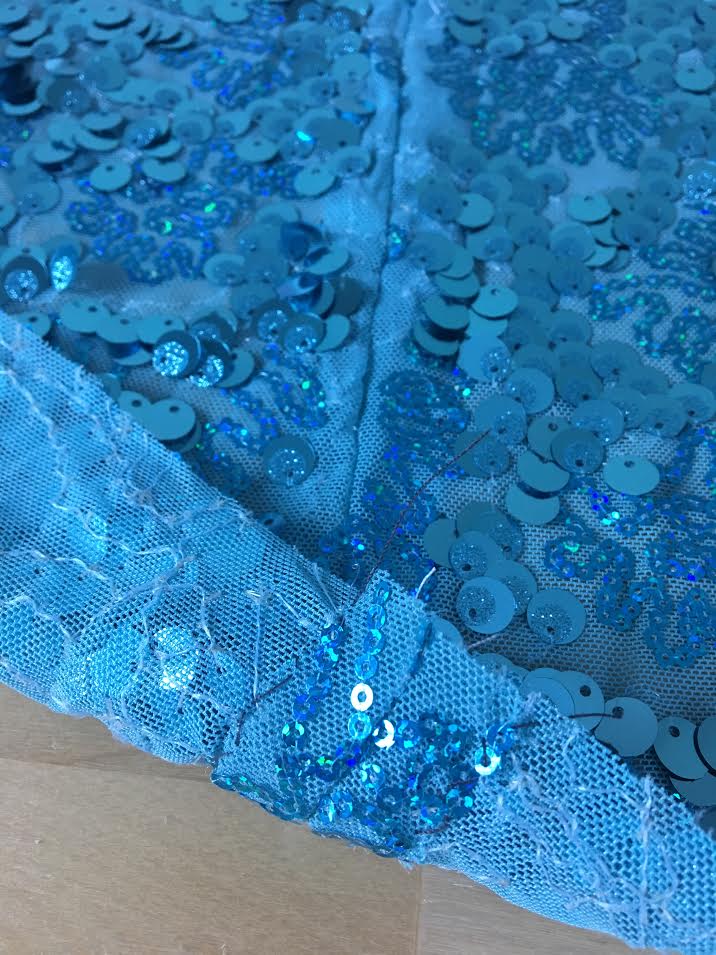
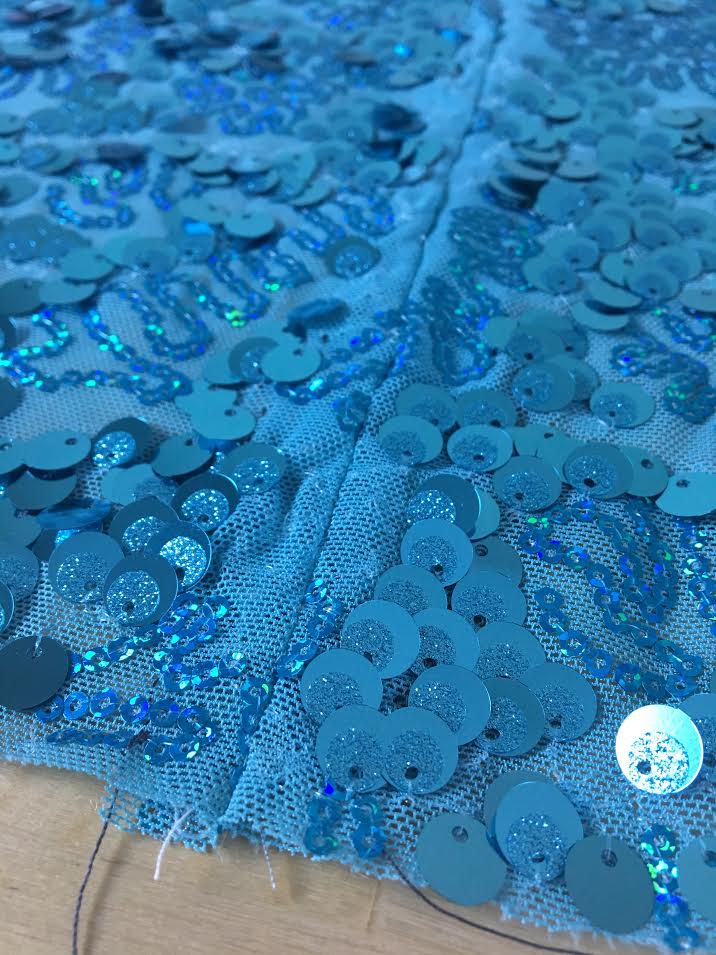
If you are reading this tutorial, you are probably in the midst of a struggle with sewing a beaded or sequined fabric. A couple of years ago, I was wearing those shoes when I took on the enormous (yet exciting) task of designing and making my sister's wedding dress. When it comes to a project as such, lets just say the pressure is always on. Everything had to be prefect and that includes, of course, the dress fabric. As we browsed store after store, no fabric was off limits. I was ready to take on any textile regardless of how ornate or potentially difficult to work with it was. Eventually, we found the one- a luxurious lace hand beaded with two different styles of beads which beautifully blended onto the fabric surface providing a tasteful sparkle. I'll be honest, I don't recall the exact lace print itself (it was definitely floral), I do however vividly recall having to remove each minuscule bead along the fabric's cut edges in order to physically stitch the seams together. Lesson number 1? Sewing with heavily beaded and sequined fabrics requires a lot of patience. The end result however, is incredibly rewarding. Precautions For Sewing With Beaded And Sequined FabricsAs you might have already guessed, sewing with beaded or sequined fabrics will take a bit more energy than working with regular fabrics. There a few aspects of taking on these unique fabrics that require a different construction (and sometimes design) process than that conventionally used with non-ornamental fabrics. First and foremost, before stitching your fabric pieces together, you have to remove the sequins or beads from the seam allowance area along each edge. You should not sew directly on top of the sequins/beads for two main reasons: 1. The final seam will be bulky and not lay flat, causing discomfort to the wearer . 2. You can break your machine needle if it directly hits one of the beads (and thicker sequins) during machine stitching. Although a time consuming task, removing the sequins and beads from the seam allowance area beforehand will provide a professional finish in the final garment and be gentle on your sewing machine. Another factor to consider is that you cannot iron directly on top of the fabric surface or the beads/sequins will melt. Conventional ironing techniques used in the garment construction process will simply not work when sewing with heavily sequined or beaded fabrics. Although gravity will usually take care of some the wrinkles, be gentle when working with ornamental fabrics as such. Try not to fold or wrinkle them extensively during pinning and machine stitching. Doing so will not only prevent significant wrinkling, it will also preserve the sequins and beads themselves which can sometimes weaken or break in the sewing process. With these precautions in mind, if you do somehow end up needing to release wrinkling, gently use a steamer on each individual wrinkle. You can also use the old shower steam trick by hanging your garment/fabric in the bathroom and using the steam from a hot shower to relax the textile. So if you can't iron the seams in a conventional fashion, how do you get the seams to lay flat? As you'll see in the steps below, you can use a slip stitch to keep the seam allowance layers flat and pointing in the desired direction. While it can be time consuming, slip stitching the seam allowance down will provide smooth, flat seams and a more comfortable, long lasting fit. The good news about sequins is that they are usually added to knit fabric which normally do not unravel when cut. Thus, you can leave seam allowance edges unfinished and just hand stitch them down (shown in the steps below). One of the main rules of sewing a regular seam is to position the fabric pieces such that the face of both pieces are touching. With sequined and beaded fabrics, you'll need to be gentle placing the two layers together since both embellished surfaces will be touching. You'll find that the layers of fabric may slip from each other (especially with sequins) or be more difficult to control. If you are a sewing beginner and don't feel comfortable using pins alone to hold the fabric in place during stitching, I highly recommend temporarily basting the fabric layers together before applying the permanent machine stitch. Last but not least, working with sequined and beaded fabrics can get pretty messy! I still find loose beads from my sister's wedding dress in my studio (which is actually a bit melancholic). Anyways, keep the messy aspect of removing sequins/beads in mind when sewing with these specialized fabrics. The best you can do is keep everything contained to the surface of your work table and use a damp paper towel to lift as many loose beads and sequins as possible when wiping the table. When removing the sequins/beads from the fabric edges, give the fabric pieces a little shake to make sure no beads or sequins are still trapped onto the sewing surface. This is highly recommended when working with small beads that are the same color as the fabric. These invisible beads blend into the fabric surface so you risk accidentally breaking your needle on one of them in the machine stitching process. Cutting Beaded Or Sequined Fabrics: 2 Techniques Based On Fabric Type.Before even getting to the sewing portion, you will need to first cut out your pattern pieces. Techniques for cutting sequined and beaded fabrics are not that different from cutting regular fabrics. In some cases however, you may need to use a more involved technique to cut and mark your fabric pieces. Here are 2 basic cutting methods and when to use them: 1. Pinning and cutting method. This is a conventional pattern cutting technique you've definitely used before with all other conventional fabrics. It is completely OK to use the regular pinning and cutting technique on sequined and beaded fabrics if the fabric is easy to pin through without damaging it. This technique should be used for fabrics that feature a more scattered sequin/bead placement (used in this tutorial) thus allowing for easy pinning and more cutting control. To cut the sewing pattern, simply pin the pattern to the face of the fabric (sequined or beaded side) making sure the pattern is placed following the same direction as the sequin direction, and is aligned with the selvage edge accordingly. Carefully cut along the edges of the sewing pattern. You can easily cut through most sequins using a regular pair of scissors. Just remember that this process will get a little messy so try to keep the cutting contained on your work table as much as possible. Note: Cutting through beaded fabrics may prove to be a bit more challenging. When cutting along the pattern edges, position the scissors such that the scissor blades are in between the beads and not directly on top of them. You can also try a roller fabric cutter. The thinner roller blade can often provide more control. Regardless of which you choose, keep in mind that you can cut through sequins but you cannot cut through beads, so be sure to exercise some caution with each individual cut. Once your pattern pieces are cut, you will have to remove the sequins/beads along each edge so you can sew the fabric piece together (detailed steps are displayed in the next section below). 2. In cases where the sequin/bead placement is so dense that you cannot pin through the fabric, you can transfer the pattern pieces onto the back of the fabric and cut them following the traced lines. For this technique, align your patterns on the wrong side of the fabric following the direction of the fabric's sequins or ornamental pattern. Instead of pinning, you can use weights (if you have them) or something a bit heavier to hold the patterns in place during the tracing process below. Using tailors chalk (use a piece of dry soap if you don't have tailors chalk) or a contrast color pencil, trace the pattern pieces onto the back of the fabric as shown. Next, remove your patterns and use a ruler to also draw in the seamlines. This will mark the required seam allowance along each edge. Cut your pattern pieces following the outer most trace lines. Once the pattern pieces are cut, remove the sequins/beads (detailed steps below) up to the seamlines you marked on the back of the fabric. The seam allowance along each edges should not have any sequins or beads prior to stitching the seams together. Preparing The Cut Sequin Fabric Pieces Before Sewing (Also Use This Technique For Beaded Fabrics).Before sewing the seams, there are some preparatory steps you should take to ensure the seam lays flat and your sewing machine needle is protected during the stitching process. First, follow the cutting guidelines noted above to cut out your sequin or beaded fabric pattern pieces. Once cut, the sequins (or beads) will extend all the way to the edges of the fabric pieces. Before sewing the seams, they will need to be removed from the seam allowance along all edges. As mentioned above, if you attempt to sew the seams as is without removing the sequins or beads, the seams will not lay flat, the seam allowance will feel uncomfortable against the skin, and you risk breaking the needle on the un-removed beads or sequins. The image above displays two edges that will be sewn together to form a seam. These edges will both need to have the sequins removed along the seam allowance before they are stitched together. 1. To start with, use a seam ripper to remove each individual sequin as shown above. This will be a bit time consuming and tedious but it will make your life so much easier once the garment's seams are stitched. When removing the sequins, cut through the stitch that connects each sequin to the fabric as shown but be careful not catch and rip through the actual fabric threads. If you prefer not to use a seam ripper, you can use a pair of scissors to cut the actual sequins removing the cut parts from the stitch. If you choose this option, be very careful in the cutting process- you want to avoid accidentally damaging the fabric. It is best to work with a smaller pair of scissors or snips as these will allow you more control in the cutting process. 2. Remove the sequins along the entire width of the seam allowance. If the sequined fabric you are working with has scattered sequins (similar to the fabric used in this tutorial), then you can remove the sequins a little past the seamline as well. This will give you a larger flat surface to work with and the sequin-less gap will blend into the finished seam. That being said, in this example, the seam allowance is 1/2" so I've removed the sequins up to about 3/4" from the edge (an extra 1/4"). You'll see that since the sequins are positioned in a random scattered fashion, this will not affect the final look of the garment/seam. If you look carefully, you'll notice that in this example, there are other smaller sequins attached to the surface of the fabric. Since these sequins are very light and flexible, they can withstand regular machine stitching without affecting the final seam too much. Removing sequins (and beads) is fairly tedious work so you can skip removing these smaller sequins. However, if you have smaller beads instead of sequins, I recommend removing them or you risk breaking your machine needle on one of them during stitching. Beads are made of a much harder material, so it is always just safer to remove them prior to machine stitching. 3. Continue removing the large sequins evenly along the entire edge, being careful not to damage the actual fabric surface. 4. Repeat the process on the other corresponding edge, removing the sequins at the same distance from the edge throughout. Since these two edges will be sewn together to form a seam, they have the same seam allowance (1/2" in this case) which is why the sequins should be removed evenly on both edges. How To Sew A Sequin/Beaded Fabric SeamNow that the sequins are removed from both edges, you can stitch the seam as you would with any regular fabric. 1. Place the fabric layers on top of one another such that the sequined sides are touching. Insert pins perpendicular to the sequin-less edges to keep them aligned. 2. Next, machine stitch the seam at the appropriate seam allowance- 1/2" in this tutorial. If your fabric has more of an open weave like the netting fabric in this example, use a denser stitch. Now that seam is permanently stitched, you'll find that with the removal of the larger sequins, the seam is flexible and the seam allowance can be directed as desired. The good news is that most sequined fabrics do not require clean finishing along the cut edges. Why? sequins are most commonly added to knit fabrics which conventionally do not fray. This means you can get away with leaving the seam allowance unfinished. However, if you find that the seam allowance edges do fray, make sure to apply a zig-zag stitch along each raw edge to contain the unraveling. If you have an overlock machine, use an overlock stitch instead. To ensure that the seam lays flat on the right side of the garment, we need to somehow reinforce the seam allowance in a single direction. When working with regular fabrics, this can be easily done by ironing the seam allowance directionally. Beaded and sequined fabrics however, cannot be ironed or they will simply melt. With that in mind, the best option is to pin the seam allowance flat and then use a blind stitch or slip stitch to keep the seam allowance edges down. This technique is very commonly used in evening wear when working with heavily embellished, specialty fabrics. With sequined and beaded fabrics, it is best to split the seam allowance down the middle and spread its excess equally on each side. This provides balance in the seam and prevents bulk , which is often an issue when working with heavily beaded and sequined fabrics. 3. As a first step in this process, pin the the seam allowance edges open, placing the pins horizontally on the wrong side of the seam as shown above. Pin along the entire seam to keep the seam allowance edges open and positioned flat against the fabric surface. You can also baste these edges down instead of pinning, which will actually allow for a flatter, smoother area to work with in the steps to follow. 4. Using a hand sewing needle and matching thread, apply a slip stitch connecting the very edge of the seam allowance to the fabric surface underneath. To apply a slip stitch, take one or two threads from the fabric surface and then insert the needle through the edge of the seam allowance in a zig zag pattern as shown. Continue alternating between the edge of the seam allowance and the fabric surface making sure to catch just a few threads from the fabric surface itself. This slip stitch forms a zig zag shaped stitch that keeps the seam allowance layer flat while also appearing invisible on the right side of the garment (also why a slip stitch is considered a blind stitch). When using matching color thread and stitching through just a couple of threads on the fabric's surface, the stitch blends into the fabric on the right side of the garment. In the actual hand stitching process, make sure not to pull on the thread too hard or you risk creating tension in the seam. 5. Apply the slip stitch along the entire length of the seam allowance on both sides as shown above. Remember that in using this hand stitch, your goal is to keep the seam allowance laying flat without altering or affecting the look of the seam on the right side of the garment. Although this is a bit more time consuming than simply ironing the seam allowance open flat, having a stitch that actually keeps the seam allowance permanently pointed in a specified direction will allow the seam to always lay flat after extended wear and care. On the right side of the seam, the sequins should naturally blend with one another making the seam less visible. Since I used a fabric with sequins that are a bit more scattered, the sequins visually blend in at the seam even though I removed additional sequins past the seamline. The same concepts apply to beaded fabrics so all the steps in this tutorial are applicable. Also remember that it may take a few tries to get it right- it is always a good idea to test stitch a sample seam using your desired sequined or beaded fabrics before working on the final garment. How To Remove Wrinkles From Sequined And Beaded Clothing.A sequin or beaded garment is always luxurious and beautiful to look at but just as is true for most specialized fabrics, it requires a bit more caution to preserve and care for. One thing is clear, sequined and beaded fabrics cannot be ironed in a conventional fashion due to their melting quality. After all, almost all sequins and beads are made of plastic, and it's no secret that plastic and high heat do not mesh well. So how should you go about removing wrinkles from a beaded or heavily sequined clothing item? Here are a few tips you may find helpful: 1. For a heavy embellished garment, hang it on its own without other garments pressing against it. In a heavier beaded or sequined garment, gravity will usually take care of some of the deeper wrinkles. 2. Try the old shower steam trick. Leave the garment hanging in your bathroom during and after a shower. The natural steam from the running hot water will release the wrinkles while also being gentle on the fabric and its embellishments. This technique will take some pre-planning as it will take a few hours (at the least) to de-wrinkle the garment. 3. Use conventional steaming. Gently steam the wrinkles using a regular garment steamer but don't over do it. Keep the steamer a safe distance way from the fabric (about 8") to prevent weakening the fibers or even melting some of the beads/sequin embellishments.
6 Comments
2/14/2019 05:54:22 pm
I totally agree when you said that using these fabrics will make an article of clothing look luxurious, but it needs more care. I will share this information with a friend of mine to ensure that she will be careful when she creates a dress with this fabric. It will be for the birthday dress that her daughter will be using in her 16th birthday party.
Reply
Sarah Smith-Tucker
9/25/2020 09:48:59 pm
I would have liked to have seen the hemming. I have to hem an entirely sequined and heavily beaded formal dress about 4 inches and I’m not sure of the best way to deal with the bottom edge.
Reply
Ángela Wood
4/28/2021 08:15:45 am
I am making a table cloth using beaded and sequence fabric so the hem is where I am a bit confused. It will have to be all hand stitched because it is heavily beaded and I assumed a blind stitch but I’m not so sure now, I would have liked to see the hemming as well
Reply
Tana Barnes
6/19/2021 05:54:34 am
What an excellent tutorial! Thank you so much for the information.
Reply
Hope Precopio
7/17/2023 10:22:46 pm
This is such a fabulous & helpful tutorial! For the first time I’ll be sewing beaded tulle fabric to make myself a short shoulder cape for my sons wedding. I wanted a bit of upper arm coverage over my sleeveless floor length gown.
Reply
Norma pollard
3/26/2024 06:20:31 am
Thank you
Reply
Leave a Reply. |
The Blog:A journey into our design process, sewing tutorials, fashion tips, and all the inspiring people and things we love. Doina AlexeiDesigner by trade and dressmaker at heart. I spend most of my days obsessing over new fabrics and daydreaming new ideas. Sadie
Executive Assistant & Client Relations Manager Archives
November 2019
Categories
All
|
-
Sewing Tutorials
-
Basics
>
- Aligning Pattern Grainlines To Fabric
- Preparing Fabrics For Sewing
- Pinning Sewing Patterns To Fabric
- Placing Sewing Patterns On Fabric For Cutting
- Rotary Cutters or Fabric Scissors?
- Cutting The Sewing Patterns
- What Are Notches And How To Use Them In The Sewing Process
- Transferring Notches From Pattern To Fabric
- Transferring Seamlines to Fabric
- Staystitching
- Backstitching: A Complete Guide
- Hand Basting: A Complete Guide
- Sewing Continuous Bias Binding
- Darts >
-
Sewing Seams
>
- The Basics Of Seams And Seam Allowance
- How To Sew A Straight Seam
- Sewing Curved Seams
- Sewing Corner Seams
- Trimming And Grading Seam Excess
- Notching/Clipping Seam Allowance for Tension Release
- Sewing Topstitched Seams
- Sewing Corded Seams
- Sewing A Slot Seam
- Sewing A Gathered Seam
- Sewing Bias Seams
- Sewing Seams With Ease
- Sewing Seams With Crossing Seamlines
- Sewing Unlike Fabric Seams
- How To Iron Seams: Ironing Tools And Conventions
- Sewing With Knit Fabrics
- Understanding Stitch Length And Tension
- Sewing Unique Fabric Seams
-
Seam Finishes
>
- Seam Finishing Techniques - Overview
- Applying A Pinked Seam Finish
- Applying A Bias Bound Seam Finish
- Serging And Zigzag Seam Finishes
- Sewing A Self-Bound Seam Finish
- Sewing A French Seam Finish
- Sewing A Hong Kong Seam Finish
- Sewing A Mock French Seam Finish
- Sewing A Turned-and-Stitched Seam Finish
- Sewing Overcast Hand-Applied Seam Finishes
- Sewing A Flat Felled Seam
- Sewing A Hairline Seam Finish
-
Hem Finishes
>
- Garment Hem Finishes: Overview
- Sewing A Double Fold Hem Finish
- Sewing A Single Fold Hem Finish
- Sewing Bound Hem Finishes
- Sewing An Exposed Double Layer Bound Hem
- Sewing A Folded-Up Bound Hem with Pre-folded Binding
- Sewing A Hong Kong Hem Finish
- Sewing A Band Hem Finish
- Sewing A Bias Faced Hem Finish
- Sewing A Twill Tape Hem Finish
- Sewing A Rolled Hem Finish
- Sewing A Shaped Hem Facing
- Using Fusible Hem Tape And Webbing
- Finishing A Lace Fabric Hem
- Finishing A Leather Hem
- Sewing Faced Hem Corners
- How To Finish Lining At The Hem
- Finishing Fabric Corners by Mitering >
- Interfacing A Hemline: Lined And Unlined Examples
-
Sewing Pockets
>
- Curved Patch Pocket With Flap
- Unlined Square Patch Pockets
- Lined Patch Pockets: Two Ways
- Extension On-Seam Pockets
- Separate On-Seam Pocket
- Front Hip Pockets
- Bound Double Welt Pocket
- Double Welt Pocket With Flap
- Self-Welt Pocket (Using Single Fabric Layer)
- Slanted Welt Pocket (Hand-Stitched)
- Faced Slash Pockets: Overview >
-
Sewing Zippers
>
- Sewing Zippers: General Information
- Sewing A Centered Zipper
- Sewing A Lapped Zipper
- Sewing An Invisible Zipper
- Sewing A Fly Front Zipper
- Sewing A Closed-End Exposed Zipper (No Seam)
- Sewing An Exposed Separating Zipper
- Sewing Hand Stitched Zipper Applications
- Sewing A Zipper Underlay
- Sewing A Placket-Enclosed Separating Zipper
- Sleeveless Finishes >
-
Neckline Finishes
>
- Sewing A Neck Shaped Facing
- Sewing An All-In-One Neck Facing
- Neck And Garment Opening Combination Facings >
- Sewing A Bias Faced Neckline Finish
- Sewing A Band Neckline Finish
- Bound Neckline Finishes: Overview >
- Sewing A Semi-Stretch Strip Band Neckline
- Ribbed Neck Band And Classic Turtleneck
- Decorative Neckline Finishes >
- Finishing Facing Edges >
-
Extras
>
- A Complete Guide on Interfacing
- Sewing Bound Spaghetti Straps
- Sewing Spaghetti Straps To A Faced Neckline
- Sewing Ruffles: Overview
- Patterning And Sewing A Circle Ruffle
- Sewing A Gathered Heading Ruffle
- Sewing Double Layer Gathered Ruffles
- Sewing A Gathered Ruffle Into A Seam
- Sewing A Gathered Ruffle To A Fabric Edge
- Sewing A Fabric Surface Slit
- Sewing A Slit Seam
- Hand-Applied Straight Stitches
- Hand-Applied Blind Stitches
- Hand-Applied Overedge Stitches
- Hand-Applied Tack Stitches
- Hand-Applied Decorative Stitches
-
Basics
>
- Custom Bridal
- Custom Apparel
- About
- Blog
Services |
Company |
|



 RSS Feed

