|
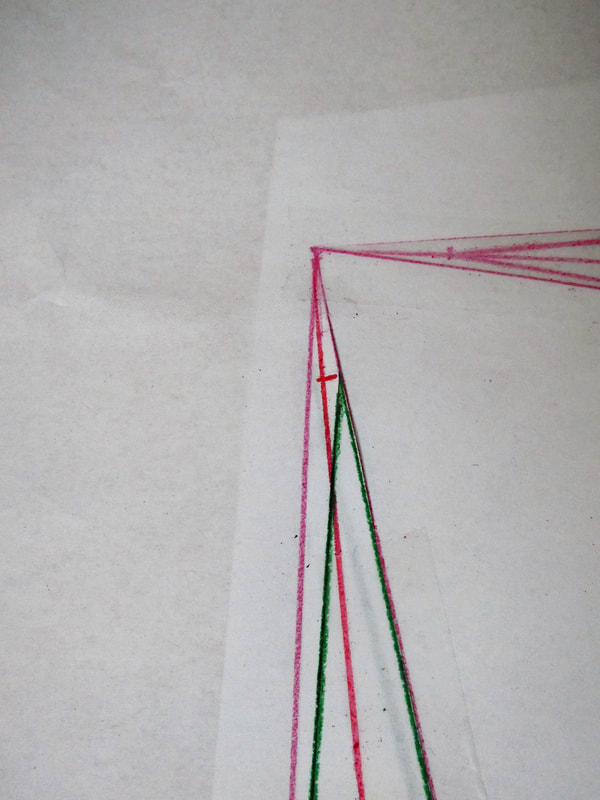
I recently got a great question from someone who is getting more into pattern drafting but not surprisingly, experiencing some setbacks with dart placement. Darts are undeniably one of the most complicated elements to maneuver around when altering or drafting sewing patterns from scratch. It comes as no surprise given that darts alone provide the transition from flat to 3-dimensional. The organic shape of the human form is complicated and not a single one is made exactly the same as the other. That being said, understanding dart placement and dart manipulation comprises the most essential part of learning patternmaking. It is also a great starting point for those that want to learn how to alter and draft patterns from scratch! 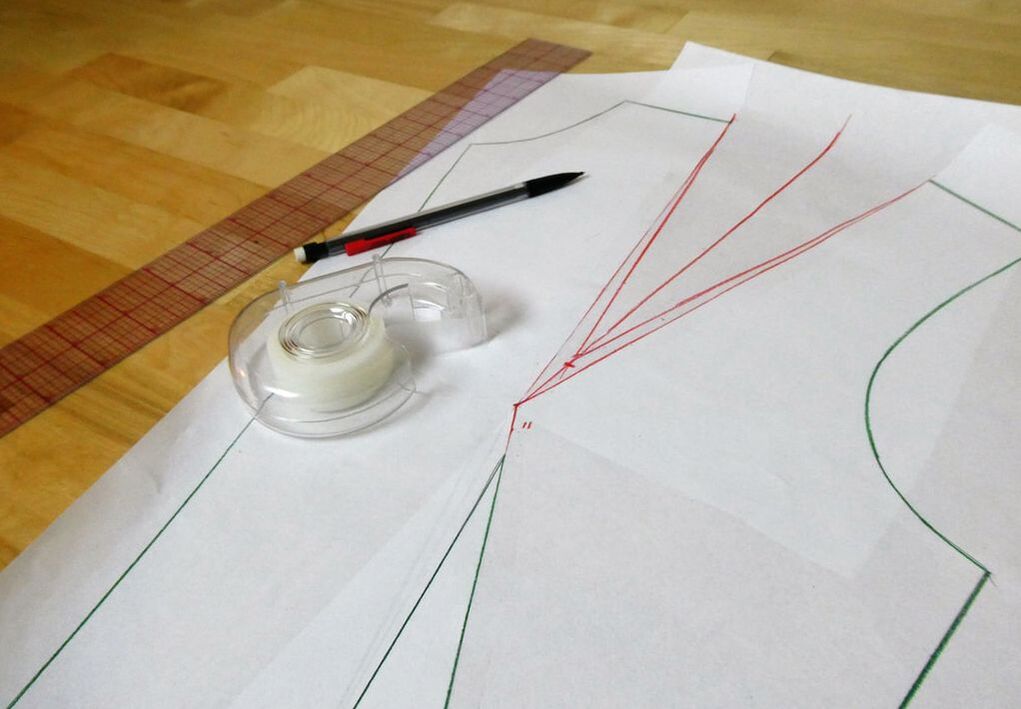 Today, I will show you how to shift darts around on a pattern using the slash and spread method- the single most important beginner technique in patternmaking, in my opinion. I don’t know why I waited so long to write this tutorial! After all, I use the slash and spread technique on almost all the patterns I draft from scratch. From adding gathers and pleats to altering fullness on sleeve caps, I can't work without this simple method. The best part about it? It is actually fun, and along with “funness” (not a real word), comes simplicity. If you’ve struggled with shifting darts around on a sewing pattern, or feel intimidated by darts altogether, follow the simple steps below and you will hopefully no longer feel like a prisoner to it. By learning the slash and spread logic with darts, you will be able to individually apply this technique to other patterning challenges. Darts are just a great, basic way to start. In today's tutorial, I will show you two different but common scenarios you may encounter when drafting a pattern that has darts: 1. How to split a single waist dart into two separate darts: one vertical waist dart and another horizontal bust dart. 2. How to transfer an entire dart from one area of the garment to another. In this particular example, I will show you how to shift full excess from the waist dart to a shoulder dart. How To Split A Single Dart Into Two Separate DartsIn the steps below, I’ll be working on half of a front bodice pattern which has a single waist darts. It is very important that you trace a copy of the original pattern or block on a separate piece of paper as opposed to directly cutting and altering the original. Doing so ensures that if a mistake is made, you can always go back and trace another copy in order to start over. All the original pattern lines below are traced in green. As we walk through the tutorial, the alteration lines will be marked red to give you a better visual of each transition step. There are still many things left to tell you about darts but truly the best way to understand them is to learn in the patterning process, so let’s get started! 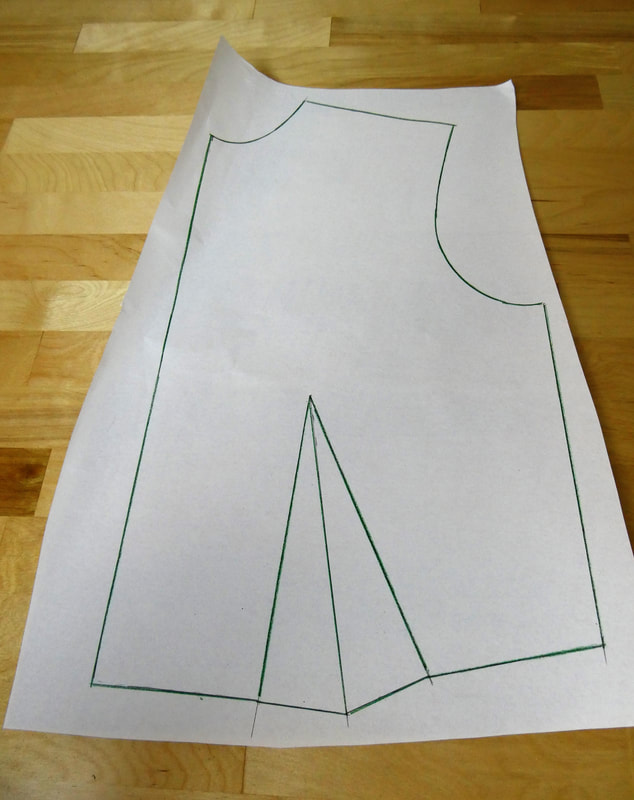 The vanishing points on all front bodice darts radiate to/from the apex which the highest point on the bust. That doesn’t mean the dart point is right at the apex, it simply means that no matter where the dart is located on the body, the apex is used as a directional tool to keep the darts aligned correctly. The actual dart points are usually located about 1” away from the apex. As you'll see below, keeping this concept in mind is important when shifting darts around on the front bodice. 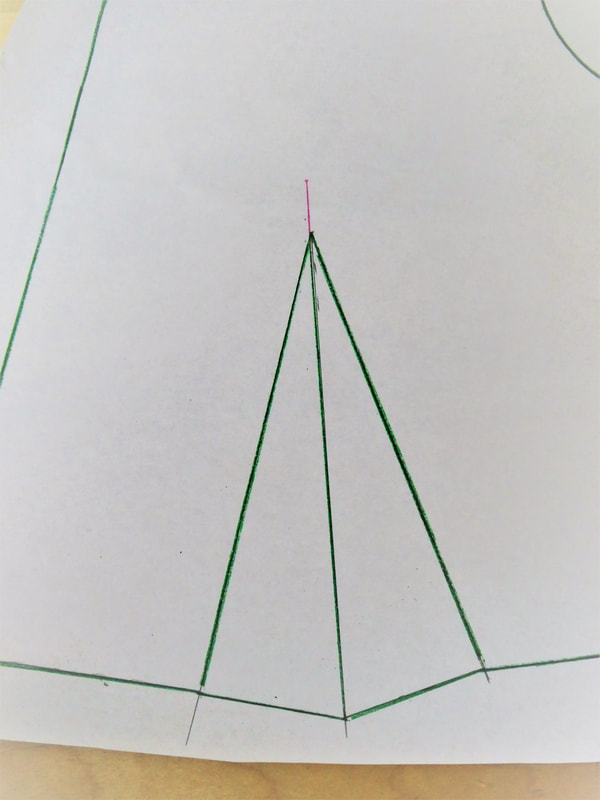 1. Draw a line from the waist dart point up 1" to continue the dart fold line as shown above. This new location marks the apex. 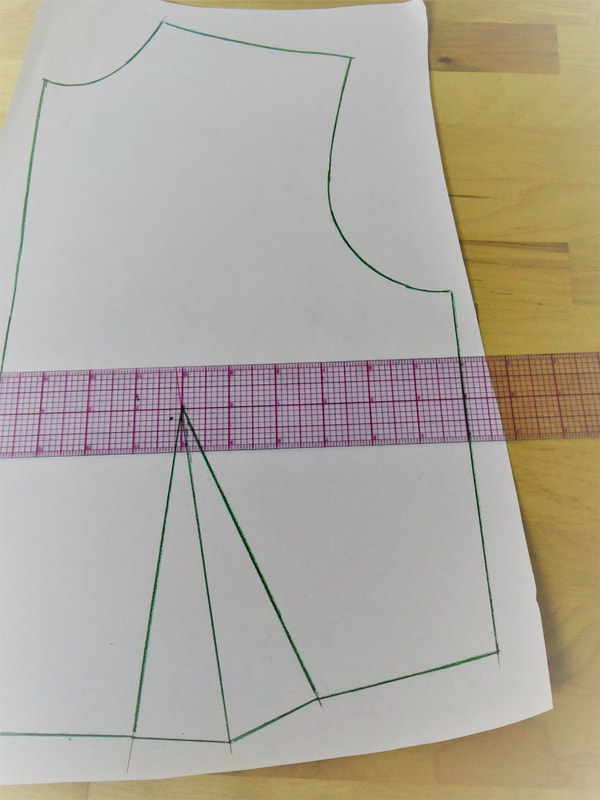 2. From the newly marked apex, draw a horizontal line towards the side seam using your ruler as shown. 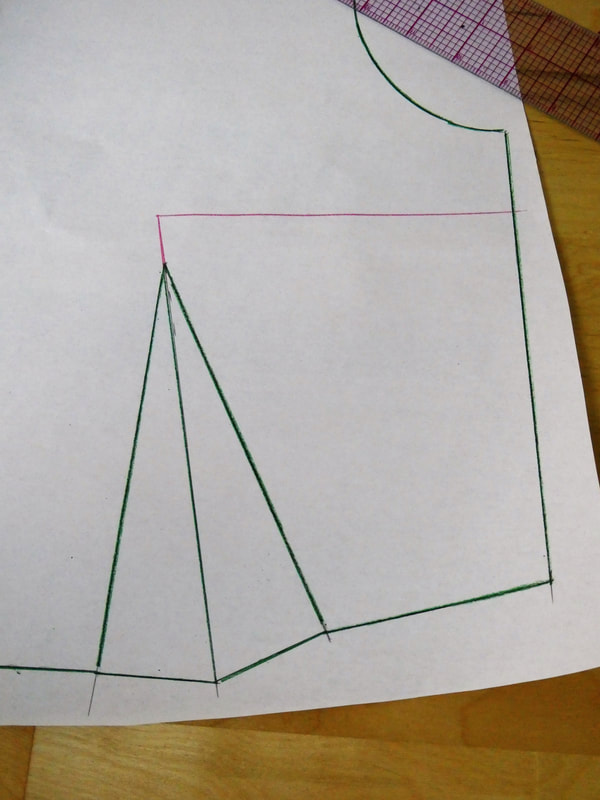 These two new intersecting lines will not only become your cut lines they also mark the direction/location of the new bust dart. 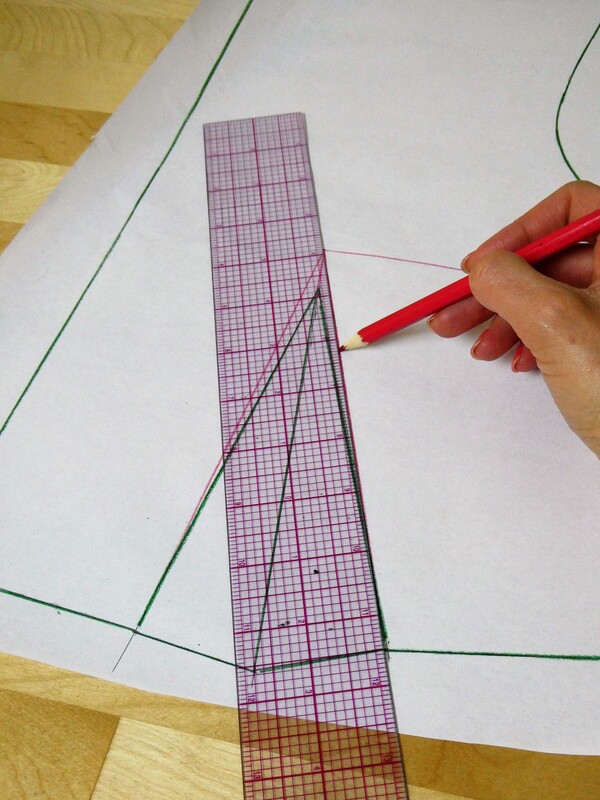 To make things a bit more clear in the slash and spread process, connect the apex to the end of each dart leg using your ruler as shown. 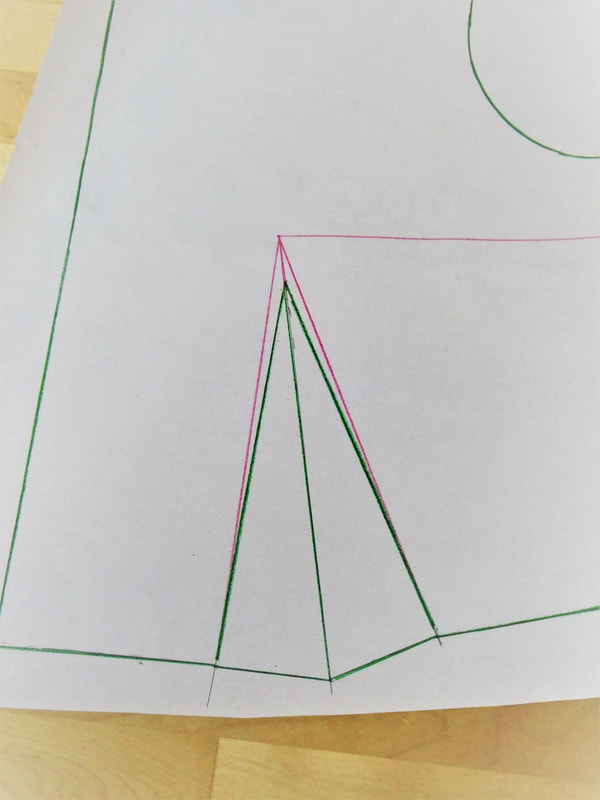 You will use these new dart lines as a guide when taking out the dart excess.
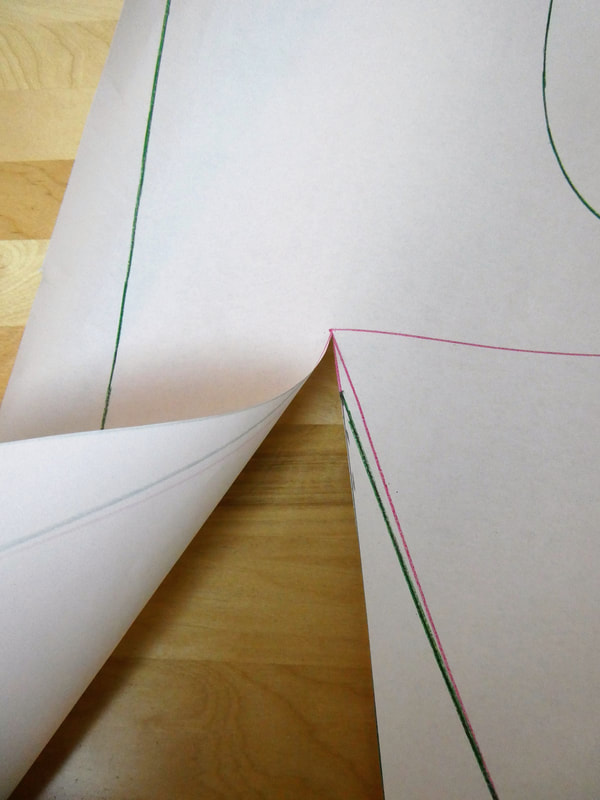
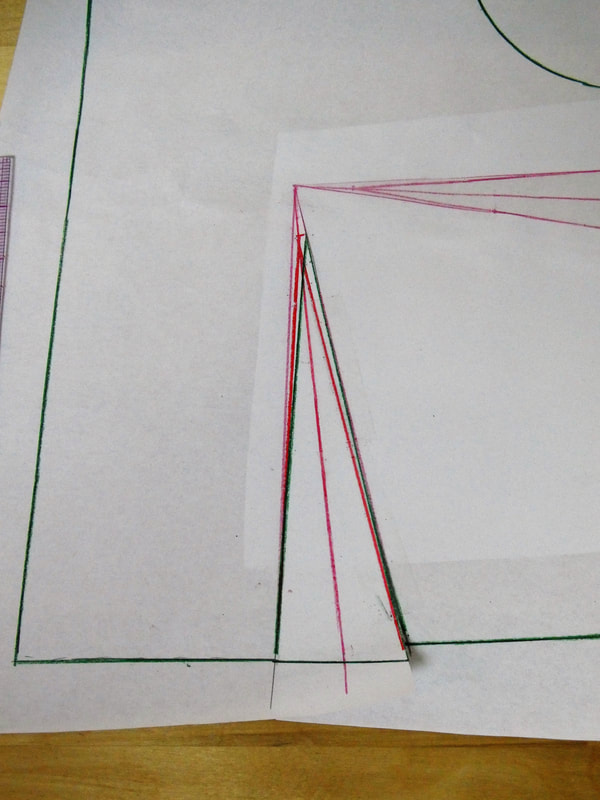
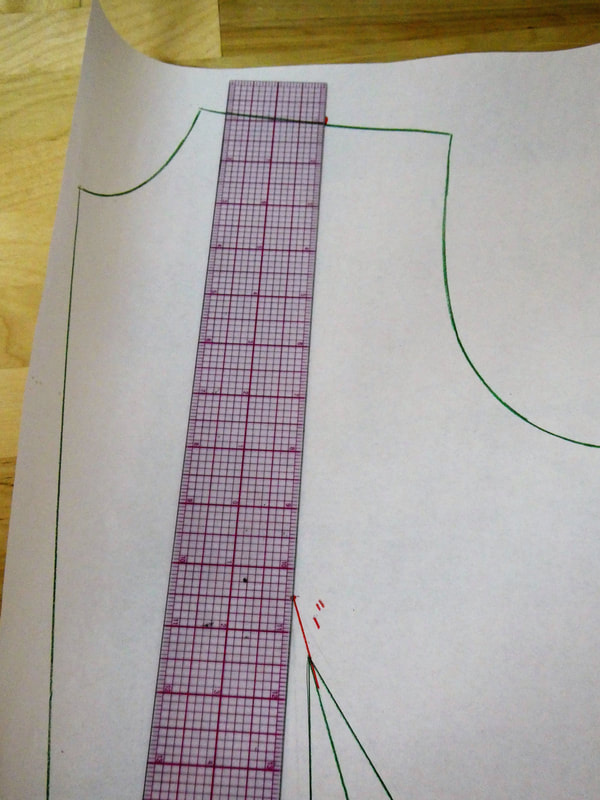
4. Now for the fun part! Cut down the waist dart fold line from the bottom to the apex as shown. Cut to but not through the apex point. 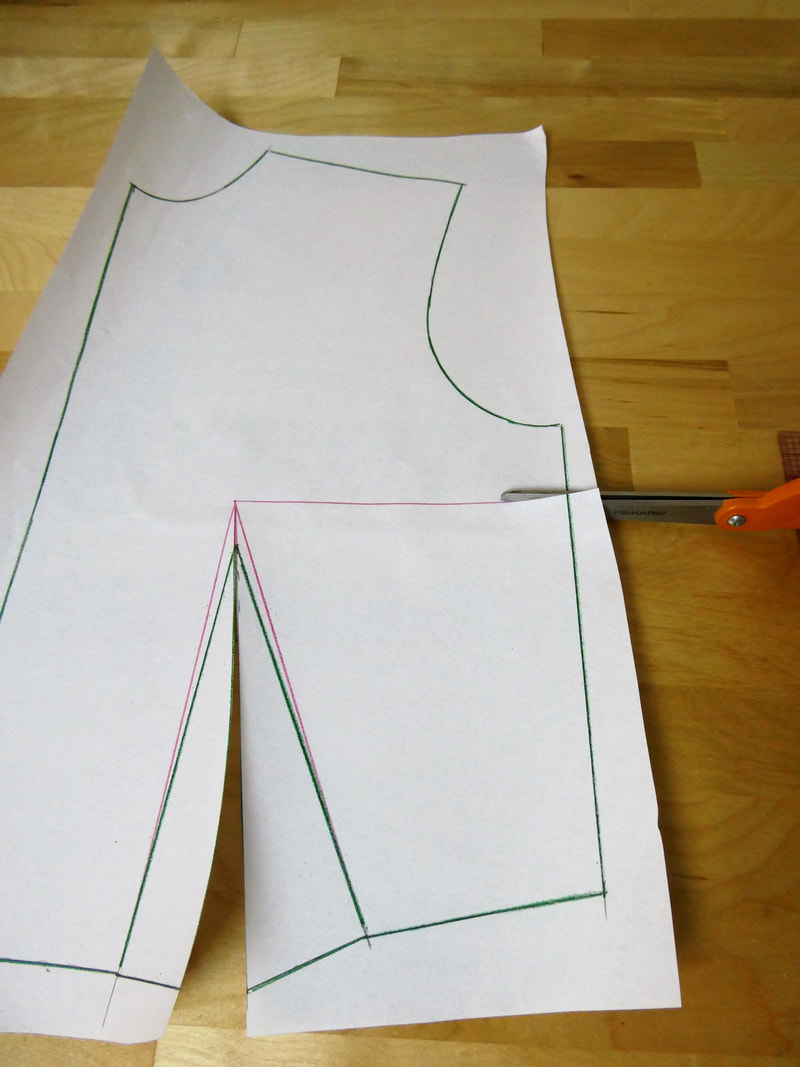 5. Next, cut down the horizontal line from the side seam to the apex. Again, cut to but not through the apex point. 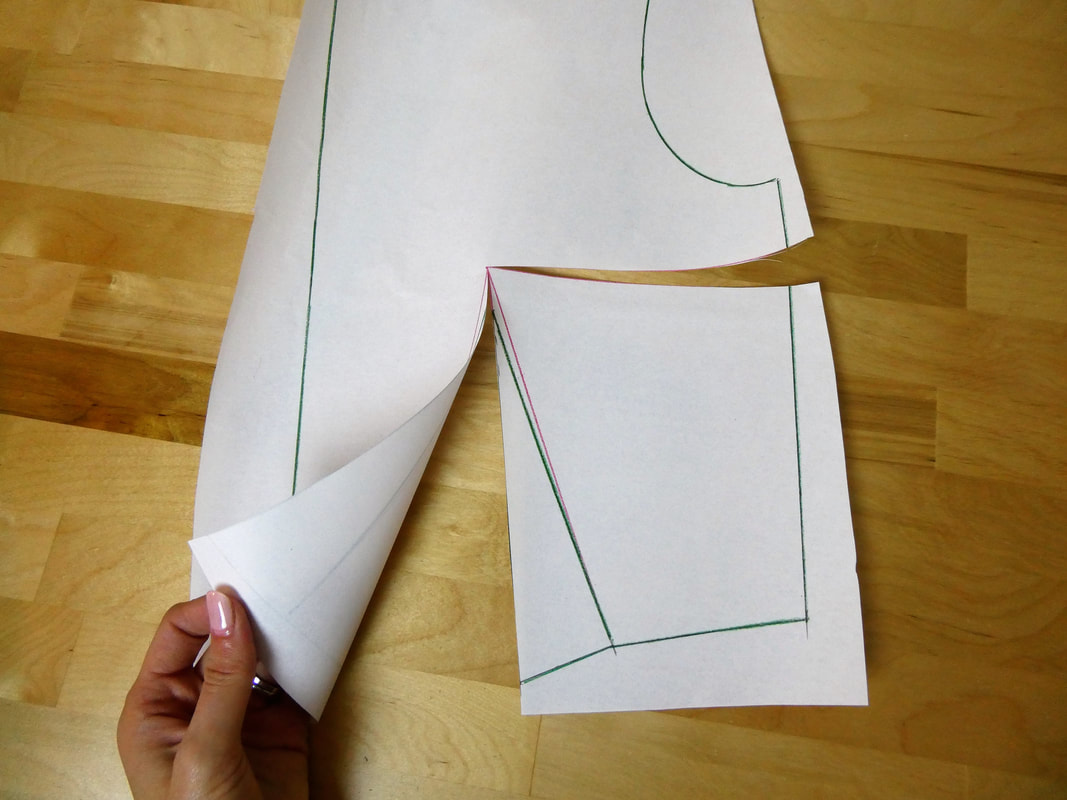 You should have about 1 mm of paper still connected at the apex as shown above. While connected, the paper pieces should now be free to move yet still lay flat on the table. 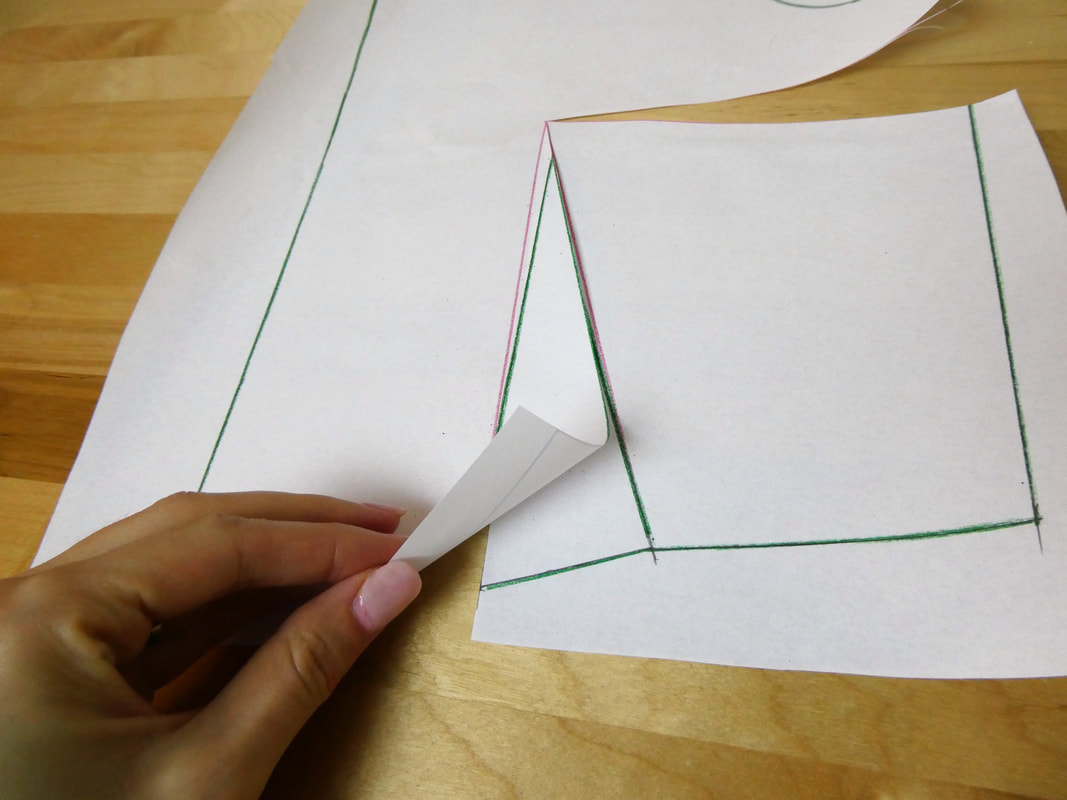 6. Next, move the waist dart lines toward one another until only half the excess is left. In the process, you’ll see that the bust dart now takes on the exact excess difference. 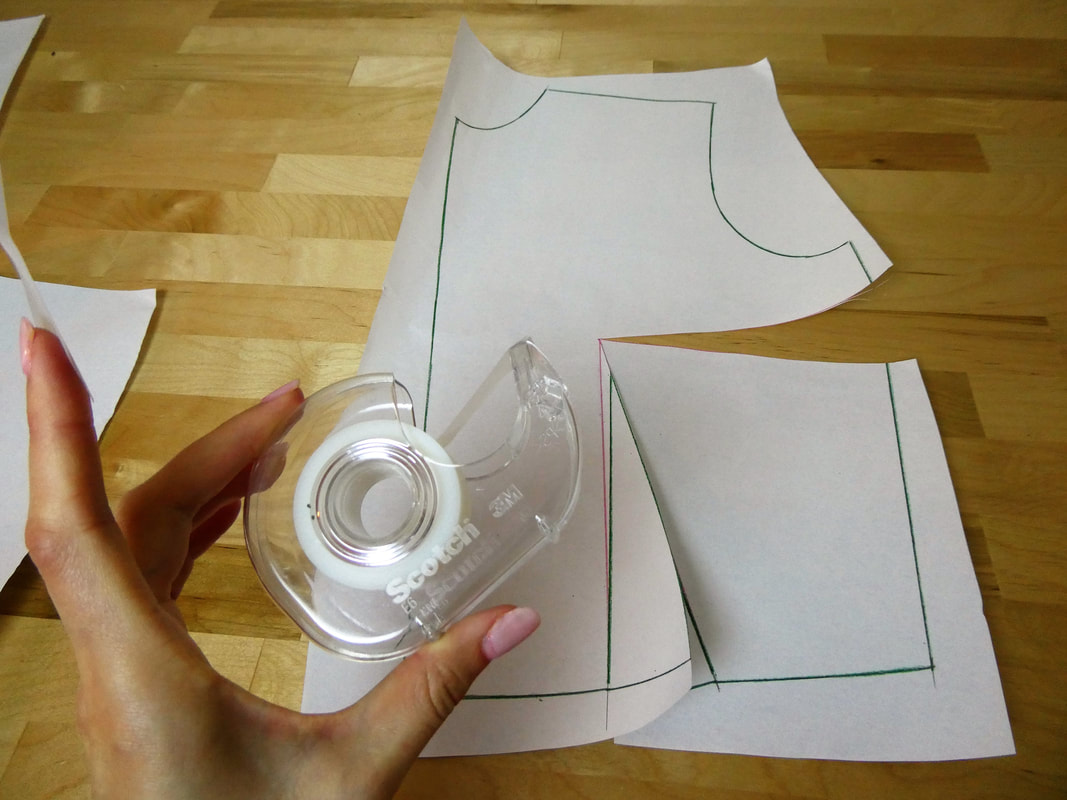 7. Once the waist dart excess is left with half of its original, and you are happy with the amount of excess on each dart, use invisible scotch tape to connect the cut edges thus keeping them permanently in place. 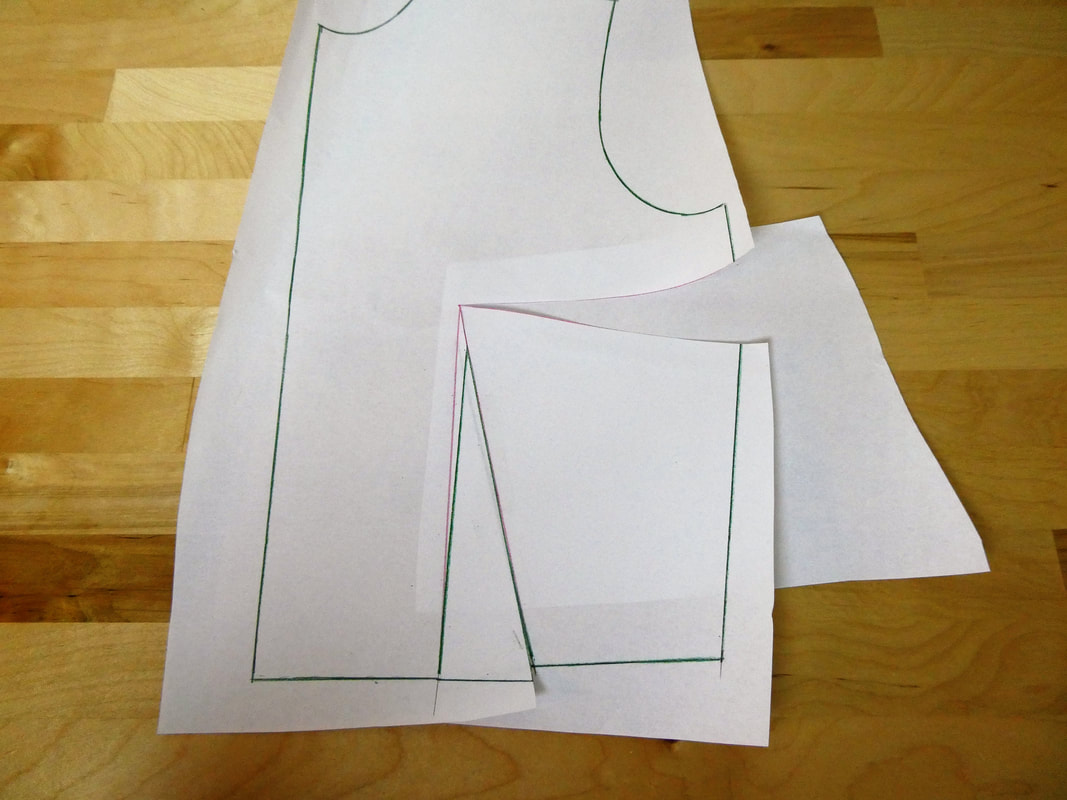 8. To finalize the newly formed bust dart, place some extra paper underneath the gap to fill the open dart. 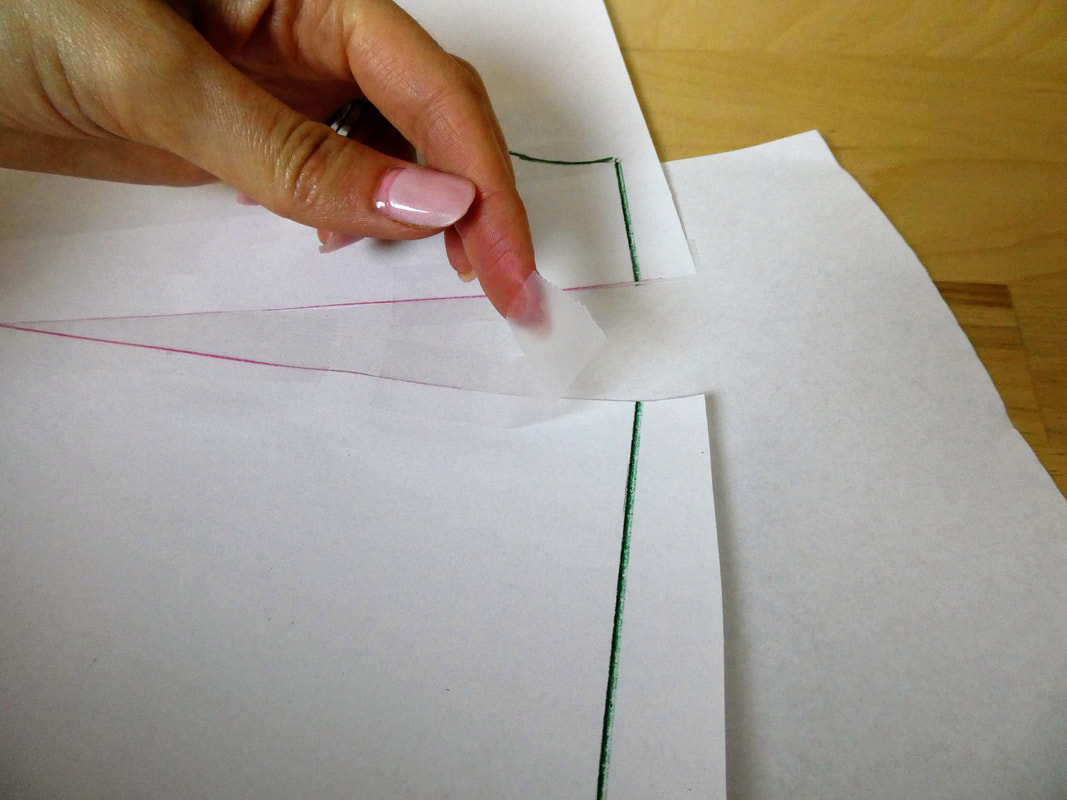 Use scotch tape along both cut edges to permanently seal. 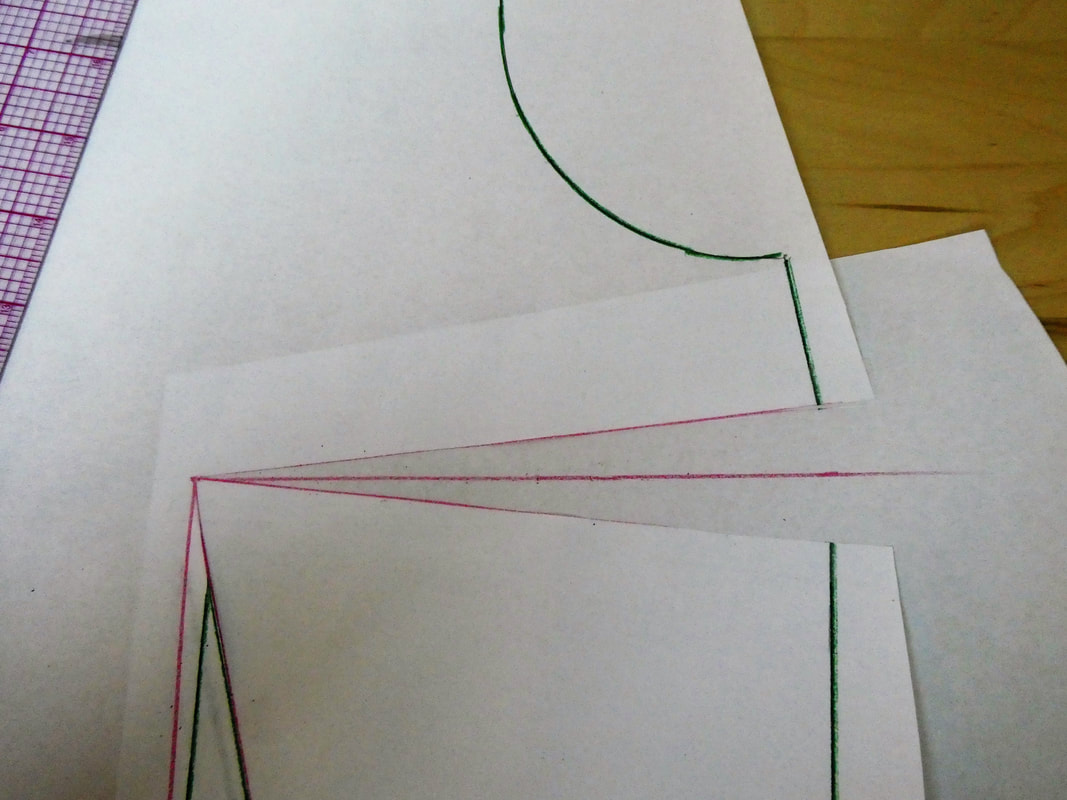 9. Both darts are not quite finished yet. The final dart points should be located 1'' down or away from the apex. At this stage they are right at the apex. To re-position the bust dart, divide it in two equal halves with a straight line, from the apex to the side seam. This line will become your dart fold line. 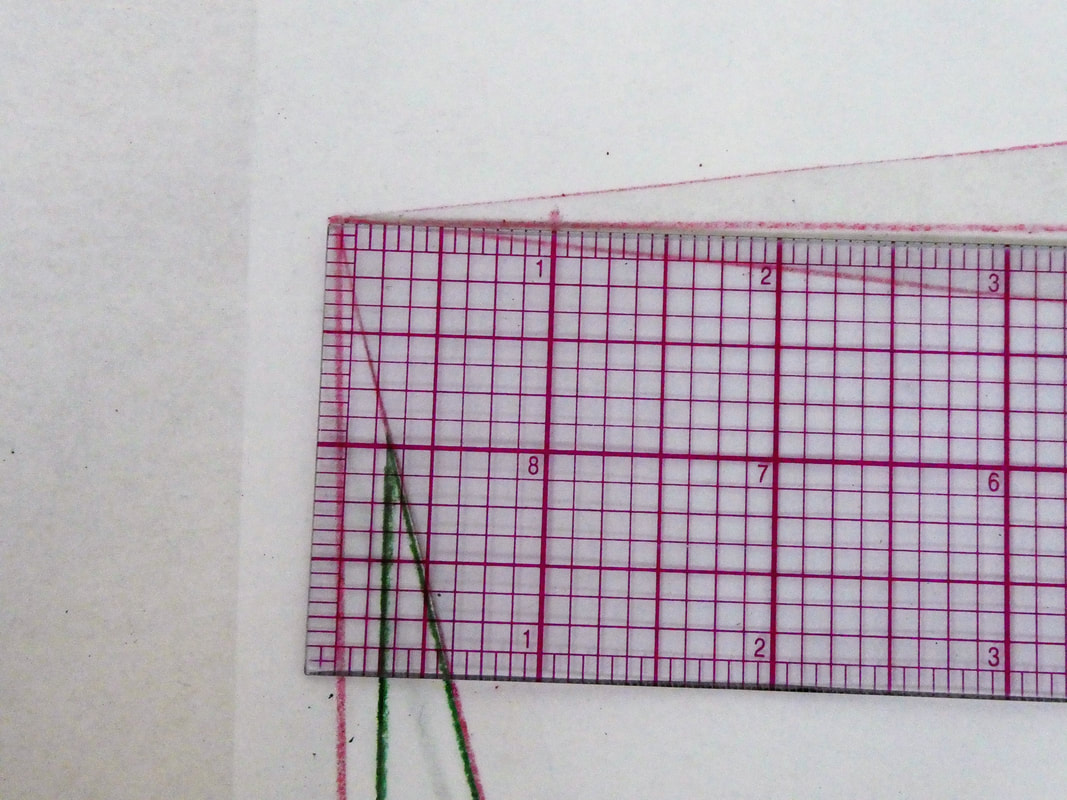 Measure 1'' from the apex down this fold line and mark with a dot or dash. This point will become your final dart vanishing point. 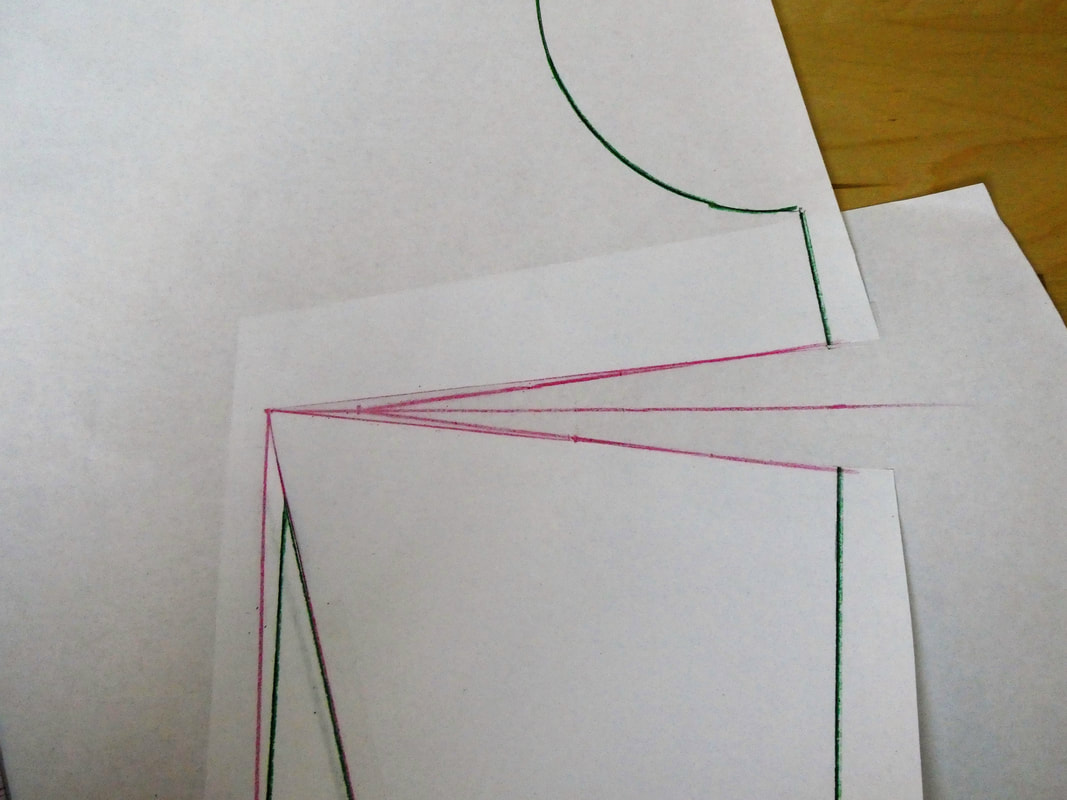 10. Redraw the dart legs with your ruler starting a this new location and blending with the existing lines at each seam.
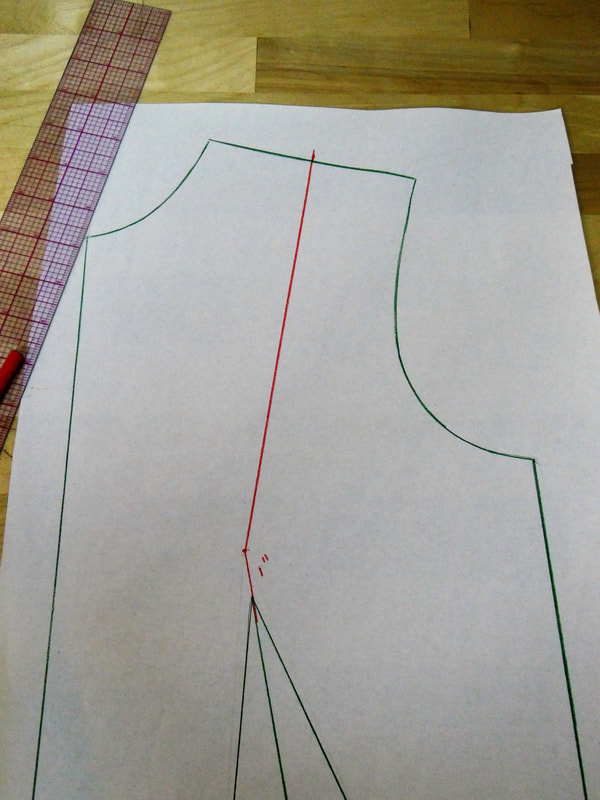
Repeat the process described above on the waist dart. Re-drawing the new dart legs starting at 1" down from the apex (shown above) and ending at the same location along the bottom.  Your darts are now complete! Don’t forget to mark each dart line with a notch and add the seam allowance correctly at each edge- more on this in a separate blog later! How To Transfer An Entire Dart To Another LocationThe same logic as above is used when completely closing a dart to open it elsewhere on the pattern. Using the slash and spread method, all you have to do is slice to the apex on both sides and shift the entire excess to the new location. Here are the detailed steps: 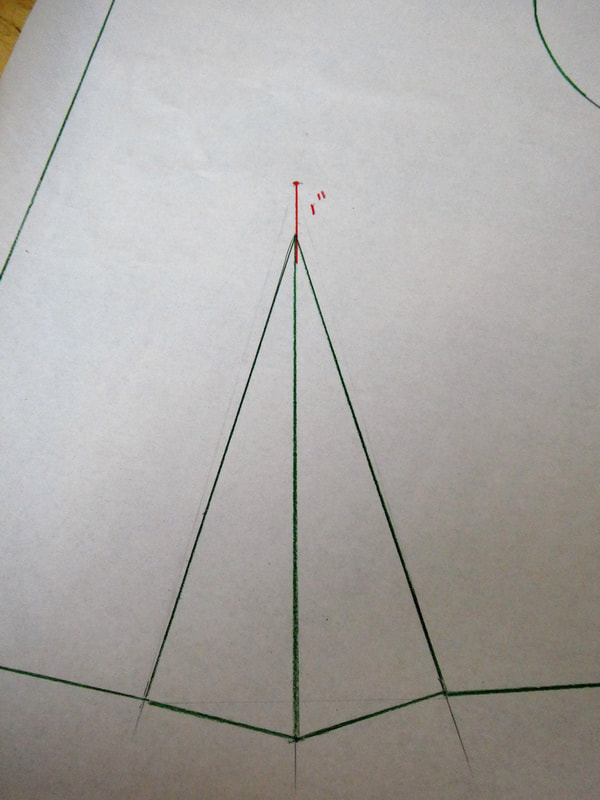 1. Extend the fold line up 1” to find the apex. You should measure following the direction of your dart fold line as shown. If your darts don’t have a fold line, you can draw it in by dividing the dart exactly in half from the vanishing point to the dart's wide opening at the end.
2. From the apex (1” away from vanishing point) draw another straight line to the location where you’d like the new dart to open. In my case, I’m transferring my waist dart to the shoulder seam. Thus, I drew a straight line from the apex to the middle of the shoulder seamline. 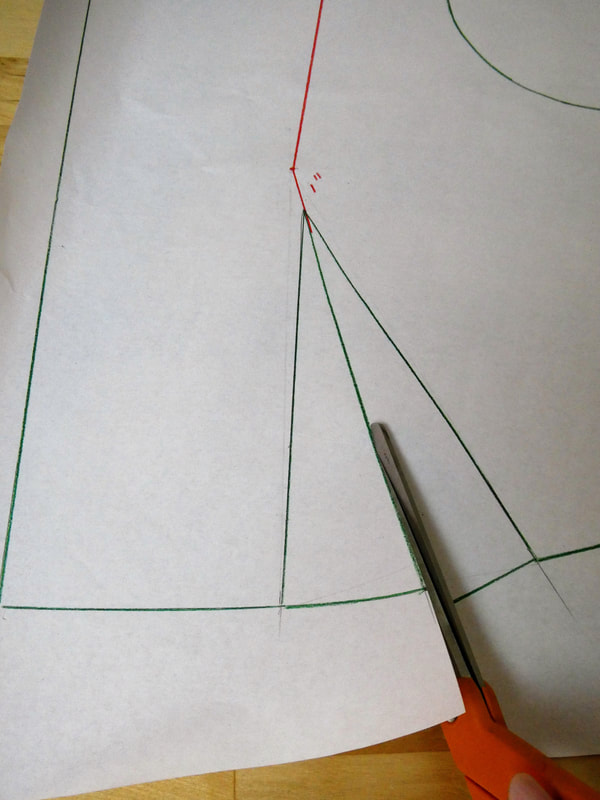 3. Cut down the waist dart fold line from the bottom to the apex. 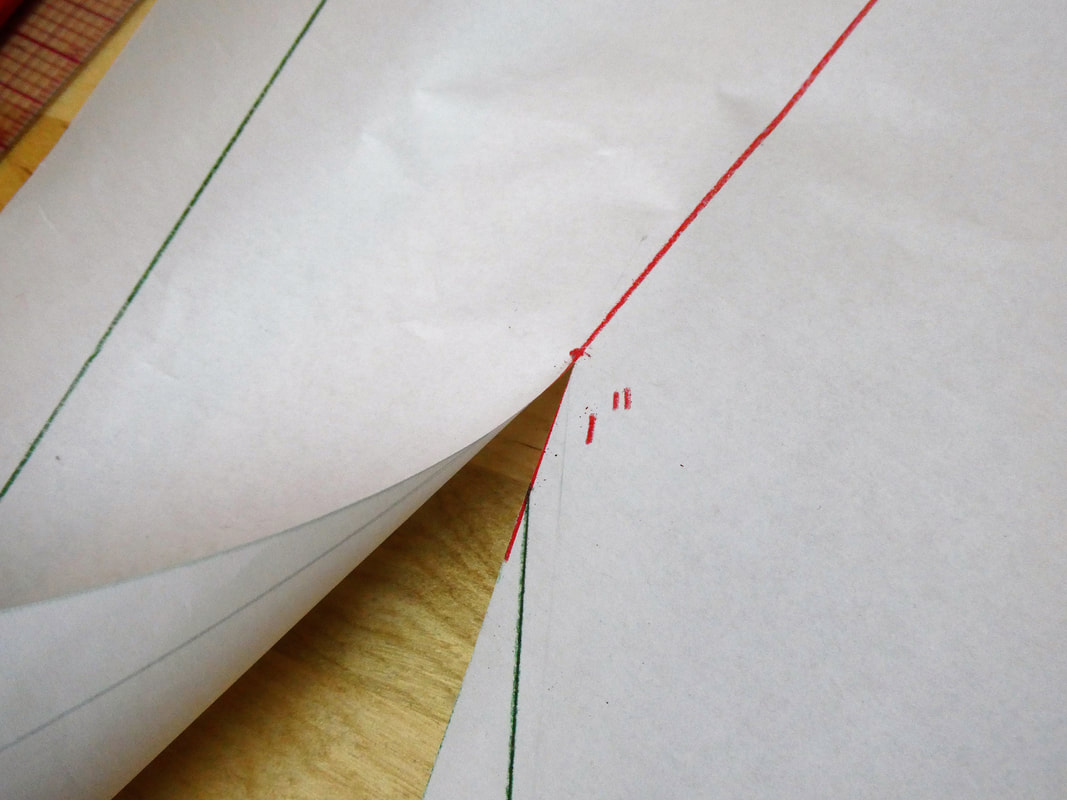 Again, cut to but not through the apex point. 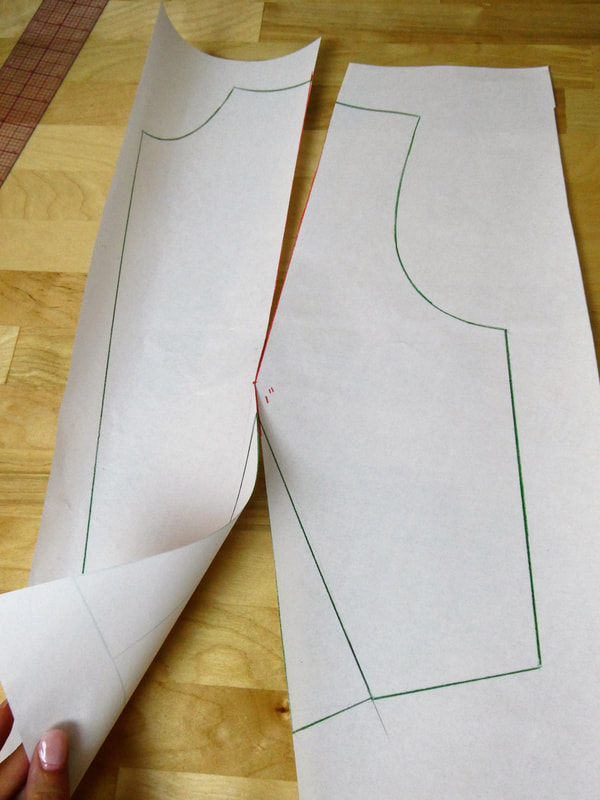 4. Next, slash again from the shoulder mark to the apex following the straight line you drew in the above step. Again, only cut to and not through the apex.  You should have a hair of paper connection at the apex so the pieces can physically shift around. As the waist darts close, the shoulder one opens. When the waist dart is completely closed, the shoulder drat opens to exactly the same distance. 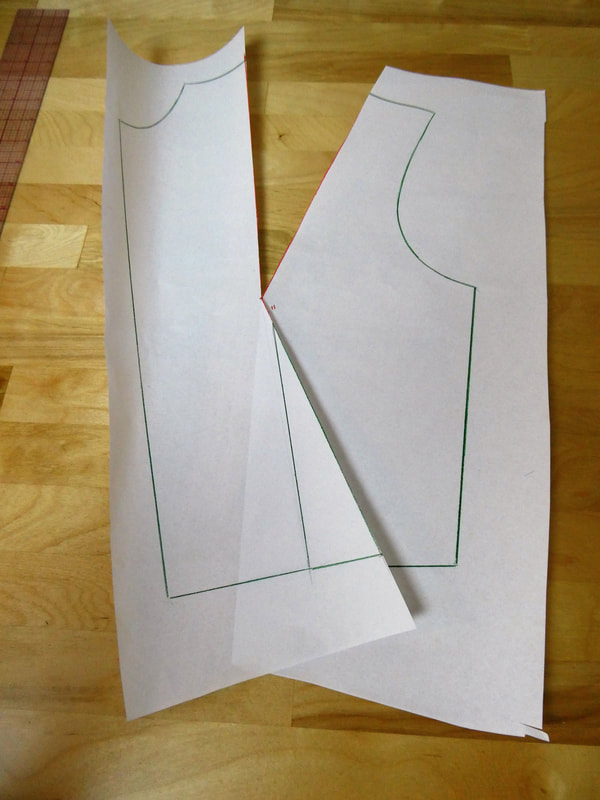 5. Bring the waist dart lines together to completely close the waist dart thus opening it at the shoulder seam. 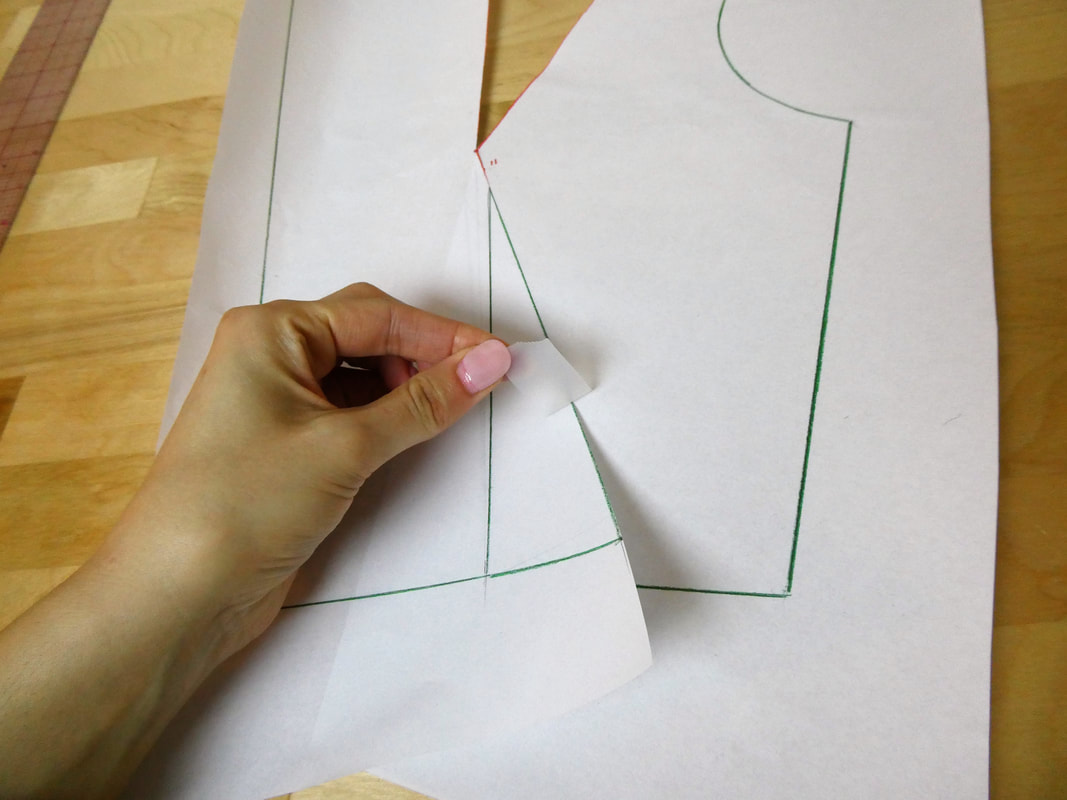 Tape the cut paper edges with invisible frosty tape to permanently seal. 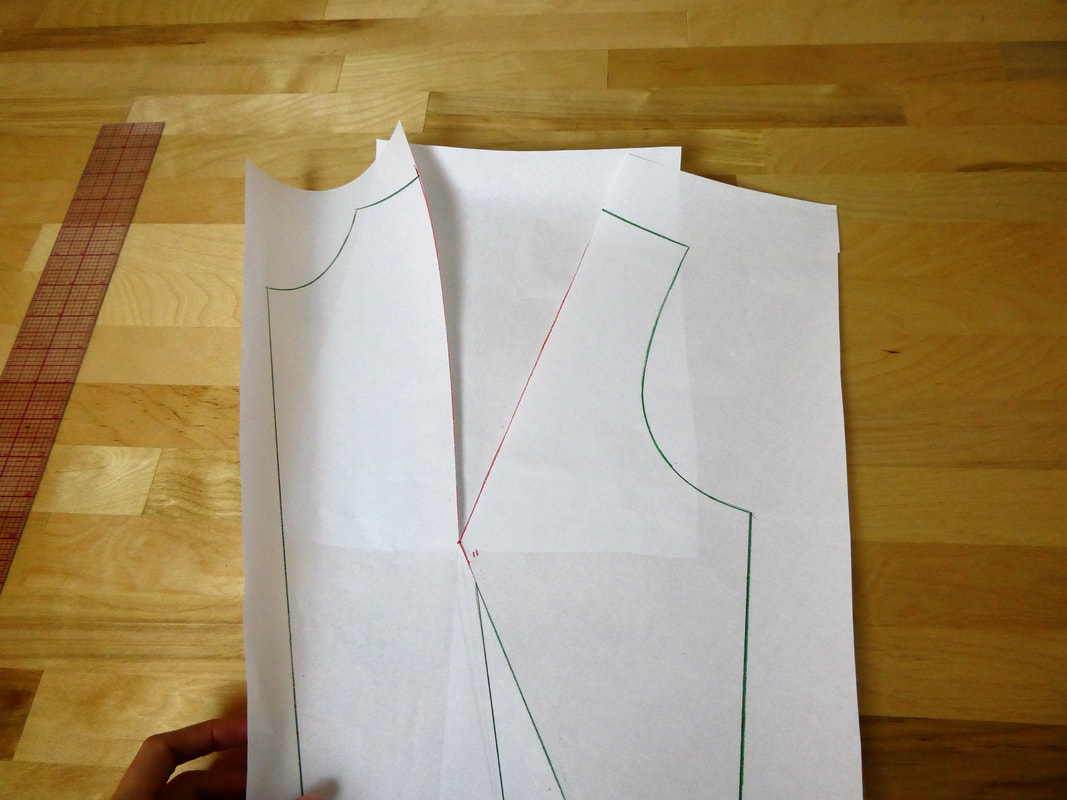 Add additional pattern paper underneath the open gap. 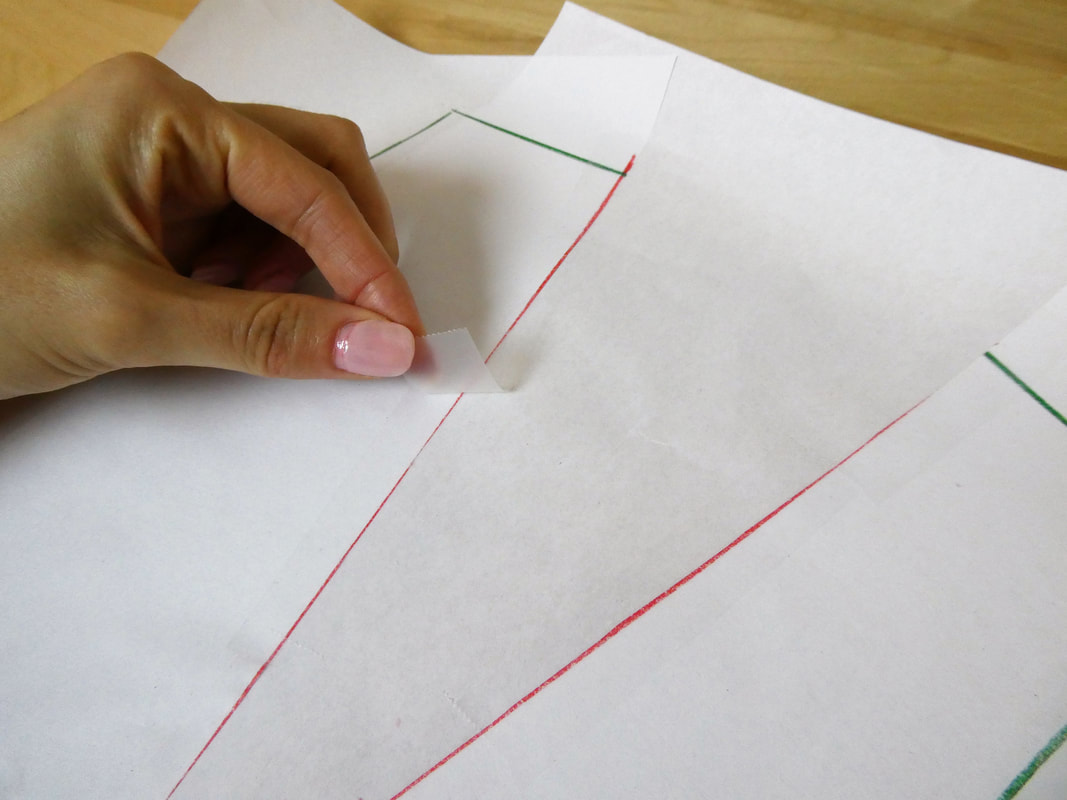 As you did above, tape the additional paper along both cut edges as shown. 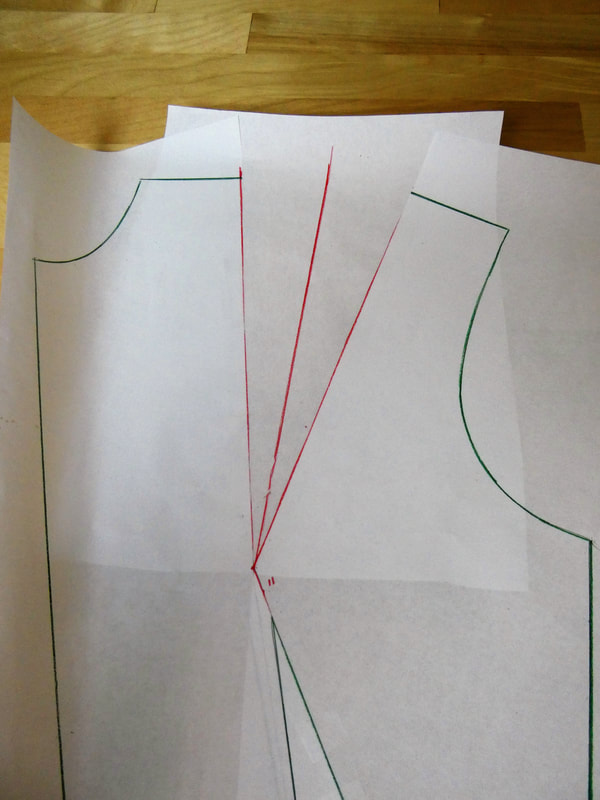 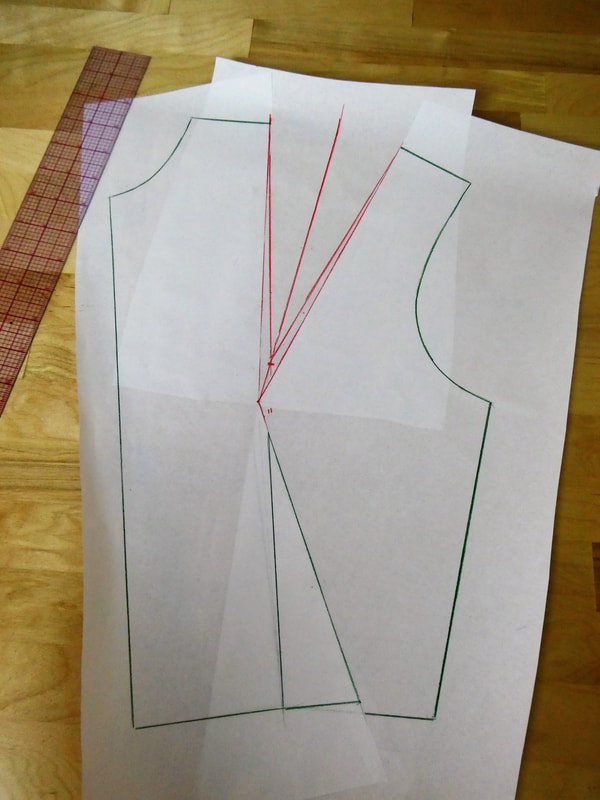 Draw the shoulder dart vanishing point at 1’’ up from the apex and redraw the dart legs from this new point to the ends of both drat legs. As you finish up the dart, don’t forget the dart leg notches and shaping the seam allowance correctly. Using these two examples, I urge you to continue to experiment with the slash and spread method! Transfer darts to different locations on the pattern, either keeping the entire single dart excess or dividing it up into multiple darts. Similar Tutorials You May Like: Want To Learn How To Sew And Make Your Own Patterns? These Are The Supplies You Need To Have. 3 Easy To Find Substitutes For Pattern Paper That Wont Break The Bank How To Make A Sewing Pattern For A Round Neckline Facing How To Draft A Sewing Pattern For An Armhole Facing How To Make A Sleeveless Blouse Sewing Pattern From Scratch
0 Comments
Leave a Reply. |
The Blog:A journey into our design process, sewing tutorials, fashion tips, and all the inspiring people and things we love. 
Doina AlexeiDesigner by trade and dressmaker at heart. I spend most of my days obsessing over new fabrics and daydreaming new ideas. 
Sadie
Executive Assistant & Client Relations Manager Archives
November 2019
Categories
All

|

-
Sewing Tutorials
-
Basics
>
- Aligning Pattern Grainlines To Fabric
- Preparing Fabrics For Sewing
- Pinning Sewing Patterns To Fabric
- Placing Sewing Patterns On Fabric For Cutting
- Rotary Cutters or Fabric Scissors?
- Cutting The Sewing Patterns
- What Are Notches And How To Use Them In The Sewing Process
- Transferring Notches From Pattern To Fabric
- Transferring Seamlines to Fabric
- Staystitching
- Backstitching: A Complete Guide
- Hand Basting: A Complete Guide
- Sewing Continuous Bias Binding
- Darts >
-
Sewing Seams
>
- The Basics Of Seams And Seam Allowance
- How To Sew A Straight Seam
- Sewing Curved Seams
- Sewing Corner Seams
- Trimming And Grading Seam Excess
- Notching/Clipping Seam Allowance for Tension Release
- Sewing Topstitched Seams
- Sewing Corded Seams
- Sewing A Slot Seam
- Sewing A Gathered Seam
- Sewing Bias Seams
- Sewing Seams With Ease
- Sewing Seams With Crossing Seamlines
- Sewing Unlike Fabric Seams
- How To Iron Seams: Ironing Tools And Conventions
- Sewing With Knit Fabrics
- Understanding Stitch Length And Tension
- Sewing Unique Fabric Seams
-
Seam Finishes
>
- Seam Finishing Techniques - Overview
- Applying A Pinked Seam Finish
- Applying A Bias Bound Seam Finish
- Serging And Zigzag Seam Finishes
- Sewing A Self-Bound Seam Finish
- Sewing A French Seam Finish
- Sewing A Hong Kong Seam Finish
- Sewing A Mock French Seam Finish
- Sewing A Turned-and-Stitched Seam Finish
- Sewing Overcast Hand-Applied Seam Finishes
- Sewing A Flat Felled Seam
- Sewing A Hairline Seam Finish
-
Hem Finishes
>
- Garment Hem Finishes: Overview
- Sewing A Double Fold Hem Finish
- Sewing A Single Fold Hem Finish
- Sewing Bound Hem Finishes
- Sewing An Exposed Double Layer Bound Hem
- Sewing A Folded-Up Bound Hem with Pre-folded Binding
- Sewing A Hong Kong Hem Finish
- Sewing A Band Hem Finish
- Sewing A Bias Faced Hem Finish
- Sewing A Twill Tape Hem Finish
- Sewing A Rolled Hem Finish
- Sewing A Shaped Hem Facing
- Using Fusible Hem Tape And Webbing
- Finishing A Lace Fabric Hem
- Finishing A Leather Hem
- Sewing Faced Hem Corners
- How To Finish Lining At The Hem
- Finishing Fabric Corners by Mitering >
- Interfacing A Hemline: Lined And Unlined Examples
-
Sewing Pockets
>
- Curved Patch Pocket With Flap
- Unlined Square Patch Pockets
- Lined Patch Pockets: Two Ways
- Extension On-Seam Pockets
- Separate On-Seam Pocket
- Front Hip Pockets
- Bound Double Welt Pocket
- Double Welt Pocket With Flap
- Self-Welt Pocket (Using Single Fabric Layer)
- Slanted Welt Pocket (Hand-Stitched)
- Faced Slash Pockets: Overview >
-
Sewing Zippers
>
- Sewing Zippers: General Information
- Sewing A Centered Zipper
- Sewing A Lapped Zipper
- Sewing An Invisible Zipper
- Sewing A Fly Front Zipper
- Sewing A Closed-End Exposed Zipper (No Seam)
- Sewing An Exposed Separating Zipper
- Sewing Hand Stitched Zipper Applications
- Sewing A Zipper Underlay
- Sewing A Placket-Enclosed Separating Zipper
- Sleeveless Finishes >
-
Neckline Finishes
>
- Sewing A Neck Shaped Facing
- Sewing An All-In-One Neck Facing
- Neck And Garment Opening Combination Facings >
- Sewing A Bias Faced Neckline Finish
- Sewing A Band Neckline Finish
- Bound Neckline Finishes: Overview >
- Sewing A Semi-Stretch Strip Band Neckline
- Ribbed Neck Band And Classic Turtleneck
- Decorative Neckline Finishes >
- Finishing Facing Edges >
-
Extras
>
- A Complete Guide on Interfacing
- Sewing Bound Spaghetti Straps
- Sewing Spaghetti Straps To A Faced Neckline
- Sewing Ruffles: Overview
- Patterning And Sewing A Circle Ruffle
- Sewing A Gathered Heading Ruffle
- Sewing Double Layer Gathered Ruffles
- Sewing A Gathered Ruffle Into A Seam
- Sewing A Gathered Ruffle To A Fabric Edge
- Sewing A Fabric Surface Slit
- Sewing A Slit Seam
- Hand-Applied Straight Stitches
- Hand-Applied Blind Stitches
- Hand-Applied Overedge Stitches
- Hand-Applied Tack Stitches
- Hand-Applied Decorative Stitches
-
Basics
>
- Custom Bridal
- Custom Apparel
- About
- Blog

 RSS Feed
Services |
Company |
|
