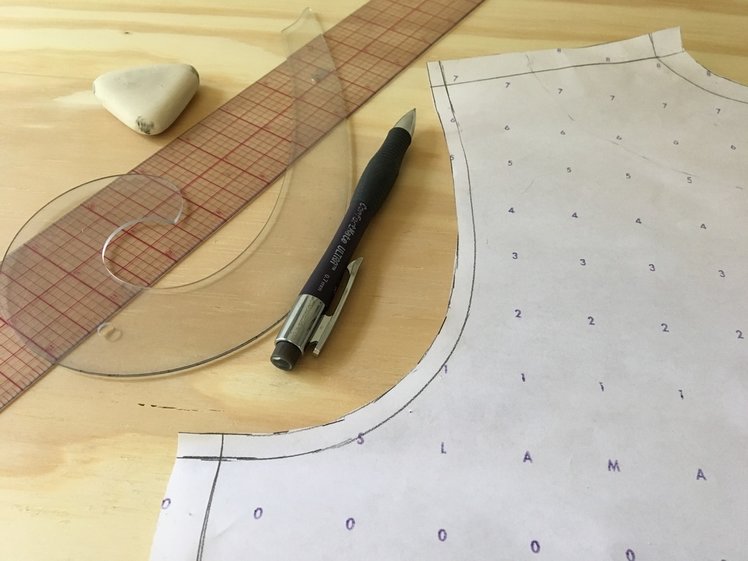
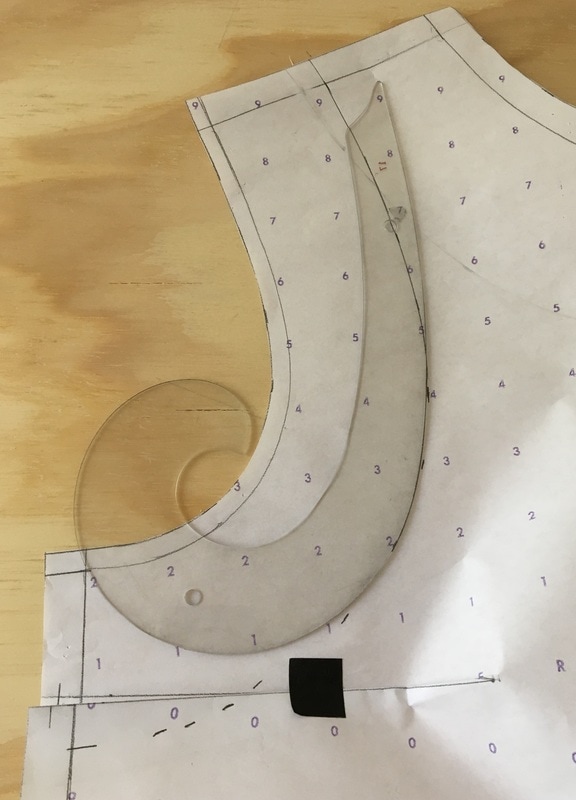
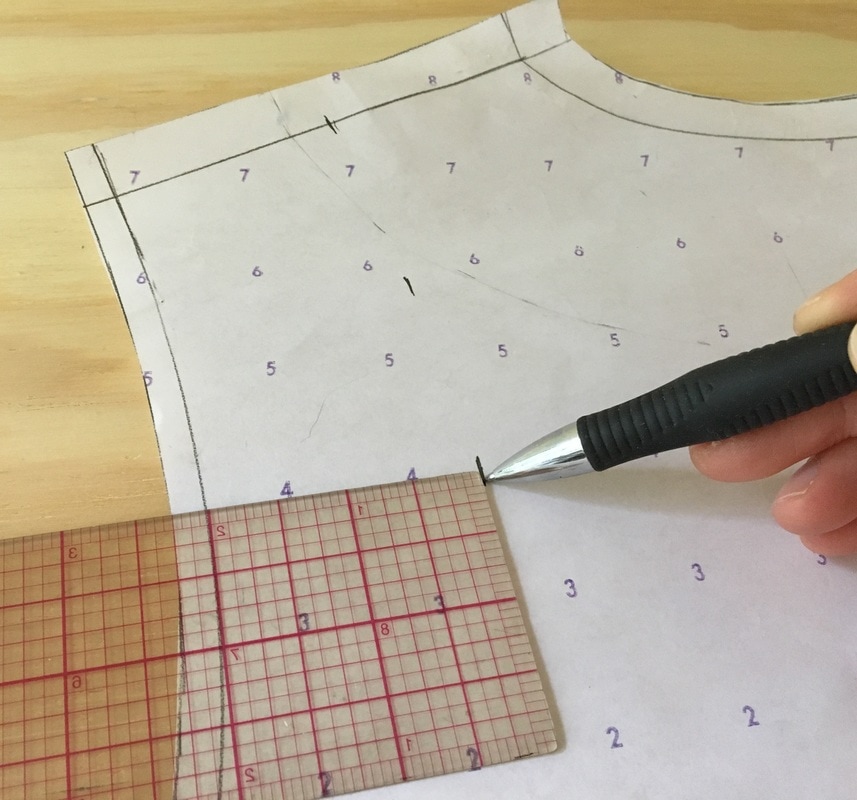
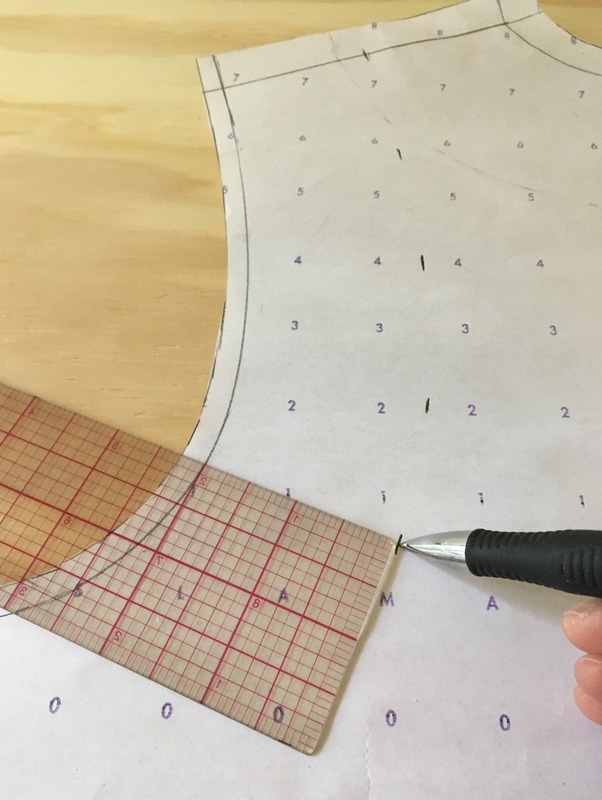
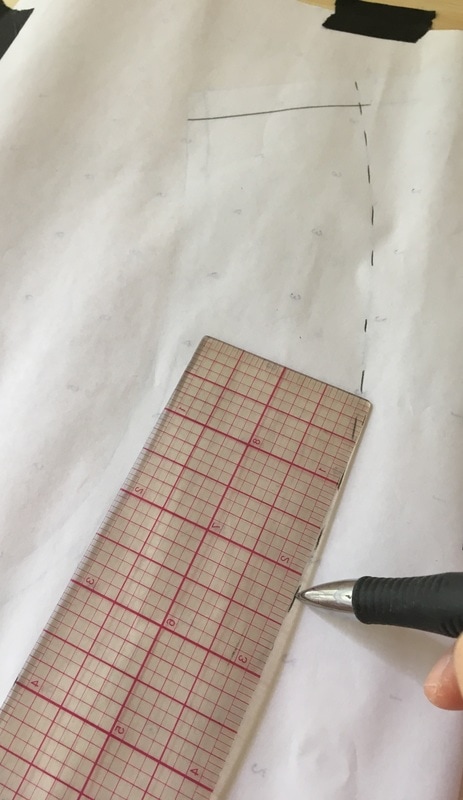
 As you you dive deeper into pattern-making, you'll soon learn that you can use a single patterning method to make any facing. Once you get the hang of all necessary steps for drafting facing sewing patterns, you'll be one step closer to understanding and mastering essential pattern-making techniques. When it comes to facings, all you need is your garment's patterns and a few basic tools. Your clothing item's patterns will always be used as a starting point for the facings' draft. The basic tools necessary to draft a simple facing are: pattern paper, an 18" inch clear plastic marked ruler, a pencil (preferably mechanical), an eraser, and a basic french curve. You should aim to be familiar with all the tools necessary for a sewing beginner but also try to avoid over-complicated tools that are not always necessary for basic sewing/pattern making. Aside form the tools/supplies you need, pattern paper is often an issue for sewing beginners. Professional marked/numbered pattern paper is difficult to find and seldom sold at local crafts/sewing supply stores. However, you shouldn't give up pattern-making just because you aren't able to work with professional pattern paper right away. The good news is, there are plenty of paper substitutes that will save you some money and work just as well. Here are 3 pattern paper substitutes you can find at any craft/arts or hardwood store. 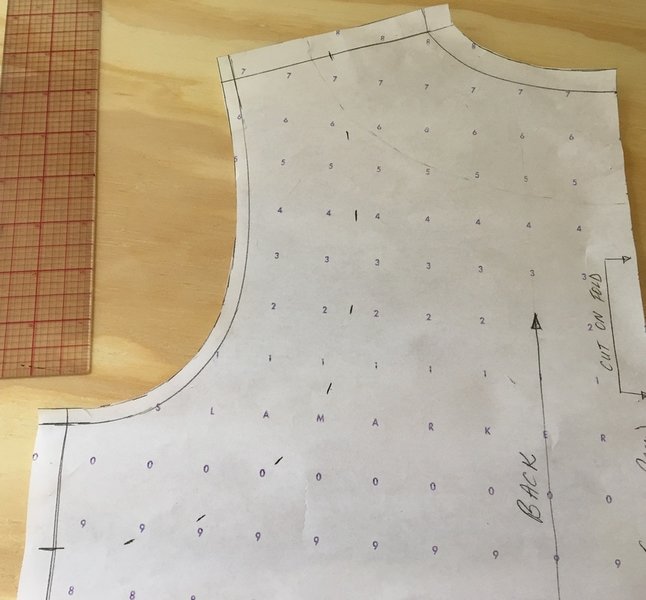 Now that you have a better understanding of sewing tools and pattern paper, there are few things you should know about drafting an armhole facing: Although very similar to a neckline facing, armhole facings are usually drafted at approximately the same width along the edge in a curved shape. This allows the facing to lay flat and feel comfortable along the finished edge of the armhole. In some cases, the bottom of the armhole facing is a little wider but blends evenly into the facing's curve at the top. As opposed to a basic neckline facing, armhole facings can never be cut on fold. An armhole facing piece does not consist of two symmetric sides that can be broken down by a cut-on-fold line. Armhole facings have a front pattern piece and a back pattern piece. You need to cut two of each front and back pieces in order to finish both armholes (unless your garment is one-shoulder). When sewing the facing, the front piece is sewn to the back piece to create a full armhole facing. Pinning and sewing armhole facings can be a little confusing for sewing beginners because both front and back pieces look very similar in shape. The way to differentiate between the front and back armhole pieces is to keep in mind that back armhole facing pieces are always larger and have a longer curve than front ones. If you look at the curves of the armholes on your garment's patterns you are sure to spot this difference right away. As a sewing beginner, it also helps to label some of the seam lines on your patterns. We suggest that you mark the shoulder seam lines on your armhole facing patterns with the corresponding "Shoulder Seam Back" and "Shoulder Seam Front"- Doing so will make it less confusing when cutting and sewing the final facings. For a clothing item that has bust darts, drafting the front armhole facing can prove to be a little challenging- We'll show you the proper method for temporarily closing the dart on your sewing pattern thus completing the armhole draft bellow. Patterning the Front Armhole Facing 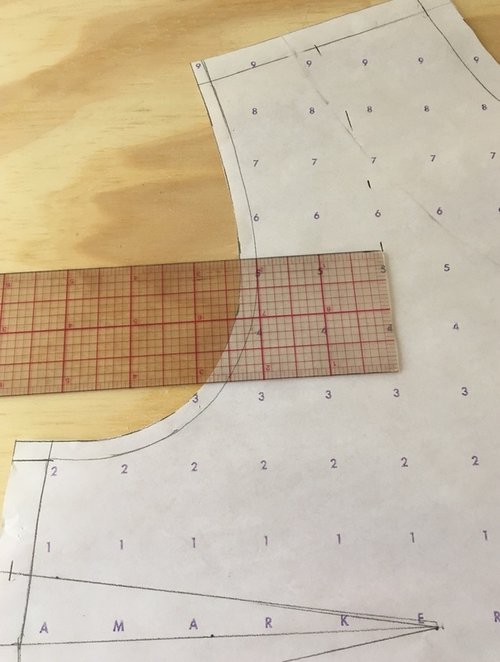 1. Decide the width if your armhole facing. In this tutorial, the facing width is 2" throughout. If this is your first time making an armhole facing pattern, stick to the same width measurement throughout. Starting at the shoulder seam, measure from the armhole's seam line in at 2" and place a vertical dash line to mark. 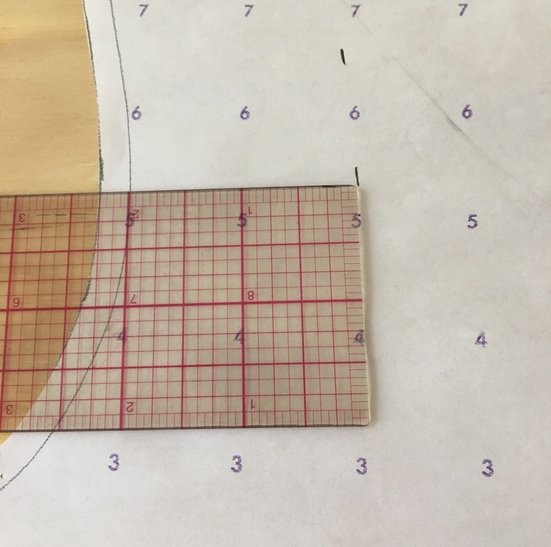 2. Continue measuring along the armhole seam line in at 2", placing dash lines along the curve. 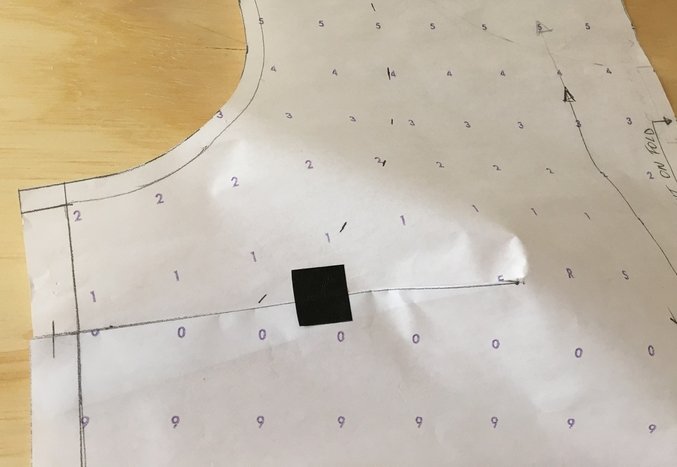 In order for the armhole facing to lay properly when the garment is completed, you will have to temporarily fold and close the bust dart. When the garment is completed the darts are sewn closed- this means that the armhole facing has to fit along the closed dart. 3. Fold the dart closed with the excess pointing down and add some masking tape to temporarily hold this fold in place. The easiest way to fold a dart closed on pattern paper is to match the sharp corner of your table to the dart point while folding it. Once the bust dart is folded, it will create a semi 3-dimensional shape that will be a little difficult to handle at first. Try to keep the pattern paper as flat as possible without damaging the sewing pattern while continuing to draft the facing pattern. 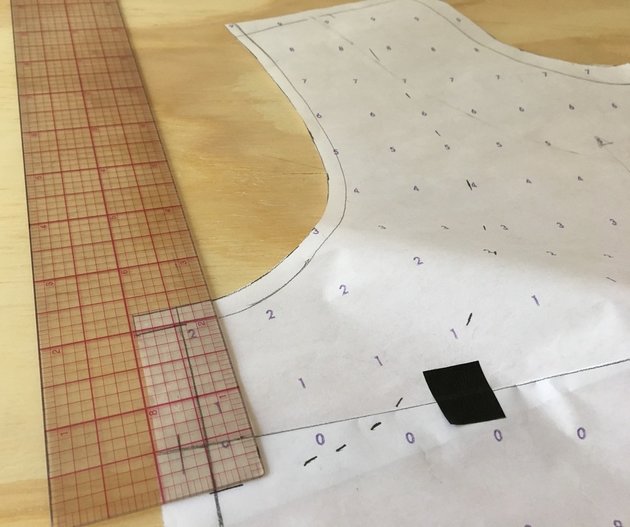 4. Continue marking the dash lines along the rest of the armhole at 2" away from seam line, making sure to keep the bust dart closed and as flat as you can.
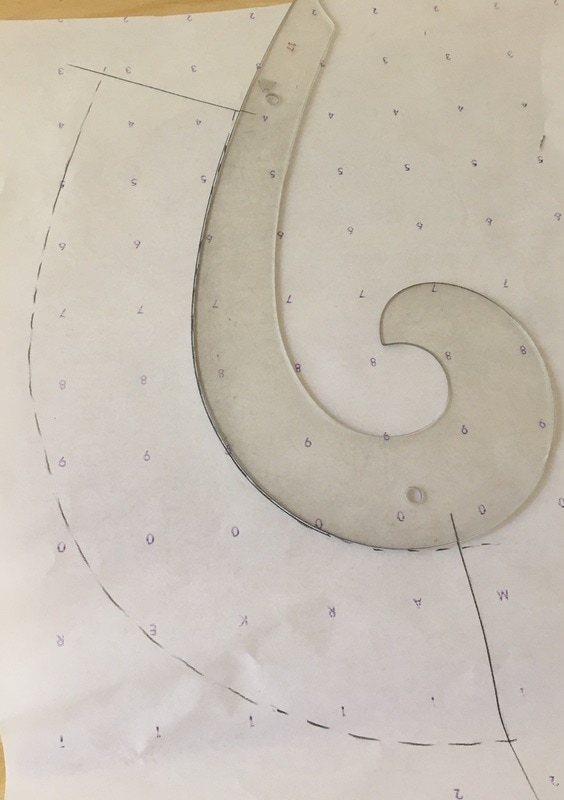
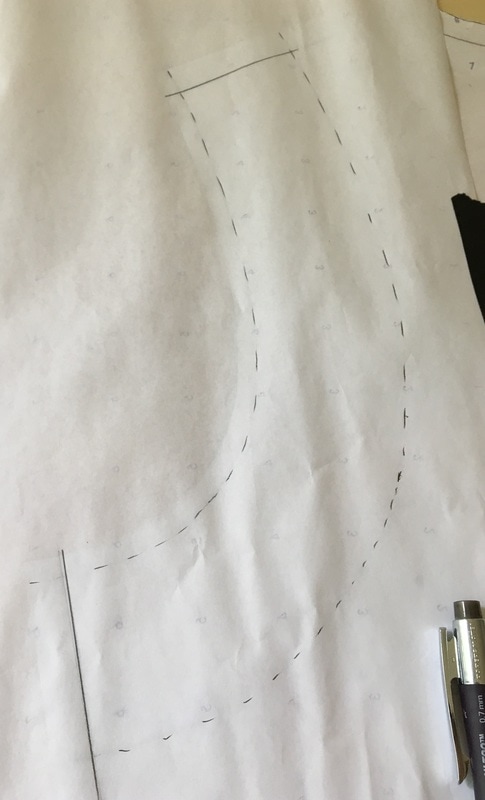
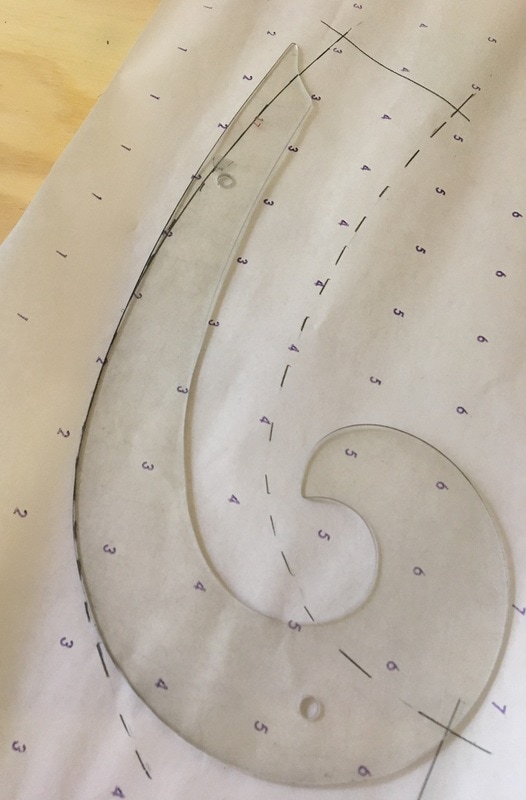
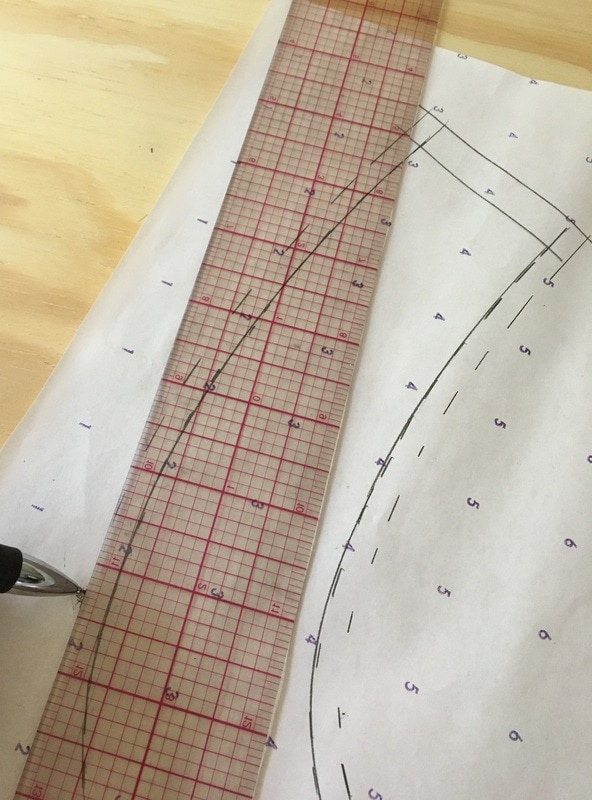
5. Use a french curve to connect all the dash lines into a single curved line. Keep in mind that you may not be able to connect all the dash lines with a single french curve placement. You'll need to shift the french curve along the dash lines to crate a continuous curved line. This curve represents the edge of the armhole facing.
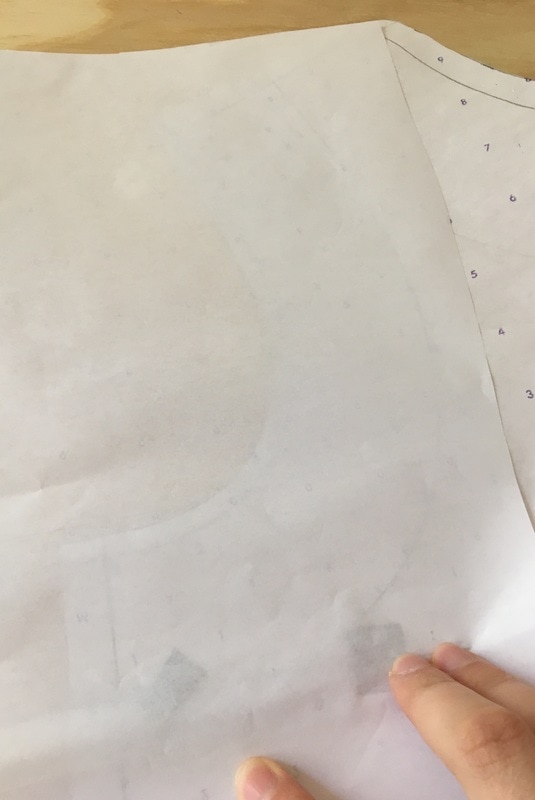
6. Place a separate piece of pattern paper (or pattern paper substitute) face down on the drafted armhole facing. If you are working with marked pattern paper, place the paper with the marked side down. You'll notice that the paper is semi-transparent. Use your pencil to transfer the armhole facing lines to the back of the pattern paper as shown above. Be careful that when the two layers of paper are overlapped, they do not shift at all during transfer. The facing should be the exact replica of the draft on the garment's pattern.
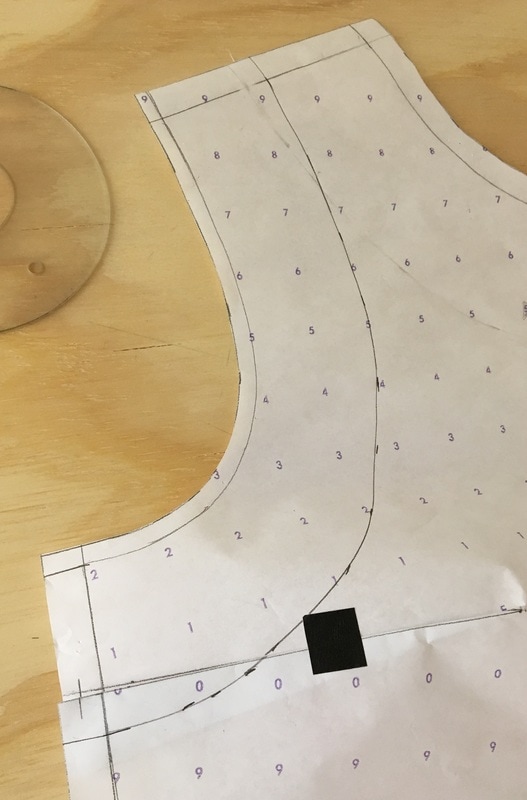
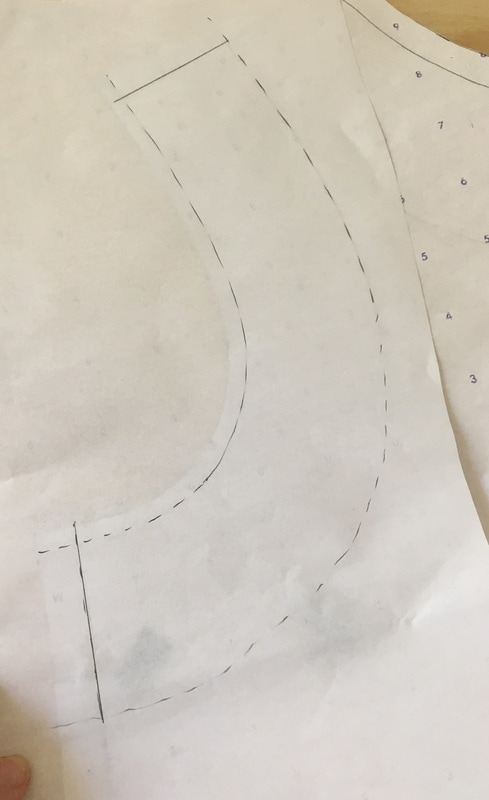
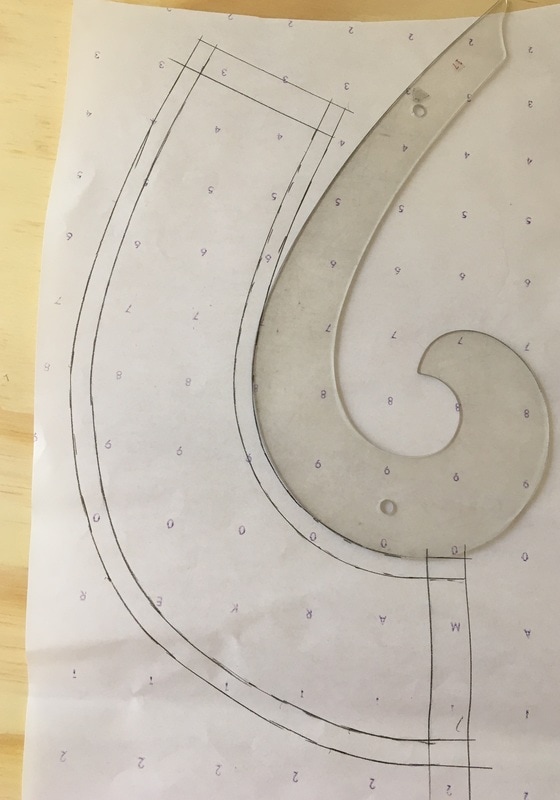
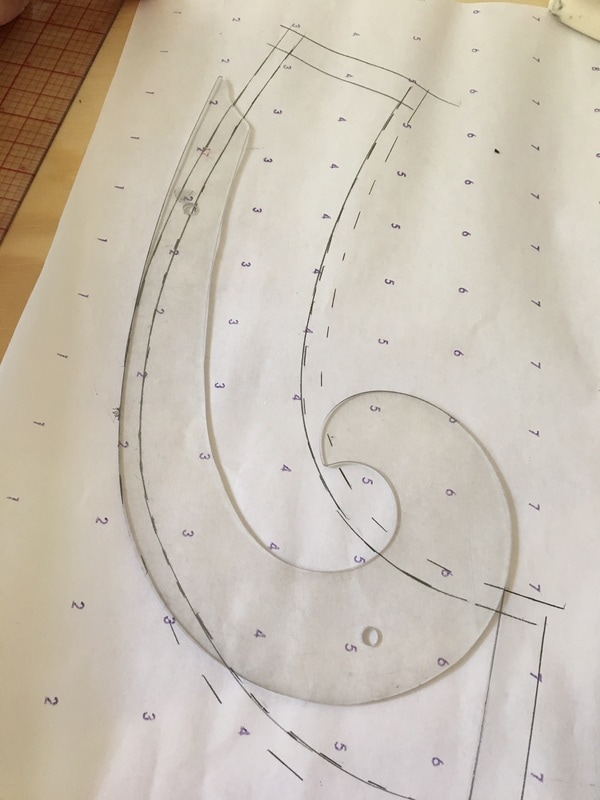
7. Turn the pattern so that the marked side is facing you and transfer the pencil markings one more time to the face of the pattern paper. Use your french curve to connect all the dash lines into smooth curves. Use your straight ruler for the shoulder and side seam lines. If you are working with a paper substitute that does not have a marked face side, you may skip this step.  Again, keep in mind that it will take a few french curve positions to connect all the dash lines into a smooth, single curve. Shift the french curve along the dash lines until this is achieved. 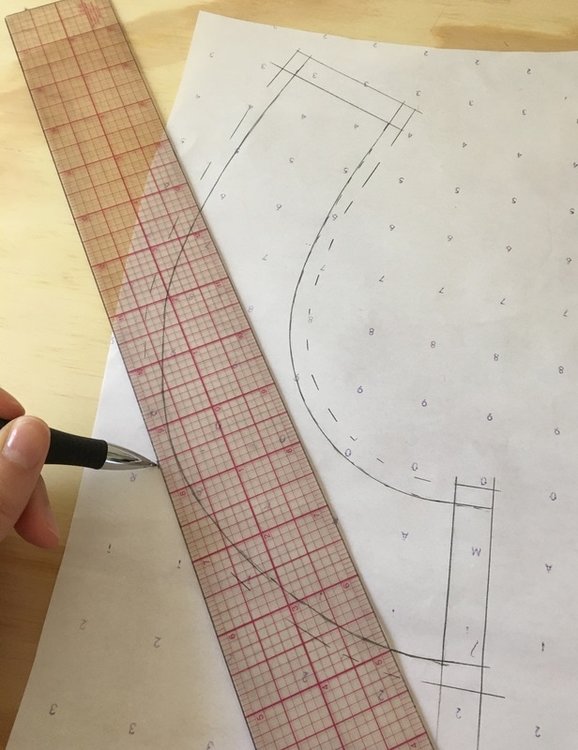 8. Use your 18" marked clear plastic ruler to add seam allowance to the armhole facing's edge. In this tutorial, the side and shoulder seams have 1/2" seam allowance while all the curved edges, including the armhole and outer edge, have a 1/4" seam allowance. Use the dash line method described above to add seam allowance to the curved areas at the correct seam allowance measurement.
Repeat the steps described above for the back facing armhole pattern making sure that you use the same width measurement as you did for the front facing. 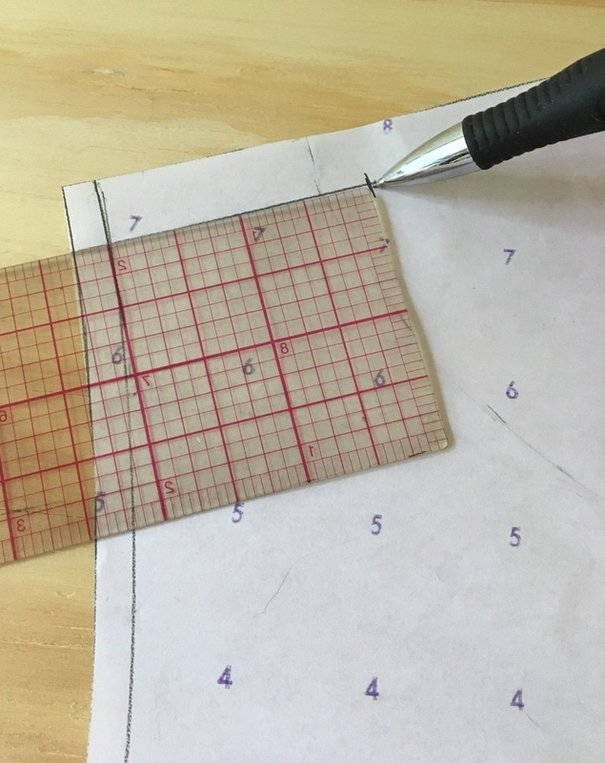 As shown above, start at the shoulder seam of the back pattern and measure 2" away from the armhole seam line again.
Repeat this step along the entire length of the armhole marking vertical dash lines 2" away. 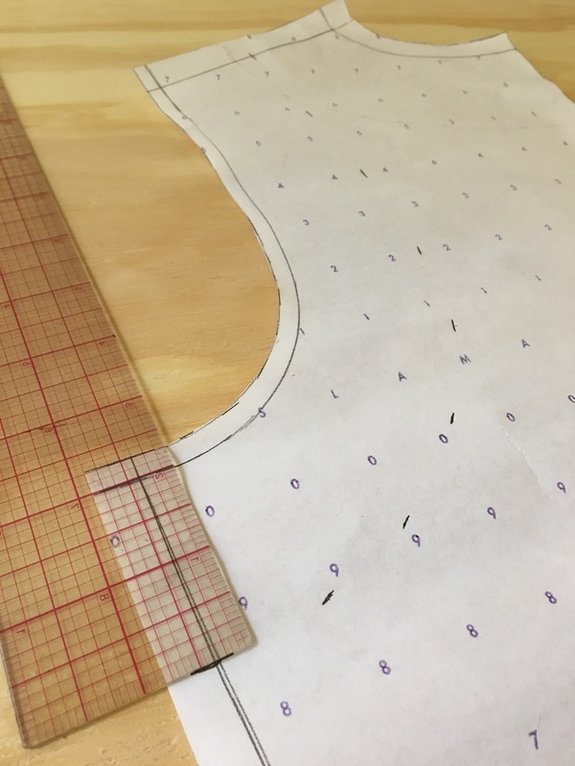 When arriving to the garment's side seam, mark a horizontal line perpendicular to the side seam line as shown above. This will ensure that the facing's bottom curve will remain smooth at the bottom edge and the facing's side seams will be easy to align, pin and sew. 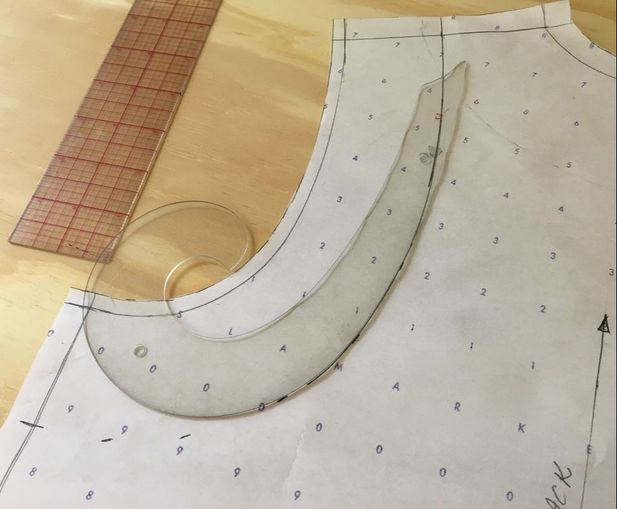 Use a french curve to connect the dashes into a smooth curve. 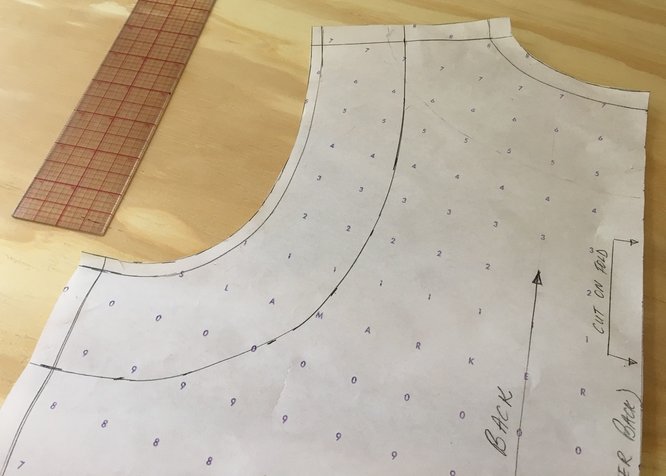 Your back armhole facing draft is now complete. Since back patterns never have bust darts, drafting the back facing does not require closing any darts temporarily, making the process more simple. 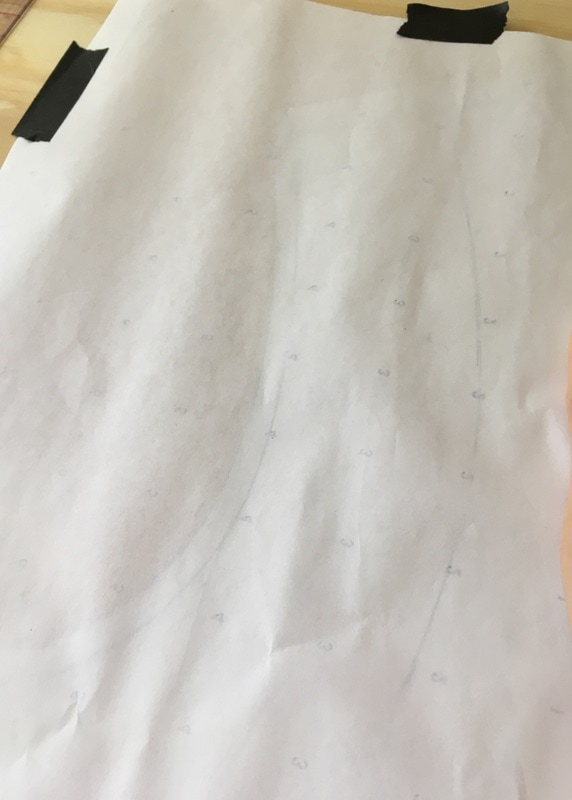 Just like you did for the front armhole facing, place a piece of pattern paper face down on the armhole facing. You may add masking tape to keep the two layers of paper from shifting during transfer.
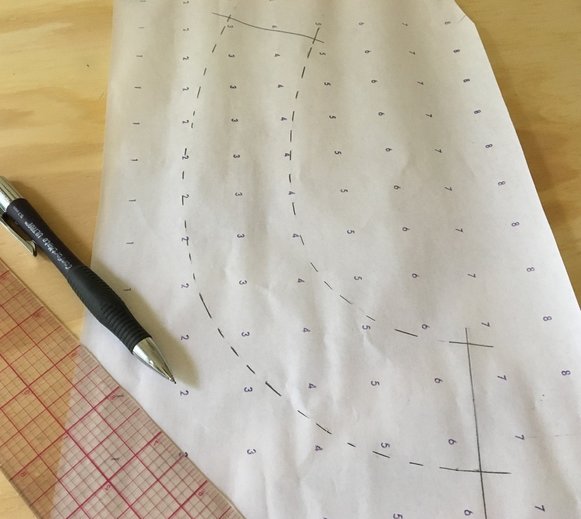
Use your pencil and ruler to accurately transfer all the facing markings from the garment's sewing pattern onto the back of the pattern paper as shown. For faster transfer, use dash lines for the curves.
Once the initial markings are transferred, flip the piece pf pattern paper so that the marked (face) side of the paper is facing up and transfer the markings using the dash line method again on the right side of the pattern paper. Note: If you are using a paper substitute that is the same on both sides, you may skip this step for this particular armhole facing. Keep in mind that just like fabric, pattern making requires that you use a face side and a back side. This ensures that the final patterns are always aligned properly to the fabric making it much easier in the cutting and sewing process. In this case, because you'll be cutting 2 mirror images of each pattern, this step can be skipped. Learn more about cutting and sewing an armhole facing here. 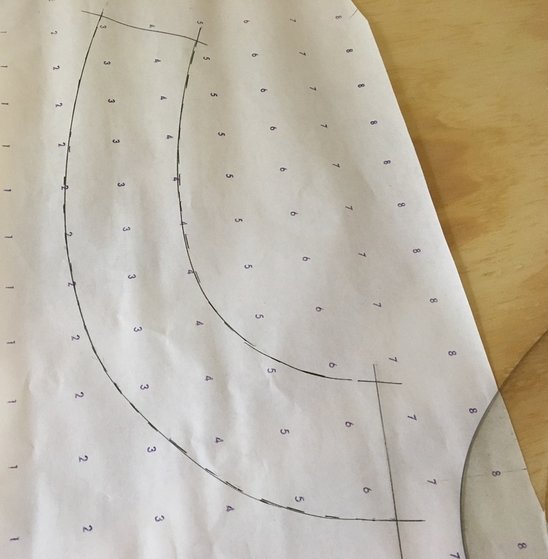 Use you french curve to connect the dash lines into smooth curves as described above.
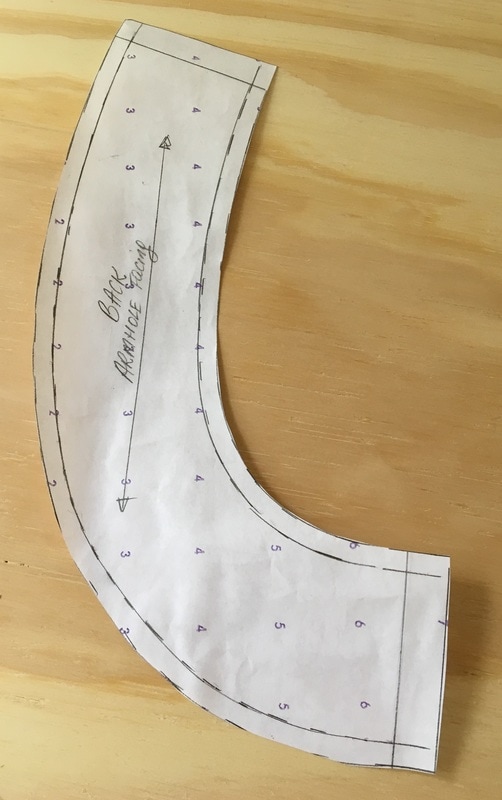
Add the same seam allowance to the back armhole facing as you did for the front using your clear plastic ruler. Mark the curved edges with dash lines positioned at the proper seam allowance from the edge. Use a french curve to connect the seam allowance edges into smooth curves. 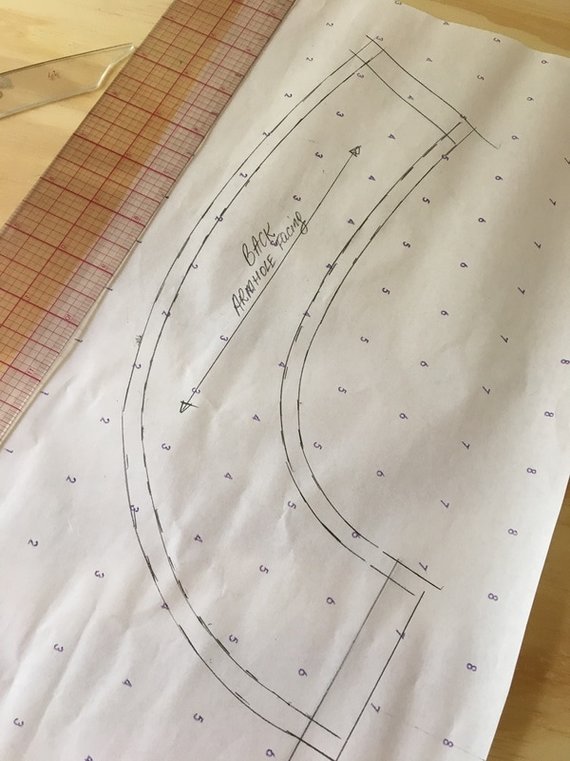 Add a grain line and label your back armhole facing for future use- this step will make the cutting and sewing process less confusing.
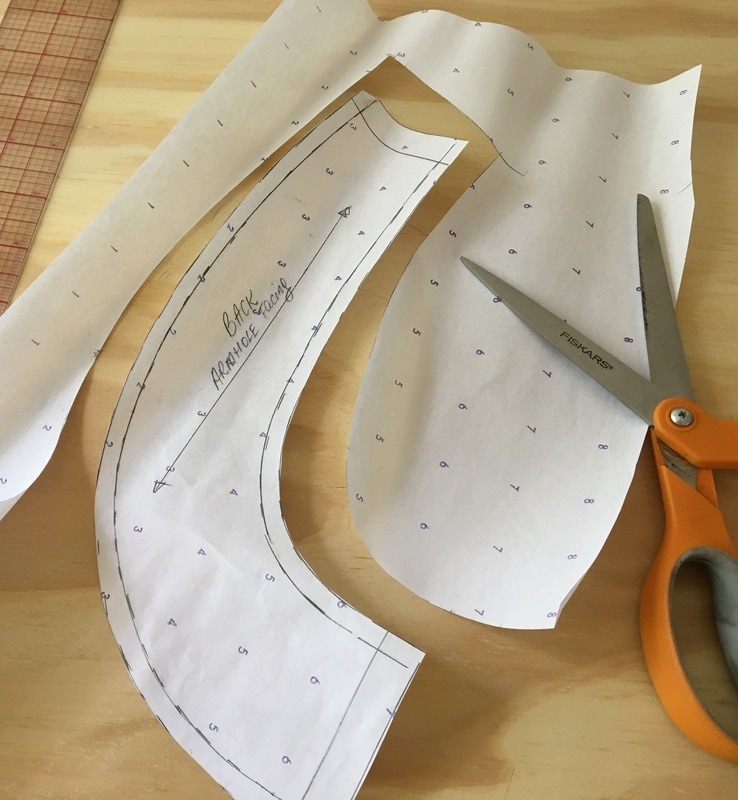
Cut out the back armhole facing smoothly along all outer edges. 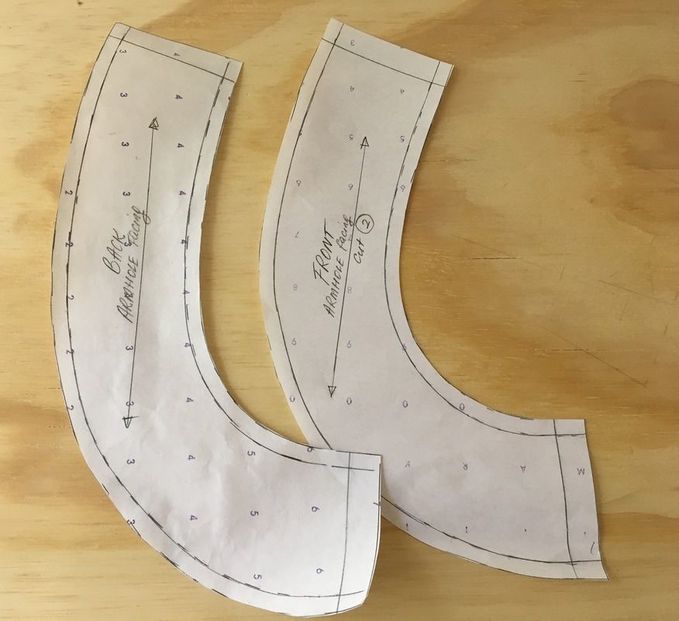 Both the front and back armhole facings look very similar in shape. You can tell them apart by the fact that the back is always longer, as well as by the proper labeling on each sewing pattern. 
0 Comments
Leave a Reply. |
The Blog:A journey into our design process, sewing tutorials, fashion tips, and all the inspiring people and things we love. 
Doina AlexeiDesigner by trade and dressmaker at heart. I spend most of my days obsessing over new fabrics and daydreaming new ideas. 
Sadie
Executive Assistant & Client Relations Manager Archives
November 2019
Categories
All

|

-
Sewing Tutorials
-
Basics
>
- Aligning Pattern Grainlines To Fabric
- Preparing Fabrics For Sewing
- Pinning Sewing Patterns To Fabric
- Placing Sewing Patterns On Fabric For Cutting
- Rotary Cutters or Fabric Scissors?
- Cutting The Sewing Patterns
- What Are Notches And How To Use Them In The Sewing Process
- Transferring Notches From Pattern To Fabric
- Transferring Seamlines to Fabric
- Staystitching
- Backstitching: A Complete Guide
- Hand Basting: A Complete Guide
- Sewing Continuous Bias Binding
- Darts >
-
Sewing Seams
>
- The Basics Of Seams And Seam Allowance
- How To Sew A Straight Seam
- Sewing Curved Seams
- Sewing Corner Seams
- Trimming And Grading Seam Excess
- Notching/Clipping Seam Allowance for Tension Release
- Sewing Topstitched Seams
- Sewing Corded Seams
- Sewing A Slot Seam
- Sewing A Gathered Seam
- Sewing Bias Seams
- Sewing Seams With Ease
- Sewing Seams With Crossing Seamlines
- Sewing Unlike Fabric Seams
- How To Iron Seams: Ironing Tools And Conventions
- Sewing With Knit Fabrics
- Understanding Stitch Length And Tension
- Sewing Unique Fabric Seams
-
Seam Finishes
>
- Seam Finishing Techniques - Overview
- Applying A Pinked Seam Finish
- Applying A Bias Bound Seam Finish
- Serging And Zigzag Seam Finishes
- Sewing A Self-Bound Seam Finish
- Sewing A French Seam Finish
- Sewing A Hong Kong Seam Finish
- Sewing A Mock French Seam Finish
- Sewing A Turned-and-Stitched Seam Finish
- Sewing Overcast Hand-Applied Seam Finishes
- Sewing A Flat Felled Seam
- Sewing A Hairline Seam Finish
-
Hem Finishes
>
- Garment Hem Finishes: Overview
- Sewing A Double Fold Hem Finish
- Sewing A Single Fold Hem Finish
- Sewing Bound Hem Finishes
- Sewing An Exposed Double Layer Bound Hem
- Sewing A Folded-Up Bound Hem with Pre-folded Binding
- Sewing A Hong Kong Hem Finish
- Sewing A Band Hem Finish
- Sewing A Bias Faced Hem Finish
- Sewing A Twill Tape Hem Finish
- Sewing A Rolled Hem Finish
- Sewing A Shaped Hem Facing
- Using Fusible Hem Tape And Webbing
- Finishing A Lace Fabric Hem
- Finishing A Leather Hem
- Sewing Faced Hem Corners
- How To Finish Lining At The Hem
- Finishing Fabric Corners by Mitering >
- Interfacing A Hemline: Lined And Unlined Examples
-
Sewing Pockets
>
- Curved Patch Pocket With Flap
- Unlined Square Patch Pockets
- Lined Patch Pockets: Two Ways
- Extension On-Seam Pockets
- Separate On-Seam Pocket
- Front Hip Pockets
- Bound Double Welt Pocket
- Double Welt Pocket With Flap
- Self-Welt Pocket (Using Single Fabric Layer)
- Slanted Welt Pocket (Hand-Stitched)
- Faced Slash Pockets: Overview >
-
Sewing Zippers
>
- Sewing Zippers: General Information
- Sewing A Centered Zipper
- Sewing A Lapped Zipper
- Sewing An Invisible Zipper
- Sewing A Fly Front Zipper
- Sewing A Closed-End Exposed Zipper (No Seam)
- Sewing An Exposed Separating Zipper
- Sewing Hand Stitched Zipper Applications
- Sewing A Zipper Underlay
- Sewing A Placket-Enclosed Separating Zipper
- Sleeveless Finishes >
-
Neckline Finishes
>
- Sewing A Neck Shaped Facing
- Sewing An All-In-One Neck Facing
- Neck And Garment Opening Combination Facings >
- Sewing A Bias Faced Neckline Finish
- Sewing A Band Neckline Finish
- Bound Neckline Finishes: Overview >
- Sewing A Semi-Stretch Strip Band Neckline
- Ribbed Neck Band And Classic Turtleneck
- Decorative Neckline Finishes >
- Finishing Facing Edges >
-
Extras
>
- A Complete Guide on Interfacing
- Sewing Bound Spaghetti Straps
- Sewing Spaghetti Straps To A Faced Neckline
- Sewing Ruffles: Overview
- Patterning And Sewing A Circle Ruffle
- Sewing A Gathered Heading Ruffle
- Sewing Double Layer Gathered Ruffles
- Sewing A Gathered Ruffle Into A Seam
- Sewing A Gathered Ruffle To A Fabric Edge
- Sewing A Fabric Surface Slit
- Sewing A Slit Seam
- Hand-Applied Straight Stitches
- Hand-Applied Blind Stitches
- Hand-Applied Overedge Stitches
- Hand-Applied Tack Stitches
- Hand-Applied Decorative Stitches
-
Basics
>
- Custom Bridal
- Custom Apparel
- About
- Blog


 RSS Feed
Services |
Company |
|
