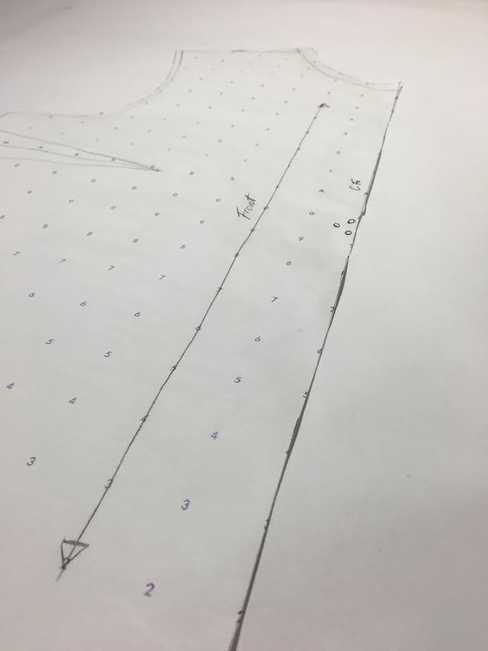
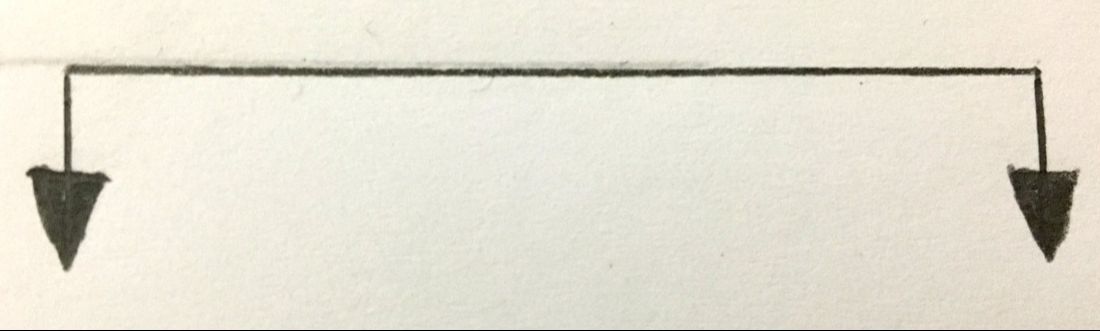
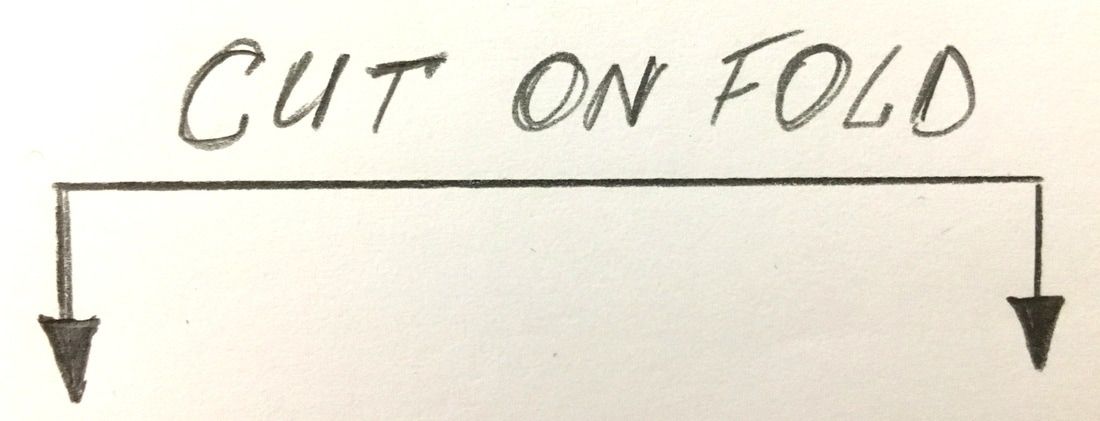
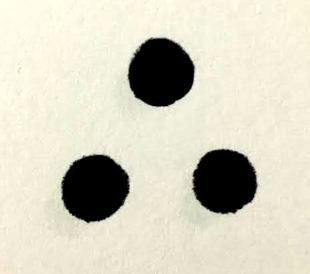
 What does cutting on fold mean?If you’re just starting to learn the logistics and techniques of sewing, you’ll soon come across the term “Cut On fold”. A sewing pattern that has two symmetric sides can be slashed in half and cut on the fold of your fabric. This method is most commonly used for simple front or back patterns and facings where the Center Front or the Center Back corresponds to the fabric’s fold. On your pattern, you can spot a line that needs to be placed on the fold by the fact that it has no seam allowance, appearing as the actual edge of the pattern. This line is marked with one of the symbols shown below, sometimes even having the words “cut on fold” printed along the edge. Once you fold your fabric properly (we’ll go over this below) and align the edge of your pattern perfectly with the fabric’s fold, the double layer is then cut according to the sewing pattern, leaving the fold intact! Once the fabric is cut and all necessary marking are transferred from the pattern, you’ll notice that when you open the fabric’s fold you have a full piece with two identical sides. This not only saves you money, but it also saves you lots of space and time.
Why do we need to cut on fold?There are a few main reasons why many seamstresses choose to draft and cut their patterns on fold. Although this isn’t a common practice in the apparel manufacturing industry mainly because the machines used cut dozens of single layers that require full patterns and not cut-on-fold. So what are the pros of making and cutting your patterns on fold? Here are 3 main reasons bellow: 1. Limited space: If you’re limited on space, which is true for many home sewers, having a pattern that requires to be cut on fold will need a smaller working space and give you more room for comfort. Not everyone has a big cutting table or a studio in their home, but that doesn’t mean you shouldn't be able to sew just as well as the pros. When your sewing pattern is laid on the fabric’s fold it allows you to comfortably extend your arms while cutting the more difficult, curved lines. This space-efficiency also allows you to handle the pattern and fabric more comfortably in a confined space- it really makes a huge difference with your working conditions so you can really start enjoying it! 2. Saving pattern paper: Sewing supplies are not cheap, especially the ones that need to be periodically replenished like pattern paper. If you’re going to make a lot of your own patterns, we recommend that you invest in some marked pattern paper (or check out some of these pattern paper substitutes)- you can find some good deals on Ebay and Amazon. If you draft your patterns to be cut on fold, a roll of pattern paper will last you a very long time. If you’re a home sewer, you should cut down on cost and space as much as you can. Patterns that are symmetric on both sides should be cut in half and marked as cut-on-fold. For example, if you have a simple A-line dress that has no asymmetric elements, the front and back patterns should be drafted so that the center lines of both back and front patterns are aligned with the fabric’s fold. These center lines, also known as Center Front (for front pattern) and Center Back (for back patterns), represent the cut-on-fold line. Because of their shape, A-line dress patterns can use up a lot of pattern paper (and space) when drafted in full so your best bet is to cut them on fold. There is however an exception: If you are just starting to learn how to sew and are still in the process of understanding the basic concepts of sewing, it is a good idea to work with full patterns first before you try your hand at cut-on-fold ones. It just gives you a better understanding on how to use your fabric’s width efficiently and the symmetry of patterns. For that reason, The Learn To Sew Box includes full A-line dress patterns. Once you start feeling comfortable with your fabric and the cutting process, you can always fold or cut the patterns in half down center front and center back to minimize space. 3. Easier to work with and faster to cut: Using cut-on-fold sewing patterns makes the pinned-together pattern and fabric more flexible to move around and turn for a more convenient cutting angle. Once you get some practice, you will find the fabric cutting angles that are most comfortable for you to work with and working with on-fold patterns are easier to maneuver when it comes to achieving your optimal comfort. In addition, cutting through multiple layers, allows for more stability in your fabric, thus helping you achieve a more precise cut. This is especially true if you are working with thinner, more flimsy fabrics. How to align and cut your patterns on fold As is true for everything we do, there is always a right and a wrong way to lay out your fabric and cut an on-fold pattern. Don’t worry, it’s really not too difficult but it should be done correctly if you want to avoid fit and comfort issues in your final product. 1. Folding the Fabric Correctly: To make sure you use your fabric efficiently, line up your pattern on your fabric as close to the selvage edge as possible. This will give you an idea of how much to fold the fabric in. Once you have an idea of the average width that needs to be folded in, put the pattern aside and fold the edge of the fabric over at the measured length, so that the selvage edge is perfectly parallel to the fold created. The easiest way to do this is by folding the fabric as close to parallel as possible using the naked eye and then measuring at the top, middle and bottom from fold to selvage edge and moving the fabric to correct measurement differences- you want the length from fold to selvage to be equal along the fabric. Tip: Always fold with the back-side of the fabric facing the outside. This way, when you cut your pattern out and are ready to transfer the markings to fabric, they end up on the inside of the garment as they should.
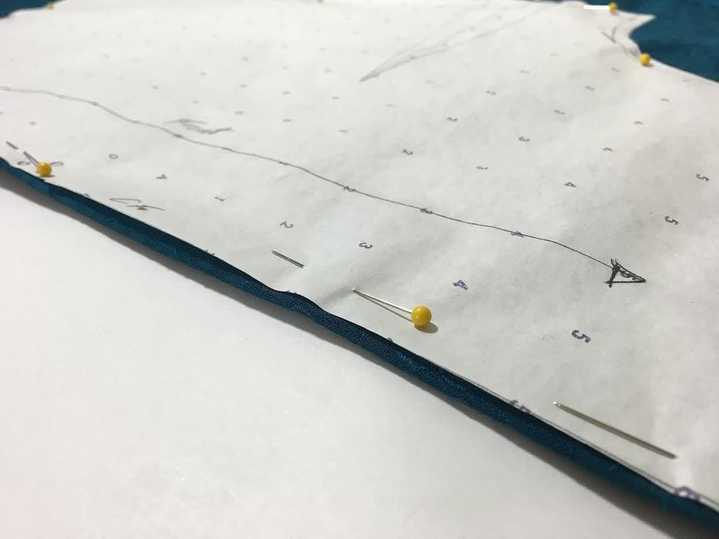
 2. Pinning and Cutting a cut-on-fold Sewing Pattern: So now that you have your fabric all folded and prepped, it’s time to pin your sewing pattern for cutting. First, you should be able to read your sewing pattern and what each of it’s markings represents. Find the edge that is marked with any of the cut-on-fold symbols or that has the words “cut on fold” marked along. You will also recognize this edge by the fact that it lacks seam allowance, notches and any other marking you might find along regular seams- It is a simple, straight line. 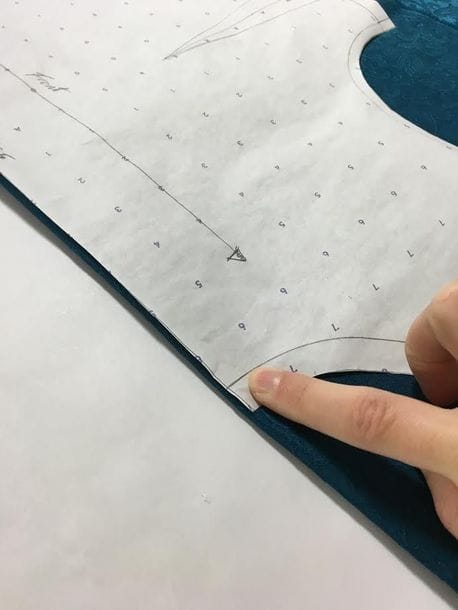 Take your sewing pattern and align this edge perfectly to the fabric’s fold as shown above. Place a few pins along the fold to hold the pattern in place. Make sure you place the edge right on top of the fold with no excess fabric showing. Once you’ve secured this edge in place, pin the rest of your fabric at the seam allowance. 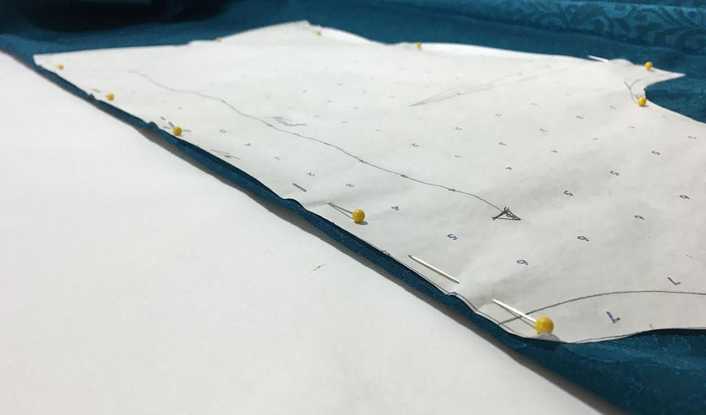 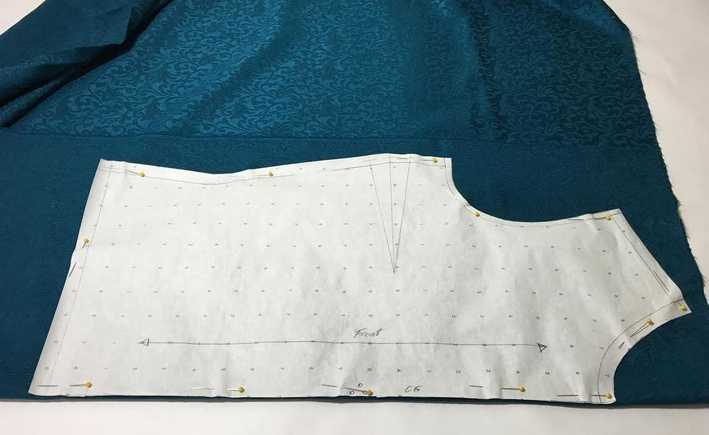 Easy huh? Now all that’s left to do is cut your fabric along the patterns edge carefully and mark it accordingly. If you have darts that need to be transferred on both sides of the fold follow the instructions in our How to transfer darts onto multiple layers of fabric correctly. 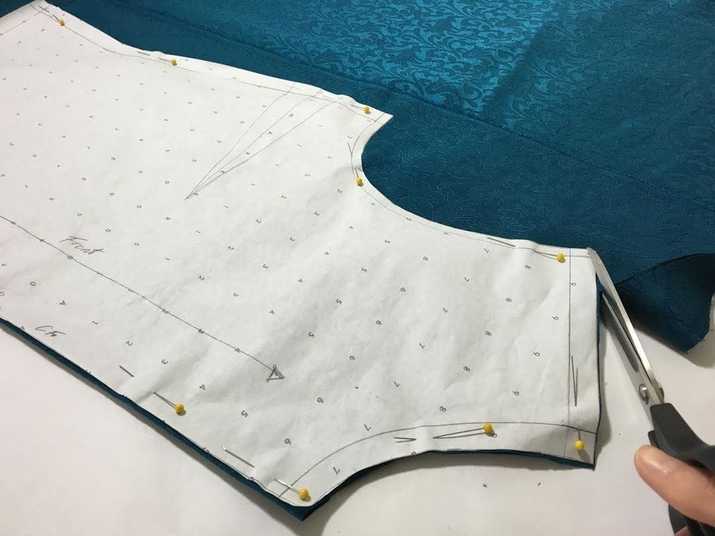 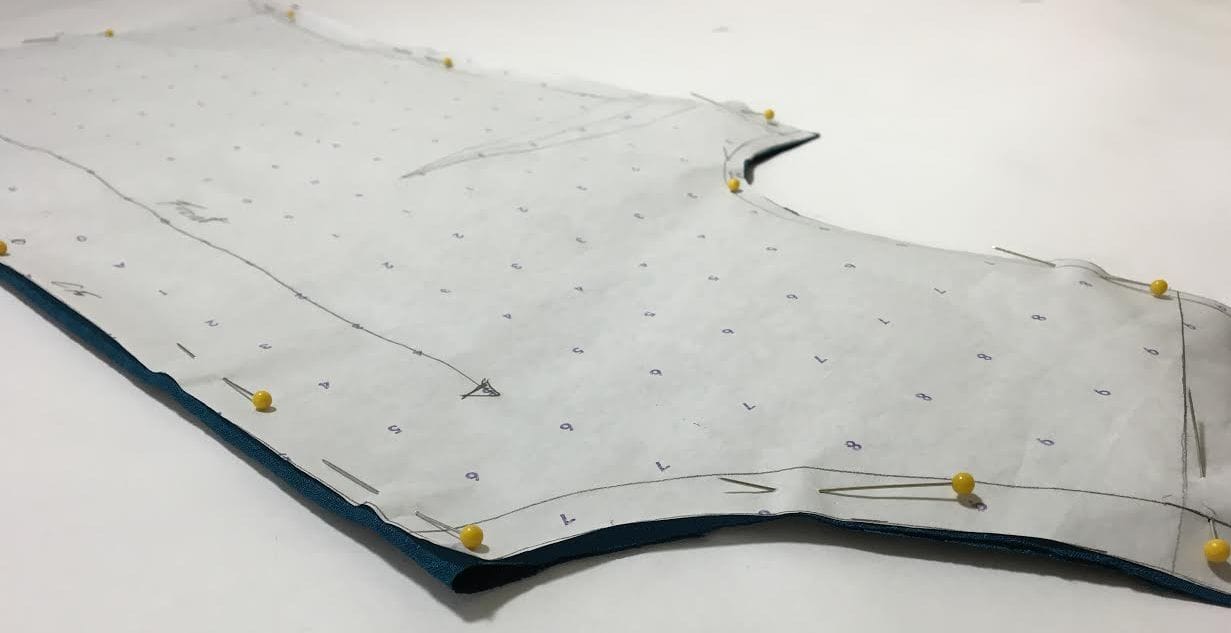
10 Comments
2/26/2019 03:38:20 pm
I want to take a pattern piece that is a “cut on the fold” and trace it so I don’t have to put in the fold. The reason I want to do this is because I want to cut out 4 or 5 pieces at a time and stacking my material to line up the fold is difficult. Is there a disadvantage to doing this. The pattern price is pretty small, 11x14 when not folded. 2/27/2019 06:51:36 am
Hi Margaret! I am making a jacket with a large print fabric. The pattern has a 2 piece back so there would be a seam down the middle of the back. I want to place the pattern piece on the fold to avoid a seam down the middle of the back so the print would not be distorted or uneven. Is this possible without ruining the whole pattern? I would also make seam allowance adjustments. Thanks for a very good article. 4/1/2019 01:49:54 pm
Hi Yvonne! Thanks for posting the great question! Yes, it is absolutely possible and I've done it many times before. The only condition is that the back seam is straight, otherwise, it wont align with the fabric's fold. I'm assuming the seam you are working with is a straight center back seam which divides the back into two symmetrical halves. 4/12/2019 02:31:39 pm
You make a good point when you say that cutting on the fold helps to save pattern paper. I have recently been thinking about getting into sewing more, but I have been worried about the cost of having to continually buy patterns. I will be sure to remember this advice if I start getting into sewing so that I can really get the most out of the patterns I might purchase.
Janine naylor
9/14/2020 04:29:58 pm
Hi just wondering what trace on fold means in sewing patterns
Dakota
12/12/2020 09:51:18 pm
Hey there! I'm currently making a dog jumper, and realise that one of the pattern pieces has a line saying : Fold Line (In the direct middle) And was just wondering how to go about cutting it? As I'm quite confused. 12/13/2020 11:44:24 am
Hi Dakota! If the pattern is identical on both sides of this middle fold line, it is most likely there to give you an option to cut the fabric on fold if needed. In this case, you can just cut the entire pattern as a single fabric layer and ignore this middle line. Hope this helps!
Yvette battle
1/29/2022 04:48:09 am
Can I sew a seam on a folded edge. I got a pattern to be cut on a fold. I want to sew a seam instead
Natalie
6/4/2023 11:15:34 am
Hi I accidentally didn’t cut on the fold of the fabric for all of my pieces and I can’t get the same fabric again. Can you cut it out not on the fold again and see them together or do I have to scrap all of the fabric buy a new one and start again? Leave a Reply. |
The Blog:A journey into our design process, sewing tutorials, fashion tips, and all the inspiring people and things we love. 
Doina AlexeiDesigner by trade and dressmaker at heart. I spend most of my days obsessing over new fabrics and daydreaming new ideas. 
Sadie
Executive Assistant & Client Relations Manager Archives
November 2019
Categories
All

|

-
Sewing Tutorials
-
Basics
>
- Aligning Pattern Grainlines To Fabric
- Preparing Fabrics For Sewing
- Pinning Sewing Patterns To Fabric
- Placing Sewing Patterns On Fabric For Cutting
- Rotary Cutters or Fabric Scissors?
- Cutting The Sewing Patterns
- What Are Notches And How To Use Them In The Sewing Process
- Transferring Notches From Pattern To Fabric
- Transferring Seamlines to Fabric
- Staystitching
- Backstitching: A Complete Guide
- Hand Basting: A Complete Guide
- Sewing Continuous Bias Binding
- Darts >
-
Sewing Seams
>
- The Basics Of Seams And Seam Allowance
- How To Sew A Straight Seam
- Sewing Curved Seams
- Sewing Corner Seams
- Trimming And Grading Seam Excess
- Notching/Clipping Seam Allowance for Tension Release
- Sewing Topstitched Seams
- Sewing Corded Seams
- Sewing A Slot Seam
- Sewing A Gathered Seam
- Sewing Bias Seams
- Sewing Seams With Ease
- Sewing Seams With Crossing Seamlines
- Sewing Unlike Fabric Seams
- How To Iron Seams: Ironing Tools And Conventions
- Sewing With Knit Fabrics
- Understanding Stitch Length And Tension
- Sewing Unique Fabric Seams
-
Seam Finishes
>
- Seam Finishing Techniques - Overview
- Applying A Pinked Seam Finish
- Applying A Bias Bound Seam Finish
- Serging And Zigzag Seam Finishes
- Sewing A Self-Bound Seam Finish
- Sewing A French Seam Finish
- Sewing A Hong Kong Seam Finish
- Sewing A Mock French Seam Finish
- Sewing A Turned-and-Stitched Seam Finish
- Sewing Overcast Hand-Applied Seam Finishes
- Sewing A Flat Felled Seam
- Sewing A Hairline Seam Finish
-
Hem Finishes
>
- Garment Hem Finishes: Overview
- Sewing A Double Fold Hem Finish
- Sewing A Single Fold Hem Finish
- Sewing Bound Hem Finishes
- Sewing An Exposed Double Layer Bound Hem
- Sewing A Folded-Up Bound Hem with Pre-folded Binding
- Sewing A Hong Kong Hem Finish
- Sewing A Band Hem Finish
- Sewing A Bias Faced Hem Finish
- Sewing A Twill Tape Hem Finish
- Sewing A Rolled Hem Finish
- Sewing A Shaped Hem Facing
- Using Fusible Hem Tape And Webbing
- Finishing A Lace Fabric Hem
- Finishing A Leather Hem
- Sewing Faced Hem Corners
- How To Finish Lining At The Hem
- Finishing Fabric Corners by Mitering >
- Interfacing A Hemline: Lined And Unlined Examples
-
Sewing Pockets
>
- Curved Patch Pocket With Flap
- Unlined Square Patch Pockets
- Lined Patch Pockets: Two Ways
- Extension On-Seam Pockets
- Separate On-Seam Pocket
- Front Hip Pockets
- Bound Double Welt Pocket
- Double Welt Pocket With Flap
- Self-Welt Pocket (Using Single Fabric Layer)
- Slanted Welt Pocket (Hand-Stitched)
- Faced Slash Pockets: Overview >
-
Sewing Zippers
>
- Sewing Zippers: General Information
- Sewing A Centered Zipper
- Sewing A Lapped Zipper
- Sewing An Invisible Zipper
- Sewing A Fly Front Zipper
- Sewing A Closed-End Exposed Zipper (No Seam)
- Sewing An Exposed Separating Zipper
- Sewing Hand Stitched Zipper Applications
- Sewing A Zipper Underlay
- Sewing A Placket-Enclosed Separating Zipper
- Sleeveless Finishes >
-
Neckline Finishes
>
- Sewing A Neck Shaped Facing
- Sewing An All-In-One Neck Facing
- Neck And Garment Opening Combination Facings >
- Sewing A Bias Faced Neckline Finish
- Sewing A Band Neckline Finish
- Bound Neckline Finishes: Overview >
- Sewing A Semi-Stretch Strip Band Neckline
- Ribbed Neck Band And Classic Turtleneck
- Decorative Neckline Finishes >
- Finishing Facing Edges >
-
Extras
>
- A Complete Guide on Interfacing
- Sewing Bound Spaghetti Straps
- Sewing Spaghetti Straps To A Faced Neckline
- Sewing Ruffles: Overview
- Patterning And Sewing A Circle Ruffle
- Sewing A Gathered Heading Ruffle
- Sewing Double Layer Gathered Ruffles
- Sewing A Gathered Ruffle Into A Seam
- Sewing A Gathered Ruffle To A Fabric Edge
- Sewing A Fabric Surface Slit
- Sewing A Slit Seam
- Hand-Applied Straight Stitches
- Hand-Applied Blind Stitches
- Hand-Applied Overedge Stitches
- Hand-Applied Tack Stitches
- Hand-Applied Decorative Stitches
-
Basics
>
- Custom Bridal
- Custom Apparel
- About
- Blog
 RSS Feed
Services |
Company |
|
