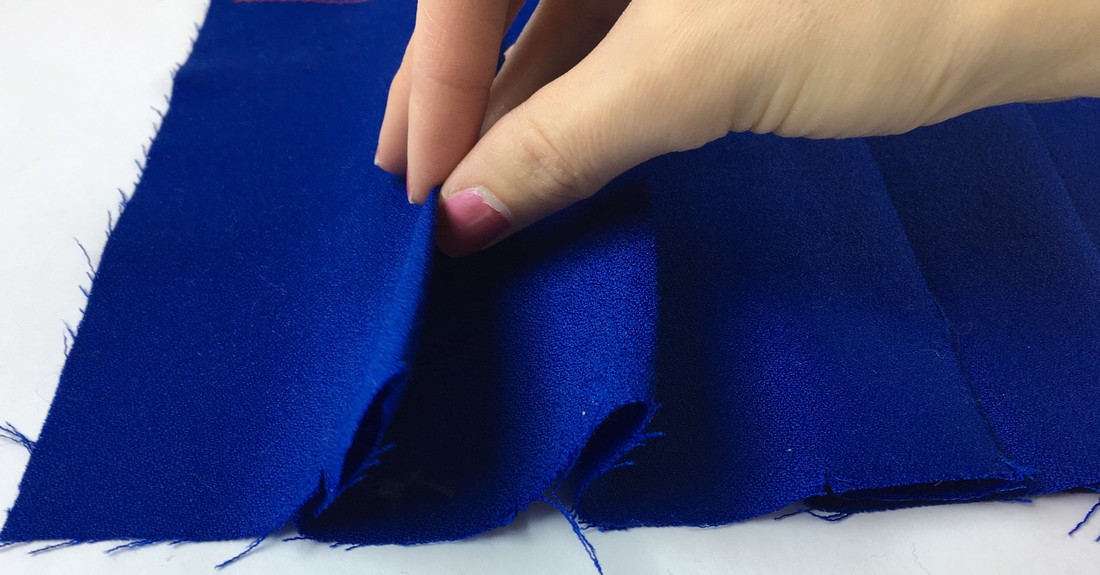
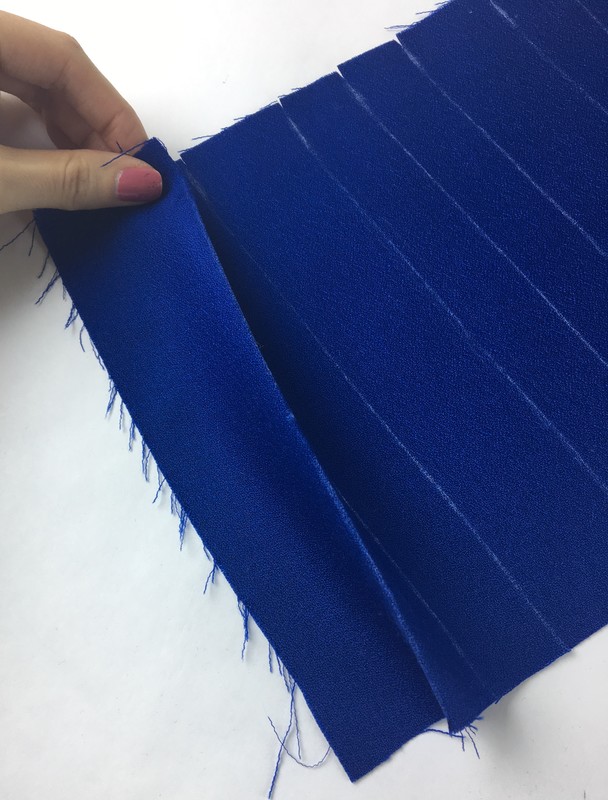
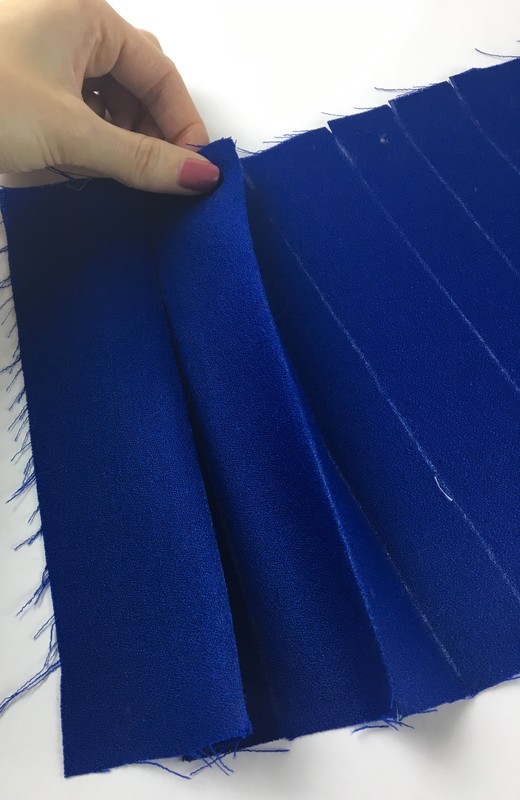
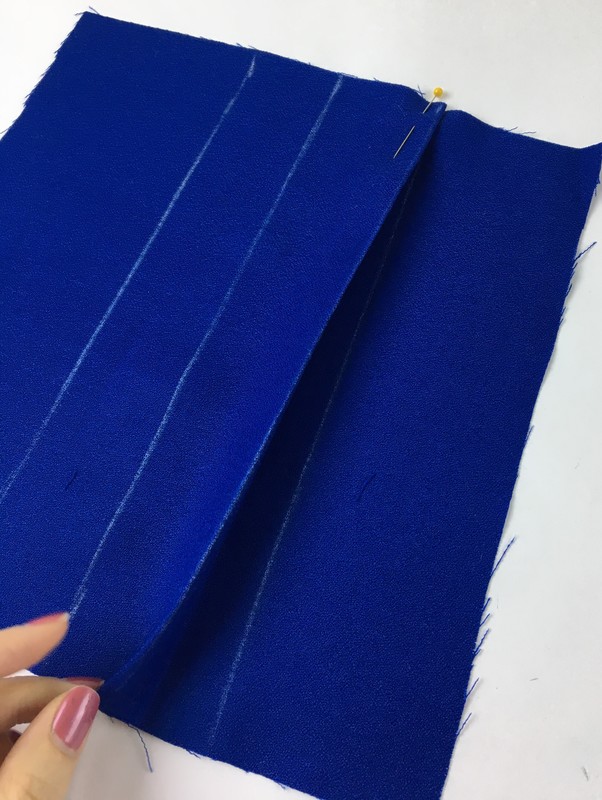
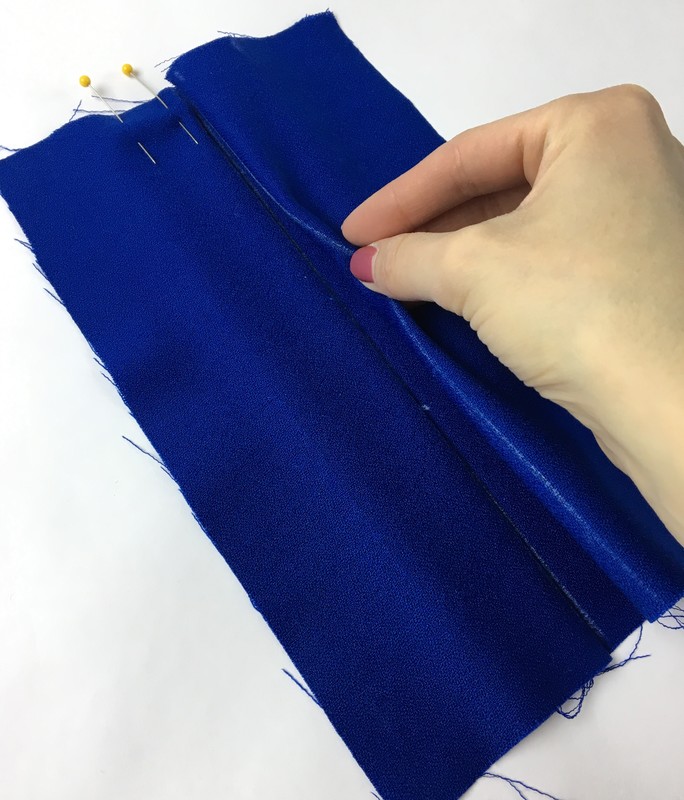
 Pleats are folds of fabric that can appear either in clusters, as a single fold, or continuously. Although pleats may look to be decorative only, they additionally serve the purpose of controlling excess fabric and fullness. Grouped pleats are most commonly seen on skirts and dresses that are more loose fitting, while single pleats are common on a variety of garments from outerwear to tops, bottoms and dresses. On a sewing pattern, pleats are represented by two main lines: a fold line and a second line that the fold line is positioned to, usually called placement line. This means that when you create a pleat, you fold the fold line first and then align this fold to the placement line- this is usually very intuitive and once you get the hang of it, it's also quite fun to do! The crispest and best hanging folds are achieved if the pleats are aligned to the straight grain- Most fabrics are also much easier to fold if the folds are positioned parallel to the grain. We'll discuss a little more about the different pleat finishes and the best fabrics for them below, but first, here are 4 styles of pleats you should know! Basic Pleats You Should Know and How to Fold Them 1. Accordion Pleats- These are pleats that are actually difficult to do at home because your iron doesn't have enough pressing power to really set this style of pleating in place. Accordion pleats are thinner in width and shaped to resemble an accordion. They are usually continuous and are found on lighter-weight fabrics for skirts, dresses and some blouses. Because this pleating style uses an industrial method we wont show you how to do it at home in this tutorial. 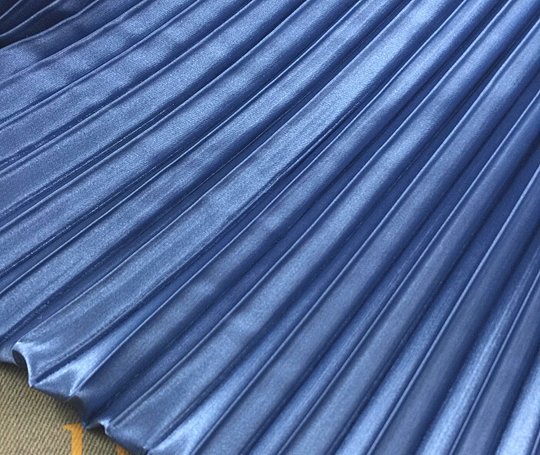 Image via www.aliexpress.com 2. Knife Pleats (also called side pleats) are represented by even, continuous or clustered folds that point to one direction (either left or right). This pleating style is much easier to sew at home than the accordion pleats and can be found either grouped in specific areas of the garment or continuously throughout. Knife pleats are done in a few different styles: -Some garments have clusters of knife pleats pointing in opposite directions, as opposed to the same side all around. -The fold of a side pleat can either start right where another begins, or have some distance in between as displayed below. 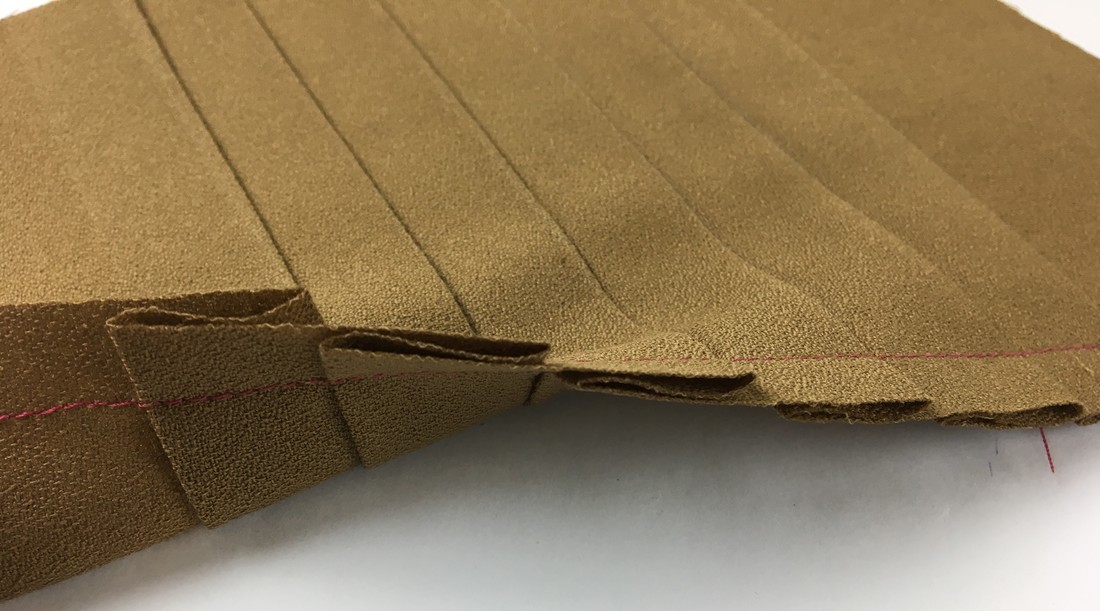 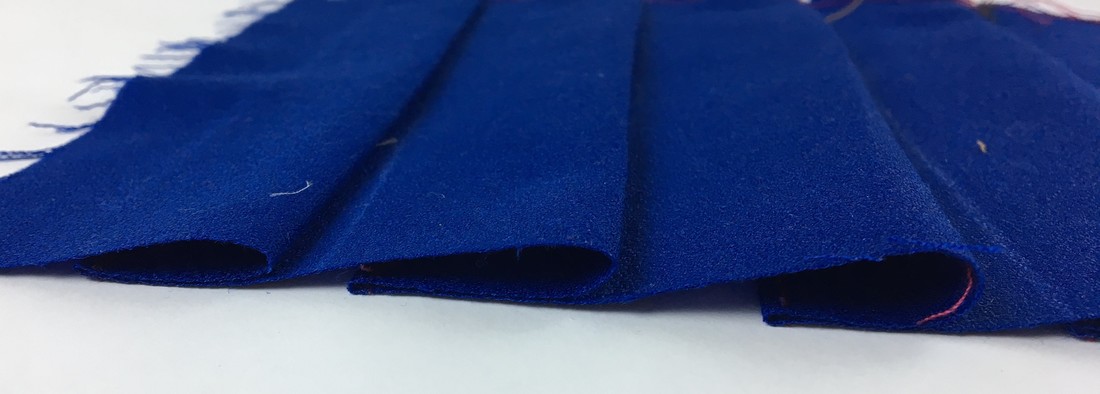 Folding a Knife Pleat: Below, you'll see a strip of fabric that requires pleating which is already marked with two fold lines and a placement line. If you look at it carefully, you'll notice that the lines are grouped in 3: The first line is the outer fold line, the second is the inner fold line and the last (3rd line) is the placement line. Each line is marked by a notch (1/4" slit) at each end. 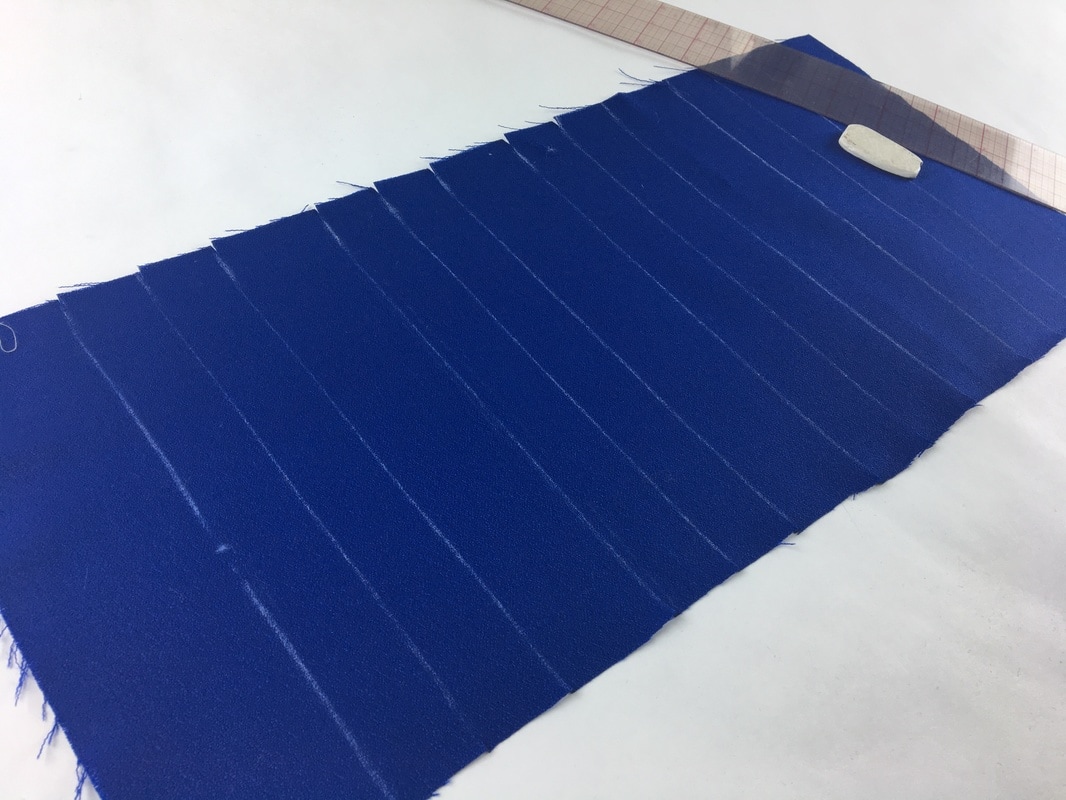 1. Once you have your pleat lines transferred to your fabric with tailor's chalk or a water soluble pencil, starting at one end, fold and iron along the first vertical line. Then, take this fold and align it to the 3rd line, skipping the second one (which inevitably becomes the inner fold). Follow the pictures below to get more clarity on this process.
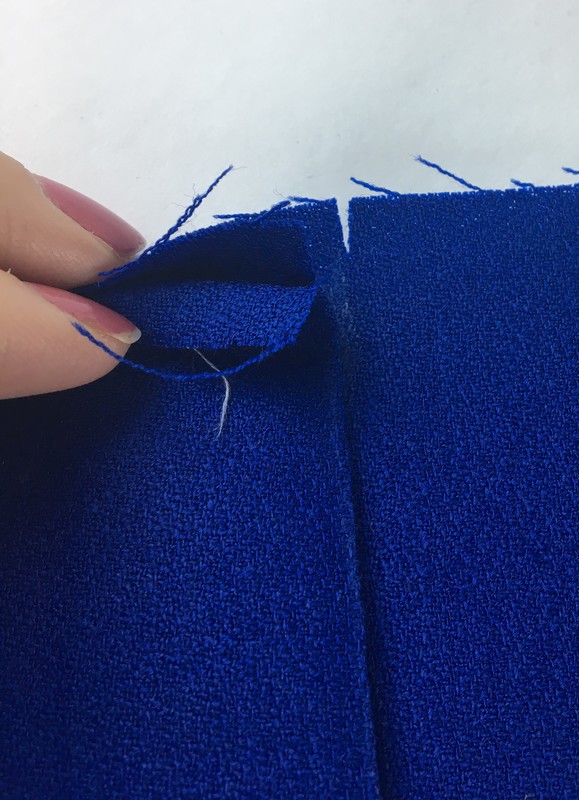
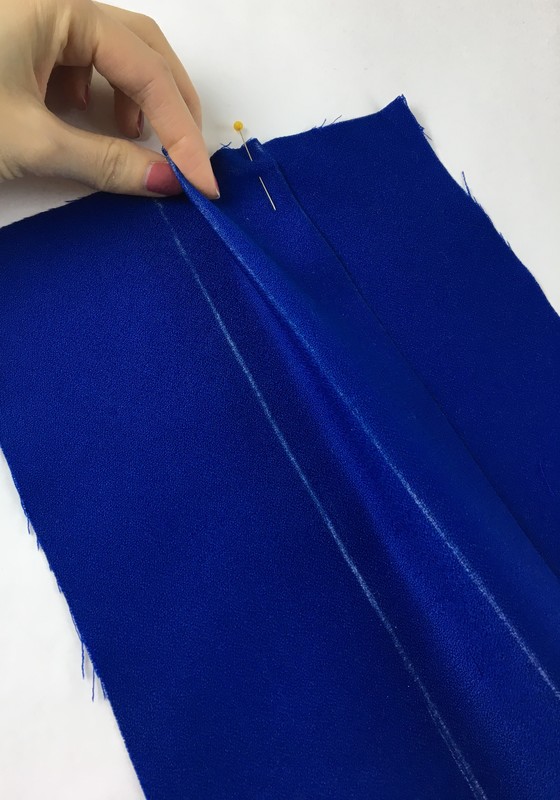
2. Iron on top of the two fold lines and makes sure your notches are matching at the top.
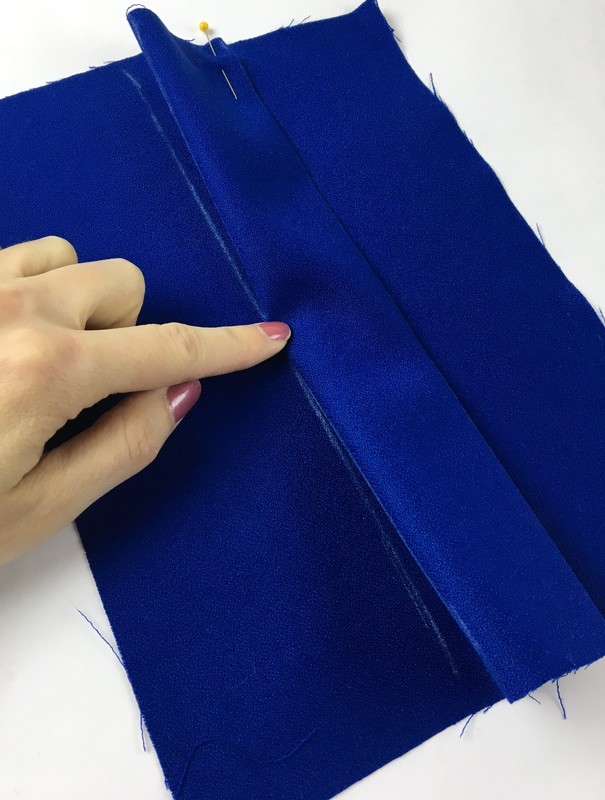
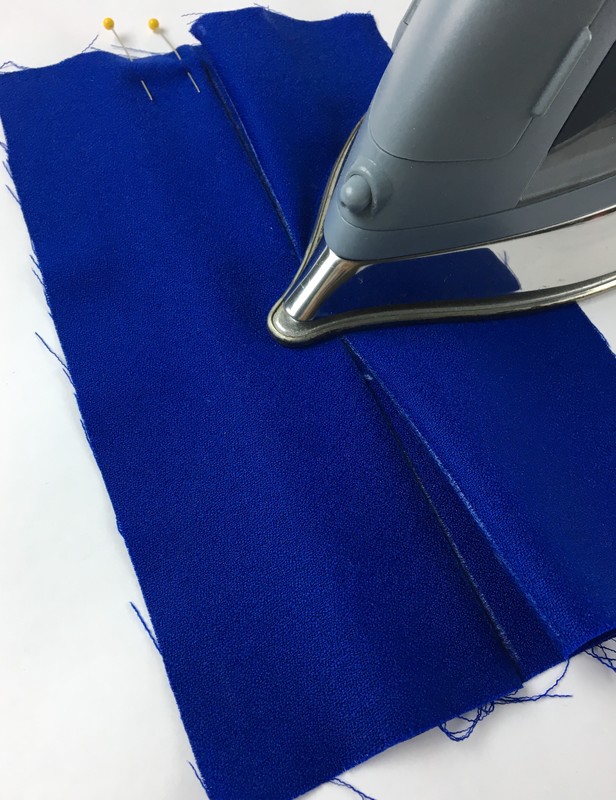
3. Repeat the process with the next cluster of lines, starting with folding and ironing the first line then aligning it with the 3rd which is the placement line, thus allowing the middle line to become the inner fold.
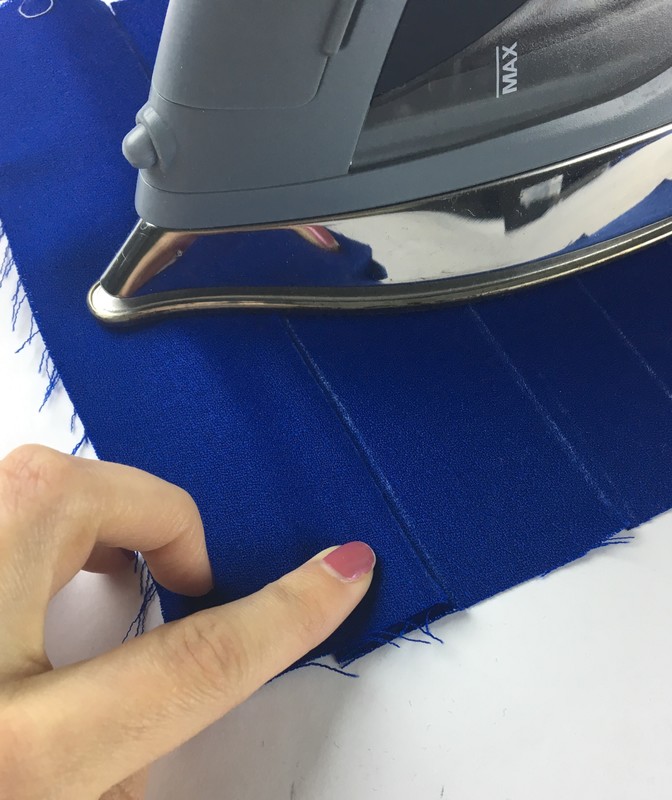
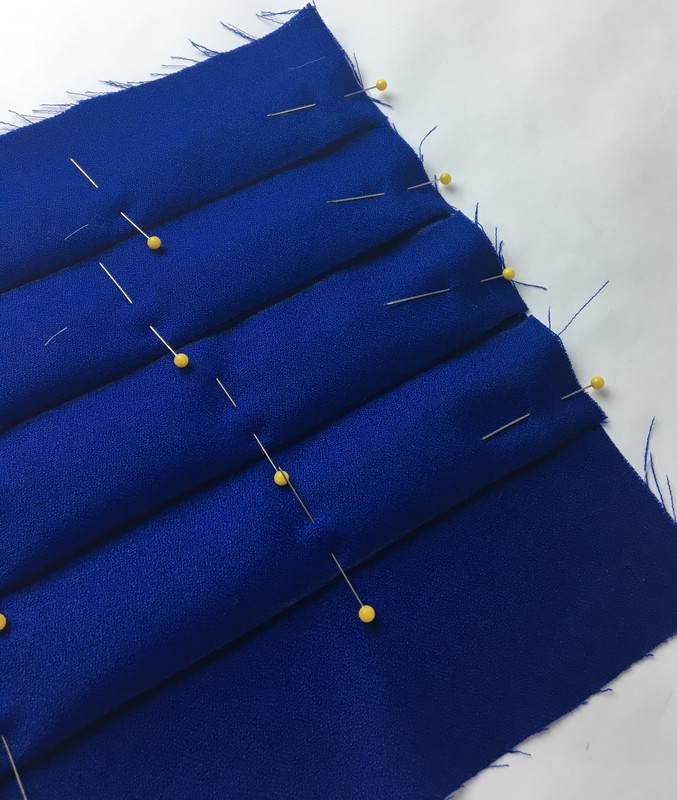
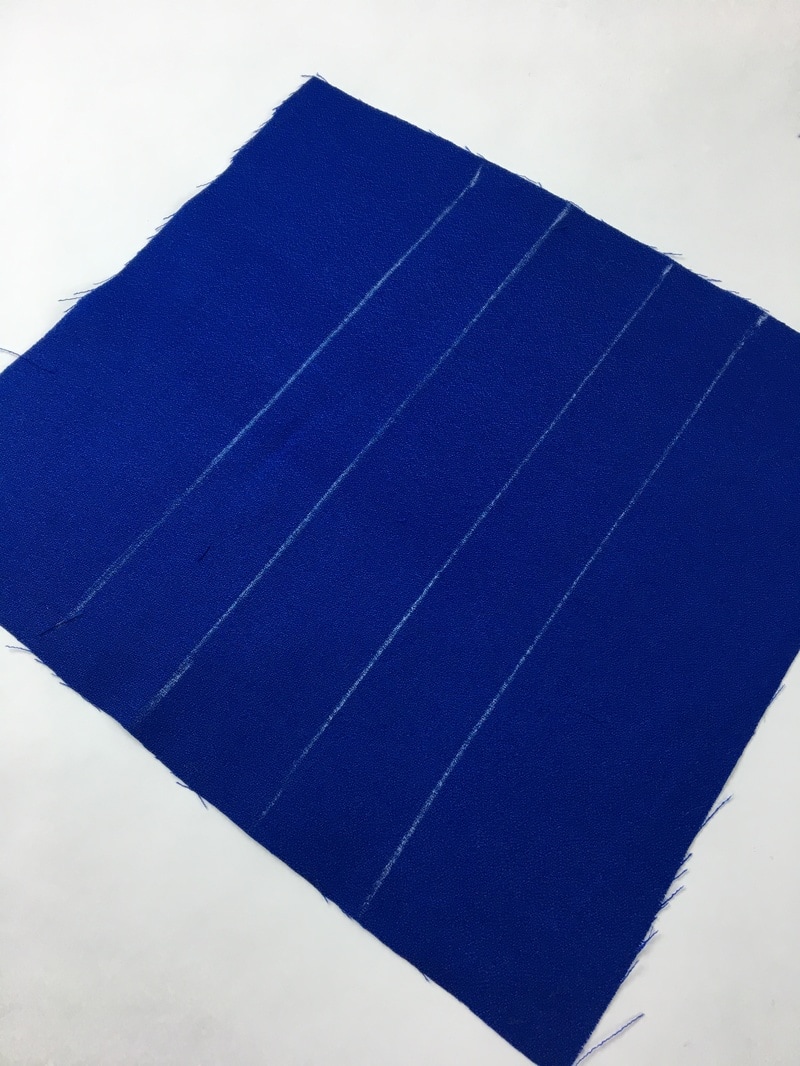
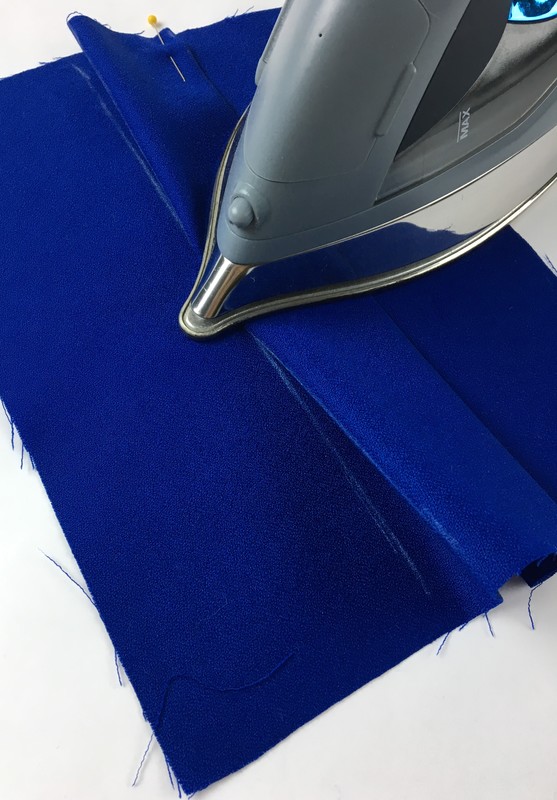
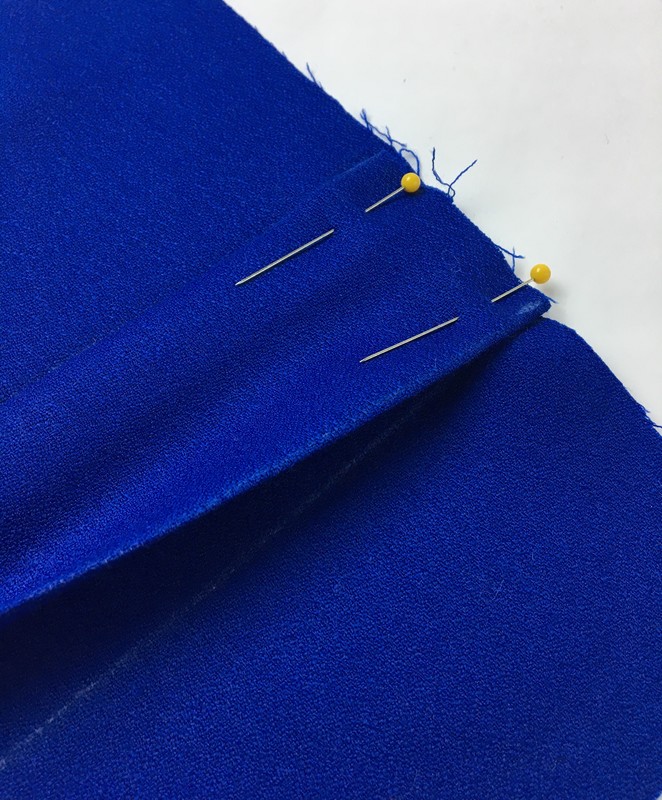
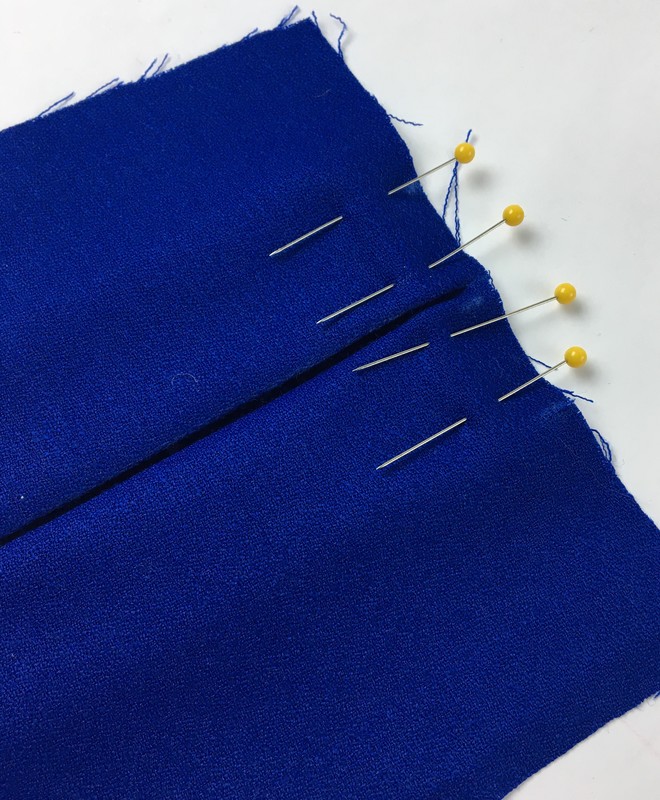
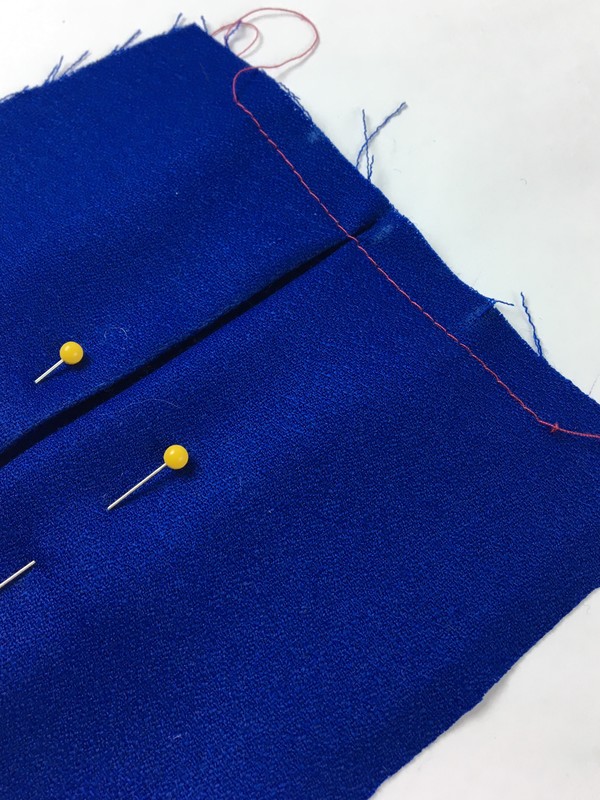
4. Iron on the top surface of the folded knife pleats. 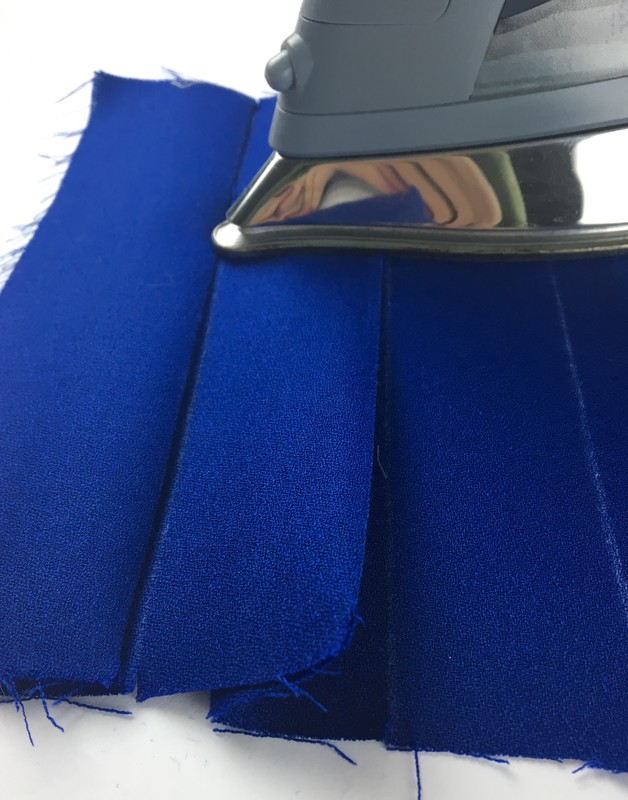 5. Continue this folding process until all your pleats are completed and ironed flat, also making sure all your notches are properly matching. Place pins horizontally along the top of the row of pleats to hold them in place. On your sewing machine, apply a straight stitch along the top in order to permanently stabilize the folds which will make it easier to sew the pleats into a regular seam.
In order to keep the pleats flat and stable while you continue working on your garment, place a few pins along all the pleat folds to hold them in place. You can also baste the folds in place for a more precise, less bulky stabilizing method. 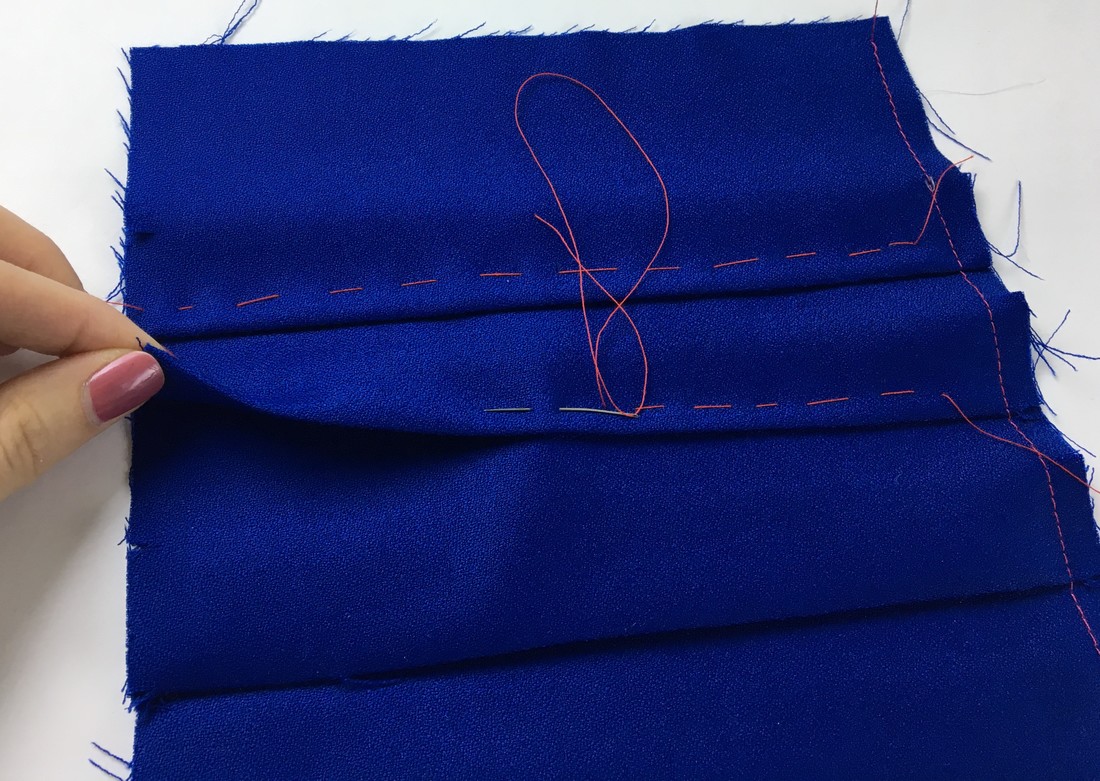 Your knife pleats are now complete! Always remember to horizontally stitch along the top to keep your edge even and the pleats aligned properly.  2. Box Pleats are easy to fold and can be a great way to add fullness as well as ease to the back of a jacket or the bottom of a dress or skirt. A box pleat is comprised of two fold lines and two placement lines- the folds are placed so that they actually face away from one another on the face side of the garment. If you look on the back side of the garment however, the folds are placed towards one another although it doesn't matter if they meet at the same line or not. Folding a Box Pleat: 1. As mentioned above, a box pleat has two fold lines and two placement lines. The image bellow displays four vertical lines: The two inner lines represent the fold lines while the two outer lines are the placement lines. In a box pleat the fold-lines are facing away from each other. Start by folding one of the inner lines and aligning it to its corresponding placement line (the closest outer line).
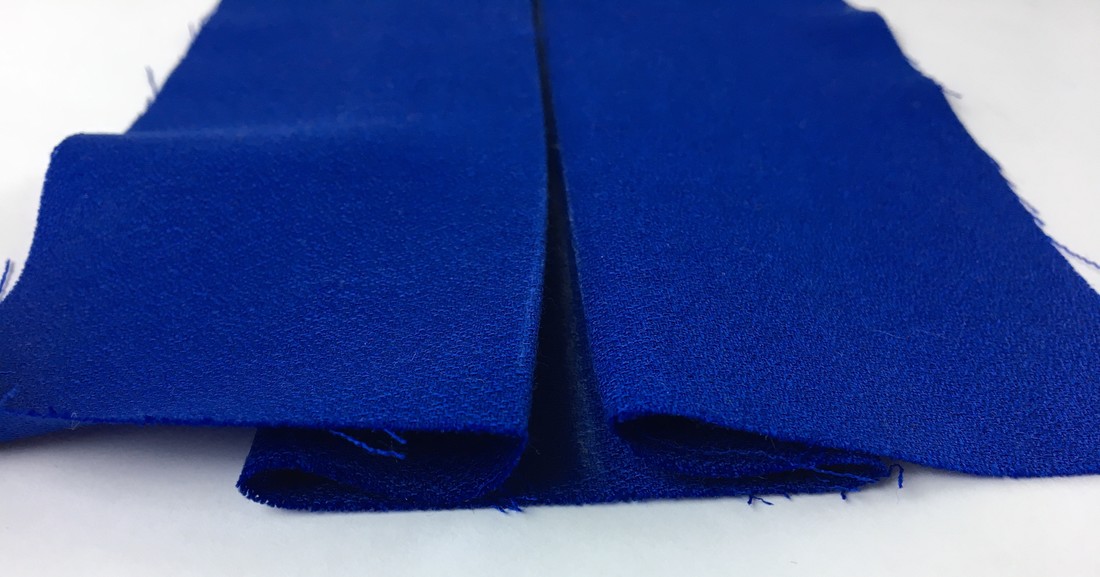
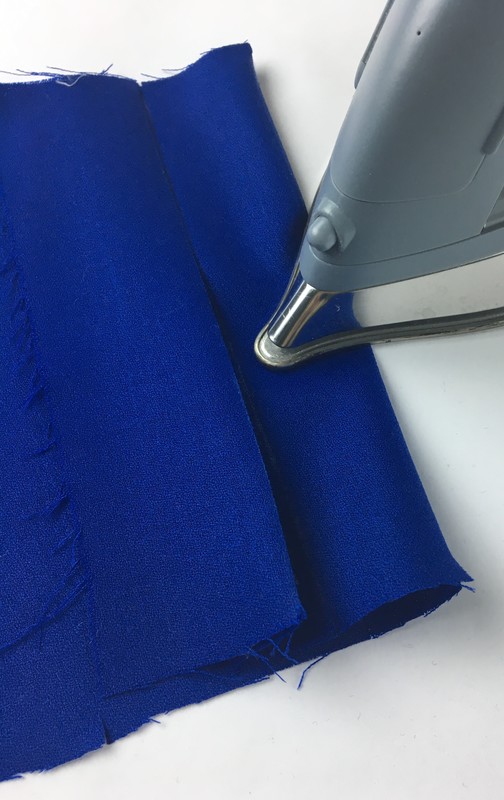
2. Iron down this fold placement and place a pin to hold the fold in place at the top as shown below.
3. Repeat this step with the second fold line by aligning it to it's corresponding placement line on the opposite end. You will now notice that the fold lines are pointing away from each other which is characteristic to a box pleat.
4. Iron down the folded box pleat and place another pin at the top of the second fold line as pictured below.
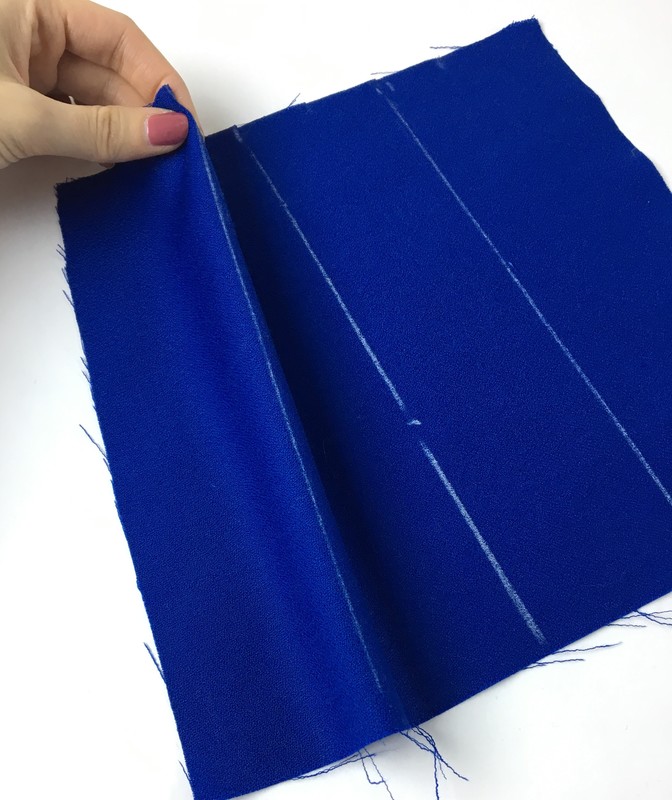
5. Apply a straight stitch along the top of the box pleat in order to hold the folds in place and maintain stability when eventually sewing the pleat into a seam. 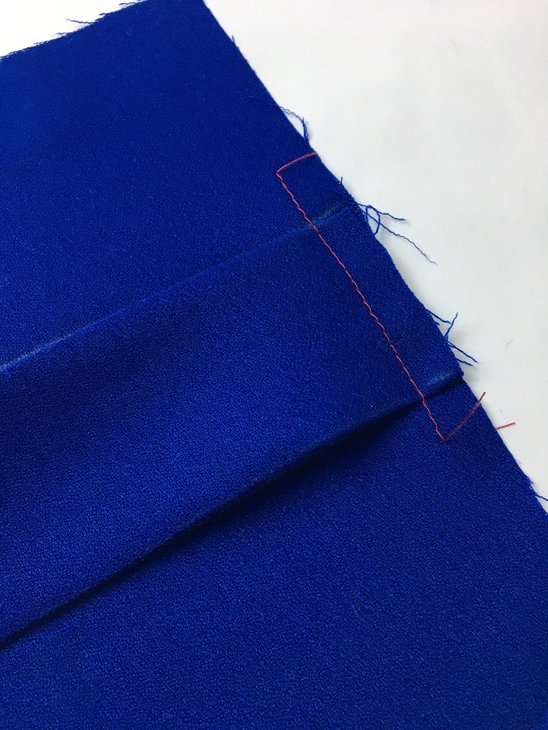 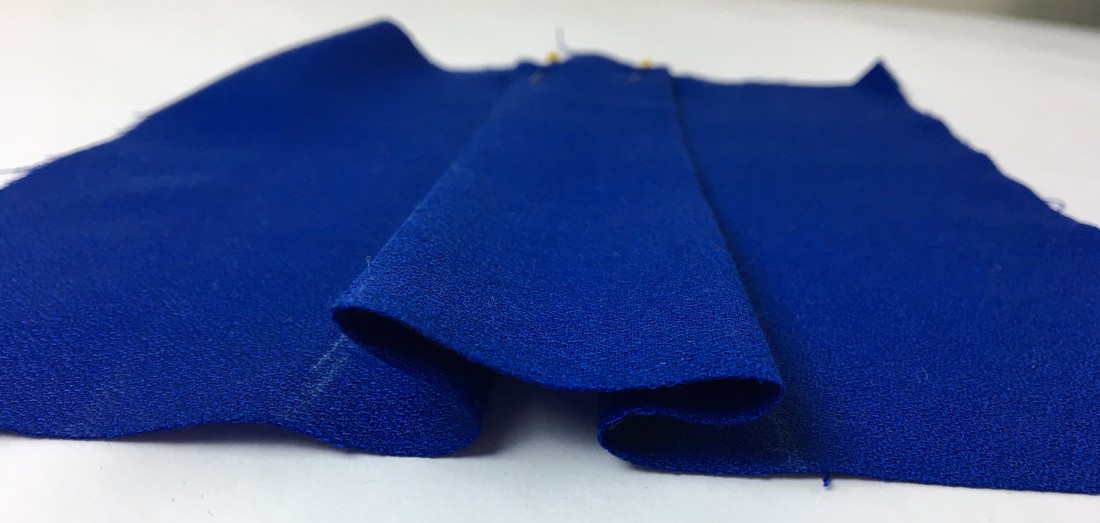 3. Inverted Pleats: An inverted pleat is comprised of two fold lines that are positioned to meet at the same placement line. On the other hand, the pleat's folds on the back side of the fabric point away from each other. Think of an inverted pleat as the opposite of a box pleat except that the fold lines share a common placement line, meaning the folds are always touching (but not overlapping). Folding an Inverted Pleat: Because an inverted pleat has two fold-lines that meet at the same placement line, the 3 lines bellow display: two fold lines each positioned at the edge and the placement line which is positioned in the middle. 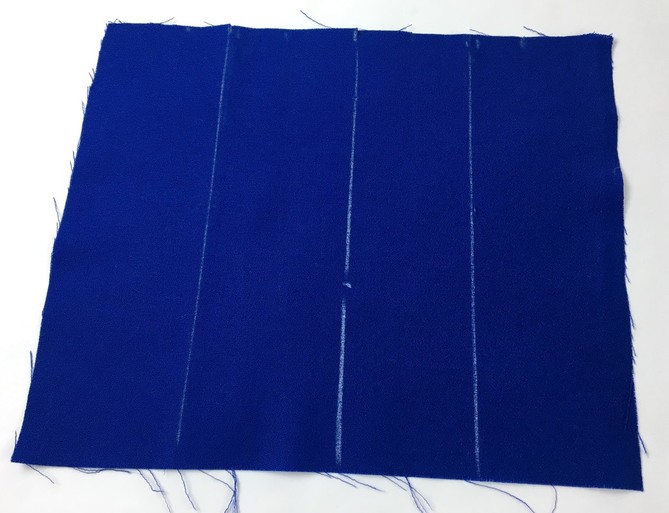 1. Begin by folding one of the two outer lines and positioning this fold along the middle placement line. Iron this fold down to stabilize.
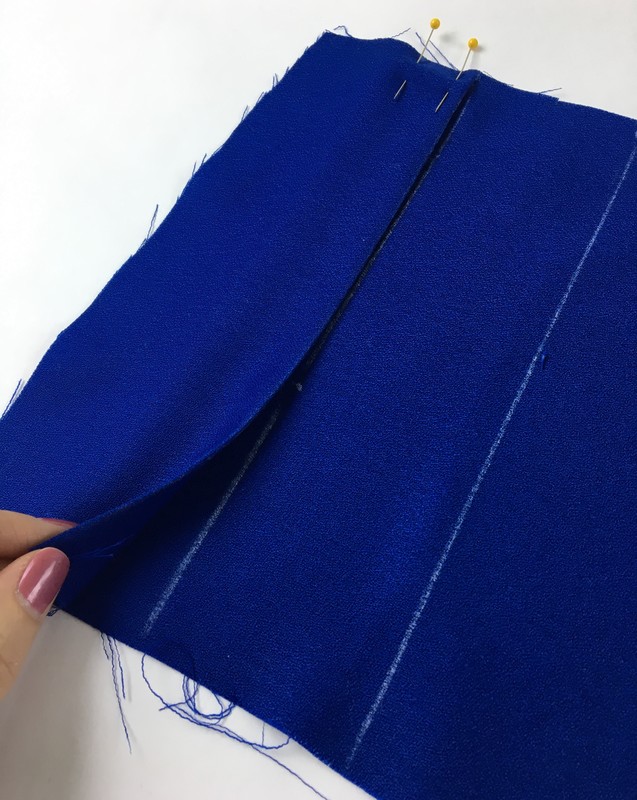
2. After placing a couple of pins at the top to keep the first fold in place, repeat the process with the second fold-line making sure it meets at the same placement line as the first, having the folds essentially touching.
3. Iron down this second fold to stabilize.
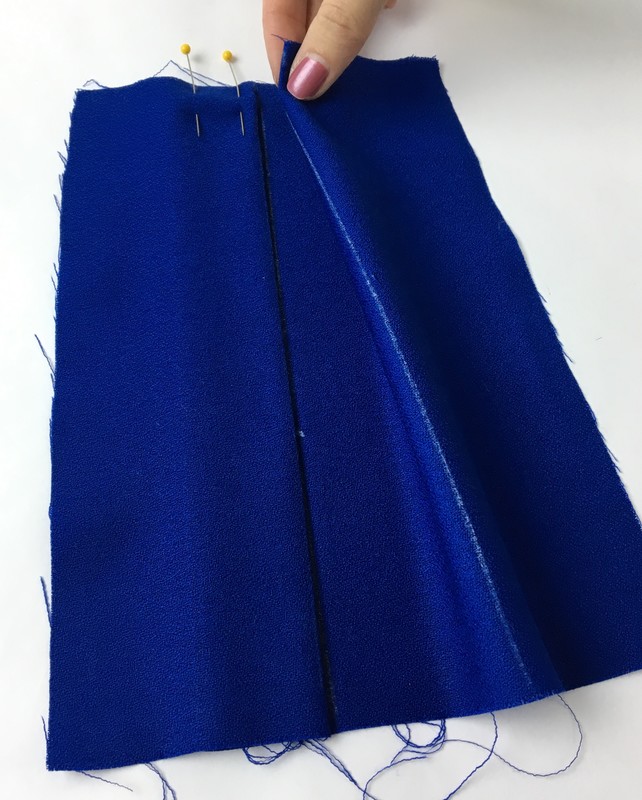
5. After placing a few pins horizontally through the top of the inverted pleat, apply a straight stitch to hold the two folds in place.
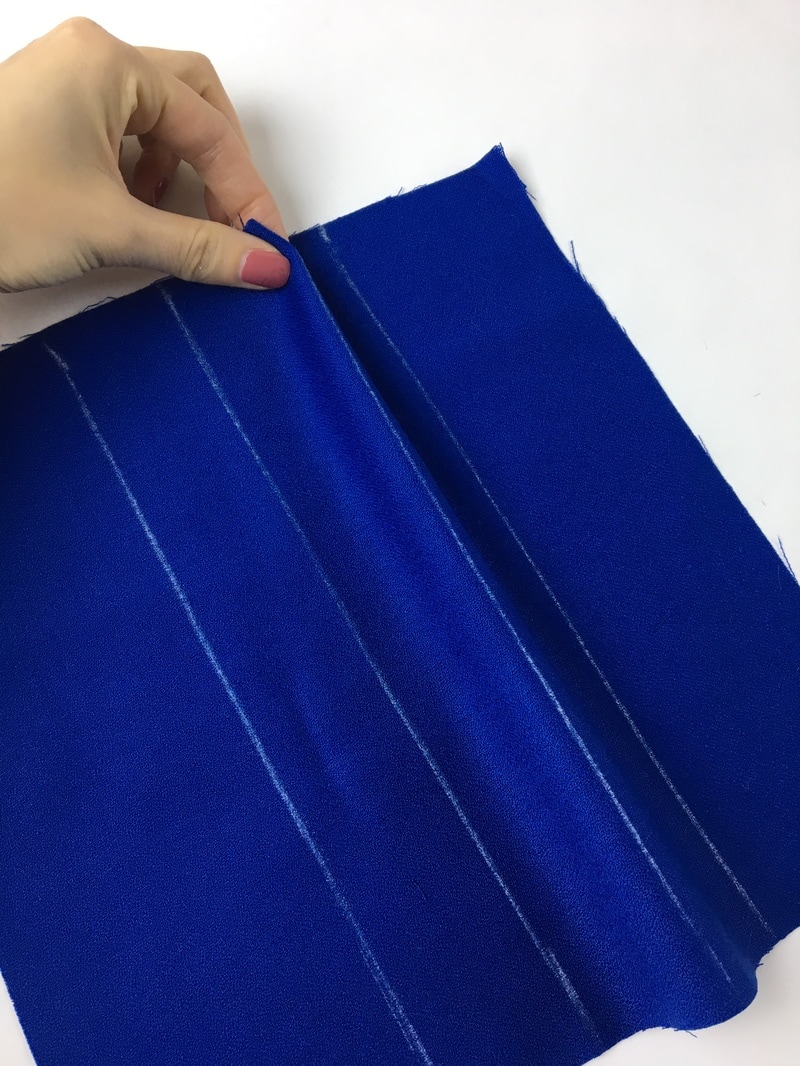
 Pleat Finishes Due to the fact that not every fabric has the same folding capability and not every style requires the same pleating look, there are a few different pleat finishes you can choose from depending on the garment you are sewing. Crisp/Sharp Folded Pleats: These pleats have a very defined, sharp fold and are usually used on woven fabrics that can easily maintain a crisp fold. Natural fabrics like linen and cotton and synthetics like polyester work the best with this style of pleating. This finish is the most commonly used for light to medium weight fabrics. Sharp folded pleating is not difficult to attain at home but you do have to use some extra steam to really set the creases in place. In addition, use an ironing cloth on more delicate fabrics when ironing down pleats. 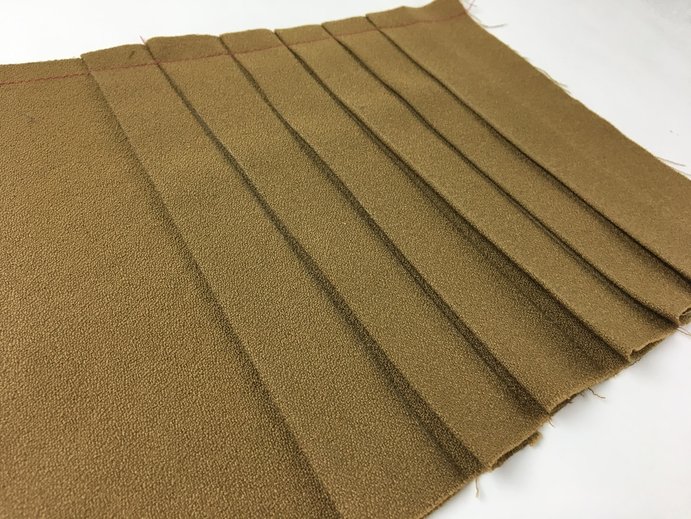 Soft Folded Pleats: As opposed to sharp edge pleats, soft fold pleats don't have crisp, defined fold lines. The pleats in a soft fold are usually more defined where they connect into the seam and lose their line structure as they move away from it. This finish works best for heavier weight fabrics and those that are difficult to iron and unable to maintain a sharp fold-line. On the other hand, soft fold pleats can be used for design purposes on an easy to iron/fold fabric when a less linear look is desired. 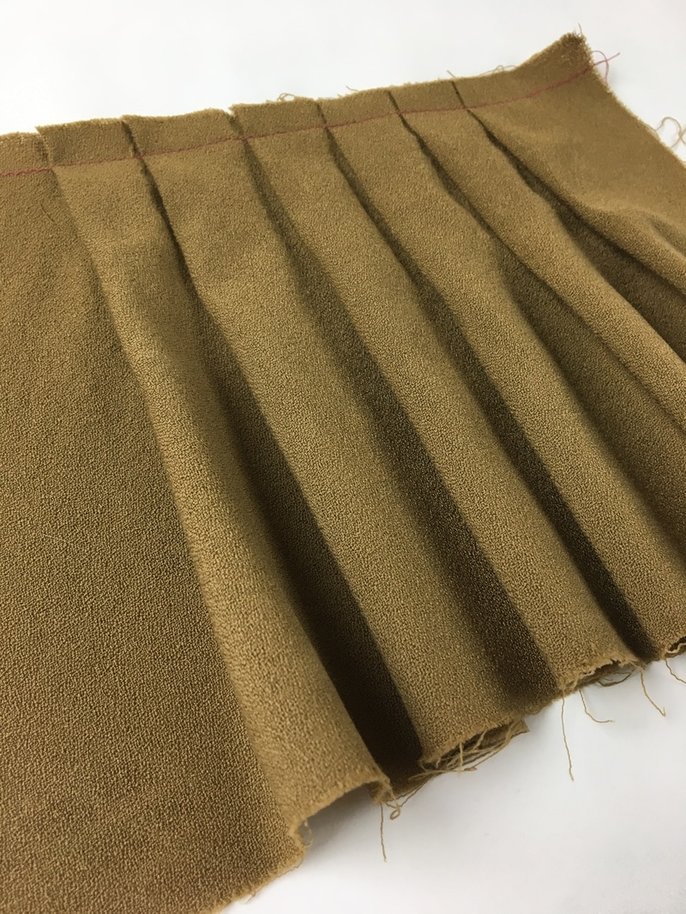 Stitched Along the Edge: This finish is represented by straight stitches that are applied along the fold line of a pleat very close to the fold's edge. The stitch goes only through the two layers of fabric that make up the fold and not through all the layers underneath. This is actually a great technique to use at home because the stitching insures that the folds will always stay in place. Often times, after washing, pleats that were initially ironed sharply lose their structure and need to be re-ironed after washing. A stitched edge pleat will not lose it's fold after washing because it is always kept folded by the stitching. 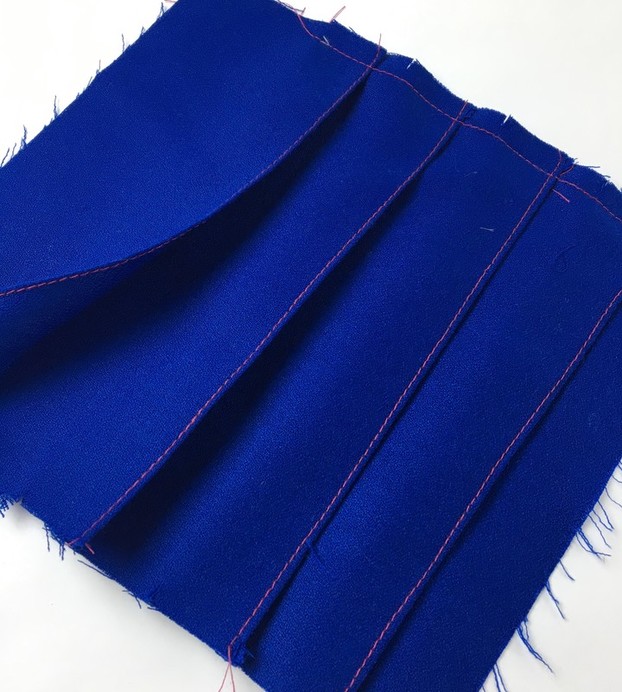 Top-stitched: As opposed to edge stitching, top-stitched pleats are stitched down at the top through all the layers of fabric. This finish is usually used on skirts and dresses from waist to hip, controlling fullness and defining the shape of this area. 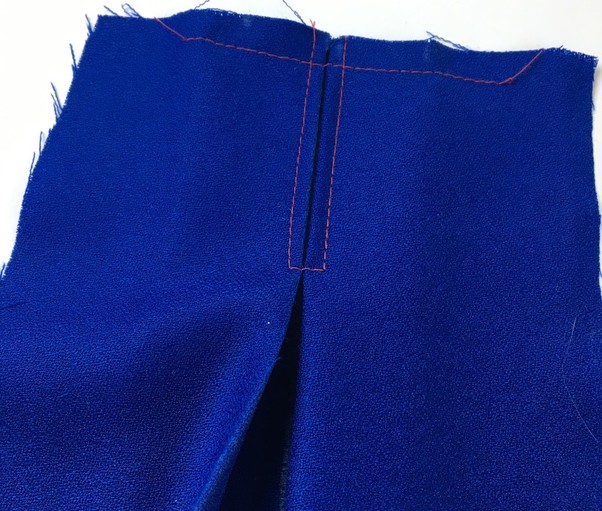 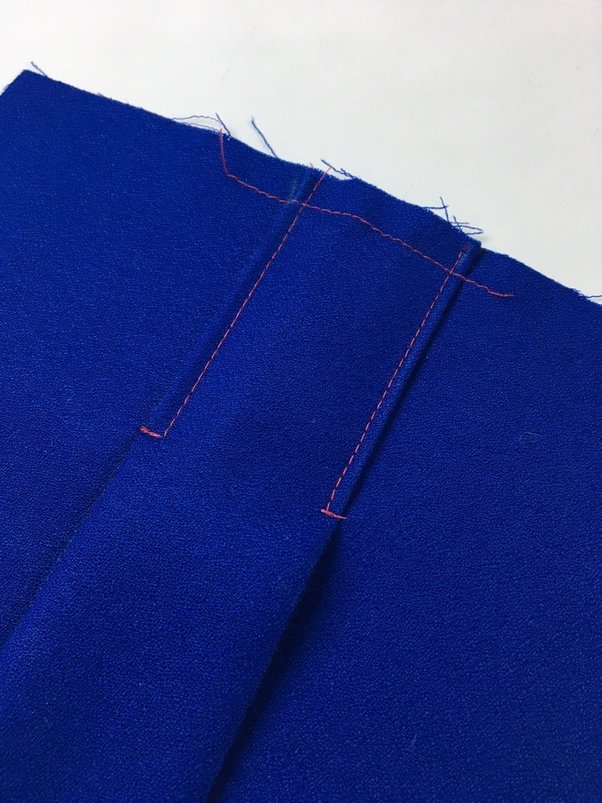
0 Comments
Leave a Reply. |
The Blog:A journey into our design process, sewing tutorials, fashion tips, and all the inspiring people and things we love. 
Doina AlexeiDesigner by trade and dressmaker at heart. I spend most of my days obsessing over new fabrics and daydreaming new ideas. 
Sadie
Executive Assistant & Client Relations Manager Archives
November 2019
Categories
All

|

-
Sewing Tutorials
-
Basics
>
- Aligning Pattern Grainlines To Fabric
- Preparing Fabrics For Sewing
- Pinning Sewing Patterns To Fabric
- Placing Sewing Patterns On Fabric For Cutting
- Rotary Cutters or Fabric Scissors?
- Cutting The Sewing Patterns
- What Are Notches And How To Use Them In The Sewing Process
- Transferring Notches From Pattern To Fabric
- Transferring Seamlines to Fabric
- Staystitching
- Backstitching: A Complete Guide
- Hand Basting: A Complete Guide
- Sewing Continuous Bias Binding
- Darts >
-
Sewing Seams
>
- The Basics Of Seams And Seam Allowance
- How To Sew A Straight Seam
- Sewing Curved Seams
- Sewing Corner Seams
- Trimming And Grading Seam Excess
- Notching/Clipping Seam Allowance for Tension Release
- Sewing Topstitched Seams
- Sewing Corded Seams
- Sewing A Slot Seam
- Sewing A Gathered Seam
- Sewing Bias Seams
- Sewing Seams With Ease
- Sewing Seams With Crossing Seamlines
- Sewing Unlike Fabric Seams
- How To Iron Seams: Ironing Tools And Conventions
- Sewing With Knit Fabrics
- Understanding Stitch Length And Tension
- Sewing Unique Fabric Seams
-
Seam Finishes
>
- Seam Finishing Techniques - Overview
- Applying A Pinked Seam Finish
- Applying A Bias Bound Seam Finish
- Serging And Zigzag Seam Finishes
- Sewing A Self-Bound Seam Finish
- Sewing A French Seam Finish
- Sewing A Hong Kong Seam Finish
- Sewing A Mock French Seam Finish
- Sewing A Turned-and-Stitched Seam Finish
- Sewing Overcast Hand-Applied Seam Finishes
- Sewing A Flat Felled Seam
- Sewing A Hairline Seam Finish
-
Hem Finishes
>
- Garment Hem Finishes: Overview
- Sewing A Double Fold Hem Finish
- Sewing A Single Fold Hem Finish
- Sewing Bound Hem Finishes
- Sewing An Exposed Double Layer Bound Hem
- Sewing A Folded-Up Bound Hem with Pre-folded Binding
- Sewing A Hong Kong Hem Finish
- Sewing A Band Hem Finish
- Sewing A Bias Faced Hem Finish
- Sewing A Twill Tape Hem Finish
- Sewing A Rolled Hem Finish
- Sewing A Shaped Hem Facing
- Using Fusible Hem Tape And Webbing
- Finishing A Lace Fabric Hem
- Finishing A Leather Hem
- Sewing Faced Hem Corners
- How To Finish Lining At The Hem
- Finishing Fabric Corners by Mitering >
- Interfacing A Hemline: Lined And Unlined Examples
-
Sewing Pockets
>
- Curved Patch Pocket With Flap
- Unlined Square Patch Pockets
- Lined Patch Pockets: Two Ways
- Extension On-Seam Pockets
- Separate On-Seam Pocket
- Front Hip Pockets
- Bound Double Welt Pocket
- Double Welt Pocket With Flap
- Self-Welt Pocket (Using Single Fabric Layer)
- Slanted Welt Pocket (Hand-Stitched)
- Faced Slash Pockets: Overview >
-
Sewing Zippers
>
- Sewing Zippers: General Information
- Sewing A Centered Zipper
- Sewing A Lapped Zipper
- Sewing An Invisible Zipper
- Sewing A Fly Front Zipper
- Sewing A Closed-End Exposed Zipper (No Seam)
- Sewing An Exposed Separating Zipper
- Sewing Hand Stitched Zipper Applications
- Sewing A Zipper Underlay
- Sewing A Placket-Enclosed Separating Zipper
- Sleeveless Finishes >
-
Neckline Finishes
>
- Sewing A Neck Shaped Facing
- Sewing An All-In-One Neck Facing
- Neck And Garment Opening Combination Facings >
- Sewing A Bias Faced Neckline Finish
- Sewing A Band Neckline Finish
- Bound Neckline Finishes: Overview >
- Sewing A Semi-Stretch Strip Band Neckline
- Ribbed Neck Band And Classic Turtleneck
- Decorative Neckline Finishes >
- Finishing Facing Edges >
-
Extras
>
- A Complete Guide on Interfacing
- Sewing Bound Spaghetti Straps
- Sewing Spaghetti Straps To A Faced Neckline
- Sewing Ruffles: Overview
- Patterning And Sewing A Circle Ruffle
- Sewing A Gathered Heading Ruffle
- Sewing Double Layer Gathered Ruffles
- Sewing A Gathered Ruffle Into A Seam
- Sewing A Gathered Ruffle To A Fabric Edge
- Sewing A Fabric Surface Slit
- Sewing A Slit Seam
- Hand-Applied Straight Stitches
- Hand-Applied Blind Stitches
- Hand-Applied Overedge Stitches
- Hand-Applied Tack Stitches
- Hand-Applied Decorative Stitches
-
Basics
>
- Custom Bridal
- Custom Apparel
- About
- Blog


 RSS Feed
Services |
Company |
|
