|
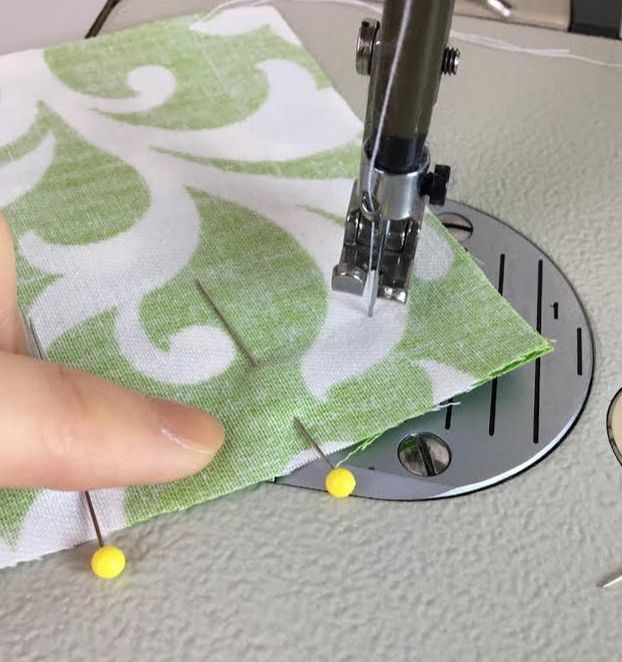
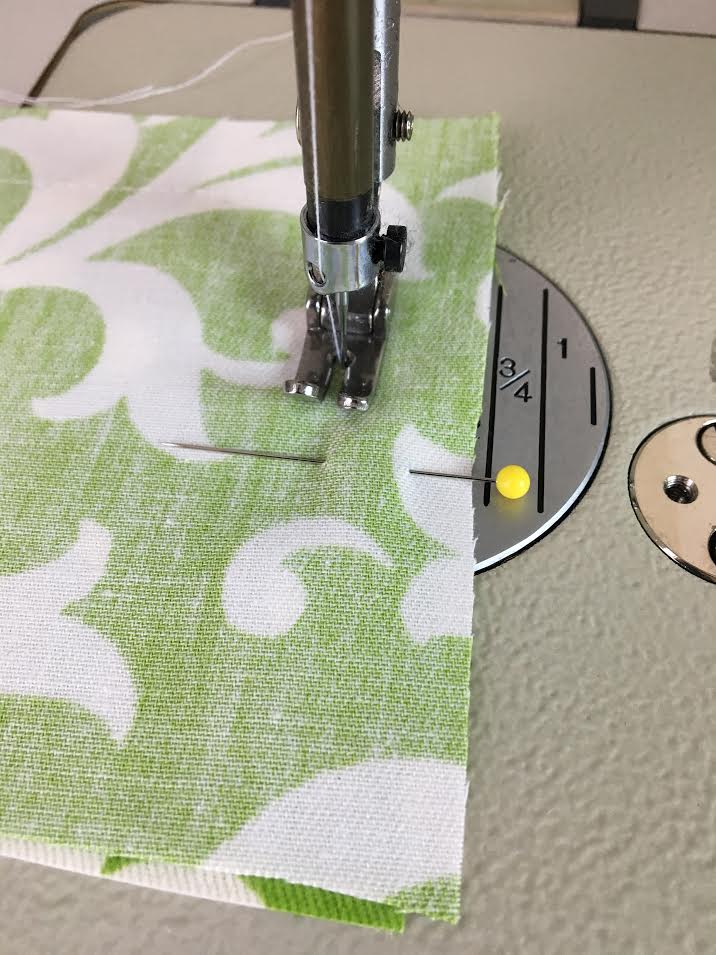
So you know how to sew a straight seam; you know basic methods for clean finishing fabric raw edges; you understand darts, seam allowance and notches; you can clean finish the hem of a garment. You should have no problem sewing a clothing item from start to finish right? Well, for the most part, yes- you only need the basics to sew a basic design. From time to time however, you might find yourself confronting some tricky sewing techniques that can halt your sewing project all together. One of these instance occurs when sewing and clean finishing inner or outer corners. You will most likely encounter cornered seams as such when sewing facings, collars, cuffs, skirt vents, and lining. Other instance not related to garment construction, may include accessories, pillows, pillowcases, etc. Cornered seams are often self-finished, usually involving two layers (or more) of fabric that are turned onto their face side after the stitch that connects them has been applied, thus enclosing the seam allowance and corner's raw edges. To begin with, there are two main challenges involving sewing inner and outer self-finished corners: 1. Making a smooth stitch transition at the corner's point. 2. Clipping and grading the seam allowance to release tension and allow the cornered seam to lay flat and smooth and have defined finish. We'll walk you through both techniques below and show you some tricks pertaining to sewing sharp inner and outer cornered seams that are self-finished (turns onto itself to enclose the raw edges of the seam allowance and the wrong side of the fabric). Pinning and Sewing Self-Finished, Outward Facing Fabric Corners: A self-finished (enclosed) outer corner is very common when sewing faced corners like those of cuffs, collars, skirt/dress vents, or garment opening edges. It is also used quite often in various craft projects that require the raw edges of the fabric to be enclosed within a corner, warranting a clean finish on both sides. Regardless of whether you are currently working on a project as such, sewing and clean finishing an outward-facing corner consisting of 2 layers of fabric is something you should familiarize yourself with. 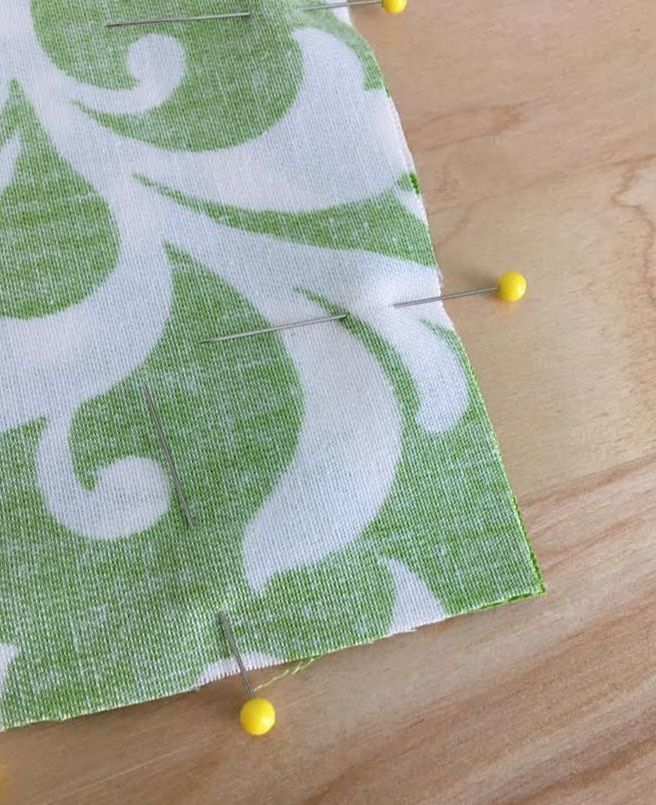 1. As is true for sewing most seams, when aligning two layers of fabric together to form a self-finished outer corner, always align the face of each fabric layer touching one another (enclosed on the inside) as shown above. The wrong side of the fabric should be facing you on the outside. Match the corresponding corners to one another and pin the two layers of fabric perpendicular to the edge as shown above. 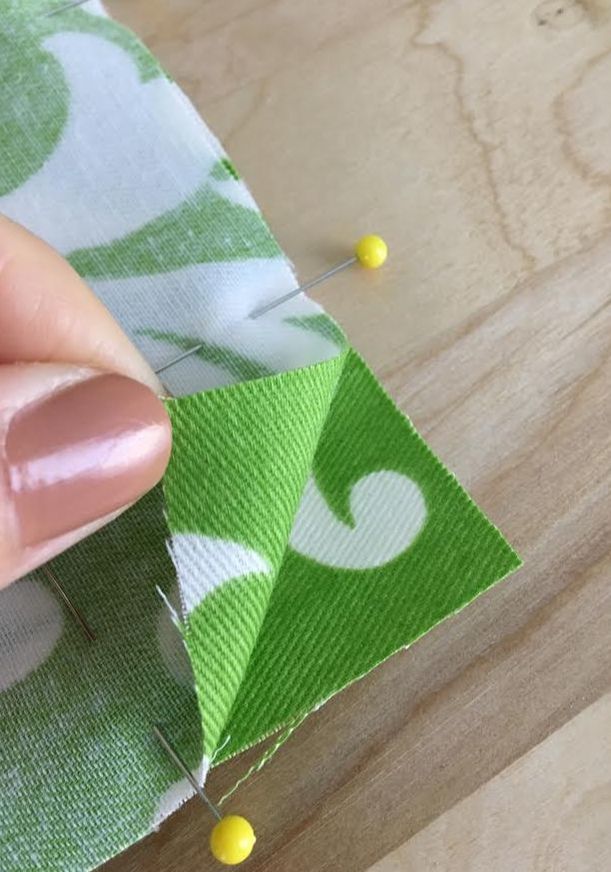 The pins should keep the corners aligned during stitching. Don't forget that the face of the fabric layers should be enclosed on the inside. Once the fabric pieces are stitched, the corner will be turned inside out to expose the face of the fabric and enclose its raw edges on the inside. 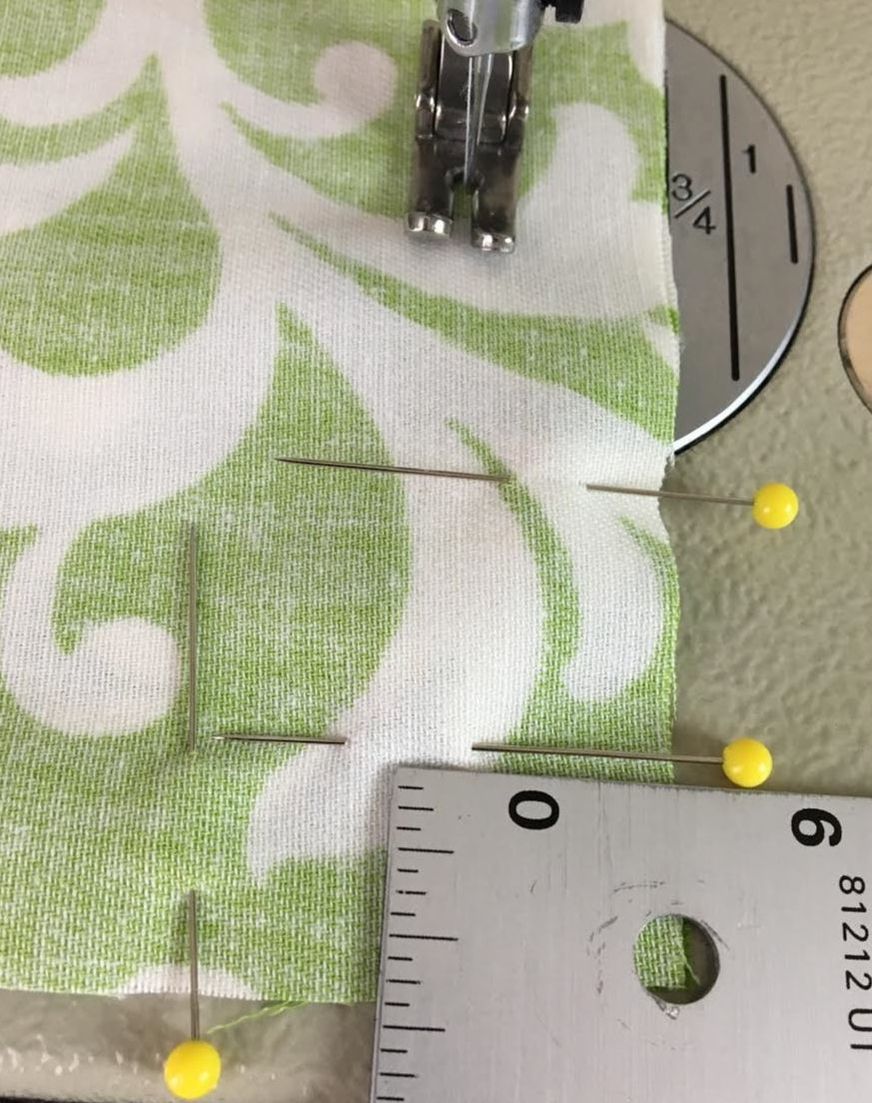 Make sure you know what the seam allowance is along each edge. You will have to conform to the appropriate seam allowance vertically and horizontally, which may be different form edge to edge. In this tutorial, the seam allowance along the vertical edge is the same as the horizontal edge seam allowance- 3/4" for both. When you start sewing vertically at the appropriate seam allowance (3/4" in this case), you will have to measure the correct seam allowance up from the bottom horizontal edge in order to determine the point of the corner. At this point, you will change direction from sewing the vertical seam onto the horizontal seam (we'll show you how this is done below). 2. For now, measure from the bottom edge up, and add a pin (or make a mark) so that you know where the turning point will be. Since, in this tutorial, the seam allowance is 3/4" along the horizontal bottom edge, we measured up 3/4" and inserted a pin as a marking point at this measurement. See image above. 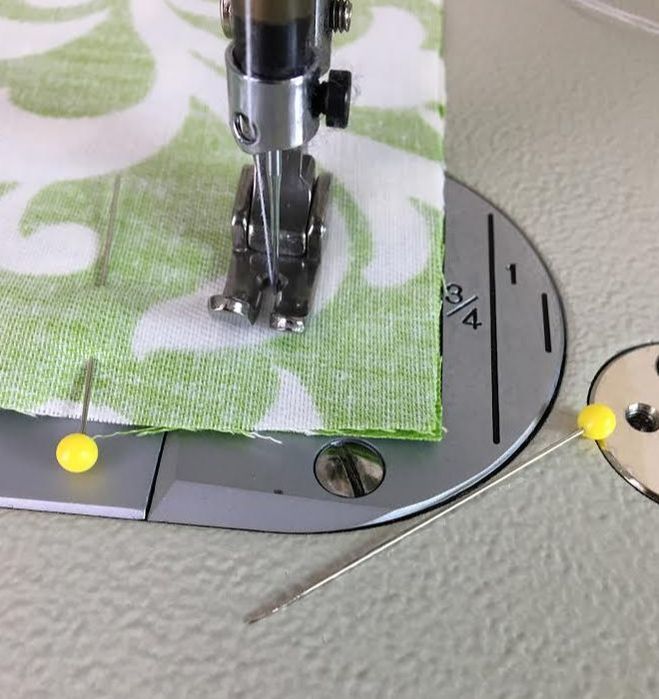 3. Keep sewing (at the correct seam allowance) until you arrive at the corner point, or turning point, marked in the previous step. 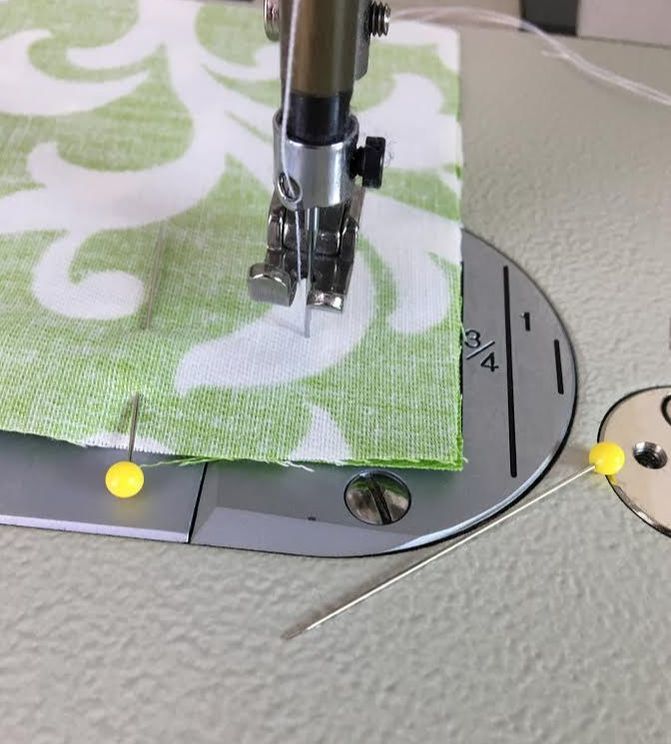 4. When you arrive at the corner point, leave the needle inserted and lift the presser foot a shown above.
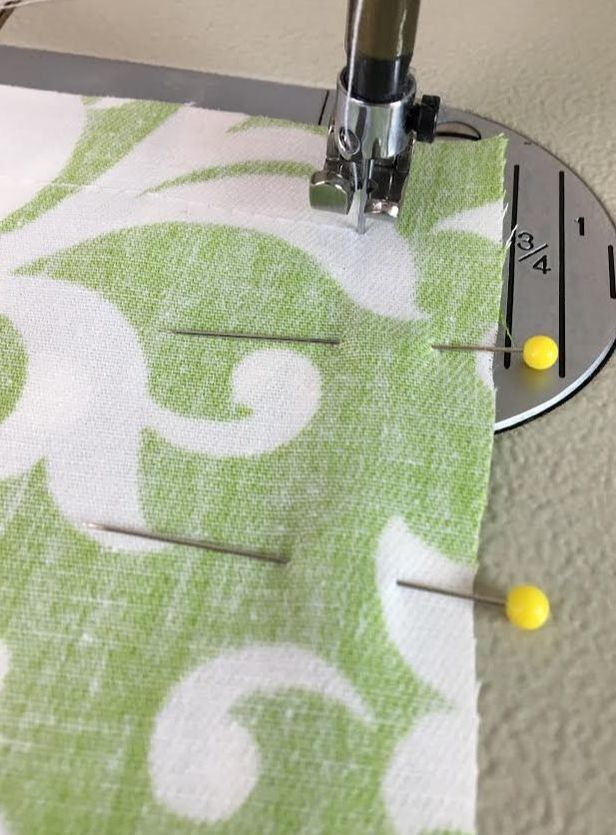
Shift the fabric such that the horizontal bottom edge is now aligned to the seam allowance guides on your sewing machine. Due to the fact that you pre-measured the corner point in Step 2 above, the horizontal bottom edge automatically aligns to the proper seam allowance guide on your machine (3/4" in this example).
Drop the presser foot and continue straight stitching until the seam is complete. How To Achieve a Smooth, Well Defined Corner: Clipping Outward-Facing Corners For Tension Release. 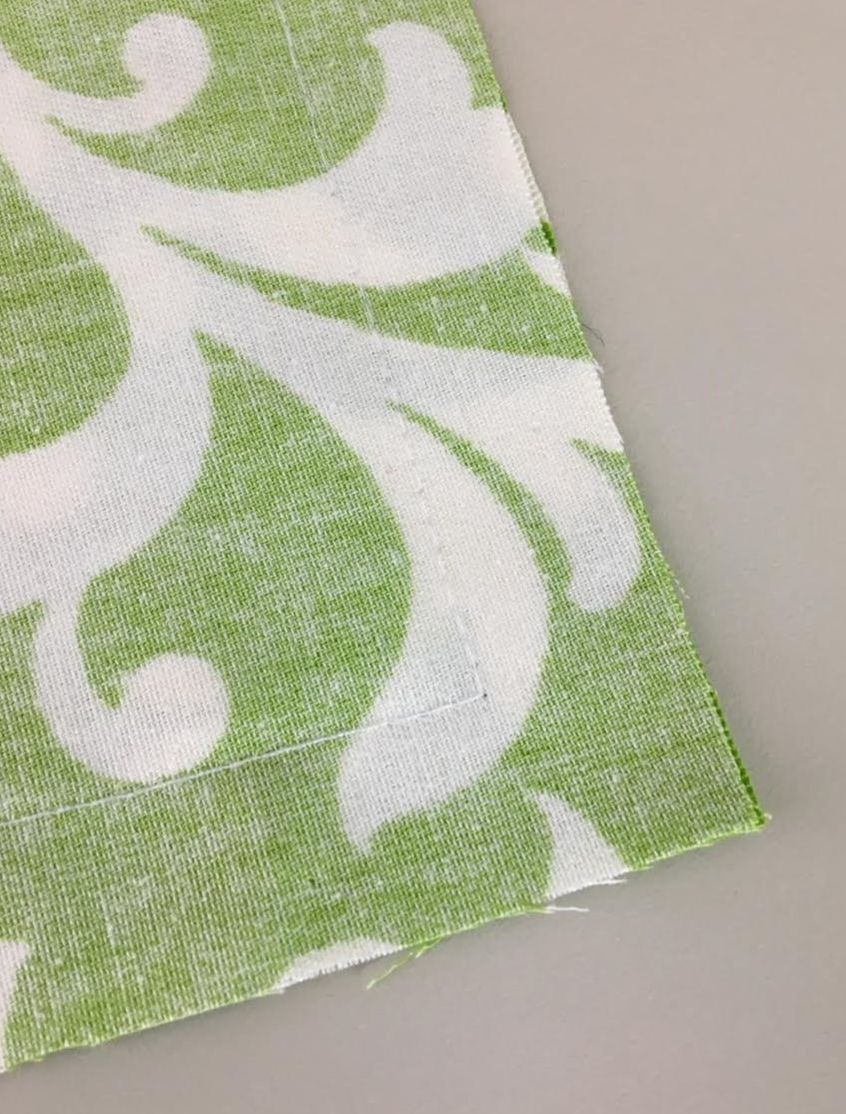 The final corner stitch should be a smooth, sharp transition. The presser foot-lifting method described above will make this no problem to achieve. You can actually use this method anytime you need to stitch at a sharp angle, whether it is for construction or decorative purposes. 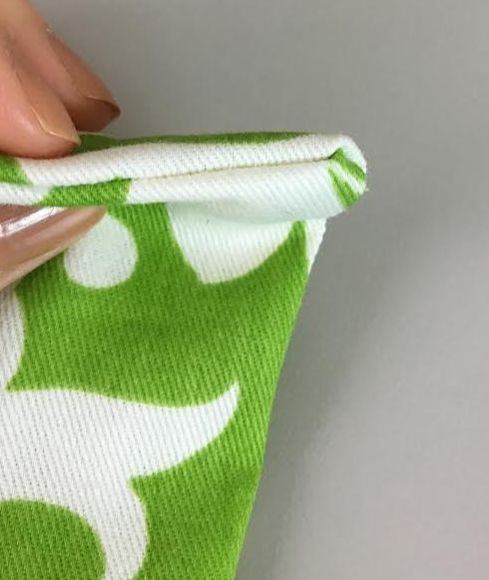 At this point, if you turn the the corner on its face side, you'll notice that the corner's point can be a bit bulky. For that reason, it is often necessary to trim the excess seam allowance on the inside, at the corner area, such that it lays flat and is defined when the fabric is turned on its right side. Note: If the corner is a perfect 90 degree angle, like the one in the example above, you don't necessarily have to trim the seam allowance on the inside- it is sort of your call to make. If the fabric is a thicker and bulkier, it may be best to trim the corner seam allowance so that it lays flat and smooth once finished. Additionally, when working with an outer corner that has a more narrow angle, you have to trim the inside seam allowance around the corner stitch or the corner will not be defined or lay smooth and flat once the garment is turned on its face side.
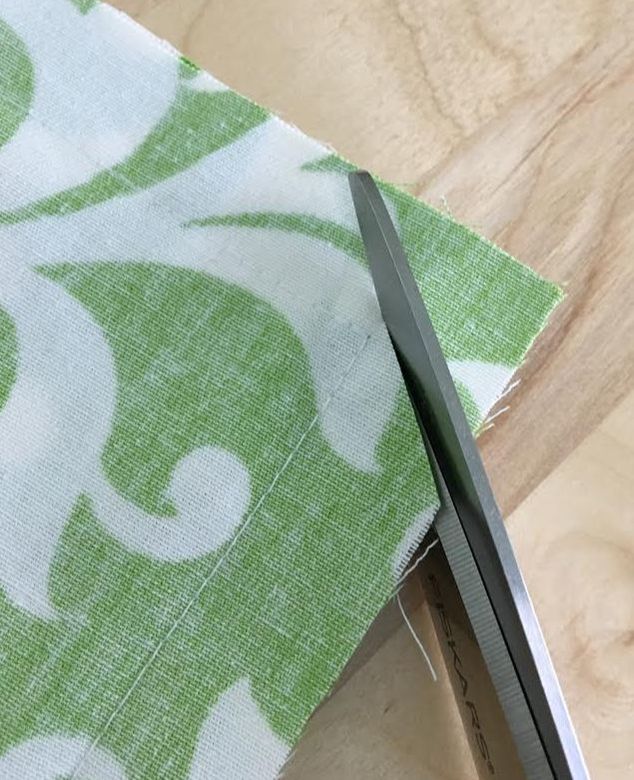
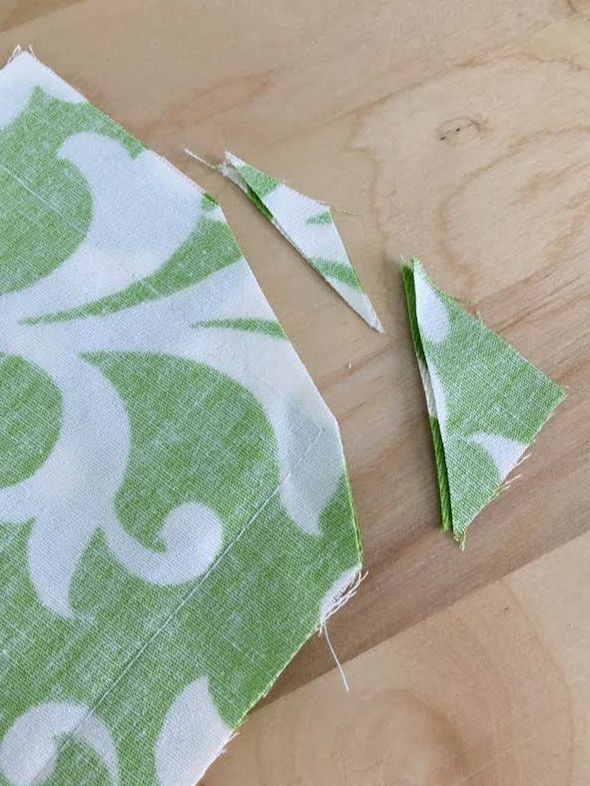
To trim excess seam allowance for an outward-facing cornered edge, first, trim diagonally between each side of the fabric edge as shown above. This will eliminate the excess right at the corner point.
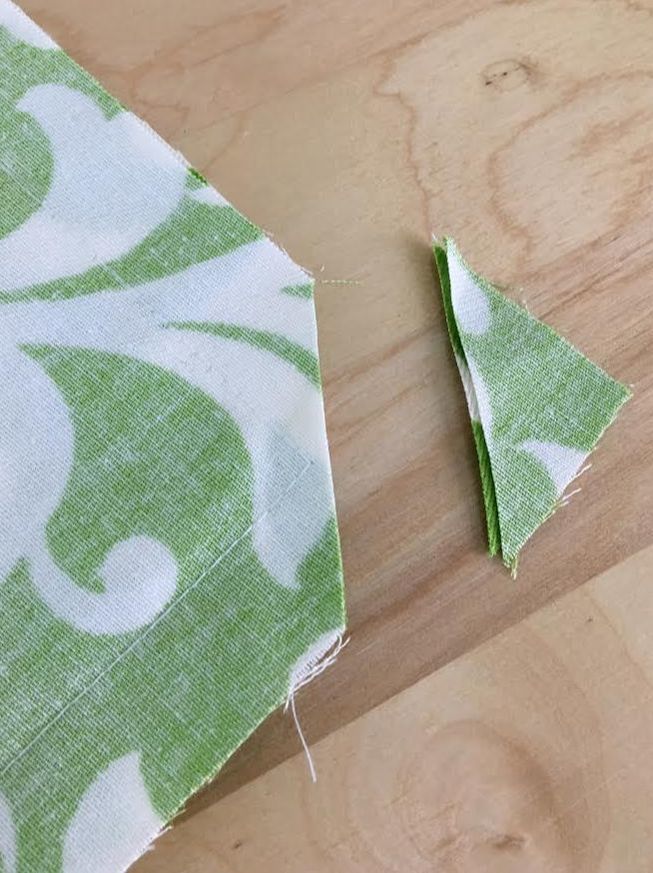
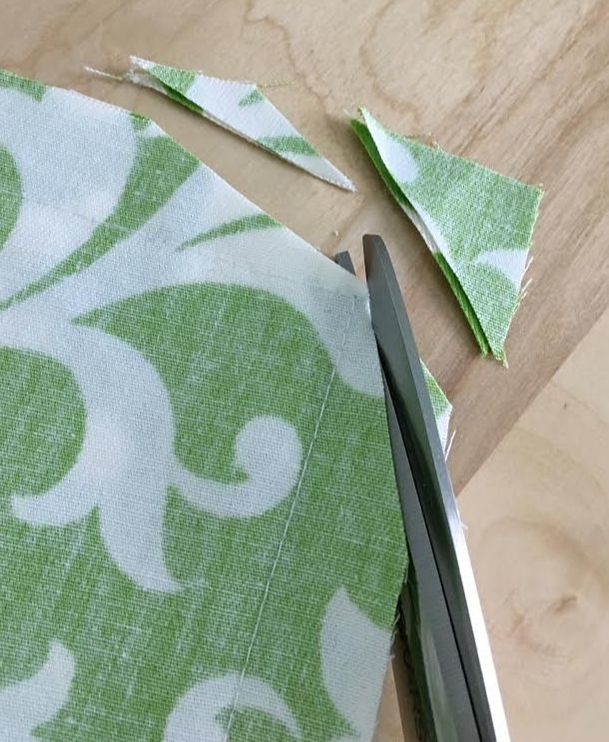
Next, trim each portion of the seam allowance in a graduated shape, with the narrower cut closer to the point of the stitch and blending out into the seam allowance as shown above.
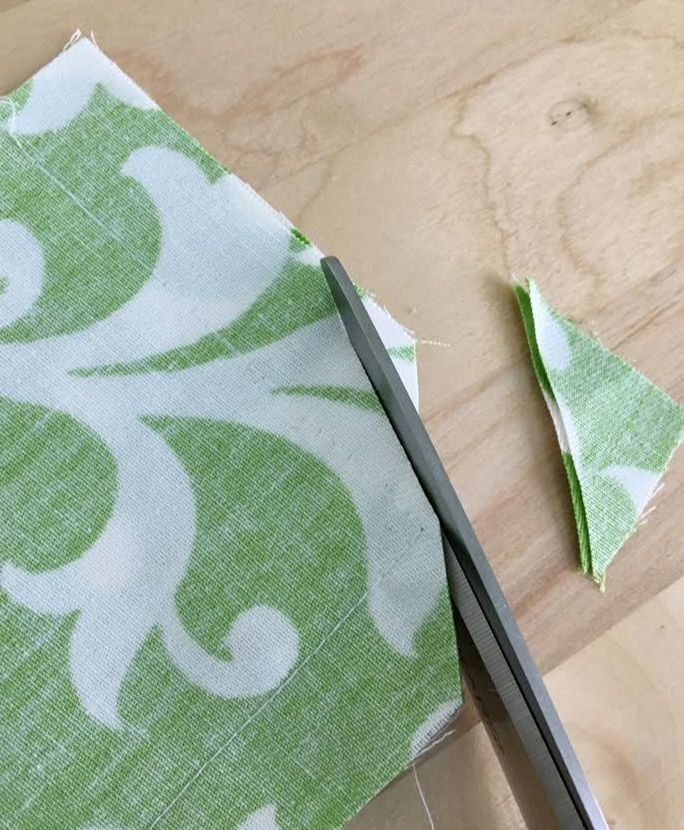
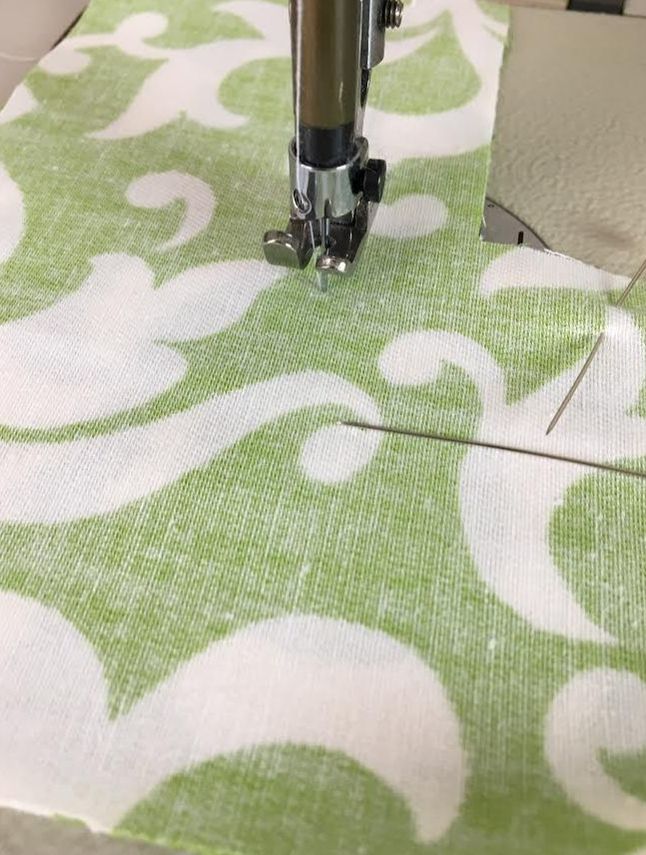
Repeat the process on the other seam allowance edge, making sure to gradually cut narrower towards the stitched point and blend the cut into the seam allowance as you move way from the point. 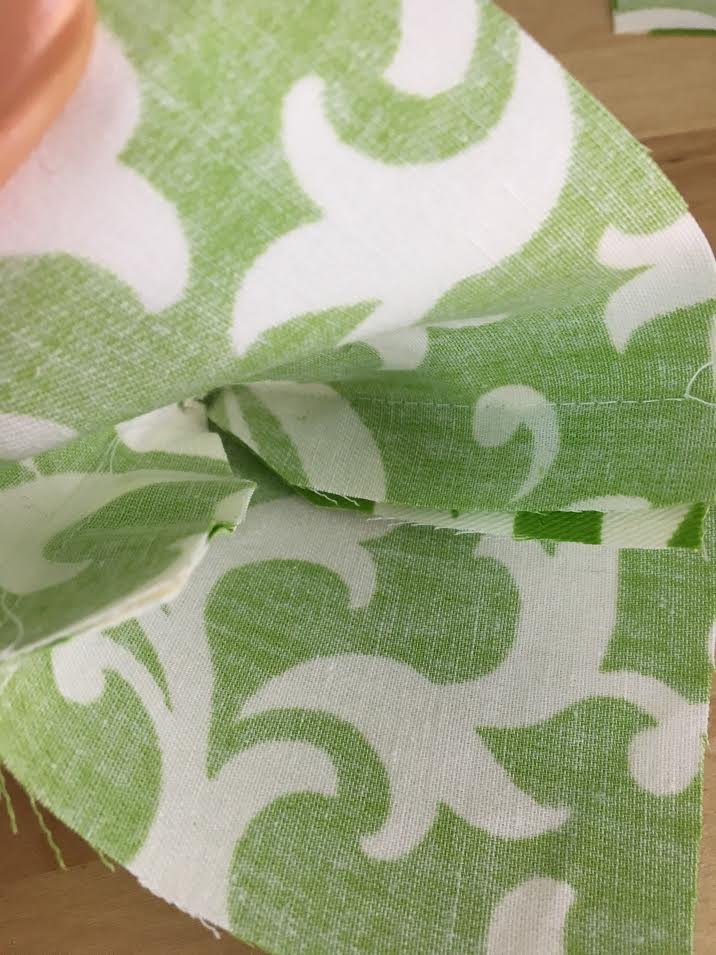 Now, if you turn the fabric on its right side and take a peek at what's happening on the wrong side (in between the fabric layers), you'll notice that the seam allowance doesn't overlap at the corner anymore, thus eliminating bulkiness and allowing the corner to lay flat. 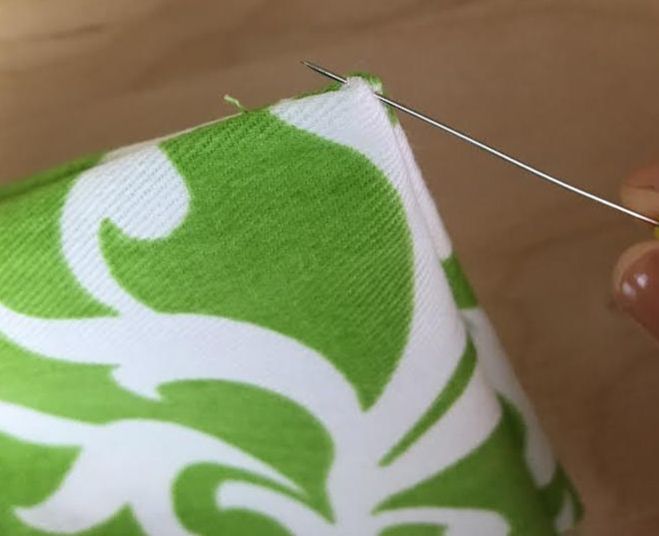 To make the corner more defined, gently pull on the corner stitch using a pin. Gently is the key word here. You don't want to pull too hard or you risk accidentally pulling the fraying edges of the fabric out.  As a final step, always iron the self-finished corner on both sides. Doing so will provide a smooth, flat, professional finish. Pinning And Sewing Inward Fabric Corners : You learned how to sew outward-facing corners above, but what about instances that require you to sew and clean finish an inner-facing corner? A self-finished, inner corner is mostly used on skirt vents, in accessory construction, and certain specialized seams. It is true that outer corners are more wide spread in sewing. However, it is very helpful to learn how to handle an inner corner, as you never know when you'll need to apply this finish. The trick to an inward corner is in applying a simple tension release clipping method that allows you to turn the self-finished corner on its right side- You'll see a demo of this in the steps to follow: 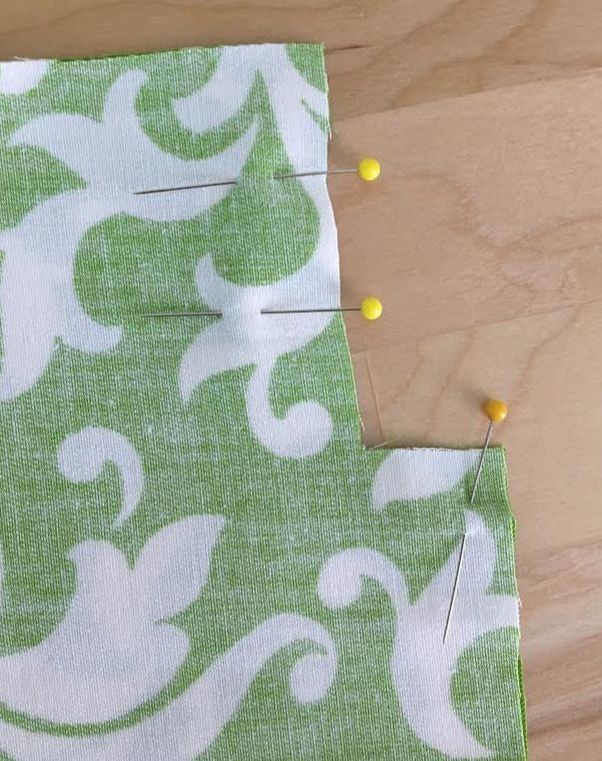 1. First, pin the the fabric layers together with the right side of each fabric piece enclosed on the inside. Making sure the corners are matched perfectly, insert pins through both layers of fabric perpendicular to the fabric edge. Just as you did for the outward corner, you need to somehow mark the transition point or corner point so that you know when to turn the fabric and sew the opposite direction. 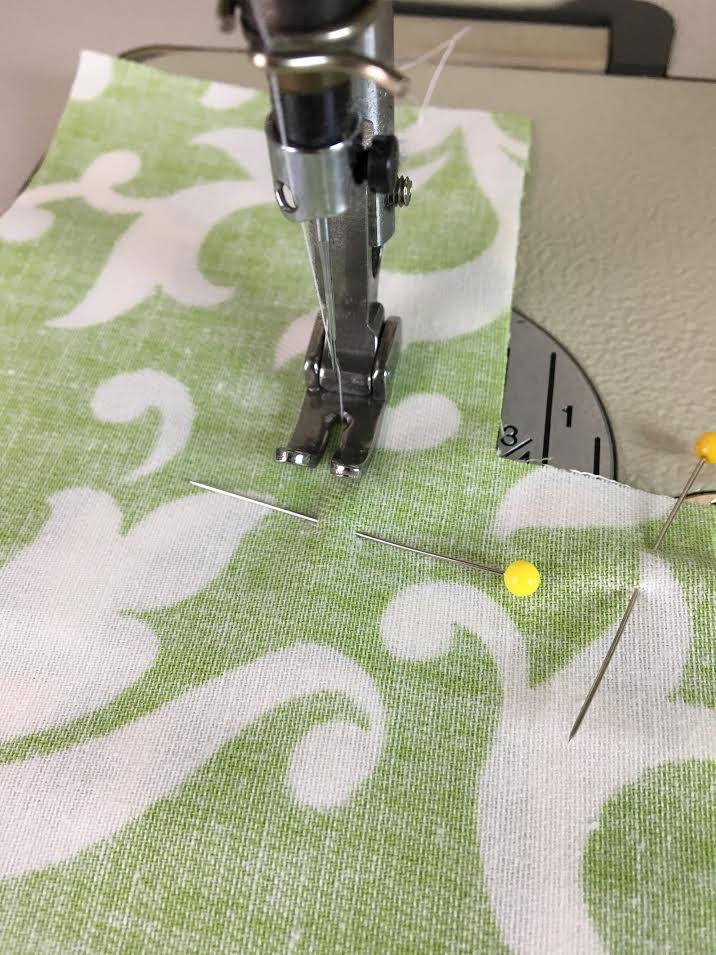 2. Pay very close attention to the seam allowance along the vertical and horizontal edge. To find the corner point you'll need to measure in along both edges and find where these measurements intersect. Insert a pin or use a pencil to mark the corner point on fabric. In this tutorial, the seam allowance is 3/4" along both the vertical and horizontal edge. We used a pin to mark the location at which the stitch transitions horizontally at a 90 degree angle.
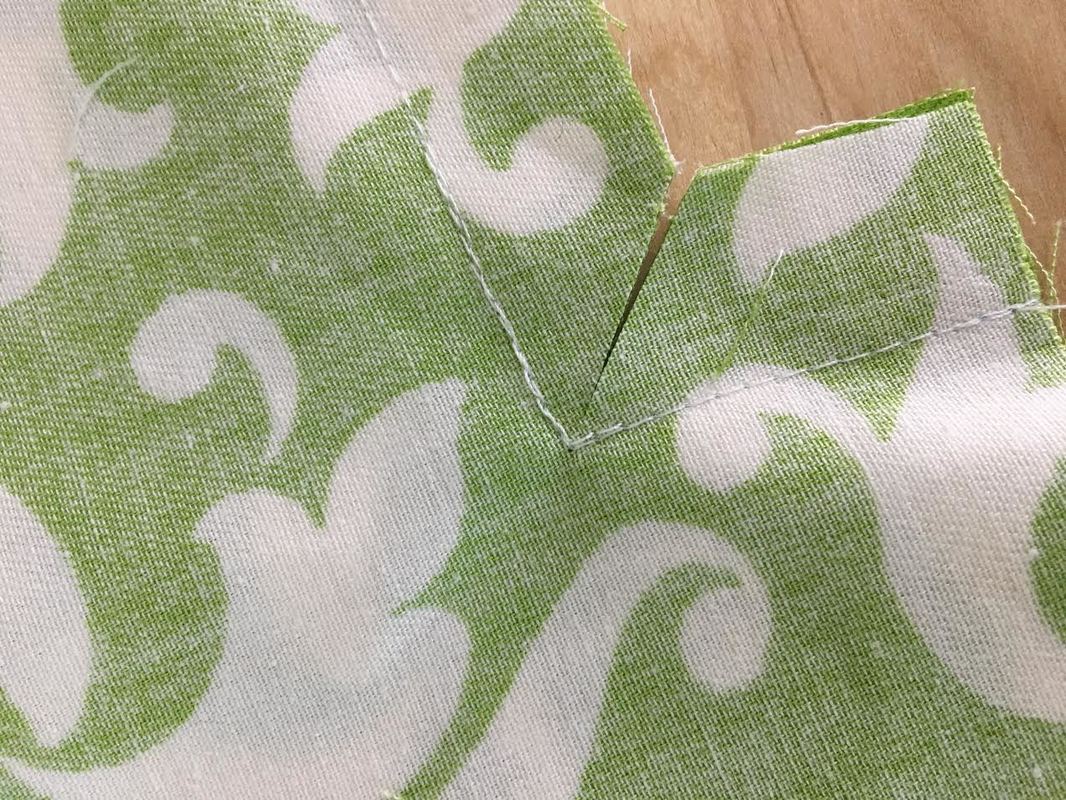
3. Similar to the outer corner, leave the sewing machine needle inserted at the transition point (corner point), and lift the presser foot as shown in the image above. Leaving the needle inserted, turn the fabric at 90 degrees, such that the horizontal edge is now aligned to the appropriate seam allowance guide on your sewing machine. Use this technique anytime you need to sew a sharp corner or apply an angled stitch. 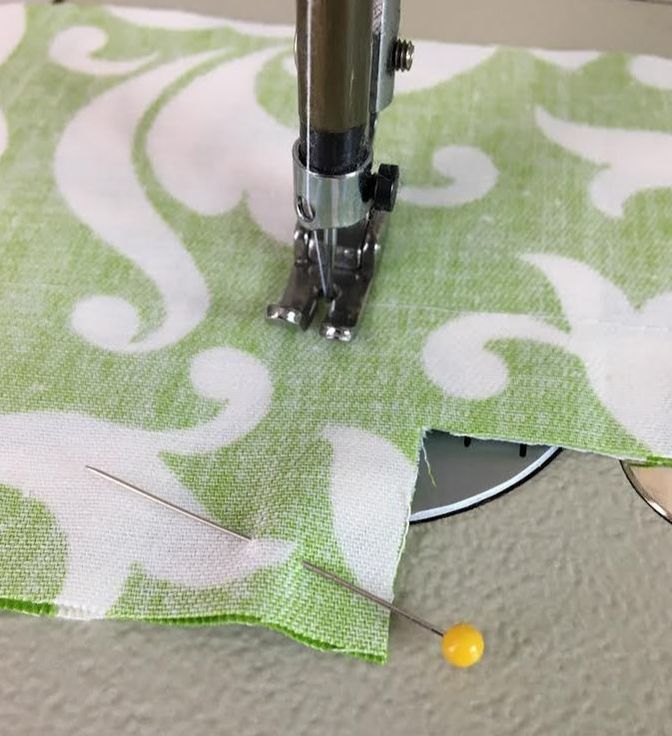 4. Drop the presser foot and continue straight stitching following the appropriate seam allowance guide until the seam is complete. Clipping Self-Finished, Inward Corners For Tension Release: 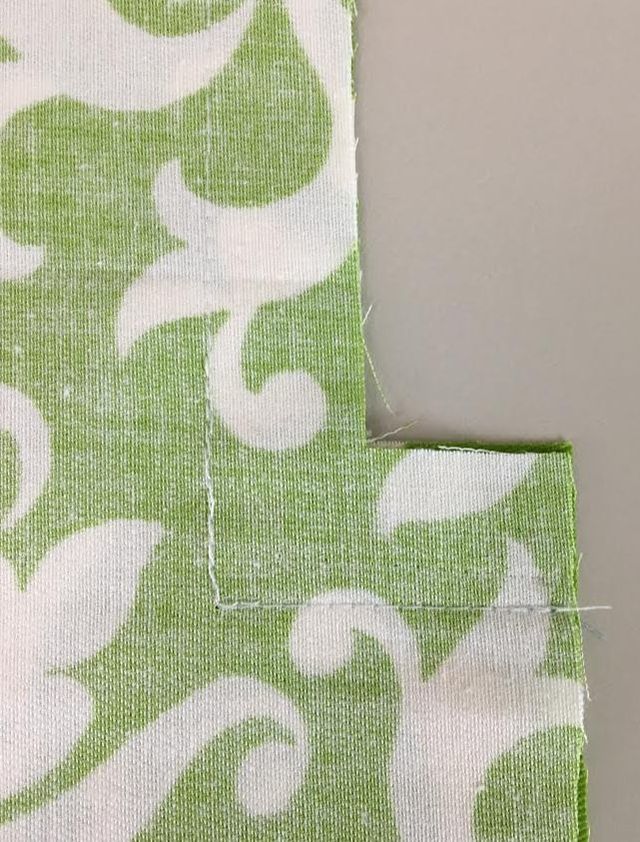 When sewing a 90 degree inner corner, the stitch lines should have a clear, linear point of transition as shown in the image above. The smoother and straighter the stitches, the better it will look once the self-finished corner is turned on its face side. 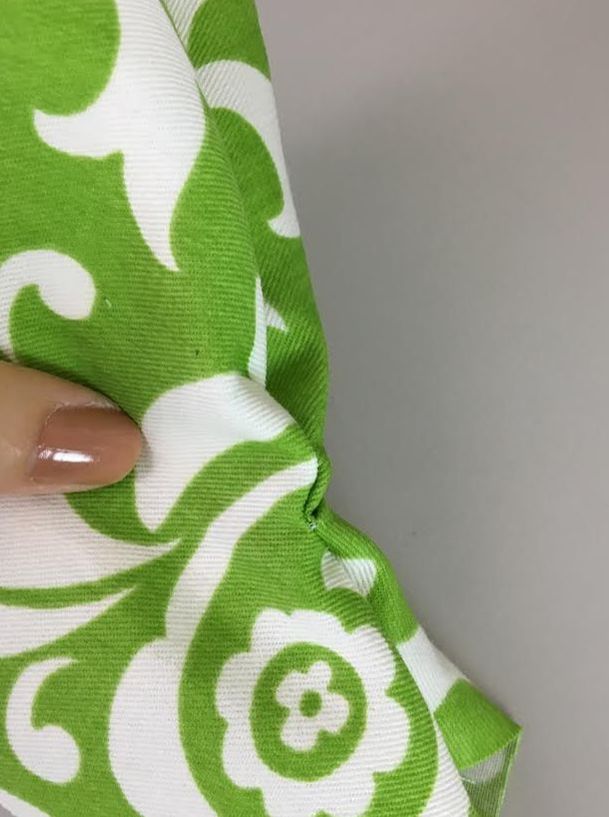 Out of curiosity, lets try to turn the finished inner corner on its right side. You'll notice that it is almost impossible to achieve a well-defined, sharp corner unless the seam allowance is clipped for tension release. As opposed to the outer corner, which you can choose to clip for tension release on a case-by-case basis, an inward, self-finished corner has to be clipped for tension release in order to lay flat and provide a defined corner.
To release tension in an inward corner, simply clip the seam allowance diagonally from the edge of the corner in towards the stitched corner. Clip right up to the stitch but be very careful not to accidentally cut through the stitch. Due to the fact that the seam allowance is trimmed so close to the corner point, it is also recommended that you apply another layer of machine stitching right on top of the existing stitch at the corner to reinforce it. 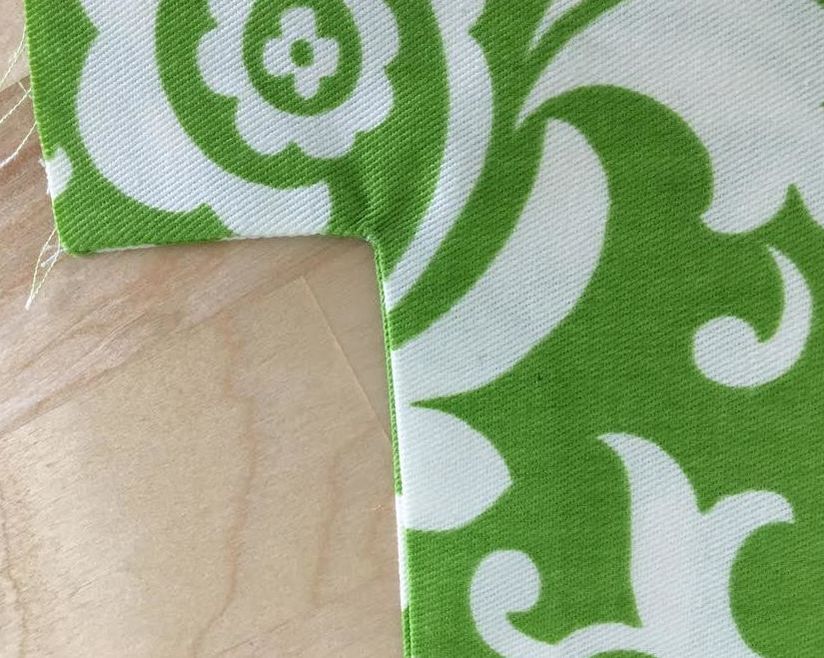 Now, if you turn the inner corner on it's face side, you'll find that everything falls into place, allowing for a flat, well-defined sharp corner. If at this point, you turn the corner on its right side and find that there is still some tension, that means you need to clip even closer to the corner stitching on the inside. The closer you clip to the point of the stitch, the less tension you'll have on the face of the garment. Don't forget to exercise a lot of caution in this process in order to avoid accidentally cutting the actual stitch. 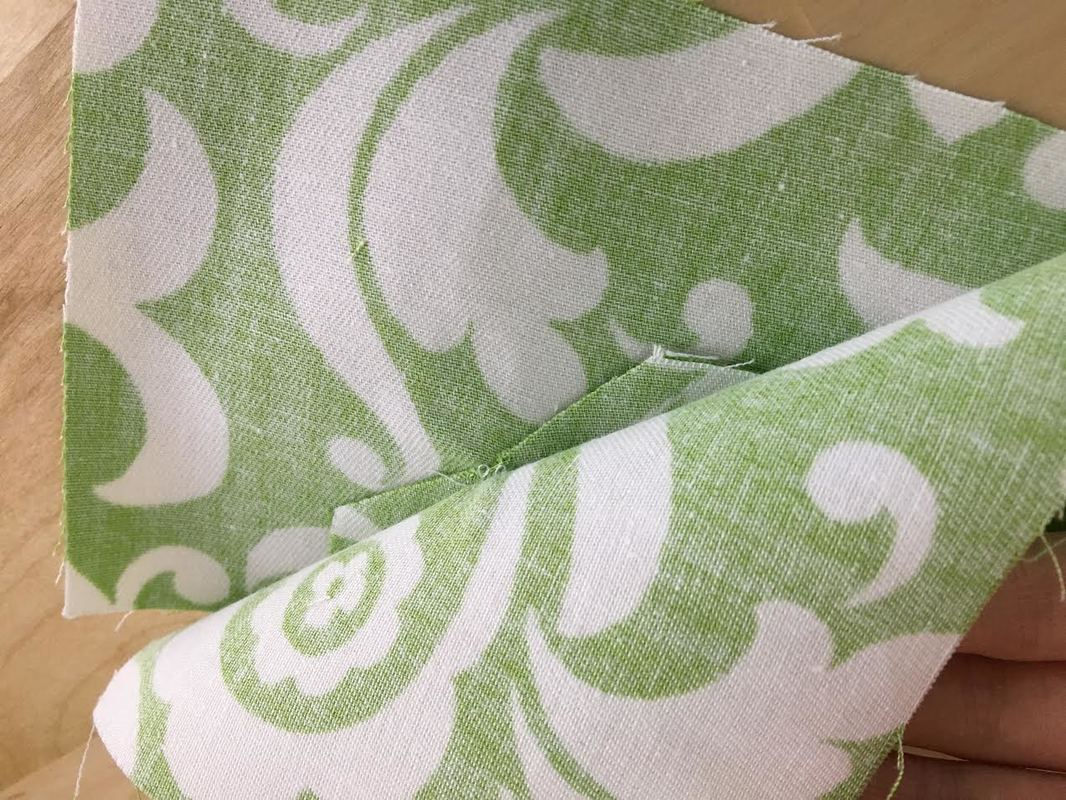 If you take a look at what happens on the inside of the self-finished corner, you'll find that the clipped seam allowance naturally separates, allowing for a flat finish on the garment's face side. 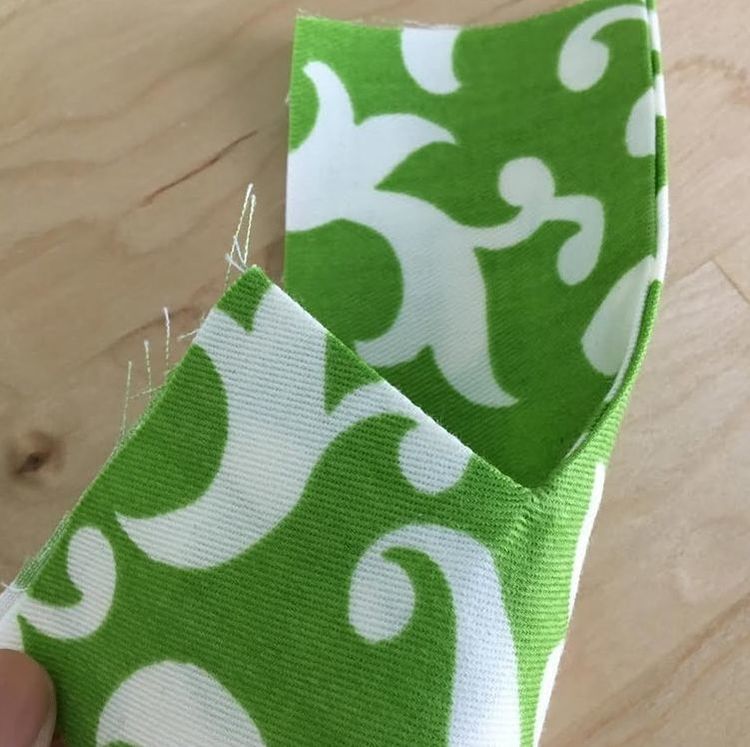 Of course, always iron the finished corner on both sides for a professional finish. The edges should be smooth and lay flat, while the corner should maintain a sharp, angular characteristic. 
2 Comments
Elizabeth
4/7/2021 07:29:09 am
What is it called when you are trying to close of a corner say in a cushion for example after stuffing it. Leave a Reply. |
The Blog:A journey into our design process, sewing tutorials, fashion tips, and all the inspiring people and things we love. 
Doina AlexeiDesigner by trade and dressmaker at heart. I spend most of my days obsessing over new fabrics and daydreaming new ideas. 
Sadie
Executive Assistant & Client Relations Manager Archives
November 2019
Categories
All

|

-
Sewing Tutorials
-
Basics
>
- Aligning Pattern Grainlines To Fabric
- Preparing Fabrics For Sewing
- Pinning Sewing Patterns To Fabric
- Placing Sewing Patterns On Fabric For Cutting
- Rotary Cutters or Fabric Scissors?
- Cutting The Sewing Patterns
- What Are Notches And How To Use Them In The Sewing Process
- Transferring Notches From Pattern To Fabric
- Transferring Seamlines to Fabric
- Staystitching
- Backstitching: A Complete Guide
- Hand Basting: A Complete Guide
- Sewing Continuous Bias Binding
- Darts >
-
Sewing Seams
>
- The Basics Of Seams And Seam Allowance
- How To Sew A Straight Seam
- Sewing Curved Seams
- Sewing Corner Seams
- Trimming And Grading Seam Excess
- Notching/Clipping Seam Allowance for Tension Release
- Sewing Topstitched Seams
- Sewing Corded Seams
- Sewing A Slot Seam
- Sewing A Gathered Seam
- Sewing Bias Seams
- Sewing Seams With Ease
- Sewing Seams With Crossing Seamlines
- Sewing Unlike Fabric Seams
- How To Iron Seams: Ironing Tools And Conventions
- Sewing With Knit Fabrics
- Understanding Stitch Length And Tension
- Sewing Unique Fabric Seams
-
Seam Finishes
>
- Seam Finishing Techniques - Overview
- Applying A Pinked Seam Finish
- Applying A Bias Bound Seam Finish
- Serging And Zigzag Seam Finishes
- Sewing A Self-Bound Seam Finish
- Sewing A French Seam Finish
- Sewing A Hong Kong Seam Finish
- Sewing A Mock French Seam Finish
- Sewing A Turned-and-Stitched Seam Finish
- Sewing Overcast Hand-Applied Seam Finishes
- Sewing A Flat Felled Seam
- Sewing A Hairline Seam Finish
-
Hem Finishes
>
- Garment Hem Finishes: Overview
- Sewing A Double Fold Hem Finish
- Sewing A Single Fold Hem Finish
- Sewing Bound Hem Finishes
- Sewing An Exposed Double Layer Bound Hem
- Sewing A Folded-Up Bound Hem with Pre-folded Binding
- Sewing A Hong Kong Hem Finish
- Sewing A Band Hem Finish
- Sewing A Bias Faced Hem Finish
- Sewing A Twill Tape Hem Finish
- Sewing A Rolled Hem Finish
- Sewing A Shaped Hem Facing
- Using Fusible Hem Tape And Webbing
- Finishing A Lace Fabric Hem
- Finishing A Leather Hem
- Sewing Faced Hem Corners
- How To Finish Lining At The Hem
- Finishing Fabric Corners by Mitering >
- Interfacing A Hemline: Lined And Unlined Examples
-
Sewing Pockets
>
- Curved Patch Pocket With Flap
- Unlined Square Patch Pockets
- Lined Patch Pockets: Two Ways
- Extension On-Seam Pockets
- Separate On-Seam Pocket
- Front Hip Pockets
- Bound Double Welt Pocket
- Double Welt Pocket With Flap
- Self-Welt Pocket (Using Single Fabric Layer)
- Slanted Welt Pocket (Hand-Stitched)
- Faced Slash Pockets: Overview >
-
Sewing Zippers
>
- Sewing Zippers: General Information
- Sewing A Centered Zipper
- Sewing A Lapped Zipper
- Sewing An Invisible Zipper
- Sewing A Fly Front Zipper
- Sewing A Closed-End Exposed Zipper (No Seam)
- Sewing An Exposed Separating Zipper
- Sewing Hand Stitched Zipper Applications
- Sewing A Zipper Underlay
- Sewing A Placket-Enclosed Separating Zipper
- Sleeveless Finishes >
-
Neckline Finishes
>
- Sewing A Neck Shaped Facing
- Sewing An All-In-One Neck Facing
- Neck And Garment Opening Combination Facings >
- Sewing A Bias Faced Neckline Finish
- Sewing A Band Neckline Finish
- Bound Neckline Finishes: Overview >
- Sewing A Semi-Stretch Strip Band Neckline
- Ribbed Neck Band And Classic Turtleneck
- Decorative Neckline Finishes >
- Finishing Facing Edges >
-
Extras
>
- A Complete Guide on Interfacing
- Sewing Bound Spaghetti Straps
- Sewing Spaghetti Straps To A Faced Neckline
- Sewing Ruffles: Overview
- Patterning And Sewing A Circle Ruffle
- Sewing A Gathered Heading Ruffle
- Sewing Double Layer Gathered Ruffles
- Sewing A Gathered Ruffle Into A Seam
- Sewing A Gathered Ruffle To A Fabric Edge
- Sewing A Fabric Surface Slit
- Sewing A Slit Seam
- Hand-Applied Straight Stitches
- Hand-Applied Blind Stitches
- Hand-Applied Overedge Stitches
- Hand-Applied Tack Stitches
- Hand-Applied Decorative Stitches
-
Basics
>
- Custom Bridal
- Custom Apparel
- About
- Blog


 RSS Feed
Services |
Company |
|
