|
You may or may not have noticed, but I am absolutely obsessed with pockets. There is nothing more functional and comfortable than a pair of pockets placed perfectly on a garment. Pockets are those simple elements that always work overtime, elevating both the quality and versatility of a garment. 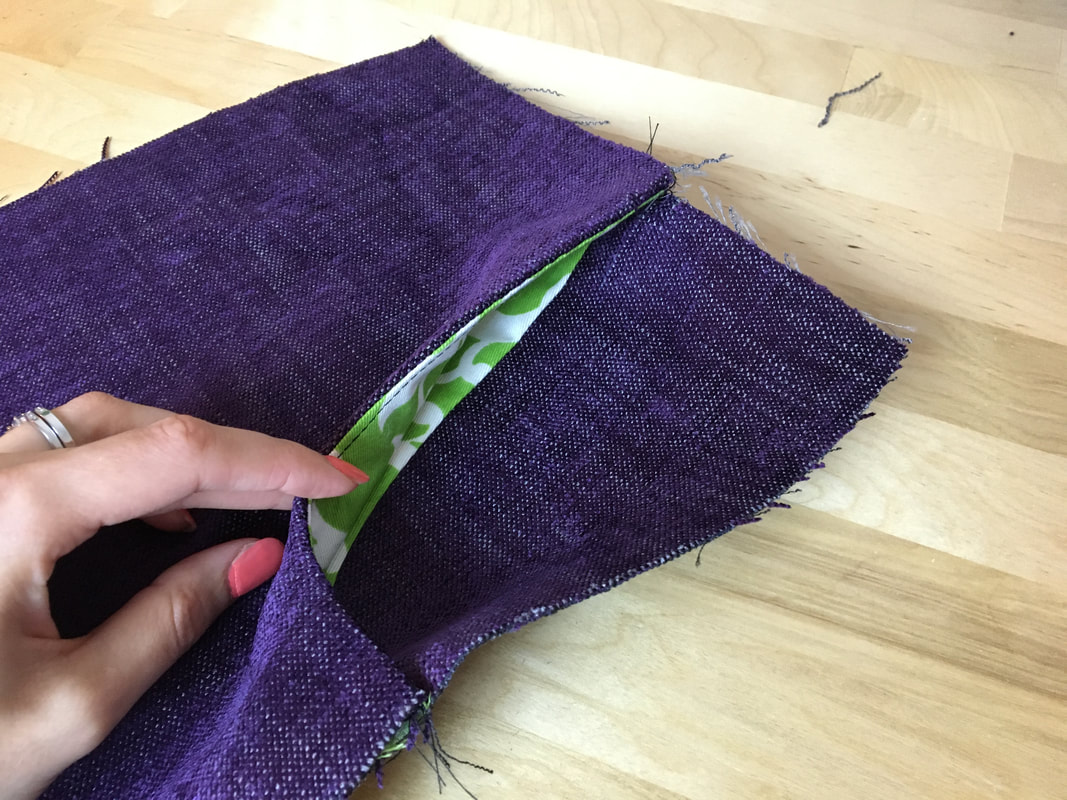 While I have a couple tutorials on the simplest of all pockets: on-seam pockets, I haven’t challenged you with something a bit more complex yet. For that reason, in today’s tutorial, I will be walking you through the process of sewing front hip pockets. If you own a pair of jeans (and you most likely do), you have seen and enjoyed the convenience of this very functional pocket style. In the example below, I'll show you the detailed steps for sewing a jean pocket which as opposed to conventional options, has an extra seam within the pocket piece. Front hip pockets are visibly positioned on the front of the garment connecting at the waist (or any horizontal seam on the front) and a side seam (or an appropriate vertical seam on the front/side of the garment). As opposed to an on-seam pocket that is comprised of two identical pocket bag pieces, a front hip pocket is made of two differently shaped pieces: a facing and a pocket piece. The pocket piece becomes part of the garment at the waist, or the horizontal seam it is sewn into. Its upper part is visible on the face of the garment so for that reason, the pocket piece is cut of the same fabric as the garment. In this tutorial however, I will show you a pocket piece that is divided into two pieces: the upper half is cut from the same fabric as the garment while the bottom half is cut from lining or your choice of pocket bag fabric. This style is conventionally used for jeans or other styles of casual and formal trousers. Having the bottom piece cut of a thinner lining fabric eliminates bulk and ensures added flexibility and comfort. A pocket facing is used to clean finish the inner curve of the pocket opening. The facing is usually cut from a lining fabric or your choice of fabric for the actual pocket bag. While they are different shapes, once sewn into each corresponding garment areas, the outer edge of each facing and pocket piece should match perfectly thus completing the pocket bag container. If this sounds confusing now, don't worry! The sewing steps below will clarify the process. 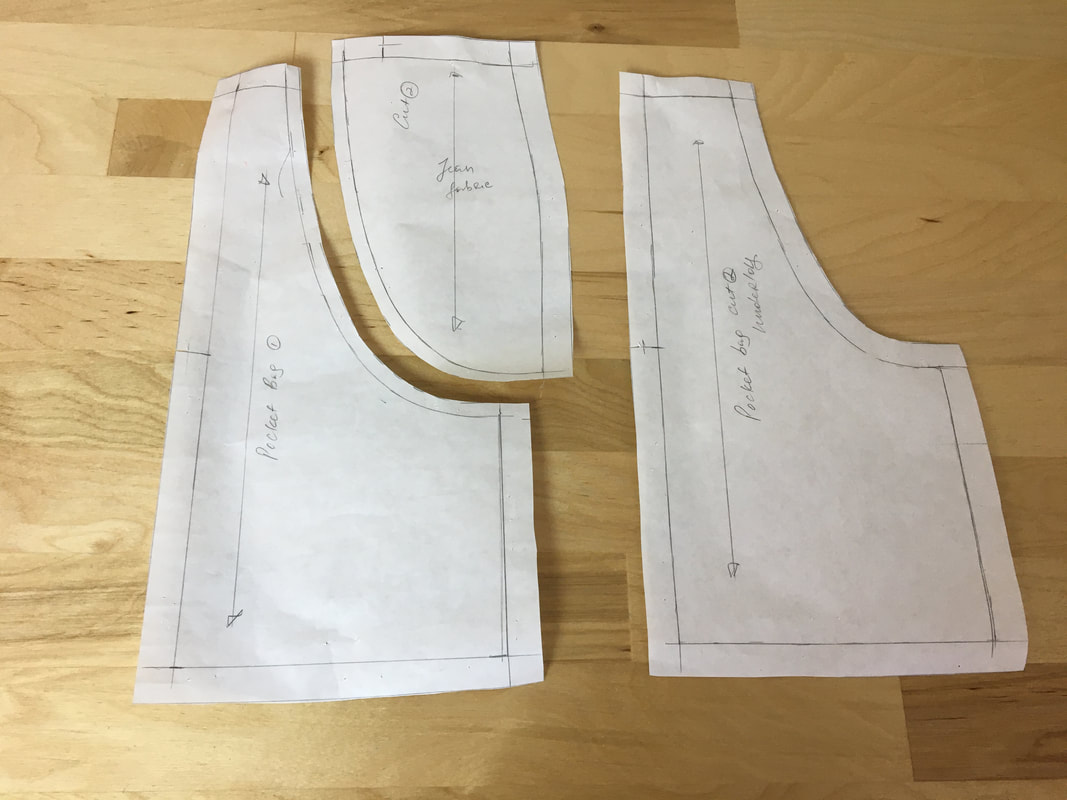 Jean pocket patterns include three pieces: 2 portions for the pocket bag (the smaller pieces) and one for the pocket opening facing. 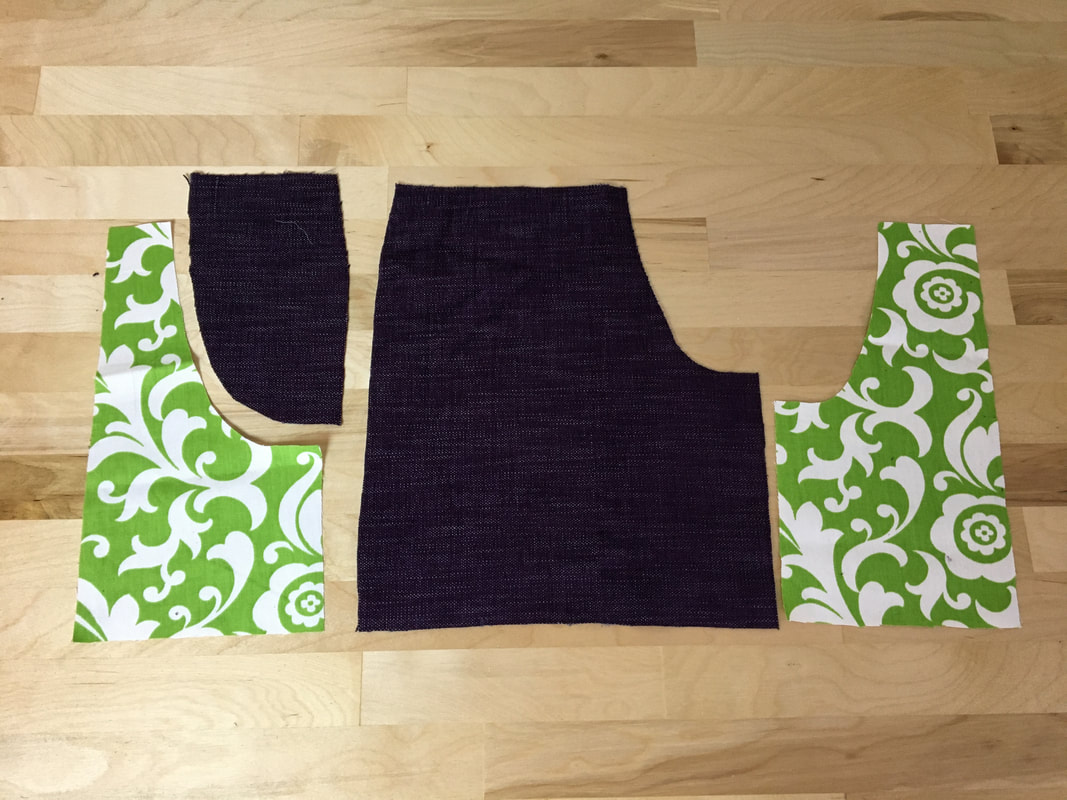 Cut out all the pocket components. For this style you should have 3 pieces: 2 smaller ones for the pocket piece and one for the pocket facing. 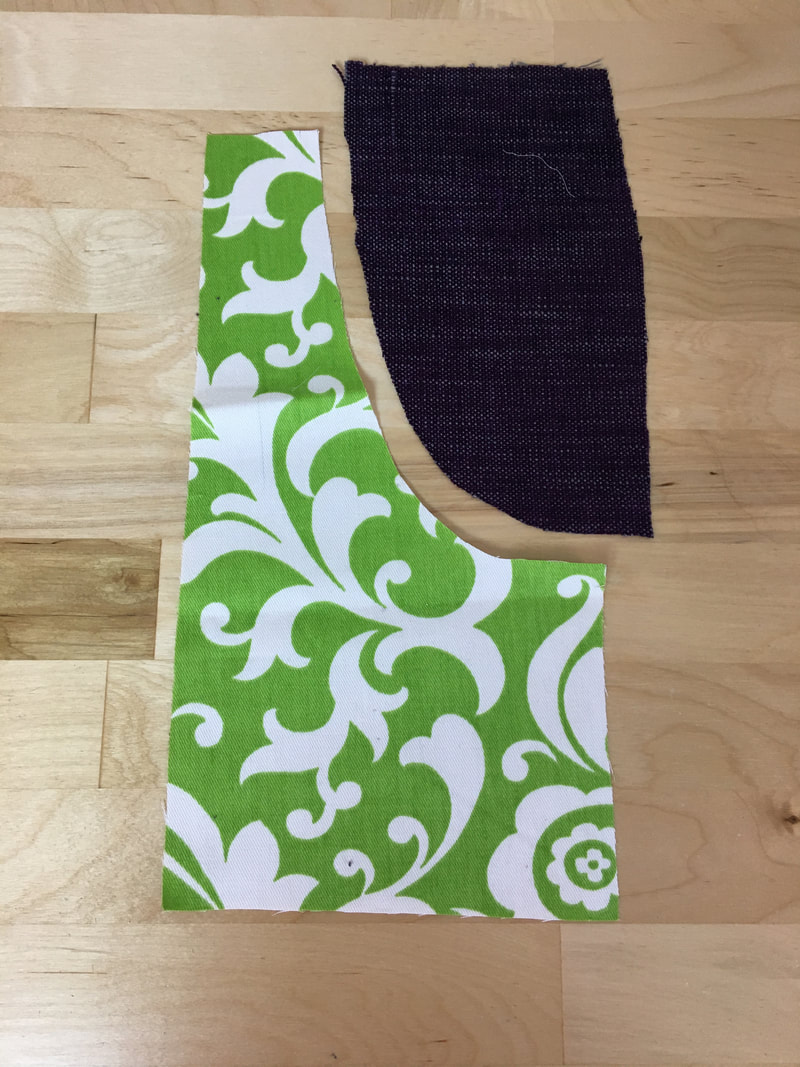 The top pocket piece is cut from the same fabric as the garment while the bottom is cut from lining (green print). The two pieces will be sewn together along the curved edges to produce the full pocket piece. 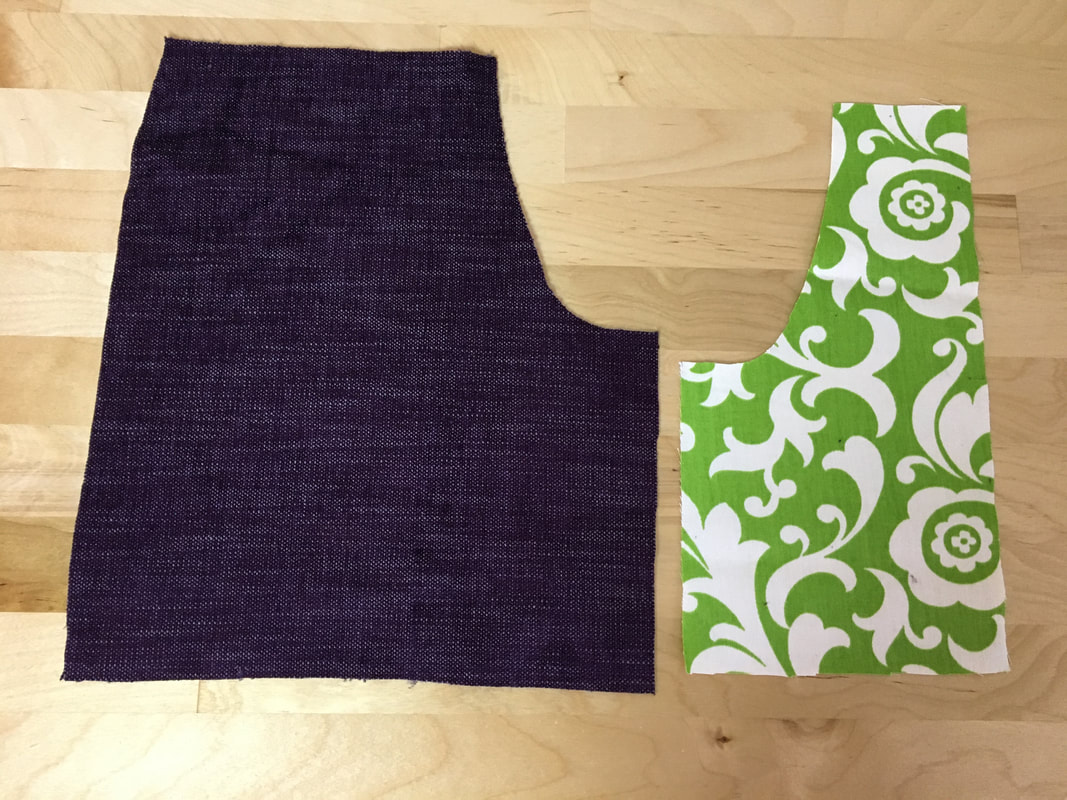 The facing is entirely cut from lining material. The curve of the facing will be stitched to that of the garment to clean finish the inner curve of the pocket opening. 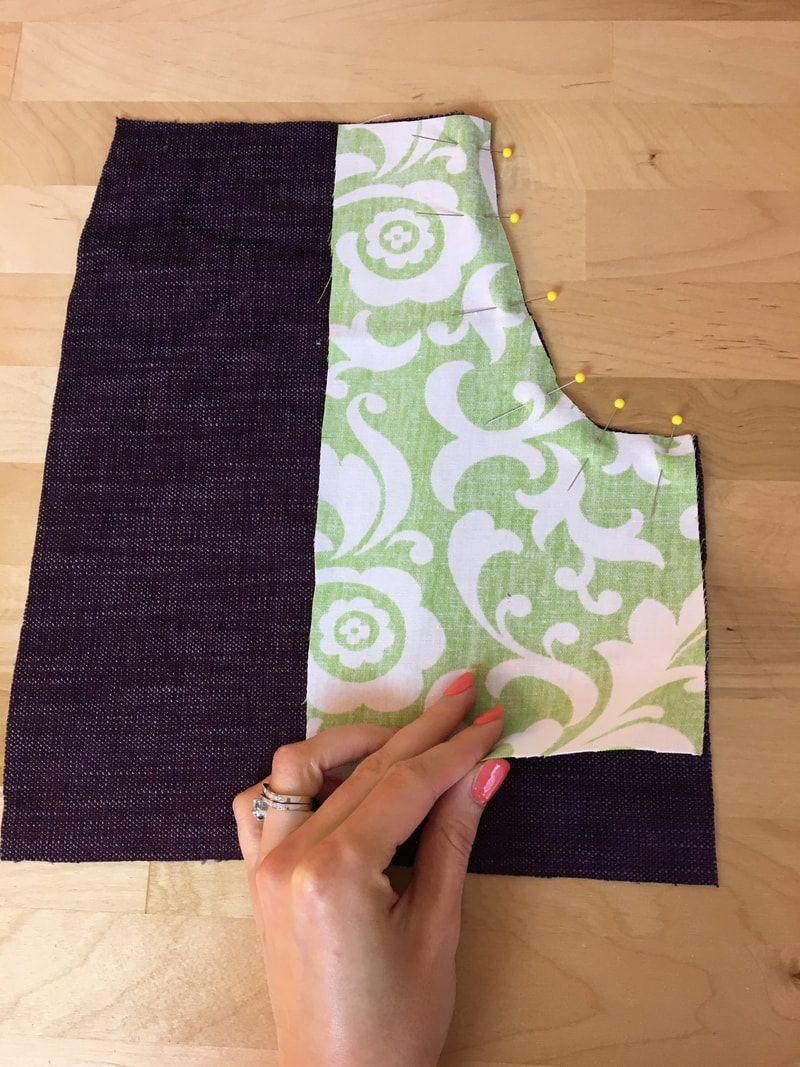 1. Let's start with the facing. Align the curve of the facing to the curve of the garment and pin the edges in perpendicular direction as shown.  The face of the lining fabric should be touching the face of the garment as shown. When the seam is completed and flipped inward, the fabric print will line the inside of the pocket. 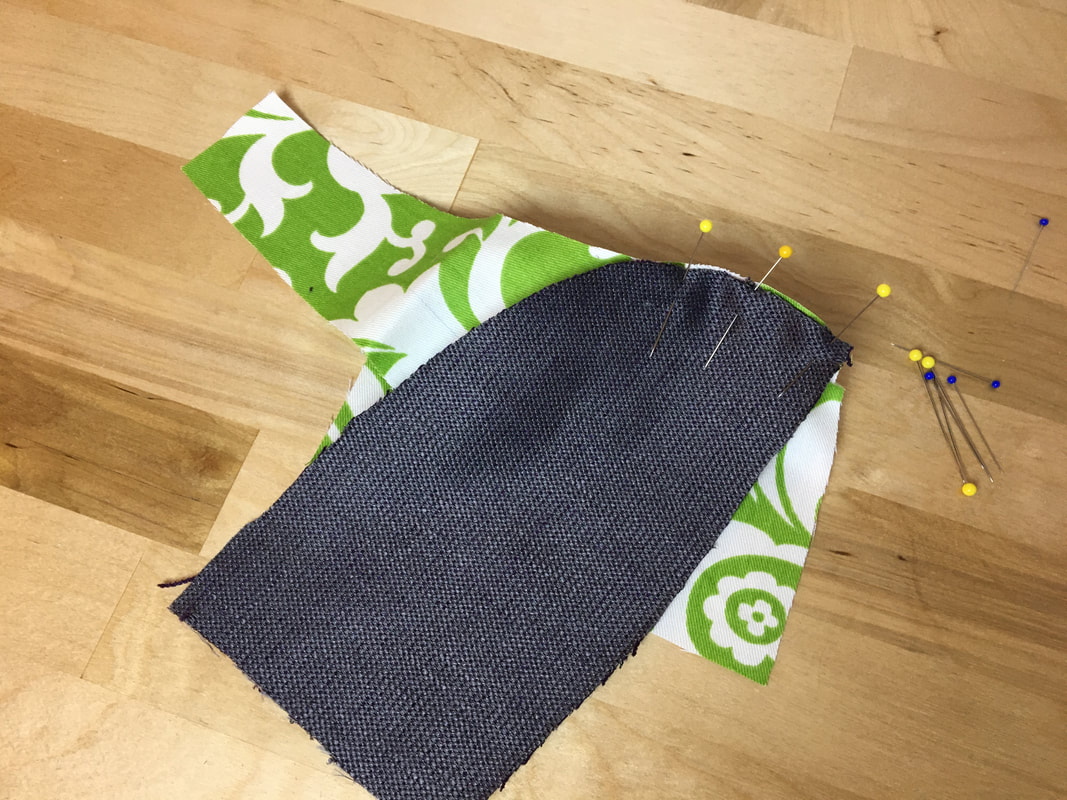 2. The pocket piece is a little bit more tricky as it requires you to pin and sew opposite curves. This not only feels extremely unnatural, it can also be quite tricky for sewing beginners. I'll cover the topic in a separate tutorial as this can be a common challenge in the sewing process. For now, align the edges little by little, making sure the raw fabric edges align as you pin each portion. I suggest you use a larger pin density to keep the two opposite curves together. 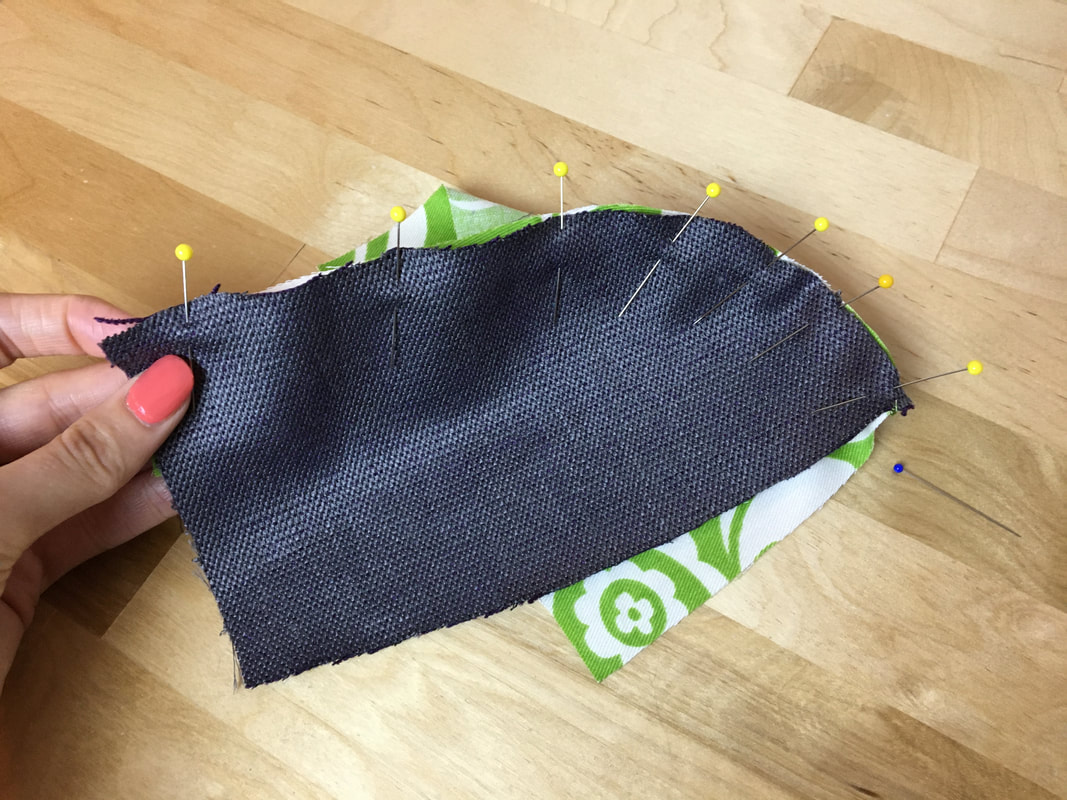 It is helpful to pin both ends first, then move towards the middle spreading the edges evenly against each other. While pins are great to position everything in place, if you don't feel comfortable sewing opposite curves, I suggest a hand basting stitch to keep the edges together more stably during the machine stitching process. 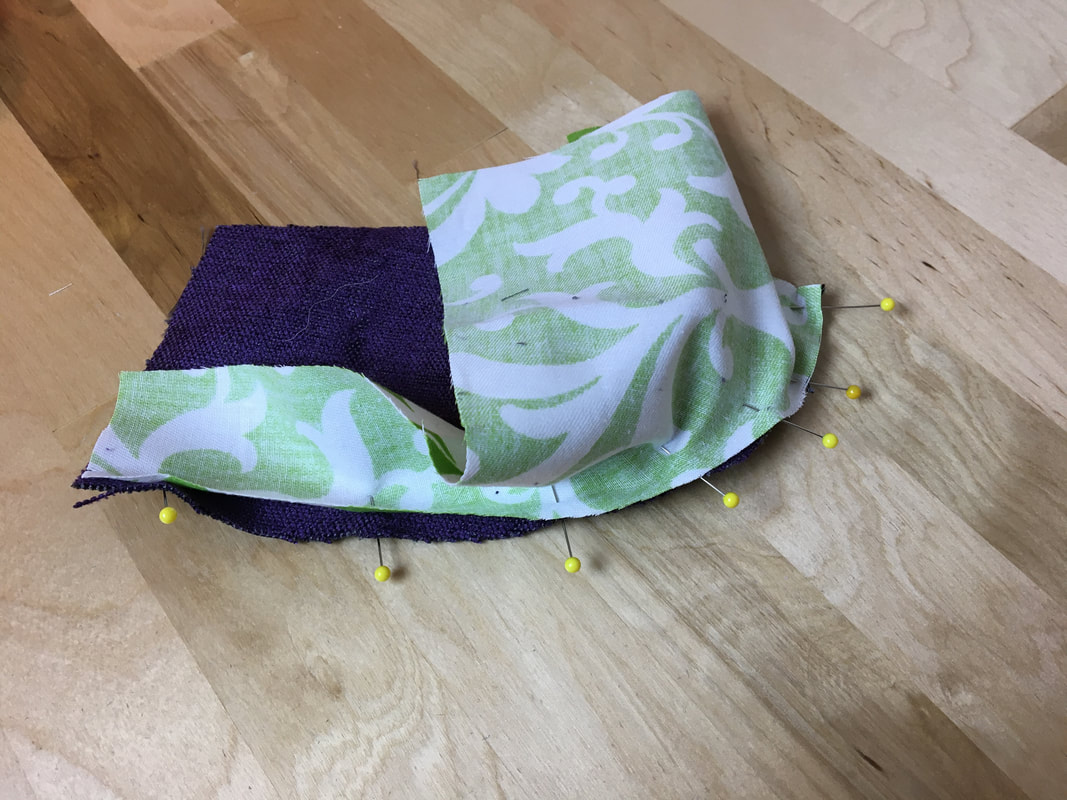 The outer curve of the lining won't lay completely flat. That is totally OK! During the stitching process, you will stitch slowly around the curve which will encourage the the curved edge to smooth out and lay flatter. 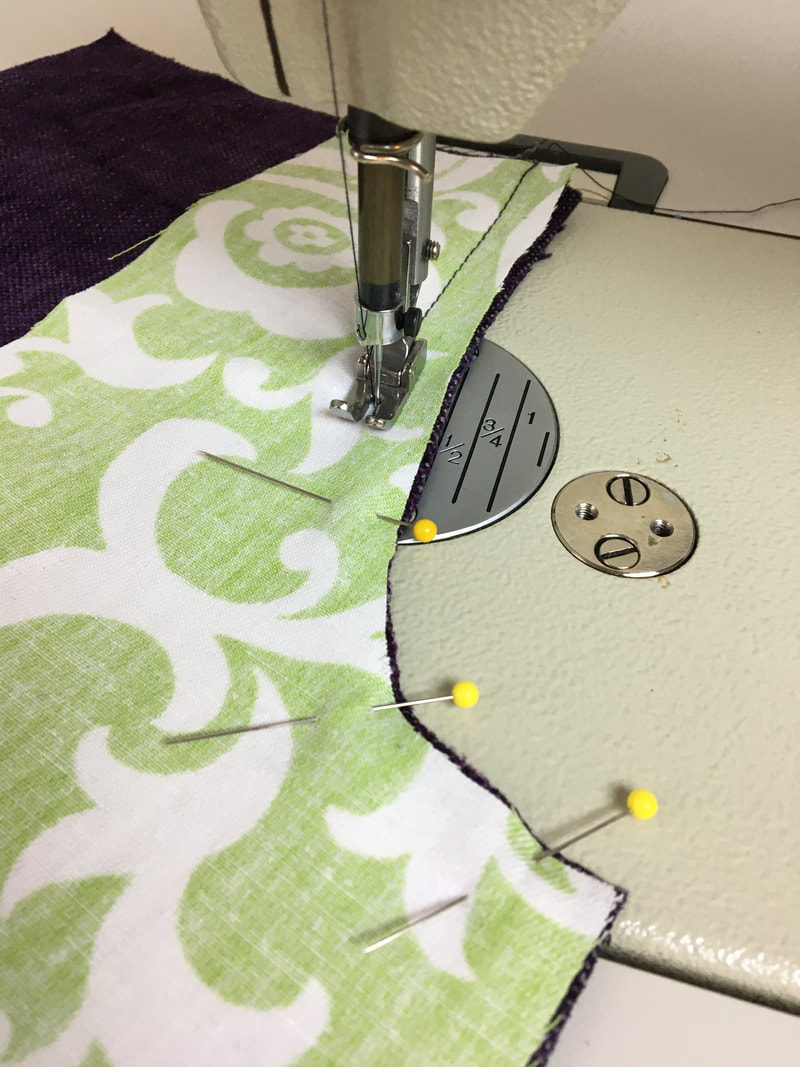 3. Next, stitch the pocket facing to the curved edge of the garment at the designated seam allowance. Mine is ½” 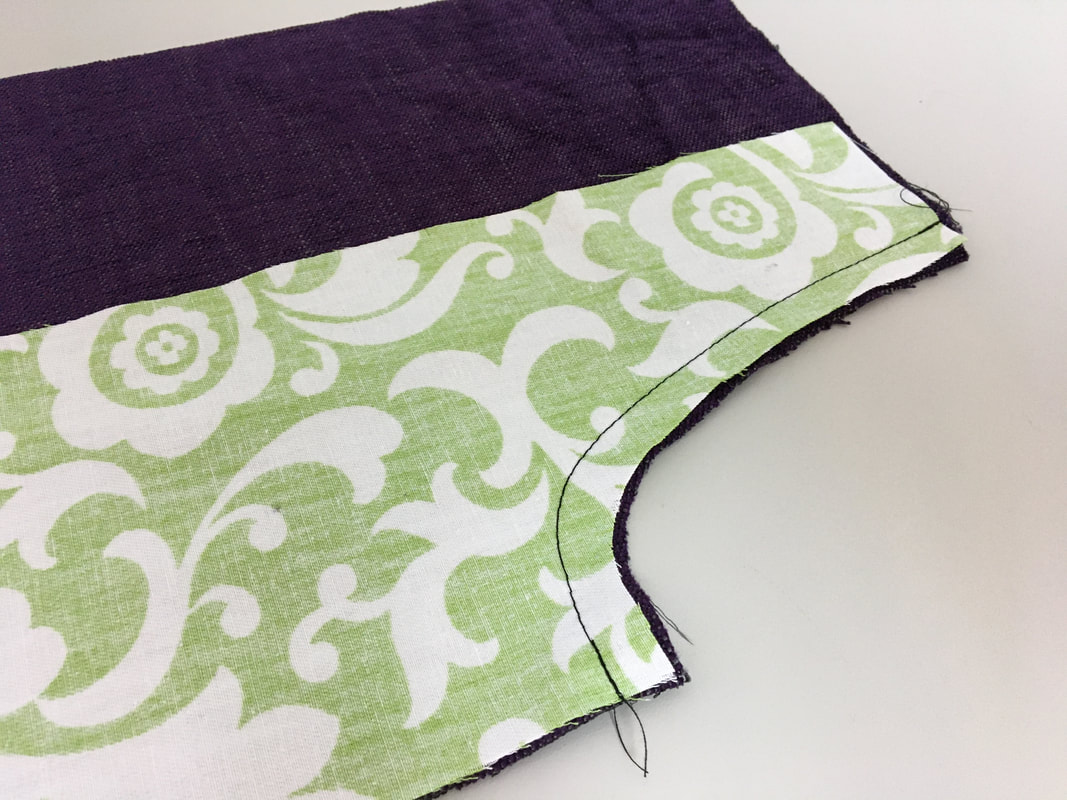 The curved stitch line should be smooth and evenly positioned throughout as shown above. 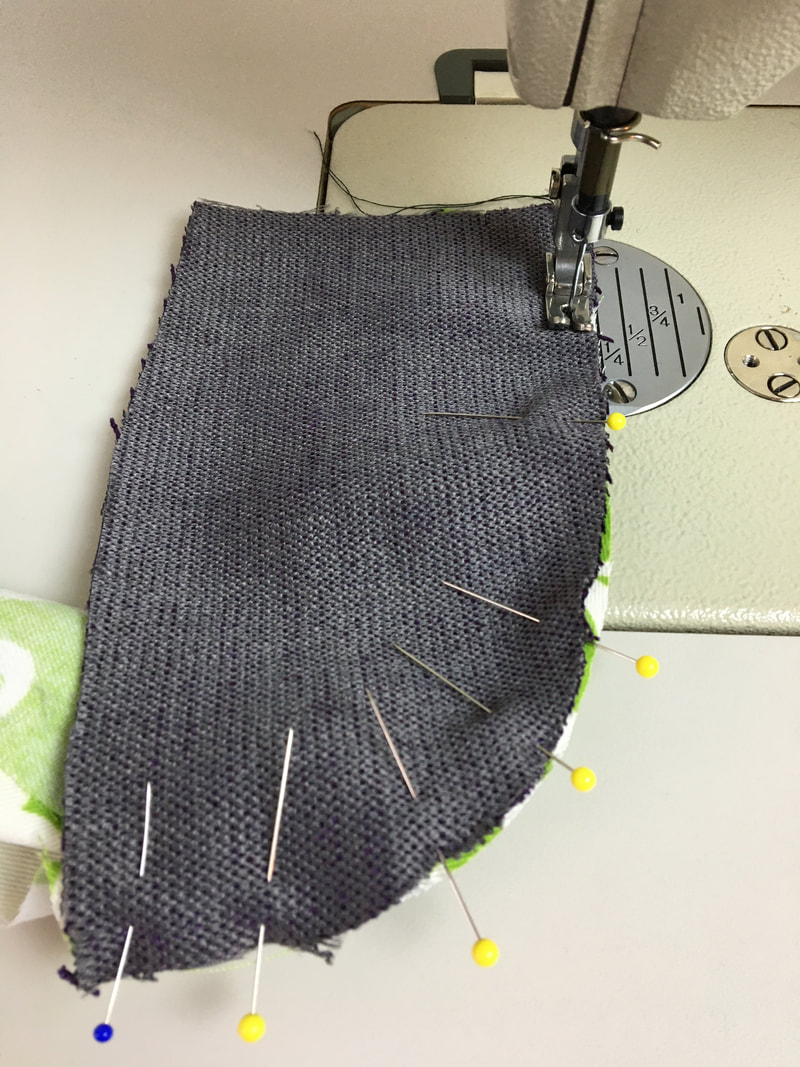 4. Carefully sew the two pieces comprising the pocket piece through the two curved edges as shown above. The seam allowance here is usually smaller- ¼” conventionally. A smaller seam allowance ensure that the seam lays flat without the need for clipping. 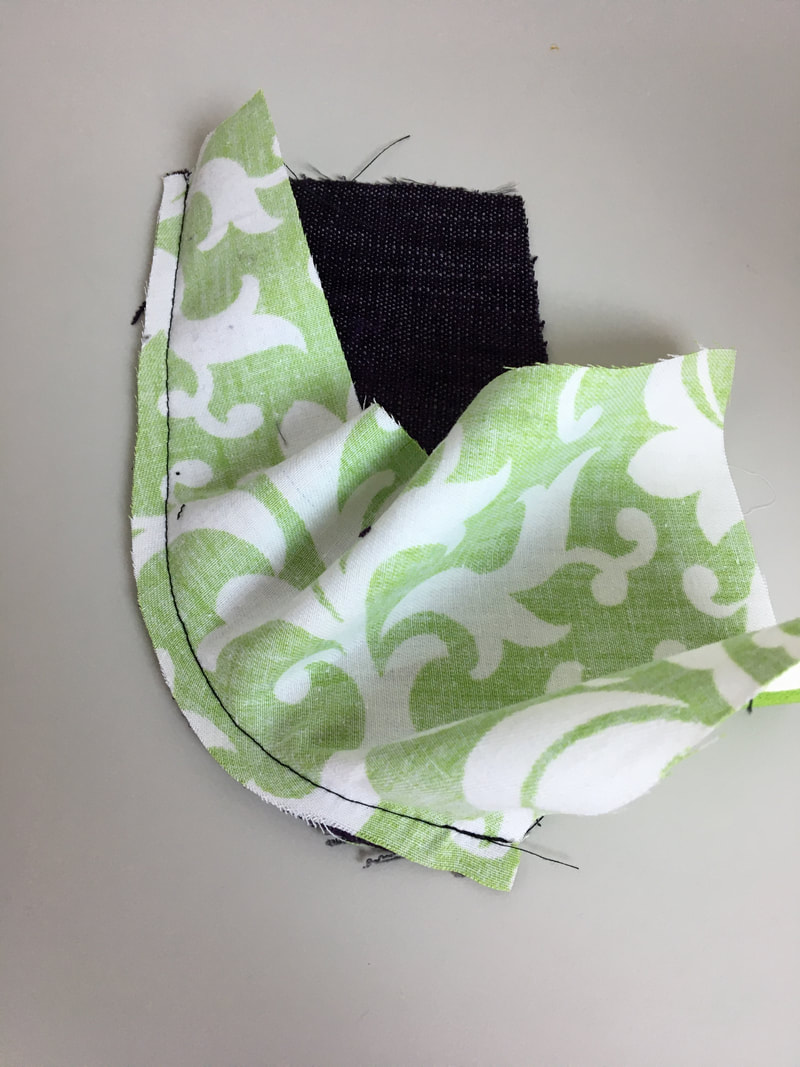 There should be no accidental puckers of folds on either side of the stitch. 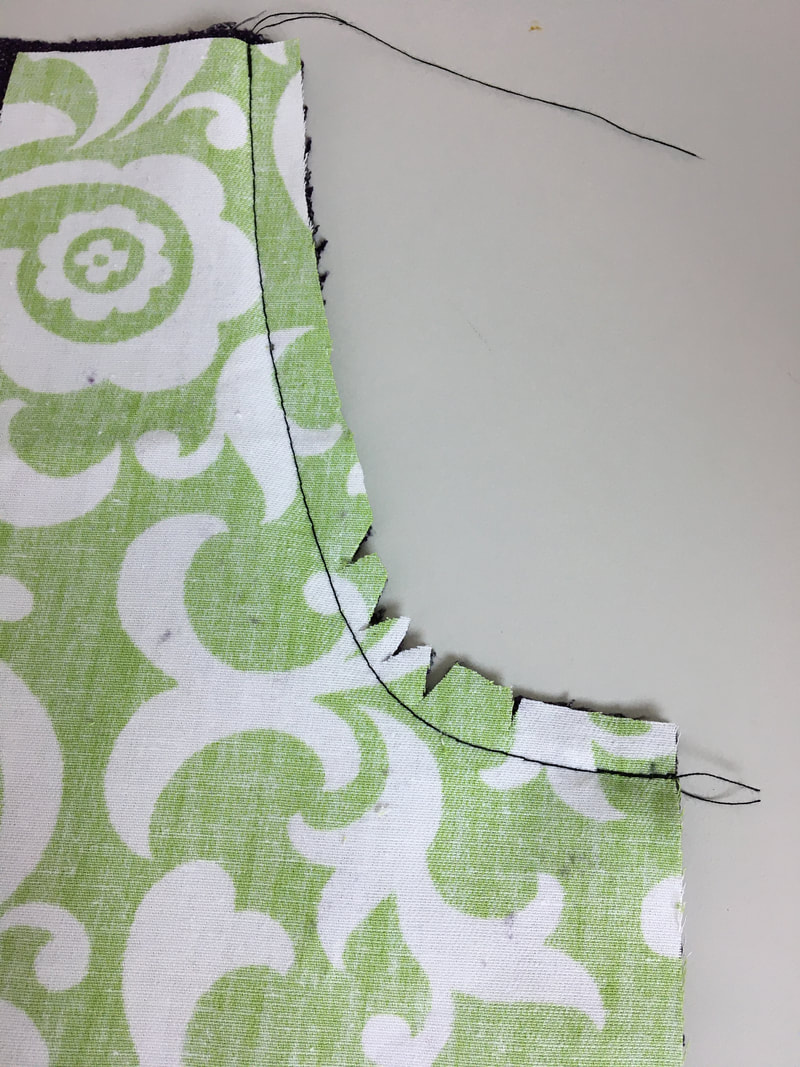 5. Clip the seam allowance long the inner curved edge to release tension. Doing so will allow the facing to lay flat when it is flipped to the inside of the garment. 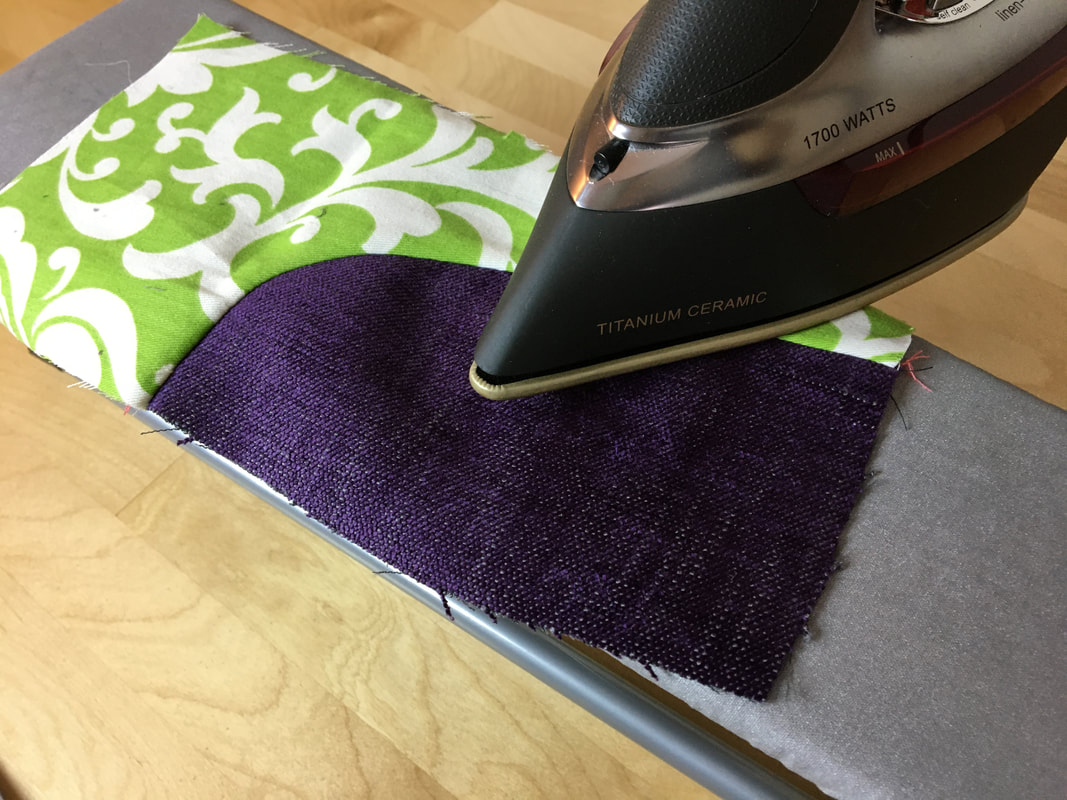 6. Clean finish the curved seam allowance on the pocket piece using a zig zag or serging stitch. Press the seam for a flat, smooth finish. 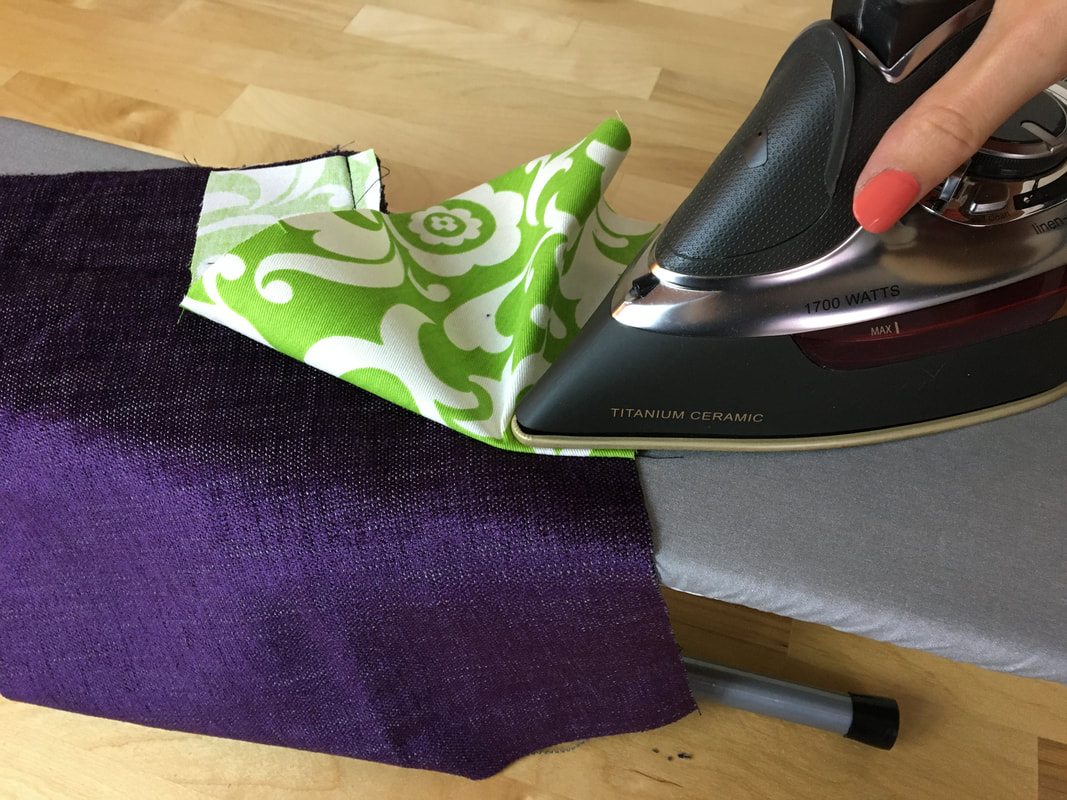 7. Iron the pocket facing seam with the seam allowance pointing out towards the facing as shown. 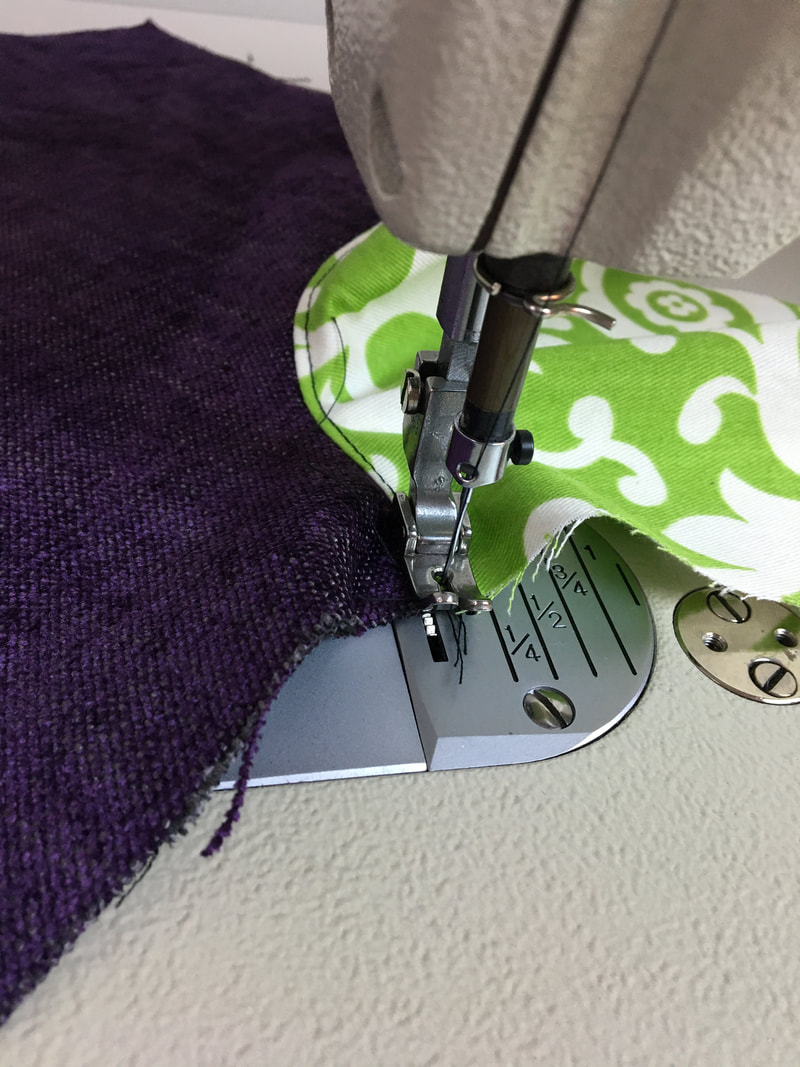 8. Understitch the facing at about 1/8” away from the seam through both facing and seam allowance layers underneath. Doing so will prevent the facing from rolling to the outside of the pocket as well as keep the final pocket opening flat. 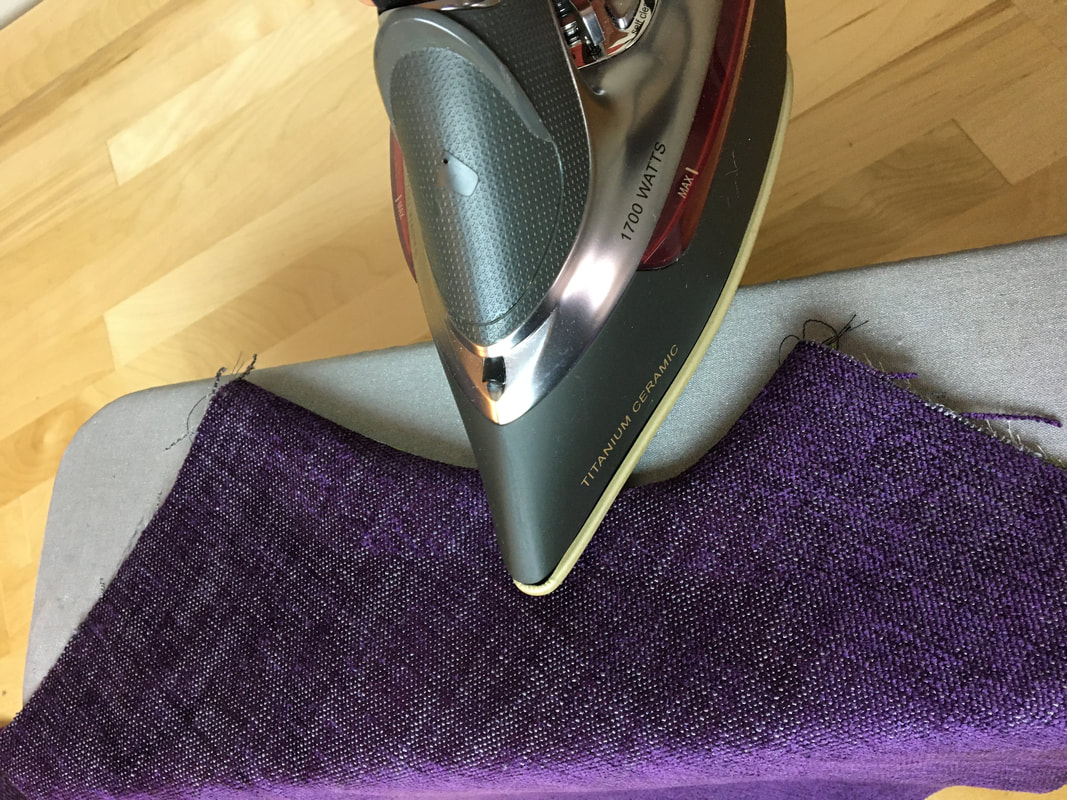 9. Once the pocket opening is understitched, bring the facing over to expose the finished curved edge and iron it for a flat, clean finish. 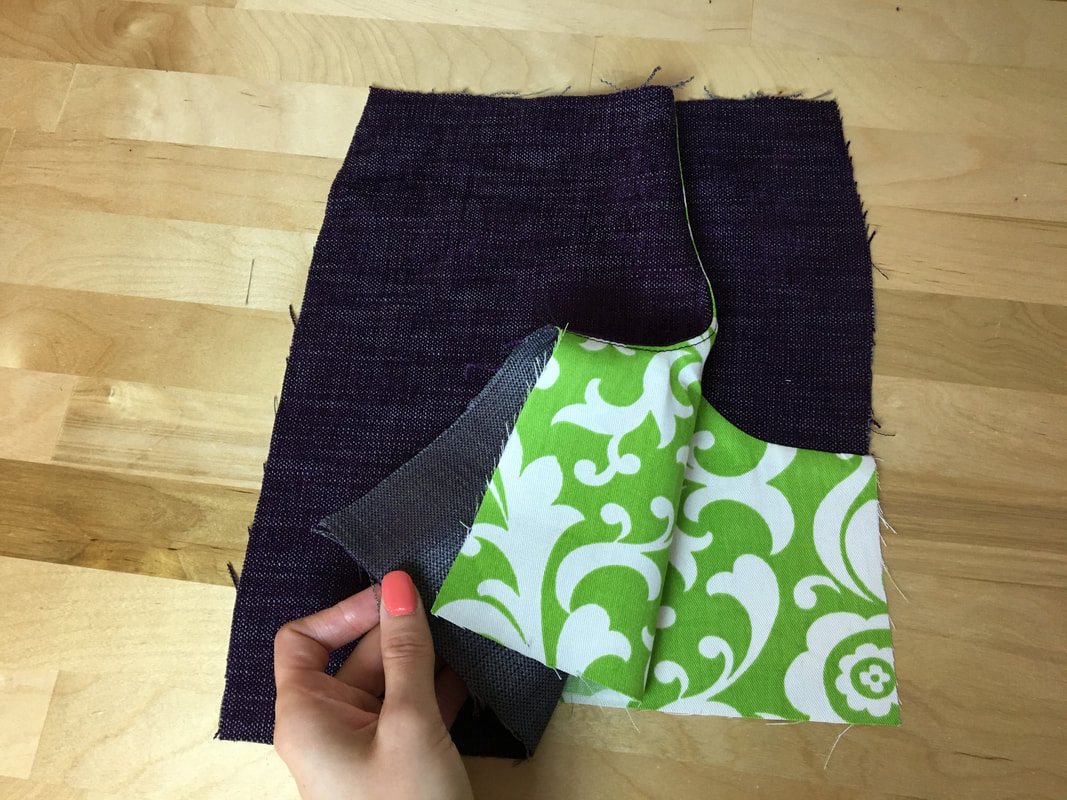 Now lets complete the pocket bag. Watching a front hip pocket come together is my favorite part! 10. Place the pocket opening garment layer on top of the pocket piece such that the outer edges of the pocket bag align. That’s the beauty of front hip pockets- once the pocket bag edges are connected, everything else falls into place naturally. 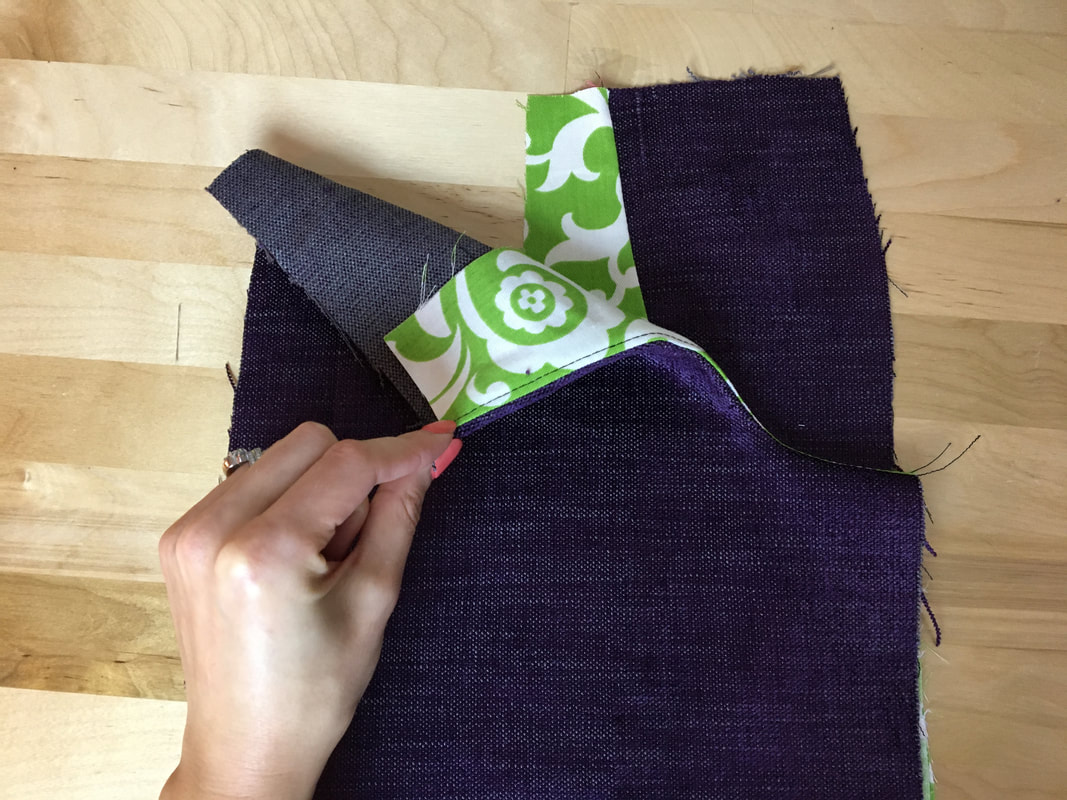 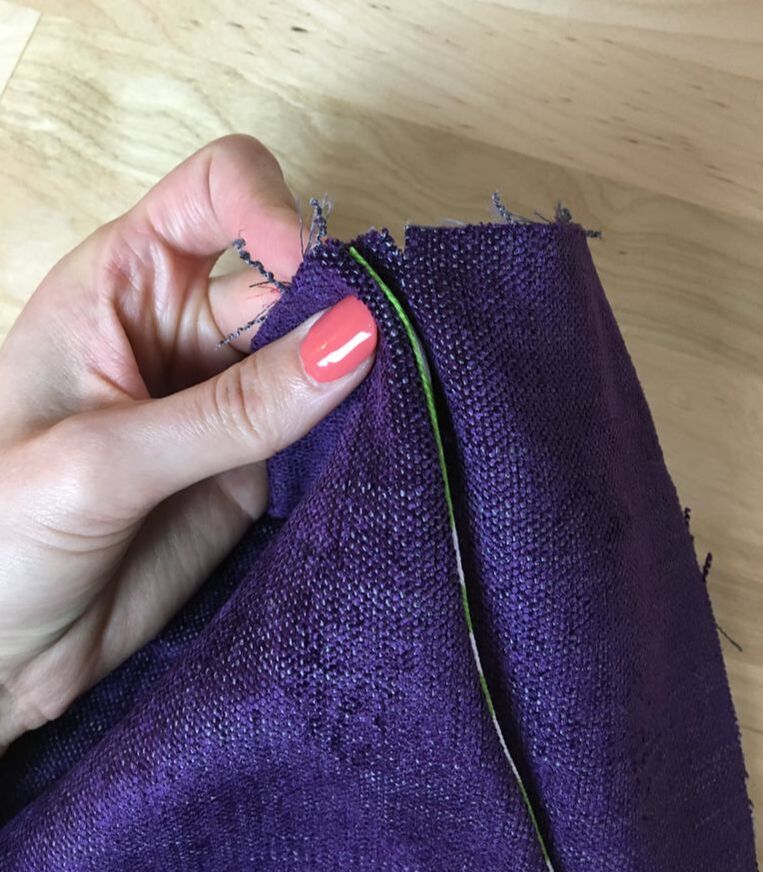 My patterns have a marked notch along the top waistline edge which should correspond to the top pocket opening as shown. A match is further confirmation that everything matches up as it should. 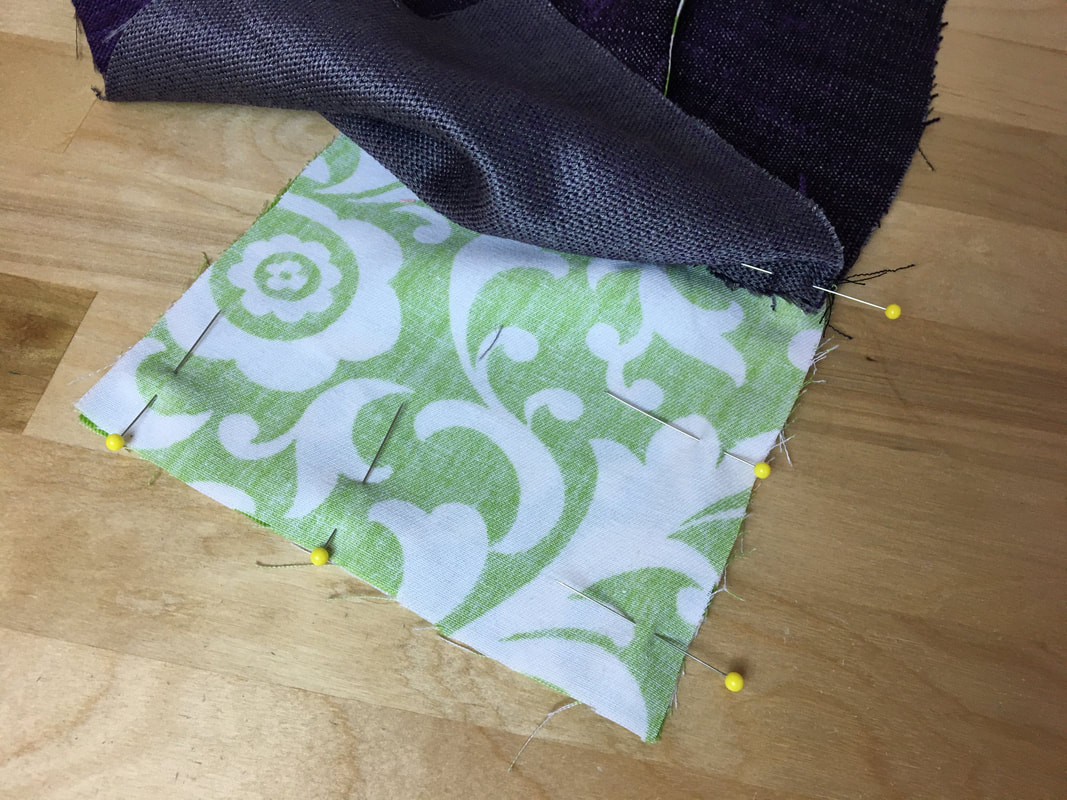 11. Pin the two layers of the pocket bag together as shown to hold the alignment in place for machine stitching.  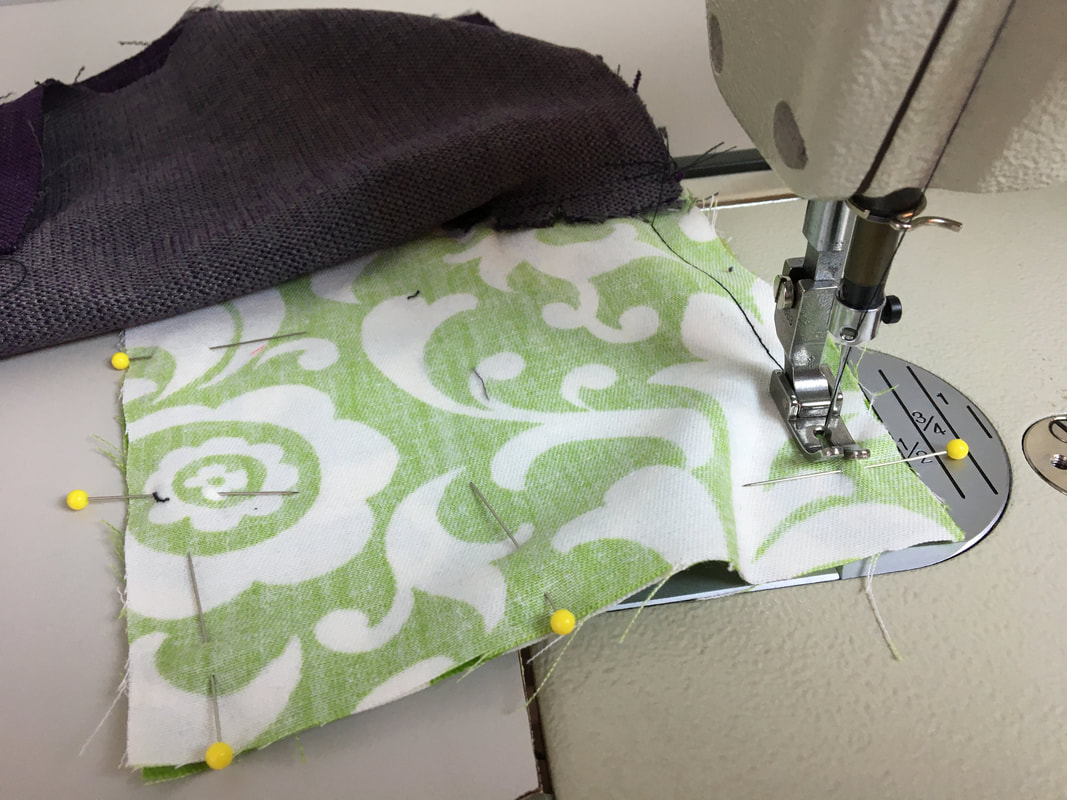 12. Stitch all around the rectangular edge of the pocket bag. I stitched the top and side seam as well but you can leave them unfinished if you wish as they will be naturally finished with the rest of the garment seams. 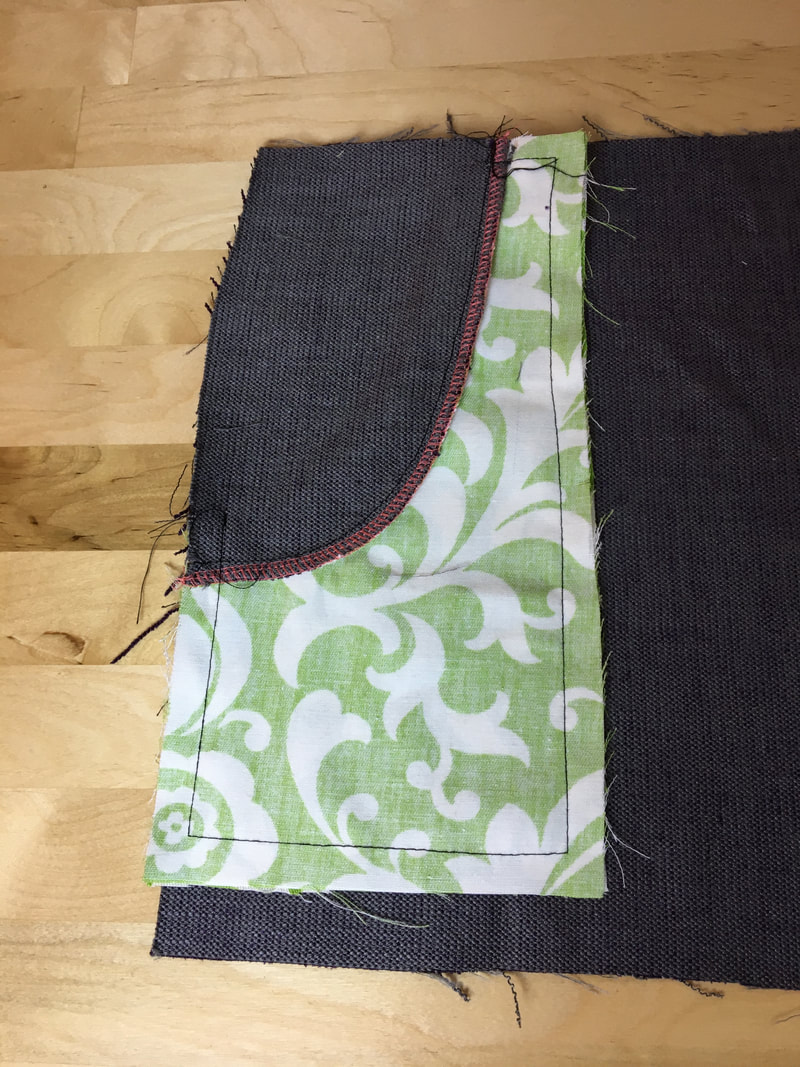 The pocket bag is now complete but in need of some clean finishing! 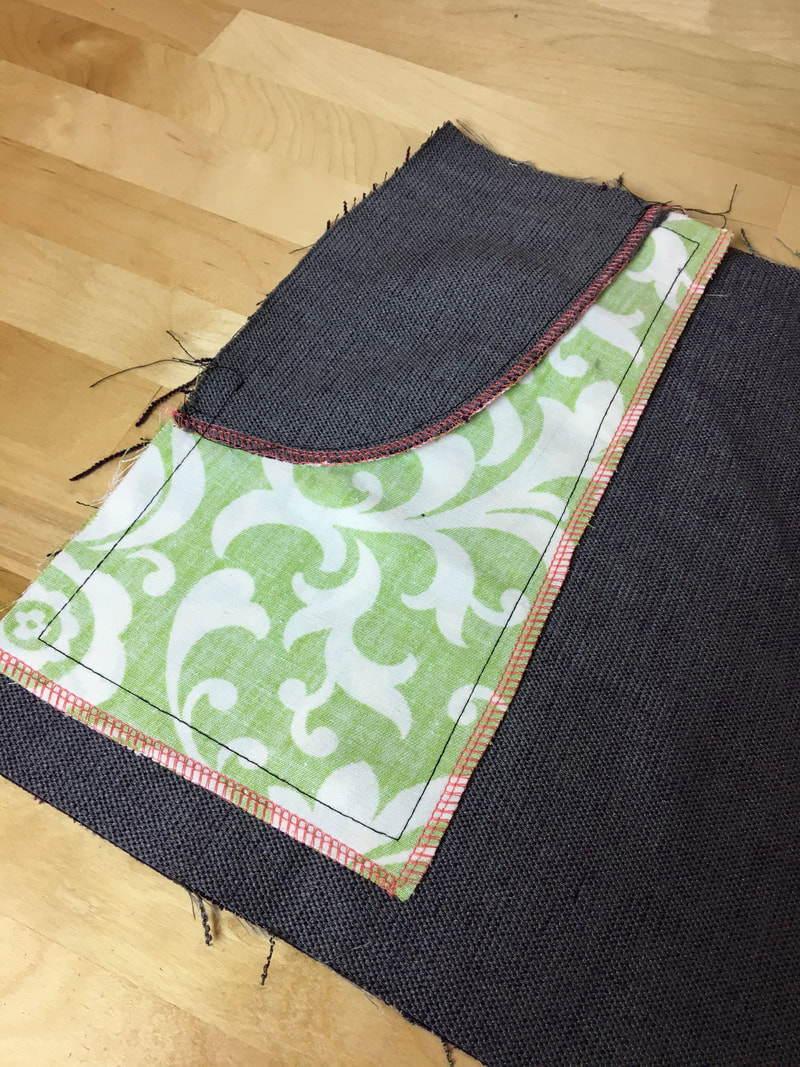 13. Use a serging or zig zag stitch (or any finish of your choice) to clean finish the raw edges of the pocket bag together as shown above. 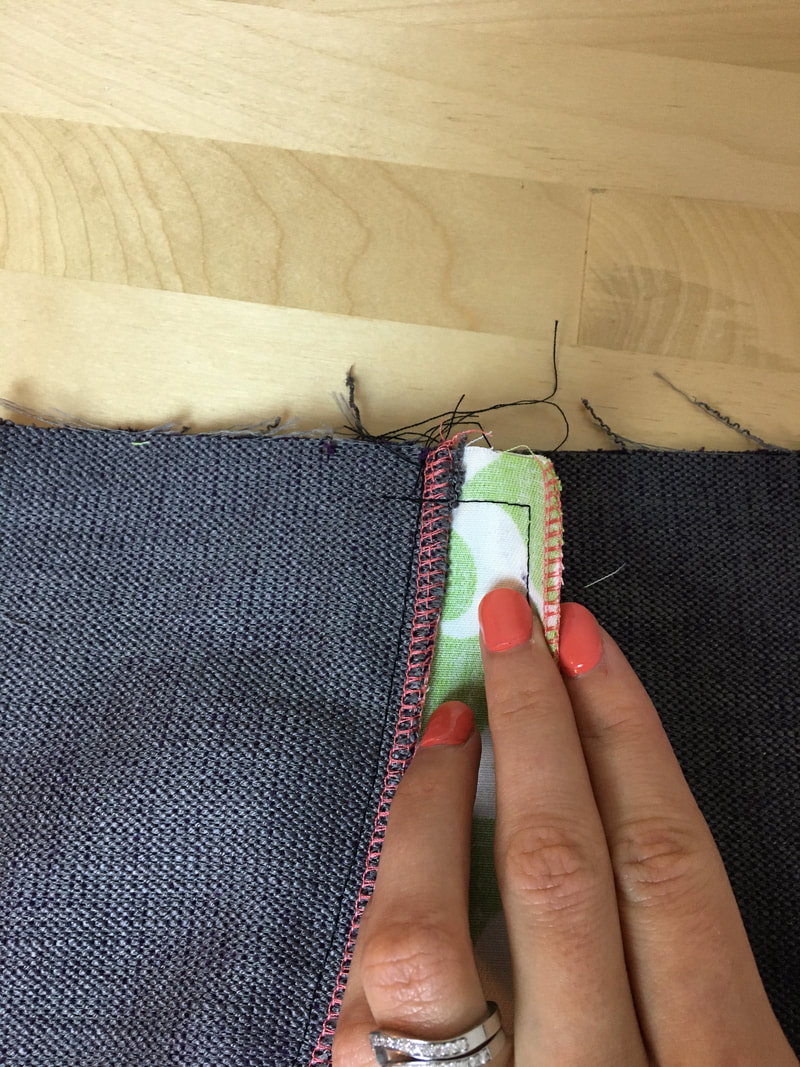 Leave the waist and side seam edges unfinished as these will become part of other garment seams. 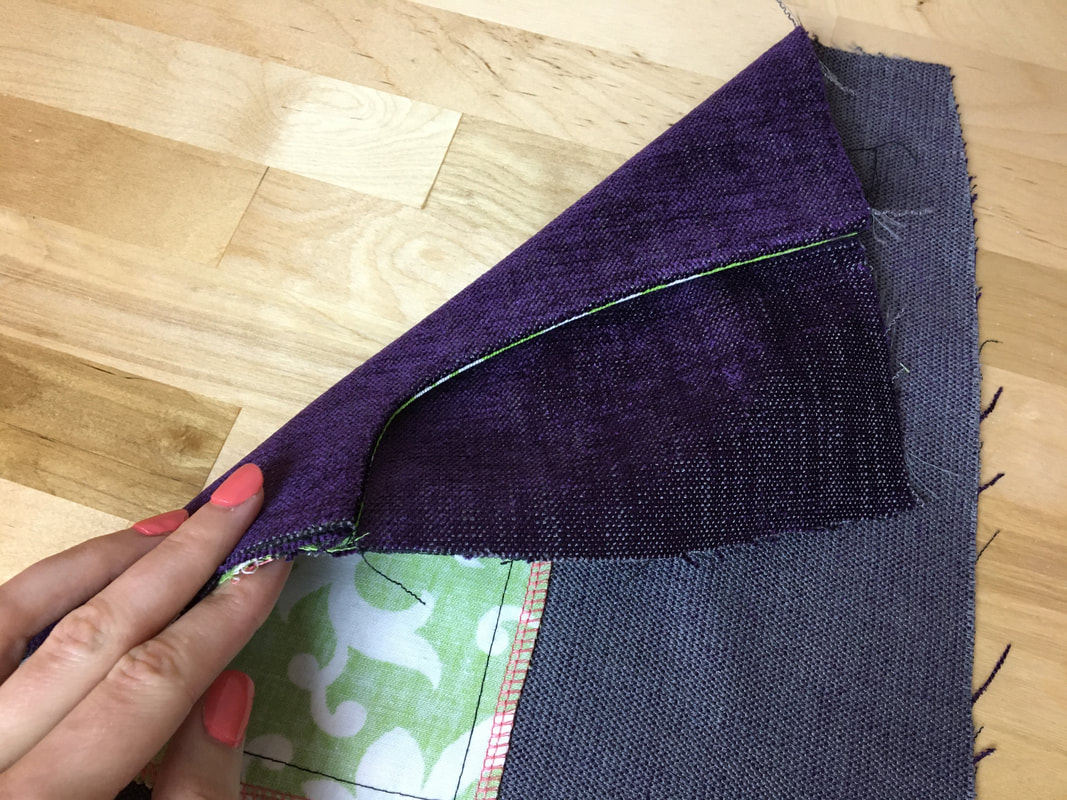 All done. This curved front hip pocket with contrast lining will add a great design and functional touch to any style! Similar Tutorials You May Like How To Make A Sewing Pattern For A Skirt On Seam Pocket A Video Guide To Sewing Skirt On Seam Pockets How To Add A Side Seam Pocket To A Dress How To Sew A Seam: The 3 Rules How To Thread A Serger/Overlock Sewing Machine
0 Comments
Leave a Reply. |
The Blog:A journey into our design process, sewing tutorials, fashion tips, and all the inspiring people and things we love. 
Doina AlexeiDesigner by trade and dressmaker at heart. I spend most of my days obsessing over new fabrics and daydreaming new ideas. 
Sadie
Executive Assistant & Client Relations Manager Archives
November 2019
Categories
All

|

-
Sewing Tutorials
-
Basics
>
- Aligning Pattern Grainlines To Fabric
- Preparing Fabrics For Sewing
- Pinning Sewing Patterns To Fabric
- Placing Sewing Patterns On Fabric For Cutting
- Rotary Cutters or Fabric Scissors?
- Cutting The Sewing Patterns
- What Are Notches And How To Use Them In The Sewing Process
- Transferring Notches From Pattern To Fabric
- Transferring Seamlines to Fabric
- Staystitching
- Backstitching: A Complete Guide
- Hand Basting: A Complete Guide
- Sewing Continuous Bias Binding
- Darts >
-
Sewing Seams
>
- The Basics Of Seams And Seam Allowance
- How To Sew A Straight Seam
- Sewing Curved Seams
- Sewing Corner Seams
- Trimming And Grading Seam Excess
- Notching/Clipping Seam Allowance for Tension Release
- Sewing Topstitched Seams
- Sewing Corded Seams
- Sewing A Slot Seam
- Sewing A Gathered Seam
- Sewing Bias Seams
- Sewing Seams With Ease
- Sewing Seams With Crossing Seamlines
- Sewing Unlike Fabric Seams
- How To Iron Seams: Ironing Tools And Conventions
- Sewing With Knit Fabrics
- Understanding Stitch Length And Tension
- Sewing Unique Fabric Seams
-
Seam Finishes
>
- Seam Finishing Techniques - Overview
- Applying A Pinked Seam Finish
- Applying A Bias Bound Seam Finish
- Serging And Zigzag Seam Finishes
- Sewing A Self-Bound Seam Finish
- Sewing A French Seam Finish
- Sewing A Hong Kong Seam Finish
- Sewing A Mock French Seam Finish
- Sewing A Turned-and-Stitched Seam Finish
- Sewing Overcast Hand-Applied Seam Finishes
- Sewing A Flat Felled Seam
- Sewing A Hairline Seam Finish
-
Hem Finishes
>
- Garment Hem Finishes: Overview
- Sewing A Double Fold Hem Finish
- Sewing A Single Fold Hem Finish
- Sewing Bound Hem Finishes
- Sewing An Exposed Double Layer Bound Hem
- Sewing A Folded-Up Bound Hem with Pre-folded Binding
- Sewing A Hong Kong Hem Finish
- Sewing A Band Hem Finish
- Sewing A Bias Faced Hem Finish
- Sewing A Twill Tape Hem Finish
- Sewing A Rolled Hem Finish
- Sewing A Shaped Hem Facing
- Using Fusible Hem Tape And Webbing
- Finishing A Lace Fabric Hem
- Finishing A Leather Hem
- Sewing Faced Hem Corners
- How To Finish Lining At The Hem
- Finishing Fabric Corners by Mitering >
- Interfacing A Hemline: Lined And Unlined Examples
-
Sewing Pockets
>
- Curved Patch Pocket With Flap
- Unlined Square Patch Pockets
- Lined Patch Pockets: Two Ways
- Extension On-Seam Pockets
- Separate On-Seam Pocket
- Front Hip Pockets
- Bound Double Welt Pocket
- Double Welt Pocket With Flap
- Self-Welt Pocket (Using Single Fabric Layer)
- Slanted Welt Pocket (Hand-Stitched)
- Faced Slash Pockets: Overview >
-
Sewing Zippers
>
- Sewing Zippers: General Information
- Sewing A Centered Zipper
- Sewing A Lapped Zipper
- Sewing An Invisible Zipper
- Sewing A Fly Front Zipper
- Sewing A Closed-End Exposed Zipper (No Seam)
- Sewing An Exposed Separating Zipper
- Sewing Hand Stitched Zipper Applications
- Sewing A Zipper Underlay
- Sewing A Placket-Enclosed Separating Zipper
- Sleeveless Finishes >
-
Neckline Finishes
>
- Sewing A Neck Shaped Facing
- Sewing An All-In-One Neck Facing
- Neck And Garment Opening Combination Facings >
- Sewing A Bias Faced Neckline Finish
- Sewing A Band Neckline Finish
- Bound Neckline Finishes: Overview >
- Sewing A Semi-Stretch Strip Band Neckline
- Ribbed Neck Band And Classic Turtleneck
- Decorative Neckline Finishes >
- Finishing Facing Edges >
-
Extras
>
- A Complete Guide on Interfacing
- Sewing Bound Spaghetti Straps
- Sewing Spaghetti Straps To A Faced Neckline
- Sewing Ruffles: Overview
- Patterning And Sewing A Circle Ruffle
- Sewing A Gathered Heading Ruffle
- Sewing Double Layer Gathered Ruffles
- Sewing A Gathered Ruffle Into A Seam
- Sewing A Gathered Ruffle To A Fabric Edge
- Sewing A Fabric Surface Slit
- Sewing A Slit Seam
- Hand-Applied Straight Stitches
- Hand-Applied Blind Stitches
- Hand-Applied Overedge Stitches
- Hand-Applied Tack Stitches
- Hand-Applied Decorative Stitches
-
Basics
>
- Custom Bridal
- Custom Apparel
- About
- Blog
 RSS Feed
Services |
Company |
|
