|
While it may seem initially intimidating, sewing a pair of shorts or trousers is not as difficult as you may think. If you adhere to a few basic sets of rules, sewing pant-style bottoms should really never pose a big challenge. In today’s tutorial I’ll show you how to sew a very simple pair of shorts with a faced waistline and invisible side zipper. For a more tailored look, I will also add a hand slip stitch to clean finish the hem. Let’s start by discussing some of the general rules of sewing trousers. To begin with, it is important to be able to differentiate between the front and back pant leg pieces. Given that they often look very similar (especially to the inexperienced eye), an easy way to accomplish this is to look at the J curve which is the crotch seam edge. The two back portions will always have a deeper curved edge while the front has a softer, shorter curve. To further differentiate between the front and back pieces, you could also take a look at the darts. Conventionally, the back darts are always deeper and/or longer than the front ones. In my shorts example below, the front does not include darts yet the back does. Keeping this in mind, I can easily spot the difference between my front and back pieces. In a conventional pant style, the front is always comprised of two or more identical pieces. Similarly, the back is also composed of two or more identical pieces. Both the front and the back pieces are separate by a J seam. Always keep an eye out for notches- your pattern pieces are most likely marked with notches along their J curves. A single notch marks the front pieces and conventionally, a double notch marks the back pieces. The front J curved edges get sewn to each other. Similarly, the back J curves also get sewn to each other. As you’ll see below, these are some of the first seams you should complete in the sewing process. Darts of course, always come at the very beginning so don’t forget to get those out of the way before starting on the J seams. Speaking of the front and back J seam- these curved seams correspond to the pant’s crotch line and thus should be comfortable and easy to move in. As you’ll see below, the seam allowance along the most curved area of the J seam should be graded and/or trimmed to improve flexibility and eliminate bulk. Never clip these curved seams for tension release! Doing so will weaken the seam not to mention that it defeats the purpose of it’s overall functionality. 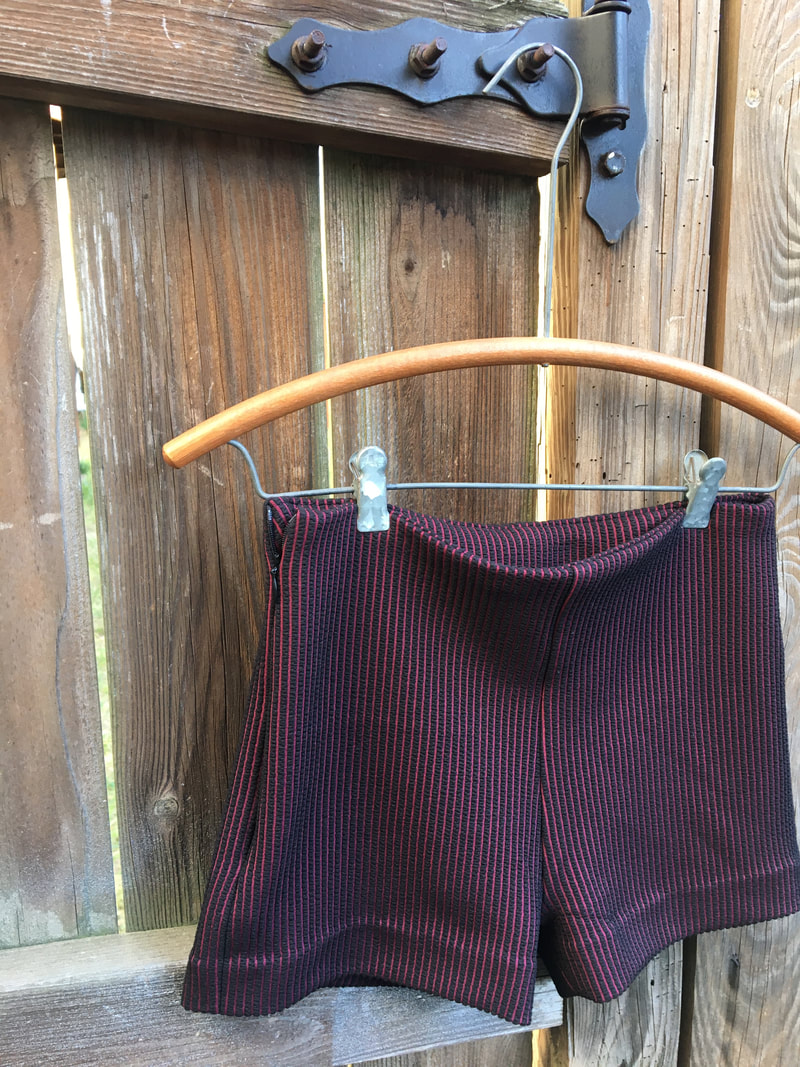 As you would with any style bottoms, think carefully about the type of closure you would like to us. Even stretch fabric may require a full zipper, snaps or buttons to provide the shorts/pants with the proper functionality. Zippers are the easiest to incorporate into shorts or trouser seams. They don’t pose as big of a challenge in terms of fit, added bulk, flaps or plackets. The inseam of the pants/shorts is almost always left for last as you’ll see in the steps below. The reason being that it is much easier to sew all necessary elements when the inseam is left all the way open. Plus, stitching it as one of the final steps is actually very simple to do with one single stitch. The hemline is always left to be finished last. So now that you know some basics on pant construction, let’s get started on the shorts! I drafted the patterns a little while ago, so we’ll just pick up at cutting the pattern pieces. Cutting The Shorts Patterns And Transferring Sewing Marks1. Fold the fabric along the selvage edge such that its face side is touching and the wrong side corresponds to the outside. This will ensure that as you cut each pattern piece you end up with two identical mirror images of the front and two of the back. 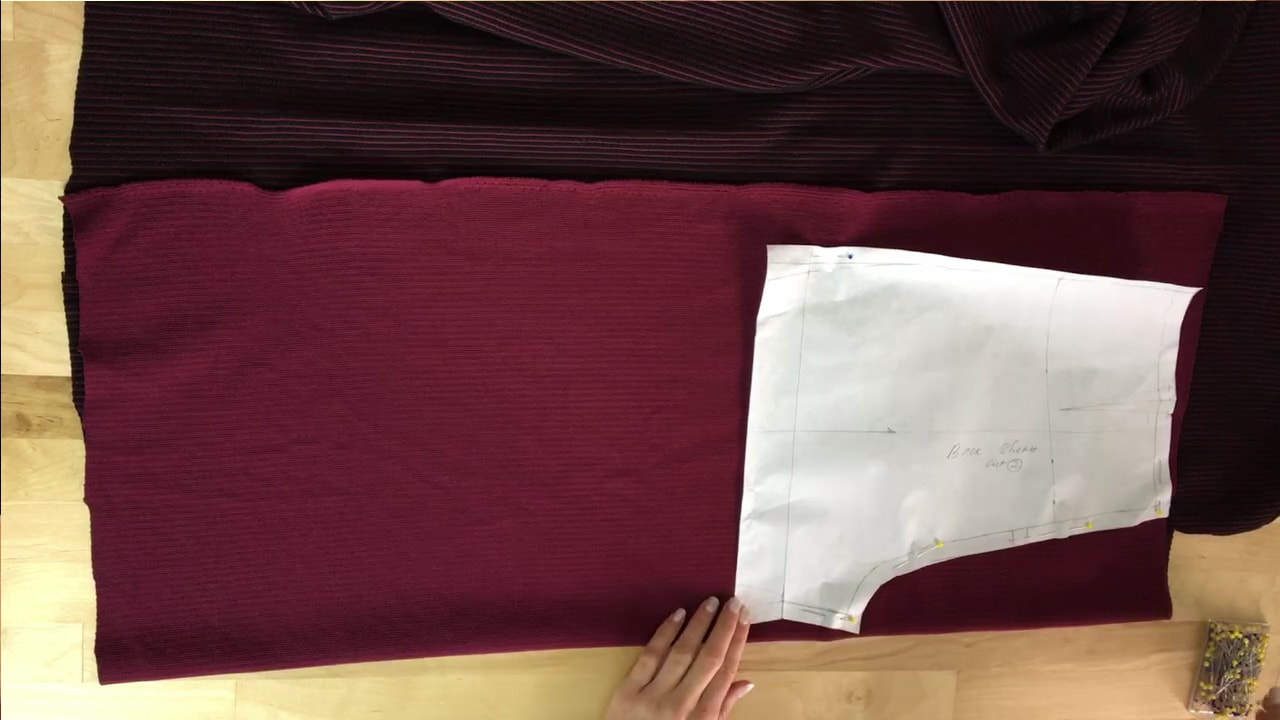 2. Align the patterns according to the grainline and pin at the seam allowance through both fabric layers underneath. 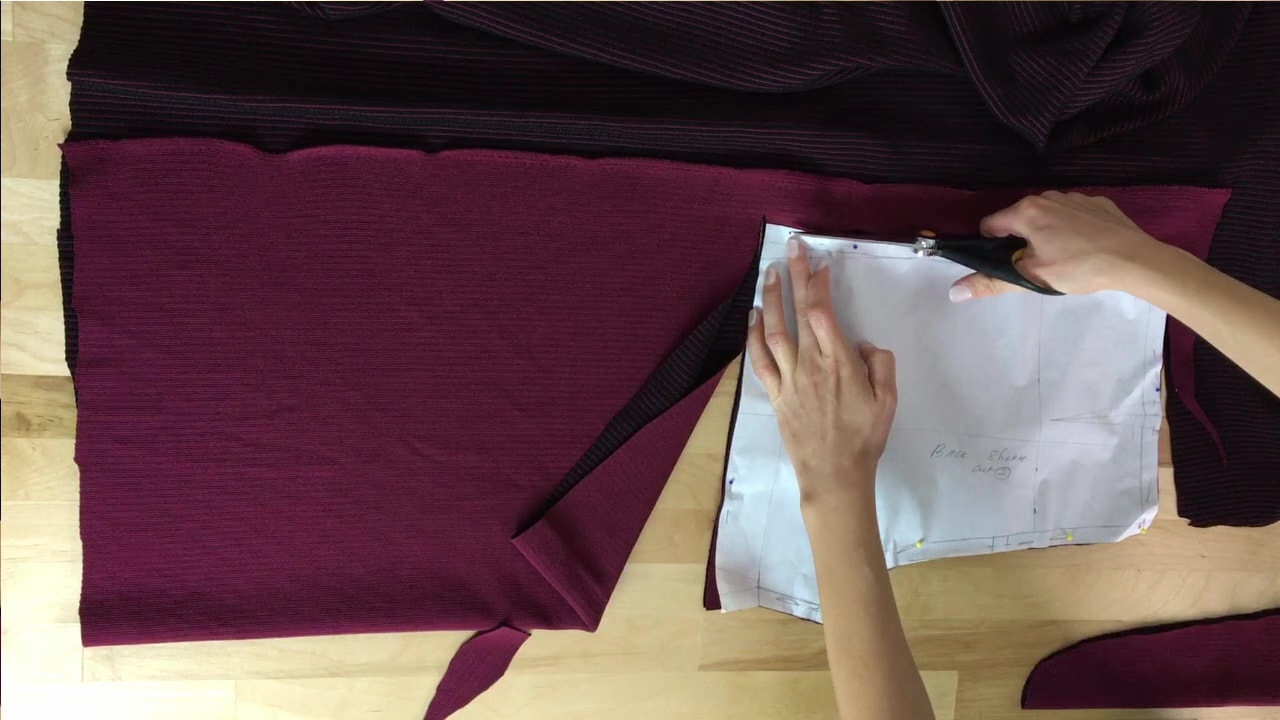 3. Cut carefully along the pattern edges. Don’t forget to cut the back and front facing pieces along with their identical fusible interfacing pieces to use as backing. My facing patterns are cut on fold style so I folded the fabric with the face sides touching and aligned the cut on fold edge on the pattern to the folded fabric edge. I used the same logic (and patterns!) to cut out the interfacing portions.  4. Transfer all notches and darts from the pattern onto both front and back pant pieces. I only have darts on the back, so I used the pin and pencil technique to transfer the dart lines to the wrong side of each of my back pieces. Sewing The Faced Waistline Shorts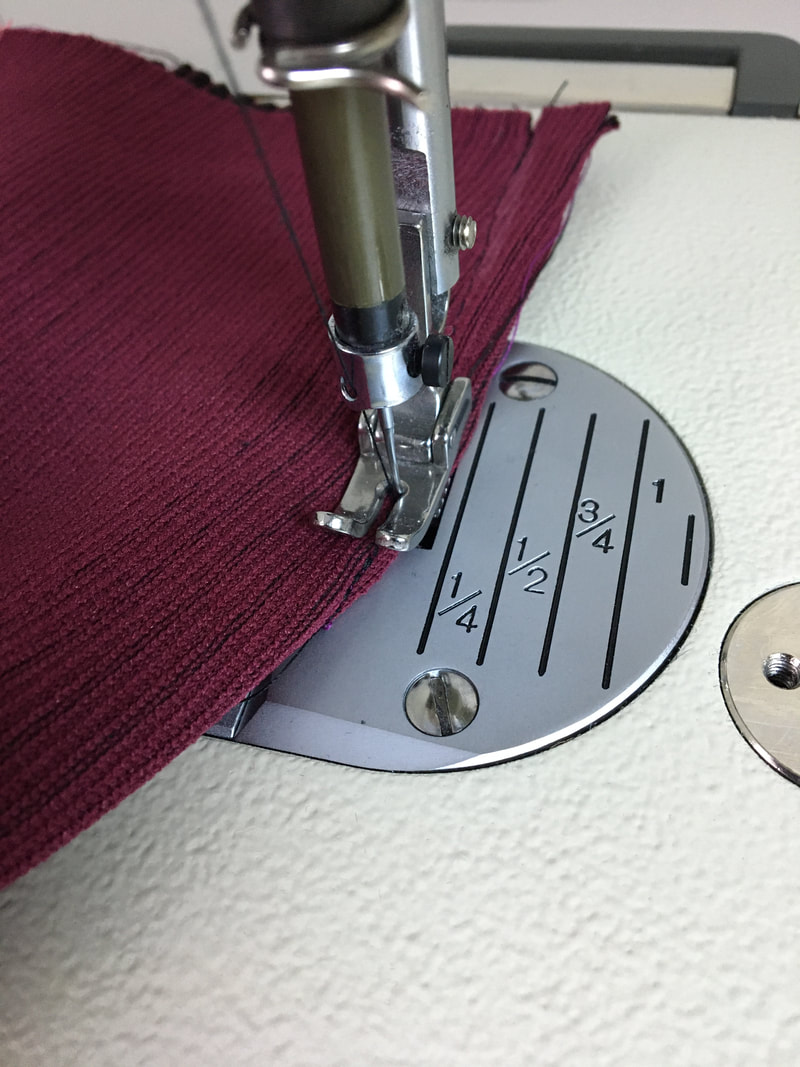 5. Fold, pin and sew the darts first. If you are unfamiliar with sewing darts altogether, check out this tutorial: How To Sew Basic Darts. 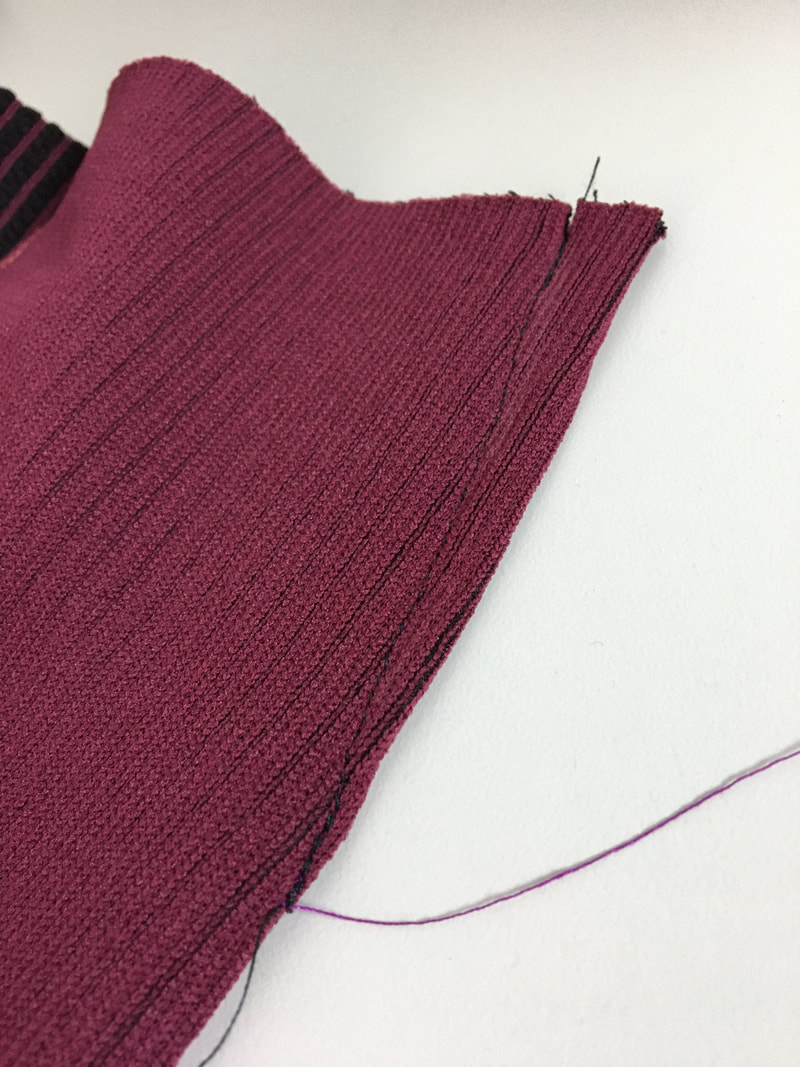 Tie the loose thread ends at the vanishing point of the dart to prevent the stitch from coming undone. 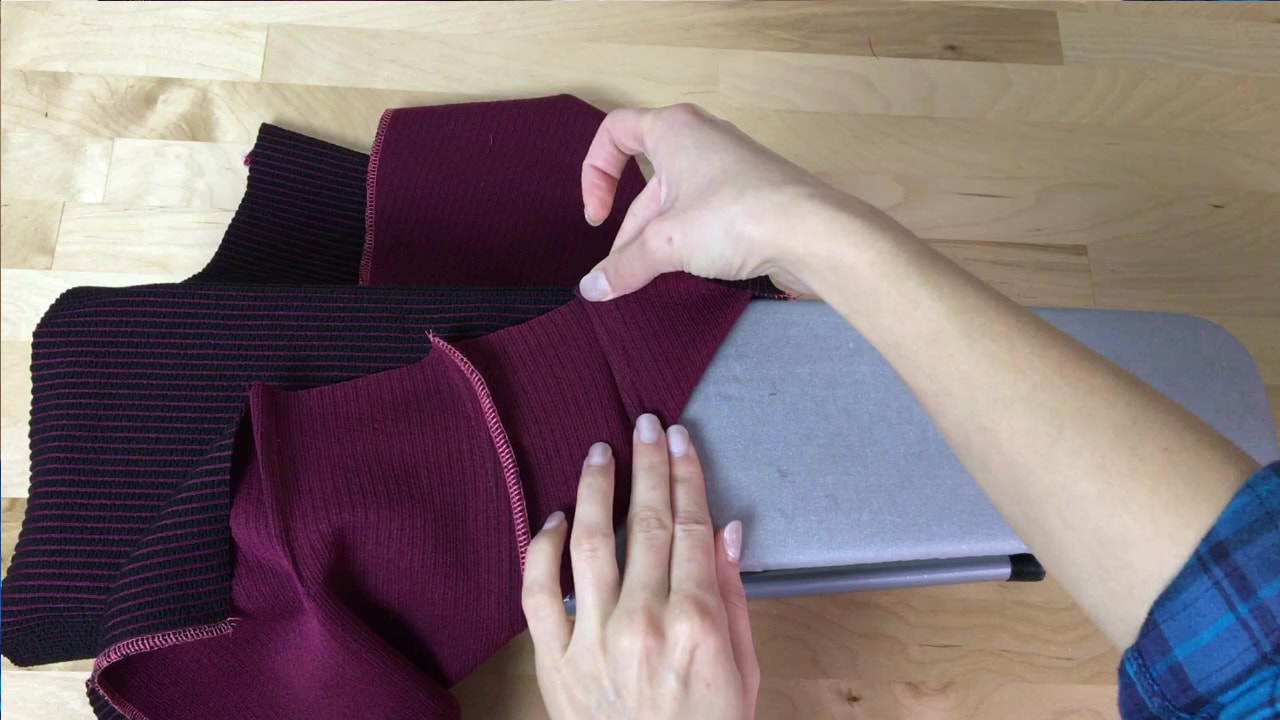 Iron the dart excess pointing towards the center of each front and back. 6. Add a serging or zig zag stitch to the side seam edges. Leave the J seams unfinished for now. 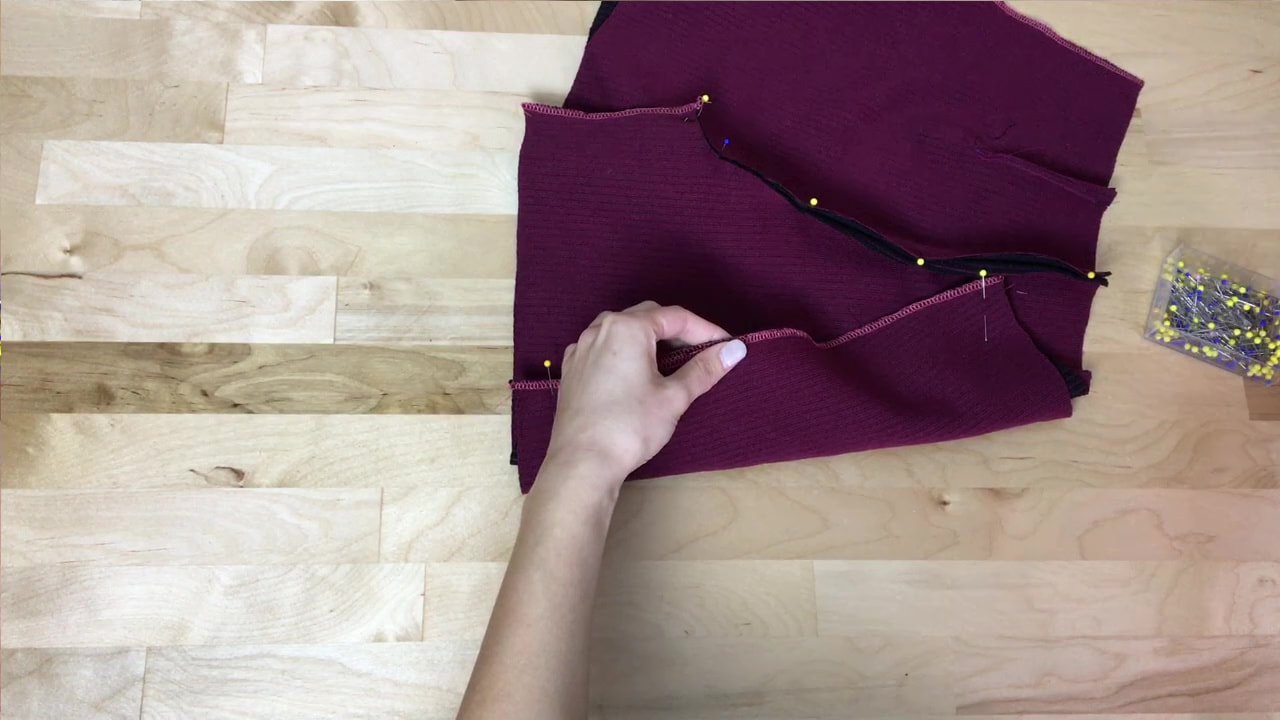 7. Align and pin the following seams: The front J curved edges, the back J curved edges, and the left side seam. I’m leaving the side seam open for now as this seam will house my invisible zipper. 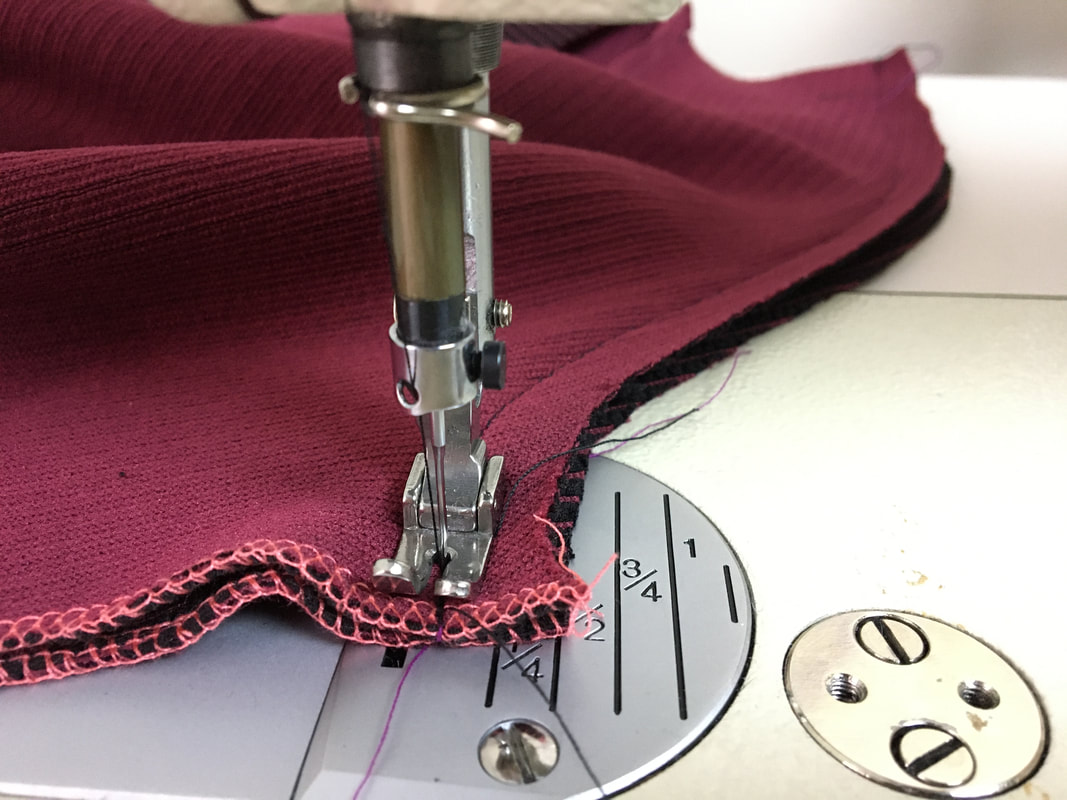 8. Stitch all at the designated seam allowance- ½” in my case. 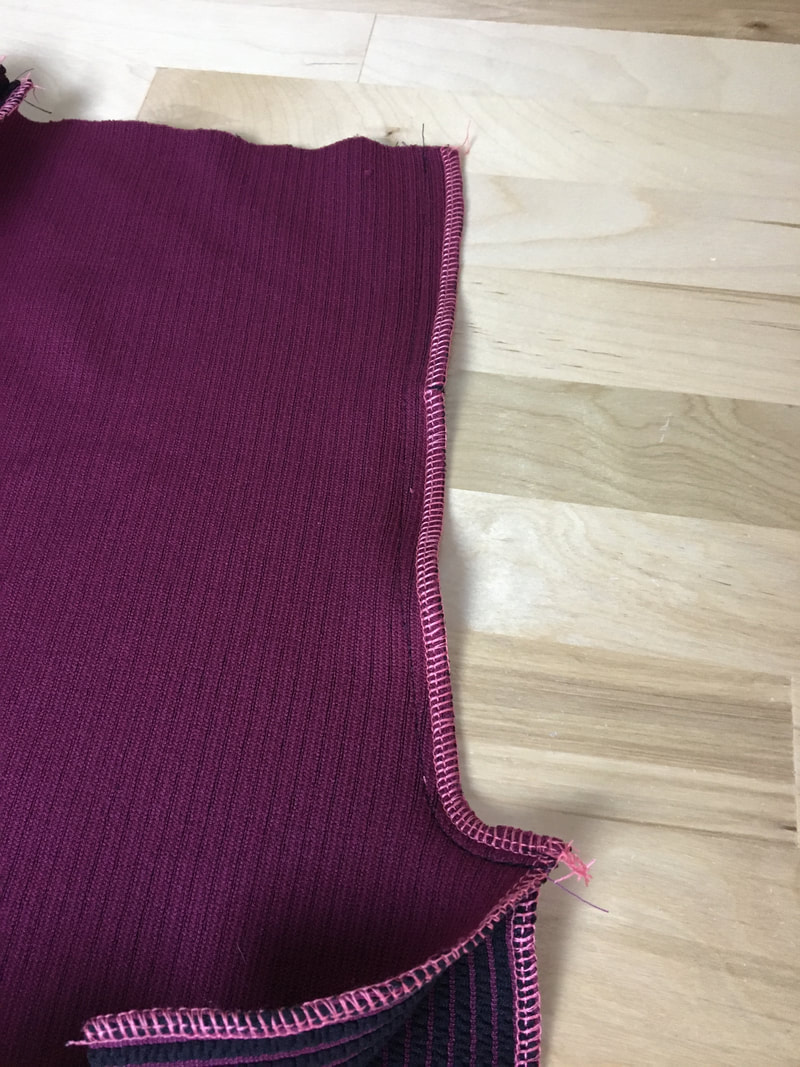 9. Next, clean finish the J curve seam allowance layers together, gradually trimming half of the excess seam allowance along the most curved portion at the bottom. I used my serger’s cutting tool to do this but you may have to trim the excess halfway down with your scissors prior to clean finishing. This step is crucial as it will increase flexibility and eliminate bulk. 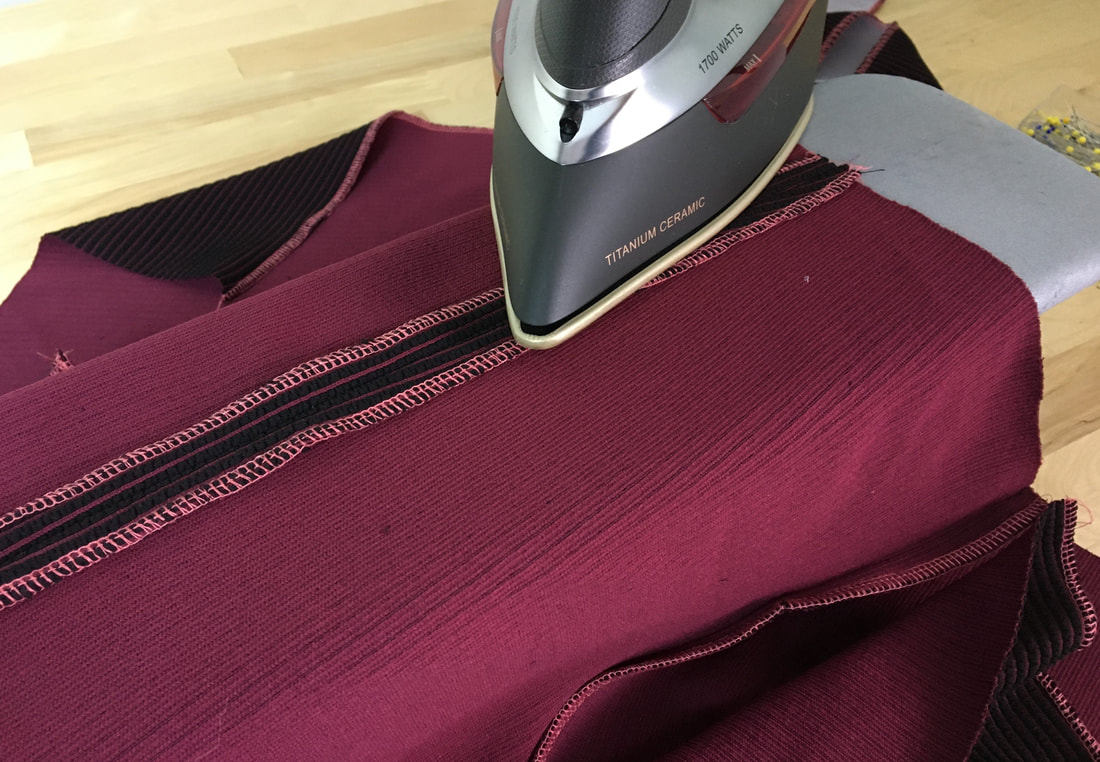 Iron the side seam allowance open. 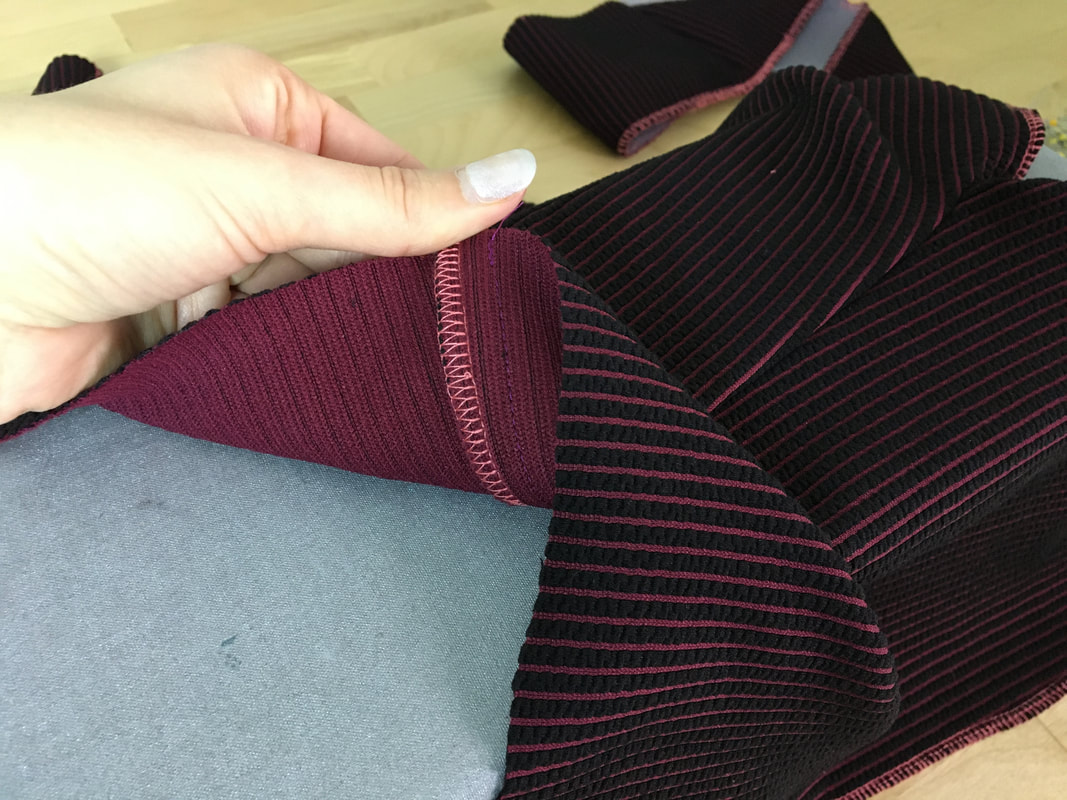 10. Iron both front and back J seams with the seam allowance pointing to one side. We are now ready for the facing! Check out a detailed tutorial on sewing this exact facing here: How To Sew A Waist Facing 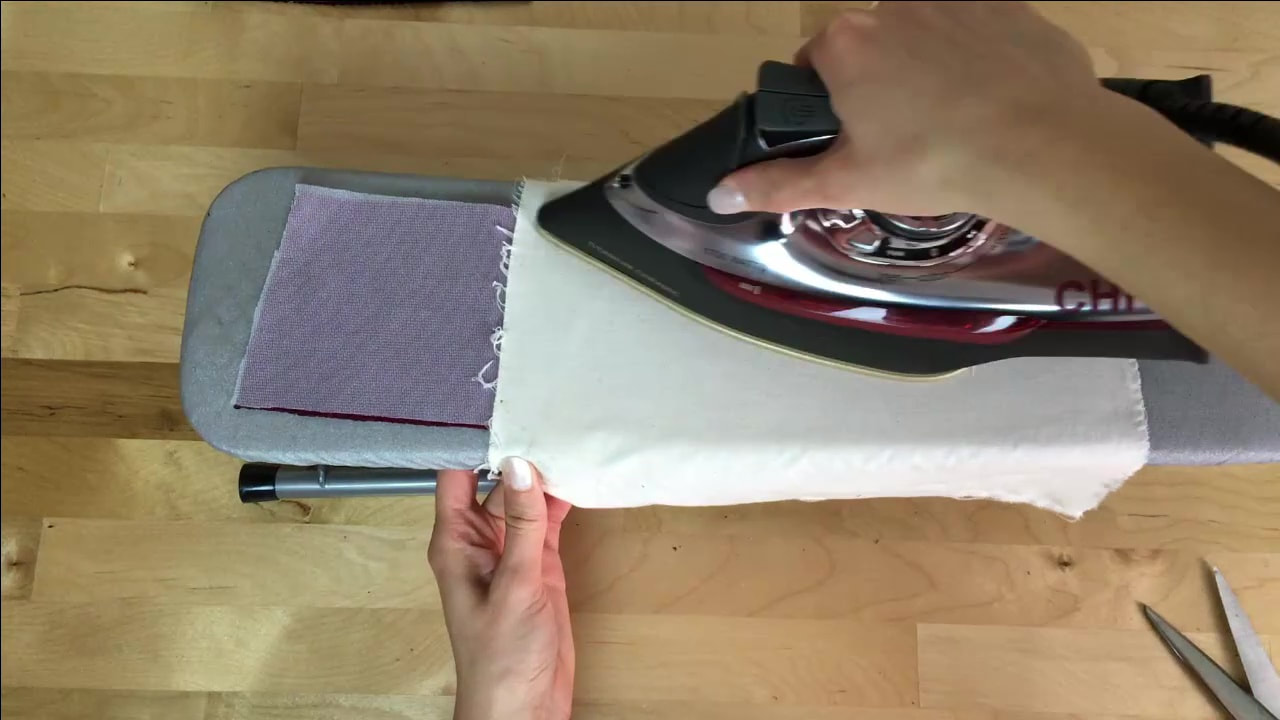 Before sewing the facing to the garment, fuse the interfacing to the wrong side of both facing pieces and sew the seam corresponding to the closed seam on the shorts.  Iron the seam allowance open as shown. 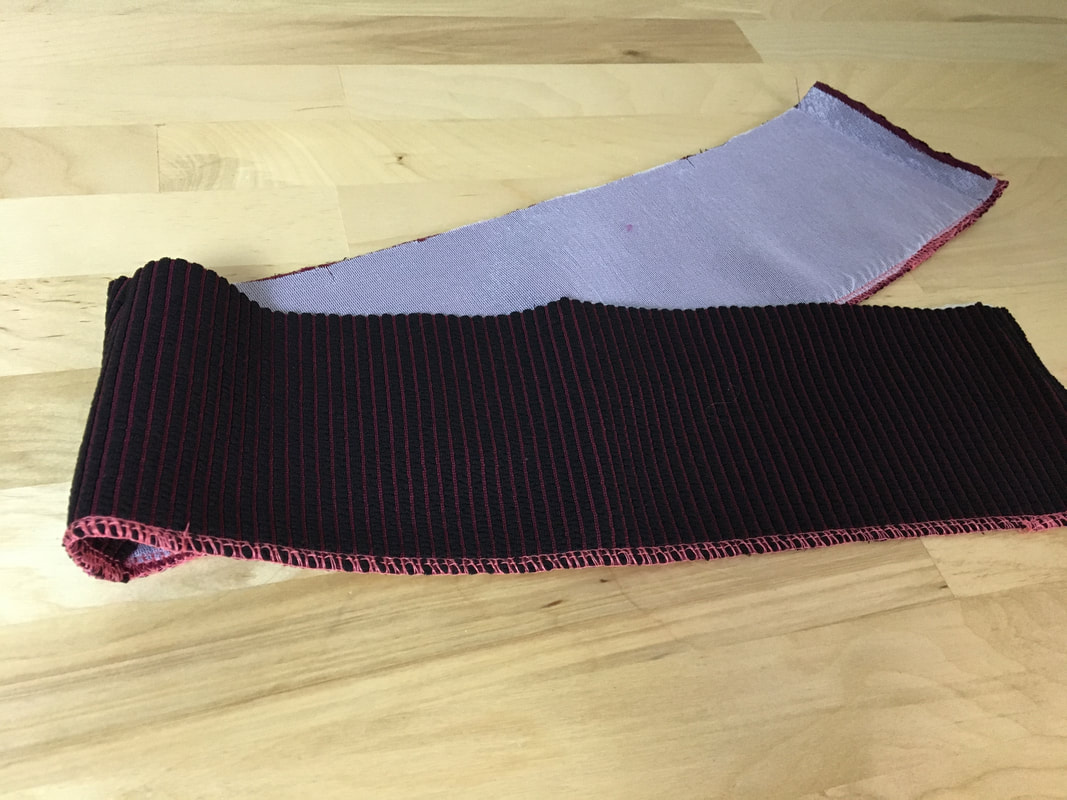 Clean finish the entire bottom facing edge. 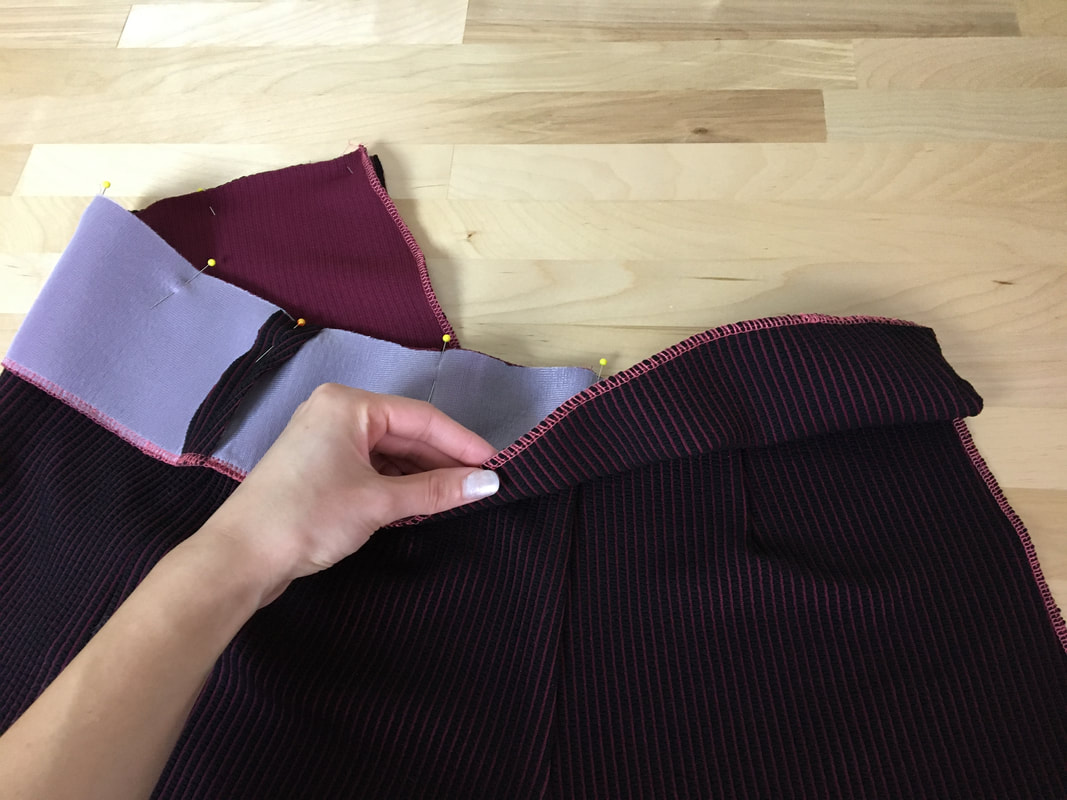 11. Align the edge of the facing to that of the shorts’ waistline with the fabric face sides touching as shown. Match each corresponding seam and notch. The back of my shorts has darts which correspond to the notches on my facing. 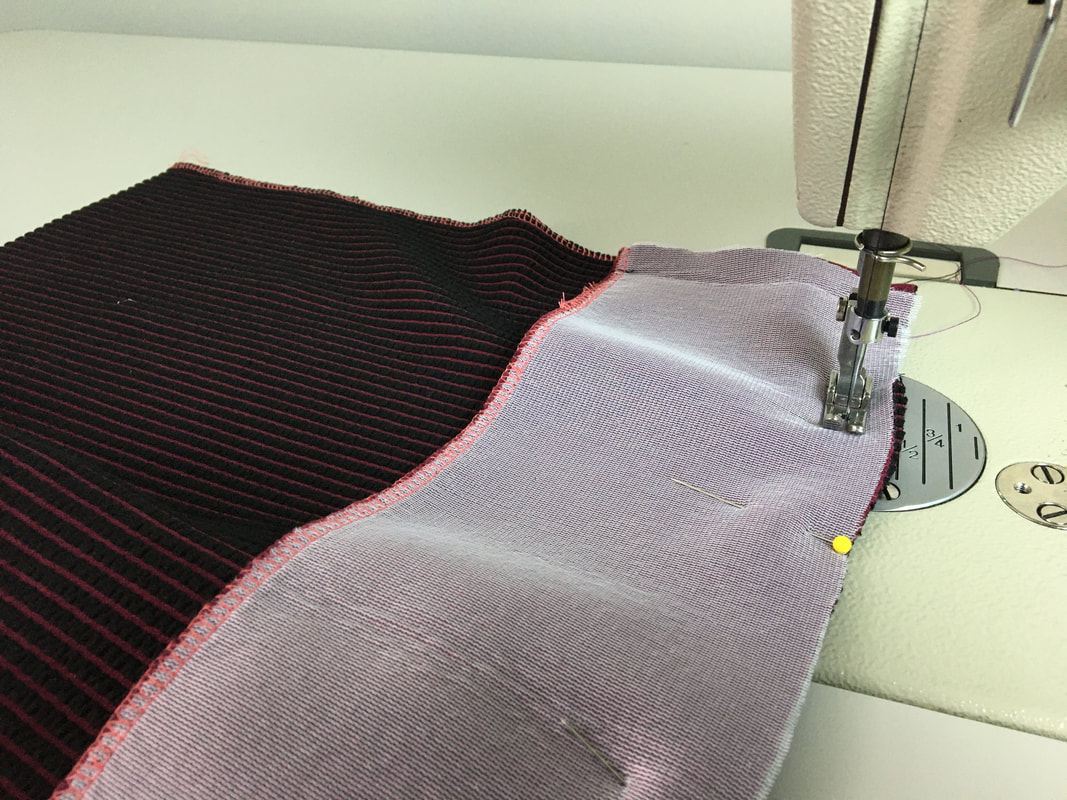 12. Insert pins perpendicular to the edge and machine stitch at the designated seam allowance. 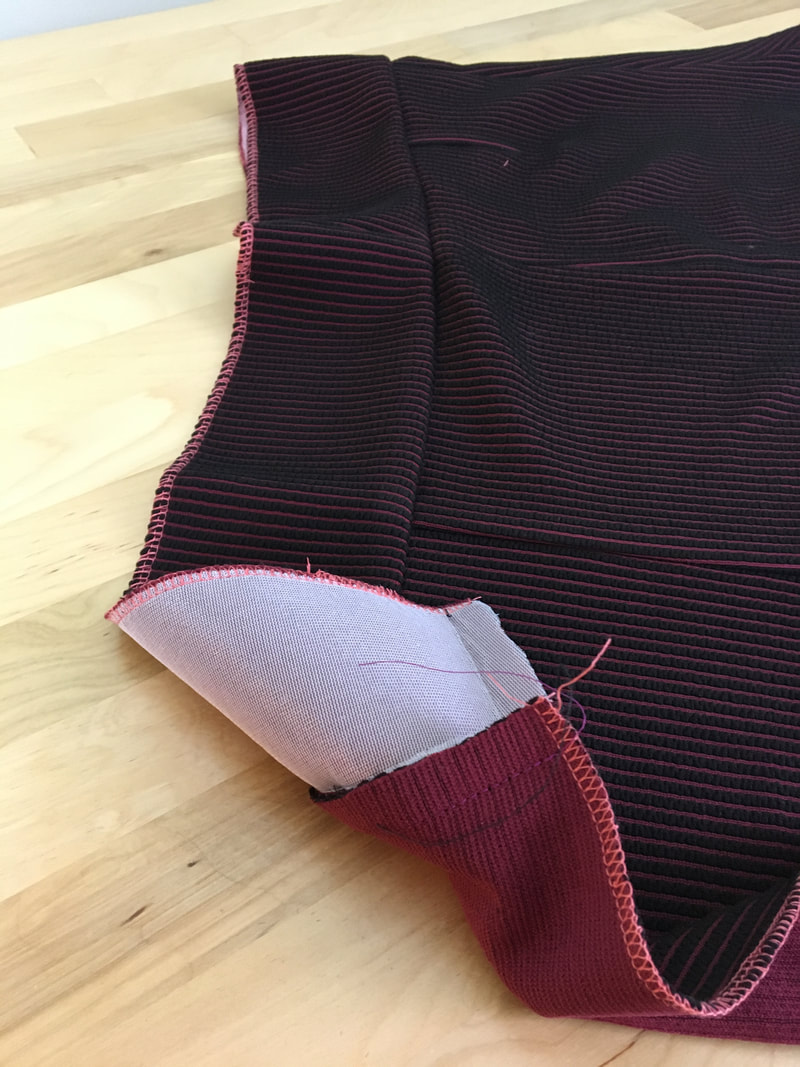 13. Iron the seam with the seam allowance point up towards the facing. 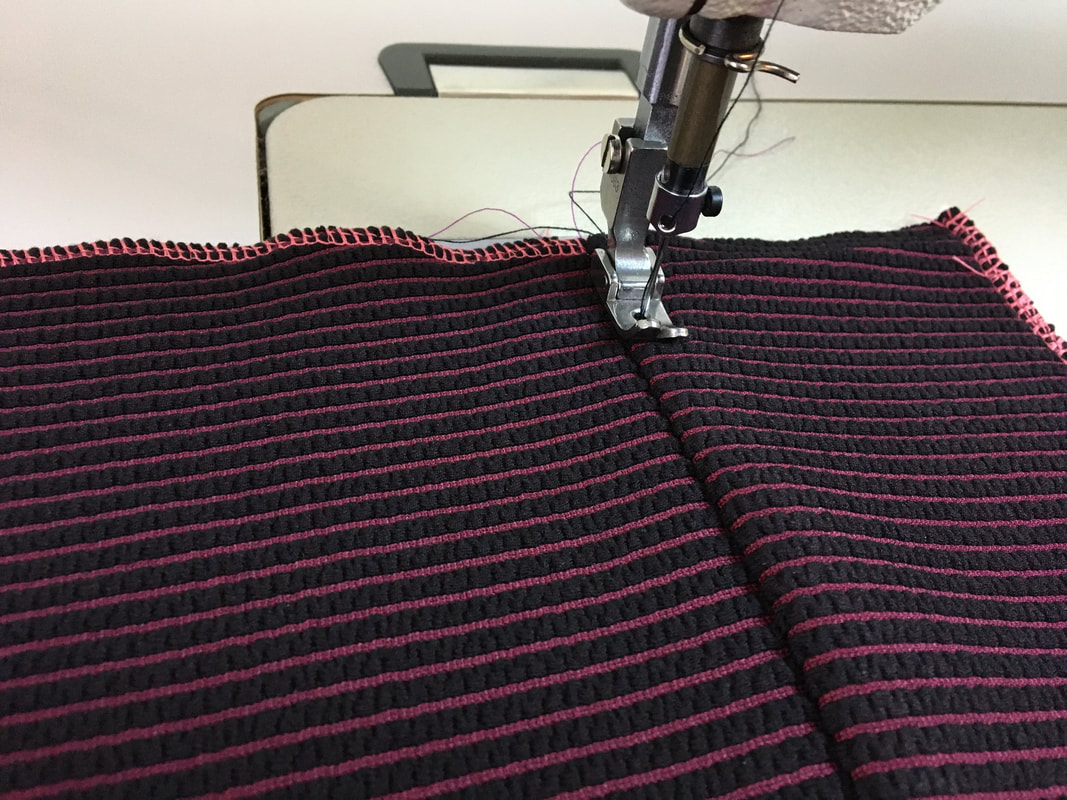 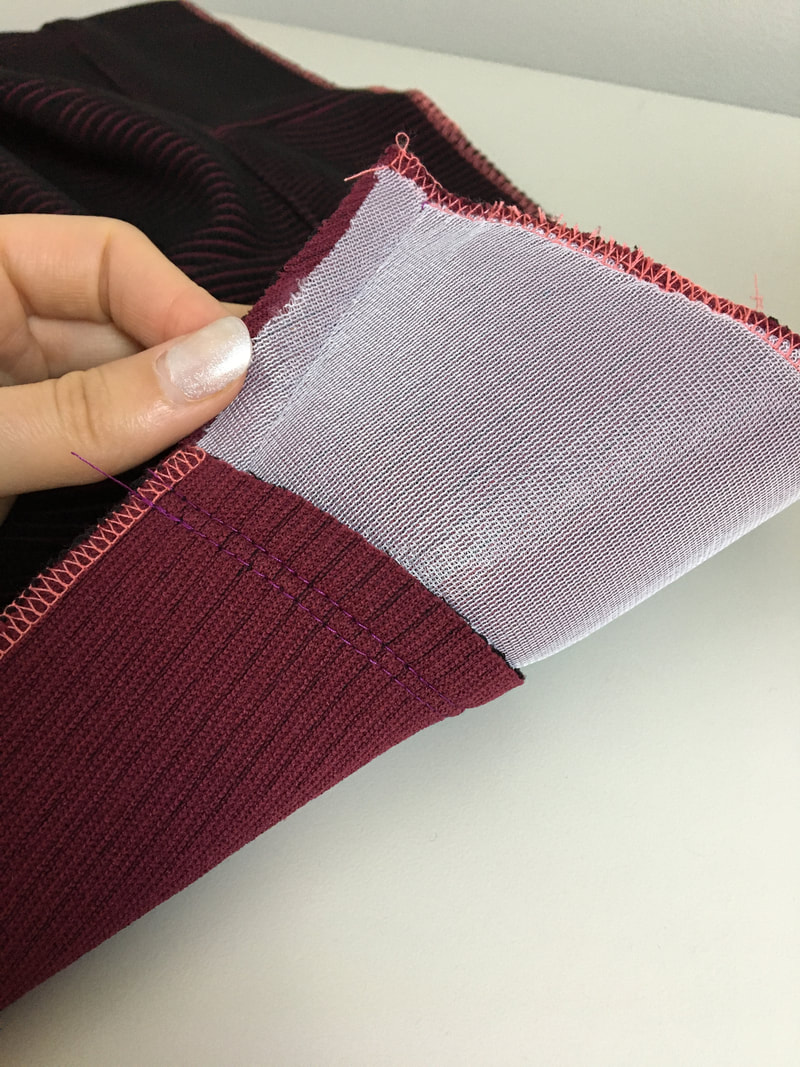 Adding this important stitch will keep the facing laying flat and prevent it from rolling to the outside of the garment. 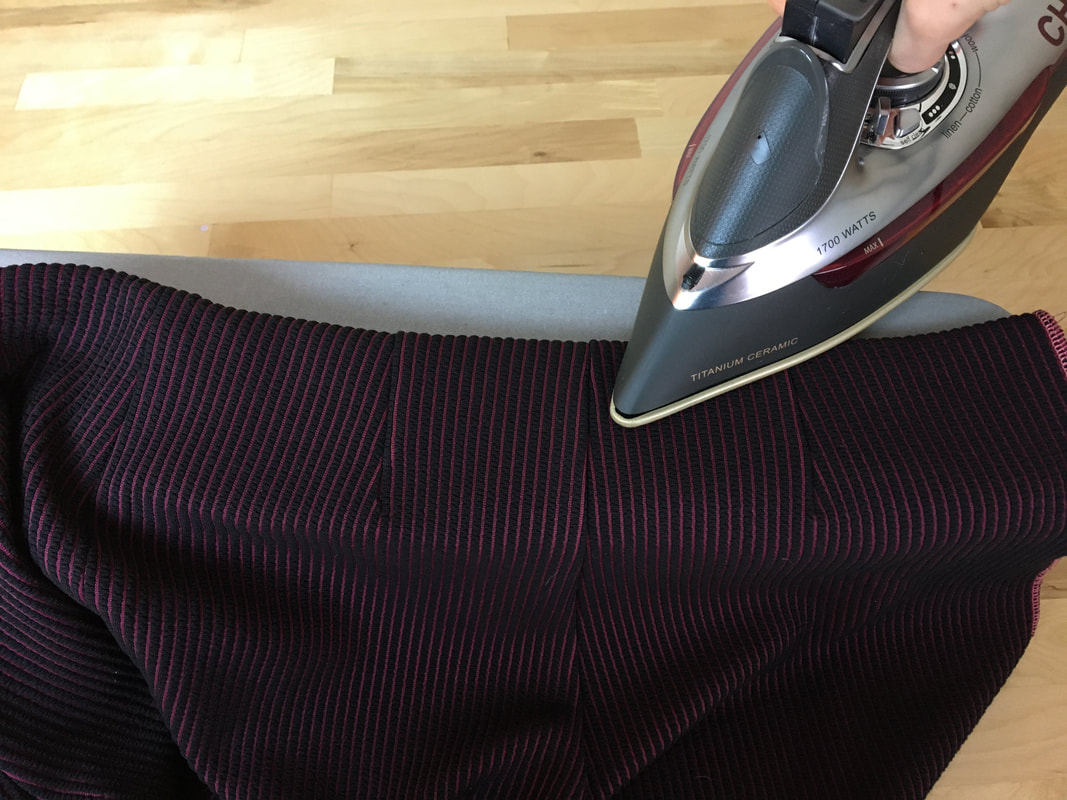 15. Move the facing to the inside of the shorts and iron the finished edge as shown. 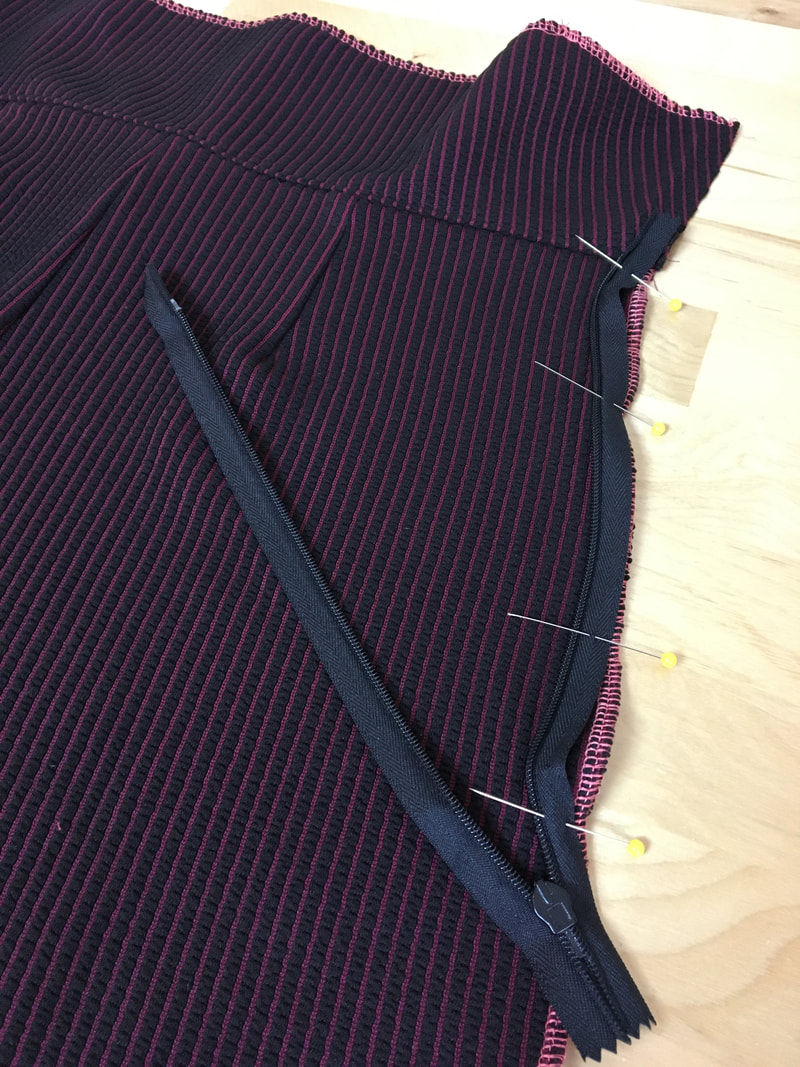 16. At this point, sew the invisible zipper into the open seam. Open the zipper all the way and align each portion to the corresponding seam edge such that the face of the zipper is touching the face of the fabric. More on sewing invisible zippers in this tutorial: Video Tutorial: How To Sew An Invisible Zipper Into A Seam With Lining. 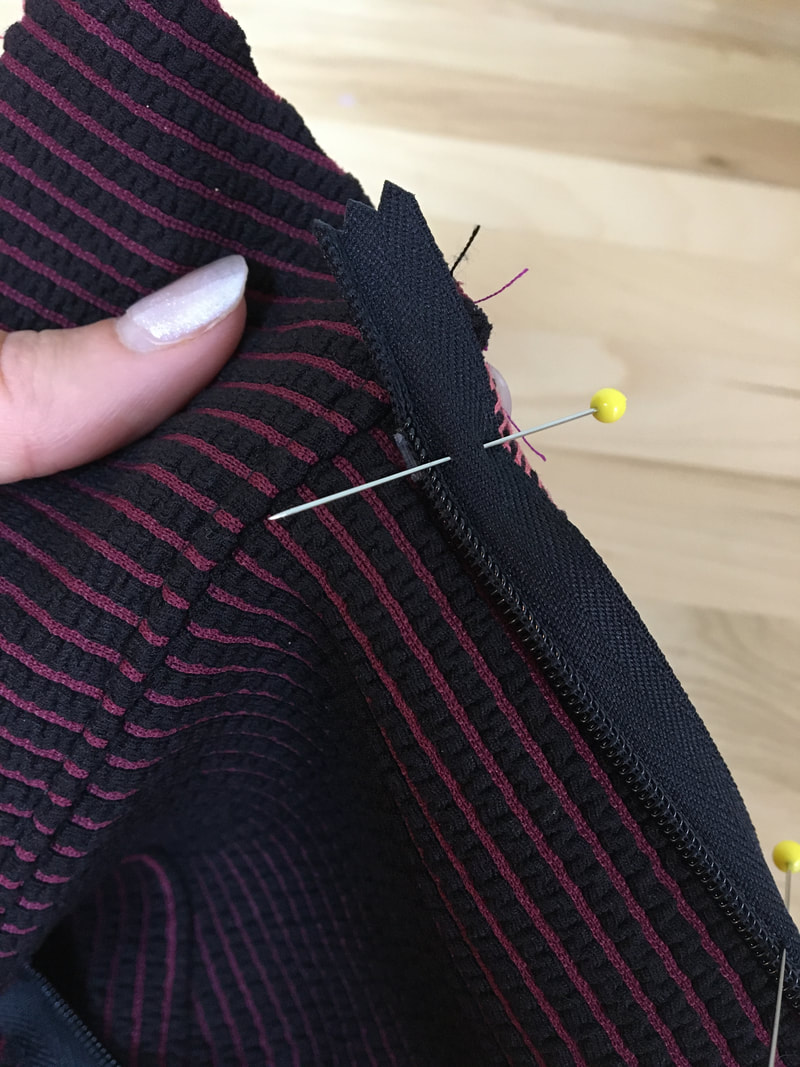 Make sure the very top edge of the zipper is aligned to the facing seam as shown. 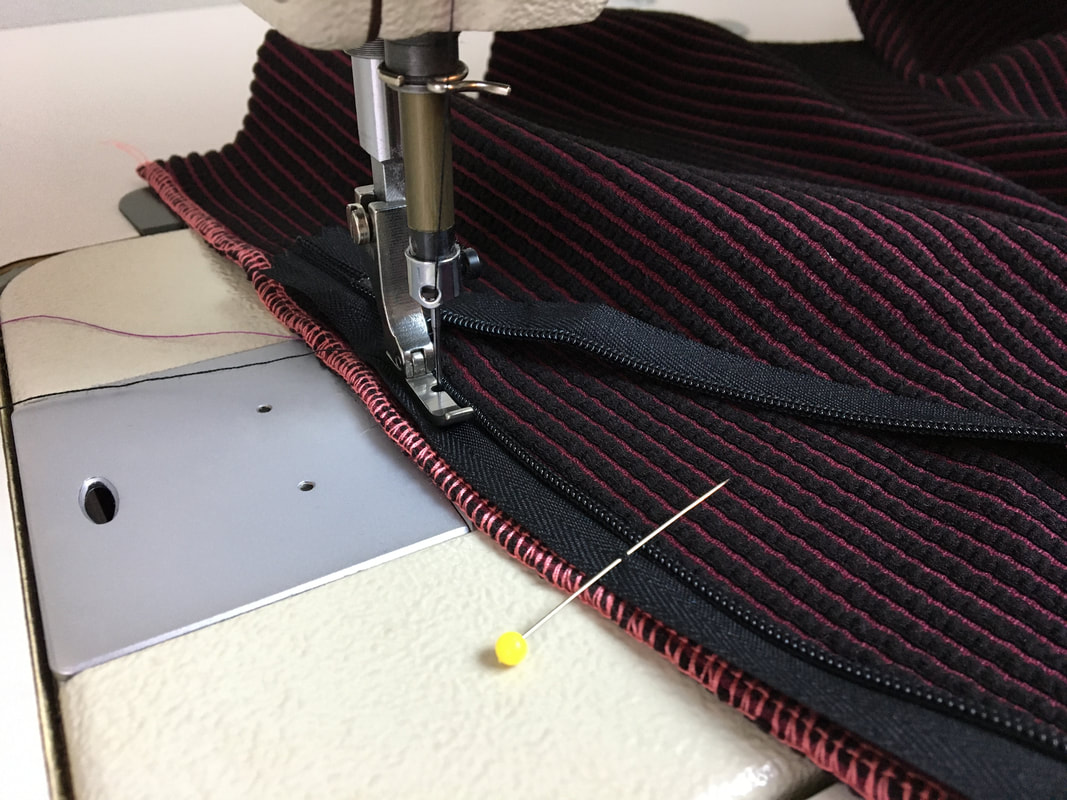 17. Stitch each zipper tape using your machine's zipper foot, most likely provided with your sewing machine. 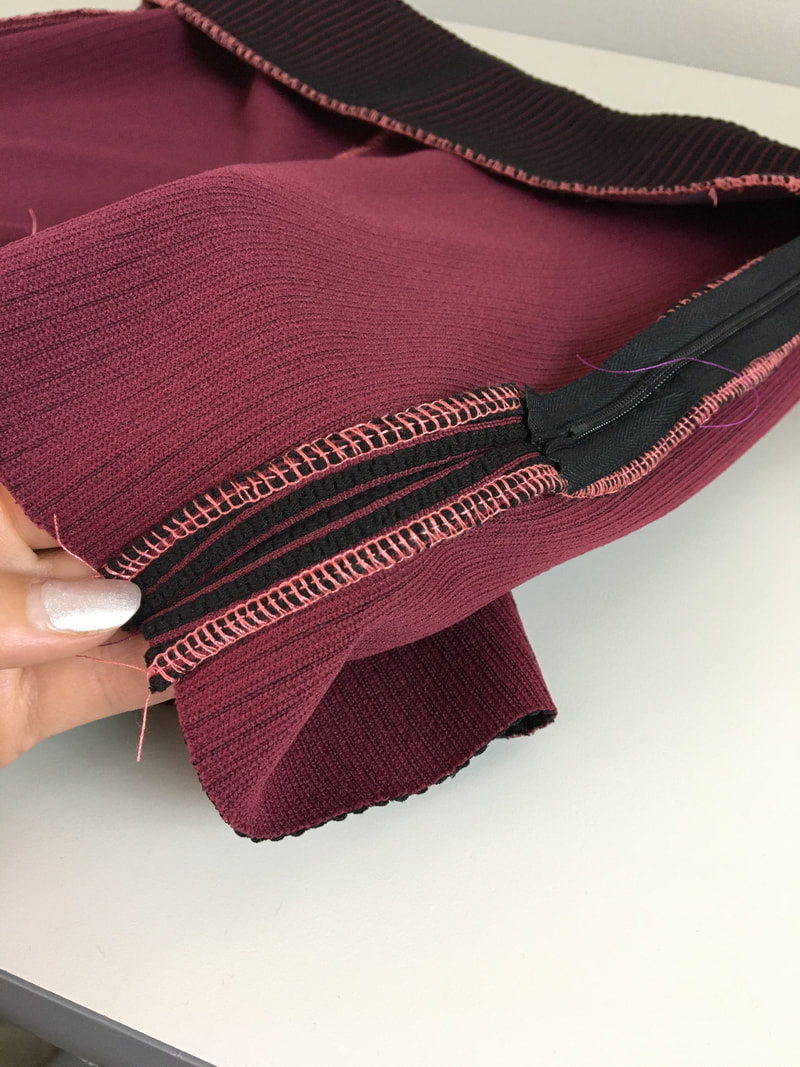 18. Next, stitch the rest of the seam below the zipper. Use your zipper presser foot to start right at the base of where the zipper ends and move down towards the bottom of the shorts following the correct seam allowance. 19. Last but not least, lets clean finish the facing ends to each corresponding zipper portion. Keeping the zipper open, flip the facing over the top of each zipper end such that the right sides of the facing and the shorts are touching and the edges align. The zipper tape should be sandwiched in between the two fabric layers. 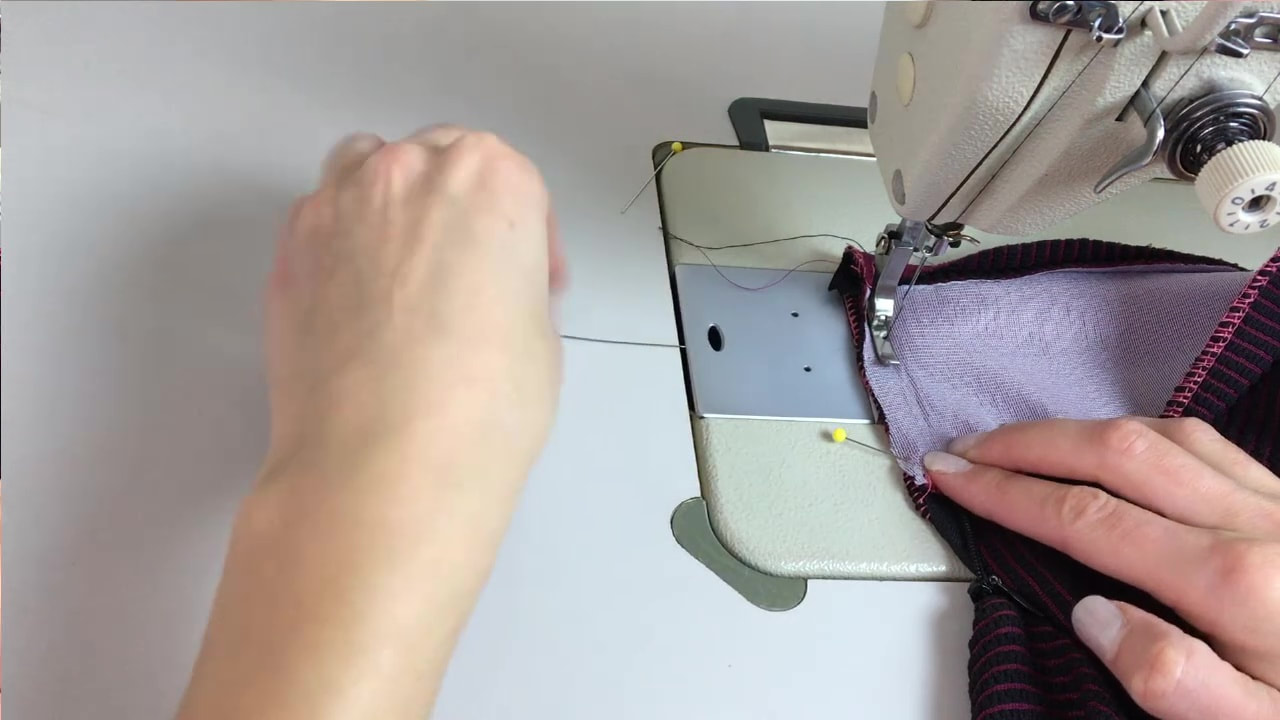 20. Use the zipper foot to stitch next to the zipper teeth through the facing, zipper tape and shorts layer as shown above. 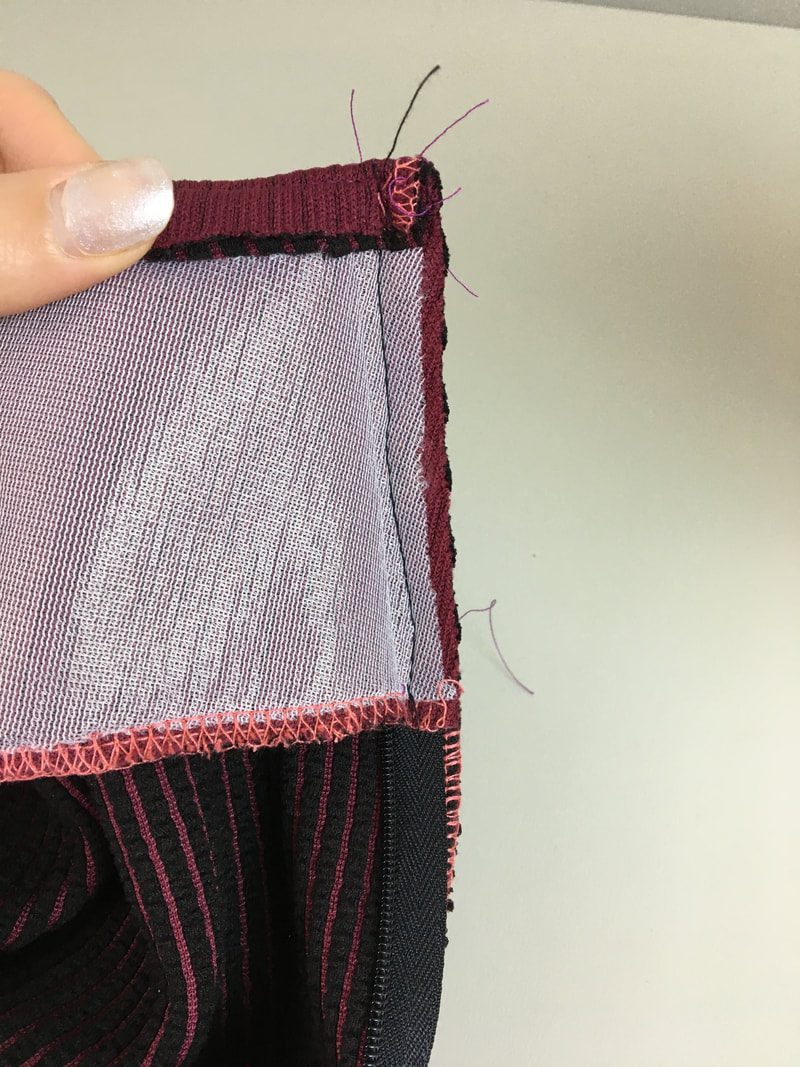 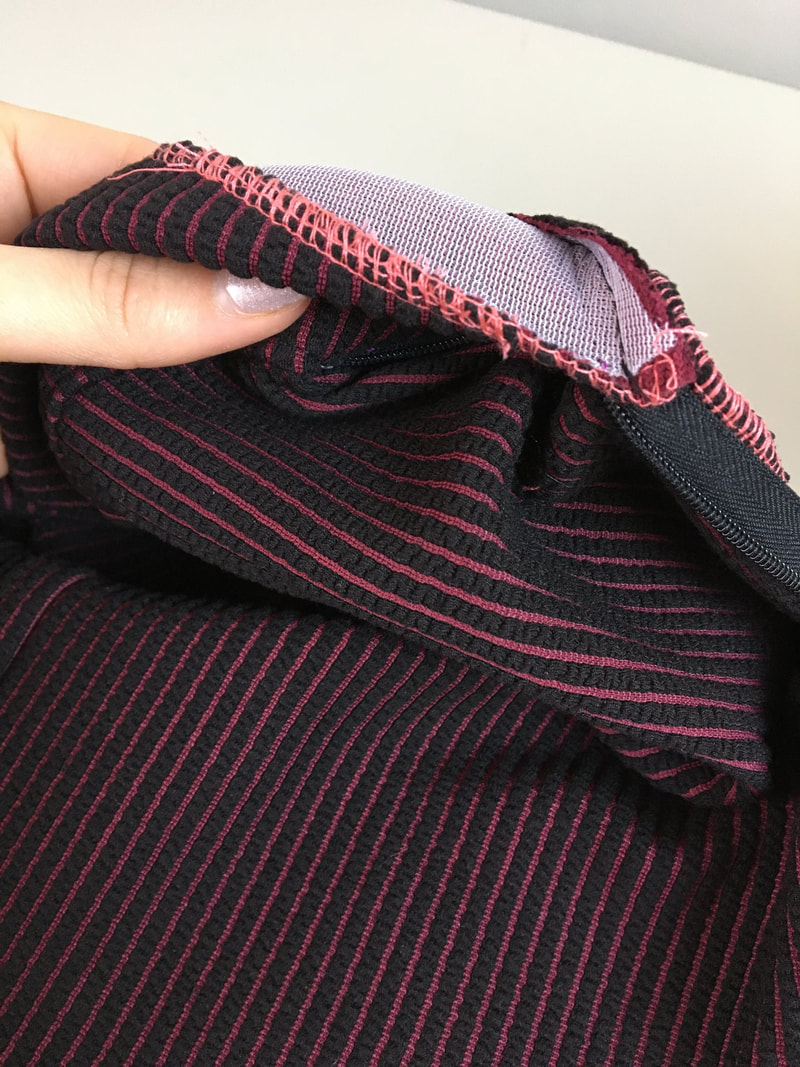 Flip the facing back to the inside of the shorts, pulling by the corner to expose the zipper teeth. 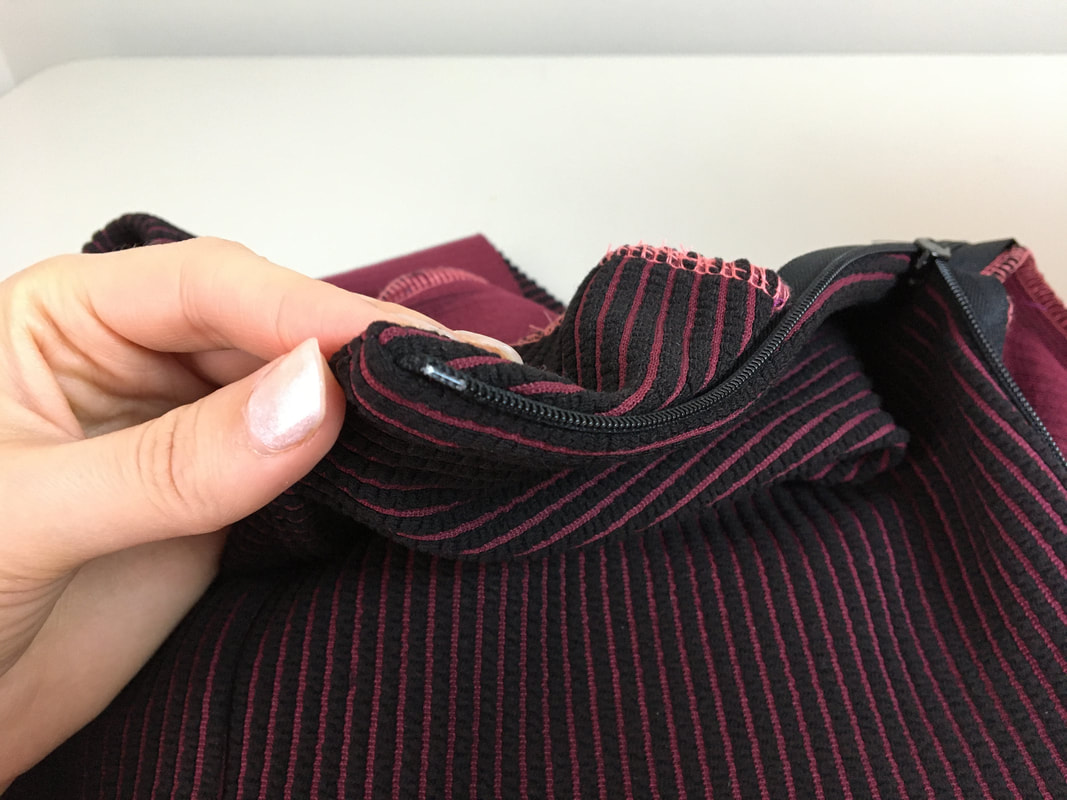 All the raw edges are now enclosed on the inside. 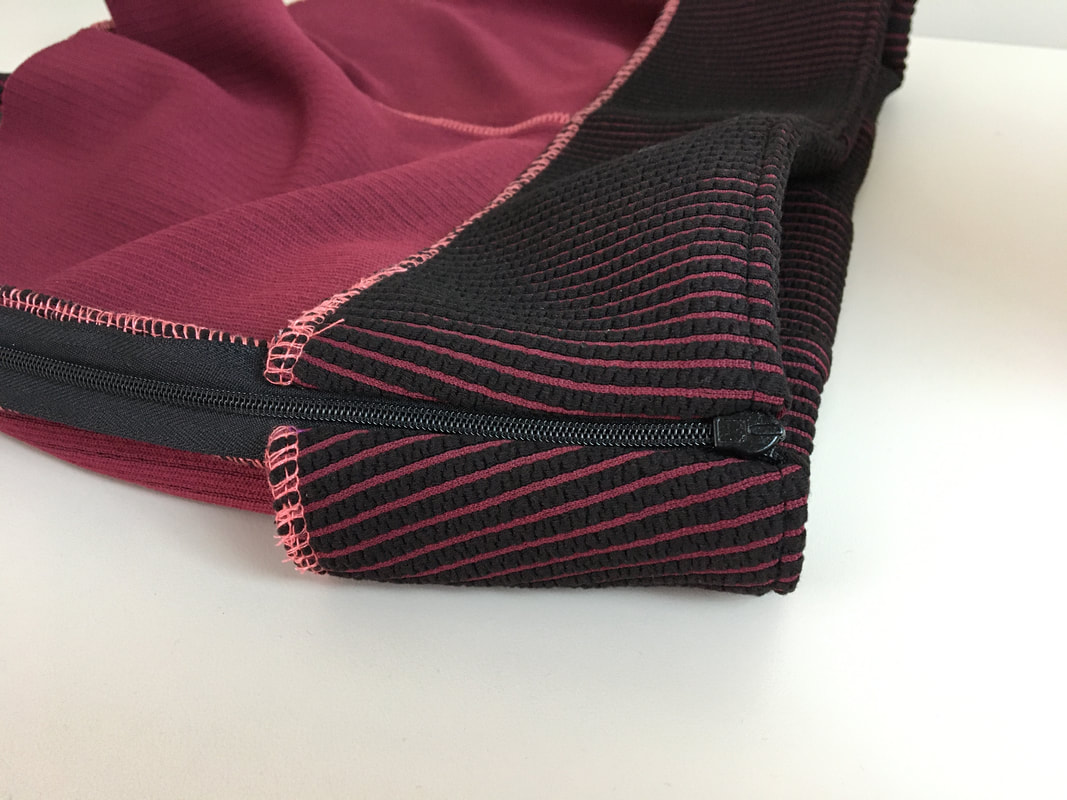 Repeat on both ends of the facing. 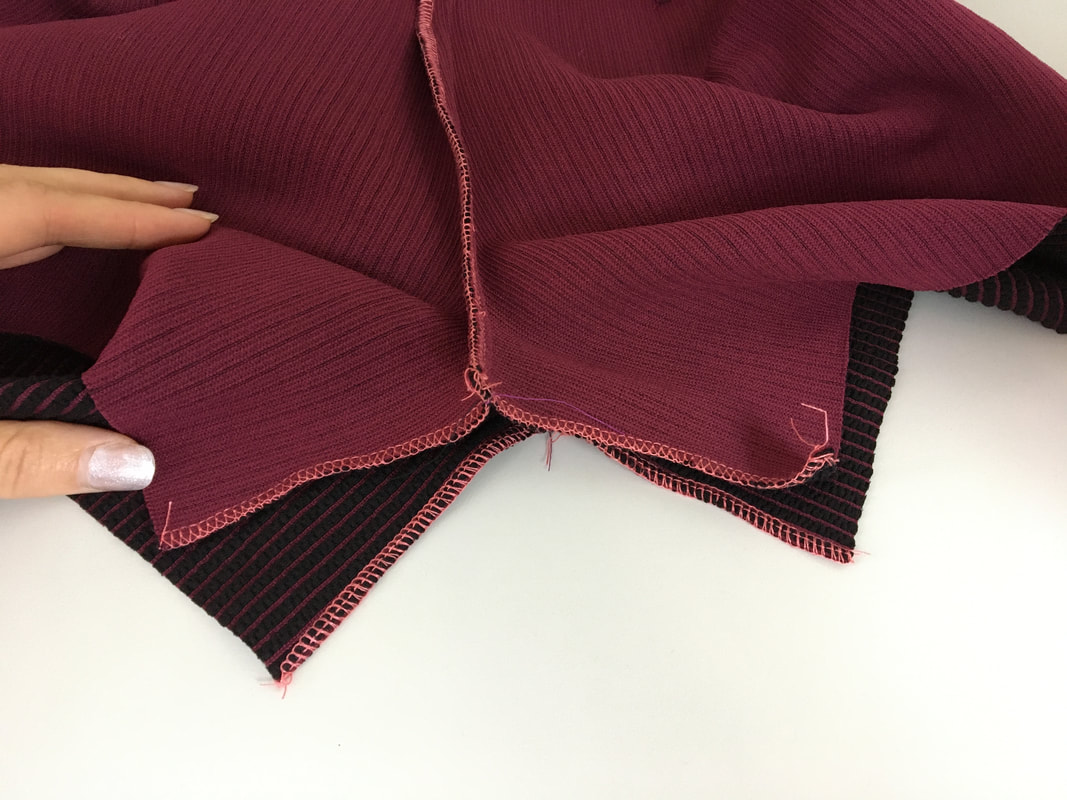 21. Next, sew the inseam. To do this, turn the shorts on their wrong side and match up the front and back J seams. Insert a pin to keep this alignment in place. 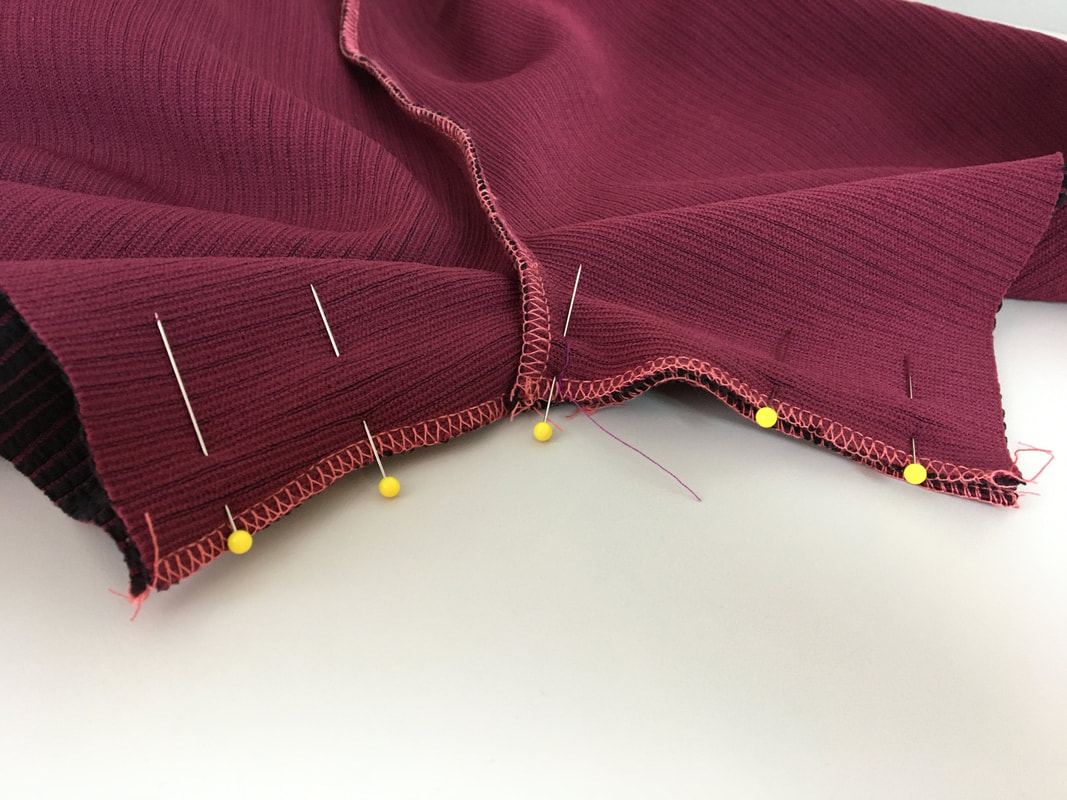 22. Match the rest of the seam on both ends. Insert pins perpendicular to the edge in preparation for machine stitching. 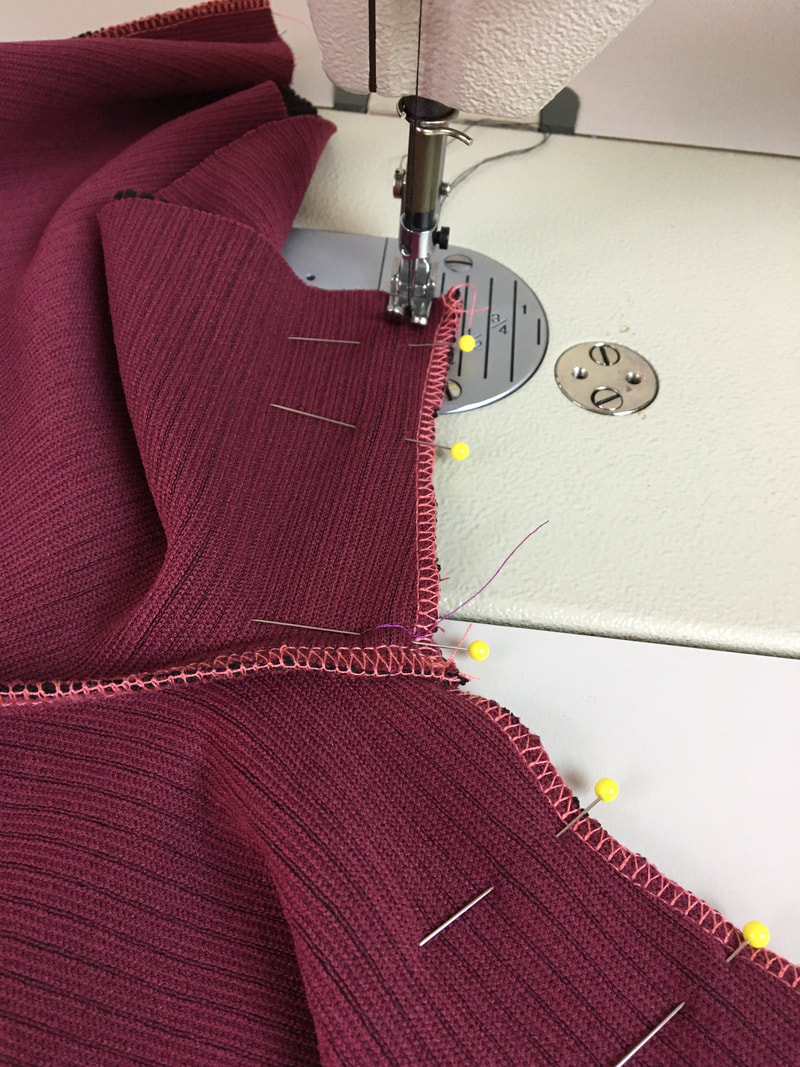 23. Machine stitch at the designated seam allowance- for me the seam allowance as always is ½” 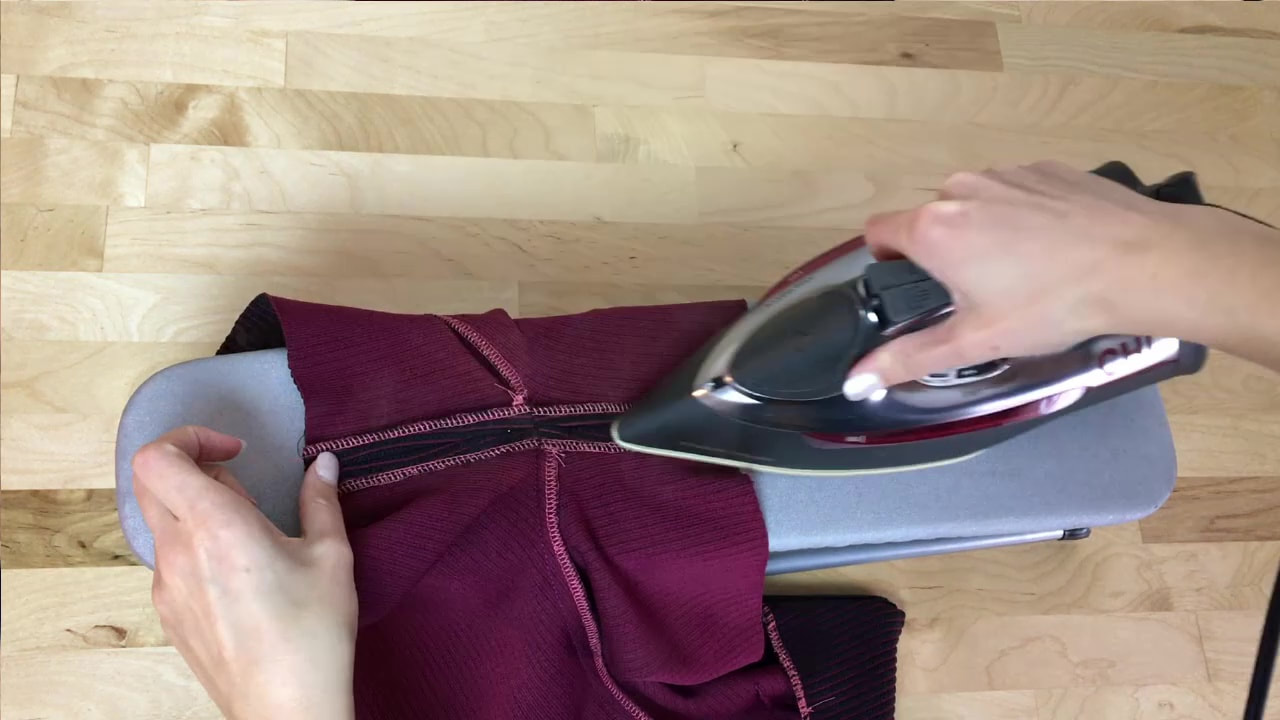 24. Before moving on to clean finishing the hem, iron the inseam and the bottom of the zipper seam with the seam allowance open. I will be applying a single fold slip stitch to the shorts' hem. You can use whatever method you prefer or what is most suitable for your fabric. 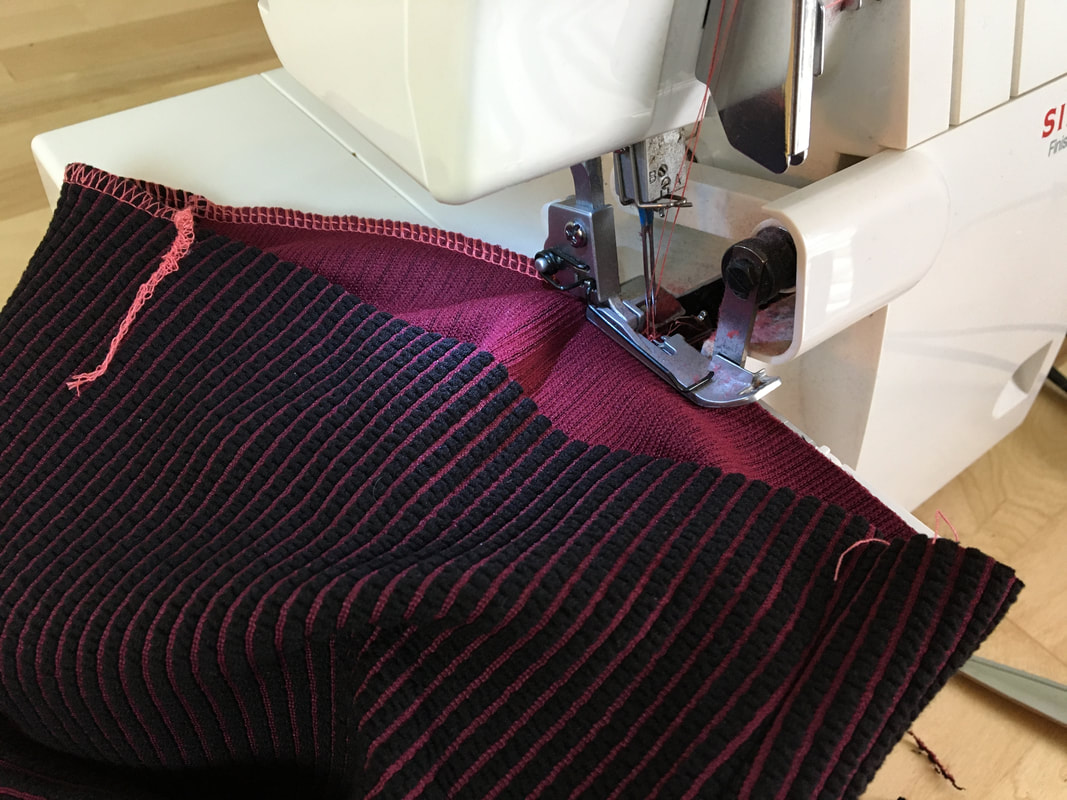 23. To start with, apply a serging or zig zag stitch along the bottom edge of each leg as shown. 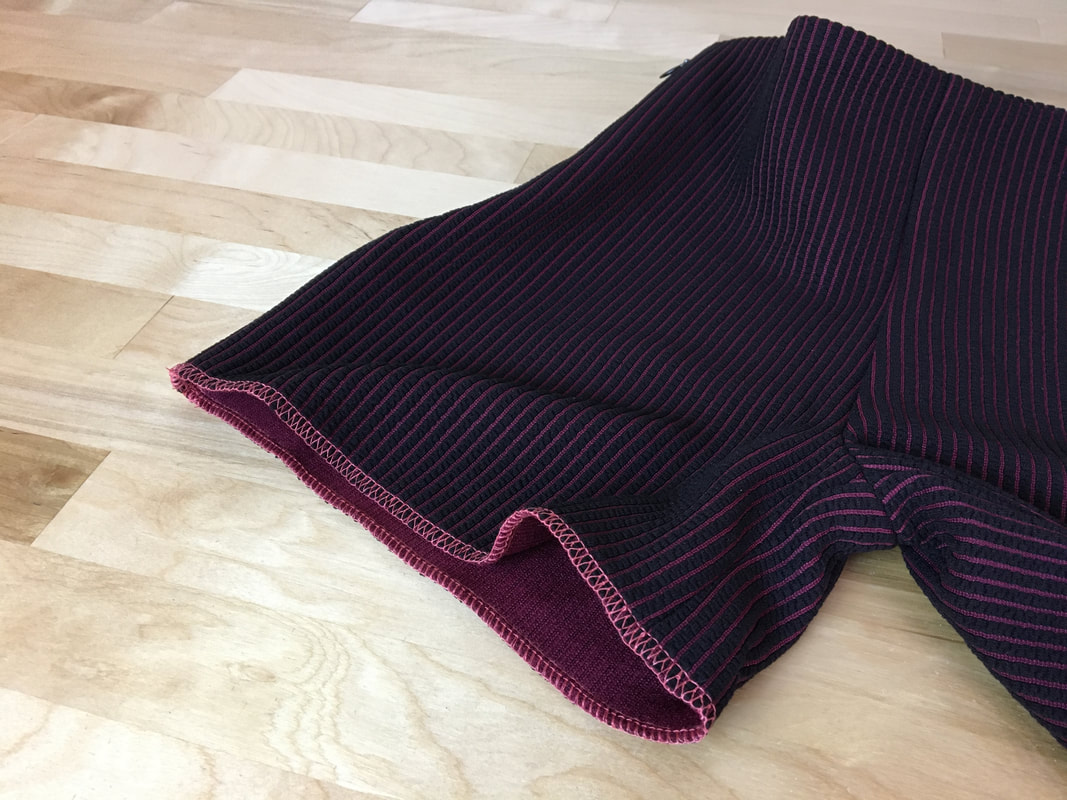 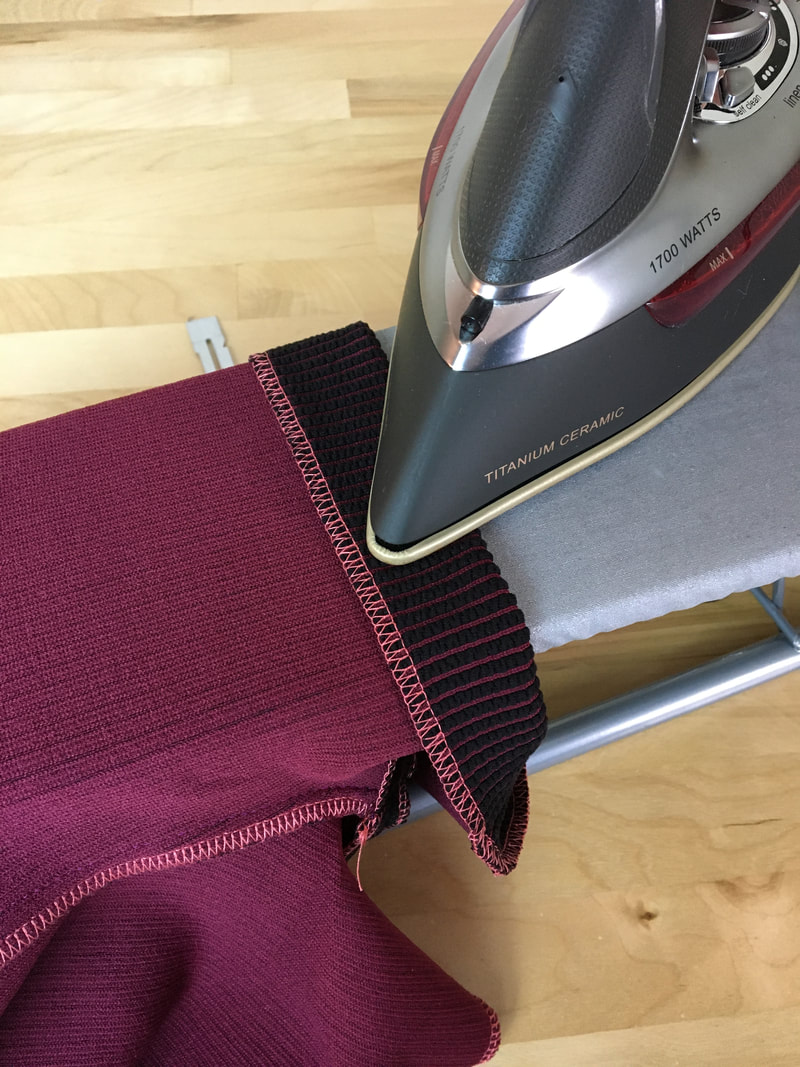 24. Fold the finished edge inward at the designated hem allowance (1 ½”) and iron the fold line to crease. Insert a few pins to keep the fold in place during hand stitching. 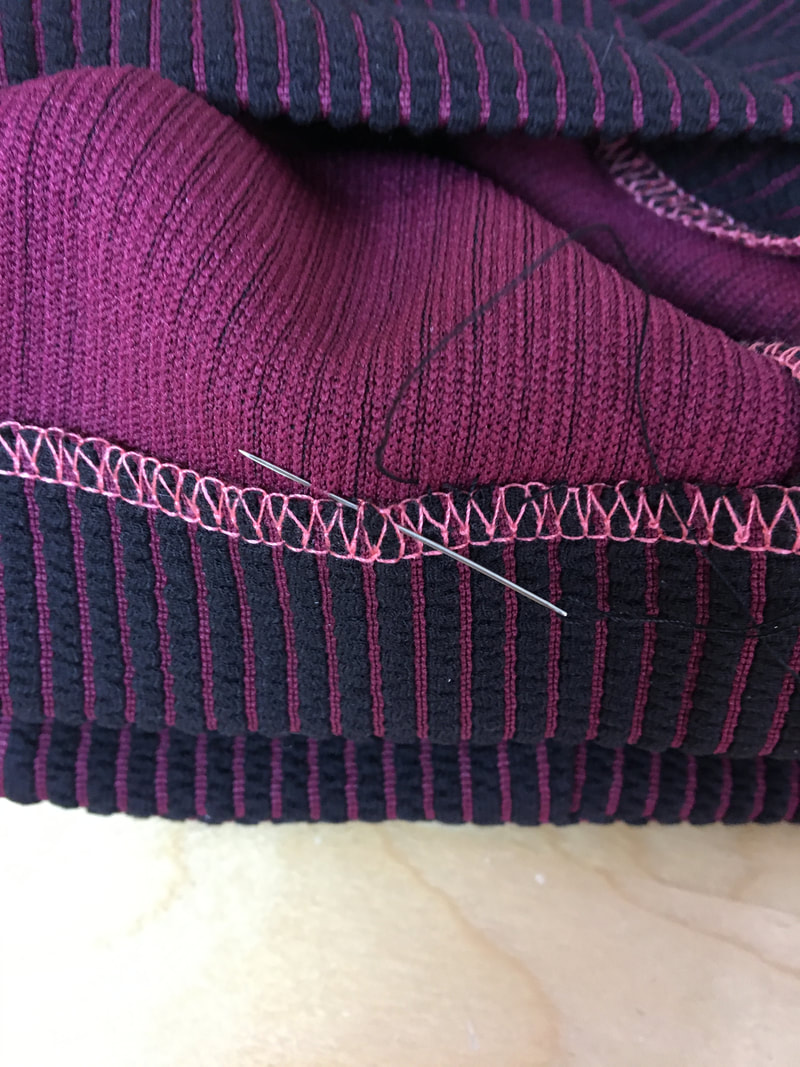 25. Using a hand sewing needle and matching thread, slip stitch the edge of the hem to the garment layer as shown. 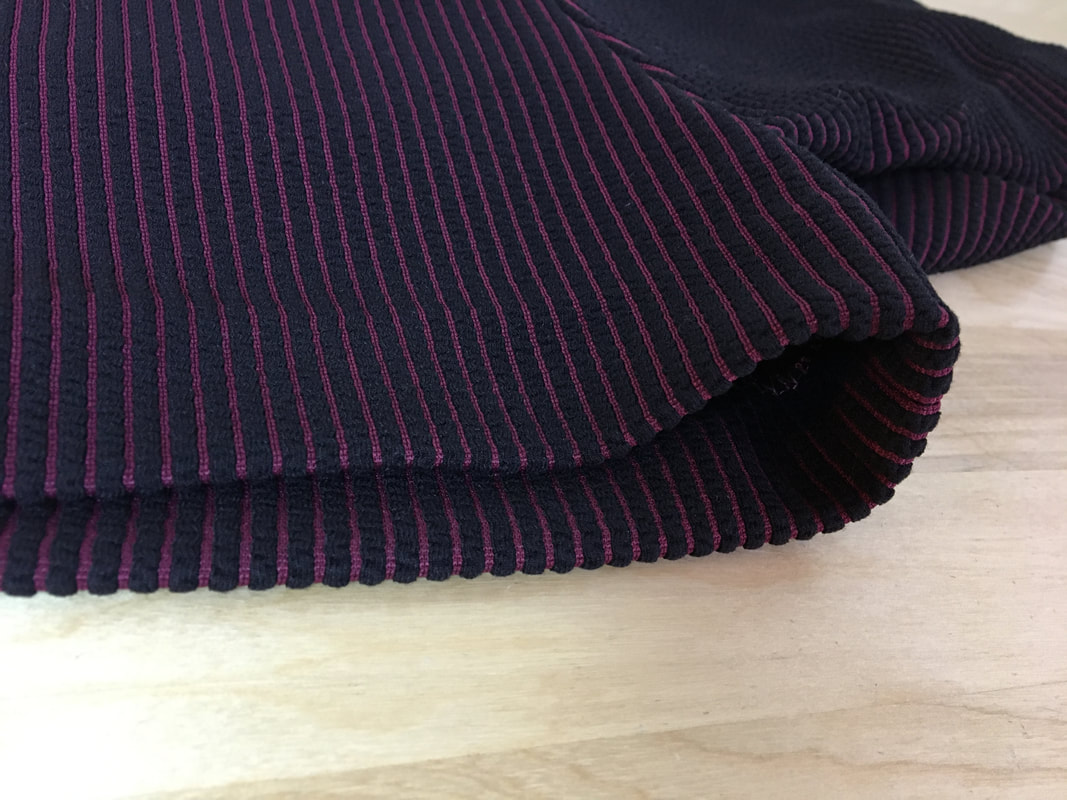 There should be no visible stitch lines on the outside of the garment. 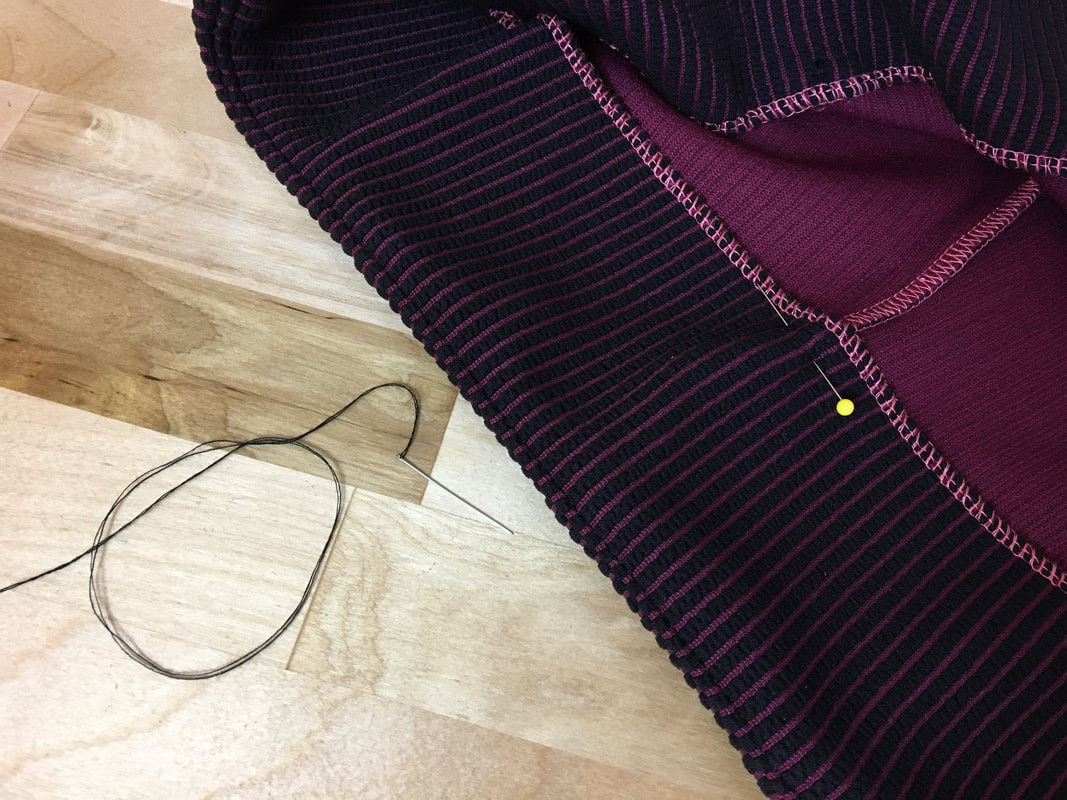 26. Last but not least, tack down the facing at each seam on the inside of the garment. Doing so will prevent the facing for flipping t the outside of the garment maintaining a smooth, even finish. 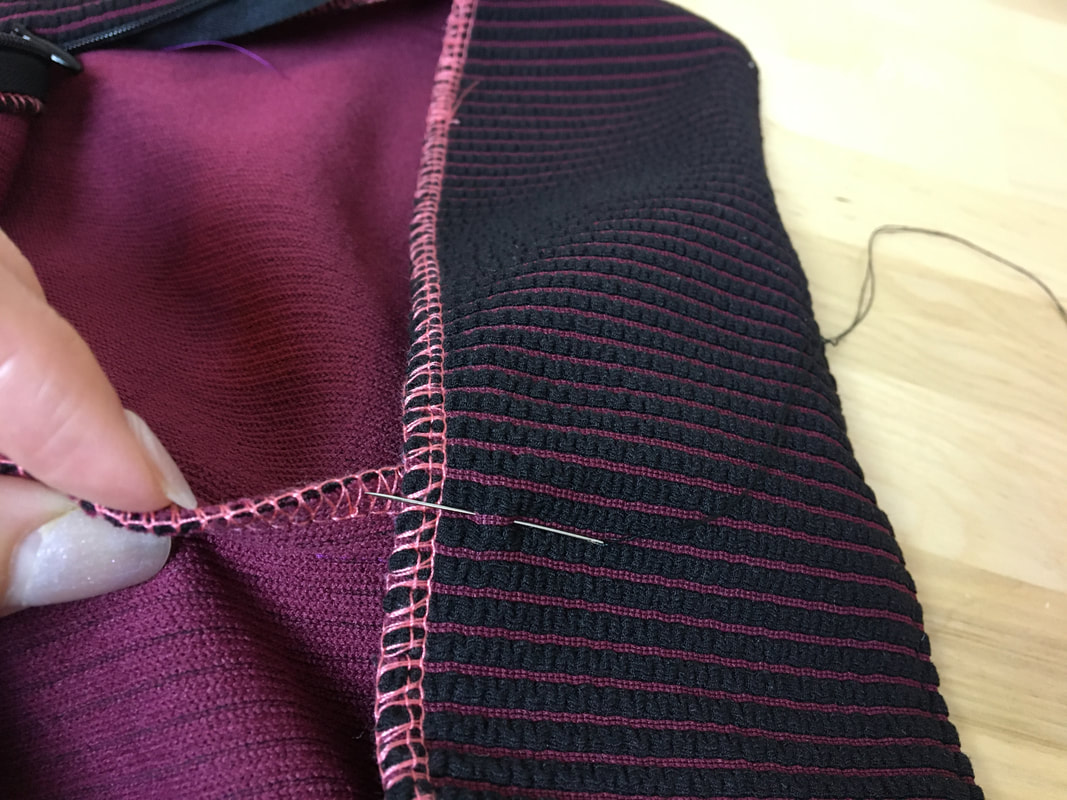 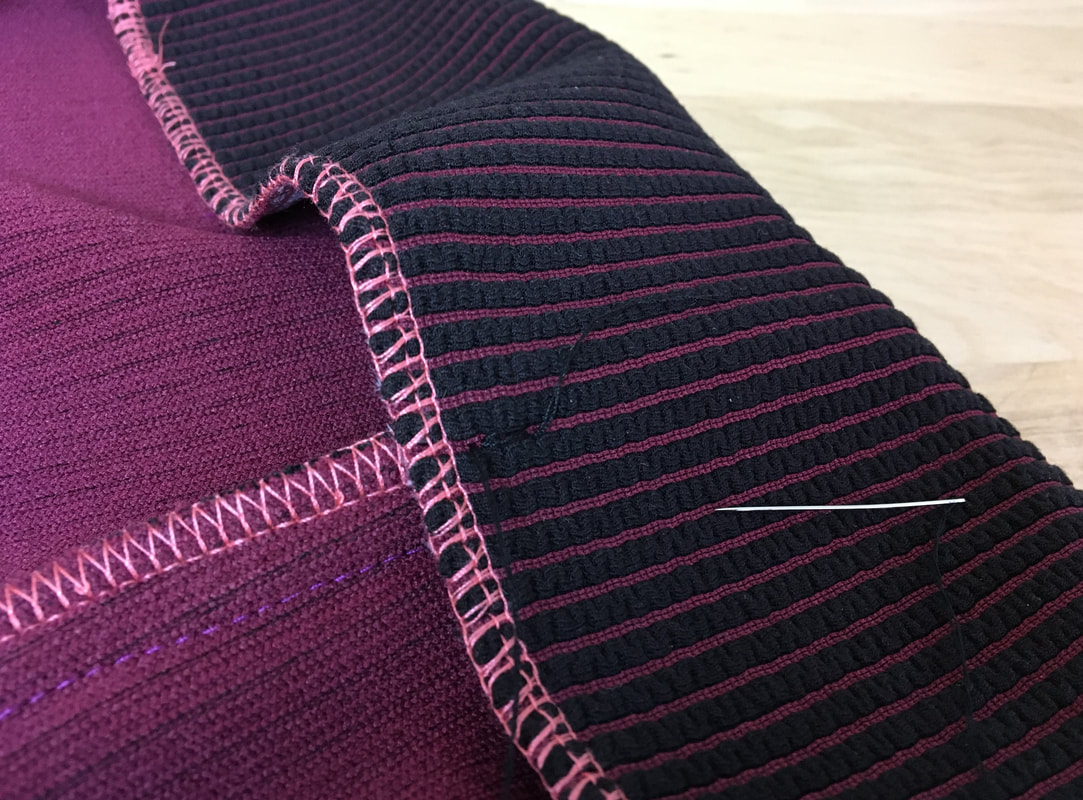 All done! Give your shorts one last press to ensure a clean, professional finish. Similar Tutorial You May Like: How To Sew A Round Neckline Facing How To Sew An Armhole Facing How To Finish Lining To The Zipper Area The Basics Of Interfacing For Sewing Beginners How To Cut A Sewing Pattern On Fold
3 Comments
Rachel Brockamp
2/27/2023 12:32:08 pm
Are there any photos of the finished shorts?
Rachel Brockamp
2/27/2023 12:33:19 pm
Nevermind, the photo loaded.
Sen
3/17/2023 08:57:31 pm
hi im so sorry but i cant seem to see the pattern? is it available on this website? Leave a Reply. |
The Blog:A journey into our design process, sewing tutorials, fashion tips, and all the inspiring people and things we love. 
Doina AlexeiDesigner by trade and dressmaker at heart. I spend most of my days obsessing over new fabrics and daydreaming new ideas. 
Sadie
Executive Assistant & Client Relations Manager Archives
November 2019
Categories
All

|

-
Sewing Tutorials
-
Basics
>
- Aligning Pattern Grainlines To Fabric
- Preparing Fabrics For Sewing
- Pinning Sewing Patterns To Fabric
- Placing Sewing Patterns On Fabric For Cutting
- Rotary Cutters or Fabric Scissors?
- Cutting The Sewing Patterns
- What Are Notches And How To Use Them In The Sewing Process
- Transferring Notches From Pattern To Fabric
- Transferring Seamlines to Fabric
- Staystitching
- Backstitching: A Complete Guide
- Hand Basting: A Complete Guide
- Sewing Continuous Bias Binding
- Darts >
-
Sewing Seams
>
- The Basics Of Seams And Seam Allowance
- How To Sew A Straight Seam
- Sewing Curved Seams
- Sewing Corner Seams
- Trimming And Grading Seam Excess
- Notching/Clipping Seam Allowance for Tension Release
- Sewing Topstitched Seams
- Sewing Corded Seams
- Sewing A Slot Seam
- Sewing A Gathered Seam
- Sewing Bias Seams
- Sewing Seams With Ease
- Sewing Seams With Crossing Seamlines
- Sewing Unlike Fabric Seams
- How To Iron Seams: Ironing Tools And Conventions
- Sewing With Knit Fabrics
- Understanding Stitch Length And Tension
- Sewing Unique Fabric Seams
-
Seam Finishes
>
- Seam Finishing Techniques - Overview
- Applying A Pinked Seam Finish
- Applying A Bias Bound Seam Finish
- Serging And Zigzag Seam Finishes
- Sewing A Self-Bound Seam Finish
- Sewing A French Seam Finish
- Sewing A Hong Kong Seam Finish
- Sewing A Mock French Seam Finish
- Sewing A Turned-and-Stitched Seam Finish
- Sewing Overcast Hand-Applied Seam Finishes
- Sewing A Flat Felled Seam
- Sewing A Hairline Seam Finish
-
Hem Finishes
>
- Garment Hem Finishes: Overview
- Sewing A Double Fold Hem Finish
- Sewing A Single Fold Hem Finish
- Sewing Bound Hem Finishes
- Sewing An Exposed Double Layer Bound Hem
- Sewing A Folded-Up Bound Hem with Pre-folded Binding
- Sewing A Hong Kong Hem Finish
- Sewing A Band Hem Finish
- Sewing A Bias Faced Hem Finish
- Sewing A Twill Tape Hem Finish
- Sewing A Rolled Hem Finish
- Sewing A Shaped Hem Facing
- Using Fusible Hem Tape And Webbing
- Finishing A Lace Fabric Hem
- Finishing A Leather Hem
- Sewing Faced Hem Corners
- How To Finish Lining At The Hem
- Finishing Fabric Corners by Mitering >
- Interfacing A Hemline: Lined And Unlined Examples
-
Sewing Pockets
>
- Curved Patch Pocket With Flap
- Unlined Square Patch Pockets
- Lined Patch Pockets: Two Ways
- Extension On-Seam Pockets
- Separate On-Seam Pocket
- Front Hip Pockets
- Bound Double Welt Pocket
- Double Welt Pocket With Flap
- Self-Welt Pocket (Using Single Fabric Layer)
- Slanted Welt Pocket (Hand-Stitched)
- Faced Slash Pockets: Overview >
-
Sewing Zippers
>
- Sewing Zippers: General Information
- Sewing A Centered Zipper
- Sewing A Lapped Zipper
- Sewing An Invisible Zipper
- Sewing A Fly Front Zipper
- Sewing A Closed-End Exposed Zipper (No Seam)
- Sewing An Exposed Separating Zipper
- Sewing Hand Stitched Zipper Applications
- Sewing A Zipper Underlay
- Sewing A Placket-Enclosed Separating Zipper
- Sleeveless Finishes >
-
Neckline Finishes
>
- Sewing A Neck Shaped Facing
- Sewing An All-In-One Neck Facing
- Neck And Garment Opening Combination Facings >
- Sewing A Bias Faced Neckline Finish
- Sewing A Band Neckline Finish
- Bound Neckline Finishes: Overview >
- Sewing A Semi-Stretch Strip Band Neckline
- Ribbed Neck Band And Classic Turtleneck
- Decorative Neckline Finishes >
- Finishing Facing Edges >
-
Extras
>
- A Complete Guide on Interfacing
- Sewing Bound Spaghetti Straps
- Sewing Spaghetti Straps To A Faced Neckline
- Sewing Ruffles: Overview
- Patterning And Sewing A Circle Ruffle
- Sewing A Gathered Heading Ruffle
- Sewing Double Layer Gathered Ruffles
- Sewing A Gathered Ruffle Into A Seam
- Sewing A Gathered Ruffle To A Fabric Edge
- Sewing A Fabric Surface Slit
- Sewing A Slit Seam
- Hand-Applied Straight Stitches
- Hand-Applied Blind Stitches
- Hand-Applied Overedge Stitches
- Hand-Applied Tack Stitches
- Hand-Applied Decorative Stitches
-
Basics
>
- Custom Bridal
- Custom Apparel
- About
- Blog
 RSS Feed
Services |
Company |
|
