|
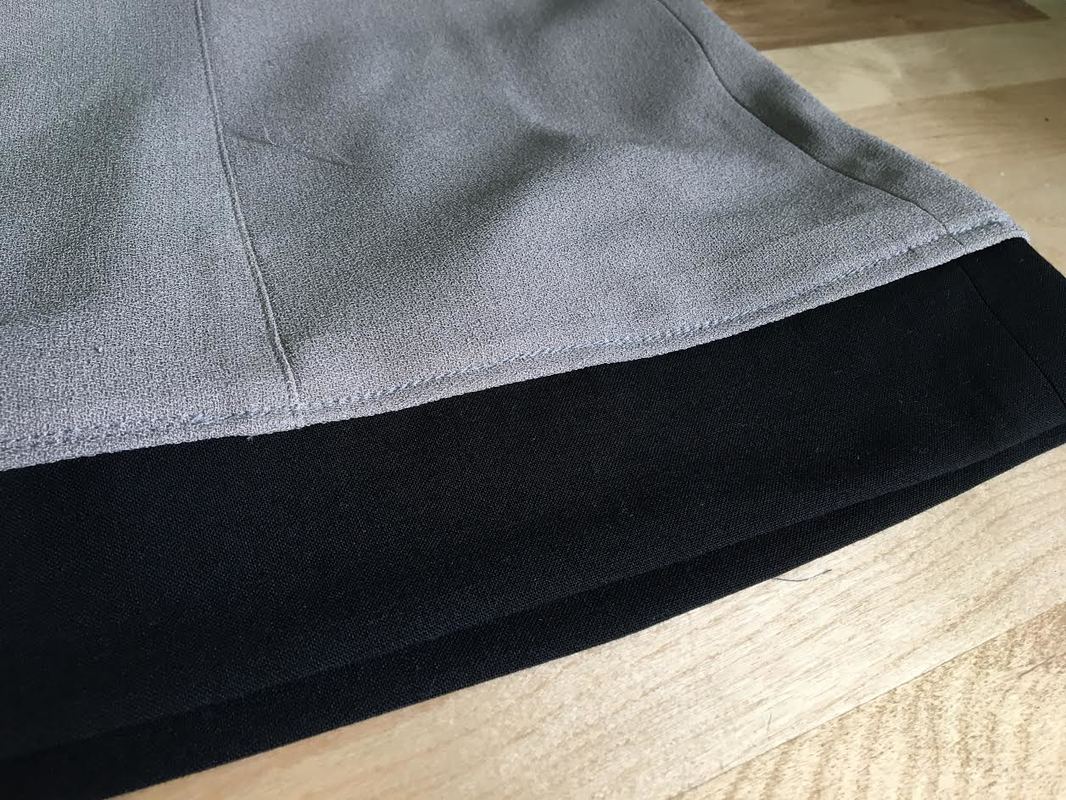
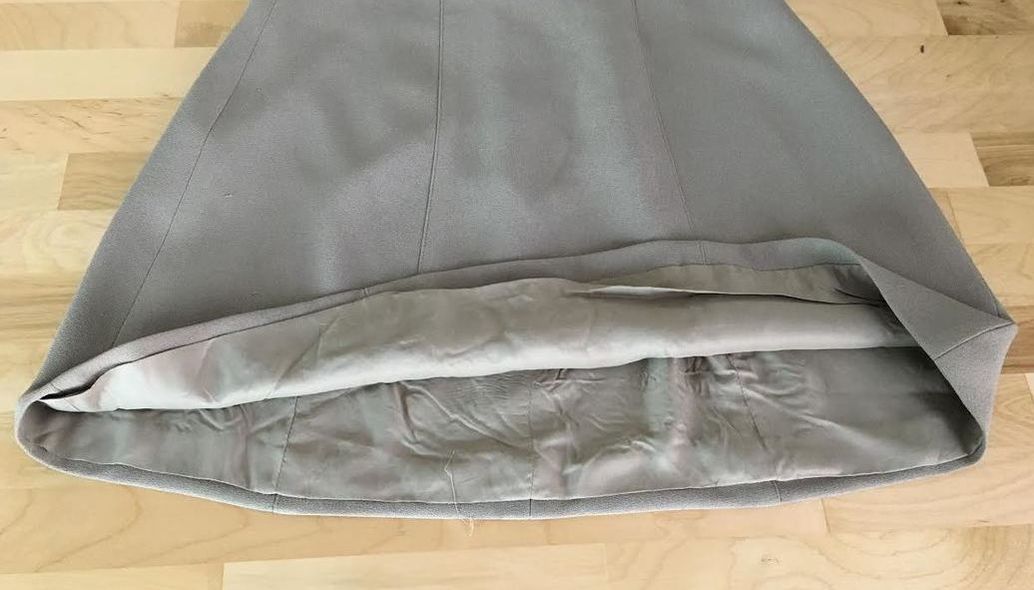
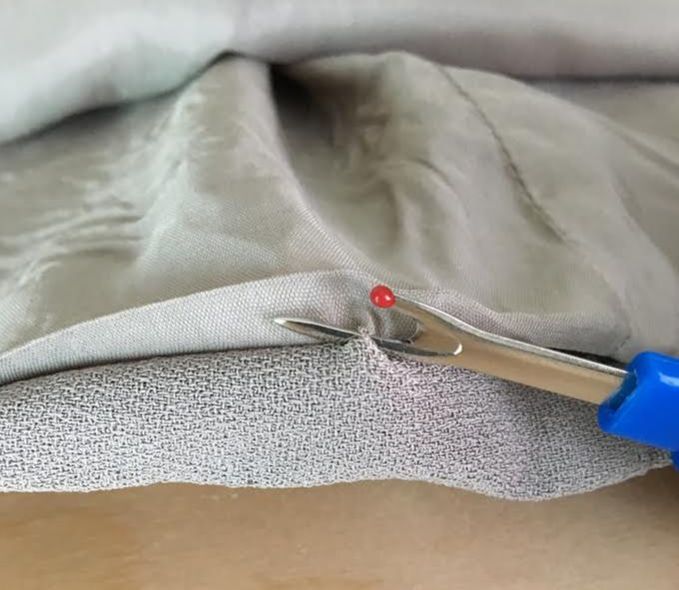
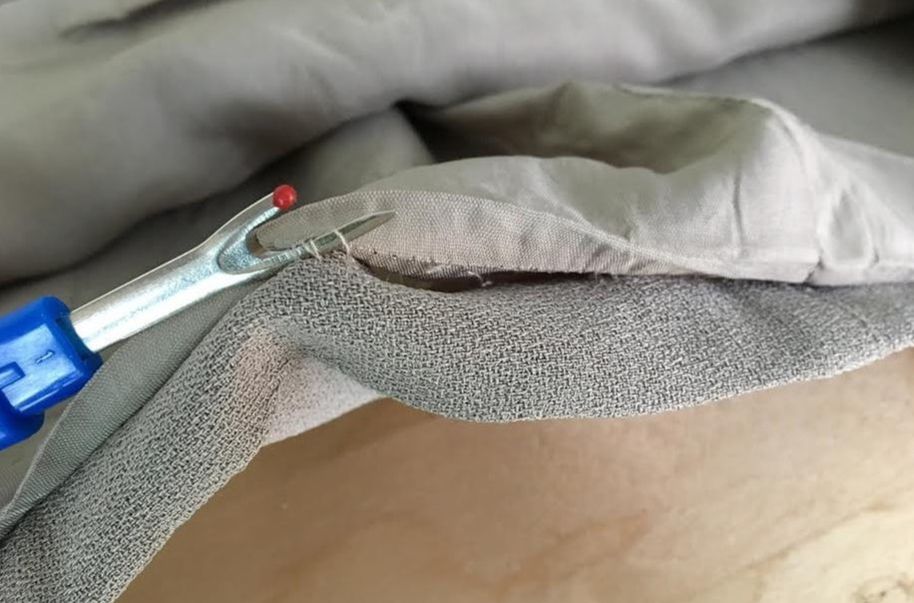
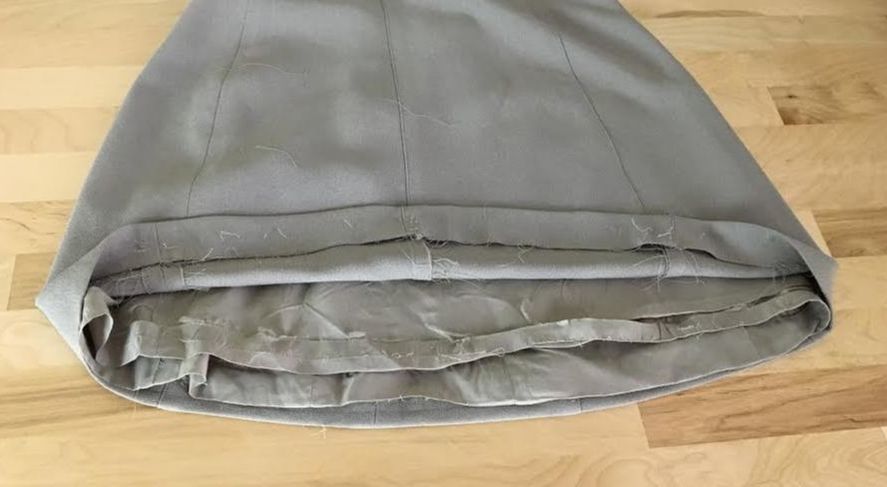
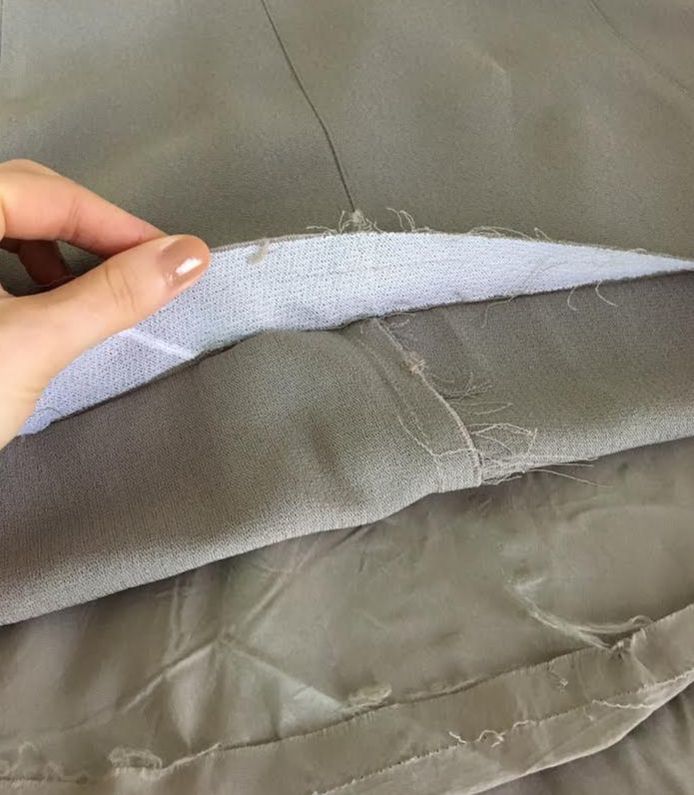
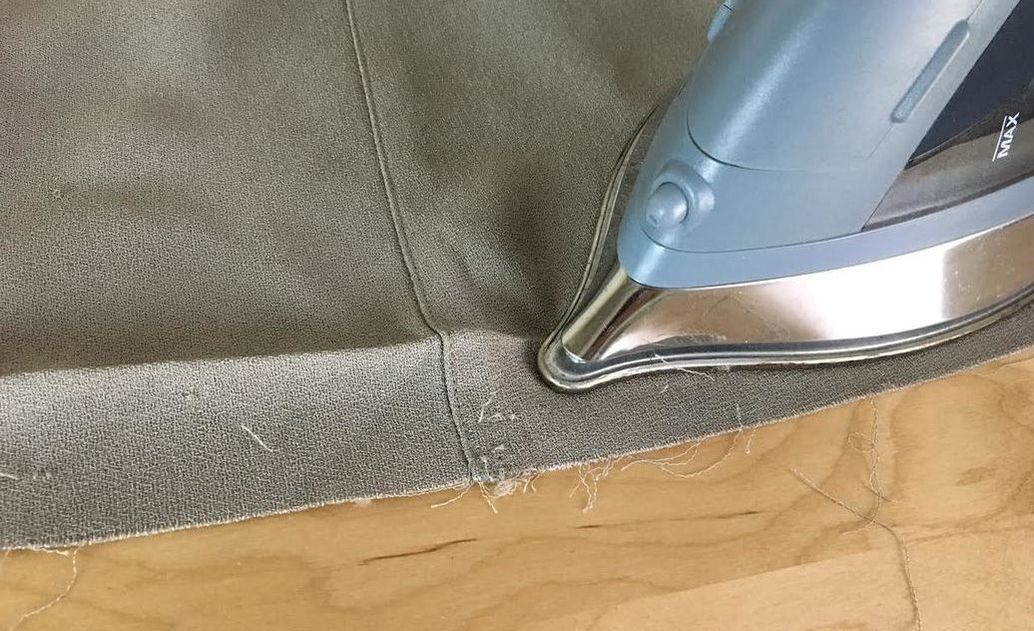
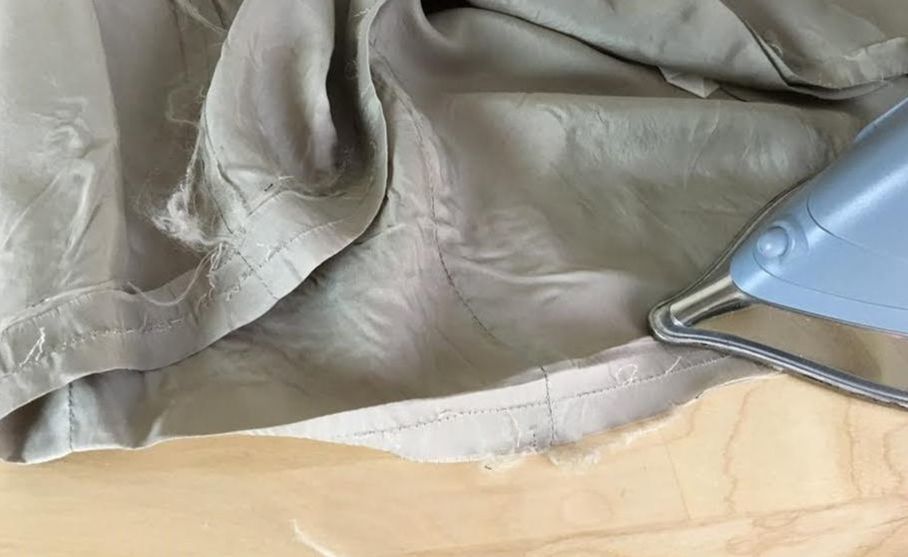
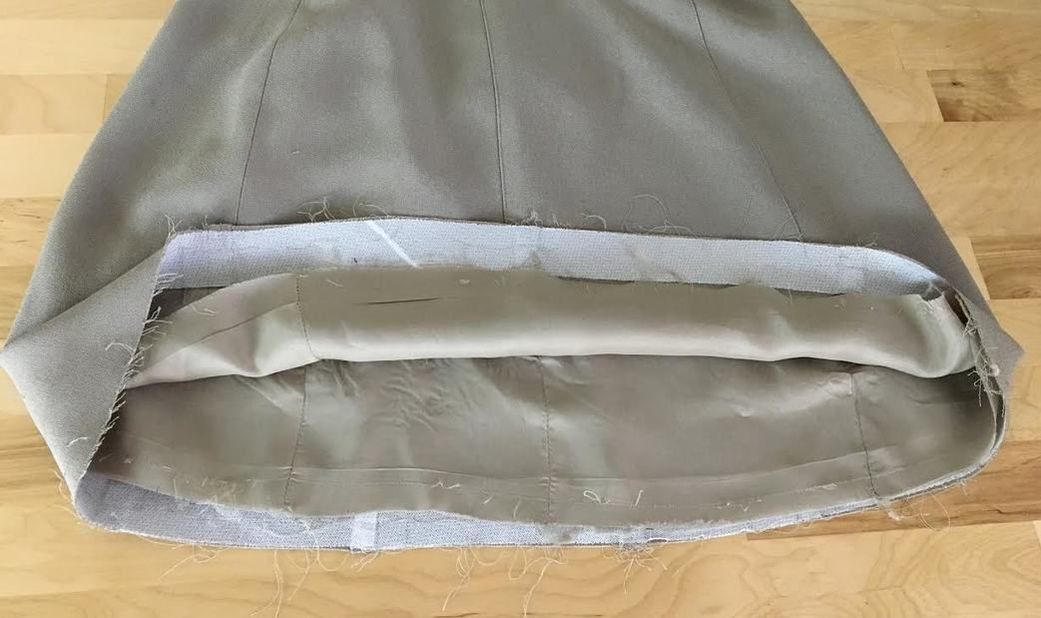
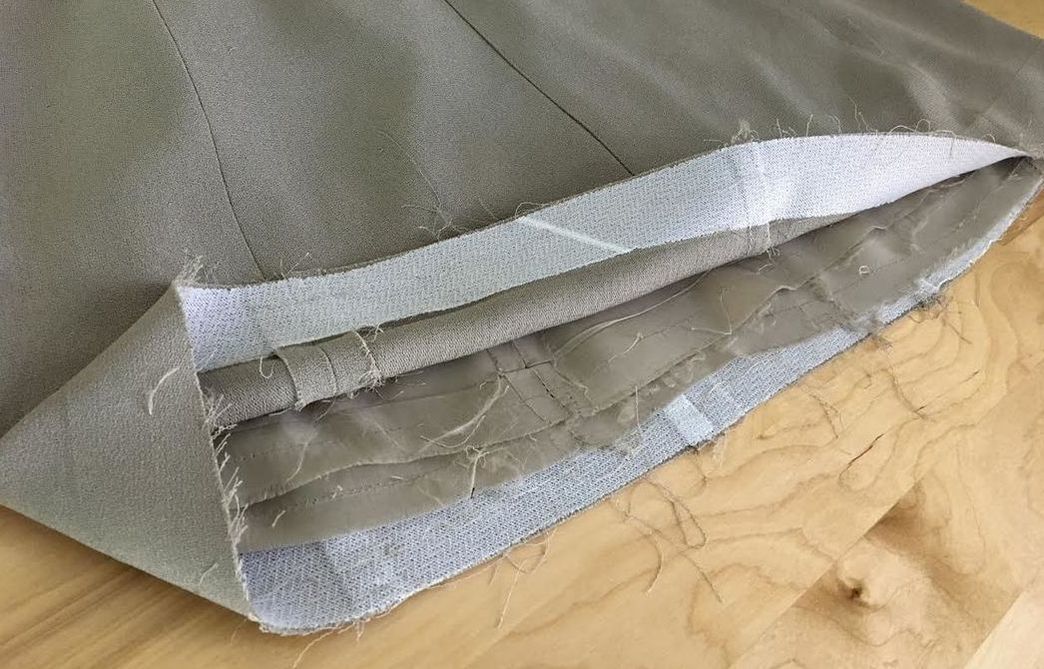
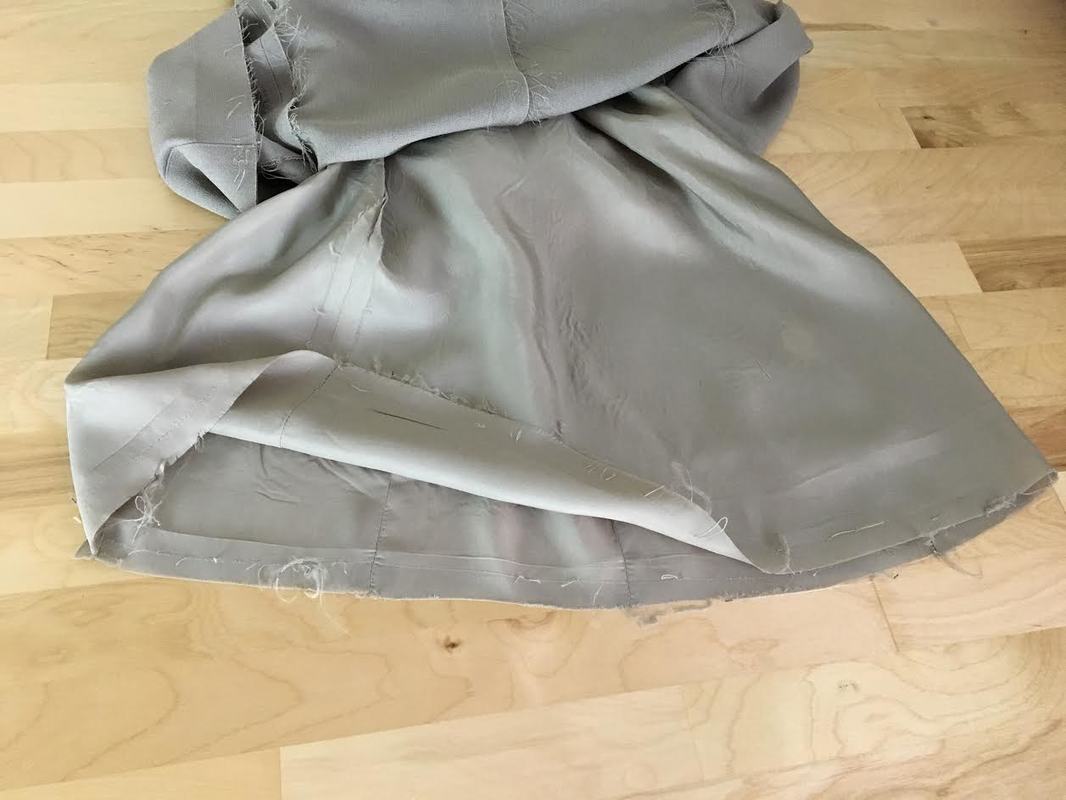
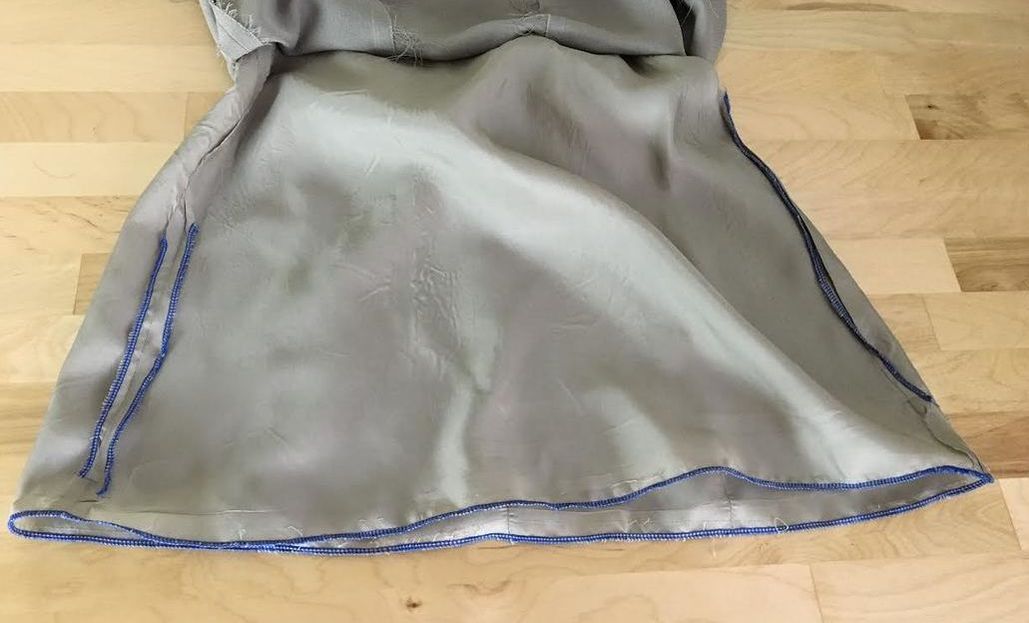
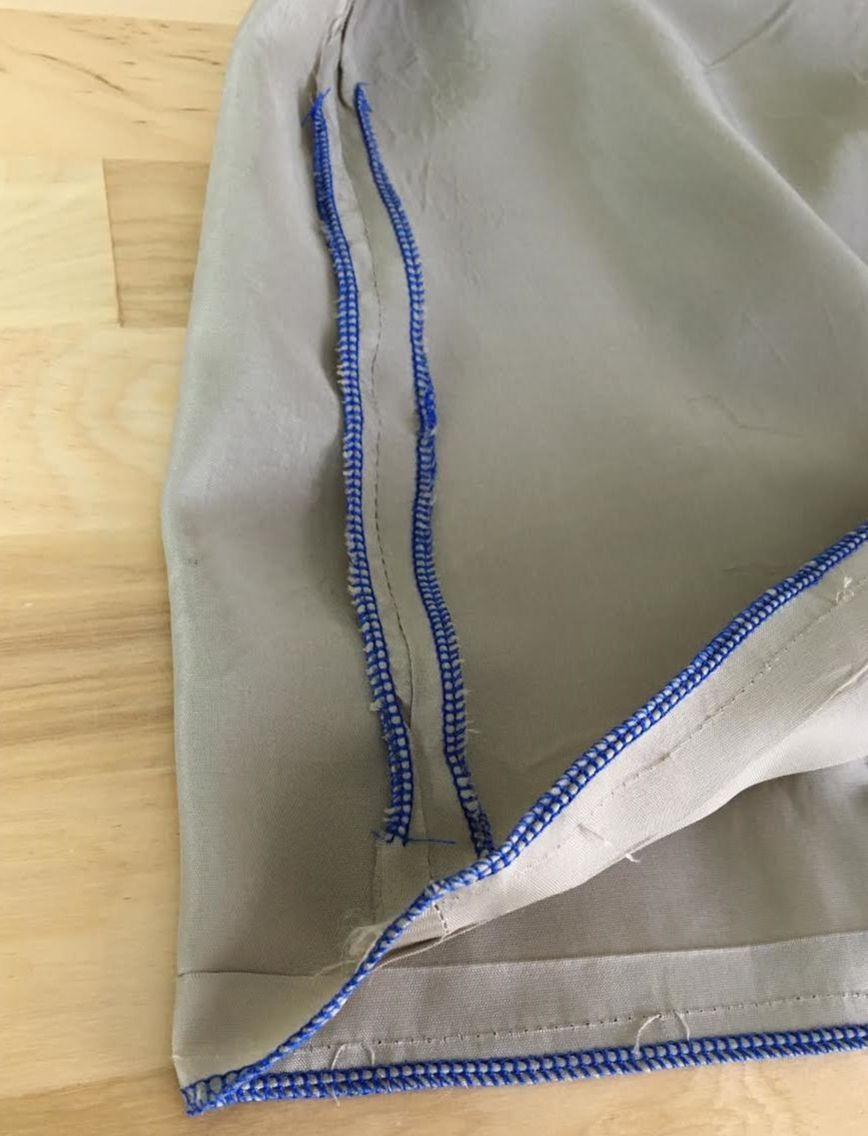
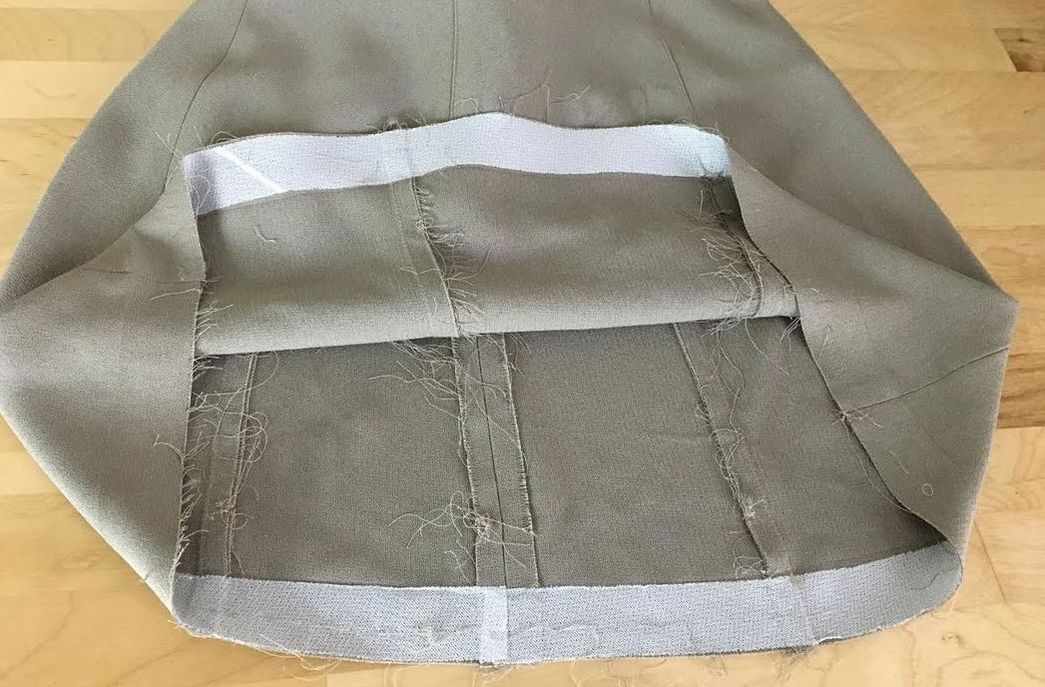
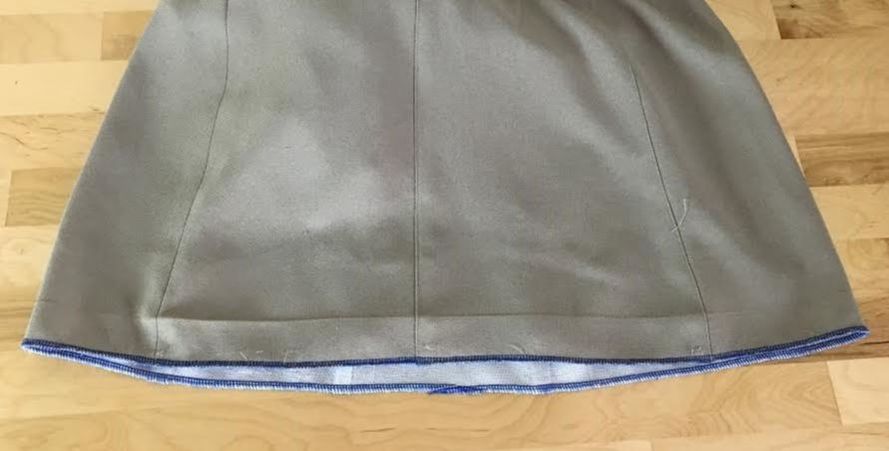
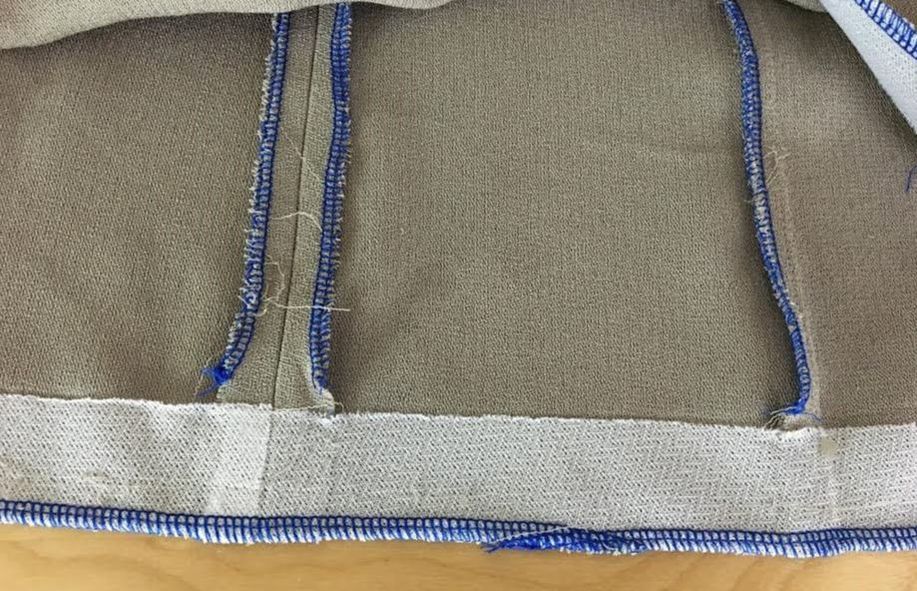
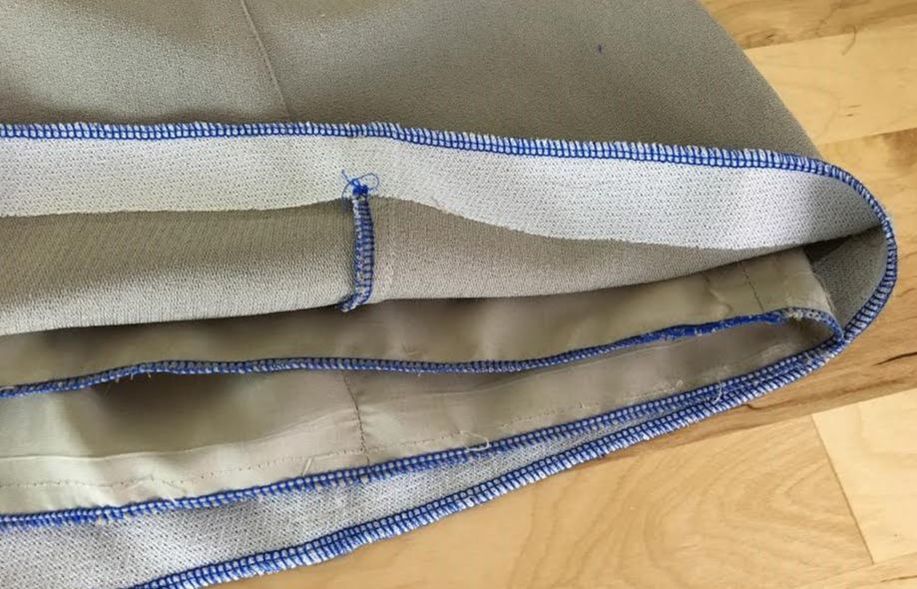
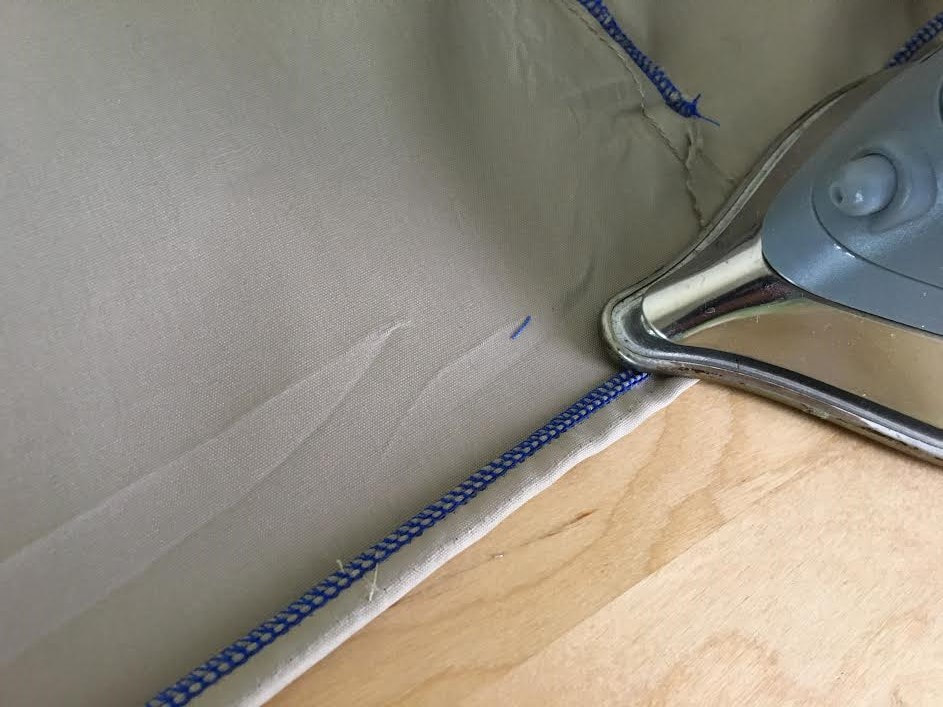
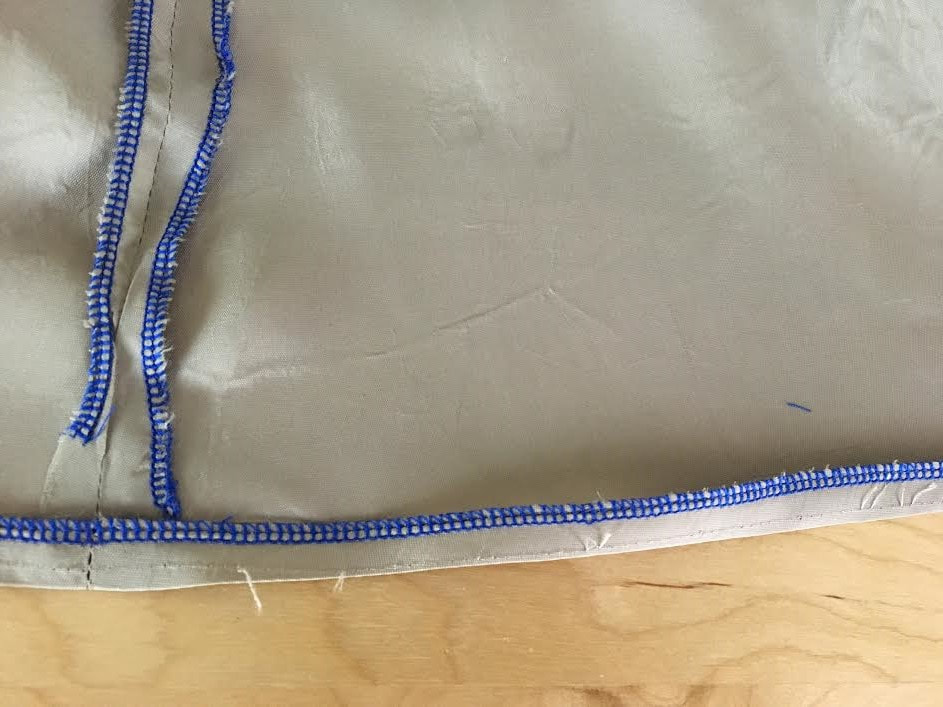
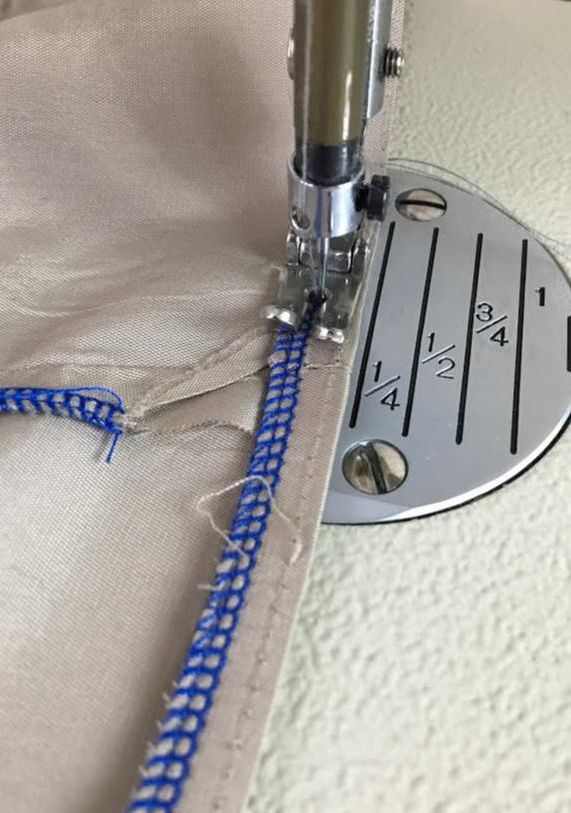
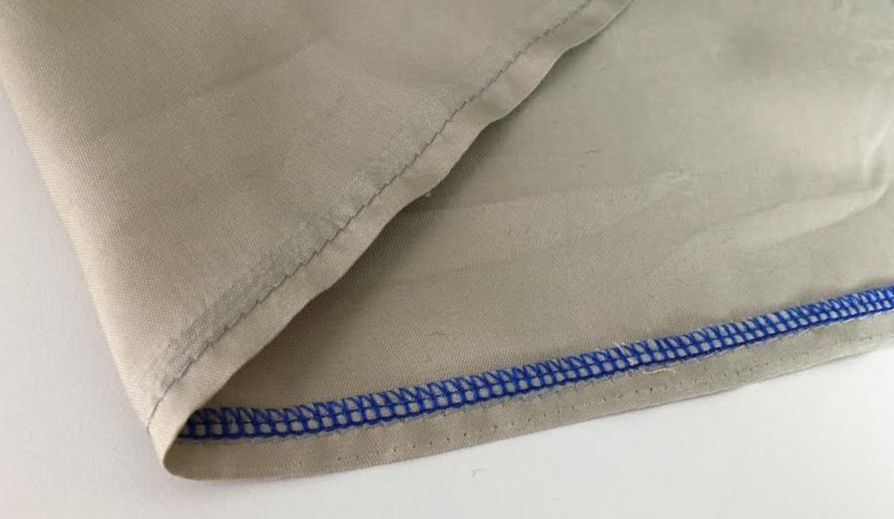
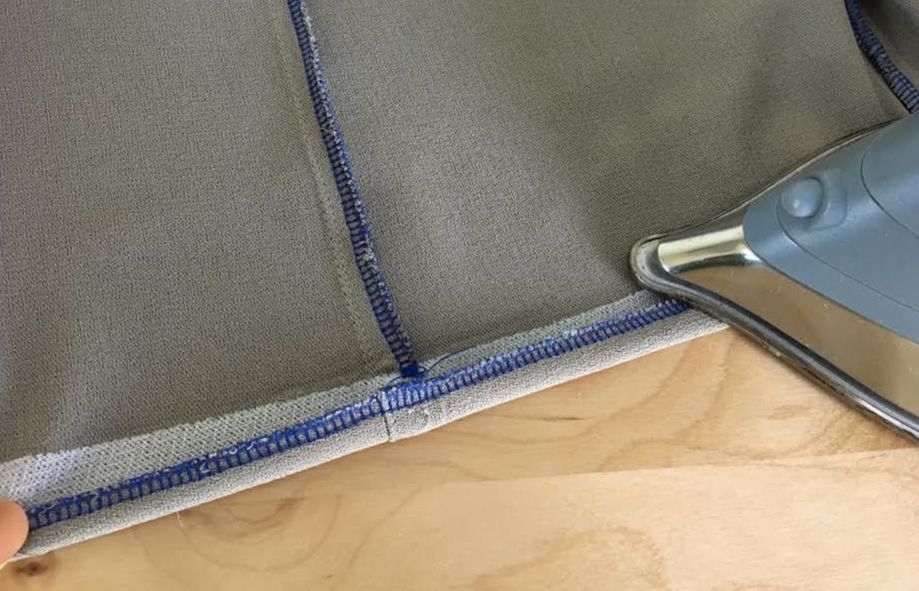
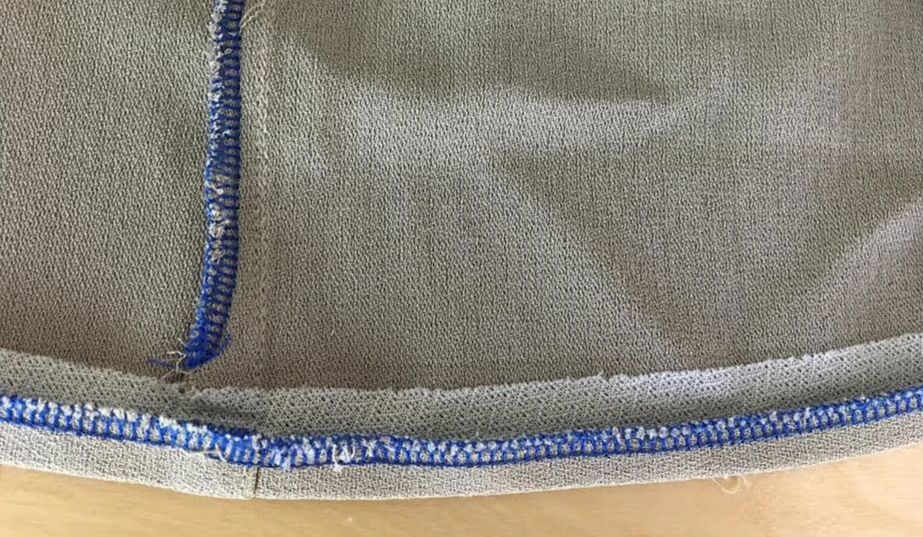
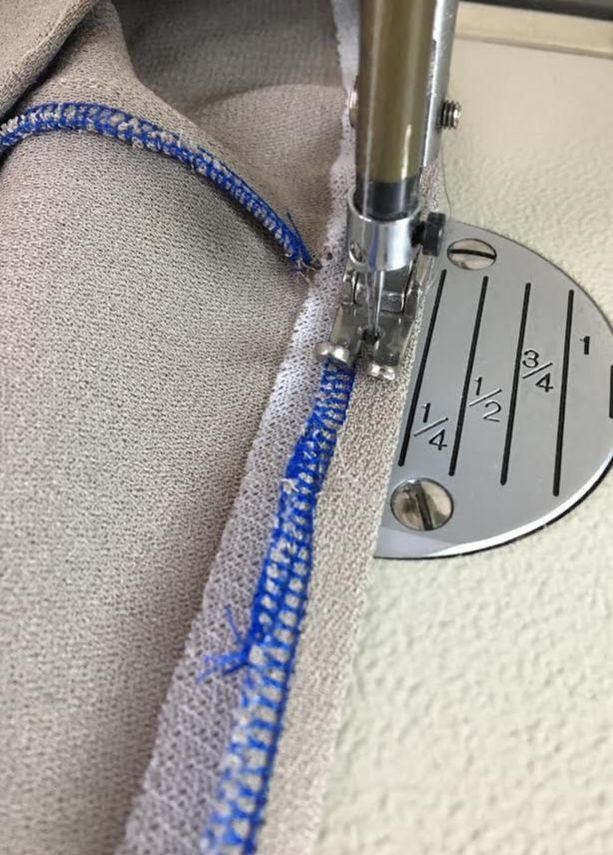
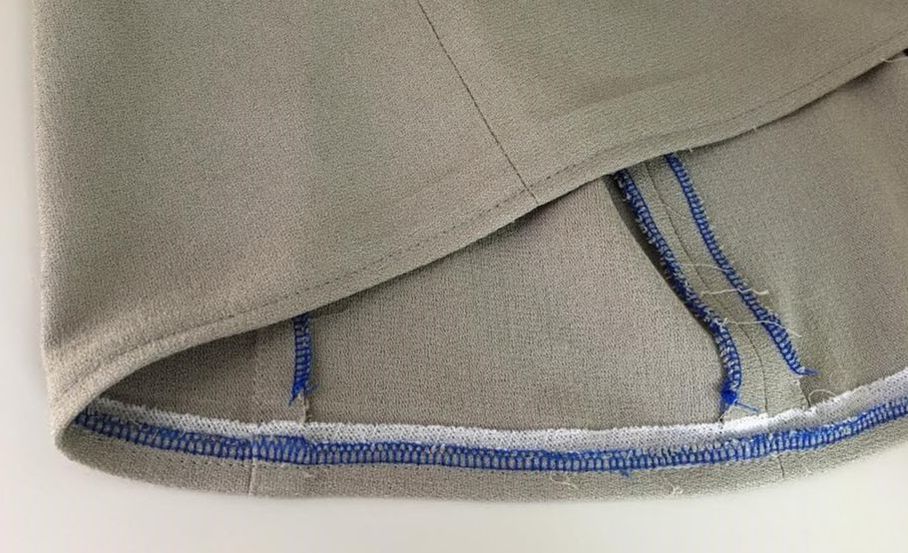
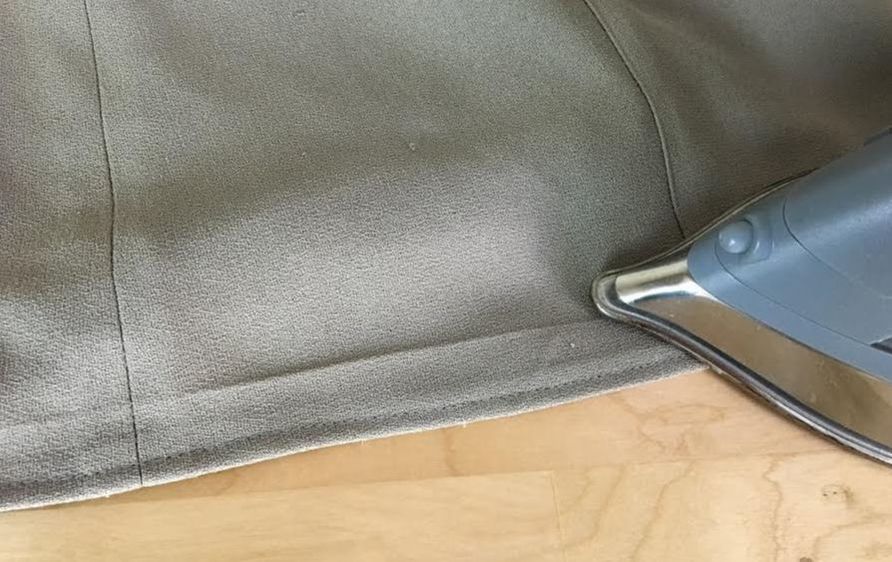
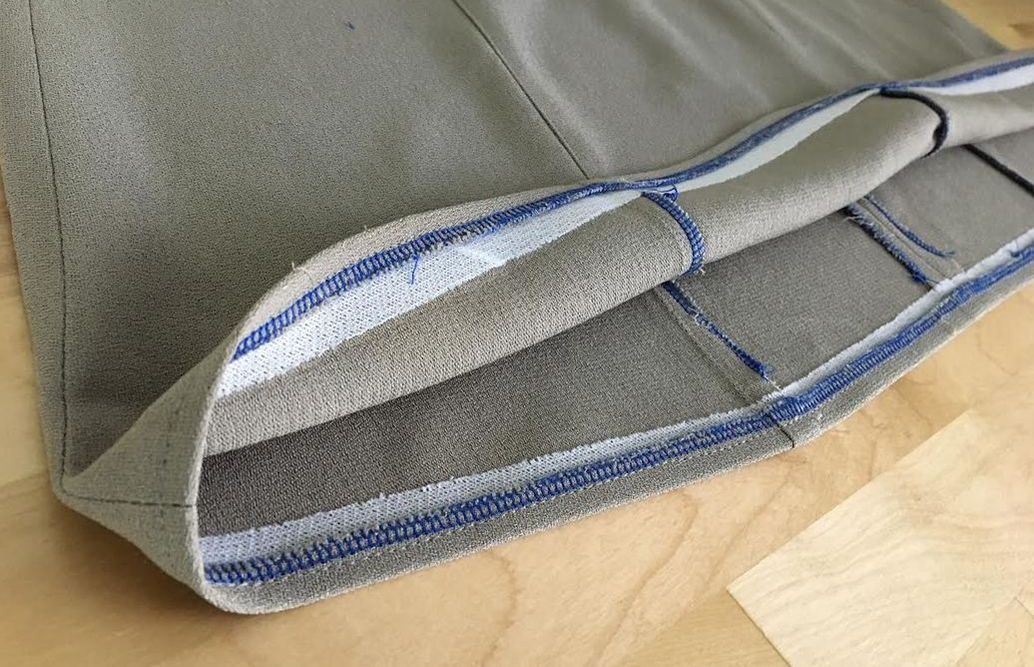
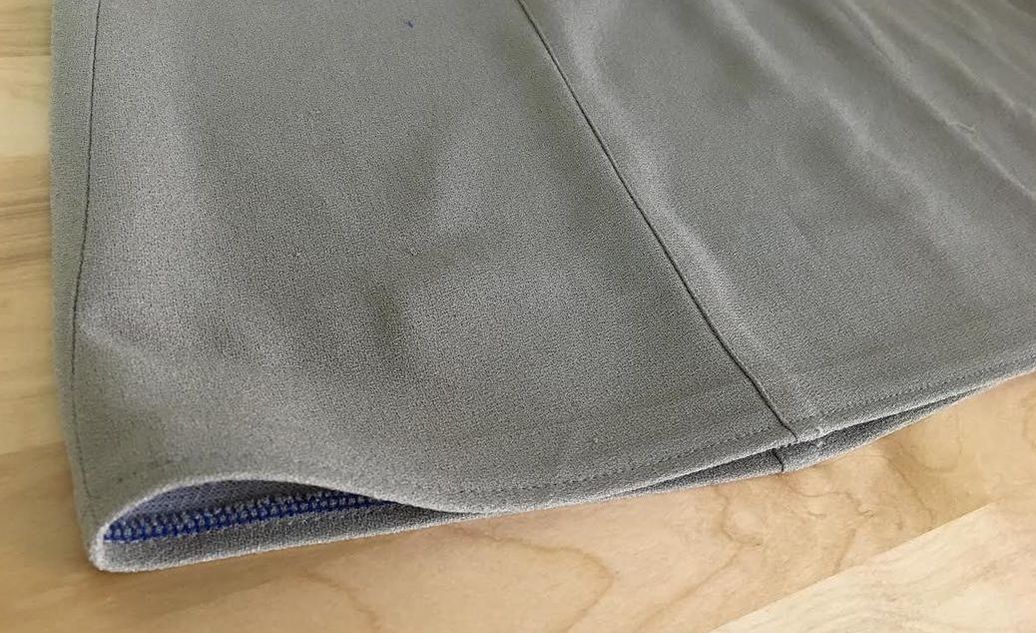
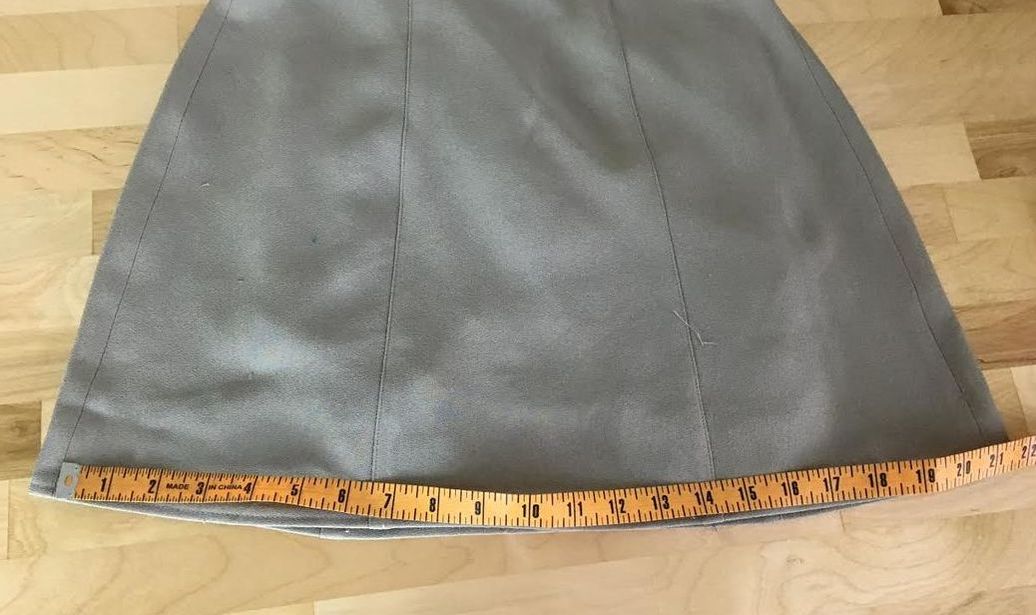
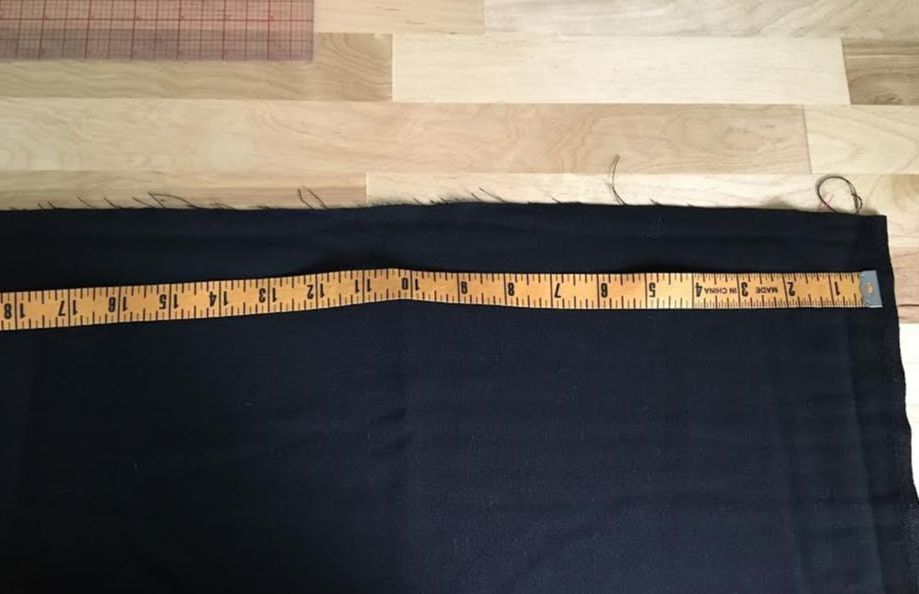
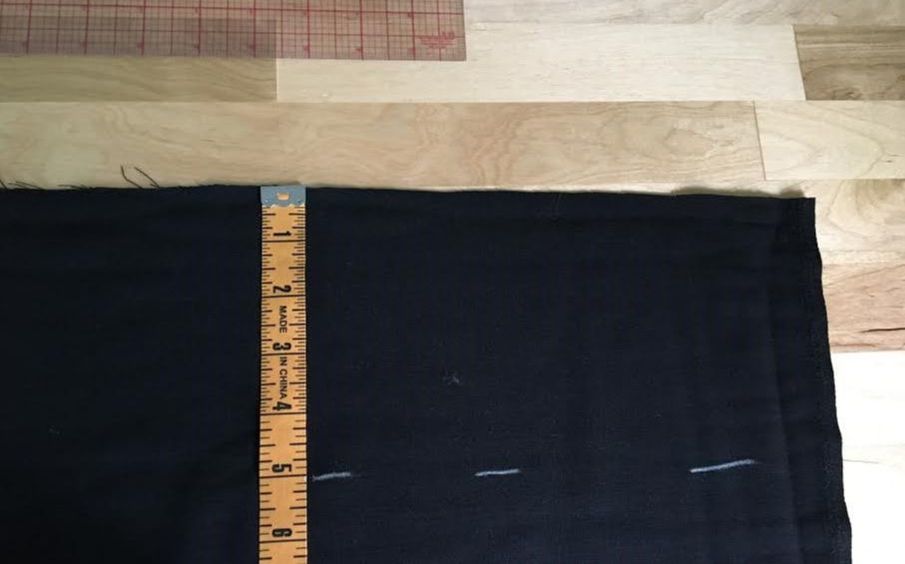
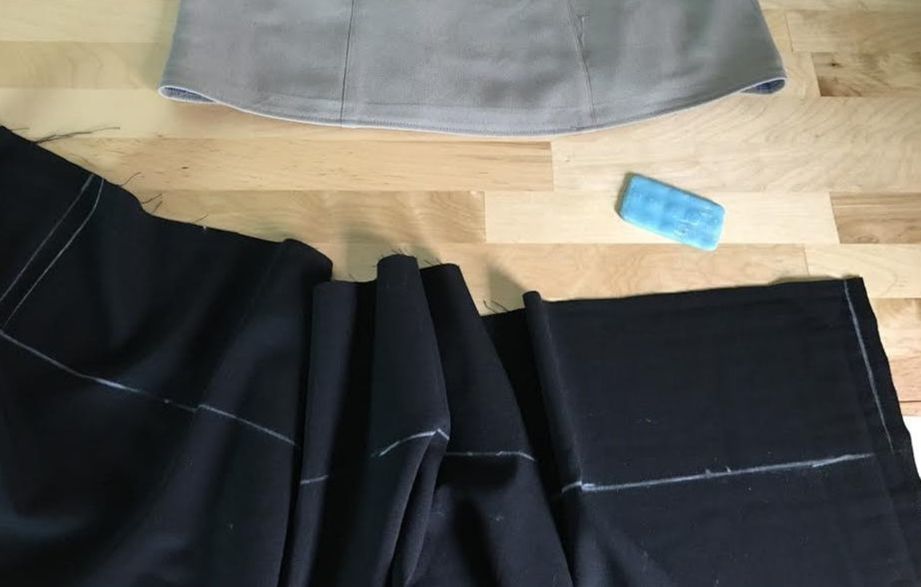
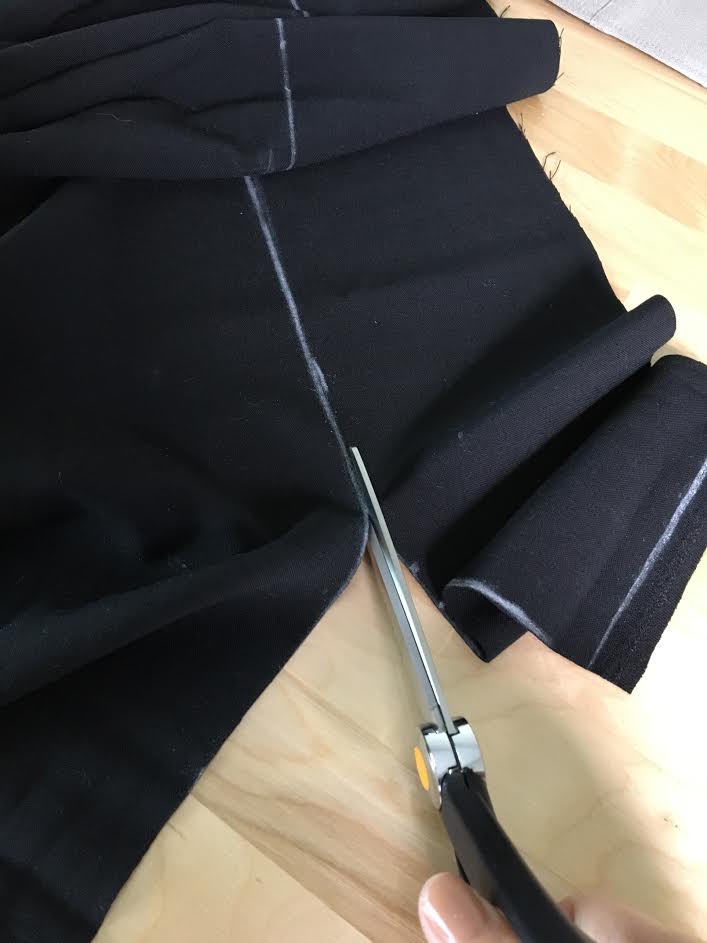
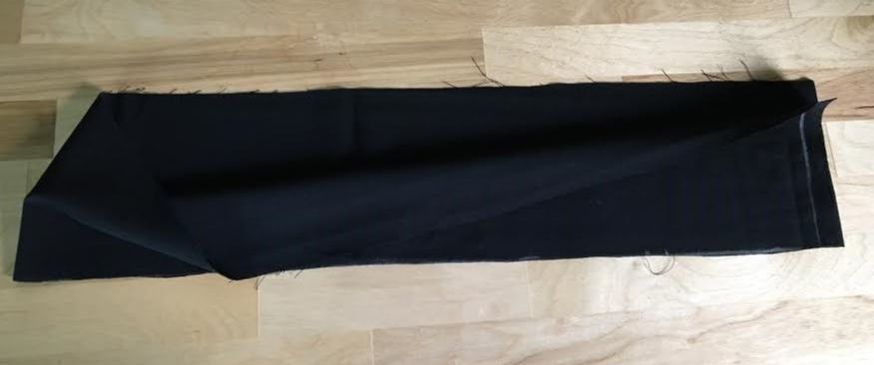
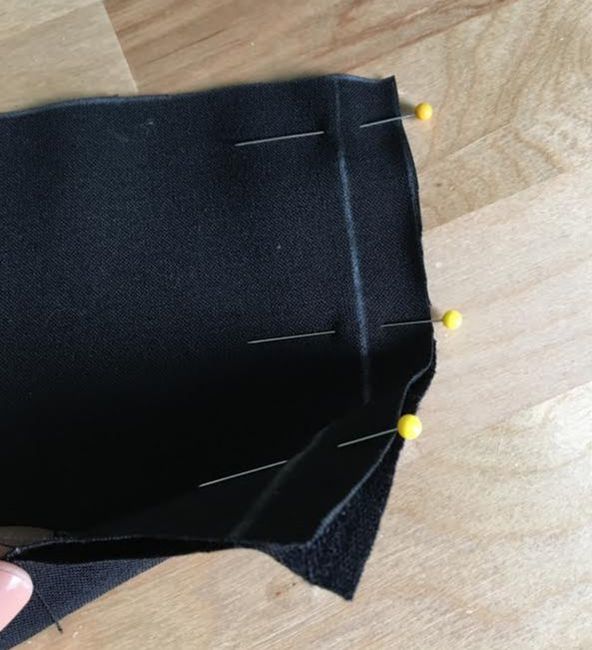
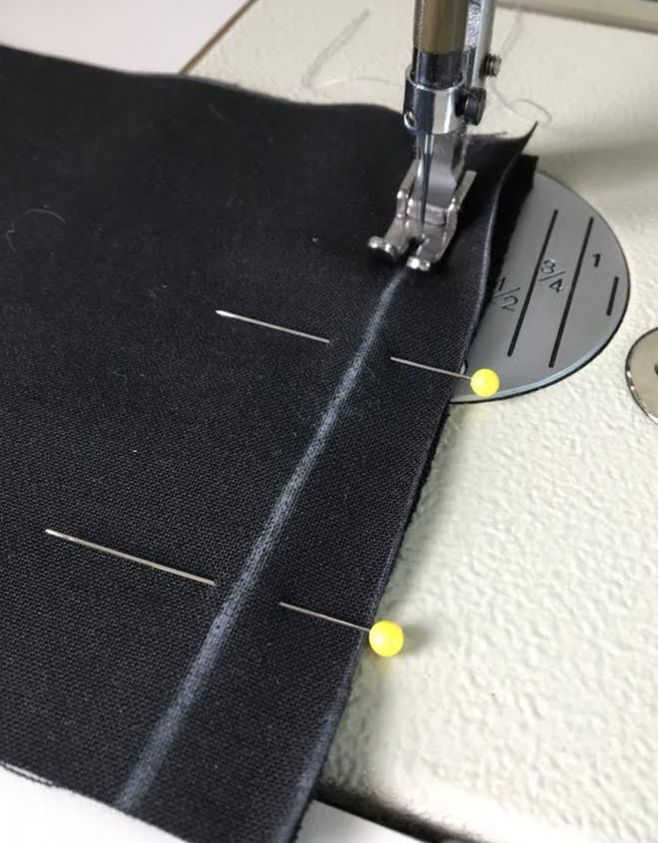
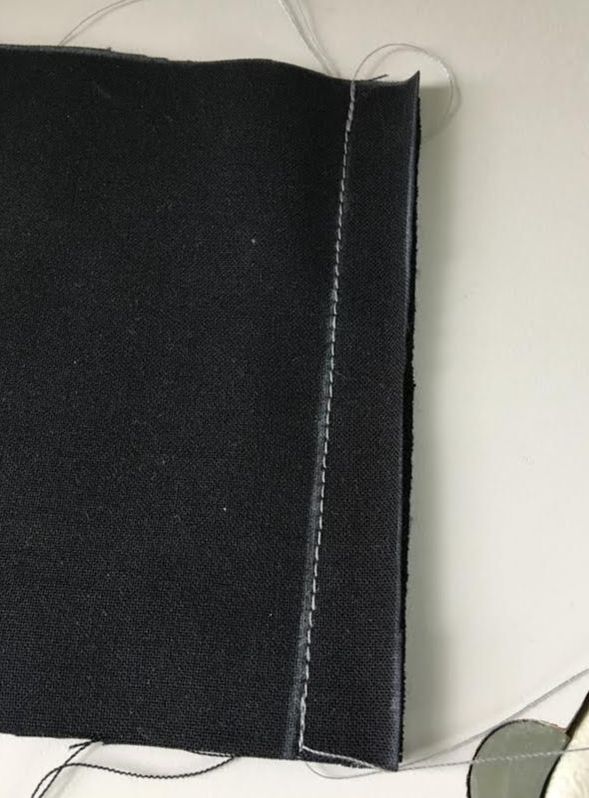
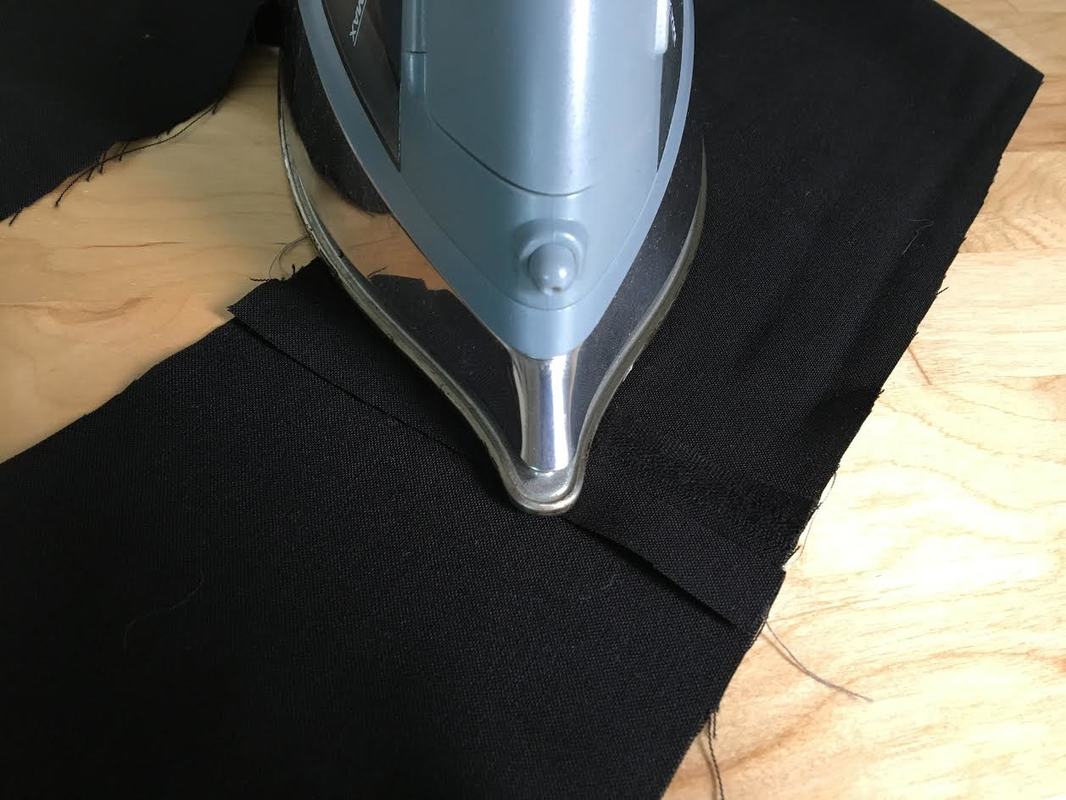
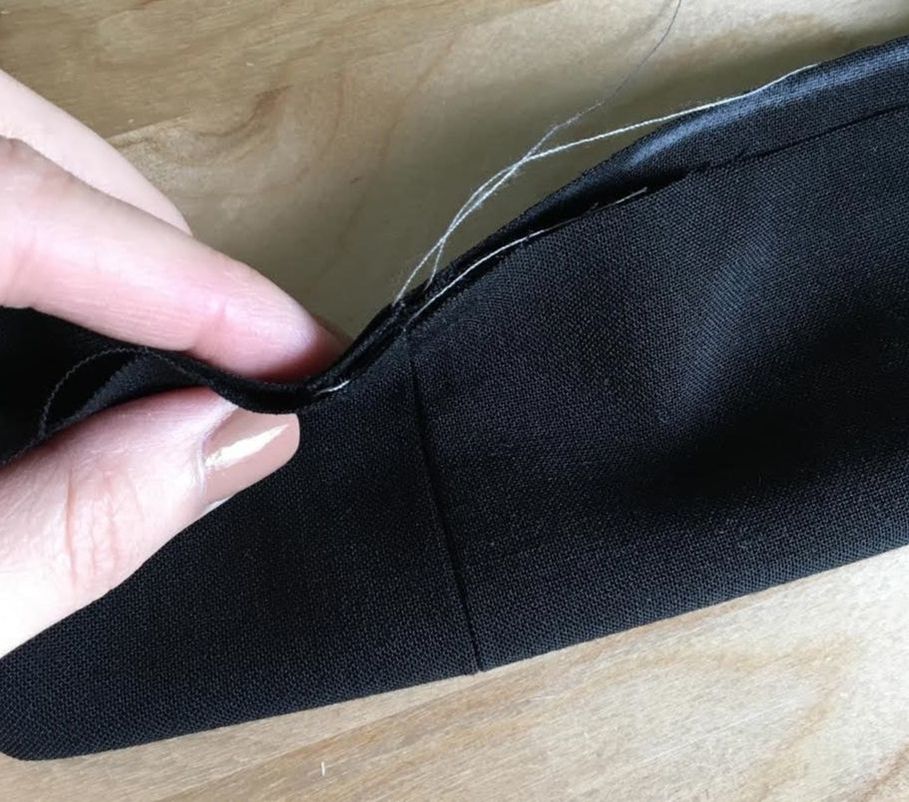
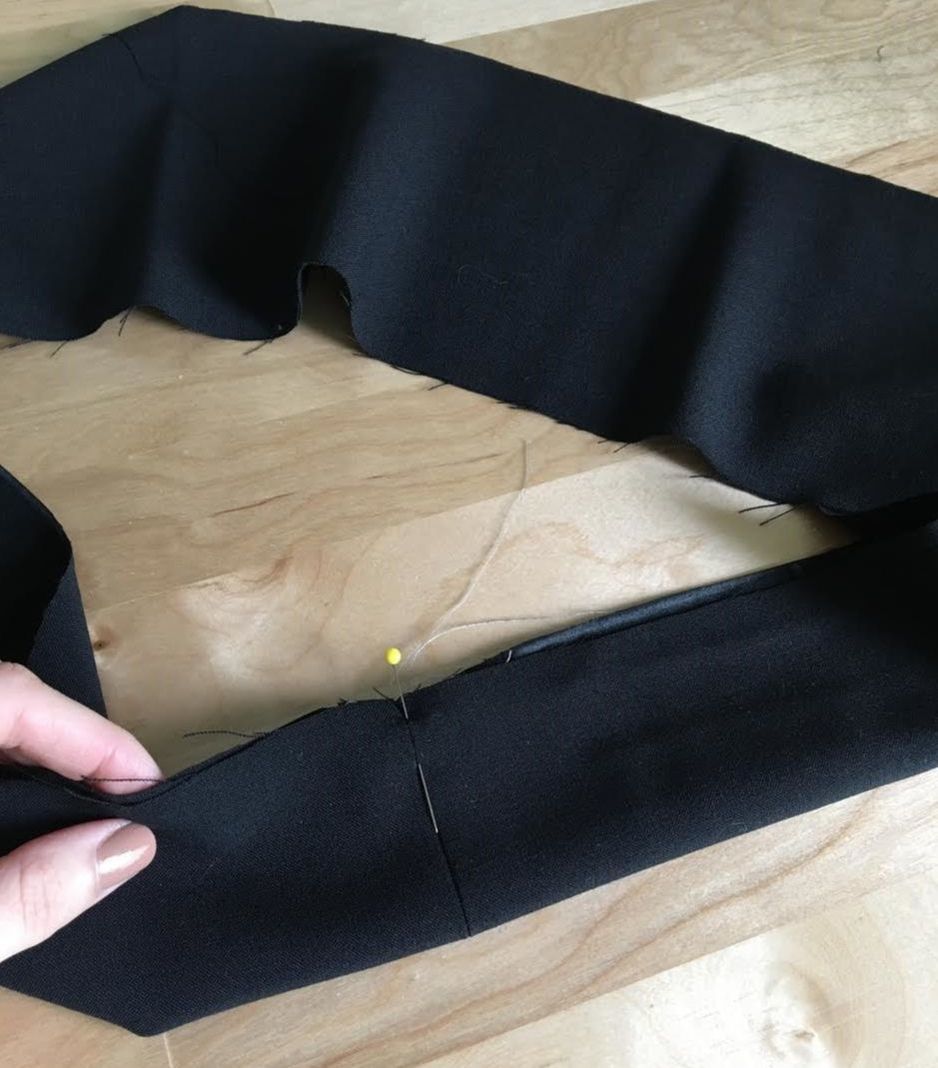
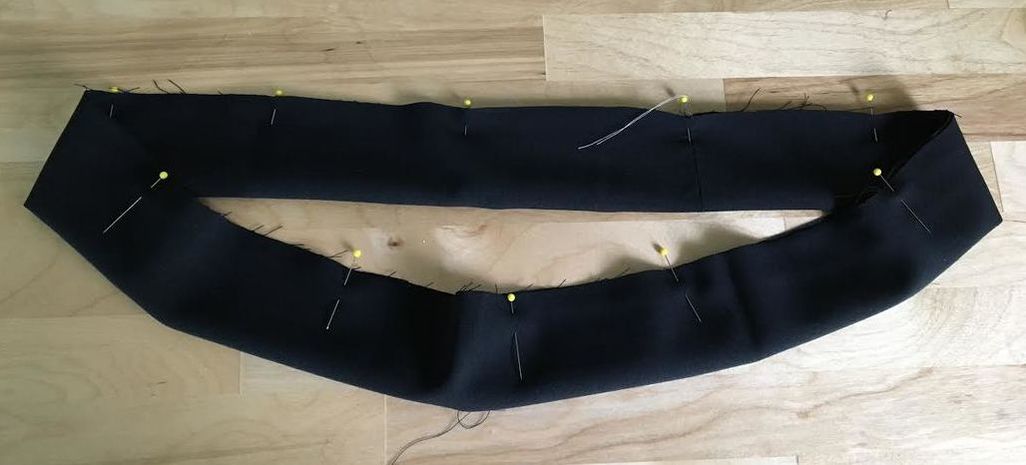
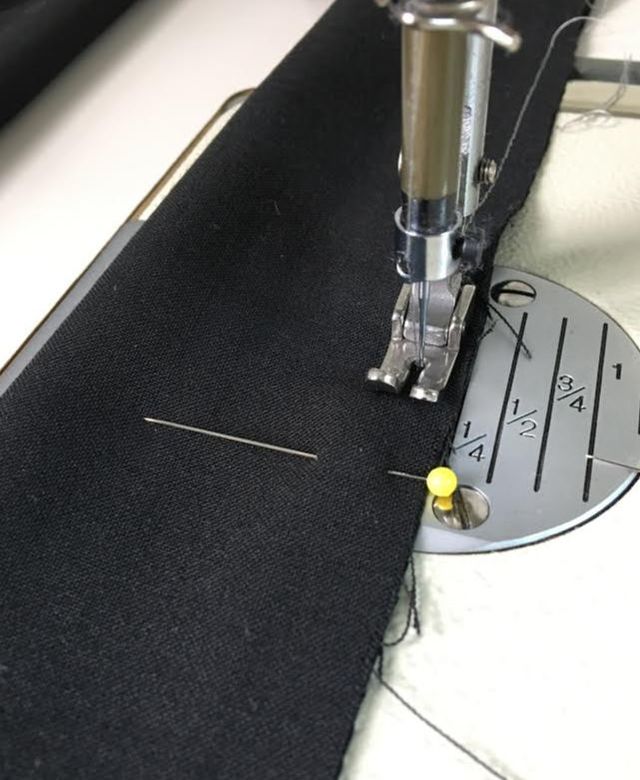
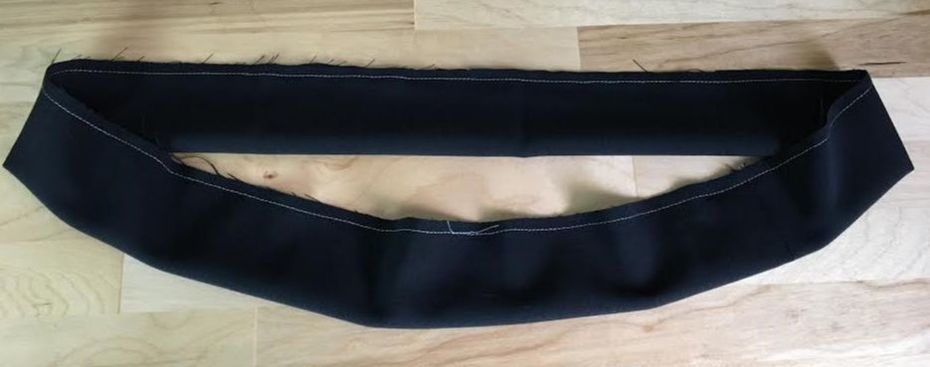
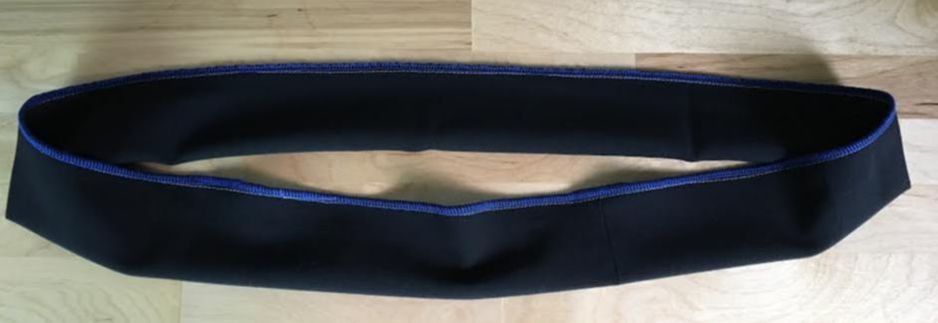
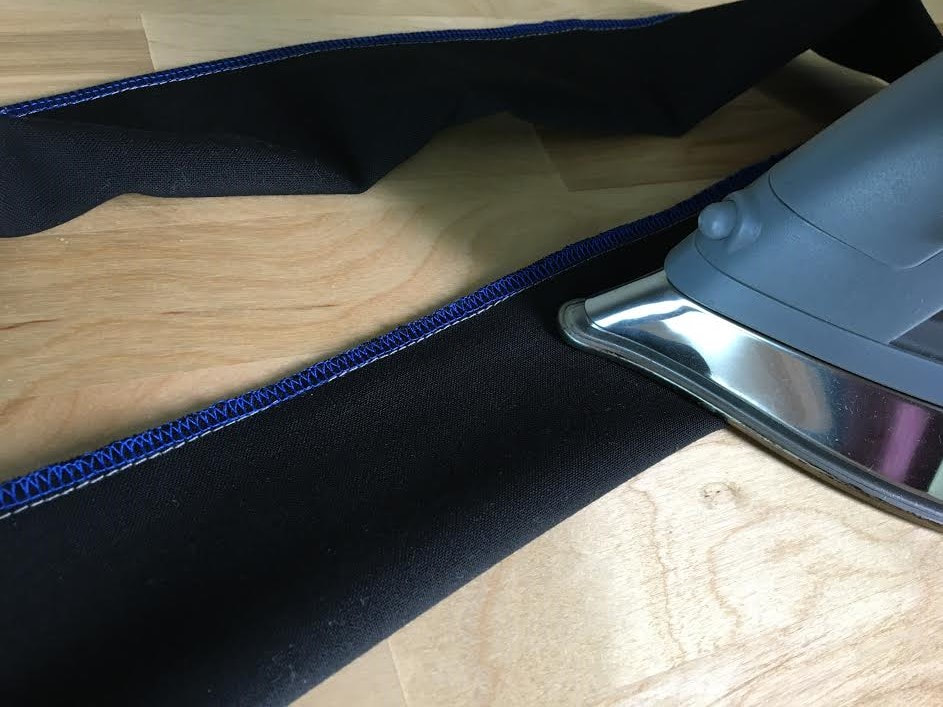
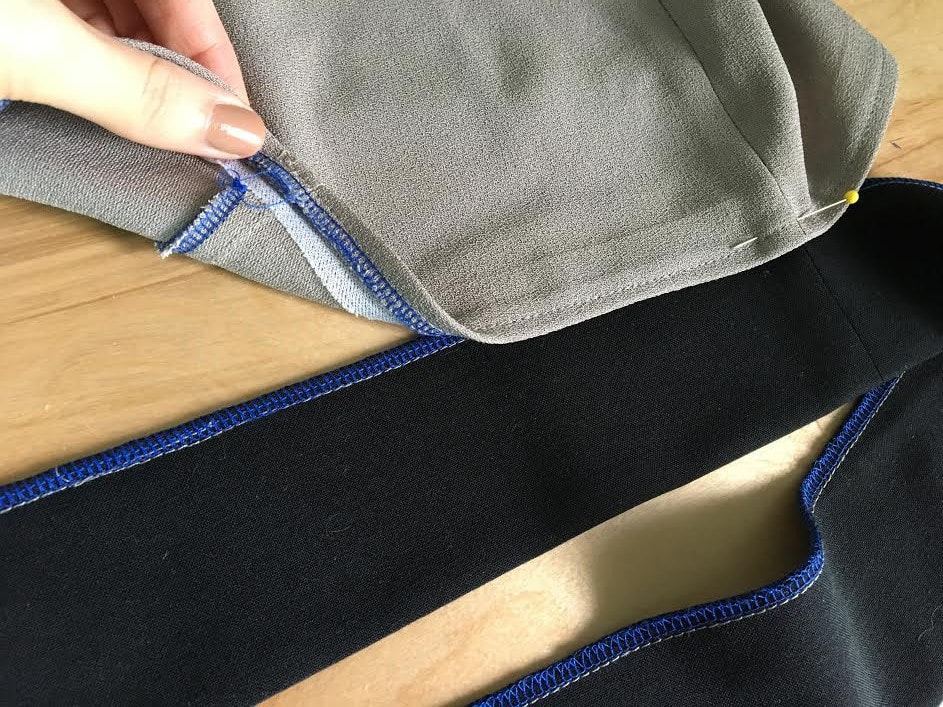
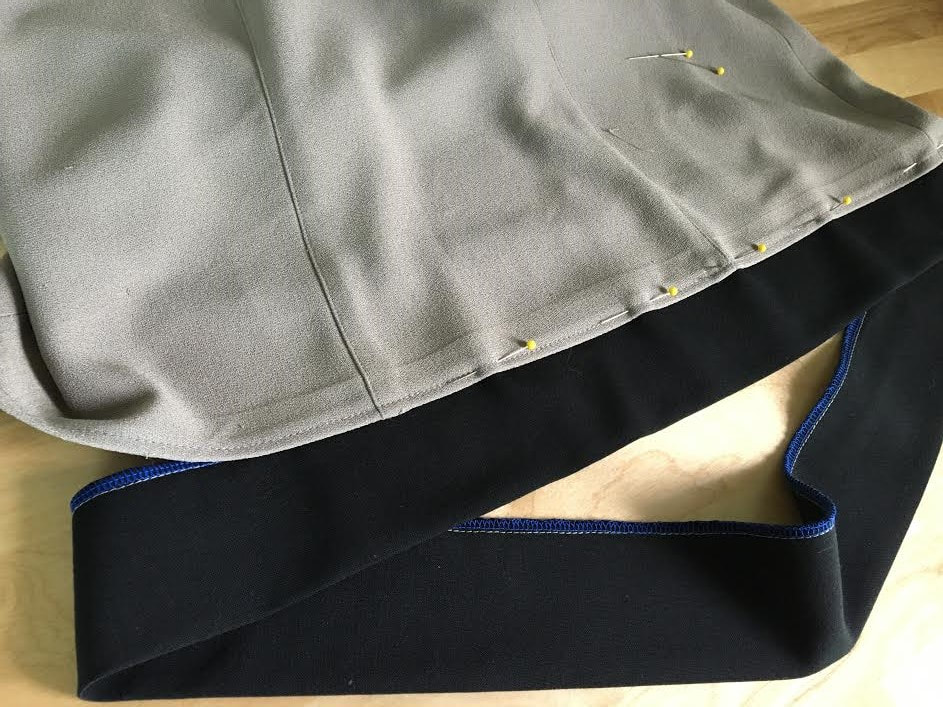
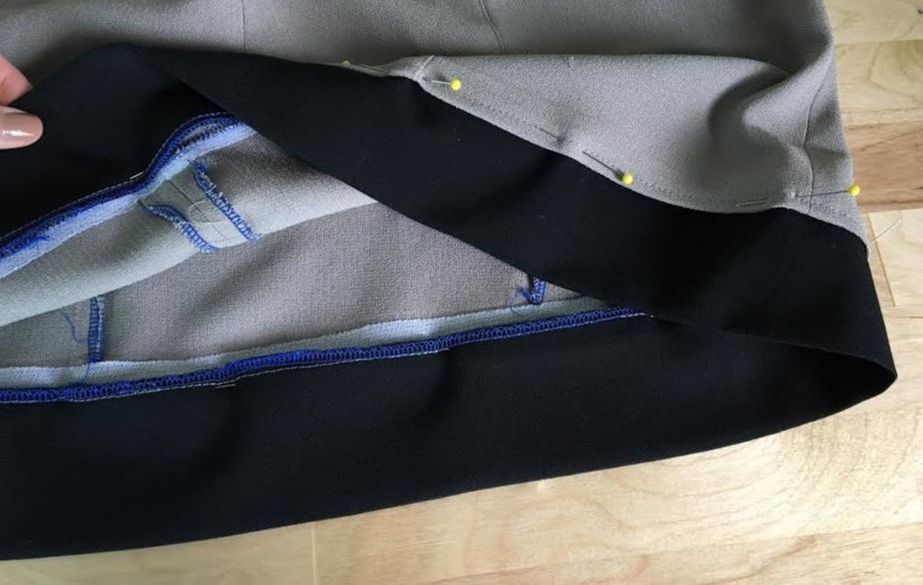
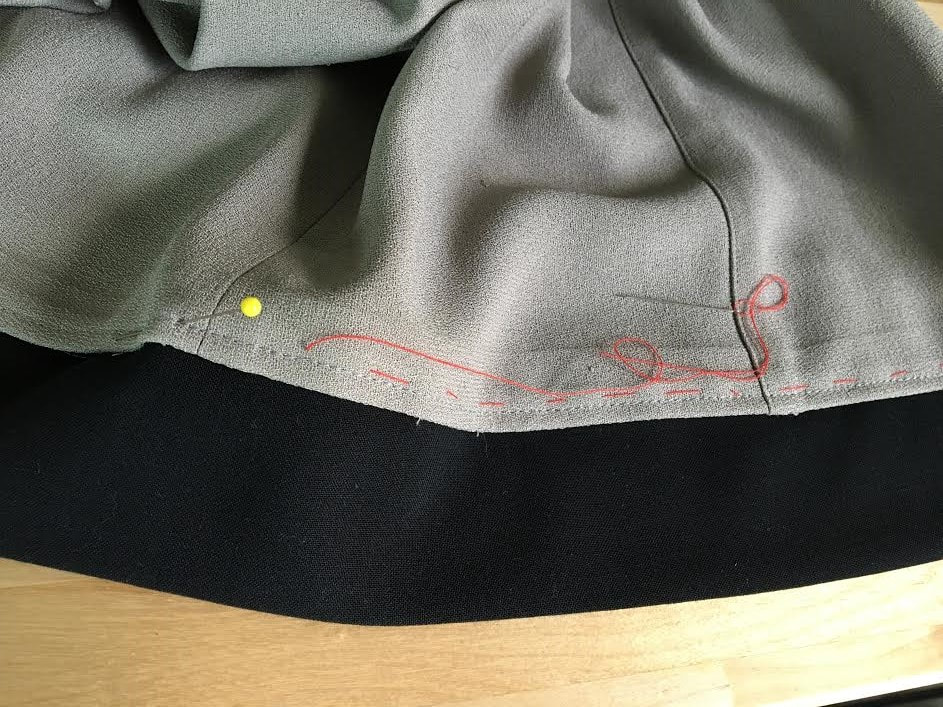
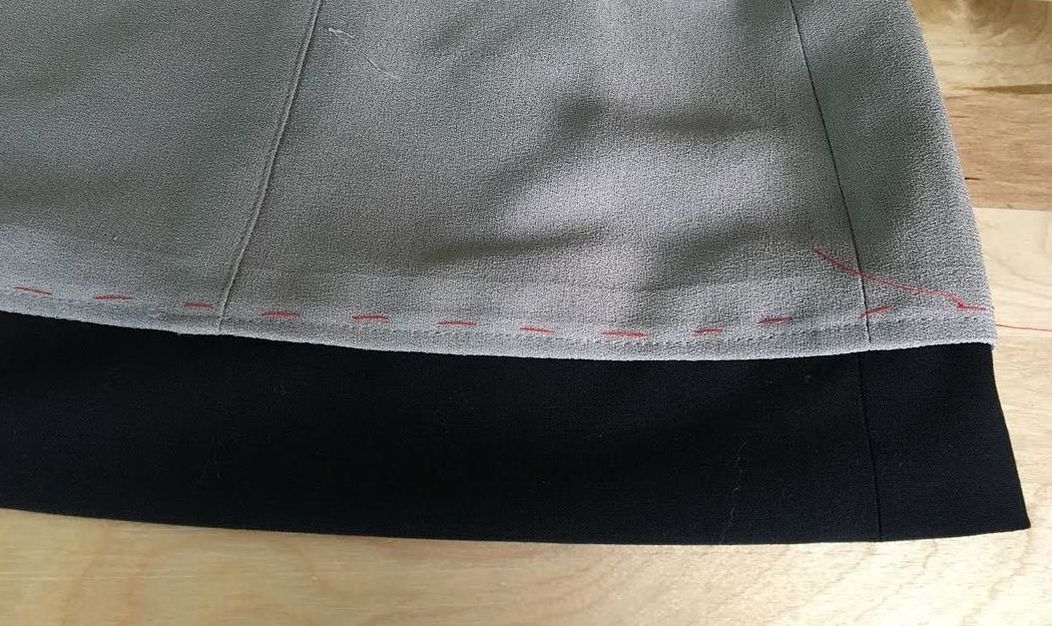
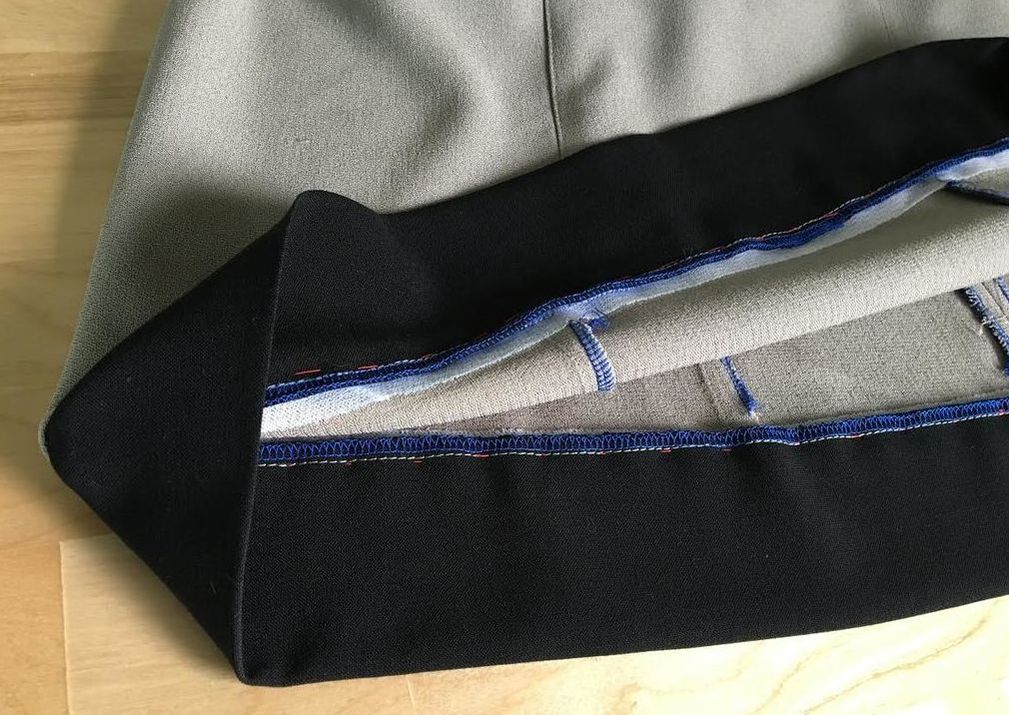
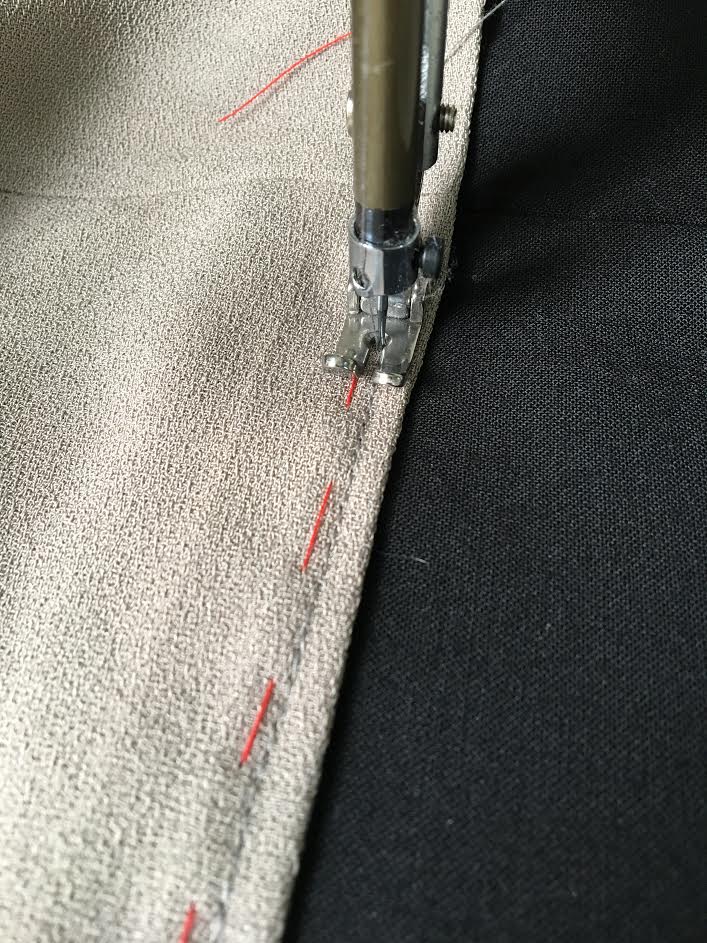
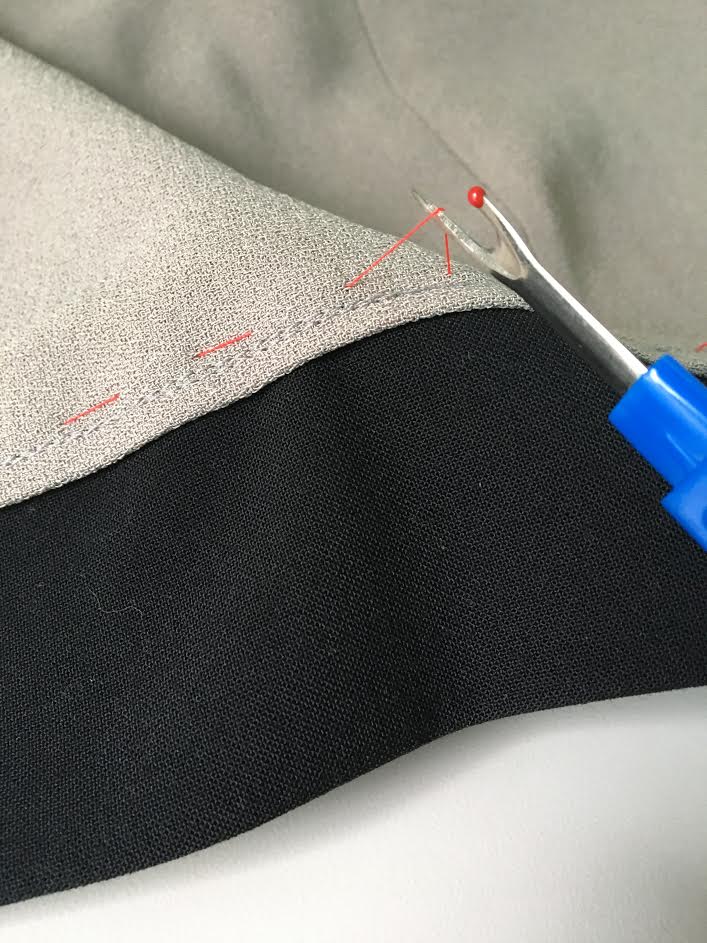
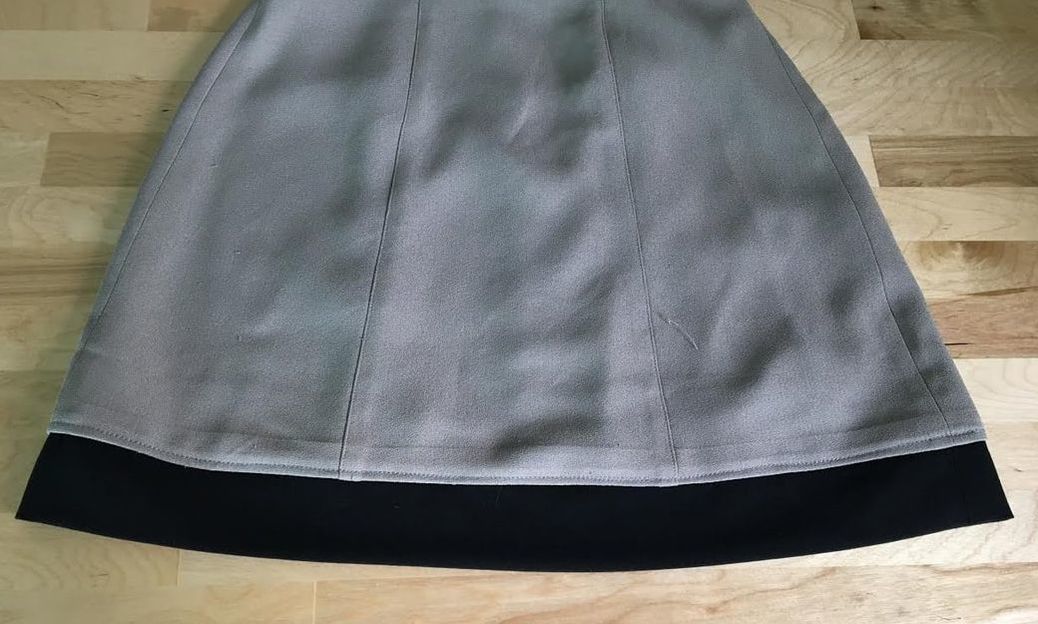
In recent years, fast fashion has forced clothing manufactures to increasingly cut back on materials and production costs in order to maintain their margins. In simple terms, this means that certain cost efficient design and construction techniques have been implemented, whether the consumer notices or not. The most common of these cost adjustments affects the length of a garment. Shortening a clothing item, especially dresses and skirts, uses a bit less fabric when bulk quantities are produced. Making the length shorter and using more affordable trims, linings and hardware are all methods being used to maintain wholesale and retail margins by keeping production and materials costs constant. The length of dresses and skirts are often shortened by an inch or two which in large production lots, can save a lot of money. Have you noticed that the same dress style you may have purchased from a specific brand or retailer used to be a bit longer years ago compared to what you get now? That's no surprise. Due to increasing manufacturing costs, shortening the length of a clothing clothing item is a cost saving technique when large quantities are manufactured. Other times however, clothing items are just designed to be shorter intentionally at the conceptualization stages. That can pose a bit of a problem when these clothing items make it to retail since we're not all made of the same height, right? Perhaps, you are a bit taller than average, and have a hard time finding a dress or skirt of appropriate length. Regardless of what the reason behind it is, the truth is, we've all been in the position where we may shy away from wearing a favorite style just because it is a bit too short. Isn't it frustrating when you find something that is the perfect fit, perfect color, flattering, comfortable but the one shortcoming is in the length? The truth is, shortening a dress or skirt is way easier than lengthening it. When it comes to garment construction, it is always easier to subtract excess fabric then it is to add it once the fabric has been cut and the garment has been sewn. Techniques For Lengthening a Dress (or Skirt): The techniques used to lengthen a dress depends largely on what sort of hem finishing method has already been applied to it. Some hem finishing techniques, like the lining one featured in the tutorial below, may provide enough excess fabric at the hem to make up the necessary length addition. Other finishes provide very little hem allowance to work with which require the addition of a separate piece of fabric in order for the dress to be lengthened. The latter is true in most cases. Most casual dresses today do not include the use of lining (another cost burden) which means the hem will most likely be either double folded and top-stitched, or serged, folded and stitched. These hem finishing techniques do not require long hem allowance (1/2"-1") which means they do not offer enough excess to compensate for any additional desired length in the dress alteration. Remember that aside from using the existing hem allowance to add length to the dress, you will also need to allow yourself enough excess along the bottom raw edge to efficiently clean finish the new hem. As you'll see in the steps to follow, you do lose some extra length at the bottom by re-finishing the new hem of the lengthened dress. As mentioned above, there are technically two main methods for making a dress or skirt longer (depending on the type of clean finish already present on the dress): One is used when a small amount of additional length is needed and is usually more suitable for dresses that have longer hem allowance accounted for in the finished design (such as a lined dress design). The second, which is the most common, is achieved by sewing a separate piece of fabric to the bottom of the dress to lengthen its hem. This method is used when a larger amount of additional length is needed which the existing hem allowance on the dress cannot compensate for. In the tutorial below, we'll show you how to use both methods. These two methods can be adjusted to your specific project whether you need to make a dress very long or shorten it by a small amount. Make a Dress Longer Using Its Existing Hem Allowance: Before you can choose this technique for lengthening a dress, you have to take a look at the finished hem of the dress and ask yourself: Does it have enough hem allowance (length from finished edge to raw edge of fabric) to cover the desired additional length and allow for some extra to clean finish the fabric's raw edge? If the answer is no, you'll have to move on to Plan B - Option 2 below. For the most part, using the existing hem allowance excess to lengthen a dress is used when the additional desired length is very short. So if you need to add just a bit of length or comfort, and the dress already has enough excess fabric at the hem to allow it, this method should work well. A dress that is lined will usually provide longer hem allowance (due to the rules of setting a hem into the lining- which I wont bore you with here). In this method, you'll first have to separate the hem of the lining from the hem of the actual dress, and clean finish both edges separately once the length has been adjusted. Follow the steps below for the step-by-step technique used in this method: In a lined dress, the hem of the lining and the hem of the actual dress layer are usually sewn together horizontally along their bottom edges. The lining is cut a bit shorter than the actual dress such that when it is connected to the dress along the hem, the lining doesn't poke out at the bottom of the finished dress. In the dress displayed above, we can approximate about how much length we can add to the dress using the existing hem allowance alone. Because the total hem allowance is about 1.5" inches, and we should always account for some excess to re-finish the hem, we'll probably be able to lengthen the dress by about 1" with approximately 1/2" left to clean finish the new hem. 1. Using a seam ripper, separate the lining and self fabric layer (dress layer) by carefully cutting the stitch that connects theses two layers. You'll find that with the help of a seam ripper, this is quite easy to do. Cut every few stitches then gently pull the two layers apart to separate them. Once the entire stitch is removed, the two layers will be completely separate. You'll notice that the seam allowance in between these two layers is not clean finished and the edge of each fabric layer is folded inwards and ironed. When it comes to lined clothing items, the hem is always backed with interfacing for structure and stability. This is necessary because lining finishes are usually more tailored requiring more control along the hemmed edge. When lengthening a dress, you don't have to separate the interfacing from the fabric as it will be hidden on the inside of the dress anyways. 2. Once the two layers of fabric are separated, iron on top of the fold lines to smooth out the bottom edges of the dress. This will make the hem of the dress much easier to measure and re-sew. Iron the bottom of both the self fabrics layer and the lining edges, making sure to smooth out the folds as much as you can. You will most likely not be able to get rid of the impression of the fold lines and that's OK- use steam and a higher iron temperature if the fabric permits. Otherwise, the original fold line impression should disappear over time with care and use. Before getting to the sewing part, the hem edges of both lining and self should be smoothed out and any excess threads should be trimmed to ensure an easier sewing process. 3. Work on each individual layer separately. First, slide the self-dress layer up to expose most of the lining at the bottom. We will be working on the lining first. Due to the fact that the dress is being lengthened, the lining's bottom edge should never be cut/trimmed but rather left as long as possible. To prevent fraying and ensure a durable finish, you'll need to clean finish the raw edges of the hem and seams respectively, especially at the area closest to the bottom. The simplest method is by using a zigzag stitch on your home sewing machine. If you have a serging/overlock machine, use a serging stitch instead. Apply the serging along the horizontal bottom raw edge of the hem and along the raw edges of the seam allowance on any existing seams as shown above. You don't have to add the zigzag stitch along the entire length of the vertical seam allowance but rather just a few inches from the bottom. After the dress is lengthened, the lining will no longer be connected to the dress layer along the bottom edges, and the two layers will be left separate form one another. For that reason, the purpose of clean finishing fabric raw edges at the bottom of the dress, is to minimize fraying as much as possible and provide a more durable finish over time. 4. Next, repeat the same clean finishing method on the self layer of the dress. Add a zigzag stitch (or serging) along the bottom hem edge, as well as the bottom portion of the seam allowance on each vertical seam. The easiest way to do this, is to move the lining layer up into the dress so that it doesn't get in the way of your stitching process. In this tutorial, we added a serging stitch as opposed to a zigzag. The stitch was applied along the horizontal raw edge of the hem without trimming or cutting the fabric at all. A zigzag or serging stitch was then added to the bottom portion of any seam allowance that was not clean finished on the inside of the dress. In this tutorial, the dress is made of a crepe fabric which is highly fraying. The zigzag stitch (or serging, as used in this tutorial) will contain the fraying edges, maximizing durability. It may be a little tricky to clean finish the seam allowance raw edges on these vertical seams due to the fact that the seams have already been stitched together. Nevertheless, if you stitch slower and are careful not to catch the actual seam within the zigzag stitch, the process shouldn't be too bad. Now that the fraying fabric edges of both lining and the dress self layer are contained and clean finished, you can visually see the slight length difference between the two layers when they are moved back in their natural position. The lining is always a bit shorter, thus remaining enclosed on the inside of the garment. At this point, the dress has an added length of the original hem allowance length which is 1.5" in this tutorial. You're not quite done yet as you still have to apply a final hem finishing technique along the horizontal bottom edge of each fabric layer. The easiest and most fabric-efficient finish in this case is a single folded stitched finish. This hem finishing technique works best for lengthening a dress due to the fact that in requires a very small amount of hem allowance-anywhere from 1/4" to 1/2" (or more) depending on how thick the fabric is. 5. Starting with the lining layer, fold the serged (zigzaged) bottom fabric edge in at about 5/8" towards the wrong side of the garment as shown above. As you fold, iron directly on top of the fold to set it in place. By the way, ironing folds before stitching them is great practice for sewing beginners. Fold along the entire edge of the lining maintaining the fold distance as even as possible throughout. 6. On your sewing machine, straight stitch the fold on the wrong side of the garment using either the serging/zigzag stitch or the bottom folded edges a guide. Stitching with the wrong side of the folded edge facing up ensures a more even stitch and provides a stitching guideline during the process. In this tutorial, we used the bottom of the serging stitch as as a guide for the final straight stitch. This results in a straight, evenly distributed stitch on the face of the lining. 7. Now that the lining's hem is complete, repeat the same process on the actual dress layer. Remember, your goal is to maximize the length of the dress which means the fold should be as as short as you can manage it given the thickness of the fabric. In this tutorial, we folded the bottom edge of the fabric up at approximately 1/4" towards the inside of the garment as shown above. Make sure you iron as you fold the entire length of the hem. As you can see, pre-ironing the fold will keep it in place without the need for using pins. If you need extra stability however, you should always add a few pins to keep the fold in place better. Keep in mind that some fabrics are more difficult to iron so the ironing technique may not always hold. If you are working with thin, flimsy fabrics, always pin and baste the fold before applying the final straight stitch, especially if you are a sewing beginner. 8. Just as you did for the lining layer, straight stitch on your sewing machine on the wrong side of the fabric, following either the serging/zigzag stitch or the bottom folded edge as a guide. Keep an eye on the seam allowance guide as well- Doing so will ensure you always achieve a straight, evenly-distributed stitch on the face of the garment. As shown above, the hem stitch should be distributed evenly along the bottom edge of the dress and blend into the color/texture of the fabric. You can probably still spot the original fold line of the dress if you look carefully at the image above. You can probably also tell that we have gained an additional length of about 1" using the existing hem allowance on the original dress. 9. To smooth out the pre-existing fold line and smooth out the re-finished dress hem, iron along the dress' bottom edge while steaming and applying the highest safest heat for the fabric at hand. You'll find that the original fold line may not completely disappear even after rigorous steaming and ironing. However, it will eventually blend into the surface of the fabric with a number of washing and drying cycles. If you take a look on the inside of the dress, all fabric raw edges closest to the dress hem should be clean finished to prevent fraying and extend the life of the dress. The dress has now been lengthened by 1" using the existing hem allowance on the original dress! How To Add Length To A Dress Using A Separate Piece Of Fabric In the case the dress in question doesn't provide enough hem allowance to add the necessary length, you can always add a separate strip of fabric to the existing hemline. This technique allows you to choose any length you want whether you'd like to make the dress substantially longer or just add a couple of extra inches. The best part is, you get to exercise the creative side of your brain and play fashion designer by choosing the fabric color/type used in combination with the dress. It is entirely up to you what fabric you choose to combine with the dress, whether it is a contrast look or something that blends into the color and texture of the dress being altered. As you'll see in the steps to follow, we used black contrast fabric to add additional length to the dress. This choice will form a black panel along the bottom edge of the dress, thus visually altering the overall design. 1. As a first step, we need to figure out the lengthwise measurement of the fabric panel that will be sewn to the bottom of the dress. To do this, carefully measure along the very bottom edge of the dress (hemline) and note this measurement. The easiest way to do this is to pick a starting point along the hem, such as a side seam (or any vertical seam) and measure along the very bottom edge until you arrive at the starting point again- Note this measurement as it will provide the lengthwise measurement for the separate fabric addition (not accounting for seam allowance). The total lengthwise measurement of the final fabric strip will have to contain the seam allowance excess as well. 2. Take the dress measurement from the step above and add 1" to it. This extra 1" will account for a 1/2" seam allowance along the two vertical edges of the fabric strip. Lay out the fabric and measure from the vertical edge of the fabric lengthwise, and add a mark using a fabric pencil or tailors chalk were the final lengthwise measurement (with seam allowance) ends. This will note how long the final fabric strip should be cut. Now for the important part: the additional dress length. The width of this fabric strip will determine the added dress length. Due to the fact that this separate fabric strip will also be folded lengthwise onto itself to clean finish, it is important that whatever additional length you need for the dress is doubled before cutting the fabric strip. If it sounds confusing, don't worry! Here's the formula: 1. Figure out how many additional inches you would like to add to the dress. Take that measurement and double it. 2. Next, add 1" total seam allowance to account for the 1/2" seam allowance along both bottom and top lengthwise edges of the final fabric strip. You need the extra layer because this fabric strip will fold onto itself to self finish and then connected to the bottom of the dress with the help of the 1/2" lengthwise seam allowance. In this tutorial, we are lengthening the dress by 2". This means the width of the fabric strip/panel will be 4" plus the 1" to account for the 1/2" seam allowance along each top and bottom lengthwise edge. This seam allowance is needed in order to connect this separate fabric strip to the dress hem. It is a good idea to draw the cut lines of the fabric strip once everything is measured and noted on the fabric. In the image above, we marked the seam allowance on the side vertical edges (side edges) to make it easier to visualize. You'll get a better understanding of how this fabric panel will be folded and sewn in the steps to follow. 3. Cut the fabric strip, carefully following the drawn pencil lines as shown above. 4. Fold the fabric strip such that the vertical side edges are touching as shown above. If your fabric has a right and a wrong side, make sure the wrong side of the fabric is on the outside. The above image displays a closeup of the vertical side edges matching up. Make sure you align these edges perfectly as they will need to be stitched together at the 1/2" seam allowance (accounted for when you calculated the lengthwise measurement in Step 1). 5. Pin the vertical side edges together aligning the pins perpendicular the fabric's edge. Remember, if your fabric has a face side and a wrong side, make sure the face of the fabric is on the inside of the fold and the wrong side is enclosed on the outside. 6. Stitch these side edges together following the seam allowance of 1/2". If you drew the stitch-line on fabric as shown in the image above, stitch directly on top of the stitch-line. However, you should still keep an eye on the machine seam allowance guide to ensure a straight, even seam. Backstitch at the beginning and end of the stitch to reinforce the seam. 7. Iron the seam with the seam allowance edges pointing away from each other. The easiest way to do this is to iron directly on the seam allowance, on the wrong side of the seam. 8. Next, fold the fabric strip such that the seam allowance is enclosed on the inside, the top and bottom portion of the seam is overlapping on both sides, and the top and bottom lengthwise edges are touching. 9. Insert a pin perpendicular to the raw edges of the fabric strips through both layers of the seamline as shown above. 10. Continue folding the fabric strip lengthwise such that the top and bottom fabric edges are matching as shown above. In this instance, the wrong side of the fabric should be enclosed on the inside of the fold and face of the fabric should be on the outside. To hold this fold in place, insert pins along the entire fabric strip perpendicular to the fabric's edges. 11. To facilitate the sewing process in the steps to follow, it is highly recommended that you machine stitch both top and bottom lengthwise edges together so that they do not become misaligned when attaching the fabric strip to the dress later. Stitch the two layers together at about 1/4" seam allowance, or shorter. This stitch is only used in the construction process and should not be visible on the face of the dress. Remove the pins as you stitch- DO NOT STITCH THROUGH THE PINS. The machine stitch applied in the step above keeps the lengthwise edges together and the fabric strip folded correctly throughout. 12. Next, use a zigzag stitch on your sewing machine (or a serging stitch if you own an overlock machine) to clean finish the raw lengthwise edges of the fabric strip. Using a zigzag stitch or serging is highly recommended due to the fact that it keeps the layers of the folded fabric strip flatter, eliminating bulk. Iron the bottom lengthwise fold before connecting it to the hem of the dress. You can iron the fabric strip now as suggested, or wait until after it is sewn to the hem of the dress. We recommend pre-ironing it just because it is much easier to work with a single fabric strip than have to handle a completed garment in the ironing process. 13. Align the fabric strip to the bottom of the dress such that the hem of the dress is overlapping the fabric strip's zigzag (serged) edge and the zigzag stitch (or serging) is hidden underneath. As you align the separate fabric strip to the hem of the dress, insert pins to temporarily connect the two pieces as shown above. Align the fabric strip as evenly as possible such that the width of the fabric strip is distributed evenly and at the same distance at the bottom of the dress. 14. Due to the overlapping nature of the dress hem and fabric strip extension, it is highly recommended that you temporarily baste the two pieces together in order to keep them from shifting during the machine stitching process. Apply the basting stitch a little above the existing dress hem stitch-line, through all layers of the dress and fabric strip underneath. Due to the fact that you'll be sewing directly on this existing stitch-line, you should avoid basting on top of it due to the fact that the basting stitch may get caught in the machine stitch and be very difficult to remove. Make sure that as you baste, the basting stitch is catching all layers of the fabric underneath. The basting stitch should be visible on the face of the dress as well as on the surface of the fabric strip extension on the inside of the garment, as shown in the image above. 15. On your sewing machine, stitch directly on the existing hem stitch-line of the dress through all layers of the dress and fabric strip underneath. Stitching on top of the existing hem stitch will not only allow for an easy-to-follow stitch guideline, it will also blend the two separate stitches together for a cleaner look. 16. Remove the basting stitch using the seam ripper or a sharp pair of scissors. This should be quite easy to do since it was applied away from the machine stitch. The dress has now been lengthened by approximately 2" using a separate fabric extension.
3 Comments
Alice Rice
3/5/2020 03:21:45 pm
Very good tutorial. It answered several questions I had about using a band of fabric to lengthen my skirt. Thanks!
Reply
3/6/2020 06:25:57 am
Hi Alice! I am so glad you found this tutorial helpful!
Reply
Leave a Reply. |
The Blog:A journey into our design process, sewing tutorials, fashion tips, and all the inspiring people and things we love. Doina AlexeiDesigner by trade and dressmaker at heart. I spend most of my days obsessing over new fabrics and daydreaming new ideas. Sadie
Executive Assistant & Client Relations Manager Archives
November 2019
Categories
All
|
-
Sewing Tutorials
-
Basics
>
- Aligning Pattern Grainlines To Fabric
- Preparing Fabrics For Sewing
- Pinning Sewing Patterns To Fabric
- Placing Sewing Patterns On Fabric For Cutting
- Rotary Cutters or Fabric Scissors?
- Cutting The Sewing Patterns
- What Are Notches And How To Use Them In The Sewing Process
- Transferring Notches From Pattern To Fabric
- Transferring Seamlines to Fabric
- Staystitching
- Backstitching: A Complete Guide
- Hand Basting: A Complete Guide
- Sewing Continuous Bias Binding
- Darts >
-
Sewing Seams
>
- The Basics Of Seams And Seam Allowance
- How To Sew A Straight Seam
- Sewing Curved Seams
- Sewing Corner Seams
- Trimming And Grading Seam Excess
- Notching/Clipping Seam Allowance for Tension Release
- Sewing Topstitched Seams
- Sewing Corded Seams
- Sewing A Slot Seam
- Sewing A Gathered Seam
- Sewing Bias Seams
- Sewing Seams With Ease
- Sewing Seams With Crossing Seamlines
- Sewing Unlike Fabric Seams
- How To Iron Seams: Ironing Tools And Conventions
- Sewing With Knit Fabrics
- Understanding Stitch Length And Tension
- Sewing Unique Fabric Seams
-
Seam Finishes
>
- Seam Finishing Techniques - Overview
- Applying A Pinked Seam Finish
- Applying A Bias Bound Seam Finish
- Serging And Zigzag Seam Finishes
- Sewing A Self-Bound Seam Finish
- Sewing A French Seam Finish
- Sewing A Hong Kong Seam Finish
- Sewing A Mock French Seam Finish
- Sewing A Turned-and-Stitched Seam Finish
- Sewing Overcast Hand-Applied Seam Finishes
- Sewing A Flat Felled Seam
- Sewing A Hairline Seam Finish
-
Hem Finishes
>
- Garment Hem Finishes: Overview
- Sewing A Double Fold Hem Finish
- Sewing A Single Fold Hem Finish
- Sewing Bound Hem Finishes
- Sewing An Exposed Double Layer Bound Hem
- Sewing A Folded-Up Bound Hem with Pre-folded Binding
- Sewing A Hong Kong Hem Finish
- Sewing A Band Hem Finish
- Sewing A Bias Faced Hem Finish
- Sewing A Twill Tape Hem Finish
- Sewing A Rolled Hem Finish
- Sewing A Shaped Hem Facing
- Using Fusible Hem Tape And Webbing
- Finishing A Lace Fabric Hem
- Finishing A Leather Hem
- Sewing Faced Hem Corners
- How To Finish Lining At The Hem
- Finishing Fabric Corners by Mitering >
- Interfacing A Hemline: Lined And Unlined Examples
-
Sewing Pockets
>
- Curved Patch Pocket With Flap
- Unlined Square Patch Pockets
- Lined Patch Pockets: Two Ways
- Extension On-Seam Pockets
- Separate On-Seam Pocket
- Front Hip Pockets
- Bound Double Welt Pocket
- Double Welt Pocket With Flap
- Self-Welt Pocket (Using Single Fabric Layer)
- Slanted Welt Pocket (Hand-Stitched)
- Faced Slash Pockets: Overview >
-
Sewing Zippers
>
- Sewing Zippers: General Information
- Sewing A Centered Zipper
- Sewing A Lapped Zipper
- Sewing An Invisible Zipper
- Sewing A Fly Front Zipper
- Sewing A Closed-End Exposed Zipper (No Seam)
- Sewing An Exposed Separating Zipper
- Sewing Hand Stitched Zipper Applications
- Sewing A Zipper Underlay
- Sewing A Placket-Enclosed Separating Zipper
- Sleeveless Finishes >
-
Neckline Finishes
>
- Sewing A Neck Shaped Facing
- Sewing An All-In-One Neck Facing
- Neck And Garment Opening Combination Facings >
- Sewing A Bias Faced Neckline Finish
- Sewing A Band Neckline Finish
- Bound Neckline Finishes: Overview >
- Sewing A Semi-Stretch Strip Band Neckline
- Ribbed Neck Band And Classic Turtleneck
- Decorative Neckline Finishes >
- Finishing Facing Edges >
-
Extras
>
- A Complete Guide on Interfacing
- Sewing Bound Spaghetti Straps
- Sewing Spaghetti Straps To A Faced Neckline
- Sewing Ruffles: Overview
- Patterning And Sewing A Circle Ruffle
- Sewing A Gathered Heading Ruffle
- Sewing Double Layer Gathered Ruffles
- Sewing A Gathered Ruffle Into A Seam
- Sewing A Gathered Ruffle To A Fabric Edge
- Sewing A Fabric Surface Slit
- Sewing A Slit Seam
- Hand-Applied Straight Stitches
- Hand-Applied Blind Stitches
- Hand-Applied Overedge Stitches
- Hand-Applied Tack Stitches
- Hand-Applied Decorative Stitches
-
Basics
>
- Custom Bridal
- Custom Apparel
- About
- Blog
Services |
Company |
|




 RSS Feed

