|
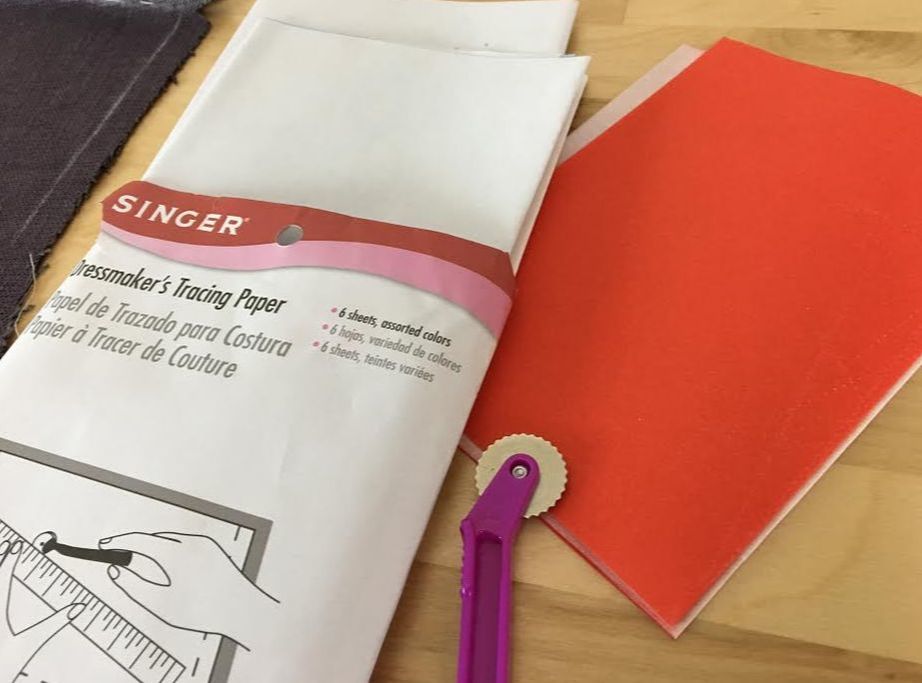
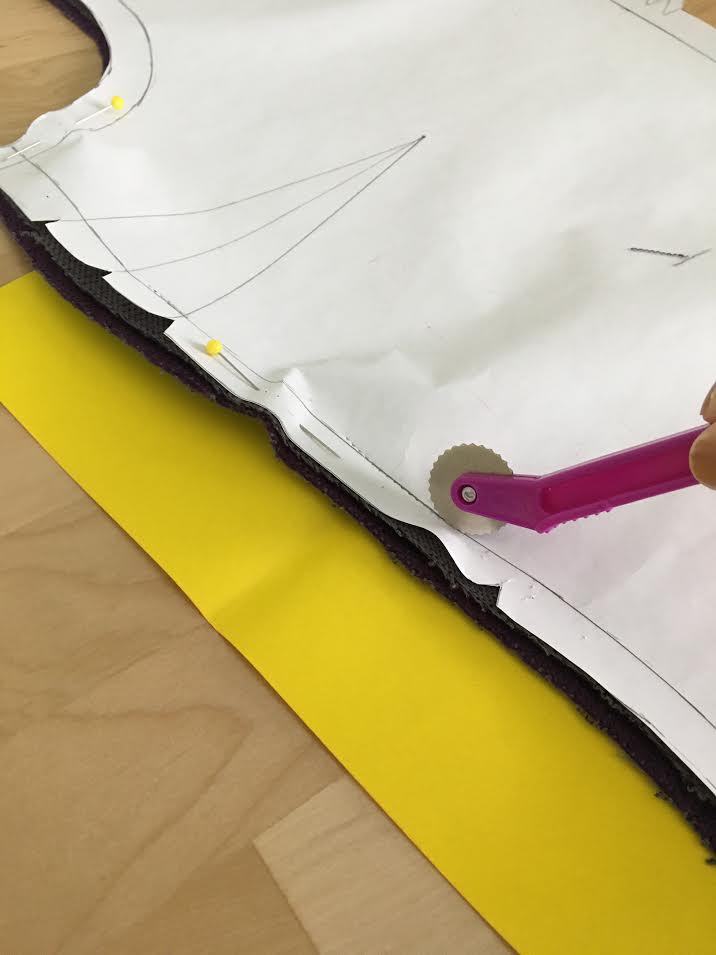
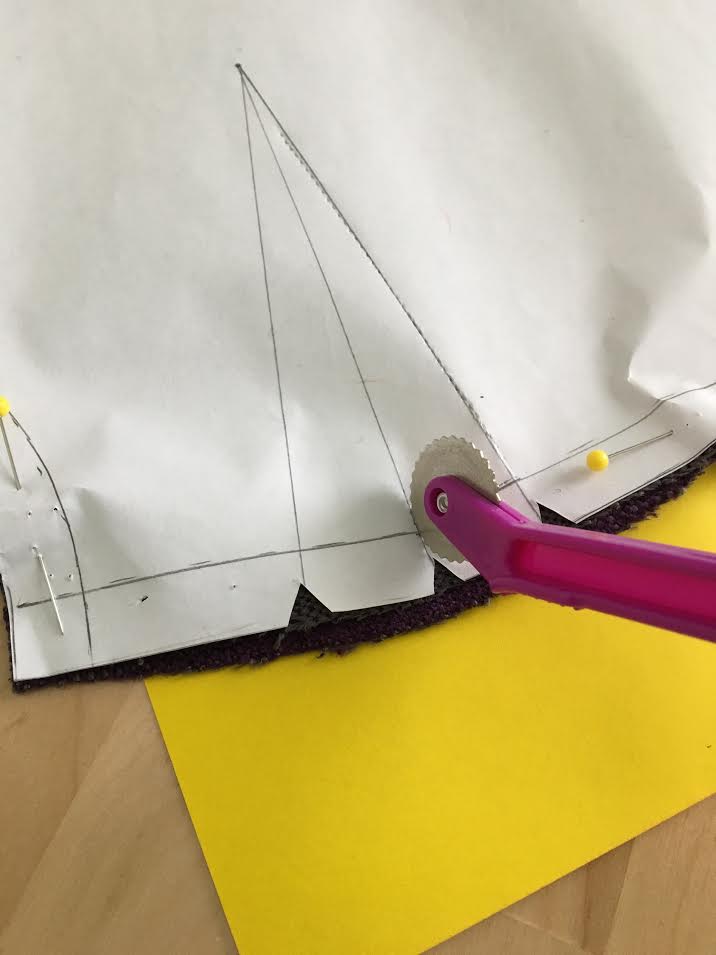
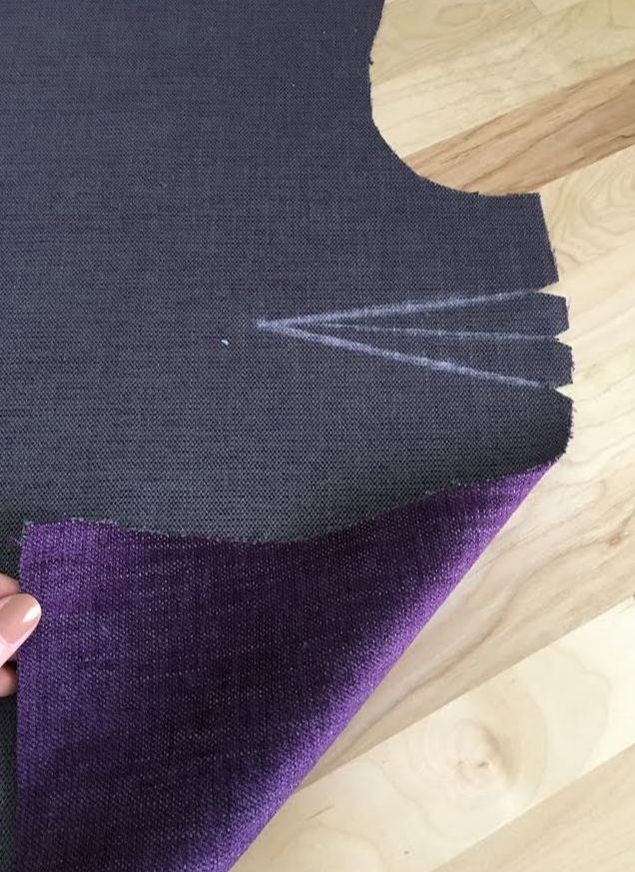
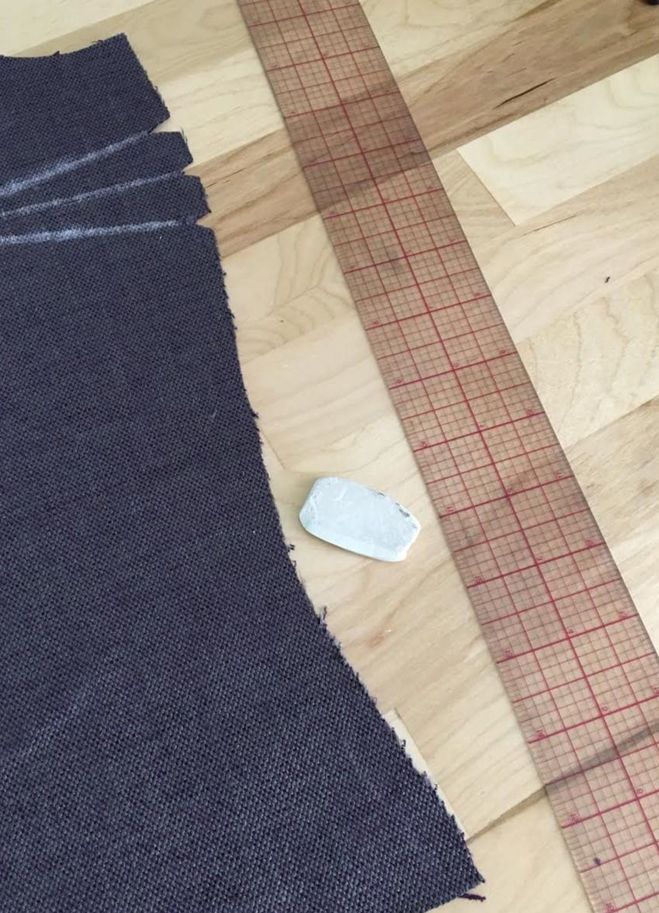
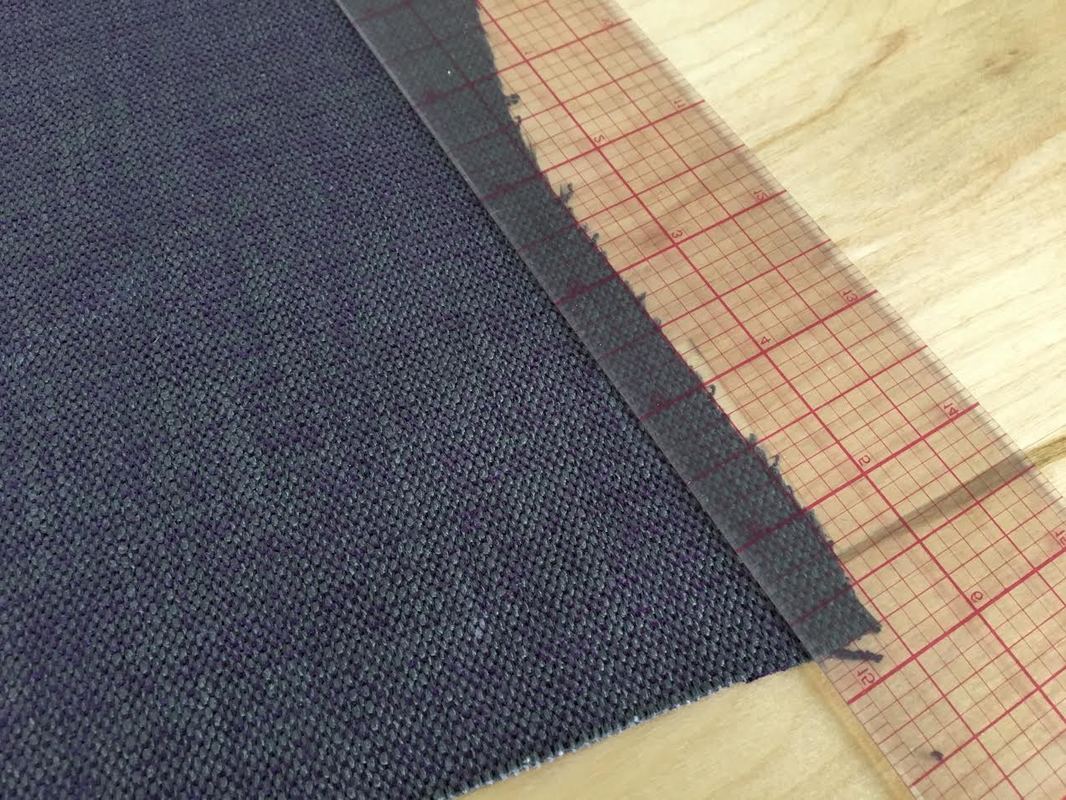
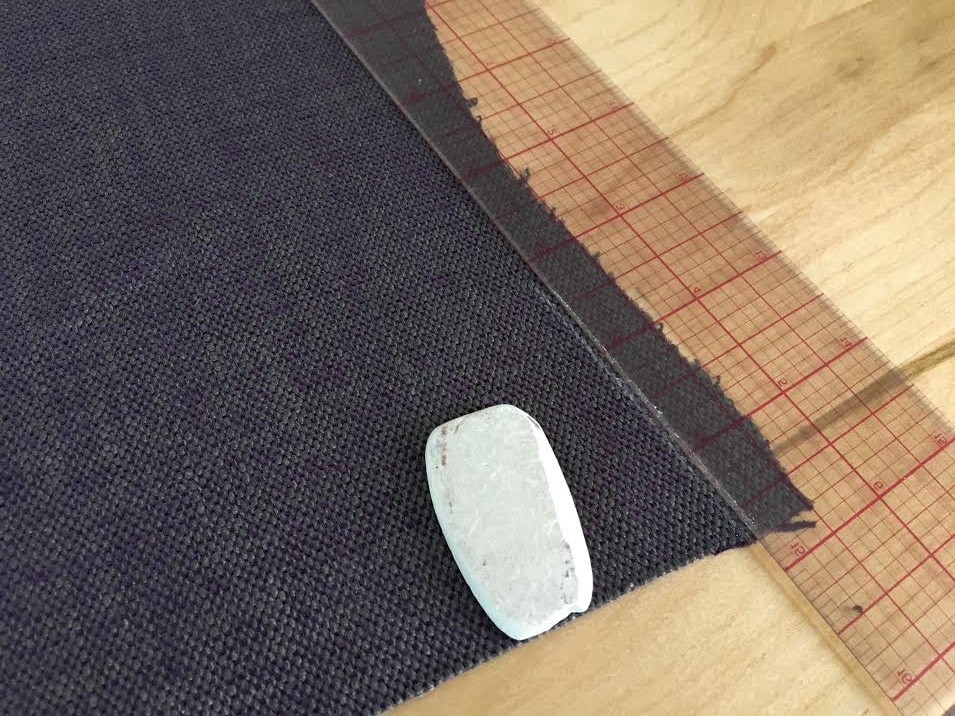
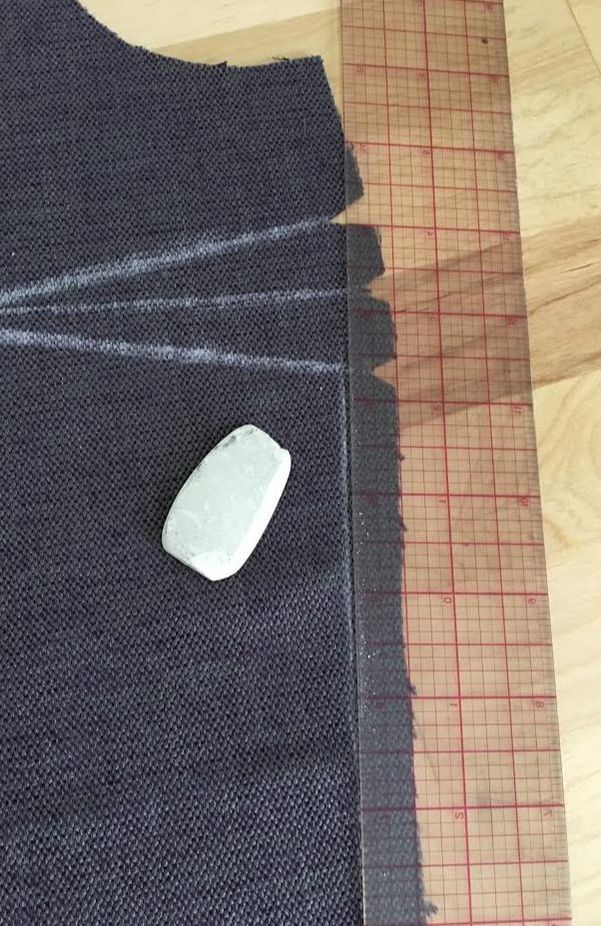
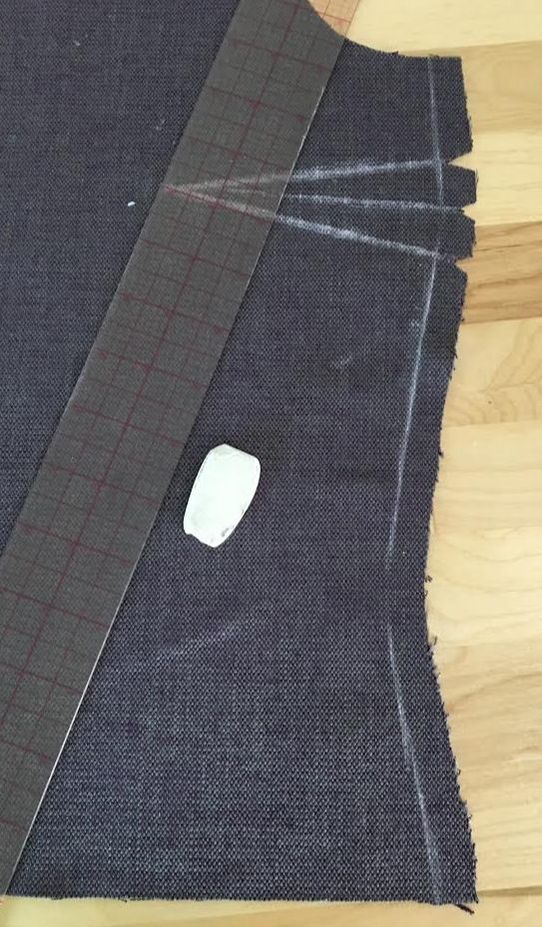
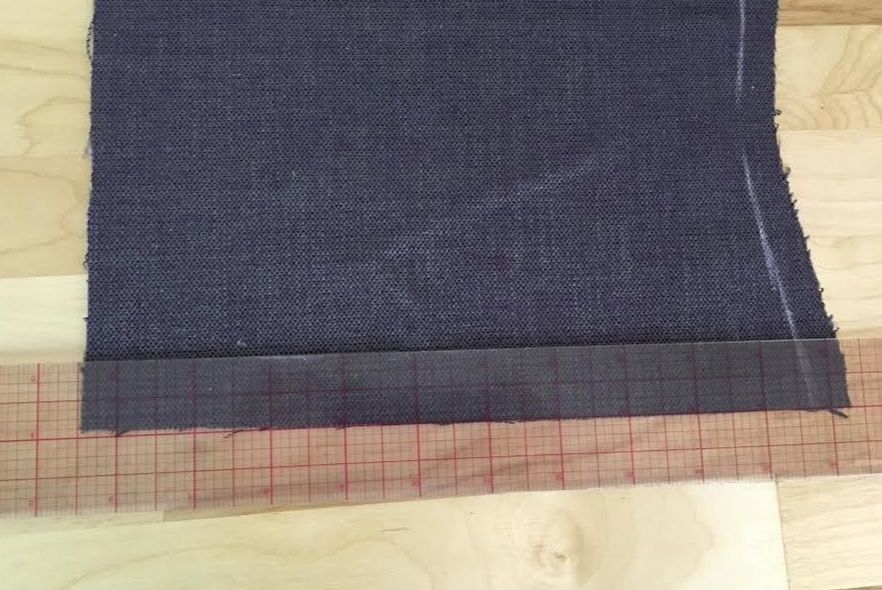
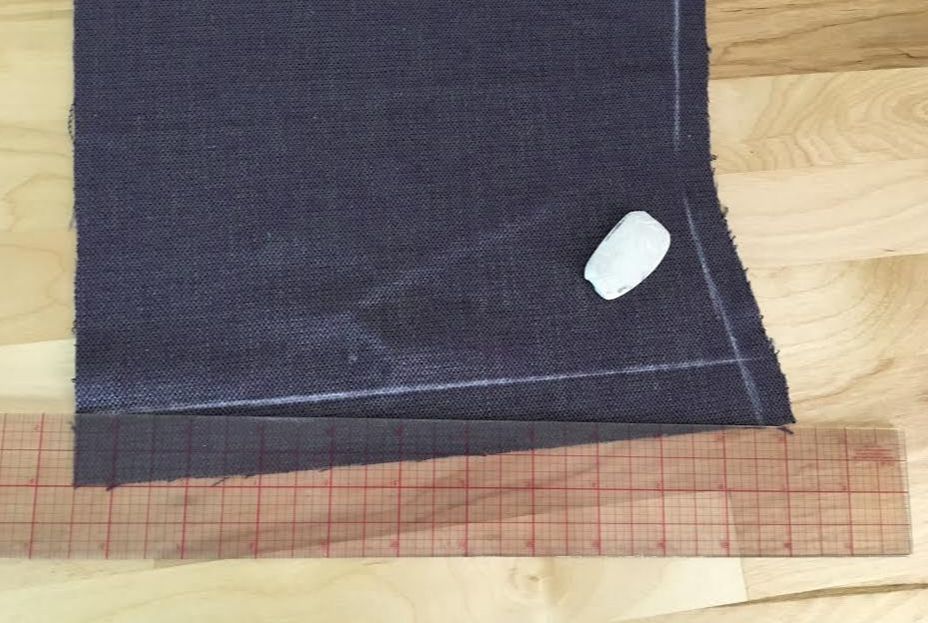
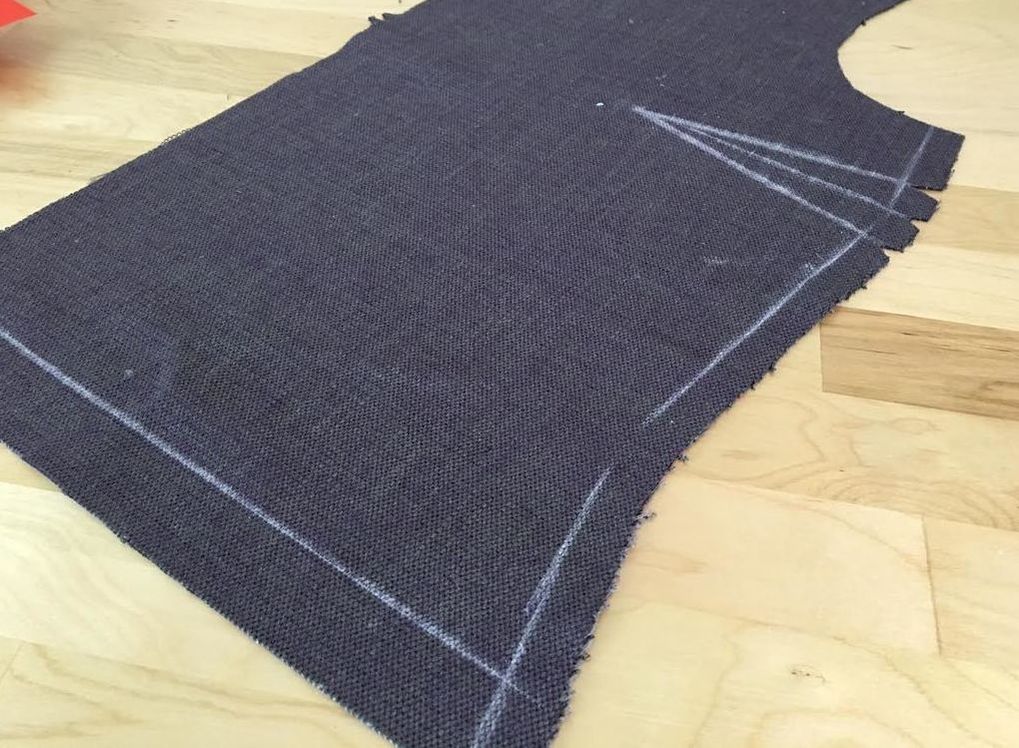
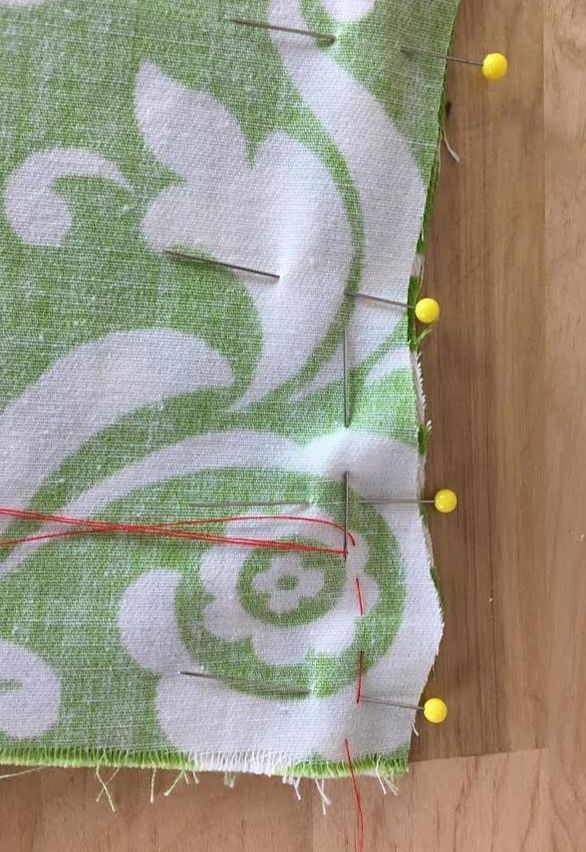
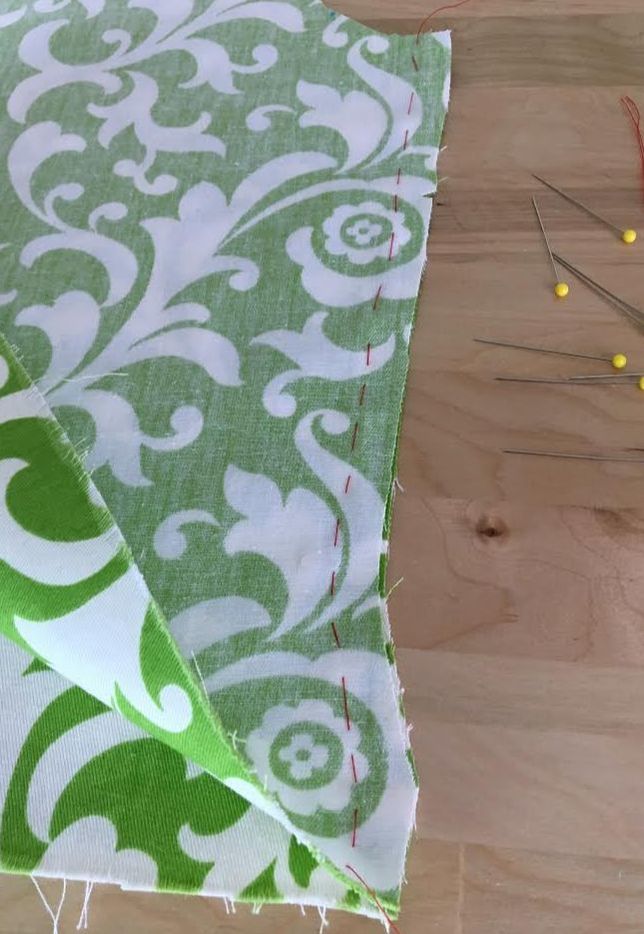
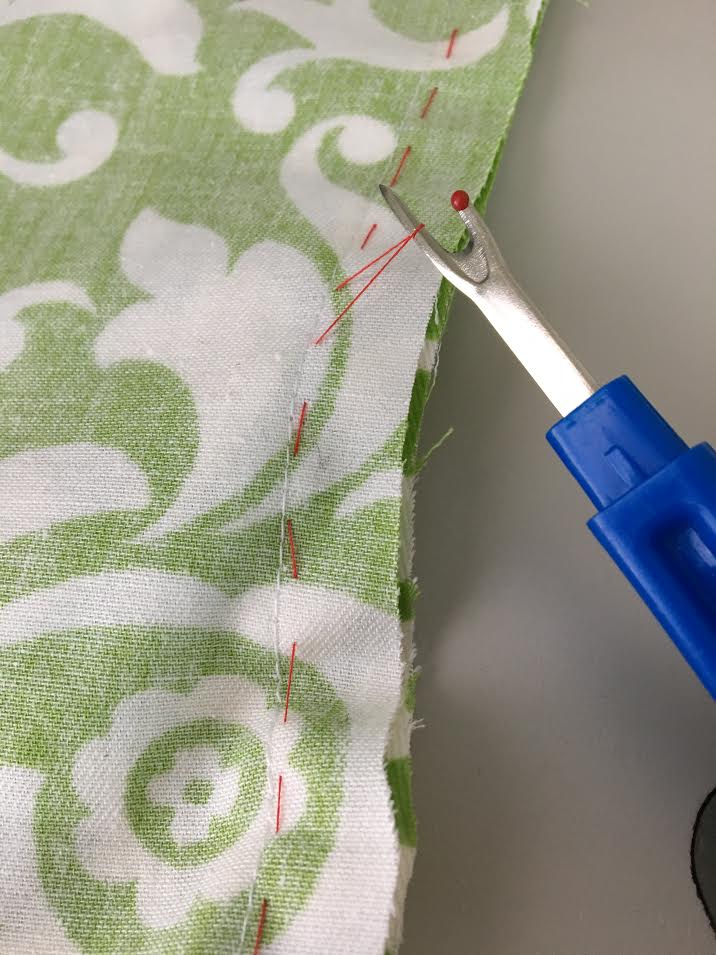
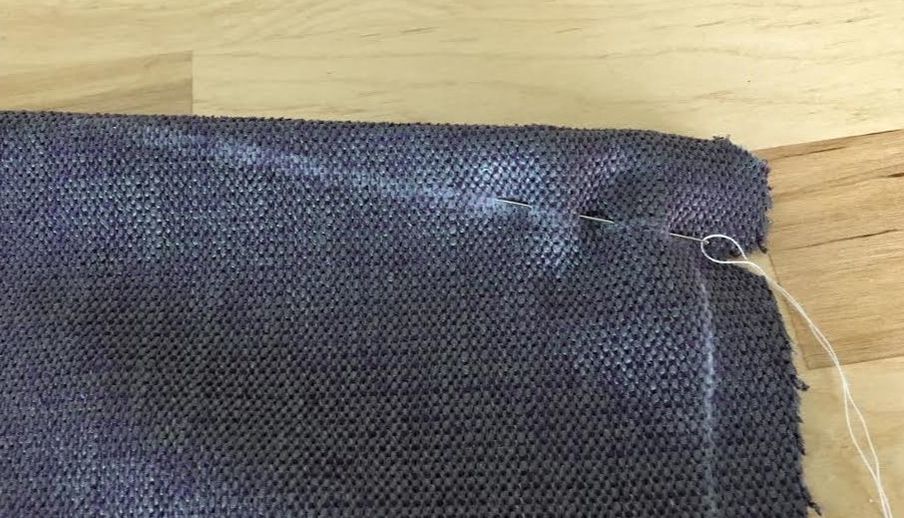
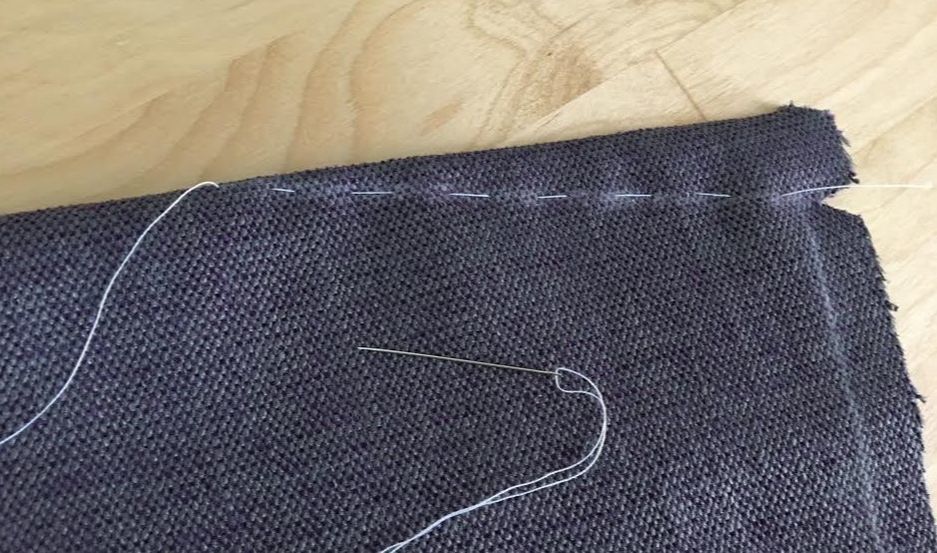
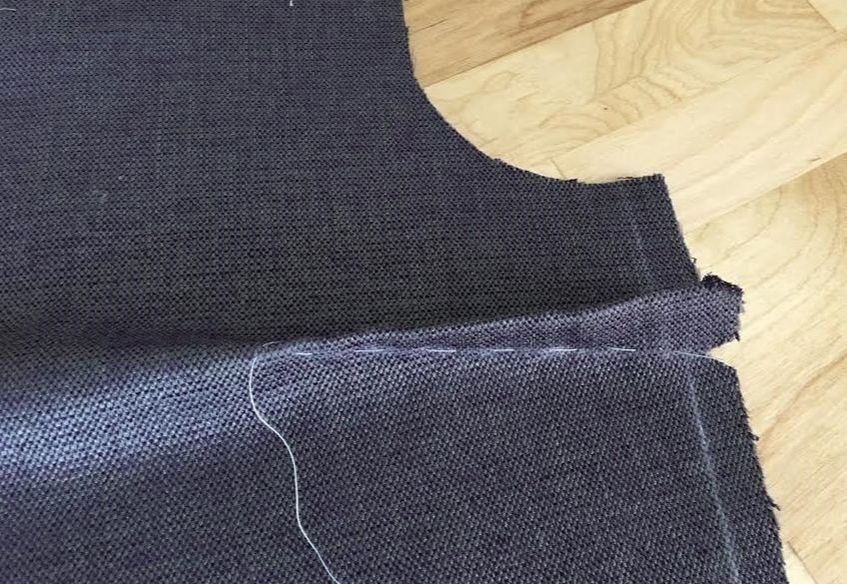
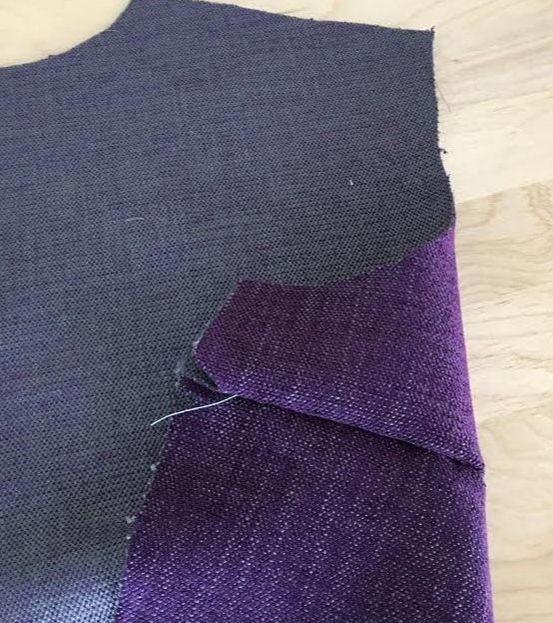
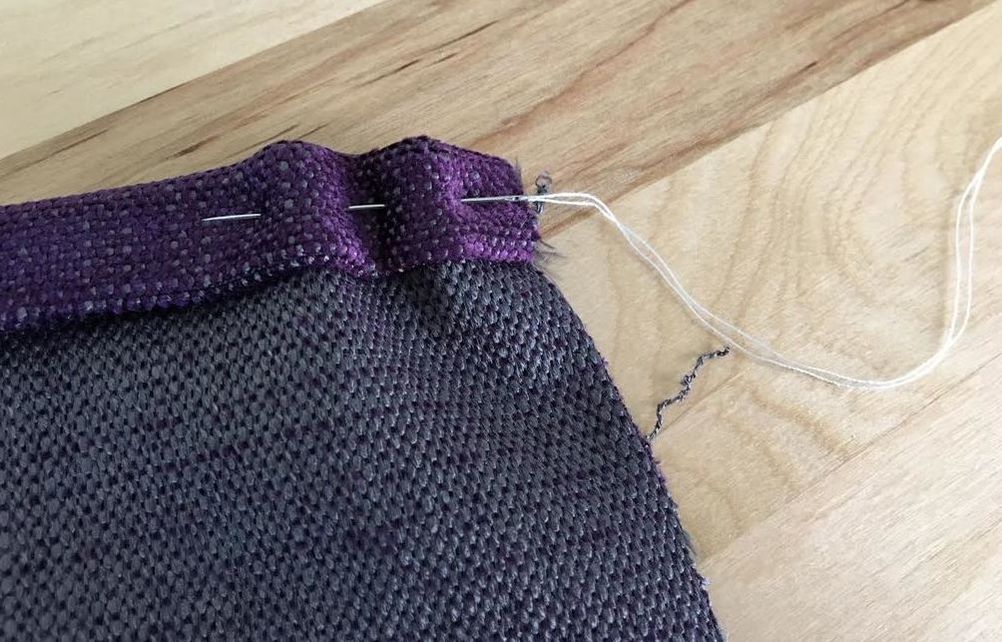
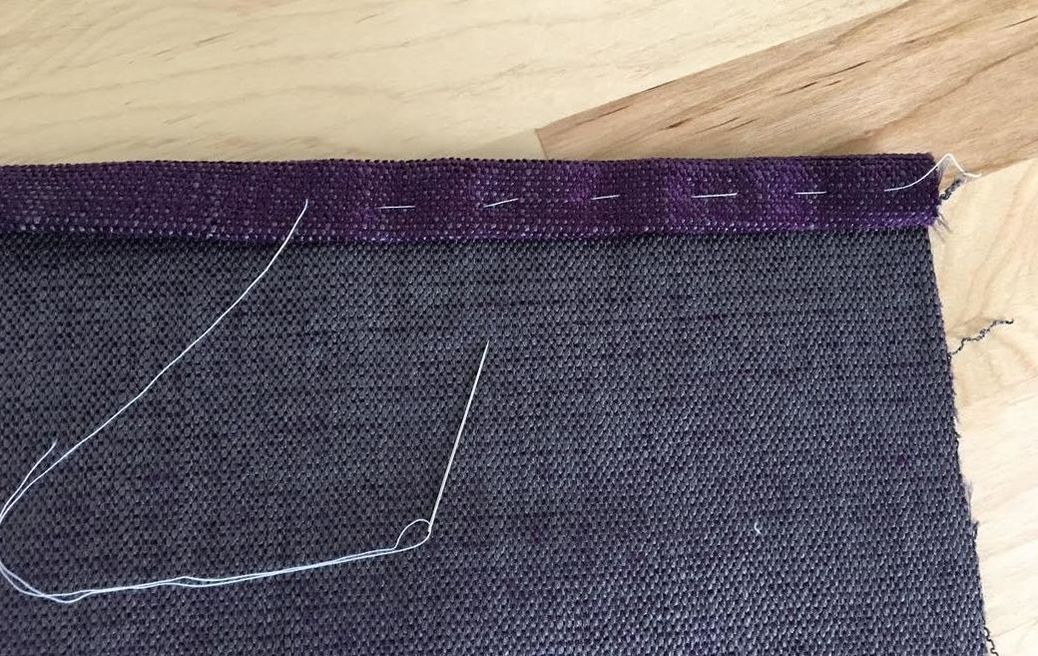
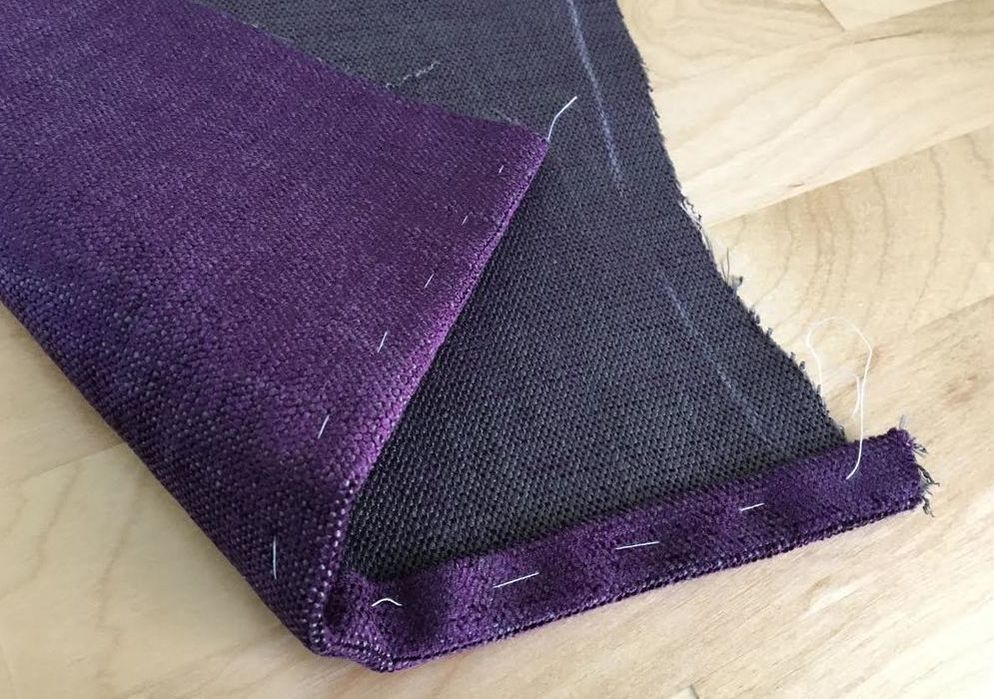
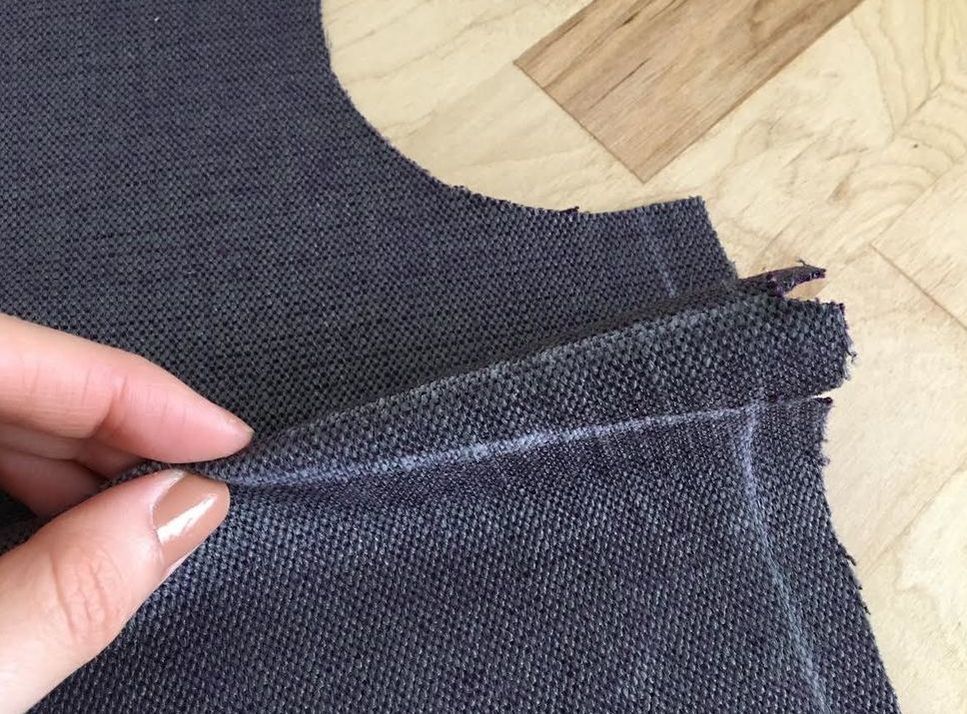
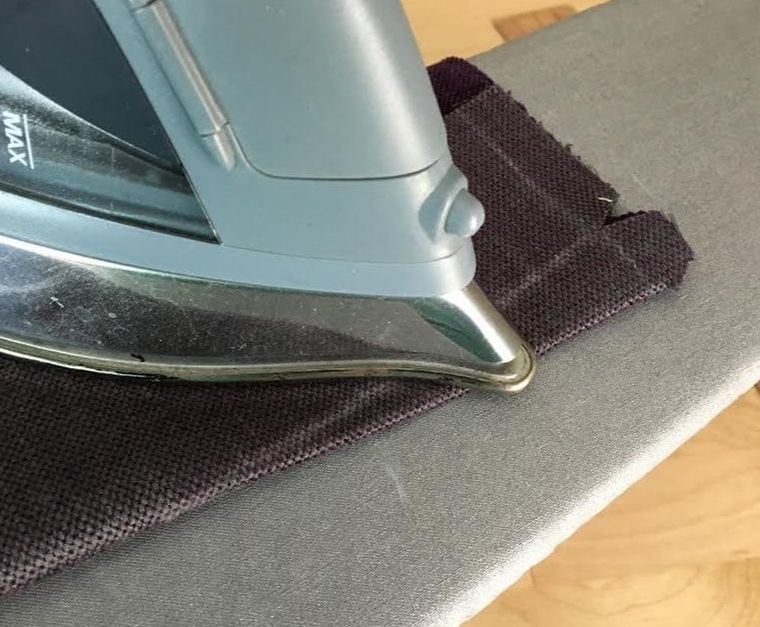
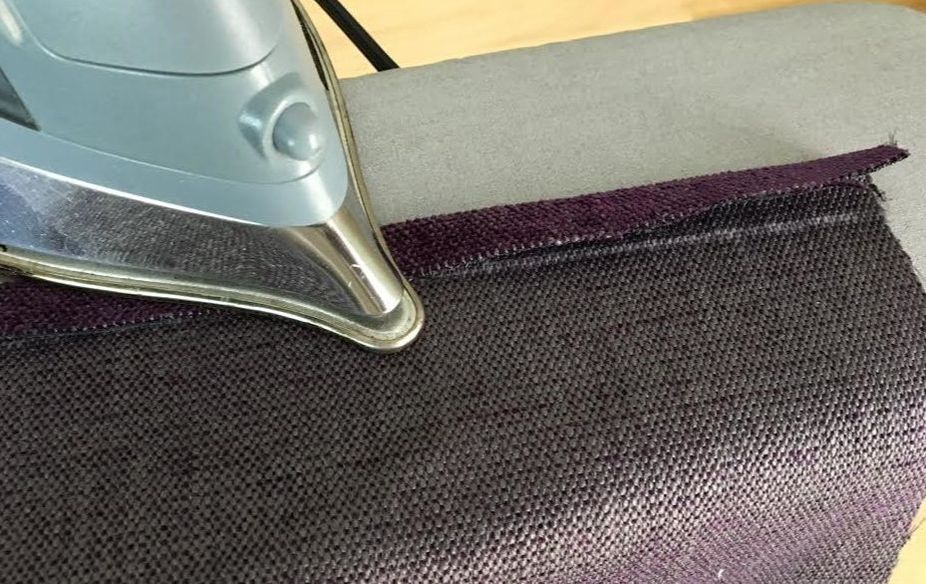
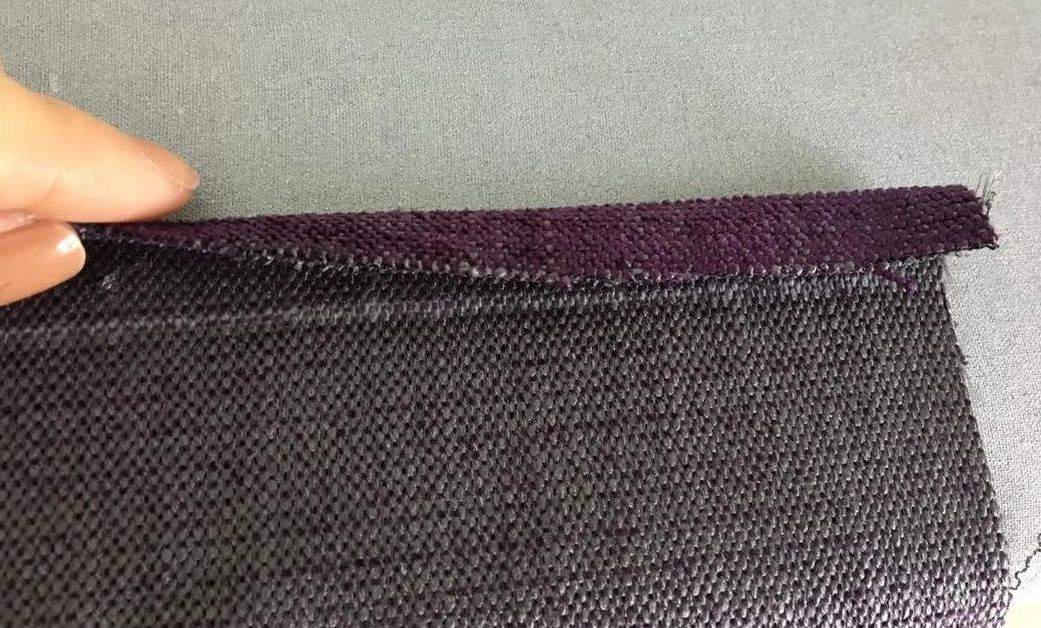
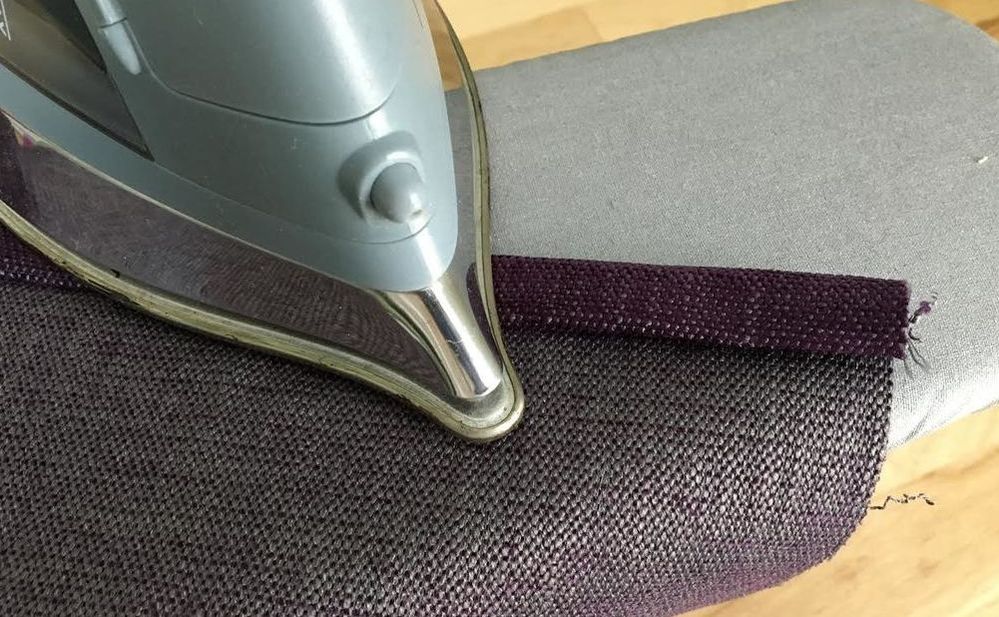
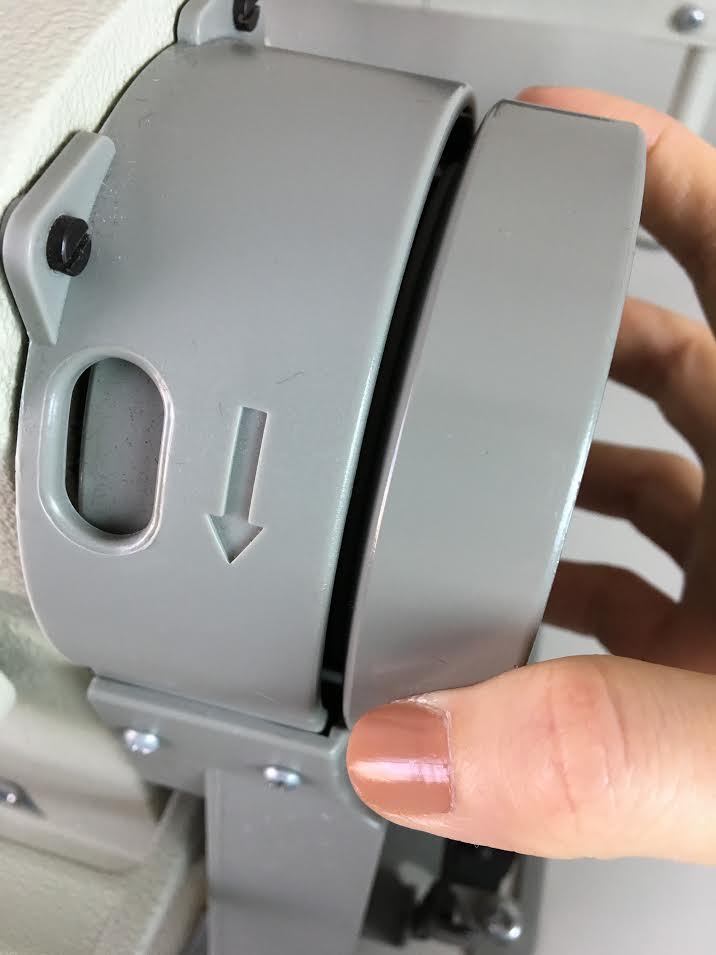
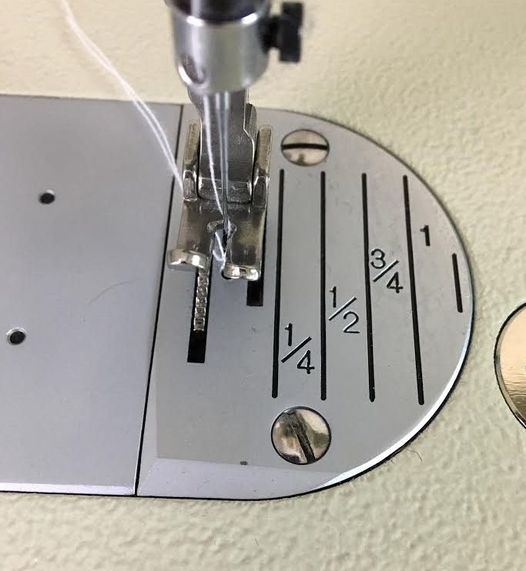
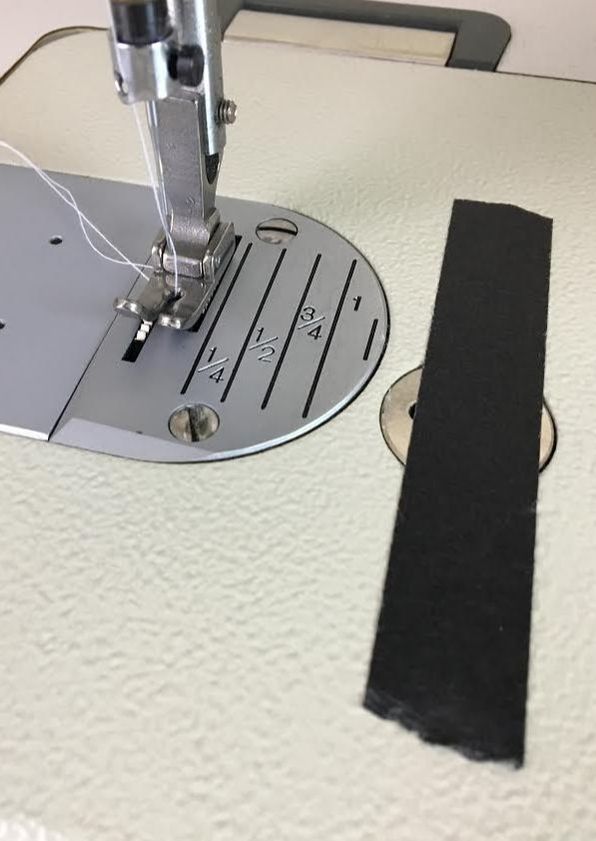
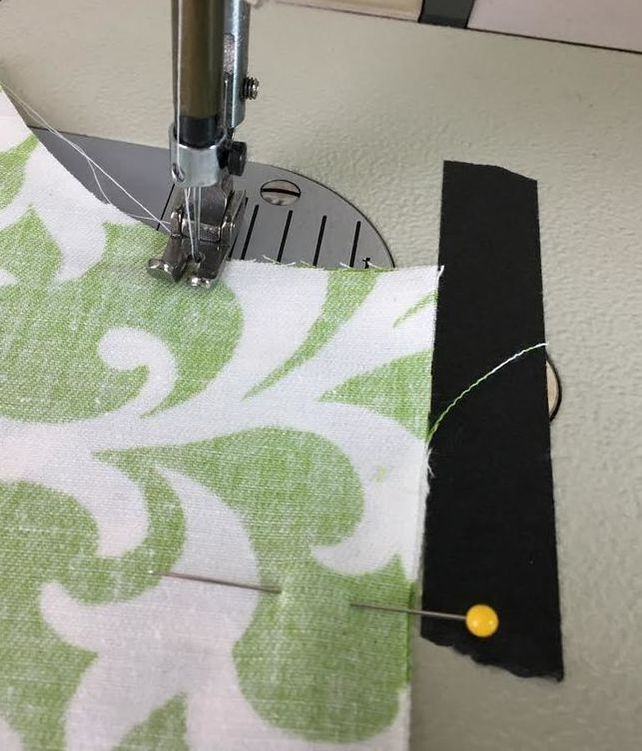
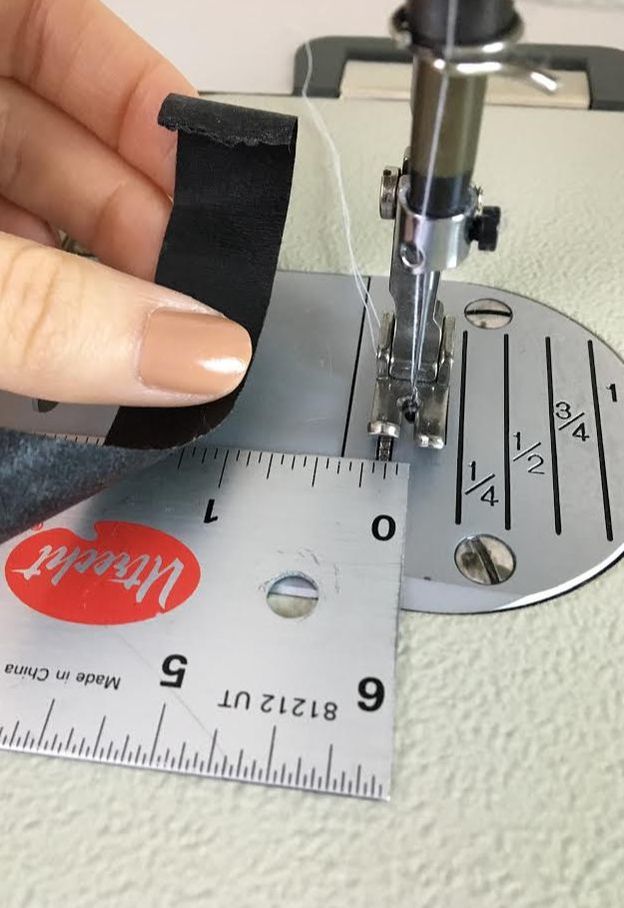
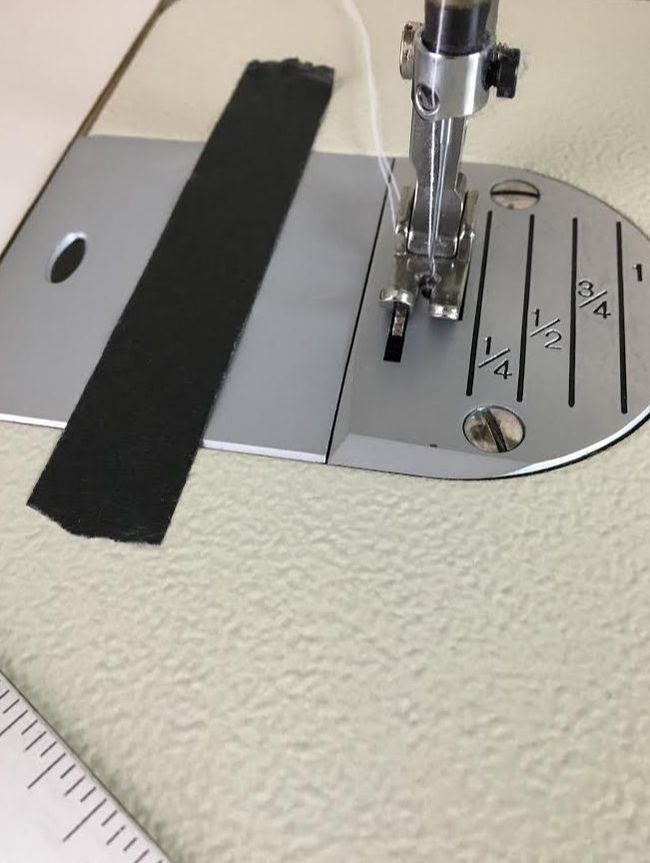
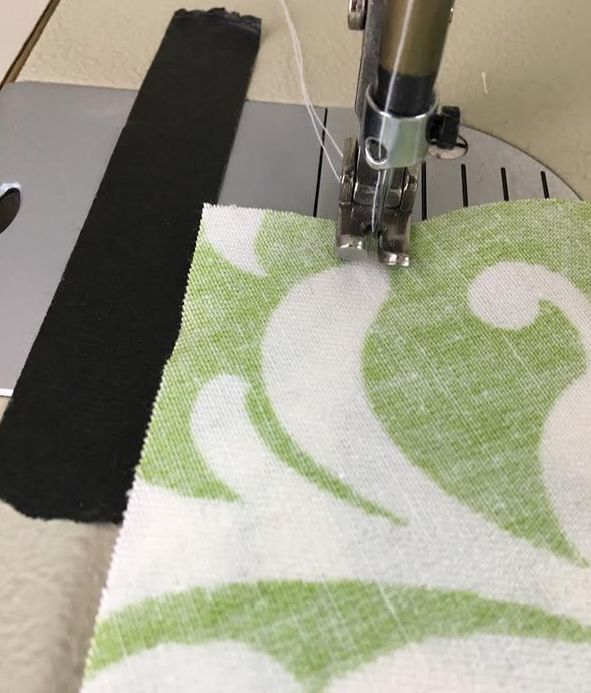
1. Transferring sewing lines (seamlines, hemline, dart lines etc.) from pattern onto fabric. Sewing patterns include a lot of important information used in the sewing process. From notches to darts to seam allowance, it can all feel a bit overwhelming if you are sewing beginner. If that is you, don't stress! If you take each pattern annotation one by one, you'll find that the concept of sewing and understanding patterns is actually quite simple. In the beginning stages, after the fabric has been cut according to the sewing patterns, you may not know exactly which information you need to transfer from your pattern pieces onto the fabric pieces. Keep in mind that technically, all notations you see on sewing patterns are fairly important in the construction process. More experienced dressmakers can sew a garment using minimal marks on the actual fabric pieces. They can piece each garment portion together just by looking at the information provided on the patterns. As a beginner however, you'll find that when you cut the sewing patterns out, the fabric pieces become somewhat of a confusing blur once the patterns are unpinned and removed. For that reason, if you are in the beginning stages of learning how to sew, you should transfer the most important pattern notations and sewing lines onto your fabric before attempting to match and stitch the fabric pieces together. You don't have to transfer every single word and line. As a beginner, it is sufficient to transfer these three important sewing notions: Notches, seamlines/hemline, and dart lines. In the line transfer process from pattern onto fabric, you are quite literally replicating the lines from the paper to the fabric. There are various transfer methods you can use depending on the color, thickness and texture of the fabric at hand. We'll walk you through two of the most commonly used (and simple) techniques below. As a rule of thumb, always transfer pattern notations on the wrong side of the fabric. 2 common line-transfer methods from sewing patterns onto fabric: 1. Using tracing paper and a tracing wheel. This method requires the use of fabric tracing paper and a tracing wheel. Whether you choose this method or not, it is a good idea to invest in a tracing wheel and tracing paper as you'll be using them later down the road. You can find both of these items at your local craft/fabric stores. As mentioned above, all seamlines, dart lines and notches should be transferred from your patterns onto the fabric pieces after cutting. Always transfer notations onto the wrong side of the fabric to avoid damaging the face of the garment. When possible, cut your sewing patterns so that the wrong side of the fabric is on the underside of the pinned pattern. To transfer pattern markings using a tracing wheel and tracing paper, place the tracing paper underneath the pattern, such that the face of the tracing paper is touching the wrong side of the fabric. Using the tracing wheel, press on top of the paper patterns, moving along each seamline and dart line, thus transferring each line to the fabric's underside. The thing about using tracing paper on fabric is that it will not clearly transfer on fabrics that are too textured or thick. Fabrics that feature a satin finish are also a bit immune to tracing paper. That being said, this method works best when used on medium to lightweight fabrics that are not increasingly textured or too shiny. Color should also be taken in consideration when using fabric tracing paper. Keep in mind that lighter colored fabrics will take on the tracing paper dye much clearer than darker ones. As you can see, there are lots of considerations when it comes to working with the tracing paper and tracing wheel method. Over time, the repeated use of the tracing wheel on paper may damage the sewing patterns, especially when the patterns are re-used continuously. For that reason, this method may not always be the best option for sewing every garment. As an alternative, use a ruler and tailors chalk (or fabric marking pencil) to measure and physically draw all the sew-lines on the fabric pieces. Dart lines are a bit more tricky to transfer, but you can learn a few different techniques here: Everything You Need To Know About Darts: 4 Ways To Transfer Dart Onto Fabric and How To Sew Basic Darts. 2. The tailor's chalk and ruler method. When transferring pattern markings, always work on the wrong side of the fabric. In the image above, the dart lines have already been transferred using the pin and tailor's chalk method. To facilitate the sewing process even more, draw all seamlines and corresponding hemlines onto each fabric piece comprising the garment. Remember to always draw these lines on the wrong side of the fabric. For this method, we'll be using a clear, marked plastic ruler (highly recommended for sewing/pattern-making!) and regular tailor's chalk. If you have a water soluble pencil or fabric quilting pencil, you can use either one as a substitute for tailor's chalk. As you can see in the image above, the fabric is a bit thicker and more textured serving as a good hint that the tracing wheel/tracing paper method described above may not work well here. 1. Measure the seam allowance length from the edge of the fabric and draw the seamline using the tailor's chalk. In this tutorial, the seam allowance is 1/2". Check your sewing patterns to find what the seam allowance of your particular garment is along each edge. These measurements should either be written on the patterns, or the patterns will have actual drawn seamlines along each edge. If you use the clear plastic ruler shown here, it is very easy to align the edge of the fabric to the 1/2" mark on the ruler. This process should be fairly fast and simple to do, ultimately making the machine stitching process much easier if you are a sewing beginner. 2. Transfer the entire seamline, following the edge of the fabric accurately as shown above. When you arrive at the dart side edge (shown above), make sure you follow the angled cut of the fabric's edge accordingly. Always maintain the seam allowance at an even distance from the fabric's edge regardless of how curved or angled the edge may be. 3. Transfer the hemline using the ruler and tailor's chalk by following the same steps described above. The hemline represents the finished bottom edge of a garment. When looking at the patterns (or un-sewn fabric pieces), the distance from the hemline to the edge of the fabric represents the hem allowance. This concept is very similar to that of seamlines and seam allowance, but instead, used for the bottom edge of a garment. You will also notice that hem allowance is usually a bit longer than seam allowance due to the types of clean-finishes used. Some commercial patterns don't include an actual hemline at all, giving you the option to control the length of the garment. As good practice, we suggest drawing the hemline (at the correct hem allowance) on all fabric pieces prior to sewing. This will greatly facilitate the hemming process if you are a sewing beginner. In this tutorial the hem allowance is 1". This means we've given ourselves 1 inch of allowance to clean finish the bottom edge of the garment. Using a clear marked ruler, measure 1" (or whatever your hem allowance is) from the bottom horizontal edge of the fabric piece and draw a line with the tailor's chalk- this denotes the hemline. If this all sounds a bit confusing, think of it this way: The finished edge of the completed garment will correspond to the drawn line (horizontal white tailor's chalk line above), which in terms, is the hemline. So how will transferring seamlines and dart lines actually help in the sewing process? To begin with, the fabric pieces will look more like the pattern pieces, which should eliminate some confusion as to what seams go together, and which pieces correspond to the front and back of the garment. This will also provide some reassurance that each seam you sew together has the same seam allowance length. Remember, the fabric edges forming a seam should always have the same seam allowance. You cannot sew a 1" seam allowance edge to a 1/2" seam allowance edge. If you notice a discrepancy as such while matching the seams for sewing, it should be a red flag that you might not be sewing the corresponding edges together. Finally, having physically-drawn seamlines on fabric will help keep the machine stitch straight and even, especially if you are not quite comfortable with using the seam allowance guide on your sewing machine. As you apply the stitch on your machine, keep an eye on the seam allowance guide (even if you're sewing directly on the tailor's chalk line). As you practice and feel more comfortable using your sewing machine, you'll be able to use the guide alone to stitch all seams, without the need for actually drawing the seamlines on fabric. 2. Temporarily basting seams and folds before sewing. Hand basting seams and layers of fabric together is perhaps the most important initial sewing steps for beginners. Regardless of whether you are basting a simple seam, a dart, or a fabric fold, doing so will prevent the fabric layers from shifting during machine stitching, keeping them smooth and stable in the process. The best part is, you don't have to worry about handling pins which is often a bit tricky for complete sewing beginners. You can get some in depth information on hand basting in this basting tutorial, but to stay within topic: temporary uneven basting is used to keep fabric layers together during the construction process. After the final machine stitch is applied, the basting is easily removed and no longer needed. Hand basting a regular seam prior to stitching it on the sewing machine: Align the seam such that the face of each fabric piece is on the inside, and the wrong side of the fabric pieces is on the outside, facing you (image above). First, pin the edges perpendicular to the fabric's lengthwise edge to keep them together for hand basting. While the pins are still in, add a quick uneven hand basting stitch through both layers of the seam, positioning the basting at a little less than what the seam allowance is. In this tutorial, the seam allowance is 1/2" (from the fabric's edge). This means that the basting stitch will be applied at about 5/8" from the edge. Make sure the edges of the fabric remain aligned at all times during the basting process. The reason why the basting is applied at a little less than the actual seam allowance is so that when the final machine stitch is applied at the proper seam allowance, the machine stitch does not overlap the basting stitch which would make it difficult to remove. To make the sewing process easier, the final machine stitch should be placed at about 1/16" to the right of the final machine stitch (shown below). As you can see in the image above, the final machine stitch (white thread) is positioned at the correct seam allowance of 1/2", and corresponds to the left of the red basting stitch. Following this logic, the two stitches should never technically overlap. Once the machine stitch is applied, the red basting can be easily removed using a seam ripper (or small pair of scissors). Simply pull the thread out from one side and it should slide out effortlessly. If for whatever reason, the basting gets caught in the machine stitch, use your seam ripper to carefully remove the basting without damaging the final stitch. Temporarily hand basting darts before final machine stitching: As a sewing beginner, you should try to always baste darts before permanently sewing them. Doing this is actually more important than hand basting seams together. Why? Because darts are folded and sewn into a vanishing point so they tend to easily shift if not stabilized with pins or better yet, a hand basting stitch. 1. Fold the dart along the dart fold line such that both dart legs correspond to each other on each side. The dart fold line is located in the middle of the 2 outer dart legs. Always iron the dart fold line to keep it more stable during pinning and sewing. Add an uneven basting stitch through both dart legs making sure the needle corresponds to each dart legs on both sides. As you push the needle through both fabric layers, it should always correspond to a dart leg line on each side. 2. Baste form the outer portion of the dart to the narrow area, ending at the vanishing point. Think of a dart line as an angle- You will always be sewing from the wider area to the point of the angle. The dart is always folded down the middle of the angle. As opposed to a seam, it is OK to apply the uneven basting directly on the marked line. Darts require a lot more precision, so during the sewing process, you'll stitch very close to the basting while following this drawn line. All of this dart prep should be performed on the wrong side of the fabric garment. The dart excess should always correspond to the inside of the garment. On the right side of the garment, the dart appears as a short seam that shapes the garment into a 3-dimensional form. Hand basting folds and folded edges before final stitching: As you learn more about the sewing process, you'll find that the most common hem finishing technique is a double folded stitched edge. This technique requires you to fold the fabric in twice in order to enclose its raw edge. It is important that any time you fold the fabric, the fold is ironed to keep it from moving and unfolding during the sewing process. Many times however, ironing alone is not enough to keep a fold stable and evenly positioned. This is often the case when working with fine, thin, and lightweight fabrics, or fabrics that have a slippery, high-draping characteristic. If you are in the position where you have to sew an edge as such, it is recommended that you hand baste the fold in place prior to applying the final machine stitch. As you become more experienced, you wont need to baste every fold (unless you find it to be necessary or more comfortable for you), and pins will be sufficient. However, if you are still not altogether comfortable with your sewing machine, always baste folds before final stitching. When basting a double folded edge don't worry too much about where the the actual basting is applied, as long as it is keeping the fold stably in place. Hand baste through all layers of the fabric comprising the fold as shown above. For example, in the instance shown above, the hand basting is applied along the middle of the fold, while the final stitch is applied a little below the fold line at the top. This way, the two stitches (basting and final) will never overlap. The temporary basting stitch will keep the fold in place at all times during machine stitching while being very easy to remove once the final stitched fold is complete. Basting folds, especially when working with very slippery, thin fabrics, ensures that the fabric's folded edges are straight and evenly positioned throughout. Especially in the case of highly-draping, thin fabrics (like silk), if pins alone are used to keep the fold steady during machine stitching, the fold may open and shift. As a sewing beginner, controlling and stitching this type of fold will prove to be a bit of a challenge unless a temporary basting stitch is used. 3. Ironing fold lines and darts before final stitching. Ironing folds and darts prior to machine stitching has made my life so much easier. Regardless of how advanced your skill is, in the garment construction process, an iron is sometimes even more useful/valuable than sewing pins. Setting folds and stabilizing seam allowance is achieved only with the help of an iron, thus making it imperative in the sewing process. When setting up your work station for a sewing project, it is very important that you have an iron and ironing board ready to go at all times during the entire sewing process. The number one rule in dressmaking is: always sew each seam as you go and NOT only after the garment is complete. As a sewing beginner, ironing should be used to stabilize any folds and fabric edges that need to remain stable during the machine stitching process. The more steady all the fabric layers are, the easier it will be to put the garment together. So let's start with two of the most important folds you should always iron before stitching: Drat fold lines and folded fabric edges (such as the hemline, for example). When in their original 2-dimensional form, all darts have a fold line positioned halfway between the dart legs. When this line is folded, the two dart legs naturally align on either side allowing them to be sewn together perfectly. When it comes to sewing a dart, the very first step you should always be folding it down its middle fold line. To keep the outer dart legs matching at all times without shifting, it is good practice to iron this middle dart fold first before moving on to the sewing portion. Simply iron the fold such that the marked fold line (white chalk line) is perfectly aligned to the fabric fold as shown above. Doing so will keep the dart legs corresponding to each other (overlapping) on both sides. Keep in mind that the finished dart's excess is always on the inside of the garment. Following this logic, the fold and all other dart marks/lines should correspond to the wrong side of the fabric as shown above. Ironing double folded edges before stitching: A similar ironing technique is recommended for sewing folded edges or specialized folded seam. The most commonly used folded edge in dressmaking is that of a double-folded and topstitched hem. It is highly recommended that before even pinning and sewing the folded edge, it is first folded and ironed at its corresponding hem/seam allowance. For example, if the excess allowance is 1", then you should fold in once at 1/2" and then again at 1/2" to enclose the fabric's raw edge without exceeding the allowance. You can also fold once at 1/4" and again at 3/4"- any option would work as long as you don't exceeded the 1" allowance (or whatever your hem allowance is), and the fabric's raw edge is securely enclosed in the fold. To keep the folded edge steady, iron the first fold along the entire edge to set it in place as shown above. (folded at 1/2" in this tutorial). Note: You can also see that the raw edge of the fabric touches the hand-drawn hemline (white chalk line in the image above) from Part 1. Once the first fold has been ironed and set in place, fold the edge one more time to enclose the fabric's raw edge an iron this second fold in the same manner. The double folded edge is now ready to be pinned, basted or machine stitched as required. You'll find that setting the fold with an iron prior to sewing will save you lots of time and headache in the final stitching process. 4. Manually "walking" the sewing machine needle along difficult portions of a stitch or seam. This little trick is for complete sewing beginners that are still getting used to stitching on their sewing machines. It is no secret that if you have never handled a sewing machine before, it can feel a bit intimidating. It is very common for beginners to have difficulty with keeping the stitches straight. While you might find it OK to sew straight seams (provided you've had some practice), curved or semi-curved seams can prove to be a real challenge. Unfortunately, the foot control cannot slow down to a speed that is steady enough for a beginner's comfort. To get through the very curved portions of a seam, you may use the walking hand control located on the right side of your sewing machine. It is a cylinder-like extension that can be rotated in either direction. This control can manually apply each stitch one-by-one as you sew the seam. This hand control is actually used in the stitching process to manually control the sewing machine needle whether it needs to be in upward or downward position. In the process of threading a sewing machine, the hand control is shifted such that the sewing needle is all the way up. To bring the bobbin thread to the sewing surface, the hand control is rotated down and then up again to catch the thread and bring it upwards. Additionally, this control is used at the end of a stitch application to make the thread easier to pull, thus allowing the fabric to slide away from the sewing surface easily without breaking the thread. To apply individual stitches using the needle hand control, keep turning the walking cylinder downwards, towards you until you've applied all the necessary stitches. This is a very slow process of course, but it can prevent uneven stitching along more challenging seams if you aren't all together comfortable with your sewing machine speed control. Most walking hand controls are located on the right side of the sewing machine so that they are easily accessible and usable. Most sewing machines will indicate an arrow pointing in a downwards direction to depict how the hand control should be used/shifted. As you apply each stitch using this hand application, make sure you keep an eye on the seam allowance guide on your sewing machine to ensure your stitch is even and positioned at the correct seam allowance throughout. While this hand control is incredibly helpful for sewing beginners when stitching flimsy fabrics or curved and angled seams, it is also used by almost all dressmakers in instances where high sewing speeds are not recommended. Examples include: 1. Sewing through a portion of very think fabric layers. There is a risk of the needle breaking if the speed is too high. 2. Stitching very close to zipper coils/zipper stops or other metal and plastic applications. The needle may accidentally hit the metal or plastic pieces causing it to break. 3. When the stitch needs to end at a very specific stop point, you may need to hand-walk the last couple of stitches such that they do not pass this specific stop location. 4. Always use the hand control to lift the machine needle all the way up after a stitch is complete. This ensures that the top and bottom threads are easy to pull as you remove the fabric from the sewing machine. 5. Use masking tape as an alternative seam allowance guide. One of the most difficult aspects of stitching a seam is following the seam allowance guide accurately while also keeping an eye on the stitch. The seam allowance guide can be a bit tricky to follow for beginners who have limited experience using a sewing machine. The lines themselves are thin and located close to one another which can make the actual line difficult to follow in relation to the fabric's edge. Remember, when sewing a seam, the fabric edge has to be aligned to the appropriate seam allowance guide at all times in order to a achieve a smooth, professional finish. Seam allowance guide on an industrial sewing machine. A trick to make the line more pronounced is to use contrast color masking tape as a seam allowance guide alternative. While this is a good way to visually enhance the actual seam allowance guide line, it is also commonly used when sewing seams at a larger seam allowance that your sewing machine may not have a guide for. You can simply measure the desired seam allowance from the needle point out to the right, and add the masking tape vertically, parallel to the existing seam allowance guide lines. While seam allowance normally corresponds to the right of the sewing needle, there are instances where you might need to stitch a seam the has its edge corresponding to the left of the needle instead. Since sewing machines don't provide a seam allowance guide on the left side, you can use the masking tape technique to create your own guide line at the desired distance from the sewing needle. All you have to do is measure out from the needle point to the left at the required seam allowance length, and position the masking tape parallel to the existing seam allowance guide lines as shown above. When stitching, keep the fabric edge aligned to the inward edge of the masking tape to achieve a smooth, evenly distributed stitch.
0 Comments
Leave a Reply. |
The Blog:A journey into our design process, sewing tutorials, fashion tips, and all the inspiring people and things we love. Doina AlexeiDesigner by trade and dressmaker at heart. I spend most of my days obsessing over new fabrics and daydreaming new ideas. Sadie
Executive Assistant & Client Relations Manager Archives
November 2019
Categories
All
|
-
Sewing Tutorials
-
Basics
>
- Aligning Pattern Grainlines To Fabric
- Preparing Fabrics For Sewing
- Pinning Sewing Patterns To Fabric
- Placing Sewing Patterns On Fabric For Cutting
- Rotary Cutters or Fabric Scissors?
- Cutting The Sewing Patterns
- What Are Notches And How To Use Them In The Sewing Process
- Transferring Notches From Pattern To Fabric
- Transferring Seamlines to Fabric
- Staystitching
- Backstitching: A Complete Guide
- Hand Basting: A Complete Guide
- Sewing Continuous Bias Binding
- Darts >
-
Sewing Seams
>
- The Basics Of Seams And Seam Allowance
- How To Sew A Straight Seam
- Sewing Curved Seams
- Sewing Corner Seams
- Trimming And Grading Seam Excess
- Notching/Clipping Seam Allowance for Tension Release
- Sewing Topstitched Seams
- Sewing Corded Seams
- Sewing A Slot Seam
- Sewing A Gathered Seam
- Sewing Bias Seams
- Sewing Seams With Ease
- Sewing Seams With Crossing Seamlines
- Sewing Unlike Fabric Seams
- How To Iron Seams: Ironing Tools And Conventions
- Sewing With Knit Fabrics
- Understanding Stitch Length And Tension
- Sewing Unique Fabric Seams
-
Seam Finishes
>
- Seam Finishing Techniques - Overview
- Applying A Pinked Seam Finish
- Applying A Bias Bound Seam Finish
- Serging And Zigzag Seam Finishes
- Sewing A Self-Bound Seam Finish
- Sewing A French Seam Finish
- Sewing A Hong Kong Seam Finish
- Sewing A Mock French Seam Finish
- Sewing A Turned-and-Stitched Seam Finish
- Sewing Overcast Hand-Applied Seam Finishes
- Sewing A Flat Felled Seam
- Sewing A Hairline Seam Finish
-
Hem Finishes
>
- Garment Hem Finishes: Overview
- Sewing A Double Fold Hem Finish
- Sewing A Single Fold Hem Finish
- Sewing Bound Hem Finishes
- Sewing An Exposed Double Layer Bound Hem
- Sewing A Folded-Up Bound Hem with Pre-folded Binding
- Sewing A Hong Kong Hem Finish
- Sewing A Band Hem Finish
- Sewing A Bias Faced Hem Finish
- Sewing A Twill Tape Hem Finish
- Sewing A Rolled Hem Finish
- Sewing A Shaped Hem Facing
- Using Fusible Hem Tape And Webbing
- Finishing A Lace Fabric Hem
- Finishing A Leather Hem
- Sewing Faced Hem Corners
- How To Finish Lining At The Hem
- Finishing Fabric Corners by Mitering >
- Interfacing A Hemline: Lined And Unlined Examples
-
Sewing Pockets
>
- Curved Patch Pocket With Flap
- Unlined Square Patch Pockets
- Lined Patch Pockets: Two Ways
- Extension On-Seam Pockets
- Separate On-Seam Pocket
- Front Hip Pockets
- Bound Double Welt Pocket
- Double Welt Pocket With Flap
- Self-Welt Pocket (Using Single Fabric Layer)
- Slanted Welt Pocket (Hand-Stitched)
- Faced Slash Pockets: Overview >
-
Sewing Zippers
>
- Sewing Zippers: General Information
- Sewing A Centered Zipper
- Sewing A Lapped Zipper
- Sewing An Invisible Zipper
- Sewing A Fly Front Zipper
- Sewing A Closed-End Exposed Zipper (No Seam)
- Sewing An Exposed Separating Zipper
- Sewing Hand Stitched Zipper Applications
- Sewing A Zipper Underlay
- Sewing A Placket-Enclosed Separating Zipper
- Sleeveless Finishes >
-
Neckline Finishes
>
- Sewing A Neck Shaped Facing
- Sewing An All-In-One Neck Facing
- Neck And Garment Opening Combination Facings >
- Sewing A Bias Faced Neckline Finish
- Sewing A Band Neckline Finish
- Bound Neckline Finishes: Overview >
- Sewing A Semi-Stretch Strip Band Neckline
- Ribbed Neck Band And Classic Turtleneck
- Decorative Neckline Finishes >
- Finishing Facing Edges >
-
Extras
>
- A Complete Guide on Interfacing
- Sewing Bound Spaghetti Straps
- Sewing Spaghetti Straps To A Faced Neckline
- Sewing Ruffles: Overview
- Patterning And Sewing A Circle Ruffle
- Sewing A Gathered Heading Ruffle
- Sewing Double Layer Gathered Ruffles
- Sewing A Gathered Ruffle Into A Seam
- Sewing A Gathered Ruffle To A Fabric Edge
- Sewing A Fabric Surface Slit
- Sewing A Slit Seam
- Hand-Applied Straight Stitches
- Hand-Applied Blind Stitches
- Hand-Applied Overedge Stitches
- Hand-Applied Tack Stitches
- Hand-Applied Decorative Stitches
-
Basics
>
- Custom Bridal
- Custom Apparel
- About
- Blog
Services |
Company |
|



 RSS Feed

