|
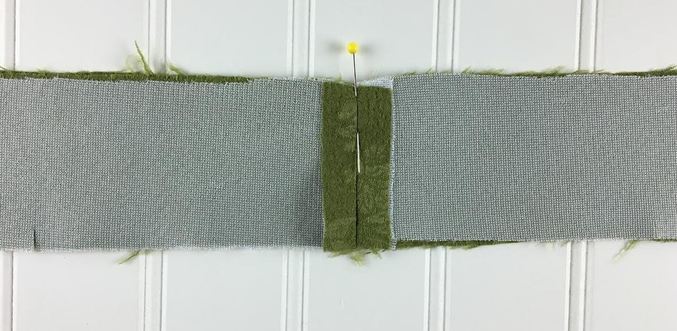
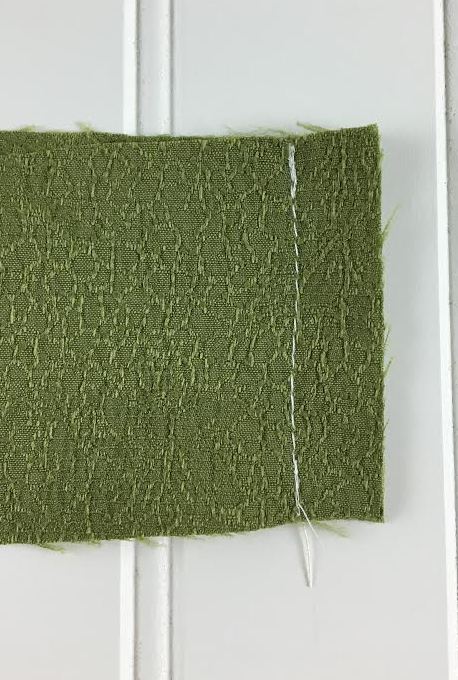
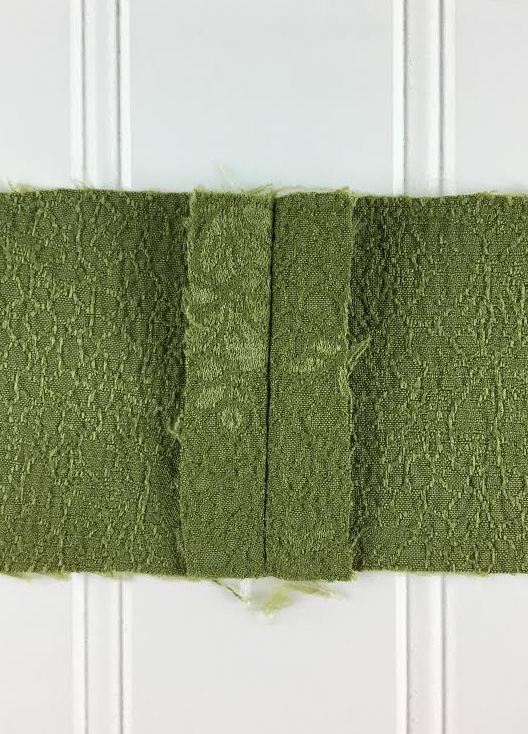
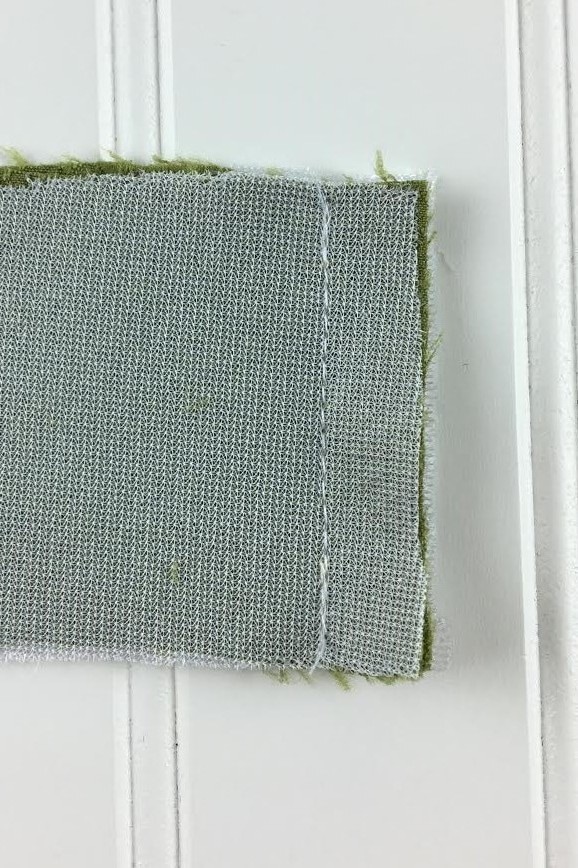
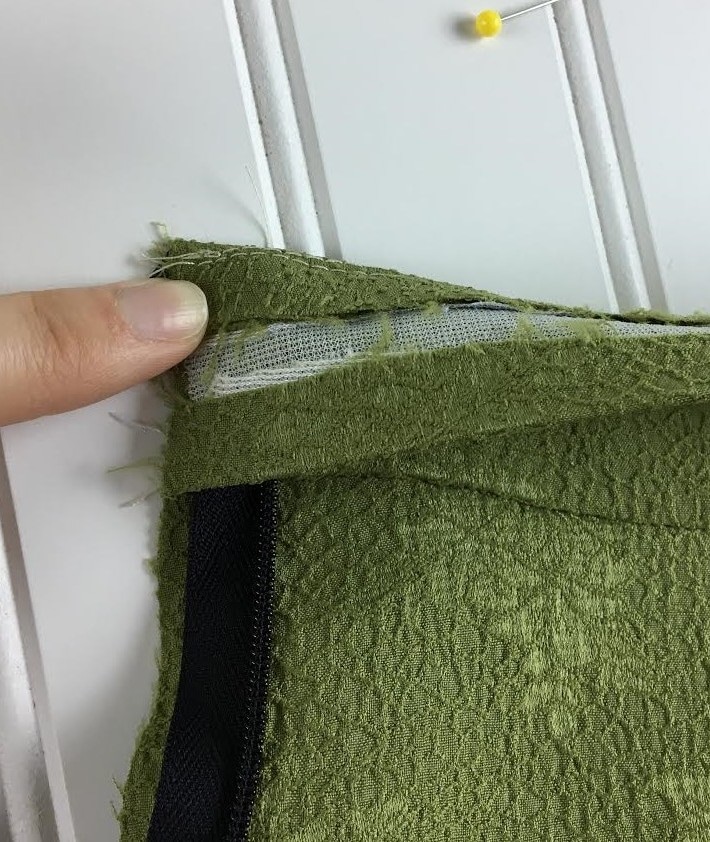
When it comes to learning how to sew, most people start with a simple sleeveless dress or a skirt and move on to more labor-intensive pieces like pants, formfitting blouses/dresses and styles that require sleeves. There are certainly hiccups along the way and a learning curve that takes some time. Sewing however, is like math- once you know the most basic techniques, you can apply them to more complicated projects. However, techniques for sewing zippers, pockets and waistbands (to name just a few) can take a bit longer to fully absorb. As for waistbands, things can get a little more intimidating when it comes to attaching a non-stretch waistband to items like pants and skirts. It is however, a necessary addition to all functional woven bottoms. As opposed to a stretchy waistband that functions with the help of elastic, a non-stretch waistband requires some extra sewing steps and a little bit of tailoring. It can appear to be complex at first, but we'll show you an easy technique for attaching any non-stretch woven waistband with an invisible zipper closure. 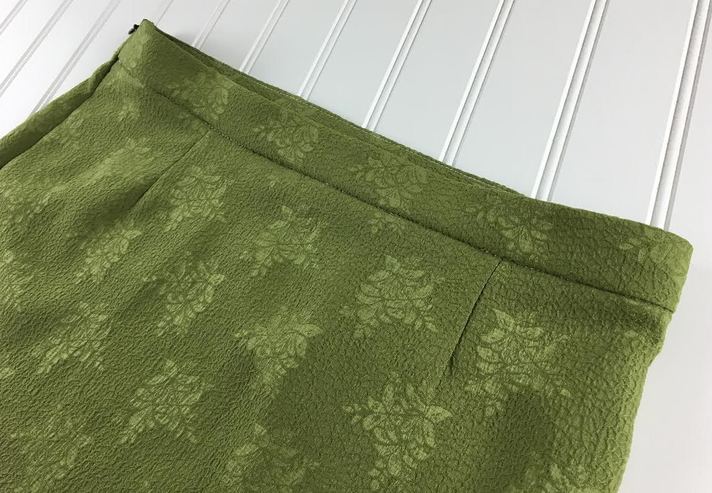 Methods for Finishing Pant/Skirt WaistlinesAlthough adding a straight waistband is the most common option for finishing the waistlines of woven bottoms, there are few other efficient finishes used depending on fabric type and garment design. For woven waistlines that are non-stretch, alternatives include a drawstring casing, elastic waistband, a stretch waistband and a faced waist finish. All of these options should be considered in relation to the type of fabric and the garment's design. For example, a faced waistline doesn't have a visible waistband and features a clean line along the edge of the waistline. In order to achieve the right amount of stability and structure, a faced waistline finish is used on non-stretch fabrics with more structure and thickness. On the other hand, a drawstring waist finish works better with light to medium weight fabrics that are not too bulky when the casing is gathered by the drawstring. As a sewing beginner, focus on learning a straight waistband with a facing first. Although it's not the easiest to sew for a beginner, it will teach you a few techniques you can apply to other parts of a garment in the sewing process. Woven Straight Waistband BasicsBefore we get started, there are a few basic concepts you should be familiar with when it comes to a woven straight waistband. Most woven waistbands are non-stretch and require a garment opening such as a zipper, snaps or buttons in order to be closed. Even if the woven fabric has a high content of spandex that still does not give it enough stretch to be comfortably pulled over the hips. Common ways to add closure to non-stretch bottoms at the waistline are with various styles of zippers (lapped, invisible or fly front), buttons, snaps, and hooks. Depending on the design specification, the closure should always extend into the waistband either by the insertion of a button, snap or hooks or in the case of an invisible zipper, the extension of the actual zipper into the waistband. A waistband extension with a button closure is the most common waistband finish found on jeans and various styles of tailored pants and skirts. In this case, the extension is located at the placket opening, and can be anywhere from 1" to 3" in length depending on how many buttons/snaps it features. Usually the waistband extension is positioned right over left for front and side garment openings, and left over right for center back opening. This overlapping criteria is based on how fast and easy it is to undo the closures being used. Because most people are right-handed, a right over left extension overlap is much more comfortable to open and works best on most bottoms (unless the closure is located on the back). Woven Waistbands With An Invisible Zipper Closure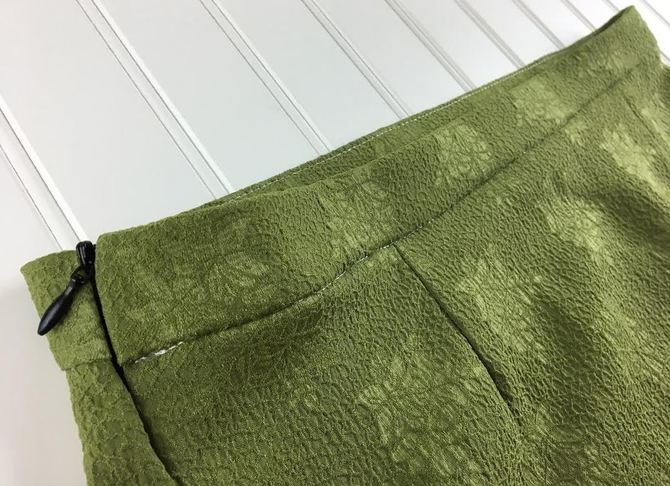 Invisible zippers are sewn into the seam blending in with it. The top of the zipper extends into the waistband. This is a finish used on more light to medium weight bottoms or tailored items in an attempt to avoid top stitching or bulky zipper finishes. Although not necessarily the easiest, this technique requires less steps and does not require a waistband flap extension on either end. It takes some practice to sew an invisible zipper into a waistband perfectly but it's not a bad technique to get started with if you're in the learning process and you feel intimidated by a fly front or lapped zipper. The most challenging part is getting the waistband seams to match up when the invisible zipper is in the closed position. However, with the use of basting and some (lots of) patience, you will fall in love with the invisible zipper technique and apply it to a lot of your future projects simply because it is easy and does not require the use of snaps or buttons/buttonholes. Sewing a Faced Non-Stretch Waistband With An Invisible Zipper Closure.Basic non-stretch waistbands are composed of the face pieces (self) and facing pieces used to finish the back side. Usually, a basic straight woven waistband is composed of 1 Front self and 1 Front facing and respectively 1 Back Self and 1 back facing. The self pieces are sewn together at the side seams while the facings are sewn together at the side seam separately. As a result, the face of the entire waistband and it's mirror image facing is attached with one continuous stitch (we'll walk you through all these steps bellow). It is important that you always back the facing pieces with interfacing. Interfacing is used to add stability, structure and more durability to parts of a garment, such as a woven waistband, and will make a huge difference in how finished product fits and withstands wear. Waistbands carry a lot of "responsibility" on a garment and should not feel too thin or flimsy. 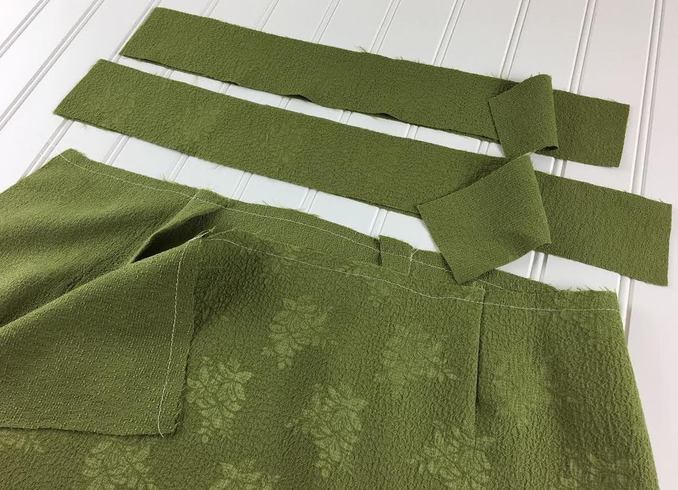 Before applying the waistband, add all the necessary finishes to the edge of the waistline. Depending on the design, sew all the darts, gathers, pleats or tucks first. As describe above, a regular straight waistband usually has a front self and a front facing, and respectively a back self and back facing. The self is used to describe the right side of the waistband- the face side visible on the outside of the garment. The facing is the mirror image of the self and used on the inside to stabilize and clean finish the waistband. The best way to differentiate between the front and back waistband pieces is to keep in mind that the front waistband pieces are always longer than the back. 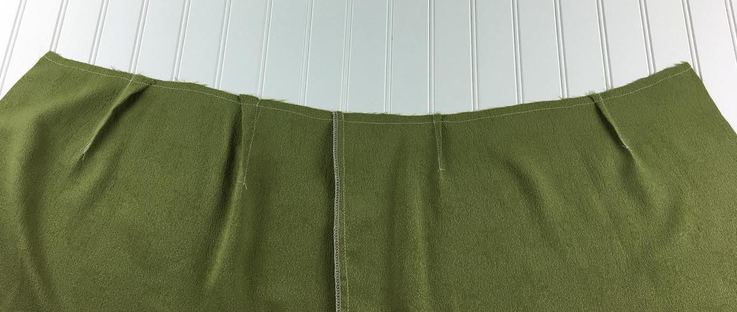 1. Stitch an clean-finish one of the side seams and leave the other side seam open. Since we're applying the invisible zipper to the right side of the skirt, the left side seam is stitched together first. Once all finishes are applied to the waistline (darts, in this case) and everything is properly ironed, add a staystitch along the raw edge of the waistline. This will prevent this semi-curved edge from stretching and losing its shape in the sewing process. 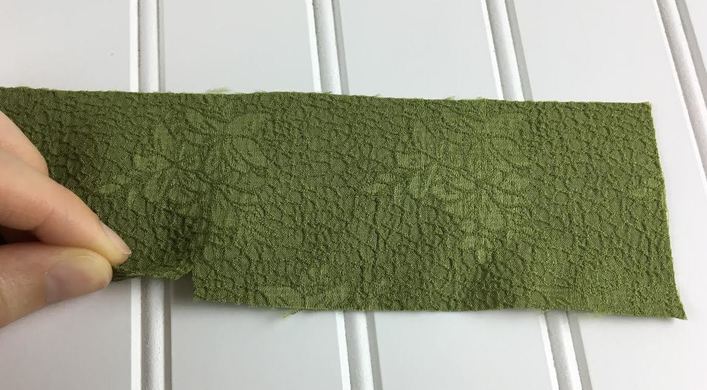 Each one of the waistband pieces has to have notches along the edge that gets sewn to the waistline. As you'll learn below, these notches match the darts on the garment and are also used in identifying the edge that gets connected to the waistline. They also serve as a guideline for matching the pieces of the waistband correctly to the waistline's edge. 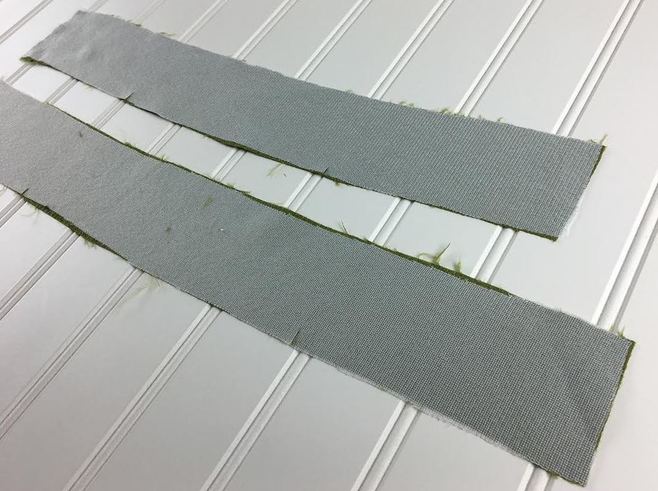 2. Identify the front and back facing pieces and apply interfacing to the wrong side of each (1 front and 1 back piece). 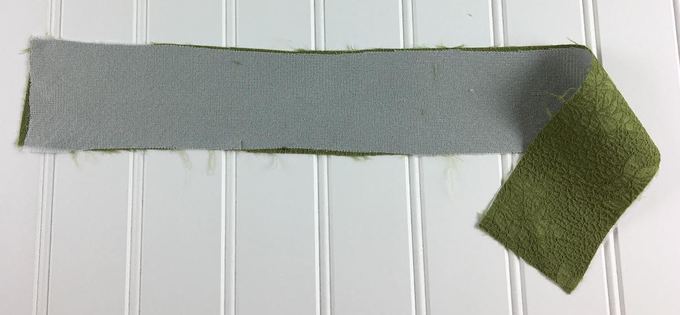 It is important that when cutting the interfacing you make sure the adhesive side matches the wrong side of each facing waistband piece. If you have waistband facing sewing patterns, use them to cut out the interfacing. 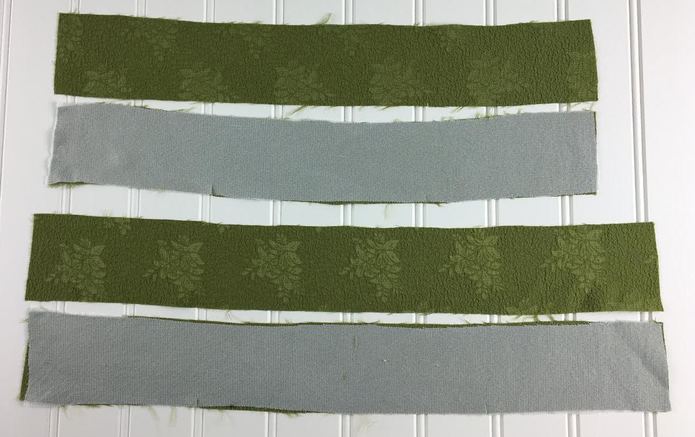 If you are having difficulty identifying which pieces correspond to the facing, align the waistband with the self pieces of the waistband matching their corresponding facing pieces, with the wrong sides of the fabric touching (the way they would be in the finished garment). Next, align them along the garment's waistline in the manner they would be attached in the finished garment. This will help you visualize which pieces are facings and should go on the inside thus allowing you to add the interfacing to the correct surface. 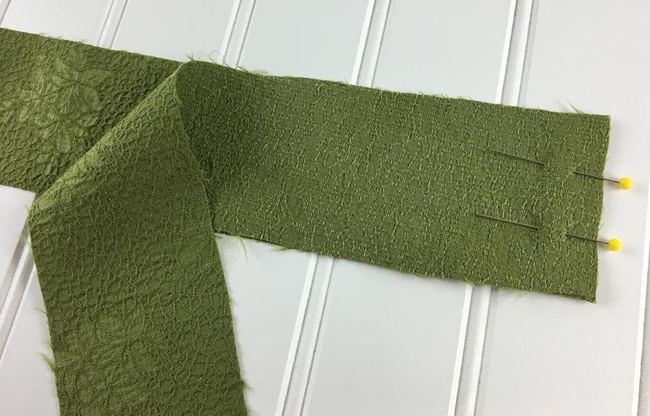 3. Begin with the self pieces: Align the front self waistband pieces to the back so that the right sides of the fabric are touching as shown. Pin the same side of the waistband as the finished side seam on the garment. In our sample, the skirt's left side seam was stitched which means our waistband will also be sewn together at the left side seam. Make sure the notches of both front and back waistband pieces are aligned at the bottom, pointing the same direction. When sewn together, the waistband self piece should have all the notches on the same edge. 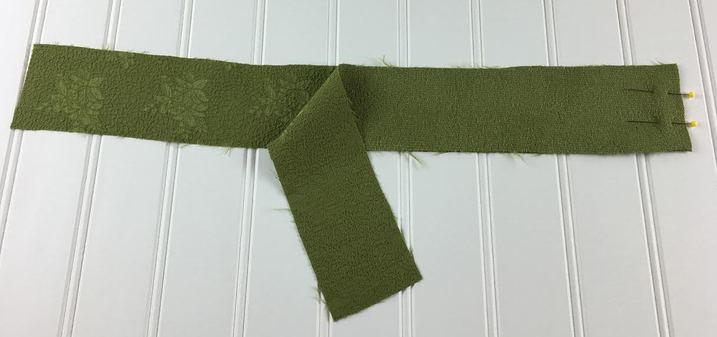 Add a couple of pins horizontally to keep the seam in place for stitching as shown above. 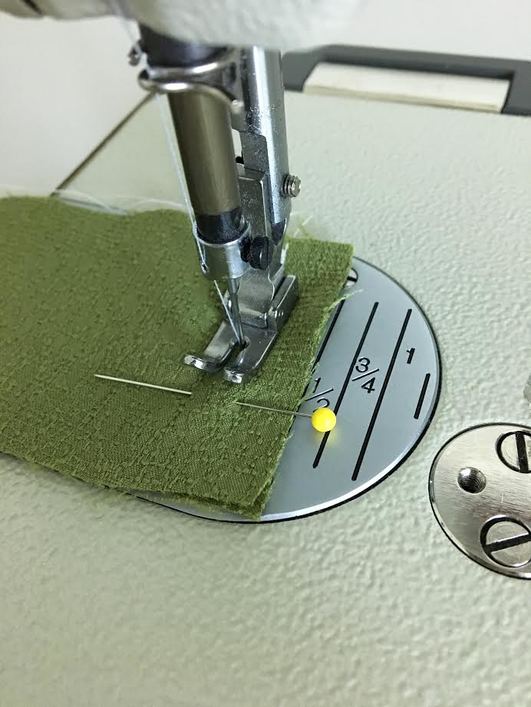 4. Apply a machine stitch at the proper seam allowance. The seam allowance in this tutorial is 1/2" along all seams.
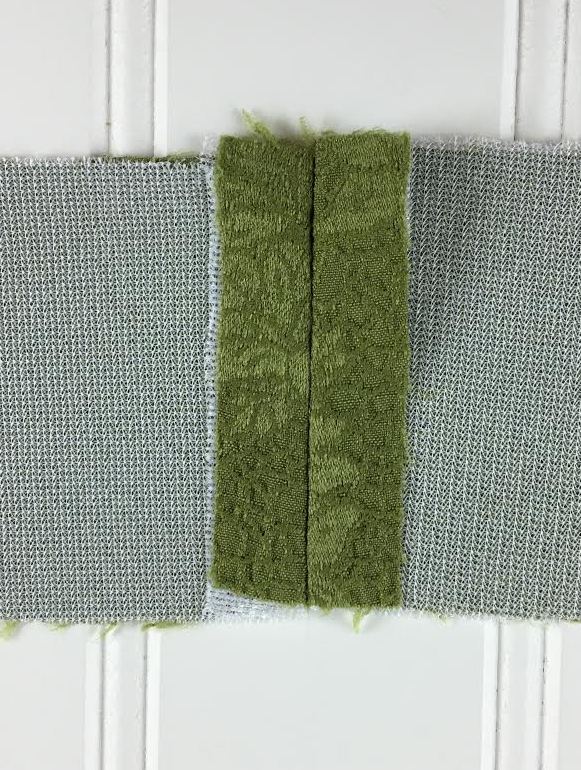
 As discussed above, make sure all notches are placed along the same edge at the bottom. 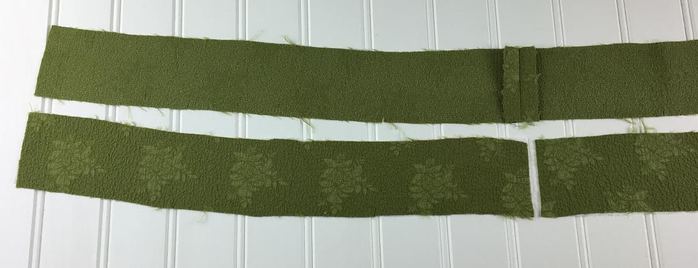 7. In order to sew the matching facing pieces, it is a good idea to first lay out your waistband pieces in order to visualize what facing seam needs to be stitched- This method is great for a sewing beginner who feels a bit intimidated by facings. First, lay out the self waistband piece you just stitched with the notches pointing to the bottom and the wrong side of the fabric facing up. Take the facing pieces, and align each one of them bellow each corresponding front or back side, making sure that the face of the fabric is pointing up and the notches are also aligned at the bottom for both facing pieces. 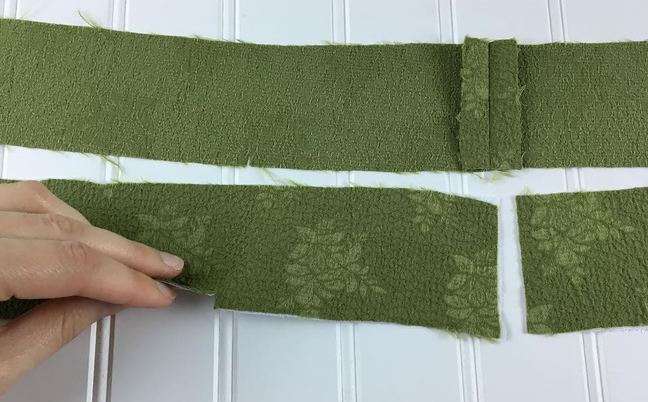 It is important that the notches are pointing towards the bottom in each pieces as this will determine proper alignment. 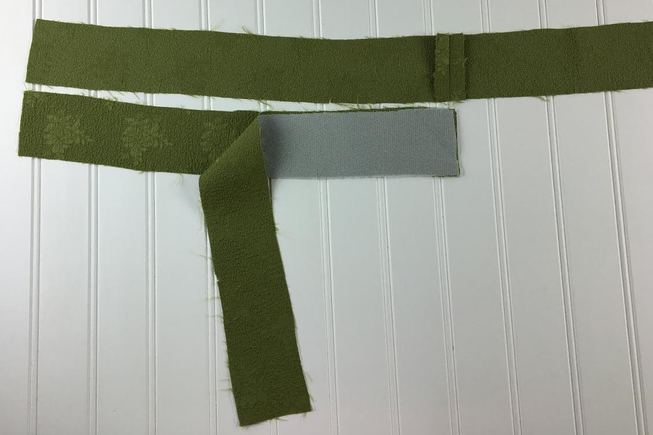 8. After you've laid out the facing pieces, overlap them at the side seam so that the face of the fabric is touching (interfacing should be on the outside) as shown above. 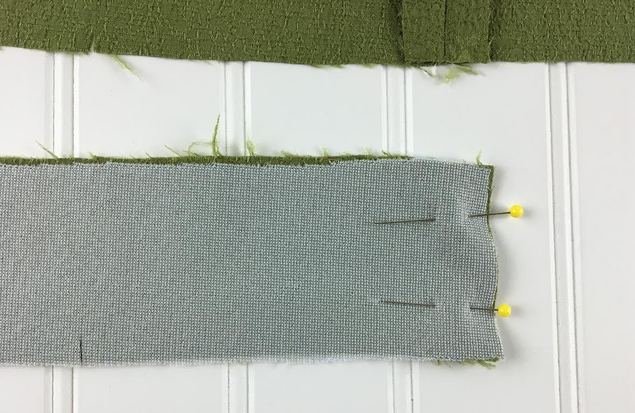 9. Place a couple of pins perpendicular to the edge in order to keep the seam together for stitching.
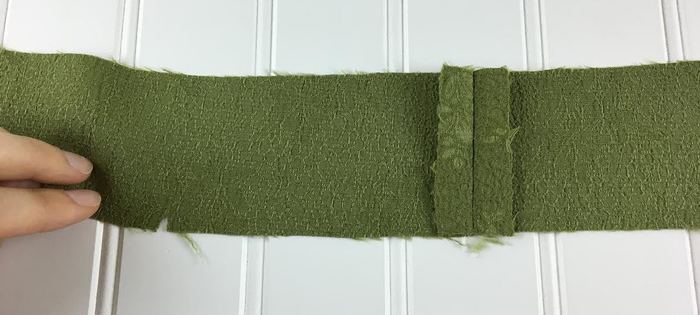
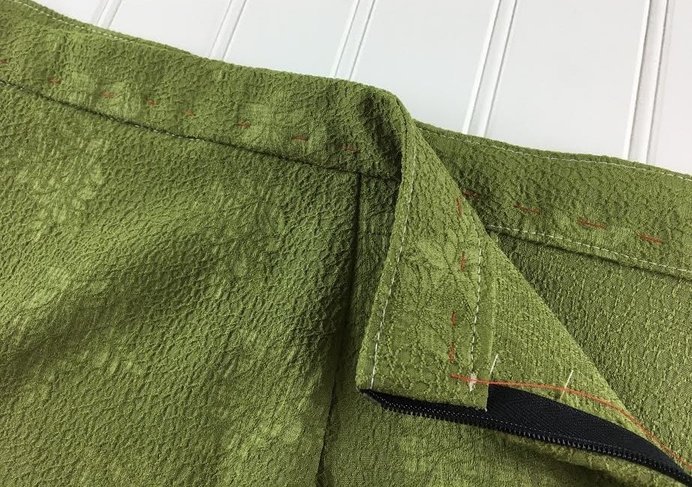
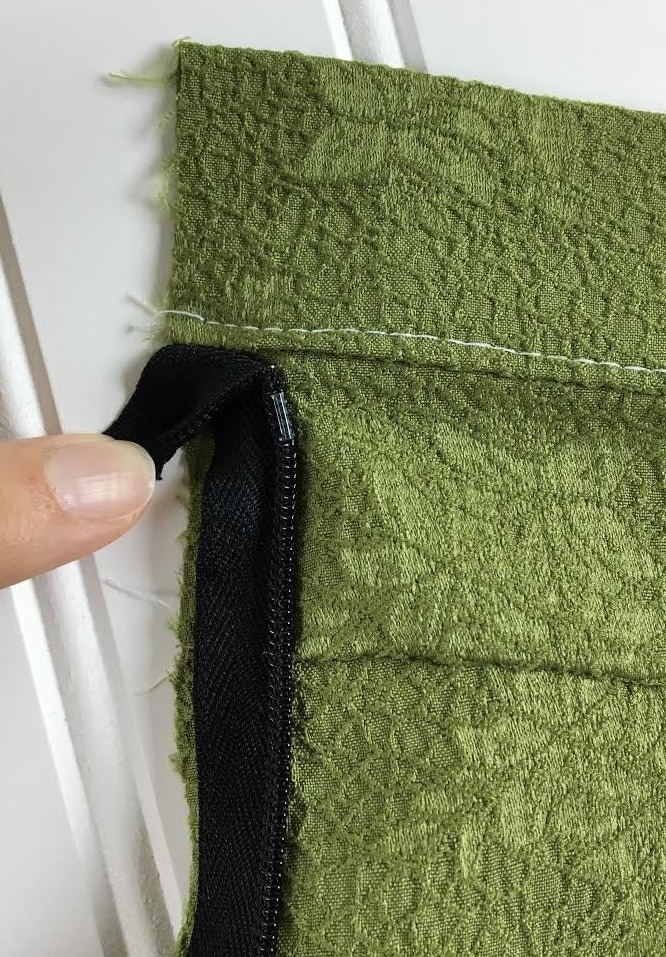
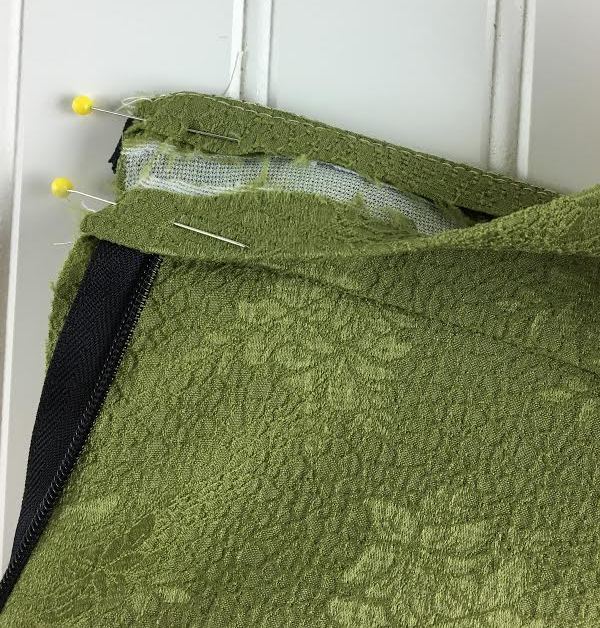
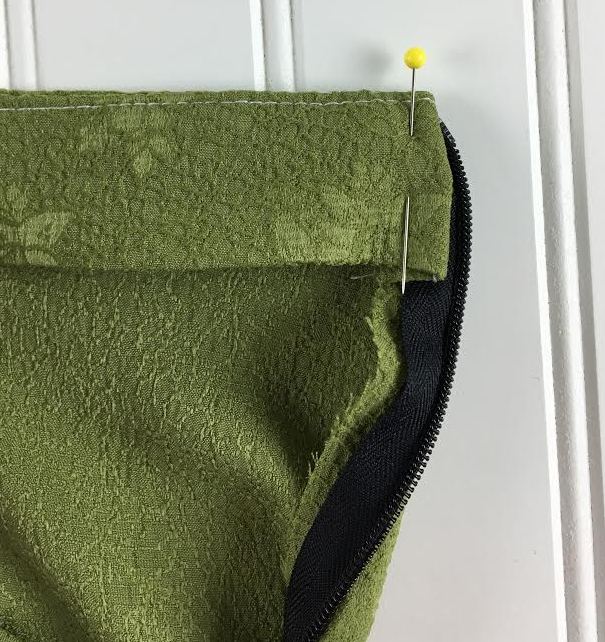
 12. Align the self waistband piece to the facing pieces so that the face of the fabric is touching and ALL notches are located on the bottom edges. The top edges should have no notches. 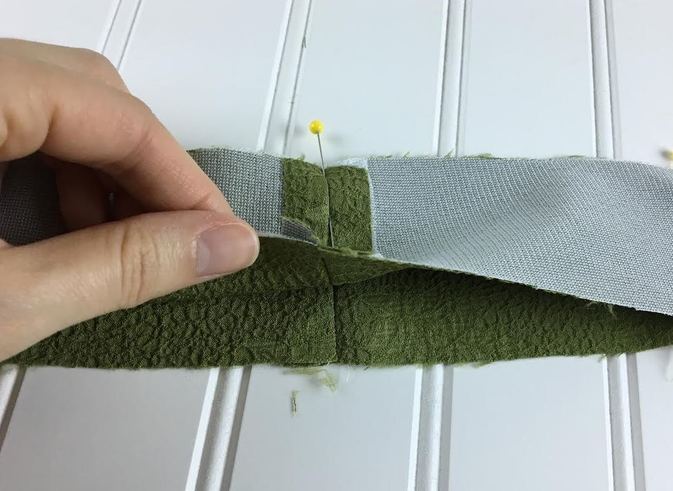 13. Add a pin through the side seam first, ensuring that both seams are matched as shown. 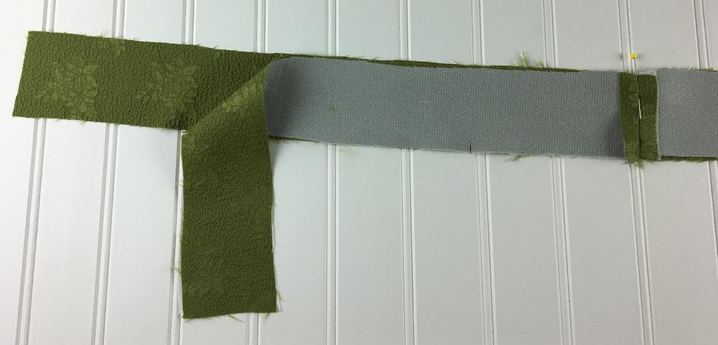 14. Align the waistband facing to the self piece on the left side of the side seam, ensuring that all notches match at the bottom. 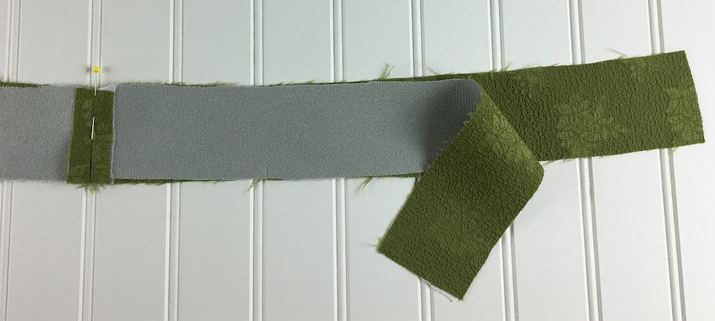 15. Repeat the process on the right side of the side seam matching all the edges of the waistband as described above. 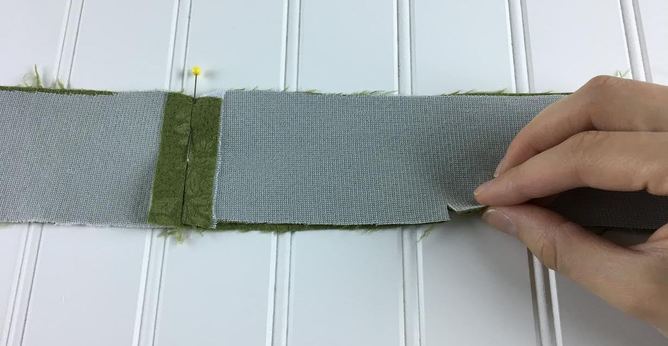 Again, the notches of both facing and self should correspond and be aligned along the bottom. 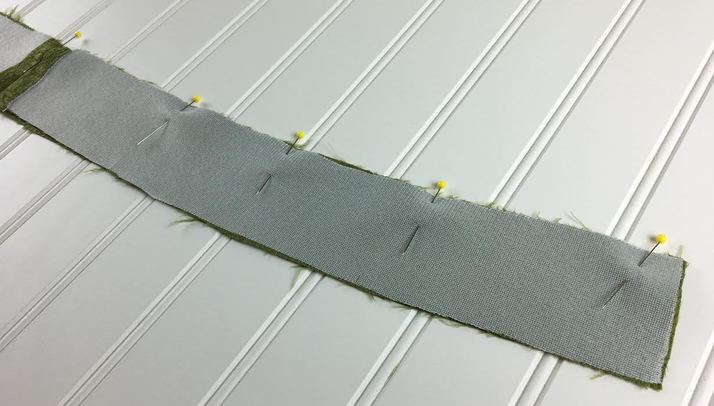 16. Once the waistband pieces are aligned, pin perpendicular to the top edge as shown above. The top edge should have NO notches. 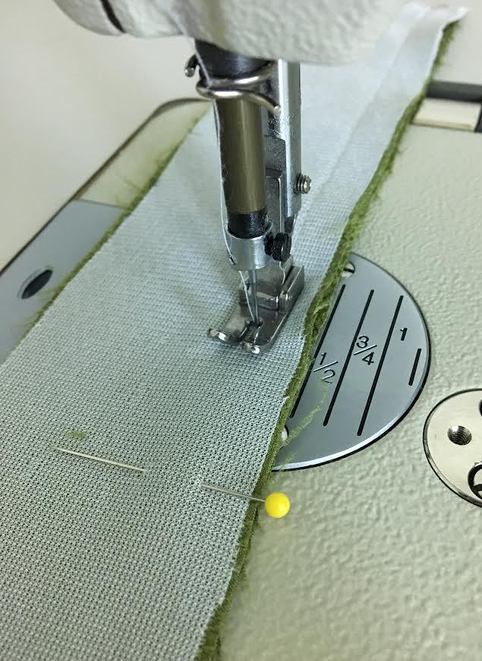 17. Stitch on your sewing machine at the appropriate seam allowance. 1/2" in this case. 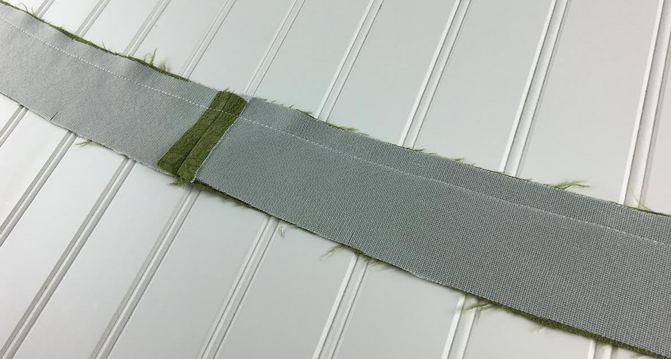 Be careful at the side seam- The seam lines should be matching properly once stitched. 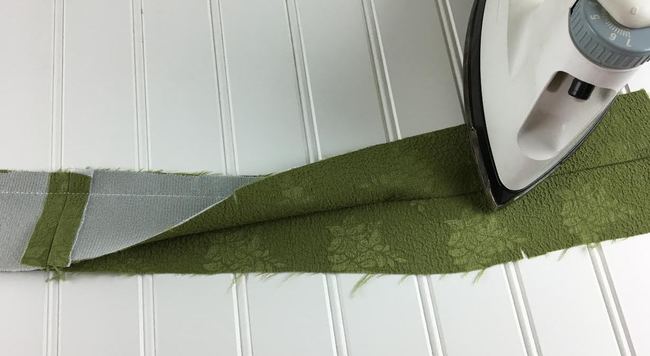 18. Iron the waistband seam open so that the seam allowance is pointing towards the facing (interfacing side) as shown above. 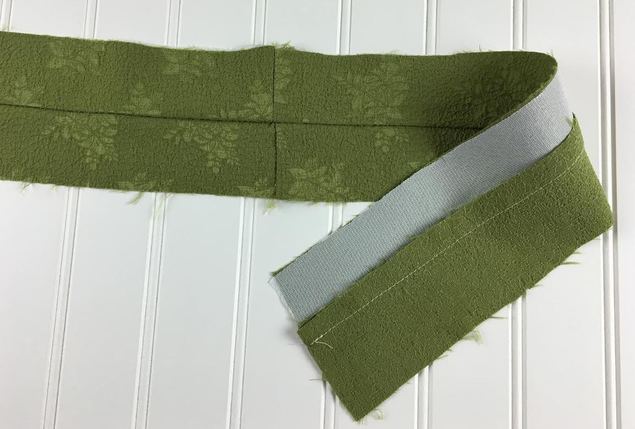 Once ironed, the waistband is ready to be understitched which will stabilize the facing and insure that it lays properly on the inside of the garment. 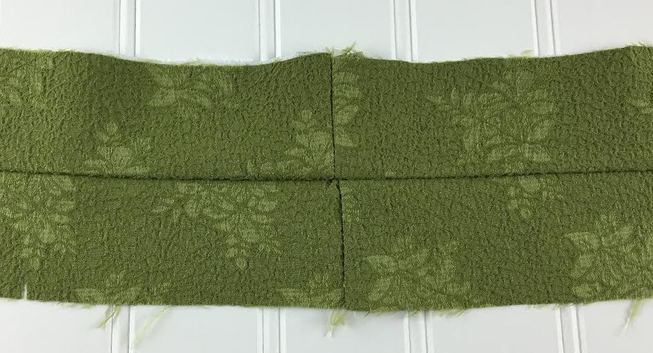 As you shown above, the side seam of both self and facing should be matching properly. This may take some practice. The best way to ensure the seam is matching properly is to keep the pin inserted until the machine needle reaches the seam-line. Once the machine needle is inserted into both layers at the seamline, you can remove pin and continue stitching. 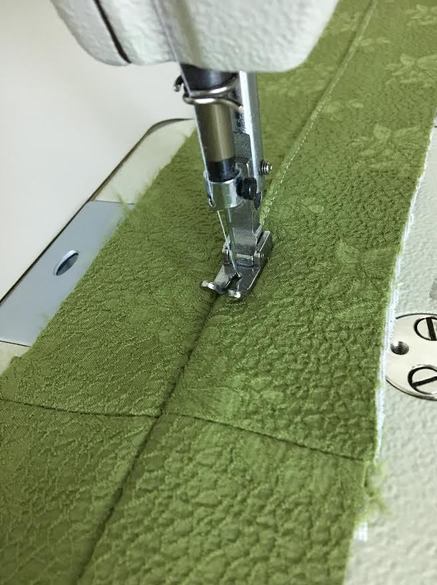 19. To understitch, apply a machine stitch on top of the facing at about 1/8" away from the seam-line making sure to sew through all layers of the seam allowance at the back. 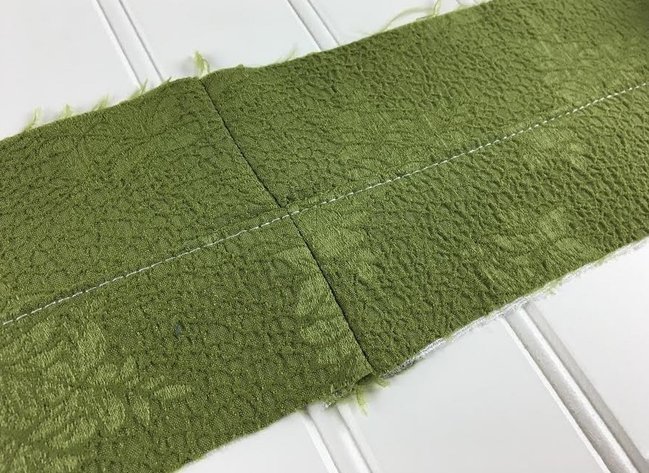 Keep the understitch as even as possible throughout. 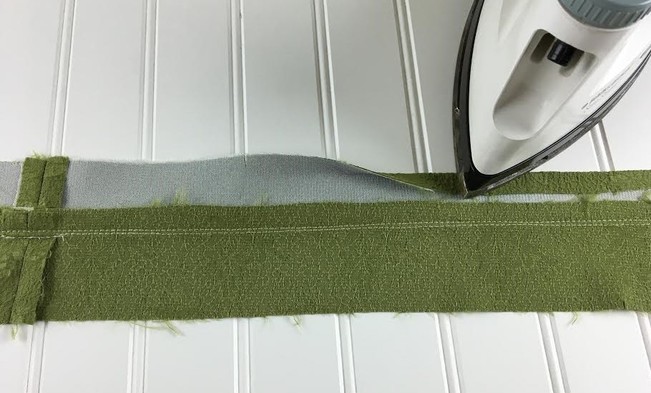 20. Lay out the waistband so that the inside (wrong side) is facing up. Fold the edge of the waistband's facing at the length of the seam allowance and iron as you fold. The seam allowance in this tutorial is 1/2", so the edge of the facing is folded and ironed at exactly 1/2" as shown. This step will make the sewing process more comfortable once the waistband is attached to the garment. 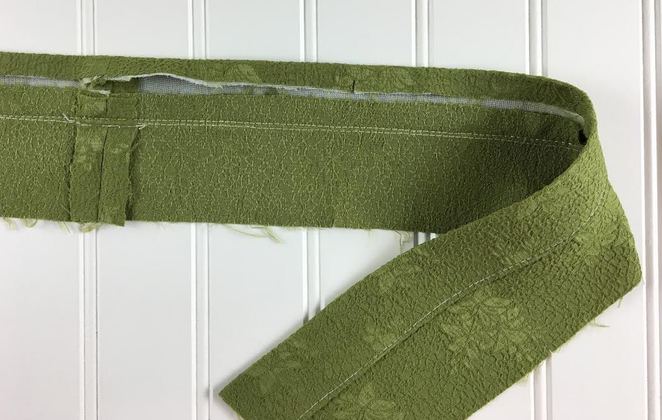 Fold along the entire edge of the facing. 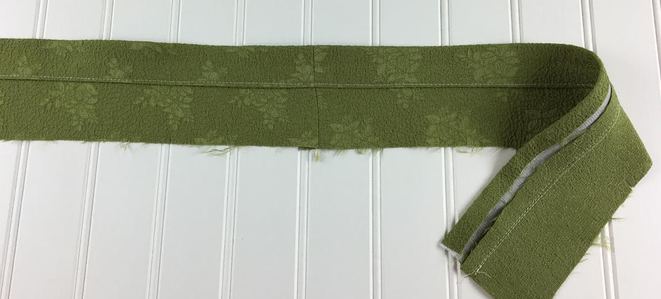 Shown above is a face view of the waistband once the facing edge is folded. Sewing the waistband to the garment 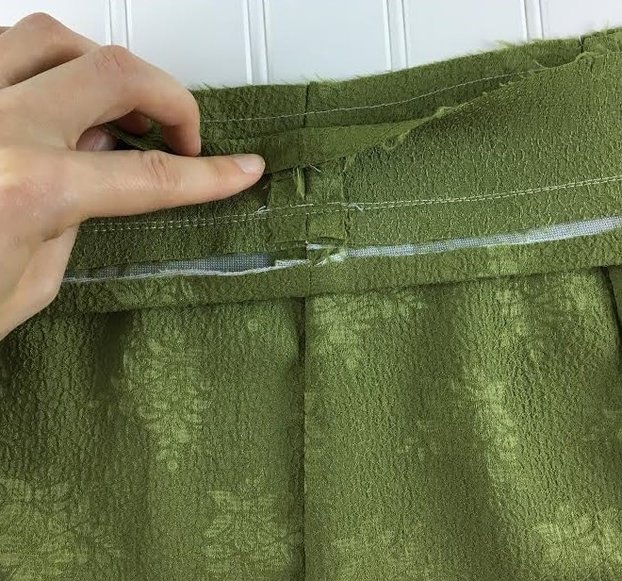 21. Align the unfolded edge of the waistband to the waistline's raw edge at the side seam, making sure the face of both fabric layers is touching. 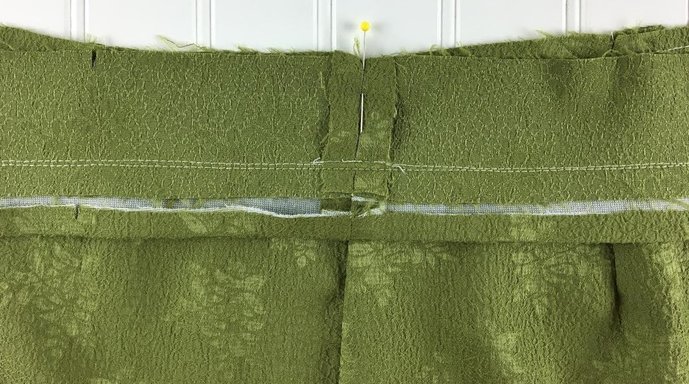 22. Just like you did when sewing the waistband individually, add a pin at the side seam making sure the seam lines of both garment and waistband are matched perfectly as shown. 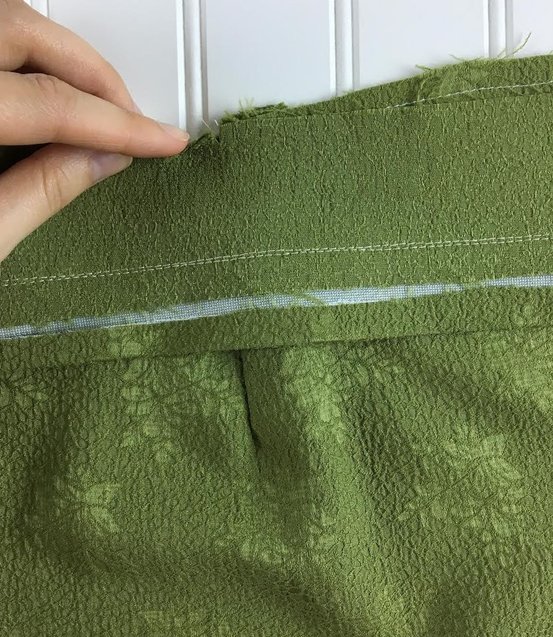 23. Align the rest of the waistband to the waistline's edge, matching every notch to the corresponding dart.  24. Pin the waistband horizontally as shown above. Make sure all the notches match the darts accurately and the side seam lines are also properly aligned. 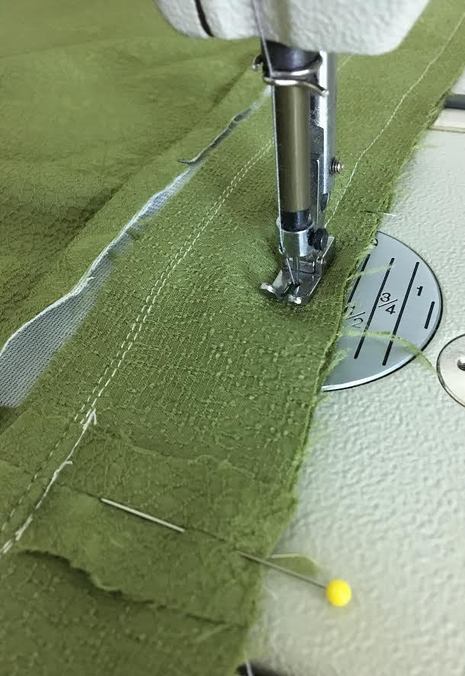 25. Sew at the appropriate seam allowance ensuring that the side seams remain properly matched on top of each other. 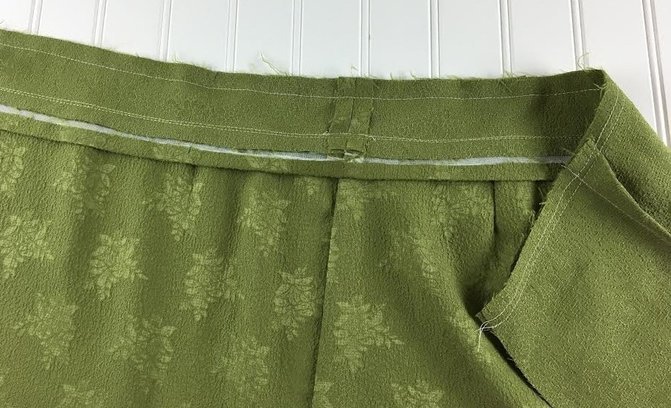 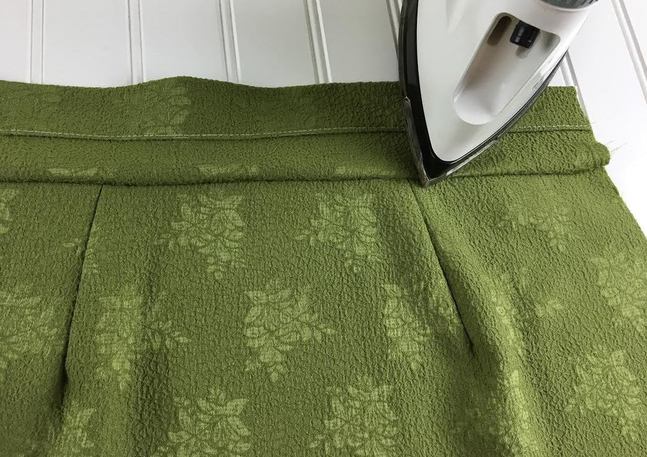 26. Iron the waistline seam with the seam allowance pointing up into the waistband.  27. Fold the waistband's facing inward and iron the waistband's top edge as shown above. 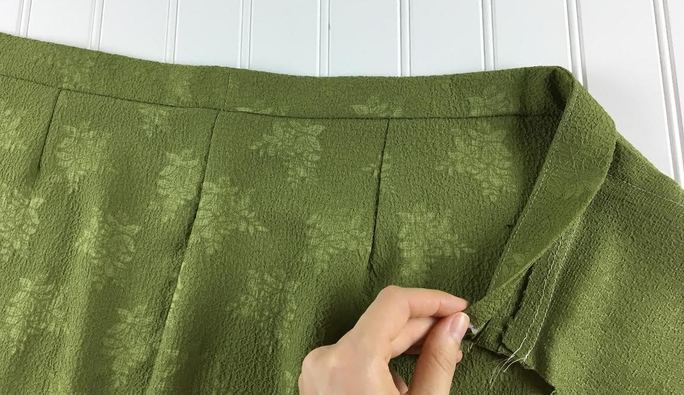 This will result in the seam allowance being encased in the waistband and all the seams laying flat thus allowing the waistband to maintain a smooth edge throughout. 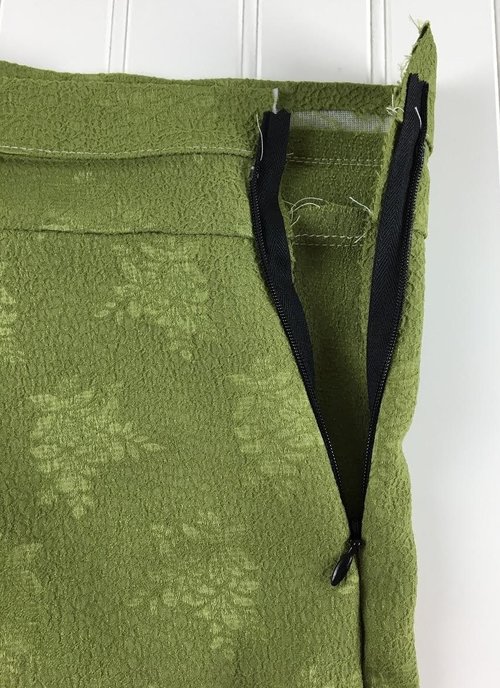 28. Apply the invisible zipper into the seam at this step. If you're unsure about how to sew one, refer to our how to sew an invisible zipper tutorial.  The top coils of the invisible zipper should be aligned at about 1/8" down from the waistband's top edge seam. 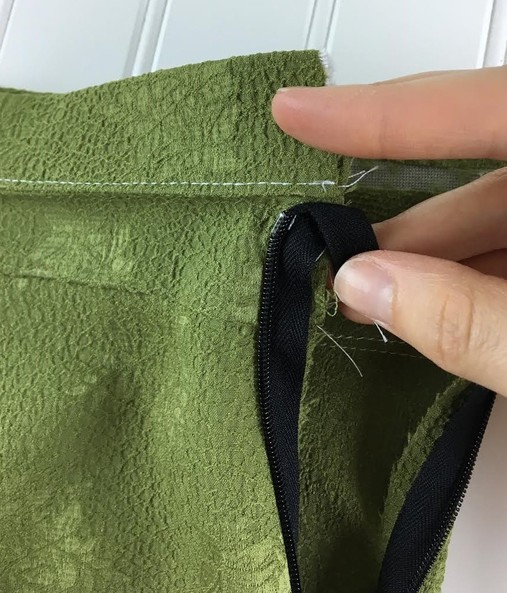 29. Fold the excess zipper tape towards the garment's seam allowance.  30. While the excess zipper tape is folded towards the seam allowance, bring the waistband's facing to the front of the garment placing it on top of the zipper as shown. Place pins along the edge to secure. 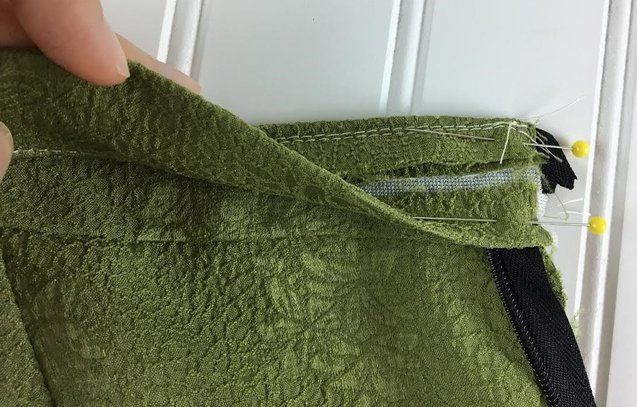 The face of the the waistband's fabric should be touching, meaning that the right side of the facing's fabric should be touching the right side of the self waistband. Align the edge of the facing's fold a little bit bellow the garment's waist seam line. 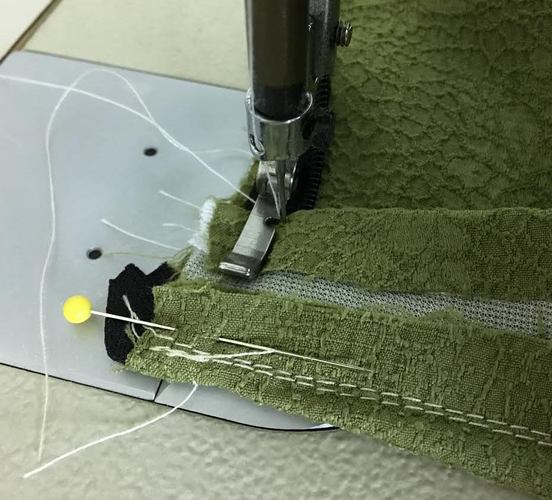 31. Using a zipper foot instead of a regular presser foot, stitch the edge of the waistband at the zipper area as shown in the image above. Be careful not to catch the zipper's teeth while sewing- stitch at about 1/8" away from the zipper. Repeat this process on the other side of the waistband.
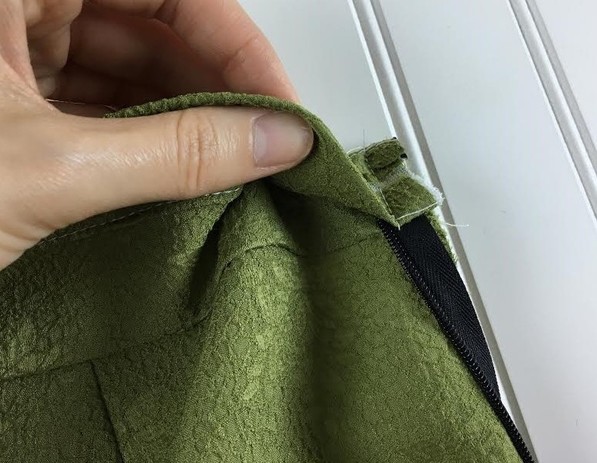
32. Bring the facing over the waistband'd edge to expose the top of the zipper coil. 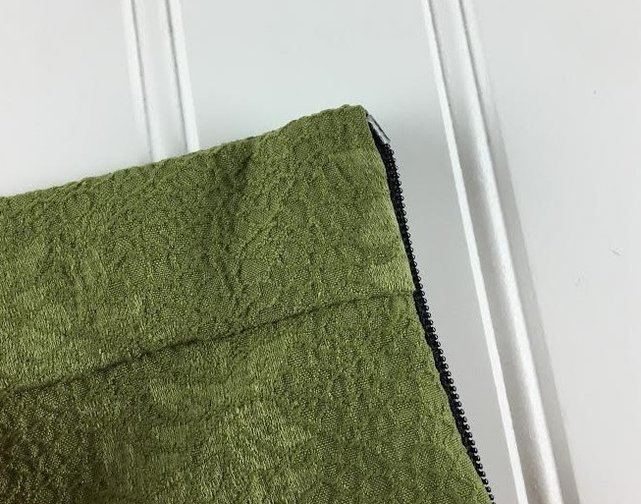 This will result in a straight corner with the zipper's top coil aligned properly to the waistband's top edge. 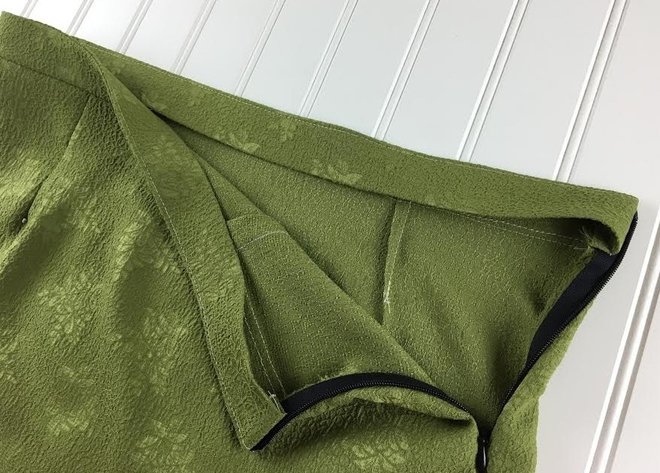 33. Turn both zipper corners as described above. You'll notice that the folded bottom edge of the facing is overlapping the waistline stitch, thus hiding it underneath.
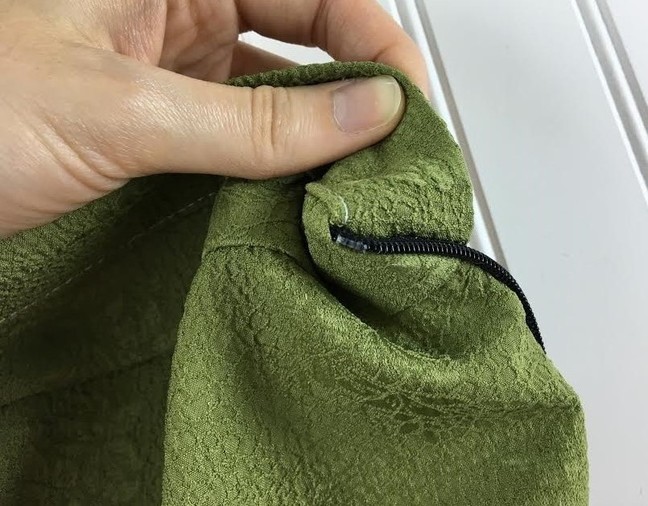
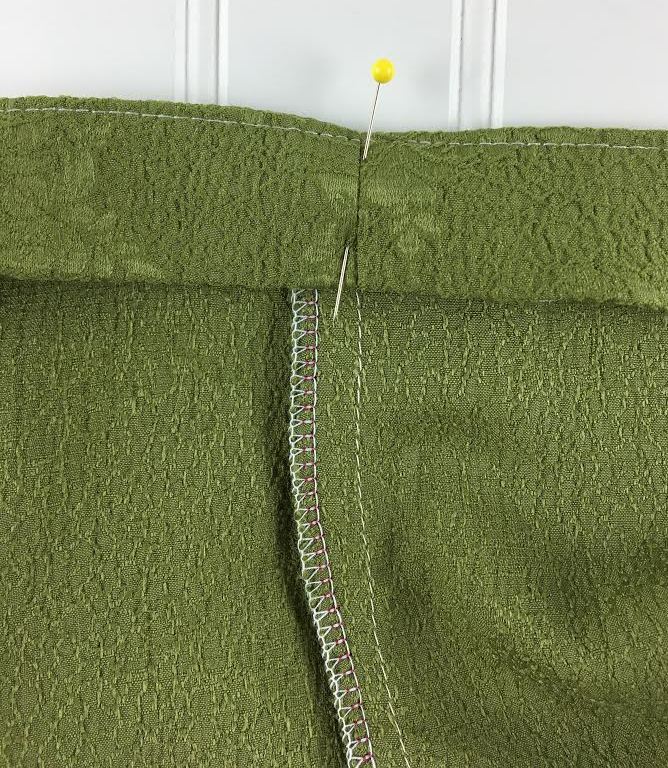
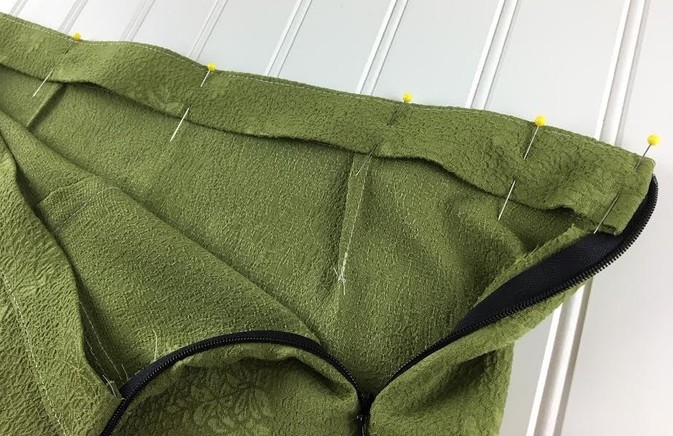 36. Continue pinning the rest of the waistband perpendicular to the edge, making sure the facing is positioned evenly and laying flat through out. 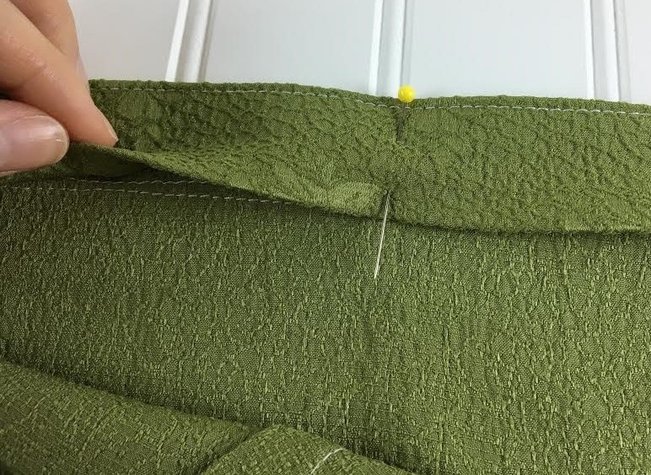 37. Make sure that the facing's fold is covering the waistline's stitch. The extra facing extension along the bottom will provide a way for the waistband to be sewn shut in the steps that follow.  38. Baste the waistband through all the layers of the waistband at about 1/2" from the bottom fold on the inside of the garment. 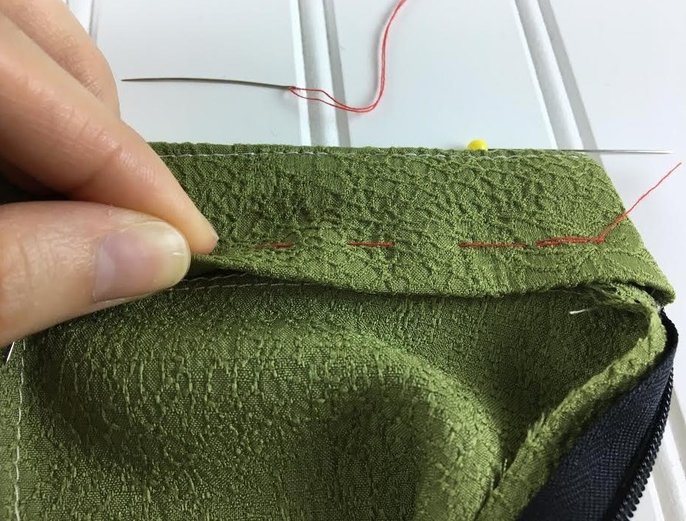 39. Keep the bottom edge aligned as evenly as possible in relation to the stitch underneath. This will determine how even the final machine stitch will look. 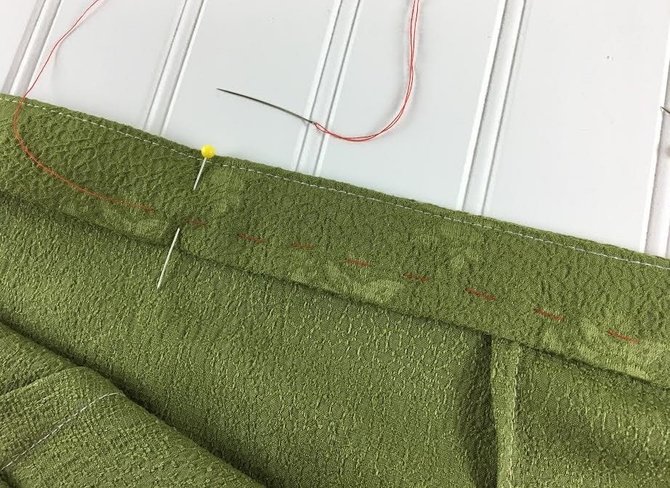 40. Continue basting along the entire length of the waistband ensuring that the facing's edge is aligned evenly throughout. 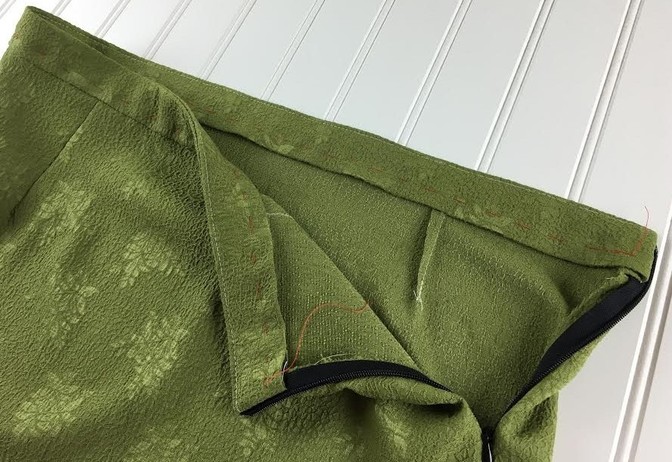
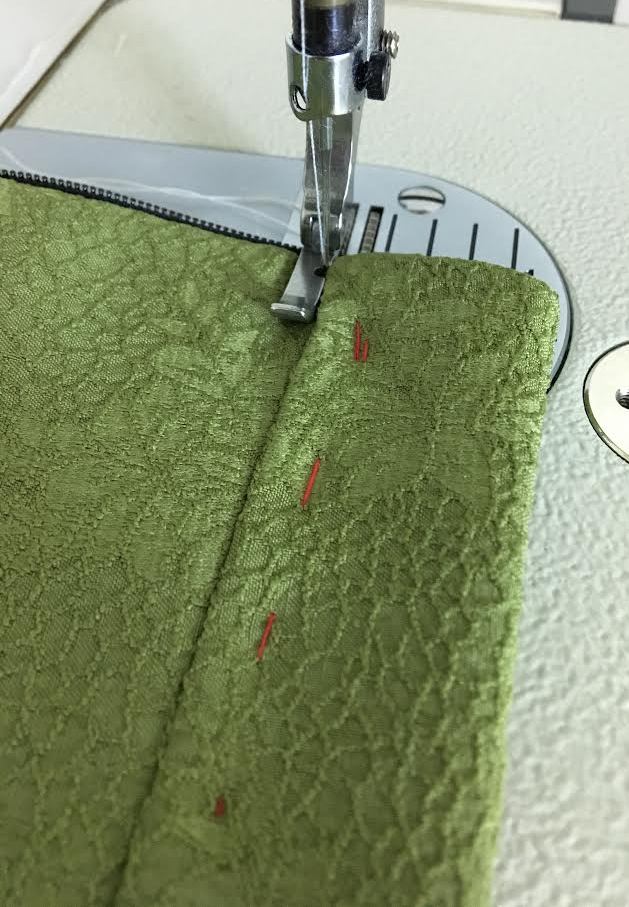
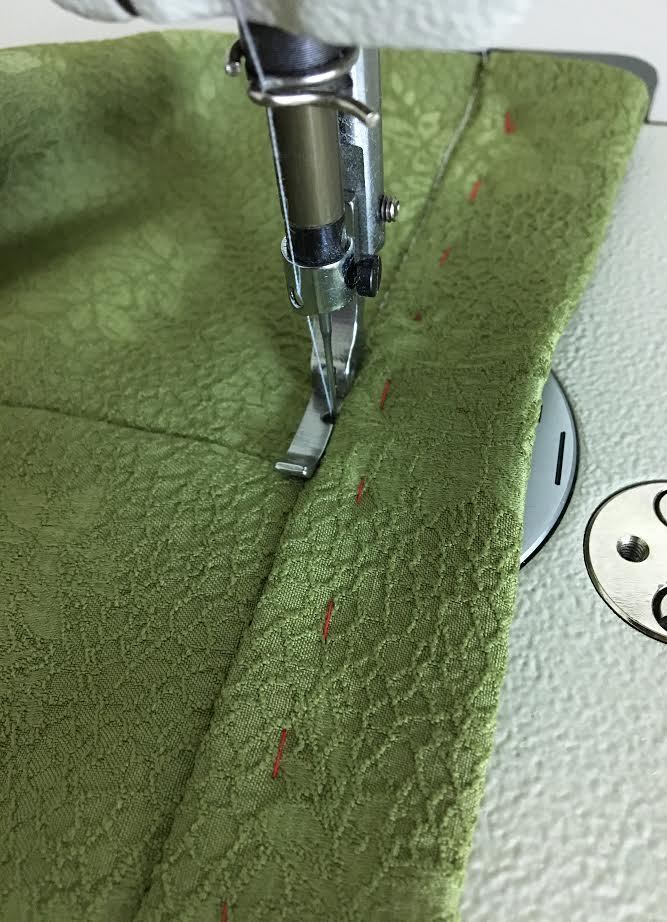
 Once the stitch is completed, you'll notice that it is almost not visible on the face side of the garment. On the inside of the waistband however, the stitch is positioned at about 1/8" away form the facing's bottom edge- this is due to the fact that the facing's fold was positioned bellow the garment's stitch line during pinning and basting. 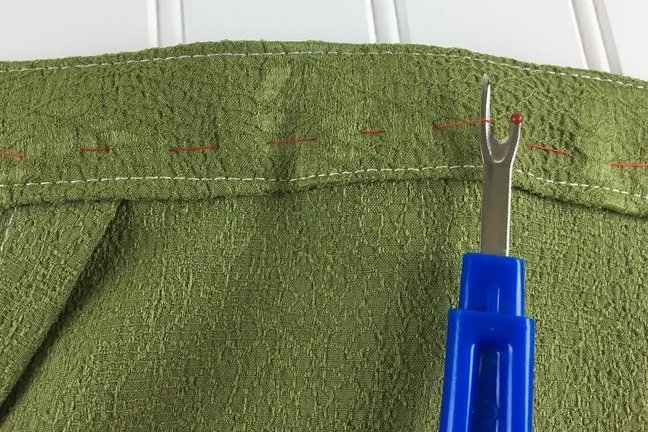 43. Use a seam ripper to easily remove the basting stitch. 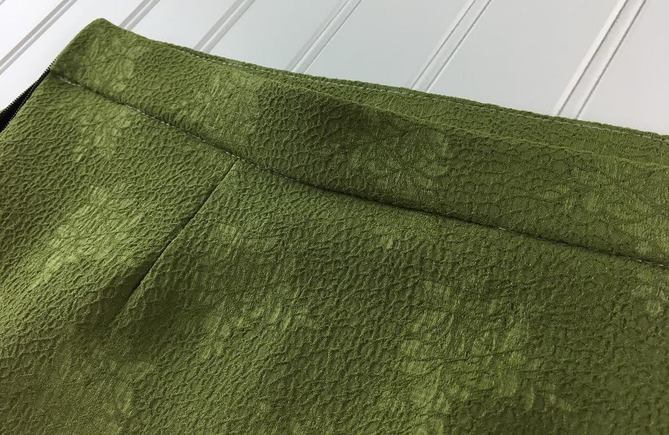 For the purpose of this tutorial, we used white thread for all the stitches. When using matching thread however, the final top stitch on the outside of the waistband is almost invisible, resulting a clean waistband finish. 
1 Comment
Mary-Ann Boyle
1/25/2021 04:34:37 am
Thank you for this great tutorial. The clearest I've seen. I was wondering if you have a tutorial on how to attach a flat waistband to a skirt with button at the side with pockets. So, no zipper, and pocket is not completely sewn as that is where you step inside your skirt. Similar to the flint pants by Megan Nielsen. Thank you. Leave a Reply. |
The Blog:A journey into our design process, sewing tutorials, fashion tips, and all the inspiring people and things we love. 
Doina AlexeiDesigner by trade and dressmaker at heart. I spend most of my days obsessing over new fabrics and daydreaming new ideas. 
Sadie
Executive Assistant & Client Relations Manager Archives
November 2019
Categories
All

|

-
Sewing Tutorials
-
Basics
>
- Aligning Pattern Grainlines To Fabric
- Preparing Fabrics For Sewing
- Pinning Sewing Patterns To Fabric
- Placing Sewing Patterns On Fabric For Cutting
- Rotary Cutters or Fabric Scissors?
- Cutting The Sewing Patterns
- What Are Notches And How To Use Them In The Sewing Process
- Transferring Notches From Pattern To Fabric
- Transferring Seamlines to Fabric
- Staystitching
- Backstitching: A Complete Guide
- Hand Basting: A Complete Guide
- Sewing Continuous Bias Binding
- Darts >
-
Sewing Seams
>
- The Basics Of Seams And Seam Allowance
- How To Sew A Straight Seam
- Sewing Curved Seams
- Sewing Corner Seams
- Trimming And Grading Seam Excess
- Notching/Clipping Seam Allowance for Tension Release
- Sewing Topstitched Seams
- Sewing Corded Seams
- Sewing A Slot Seam
- Sewing A Gathered Seam
- Sewing Bias Seams
- Sewing Seams With Ease
- Sewing Seams With Crossing Seamlines
- Sewing Unlike Fabric Seams
- How To Iron Seams: Ironing Tools And Conventions
- Sewing With Knit Fabrics
- Understanding Stitch Length And Tension
- Sewing Unique Fabric Seams
-
Seam Finishes
>
- Seam Finishing Techniques - Overview
- Applying A Pinked Seam Finish
- Applying A Bias Bound Seam Finish
- Serging And Zigzag Seam Finishes
- Sewing A Self-Bound Seam Finish
- Sewing A French Seam Finish
- Sewing A Hong Kong Seam Finish
- Sewing A Mock French Seam Finish
- Sewing A Turned-and-Stitched Seam Finish
- Sewing Overcast Hand-Applied Seam Finishes
- Sewing A Flat Felled Seam
- Sewing A Hairline Seam Finish
-
Hem Finishes
>
- Garment Hem Finishes: Overview
- Sewing A Double Fold Hem Finish
- Sewing A Single Fold Hem Finish
- Sewing Bound Hem Finishes
- Sewing An Exposed Double Layer Bound Hem
- Sewing A Folded-Up Bound Hem with Pre-folded Binding
- Sewing A Hong Kong Hem Finish
- Sewing A Band Hem Finish
- Sewing A Bias Faced Hem Finish
- Sewing A Twill Tape Hem Finish
- Sewing A Rolled Hem Finish
- Sewing A Shaped Hem Facing
- Using Fusible Hem Tape And Webbing
- Finishing A Lace Fabric Hem
- Finishing A Leather Hem
- Sewing Faced Hem Corners
- How To Finish Lining At The Hem
- Finishing Fabric Corners by Mitering >
- Interfacing A Hemline: Lined And Unlined Examples
-
Sewing Pockets
>
- Curved Patch Pocket With Flap
- Unlined Square Patch Pockets
- Lined Patch Pockets: Two Ways
- Extension On-Seam Pockets
- Separate On-Seam Pocket
- Front Hip Pockets
- Bound Double Welt Pocket
- Double Welt Pocket With Flap
- Self-Welt Pocket (Using Single Fabric Layer)
- Slanted Welt Pocket (Hand-Stitched)
- Faced Slash Pockets: Overview >
-
Sewing Zippers
>
- Sewing Zippers: General Information
- Sewing A Centered Zipper
- Sewing A Lapped Zipper
- Sewing An Invisible Zipper
- Sewing A Fly Front Zipper
- Sewing A Closed-End Exposed Zipper (No Seam)
- Sewing An Exposed Separating Zipper
- Sewing Hand Stitched Zipper Applications
- Sewing A Zipper Underlay
- Sewing A Placket-Enclosed Separating Zipper
- Sleeveless Finishes >
-
Neckline Finishes
>
- Sewing A Neck Shaped Facing
- Sewing An All-In-One Neck Facing
- Neck And Garment Opening Combination Facings >
- Sewing A Bias Faced Neckline Finish
- Sewing A Band Neckline Finish
- Bound Neckline Finishes: Overview >
- Sewing A Semi-Stretch Strip Band Neckline
- Ribbed Neck Band And Classic Turtleneck
- Decorative Neckline Finishes >
- Finishing Facing Edges >
-
Extras
>
- A Complete Guide on Interfacing
- Sewing Bound Spaghetti Straps
- Sewing Spaghetti Straps To A Faced Neckline
- Sewing Ruffles: Overview
- Patterning And Sewing A Circle Ruffle
- Sewing A Gathered Heading Ruffle
- Sewing Double Layer Gathered Ruffles
- Sewing A Gathered Ruffle Into A Seam
- Sewing A Gathered Ruffle To A Fabric Edge
- Sewing A Fabric Surface Slit
- Sewing A Slit Seam
- Hand-Applied Straight Stitches
- Hand-Applied Blind Stitches
- Hand-Applied Overedge Stitches
- Hand-Applied Tack Stitches
- Hand-Applied Decorative Stitches
-
Basics
>
- Custom Bridal
- Custom Apparel
- About
- Blog

 RSS Feed
Services |
Company |
|
