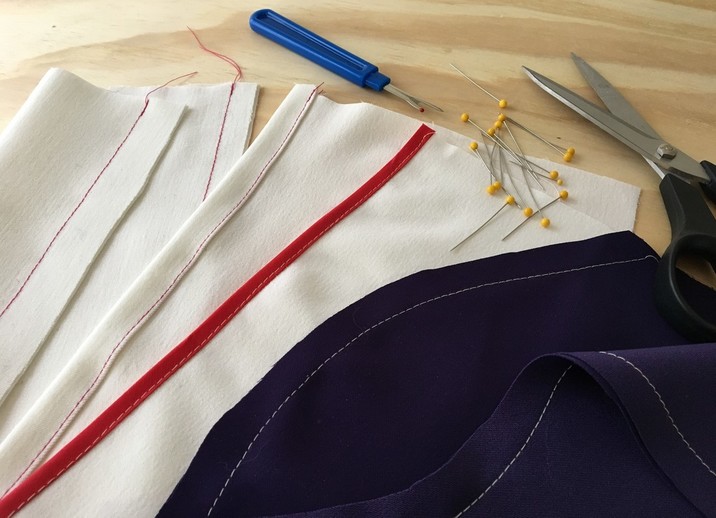
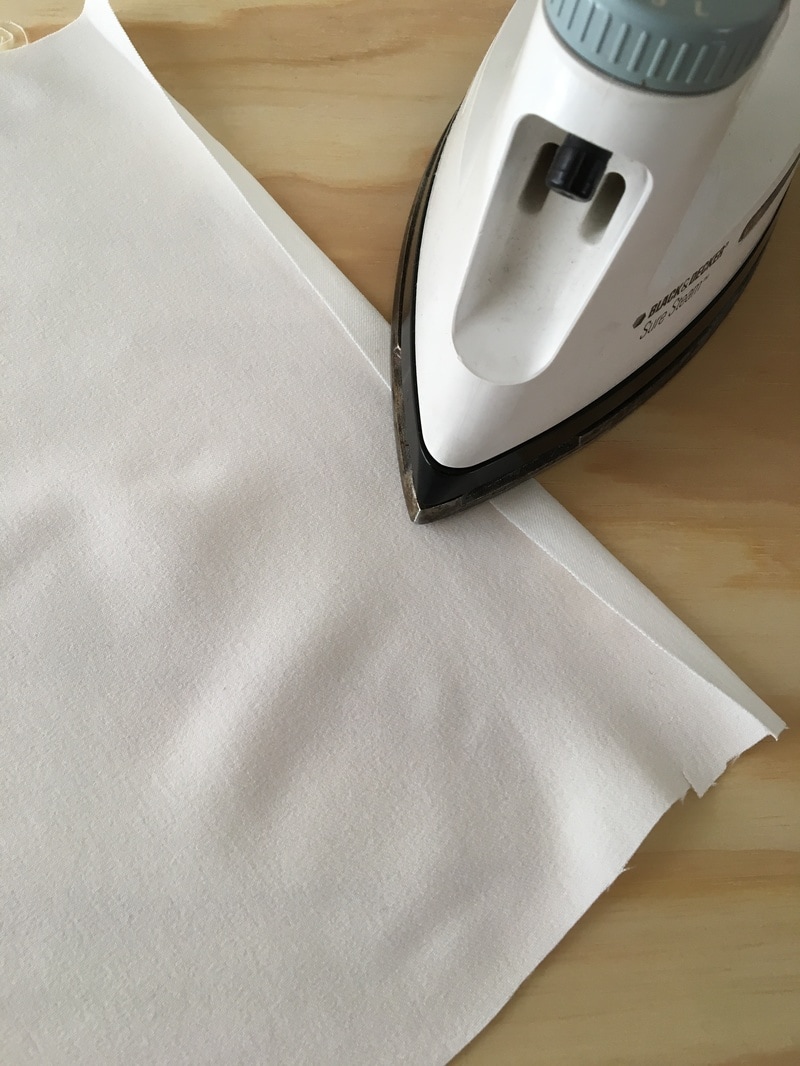
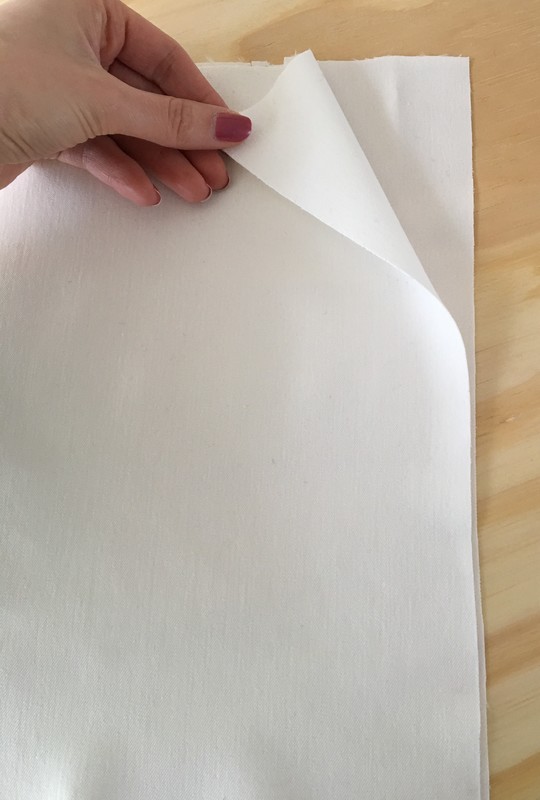
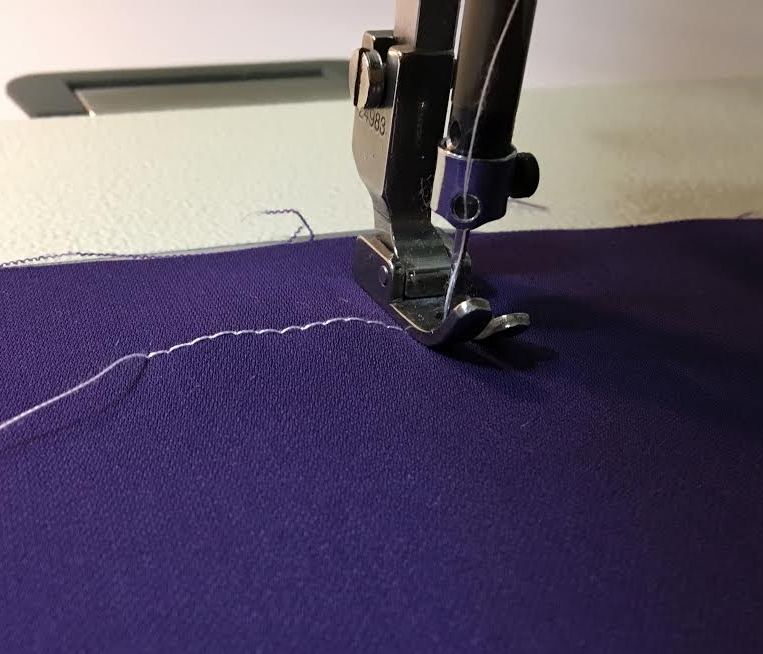
 Perhaps one of the most difficult and time consuming aspects of learning how to sew is getting accustomed to using your sewing machine. Nonetheless, feeling comfortable sewing on your machine is essential to making good quality, professional looking clothing. You should think of your sewing machine as you do of your car- you have to feel in complete control of it and get attuned to it's rhythm in order to feel fully secure using it. Time and practice is definitely on your side here! Before you get started on sewing actual seams, you should first practice on scrap fabric until you feel comfortable sewing a straight stitch in one swift move, without having to stop constantly. As you learn how to sew, you will also come across round and angular edges, so practicing them on your machine until you feel comfortable sewing them will save you lots of frustration when you're ready to sew the big stuff. Below we listed 4 practice exercises you can do in order to feel more comfortable using yours sewing machine. They will help you feel more confident with certain stitches and seams that you'll come across quite often as you learn how to sew. 1. Learn to Stitch Along a Fold 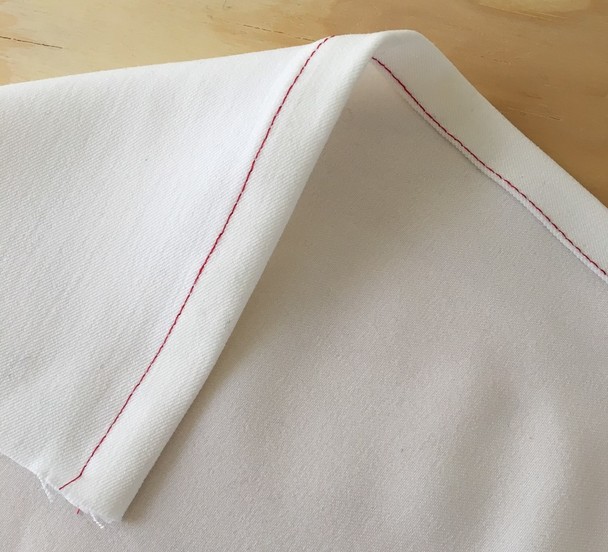 Stitching along a fold will be used quite often on hems and binding. It is actually considerably easier to get accustomed to because the fold line serves as an actual guide for the needle. It does however take a few tries to really get the hang of it. Here's what you can do: 1. Cut a few square or rectangular pieces of plain fabric (preferably muslin if you have it). The best size to practice with will be about 10" x 10" but you can always use a bigger or smaller size, depending on how much fabric you have available.
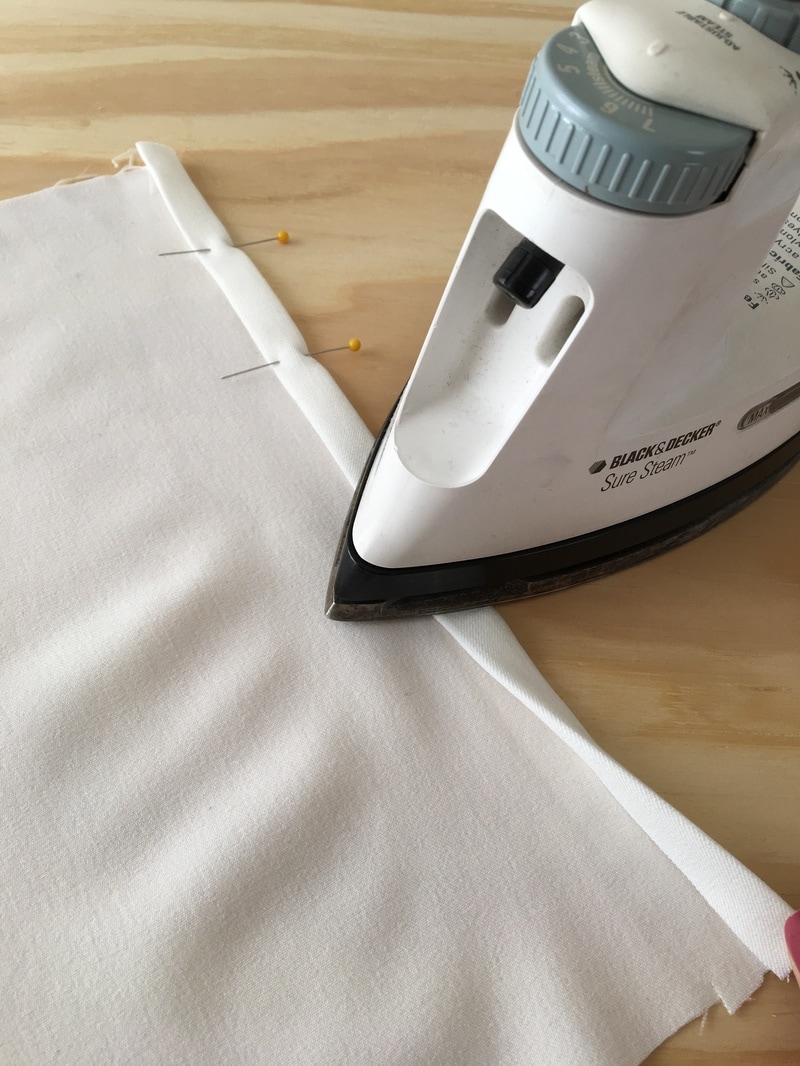
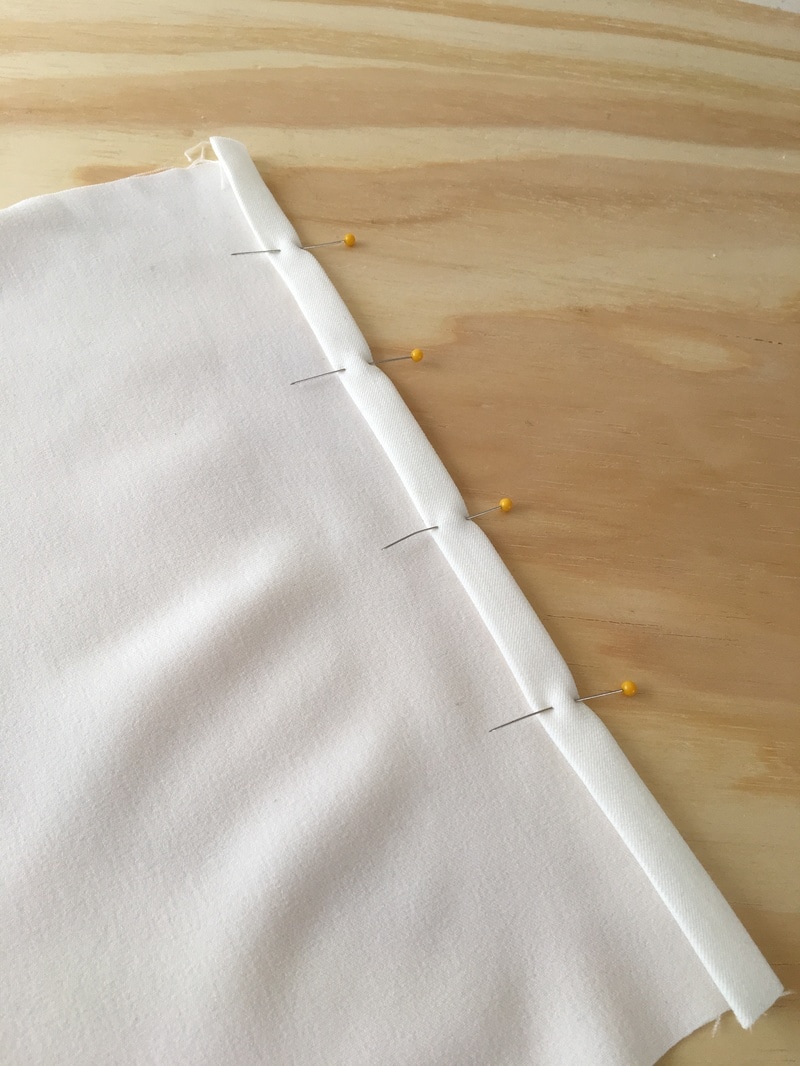
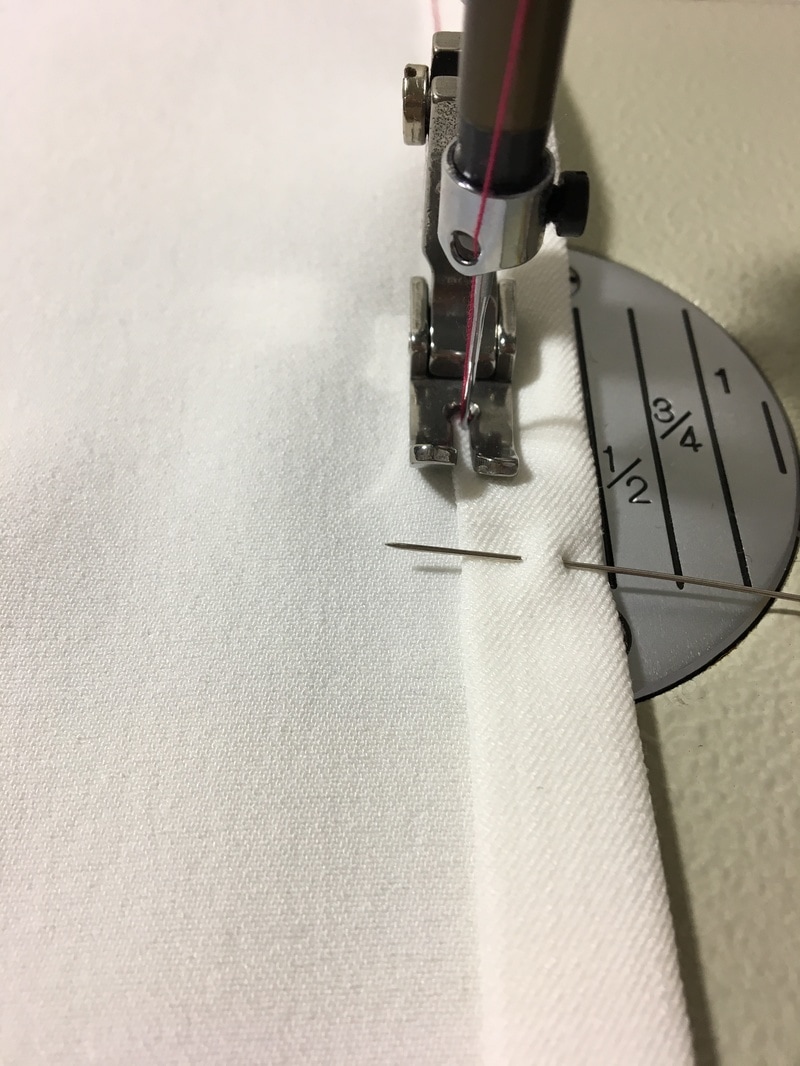
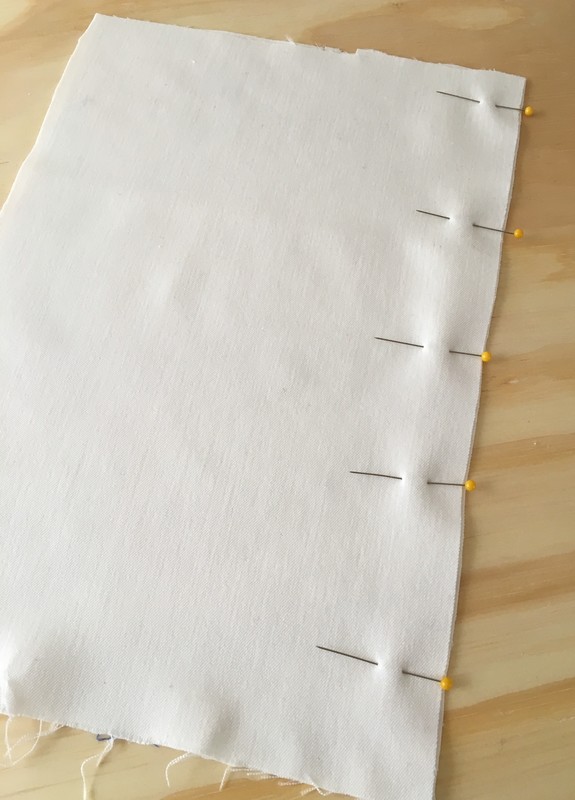
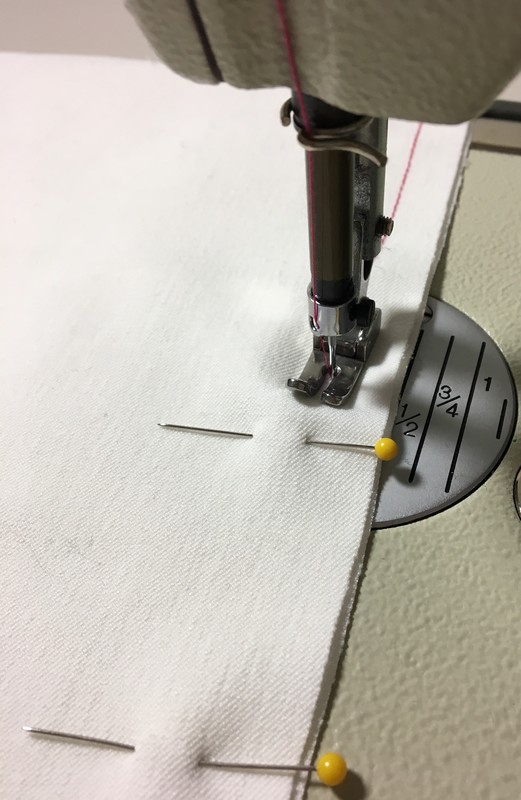
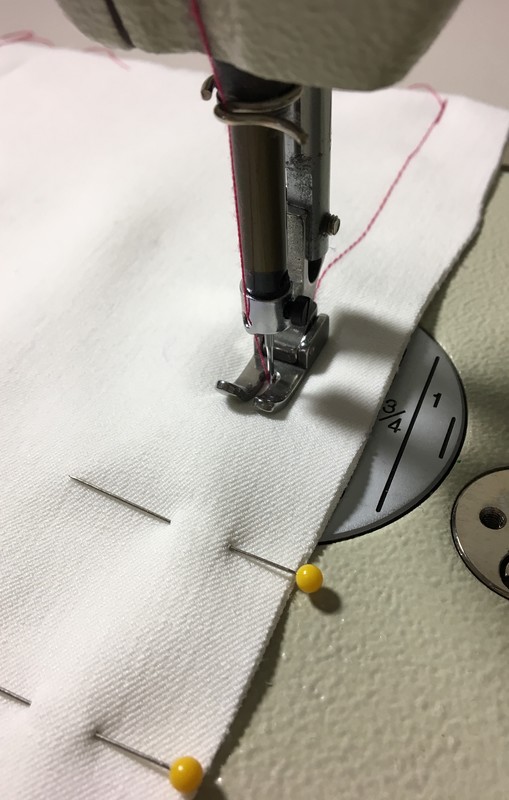
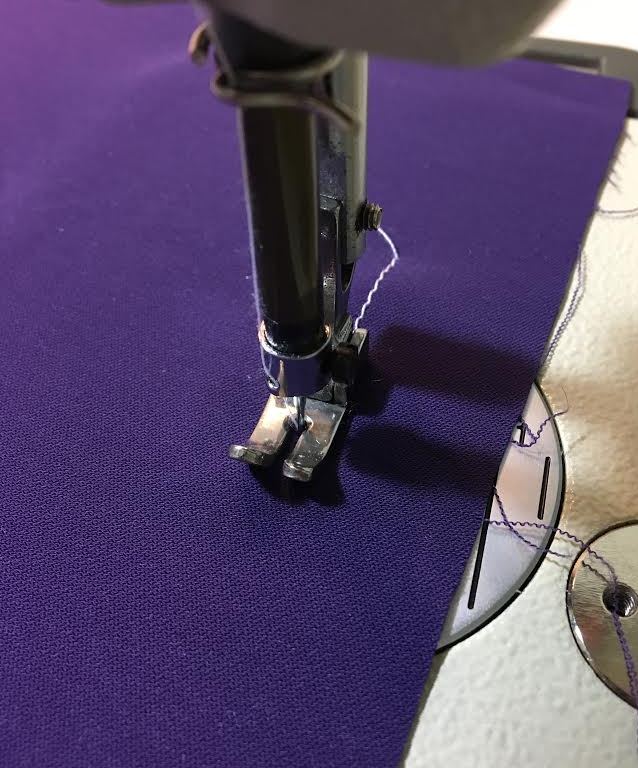
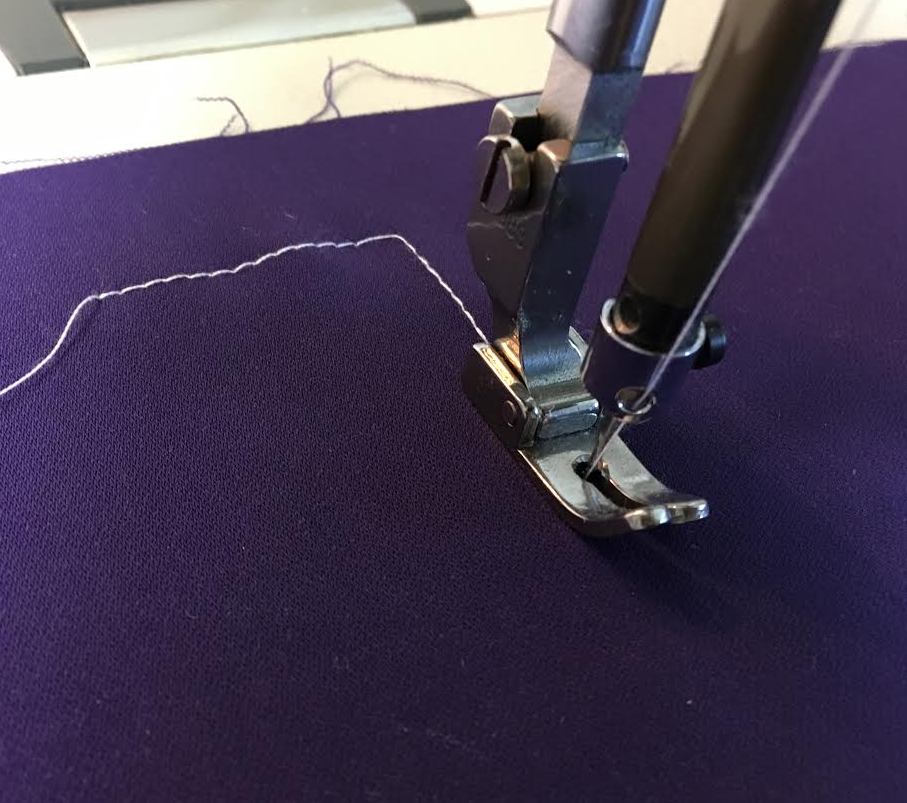
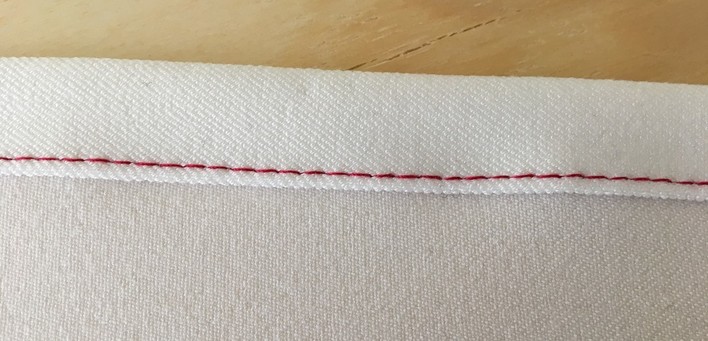 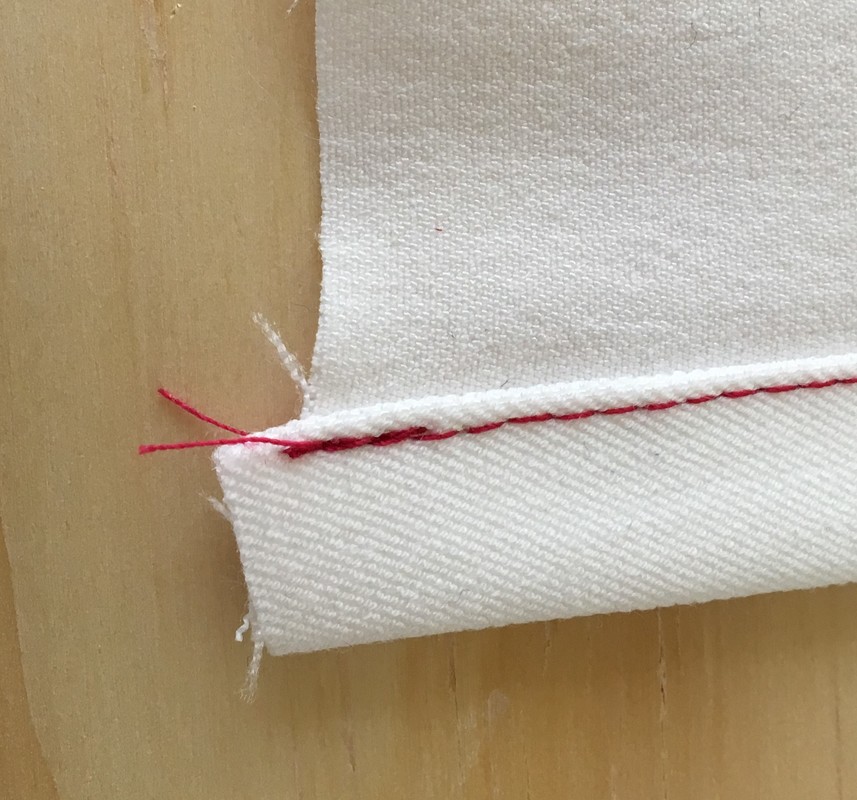 3. Place a few pins horizontally along the fold to hold in in place for stitching. Place the fold under the presser foot of your sewing machine, and insert the needle about a mm down from the fold. Begin to straight stitch using the fold as a guide. Your final stitch should be close to the fold (in our case, about 1 mm) and run perfectly parallel to it. Repeat the process with the rest of your practice fabric until you feel comfortable with sewing along a fold. 4. Practice backstitching on your machine at the beginning and end of each stitch. 2. Learn to follow the seam allowance guide on your sewing machine 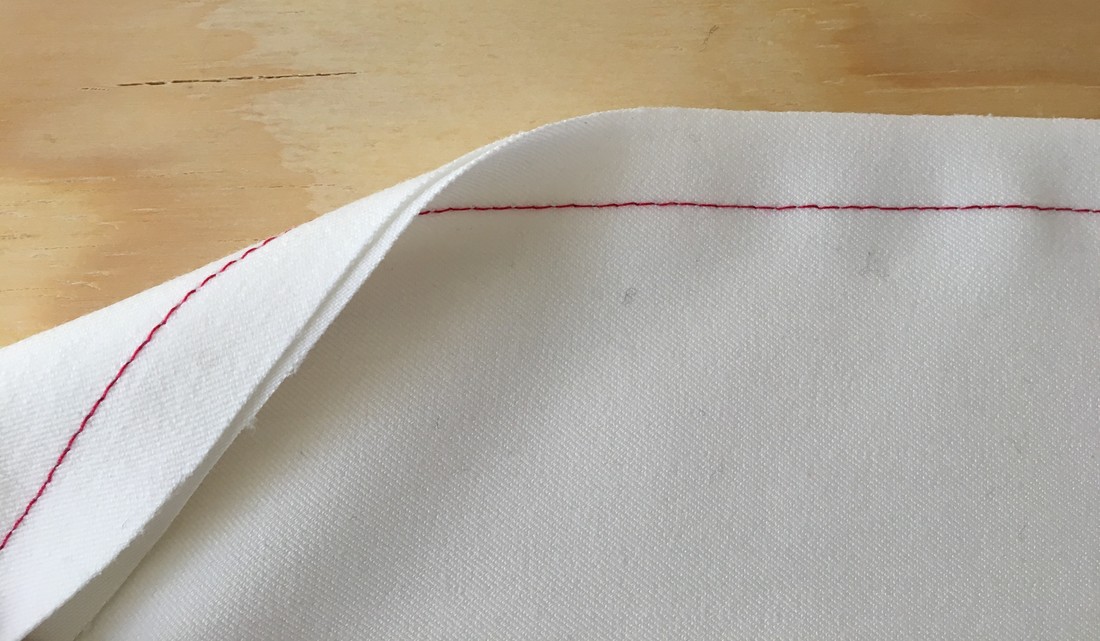 This is perhaps the most important aspect of straight stitching on a sewing machine. Every seam has a seam allowance that needs to be followed accurately. To the right of the presser foot, every sewing machine has a measuring guide marked by vertical dashes. Each dash represents a specific distance from the actual stitch and most commonly divided in 1/4" increments. Most sewing machines have guides that go up to 1" (or even higher in some cases). What you'll need to learn is to follow these guides while you stitch, making sure that the edge of the fabric is always vertically aligned to the proper guide, depending on the seam allowance. As a beginner, this will seem a bit nerve-racking but as you continue to practice, following the seam allowance guides on your sewing machine will become completely habitual- you'll eventually be able do it automatically. Practice Exercise: You will need multiple rectangular or square cuts of fabric.
1. Take two pieces of fabric at a time and imitate a seam by matching the edges and pinning them together.
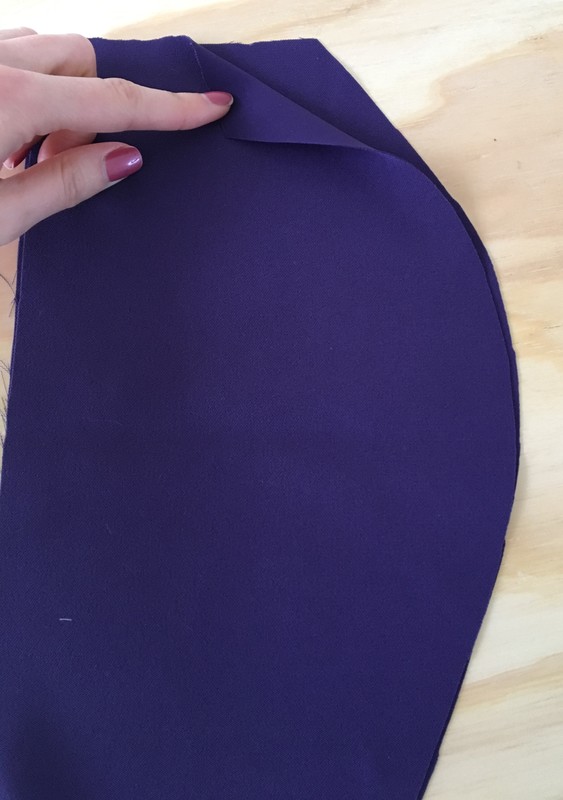
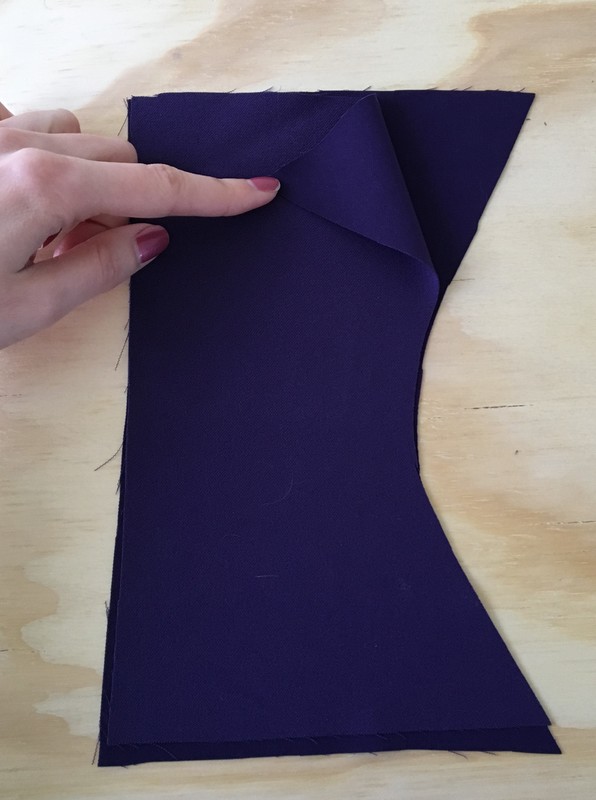
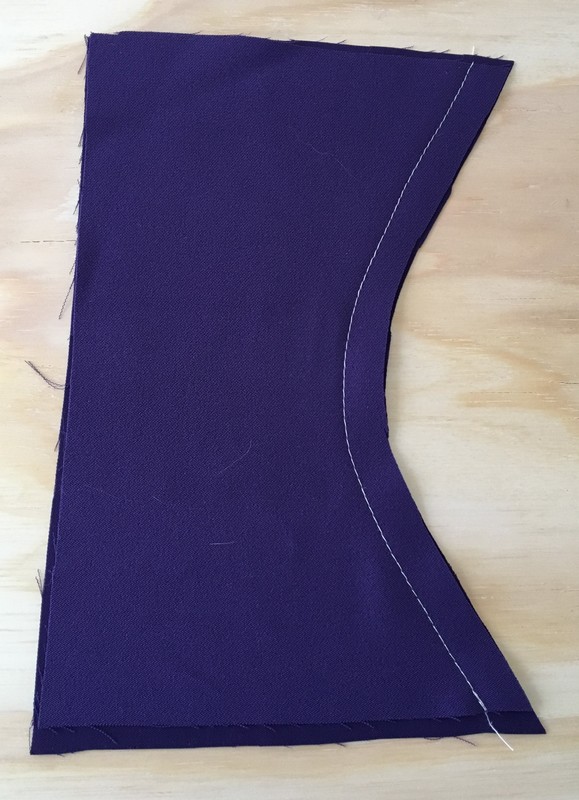
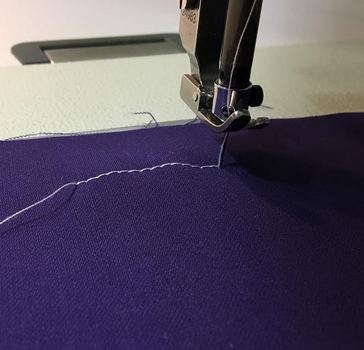
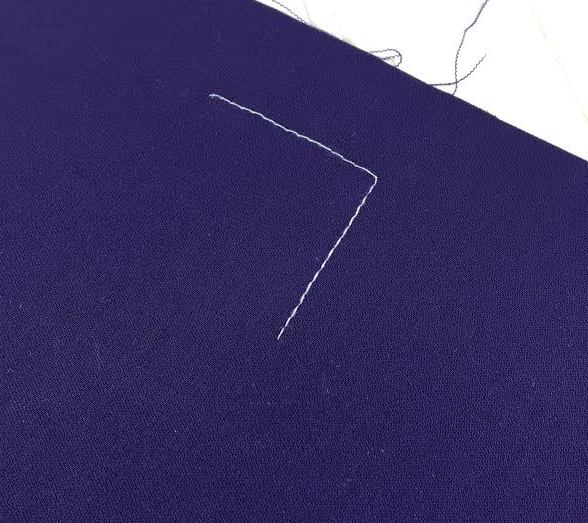
3. Practice round edges and straight edges Sewing is not just a straight stitch game. Because the human body is an organic shape, most garment pieces will require you to switch from a straight to round stitch mid-sewing, so you should be comfortable and prepared to swiftly take on the change. This happens most often when sewing at the side-seams around the waist and hips. Later down the road, as you become a more advanced seamstress, you will need to master sewing along round edges for pants, sleeves, and attaching facings, linings and binding. A straight edge stitch will be necessary when you need to sew a 90 degree angle without interrupting the stitch. It is actually quite easy and we'll show you how! You'll come across a 90 degree angle stitch when sewing around patch pockets, button holes, and various top-stitching styles. Practice Exercise: To practice stitching along round edges, you will need to cut a few pieces of fabric with an inner and outer curve. You should be able to sew around both. Use the images bellow as an example.
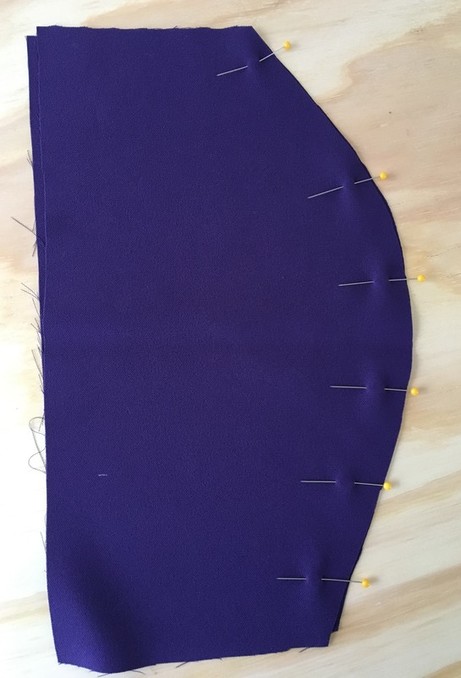 1. Take two pieces of fabric with the identical outer curve and pin the two layers together along the curve as you would on a regular straight seam.
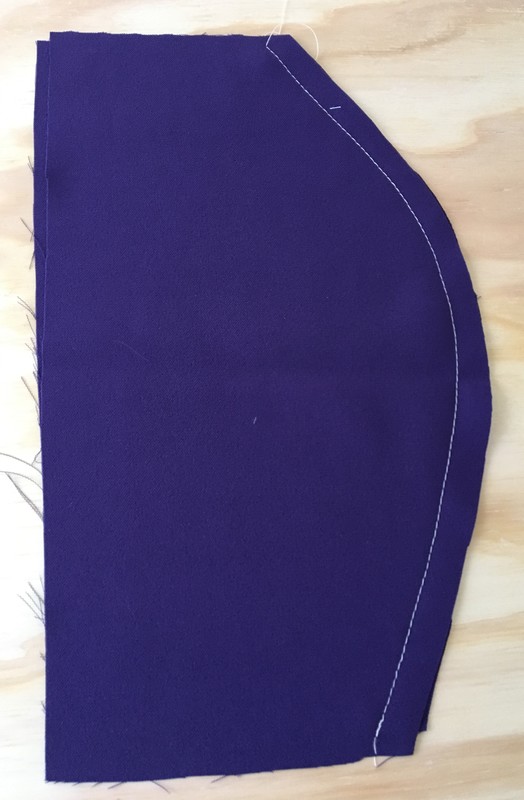
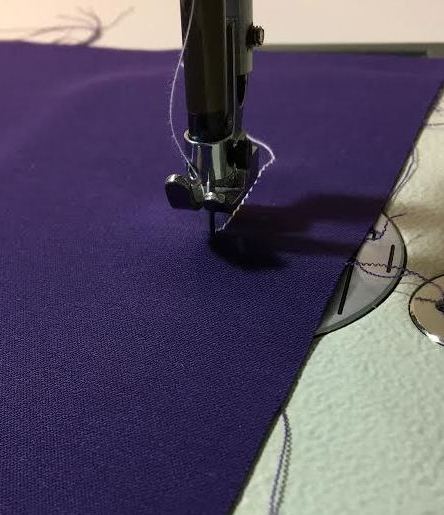
2. Practice stitching this curve smoothly at 1/2" seam allowance. Your final result should be a smooth curve at a consistent seam allowance throughout. Practice sewing inner curves: 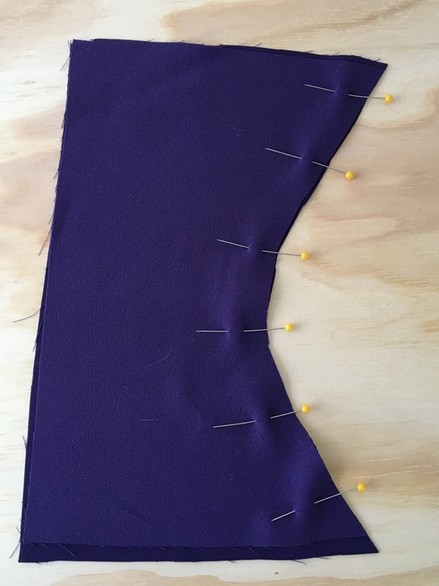 1. Pin two layers of an inside curve together horizontally as you would on any regular straight seam.
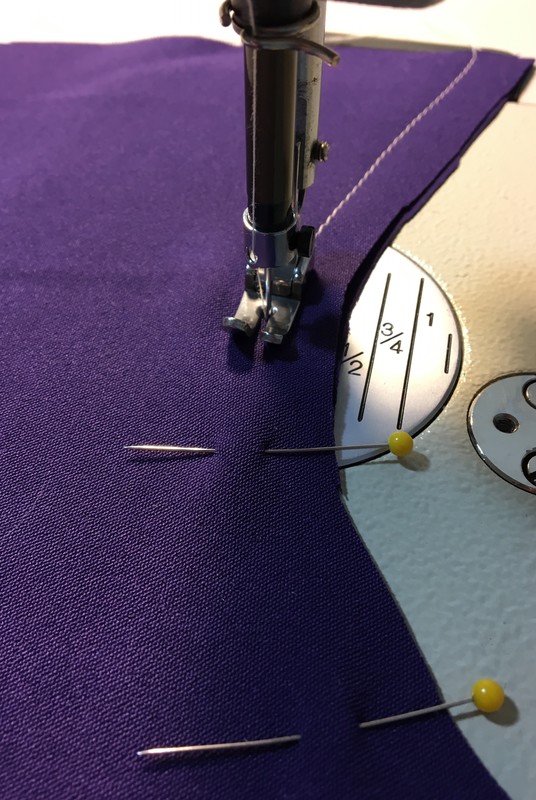
Practice a straight angle stitch: 2. Stitch on your sewing machine along this inner curve while consistently following the seam allowance guide on your sewing machine. Just like on an outer curve, the final stitch should be smooth and maintain the same seam allowance throughout.
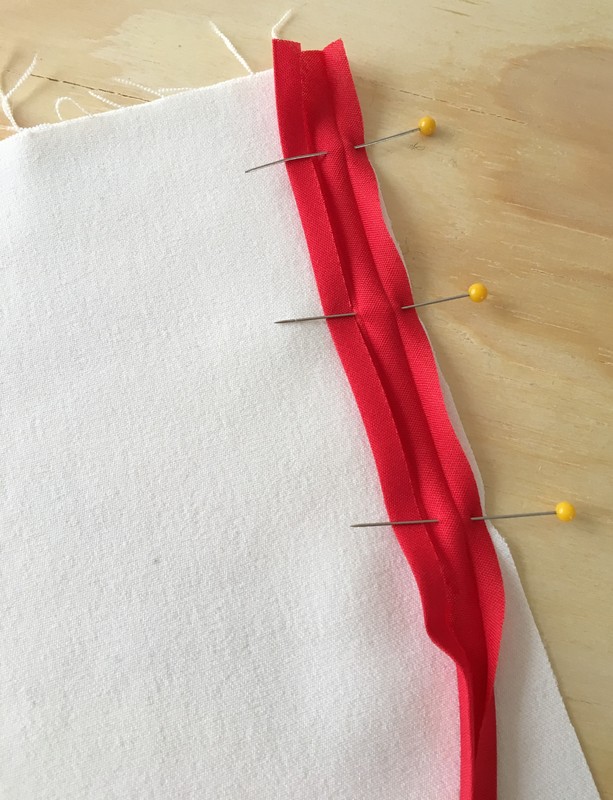
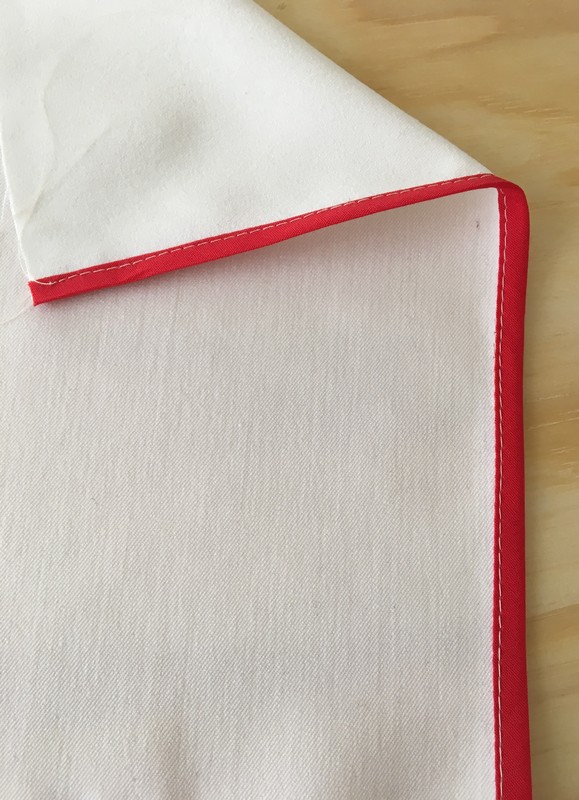
Use this method for any angular stitching. 4. Stitching along a binding's fold Binding will probably become your go-to for finishing armholes and necklines, so it is imperative that you truly master how to sew a binding in. Finishing raw edges with a binding requires stitching following both inside and outside fold lines. You've already practiced following the outside line of a fold, so it is only natural that you should get used to sewing along the inside of a fold also. Most of the time, this is quite simple because you can use the fold line as a guide. However, when finishing raw edges of necklines and armholes you'll find yourself needing to stitch a binding along a very round curve- that's when having some practice beforehand will really come in handy. Practice Exercise: For this exercise you will need a piece of scrap fabric and some double folded binding. To challenge yourself even further, use the 1/4" double fold binding from your local fabric/crafts store. 1/4" binding is very commonly used for most dresses and sleeveless blouses as well as seam finishes, so getting used to working with it early on will save you lots of frustration later down the road.
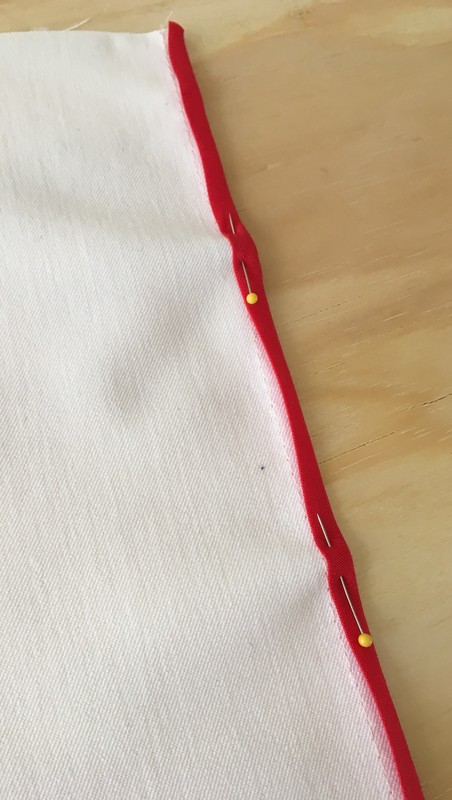
1. Open the folded binding so that the inside of the fold is facing you, and pin the binding to the fabric so that the raw edges are aligned as shown bellow. Pin horizontally for more stability and easy removal during sewing.
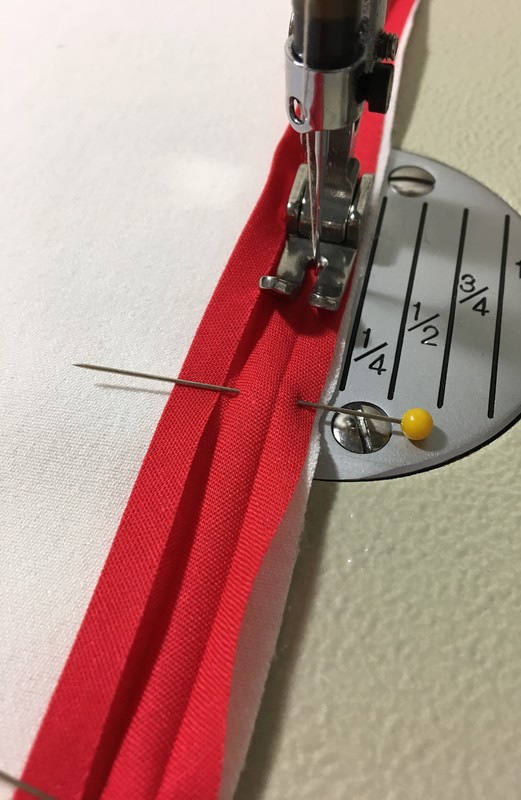
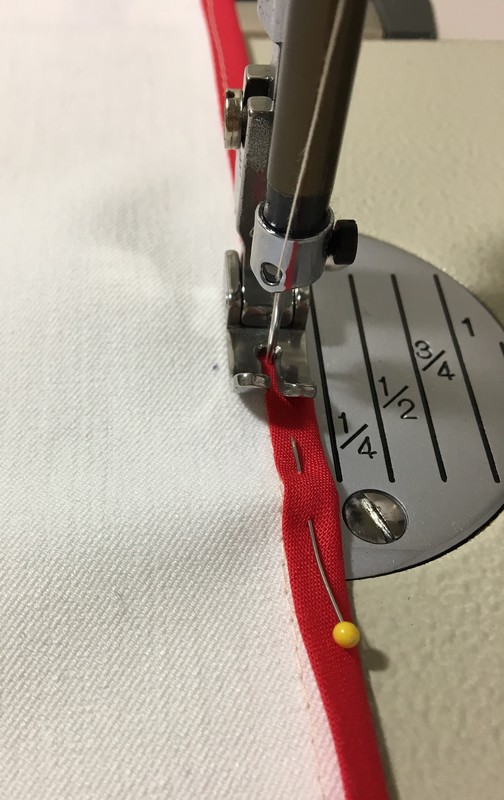
2. Align the edge under the presser foot so that the needle starts right on top of the inner fold of the binding. Begin stitching on top of this inner fold, removing every pin as you approach it. DO NOT SEW OVER THE PINS!
3. Fold the binding in its place over the raw edge of the fabric to enclose it. Pin for sewing.
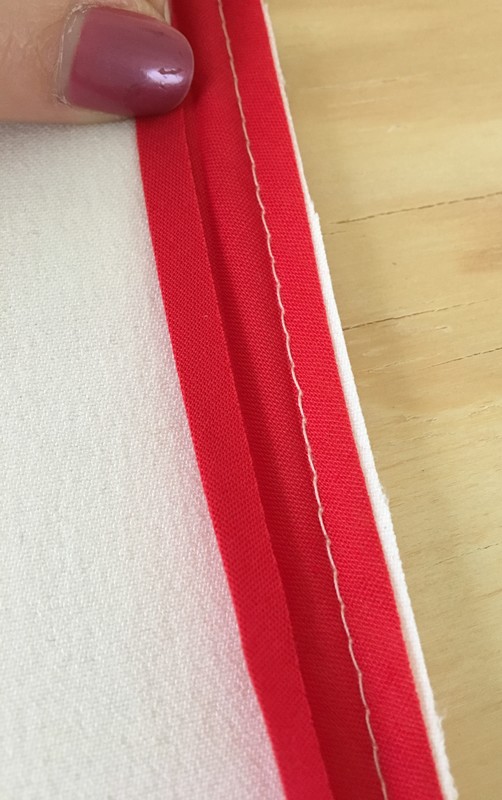
4. Stitch the binding in place at about 1 mm up from the binding's fold line. Use this fold line as a guide for straight stitching. Practice Tips for sewing binding along curved edges (necklines and armholes) You will need to cut a few pieces of fabric with an inner curve, replicating and armhole or neckline. For round edges, use 1/4" double folded binding as this is the easiest to sew along curved edges. Tip 1: As you're sewing along the really curved edge, stop a few times to readjust your presser foot or fabric so that the stitch is following the curve accurately. Tip 2: Don't forget that even around the curve, the raw edges of the fabric should match the raw edge of the binding perfectly. Tip 3: Once your binding is sewn to enclose the raw edges, fold the binding once more towards the inside of the garment so that the binding doesn't show on the outside. Stitch one more time along the binding's fold using it as a guide. Tip 4: Always iron the binding application after sewing for a clean, professional finish! 
2 Comments
Praveen
9/23/2021 04:52:39 am
Hey there is more informative notes in your blog, which is very useful to me. Form more details regarding <a href="sewingmachinebazar.com">sewing machine dealers in chennai</a> visit this page. Thank you. Leave a Reply. |
The Blog:A journey into our design process, sewing tutorials, fashion tips, and all the inspiring people and things we love. 
Doina AlexeiDesigner by trade and dressmaker at heart. I spend most of my days obsessing over new fabrics and daydreaming new ideas. 
Sadie
Executive Assistant & Client Relations Manager Archives
November 2019
Categories
All

|

-
Sewing Tutorials
-
Basics
>
- Aligning Pattern Grainlines To Fabric
- Preparing Fabrics For Sewing
- Pinning Sewing Patterns To Fabric
- Placing Sewing Patterns On Fabric For Cutting
- Rotary Cutters or Fabric Scissors?
- Cutting The Sewing Patterns
- What Are Notches And How To Use Them In The Sewing Process
- Transferring Notches From Pattern To Fabric
- Transferring Seamlines to Fabric
- Staystitching
- Backstitching: A Complete Guide
- Hand Basting: A Complete Guide
- Sewing Continuous Bias Binding
- Darts >
-
Sewing Seams
>
- The Basics Of Seams And Seam Allowance
- How To Sew A Straight Seam
- Sewing Curved Seams
- Sewing Corner Seams
- Trimming And Grading Seam Excess
- Notching/Clipping Seam Allowance for Tension Release
- Sewing Topstitched Seams
- Sewing Corded Seams
- Sewing A Slot Seam
- Sewing A Gathered Seam
- Sewing Bias Seams
- Sewing Seams With Ease
- Sewing Seams With Crossing Seamlines
- Sewing Unlike Fabric Seams
- How To Iron Seams: Ironing Tools And Conventions
- Sewing With Knit Fabrics
- Understanding Stitch Length And Tension
- Sewing Unique Fabric Seams
-
Seam Finishes
>
- Seam Finishing Techniques - Overview
- Applying A Pinked Seam Finish
- Applying A Bias Bound Seam Finish
- Serging And Zigzag Seam Finishes
- Sewing A Self-Bound Seam Finish
- Sewing A French Seam Finish
- Sewing A Hong Kong Seam Finish
- Sewing A Mock French Seam Finish
- Sewing A Turned-and-Stitched Seam Finish
- Sewing Overcast Hand-Applied Seam Finishes
- Sewing A Flat Felled Seam
- Sewing A Hairline Seam Finish
-
Hem Finishes
>
- Garment Hem Finishes: Overview
- Sewing A Double Fold Hem Finish
- Sewing A Single Fold Hem Finish
- Sewing Bound Hem Finishes
- Sewing An Exposed Double Layer Bound Hem
- Sewing A Folded-Up Bound Hem with Pre-folded Binding
- Sewing A Hong Kong Hem Finish
- Sewing A Band Hem Finish
- Sewing A Bias Faced Hem Finish
- Sewing A Twill Tape Hem Finish
- Sewing A Rolled Hem Finish
- Sewing A Shaped Hem Facing
- Using Fusible Hem Tape And Webbing
- Finishing A Lace Fabric Hem
- Finishing A Leather Hem
- Sewing Faced Hem Corners
- How To Finish Lining At The Hem
- Finishing Fabric Corners by Mitering >
- Interfacing A Hemline: Lined And Unlined Examples
-
Sewing Pockets
>
- Curved Patch Pocket With Flap
- Unlined Square Patch Pockets
- Lined Patch Pockets: Two Ways
- Extension On-Seam Pockets
- Separate On-Seam Pocket
- Front Hip Pockets
- Bound Double Welt Pocket
- Double Welt Pocket With Flap
- Self-Welt Pocket (Using Single Fabric Layer)
- Slanted Welt Pocket (Hand-Stitched)
- Faced Slash Pockets: Overview >
-
Sewing Zippers
>
- Sewing Zippers: General Information
- Sewing A Centered Zipper
- Sewing A Lapped Zipper
- Sewing An Invisible Zipper
- Sewing A Fly Front Zipper
- Sewing A Closed-End Exposed Zipper (No Seam)
- Sewing An Exposed Separating Zipper
- Sewing Hand Stitched Zipper Applications
- Sewing A Zipper Underlay
- Sewing A Placket-Enclosed Separating Zipper
- Sleeveless Finishes >
-
Neckline Finishes
>
- Sewing A Neck Shaped Facing
- Sewing An All-In-One Neck Facing
- Neck And Garment Opening Combination Facings >
- Sewing A Bias Faced Neckline Finish
- Sewing A Band Neckline Finish
- Bound Neckline Finishes: Overview >
- Sewing A Semi-Stretch Strip Band Neckline
- Ribbed Neck Band And Classic Turtleneck
- Decorative Neckline Finishes >
- Finishing Facing Edges >
-
Extras
>
- A Complete Guide on Interfacing
- Sewing Bound Spaghetti Straps
- Sewing Spaghetti Straps To A Faced Neckline
- Sewing Ruffles: Overview
- Patterning And Sewing A Circle Ruffle
- Sewing A Gathered Heading Ruffle
- Sewing Double Layer Gathered Ruffles
- Sewing A Gathered Ruffle Into A Seam
- Sewing A Gathered Ruffle To A Fabric Edge
- Sewing A Fabric Surface Slit
- Sewing A Slit Seam
- Hand-Applied Straight Stitches
- Hand-Applied Blind Stitches
- Hand-Applied Overedge Stitches
- Hand-Applied Tack Stitches
- Hand-Applied Decorative Stitches
-
Basics
>
- Custom Bridal
- Custom Apparel
- About
- Blog


 RSS Feed
Services |
Company |
|
