|
Tassels are those cute little trims that will probably never go out of style. They are applicable just as much in apparel as they are in home decor, accessory and jewelry design. Tassels can be used individually or added to continuous trims and fabrics. They can also be beaded and are available in a variety of lengths, densities and materials. It is perhaps this functional and aesthetic versatility that allows tassels to be incorporated into just about any project, adding a playful and elevated quality to a garment or accessory. 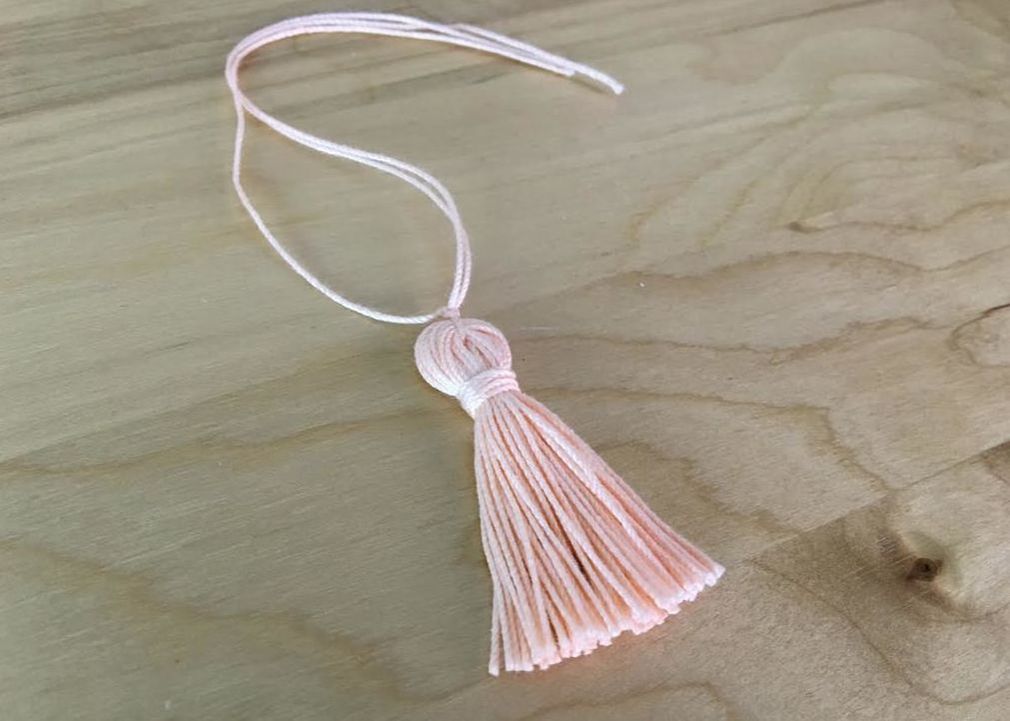 As mentioned, various tassel styles are available on the market as individual pieces or incorporated into decorative trims and novelty fabrics. Deciding on which tassel style to use really depends on the project at hand. In apparel, you should particularly pay attention to end-use, especially the care of the final clothing item that the tassels are added to. If you prefer the final garment to be machine washable, use polyester tassels as opposed to silk and examine them carefully to see how they are constructed- Will the tassels withstand the friction of a washing machine without coming apart? If you are having difficulty finding the desired color or style at your local craft/fabric stores (which often happens), or you consider the construction of the tassels you found to not be durable enough for your particular project, you can actually make your own tassels by hand. This is not difficult to do and allows you control over just about every aspect of the tassel style, from color to thickness, density, material and beyond. In the tutorial below, we'll teach you a tassel-making method that can withstand regular washing machine cycles without unraveling or incurring structural damage. Using the method described in the step-by-step guide to follow, you will be able to easily control the thickness and density of the tassel without the use of any special tools. Choosing the tassel material: What kind of yarn/thread should you buy? End use is an important deciding factor for what kind of tassel material you should purchase. When looking for a more luxurious feel, silk yarn or thread will probably work best by providing for a smoother, nicely-draping tassel. However, silk should not be machine washed which means a silk tassel can not withstand a regular washing machine cycle causing damage to the tassel. For that reason, use silk yarn or thread to construct tassels used for jewelry, accessories or apparel that is dry clean only. Machine washable fiber content for machine washable yarn includes: cotton, polyester, acrylic, nylon etc. These are all great options for tassels that can eventually be machine washable. Polyester is probably the best and most readily available option as it allows for a durable material yet maintains a more draped, sleek appearance. If you are unsure where to start, take a trip to your local fabric or craft store and stroll through the yarn section. There are a variety of different colors, weights and materials to choose from. Almost all yarn styles will make great tassels. However, the best tassels are made of yarn that has a slight sheen and sleekness to it. In addition, a tightly woven yarn, like that used for crocheting, has a better drape and higher density which gives the tassel a more flowy, draped structure. A sleeker, heavier yarn will also prevent the tassel strings from sticking together which otherwise compromises the appropriate structure and playful drape of a tassel. If you've never tired your hand at making a tassel before, you should get a few different types of yarn and experiment with each. This is truly the best way to find the perfect tassel material for your specific project. Follow the step-by-step sewing guide bellow to construct a durable, machine washable tassel by hand! How To Make a Durable, Washing Machine-Safe Tassel By Hand. 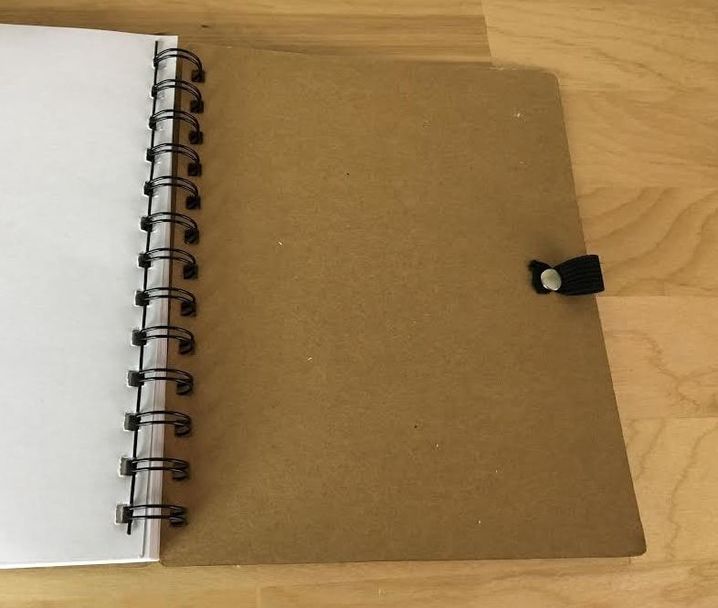 Choose a sturdy, flat surface you can use to form the structure and thickness of the tassel. In this tutorial, we're using the cardboard cover of a notebook. You can use anything similar to this in structure and thickness as long as it is strong enough to withstand wrapping the yarn around it steadily (as you'll see in the steps to follow). If you have a regular clipboard, it may be the best option to use. A clipboard, especially a plastic one, is thin and strong enough to withstand tassel construction, while the slippery surface allows for easy yarn removal during the process. 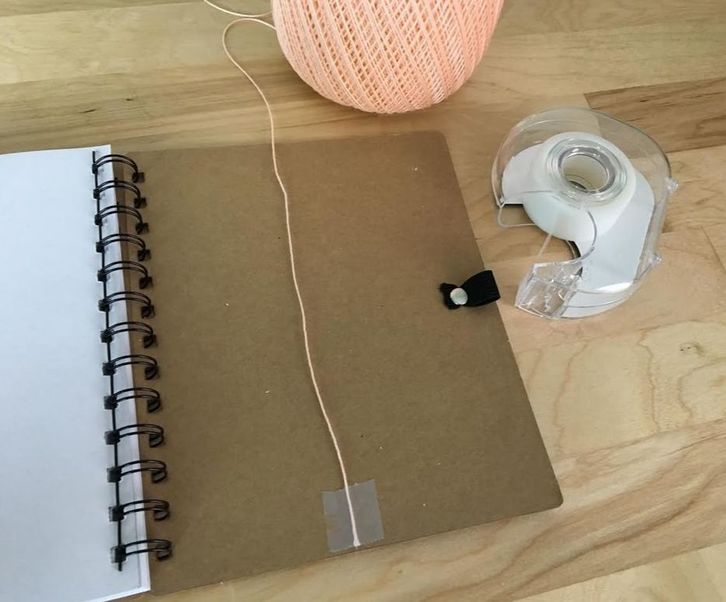 1. Using tape (scotch or masking tape), attach the yarn end to the bottom of the notebook cover as shown above. In this tutorial, a medium weight, tightly-woven crochet yarn is used to construct the tassel.  2. Wrap the yarn around the notebook cover evenly and tightly, but not so tight that you wont be able to remove/slide the yarn layers off the cardboard surface later.  3. Continue wrapping the thread around smoothly and evenly, overlapping each yarn layer, until you arrive at half the desired tassel thickness. As you'll see form the steps to come, one side of the notebook cover comprises just half of the final tassel's total thickness. Once the desired thickness is achieved, cut the yarn at the bottom of the yarn layers as shown above. 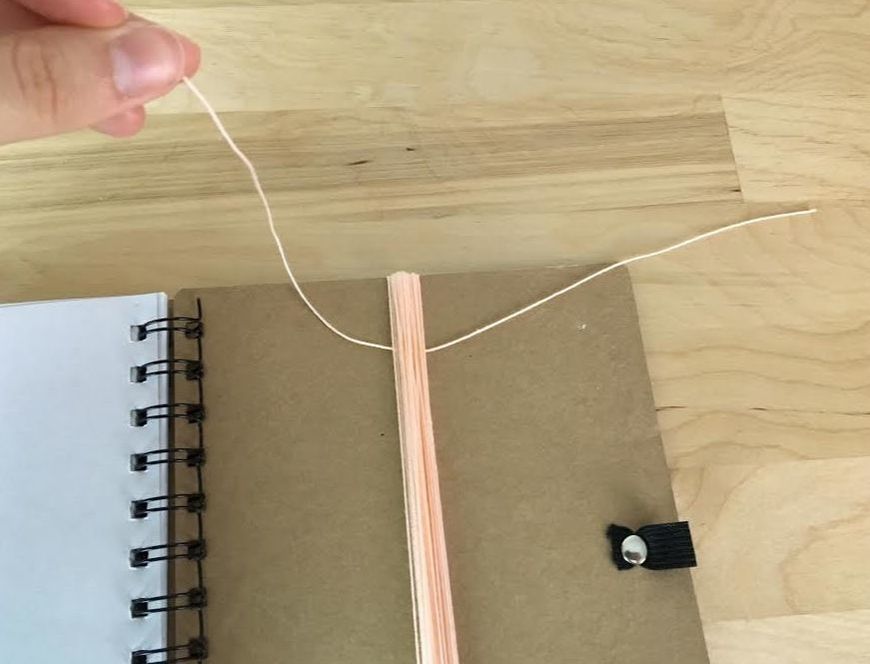 4. Cut a piece of the same yarn (about 10-14" in length) and slide it in between the yarn layers and cardboard cover as shown above. 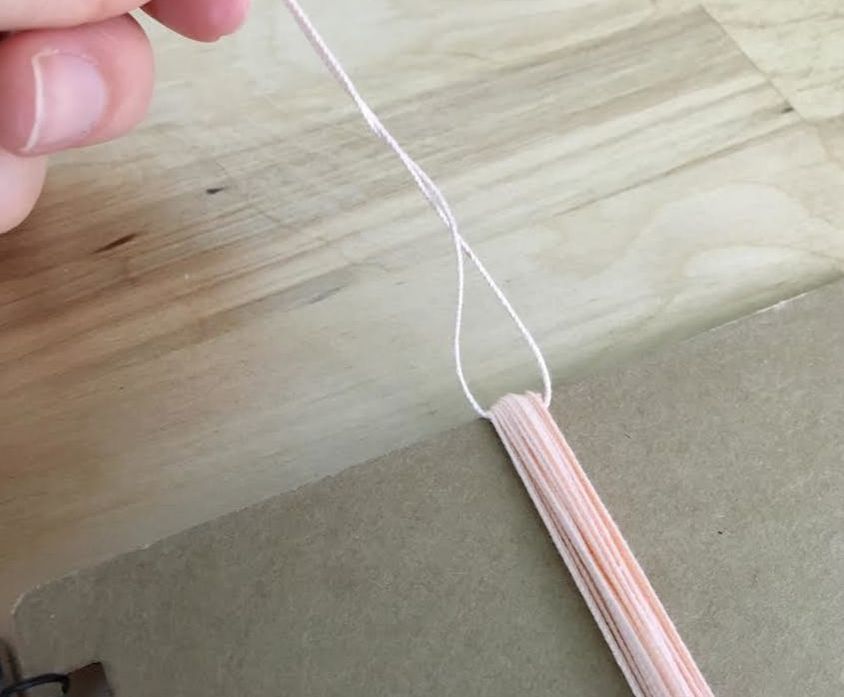 Next, slide the piece of yarn all the way to the top, at the edge of the cardboard cover as shown above. This will mark the top end of the tassel while also keeping the yarn layers correctly in place once they are removed from the cardboard cover. 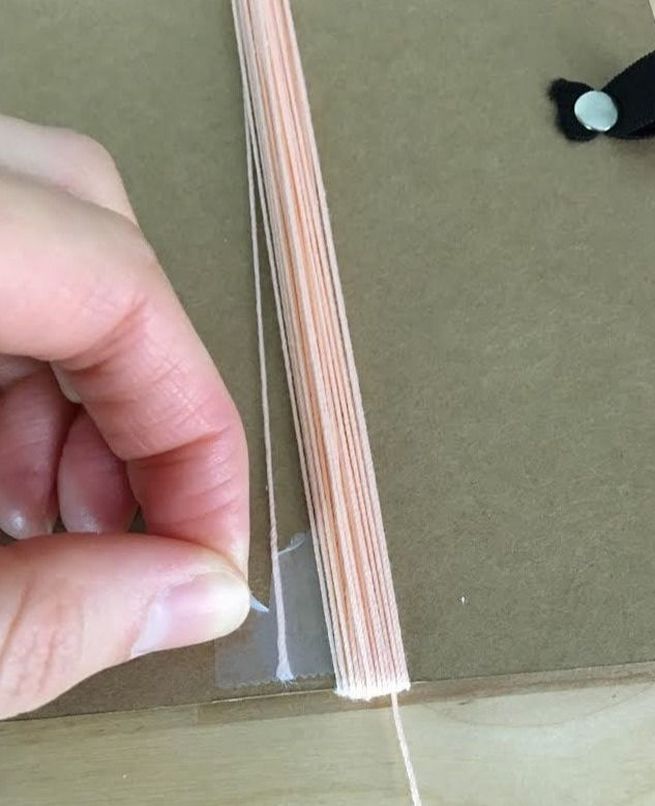 5. Remove the scotch tape at the bottom to release the yarn layers from the notebook cover. 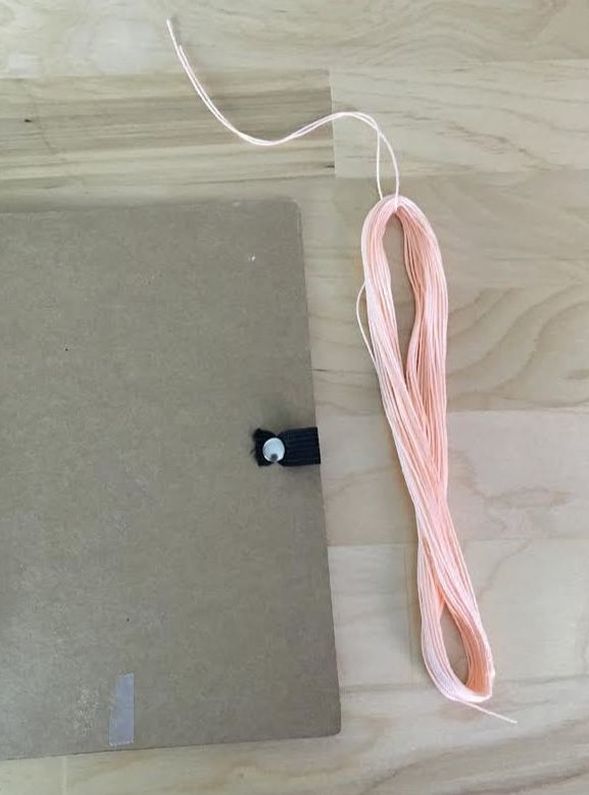 6. Carefully slide the yarn layers off the cardboard cover, making sure to keep the yarn smoothly in place. 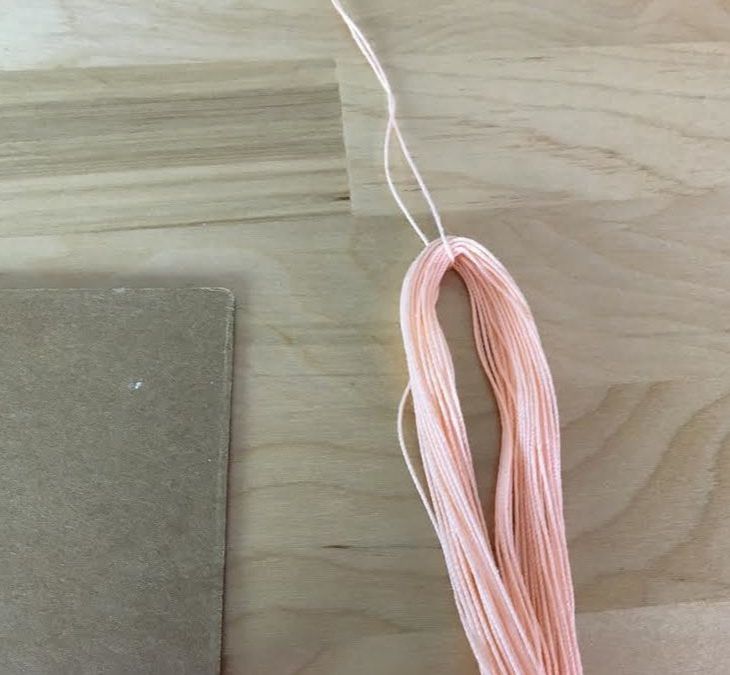 The loose piece of yarn at the top should keep the yarn strings together in an even, smooth fashion. This piece of yarn will also become a functional part of the tassel by serving as a means for attachment once the tassel is complete. 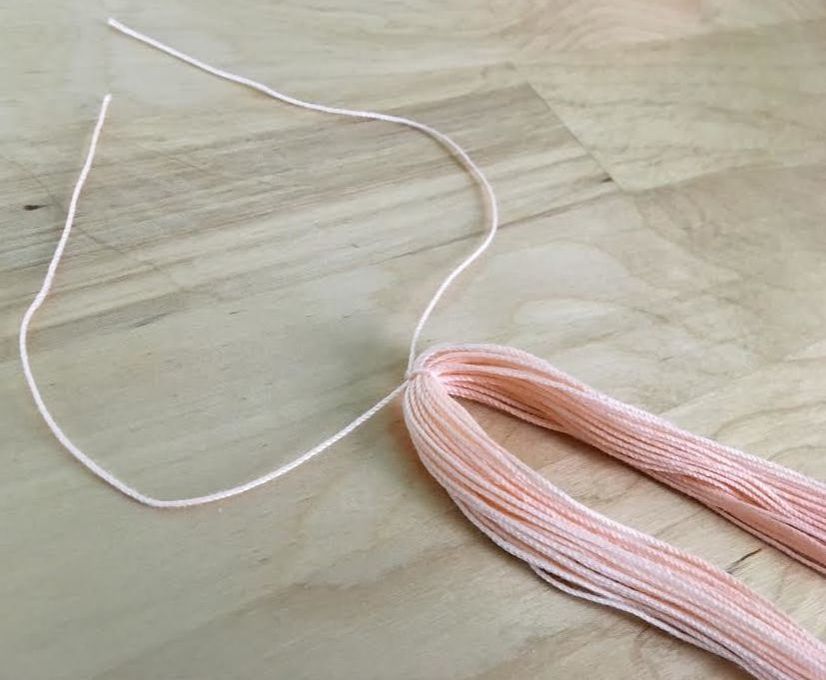 7. Tie the loose piece of yarn around the tassel layers twice for a tight, durable fit.
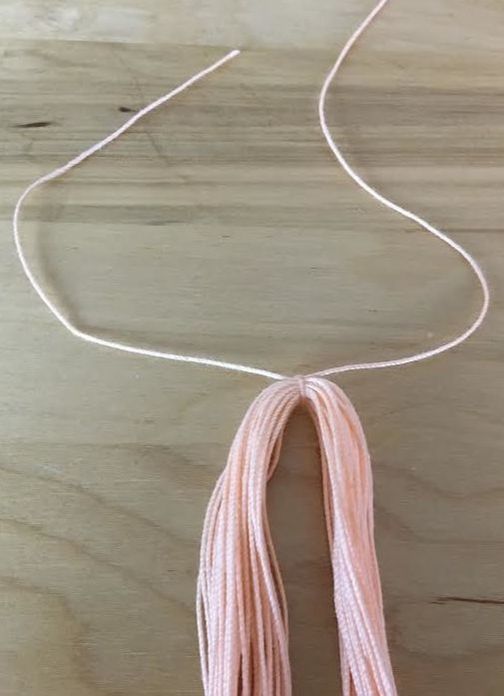
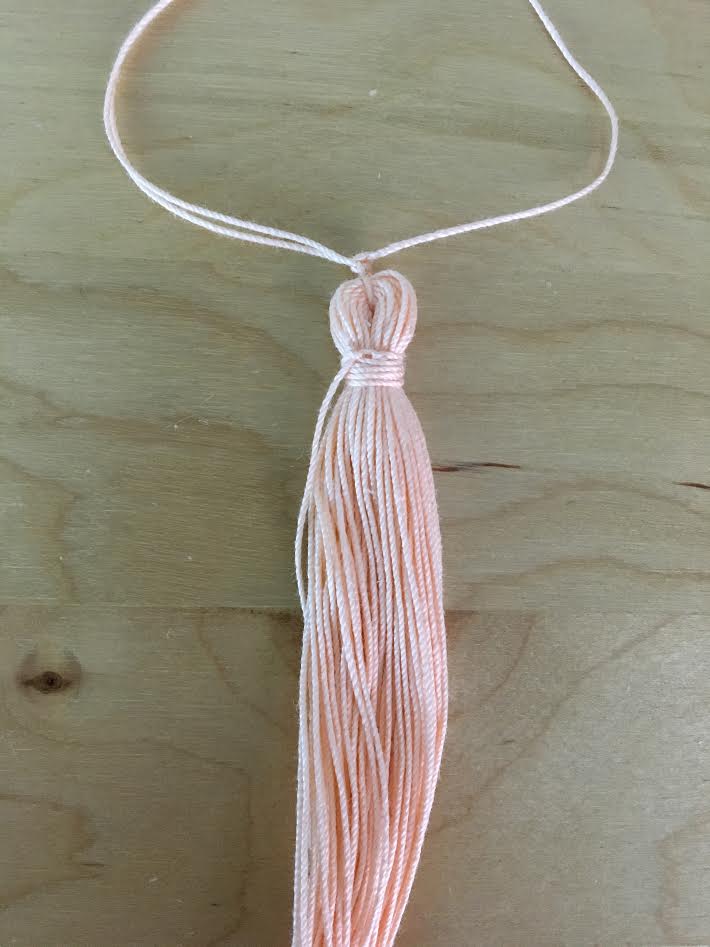
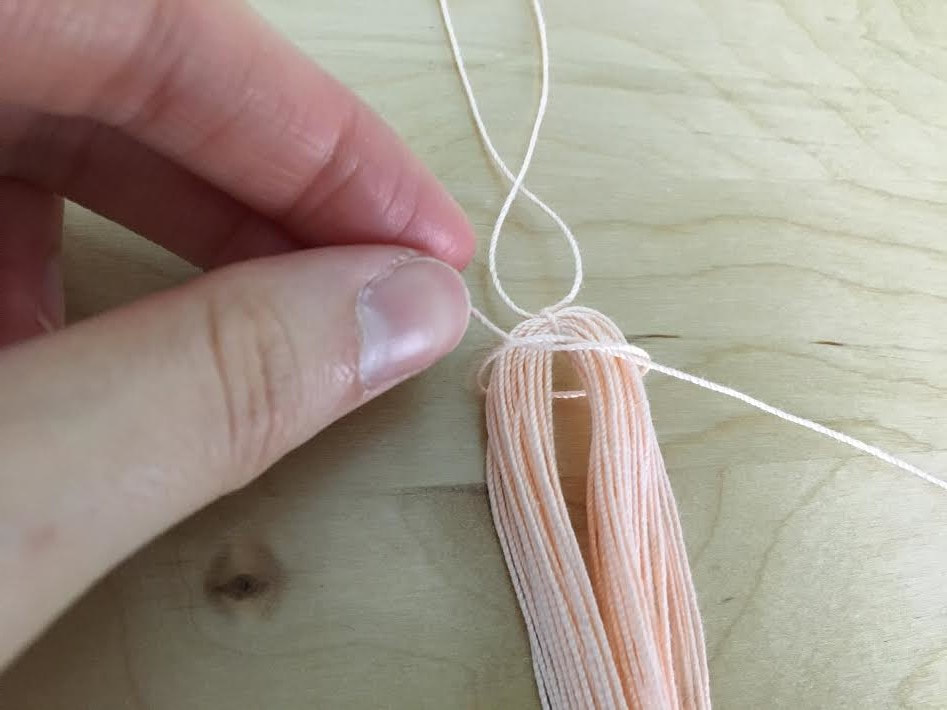 9. Keeping the piece of yarn in the alignment described in Step 8 above, knot it around the yarn layers of the tassel twice.  The yarn should be knotted tightly, maintaining one end longer than the other as shown. 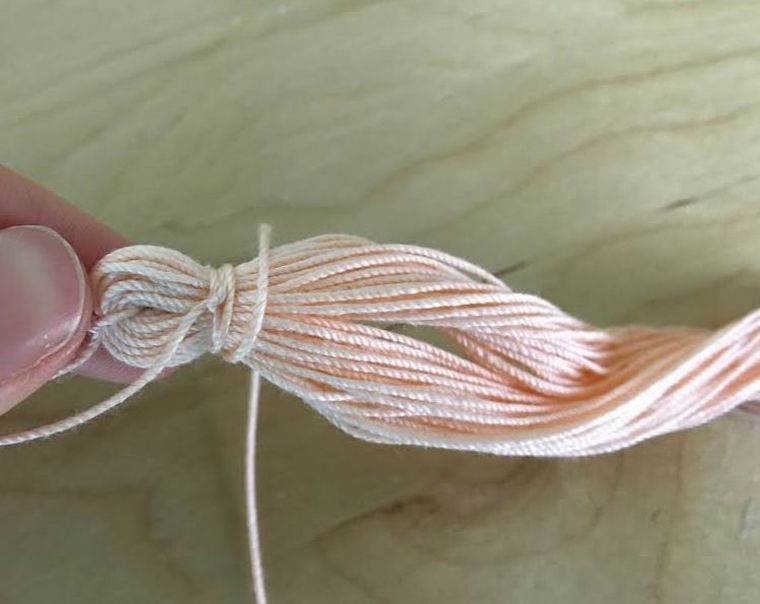 10. Holding the top of the tassel in your hand, wrap the longer end of the yarn tightly around the tassel string layers moving down while maintaining a smooth, even alignment. 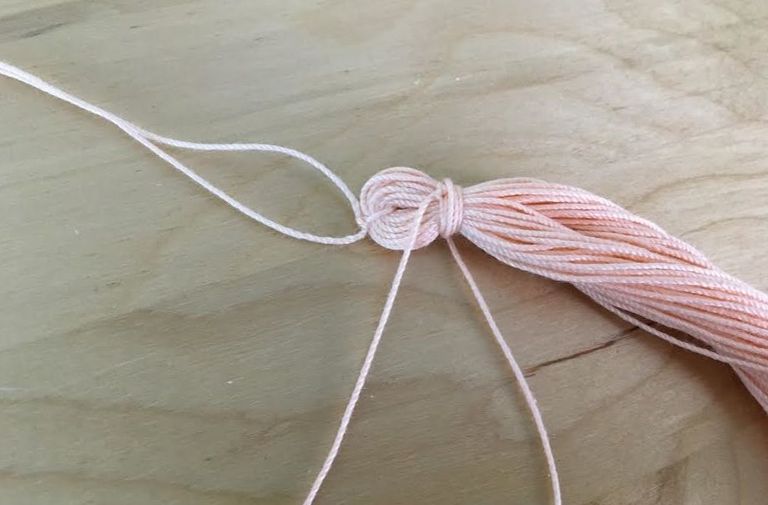 Wrap the string around as many times as you wish depending on the tassel look you'd like to achieve. In this tutorial, the yarn was wrapped around about 5 times creating 5 even layers. In the same even fashion, wrap the yarn back up, directly on top of the first layers, arriving back at the knot and closer to the other string end. 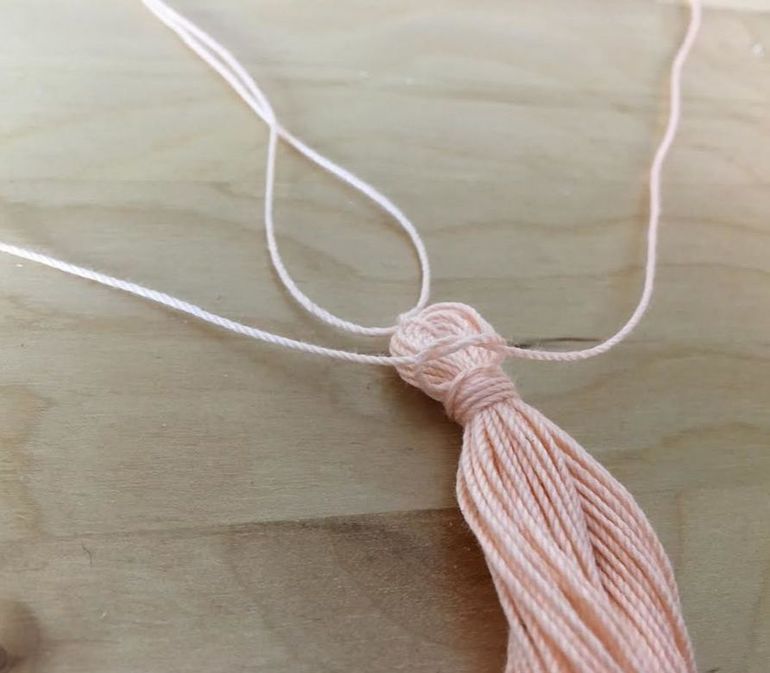 11. Double-tie both ends of the yarn/strings together tightly again. 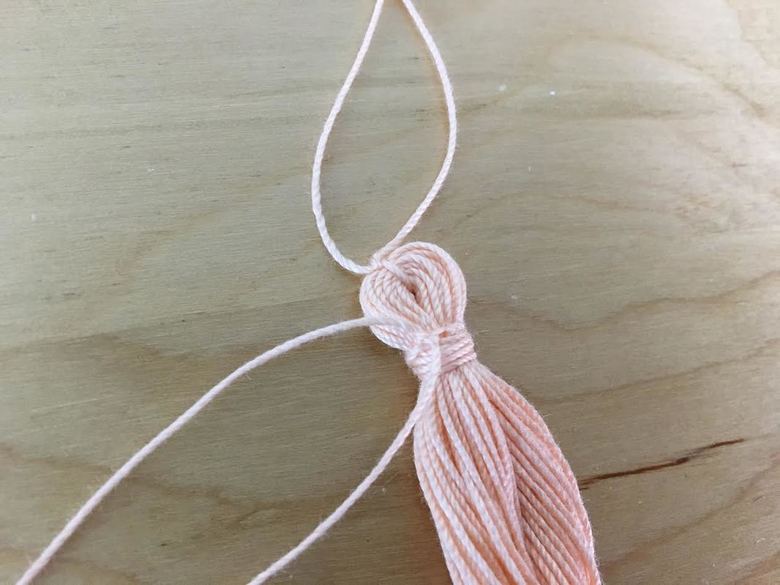 Two knots should be enough to maintain the tassel's durability without adding too much bulk.
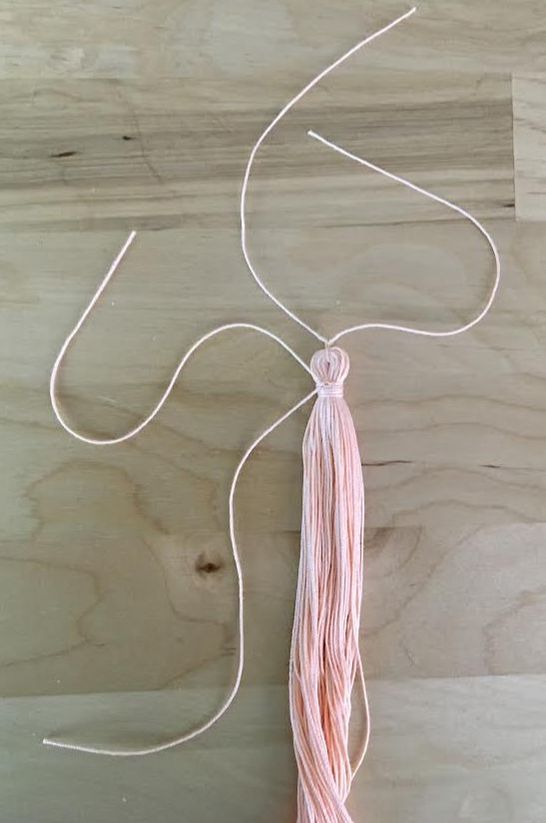
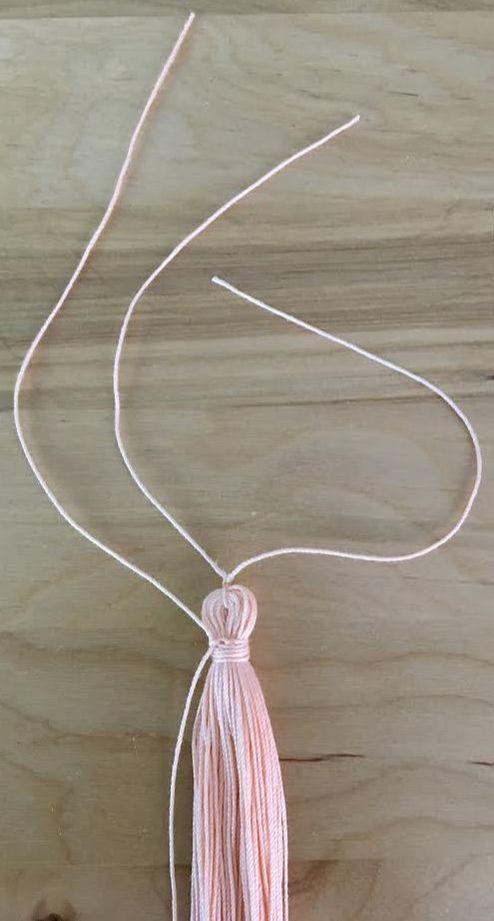
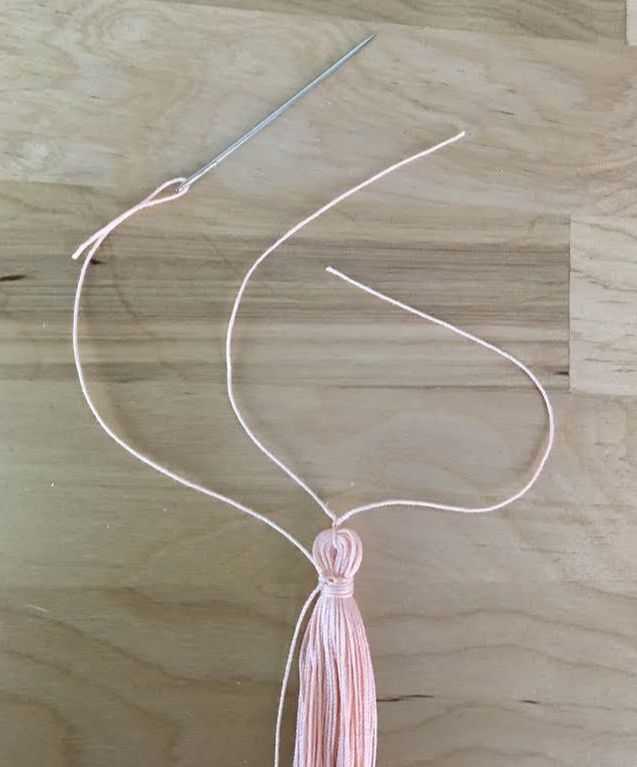
In order to prevent the horizontal string layers from sliding off the tassel during machine washing, this yarn end (that gravitates to the top) will be tied to the two existing string ends at the top. This is an essential part in achieving a durable, machine washable tassel.
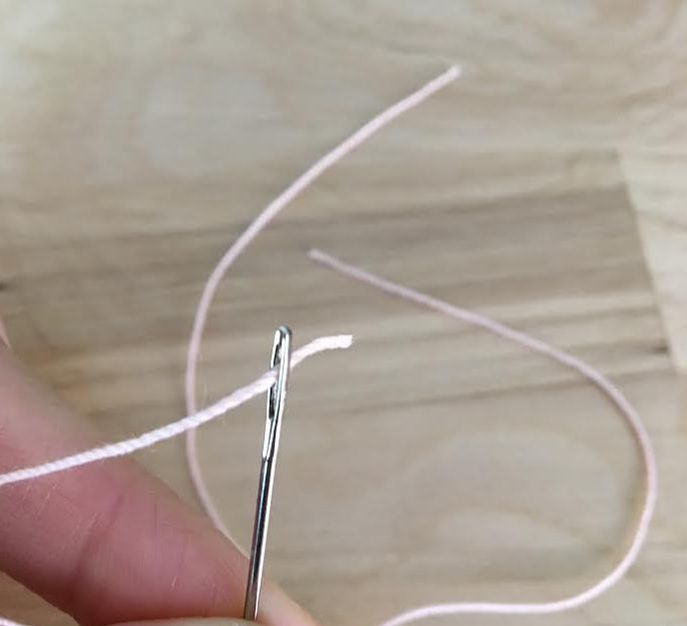
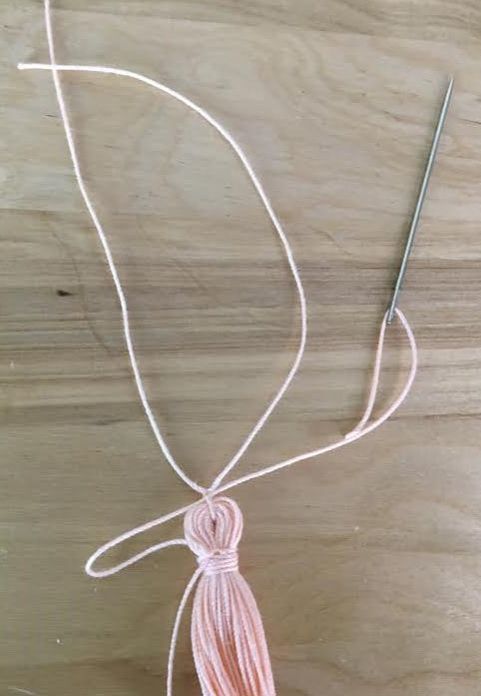
12. Insert the loose yarn that aligns towards the top into a larger needle as shown. 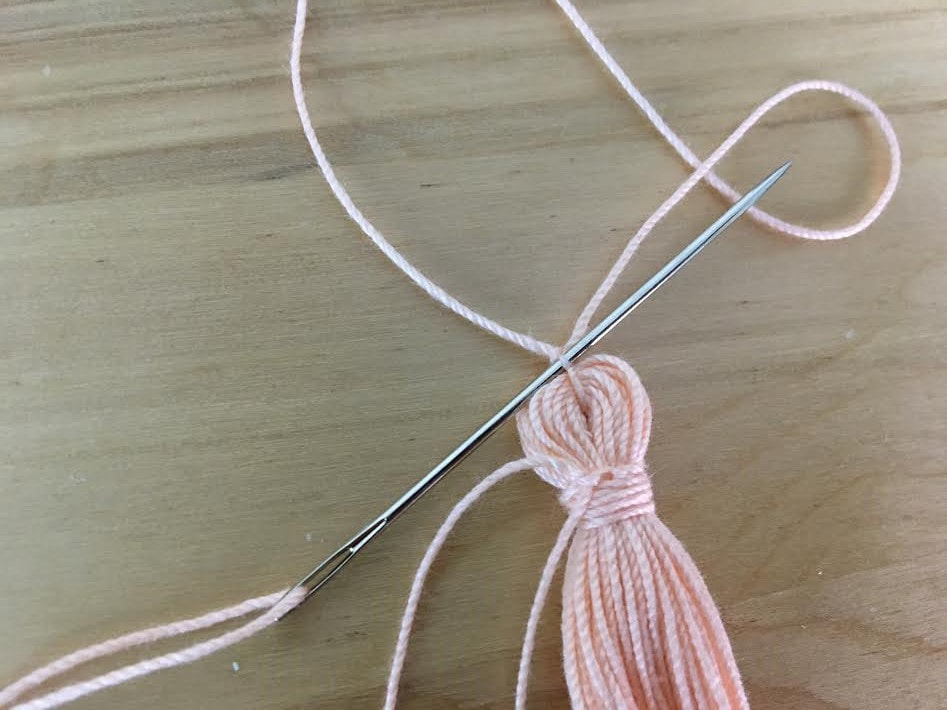 13. Insert the threaded needle through one of the layers of the knotted yarn at the top.
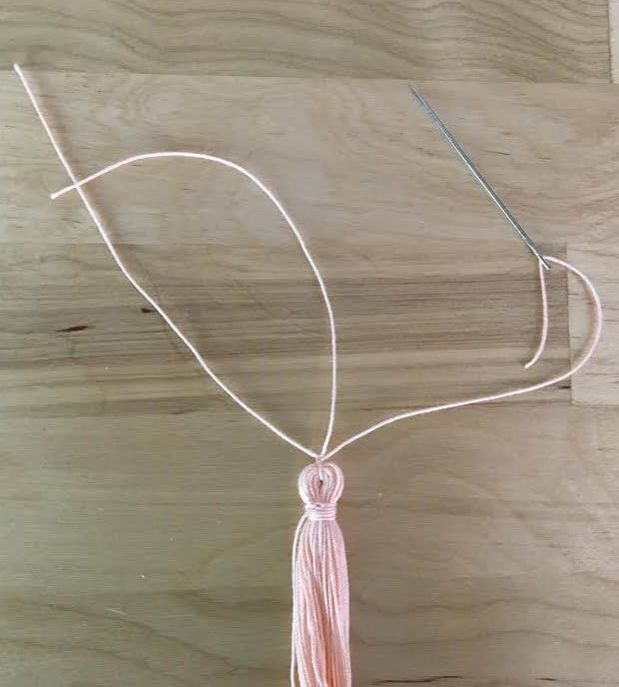
Pull the yarn through gently such that it blends into the tassel layers at the top until it becomes invisible. It is important that you don't pull the yarn in too hard or it will damage the structure of the tassel at the top. Simply pull the yarn until it blends in with the top loop structure.
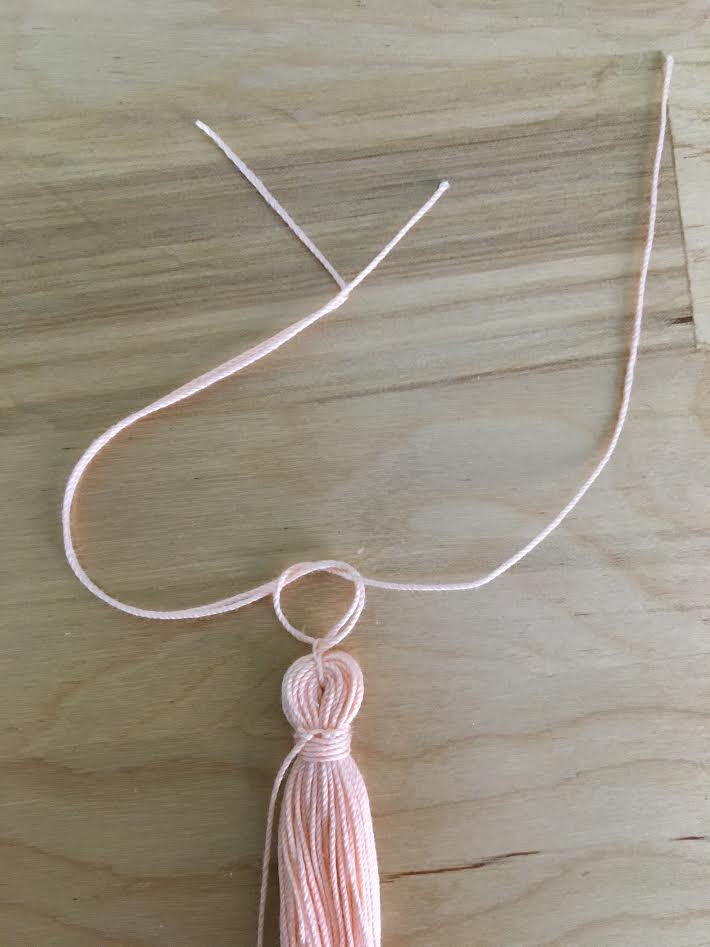
14. Double-knot the yarn ends at the top again for a durable finish. Knot the newly inserted yarn in combination with one of the existing yarns at the top. This will add extra strength and maintain the tassel structure even if you pull too hard during this knotting process. 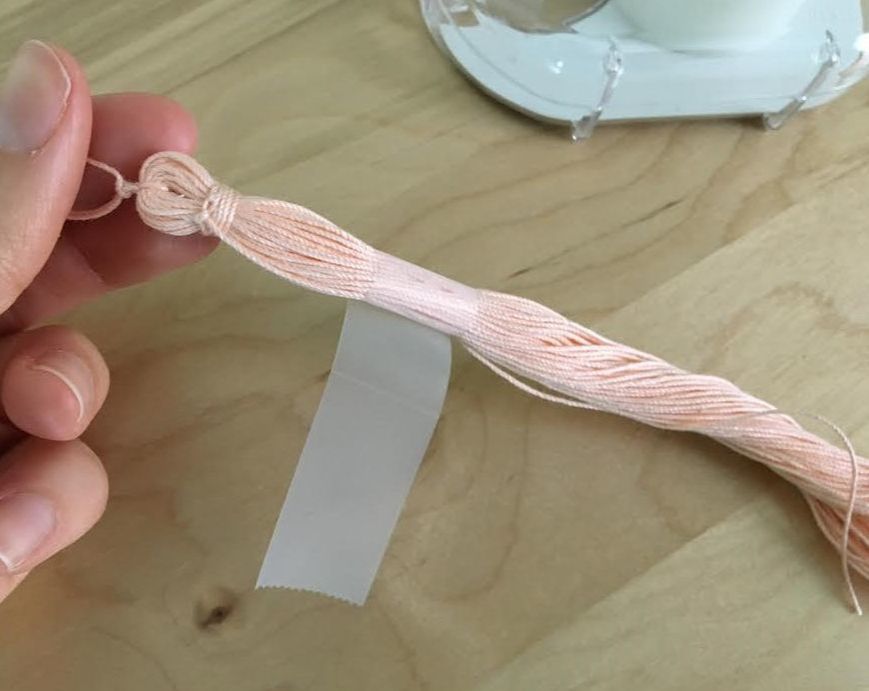 15. Decide on the desired tassel length and smooth out the tassel strings such that they are evenly aligned next to one another. Keeping the strings smoothly but tightly together, wrap a piece of scotch tape around them as shown above. 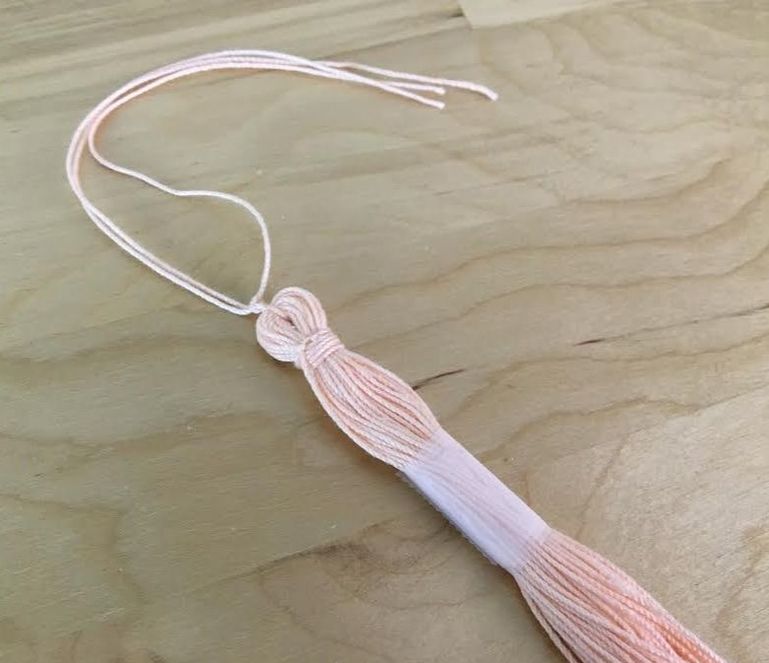 Wrapping the yarn strings with scotch tape ensures that the tassel will instantly be cut evenly while also keeping the process easy to accomplish. 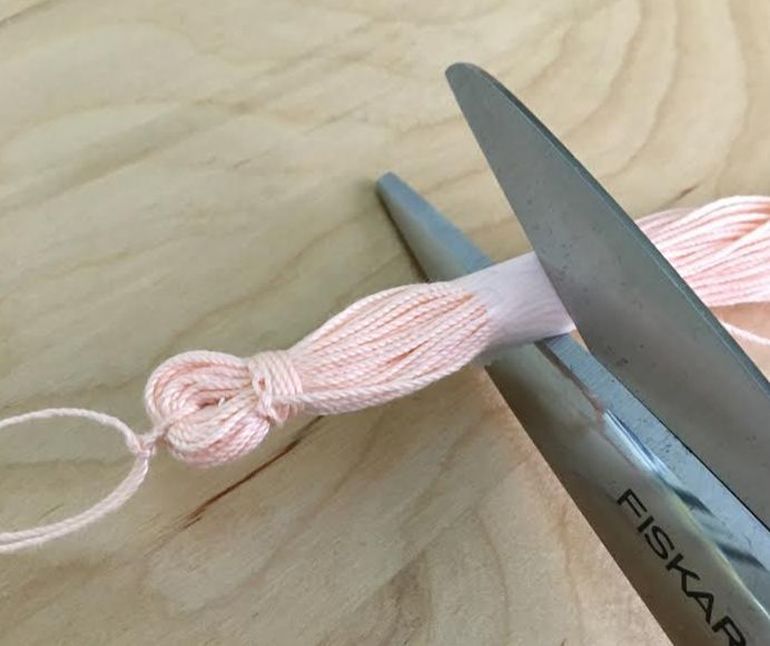 16. Using your best pair of fabric scissors, cut straight across the scotch tape through all string layers in one single cut as shown above. This should be fairly easy to do if you use a sharp-enough pair of scissors. 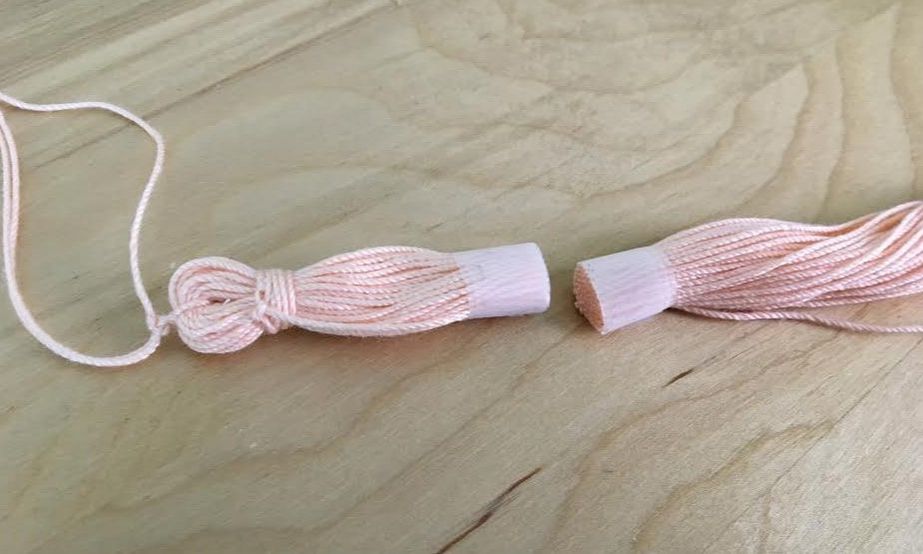 As you can see from the image above, the scotch tape ensures that each yarn piece is maintained at the same distance from the top achieving an even, smooth tassel structure. 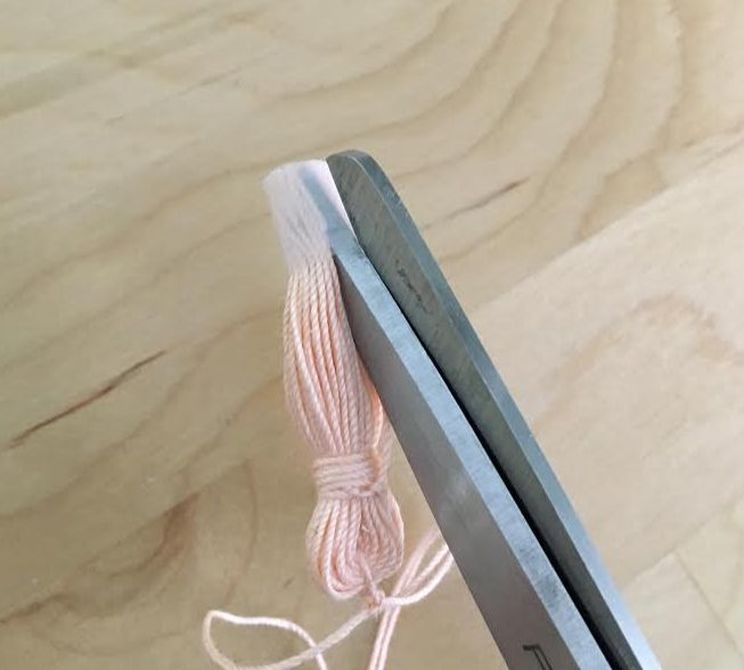 To remove the scotch tape from the tassel bottom, simply cut vertically along the tape layer only, being careful not to accidentally cut one of the yarn strings.  The tassel is now complete! Due to the special construction method described above, this tassel has the ability to withstand continuous machine washing without the risk of unraveling or incurring structural damage. The loose string ends at the top should allow enough length to attach the tassel to any desired edge or surface. You can also string beads to the top for a more unique, elevated look which is often used in accessory and jewelry design. 
0 Comments
Leave a Reply. |
The Blog:A journey into our design process, sewing tutorials, fashion tips, and all the inspiring people and things we love. 
Doina AlexeiDesigner by trade and dressmaker at heart. I spend most of my days obsessing over new fabrics and daydreaming new ideas. 
Sadie
Executive Assistant & Client Relations Manager Archives
November 2019
Categories
All

|

-
Sewing Tutorials
-
Basics
>
- Aligning Pattern Grainlines To Fabric
- Preparing Fabrics For Sewing
- Pinning Sewing Patterns To Fabric
- Placing Sewing Patterns On Fabric For Cutting
- Rotary Cutters or Fabric Scissors?
- Cutting The Sewing Patterns
- What Are Notches And How To Use Them In The Sewing Process
- Transferring Notches From Pattern To Fabric
- Transferring Seamlines to Fabric
- Staystitching
- Backstitching: A Complete Guide
- Hand Basting: A Complete Guide
- Sewing Continuous Bias Binding
- Darts >
-
Sewing Seams
>
- The Basics Of Seams And Seam Allowance
- How To Sew A Straight Seam
- Sewing Curved Seams
- Sewing Corner Seams
- Trimming And Grading Seam Excess
- Notching/Clipping Seam Allowance for Tension Release
- Sewing Topstitched Seams
- Sewing Corded Seams
- Sewing A Slot Seam
- Sewing A Gathered Seam
- Sewing Bias Seams
- Sewing Seams With Ease
- Sewing Seams With Crossing Seamlines
- Sewing Unlike Fabric Seams
- How To Iron Seams: Ironing Tools And Conventions
- Sewing With Knit Fabrics
- Understanding Stitch Length And Tension
- Sewing Unique Fabric Seams
-
Seam Finishes
>
- Seam Finishing Techniques - Overview
- Applying A Pinked Seam Finish
- Applying A Bias Bound Seam Finish
- Serging And Zigzag Seam Finishes
- Sewing A Self-Bound Seam Finish
- Sewing A French Seam Finish
- Sewing A Hong Kong Seam Finish
- Sewing A Mock French Seam Finish
- Sewing A Turned-and-Stitched Seam Finish
- Sewing Overcast Hand-Applied Seam Finishes
- Sewing A Flat Felled Seam
- Sewing A Hairline Seam Finish
-
Hem Finishes
>
- Garment Hem Finishes: Overview
- Sewing A Double Fold Hem Finish
- Sewing A Single Fold Hem Finish
- Sewing Bound Hem Finishes
- Sewing An Exposed Double Layer Bound Hem
- Sewing A Folded-Up Bound Hem with Pre-folded Binding
- Sewing A Hong Kong Hem Finish
- Sewing A Band Hem Finish
- Sewing A Bias Faced Hem Finish
- Sewing A Twill Tape Hem Finish
- Sewing A Rolled Hem Finish
- Sewing A Shaped Hem Facing
- Using Fusible Hem Tape And Webbing
- Finishing A Lace Fabric Hem
- Finishing A Leather Hem
- Sewing Faced Hem Corners
- How To Finish Lining At The Hem
- Finishing Fabric Corners by Mitering >
- Interfacing A Hemline: Lined And Unlined Examples
-
Sewing Pockets
>
- Curved Patch Pocket With Flap
- Unlined Square Patch Pockets
- Lined Patch Pockets: Two Ways
- Extension On-Seam Pockets
- Separate On-Seam Pocket
- Front Hip Pockets
- Bound Double Welt Pocket
- Double Welt Pocket With Flap
- Self-Welt Pocket (Using Single Fabric Layer)
- Slanted Welt Pocket (Hand-Stitched)
- Faced Slash Pockets: Overview >
-
Sewing Zippers
>
- Sewing Zippers: General Information
- Sewing A Centered Zipper
- Sewing A Lapped Zipper
- Sewing An Invisible Zipper
- Sewing A Fly Front Zipper
- Sewing A Closed-End Exposed Zipper (No Seam)
- Sewing An Exposed Separating Zipper
- Sewing Hand Stitched Zipper Applications
- Sewing A Zipper Underlay
- Sewing A Placket-Enclosed Separating Zipper
- Sleeveless Finishes >
-
Neckline Finishes
>
- Sewing A Neck Shaped Facing
- Sewing An All-In-One Neck Facing
- Neck And Garment Opening Combination Facings >
- Sewing A Bias Faced Neckline Finish
- Sewing A Band Neckline Finish
- Bound Neckline Finishes: Overview >
- Sewing A Semi-Stretch Strip Band Neckline
- Ribbed Neck Band And Classic Turtleneck
- Decorative Neckline Finishes >
- Finishing Facing Edges >
-
Extras
>
- A Complete Guide on Interfacing
- Sewing Bound Spaghetti Straps
- Sewing Spaghetti Straps To A Faced Neckline
- Sewing Ruffles: Overview
- Patterning And Sewing A Circle Ruffle
- Sewing A Gathered Heading Ruffle
- Sewing Double Layer Gathered Ruffles
- Sewing A Gathered Ruffle Into A Seam
- Sewing A Gathered Ruffle To A Fabric Edge
- Sewing A Fabric Surface Slit
- Sewing A Slit Seam
- Hand-Applied Straight Stitches
- Hand-Applied Blind Stitches
- Hand-Applied Overedge Stitches
- Hand-Applied Tack Stitches
- Hand-Applied Decorative Stitches
-
Basics
>
- Custom Bridal
- Custom Apparel
- About
- Blog

 RSS Feed
Services |
Company |
|
