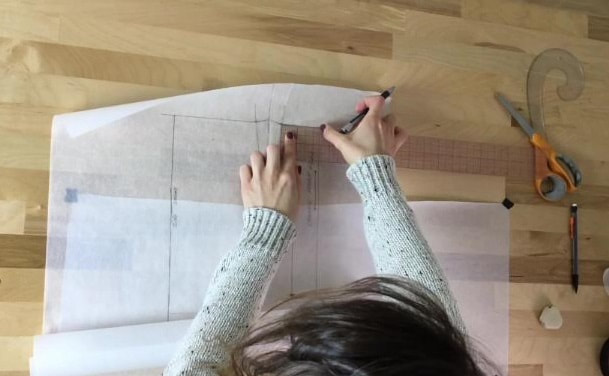
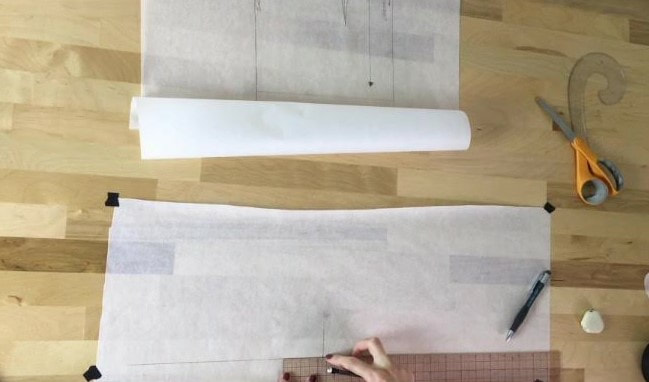
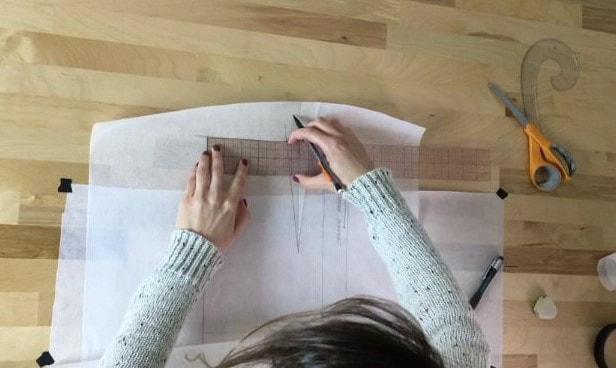
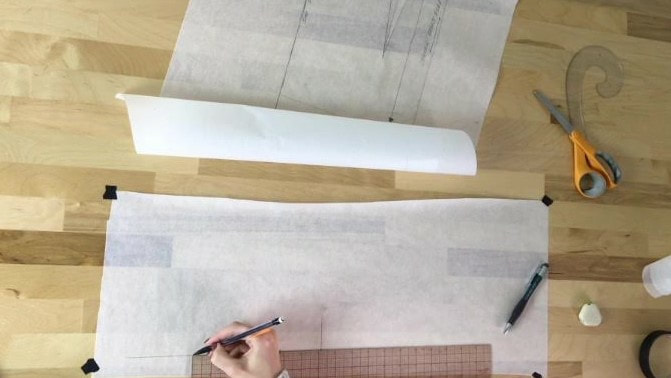
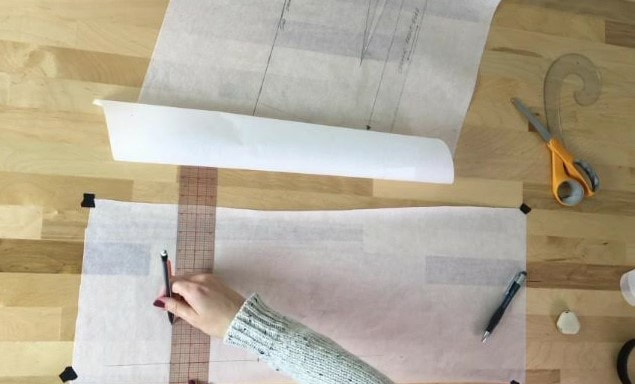
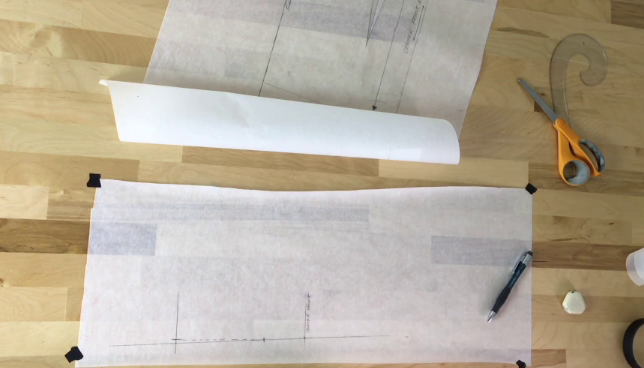
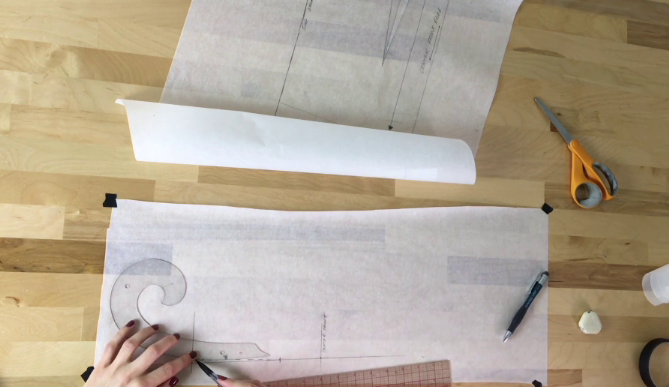
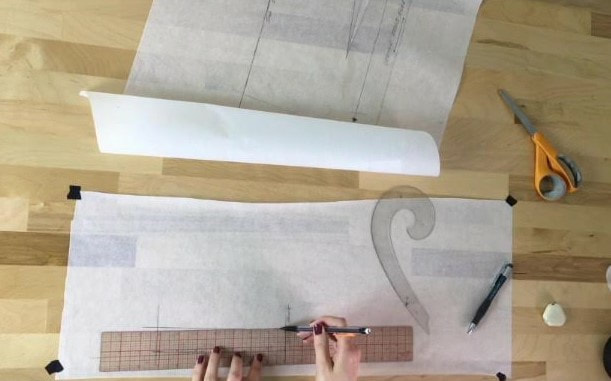
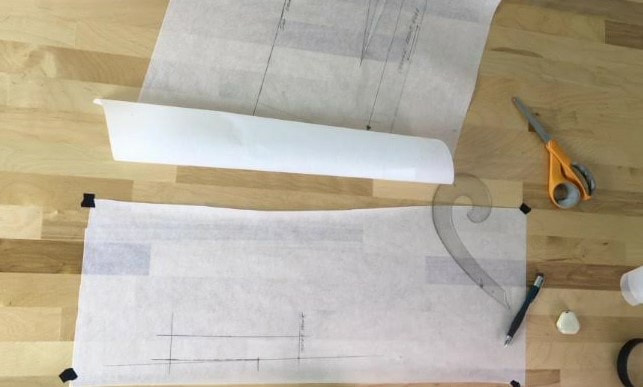
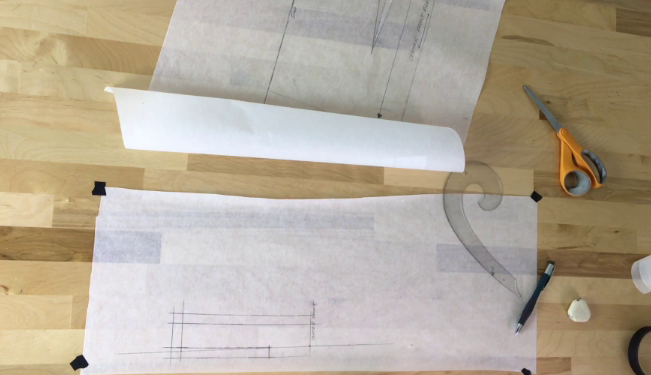
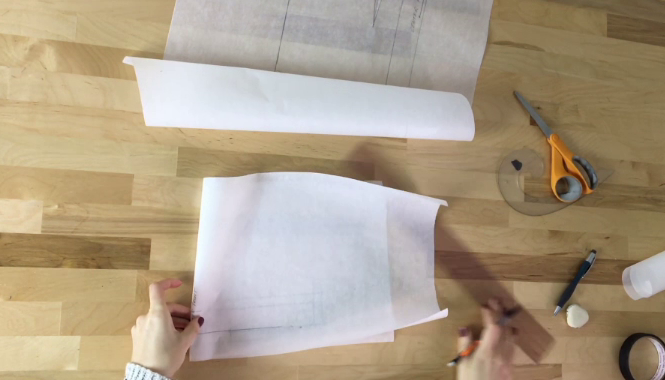
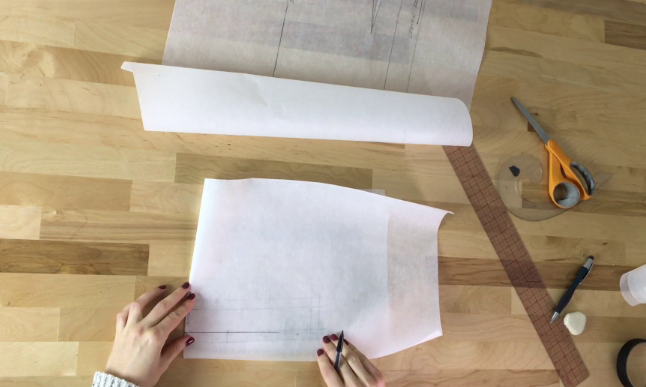
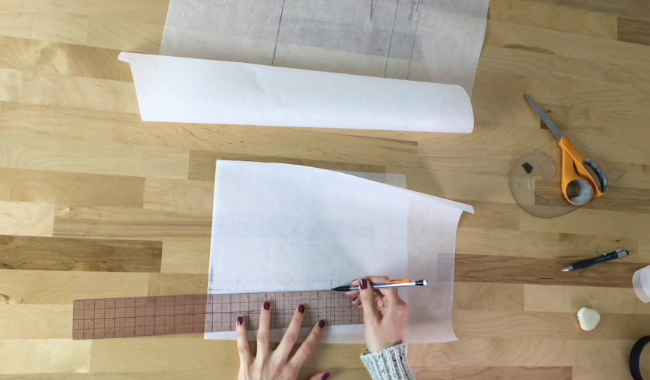
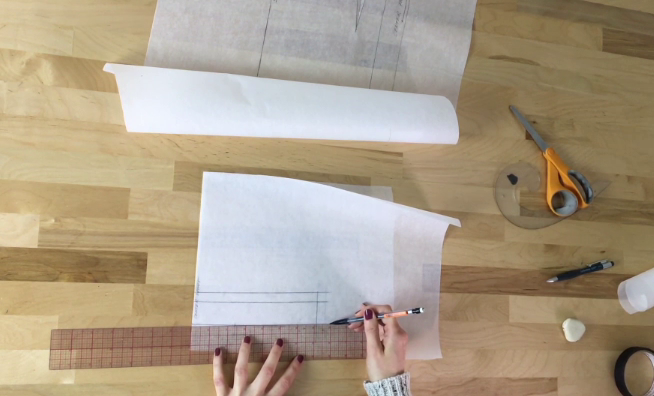
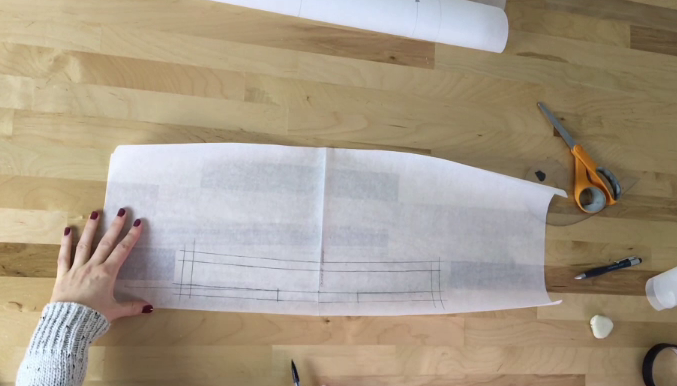
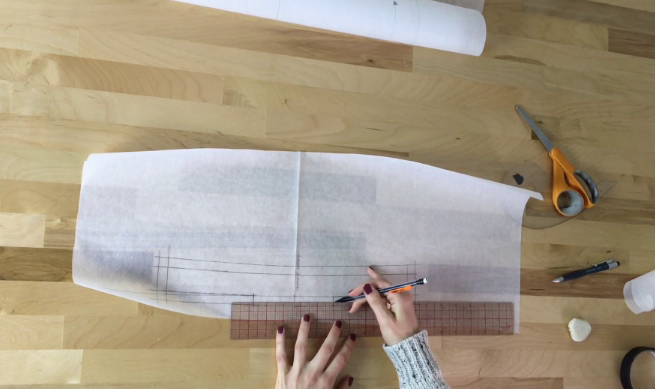
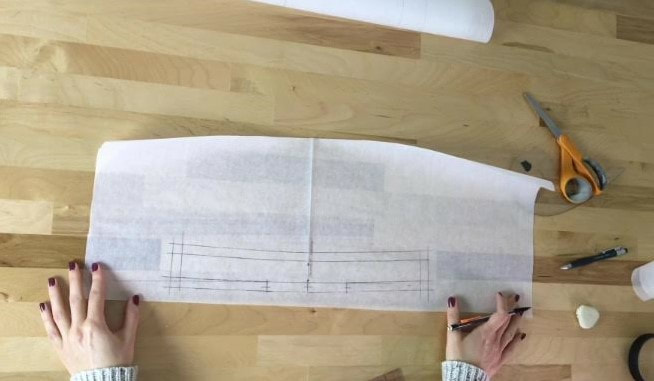
Video Tutorial: How To Draft A Sewing Pattern For A Non-Stretch Skirt Waistband (Faced Style).1/14/2019 Time for another patterning tutorial! I know drafting patterns is not exactly the most exciting topic, but if you really want to learn to how to design and make your own clothing, it is an essential tool in dressmaking. Learning some basic pattern drafting concepts is not only beneficial for those that want to construct the entire style from scratch, but also in the process of adjusting and altering store-bought, commercial patterns. As you become a more experienced sewist, you'll find yourself needing to do the latter a lot more than you may think. In this tutorial I'll walk you through an easy technique for drafting a non-stretch skirt waistband pattern. The same technique is applicable to other bottoms like trousers, shorts, and various other skirt styles. In this case, I'm working with a basic skirt pattern which has two darts at the front and two at the back. Due to the fact that both right and left sides of this basic skirt are symmetrical, the pattern in this tutorial is a cut on fold style. This means that I'll be working with only one side of the front skirt pattern (left) with the center front line serving as the cut on fold edge (the same applies to the back pattern piece). The center front and center back lines are the straight vertical lines that go down the very center of the front and respectively the back of a sewing pattern, dividing each (front and back) into two symmetrical sides. If you are working with a full pattern, you can still follow the steps described below to draft the waistband. Regardless of whether it is a cut on fold pattern or a full pattern, the center front and center back lines are an essential element to use in the process as it provides a guide to help you draft a perfectly symmetrical waistband (as you'll see below). Let's get started! You'll need the following: - a scrap piece of pattern paper or tracing paper (used here) large enough to hold the size of the waistband pattern but not so large that it's difficult to fold and handle. - an 18" clear plastic ruler (conventionally used for pattern making). I am completely depended on this ruler. It is broken down to the 1/16" and its transparency allows you to add seam allowance and measure/draft your patterns with high accuracy. I got mine at Joanns here: 2" x 18" Design Ruler - A plain french curve. My biggest advice when it comes to french curves is don't over complicate your life with super complex curves of different sizes and markings. Stick to a plain armhole curve like the one used in this tutorial. It is easy to work with and will keep things simple in the learning process. - A mechanical pencil (recommended) and eraser. - A decent pair of scissors Optional: Masking tape, or a similar alternative, to keep paper edges down. The waistband pattern drafted in this tutorial is a non-stretch, faced waistband for bottoms that have darts. The final result should be two separate front and back waistband patterns with seam allowance along all edges. This waistband will not fold onto itself for clean finishing but rather be backed with a facing identical to its front or back corresponding piece. Luckily, you don't have to draft separate patterns for the front and back facings in this case. Instead, cut two pieces of each front and back waistband and use one piece as the self and the other as the facing for both front and back waistband portions accordingly. 1. Using your clear plastic ruler measure along the skirt's top edge from the center front line to the closest (or first) dart leg as shown above. 2. On a separate piece of paper draw a horizontal straight line with a perpendicular vertical line intersecting at the middle. This vertical line will become the center front line on your waistband pattern. Starting at this center front line, measure the distance from Step 1 above, moving out towards the left (similar to how you measured on the skirt pattern). Mark this distance directly on the horizontal line with a little vertical dash. 3. Next, measure along the skirt's top edge again, this time from the other dart leg (farthest from center front) to the side seam line or side edge of the skirt as shown above. Don't include the seam allowance if your pattern has it. 4. Go back to the waistband pattern and measure this second distance from the first vertical dash (Step 2) out towards the left again. Mark again with a small dash. This second dash marks the waistband's side edge. The first dash from Step 2 will eventually become a notch and be matched to the skirt's stitched dart in the sewing process. 5. At the second vertical dash (Step 4 above), use your ruler to draw another straight vertical line perpendicular to the horizontal one underneath. This line will become the waistband's side edge. 6. On this second vertical line (side edge) measure 1/4" up from the horizontal line and add another dash as shown. 7. Freehand a semi-curved dash line from the side mark (horizontal) down to the middle (first) vertical dash as shown above. Try to keep this transition as smooth as possible. It should be a very soft curve slowly transitioning up into the side edge. Use the french curve to connect the dashes into a smooth line as shown above. Keep in mind that you may have to move the french curve around a few times to capture the right placement. This line will become the waistband's bottom edge which will eventually be sewn to the skirt's upper edge (after the darts are stitched). 8. If you haven't done so yet, decide how wide you'd like the waistband to be. The waistband in this tutorial is 1 and 1/4" wide. Align the clear plastic ruler with the waistband's semi curved bottom edge such that the ruler's top edge corresponds to the width of the waistband (in this case 1 1/4"). Shift the ruler around as needed to maintain the correct width, and draw the top edge of the waistband at the same distance from the curved bottom edge throughout. This is where that clear marked plastic ruler really comes in handy as it allows you to see all the lines underneath. 9. Once the left side of the waistband is drafted, add seam allowance all around and extend the first (middle) vertical dash at the bottom into a vertical line as shown. In this tutorial, the seam allowance is 1/2" throughout. Keep in mind that this waistband will require a self facing which means you'll need to cut two pieces of both front and back in order to complete it. You can check out more of this process in this tutorial: How To Sew A Pant Or Skirt Non-Stretch Waistband 10. To draft the full waistband pattern, remove the masking tape (if you used any) and fold the paper down the vertical center front line as shown. The left side of the bottom horizontal line should overlap the right size of the horizontal line perfectly a shown above. This will ensure that the paper is folded symmetrically and the waistband is identical on both right and left sides. If you are working with tracing paper, which I highly recommend, you'll be able to see all the lines underneath. If you are working with a pattern paper that has no transparency use a tracing wheel and fabric tracing paper to transfer the left waistband marks onto the right side of the CF (center front) line. 11. Using your ruler and french curve as needed, copy the waistband lines you see underneath onto the right side of the waistband (right of Center Front line) as shown. Make sure the folded paper doesn't shift in the process. Transfer the seamlines, seam allowance and of course, don't forget to transfer that bottom vertical dash. Once everything is transferred, open the folded paper to reveal the full front waistband pattern. Left and right of the middle Center Front line, you should have two perfectly symmetrical rectangular shapes that curve upwards gently as they move towards the left and right sides edges. Each side should also have a vertical notch at the bottom corresponding to the location of the skirt's darts (when sewn). Keep in mind that if your skirt has additional darts at the front or back, the waistband pattern should have an equal amount of notches positioned such that they correspond to these darts' placement. To finalize the notches, mark them with a little dash to form a cross or 'T' mark directly on top of each vertical dash at halfway through the seam allowance as shown. If you feel more comfortable with V-shaped notched, then mark a V notch instead. As a final step, cut the waistband pattern carefully along the outer edges. It is also extremely important to note that the top edge of a non-stretch waistband like the one in this tutorial should never have notches (unless required by a complex design). The bottom placement of the notches helps you differentiate between the top and bottom edges of the waistband once the fabric pieces are cut. On that note, the distance between the bottom notches on a waistband help you differentiate between front and back fabric pieces (when waistband is cut)- the back waistband notches are always closer to each other. To complete the back waistband pattern, follow the steps above, this time using the Center Back and back dart(s) as a guide. In the cutting and and sewing process you will need 2 pieces of each front and back waistband pattern. Happy patterning! Similar tutorials you may like: How To Pattern And Sew An Elastic Waistband How To Sew A Pant Or Skirt Non-Stretch Waistband How To Make A Sewing Pattern For A Two-Piece Stand Collar (Mandarin Collar) Video Tutorial: How To Cut A Blouse Pattern On Fold And Transfer Darts 5 Good Habits To Develop In The Process Of learning How To Sew
0 Comments
Leave a Reply. |
The Blog:A journey into our design process, sewing tutorials, fashion tips, and all the inspiring people and things we love. Doina AlexeiDesigner by trade and dressmaker at heart. I spend most of my days obsessing over new fabrics and daydreaming new ideas. Sadie
Executive Assistant & Client Relations Manager Archives
November 2019
Categories
All
|
-
Sewing Tutorials
-
Basics
>
- Aligning Pattern Grainlines To Fabric
- Preparing Fabrics For Sewing
- Pinning Sewing Patterns To Fabric
- Placing Sewing Patterns On Fabric For Cutting
- Rotary Cutters or Fabric Scissors?
- Cutting The Sewing Patterns
- What Are Notches And How To Use Them In The Sewing Process
- Transferring Notches From Pattern To Fabric
- Transferring Seamlines to Fabric
- Staystitching
- Backstitching: A Complete Guide
- Hand Basting: A Complete Guide
- Sewing Continuous Bias Binding
- Darts >
-
Sewing Seams
>
- The Basics Of Seams And Seam Allowance
- How To Sew A Straight Seam
- Sewing Curved Seams
- Sewing Corner Seams
- Trimming And Grading Seam Excess
- Notching/Clipping Seam Allowance for Tension Release
- Sewing Topstitched Seams
- Sewing Corded Seams
- Sewing A Slot Seam
- Sewing A Gathered Seam
- Sewing Bias Seams
- Sewing Seams With Ease
- Sewing Seams With Crossing Seamlines
- Sewing Unlike Fabric Seams
- How To Iron Seams: Ironing Tools And Conventions
- Sewing With Knit Fabrics
- Understanding Stitch Length And Tension
- Sewing Unique Fabric Seams
-
Seam Finishes
>
- Seam Finishing Techniques - Overview
- Applying A Pinked Seam Finish
- Applying A Bias Bound Seam Finish
- Serging And Zigzag Seam Finishes
- Sewing A Self-Bound Seam Finish
- Sewing A French Seam Finish
- Sewing A Hong Kong Seam Finish
- Sewing A Mock French Seam Finish
- Sewing A Turned-and-Stitched Seam Finish
- Sewing Overcast Hand-Applied Seam Finishes
- Sewing A Flat Felled Seam
- Sewing A Hairline Seam Finish
-
Hem Finishes
>
- Garment Hem Finishes: Overview
- Sewing A Double Fold Hem Finish
- Sewing A Single Fold Hem Finish
- Sewing Bound Hem Finishes
- Sewing An Exposed Double Layer Bound Hem
- Sewing A Folded-Up Bound Hem with Pre-folded Binding
- Sewing A Hong Kong Hem Finish
- Sewing A Band Hem Finish
- Sewing A Bias Faced Hem Finish
- Sewing A Twill Tape Hem Finish
- Sewing A Rolled Hem Finish
- Sewing A Shaped Hem Facing
- Using Fusible Hem Tape And Webbing
- Finishing A Lace Fabric Hem
- Finishing A Leather Hem
- Sewing Faced Hem Corners
- How To Finish Lining At The Hem
- Finishing Fabric Corners by Mitering >
- Interfacing A Hemline: Lined And Unlined Examples
-
Sewing Pockets
>
- Curved Patch Pocket With Flap
- Unlined Square Patch Pockets
- Lined Patch Pockets: Two Ways
- Extension On-Seam Pockets
- Separate On-Seam Pocket
- Front Hip Pockets
- Bound Double Welt Pocket
- Double Welt Pocket With Flap
- Self-Welt Pocket (Using Single Fabric Layer)
- Slanted Welt Pocket (Hand-Stitched)
- Faced Slash Pockets: Overview >
-
Sewing Zippers
>
- Sewing Zippers: General Information
- Sewing A Centered Zipper
- Sewing A Lapped Zipper
- Sewing An Invisible Zipper
- Sewing A Fly Front Zipper
- Sewing A Closed-End Exposed Zipper (No Seam)
- Sewing An Exposed Separating Zipper
- Sewing Hand Stitched Zipper Applications
- Sewing A Zipper Underlay
- Sewing A Placket-Enclosed Separating Zipper
- Sleeveless Finishes >
-
Neckline Finishes
>
- Sewing A Neck Shaped Facing
- Sewing An All-In-One Neck Facing
- Neck And Garment Opening Combination Facings >
- Sewing A Bias Faced Neckline Finish
- Sewing A Band Neckline Finish
- Bound Neckline Finishes: Overview >
- Sewing A Semi-Stretch Strip Band Neckline
- Ribbed Neck Band And Classic Turtleneck
- Decorative Neckline Finishes >
- Finishing Facing Edges >
-
Extras
>
- A Complete Guide on Interfacing
- Sewing Bound Spaghetti Straps
- Sewing Spaghetti Straps To A Faced Neckline
- Sewing Ruffles: Overview
- Patterning And Sewing A Circle Ruffle
- Sewing A Gathered Heading Ruffle
- Sewing Double Layer Gathered Ruffles
- Sewing A Gathered Ruffle Into A Seam
- Sewing A Gathered Ruffle To A Fabric Edge
- Sewing A Fabric Surface Slit
- Sewing A Slit Seam
- Hand-Applied Straight Stitches
- Hand-Applied Blind Stitches
- Hand-Applied Overedge Stitches
- Hand-Applied Tack Stitches
- Hand-Applied Decorative Stitches
-
Basics
>
- Custom Bridal
- Custom Apparel
- About
- Blog
Services |
Company |
|



 RSS Feed

