|
If you've ever sewn a garment from start to finish, you most likely know of that one or multiple elements in the process that once sewn, make everything instantly come together! For me, that special moment happens when either completing the zipper, attaching both sleeves or sewing in the waistband. When sewing bottoms, the waistband is often that single component that keeps everything together, binding the rest of the design elements into a finished product. In this tutorial, I will be using a simple yet classic technique to sew a waistband to the box pleat skirt I've been working on in this recent sewalong. Attaching this particular woven waistband is especially rewarding as it provides structure and support to the deep pleating along the skirt's waistline. Needless to say, a classic waistband (like the one in this tutorial) will keep all the folds aligned properly while also visually enhancing the skirt's fullness. When adding a waistband to an edge that houses pleats or gathers, it is always a good idea to first reinforce the folds or gathers with an additional stitch so that they don't stretch or come undone during the rest of the sewing process. Although waistband construction techniques vary based on style, fabric and design, reinforcing the garment's edge is one of those rules that needs to be followed regardless. My skirt will have a basic two piece (faced) waistband that is non-stretch (woven). The design also calls for an invisible zipper sewn into the side seam which as you'll see below, will dictate the sequence of steps for sewing this particular band. That being said, if you follow the steps in order, you should not run into any major issues. If you're anything like me, you will find the process fairly enjoyable! A few things to keep in mind about sewing faced (two piece) waistbands before we begin:
We have lots to cover so let's get started! My box pleats have already been folded and stitched in place accordingly. The skirt's waistline edge is ready for the waistband! 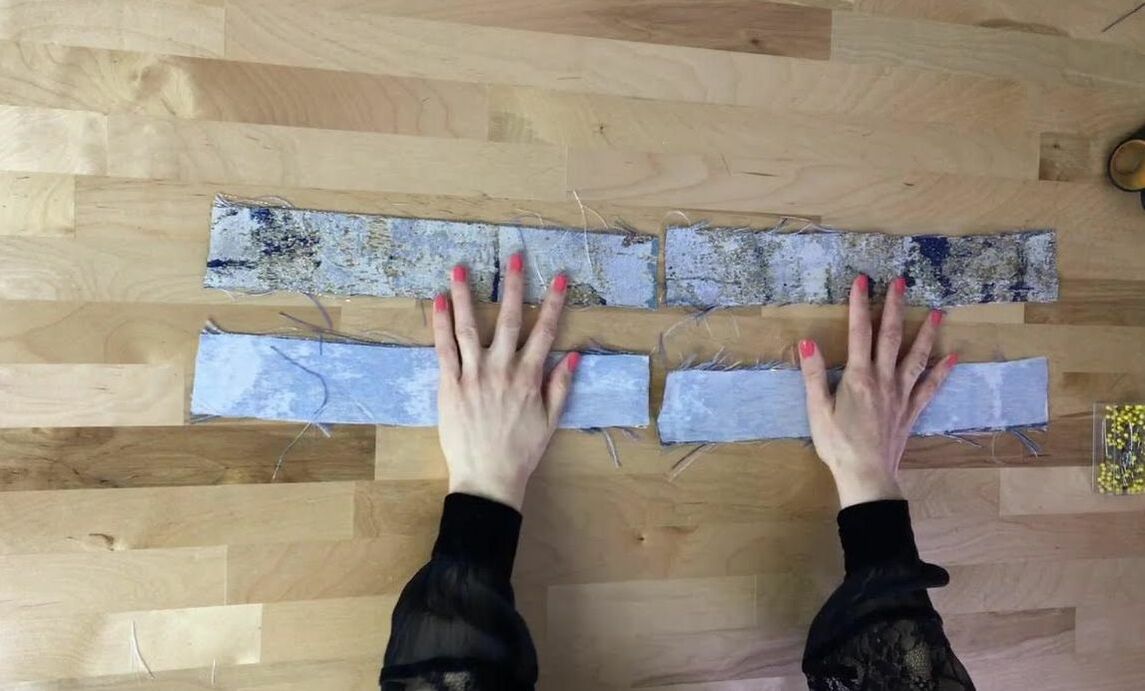 1. To start with, I always like to align the front and back waistband pieces on the table to better visualize how they fit together. Group the front and back facing together at the top and the front and back self pieces at the bottom. At this point, figure out which side seam will be stitched closed and which will house the zipper opening. You can clarify that by matching the pieces to the skirt waistline and finding the side that houses the zipper. 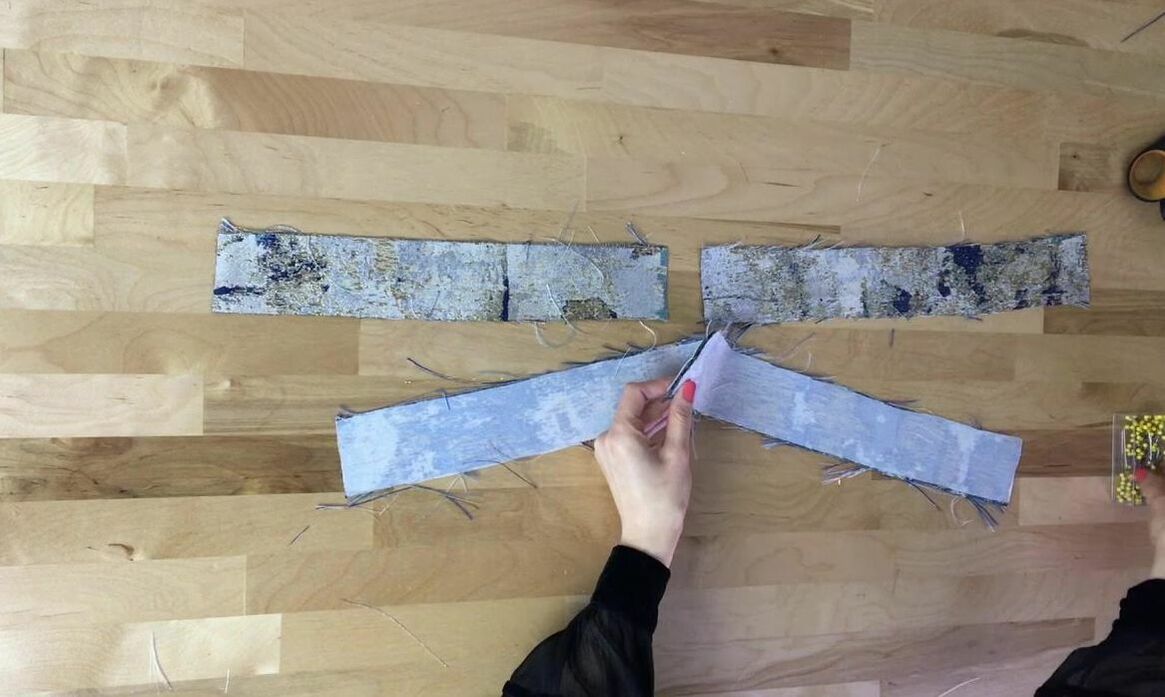 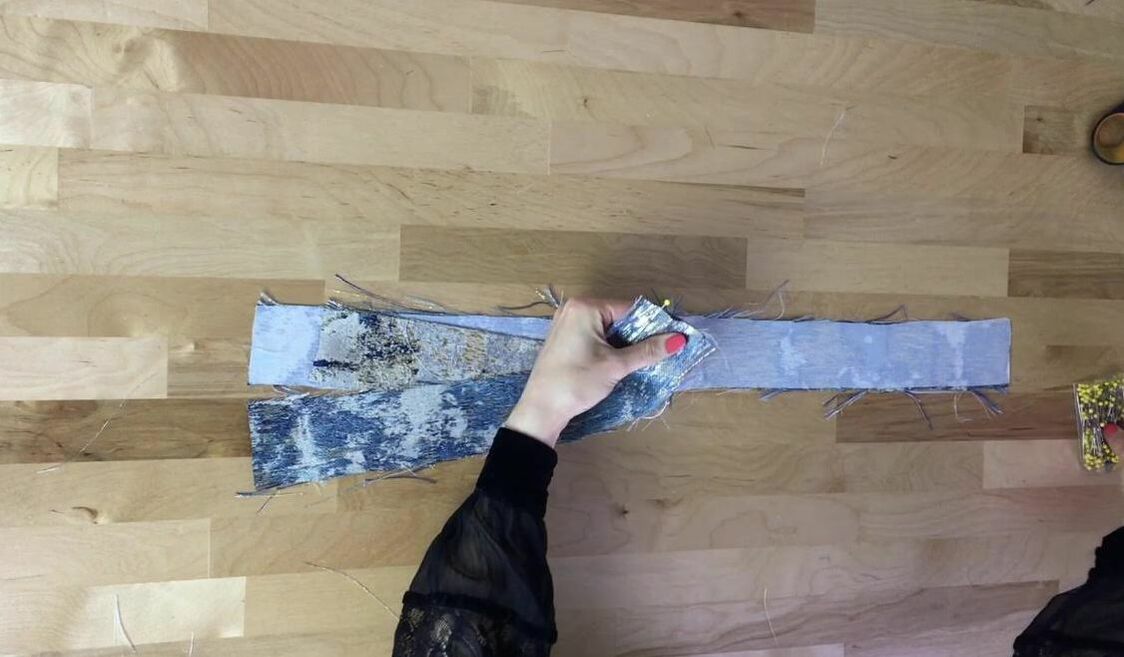 2. Align the side seam edges for both self and facing and pin perpendicular to the edge as shown. 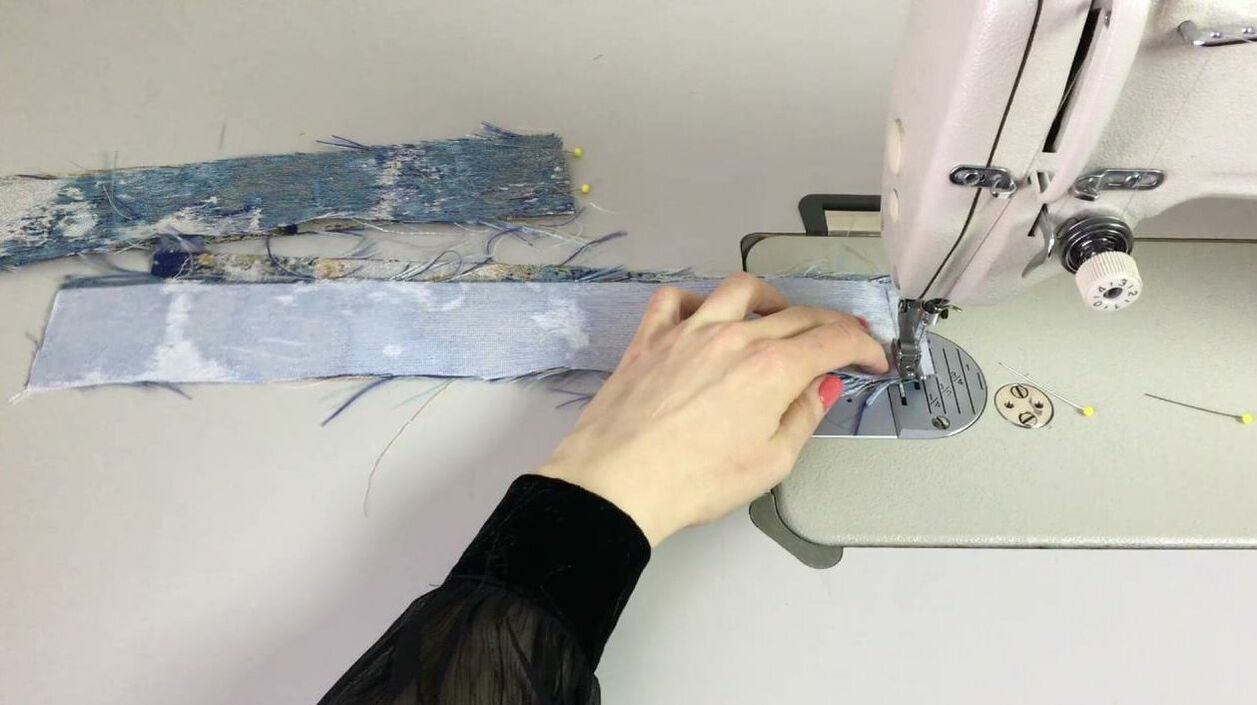 3. Machine stitch the side seams at the designated seam allowance. 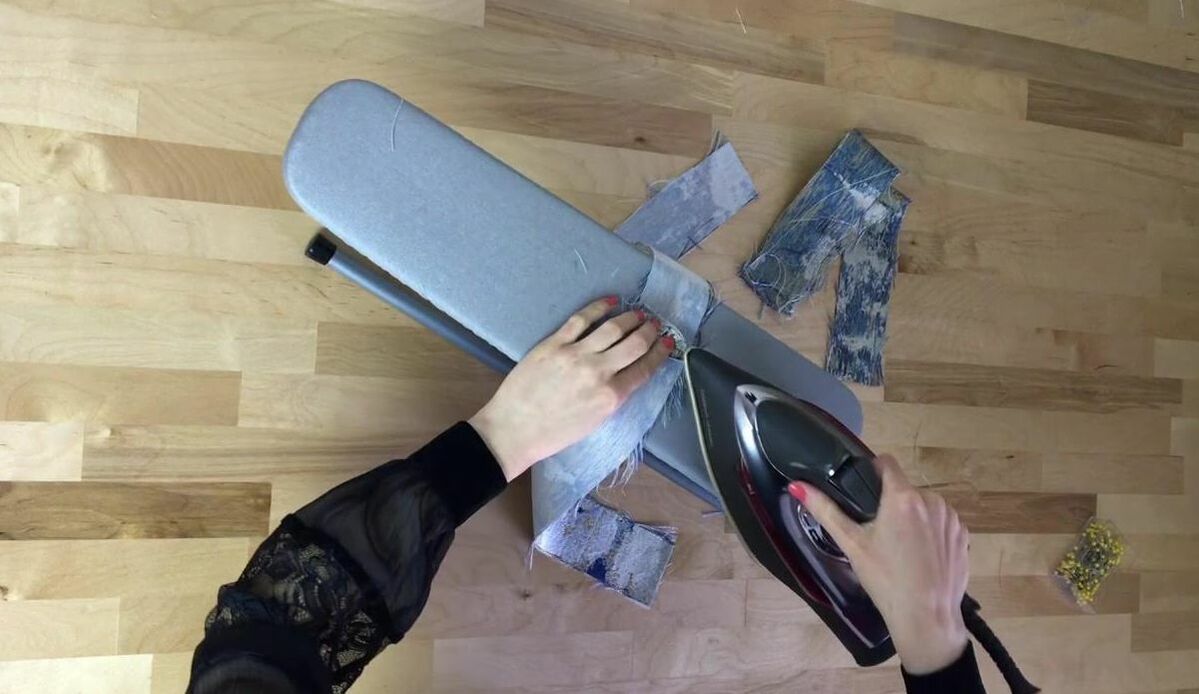 Iron the seam allowance open as shown. At this point, you should have 1 full piece for the self and one for the facing layer, each consisting of a front and back portion. The self and facing pieces should be the mirror copies of each other. When overlapped with the face sides touching, the side seams should naturally align and match up perfectly. 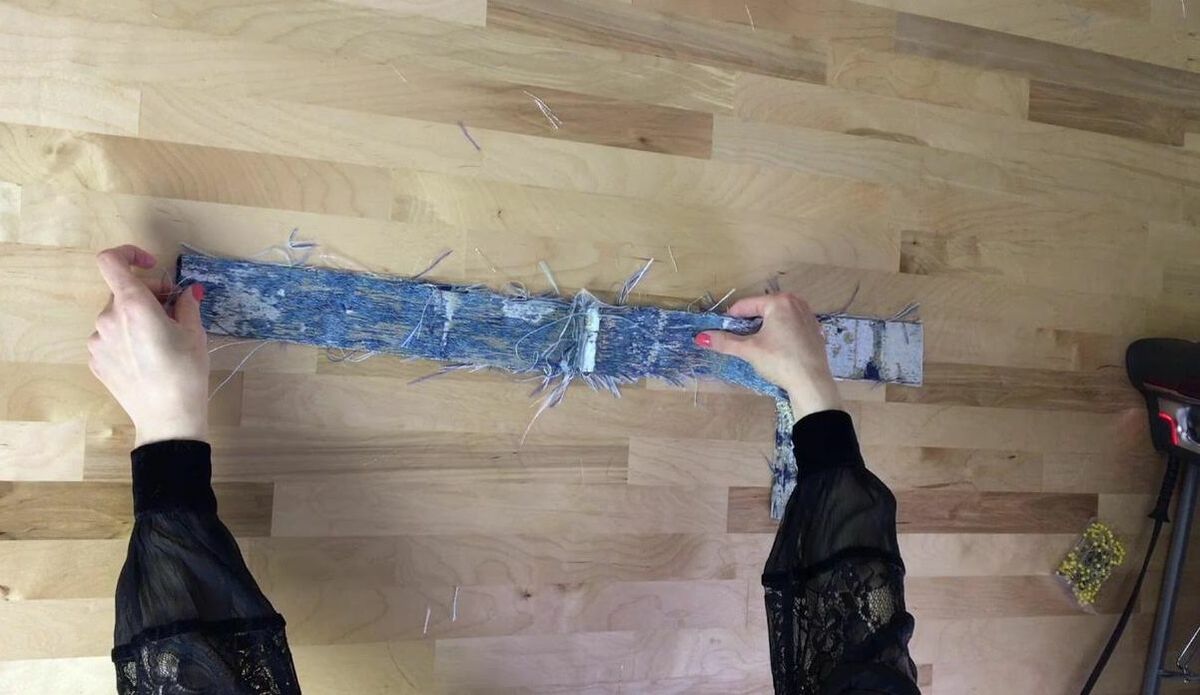 4. Place the facing on top of the self layer such that the face of the fabric is touching and the side seams are perfectly aligned on top of each other as shown. Make sure the front and back portions on both facing and self correspond to each other. 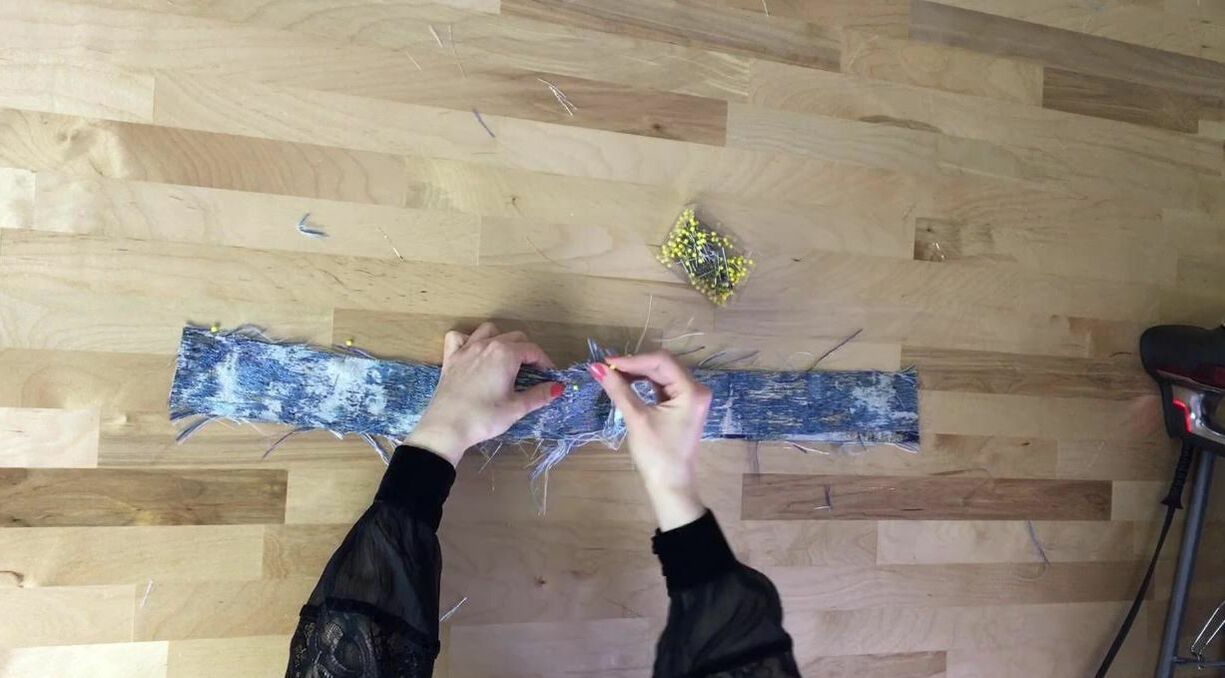 Pin the two waistband layers along the top edge only.  Insert the pins horizontally, perpendicular to the edge as shown. As you'll see in the following step, this pin placement is much easier to handle during the machine stitching process. 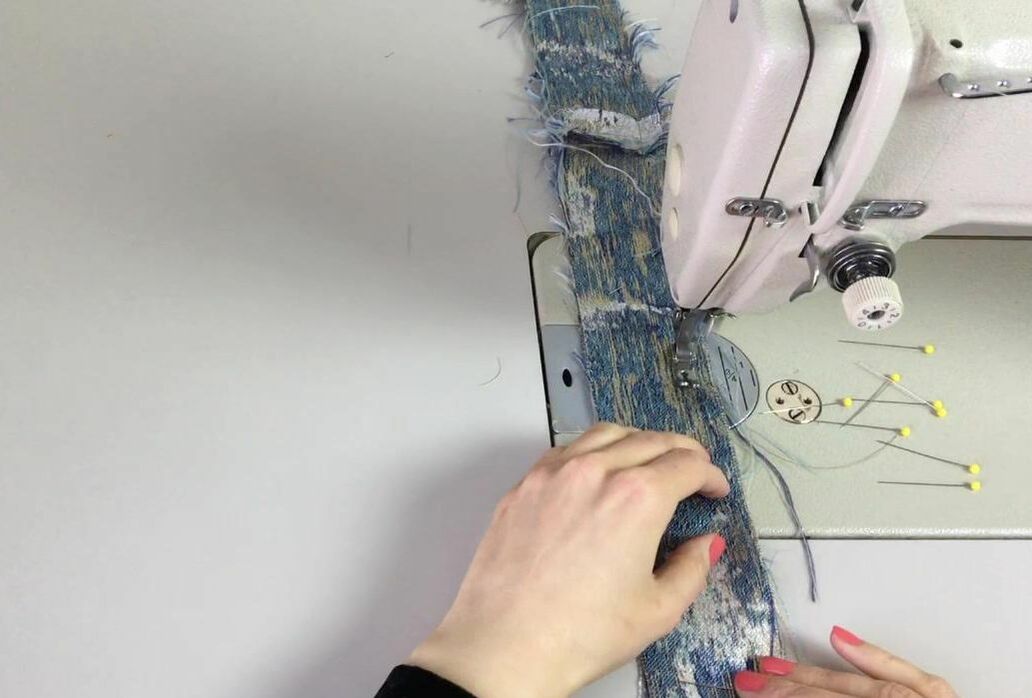 5. Stitch the top edges together at the designated seam allowance. In this tutorial, the seam allowance is 1/2". 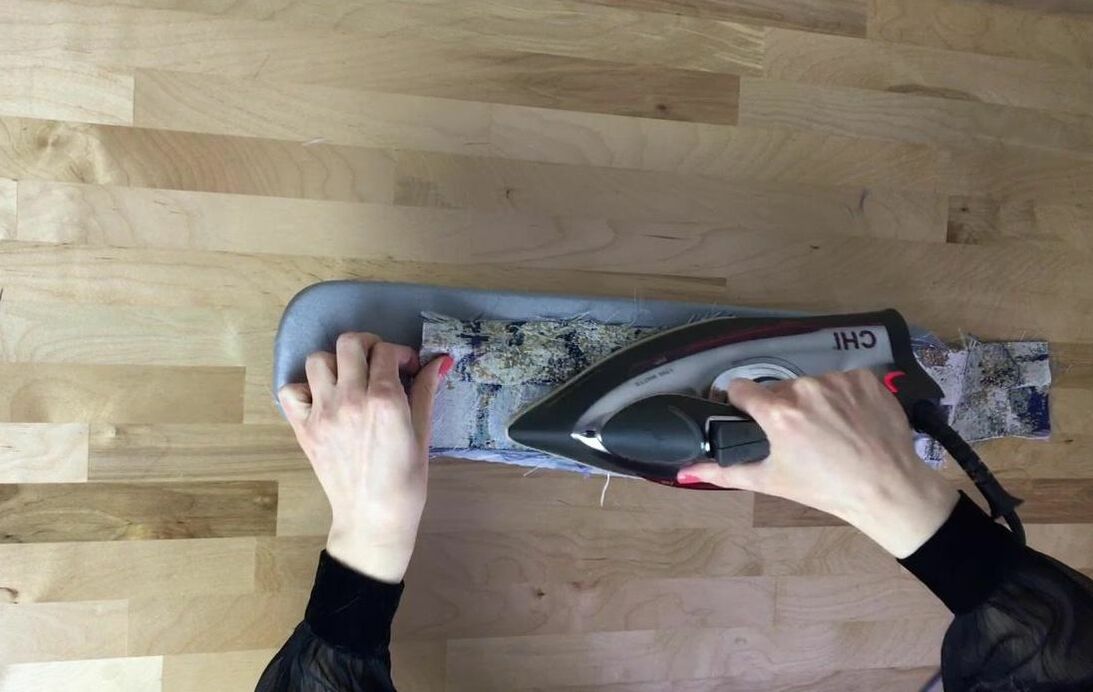 6. Iron the seamline with the seam allowance pointing towards the facing. The best (and easiest) way to do this is to iron directly on the face side of the seam as shown above. 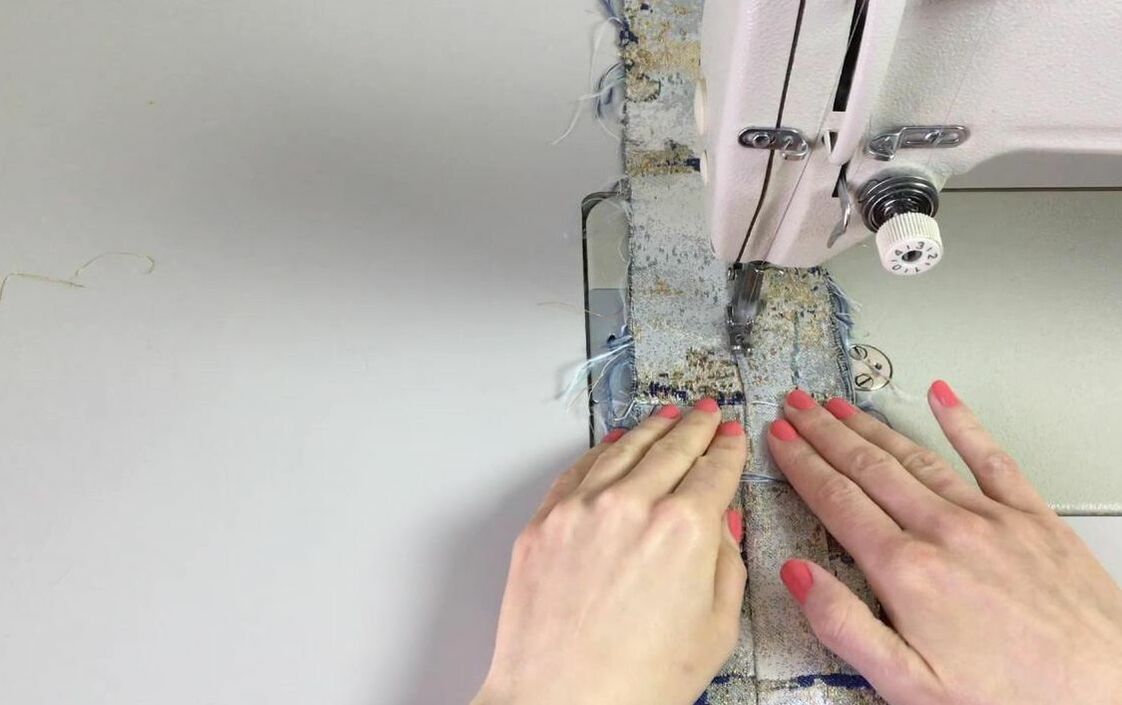 7. Stitch at about 1/8" away from the seamline trough both the facing layer and seam allowance underneath. This process is called understitching. 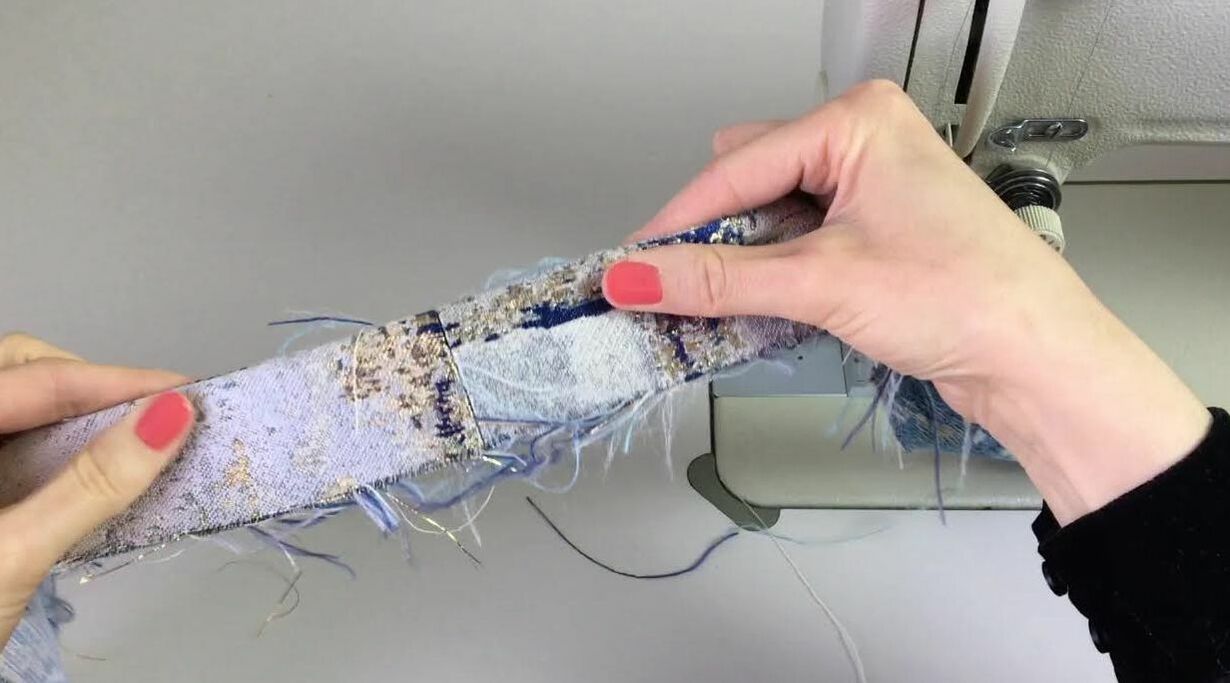 Understitching ensures that the waistband lays flat and the facing doesn't roll towards the outside of the garment. The top edge should remain perfectly straight and well defined during the wear and care of the garment. 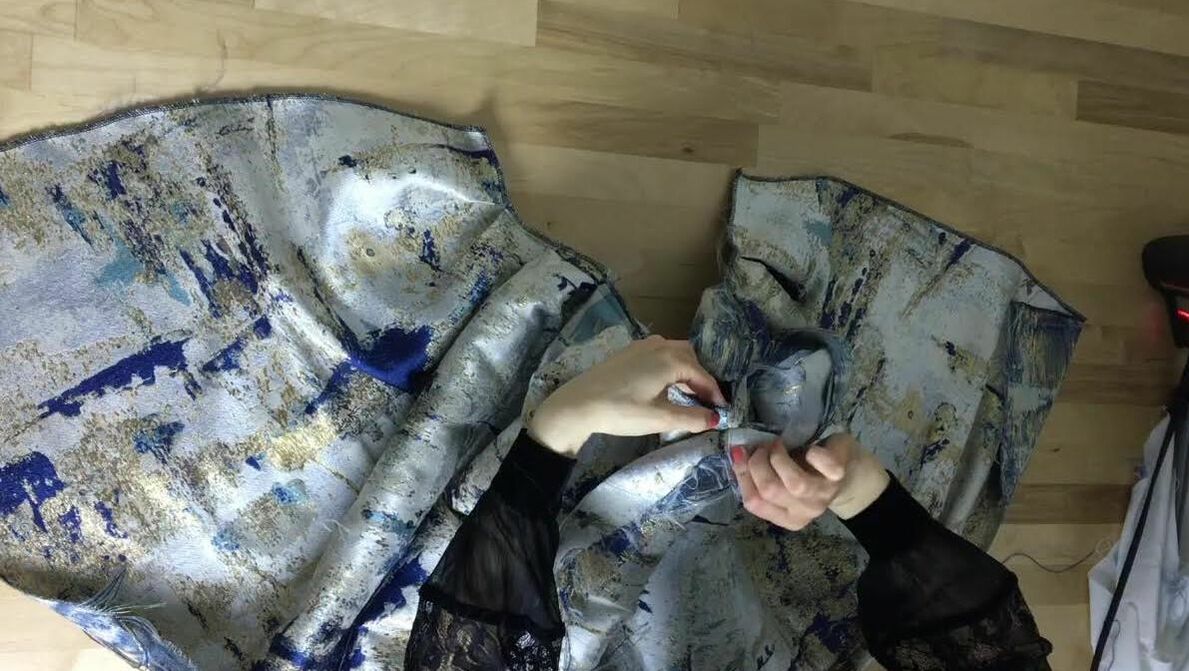 8. As a first step in attaching the waistband to the skirt, match the skirt's side seam to the waistband's seam as shown. 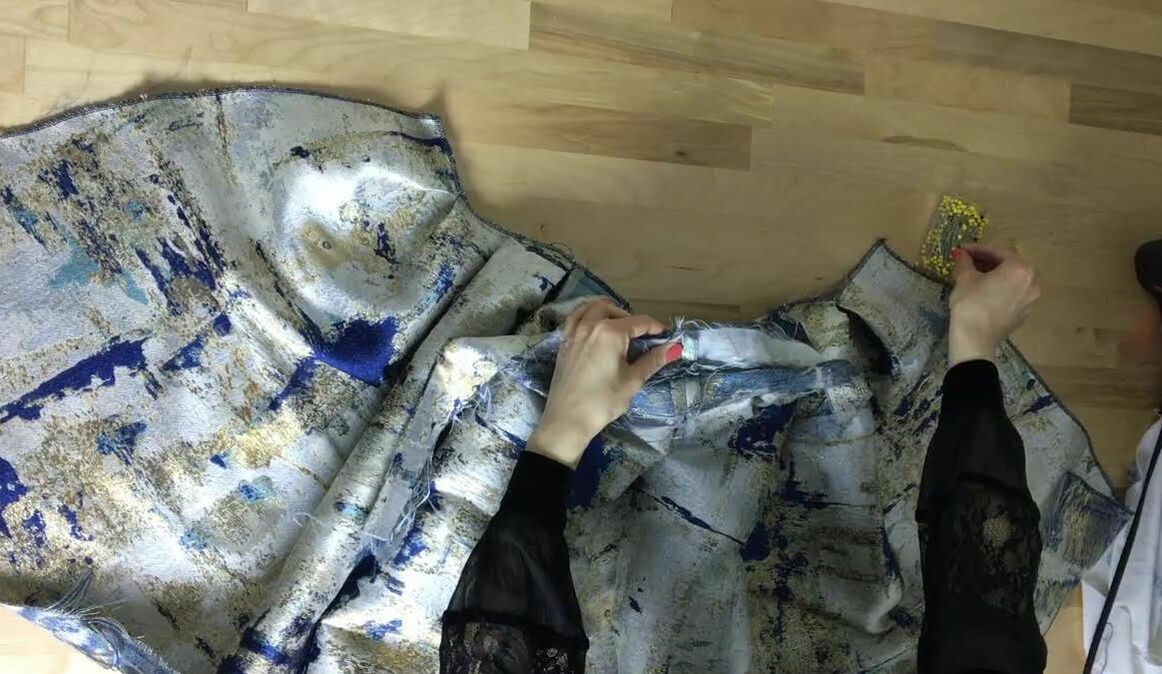 Pin the two seamlines together making sure they overlap perfectly on top of each other. 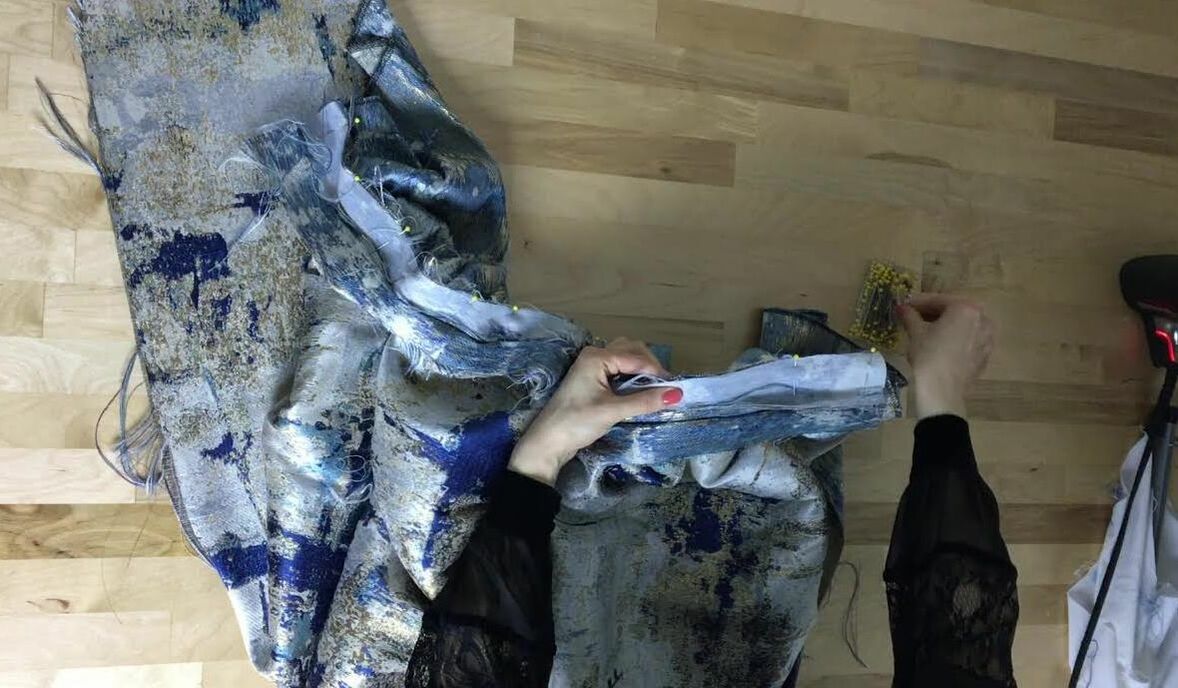 9. Next, pin the rest of the waistband to the skirt waistline edge, matching the notches to the rest of the skirt's seams, and in this case, the skirt's pleats as well. As noted, it's good practice insert the pins horizontally, perpendicular to the edge (shown above) for easy removal during machine stitching. 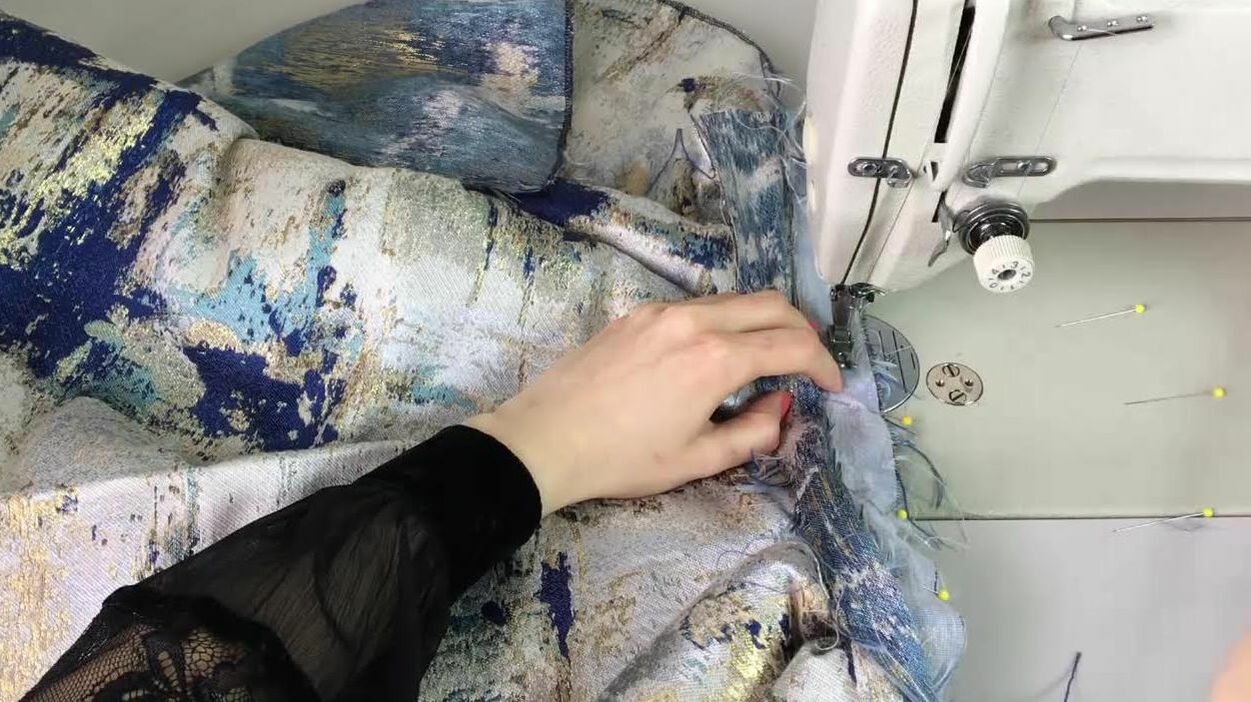 10. Stitch the waistband to the skirt's edge following the designated seam allowance. As always, my seam allowance is 1/2". If you are sewing through gathers or pleats (like in this tutorial) be very careful in preventing the folds/gathers from shifting or catching under the machine needle. I prefer to stitch a little at a time, checking the skirt's edge periodically for any possible misalignments. 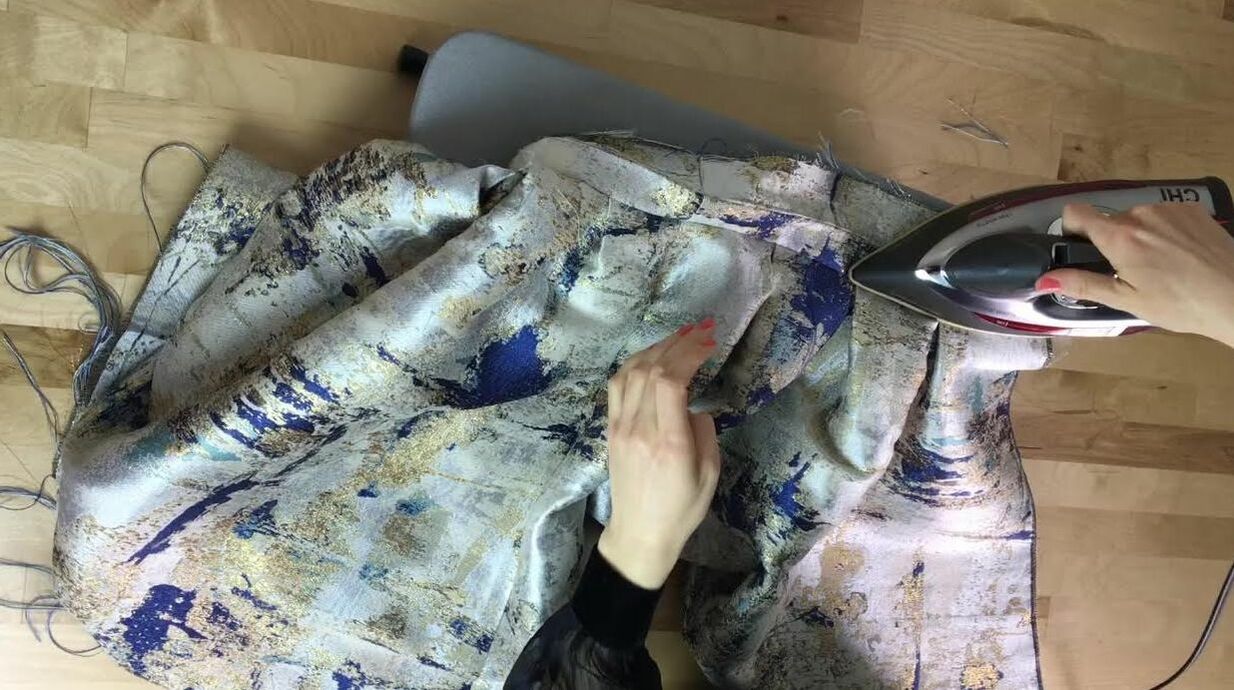 11. Once stitched, carefully iron the seamline with the seam allowance pointing up towards the facing as shown. Note: If your skirt has gathers, do not iron directly on top of the gathered seam. Instead, iron the very edge of the waistband, ensuring none of the gathers are pressed in the process. For more on sewing gathers and ironing them correctly, check out this tutorial: What Is Gathering And How To Sew A Gathered Seam. 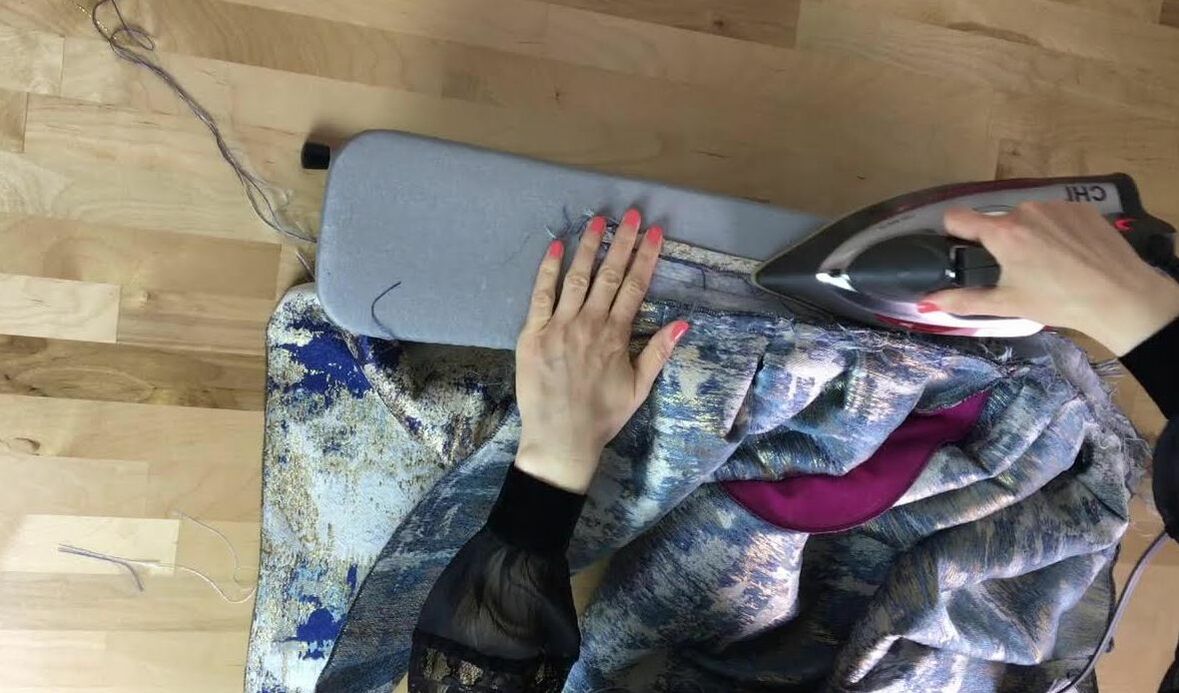 12. To facilitate the clean finishing process later, I like to fold the edge of the facing in at 1/2" and iron the fold line down as shown. Doing so ensures that when you're finally ready to seal the waistband, all you have to do is pin the fold in place easily enclosing all seam allowance and raw edges underneath. 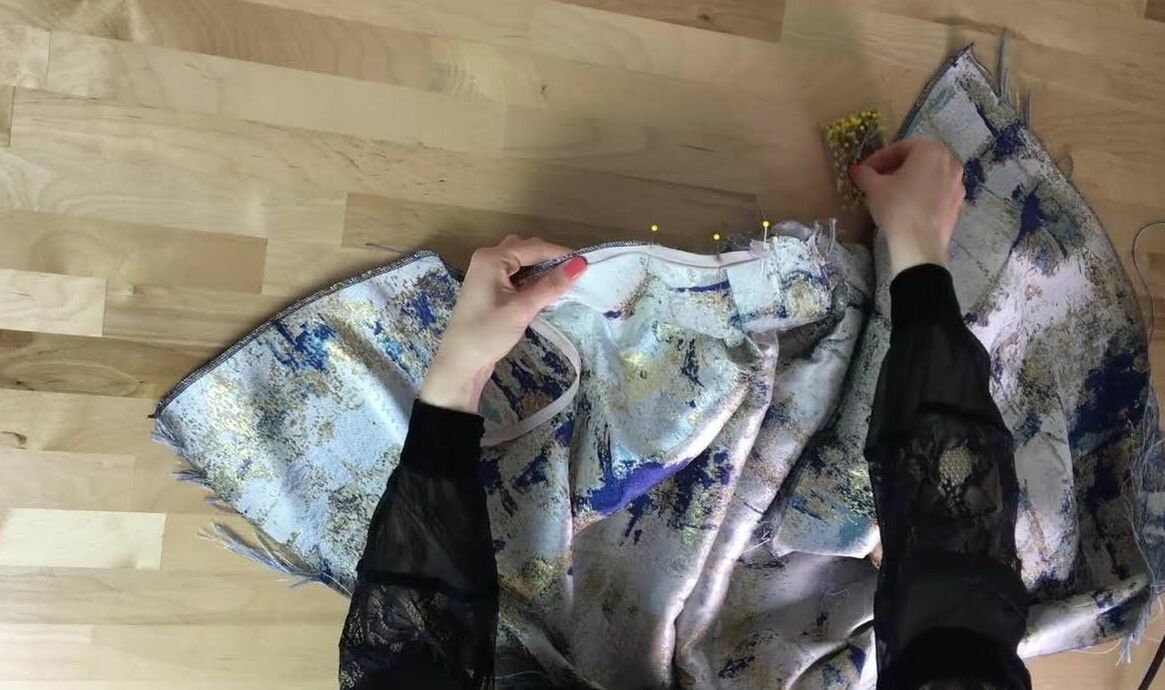 13. At this point, the invisible zipper can be sewn into the skirt's open seam. Pin each side of the invisible zipper into the open side seam. Make sure the zipper extends through the waistband, stopping at the very top edge. Do not pin the zipper to the waistband facing. Fold the excess zipper tape at the top- Do not cut it! The extra tape length will eventually be enclosed in the finished waistband.  Think of the waistband as an extension of the seam. When the zipper is closed, the skirt and waistband seams are both closed up to the very top. 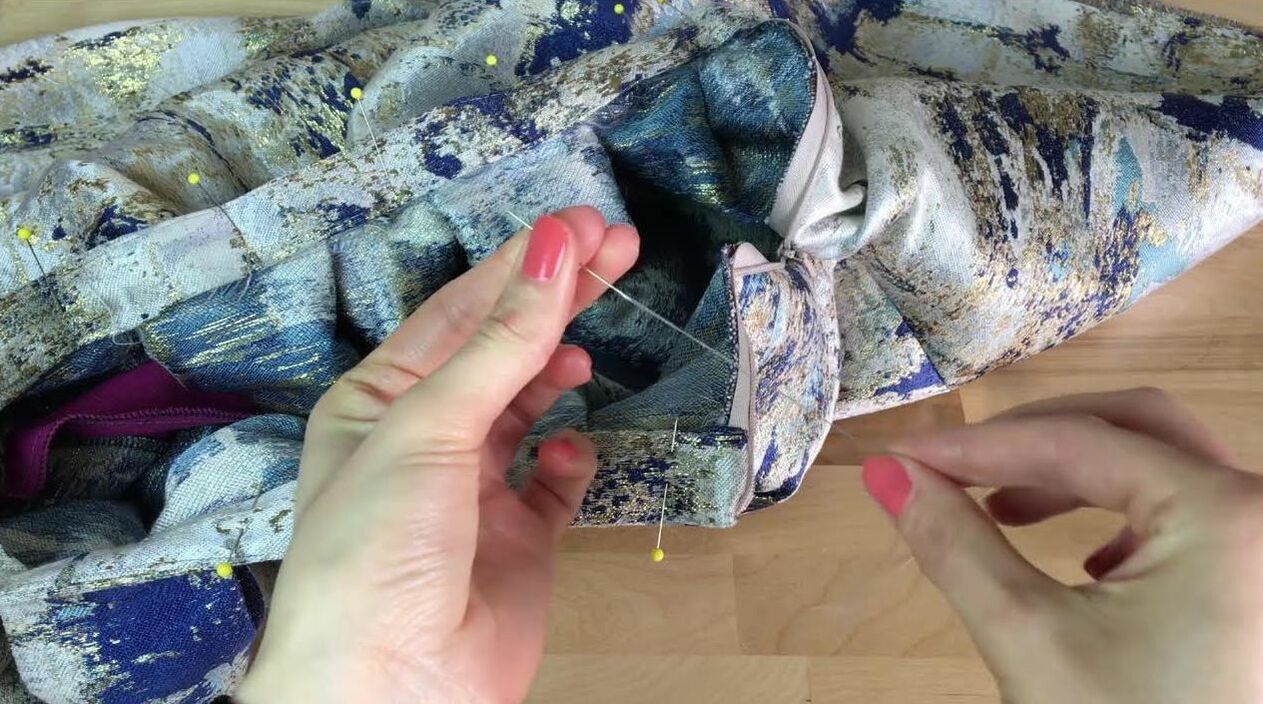 14. Pin the waistband facing down to enclose all raw edges and seam allowance. To facilitate the hand stitching process to follow, pin vertically through the waistband layers as shown above. This vertical pin placement (perpendicular to the folded edge) will ensure a sturdier connection and prevent you from accidentally pricking your fingers in the hand sewing process. 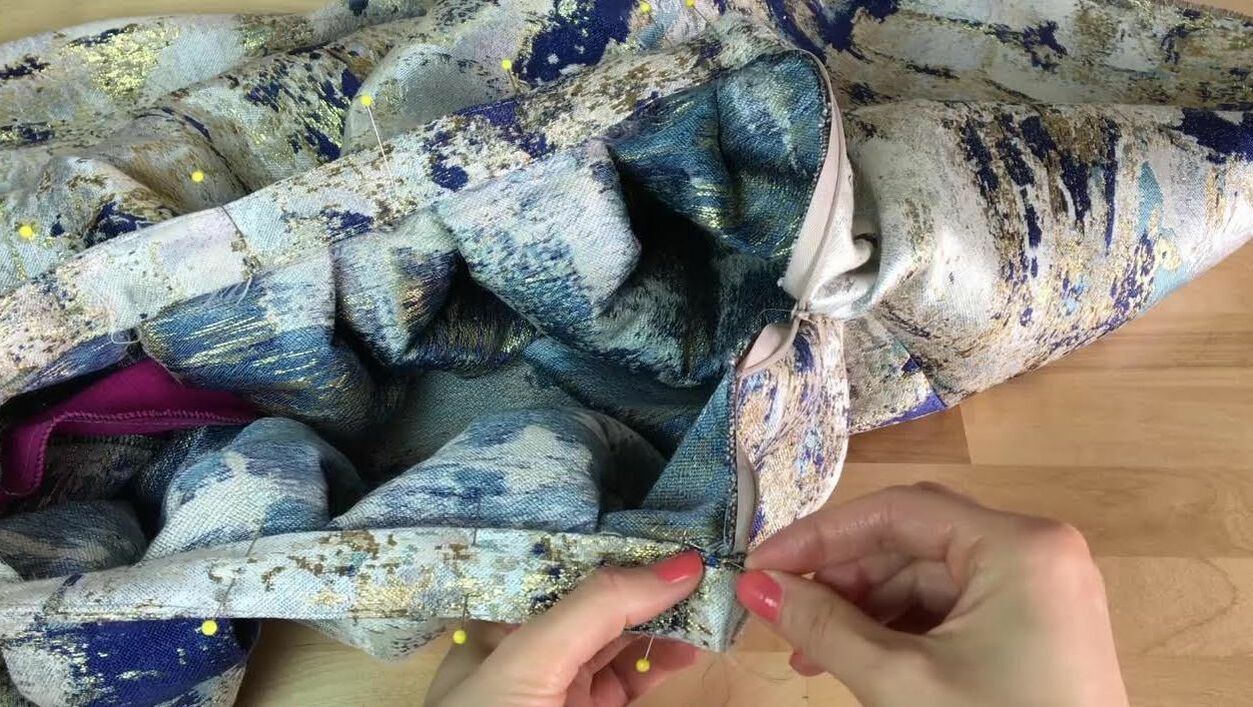 15. Starting on one end of the zipper opening, slip stitch through the waistband's folded edge catching the skirt seamline underneath. Continue slip stitching until you arrive at the other edge of the zipper opening. 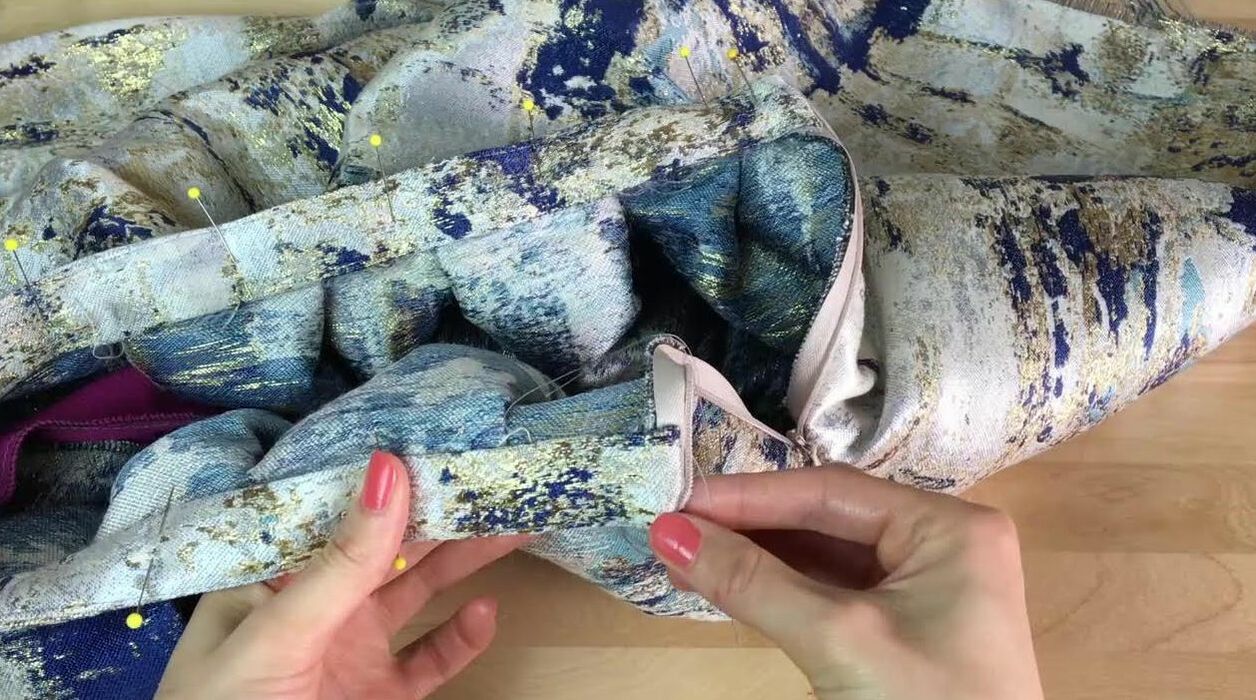 The end result should be a tailored, clean finished waistband with no top stitching visible anywhere on the face or wrong side of the skirt. Note: There is actually a machine stitching technique used for sewing a waistband with no top stitching visible on the face of the garment. Although much faster, it takes a bit of practice and requires that you feel very comfortable with your sewing machine. If you're a beginner-to-intermediate dressmaker, I suggest using the blind stitch shown in this tutorial to complete most of your woven (no stretch) waistbands. Similar Tutorials You May Like: Video Tutorial: How To Draft A Pattern For A No-Stretch Skirt Waistband How To Pattern And Sew An Elastic Waistband How To Sew A Pant Or Skirt Non-Stretch Waistband Video Tutorial: How To Sew An Invisible Zipper Into A Seam The Basics Of Interfacing For Sewing Beginners What Are Notches And How Are They Used In Sewing What Are Pleats: Common Pleats And How To Sew Them 4 Hand Sewing Techniques And Stitches You Should Know As A Sewing Beginner
0 Comments
Leave a Reply. |
The Blog:A journey into our design process, sewing tutorials, fashion tips, and all the inspiring people and things we love. 
Doina AlexeiDesigner by trade and dressmaker at heart. I spend most of my days obsessing over new fabrics and daydreaming new ideas. 
Sadie
Executive Assistant & Client Relations Manager Archives
November 2019
Categories
All

|

-
Sewing Tutorials
-
Basics
>
- Aligning Pattern Grainlines To Fabric
- Preparing Fabrics For Sewing
- Pinning Sewing Patterns To Fabric
- Placing Sewing Patterns On Fabric For Cutting
- Rotary Cutters or Fabric Scissors?
- Cutting The Sewing Patterns
- What Are Notches And How To Use Them In The Sewing Process
- Transferring Notches From Pattern To Fabric
- Transferring Seamlines to Fabric
- Staystitching
- Backstitching: A Complete Guide
- Hand Basting: A Complete Guide
- Sewing Continuous Bias Binding
- Darts >
-
Sewing Seams
>
- The Basics Of Seams And Seam Allowance
- How To Sew A Straight Seam
- Sewing Curved Seams
- Sewing Corner Seams
- Trimming And Grading Seam Excess
- Notching/Clipping Seam Allowance for Tension Release
- Sewing Topstitched Seams
- Sewing Corded Seams
- Sewing A Slot Seam
- Sewing A Gathered Seam
- Sewing Bias Seams
- Sewing Seams With Ease
- Sewing Seams With Crossing Seamlines
- Sewing Unlike Fabric Seams
- How To Iron Seams: Ironing Tools And Conventions
- Sewing With Knit Fabrics
- Understanding Stitch Length And Tension
- Sewing Unique Fabric Seams
-
Seam Finishes
>
- Seam Finishing Techniques - Overview
- Applying A Pinked Seam Finish
- Applying A Bias Bound Seam Finish
- Serging And Zigzag Seam Finishes
- Sewing A Self-Bound Seam Finish
- Sewing A French Seam Finish
- Sewing A Hong Kong Seam Finish
- Sewing A Mock French Seam Finish
- Sewing A Turned-and-Stitched Seam Finish
- Sewing Overcast Hand-Applied Seam Finishes
- Sewing A Flat Felled Seam
- Sewing A Hairline Seam Finish
-
Hem Finishes
>
- Garment Hem Finishes: Overview
- Sewing A Double Fold Hem Finish
- Sewing A Single Fold Hem Finish
- Sewing Bound Hem Finishes
- Sewing An Exposed Double Layer Bound Hem
- Sewing A Folded-Up Bound Hem with Pre-folded Binding
- Sewing A Hong Kong Hem Finish
- Sewing A Band Hem Finish
- Sewing A Bias Faced Hem Finish
- Sewing A Twill Tape Hem Finish
- Sewing A Rolled Hem Finish
- Sewing A Shaped Hem Facing
- Using Fusible Hem Tape And Webbing
- Finishing A Lace Fabric Hem
- Finishing A Leather Hem
- Sewing Faced Hem Corners
- How To Finish Lining At The Hem
- Finishing Fabric Corners by Mitering >
- Interfacing A Hemline: Lined And Unlined Examples
-
Sewing Pockets
>
- Curved Patch Pocket With Flap
- Unlined Square Patch Pockets
- Lined Patch Pockets: Two Ways
- Extension On-Seam Pockets
- Separate On-Seam Pocket
- Front Hip Pockets
- Bound Double Welt Pocket
- Double Welt Pocket With Flap
- Self-Welt Pocket (Using Single Fabric Layer)
- Slanted Welt Pocket (Hand-Stitched)
- Faced Slash Pockets: Overview >
-
Sewing Zippers
>
- Sewing Zippers: General Information
- Sewing A Centered Zipper
- Sewing A Lapped Zipper
- Sewing An Invisible Zipper
- Sewing A Fly Front Zipper
- Sewing A Closed-End Exposed Zipper (No Seam)
- Sewing An Exposed Separating Zipper
- Sewing Hand Stitched Zipper Applications
- Sewing A Zipper Underlay
- Sewing A Placket-Enclosed Separating Zipper
- Sleeveless Finishes >
-
Neckline Finishes
>
- Sewing A Neck Shaped Facing
- Sewing An All-In-One Neck Facing
- Neck And Garment Opening Combination Facings >
- Sewing A Bias Faced Neckline Finish
- Sewing A Band Neckline Finish
- Bound Neckline Finishes: Overview >
- Sewing A Semi-Stretch Strip Band Neckline
- Ribbed Neck Band And Classic Turtleneck
- Decorative Neckline Finishes >
- Finishing Facing Edges >
-
Extras
>
- A Complete Guide on Interfacing
- Sewing Bound Spaghetti Straps
- Sewing Spaghetti Straps To A Faced Neckline
- Sewing Ruffles: Overview
- Patterning And Sewing A Circle Ruffle
- Sewing A Gathered Heading Ruffle
- Sewing Double Layer Gathered Ruffles
- Sewing A Gathered Ruffle Into A Seam
- Sewing A Gathered Ruffle To A Fabric Edge
- Sewing A Fabric Surface Slit
- Sewing A Slit Seam
- Hand-Applied Straight Stitches
- Hand-Applied Blind Stitches
- Hand-Applied Overedge Stitches
- Hand-Applied Tack Stitches
- Hand-Applied Decorative Stitches
-
Basics
>
- Custom Bridal
- Custom Apparel
- About
- Blog
 RSS Feed
Services |
Company |
|
