|
While it may seem initially intimidating, sewing a pair of shorts or trousers is not as difficult as you may think. If you adhere to a few basic sets of rules, sewing pant-style bottoms should really never pose a big challenge. In today’s tutorial I’ll show you how to sew a very simple pair of shorts with a faced waistline and invisible side zipper. For a more tailored look, I will also add a hand slip stitch to clean finish the hem. Let’s start by discussing some of the general rules of sewing trousers. To begin with, it is important to be able to differentiate between the front and back pant leg pieces. Given that they often look very similar (especially to the inexperienced eye), an easy way to accomplish this is to look at the J curve which is the crotch seam edge. The two back portions will always have a deeper curved edge while the front has a softer, shorter curve. To further differentiate between the front and back pieces, you could also take a look at the darts. Conventionally, the back darts are always deeper and/or longer than the front ones. In my shorts example below, the front does not include darts yet the back does. Keeping this in mind, I can easily spot the difference between my front and back pieces. In a conventional pant style, the front is always comprised of two or more identical pieces. Similarly, the back is also composed of two or more identical pieces. Both the front and the back pieces are separate by a J seam. Always keep an eye out for notches- your pattern pieces are most likely marked with notches along their J curves. A single notch marks the front pieces and conventionally, a double notch marks the back pieces. The front J curved edges get sewn to each other. Similarly, the back J curves also get sewn to each other. As you’ll see below, these are some of the first seams you should complete in the sewing process. Darts of course, always come at the very beginning so don’t forget to get those out of the way before starting on the J seams. Speaking of the front and back J seam- these curved seams correspond to the pant’s crotch line and thus should be comfortable and easy to move in. As you’ll see below, the seam allowance along the most curved area of the J seam should be graded and/or trimmed to improve flexibility and eliminate bulk. Never clip these curved seams for tension release! Doing so will weaken the seam not to mention that it defeats the purpose of it’s overall functionality. 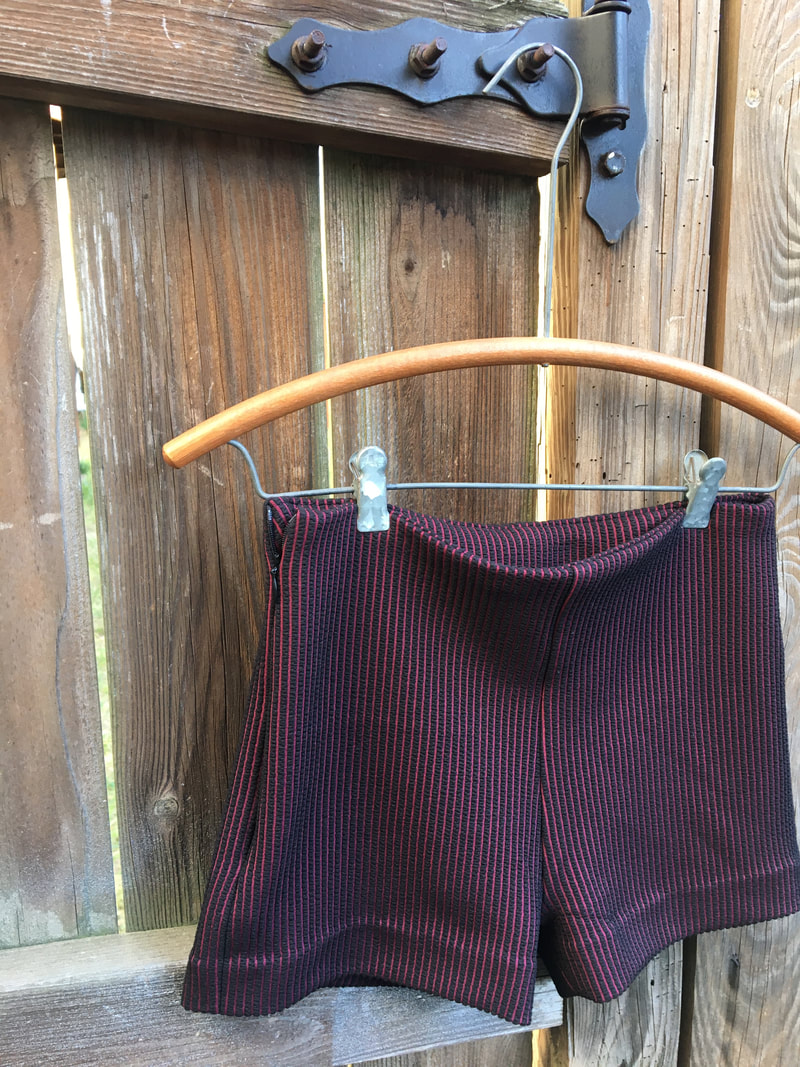 As you would with any style bottoms, think carefully about the type of closure you would like to us. Even stretch fabric may require a full zipper, snaps or buttons to provide the shorts/pants with the proper functionality. Zippers are the easiest to incorporate into shorts or trouser seams. They don’t pose as big of a challenge in terms of fit, added bulk, flaps or plackets.
3 Comments
You may or may not have noticed, but I am absolutely obsessed with pockets. There is nothing more functional and comfortable than a pair of pockets placed perfectly on a garment. Pockets are those simple elements that always work overtime, elevating both the quality and versatility of a garment. 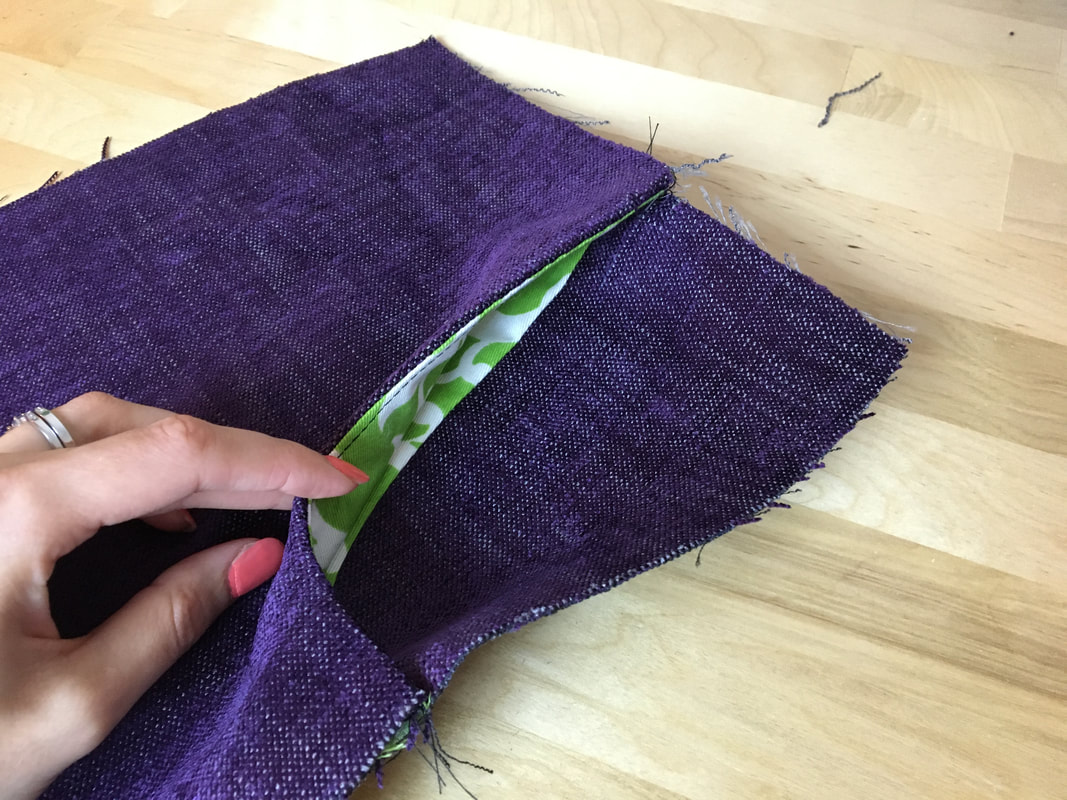 While I have a couple tutorials on the simplest of all pockets: on-seam pockets, I haven’t challenged you with something a bit more complex yet. For that reason, in today’s tutorial, I will be walking you through the process of sewing front hip pockets. If you own a pair of jeans (and you most likely do), you have seen and enjoyed the convenience of this very functional pocket style. In the example below, I'll show you the detailed steps for sewing a jean pocket which as opposed to conventional options, has an extra seam within the pocket piece. Front hip pockets are visibly positioned on the front of the garment connecting at the waist (or any horizontal seam on the front) and a side seam (or an appropriate vertical seam on the front/side of the garment). As opposed to an on-seam pocket that is comprised of two identical pocket bag pieces, a front hip pocket is made of two differently shaped pieces: a facing and a pocket piece.
The pocket piece becomes part of the garment at the waist, or the horizontal seam it is sewn into. Its upper part is visible on the face of the garment so for that reason, the pocket piece is cut of the same fabric as the garment. In this tutorial however, I will show you a pocket piece that is divided into two pieces: the upper half is cut from the same fabric as the garment while the bottom half is cut from lining or your choice of pocket bag fabric. This style is conventionally used for jeans or other styles of casual and formal trousers. Having the bottom piece cut of a thinner lining fabric eliminates bulk and ensures added flexibility and comfort. A pocket facing is used to clean finish the inner curve of the pocket opening. The facing is usually cut from a lining fabric or your choice of fabric for the actual pocket bag. While they are different shapes, once sewn into each corresponding garment areas, the outer edge of each facing and pocket piece should match perfectly thus completing the pocket bag container. If this sounds confusing now, don't worry! The sewing steps below will clarify the process. I absolutely love a faced waistline finish! Surprisingly, this sewing application is much easier than any waistband style, including an elastic one, believe it or not. It requires two simple stitches with a final finish that looks like a million bucks. Clean, tailored and highly professional, a faced waist finish is similar in construction to any regular facing. Just as any facing, it also requires interfacing and understitching. A waist facing will usually need to be finished around a zipper or other closures like snaps or buttons. Regardless, you’ll find the process of cutting and sewing one fairly simple. That is if you know the 3 basic rules of sewing! You can learn more about them here: How To Sew A Seam- The 3 Rules. A waist facing can be used on both skirts and short/long trousers. It is a finish usually applied to non stretch fabrics as they provide the right structure and drape to withstand them. A faced waist is not suitable for very stretch fabrics as it requires the use of interfacing to actually keep the bottoms from sliding down. Applying interfacing will inhibit flexibility thus if the stretch garment has no closures, applying a waist facing to it will prevent the bottoms from expanding enough to get over the human form. Before we get into the sewing portion of this tutorial, I wanted to touch a bit on sewing patterns as this of course is an important aspect of constructing any garment. Depending on the type of fabric used, the waist area of the bottoms you are sewing may or may not have darts. Due to the fact that faced waistlines are usually applied to woven non-stretch bottoms, your garment will most likely include darts. When drafting the waist facing patterns, the darts will most likely be omitted in order to eliminate bulk from overlapping dart excess. This is fairly simple to do but I’ll save it for a pattern drafting tutorial! So to recap, the waist facings are the identical mirror images of the front and back but normally don’t included darts.
I recently came to a realization: I have way too much stuff (and by stuff, I mean sewing related stuff) in my studio that I hardly ever use. I’ve been sewing for years and while I have drawers filled with sewing tools, thread and trimmings accumulated over time, some of them I have almost never used. In order to optimize my work to its fullest capacity, I decided to take a closer look at 6 lesser used sewing tools in today post. These include: the awl, double faced tape, bodkin, pointer and creaser, beeswax, and a loop turner. What is their purpose and how can I start introducing them into my work routine to make the process faster, simpler and more efficient? 1. Awl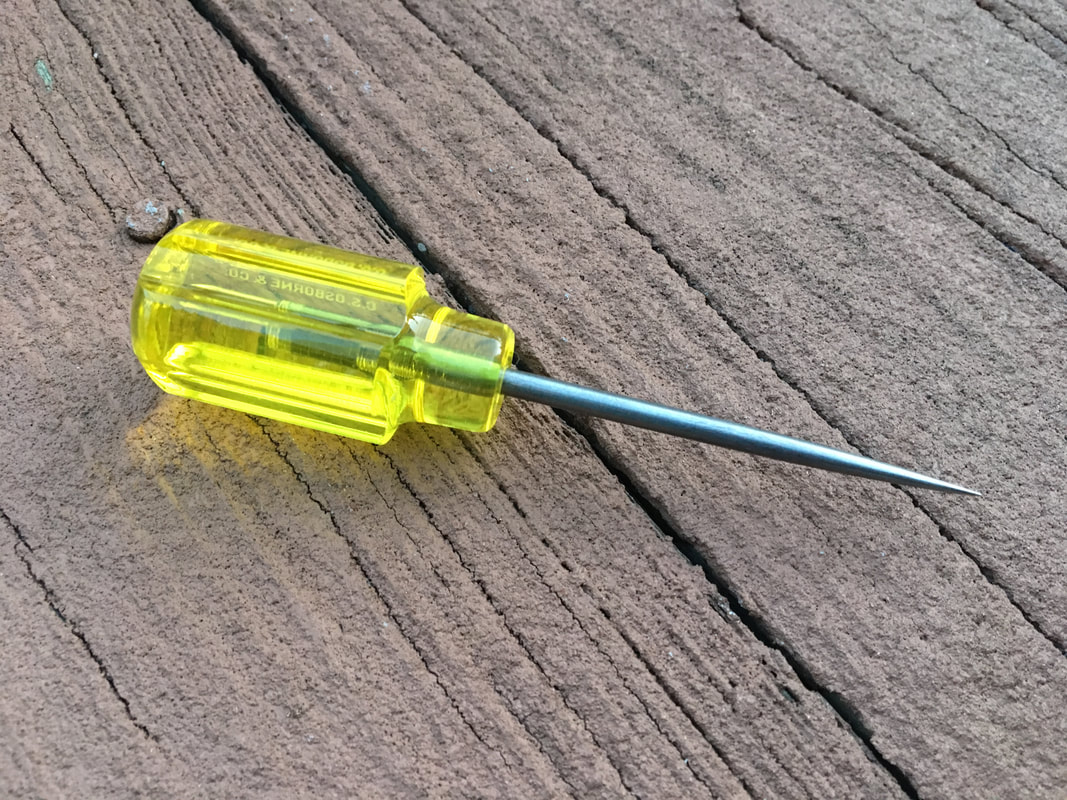 I was introduced to this tool way back in the day when I started sewing in high school. I never really understood its use until I got to college. Even then, I can’t say I was using it all that much. These days, I am realizing I may have had a bit of a missed opportunity by not taking full advantage of it over time. To start with, what exactly is an awl? It is a hand held tool that has a pointed sharp end on one side and a handle on the other. It is used both in patternmaking and sewing. In pattern drafting an awl is used to keep layered patterns in place at a specific point, to “walk" patterns when checking seams, and to perforate marker points through paper (especially used on basic blocks) that can then be used to easily transfer pencil lines to other patterns. By the way, walking a pattern means overlapping corresponding seams on two patterns and shifting them as needed at certain points to check that both seamlines are the same length.
In sewing, the awl is commonly used to perforate fabric layer(s) at buttonhole or eyelet locations in order to create the round holes needed to complete these applications. You can also use an awl to perforate fabric as a starting point for adding small slits and cuts to the surface of a finished garment- allows for more precision! I’ve experienced a need for this tool in both the patterning and sewing scenarios described above. Alternately, I've used the sharp point on my pencil to walk my patterns in the quality control process. When needing to perforate holes into fabric, I've always used the tip of my scissors. I now realize doing so offers nowhere near the precision an awl would. Needless to say, I am hands down introducing this tool into my repertoire starting today! When it comes to designing, I somehow have an inclination to add elements that have some form of curvature at the hem. For that reason, I’ve spent years sewing and clean finishing curved edges. I feel that soft curves flow nicer, feeling softer and looking more organic. In dressmaking, materializing a design means applying sewing techniques that are often a bit more tricky than others. Clean finishing a curved edge, while it may seem and sound simple, is one of those sewing instances that can actually be quite tricky. Fun fact: Curved edges misbehave. They tend to defy folding and require a lot more patience in the clean finishing process. For years, I’ve patiently turned curved fabric edges by hand, attempting to keep them smooth and tension free. Even with using and iron and hand basting, folding and topstitching curved hemlines is nothing more than a roller coaster ride. Recently however, I came across a simple technique that saved me from hours of crouching over the ironing board. It is called easestitching and in its pure simplicity, solves some of the most complex sewing challenges. 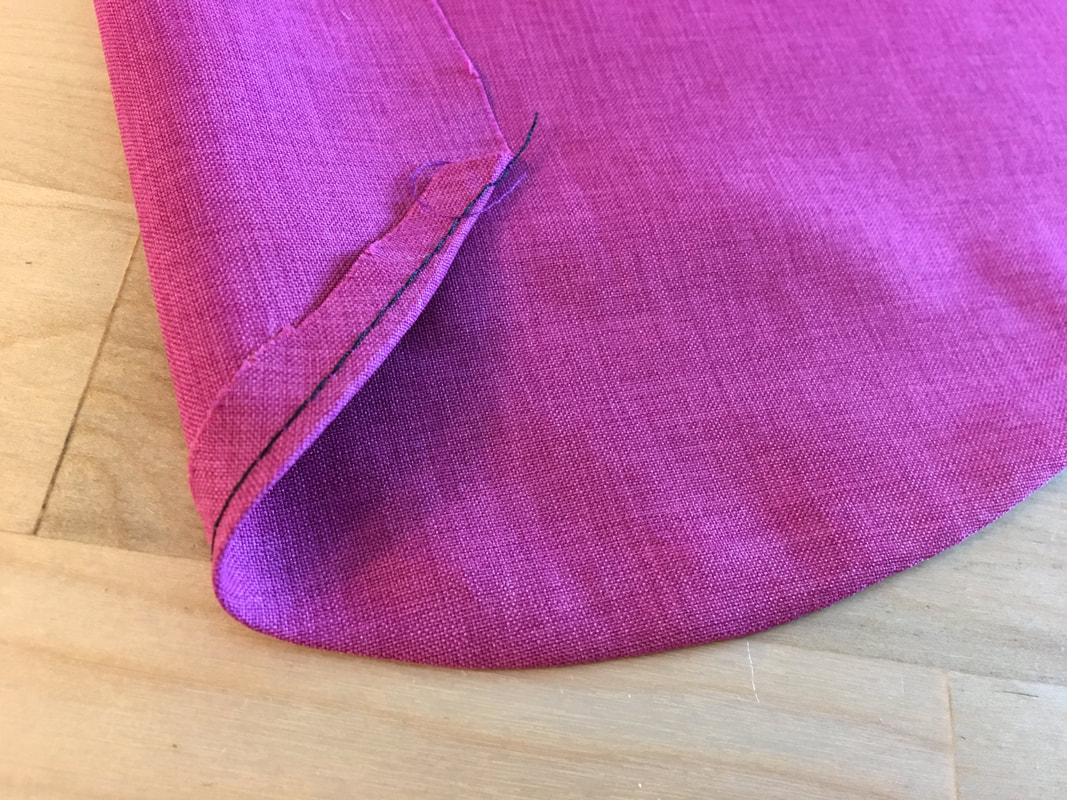 What is easestitching? A machine basting stitch that is applied along curved fabric edges and then pulled as much as necessary to gather up the seam allowance into even, smooth curves- Beautiful.
Easestitching serves as the perfect tool for manipulating curved folds and evenly distributing excess seam allowance. In the steps below, I’ll show you a techniques for folding curved edges with easestitching used on hemline finshes, as well as curved patch pockets and folded edge appliques. I have a problem with loosing things. Yes, I’m the person that spends a good 10 minutes looking for car keys every morning. The smaller the objects the easier they are to loose and more difficult they are too find. Since old habits die hard, I have a similar issue in my sewing studio where over time, pins have disappeared into oblivion never to be found or seen again. 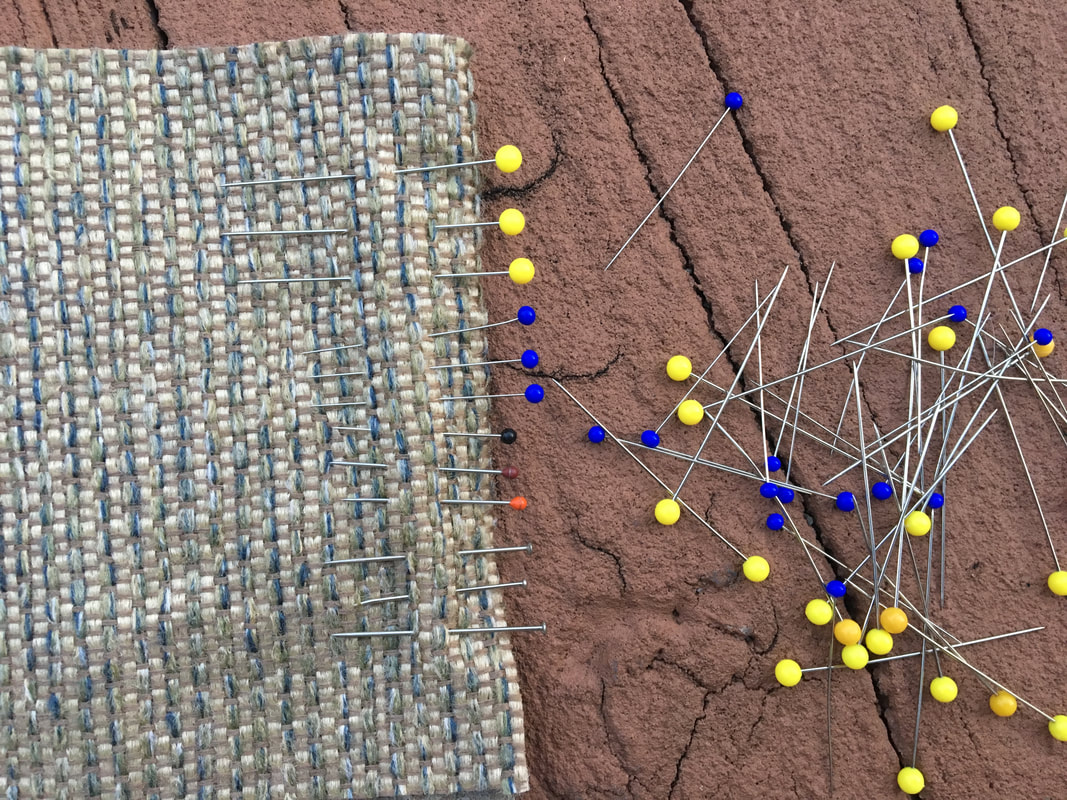 There is no denying the fact that the sewing process requires the use of lots of pinning. While I genuinely attempt to collect each fallen pin at the end of a work day, some fall through the cracks both literally and metaphorically speaking. In an effort to replenish my sewing pin collection, I ran over to the fabric store for what was supposed to be a five minute shopping session. Instead, I spend a good 20 minutes trying to decide what sewing pins I should get. Something as simple as sewing pins can impact sewing speed, comfort and functionality. If you are at the beginning of the road, I encourage you to start with the right set of sewing pins as this will help you optimize your construction process!
Here are 4 main factors to consider: |
The Blog:A journey into our design process, sewing tutorials, fashion tips, and all the inspiring people and things we love. 
Doina AlexeiDesigner by trade and dressmaker at heart. I spend most of my days obsessing over new fabrics and daydreaming new ideas. 
Sadie
Executive Assistant & Client Relations Manager Archives
November 2019
Categories
All

|

-
Sewing Tutorials
-
Basics
>
- Aligning Pattern Grainlines To Fabric
- Preparing Fabrics For Sewing
- Pinning Sewing Patterns To Fabric
- Placing Sewing Patterns On Fabric For Cutting
- Rotary Cutters or Fabric Scissors?
- Cutting The Sewing Patterns
- What Are Notches And How To Use Them In The Sewing Process
- Transferring Notches From Pattern To Fabric
- Transferring Seamlines to Fabric
- Staystitching
- Backstitching: A Complete Guide
- Hand Basting: A Complete Guide
- Sewing Continuous Bias Binding
- Darts >
-
Sewing Seams
>
- The Basics Of Seams And Seam Allowance
- How To Sew A Straight Seam
- Sewing Curved Seams
- Sewing Corner Seams
- Trimming And Grading Seam Excess
- Notching/Clipping Seam Allowance for Tension Release
- Sewing Topstitched Seams
- Sewing Corded Seams
- Sewing A Slot Seam
- Sewing A Gathered Seam
- Sewing Bias Seams
- Sewing Seams With Ease
- Sewing Seams With Crossing Seamlines
- Sewing Unlike Fabric Seams
- How To Iron Seams: Ironing Tools And Conventions
- Sewing With Knit Fabrics
- Understanding Stitch Length And Tension
- Sewing Unique Fabric Seams
-
Seam Finishes
>
- Seam Finishing Techniques - Overview
- Applying A Pinked Seam Finish
- Applying A Bias Bound Seam Finish
- Serging And Zigzag Seam Finishes
- Sewing A Self-Bound Seam Finish
- Sewing A French Seam Finish
- Sewing A Hong Kong Seam Finish
- Sewing A Mock French Seam Finish
- Sewing A Turned-and-Stitched Seam Finish
- Sewing Overcast Hand-Applied Seam Finishes
- Sewing A Flat Felled Seam
- Sewing A Hairline Seam Finish
-
Hem Finishes
>
- Garment Hem Finishes: Overview
- Sewing A Double Fold Hem Finish
- Sewing A Single Fold Hem Finish
- Sewing Bound Hem Finishes
- Sewing An Exposed Double Layer Bound Hem
- Sewing A Folded-Up Bound Hem with Pre-folded Binding
- Sewing A Hong Kong Hem Finish
- Sewing A Band Hem Finish
- Sewing A Bias Faced Hem Finish
- Sewing A Twill Tape Hem Finish
- Sewing A Rolled Hem Finish
- Sewing A Shaped Hem Facing
- Using Fusible Hem Tape And Webbing
- Finishing A Lace Fabric Hem
- Finishing A Leather Hem
- Sewing Faced Hem Corners
- How To Finish Lining At The Hem
- Finishing Fabric Corners by Mitering >
- Interfacing A Hemline: Lined And Unlined Examples
-
Sewing Pockets
>
- Curved Patch Pocket With Flap
- Unlined Square Patch Pockets
- Lined Patch Pockets: Two Ways
- Extension On-Seam Pockets
- Separate On-Seam Pocket
- Front Hip Pockets
- Bound Double Welt Pocket
- Double Welt Pocket With Flap
- Self-Welt Pocket (Using Single Fabric Layer)
- Slanted Welt Pocket (Hand-Stitched)
- Faced Slash Pockets: Overview >
-
Sewing Zippers
>
- Sewing Zippers: General Information
- Sewing A Centered Zipper
- Sewing A Lapped Zipper
- Sewing An Invisible Zipper
- Sewing A Fly Front Zipper
- Sewing A Closed-End Exposed Zipper (No Seam)
- Sewing An Exposed Separating Zipper
- Sewing Hand Stitched Zipper Applications
- Sewing A Zipper Underlay
- Sewing A Placket-Enclosed Separating Zipper
- Sleeveless Finishes >
-
Neckline Finishes
>
- Sewing A Neck Shaped Facing
- Sewing An All-In-One Neck Facing
- Neck And Garment Opening Combination Facings >
- Sewing A Bias Faced Neckline Finish
- Sewing A Band Neckline Finish
- Bound Neckline Finishes: Overview >
- Sewing A Semi-Stretch Strip Band Neckline
- Ribbed Neck Band And Classic Turtleneck
- Decorative Neckline Finishes >
- Finishing Facing Edges >
-
Extras
>
- A Complete Guide on Interfacing
- Sewing Bound Spaghetti Straps
- Sewing Spaghetti Straps To A Faced Neckline
- Sewing Ruffles: Overview
- Patterning And Sewing A Circle Ruffle
- Sewing A Gathered Heading Ruffle
- Sewing Double Layer Gathered Ruffles
- Sewing A Gathered Ruffle Into A Seam
- Sewing A Gathered Ruffle To A Fabric Edge
- Sewing A Fabric Surface Slit
- Sewing A Slit Seam
- Hand-Applied Straight Stitches
- Hand-Applied Blind Stitches
- Hand-Applied Overedge Stitches
- Hand-Applied Tack Stitches
- Hand-Applied Decorative Stitches
-
Basics
>
- Custom Bridal
- Custom Apparel
- About
- Blog
 RSS Feed
Services |
Company |
|
