|
I recently came to a realization: I have way too much stuff (and by stuff, I mean sewing related stuff) in my studio that I hardly ever use. I’ve been sewing for years and while I have drawers filled with sewing tools, thread and trimmings accumulated over time, some of them I have almost never used. In order to optimize my work to its fullest capacity, I decided to take a closer look at 6 lesser used sewing tools in today post. These include: the awl, double faced tape, bodkin, pointer and creaser, beeswax, and a loop turner. What is their purpose and how can I start introducing them into my work routine to make the process faster, simpler and more efficient? 1. Awl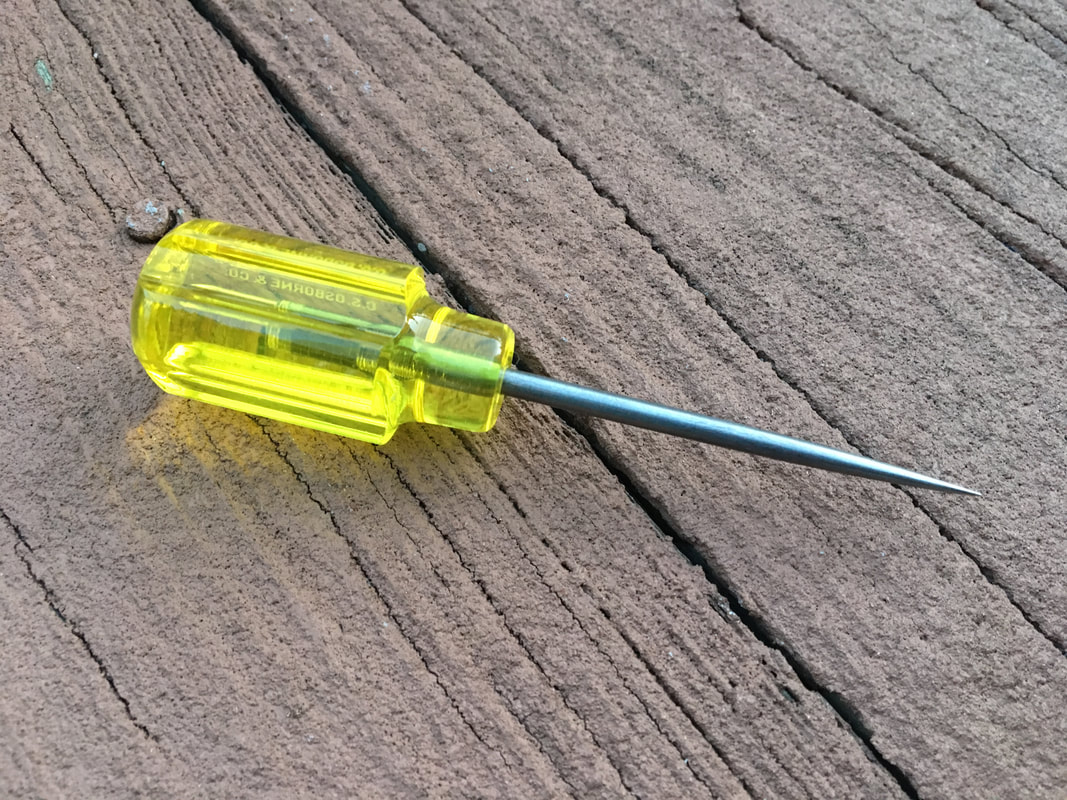 I was introduced to this tool way back in the day when I started sewing in high school. I never really understood its use until I got to college. Even then, I can’t say I was using it all that much. These days, I am realizing I may have had a bit of a missed opportunity by not taking full advantage of it over time. To start with, what exactly is an awl? It is a hand held tool that has a pointed sharp end on one side and a handle on the other. It is used both in patternmaking and sewing. In pattern drafting an awl is used to keep layered patterns in place at a specific point, to “walk" patterns when checking seams, and to perforate marker points through paper (especially used on basic blocks) that can then be used to easily transfer pencil lines to other patterns. By the way, walking a pattern means overlapping corresponding seams on two patterns and shifting them as needed at certain points to check that both seamlines are the same length. In sewing, the awl is commonly used to perforate fabric layer(s) at buttonhole or eyelet locations in order to create the round holes needed to complete these applications. You can also use an awl to perforate fabric as a starting point for adding small slits and cuts to the surface of a finished garment- allows for more precision! I’ve experienced a need for this tool in both the patterning and sewing scenarios described above. Alternately, I've used the sharp point on my pencil to walk my patterns in the quality control process. When needing to perforate holes into fabric, I've always used the tip of my scissors. I now realize doing so offers nowhere near the precision an awl would. Needless to say, I am hands down introducing this tool into my repertoire starting today! 2. Double Faced Stick Tape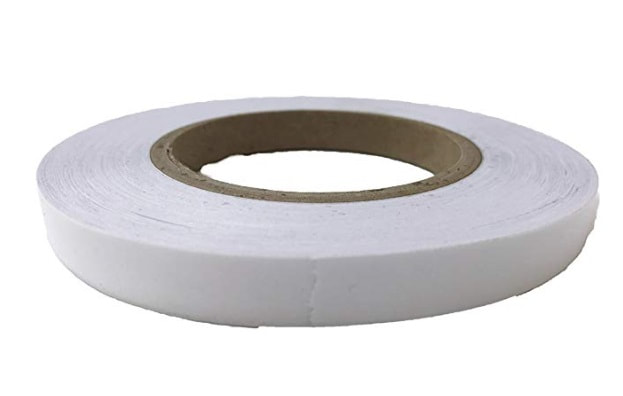 Via www.amazon.com I have always been sort of indifferent to using double stick fabric tape in the sewing process as I find it to be just an extra tool that can easily be replaced by other available alternatives. I recently realized however that double stick fabric tape can be the ultimate time saver! You can use it as a fast alternative to pinning and basting in a variety of sewing applications. One of the most useful ways to introduce this tool into your sewing routine is in the process of keeping zippers in place during the stitching process. For those that are familiar with the headache of sewing zippers, double faced tape is a great alternative to temporarily basting the zipper in place prior to machine stitching. Once complete, the double stick tape can be easily removed without leaving any marks on fabric. This handy tape can also be used to keep fabric layers in place during the stitching process, especially those slippery ones that are difficult to handle. Needles to say, double faced tape is a great alternative to basting if you are looking to save some time. However, be careful not to stitch directly through the tape as it will make it more difficult to remove and you risk leaving sticky residue on the needle and fabric in the process. 3. Pointer And Creaser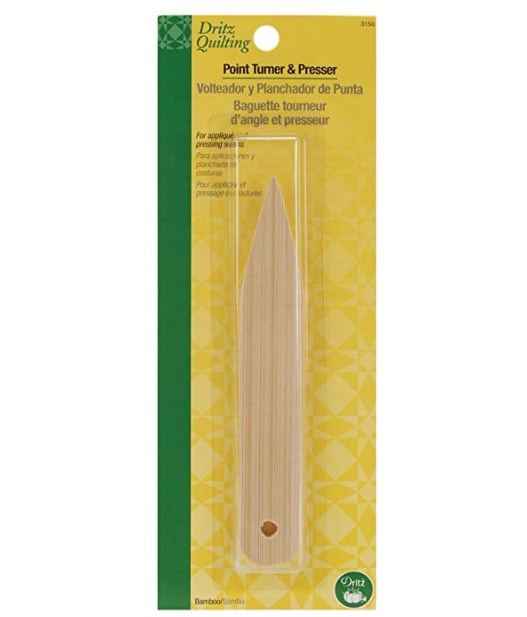 Via www.amazon.com I’ve never actually owned a pointer and/or creaser. I tend to use other random tools to achieve pointy edges or crease seam allowance and fabric folds. In lieu of an actual pointer, I've been using a sewing pin to pull out straight/sharp corners, and when it comes to creasing, I use my bare fingers to direct seam allowance and keep folds in place. Needless to say, I think I need this tool! A pointer/creaser is a plastic or wooden hand held tool that has one pointed end and rounded lengthwise edges. The pointy end is used to push out sharp or straight self-finished edges/corners while the rounded lengthwise portion is used to crease folds or to keep seam allowance open during the ironing process. I love multi-functional tools and this certainly is one that will optimize your sewing process. You'll be surprised how many times you may find yourself needing a pointer: collars, self-finished ties, faced garment openings and even some pocket applications. A creasing tool on the other hand, will be gentle on fabric due to its softly curved edges and is much safer to use in the pressing process than your fingers (speaking from experience here). 4. Bodkin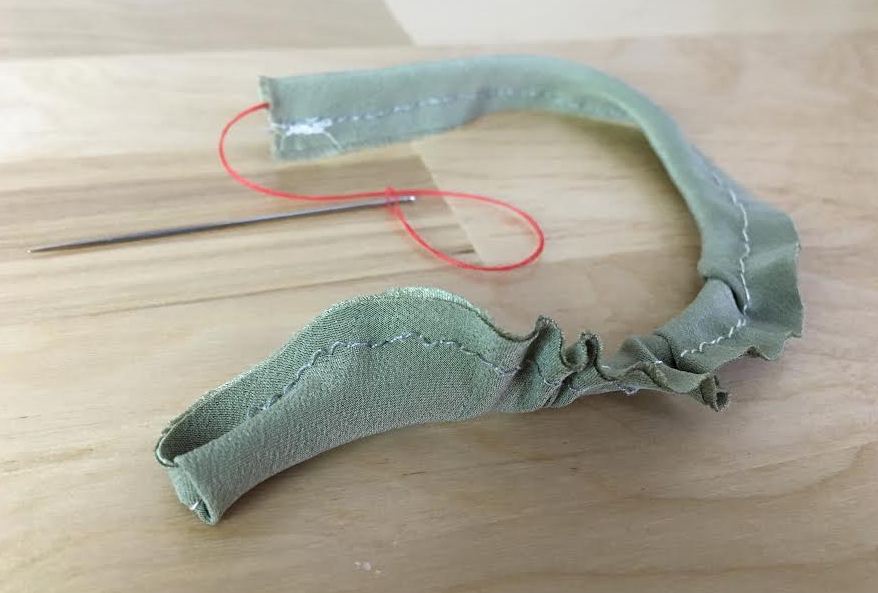 Whether you know its name or not, you have definitely seen or used this tool before. A bodkin is best characterized as a long, thick needle with a blunt end (not sharp like a regular needle). It is used to thread elastics, cording and tubing through various types of casings. A bodkin's eye is much larger allowing the trims to actually be threaded through. Some bodkins have an eye that opens and closes like a safety pin attaching easier and more efficiently to various styles of elastic or tubing. By the way, aside from pulling tubing through a casing, bodkins can also be used to turn tubing and binding on their right side during the construction process. Check out this tutorial on making tubing and then flipping it on its face side with a bodkin: How To Make Button Loop Tubing By Hand. While the processes discussed above are the most conventionally used in sewing, bodkins are also great for decorative applications as well as hand sewing through loosely woven, thick fabrics or pre-applied holes in leather and suede. All and all, another great little tool to have as you advance through the learning process! 5. Thread Beeswax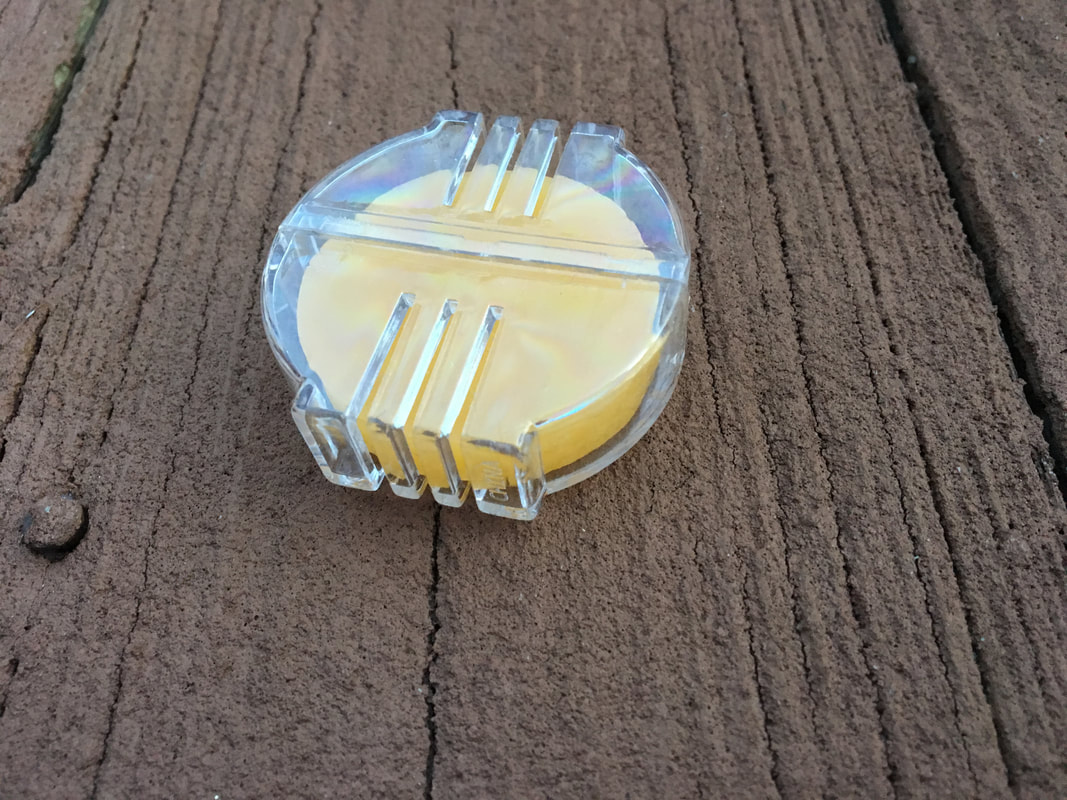 If you do or have done a lot of hand sewing you most likely already own thread beeswax- a great way to keep thread from misbehaving. When hand sewing, thread has a tendency to tangle, separate (when 2 layers are needed), twist and knot. Beeswax prevents these issues, keeping thread strong and straight as it goes in and out of fabric. Applying beeswax to thread is very easy thanks to the smart little application container it comes in. Shown above is thread beeswax as you will most likely find at your local fabric or craft store. It is conventionally round or square shaped, and has a few slots that allow the thread to be easily inserted and coated with just the right amount of wax. Traditionally, the plastic container is clear as this allows you to keep track of how much wax you have left. You can buy individual wax refills to replenish the plastic applicator, or just get a new one altogether as this tool is fairly inexpensive! 6. Loop Turner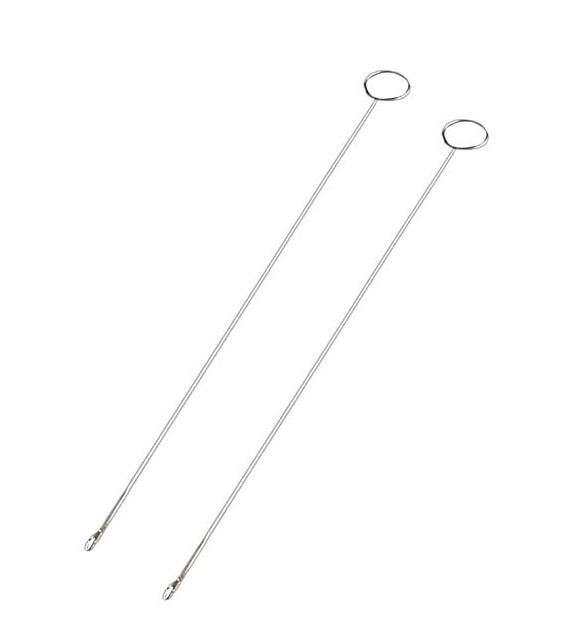 Via www.amazon.com I admit, I've never owned or used a loop turner. However, after recently learning more about it, I want one! It is somewhat similar in structure to a bodkin but used for other binding-like trims to easily turn them on their face side. As opposed to a bodkin, a loop turner is more comfortable to handle due to its longer length, a hook on one and a handle on the other. It simply allows for a much faster process as all you have to do is insert the looper through the binding or tubing, catch one of the ends with the hook, and pull the end inward while holding the handle on the other looper end. Another reason a looper hook is much faster and more comfortable to use is due to the fact that you wont lose it through the tubing the way you would a bodkin. I personally, have used a safety pin to turn various cording structures on their face side. However, I can see the potential of the loop tuner in optimizing my personal sewing process! Similar Tutorials You May Like: Sewing Terms You Should Know In The Process Of Learning How To Sew Want To Learn How To Sew And Make Your Own Patterns: These Are The Basic Supplies You Should Have Picking The Right Woven Fabrics: Type Of Wovens You Should Know 4 Practice Exercises For Getting Comfortable With Your Sewing Machine 6 Sewing Hacks For The Creative Seamstress
0 Comments
Leave a Reply. |
The Blog:A journey into our design process, sewing tutorials, fashion tips, and all the inspiring people and things we love. 
Doina AlexeiDesigner by trade and dressmaker at heart. I spend most of my days obsessing over new fabrics and daydreaming new ideas. 
Sadie
Executive Assistant & Client Relations Manager Archives
November 2019
Categories
All

|

-
Sewing Tutorials
-
Basics
>
- Aligning Pattern Grainlines To Fabric
- Preparing Fabrics For Sewing
- Pinning Sewing Patterns To Fabric
- Placing Sewing Patterns On Fabric For Cutting
- Rotary Cutters or Fabric Scissors?
- Cutting The Sewing Patterns
- What Are Notches And How To Use Them In The Sewing Process
- Transferring Notches From Pattern To Fabric
- Transferring Seamlines to Fabric
- Staystitching
- Backstitching: A Complete Guide
- Hand Basting: A Complete Guide
- Sewing Continuous Bias Binding
- Darts >
-
Sewing Seams
>
- The Basics Of Seams And Seam Allowance
- How To Sew A Straight Seam
- Sewing Curved Seams
- Sewing Corner Seams
- Trimming And Grading Seam Excess
- Notching/Clipping Seam Allowance for Tension Release
- Sewing Topstitched Seams
- Sewing Corded Seams
- Sewing A Slot Seam
- Sewing A Gathered Seam
- Sewing Bias Seams
- Sewing Seams With Ease
- Sewing Seams With Crossing Seamlines
- Sewing Unlike Fabric Seams
- How To Iron Seams: Ironing Tools And Conventions
- Sewing With Knit Fabrics
- Understanding Stitch Length And Tension
- Sewing Unique Fabric Seams
-
Seam Finishes
>
- Seam Finishing Techniques - Overview
- Applying A Pinked Seam Finish
- Applying A Bias Bound Seam Finish
- Serging And Zigzag Seam Finishes
- Sewing A Self-Bound Seam Finish
- Sewing A French Seam Finish
- Sewing A Hong Kong Seam Finish
- Sewing A Mock French Seam Finish
- Sewing A Turned-and-Stitched Seam Finish
- Sewing Overcast Hand-Applied Seam Finishes
- Sewing A Flat Felled Seam
- Sewing A Hairline Seam Finish
-
Hem Finishes
>
- Garment Hem Finishes: Overview
- Sewing A Double Fold Hem Finish
- Sewing A Single Fold Hem Finish
- Sewing Bound Hem Finishes
- Sewing An Exposed Double Layer Bound Hem
- Sewing A Folded-Up Bound Hem with Pre-folded Binding
- Sewing A Hong Kong Hem Finish
- Sewing A Band Hem Finish
- Sewing A Bias Faced Hem Finish
- Sewing A Twill Tape Hem Finish
- Sewing A Rolled Hem Finish
- Sewing A Shaped Hem Facing
- Using Fusible Hem Tape And Webbing
- Finishing A Lace Fabric Hem
- Finishing A Leather Hem
- Sewing Faced Hem Corners
- How To Finish Lining At The Hem
- Finishing Fabric Corners by Mitering >
- Interfacing A Hemline: Lined And Unlined Examples
-
Sewing Pockets
>
- Curved Patch Pocket With Flap
- Unlined Square Patch Pockets
- Lined Patch Pockets: Two Ways
- Extension On-Seam Pockets
- Separate On-Seam Pocket
- Front Hip Pockets
- Bound Double Welt Pocket
- Double Welt Pocket With Flap
- Self-Welt Pocket (Using Single Fabric Layer)
- Slanted Welt Pocket (Hand-Stitched)
- Faced Slash Pockets: Overview >
-
Sewing Zippers
>
- Sewing Zippers: General Information
- Sewing A Centered Zipper
- Sewing A Lapped Zipper
- Sewing An Invisible Zipper
- Sewing A Fly Front Zipper
- Sewing A Closed-End Exposed Zipper (No Seam)
- Sewing An Exposed Separating Zipper
- Sewing Hand Stitched Zipper Applications
- Sewing A Zipper Underlay
- Sewing A Placket-Enclosed Separating Zipper
- Sleeveless Finishes >
-
Neckline Finishes
>
- Sewing A Neck Shaped Facing
- Sewing An All-In-One Neck Facing
- Neck And Garment Opening Combination Facings >
- Sewing A Bias Faced Neckline Finish
- Sewing A Band Neckline Finish
- Bound Neckline Finishes: Overview >
- Sewing A Semi-Stretch Strip Band Neckline
- Ribbed Neck Band And Classic Turtleneck
- Decorative Neckline Finishes >
- Finishing Facing Edges >
-
Extras
>
- A Complete Guide on Interfacing
- Sewing Bound Spaghetti Straps
- Sewing Spaghetti Straps To A Faced Neckline
- Sewing Ruffles: Overview
- Patterning And Sewing A Circle Ruffle
- Sewing A Gathered Heading Ruffle
- Sewing Double Layer Gathered Ruffles
- Sewing A Gathered Ruffle Into A Seam
- Sewing A Gathered Ruffle To A Fabric Edge
- Sewing A Fabric Surface Slit
- Sewing A Slit Seam
- Hand-Applied Straight Stitches
- Hand-Applied Blind Stitches
- Hand-Applied Overedge Stitches
- Hand-Applied Tack Stitches
- Hand-Applied Decorative Stitches
-
Basics
>
- Custom Bridal
- Custom Apparel
- About
- Blog

 RSS Feed
Services |
Company |
|
