|
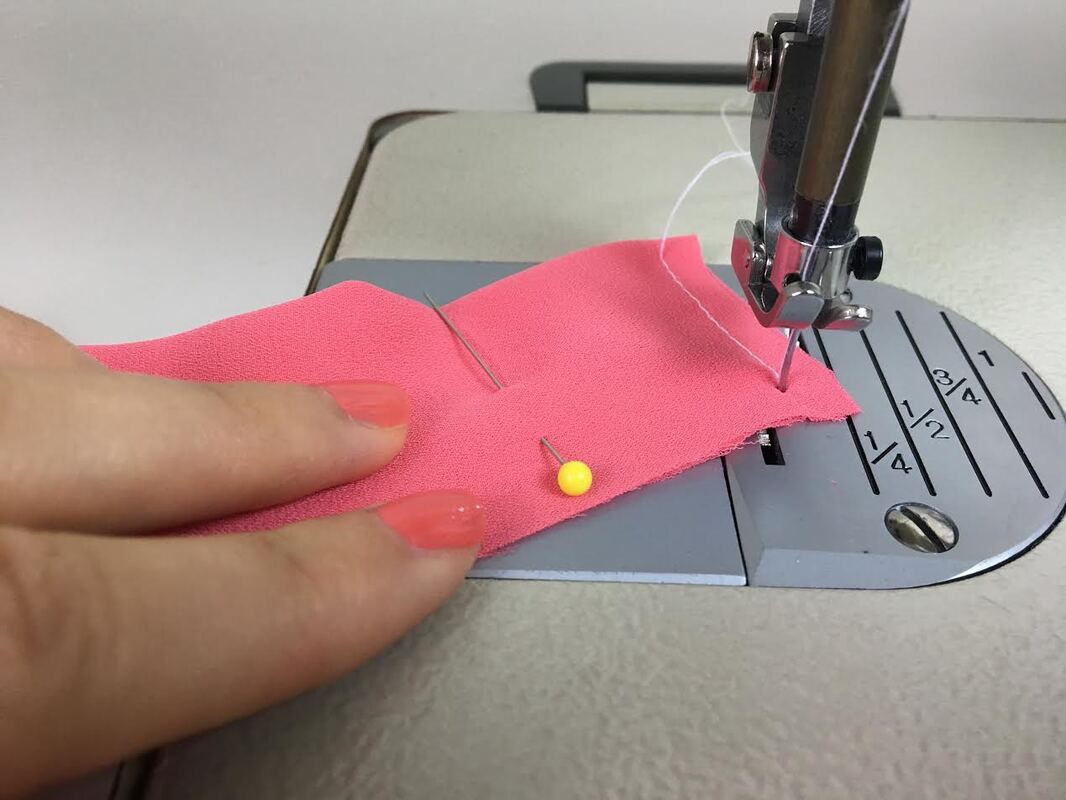
This week's tutorial will be a very simple one. It has been inspired by a cute little sash I recently made for a cute little flower girl. To make the sash match the fabric of the bridesmaid dresses, I treated the construction of the sash as I would with any conventional waist tie. So this brought me to another thought: considering its sewing simplicity, wouldn't a waist tie make a really pretty addition to any old dress or tunic top that needs to be replenished a bit? In the steps below, I'll show you two techniques for sewing a professional waist tie: The self-finished folded method and the lined method. 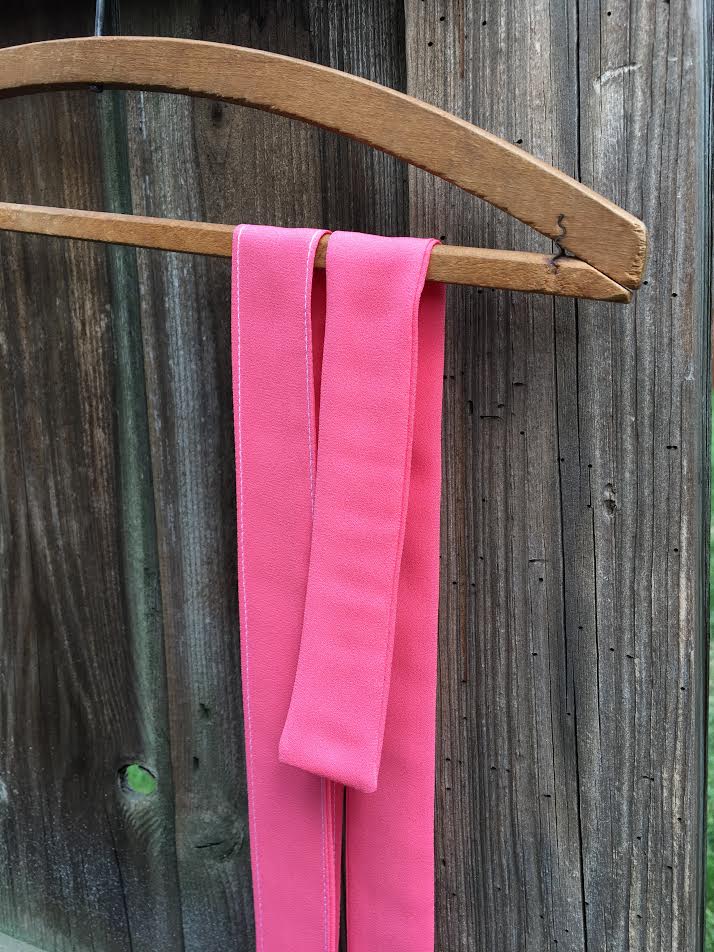 A waist tie can take on many styling challenges and serve a number of different functions. Yes, it's a great little bow builder for a flower girl, but it can also make a perfect stylistic element for any dress that needs an update. A tie waist look is classic, accentuates the waistline, and can hide a majority of size and design issues. If this sewing tutorial has already peaked your interest, here are some tips on how and where to start if you want to vamp up a dress in your closet with a waist tie sewn by you! Consider these three elements: Fabric, color and drape. FabricChoose a fabric that either matches the weight, thickness and texture of the dress or vise versa, an opposite that compliments the dress' design and fabric. You could of course sew the waist tie out of any scrap fabrics you already have, but I suggest that you pay close attention to what also works with the dress both visually and functionally. If mismatched however, make sure the combo looks intentional. For example, if you are adding a tie to a very lightweight silk dress, a waist tie made of stiff, textured fabric (like linen or wool) may not feel or look the part. Vise versa, if the dress is more structured, a very thin, flimsy waist tie may be overpowered or simply not withstand the dress both functionally and visually. So that being said, if you're rummaging through scrap fabrics trying to find the perfect tie material, keep these fabric-related elements in mind. ColorOn the topic of color: you can and should use your design eye. I suggest choosing a color that works in combination with the rest of the dress to ensure a cohesive look. Sometimes when it comes to color opposites attract, so you can certainly color block! What you want to avoid however, is making the waist tie look like an add-on that simply doesn't belong. Because it is a removable piece, color blocking doesn't always work as it can make the tie feel as if it is not intentionally part of dress. If you can't find a matching color, I suggest either staying within the same basic color scheme but choosing a darker or lighter shade, or making the separate tie in a neutral like black. DrapeAlthough drape goes hand-in-hand with fabric, I think it's important to consider it separately as it will affect the design and overall look of the garment. Consider how you would ultimately like to knot or style the waist tie. A lightweight fabric with high draping capabilities carries less bulk and for that reason, works well with a longer waist tie. Vise versa, if the fabric is stiff with no natural drape, you should almost look at it more as a belt. When styling a more structured waist tie, I suggest either making it shorter or wrapping it around the waist a few times so that the hanging ends are nicely contained at the waist. A tie made from drape-less fabric can look bulky and overwhelm a garment if the loose ends are long and left floating at the bottom. Ultimately, it is really up to your taste and design eye to decide what fabric, color and drape is best suited for your waist tie addition (or sash)! But now that I got some of my own suggestions out of the way, let's get started on the sewing portion of this tutorial. As mentioned above, it will be a fairly simple and hopefully a fun one! I'll walk you through two separate techniques both resulting in almost the same edge finished style. Choose your method based on how much fabric you have available and what is most suitable for your sewing experience. Hint: You'll find that the first technique is more simple and has less steps to fiddle with. Self Finished By FoldingThis is the easier method of the two I'll show you today. With this technique, a layer of fabric is folded onto itself to self finish the waist tie. It requires just one machine stitch, thus has one seam along one side and a fold on the opposite side. How to measure and cut the fabric: For this step, you'll need a ruler and a fabric-safe tool for marking the cut lines directly on fabric. Fabric-safe marking options are those that come out in the wash easily including tailor's chalk or various quilting pencils. Choose your option based on your fabric's color and texture as some marking methods will work better than others when these factors are considered. Decide what width you'd like the waist tie or sash to be. To keep things simple, mine is 1.5" inches wide. To calculate the width of the fabric strip you need to cut, double this measurement and add twice the seam allowance to account for each edge. My seam allowance in this case is a quarter of an inch (.25"). Thus, the final width of my fabric strip is (1.5"x 2) + (.25" x 2)= 3.5". Nothing like a little math problem to get the wheels turning! A note on seam allowance: I chose 1/4" (.25") because I'm working with a lightweight, thin fabric. The thicker and heavier the fabric, the wider should the seam allowance be. I suggest that when in doubt, a standard half inch (.5") allowance is the best way to go. Next, decide on the appropriate length. Consider how you'd ultimately like to style your sash or waist tie. If you like longer loose ends and the ability to wrap it around or tie it in a bow, make sure you give yourself plenty of length to do so. To keep things simple, I'll just work with a standard(ish) 36". The total length of the fabric strip however should also account for seam allowance, which in my case is 1/4" (.25") on both ends. That being said, the true length of the finished waist tie will actually be 35.5"- which is within totally acceptable length for what I need. Now lets finally measure, mark and cut the fabric strip! I like to use an existing straight edge on my fabric to measure from. Normally, the selvage edge is a good indicator to work with but similar to a waistband, there is a rule as to the direction you should cut a waist tie in. Remember that a fabric is strongest lengthwise and a little weaker in crosswise direction. The crosswise threads, which go perpendicular to the selvage edge, also offer a bit of stretch, so you can use it to your advantage if you're looking for a bit more flexibility. My focus is always on durability and I personally like to work parallel to the selvage edge when making a waist tie. 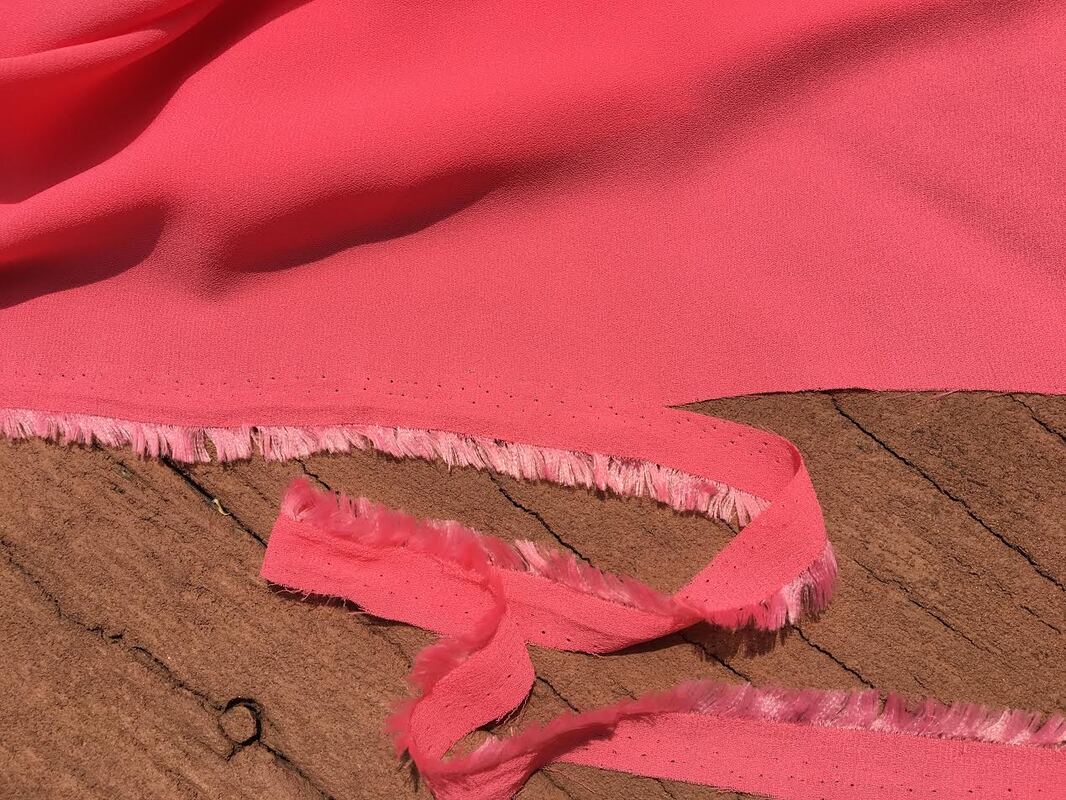 1. Cut the actual selvage edge off up to the length of your waist tie (36" here) to achieve a smooth, clean straight edge. If your fabric has a right and a wrong side, always work on the wrong side during the marking portion described below. 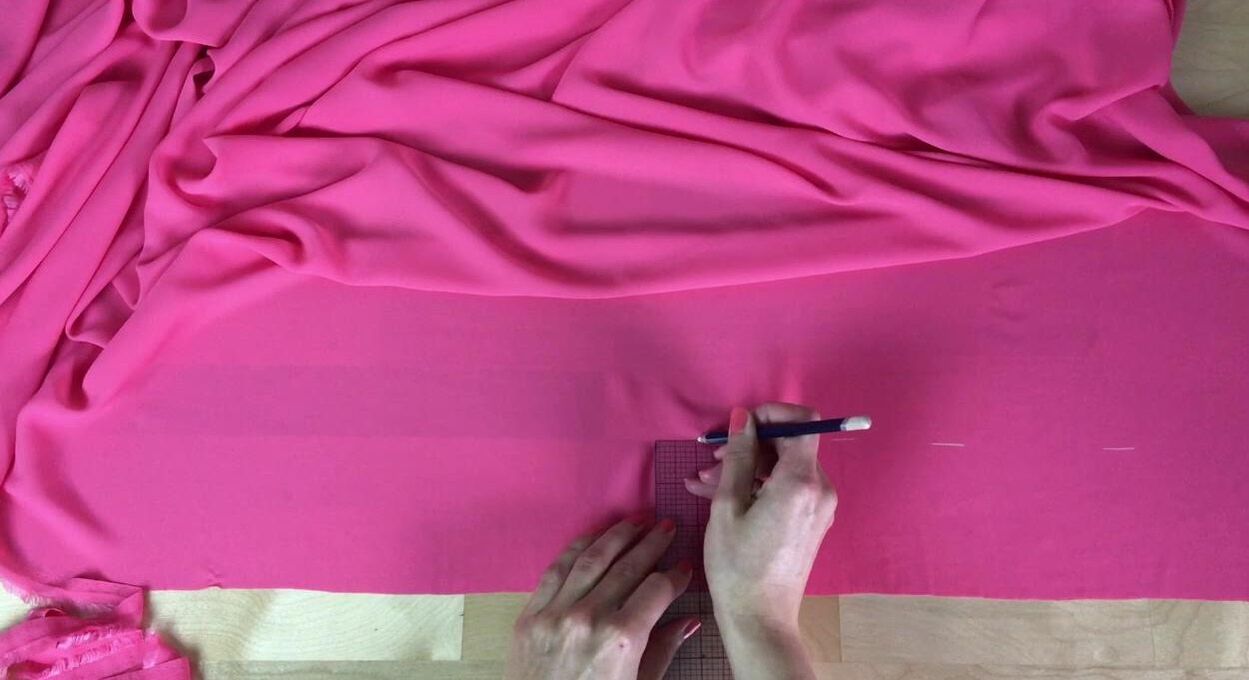 2. From this straight edge, measure the total width of the fabric strip calculated above ( 3.5") and mark with a fabric pencil, tailor's chalk or even dry piece of soap (check out this sewing hack!). 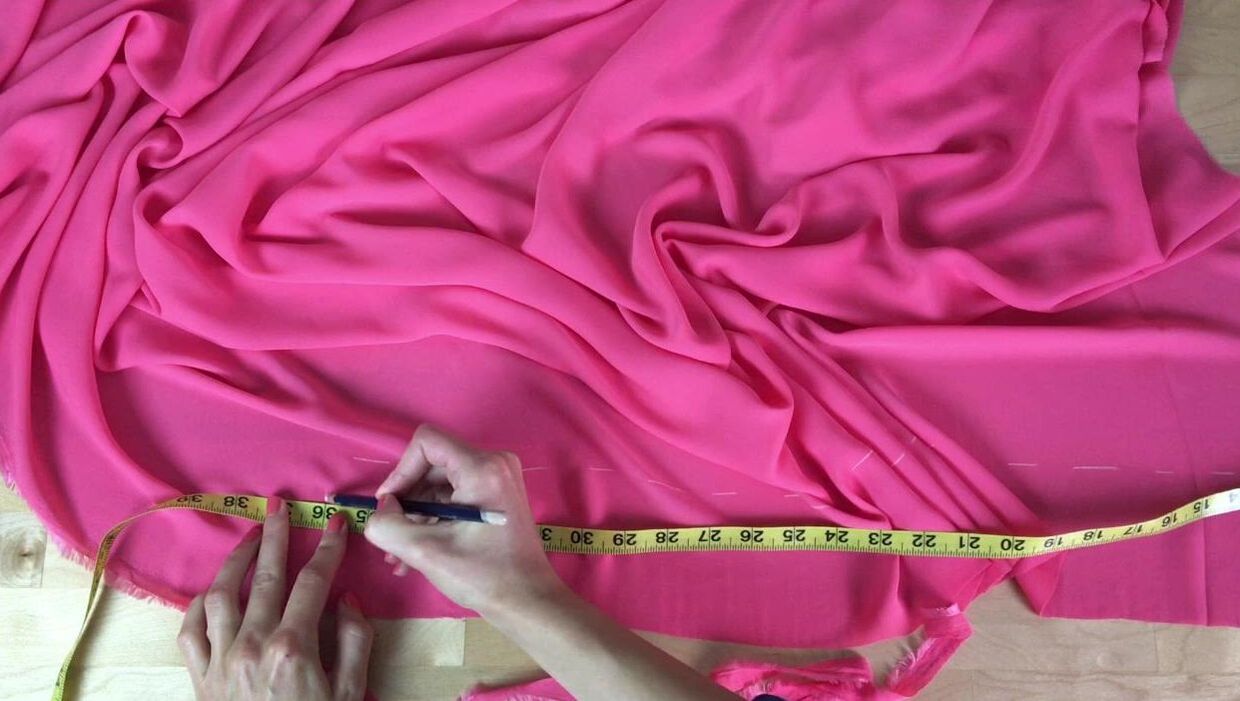 I like to mark dash lines every 2-3 inches until I can start to see the dashes form a straight line. Repeat this "drawing" process for the entire length of the fabric strip (36"). 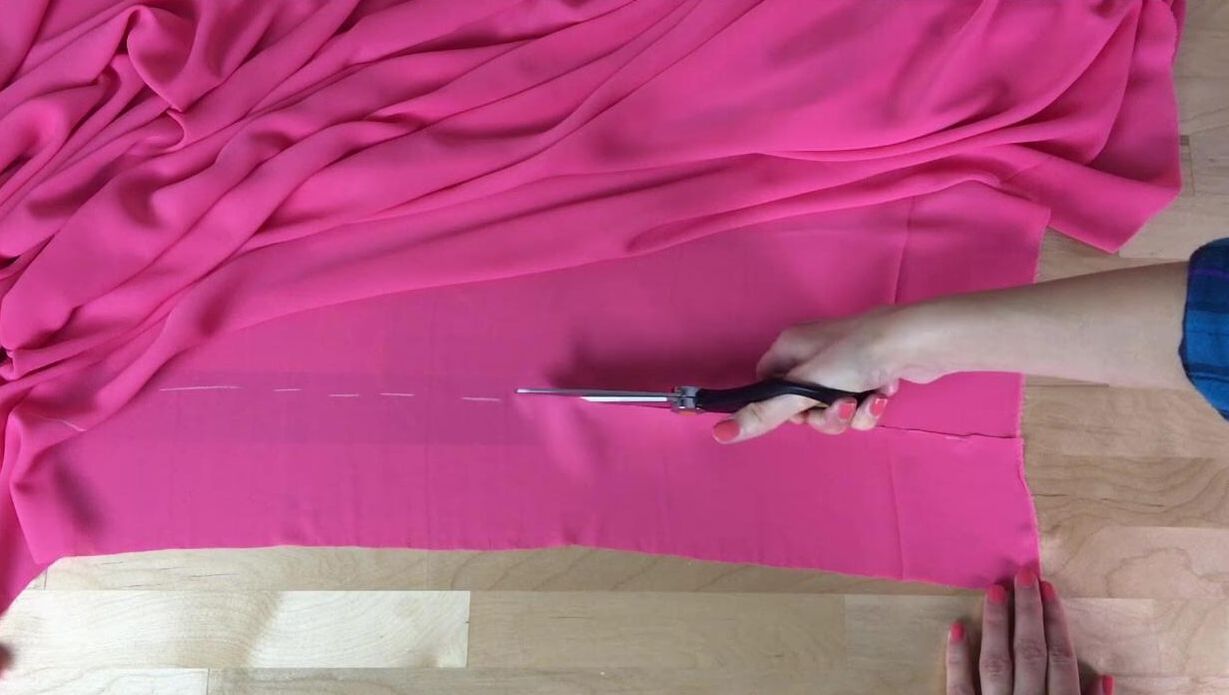 3. The final fabric strip is now ready to be cut! I use the dashes alone as a guide in this cutting process but I also have years of experience cutting fabric. If you don't quite trust your cutting abilities yet, I suggest connecting the dashes into a straight line. Next, use this straight line to cut the fabric strip carefully. Folding and sewing: The fun part! Let's finally pin and sew this thing. 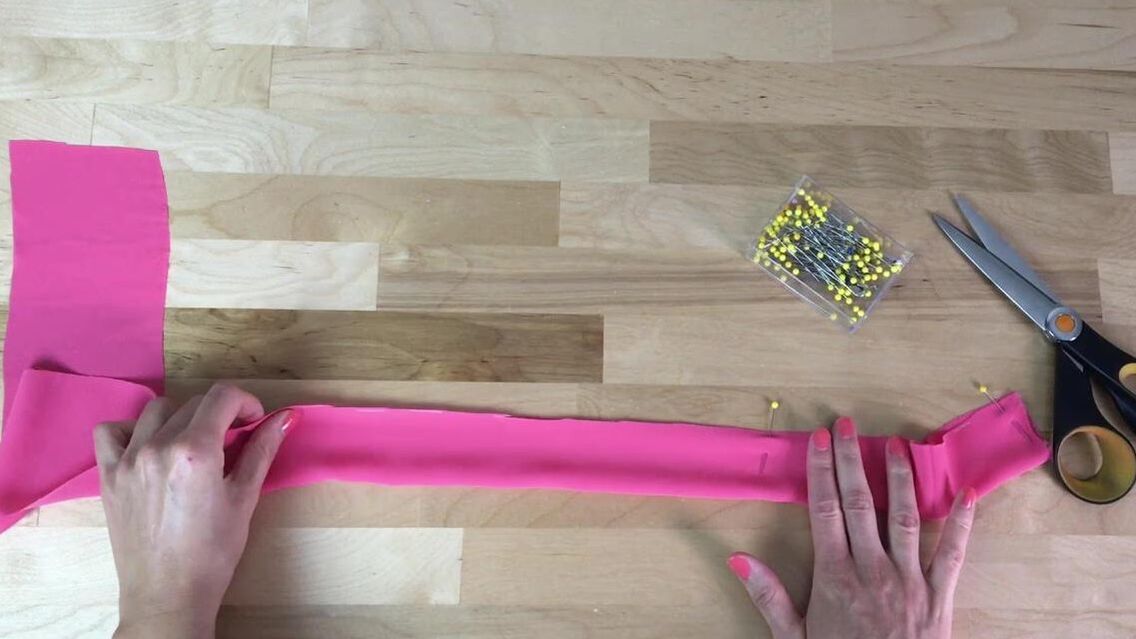 4. Fold the fabric strip exactly down the middle such that two lengthwise edges align perfectly with each other. If your fabric has a right and a wrong side, make sure the right side is enclosed on the inside of the fold (the wrong side should be facing outwards). 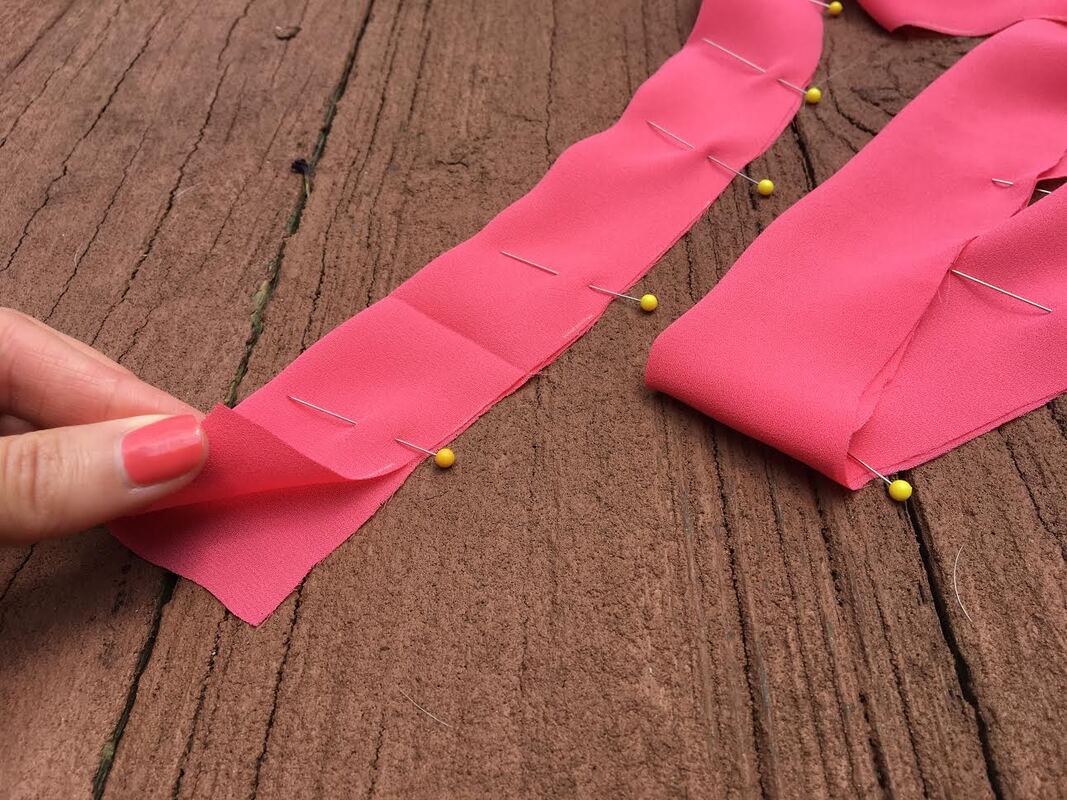 5. Insert pins perpendicularly to keep the two cut edges together as shown. A pin direction that is perpendicular to the edge will allow for easy and safe pin removal during the stitching process. This folded tie requires a single stitch (although a very long one) to be applied in a straight line. If you've never attempted to sew a self finished sash or waist tie before, the question is where should the stitch start and where should it end so that the final tie can be easily turned on its right side with minimal amount of stitching left to do afterwards. The answer to this question is in the remaining steps below! 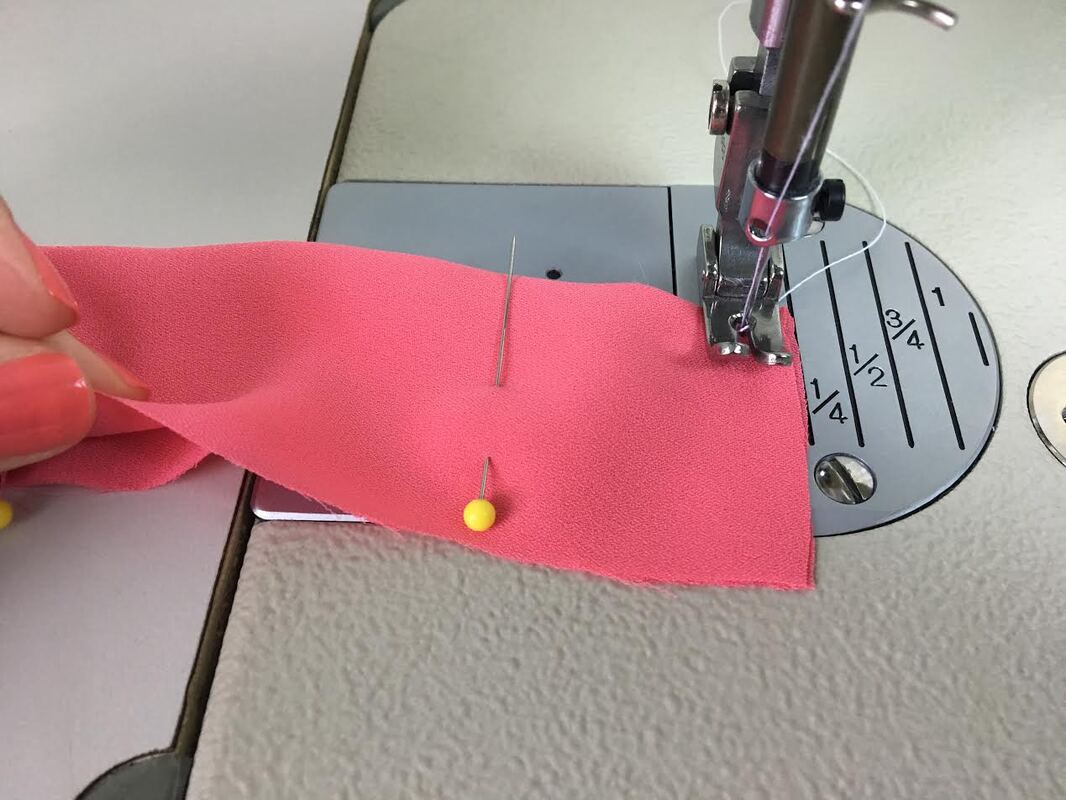 6. At one of the tie ends, stitch from the fold line down in a straight line towards the two lengthwise edges (opposite the fold) as shown.
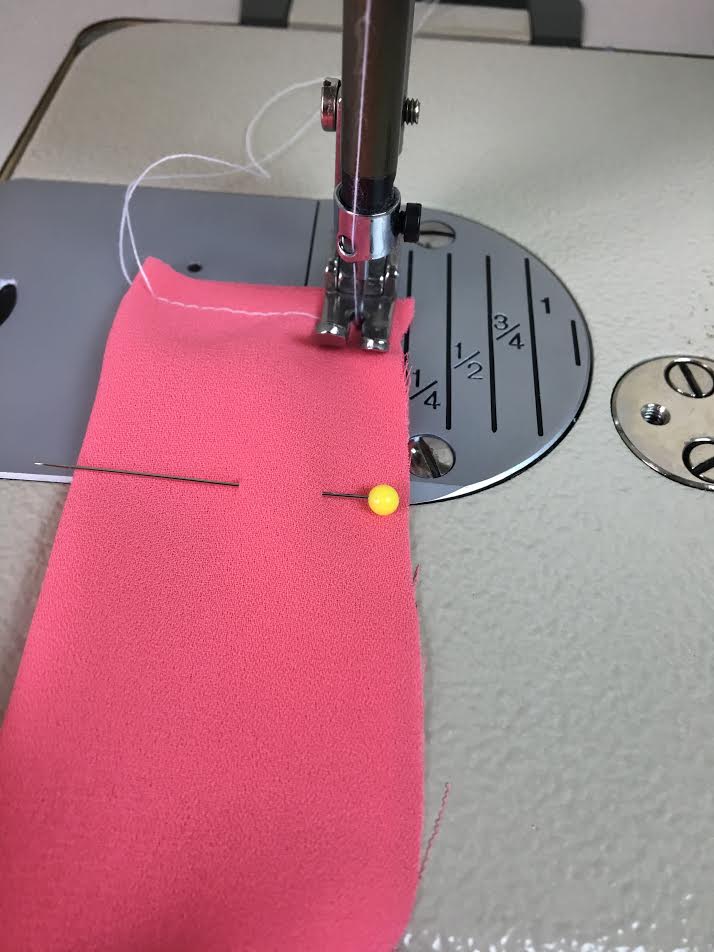
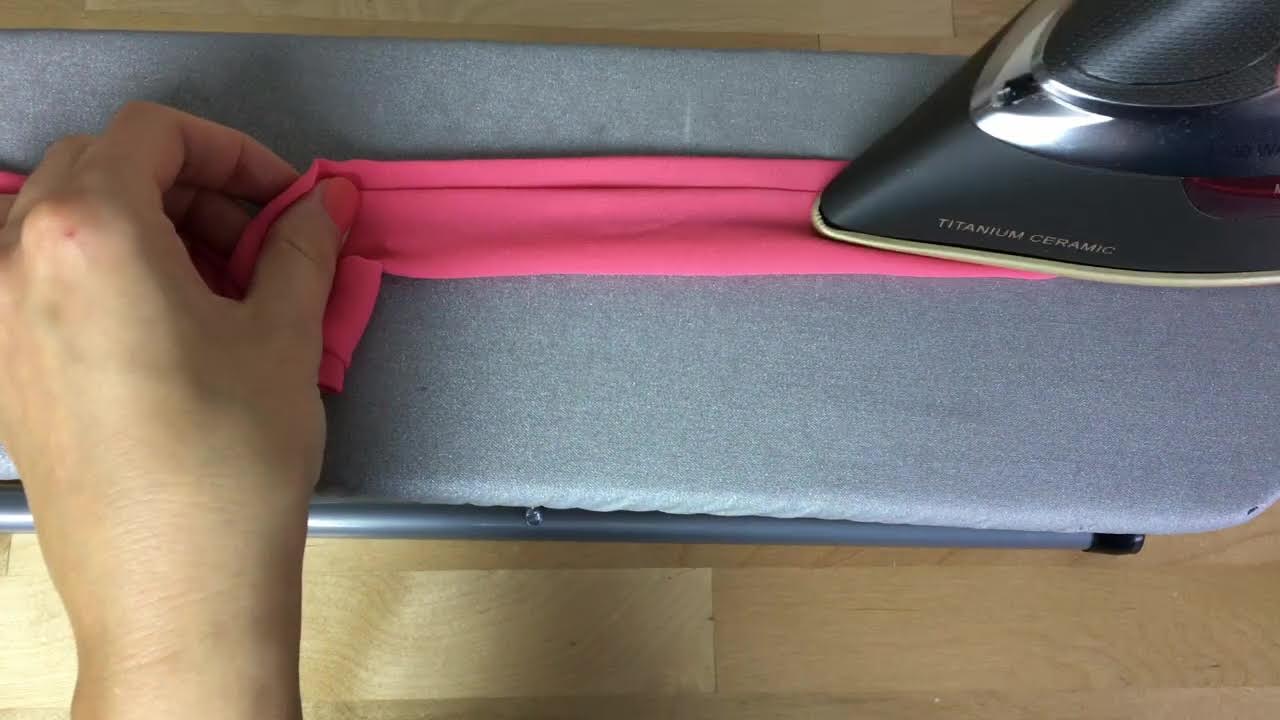
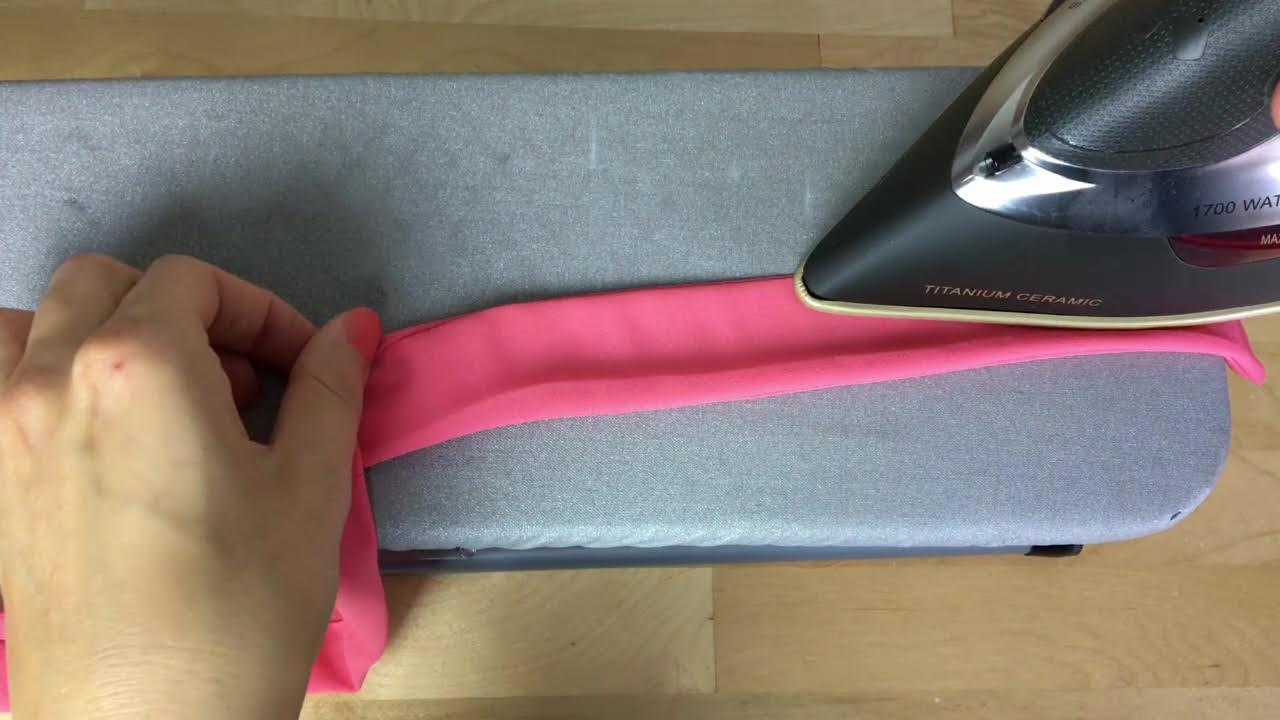
7. When you get to the point where the lengthwise seam allowance starts, insert the machine needle, lift the presser foot and turn the direction of the waist tie (while the needle is still in) such that the lengthwise cut edges are now aligned with the appropriate seam allowance guide on your sewing machine (as shown above). 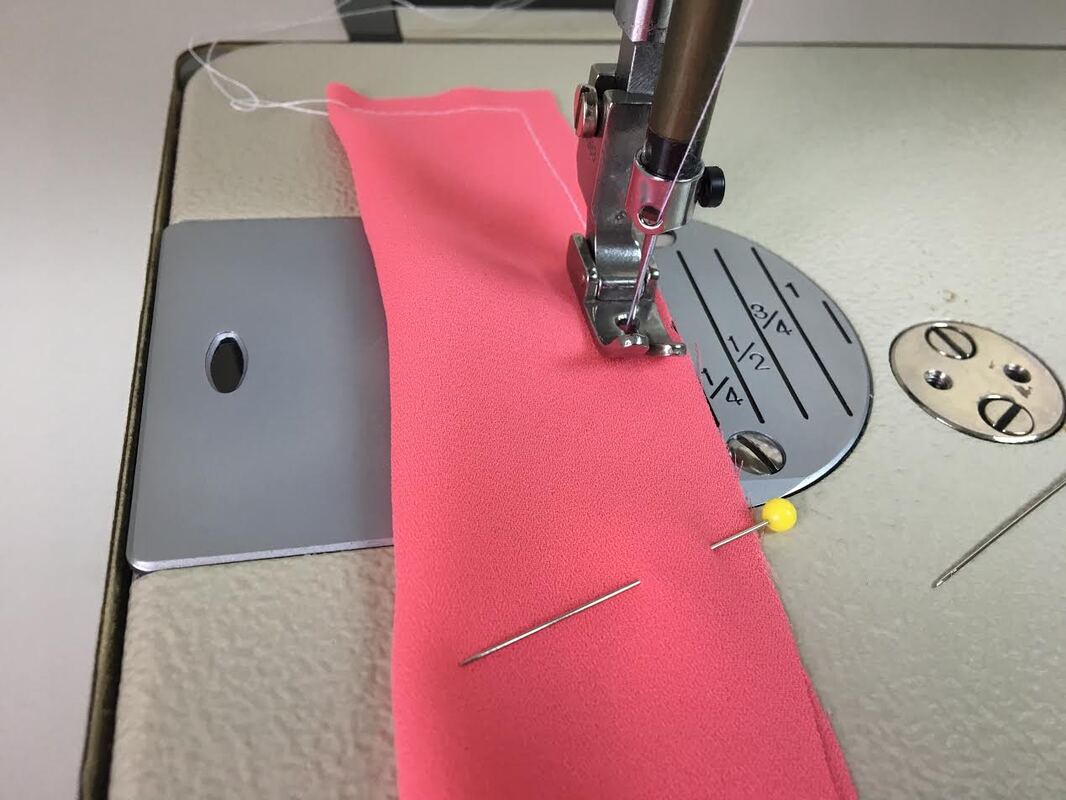 8. Drop the presser foot and continue stitching the two lengthwise edges together at the designated seam allowance- 1/4" (.25") in this tutorial. 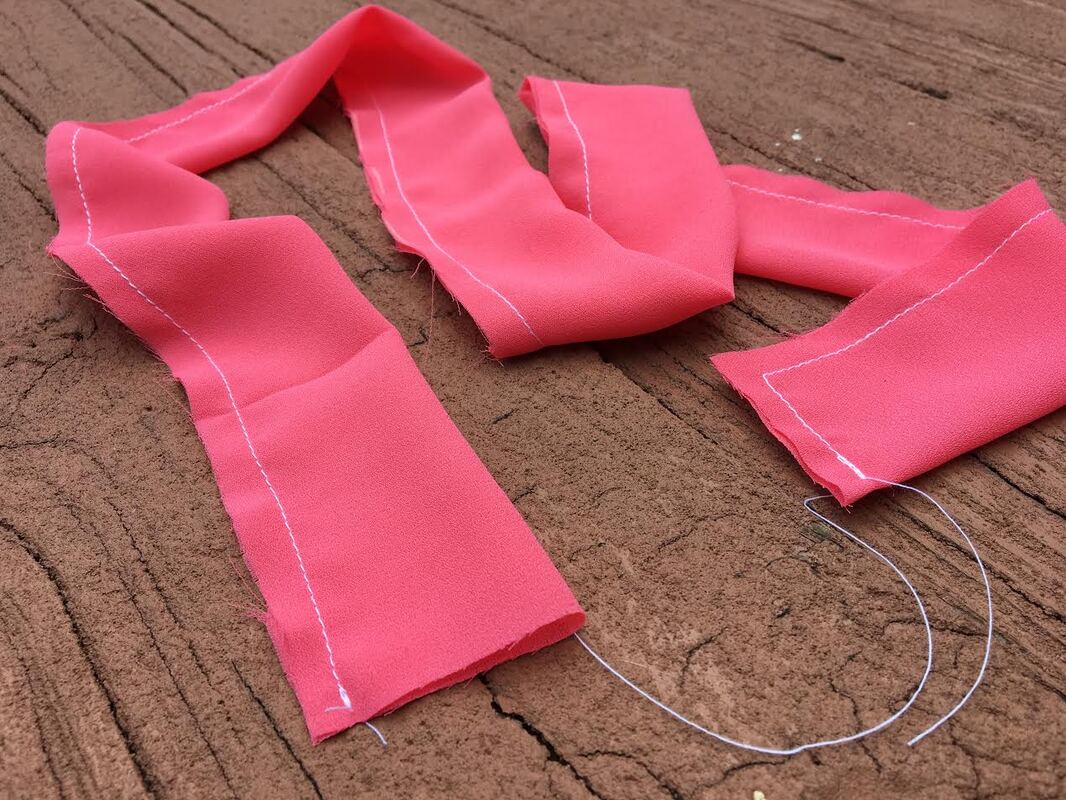 9. Stop and backstitch at the end of the lengthwise edge, leaving the other end of the waist tie open as shown. This will serve as a window for turning the self-finished tie on its right side (shown below). Turning tie outwards to expose the right side: I always find the process of turning a fully finished fabric strip on its right side to be fun and quite satisfying! You can get pretty creative with the methods you use in this process. I like to work with the closed end of a pencil (or pen) to turn the stitched layers on their right side, and then a pin to straighten the self-finished corners. To do this: 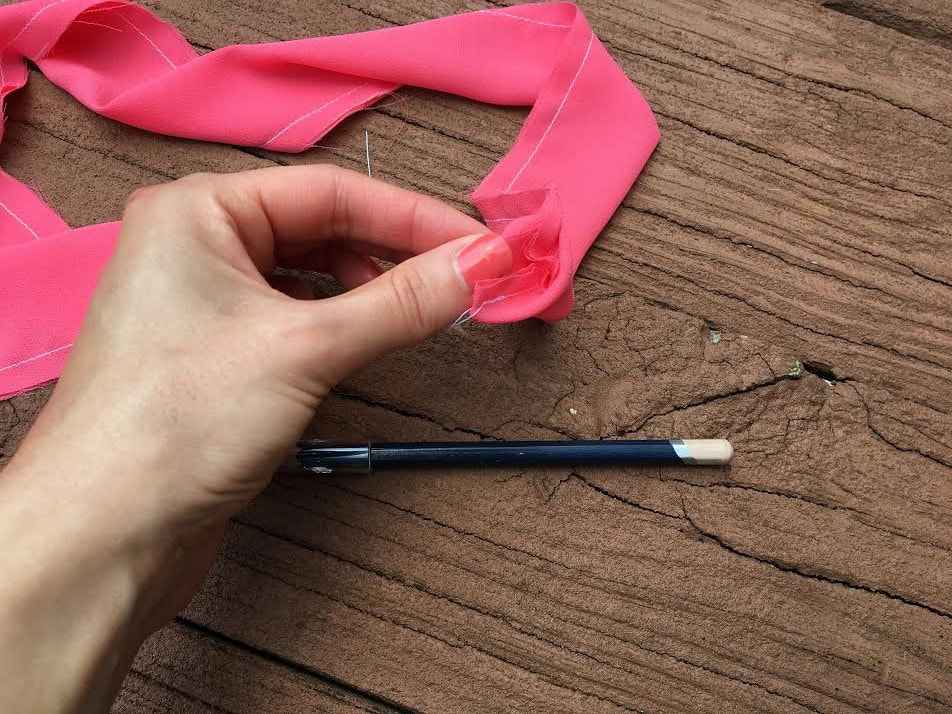 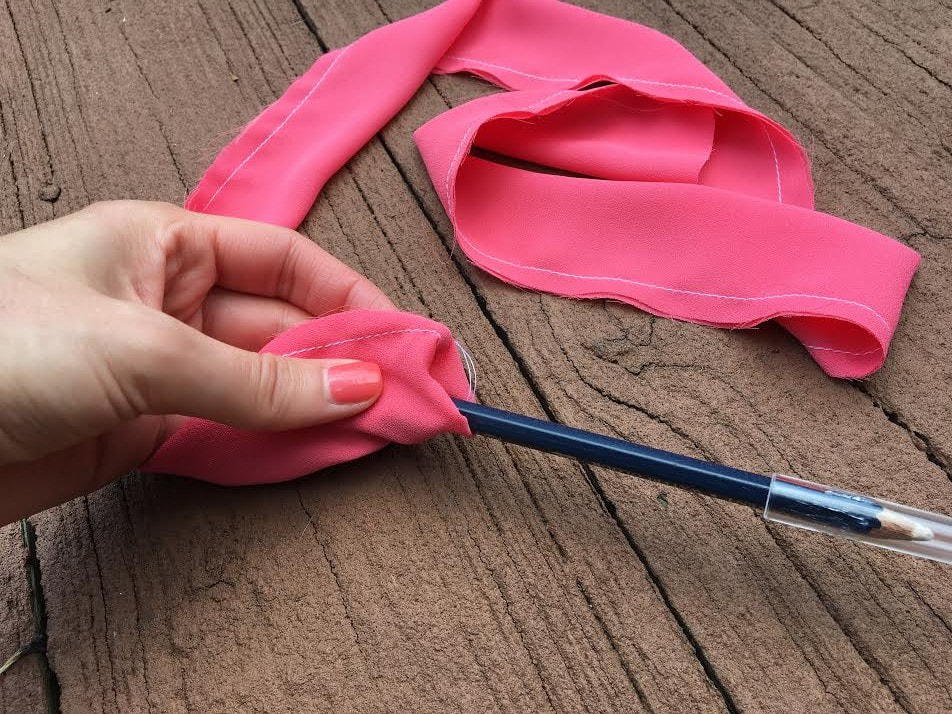 10. Insert the back of a closed pen or closed pencil (make sure it's closed so you don't accidentally stain the fabric) through the stitched end of the tie such as to push its right side through the open opposite end. The video above will provide more clarity on this step! 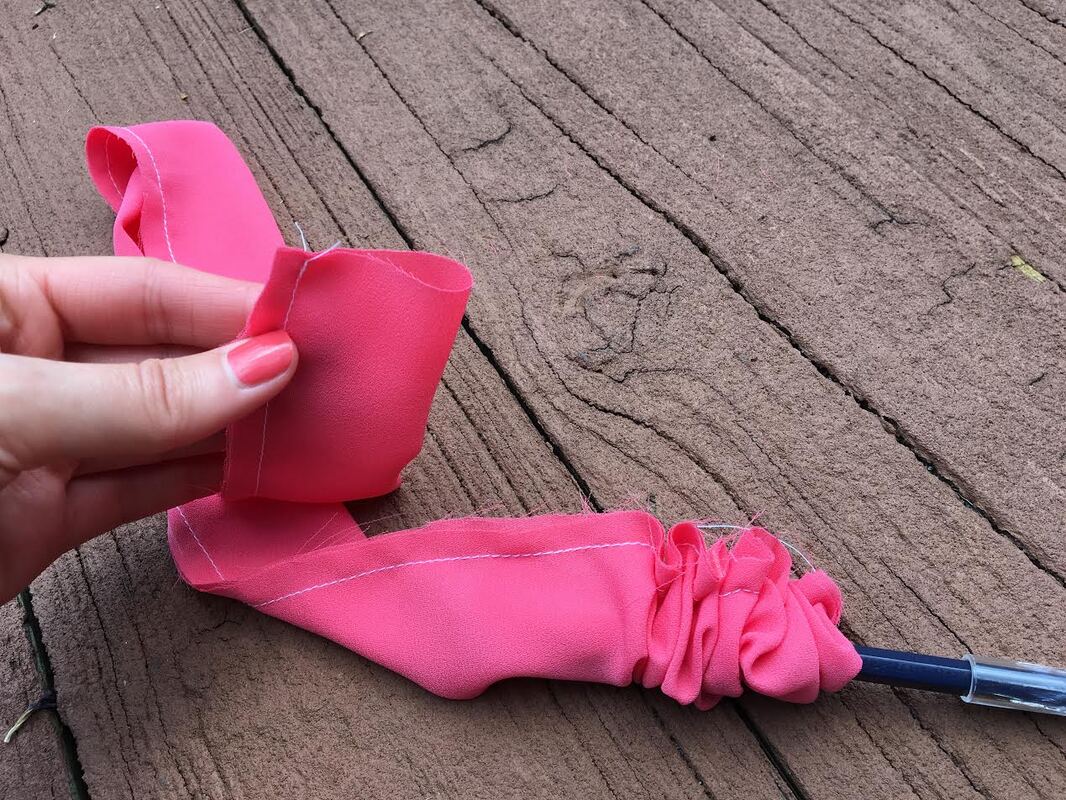 11. Continue pushing with the pencil (or whatever your tool of choice is) until you can actually touch the right side of the stitched end through the opening. Once you are able to grab a hold of it, pull gently until the entire piece is flipped on its right side. What you have now is a clean finished fabric tunnel. It does not lay flat and doesn't quite look like a pretty waist tie yet. This is where your trusty (and mandatory) iron comes in! Before sealing the open end, you'll need to iron the lengthwise seam such that the tie lays flat. Doing this can feel a little fiddly, so I've developed a shortcut that results in an even, straight finish. 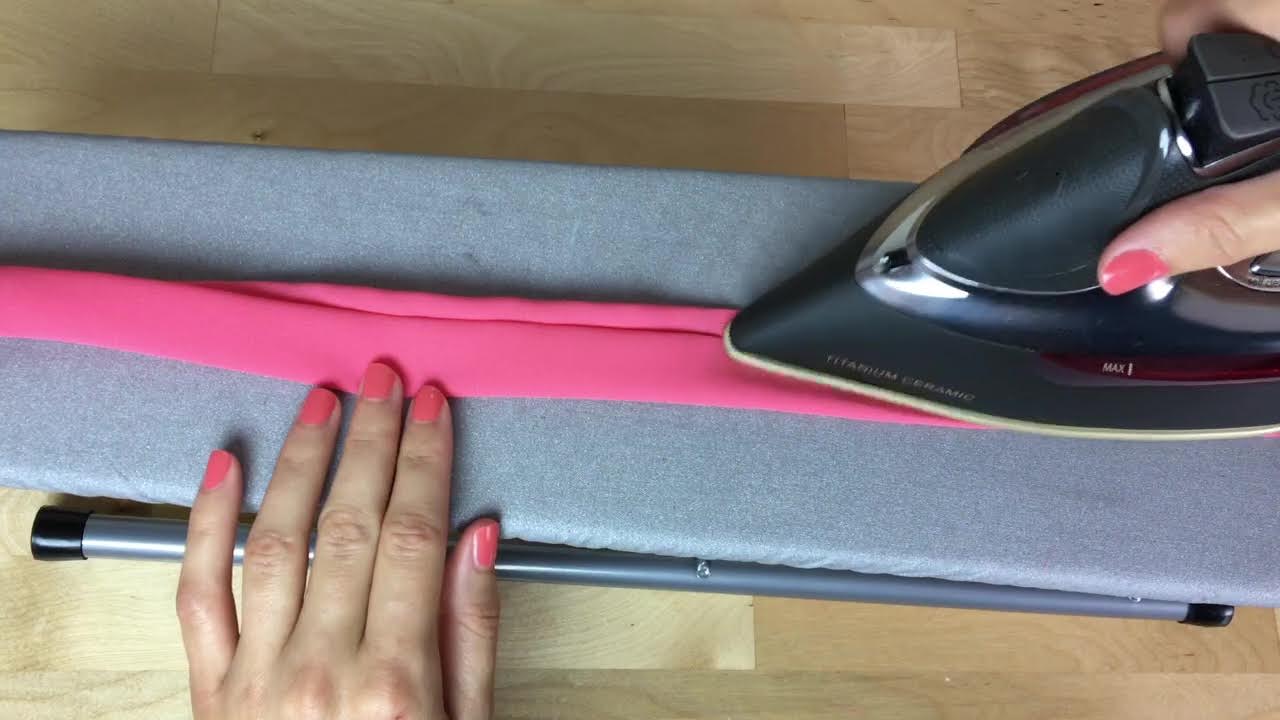 Not worrying about creasing the body of the waist tie, iron the seam from the face side with the allowance pointing in a single direction. Use a lower heat setting for this step so that the crease left on the body of the tie is easy to iron out in the next step. 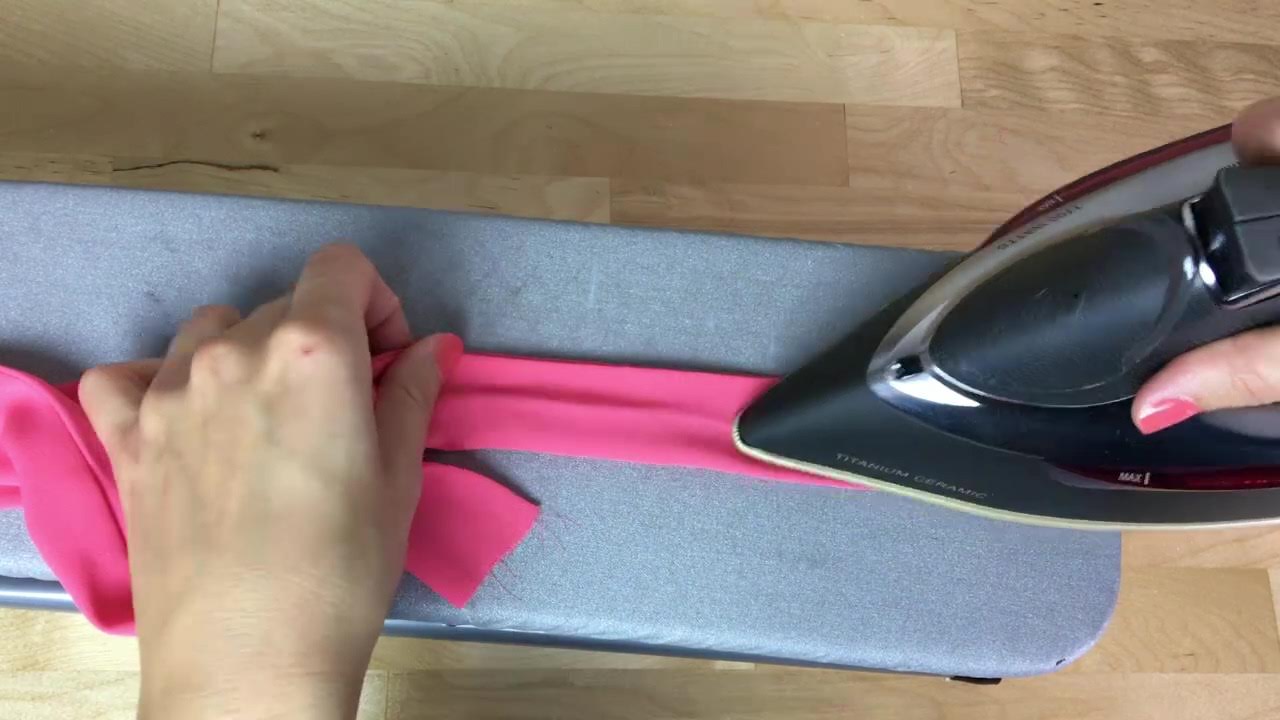 Next, set your iron to a higher setting (appropriate for your fabric) and iron the lengthwise edges in the desired alignment so that both layers are even and lay flat. Use the video above as a guide. Clean finishing the open end by hand: If you are looking for a clean, professional finish, both ends of the tie should look identical. The closed end is machine stitched and naturally self finished without the need for any special attention. The open end however, will require some blind stitching to achieve a matching finished edge. 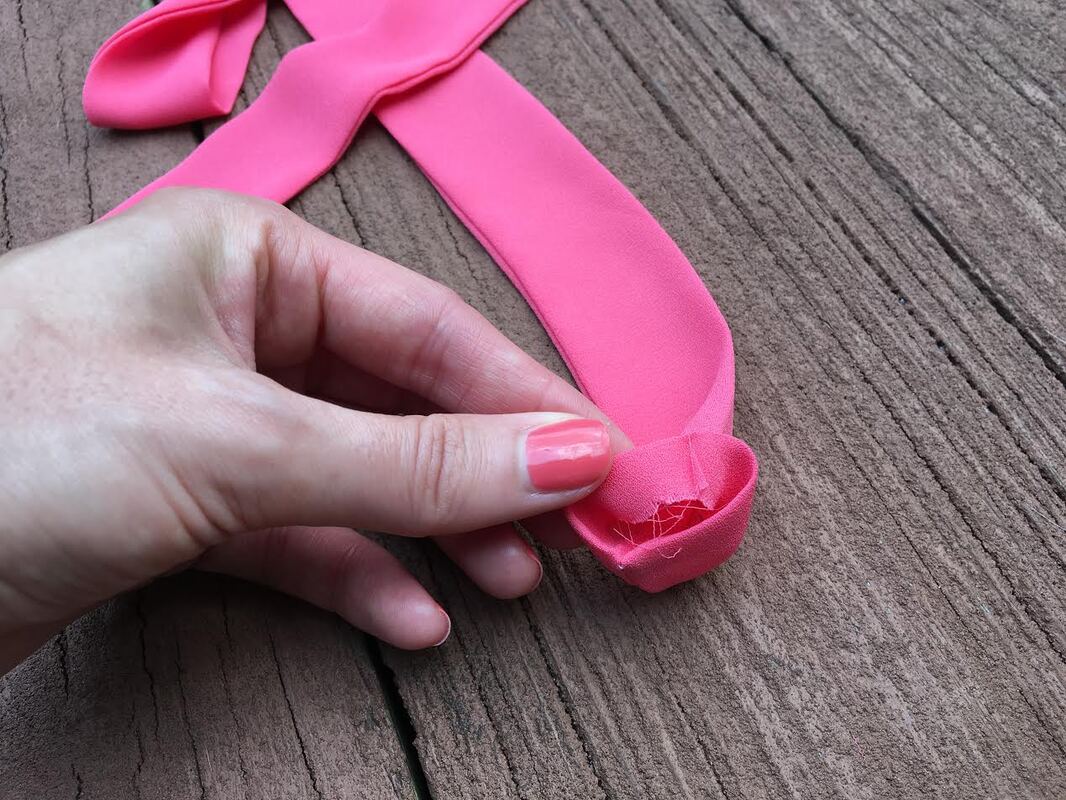 12. First, fold the edges of the fabric layers in at the designated seam allowance (.25" in this tutorial) such that this folded end is straight and looks identical to the already finished opposite end. 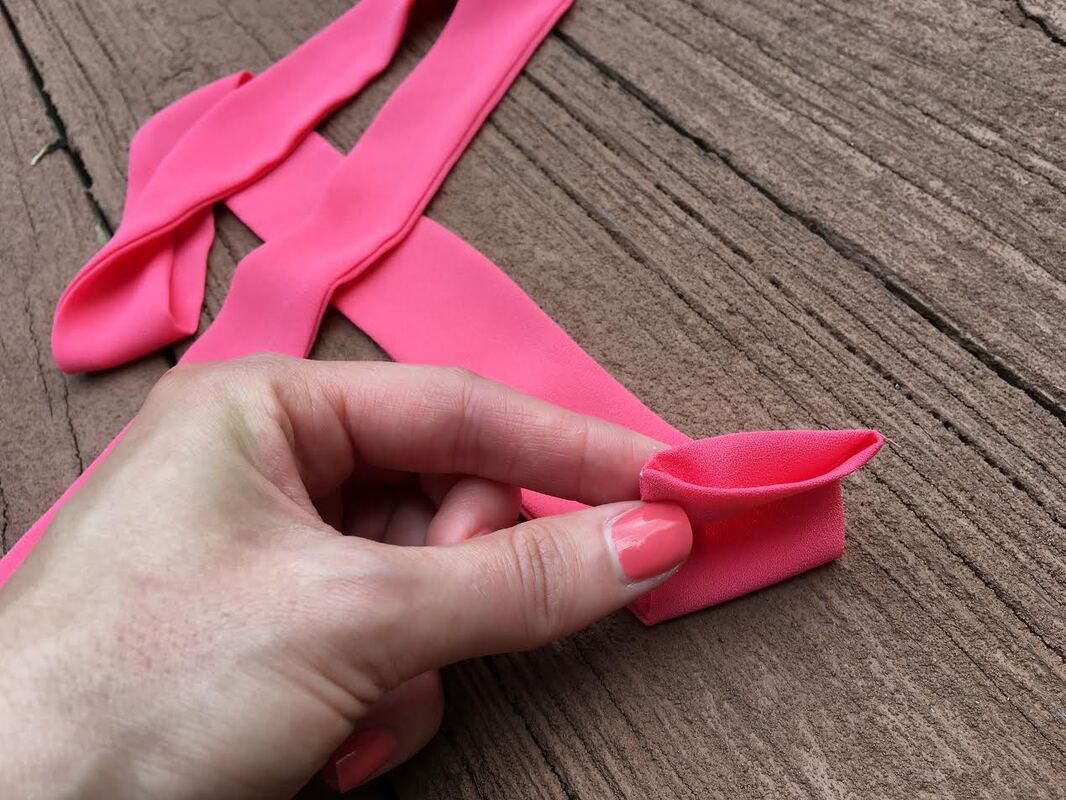 Iron to keep the folded edges in place. You may also need to insert some pins for additional reinforcement. 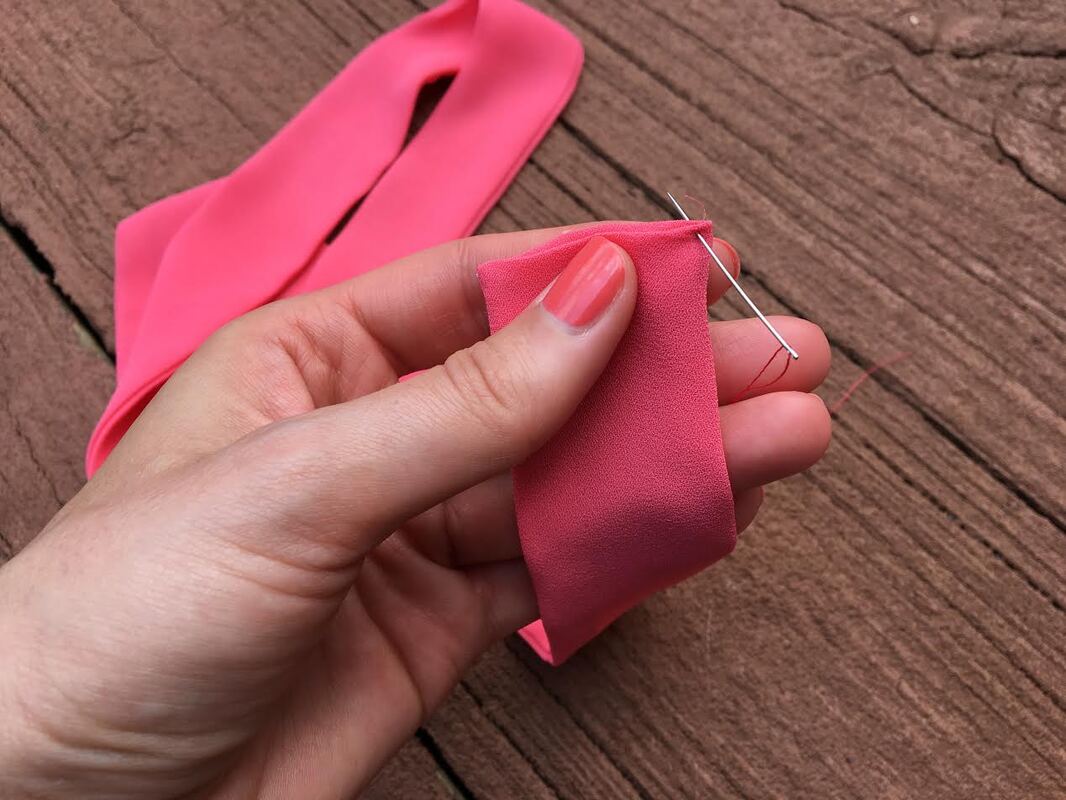 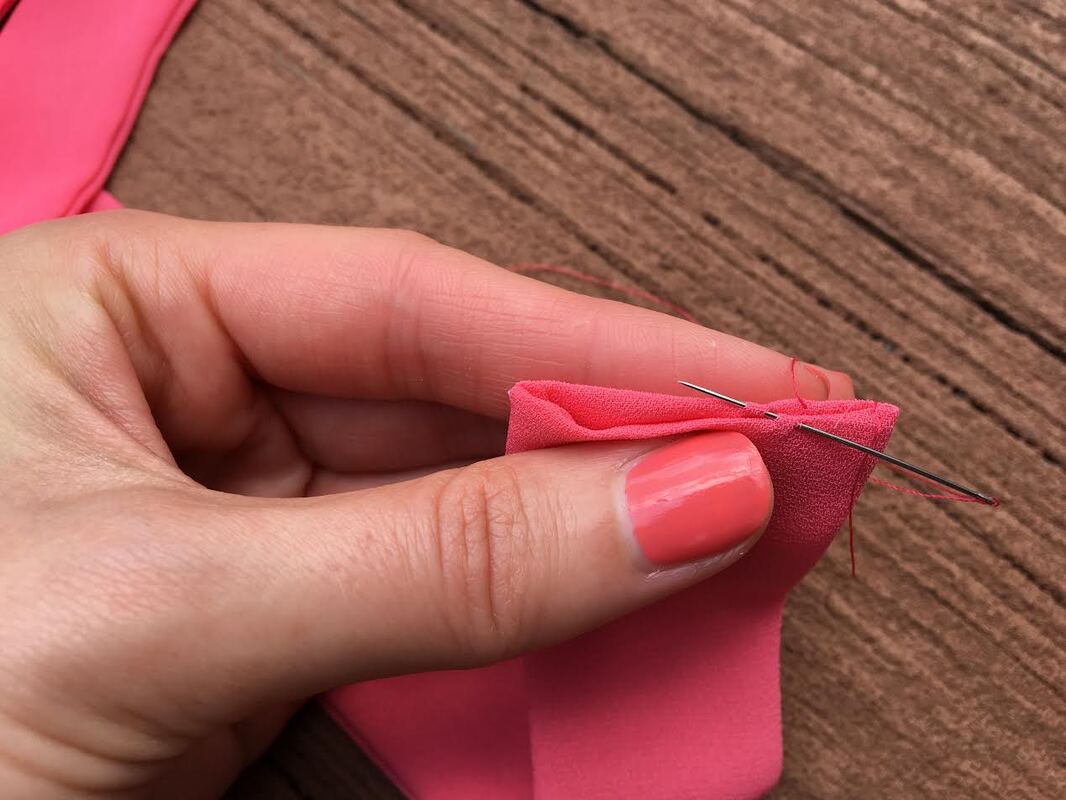 13. Using matching thread and a hand sewing needle, blind stitch at the very top edge (through the actual fold lines) to connect the two layers together and permanently seal this open end. To learn more about blind stitching, what it is and how to do it, check out this detailed tutorial: 4 Hand Sewing Techniques And Stitches You Should Know As a Sewing Beginner. 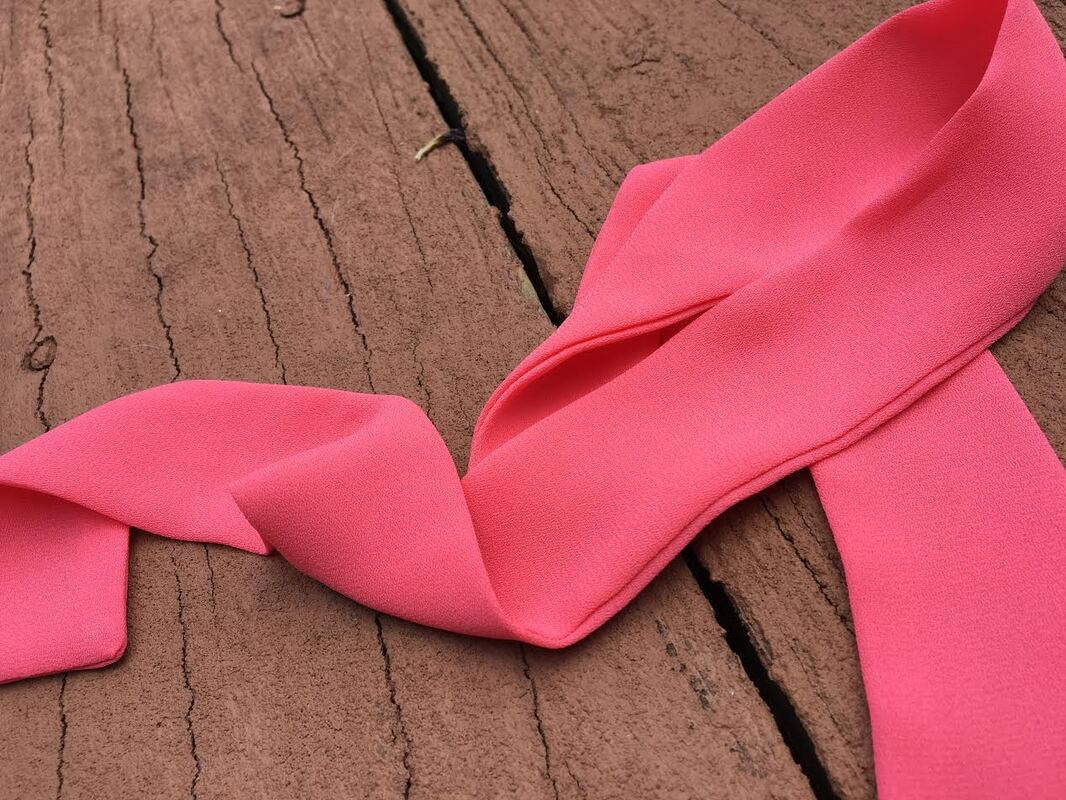 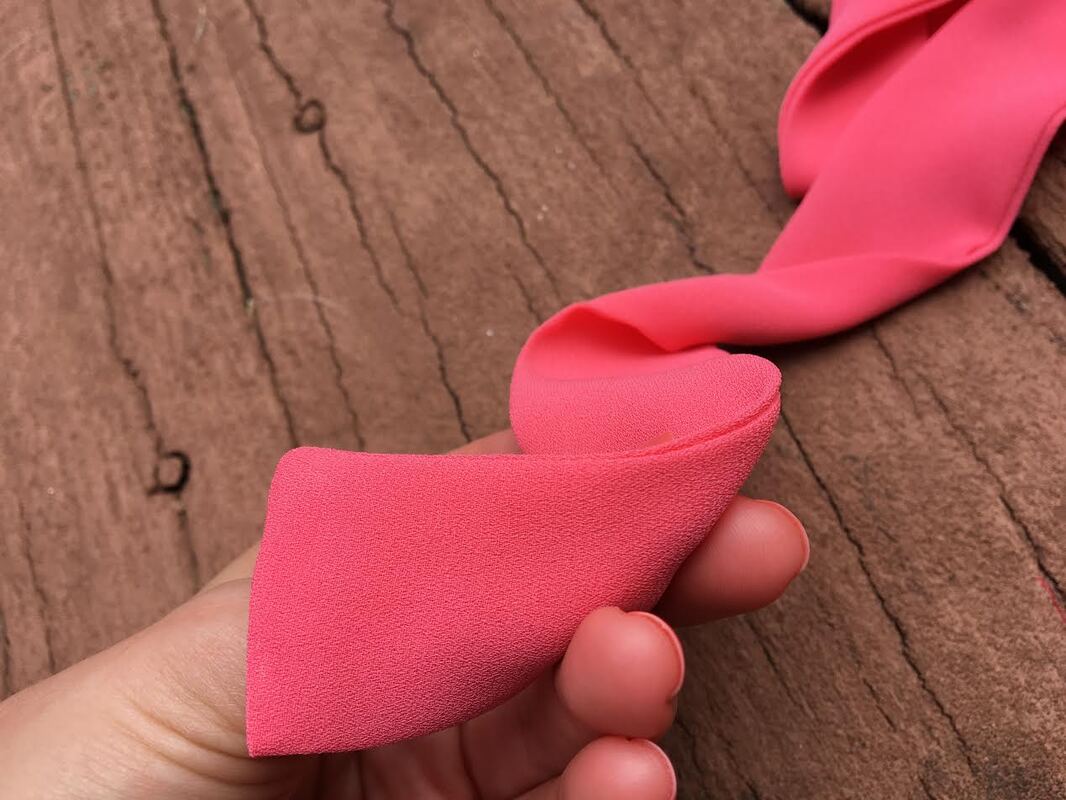 You can replace hand stitching with a top stitch: If you usually try to steer clear of hand stitching, you can actually use top stitching as an alternative to finish and seal all the tie's edges. Keep in mind that while a top stitch will help you skip the blind stitch, it may not always fit within your design. Top stitching can stiffen the drape of a sash or waist tie and depending on the fabric, may sometimes look more casual and sporty. From a design perspective, keep that in mind if you choose to go this route. 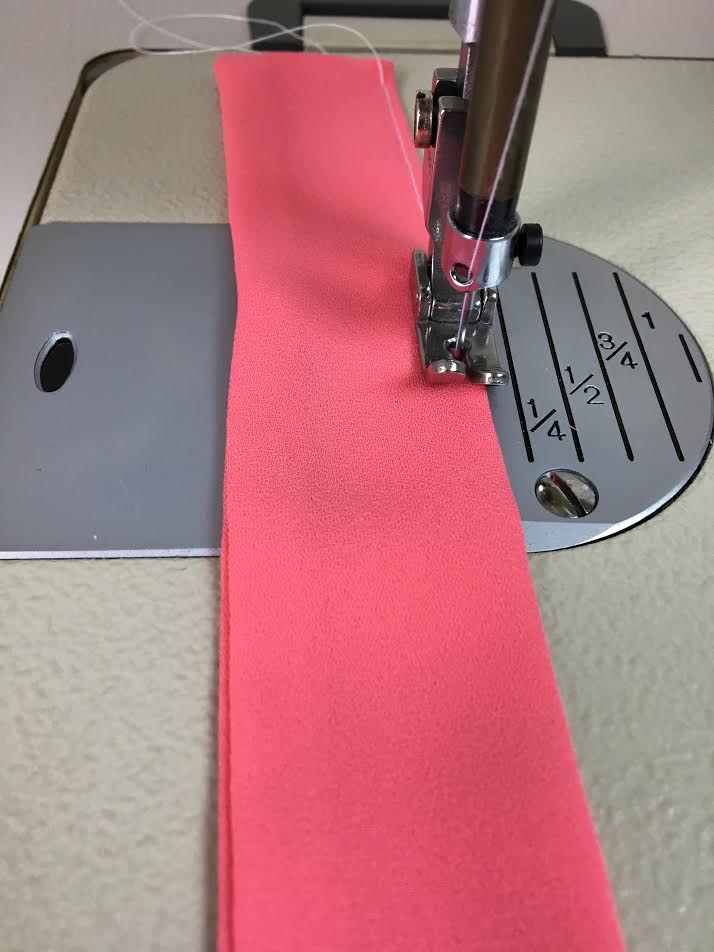 To top stitch, simply choose how close to the edge you'd like the visible stitch to appear and use this distance as a guide in the machine stitching process. Apply the top stitching only after the entire waist tie has been ironed flat and the open end has been folded in and also ironed flat. Use the tie's edges as a guide and keep the machine stitch as even in relation to it as possible. Finished With Identical LiningA lot of the steps for this method are a repeat of the self finished tie above with the exception that instead of using a single layer of fabric, two identical but separate pieces of fabric are sewn together along all edges. This means that the two pieces require seam allowance along all their edges, which accordingly, should be taken into account when measuring and cutting the fabric. How to measure, mark and cut the two identical fabric pieces: I'll try to skip some of the repetitive steps and explanations from above. So what method can you use to cut both pieces identically without using a sewing pattern? Given that I'm working with the same measurements described above, here's how I would do it: 1. Figure out the width of each piece. The final waist tie will be 1.5" wide and I need two identical separate layers with seam allowance along all edges. This means that each fabric piece will be 1.5" +.25" +.25"= 2" wide to account for .25 seam allowance along both lengthwise edges. As far as the length of the tie, I'm staying with 36" keeping into account that .5" of that belongs to seam allowance intake. 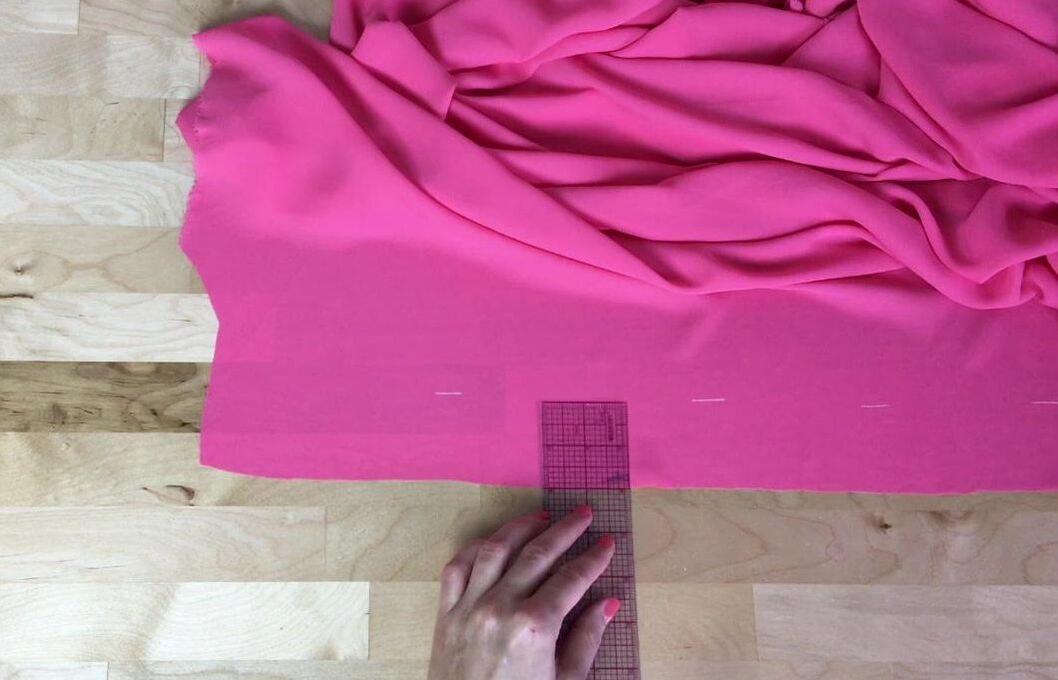 2. Just as you did above, use the selvage edge as a straight line marker. Trim the selvage edge off and from this cut edge, measure a strip that is 2" wide. Follow the same ruler and pencil technique described above to mark a rectangular strip that is 36" long and 2" wide. 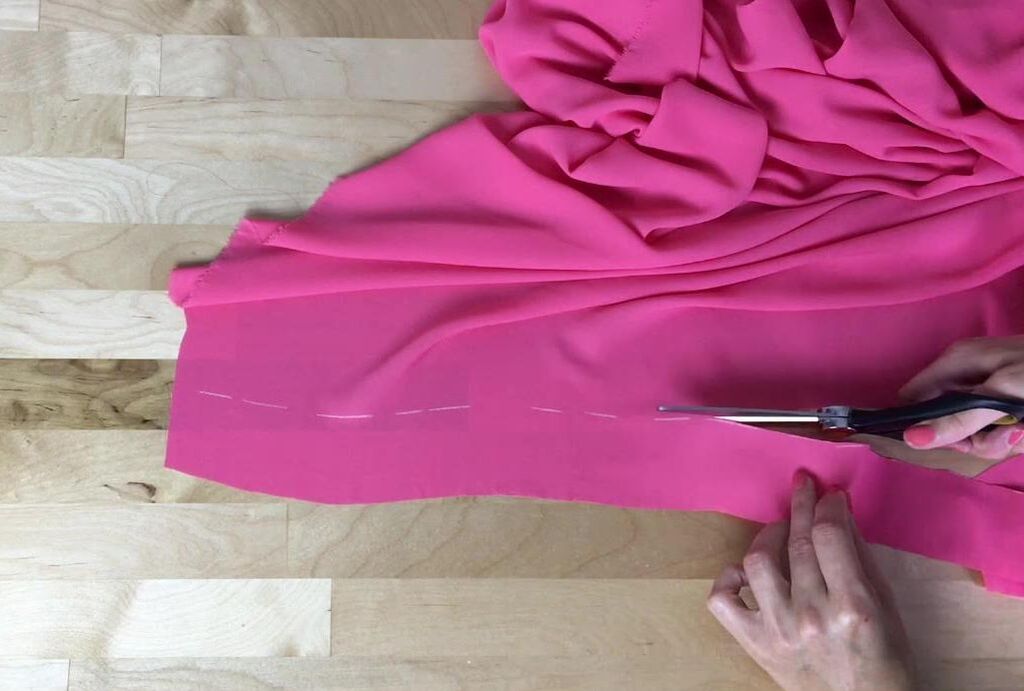 3. Cut this fabric strip carefully following these marked lines. 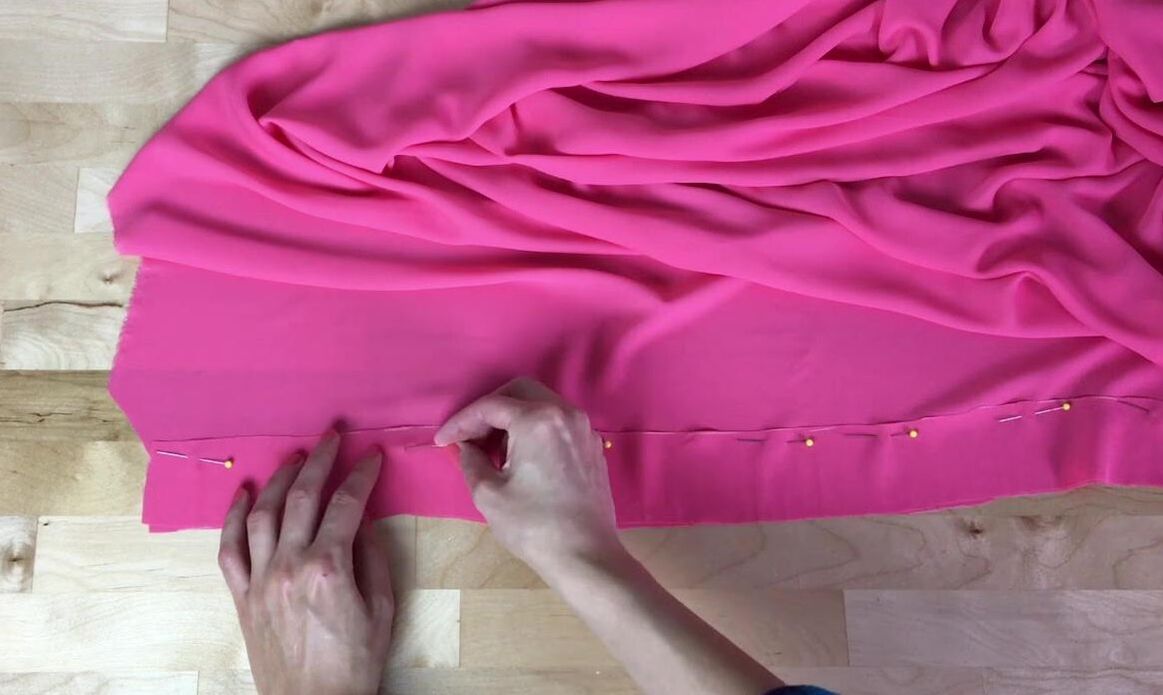 4. To cut the second identical strip, use the already cut one as a makeshift sewing pattern. Place it on top of the fabric, pin it, and following the edges cautiously, cut the second strip of fabric underneath. Voila! Now you have two identical pieces to complete your waist tie/sash. 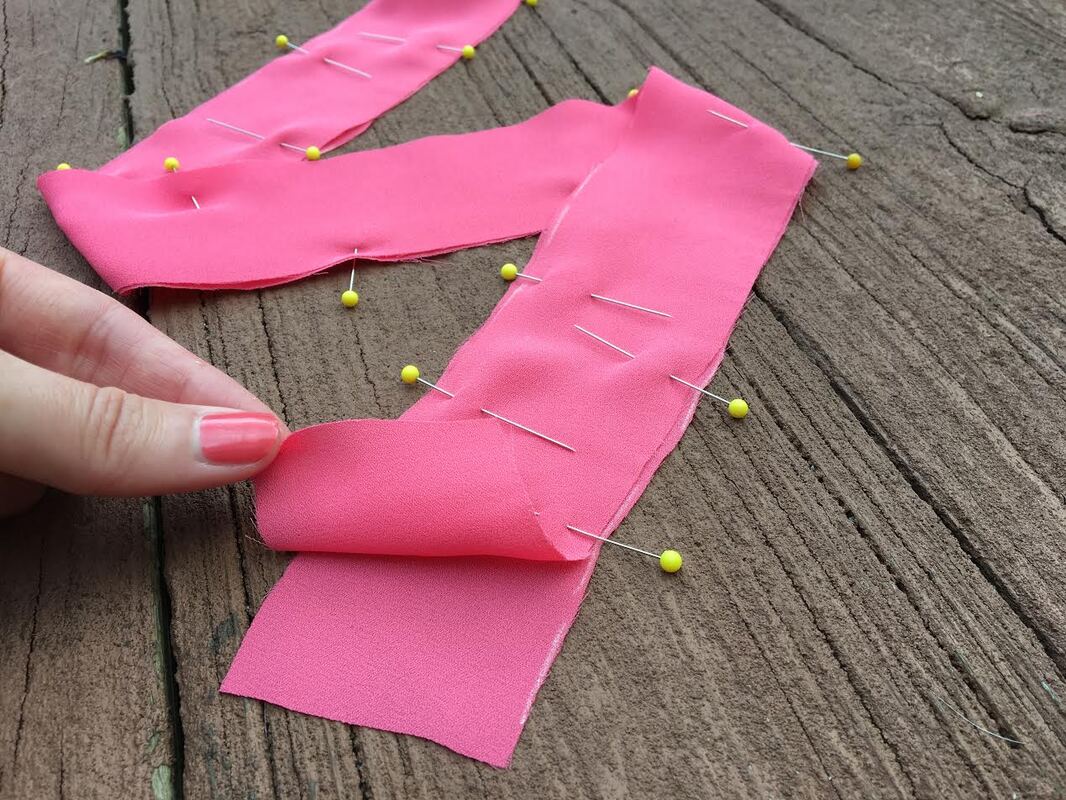 5. Sewing the two layers together into a waist tie is very similar to the self-finished folding method above with the exception that it requires a bit more sewing. To start with, pin the two layers of fabric together along all edges, leaving only one end of the tie unpinned. If your fabric has a face side, make sure both face sides are touching and the wrong sides correspond to the outside. 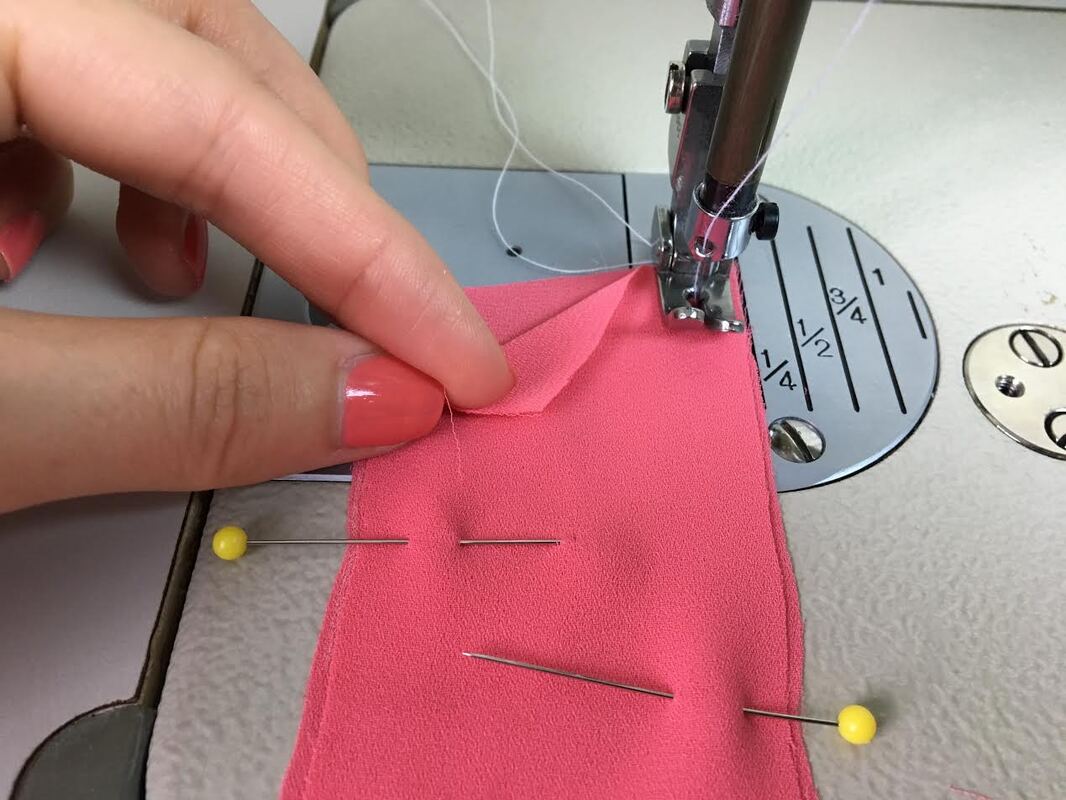 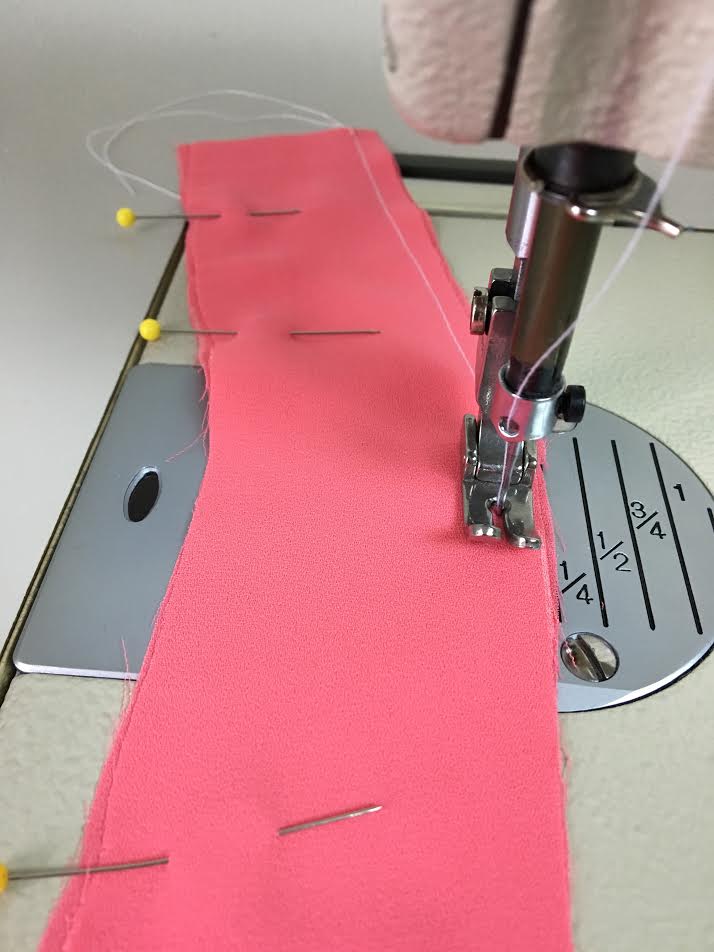 6. Starting from the open end, stitch the two fabric pieces together lengthwise following the designated seam allowance (1/4" or .25" in this tutorial). 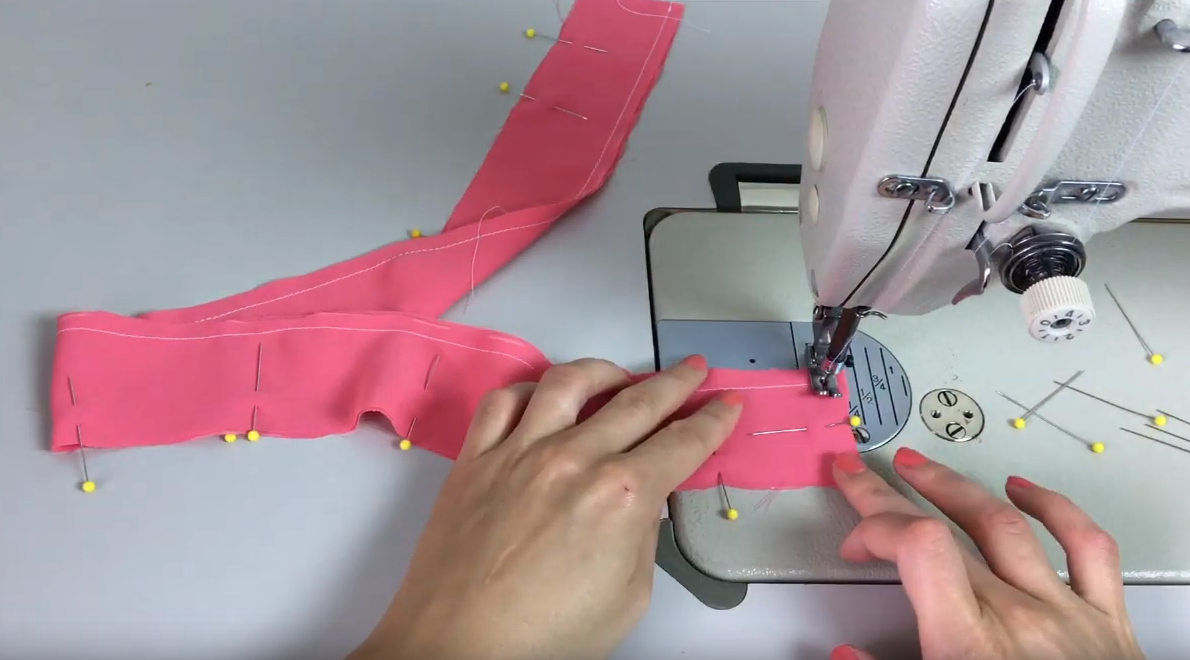 When arriving at the tie's other end, leaving the needle inserted and lifting the presser foot, shift the fabric such that this end now aligns with the machine's seam allowance guides. 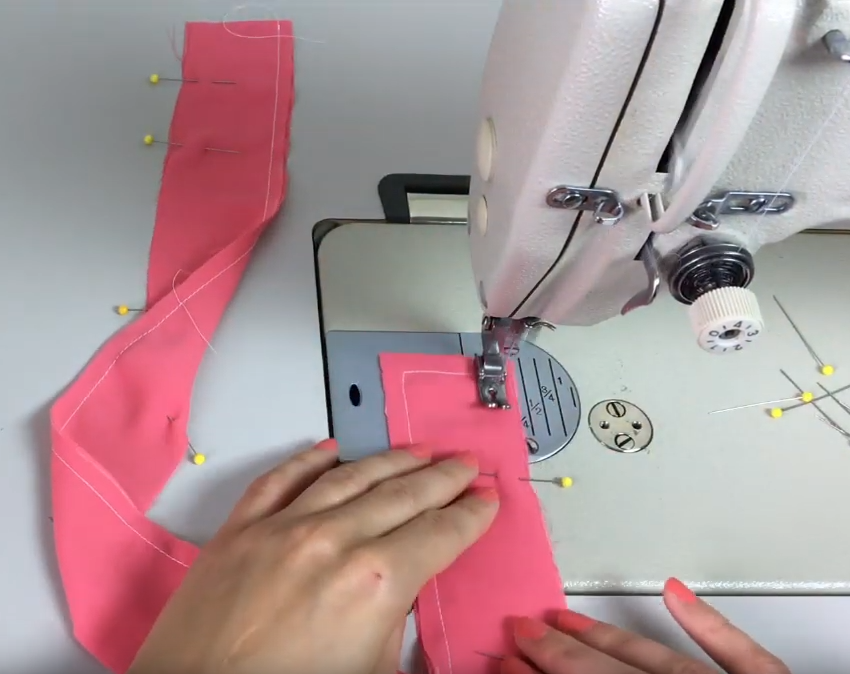 Stitch until you arrive at the other lengthwise edge and repeat the same process to shift the fabric layers in the new lengthwise direction as shown. 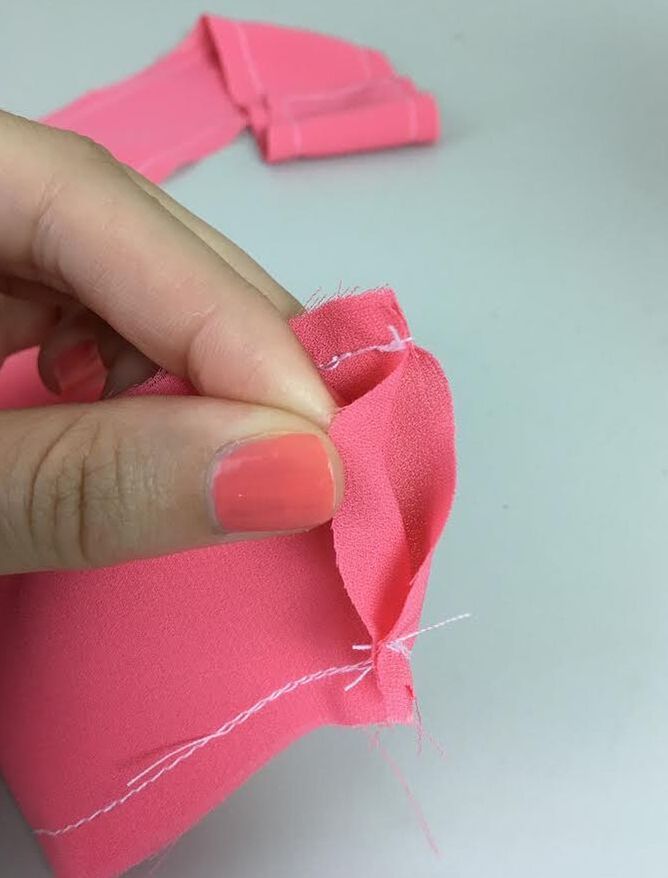 Continue stitching until you arrive at the open end that you started from. Leave this end open - you'll use it to turn the waist tie on its right side. 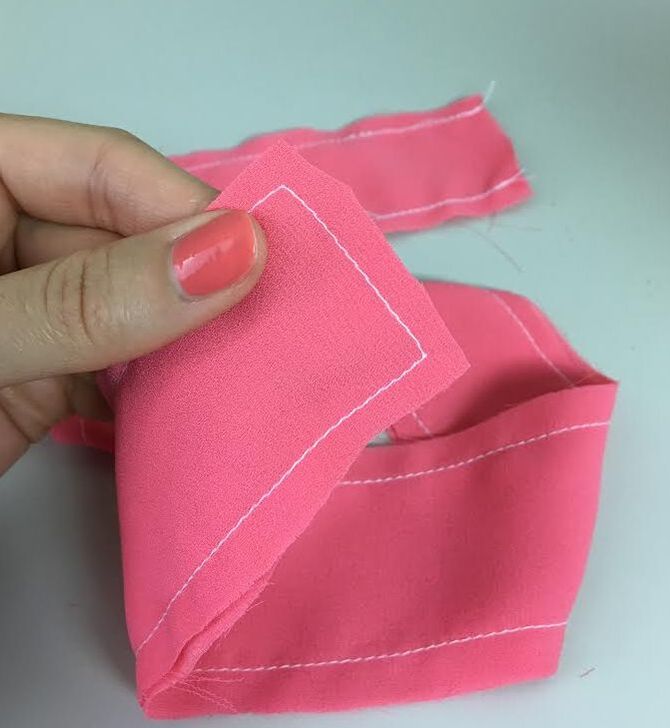 7. From this point on, the steps are a duplicate of the flipping, ironing and hand stitching (or top stitching, if you choose that as an option) process described above! The only difference in the finished product is that the self-finished waist tie above has a fold on one side and a seam on the other, while the lined version has seams along all its edges. 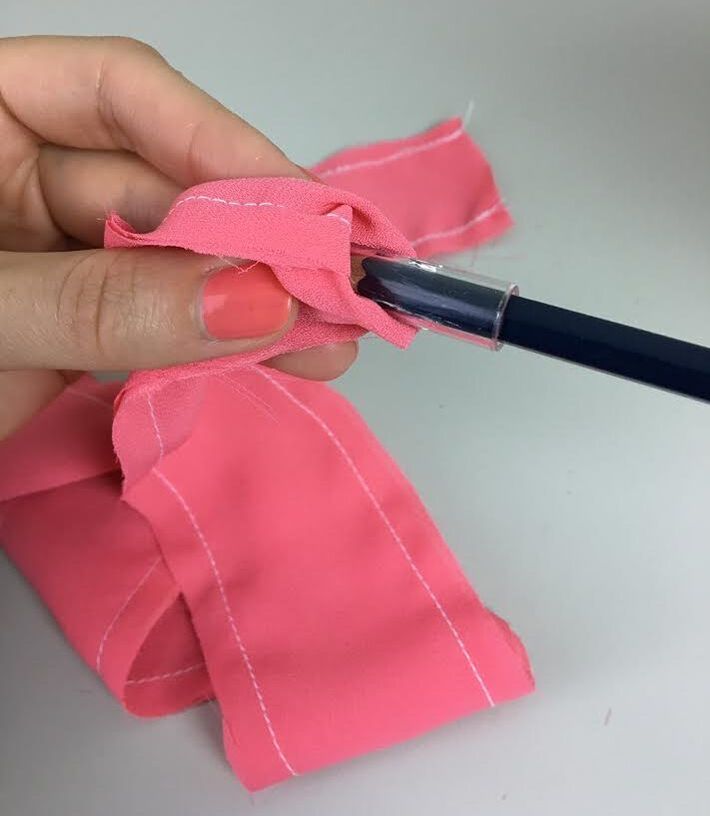 Insert a pen or pencil into the stitched end of the tie such as to push its right side through to the open end. 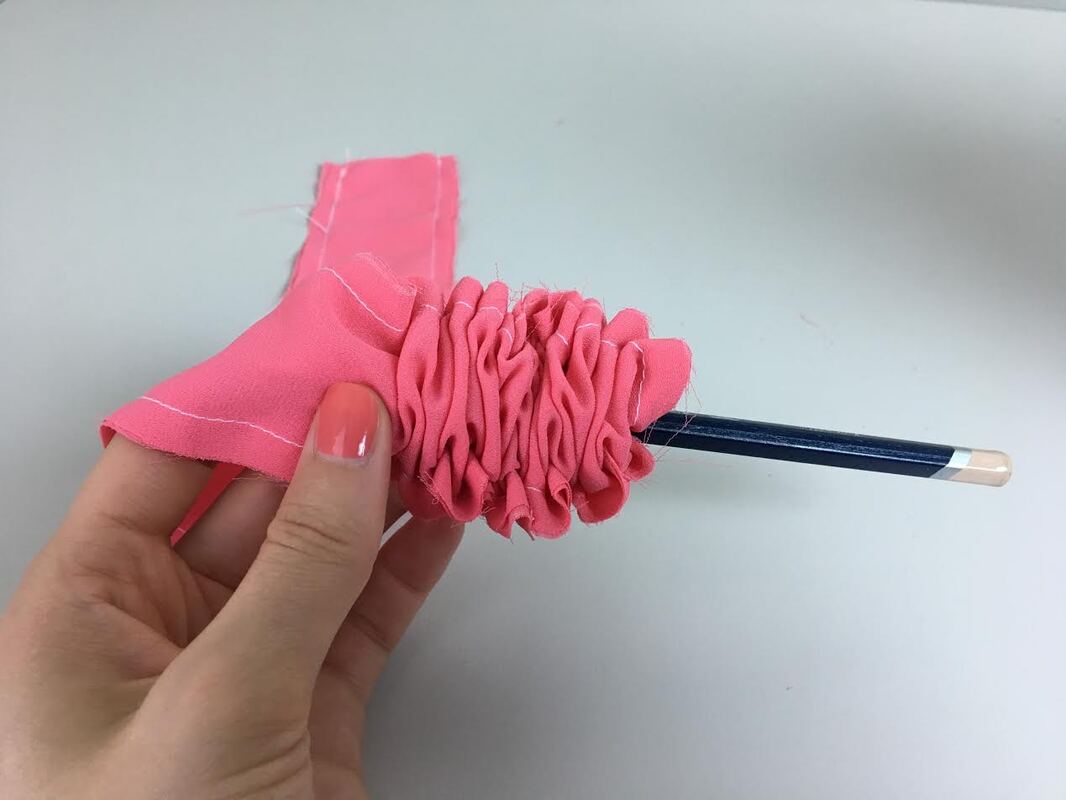 Continue moving the fabric layers to the right until you can physically grab the right side of the stitched end as shown below. 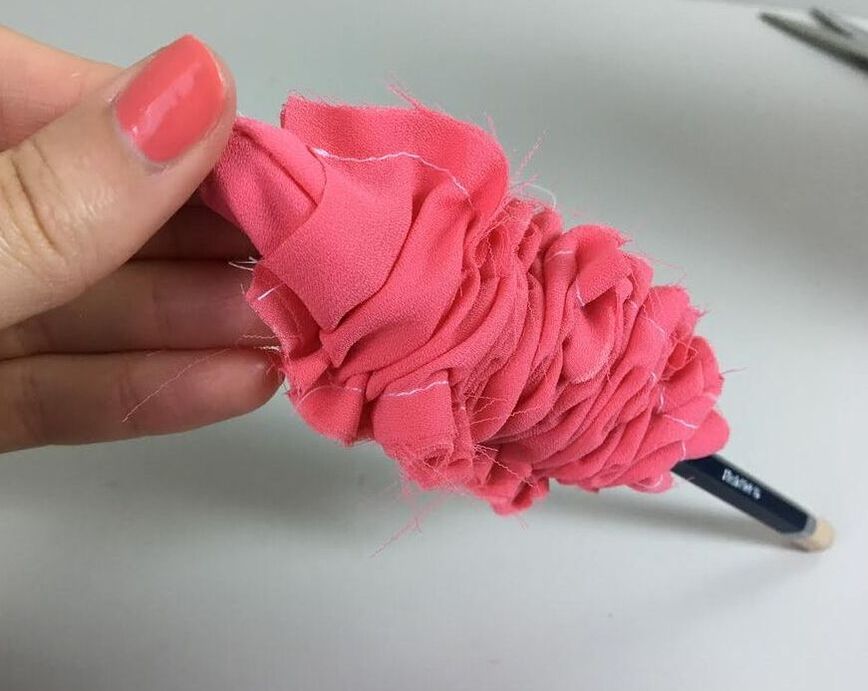 Pull the closed end until the waist tie is entirely flipped on its right side. Don't forget to iron the seams and body of the tie flat. Use the video above for additional guidance on this crucial step!
Iron the lined waist tie flat following the same technique for the self-finished folded tie described above. 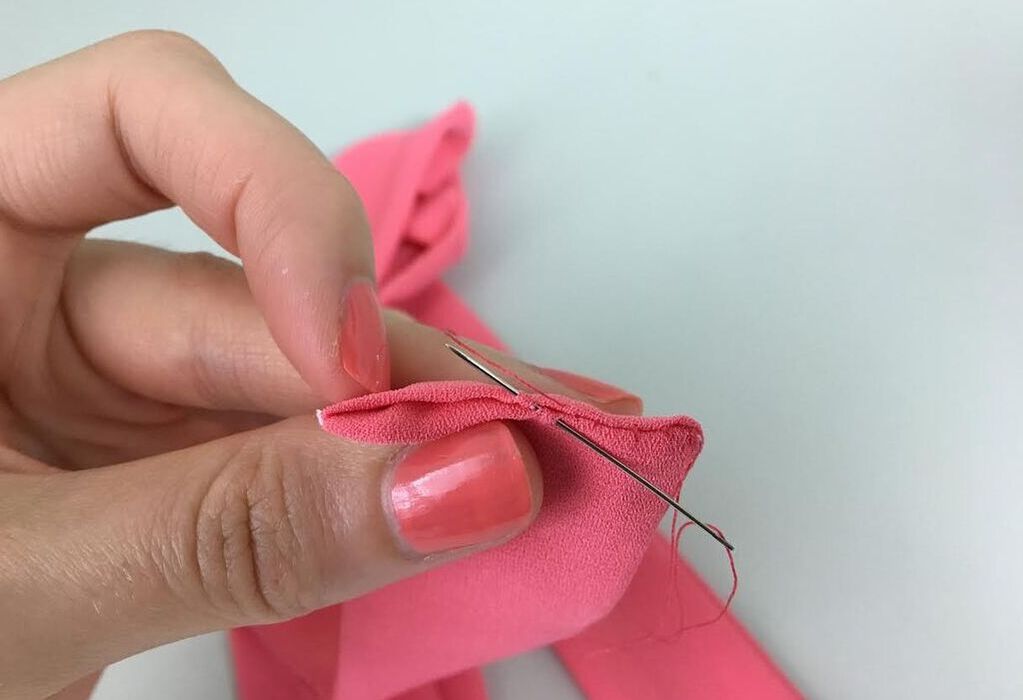 Repeat the folding and blind stitching process to permanently close the waist tie's open end. When should you use the lined version over the folded self-finished one?
Similar Tutorials You May Like: How To Add A Side Seam Pocket To A Dress How To Make A Dress Longer Using Existing Hem Allowance Or Adding Excess Fabric Understanding Seam Allowance In Sewing No Sewing Machine? No Problem. 4 Hand Sewing Techniques You Should Know As A Beginner How To Sew Self Finished, Inner and Outer Straight Corners Sewing 101: What Is Top Stitching, How And When To Use It
1 Comment
anca g
12/8/2021 12:37:23 am
great blog Leave a Reply. |
The Blog:A journey into our design process, sewing tutorials, fashion tips, and all the inspiring people and things we love. 
Doina AlexeiDesigner by trade and dressmaker at heart. I spend most of my days obsessing over new fabrics and daydreaming new ideas. 
Sadie
Executive Assistant & Client Relations Manager Archives
November 2019
Categories
All

|

-
Sewing Tutorials
-
Basics
>
- Aligning Pattern Grainlines To Fabric
- Preparing Fabrics For Sewing
- Pinning Sewing Patterns To Fabric
- Placing Sewing Patterns On Fabric For Cutting
- Rotary Cutters or Fabric Scissors?
- Cutting The Sewing Patterns
- What Are Notches And How To Use Them In The Sewing Process
- Transferring Notches From Pattern To Fabric
- Transferring Seamlines to Fabric
- Staystitching
- Backstitching: A Complete Guide
- Hand Basting: A Complete Guide
- Sewing Continuous Bias Binding
- Darts >
-
Sewing Seams
>
- The Basics Of Seams And Seam Allowance
- How To Sew A Straight Seam
- Sewing Curved Seams
- Sewing Corner Seams
- Trimming And Grading Seam Excess
- Notching/Clipping Seam Allowance for Tension Release
- Sewing Topstitched Seams
- Sewing Corded Seams
- Sewing A Slot Seam
- Sewing A Gathered Seam
- Sewing Bias Seams
- Sewing Seams With Ease
- Sewing Seams With Crossing Seamlines
- Sewing Unlike Fabric Seams
- How To Iron Seams: Ironing Tools And Conventions
- Sewing With Knit Fabrics
- Understanding Stitch Length And Tension
- Sewing Unique Fabric Seams
-
Seam Finishes
>
- Seam Finishing Techniques - Overview
- Applying A Pinked Seam Finish
- Applying A Bias Bound Seam Finish
- Serging And Zigzag Seam Finishes
- Sewing A Self-Bound Seam Finish
- Sewing A French Seam Finish
- Sewing A Hong Kong Seam Finish
- Sewing A Mock French Seam Finish
- Sewing A Turned-and-Stitched Seam Finish
- Sewing Overcast Hand-Applied Seam Finishes
- Sewing A Flat Felled Seam
- Sewing A Hairline Seam Finish
-
Hem Finishes
>
- Garment Hem Finishes: Overview
- Sewing A Double Fold Hem Finish
- Sewing A Single Fold Hem Finish
- Sewing Bound Hem Finishes
- Sewing An Exposed Double Layer Bound Hem
- Sewing A Folded-Up Bound Hem with Pre-folded Binding
- Sewing A Hong Kong Hem Finish
- Sewing A Band Hem Finish
- Sewing A Bias Faced Hem Finish
- Sewing A Twill Tape Hem Finish
- Sewing A Rolled Hem Finish
- Sewing A Shaped Hem Facing
- Using Fusible Hem Tape And Webbing
- Finishing A Lace Fabric Hem
- Finishing A Leather Hem
- Sewing Faced Hem Corners
- How To Finish Lining At The Hem
- Finishing Fabric Corners by Mitering >
- Interfacing A Hemline: Lined And Unlined Examples
-
Sewing Pockets
>
- Curved Patch Pocket With Flap
- Unlined Square Patch Pockets
- Lined Patch Pockets: Two Ways
- Extension On-Seam Pockets
- Separate On-Seam Pocket
- Front Hip Pockets
- Bound Double Welt Pocket
- Double Welt Pocket With Flap
- Self-Welt Pocket (Using Single Fabric Layer)
- Slanted Welt Pocket (Hand-Stitched)
- Faced Slash Pockets: Overview >
-
Sewing Zippers
>
- Sewing Zippers: General Information
- Sewing A Centered Zipper
- Sewing A Lapped Zipper
- Sewing An Invisible Zipper
- Sewing A Fly Front Zipper
- Sewing A Closed-End Exposed Zipper (No Seam)
- Sewing An Exposed Separating Zipper
- Sewing Hand Stitched Zipper Applications
- Sewing A Zipper Underlay
- Sewing A Placket-Enclosed Separating Zipper
- Sleeveless Finishes >
-
Neckline Finishes
>
- Sewing A Neck Shaped Facing
- Sewing An All-In-One Neck Facing
- Neck And Garment Opening Combination Facings >
- Sewing A Bias Faced Neckline Finish
- Sewing A Band Neckline Finish
- Bound Neckline Finishes: Overview >
- Sewing A Semi-Stretch Strip Band Neckline
- Ribbed Neck Band And Classic Turtleneck
- Decorative Neckline Finishes >
- Finishing Facing Edges >
-
Extras
>
- A Complete Guide on Interfacing
- Sewing Bound Spaghetti Straps
- Sewing Spaghetti Straps To A Faced Neckline
- Sewing Ruffles: Overview
- Patterning And Sewing A Circle Ruffle
- Sewing A Gathered Heading Ruffle
- Sewing Double Layer Gathered Ruffles
- Sewing A Gathered Ruffle Into A Seam
- Sewing A Gathered Ruffle To A Fabric Edge
- Sewing A Fabric Surface Slit
- Sewing A Slit Seam
- Hand-Applied Straight Stitches
- Hand-Applied Blind Stitches
- Hand-Applied Overedge Stitches
- Hand-Applied Tack Stitches
- Hand-Applied Decorative Stitches
-
Basics
>
- Custom Bridal
- Custom Apparel
- About
- Blog
 RSS Feed
Services |
Company |
|
